by Nebula Haze
How to Germinate Marijuana Seeds So They Grow Fast
Plus, how to care for new cannabis seedlings…
We have a cannabis seedling germination page that includes everything you need to know about all the different germination methods, but this tutorial is different. In this tutorial, I’m going to share exactly how I do my seeds from beginning to end. Just follow these instructions and you’ll end up with healthy, fast-growing plants that germinate in just a few days. It’s basically fail-proof.
Quick Guide: Why aren’t my cannabis seeds sprouting?
Turn your cannabis seeds…
…into seedlings!
This step-by-step tutorial will teach you how to germinate seeds and provide basic seedling care
Soon you’ll have healthy cannabis plants to admire
Supplies Needed
- Seeds
- Soil or Coco (learn how to germinate seeds in hydro)
- A plant pot or container to put plants in
- Cheap paper towels (the lower quality the better for this purpose)
- Rapid Rooters (optional but nice)
1.) Get Cannabis Seeds
There are a few different ways to get cannabis seeds, with the most common being ordering seeds online and growing seeds you find in weed that you buy. Learn how to research and find the right strain.
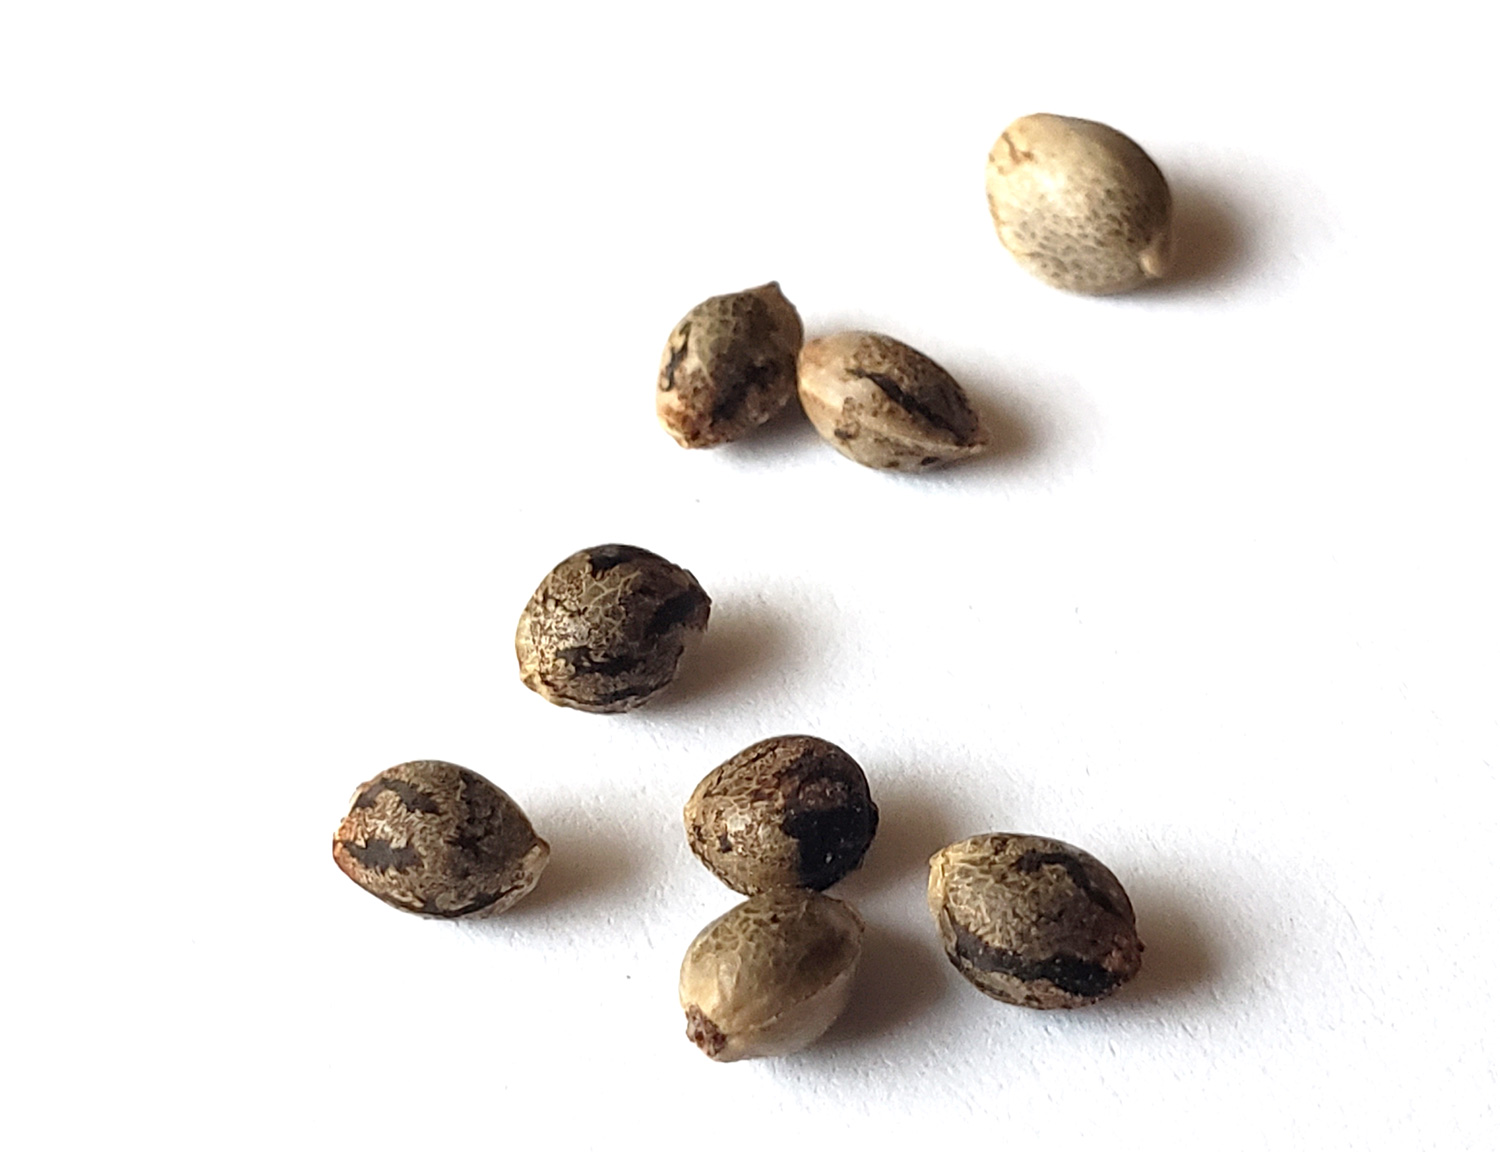
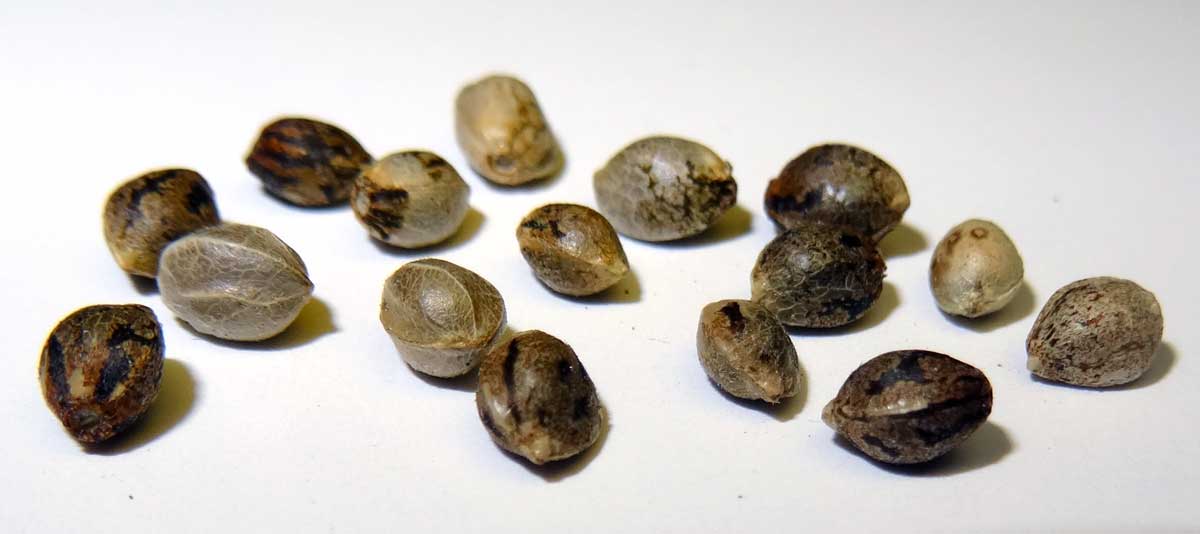
If you’ve found seeds, learn how to tell if they’re good to grow.
Here’s a picture showing several healthy and viable cannabis seeds
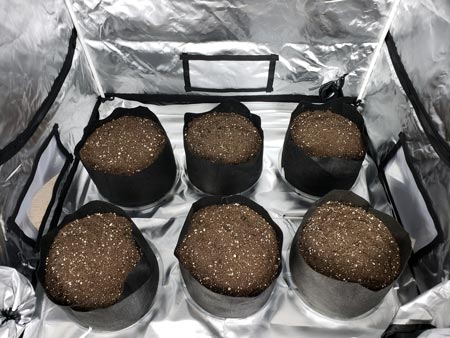
2.) Prepare Your Soil or Coco Containers
Before you start germinating your seeds, set up your soil or coco. It will still be a few days until your seedlings arrive, but you want to have everything ready before the seedlings need to be planted.
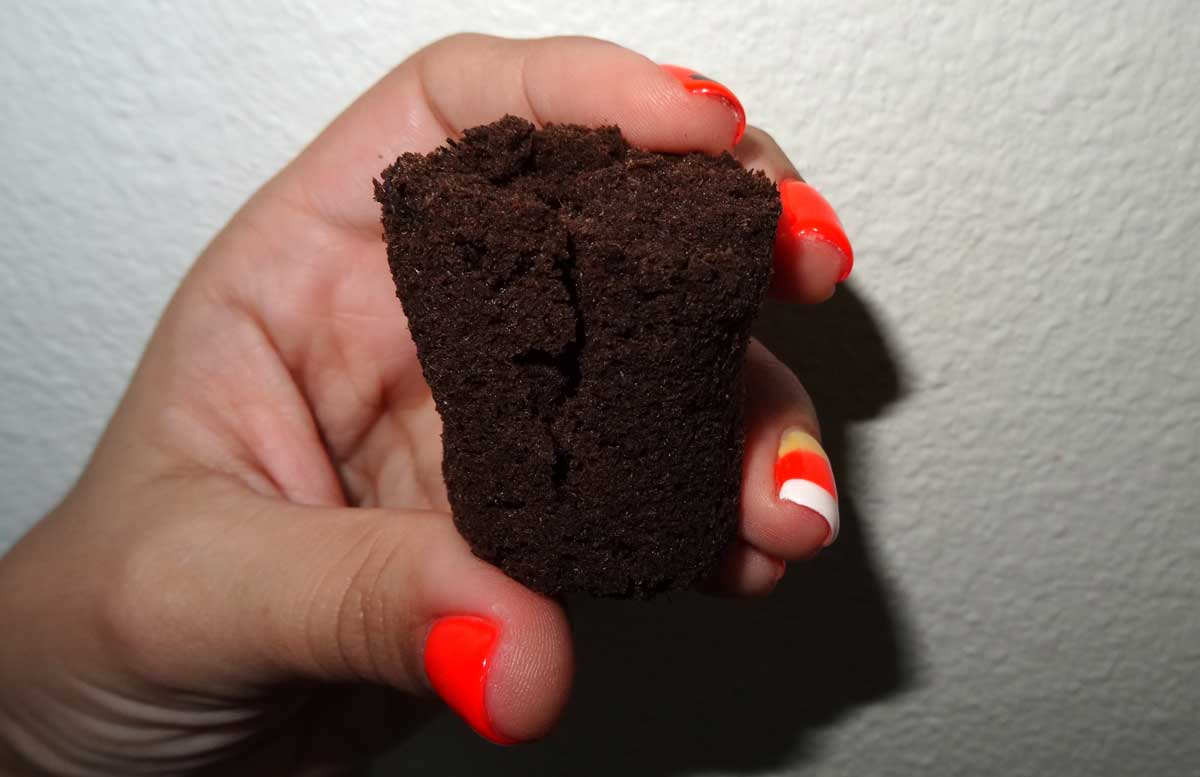
Get your containers ready before you start germinating
What type of growing container should I use?
What kind of coco should I use?
Which soil is good for growing cannabis?
3.) Germination
When it comes to new growers, it seems like the most fool-proof method (at least for me, and many of the new growers who write in) is the Paper Towel Method! It’s so simple, but there’s something about wet paper towels that a young seedling loves 🙂 Learn About Other Ways to Germinate Seeds.
Paper Towel Method – Place your seeds inside a folded wet paper towel (Important: use cheap brand!)
This method is hard to mess up if you follow the instructions. Place your seeds inside a folded wet paper towel, and put that between two plates. The purpose of the plates is to prevent the seeds from drying out. Don’t let any part of a paper towel hang out the edges or it will wick away all the moisture and dry out. Keep everything totally contained between the plates.
Surprisingly, the really cheap paper towels work the best because the seeds and roots lay on top without getting stuck to anything. This is important. The more expensive “cloth-like” paper towels (like Viva brand) aren’t good for germination because the roots actually grow into them instead of laying on top.
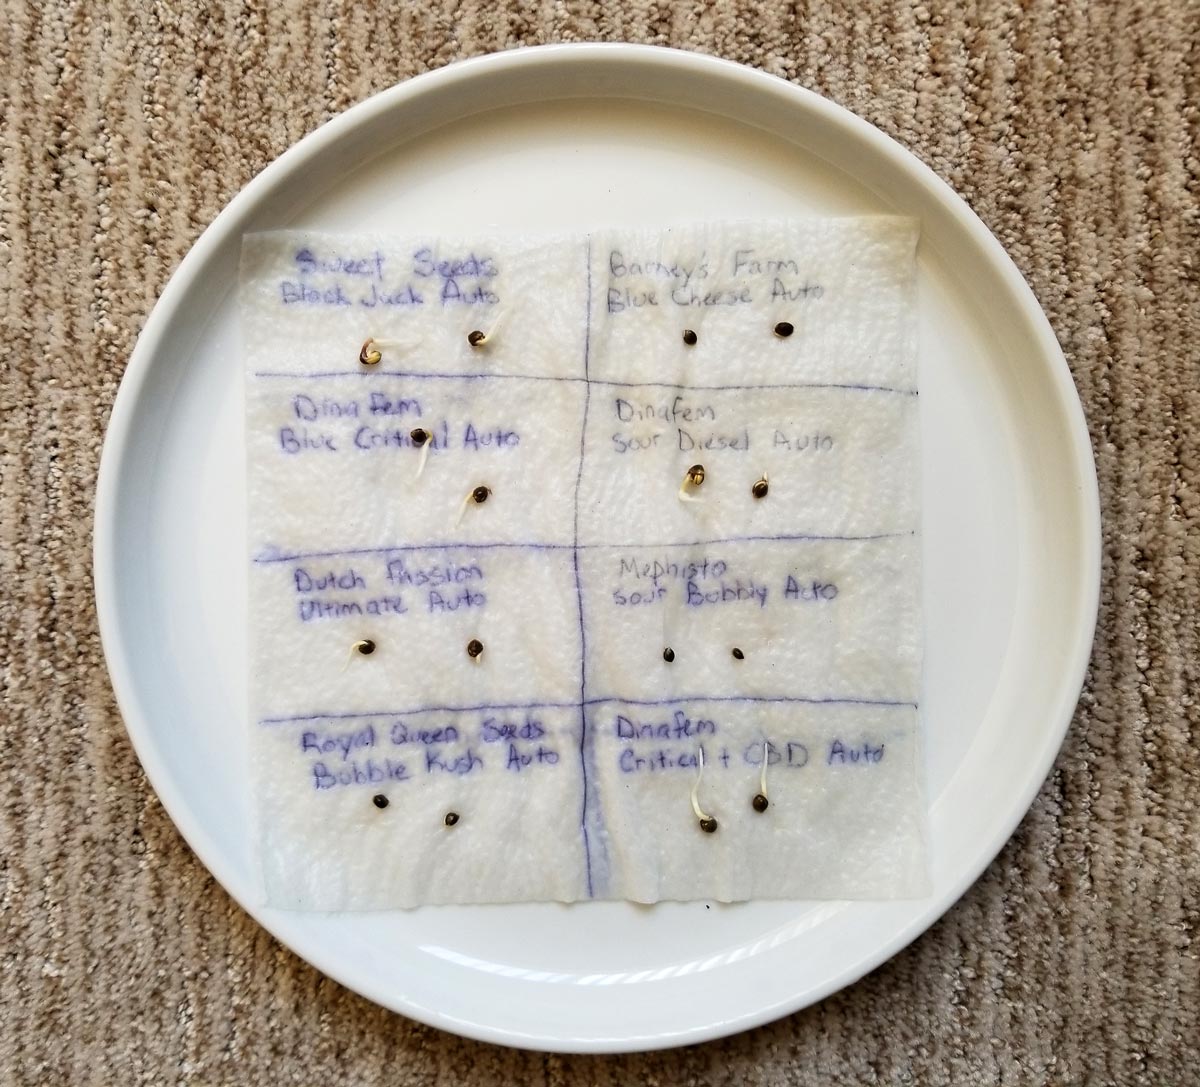
Wet a paper towel (use the cheapest brand you can find). If growing multiple strains, you may want to label the paper towel so you know which is which. Place each seed on the wet paper towel next to their label.
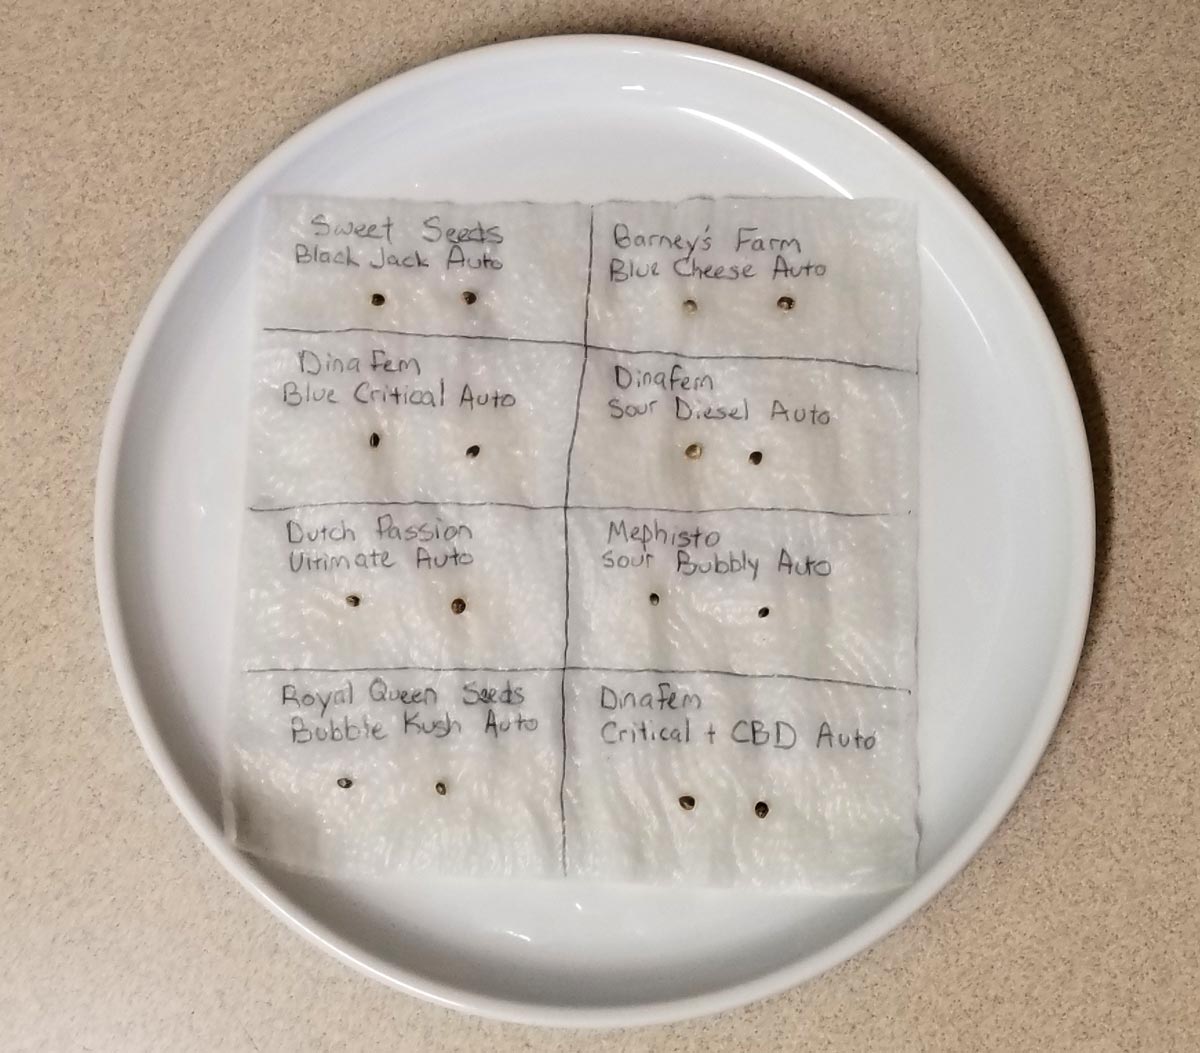
Cover with another wet paper towel
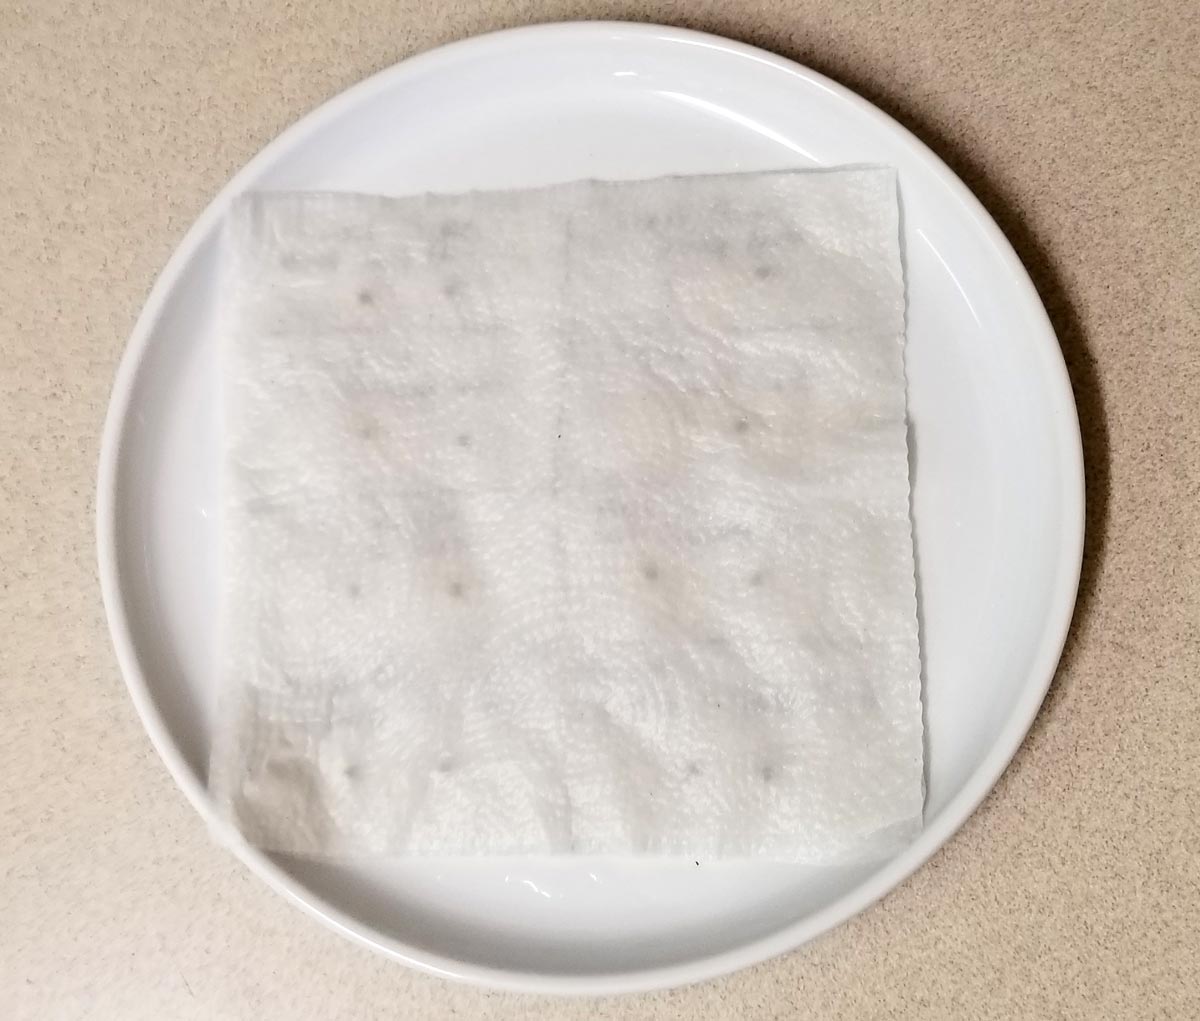
Add another plate on top to keep the paper towels from drying out. Make sure now paper towel is sticking out the sides.
Tips
- Check on your seeds every 24 hours but try not to disturb them. When they’ve germinated, you’ll see the seeds have cracked and there are little white roots coming out.
- They should germinate in 1-4 days, though some seeds can take 7 days or longer (especially older and smaller seeds).
- Keep them warm if possible. Seeds germinate a little faster is to keep them in a warm place (75-80°F). Some people use a seedling heat mat but in most cases that’s unnecessary. I leave mine near a sunny window. I usually put a thermometer in the same place to make sure it’s not too hot or cold (or just check the plate with your hands)
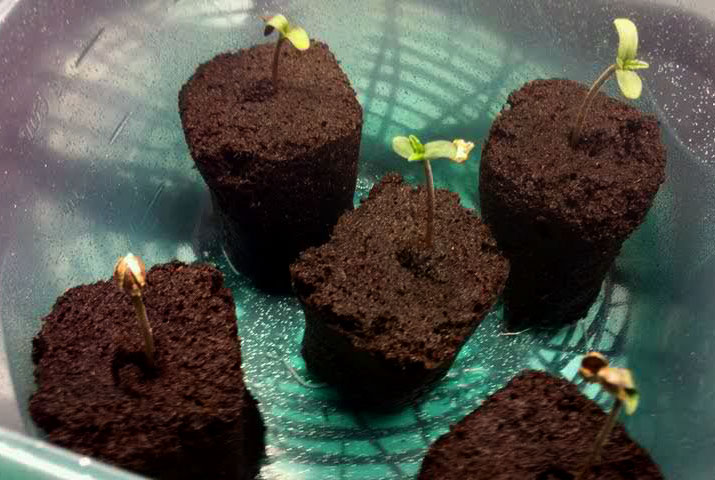
Here are those seedlings about 2 days later. Be extra careful when removing the paper towels. Don’t let the seeds roll around or you won’t know which is which. This is when you’ll be glad you used cheap paper towels, as they are much easier to peel off without disturbing your seedlings.
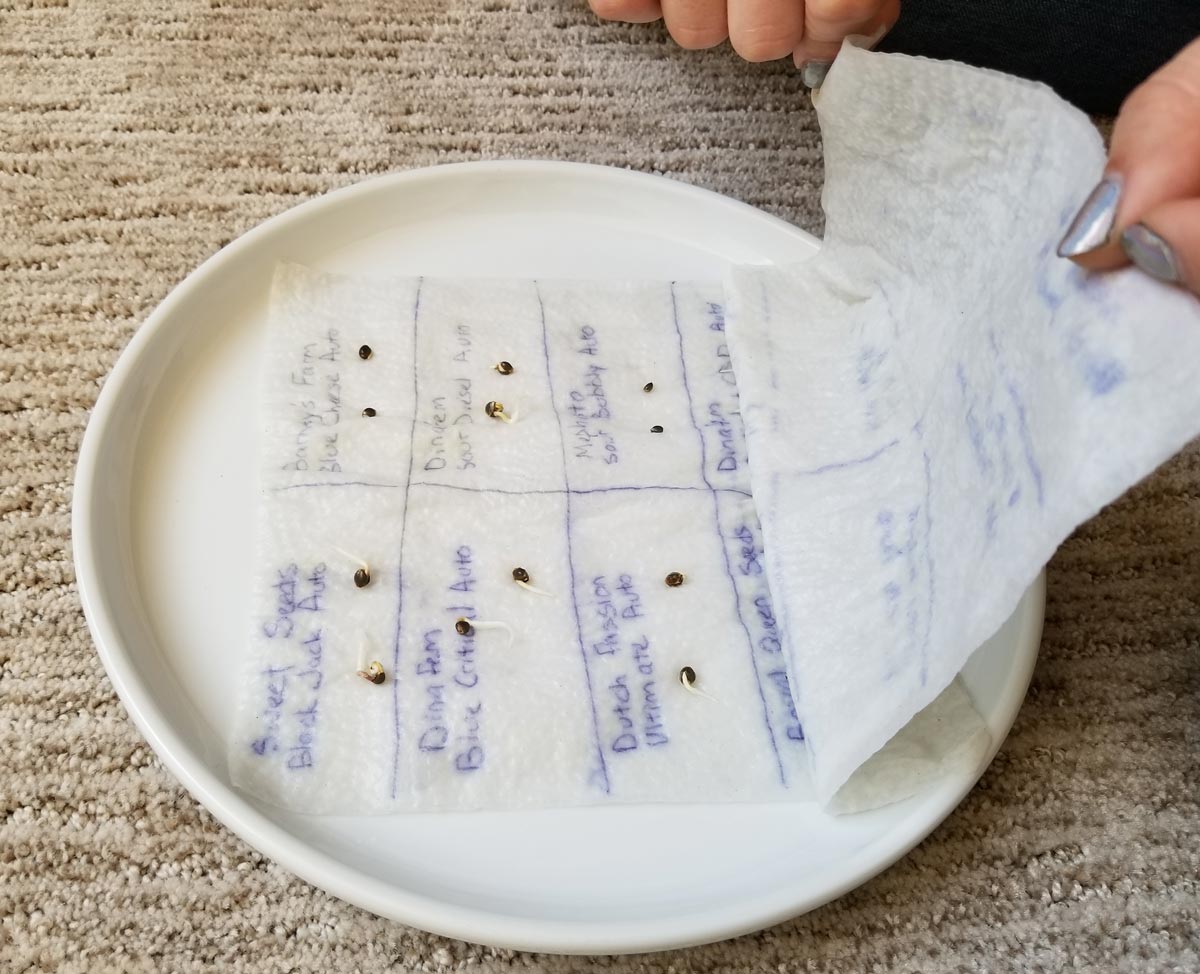
You can see some of the seeds sprouted, but some of them haven’t yet. That’s totally normal! Each seed is different. If this happens to you, you have two choices. You could plant the ones that have already sprouted and let the other ones stay in the paper towels until they germinate. Or you could just put all the seeds in Rapid Rooters now, and hope for the best as far as the slow-sprouting ones. It’s up to you. Letting the unsprouted seeds stay in the paper towels longer improves the germination rate in my experience, but it’s simpler (easier) to move them all at once.
Seeds often germinate at different rates even if they get the exact same conditions
4.) Place Germinated Seed in a Rapid Rooter
Now it’s time to get your Rapid Rooters! Alternatively, you could place your sprouted seeds directly in the final growing medium (coco or soil). I think these help them get started, but I’ve grown many successful plants by just putting the germinated seed directly in its final home.
Rapid Rooters are nice, but not necessary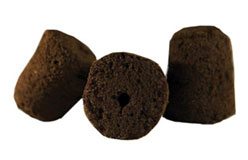
The Rapid Rooter should be cut open lengthwise. I use big scissors but you could also use a knife.
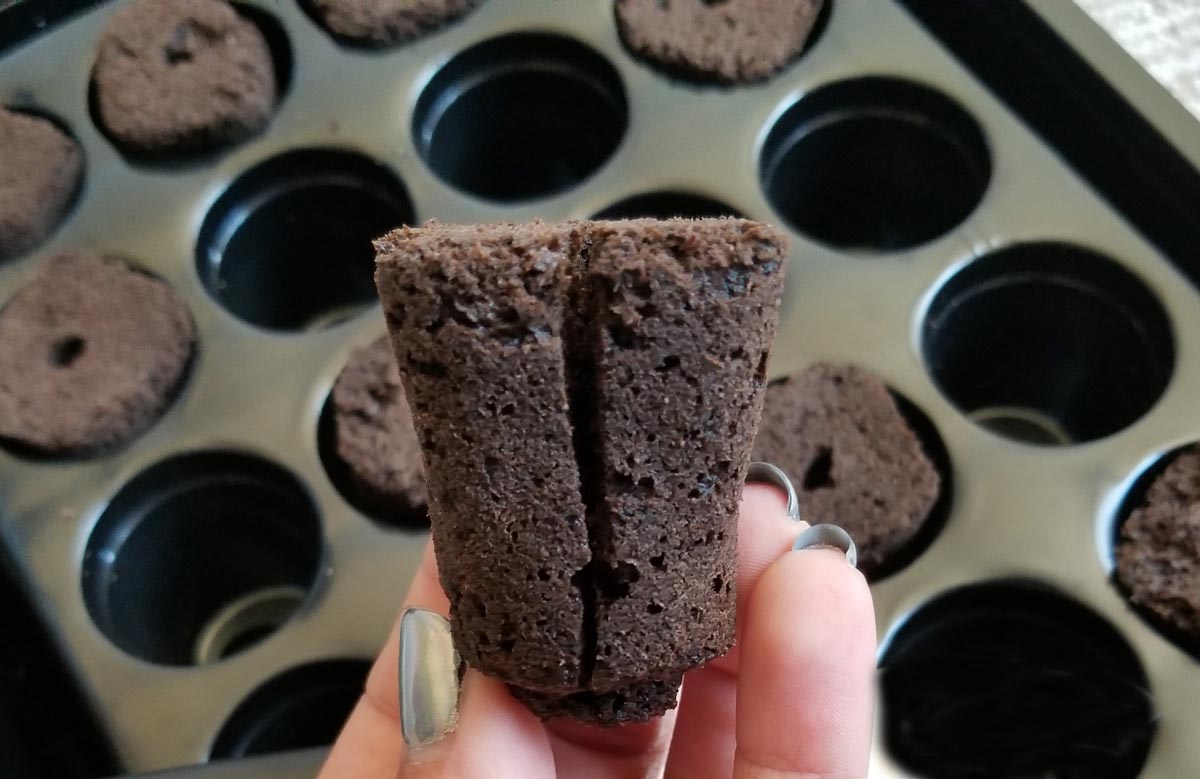
Gently place the germinated seed inside, root down. Place the seed close to the surface so it doesn’t have far to go.
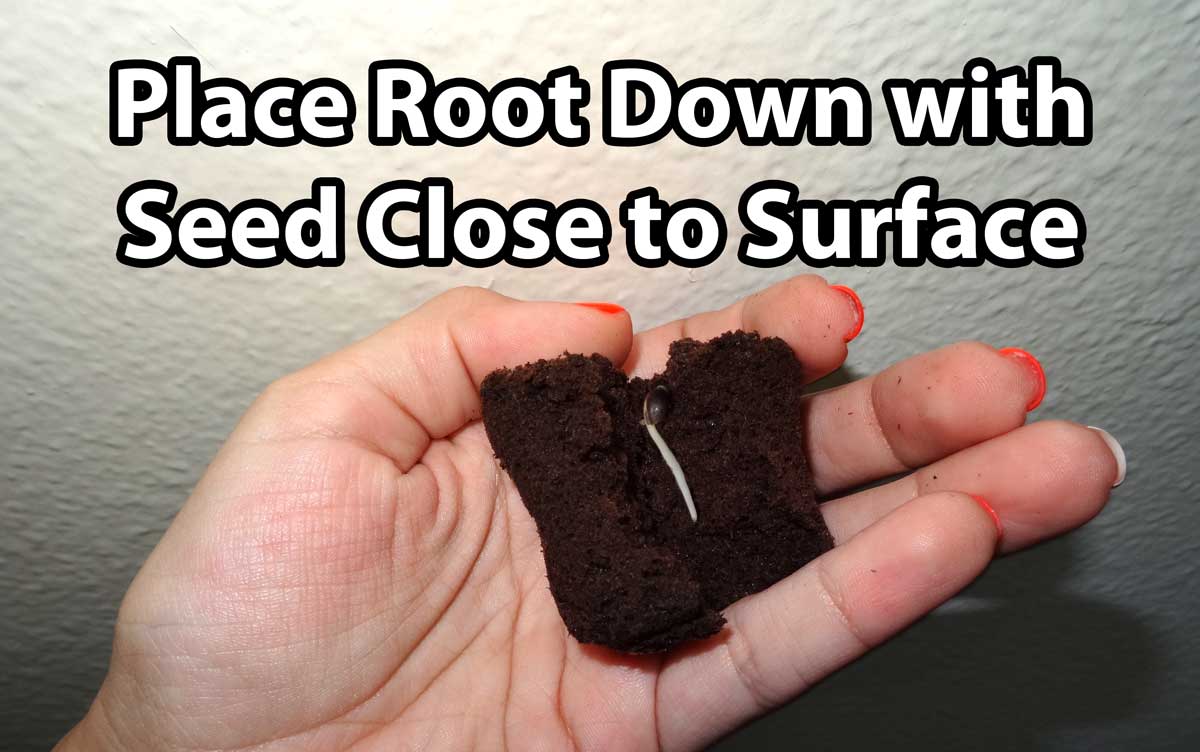
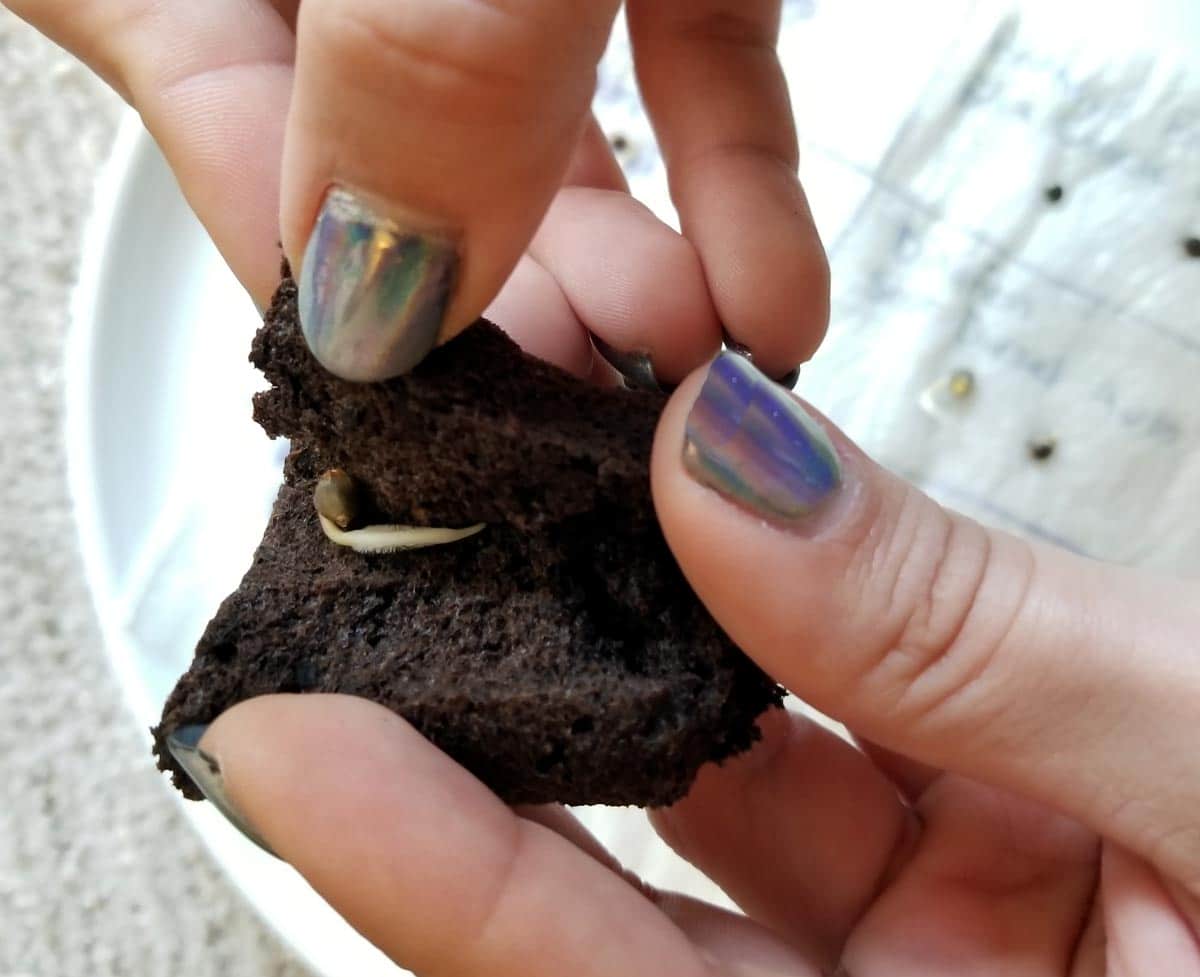
If you have a root that is curved or bent, don’t try to straighten it out. Open the Rapid Rooter and lay the germinated seed down gently. It will naturally lay on its flattest side. When you slowly close the Rapid Rooter, the bent parts of the root will end up in the “crack” of the Rapid Rooter that you cut to split it open from the side.
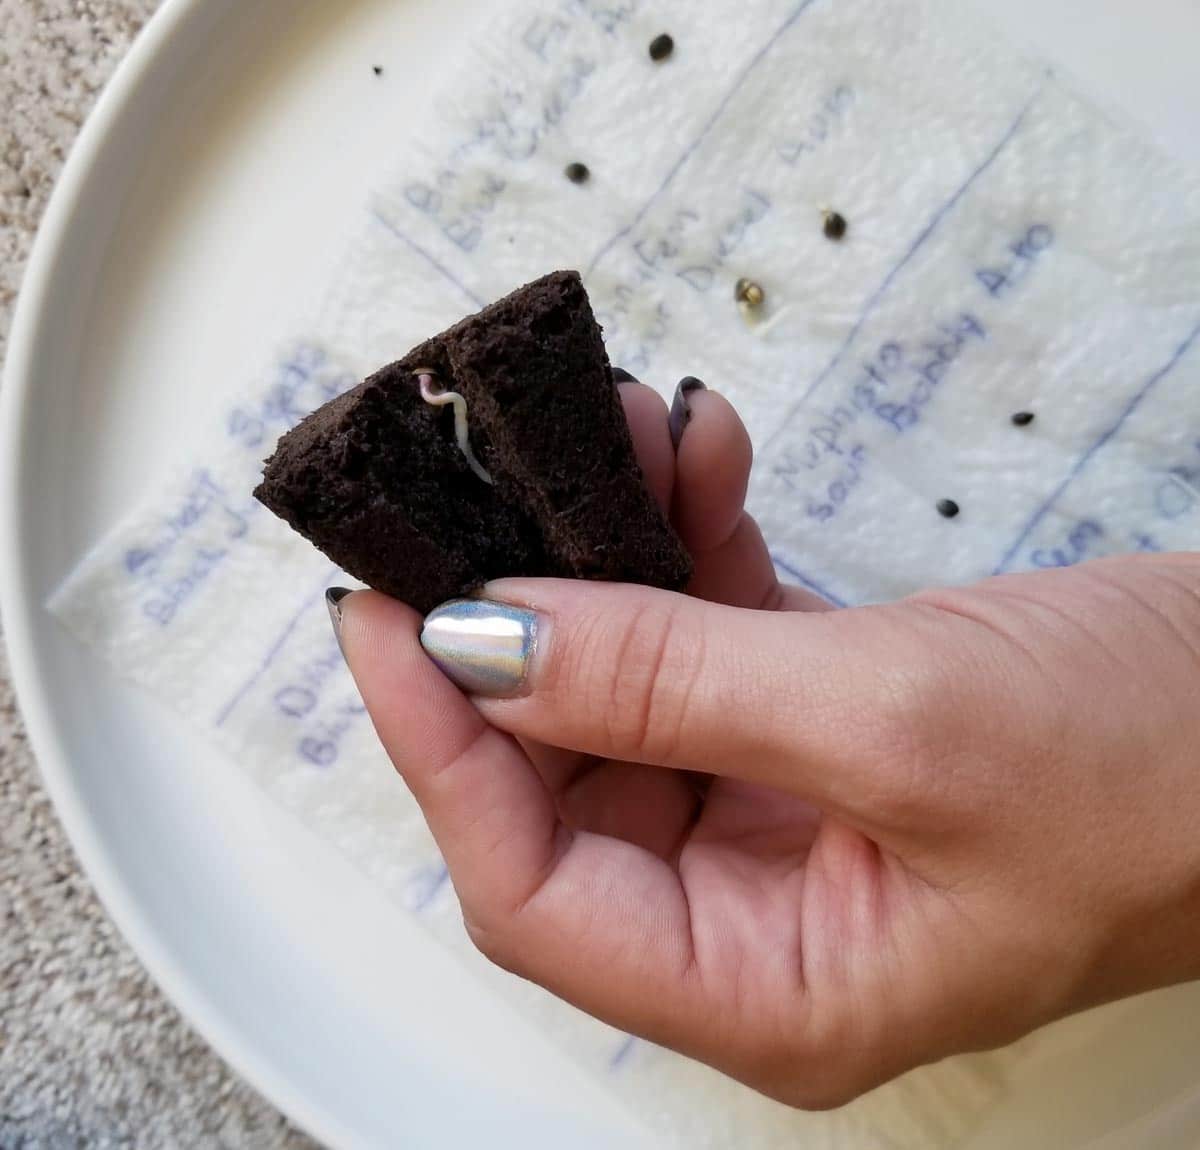
Most seedling plugs will go back into place easily, and you’ll barely be able to tell it’s been opened. I love Rapid Rooters because their texture causes most seeds to stay in place and not “fall down” further into the hole once you’ve got the Rapid Rooter closed.
5.) Water the seedling in the Rapid Rooter until you see a root come out bottom, 1-2 days.
Make sure to always keep the Rapid Rooter moist but not soaking wet and give plain water.
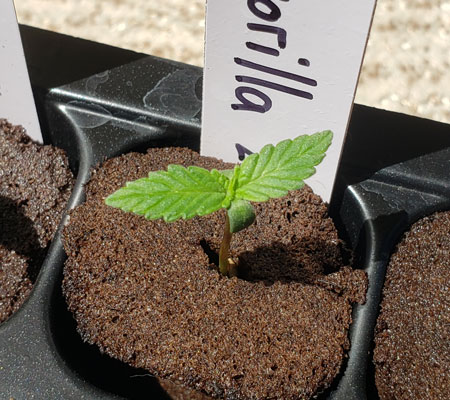
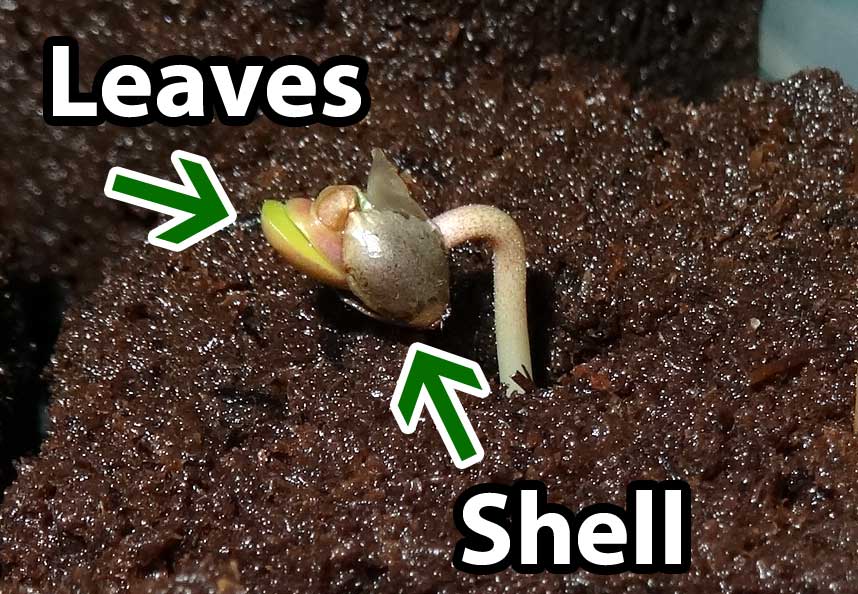
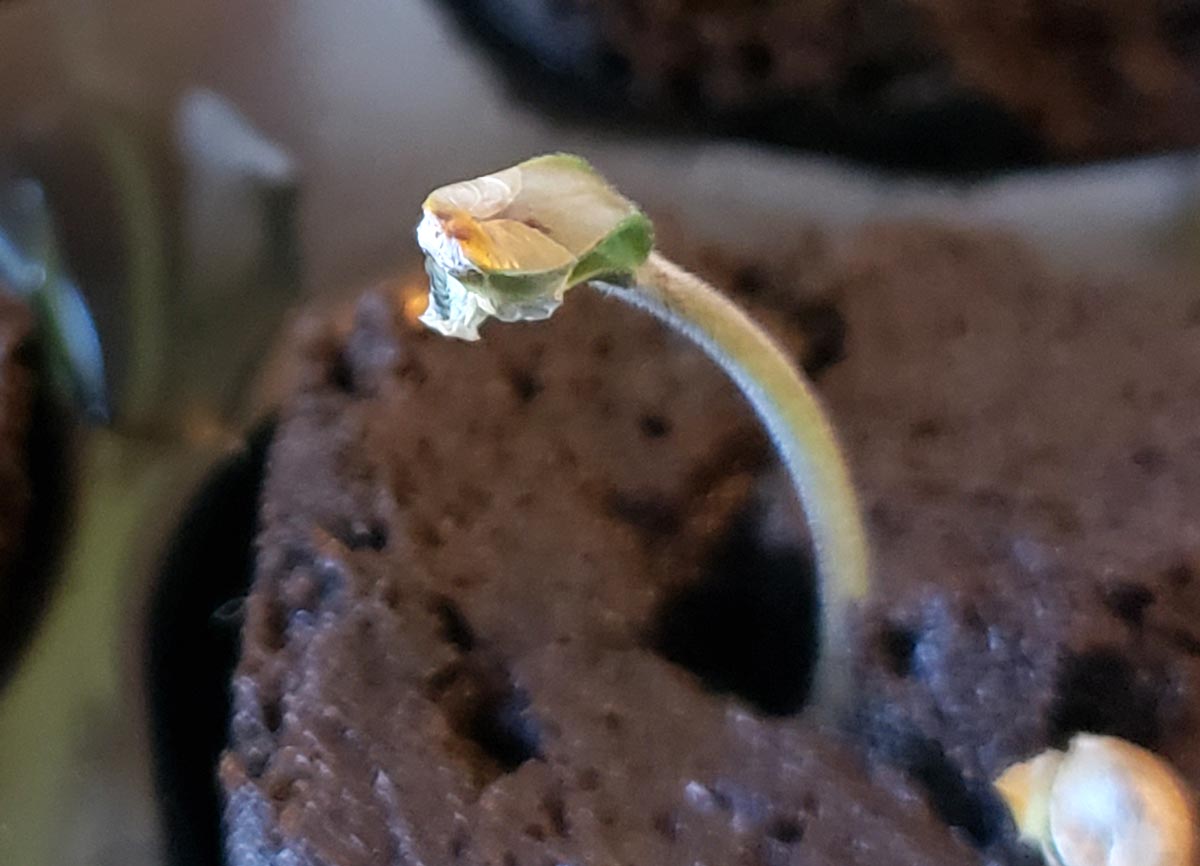
Since your seed has already sprouted and been in placed into the right growing position, it’ll often pop its head out within just 12-24 hours! Sometimes you see just the leaves, but often you actually see the seedling push the shell above ground.
Don’t touch the shell if possible because a tiny tug in the wrong direction can pull the seedling out of the plug and break off the taproot.
Try to let the seedlings break free if possible. But if you have a seedling that’s stuck in a shell after a day or two, and doesn’t seem to be getting any better, you need to go in and help.
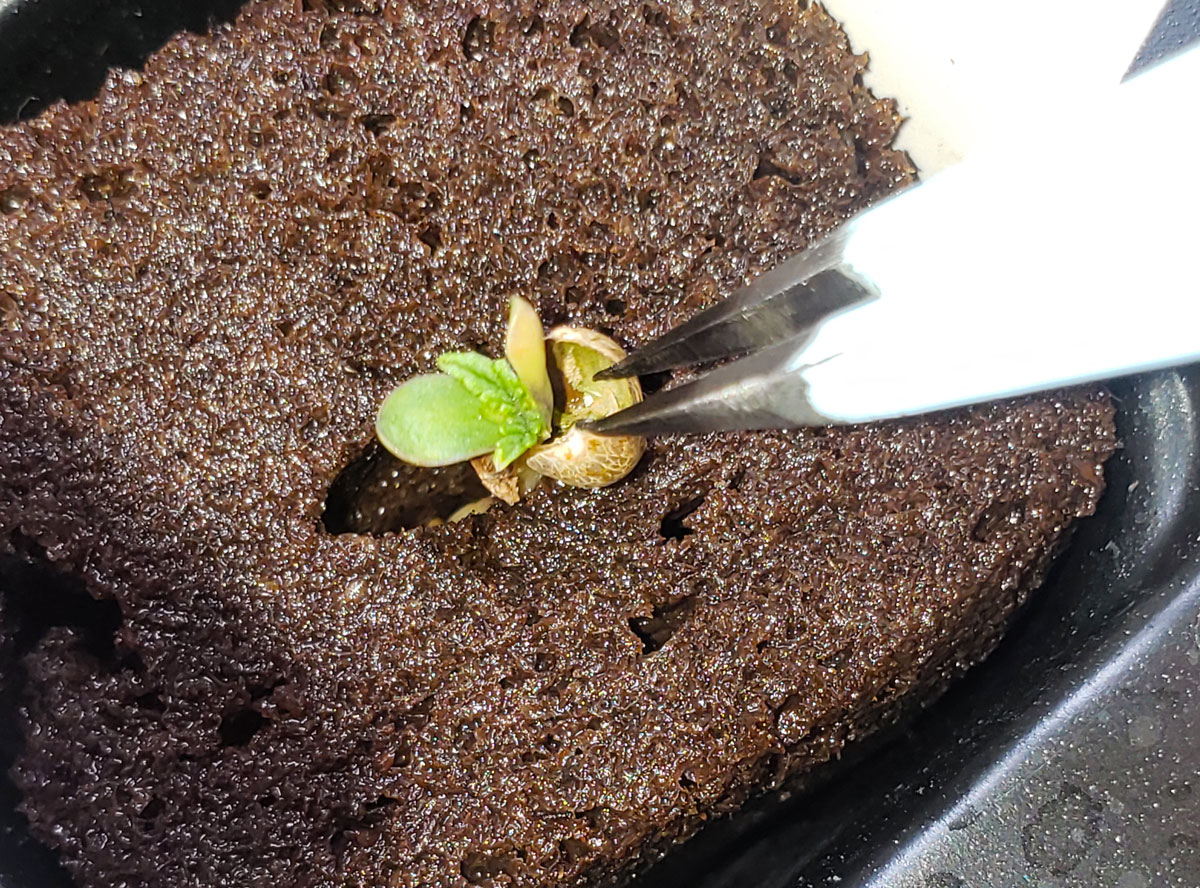
I’ve found that pointy tweezers are perfect to pry open a shell that’s stuck. Just close the tweezer, stick it inside between the shell halves, and let it slowly open to pull the shell apart without you ever touching the seedling.
Sometimes a “film” from inside the shell gets stuck on the leaves. If that happens, try putting a drop of water on the film a few times a day to soften it. If the seedling doesn’t push it off on its own, hold the stem between your fingers (so it doesn’t pull at the root) and use tweezers to gently tug at the membrane and release the leaves.
Don’t use a dome on seedlings unless it’s very dry where you live. If you do use a dome, consider keeping a vent open and watching the humidity. A young seedling doesn’t require as high humidity as clones (which are what the domes are designed for), and seedlings tend to get “wet feet” and stop growing as fast in constantly wet conditions.
Water your seeding in the Rapid Rooters until you see a root coming out the bottom. Keep Rapid Rooters moist but not wet. During this time, give seedlings bright filtered light. A CFL or LED light bulb kept several inches away works well. I’ve left mine on the kitchen table next to a sunny window, and that’s also worked fine for me as long as it doesn’t get too hot.
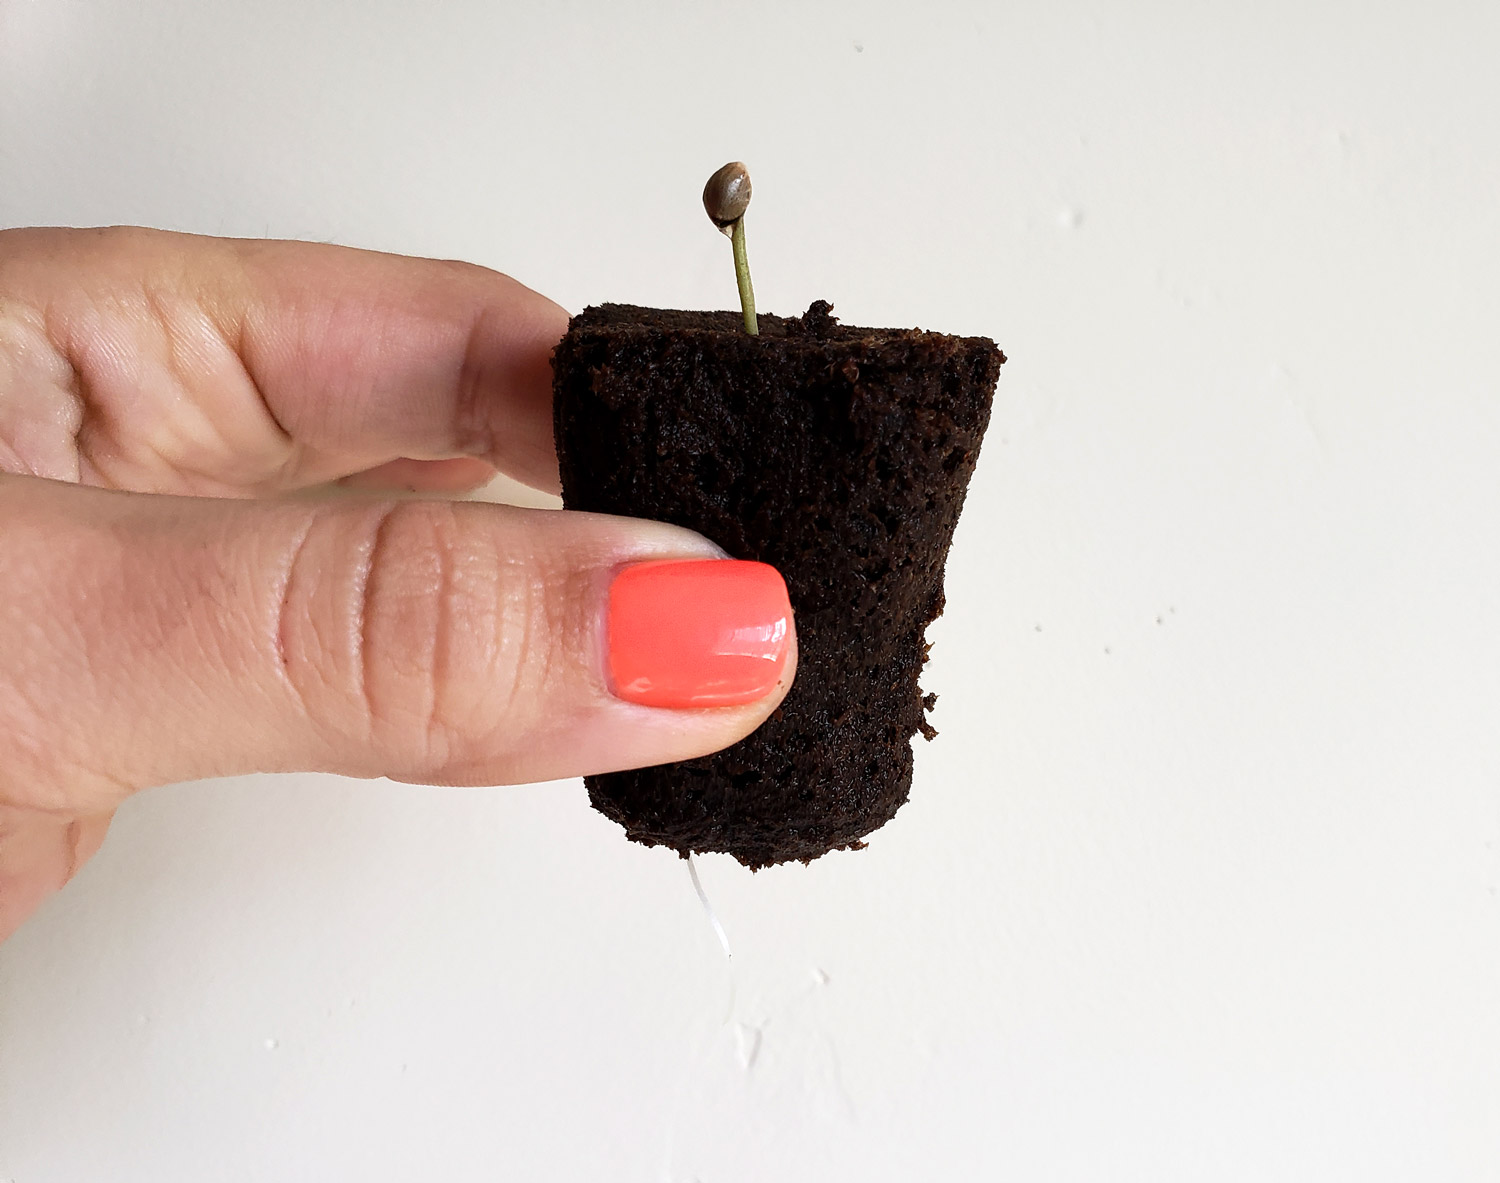
You should see a root come out the bottom in just a day or two!
After you see your first root, it’s time to…
6.) Put Seedling in its New Home
You are about to water your seedlings for the first time, so prepare your water now.
- Coco – Prepare water with seedling-strength nutrients, and make sure to pH your water to 5.5-6.5 right before giving it to plants. Unlike soil, coco does not naturally contain any nutrients so you must provide nutrients in the water from the first watering.
- Soil – Prepare plain water at 6-7 pH. You don’t need to add nutrients for the first 3 weeks or so because your plants will live off what’s in the soil. Adding extra nutrients at this point might overload and burn the seedlings.
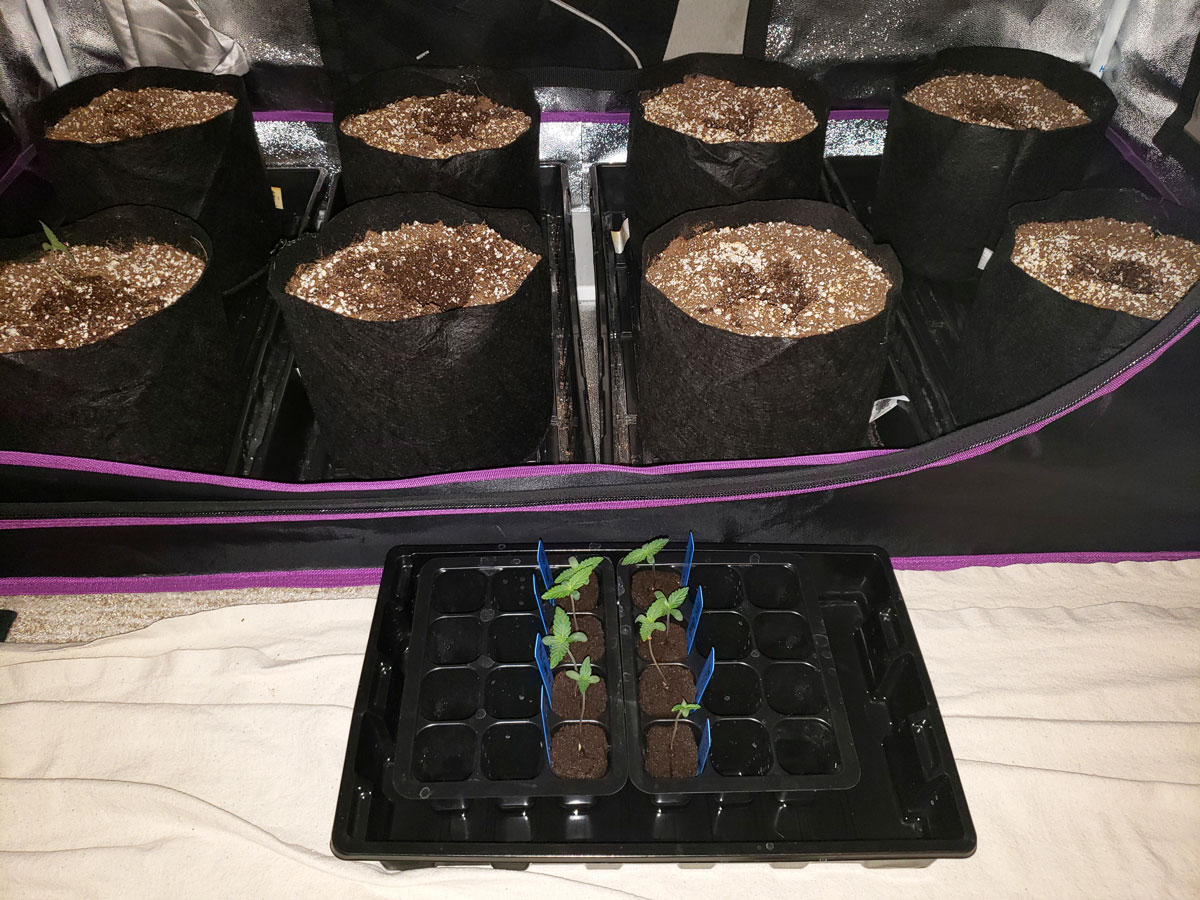
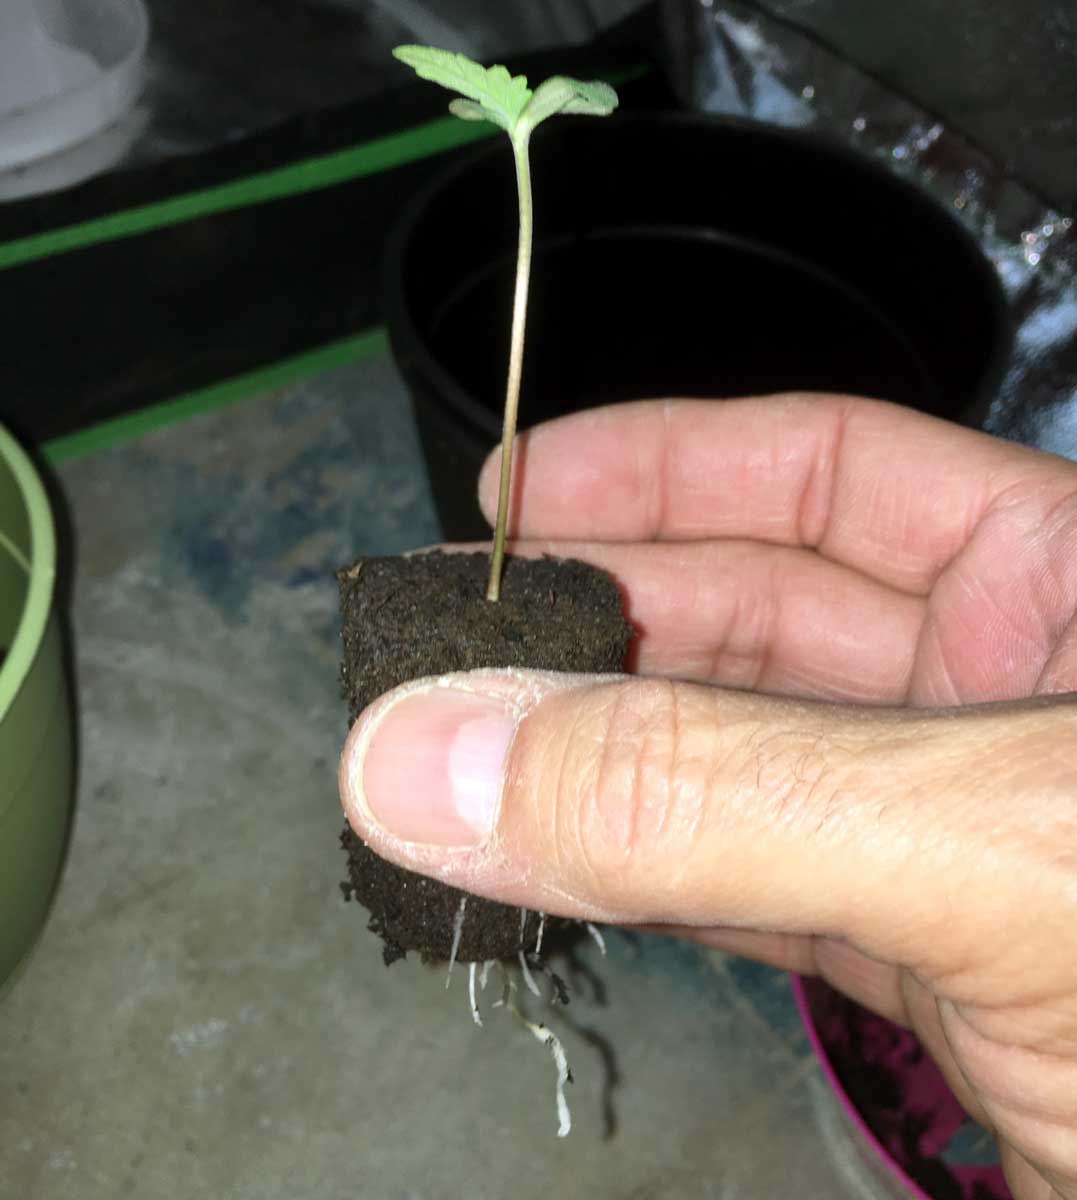
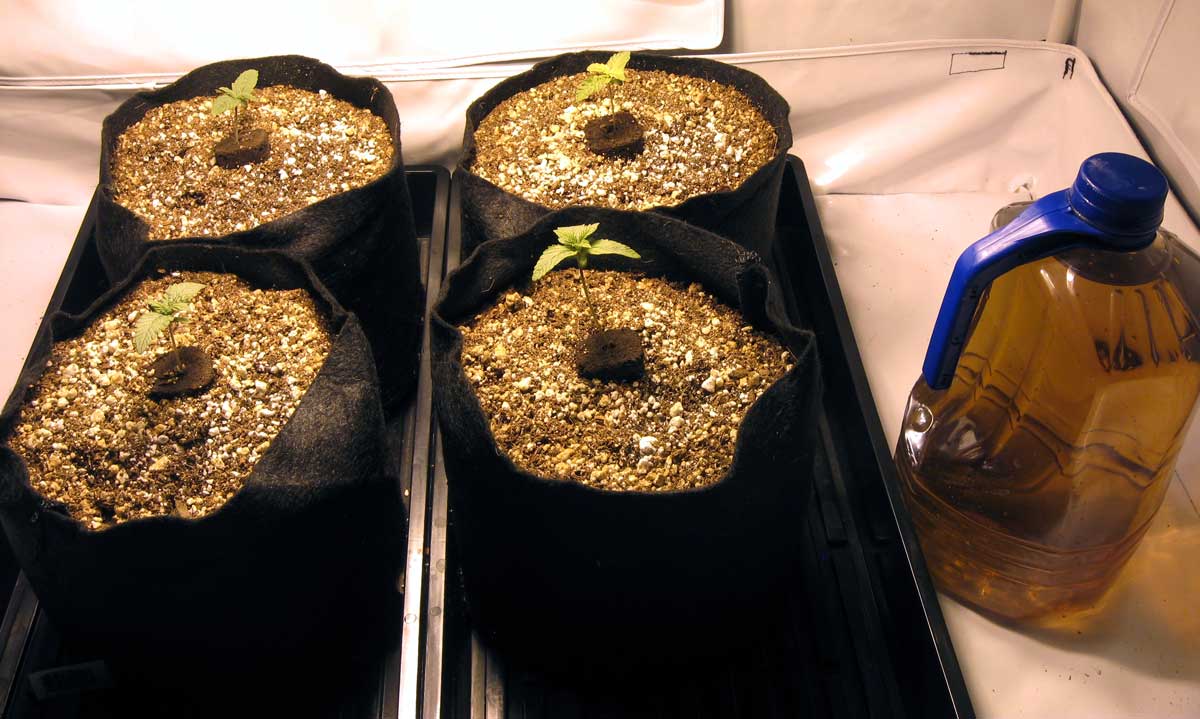
Now that your water is ready, dig a hole that’s a little smaller than the Rapid Rooter, and place your seedling plug inside. The idea is to let the Rapid Rooter stick up above the soil a little to help the roots get more oxygen. It’s okay if the plug goes in flat with the soil, but don’t bury the stem as that can cause stem rot in some cases. Even if you’ve got a tall seedling, you usually won’t notice the extra length once the plant is bigger.
Gently pack the nearby soil/coco to hold the Rapid Rooter in place so the seedling is stable.
Your seedlings get a little extra oxygen if you let the Rapid Rooter stick up into the air slightly as opposed to burying it.
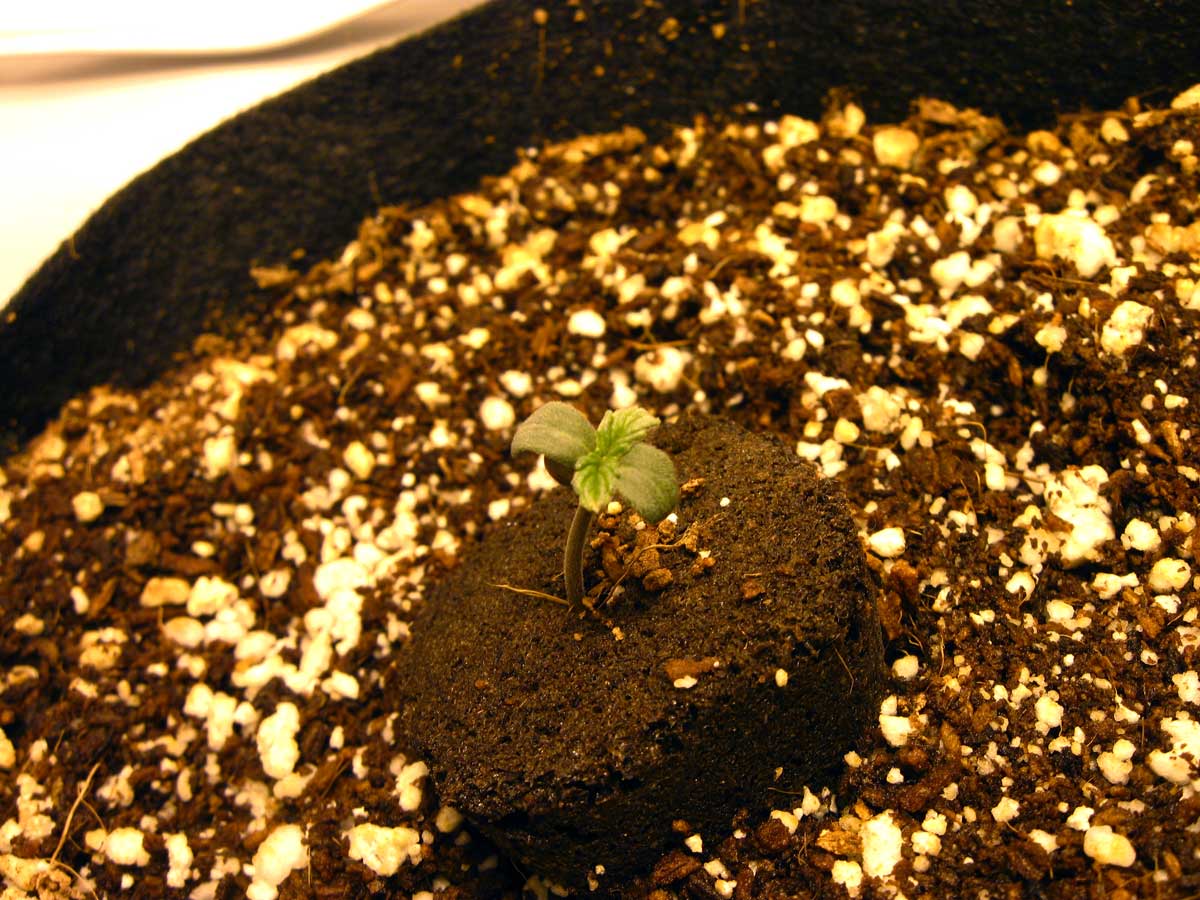
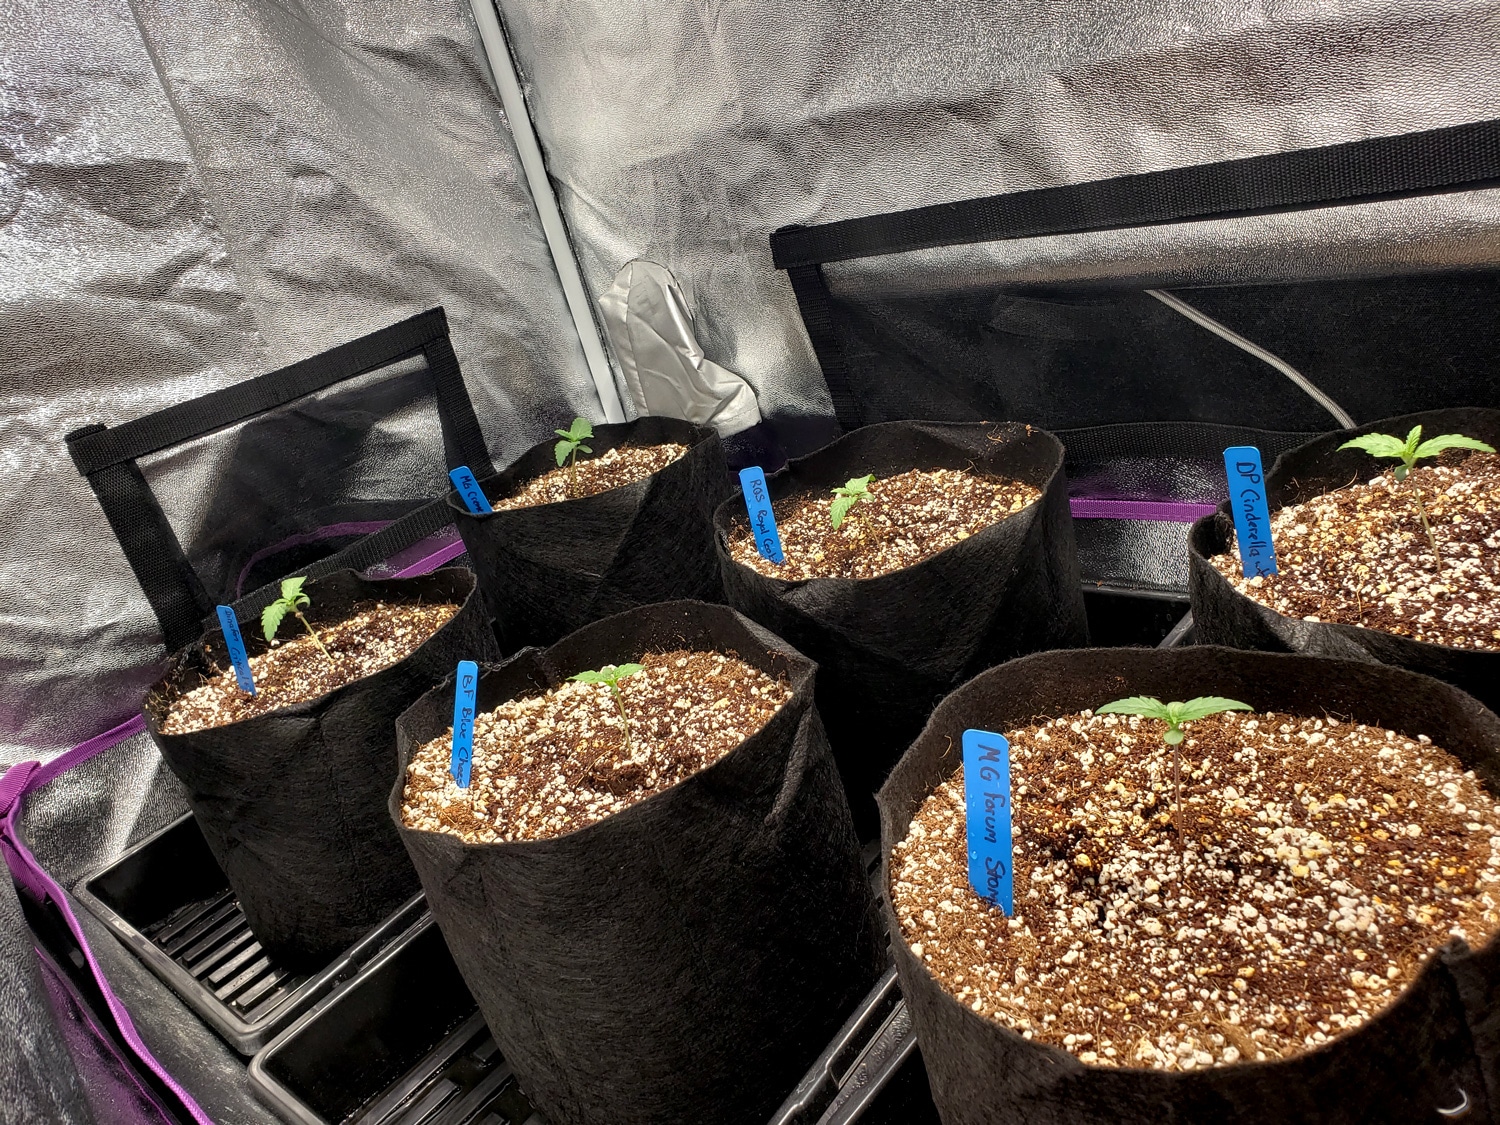
Example of cannabis seedlings growing in coco coir, about to get seedling-strength nutrient water. If they were in soil, I would give plain water for the first few weeks.
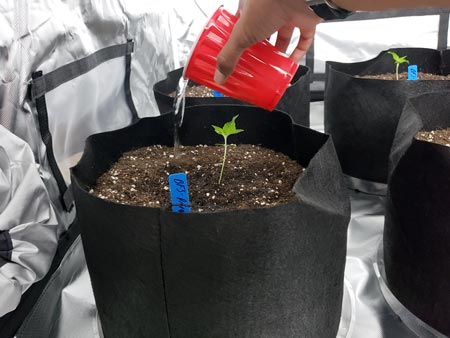
Water immediately in a small circle around your seedling. For most grow mediums and containers above 1 gallon, you can give 2 cups (500 ml) of water immediately without overloading your seedling. If the grow medium feels moist (for example coco that was recently re-hydrated), give 1 cup (250ml) of water this first watering.
Give 2 cups (500 ml) water in a circle around the seedling. If the grow medium is already wet, give just 1 cup (250 ml)
How to Water Seedlings in the Beginning
Two Main Goals
- Seedling roots never dry out (most important)
- Seedling roots aren’t staying soaking wet (roots need oxygen)
Seedlings “drown” and die due to lack of oxygen if they get too much water too often. To avoid this, try to provide an amount of water that lets you water seedlings every few days. Avoid giving so much water that the seedling roots are in a super wet grow medium for days as this causes “damping off” and root problems. Some grow styles like high-frequency fertigation call for watering more frequently. Just remember that the more often you water your plants, the less water you should give at a time. Also, keep in mind that a smaller container tends to dry out fast while a bigger container holds onto the water for longer
Try to maintain a schedule that lets you water your plants every few days without them looking droopy
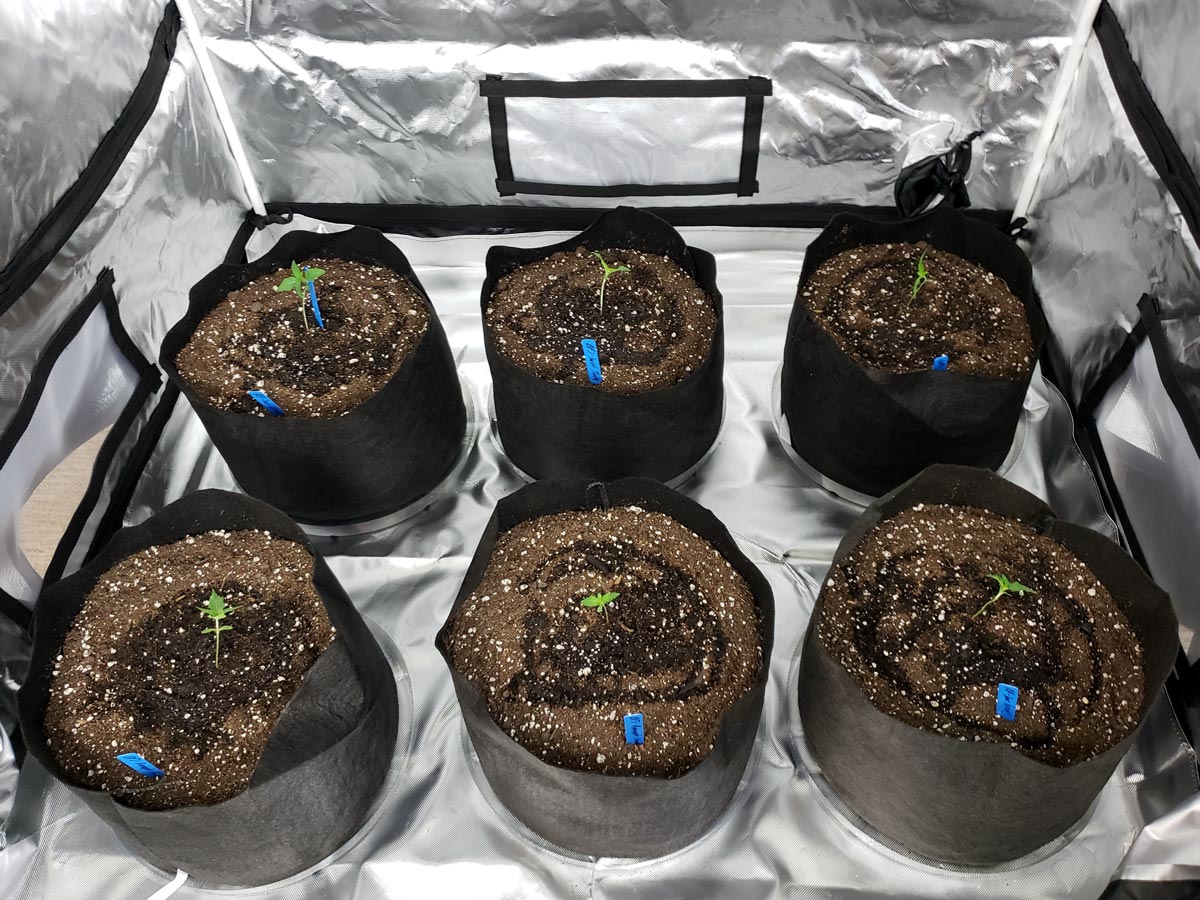
- Water in a small circle around the base of the plant at first
- If the growing medium feels dry within 1 day, give more water next time. Otherwise, give the same amount again next time you water
- Repeat, until you can give enough water to get at least a little runoff, and have it dry in a few days
If the medium is drying in less than 2 days, it means you need to give more water to the plant at a time, or possibly transplant to a bigger container if the plant has outgrown its current one.
If your growing medium takes longer than 3 days for the top inch to dry, it means the soil is staying wet too long, and plant roots aren’t getting enough oxygen. It also puts your plants at risk of getting fungus gnats. Try giving less water at a time until the plant is drinking more. It’s possible you may have a problem with drainage in your medium (what is good soil?) or there are no drainage holes so extra water can’t come out the bottom of the container. Always remove any runoff water instead of letting the plant sit in it.
More seedling resources
How to water cannabis plants perfectly every time
How can I tell if my seedling is over or under-watered?
Guide to common seedling problems
How to transplant cannabis seedlings into a bigger pot
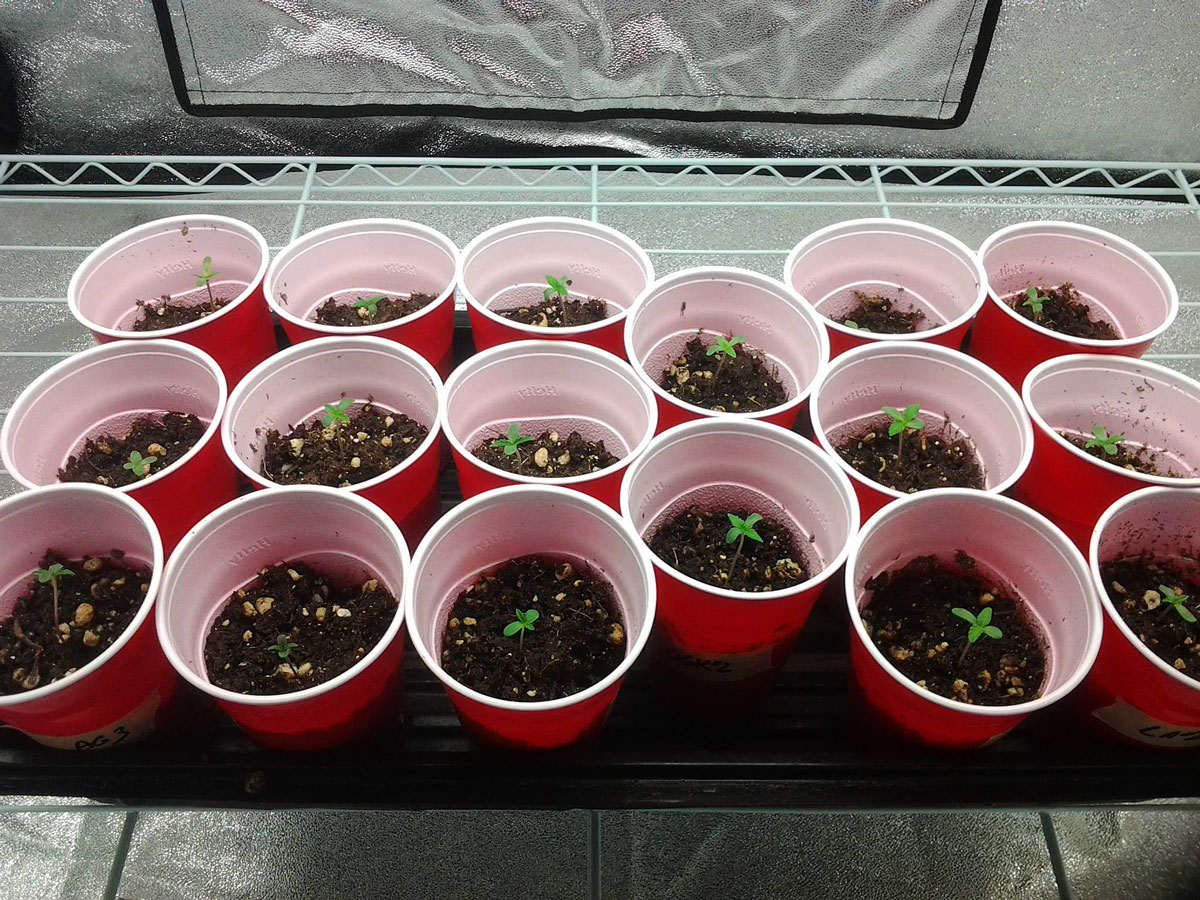
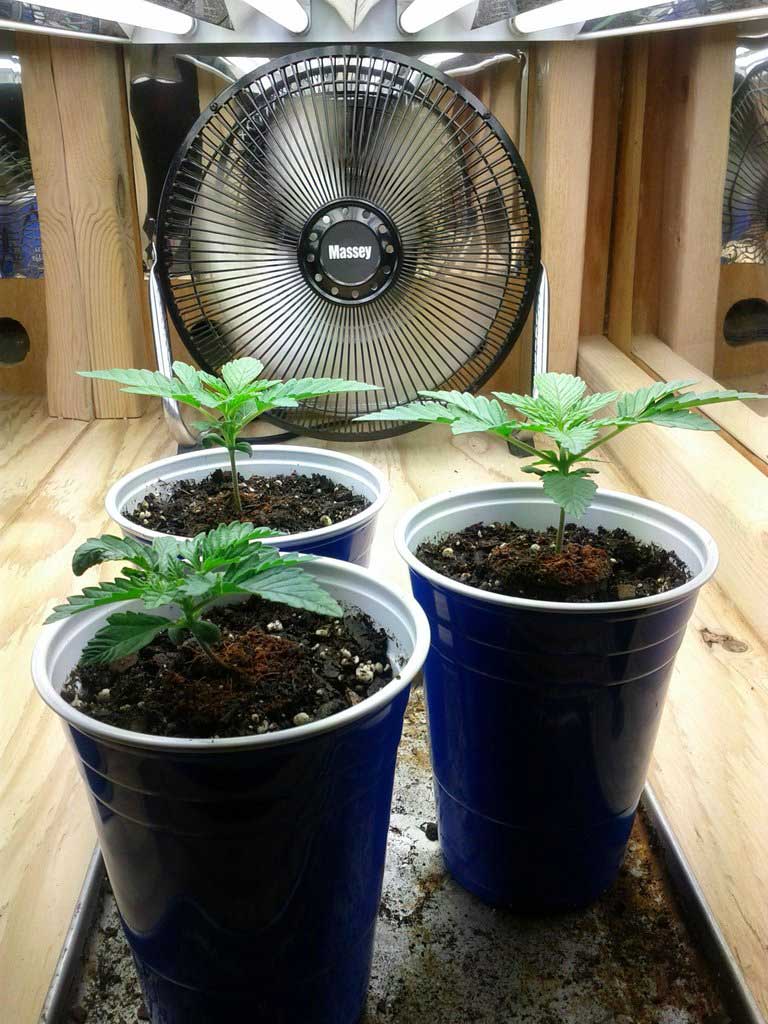
Some growers like to put seedlings in solo cups and then into their final container. When done right this can increase the rate of growth by providing more oxygen to the plant’s roots. If you go that route, I recommend paper cups as they’re not as bad for the environment.
Autopsy: Why Aren’t My Marijuana Seeds Sprouting?
If your seeds still aren’t sprouting and growing properly, consider the following factors.
If there’s no germination at all…
- Temperature may be too hot or cold – aim for 75-80°F
- Too wet – seeds and seedling roots should always be moist, but should not be soaking wet
- Too dry – if a root dries out the seedling can die
- Bad seeds – It might not be you, it could be the seeds themselves. Even if you purchase from a good breeder, sometimes you still get duds. How can I tell if seeds are viable?
If seeds sprout, but then stop growing…
- Temperature is too hot or cold – aim for 75-80°F
- Too wet – new seedlings don’t like “wet feet” so make sure your Rapid Rooter or growing medium never looks shiny or muddy, as that means there’s too much water! For this reason, it’s also usually recommended to avoid using a humidity dome with seedlings unless your air is dry. Although clones love humidity domes (they need water from the air because they don’t have any roots to get water), seedlings like it a little drier or roots tend to get mushy.
- Too dry – less common unless you live in a very dry area, but sometimes your medium dries out too fast if you’ve got a heavy-drinking, fast-growing seedling!
- Too much light – if the seedlings get blasted with high levels of light right away, it can shock them. They may need some time to adjust to higher light levels. Simply starting your grow light a little further away than normal is usually enough. Think sunny window at first, and start ramping up after a week of healthy growth.
- Not enough light – if seedlings are growing long and stretchy without growing new sets of leaves, it means it wants more light.
- No light for more than a day – if the sprouted seed doesn’t get light within 24 hours after sprouting, it may die. Once seeds are sprouted, get them in a Rapid Rooter and under at least some amount of light as soon as possible!
- Roots damaged – If somehow your roots got damaged, it can sometimes stop the seedling from growing
Don’t forget to check out our complete guide to common seedling problems.
Read an alternative guide to starting seedlings in coco or soil.
Unfortunately, sometimes you will never know why certain seeds just don’t thrive. It’s all part of nature. But if you follow this tutorial you will get the best results possible.
Jump to…..
What Causes Marijuana Seedlings to Grow Tall and Stretchy?
How to Avoid Common Seedling Mistakes
How to Start Seedlings in Hydroponics