by Nebula Haze
If you’re just getting started on your weed-growing journey, it can feel totally overwhelming. Where do you start? There’s so much to know, so what should you focus on first? Get the answers to all your questions in this straightforward tutorial. I’ll show you exactly what needs your attention, so you consistently get the harvest results you seek.
What should a beginner focus on to achieve great results on their first grow? Find out today!

If you read this article and follow the three steps, you’ll produce exceptional weed (and tons of it) even if you make a bunch of mistakes.

These techniques also increase overall marijuana bud quality, looks, and potency, so your homegrown buds look like this!

Today I’ll break down the 3 things you need to get right to become a legendary grower. If you understand these three aspects of growing, you will get good results. Yes, even if you mess up quite a bit!
Growing cannabis doesn’t have to be as complicated as a lot of people make it out to be. Typically, when growing weed feels difficult or frustrating, it’s because you lack the information on what to direct your efforts toward. You just need to know the following three things, and you’ll be able to grow exceptional weed and get the yields you want.
- Understand the cannabis life cycle
- Use the right equipment
- Start with quality genetics
Get ready to transform into a legendary indoor cannabis grower!
1.) Understand the basics of a cannabis plant’s life cycle
A solid understanding of a cannabis plant’s life cycle will make everything a million times easier for you! This cannabis life timeline is a quick overview of the main aspects you should know as a cannabis grower.

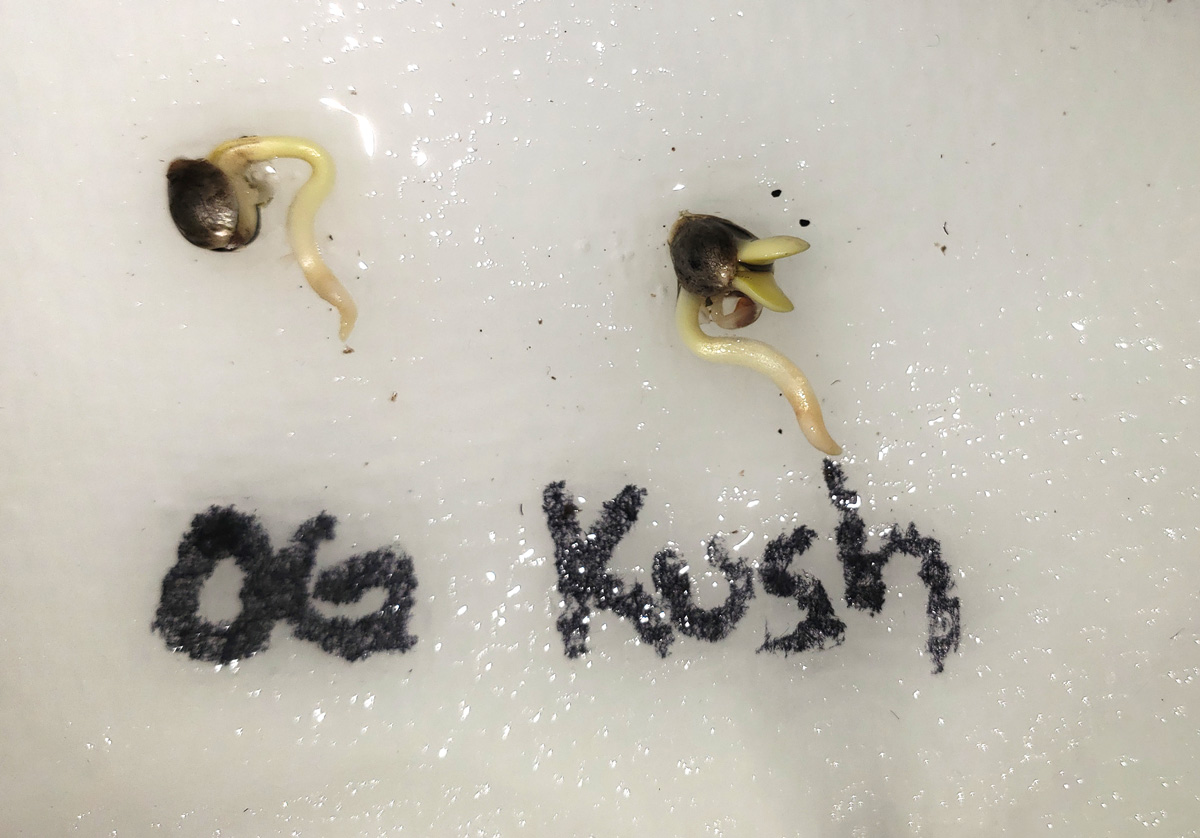
Seed Germination – Seeds germinate into seedlings.
Tips:
- use a proven germination method
- keep seeds warm and moist but not soaking
I love modern versions of the classic OG Kush strain. Easy to grow, lovely unique “kush” smell, with excellent bud effects.
Vegetative Stage
Plants grow only leaves and stems at first. Since all growth is vegetative, this is known as the vegetative stage. On average, plants gain half their final size in this stage.
Tips:
- Pay attention to the environment – If it’s comfortable for you, it’s comfortable for your plants. Learn about the optimal cannabis environment. Getting your environment right now makes things easier when buds start forming.
- Watering habits – Learn how to water your plants perfectly, and pay attention if you notice drooping or signs of overwatering.
- Vegetative nutrients – Give all-purpose or “grow” nutrients in the vegetative stage. In soil, wait four weeks before giving nutrients. However, in coco or hydro, give nutrients from the beginning. An example of a extremely simple vegetative nutrient that works great for cannabis plants in any grow medium is Dyna-Gro Grow (give at 1 tsp/gallon). For more advanced growers, Fox Farm nutrient trio (for soil) or General Hydroponics Flora trio (for coco or hydro) offer professional results. Learn about cannabis nutrients.
- Plant training (optional) – Helps increase yields and maximizes the size and density of buds, but plant training is not necessary for success. Skip this if you feel overwhelmed! Learn about plant training.
- Start flowering/budding at the right time – Move on to the next stage when you cannabis plants reach about half the final desired size. They will about double in size after they start budding in the flowering stage, which is their next stage of life. Initiating flowering at this point sets you up so your plants are the perfect size (not too big, not too little) at harvest, so you get max yields but not overgrown plants.
Flowering Stage
Initiate the flowering stage by giving plants a 12/12 light schedule (except auto-flowering strains, which start flowering on their own after 3-4 weeks). Once plants get a 12/12 light schedule, they start growing flowers/buds within 1-3 weeks. Plants can double in size after getting 12/12 on average, though the amount of “stretch” depends greatly on the strain. Once buds form, the time until harvest is determined by the strain.
Tips:
- Initiate a 12/12 light schedule when plants are about half the final desired size. Learn about “12/12” and cannabis light schedules.
- Pay attention to the environment (especially make sure it’s not hot or humid) – Learn about environment effects on bud quality.
- Watering – Watering techniques should be about the same as before, though plants will be drinking more overall. The main thing that changes is the amount of nutrients you provide.
- Nutrients– Switch to flowering or “Bloom” nutrients. Dyna-Gro Bloom (at 1 tsp/gallon) is super simple and effective. If you’ve been using professional nutrients like Fox Farm nutrient trio (for soil) or General Hydroponics Flora trio (for coco or hydro), switch to their included “flowering schedule” which will change up the ratios to give plants what they need while buds form.
- Plant pruning (optional) – These two main techniques increase yields by ensuring all buds get tons of direct light. As a bonus, the top buds on the plants get the biggest, densest, and most potent, so these types of training maximizes bud quality, too, since all your buds will be top buds.
- The first technique is to keep flowering plants flat like a table as opposed to a Christmas tree shape, which is done by bending tall branches over and tying them down.
- The second technique is to remove excessive leaves to make sure all buds are exposed to direct light. Learn about how to prune flowering cannabis plants.
- Problem resolution – Many growers notice leaf symptoms in the second half of the flowering stage because plants are much pickier than in the vegetative stage. This is normal and a common issue for beginner growers. Don’t panic, but don’t ignore problems either. Check the plant doctor for help diagnosing the cause, and then fix the issue before it affects your harvest. Also, here’s some help on controlling height.
Plants are a bit more picky about the environment and nutrients in the late flowering stage, but they’ll reward you if you follow the above tips!
Harvest
Harvest cannabis buds when they’re mature, dry them, then jar them for storage and curing.
Tips:
- Pick the right time to harvest. Here’s what to look for.
- Proper drying is crucial – Drying buds makes a huge difference to final bud quality.
- “Cure” the buds! Store dried buds in jars and burp occasionally. Bud quality improves for weeks.
Harvest cannabis buds when they’re ready!
Time for a quick review!
This infographic shows the whole life cycle with a timeline of what to expect

2.) Get good equipment
Now that you understand the most important aspects of what it takes to grow cannabis, let’s talk about setting up so that nature does most of the work for you. That way you get to focus on enjoying the process and looking at your beautiful, healthy buds forming.
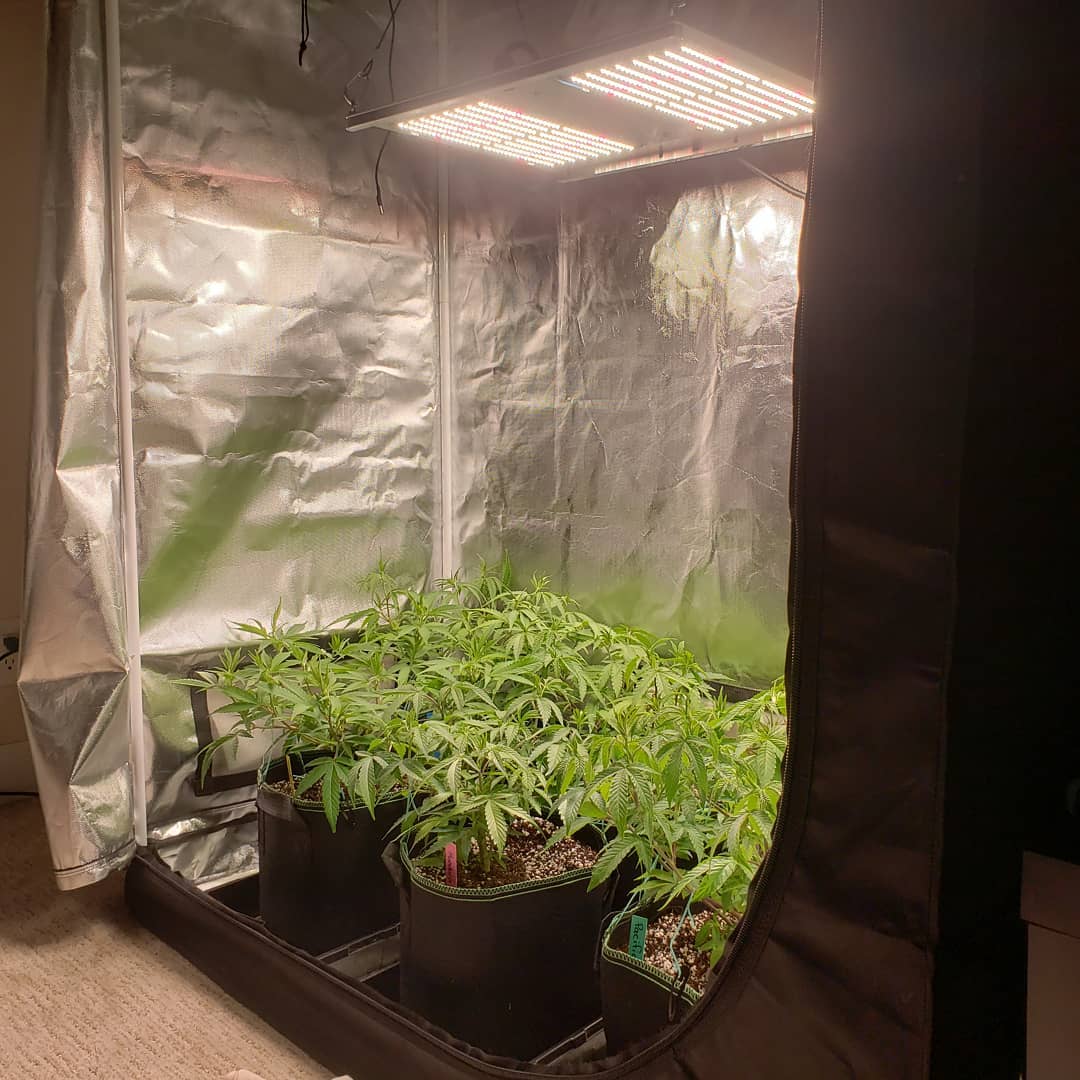
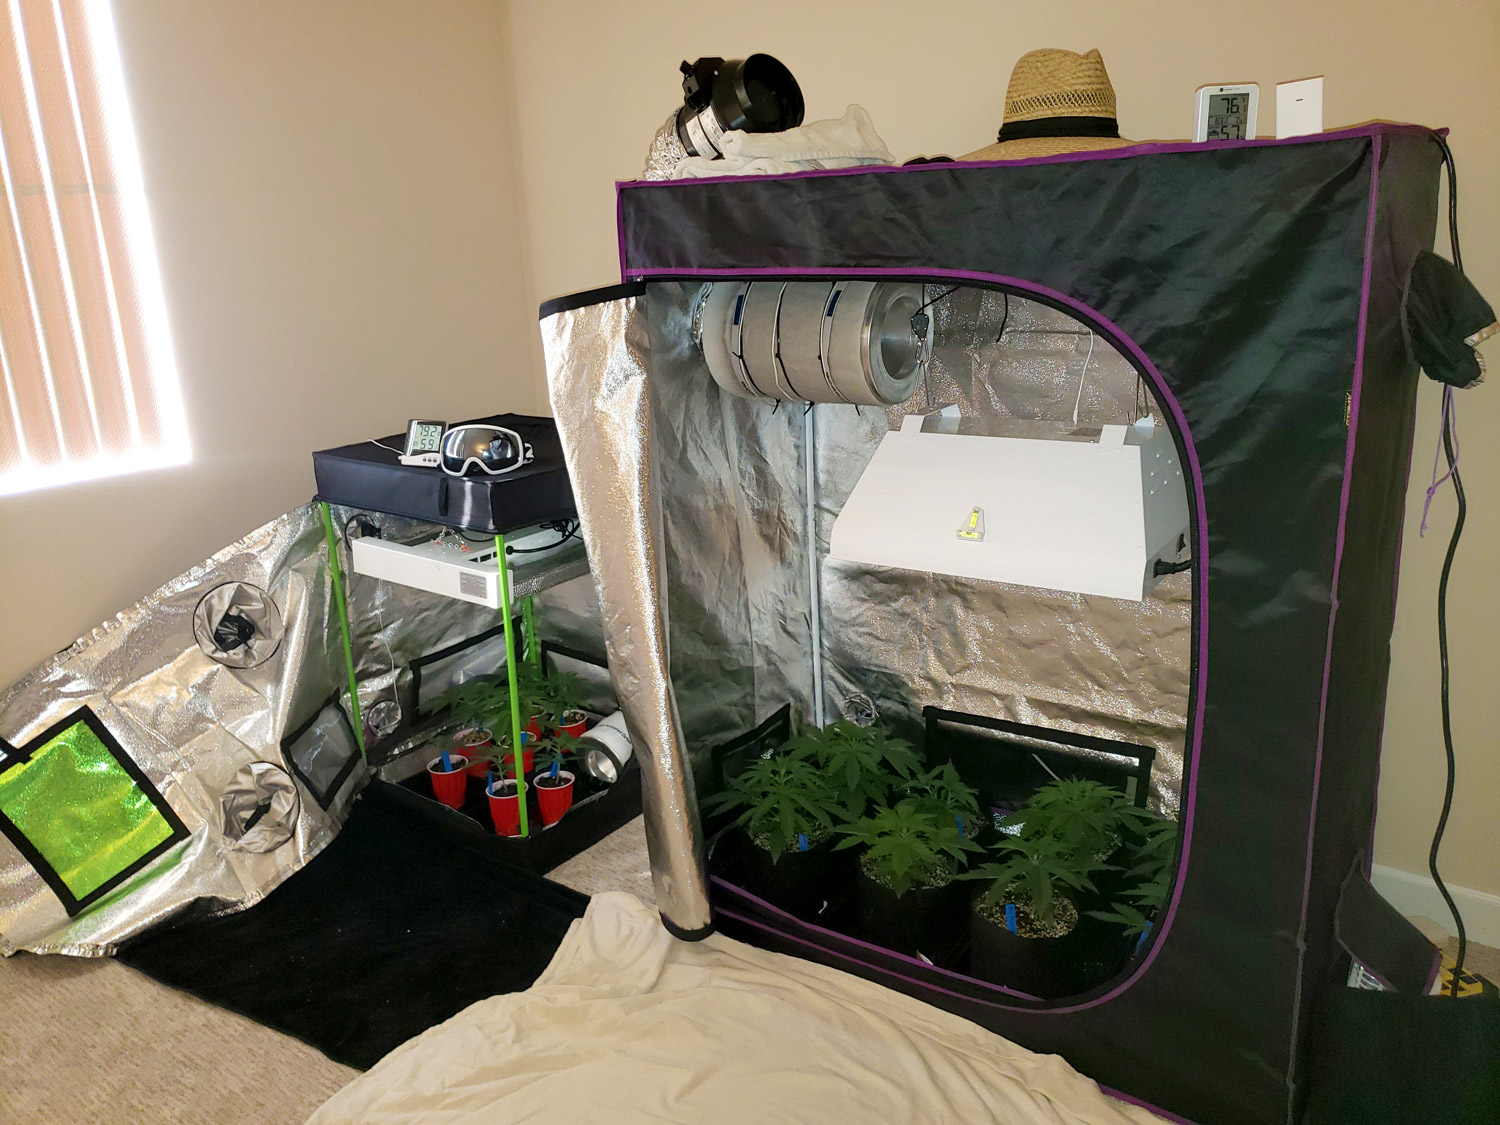
- Environment – Your setup should make it easy to maintain comfortable temperature and humidity for your growing plants (a grow tent with fan pointing out works really well!). You can hang a grow light from inside a closet and use a fan to help blow air around. Just know that you may have more trouble controlling the environment than if you get proper equipment.
- Grow light – For beginners, I recommend a 200-300W LED grow light like the Spider Farmer SF2000 (200W) or Mars Hydro TSL2000 (300W). These LEDs get excellent cannabis growth, yields, and bud quality. If it tends to get cool in the grow room (for example you’re growing in a basement, or during the winter), then a 400W MH/HPS may be a better choice because it’ll help heat up the grow space.
- Grow medium – Examples are rich fluffy potting soils (Coco Loco, Ocean Forest, Roots Organics, etc.), coco/perlite potting mix (Mother Earth Coco plus Perlite mix is what I use, and it’s fantastic), and lastly, water for hydroponic setups. If you’re not sure, you can’t go wrong with simple old soil! Learn more about grow mediums.
- Nutrients – Nutrients are necessary for the best yields unless you’re growing in a super soil setup (which slowly releases organic nutrients over time throughout the plant’s life). Use an all-purpose/grow nutrient formula for the vegetative stage, and flowering/bloom nutrients for the flowering stage. With soil, you should start giving nutrients about 4 weeks after plants have been in the same pot. With coco or hydro, give nutrients from germination or the plants won’t grow (coco and hydro don’t naturally contain nutrients, so the plant only gets what you give in the water).
See examples setups that work well for growing cannabis.
Get a setup that fits your yield goals, space limits, and budget.
3.) Start with good genetics
I highly recommend beginners starting with feminized seeds from a trustworthy breeder. Feminized seeds means 99.9% of seeds will produce female plants, unlike regular seeds, which produce male plants roughly half the time. Since male plants don’t produce buds, starting with feminized seeds means you can feel confident that every seed you germinate will produce buds.

Ideas for genetics:
- Highest THC – Check the list of American strains and seed banks. I’ve found that American strains tend to have the highest THC levels, though not always.
- Therapeutic use – High CBD, low THC, symptom-specific strains. Use the filters on this feminized seed selector tool to help find what you’re looking for.
- Biggest yields – Choose a high-yielding strain. Here’s a list of high-yielding, feminized strains on Seedsupreme.com. I set the filter on that link so the highest-rated strains appear at the top.
- Easiest to Grow – Stick to established strains that have been stabilized to produce consistent results. Avoid “crosses” (usually with a name like STRAIN x STRAIN). Crosses result in a variety of different types of plants. Crosses are great for breeders looking for the next big strain, but not necessarily the best choice for someone who just wants to grow weed and know what to expect.
- Low time commitment – Autoflowering strains mean fewer steps to get plants to make buds, plus you’ll get to harvest quicker than with other strains.
- Bag seed? I’ve seen growers get good results with bag seed (seeds they find). If that’s all you have, that’s what you have to use. Just know that the results can turn out extremely different from the weed it came from, and you’ll have no idea what to expect as far as growth patterns or how long it will take before it’s ready to harvest. Bag-seed really makes you appreciate breeders. If you can afford even a few cheap seeds, you’ll be a lot more prepared! I highly recommend Seedsupreme strains if you’re looking for something inexpensive but generally dependable.
Learn how to find the right strain.
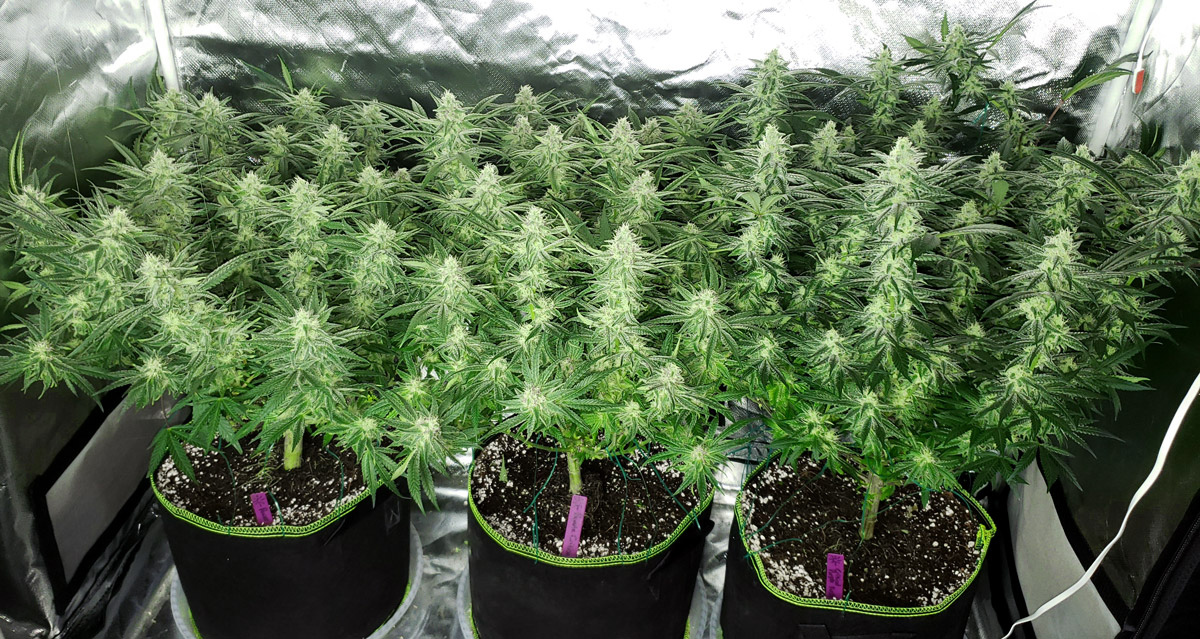
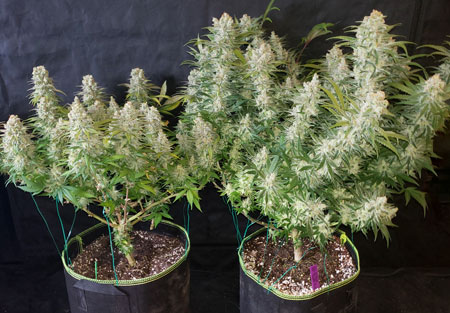
I recently grew these two Critical Kush plants and was beyond pleased by the yields, ease of growth, and potency! I highly recommend the strain if you’re not sure what to get.
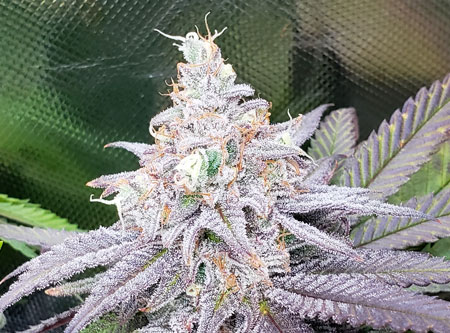
Closeup of a Critical Kush bud (click picture for full-size version). Although the buds look pretty typical, don’t let that fool you. The yields, smoothness, smell, and effects are outstanding.

For auto-flowering strains, Dinafem genetics have never done me wrong!
About the Author Nebula Haze
I’ve grown a lot of excellent weed since I started in 2008! After struggling to get started growing, my goal in life became to help other people grow as much weed as they want, and grow better weed than they can buy. That’s why I co-founded GrowWeedEasy.com in 2010 and have been teaching growers ever since.
If you liked today’s article, sign up for our weekly newsletter and get a new growing article delivered to you every Sunday.
Happy growing!