by Nebula Haze
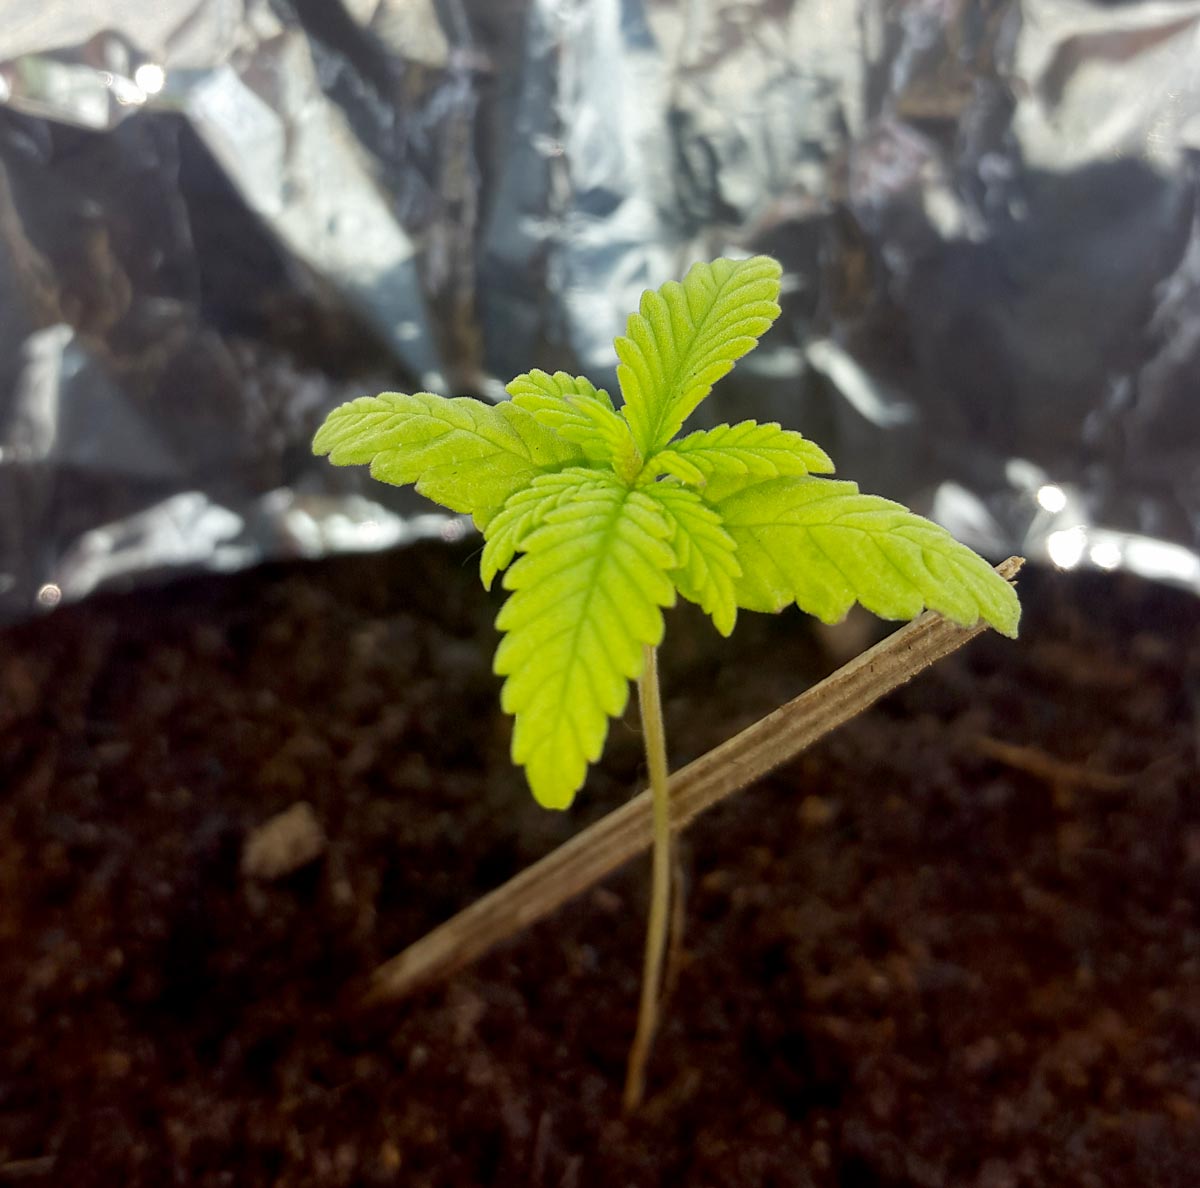
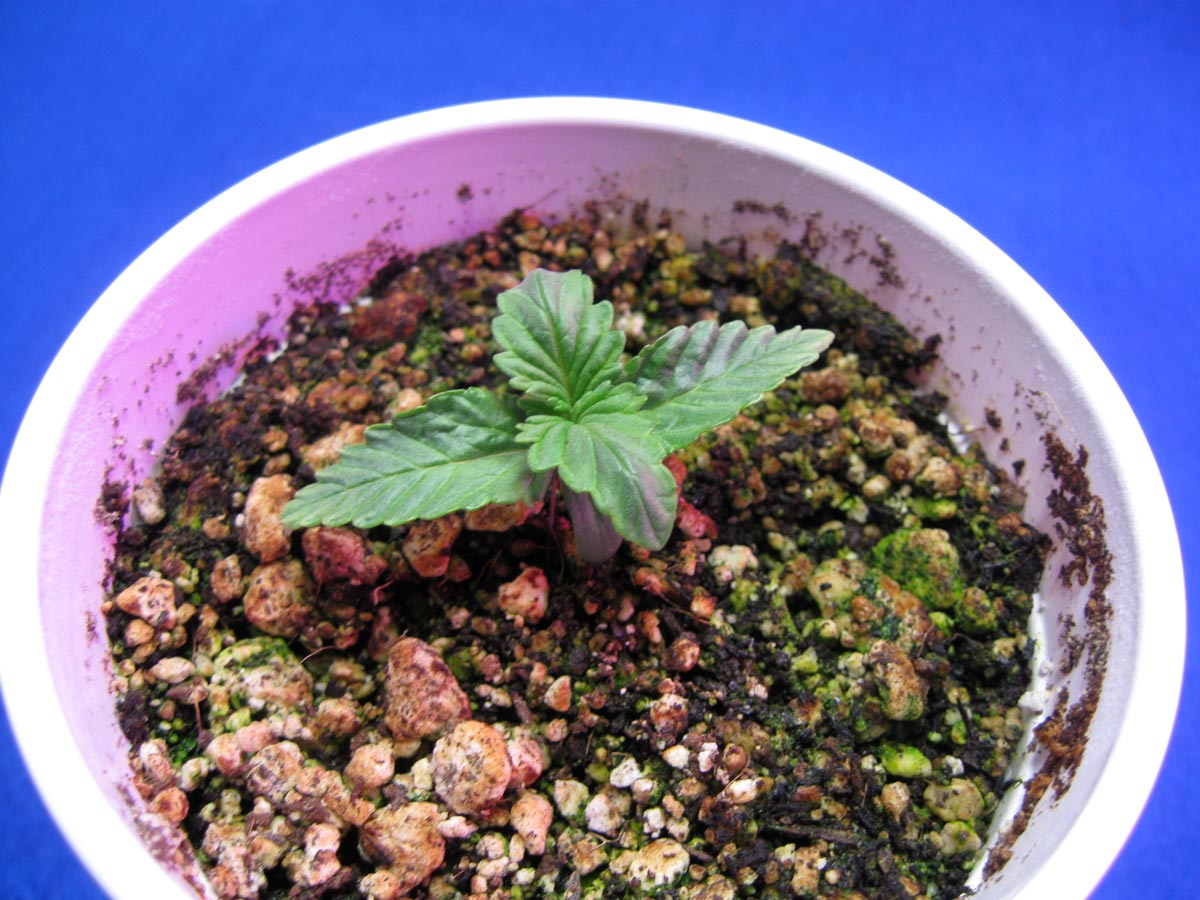
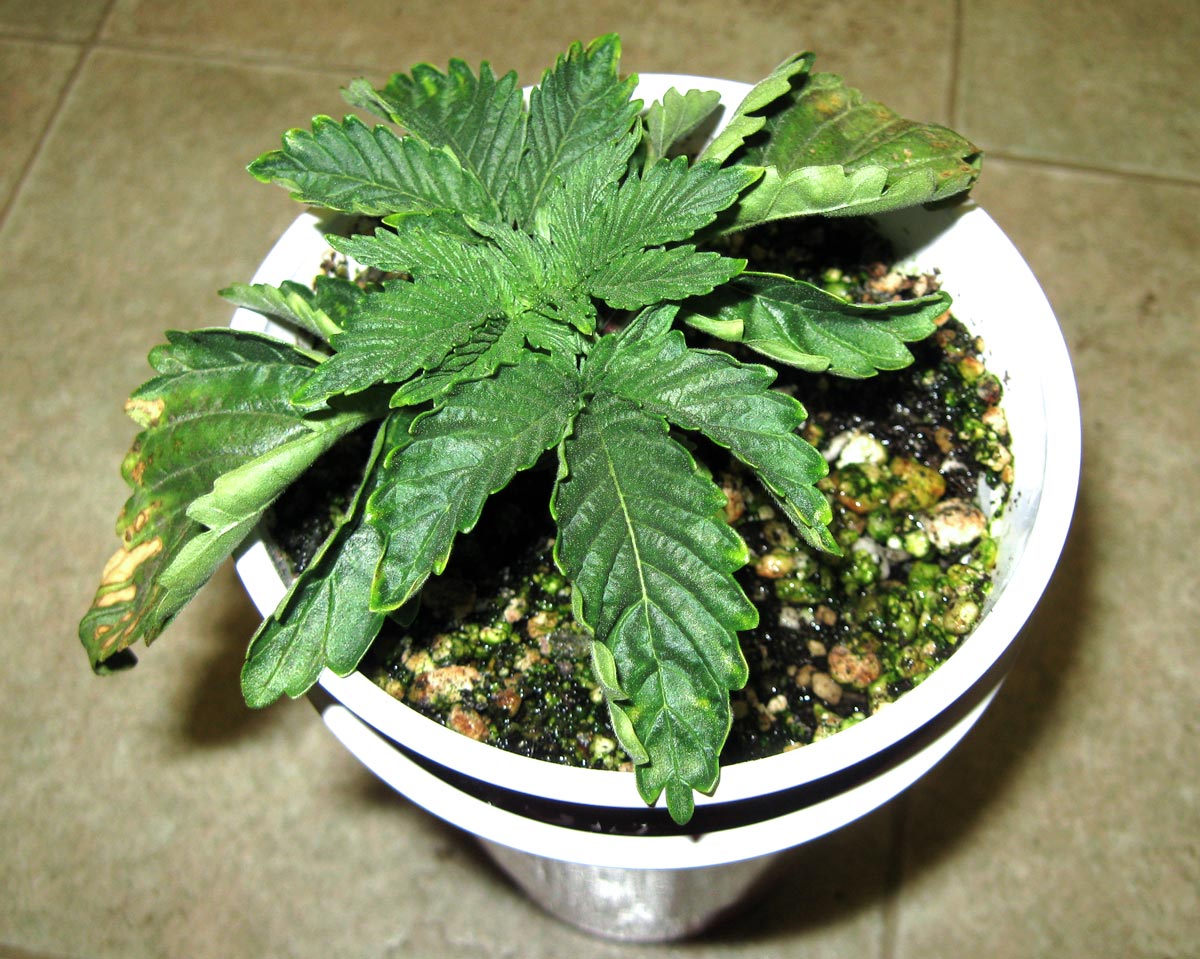
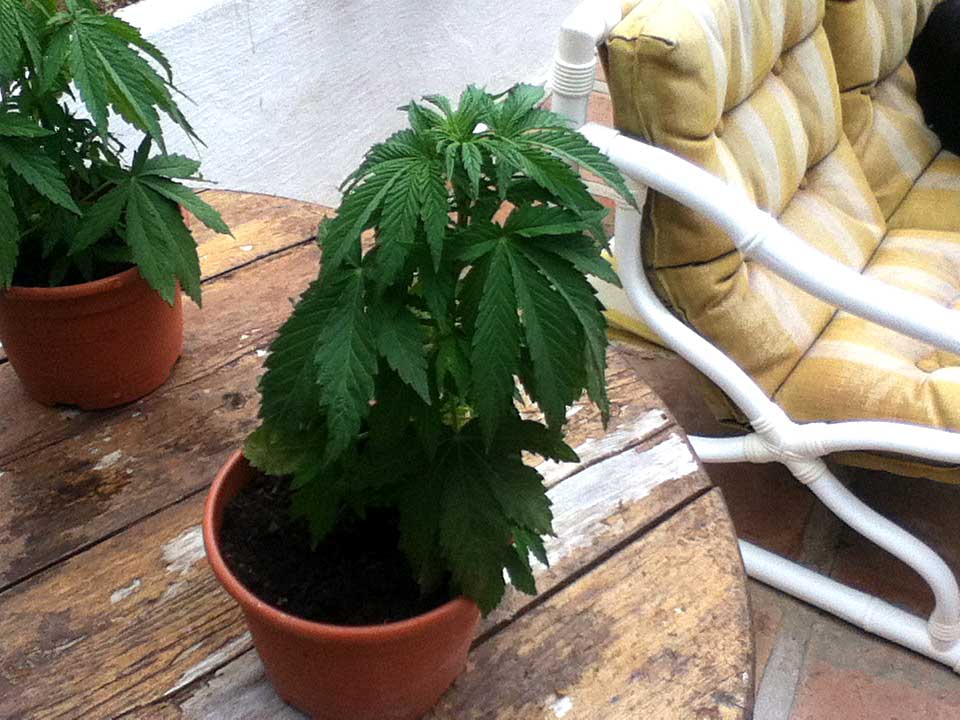
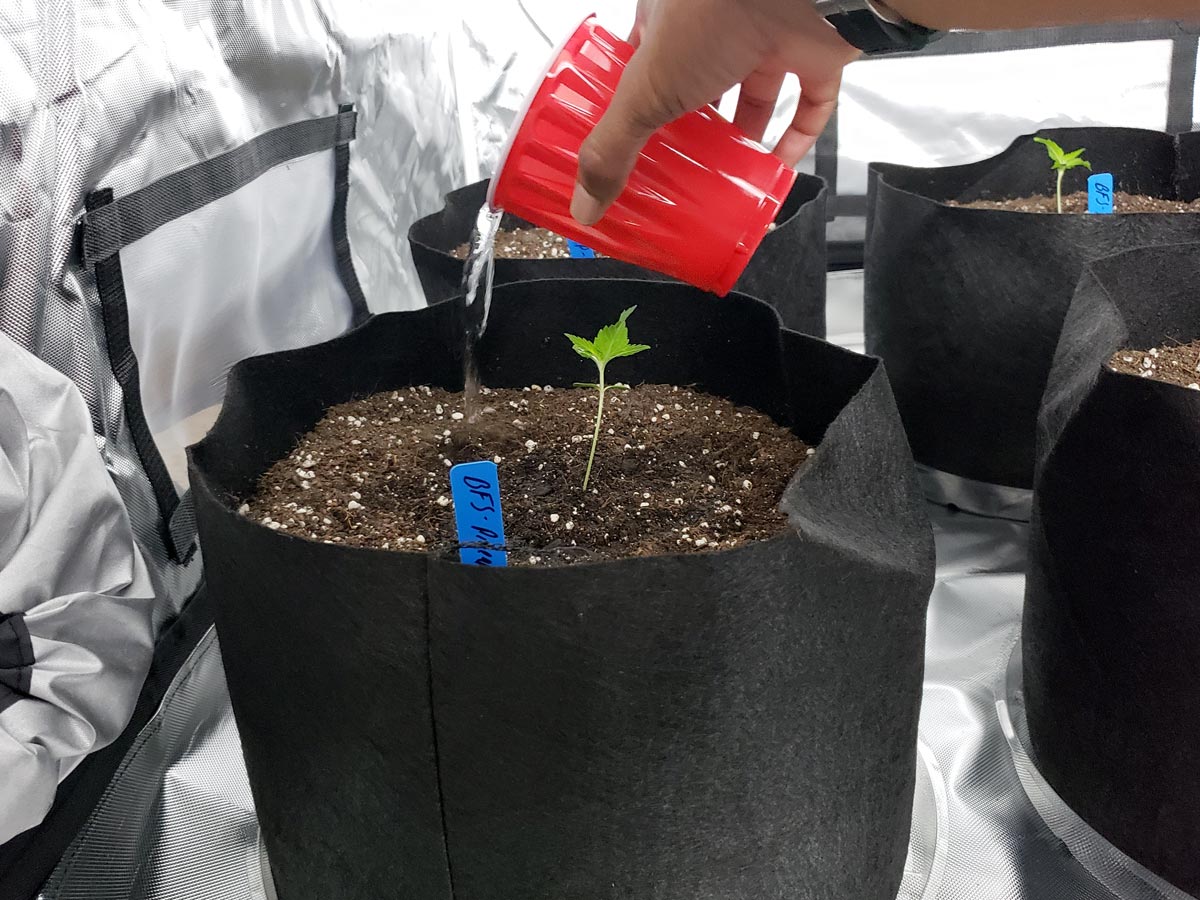
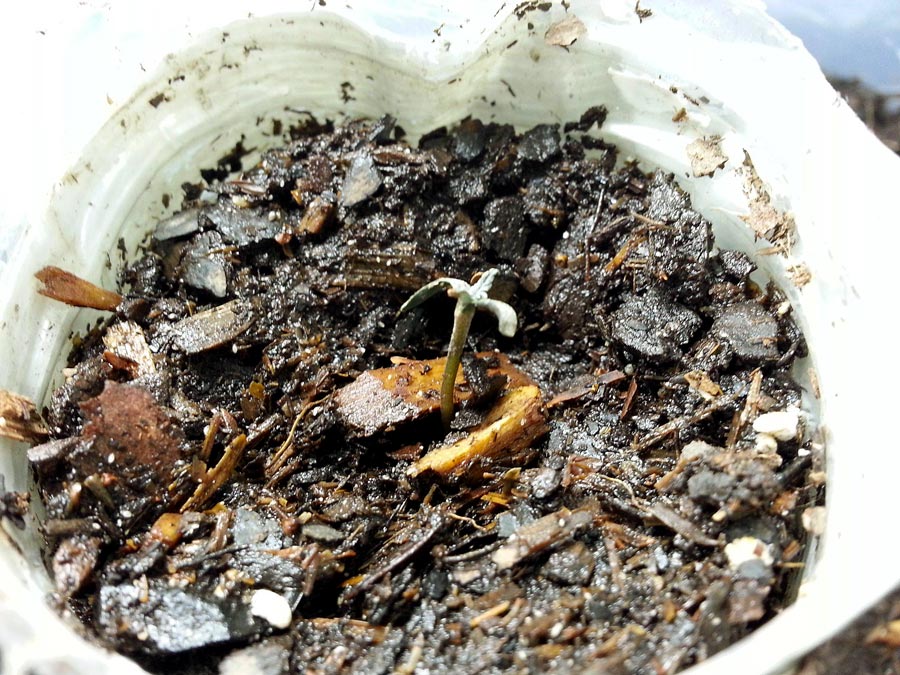
This overwatered cannabis seedling is drooping from being given too much water too often.
If you’ve got droopy cannabis plants, you’re not alone. Overwatering is one of the most common problems faced by cannabis growers. Giving too much water to your cannabis plants doesn’t mean you’re a bad grower. In fact, overwatering is usually a sign you care about your cannabis plants. You just need to learn how to water them properly.
Jump straight to the overwatering solution!
Besides droopiness, you may see a host of other strange symptoms. In today’s overwatering tutorial, you’ll learn how to identify all the signs of overwatering, and then discover how to water your cannabis plants perfectly every time. Here’s what to look out for:
5 Surprising Signs of Overwatered Cannabis Plants
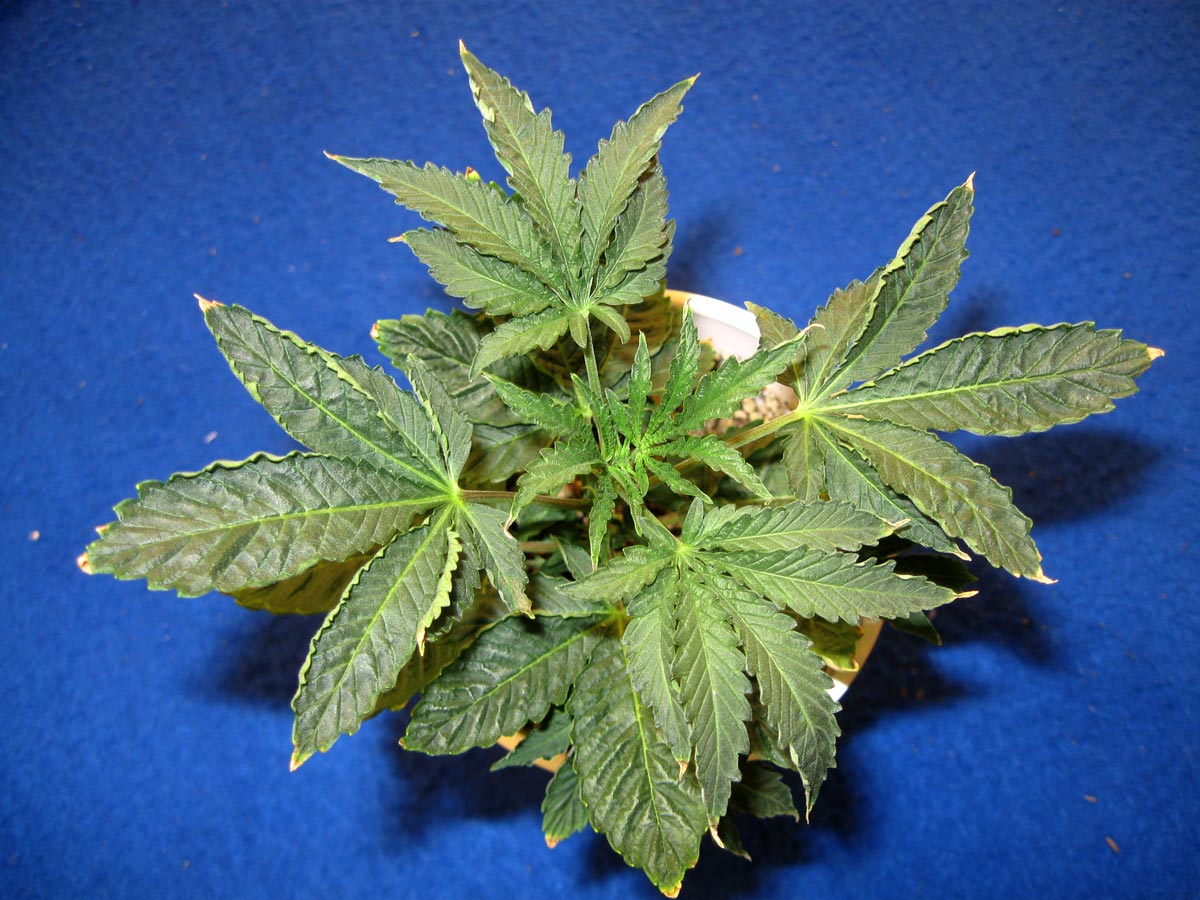
- Brown Leaf Edges
- Yellowing or Bleaching
- Nutrient Deficiencies
- Cupping or Curling
- Unexpected Life in the Soil
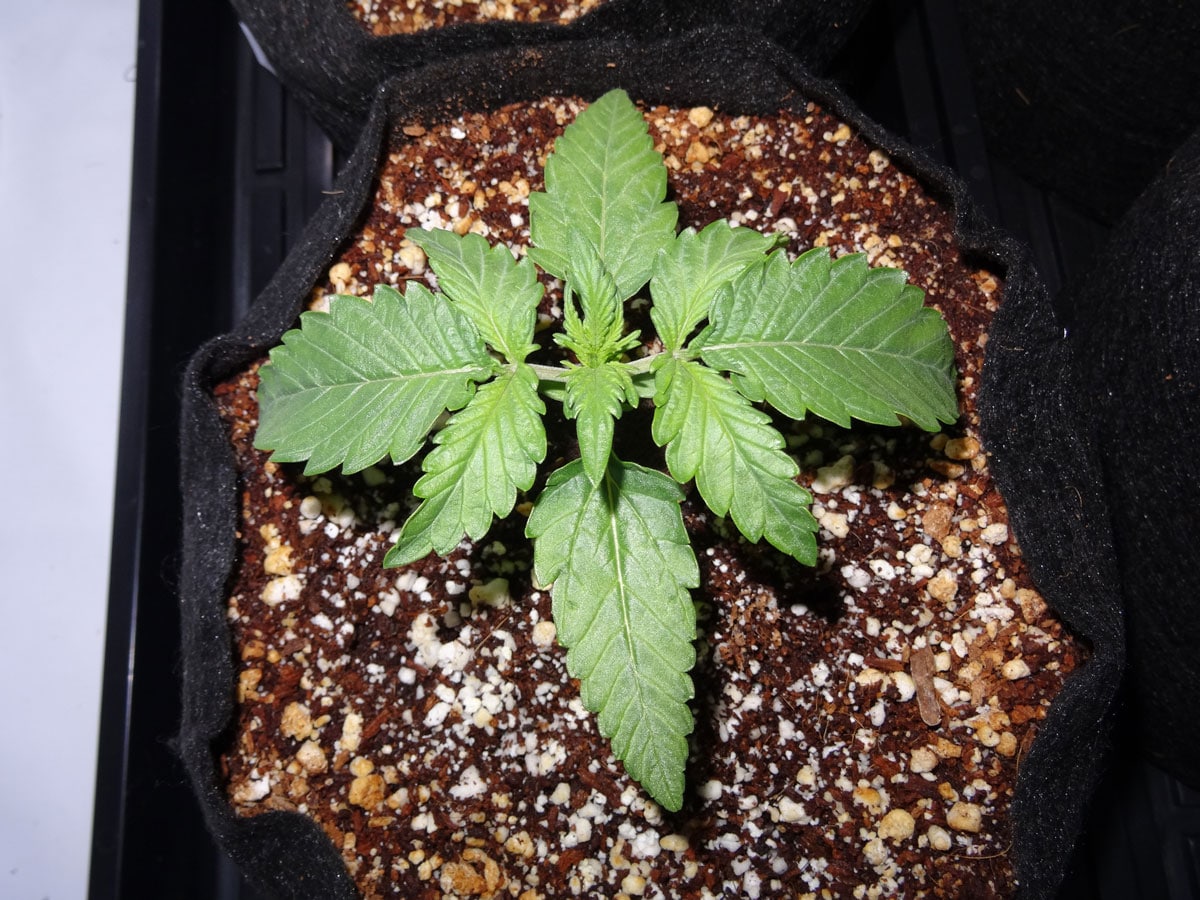
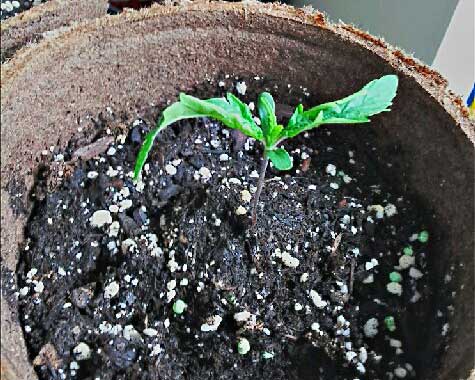
Note: As a result of these problems, overwatered cannabis seedlings often grow slowly or stay small for a long time.
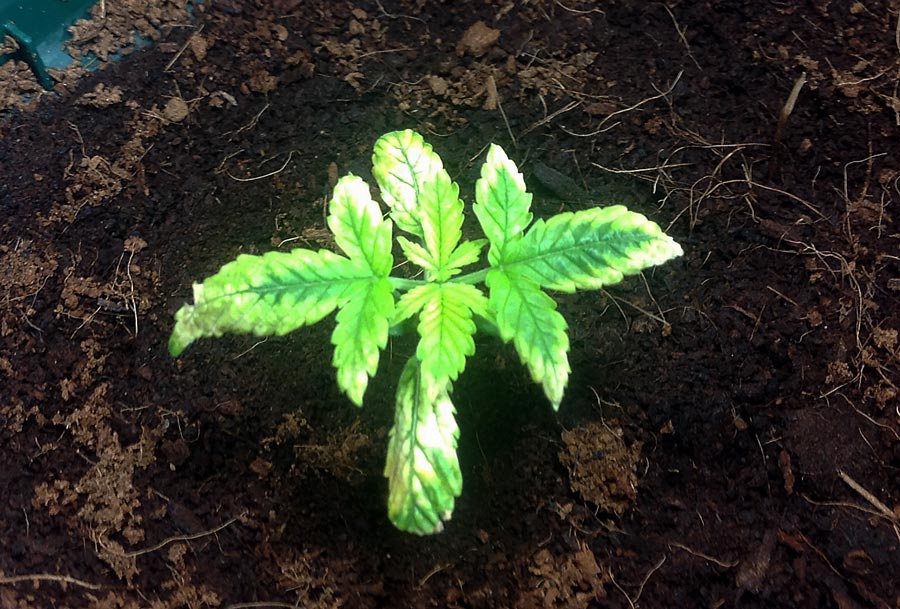
This cannabis seedling looks like it has a nutrient deficiency, but the cause is being watered too often.
If you see the listed symptoms combined with droopiness, especially with soggy or waterlogged soil, there’s a strong chance your cannabis plant is overwatered. The goal of this article is to prevent you from chasing solutions to other issues when the only answer is simply to water plants less. Let’s dive into the details of each sign and then I’ll show you how to water correctly.
5 Surprising Signs of Overwatered Cannabis Plants
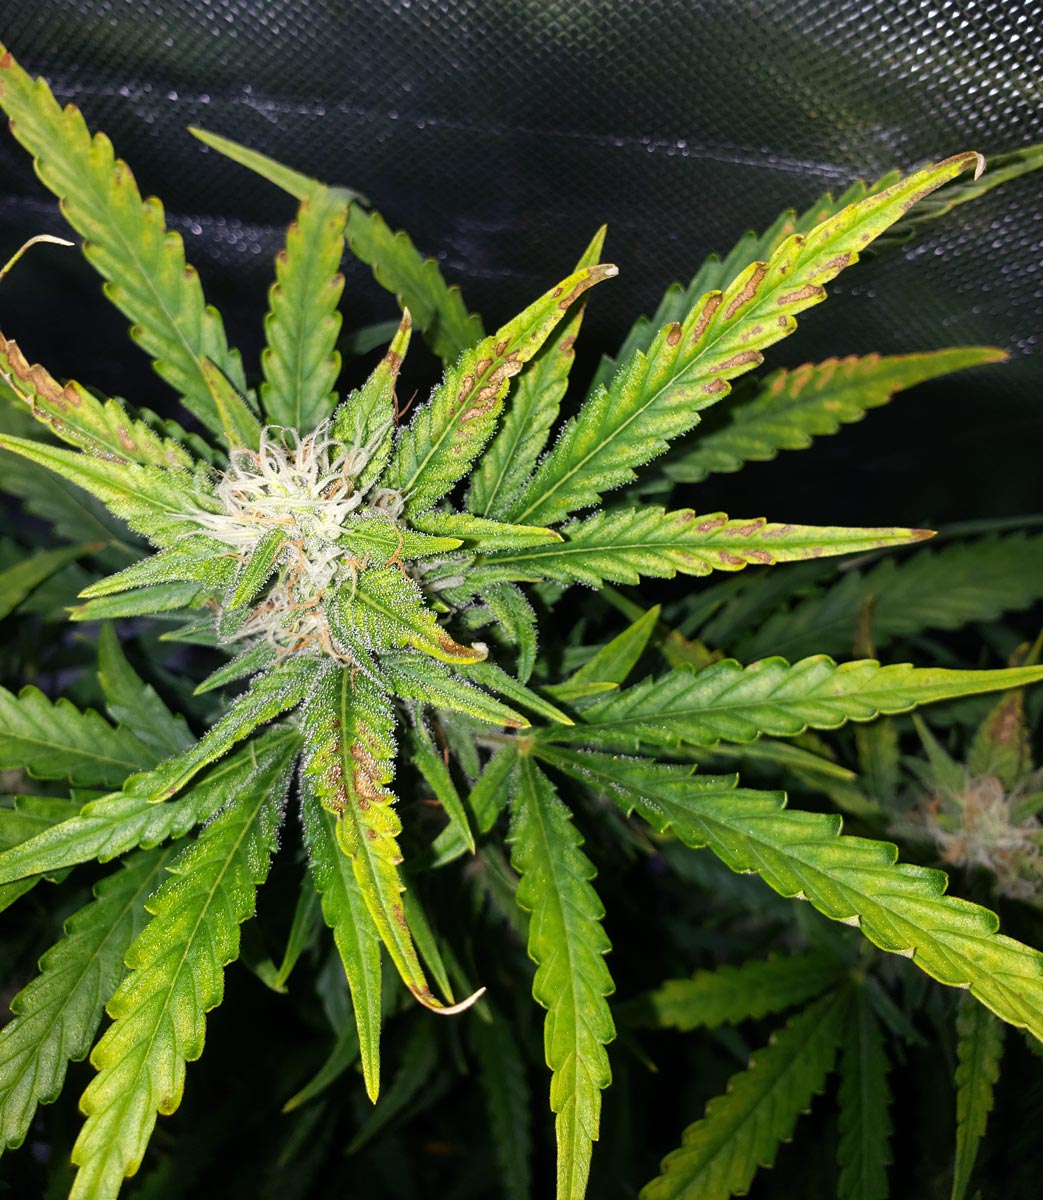
1.) Brown Leaf Edges
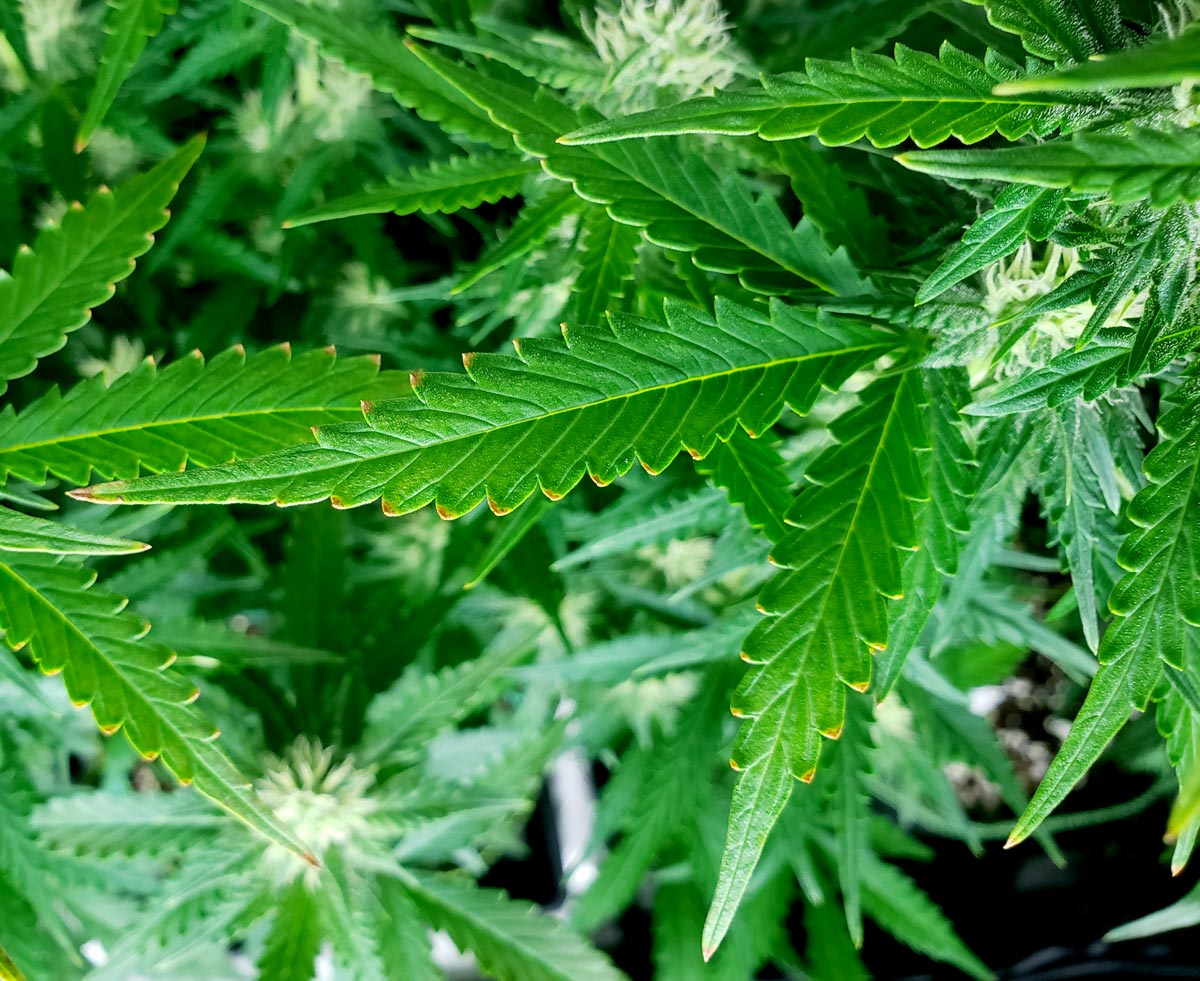
When I first started growing cannabis I heard this symptom was nutrient burn (too many nutrients), but since then, I’ve learned nutrient burn typically only affects the tips of leaves as opposed to all the edges. I’ve also heard this is a calcium deficiency, but that looks more like brown patches or burns on the leaves themselves. I’ve personally found that spots on the serrated edges of leaves are often related to root problems or issues with water movement through the plant. Most commonly overwatering, especially when combined with overly hot or cool temperatures.
Overwatering can cause brown spots on the serrated edges of leaves.

These brown leaf edges appeared after the plant was heavily watered.
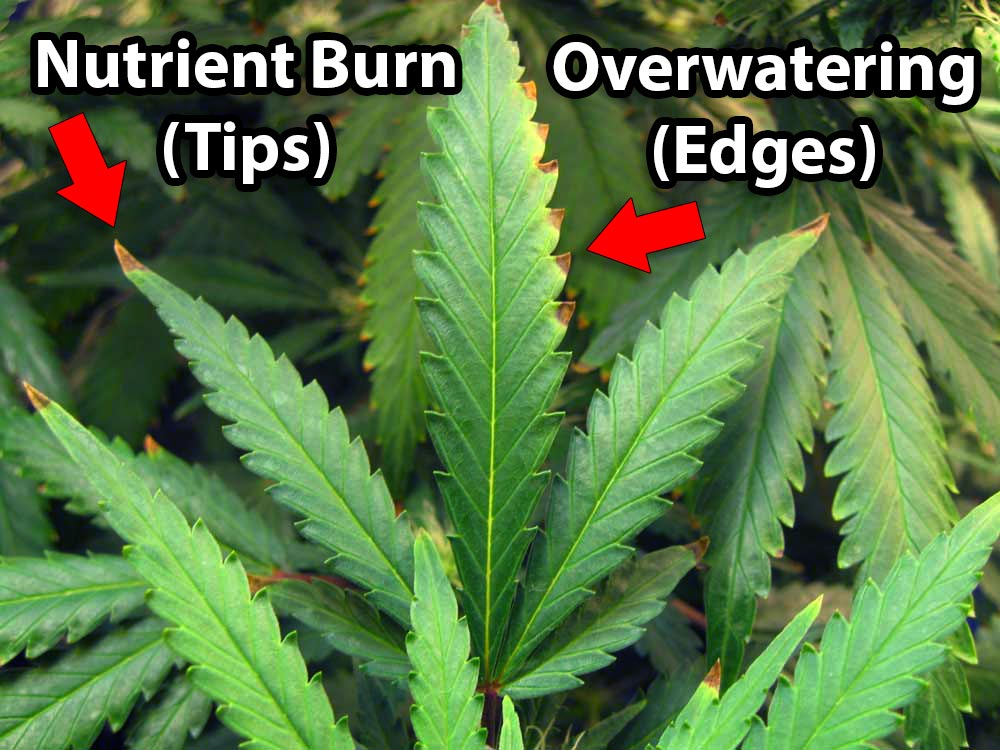
How can you tell the difference between brown leaf edges from overwatering vs nutrient burn? The burnt spots appear on different parts of the leaf.
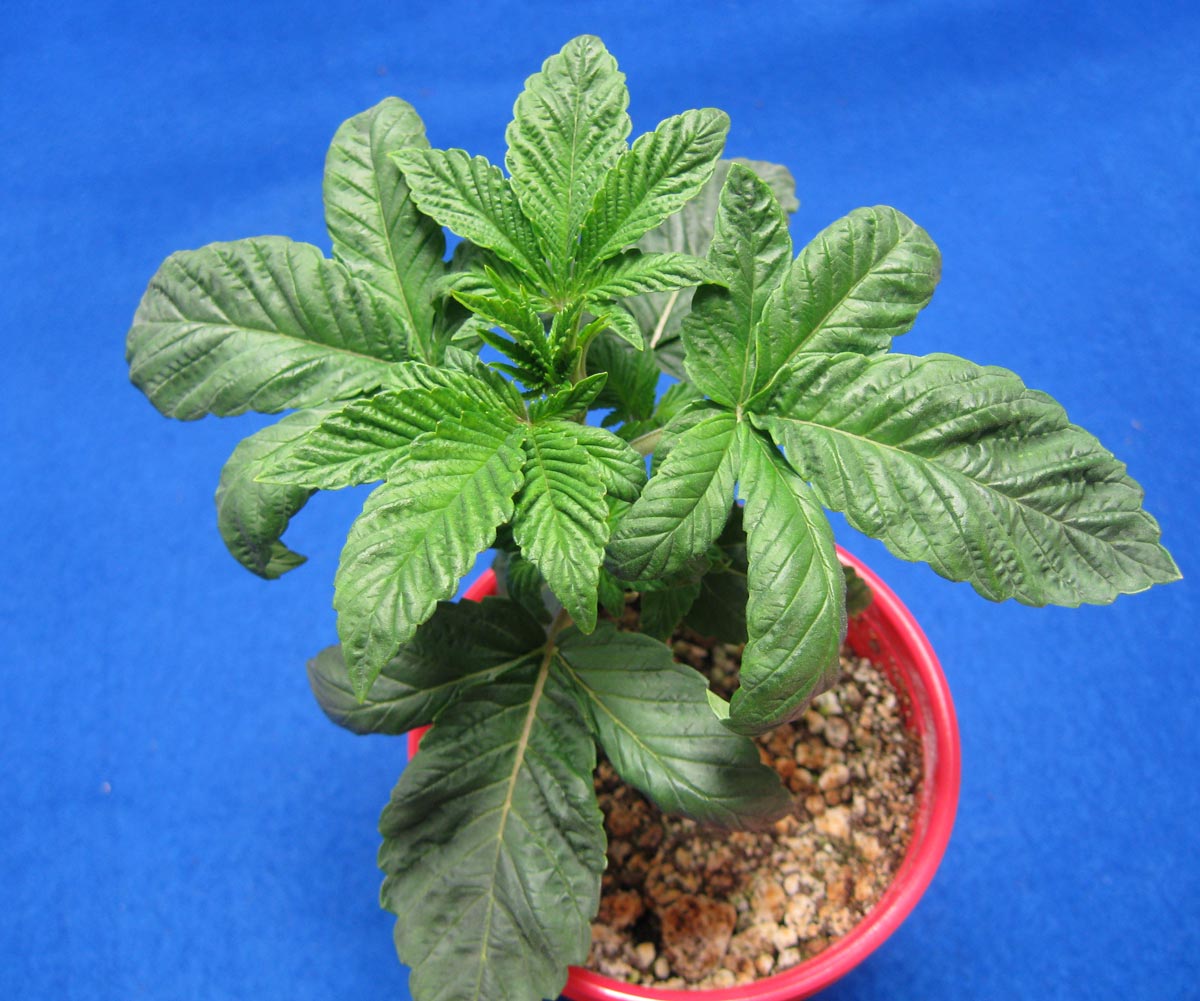
2.) Yellowing or Bleaching
Overwatering prevents plants from conducting normal plant processes. A heavily overwatered cannabis plant (especially a young one) may start looking yellow all over from being overwatered. The yellowing can occur even when roots have access to nutrients and are given the right pH (proper pH helps prevent nutrient deficiencies).
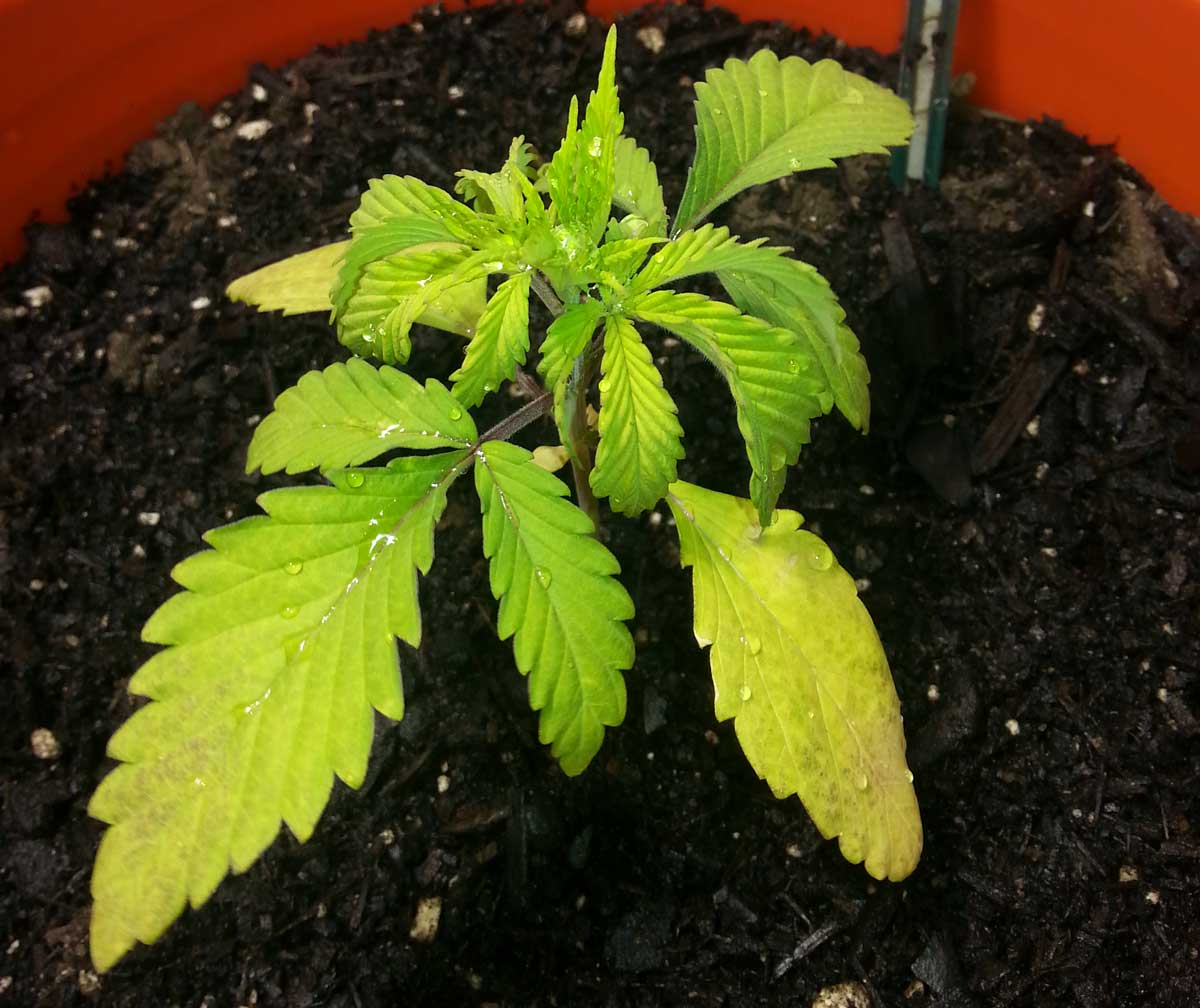
This cannabis seedling is yellow all over due to being overwatered in a big pot with a thick grow medium.
Here’s another example of an overwatered seedling that’s turned yellow all over despite otherwise good conditions.
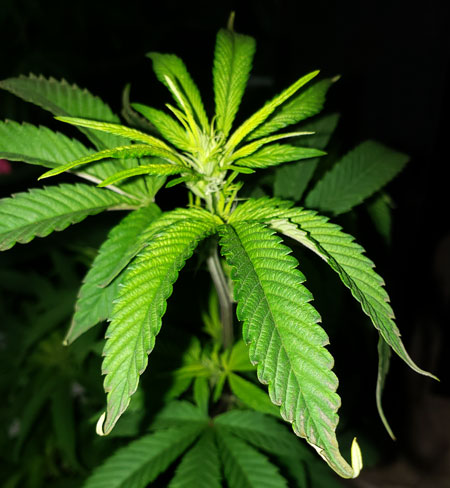
Overwatering may cause symptoms that look similar to light stress. By this, I mean you may see the top leaves closest to the light are turning yellow. Although it looks like light stress (a sign the grow light is too close), the issue is actually that the plant isn’t able to move water and nutrients properly. The plant can’t keep up with the hardest-working leaves and they start turning yellow. If you know you’re keeping your grow lights the right distance away and are still seeing yellow top leaves, there’s a strong chance you’re actually dealing with a nutrient deficiency or a watering problem.
This seedling turned yellow on top after the roots were too wet for too long.
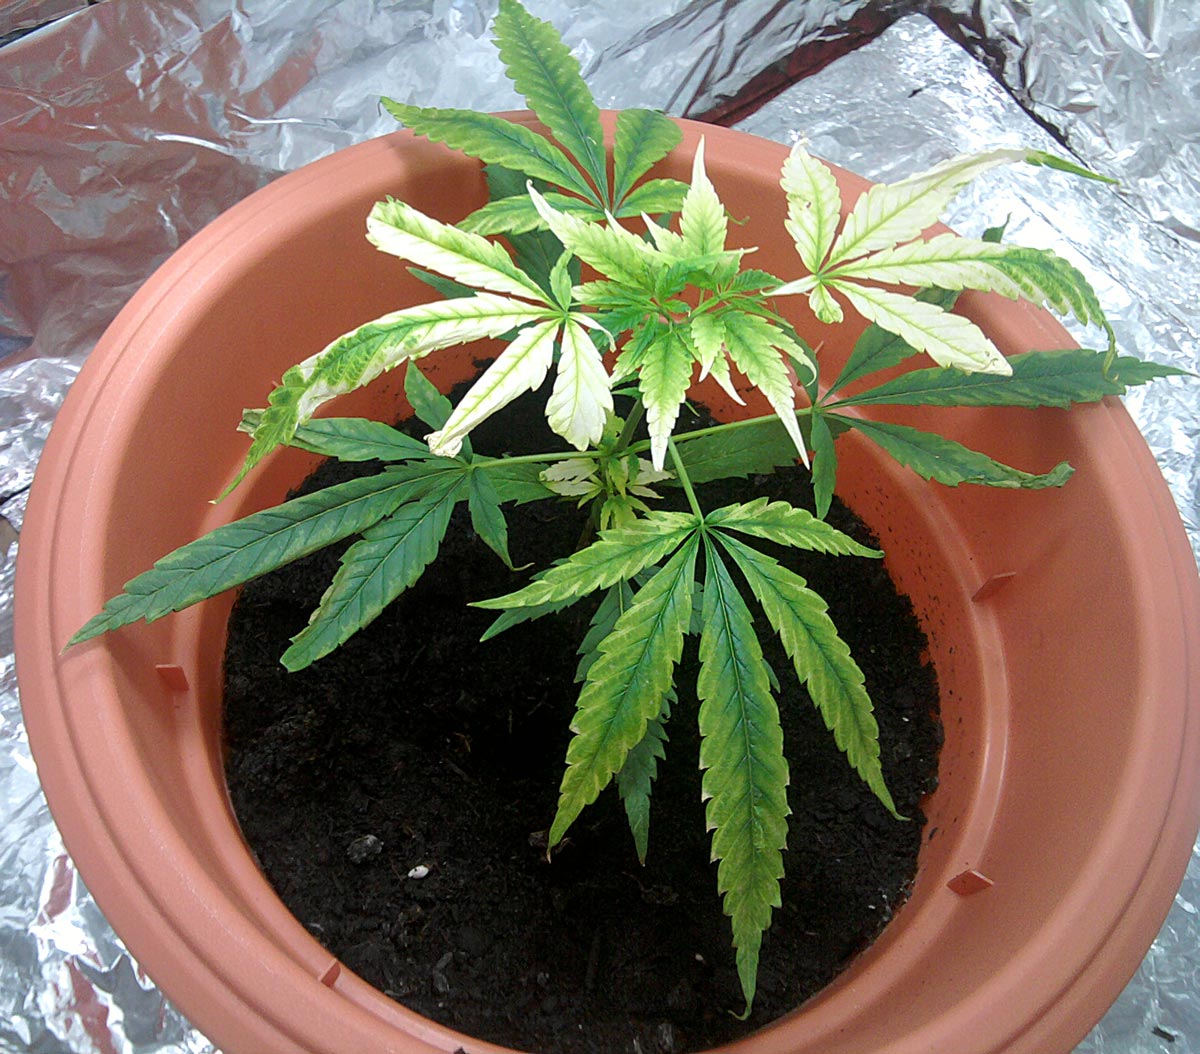
Here’s another example where the symptoms look a bit like bleaching from the grow light being too close, or perhaps a potassium deficiency, but the yellow leaves are actually the result of overwatering combined with a poor-draining grow medium.
3.) Other Nutrient Deficiencies
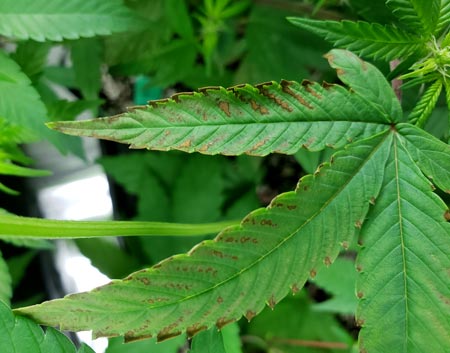
Brown spots (leaf scorch) on leaves seems to be one of the more common symptoms of overwatering, yet this is commonly confused for a calcium deficiency. In addition to brown spots, it’s not uncommon to see other random deficiencies like potassium, copper, iron, phosphorus, etc.
Brown spots, burnt marks, and leaf scorch can be triggered by overwatering. These symptoms are commonly mistaken for a calcium deficiency, ph problem, or light stress.
In these cases, the symptoms often get worse after watering. The leaves curling up at the ends is another clue that this may be the result of overwatering or root issues as opposed to something else.
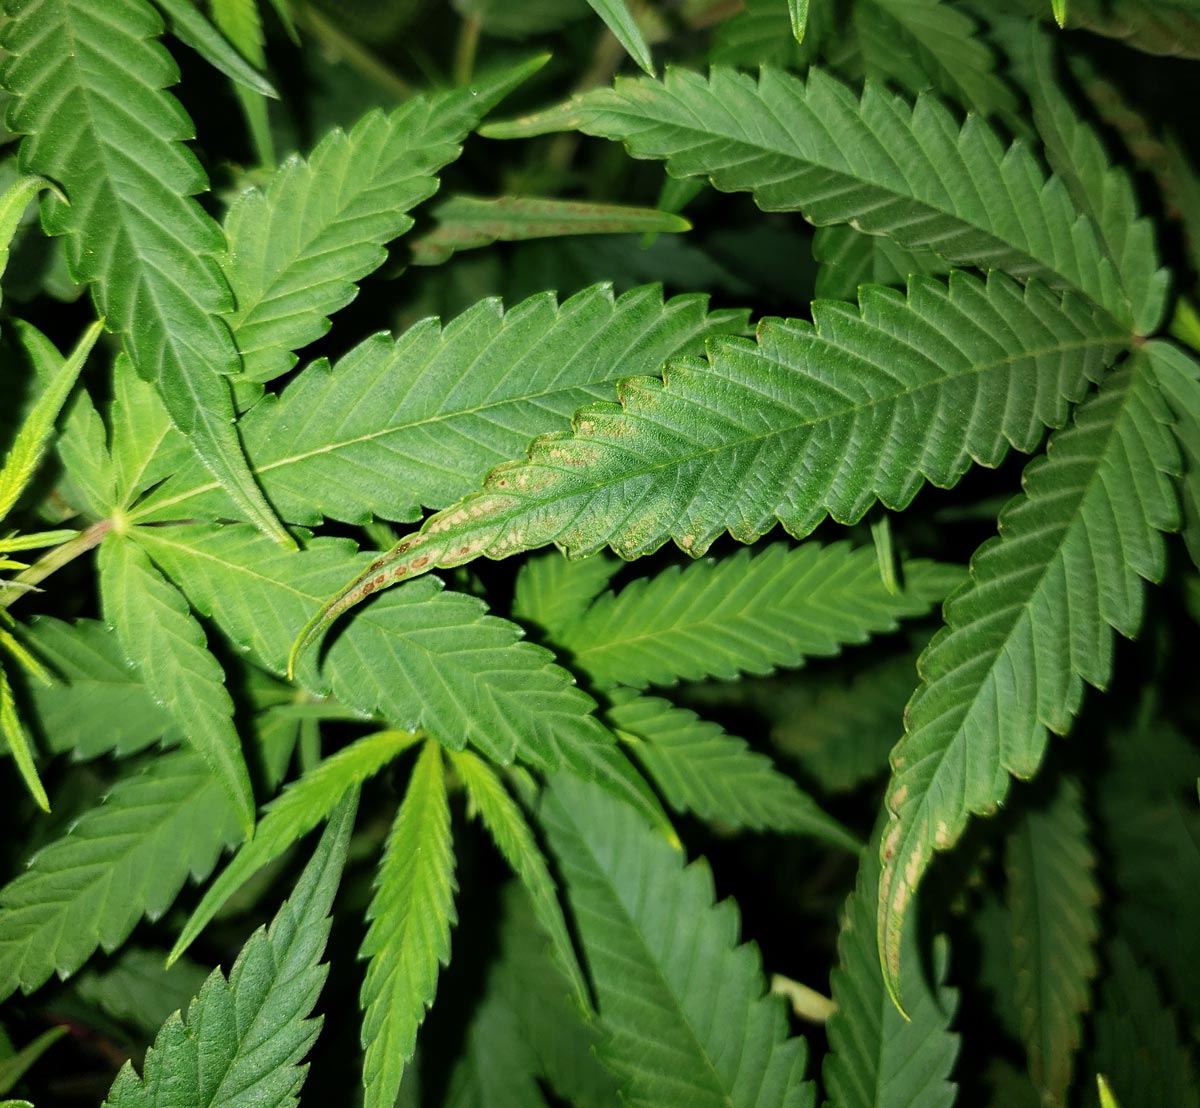
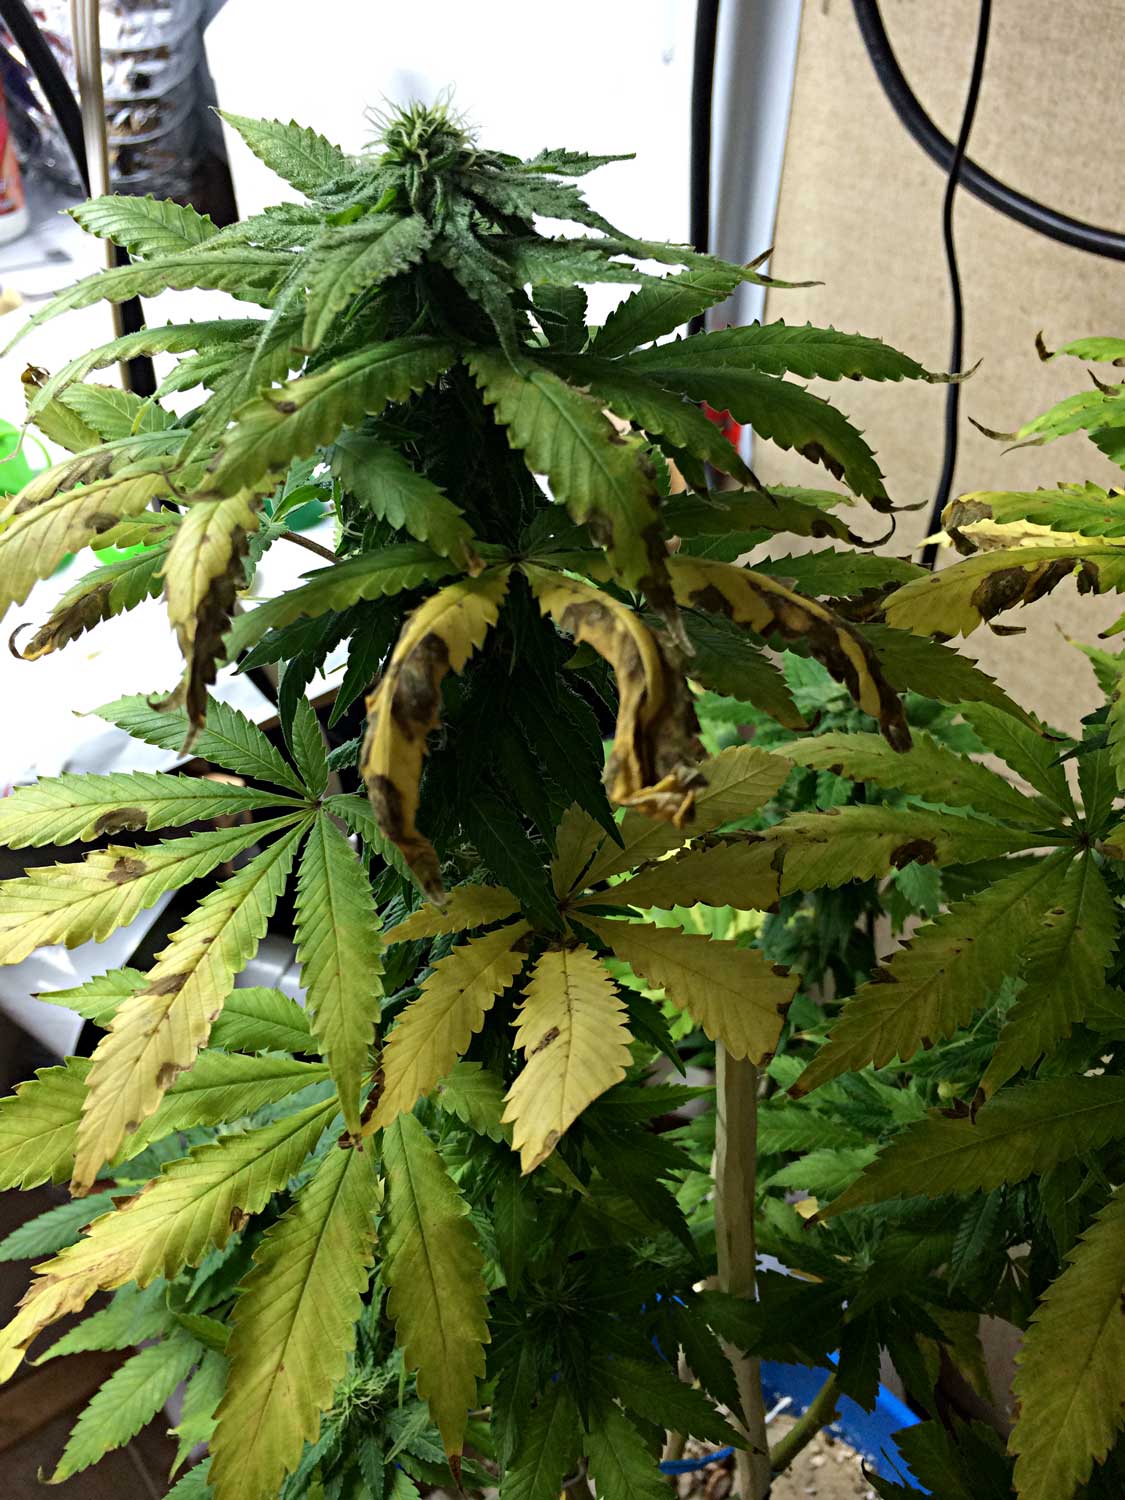
These symptoms appeared the day after the plant was heavily watered. In addition to the brown patches in between the veins, notice how the serrated edges of the leaves have brown spots, too (a sign of overwatering we covered already).
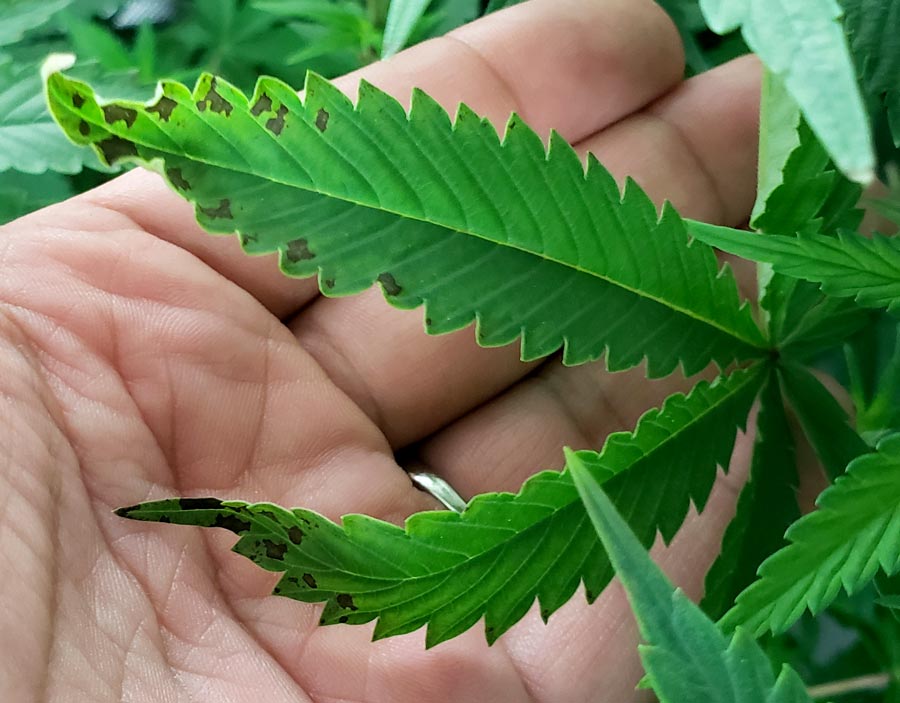
More brown spots from overwatering
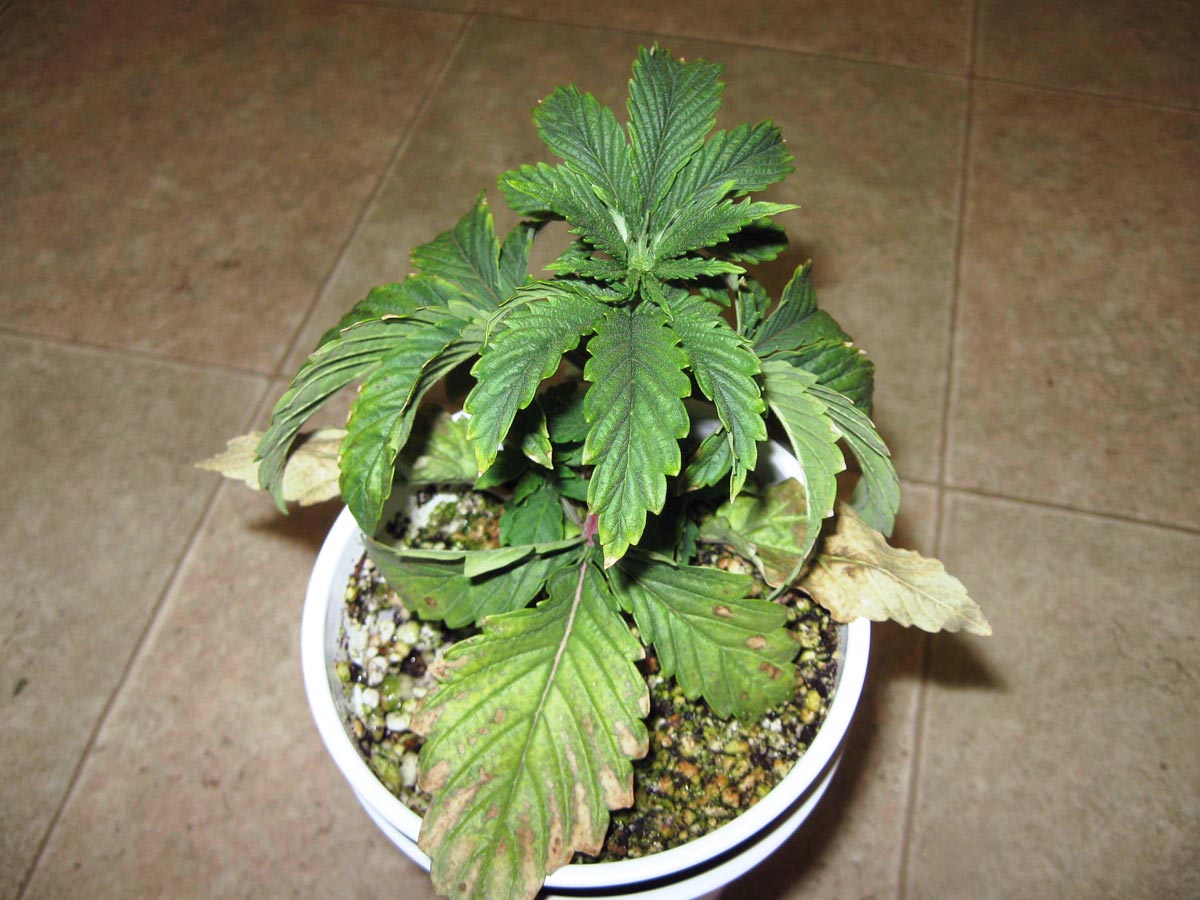
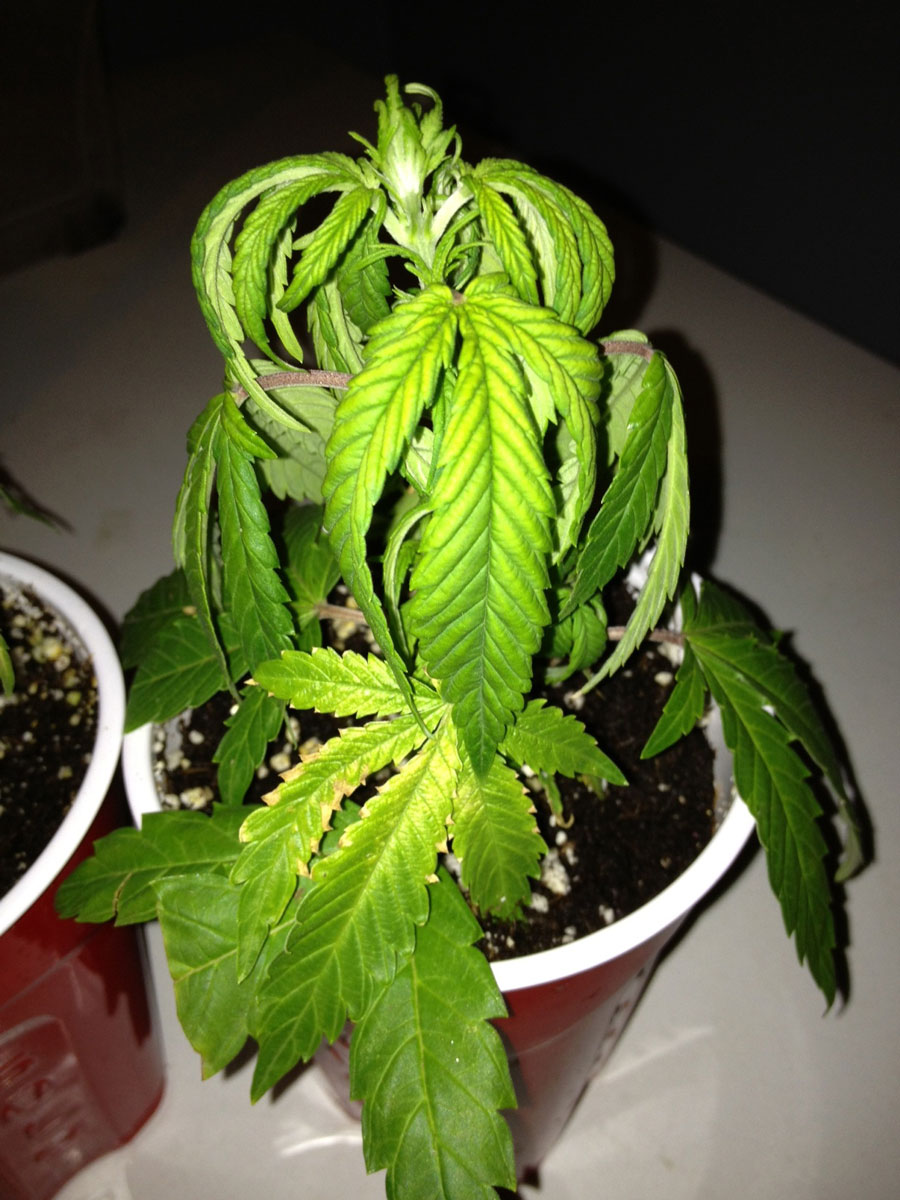
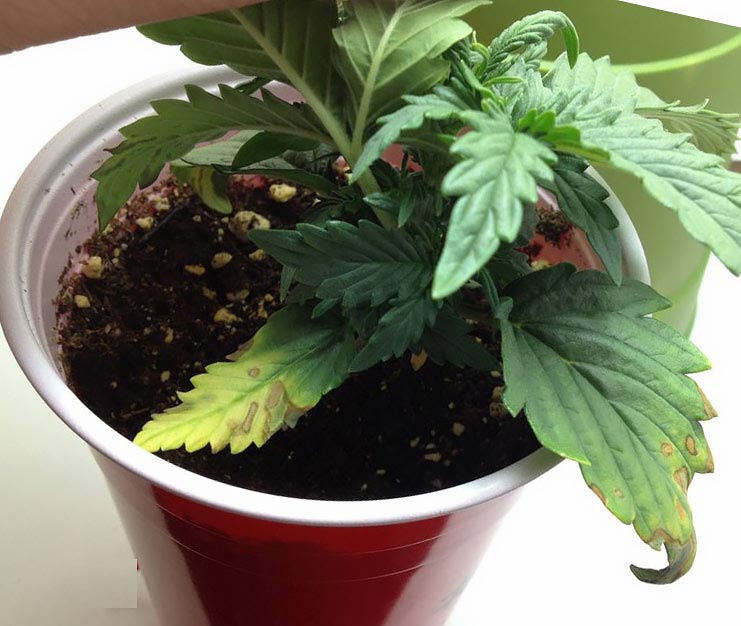
The yellowing leaf veins look like a nutrient deficiency, but overwatering is the actual cause (the extreme drooping is a major clue).
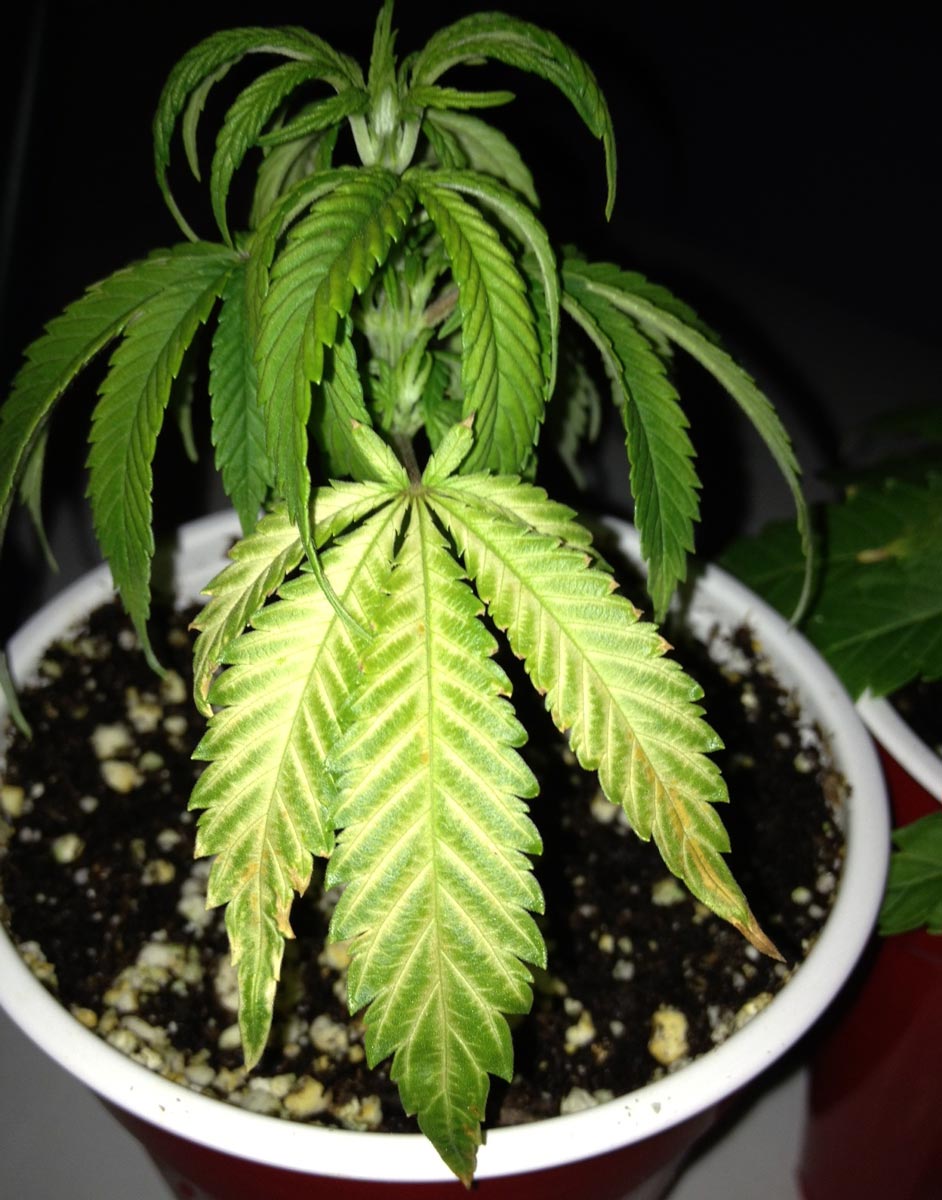
This seedling also looks like it’s dealing with a nutrient deficiency. However, the thick muddy grow medium and overall droopiness indicate the issue is actually overwatering.

This odd symptoms on this seedling also look like deficiencies, but they’re caused by a grow medium that’s too wet and thick.
Another example of an overewatered cannabis seedling with what appears to be a nutrient deficiency (brown spots, yellowing, etc.)
These brown spots in between the veins kept getting worse every time this plant was watered to runoff. The grower had to start giving less water at a time before they stopped appearing.
4.) Cupping or Curling
Sometimes the symptoms look a bit like heat stress (tipped edges, curling up or down, etc.). Since overwatering is relatively common with heat, this can keep you focused on the temperature when you should also be paying attention to watering habits.
Let me give you a bunch of examples. After seeing all these pictures, you should have a more intuitive understanding of common overwatering symptoms.
The top leaves curling down, yellow bottom leaves curling up, and stunted size are all signs this seedling is suffering from watering problems
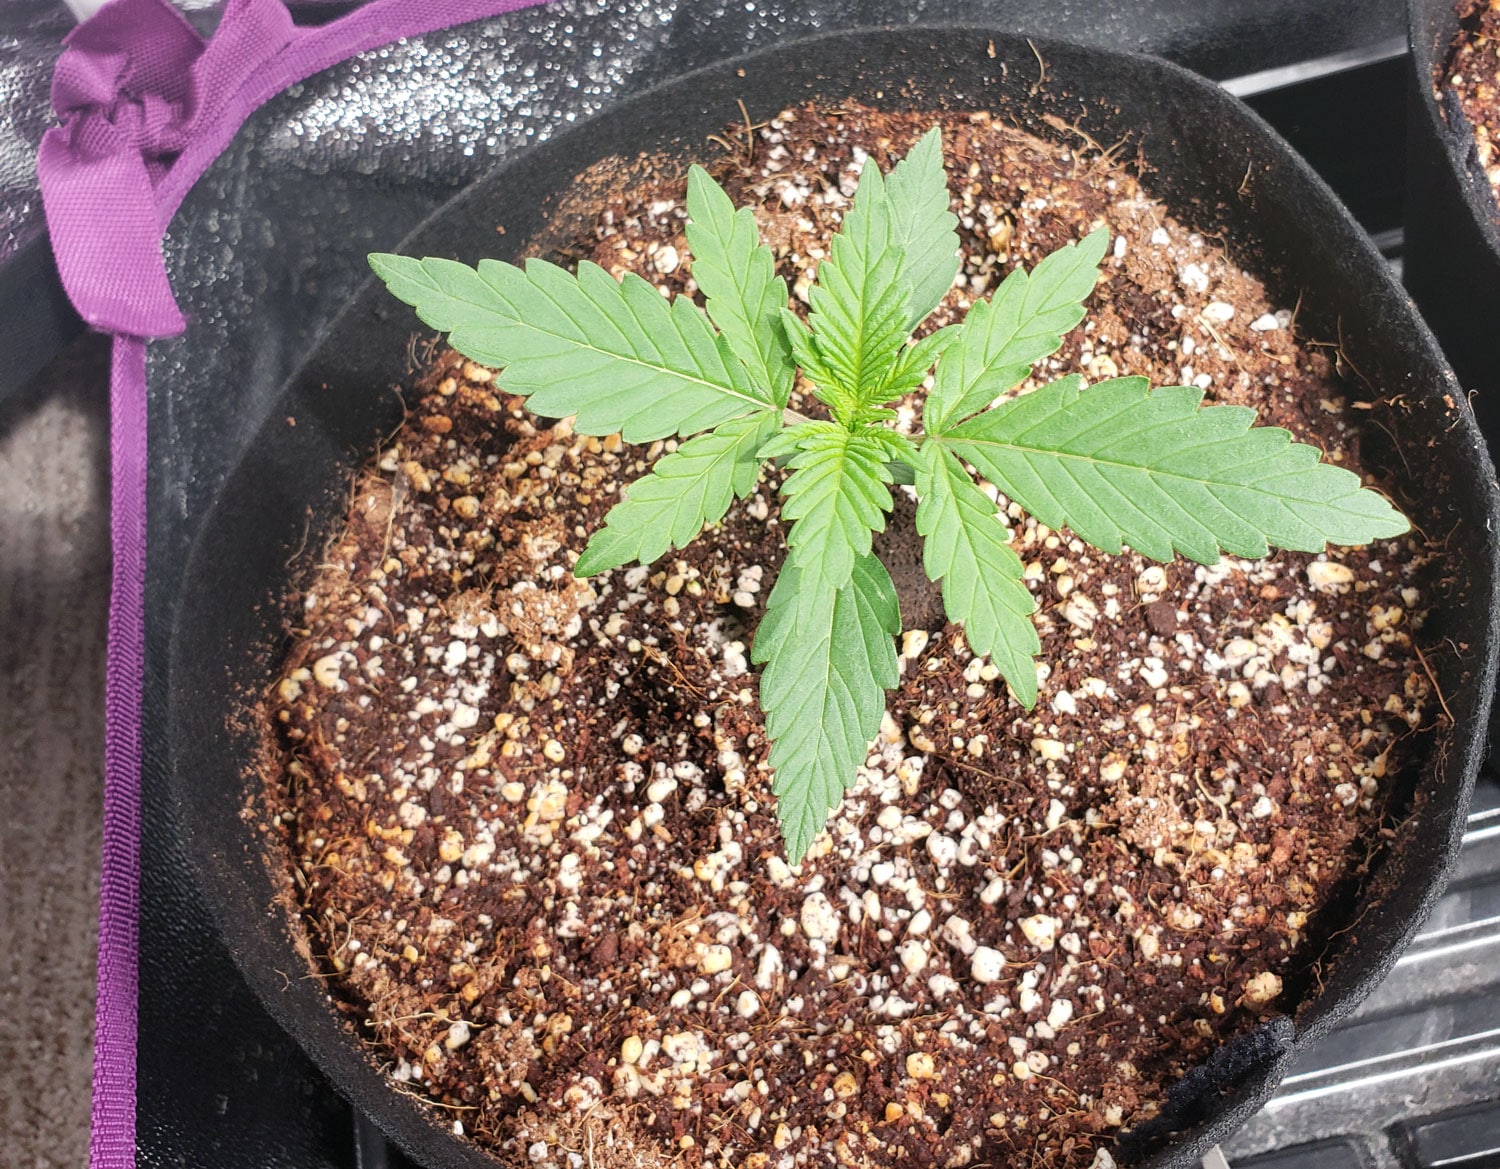
The following seedling looks green and mostly healthy, but notice the soaked grow medium and top leaves are curling down. This indicates seedling is being overwatered.
The grower didn’t realize she was overwatering, and the symptoms kept getting worse. Okay, I’ll admit, it was me, but this was a long time ago 🙂 Soon the leaves became wrinkled and papery with the edges folded up.
Another overwatered seedling showed a different sort of curling and cupping. I’m thankful for this batch of seedlings because I learned about some of the odd leaf symptoms that can result from overwatering!
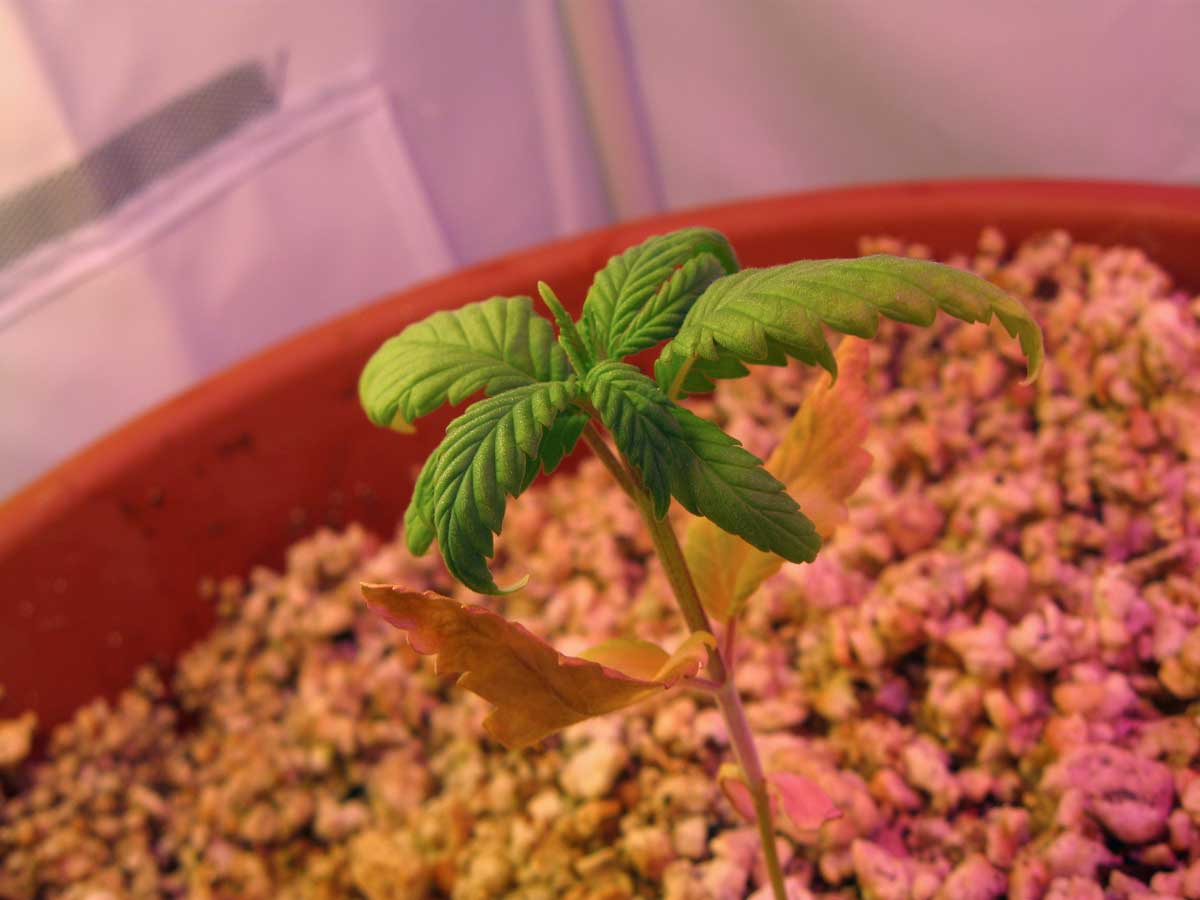
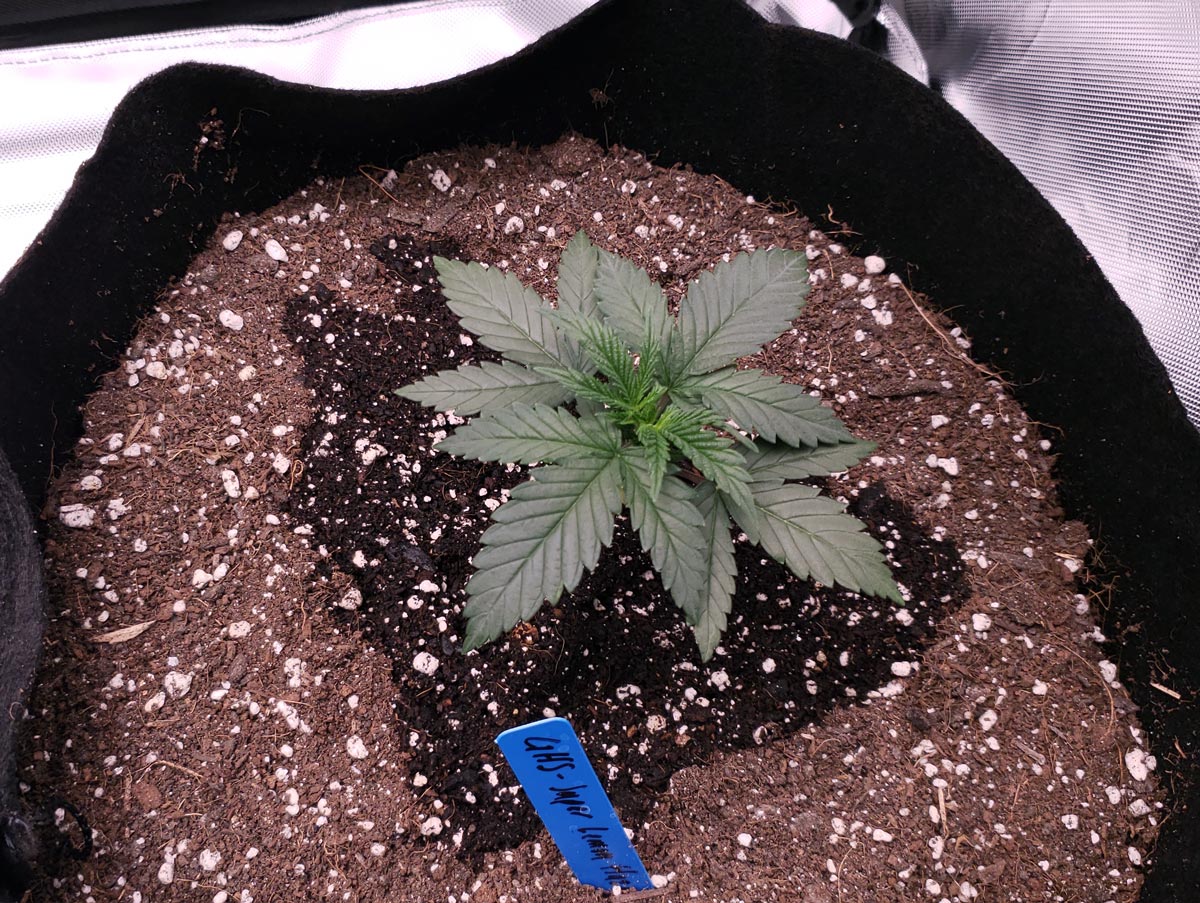
This stunted 27-day old seedling is growing slow with curling leaves as the result of being overwatered in a large container.

Notice the tips of leaves curling on this next plant. This is the result of overwatering combined with cold. Cold temperatures make it more likely for plants to suffer from overwatering because plants don’t drink as much. You can tell the brown tips are not nutrient burn (though it looks somewhat similar) because the browning appears in between the veins instead of just on the very leaf tip.
The issue was also localized instead of all over the plant. That lets you know you’re not looking at nutrient burn, which usually appears all over the plant. Since this plant was receiving perfect nutrients and pH, that narrowed the problem down to overwatering. Once the plant stopped getting watered so much at a time, the leaves started growing green and healthy.
5.) Topsoil issues
When it comes to diagnosing your sick cannabis plant, examining the topsoil can help you narrow down the possible problems. If you notice the following issues with your topsoil alongside any of the plant symptoms above, you can feel pretty confident that overwatering is your villain.
- Fungus gnats
- Green algae
- Soil is constantly wet or waterlogged
- Topsoil has turned solid
- Indents or divots where water is getting poured heavily
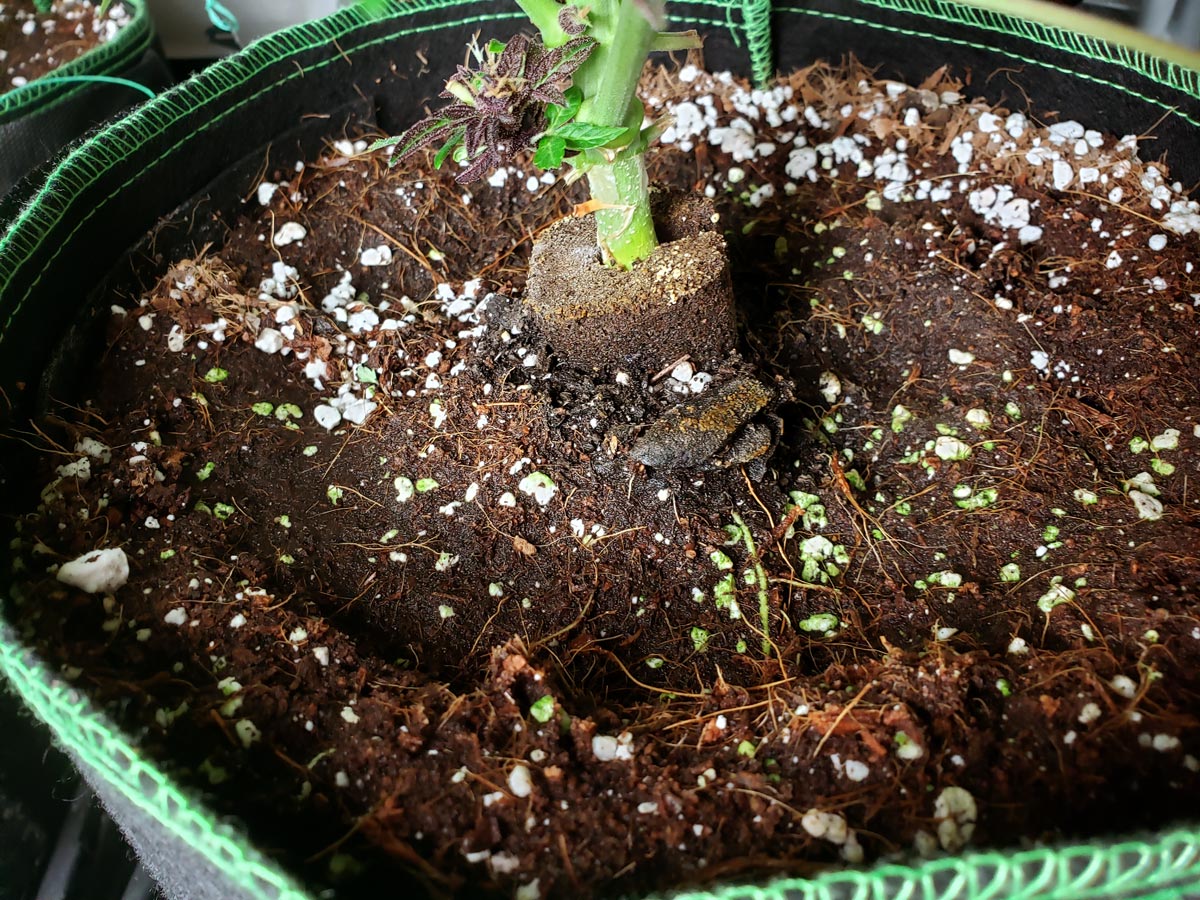
Notice how the grow medium here looks completely soaked with green algae growing on top. Green algae only grows when topsoil is staying wet too long. That lets you know the problem is overwatering in this case without even looking at the symptoms on the plant itself.
The appearance of green algae shows this soil is way too wet.
Just like algae, fungus gnats can only live when the topsoil is staying wet for long periods of time. If you see fungus gnats (tiny black flies buzzing around the soil) it almost always means you’ve been overwatering the plants.
This plant has a bad infestation of fungus gnats, which means it’s being overwatered. At this point, it’s hard to tell whether the fungus gnats or the overwatering is directly causing the symptoms, but the solution is the same: better watering habits.
It’s common for topsoil to look hard and almost solid if it’s staying too wet for too long. If you’re also seeing green algae and permanent deep divots/holes where the water is getting poured, you can feel pretty certain you’re overwatering
FAQs (Frequently Asked Questions)
Why do cannabis plants droop at night?
Most plants get a bit droopy during their “night” period, and leaves perk up at the beginning of the plant’s “day”. This is normal. But if your plant already looks droopy even right after lights come on, you know that you have a watering problem.
Plants love water. Why don’t cannabis plants love getting a lot of water?
The droopiness from overwatering is actually the result of a lack of oxygen at the roots, not from too much water. This is why hydroponic plants can grow with roots directly in oxygenated water. As long as the water has lots of air bubbles constantly adding oxygen, roots get what they need and plants don’t droop.
In hydroponics, bubbles add tons of oxygen to the water. This is why healthy hydroponic plants with roots in water don’t droop.
In soil or coco coir, however, excessive water leads to drooping and other issues. If your grow medium is soaked full of water, there are no pockets of air to provide oxygen. As a result, roots start “drowning” when the soil is totally drenched and waterlogged. There’s no easy way to pump oxygen into an overly wet grow medium. Luckily, plants usually recover quickly once the soil starts to dry out.
Here’s an example of overwatered cannabis plants. The cure was to fix their watering schedule.
Why does overwatering cause so many different symptoms?
A lack of oxygen at the roots can result in a surprising number of different symptoms in addition to drooping because this situation completely disrupts water and nutrient flow through the plant.
Remember, if your symptoms always seem to get worse soon after watering, you can feel almost certain that you’ve discovered the root of your problem.
What about underwatering? Doesn’t that also cause droopiness?
Yes, underwatering also causes droopiness. However, undiagnosed underwatering is relatively rare in the cannabis garden, in part because young cannabis plants don’t drink much water at all. Underwatering sometimes happens when the grower has been strongly warned to avoid overwatering, and goes too far the other way. One key difference is underwatered leaves tend to look more “limp” and lifeless, as opposed to “plump” like with overwatering. Underwatered leaves also often appear dark green due to nitrogen buildup in the leaves. Another major difference is underwatered plants perk up after being watered, while overwatered plants get more droopy after being watered.
Related tutorial: How to tell the difference between over and under-watered cannabis plants.
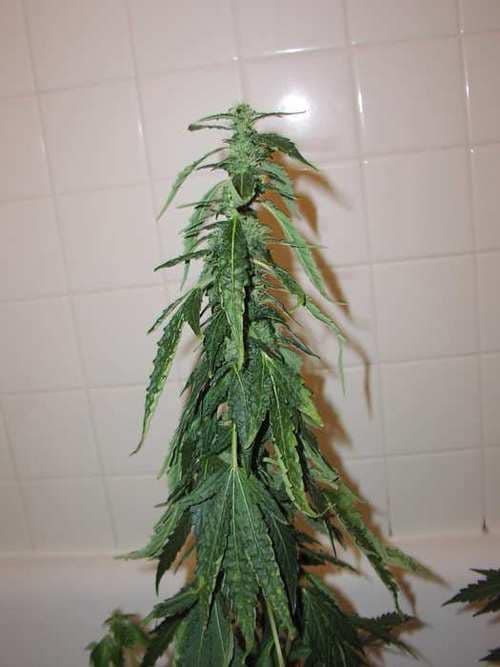
Underwatered plants (not enough water) are also droopy, but underwatered leaves typically look more “limp” and less “plump”. Leaves are usually dark green.
Solution: How to Water Cannabis Plants Perfectly
It’s common for cannabis plant issues to be confused for something else. One of the things that can be difficult about diagnosing problems is that many symptoms can be caused by multiple different factors. For example, nutrient deficiencies can be caused by lack of nutrients, but also incorrect pH, bugs, overwatering, etc. Yet if you’re seeing droopiness alongside mysterious symptoms, especially with waterlogged topsoil, there’s a strong chance that watering habits may be the true culprit.
Before you can fix the issue, you have to identify exactly where you’re tripping up. “Overwatering” is a broad term that describes a situation with lots of water at the roots but not much oxygen. There are a few different ways to get there.
Okay, you know your plant is overwatered, but how do you fix it?
Common Causes of Overwatering
- Watering too often
- Watering too much at a time
- Poor draining grow medium (dense, thick, muddy, etc.)
- No drainage holes to release runoff water out the bottom
- Letting plant sit in runoff water (growers should remove runoff after watering for the best results)
- Poor transpiration (plant can’t efficiently evaporate water through the leaves). This prevents plants from “sucking up” water from the roots like a straw, and results in slow water uptake.
Environment: Overwatering is More Likely When…
- Weak grow lights – Plants just don’t drink as much under weaker lights. That means overwatering is more common with small LEDs, CFLs, T5s, and other grow lights that are on the smaller side.
- Small plant, big pot – When plants are small, young, or unhealthy, they just don’t drink as much. When they’re in a container that’s much bigger than the size of their roots, it’s easy for them to drown because they use up all the oxygen and then roots are sitting in stagnant water. The best way to help these plants is give less water at a time until they’re bigger and drinking more. Learn how to water a seedling in a big pot.
- Heat (above 85°F / 30°C) – In the heat, oxygen is less available at the roots. Keeping roots from getting too hot helps the plant better deal with heat. That’s part of why plants become more resistant to heat after they get bigger. The big plants help shade the roots from the grow light, and grow lights are typically further away because plants are taller. This combo prevents roots from heating up as much and plants just become more resistant overall.
- Cold (below 70°F / 20°C ) – In the cold, plants are evaporating less water from their leaves, which means they drink less, making it more likely for roots to stay too wet, too long. Roots especially hate being cold. Yeah, roots are kind of picky. Plants can thrive in much cooler ambient temperatures as long as you keep the roots relatively warm. For example, don’t let the roots sit directly on a cold basement floor. Keeping plants slightly up off a cold floor will help them handle a wider range of temperatures without slowing down.
- Humid (above 65% RH) – Just like with cold, high humidity prevents water from evaporating properly from the leaves. That means plants are drinking less overall, which increases the chance of water hanging out too long at the roots.
- Lack of Air Circulation – A slight breeze is good for your plants. Not only does a little airflow prevent hot spots and strengthen stems, but plants are also better able to evaporate water off their leaves. Gentle air movement also helps keep topsoil from staying wet for too long and can even offer some protection against bugs like fungus gnats and spider mites.
A perfect environment helps plants deal with a variety of root moisture levels without issue. In fact, nearly all environmental problems except low humidity (too dry) increase the chance of plants suffering from overwatering. Extremely dry air can cause slow or unhealthy growth, but it does help plants drink more quickly and water evaporate faster. You can still overwater plants when the air is too dry, but it’s a little less common.
How to Water Plants Perfectly
This section breaks down good watering habits in a variety of different situations.
Seedlings
Don’t give more than 2-3 cups (500-750ml) of water at a time until plants are at least 2 weeks old. Typically seedlings need to be watered every 2-3 days. Every grow is a little different because plants drink more or less depending on how big they are, the environment (temperature/humidity/airflow), the grow medium, and the size/type of pots. However, most seedlings will do well with 2 cups (500ml) of water every 2 days for the first 2 weeks. However, this is a very general guideline. If the top of grow medium looks wet, wait an extra day or two to water. If the grow medium looks totally dry, either water more often or more at a time.
Big pot, small plant
Give just a little water at a time in a small circle around the base of the main stem. Once plants are bigger and drinking more, you can start fully watering them. The 2-2-2 rule from above should work for seedlings in a big pot (2 cups of water ever 2 days for the first 2 weeks after germination). After that, start giving a little more water at a time until you’re able to water plants thoroughly. I’ve found that plants often grow the fastest when you figure out the perfect amount of water that allows you to water every other day. Learn how to water a small plant in a big pot.
Not sure whether to water? Pick up plant pots
When a grow medium is soaked with water, it feels as heavy as a brick. However, when soil or coco is dry, it becomes almost feather-light. That means if you pick up your plant and it feels surprisingly heavy for its size, you should wait a bit longer before watering (and possibly give less water at a time for now). If you pick up a plant and it feels surprisingly light, that means you should water plants today!
Pick up the pot! If plant feels heavy for its size, it probably doesn’t need water quite yet
Watch topsoil
If the topsoil looks wet all the time, you probably should be watering less. Especially if you’re seeing fungus gnats, green algae, or the top looks hardened with divots where water is getting poured too often.
Notice the muddy, waterlogged soil. This plant is getting too much water!
What to do with a too-thick grow medium
If your grow medium is extremely thick or muddy, you have two choices. You can either ride it out and hope for the best, or transplant plants to a better grow medium. If your plant seems to be getting better as it gets bigger, or if you find a different watering schedule that seems to stop the symptoms, you can probably skip transplanting. It’s possible to stunt plants during transplanting so you don’t want to do it if you don’t have to. But if plants are growing poorly despite you altering the watering schedule, you may have to give roots a new home or the plant won’t ever thrive.
If your grow medium is too thick, you can either transplant to a new grow medium or try to let plants adapt. The worse the grow medium, the more you should consider transplanting.
How to Water in Super Soil
If you’re growing in super soil (composted, organically amended grow medium), you don’t need to add any nutrients from seed to harvest. This is super convenient, but you must ensure you aren’t accidentally washing away extra nutrients. In a super soil setup, you’re trying to conserve all the nutrients. The beneficial microorganisms in the soil work together with roots to make sure plant is getting the exact right amount of nutrients at the right time, just like in nature. That means in super soil, you should almost never water plants until they get runoff out the bottom. Whenever runoff water is coming out the bottom, it’s draining away nutrients with it. You’re basically looking to water plant just enough to saturate the medium but none comes out the bottom.
Growing in super soil lets you go from seed to weed without adding any nutrients, but you must avoid overwatering to prevent nutrient deficiencies down the road.
Check out our Super Soil Grow Guide to learn how to grow organic weed the easy way! (includes a day-by-day watering schedule)
When to Start Watering to Runoff
If you’re giving plants extra nutrients in your water, you may want to give enough water to get runoff out the bottom. This helps prevent nutrient buildup in the soil. However, watering to runoff when plants are too small is an easy way to cause the symptoms of overwatering. So when should you start watering to runoff? This guide will help.
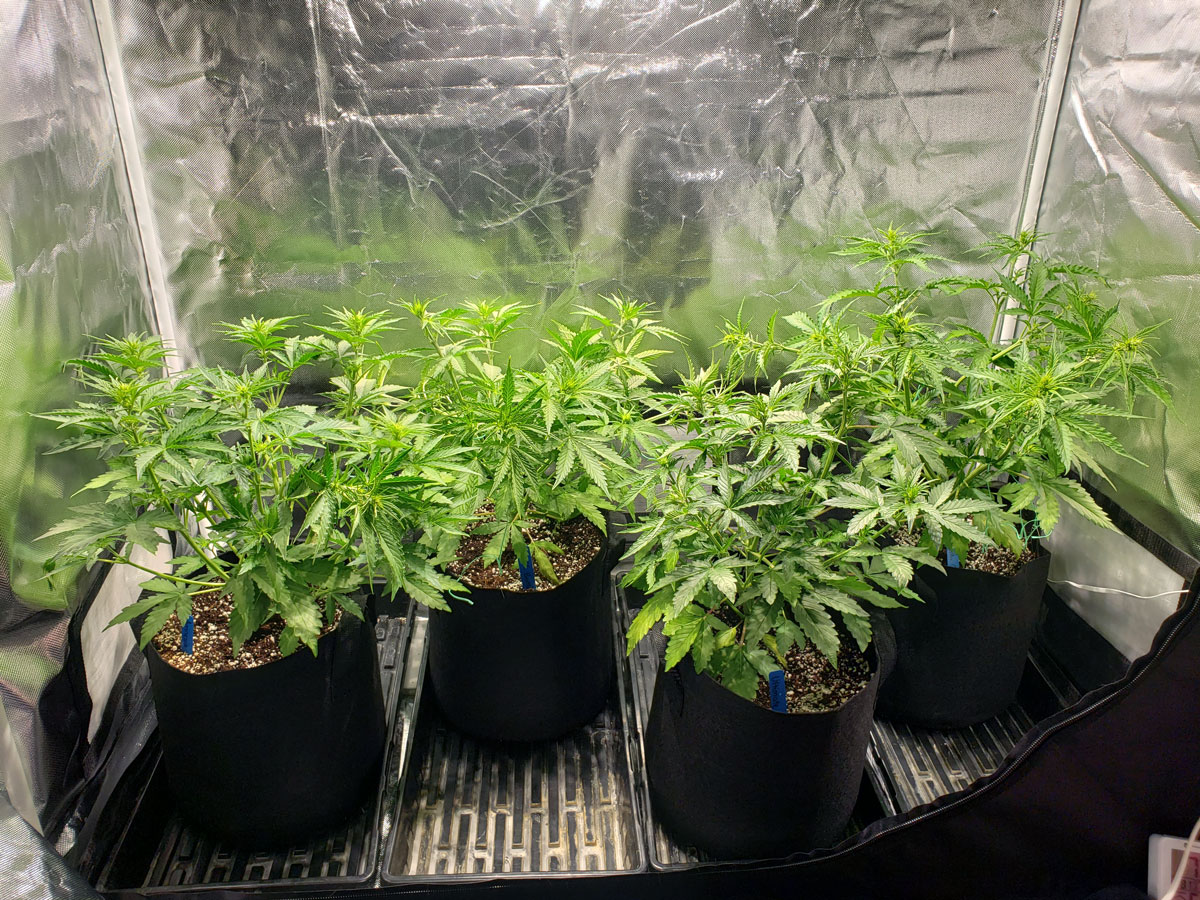
Plants are big enough to water to runoff when they’re about this size…
- 12″ (30cm) tall ~ 2-3 gallon container
- 24″ (60cm) tall ~ 3-5 gallon container
- 36″ (90cm) tall ~ 5-7 gallon container
- 48″ (120 cm) tall ~ 6-10 gallon container
- 60″ (150 cm) tall ~ 8-10+ gallon container
The type of plant container and grow medium make a difference, which is why the ranges overlap. A thicker grow medium needs to be watered less, while a well-draining or airy grow medium should be watered more. As far as plant pots, just remember that any container which lets air in from the sides (air pots, fabric pots, etc) need more water, more often. This is because water is constantly evaporating out the sides in addition to just being used up by the plant roots. In an air pot or fabric pot, start watering to runoff when plants are on the smaller side of the range. If your plants are in a hard-sided pot, wait until they’re a bit bigger to water to runoff.
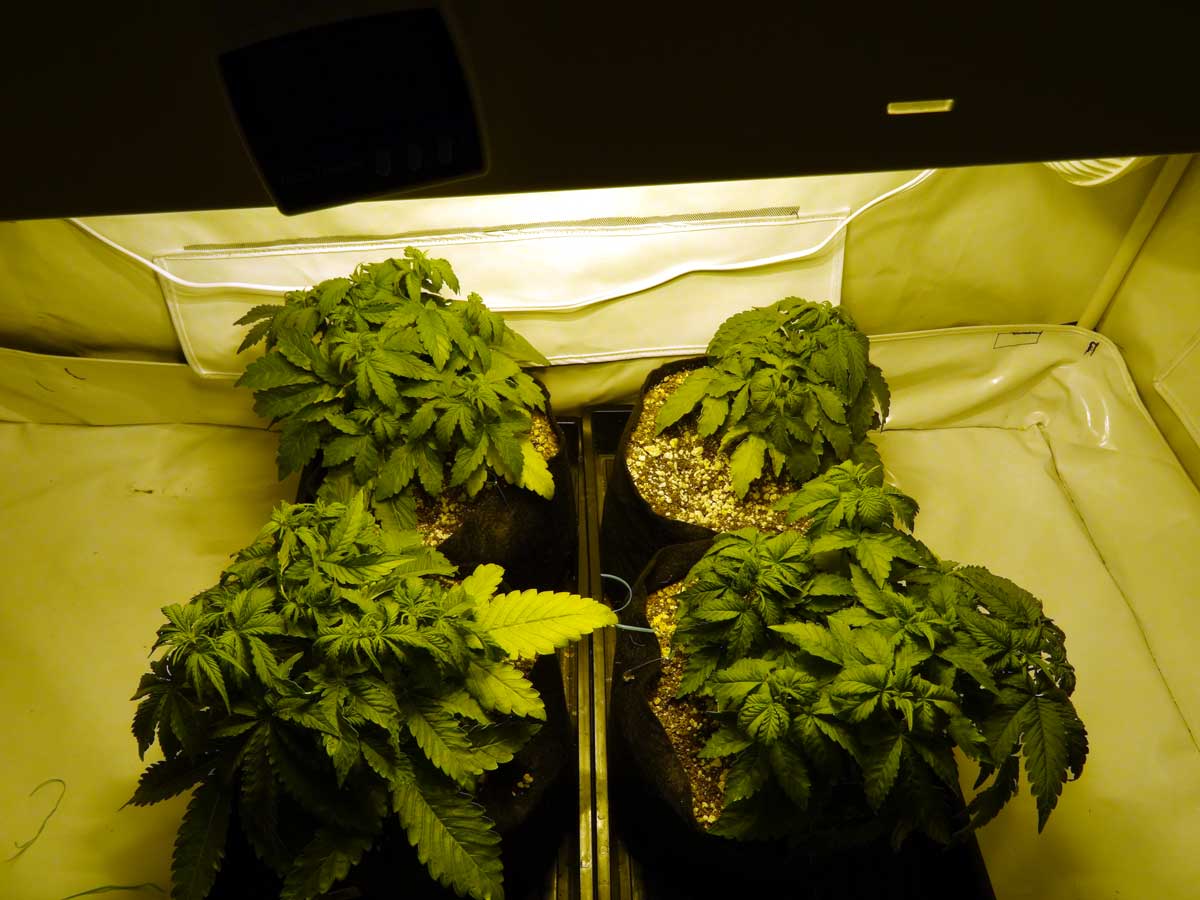
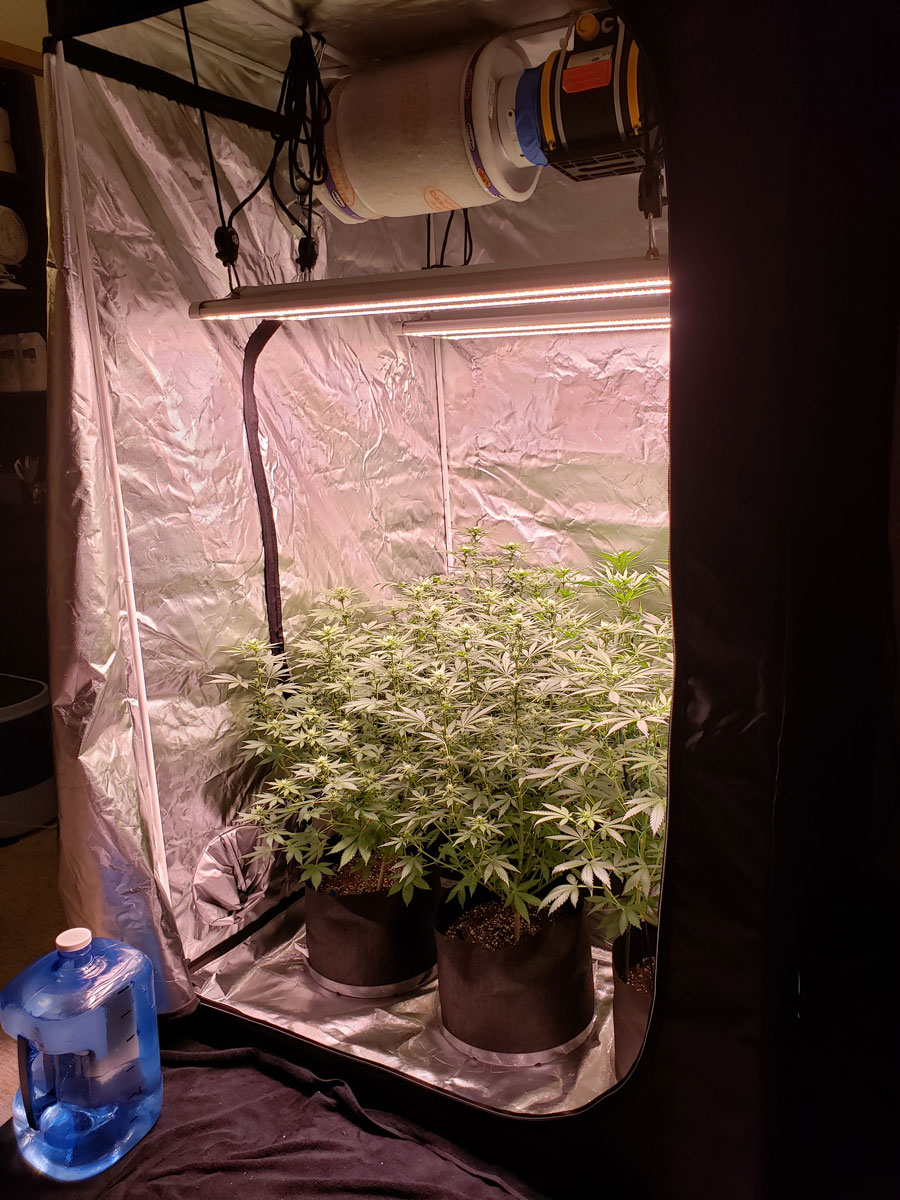
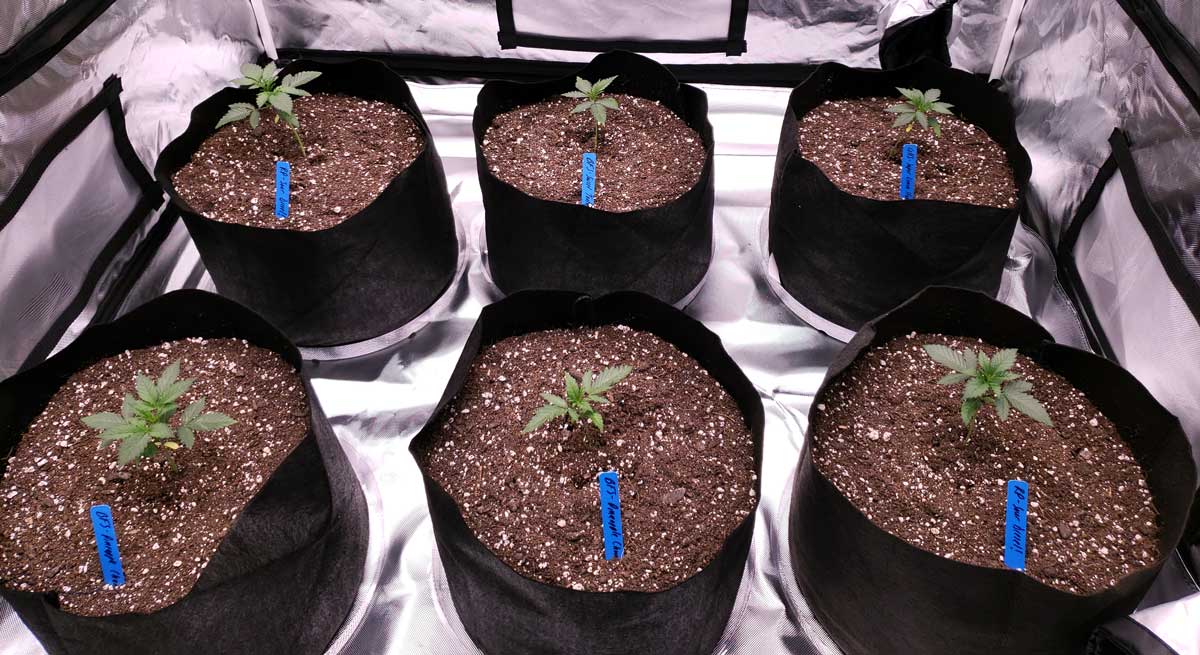
These 15″ tall plants in 3-gallon fabric pots are just about big enough to start watering to runoff
What if my plant never gets that big? If your plants are in a big pot, or you’re growing very small plants, you may never need to water to runoff. In some cases, watering to runoff will cause the symptoms of overwatering even until harvest. In this situation, it’s up to you to watch the plant to ensure there’s no nutrient buildup in the grow medium.
When this happens, it kind of reminds me of growing in a DWC or hydroponic setup because you’re basically treating the root ball like a nutrient reservoir.
How do you know whether to increase or decrease nutrient levels? If plants are getting dark green or showing nutrient burn, it means that you should lower the overall amount of nutrients in the water. If plants appear pale/lime green or lots of bottom leaves are yellowing and falling off, it means your plants want more nutrients overall. In that case, increase the overall nutrient levels in the water without changing the ratio.
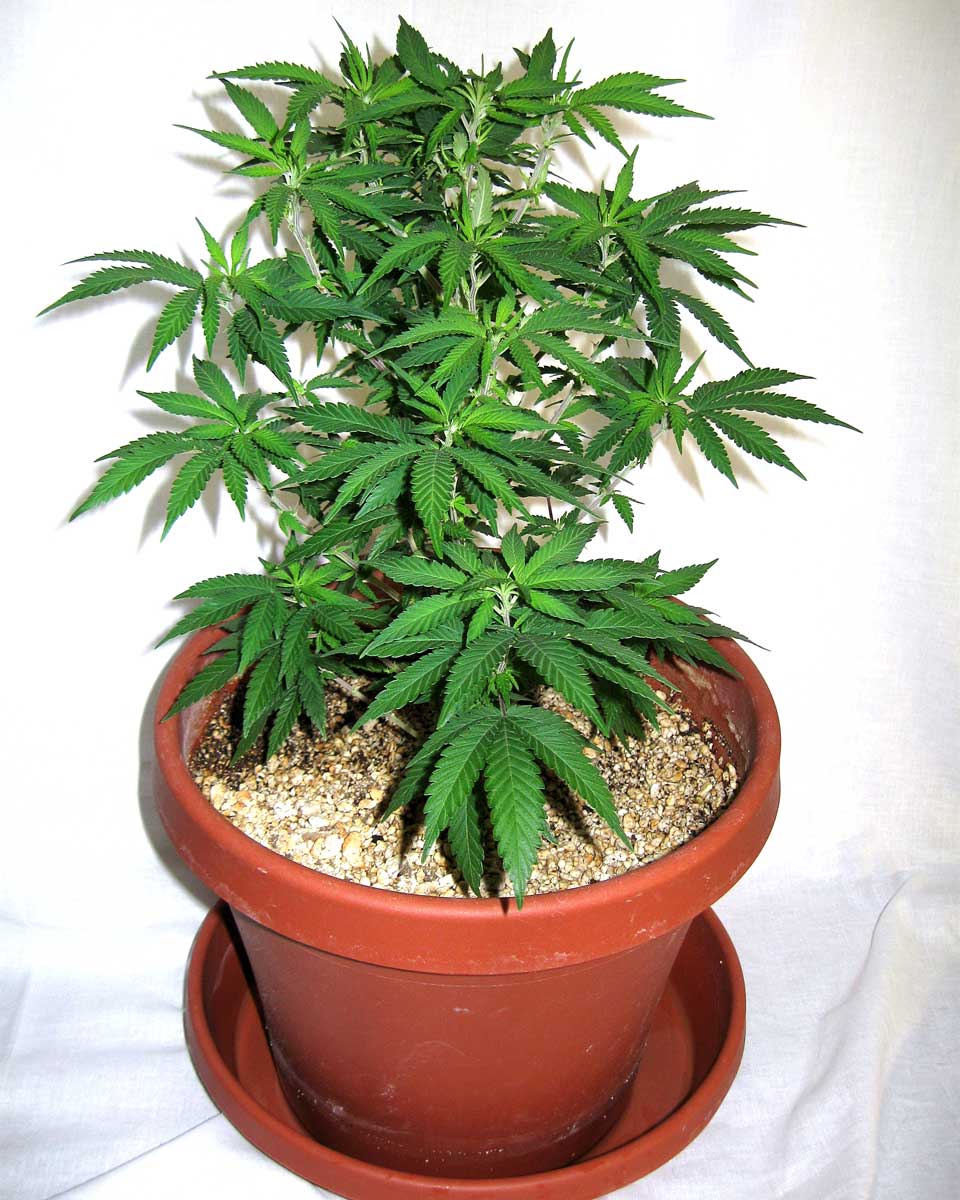
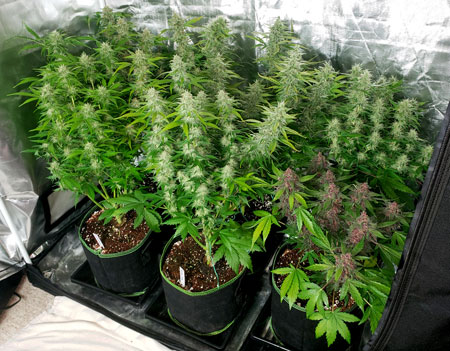
The short purple plant in this picture will never get big enough to be watered to runoff
How to water to runoff (Soil)
Once plants have reached a good size for their container (check the above chart), they’re ready to start getting watered with runoff. If you’re growing in soil, most plants have already used up the majority of nutrients by this point. That means if you haven’t been providing nutrients in the water yet, now is a great time to start.
- Wait until topsoil is dry up to first knuckle (alternative: wait until plant pot feels light to pick up)
- Water until you get about 10% extra runoff water out the bottom
- Remove runoff water
- Repeat
Soil that is ready to be watered (topsoil is dry, pot doesn’t feel heavy)
How to water to runoff (Coco)
In coco, you should be watering with nutrients from when plants are seedlings, so you never have to wonder when to start adding nutrients. However, coco-grown plants seem to want things to be just a bit wetter than soil-grown plants. Plants in coco don’t seem to react well to extensively drying out. That means you’ll typically end up watering a bit more often in coco than soil.
- Wait until top of coco appears mostly dry (with a few damp patches left) and pot doesn’t feel heavy
- Water until you get about 10% extra runoff water out the bottom
- Remove runoff water
- Repeat
Coco that is ready to be watered (top of coco is mostly dry and pot doesn’t feel heavy)
Wow, that was a lot. You are now officially an expert on overwatering. You know all the crazy and surprising symptoms to look for when diagnosing your sick plant, and you also know how to water your plants perfectly every time. Congratulations!
Wait! I still need help diagnosing my sick cannabis plants (we got you covered!)