by Nebula Haze
Do you want to grow a bunch of (almost) free weed outdoors? Do you seek the satisfaction of growing cannabis plants in nature? If so, you’ve come to the right place. This beginner outdoor marijuana growing tutorial will walk you through the basics of growing weed under the sun. Just follow all the steps, and you will be holding your own homegrown weed by the fall.
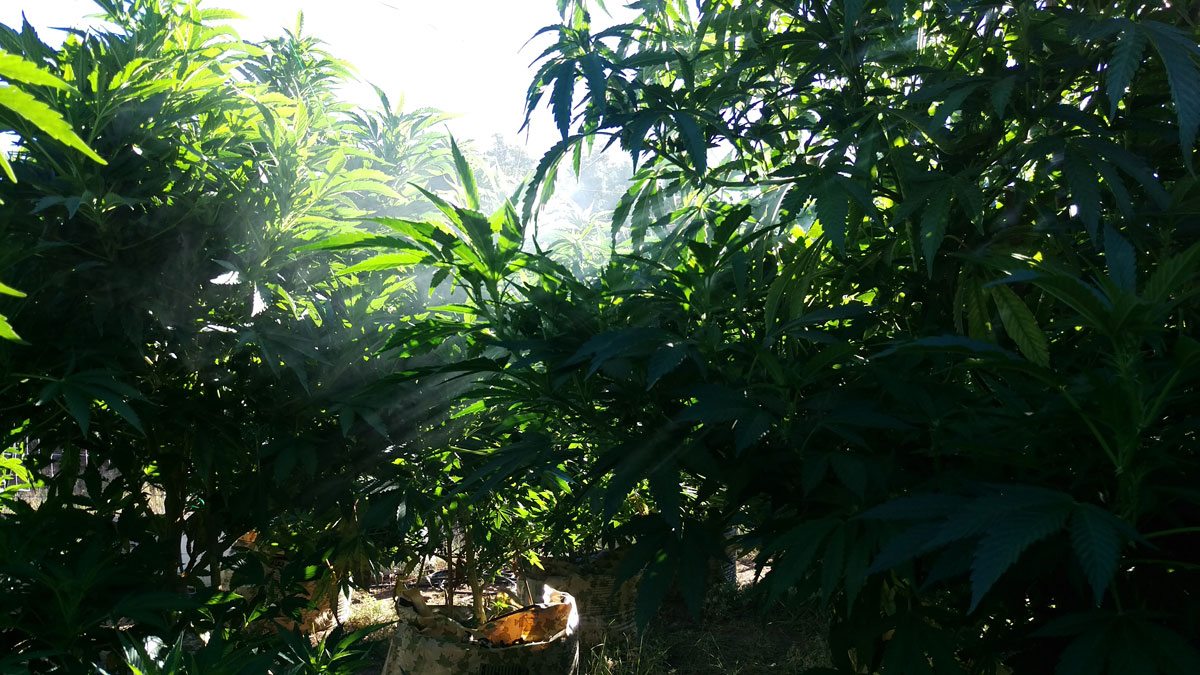
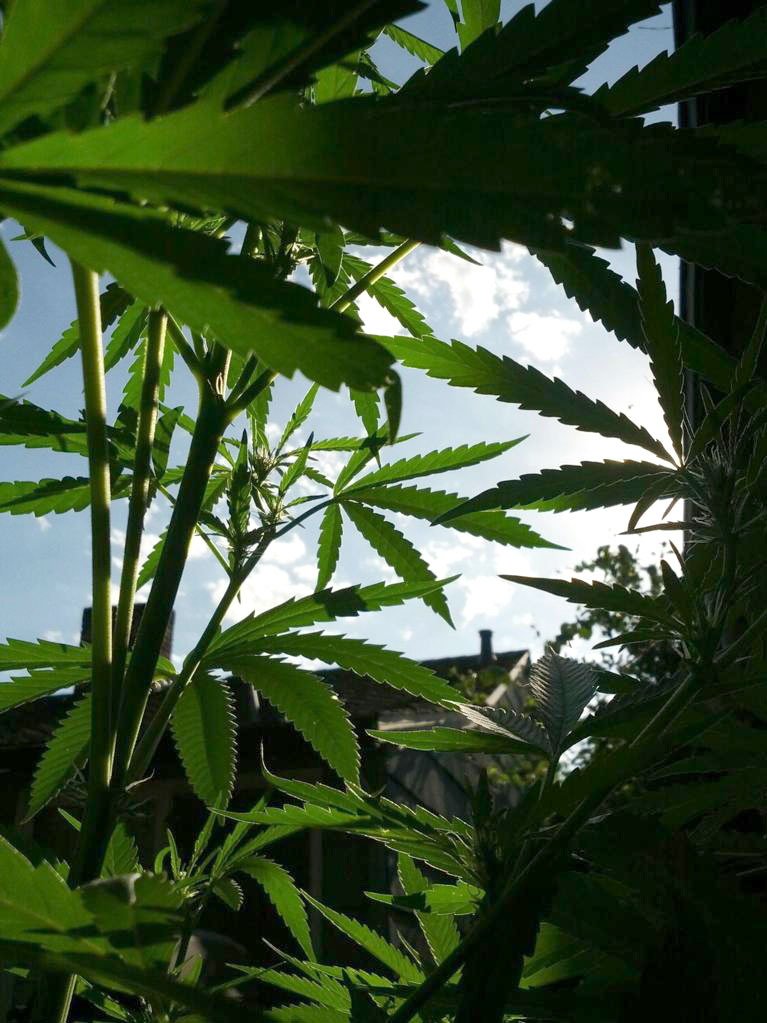
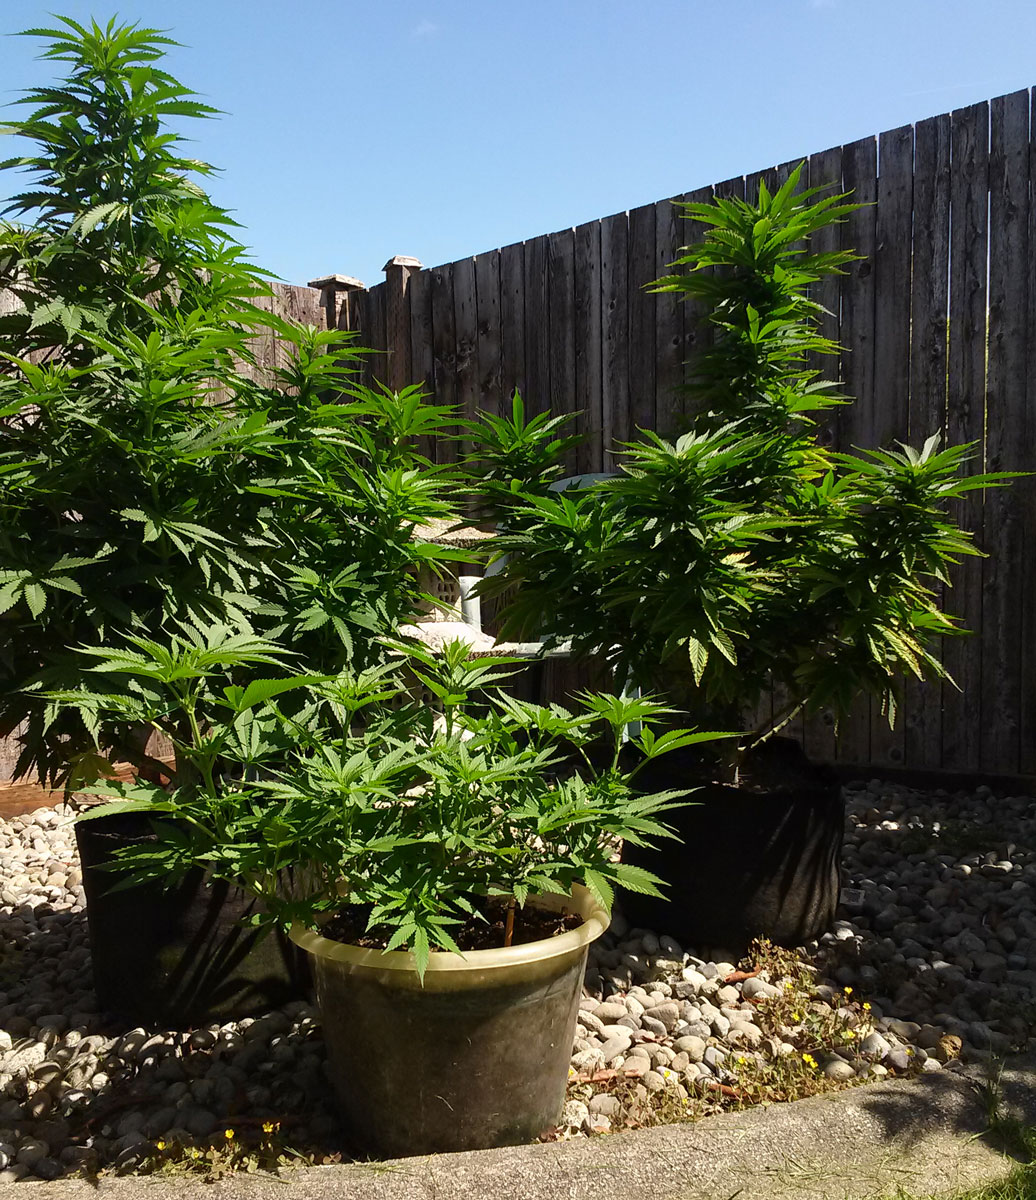
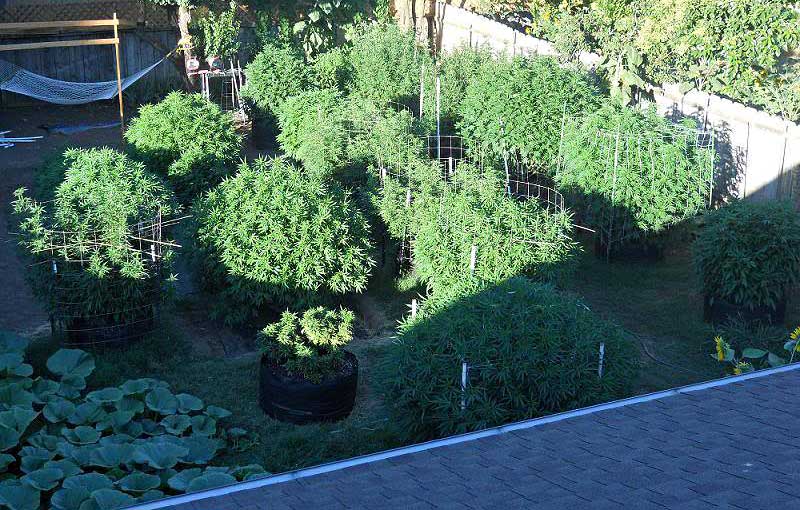
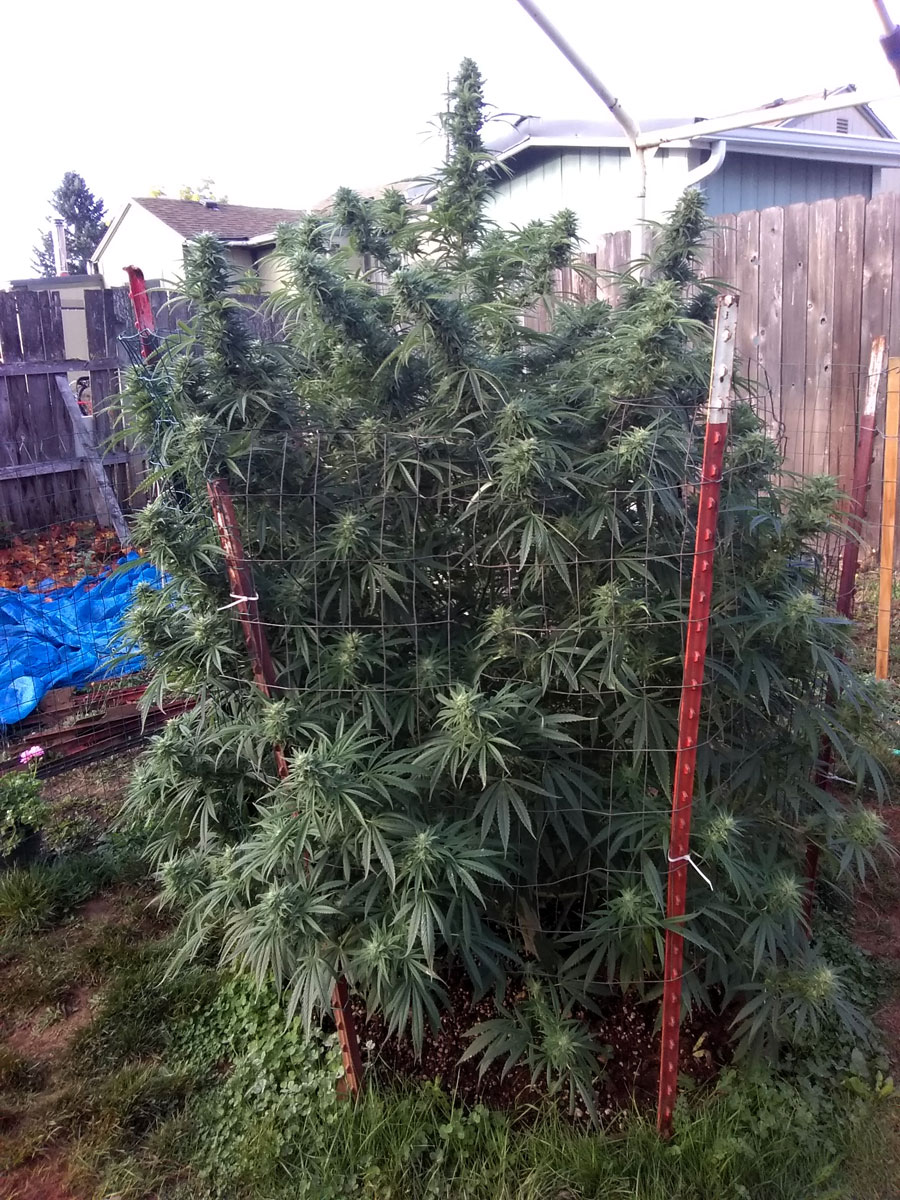
Don’t you want cannabis growing in your backyard like these beautiful plants by LuckyAcres?

Why Let Your Cannabis Buds Embrace the Sun?
Why grow your cannabis outdoors?
- Free Light! (The Sun) – Cannabis plants “eat” light. Light is what feeds the growth of buds, and more light = bigger yields on average. Outdoors, the sun provides all the light a cannabis plant could use.
- Turn Outdoor Space into a Weed Factory – An indoor cannabis garden takes room in the house. If you’ve got a good space outdoors to grow weed, why not use it?
- Free Weed Every Year – Even if you also grow cannabis indoors, it’s nice for any grower to get a huge bumper crop of extra weed every year. If you set your outdoor grow up properly, it should be fun, straightforward, and lucrative.
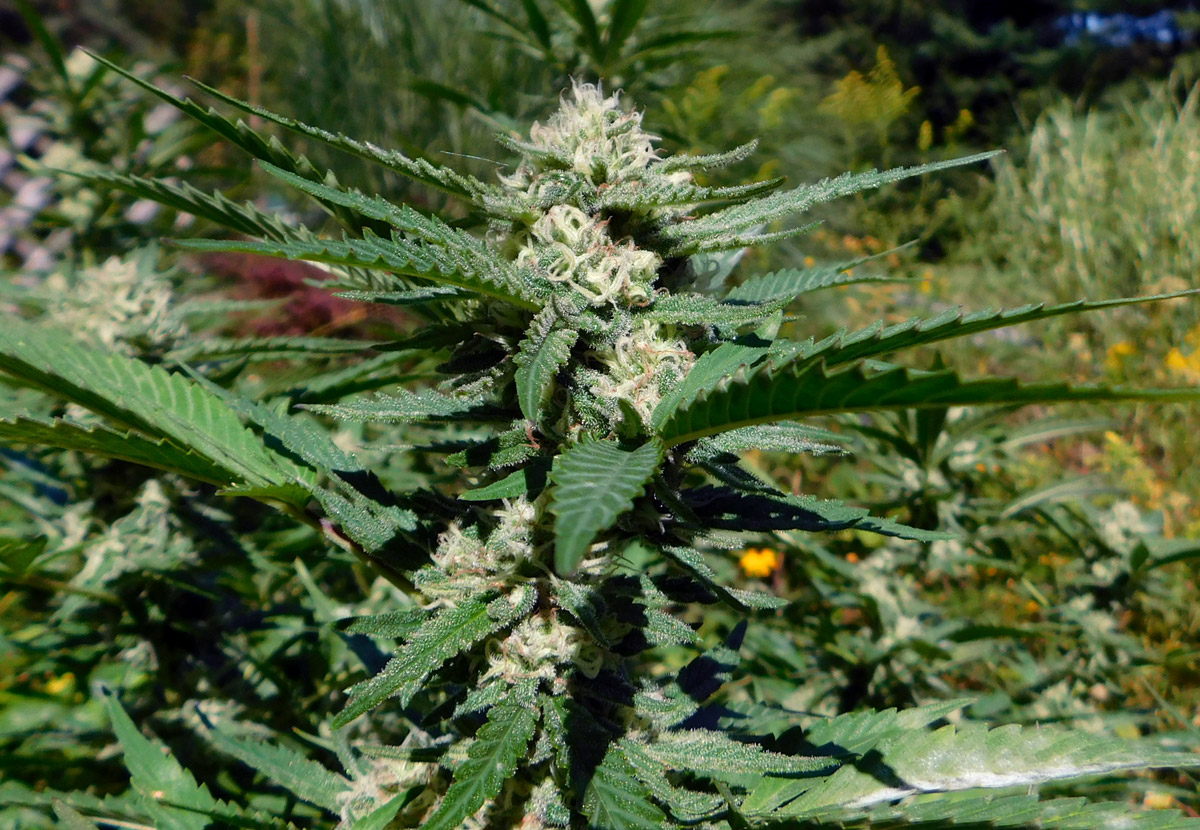
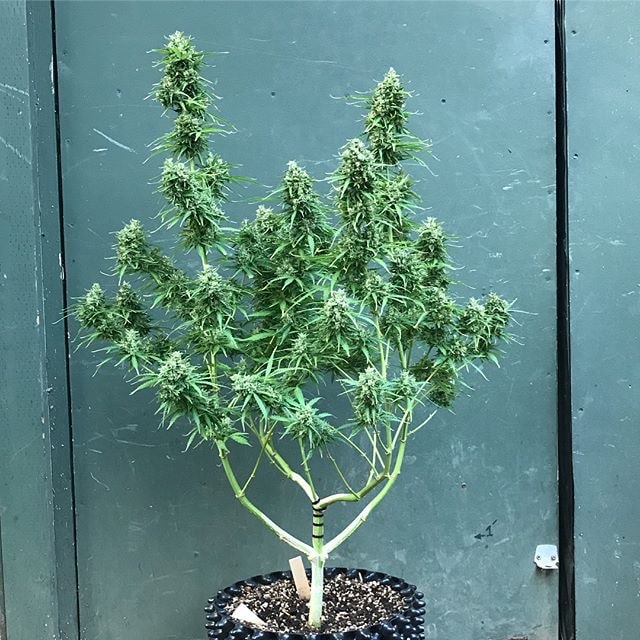
This White Widow plant is growing big, beautiful cannabis buds.
Pros of Growing Cannabis Outdoors vs Indoor Growing
- Cheaper Than Indoors – Thanks to the sun, you don’t need electricity or grow lights to grow cannabis outdoors. Electricity is usually the highest cost for indoor cannabis growers. A free source of unlimited light dramatically cuts down costs. Outdoor weed is the cheapest weed to grow.
- No Extra Heat in the House – Outdoor growing doesn’t cause heat in the home, like a grow light. Though admittedly, a very small LED grow light won’t change the temperature of a room.
- Less Work – Depending on where you live, Mother Nature takes care of many of a cannabis plant’s needs, such as providing water through rain. With indoor growing, you typically water your plant a few times a week.
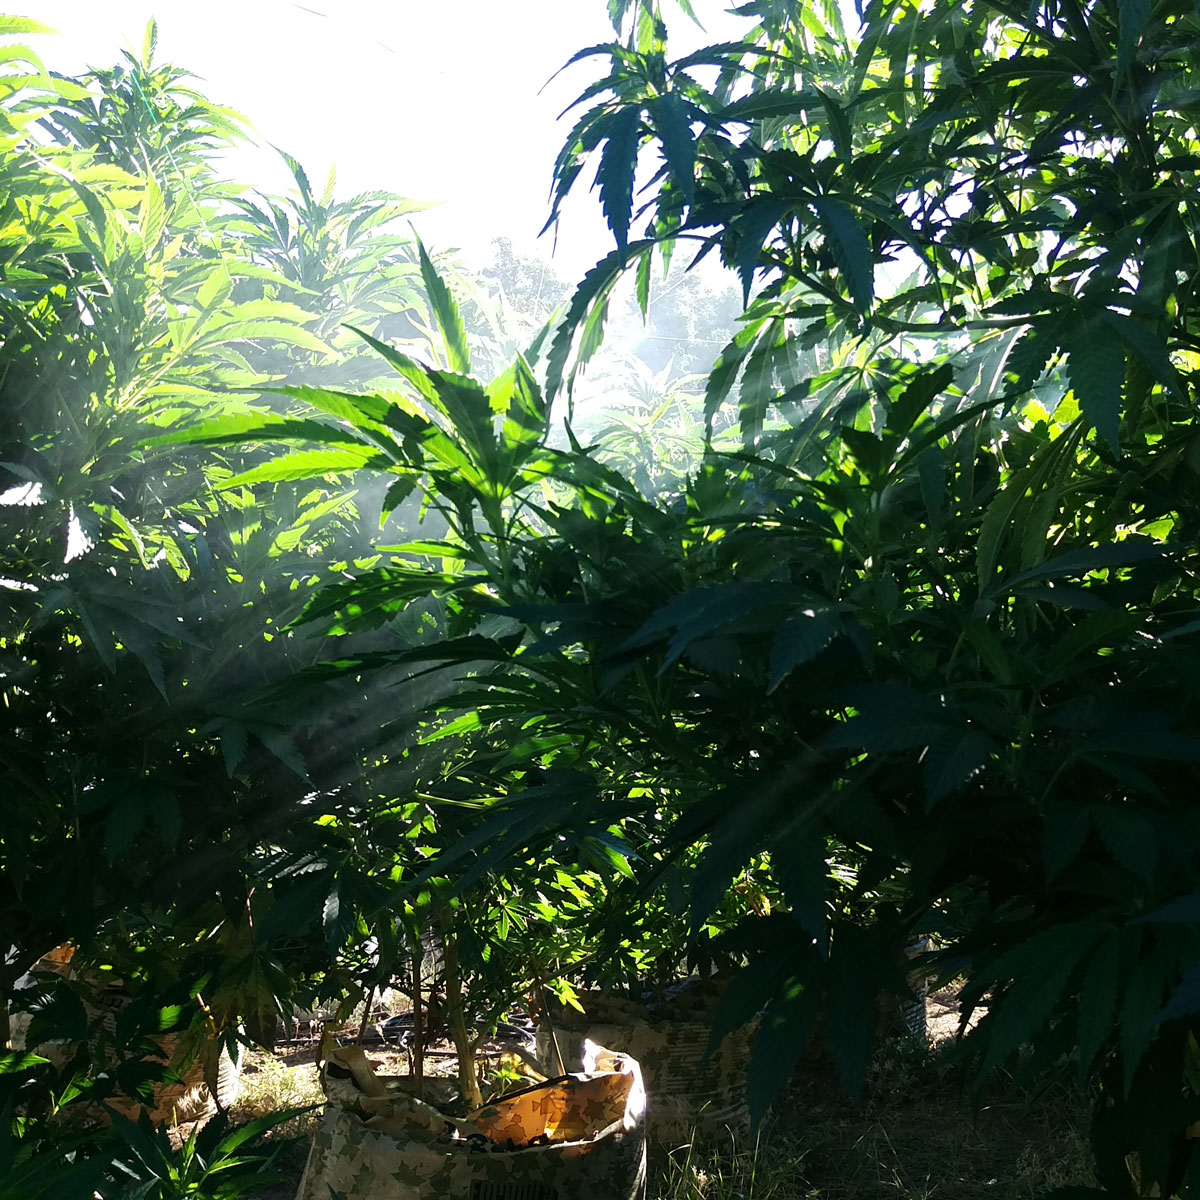
There’s something particularly beautiful about outdoor cannabis plants.
Cons of Growing Cannabis Outdoors vs Indoors
Cannabis Pests Want Your Plants
- Problem: Bugs and other outdoor pests are often the biggest challenge for outdoor cannabis growers compared to indoor growing.
- How to Deal: Bugs can be dealt with. This outdoor tutorial suggests a mix of pest management practices and safe insecticides (when necessary). But with extra care, outdoor growers can grow a clean cannabis crop of big beautiful buds.
Local Climate Might Not Be Optimal
- Problem: Cannabis plants need lots of direct sun every day. Harvest timing is also a factor for outdoor growers, because weather/light cycles are different in different parts of the world. Some growers may have to prepare for weather such as storms or heat.
- How to Deal: It helps greatly to learn a little about your local sunlight cycles and seasons. Most strains of cannabis are ready to harvest in mid-Autumn, which is still good weather for some growers. If not, some fast-flowering photoperiod strains are ready to harvest earlier. Luckily, you can also grow autoflowering strains and choose almost any harvest date (more info below). For weather, here are cold-resistant strains, heat-resistant strains, and extra tips for dealing with heat and humidity outdoors.
Artificial Light Can Cause Problems (Photoperiod Strains)
- Problem: Outdoor photoperiod cannabis plants need total darkness at night to make buds in late summer. Long nights tell the plant “winter is coming”. Artificial light at night can interrupt this process.
- How to Deal: Small lights in the distance aren’t enough, but artificial light close to cannabis plants at night can cause the plant to revert to the vegetative stage. Cannabis plants need their beauty sleep to make buds. Take a moment to think about nearby artificial lights. For example, don’t plant your cannabis right under a street light or bright window.
Note: Ignore this for autoflowering strains, as autoflowering cannabis plants don’t care about light cycles.
Stealth is Paramount
- Problem: It’s best no one knows about your cannabis plants besides you. Even if just to prevent a heart-breaking plant theft. The problem is cannabis plants have a potent aroma and plants given plenty of sun, nutrients, and root space can grow quite large.
- How to Deal: Even if it’s legal to grow where you live, and you’re not worried about thieves, it’s still good to be a considerate neighbor and not stink up the neighborhood. Here’s a helpful guide to stealthy outdoor cannabis cultivation.
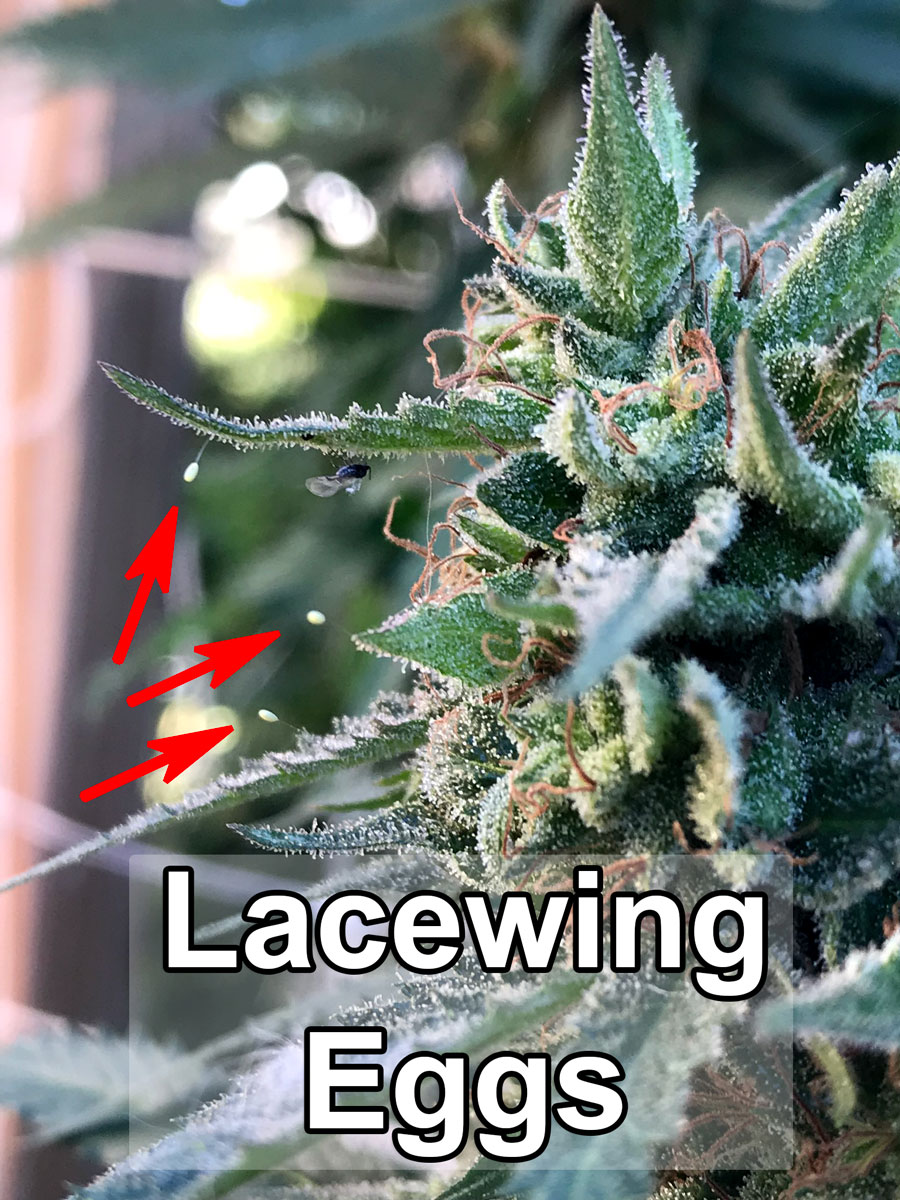
Quick outdoor tip, while we’re here: These delicate floating white eggs are actually good eggs. They come from the green lacewing bug, a garden friend. Leave these eggs alone so they can hatch and eat cannabis pests in the area. Check out this guide to outdoor pest management.
Lacewing eggs make GOOD bugs.
Less Control
- Problem: You have much less control over your outdoor environment compared to indoors.
- How to Deal: Being more zen helps a lot. Part of outdoor growing is acceptance. If it rains for a week, that’s just what your plants are getting unless you can shield them. You can gain more control by growing in pots so plants can be moved, but to some extent, outdoor plants are at the mercy of the elements. Outdoor growers must accept that some bugs will crawl on your plants at some point. However, this tutorial shows you how to minimize the most common outdoor challenges, so you’re rewarded for your patience at harvest time.
Now that you know how to overcome these stepping stones, you are ready to join the wonderful exciting world of outdoor cannabis cultivation!
Overview: Timeline of an Outdoor Cannabis Plant in This Tutorial
Seedling Stage: The life of an outdoor cannabis plant starts as a seedling indoors. Seedlings get moved outdoors after it stops getting cold at night.
Vegetative Stage: Plants are nurtured with sunlight and regular watering. Autoflowering plants grow on a schedule, but traditional photoperiod plants follow the sun’s light cycles. Photoperiod cannabis plants typically reach about half of their final size by mid-summer, at which point you should see the first buds forming. This is the sign your plant is entering the “flowering” or budding stage of life.
Flowering Stage: Continue to water plants regularly. Since cannabis plants are nutrient-hungry when buds are forming, it’s recommended to give organic or synthetic “bloom” nutrients during the budding phase. This helps prevent nutrient deficiencies, which tend to reduce yields and slow down bud development.
Harvest: Wait until buds are ready to harvest. Then cut down the plant, hang each branch upside down to dry, and jar the buds.
Enjoy: An outdoor marijuana harvest can be huge if you follow all the steps below.
7 Steps to Grow Weed a Ton of Weed Outdoors: Easy Method
Whether you’re a curious newbie or a seasoned grower looking to switch from indoor to outdoor, we’ve got you covered with our fail-proof method.
Step 1: Source Quality Seeds
You have two main options, autoflowering or photoperiod strains.
- Autoflowering Strain – Autoflowering plants are ready to harvest on a schedule. For example, most strains are ready to harvest around 3 months from germination. With these, the main thing is to make sure you plant the seeds so they’re ready to harvest before it gets cold or rainy where you live.
- Photoperiod Strain – These can be a bit trickier. Photoperiod strains automatically start making buds when nights get longer in mid-to-late summer. Then they are ready to harvest in early to mid-autumn, depending on the strain. If your local climate gets cold or rainy before mid-autumn, you might want to consider auto-flowering plants to make sure they’re ready to harvest in time before the weather gets bad. If you do have a decently warm fall where you live, opt for a photoperiod strain that is listing as being a good choice for your climate.
Other factors to keep in mind:
- Avoid sensitive strains – When growing outdoors, it’s best to get cannabis strains that are known to be hardy against the elements, for example have some resistance to heat, high humidity, and bugs. You probably don’t want a particularly fragile strain outdoors, since you don’t have as much control to baby the plants.
- Ask locals – Sometimes the best cannabis strain for growing outdoors comes from local growers. If you can find someone who’s been growing weed in your area for a few years, they may even have some great tips or genetics to share about your local environment.
Recommended Outdoor Autoflowering Strains
- Blue Dream Autoflower – Easy to grow, nice “in-your-head” daytime effects that are not overwhelming. Ready to harvest about 9-10 weeks from germination.
- Blueberry x Mazar Autoflower – Excellent effects, easy to grow, ready to harvest about 3 months from germination.
- Durban Poison Autoflower – Robust, healthy plants that do well in many environments. Ready to harvest about 3 months from germination.
- LSD-25 Auto – Beautiful purple buds, potent effects, easy to grow. Harvest buds about 10 weeks from germination to get the highest potency and bud quality.
- Runtz Auto (MSNL version) – Big yields of sparkly buds, easy to grow, with an extremely fast flowering time, up to 24% THC levels, and a stimulating high.
- Purple Punch Autoflower (Royal Queen Seeds version) – Very fast strain that’s ready to harvest as soon as 7 weeks from germination, though an extra week or two tends to increase the potency and density.
Check out my recommended outdoor autoflowering strains for the 2024 season.
Recommended Photoperiod Strains for Outdoor Growing
- Apple Fritter – Super high THC levels and excellent bud quality. It does well outdoors and can handle heat and cold, a good choice for grower who want super high potency. Just be careful to protect it from bugs as it can be extra tasty to bugs (like caterpillars) compared to some other strains.
- Blue Dream – A classic for good reason. Hardy, high-yielding, and relatively easy to grow. Resistant to common molds and pests. Offers a balanced high and is generally a crowd-pleaser.
- Blueberry x OG Kush – A popular strain that’s well-suited for warmer climates. It requires some attention but rewards with high-quality buds. It’s known for its potent effects and complex aroma, blending earthy, pine, and lemon notes.
- Baldur’s Crepe – This photoperiod strain thrives outdoors even at northern latitudes, as it was bred to grow outdoors in northern Maine close to the Canadian border. New to the scene, it has proven to produce gorgeous fat round buds that belong on the top shelf, even if you make a few mistakes along the way. The same breeder also offers Skunch, which performs well in similar conditions, with buds that take on a “peanut butter” smell after they’ve been dried.
- Durban Poison – This pure sativa is great for outdoor cultivation, especially in warmer climates. It’s known for its resilience and can grow quite tall. It offers a clear, uplifting high and a sweet smell.
- Frisian Dew – Specifically created as an outdoor cannabis strain, Frisian Dew is known for its hardiness, mold resistance, and visually striking purple buds.
- Granddaddy Purple – Perfect for cooler climates. It’s a hardy strain that produces dense, resinous buds with a sweet, grape-like aroma. It’s great for pain relief and relaxation, and its stunning purple hues are a sight to behold.
- Gorilla Sherbet F1 FAST – This fast version of Gorilla Sherbert by Sweet Seeds is ready to harvest earlier outdoors
- Maui Wowie – A classic strain with unique effects. It grows well in various grow environments, and can tolerate a wide range of conditions and still produce excellent weed.
- Pineapple Express #2 – Designed to thrive in hostile climates and still give you sweet-smelling, delightful weed.
- Sour Diesel – Known for its pungent, diesel-like aroma, this strain is a favorite among growers for its strong, energetic high. It’s fairly resistant to mildew and pests, and thrives in a sunny, outdoor environment.
Frisian Dew is the quintessential outdoor cannabis strain.
Step 2: Set Up Your Grow Spot
What Supplies Do you Need?
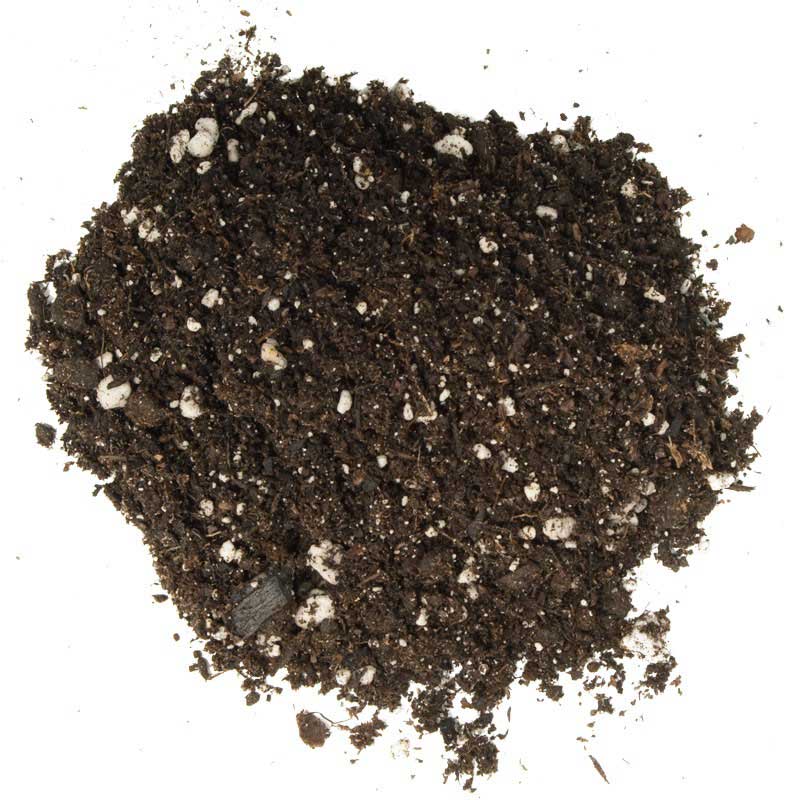
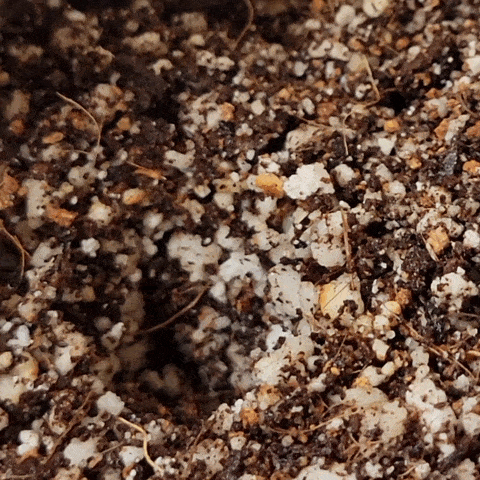
Soil – I like Coco Loco because cannabis seems to grow faster for me in soil that uses coco instead of peat. Anything labeled as an “organic potting mix” usually works well for growing cannabis.
Other Thoughts on Soil: If soil looks rich and you see little white rocks in it (shows up as “perlite” on the ingredients list), that’s a good sign. I’ve had good luck with any soil by Fox Farm. Their Ocean Forest soil tends to burn young seedlings because it it “hot” with a lot of nutrients, but they get used to it and grow well after that (just don’t give extra nutrients for a few weeks). Their Happy Frog soil is made for seedlings, with great fast growth, though you need to start giving extra nutrients after a week or so because they’ll quickly use up everything in the soil. My local garden nursery offers “rich organic potting soil with coco and perlite” and that works amazing. If there are friendly garden workers near you, it can’t hurt to ask what soil they recommend for an outdoor vegetable garden.
What’s the best soil for growing cannabis?
Don’t skimp on soil. Give plants good cannabis soil like Coco Loco if you want good weed!
Bad soil results in sad, weak plants that don’t ever grow happy and fast.
This is bad soil!!!
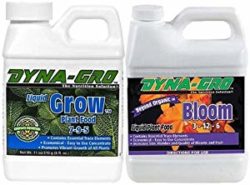
Nutrients – Regular soils typically starts running out of nutrients before cannabis hits the crucial nutrient-heavy budding phase. For your first grow outdoors, I recommend doing what’s easy and proven to work great, which is to add cannabis-specific nutrients to your water when watering your plants.
- Easy, Cheap Nutrient Option: Dyna-Gro Grow & Bloom. Give 1/2 tsp/gallon of “Grow” with every watering at first, then 1 tsp/gallon after the first 2 weeks. When the new buds have started coming out, and you see little white “puffballs” all over the plant, switch to giving 1 tsp/gallon of Bloom with every watering. Learn more about using Dyna-Gro nutrients to grow cannabis.
- Higher End Cannabis Nutrients: Fox Farm Nutrient Trio – Give this to cannabis plants according to their schedule, but start at half strength as it tends to be a bit strong.
Check out more recommended cannabis nutrients.
Easy, cheap nutrient option for growing weed outdoors: Dyna-Gro Grow & Bloom.
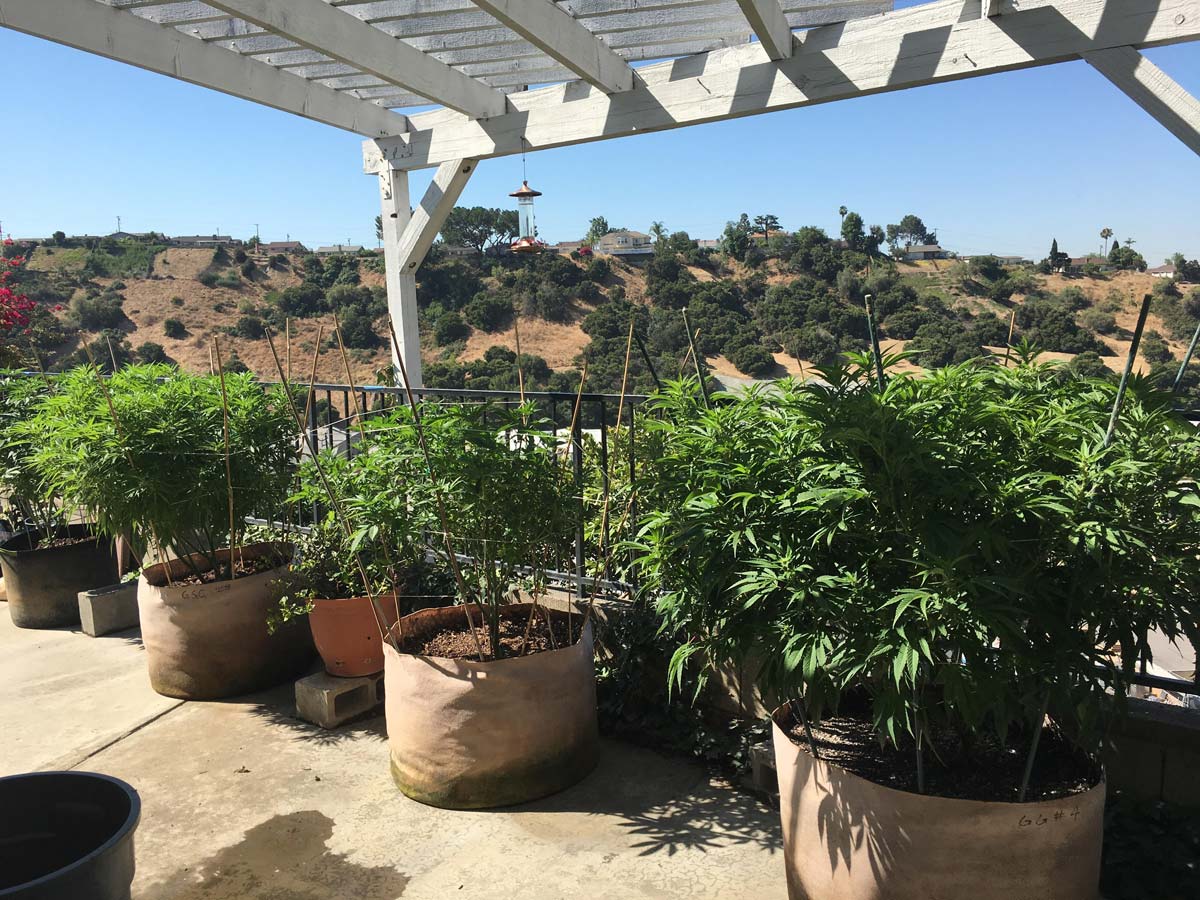
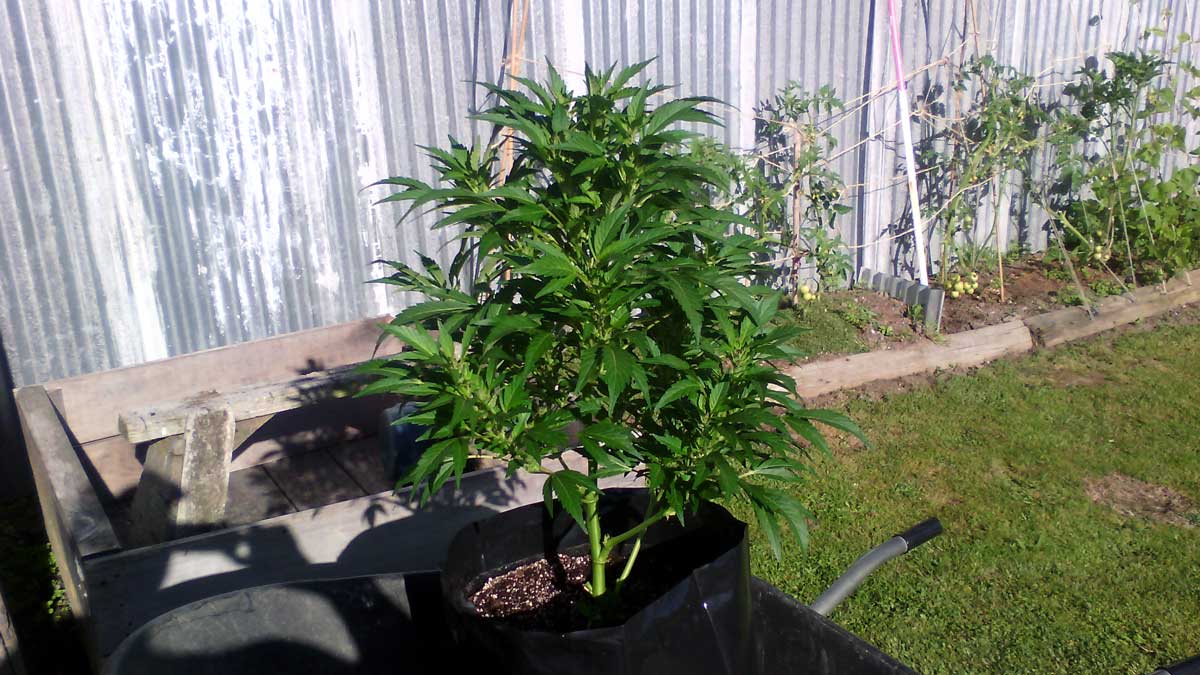
Home for Roots: Plant Pots, in the Ground, or a Raised Bed?
- Plant pot – A relatively small plant pot can help keep plants smaller, while an enormous pot can support bigger plants. A 5-gallon or 10-gallon pot can support a big but not crazy cannabis plant. If growing in a fabric pot, don’t get anything smaller than a 5-gallon, and it can help retain water and protect roots from heat if you put the fabric pot inside of a hard-sided pot.
- In the Ground – This can be a good option if you have particularly good soil where you live, but typically you should either dig a hole and fill it with good soil, or get your soil analyzed and fix it so that it has the right properties to support a plant like cannabis.
- Raised Bed – Tends to grow bigger and more vigorous plants than using plant pots. A good choice if you want to grow big plants without having to rehabilitate a bunch of soil in the ground.
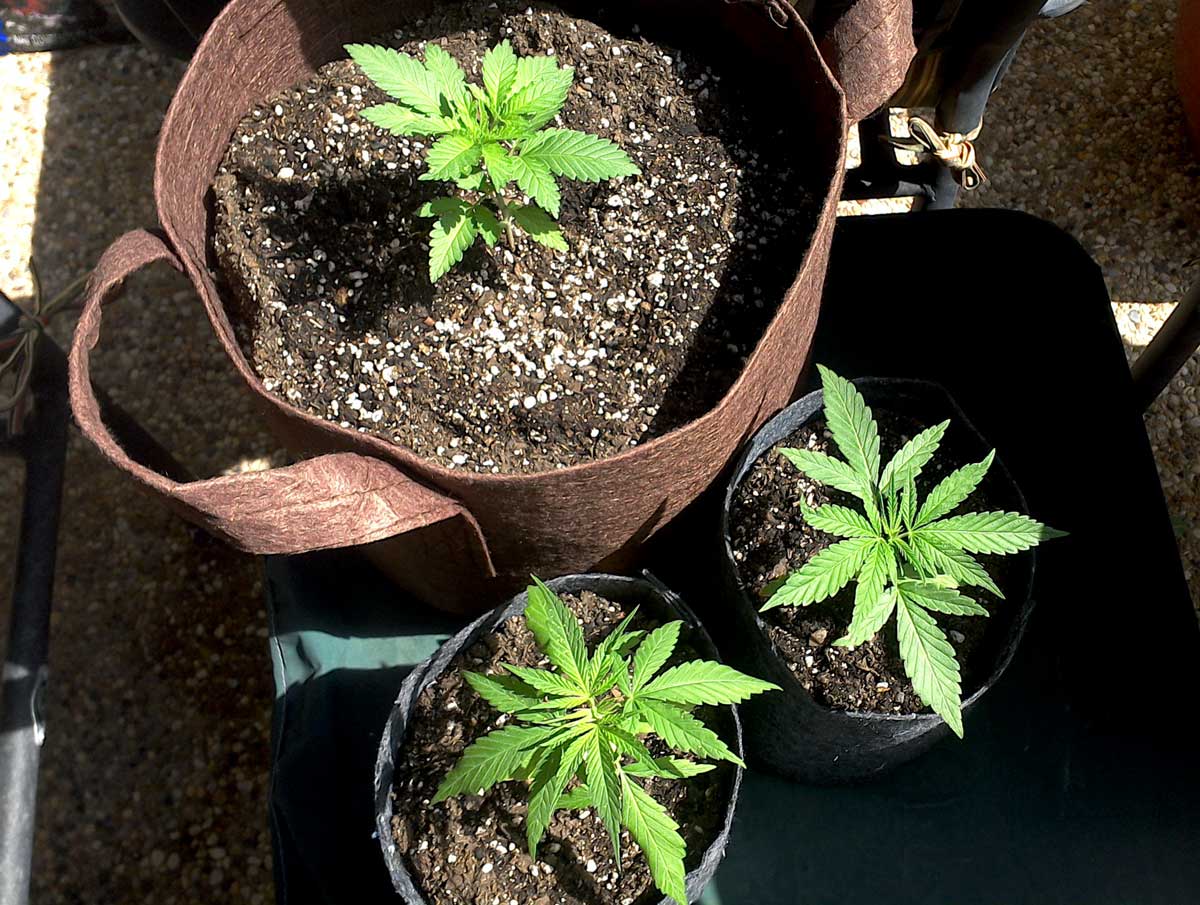
Starting multiple cannabis plants in different kinds of pots lets you decide what works best for you.
Some advice about pots from my outdoor growing friend LuckyAcres. “After 20 years of being around black “nursery pots”, airpots have become my number one choice. Better root growth, better access to air, massive root terminals…. day and night to what I was accustomed to. Grow bags can retain salts and pests if not dealt with properly between grows. My access to sun changes thru the season so I must be able to move my ladies as needed.”
Learn more about air pots vs regular pots.
Example of a Night Queen Auto by Dutch Passion that was grown in an air pot.
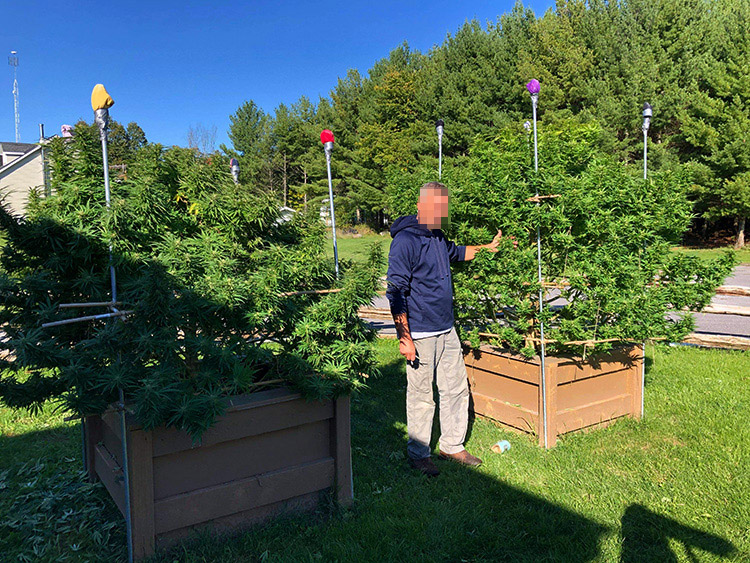
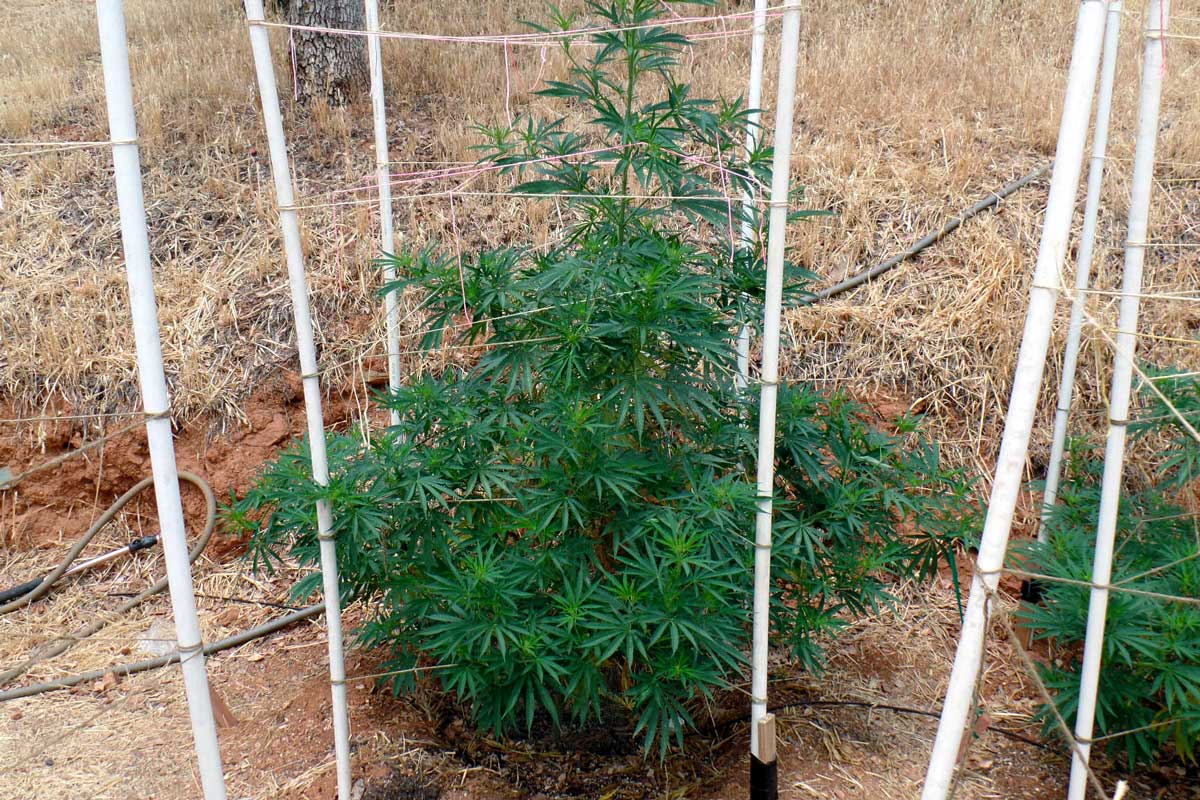
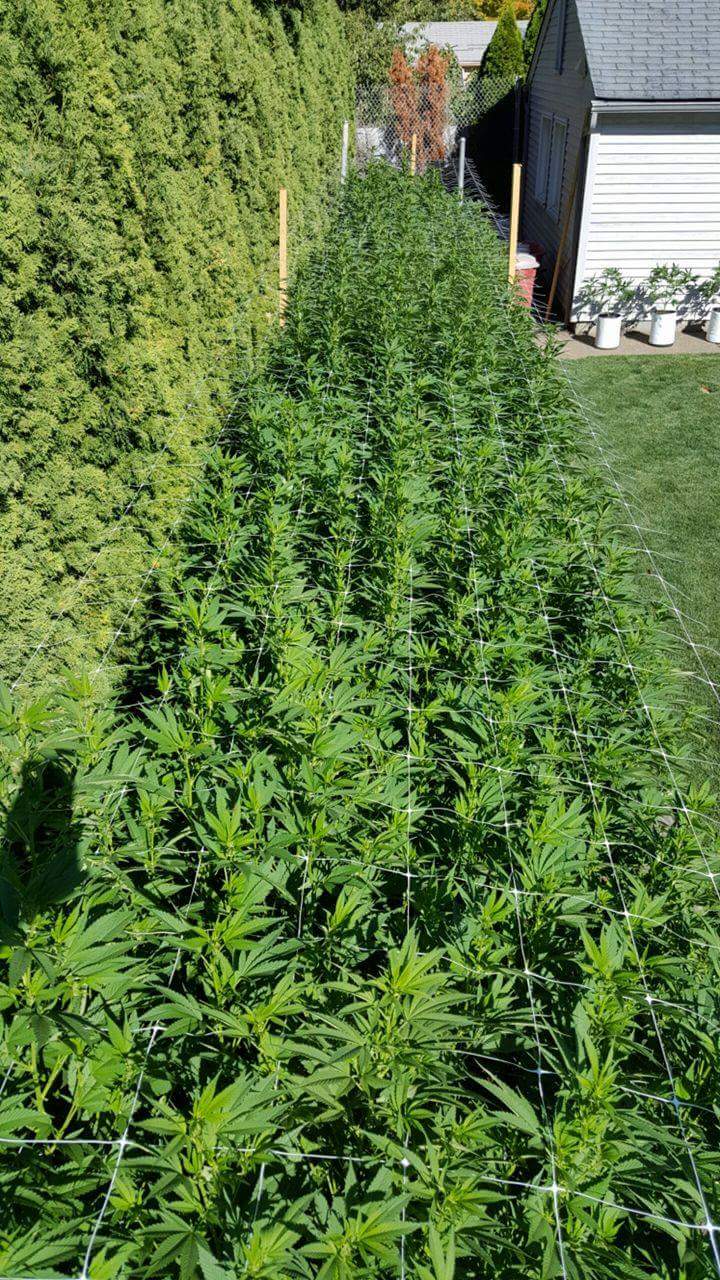
Outdoor grower Jim shows off his outdoor cannabis plants in raised beds.
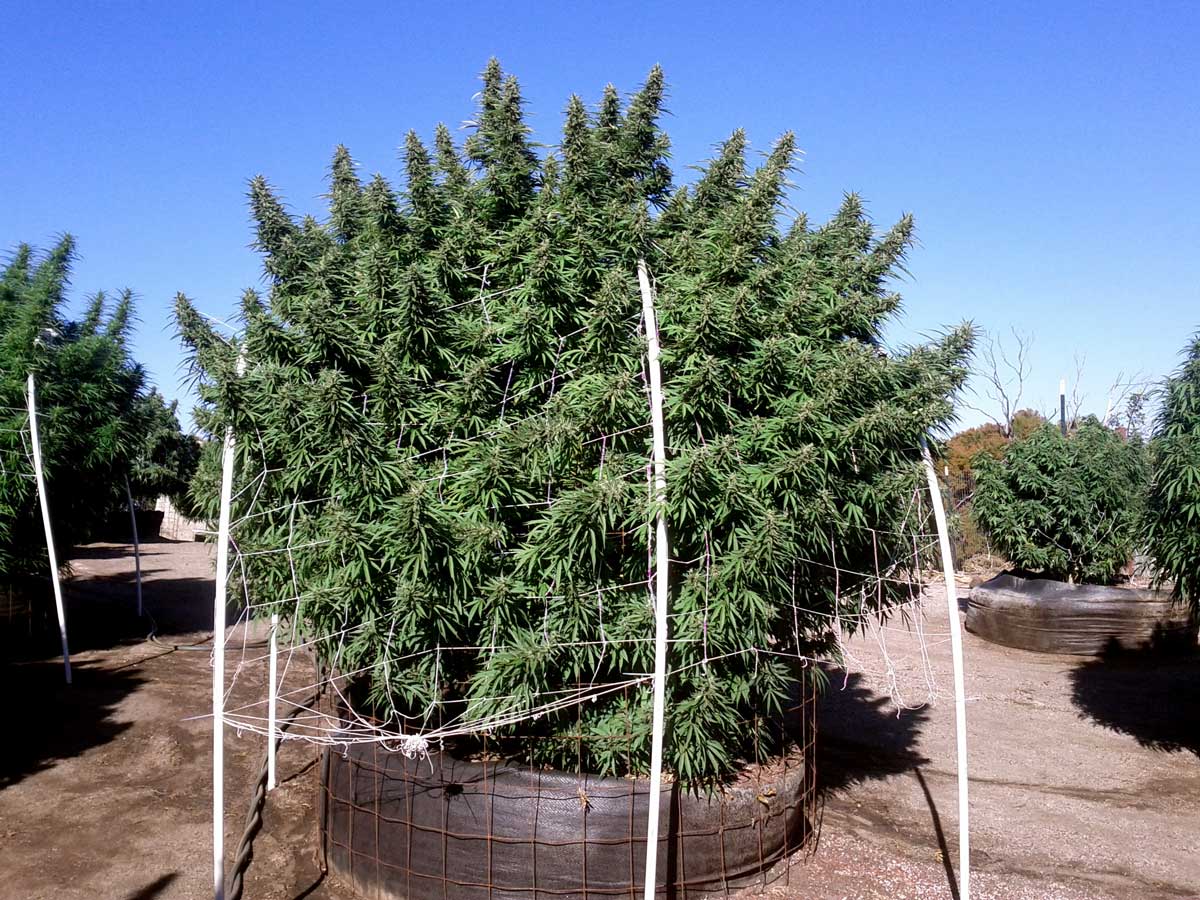
You need big pots with lots of soil and tons of sunlight to grow huge cannabis plants outside. These are 200-gallon fabric pots!
Where should I grow cannabis outdoors?
Here’s what to consider.
- Hours of Sunlight – When it comes to growing outdoors, you want to maximize direct sunlight to your plants. Most importantly, your plants should be getting at least 6-8+ hours of direct sunlight every day during late summer. Cannabis plants need a lot of light to produce big buds. If they only get indirect light, or only get light for a few hours a day, the buds will never get dense or mature fully.
- Stealth – If possible, the grow spot should be easy to hide, so that no one will accidentally see the plants. If there are people around, you may also want to consider security to deter possible thieves.
- Water Access – It should be easy to get water there (a hose is ideal)
- Smell – What will happen if the smell of weed starts to get out of control? If neighbors will be able to smell your plants, you’ll want to think about this (for example grown in a greenhouse with a carbon filter to contain smells, or grow low-odor strains).
- Wind Exposure – Cannabis plants like fresh air, and don’t want to be planted in a humid or musty spot. Grow cannabis plants where there is a nice breeze if possible, but not so breezy it would make the stems wave around.
- Pests and Wildlife – Outdoor grows may attract pests and even wildlife like deer or rabbits. If possible, try to grow in a clean, tended, fenced outdoor grow area that doesn’t have a lot of bugs or wildlife.
- Overall Accessibility – Your outdoor cannabis garden should be located somewhere that’s relatively easy for you to get to. It should be convenient to check on your plants every day. If they’re in some Far away clearing you probably aren’t going to be able to tend to the plants much. But if it’s in your backyard, it’s easy to check on plants regularly.
A greenhouse makes it a lot easier to hide cannabis plant.
Keeping plants in pots helps keep them on the smaller side, and gives you more freedom to move the plants (at least until they get too big).
When planting straight in the ground, it’s important to dig a big hole and fill the hole with several gallons of good soil, like this grower did. It’s unlikely your local soil happens to naturally support happy cannabis plants (with some exceptions).
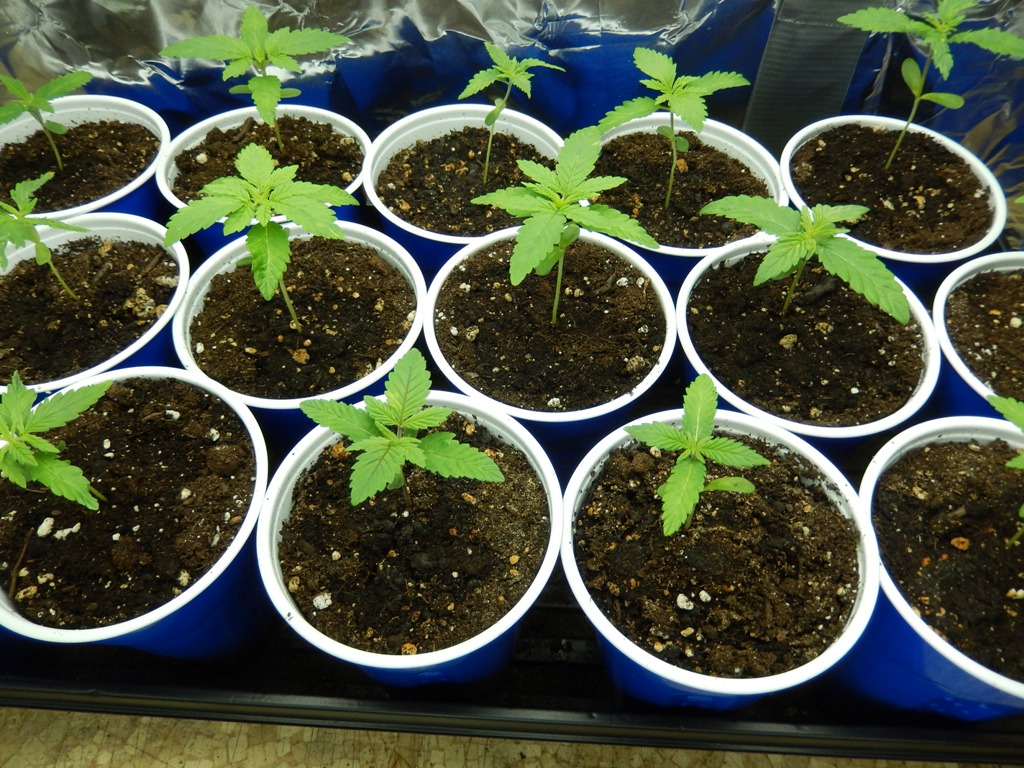
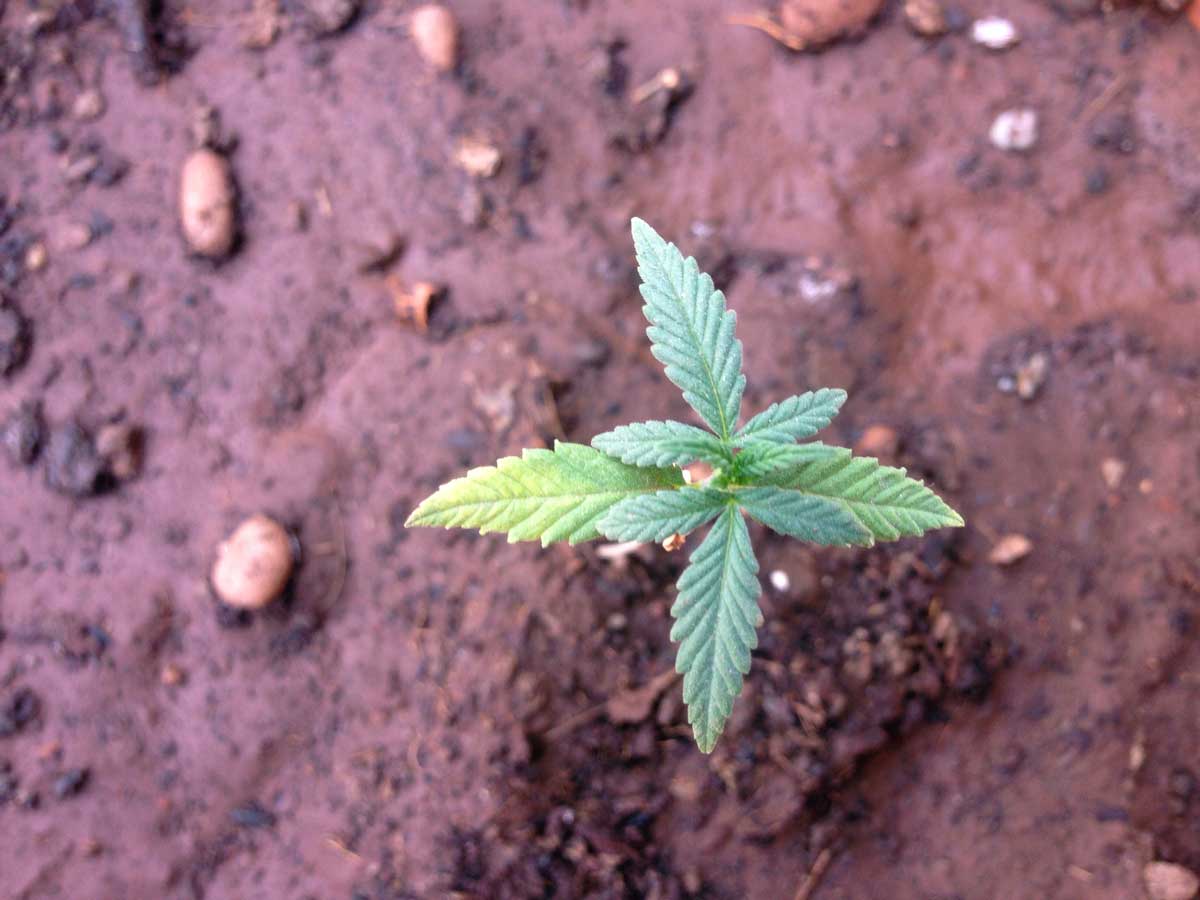
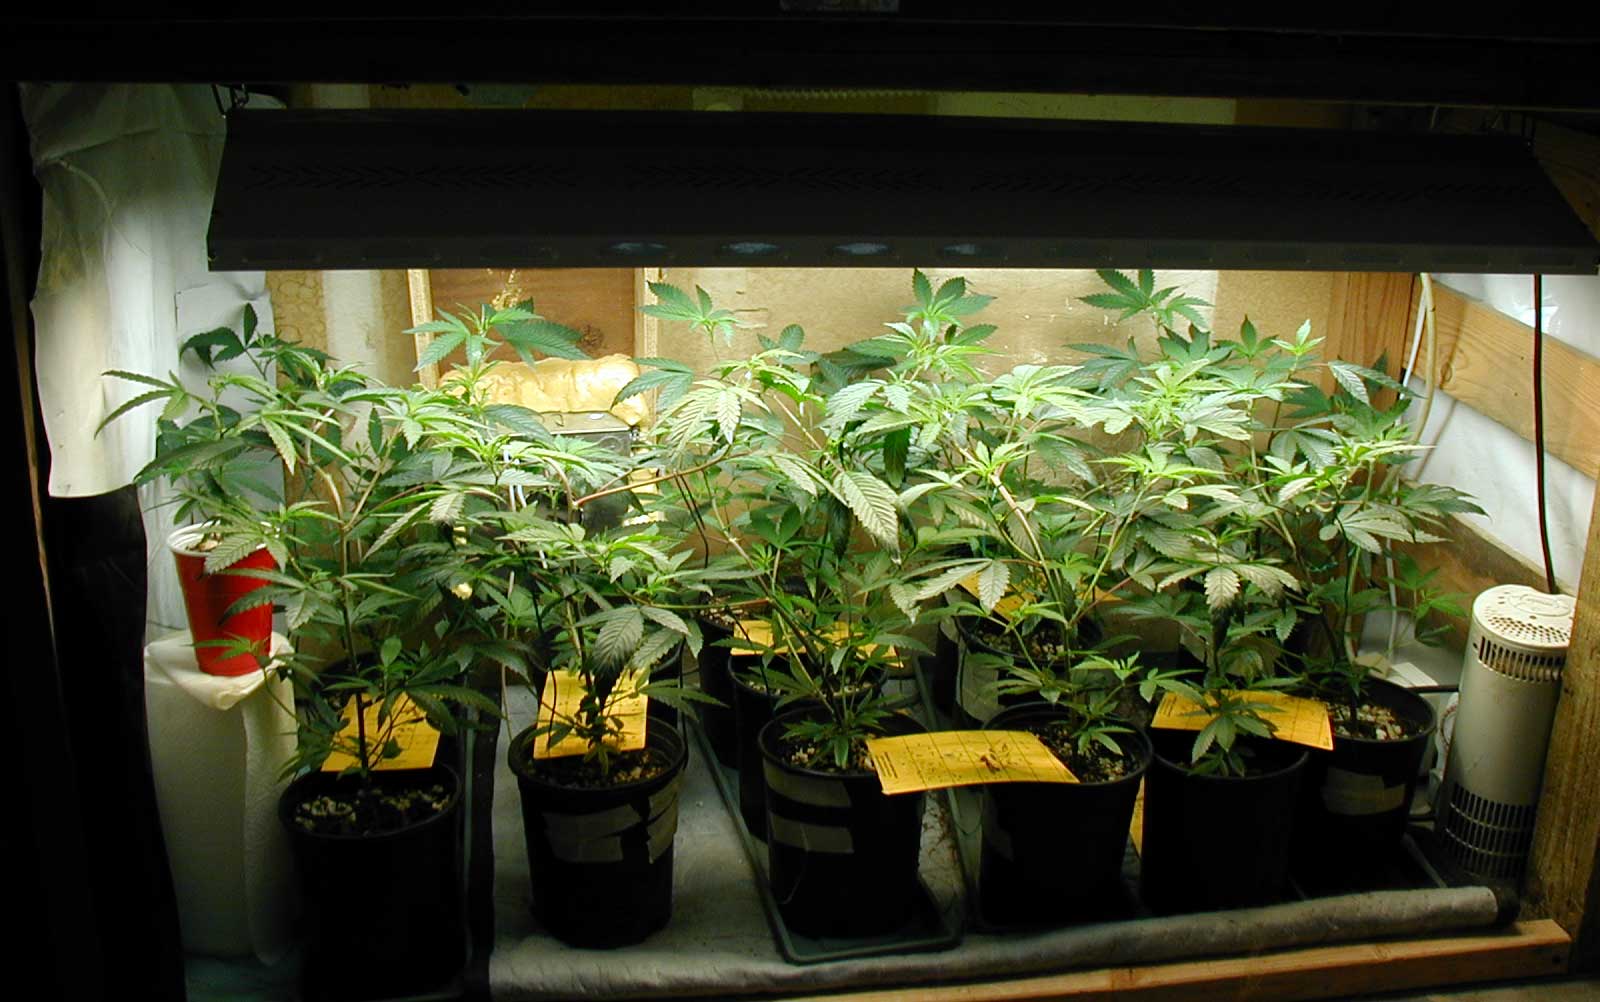
Step 3: Start Seedlings Indoors
Easy method:
Start in solo cups if you plan to grow multiple seeds. This makes it easy to decide what you want to do until after you see which seeds have sprouted and how they start growing.
Don’t forget to label each cup with the strain you planted, or you will often forget which is which lol
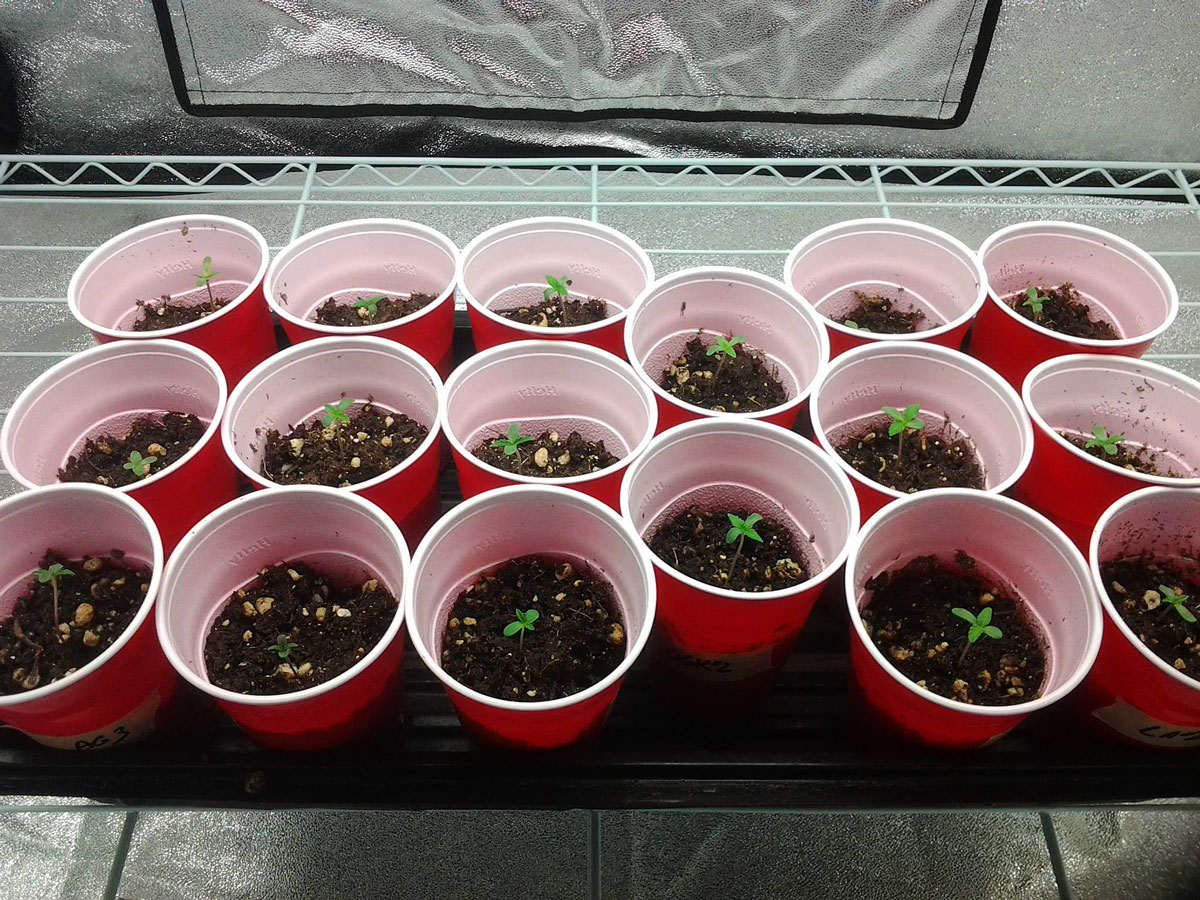
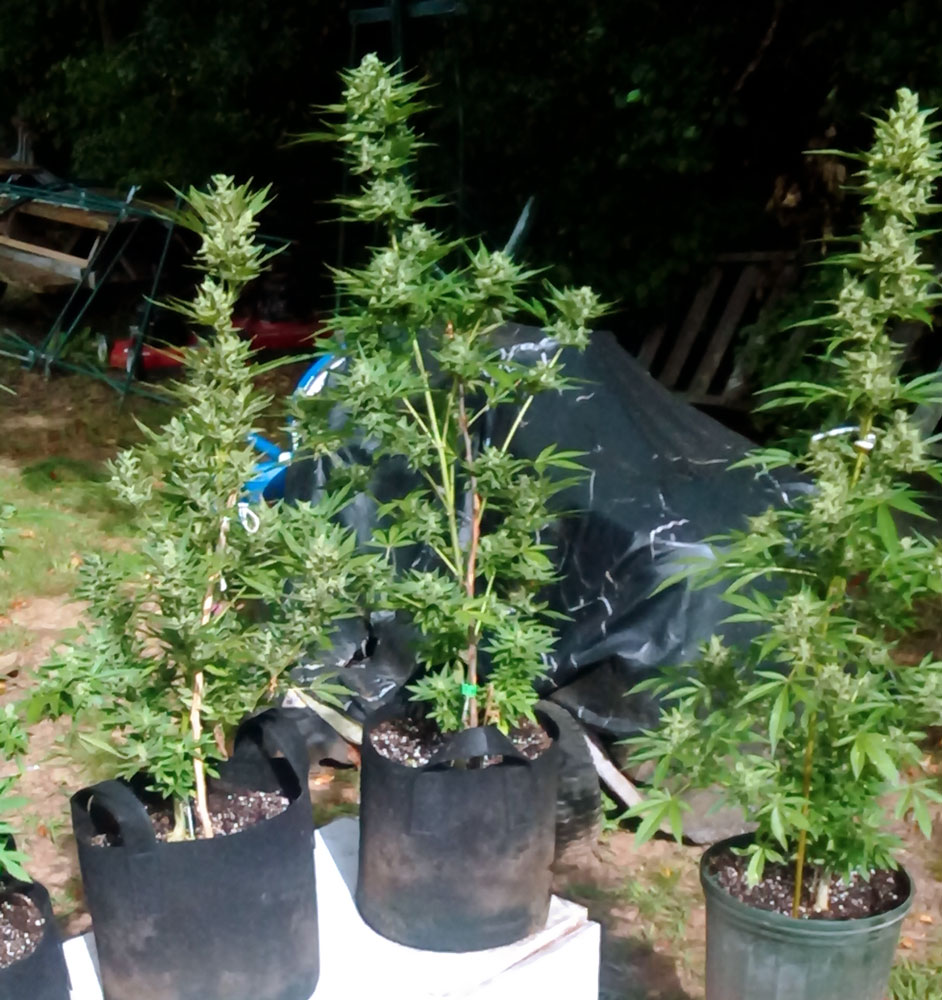
Or if you don’t mind using some extra soil, it’s awesome to put cannabis plants in 1-gallon or 2-gallon nursery pots. They’re relatively cheap, let plants get pretty big, and are relatively easy to transplant into their outdoor homes.
Plant seed directly in the soil under a small grow light. A very bright household light kept close works too. Just use the “hand test” and make sure it’s not too hot for your hard where the seeds are located.
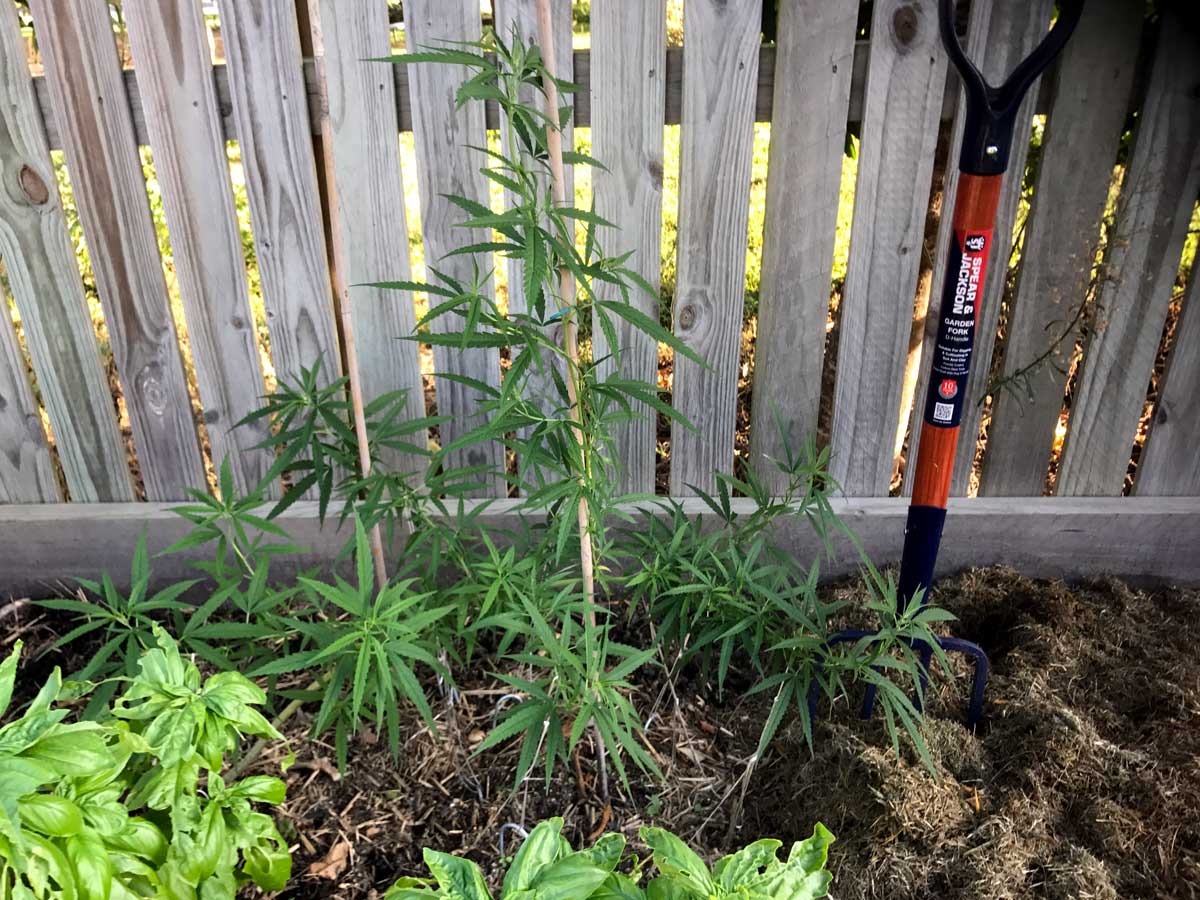
Step 4: Transition to Nature in Early Summer
Move seedlings outdoor to their final home in early summer. It should be after the last frost of the season, and not get too cold at night anymore.

Just transplanted to a 15 gallon pot.
![]()
This plant was planted strain into the ground in a bed of awesome soil.
A plant going out for summer in Australia.
Follow a Proven Watering Schedule and Nutrient Regimen
How to Water Plants in Pots
- Wait – Wait until the top inch is dry
- Nutrients – Add nutrients to water
- Get Runoff – Give enough water to get some runoff
- Remove Runoff – Don’t let your plant pots sit in water.
*Alternative: “Pick up the pot” method. Water when the plants start to feel light when you pick up the pot, as most of their weight actually comes from the water.
How to Water Plants in a Raised Bed or Giant Pot
- Check the Soil Moisture – Dig your fingers an inch or two down and see if it feels wet. It should be moist, not soggy or bone dry. Generally if the top inch is dry it’s good to water again.
- Water Deeply and Evenly – Water slowly and evenly around the plants to allow the water to penetrate deep into the soil.
- Watch the Weather – Plants drink more when it’s hot, dry, or sunny. THey need less water when it’s cool or cloudy. Make sure to adjust your watering accordingly.
- Mulch to Retain Moisture – If soil is drying out, add a layer of mulch to hold extra moisture and help keep an even temperature at your plant roots.
- No Waterlogged Soil – Overwatering cannabis is a common mistake. Soil should be wet but not muddy. Make sure your planter has good drainage so extra water isn’t trapped with the roots. If soil seems really really wet, give it a long while to dry out before watering again. Not only is overwatering bad for your cannabis roots and growth rates, it tends to attract unwanted pests like fungus gnats.
- Monitor Plants – Watch how they respond after getting watered. If they droop for days after watering, that’s a sign you’re giving too much water at a time or watering too often. Healthy plants stand upright with vibrant, green healthy leaves.
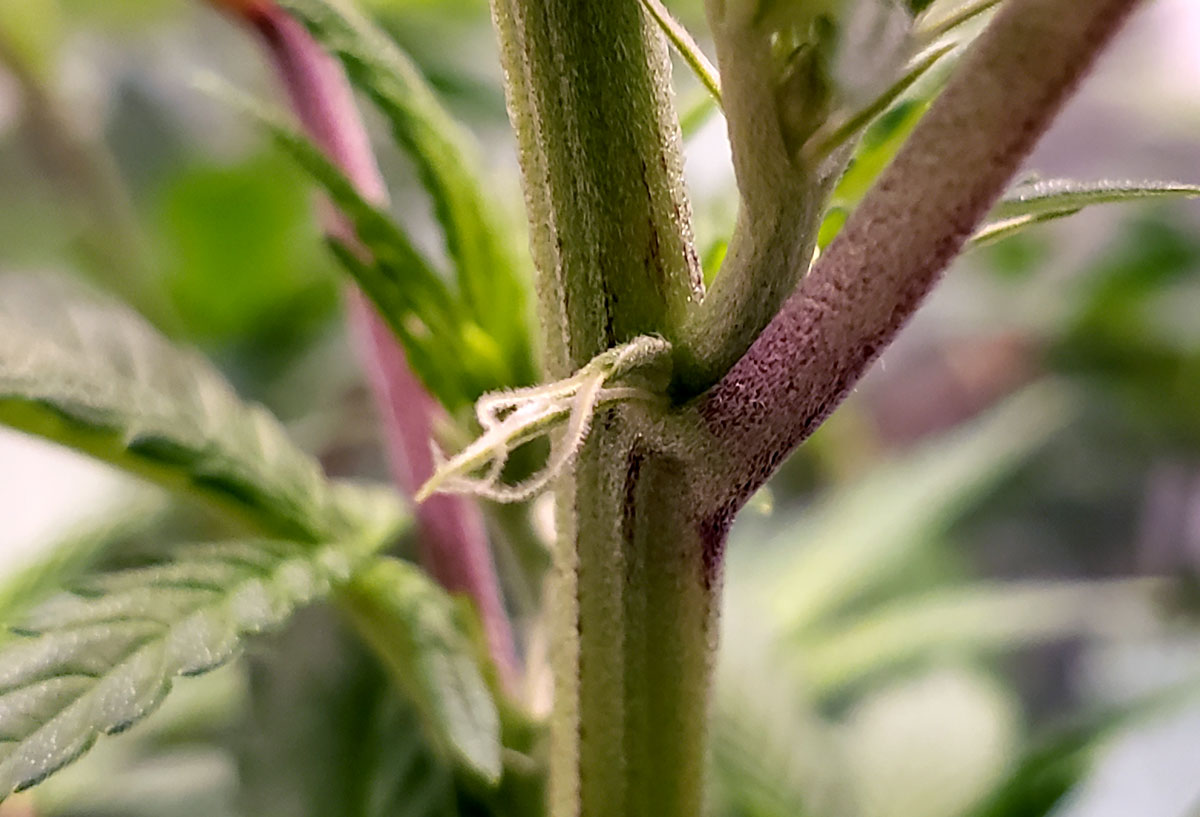
If height is a concern, you can force cannabis plants into the shape you want simply by bending stems and tying them where you want.
Mainly, your job is to keep plants watered and happy. Then let them do their thing.
How to Avoid Cannabis Nutrient Deficiencies
- Cannabis Nutrients – Give good cannabis nutrients in the water.
- Check PH – Check the pH of your water with a kit
- React to Symptoms – Use our Plant Doctor tool to diagnose your symptoms and quickly fix the problem.
Check our free cannabis plant doctor tool if you see nutrient deficiencies or bugs.

Step 5: Shield with a Midsummer’s Spray
Spray cannabis plants in mid-summer to prevent bugs in the flowering/budding phase. You can spray plants now without any consequences, but once they start making buds you don’t want to spray them with anything because it may leave residue on the buds. If possible, it’s good to spray your plants proactively for common local pests, especially caterpillars. Other common outdoor cannabis pests are aphids, grasshoppers, crickets, leafhoppers, and planthoppers. As your local garden center what the worst local pests are in the garden.
Note: If you live in a place with sparse vegetation, for example in a desert or at very high altitudes, plant-eating bugs like caterpillars are less common. In that case, you may not need to do any preventative spraying for cannabis pests. However, always stay vigilant for any signs of bugs and be prepared to respond quickly if they appear.
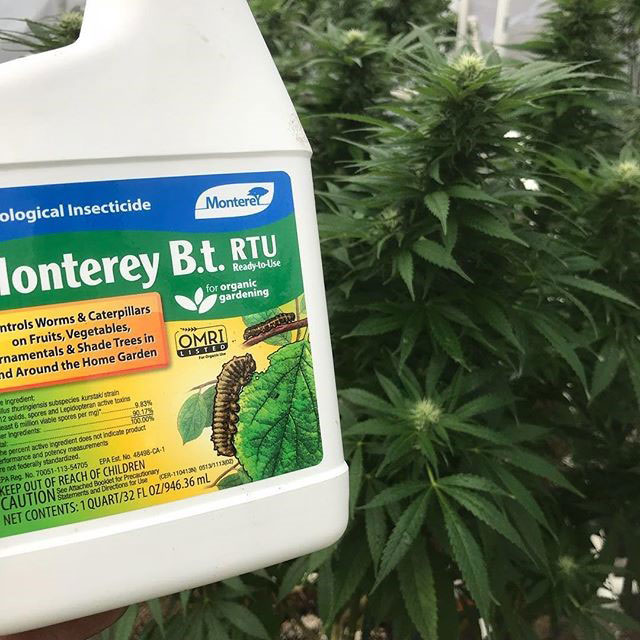
- 1st spray at first site of pistils/white hairs/buds: BT Spray for Caterpillars
- This biological insecticide contains the bacillus thuringiensis (BT) bacteria which kills larva and prevents caterpillars from being able to eat. Make sure to get something labeled for caterpillars, as there is a different type of BT that’s good for killing mosquitos but isn’t as effective on caterpillars. BT is harmless to humans. Although BT spray almost instantly stops caterpillars from being able to eat, it doesn’t kill them directly. So, although you may see the caterpillars alive and apparently unharmed after spraying, the BT is still doing its dirty work because they’re slowly starving to death.
- 1 week later: Spray with a horticultural oil or insecticidal soap, which kills or deters many insects from being on your cannabis plants.
- Neem oil is the most popular organic insecticide for cannabis plants, by far. It’s effective against many cannabis pests and widely available all over the world. However, some people don’t like the smell or have adverse reactions. Learn more about neem oil for cannabis pests.
- Insecticidal soap works by weakening the outer shell of bugs. Not as long-lasting as neem oil but some cannabis growers like it because it doesn’t leave much of a residue. This version comes as a concentrate and needs a sprayer to apply properly.
- Lost Coast Plant Therapy is ridiculously expensive, but really effective on cannabis plants when used with a sprayer.
- 2 weeks later: One more BT spray (be careful not to spray any developing buds, which likely look like little white puff balls by now).
Recommended: Monterey BT Spray – Any caterpillar BT product should work, but I know Monterey BT works from experience. You can save money in the long run by getting the BT Caterpillar Spray concentrate, and mixing it with water in a mister to spray your plants.
I know it’s a pain, but spraying plants now will save a lot of headaches and frustration later.
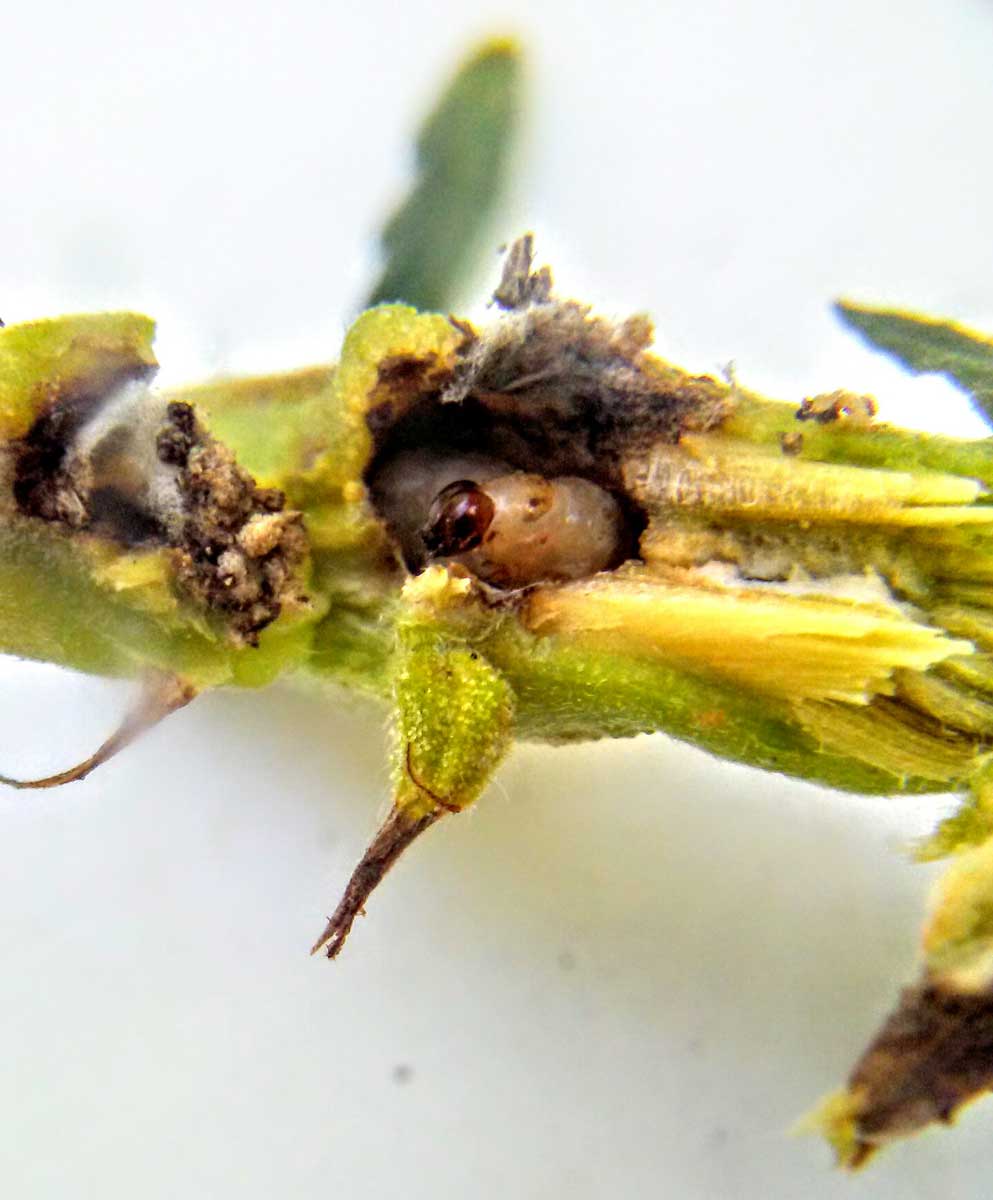
Caterpillars don’t just eat cannabis leaves. Some caterpillar species known as “bud worms” burrow into the stems and cause entire branches to die. Spraying your plants ahead of time with BT spray helps prevent this from happening. There is nothing more heartbreaking than losing the branch with your biggest cannabis buds because some caterpillar burrowed into the stem.
Step 6: Tend to Buds as they Grow
How do you tend cannabis plants to ensure the buds are taken care of?
Defoliation
If plants look leafy, remove extra leaves in the middle of the plant, especially during the first few weeks of the flowering stage. Learn more about strategic flowering stage defoliation.
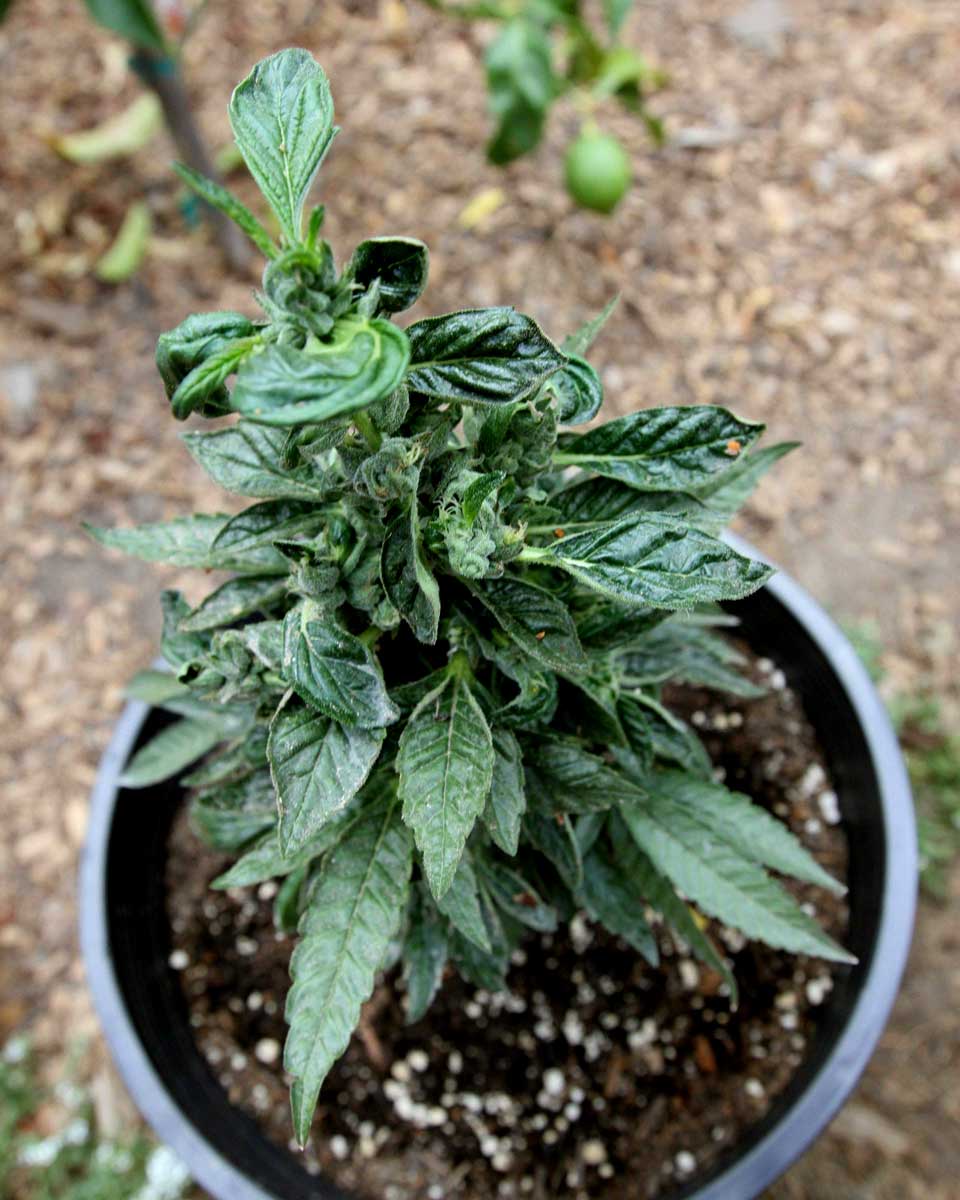
This plant just showed its first white hairs where buds will be. In addition to defoliation, this plant would benefit from being transplanted to a new, bigger pot with fresh soil.
![]()
Speaking of transplanting… Once you see actual buds on your plant, it’s recommended not to transplant it, because that could stress it out and mess with bud formation. Luckily, as long as you water plants with nutrient water, they can typically handle being in a too-small pot.
Make sure buds are developing normally
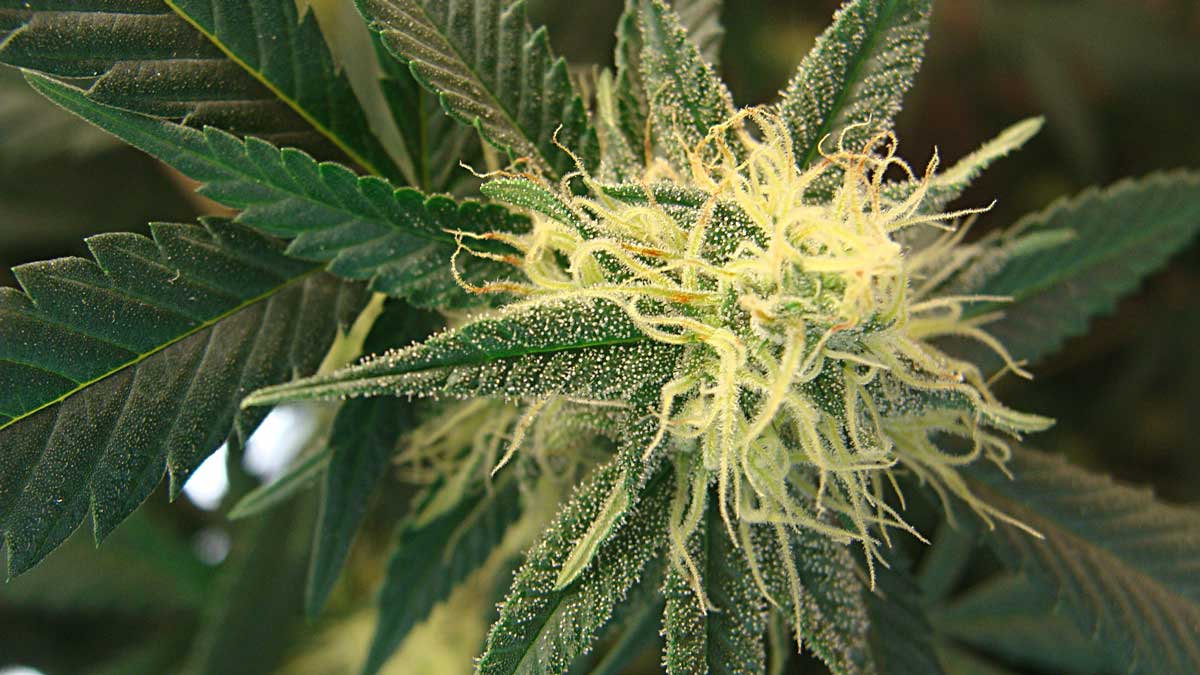
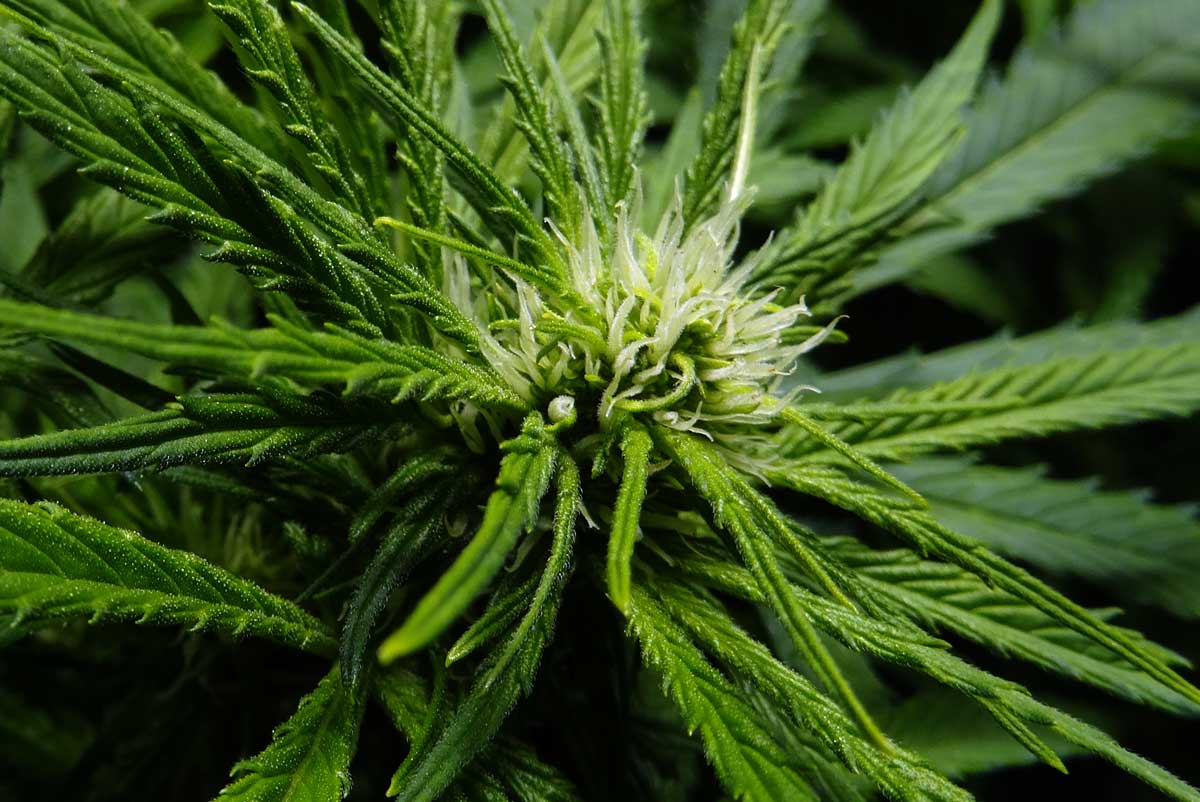
Here are the first sign of buds growing on a plant. They are often called pistils and look like white hairs at first.
The white hairs soon turn into puffballs. These are cannabis flowers. Yep, your buds are coming in!
Start giving flowering nutrients at this point, when you see buds look like white puffs (“budlets” as I think of them). Flowering nutrients are characterized by being low in N (Nitrogen) while being high in P (Phosphorus) and K (Potassium).
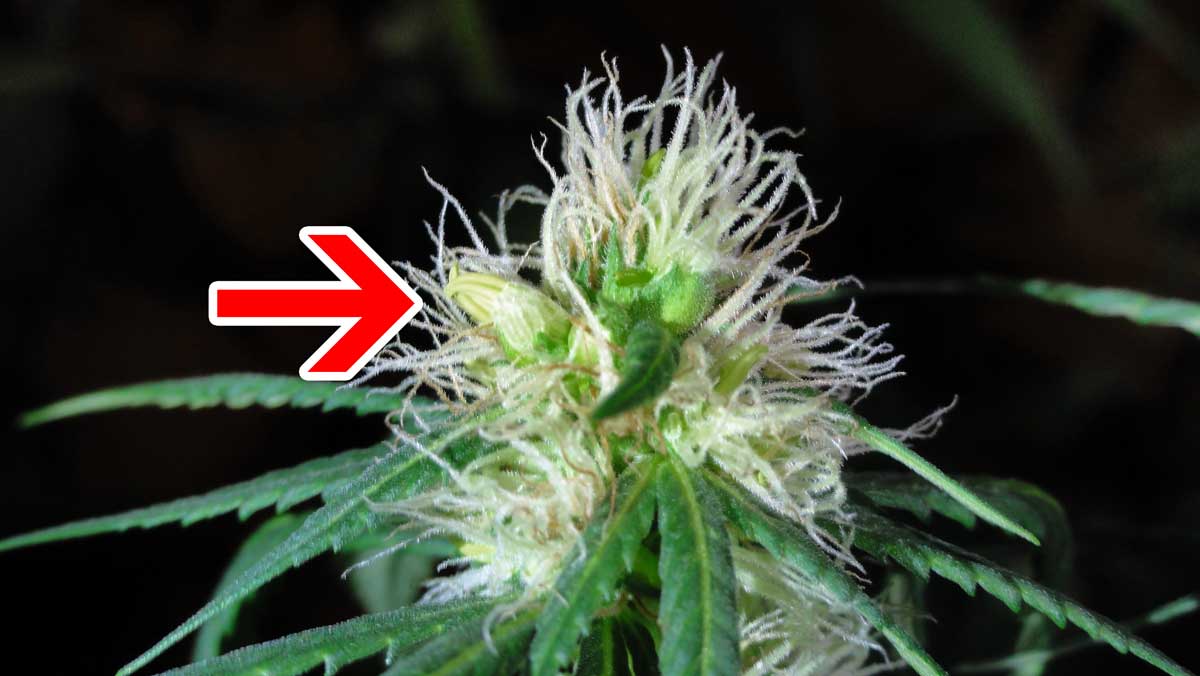
IMPORTANT! If you see male pollen sacs or “hermie” bananas where buds can be, you need to remove the plants or they may cause your other buds to get seeds. Learn why you need to get rid of male plants and hermies.
Throw away any cannabis plant that grows pollen sacs where buds should be. This is a male plant. Male flowers look like bunches of grapes and won’t turn into buds.
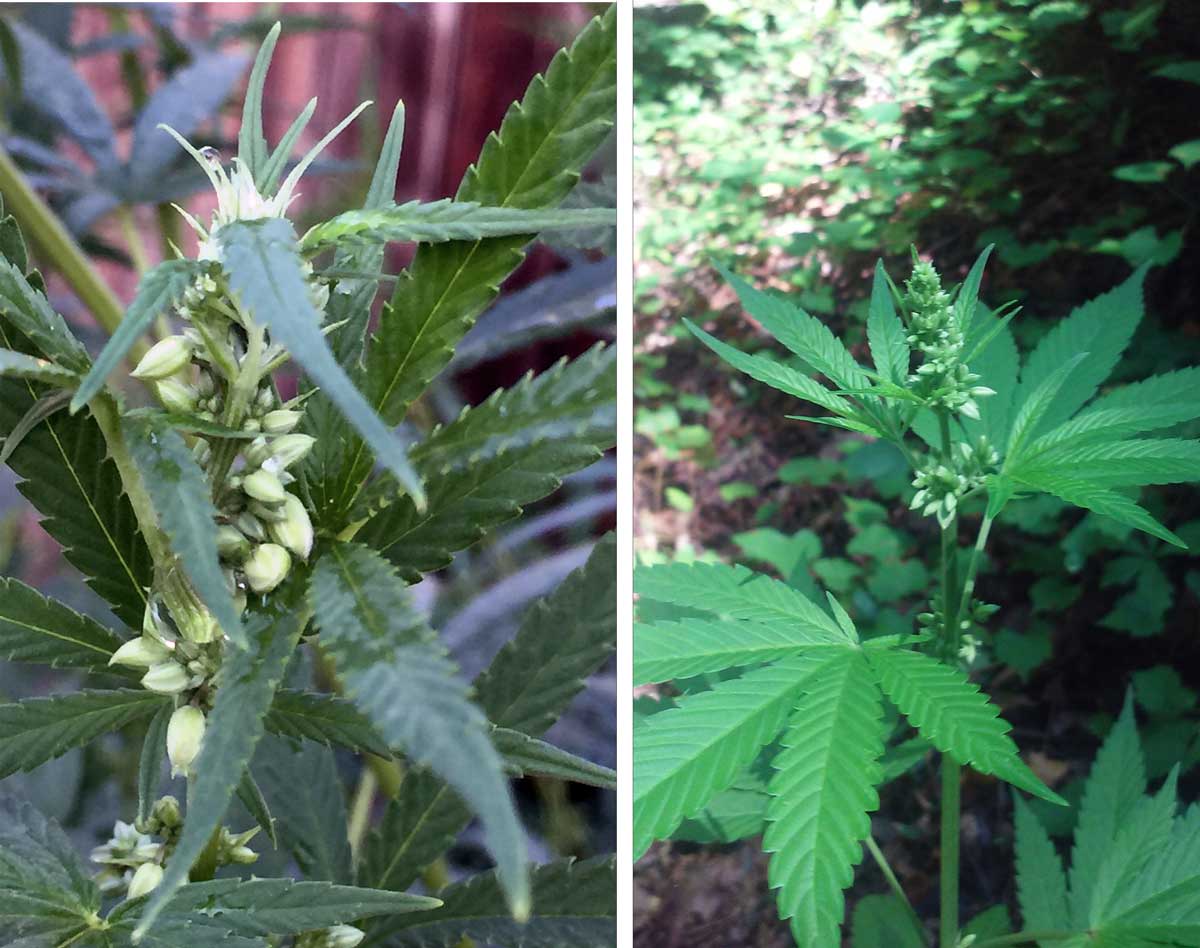
This picture shows a hermie banana, which looks like a yellow growth on your buds. These can cause seedy buds just like male plants, so any plants with bananas should be removed right away. What causes bananas on cannabis buds?
Inspect plants regularly for any symptoms or signs of unhealthy or unusual growth.
As cannabis buds form, check plants regularly to make sure all the leaves look green and healthy. React quickly to any symptoms on the leaves like nutrient deficiencies, holes, or bites.
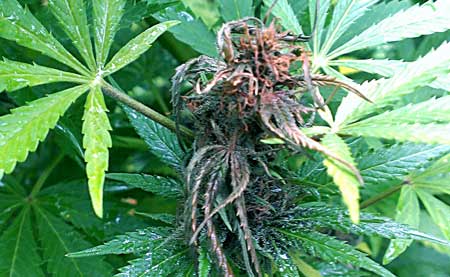
Watch out for bud rot! If you see random buds dying on your plants, especially if it’s been wet or humid recently, investigate closer as it may be the buds are molding.
As you’re regularly inspecting your plants, don’t forgot to take a moment to admire how beautiful your plants are!
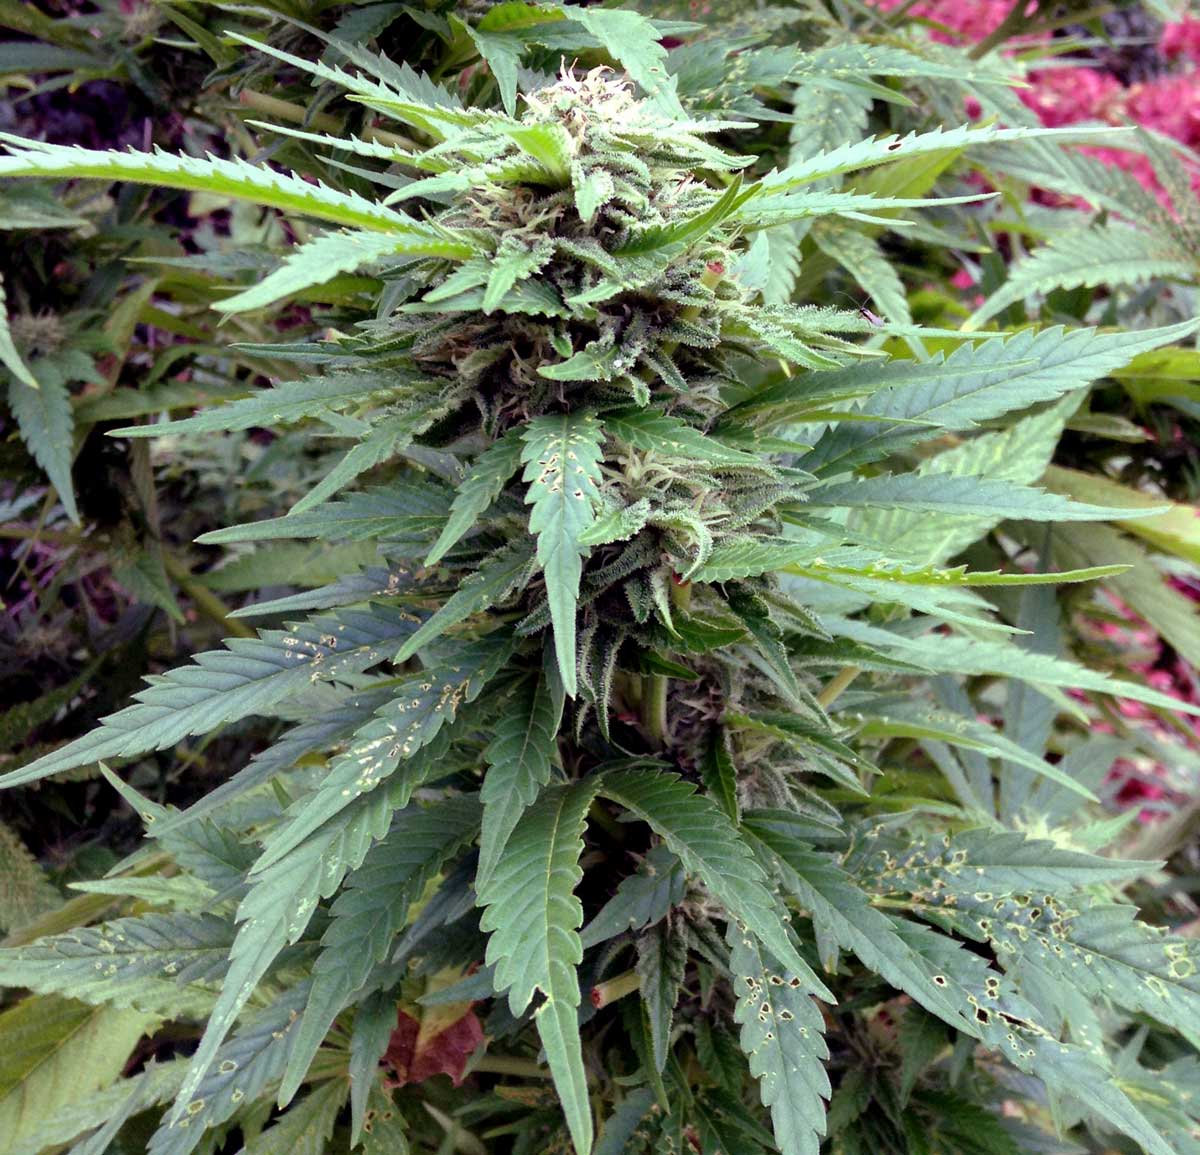
This cannabis plant shows what you can accomplish with amazing plant care, a ton of light, and getting flowering nutrients every watering.
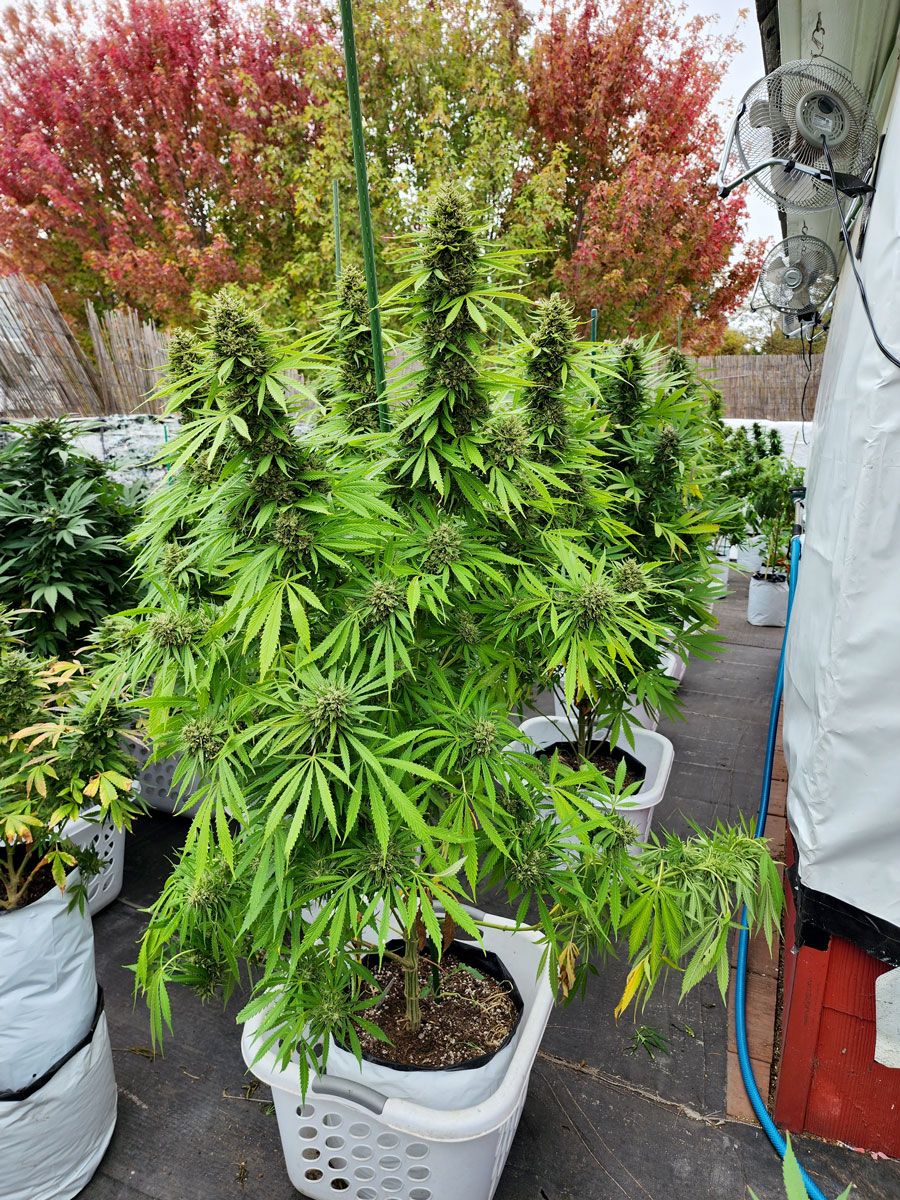
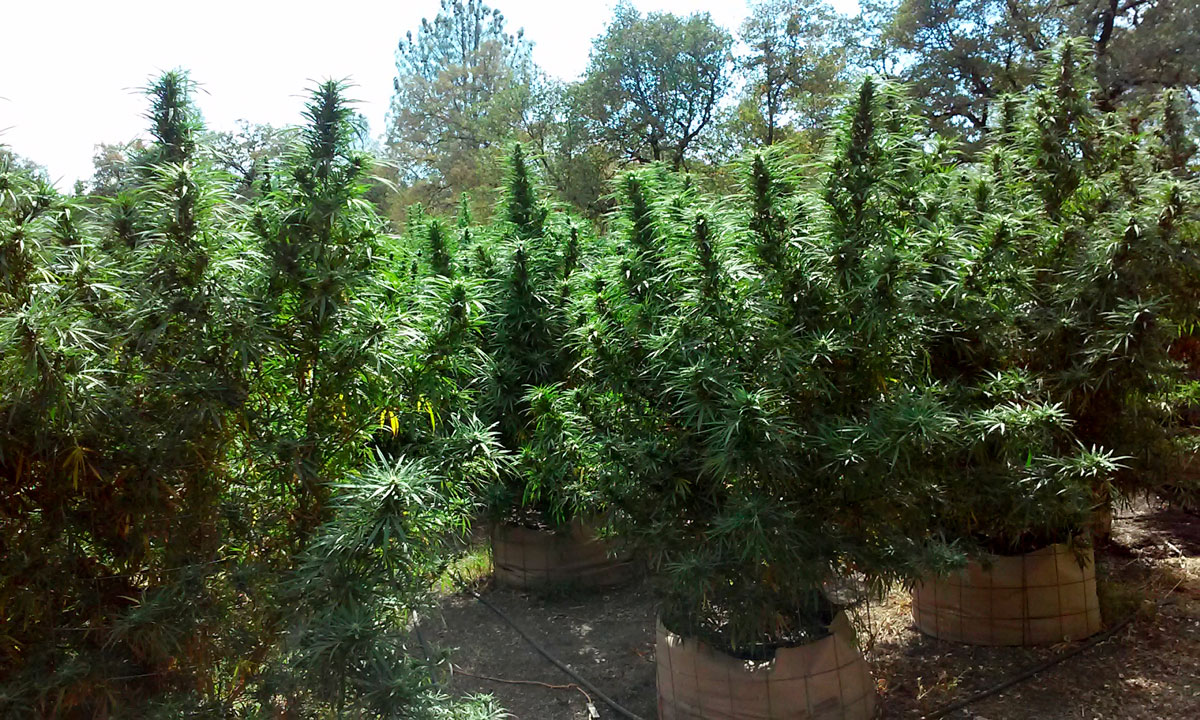
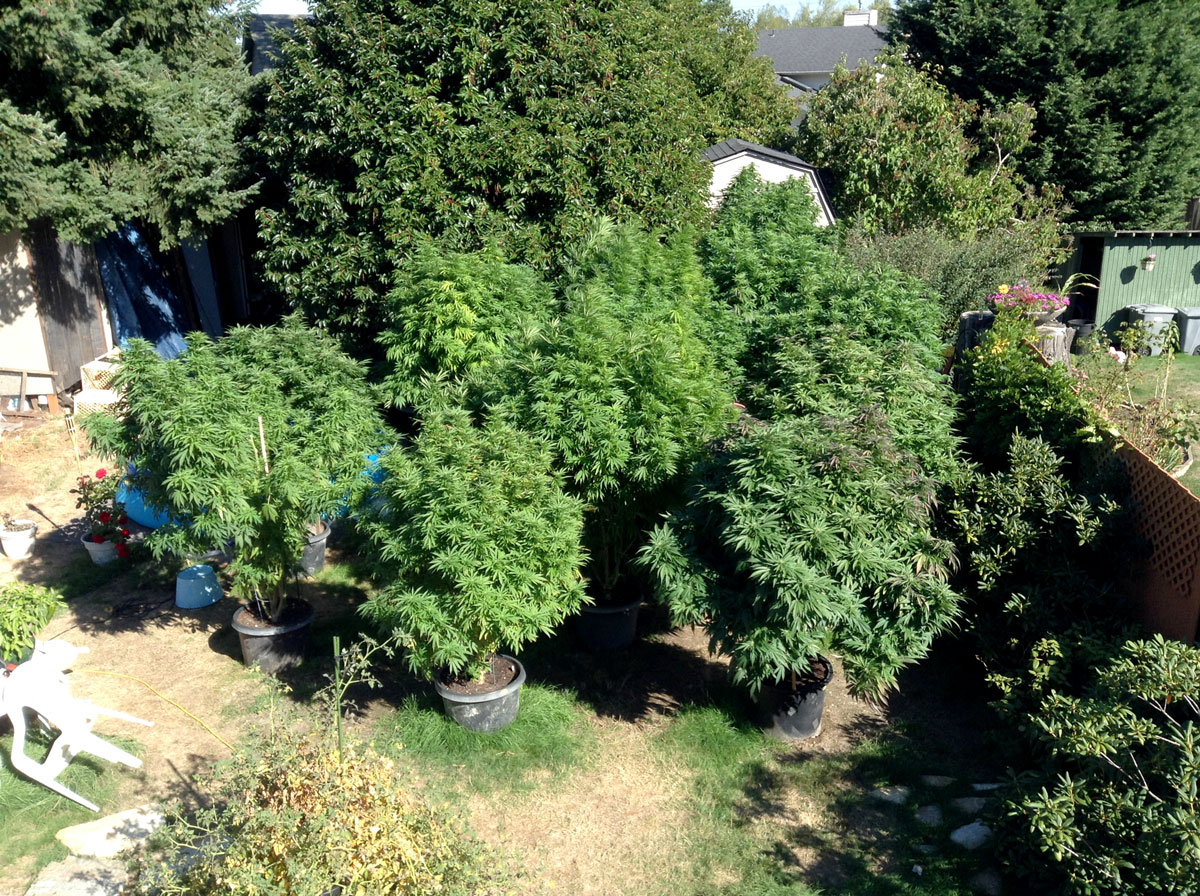
If you plant cannabis in the ground with fertile soil and give it a ton of light every day, you’ll end up with monsters!
Smaller pots restricts the roots, which tends to keep plants smaller, on average.
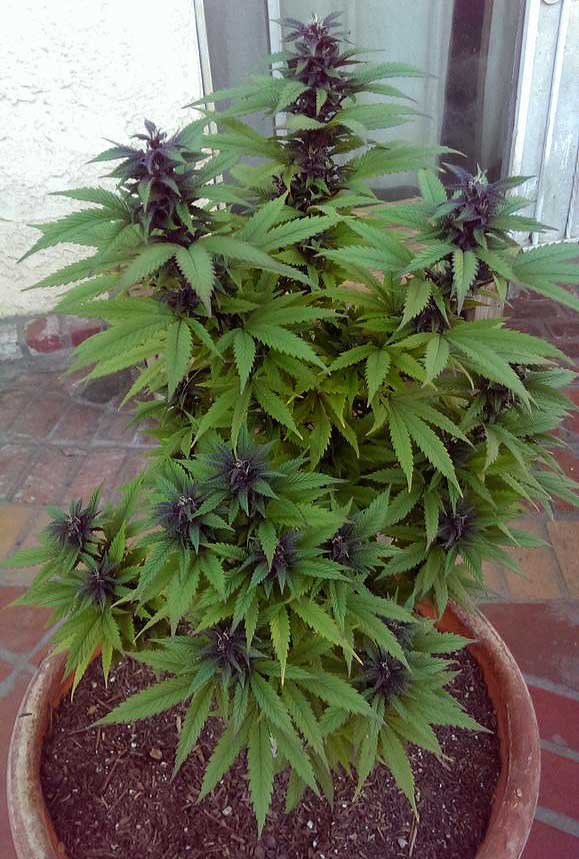
Some plants grow purple buds. Pretty!
Frisian Dew picture by hamburger
Step 7: Reap the Fruits – Harvest and Cure
Harvest by cutting down plants, drying the buds, and putting dried buds in jars.
When to Harvest Cannabis
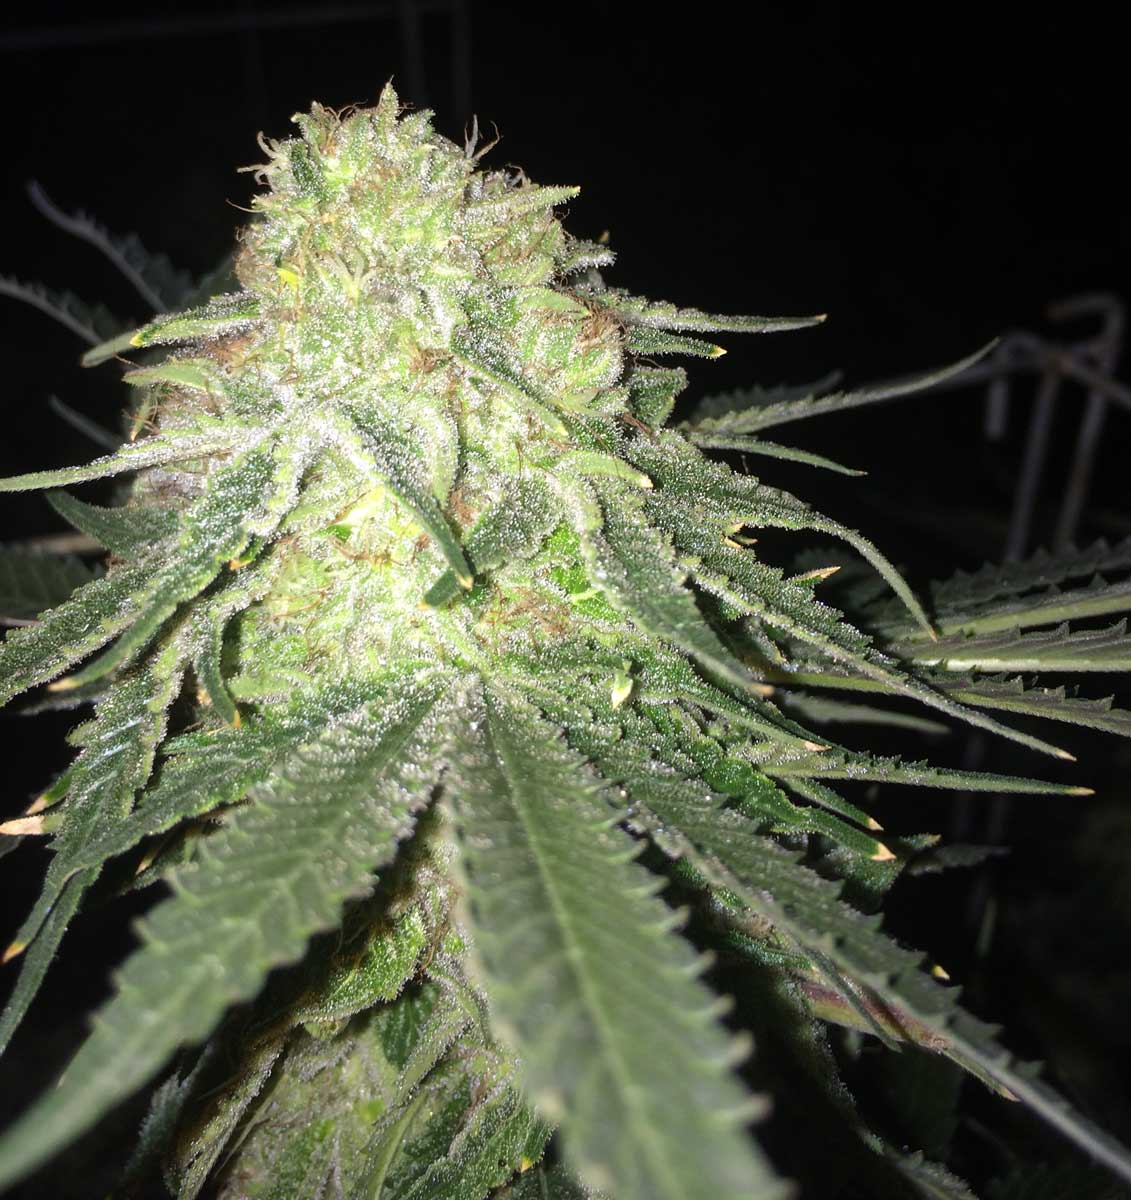
Harvest when all the white hairs on the buds have darkened and curled in. The buds should look solid. I’ve got some examples below, and check out more pictures of read-to-harvest outdoor cannabis buds.
Not Ready – This White Widow is not ready to harvest. Notice that all the hairs on the buds are still white and sticking out. This bud has about 4 weeks left before it’s ready to harvest.
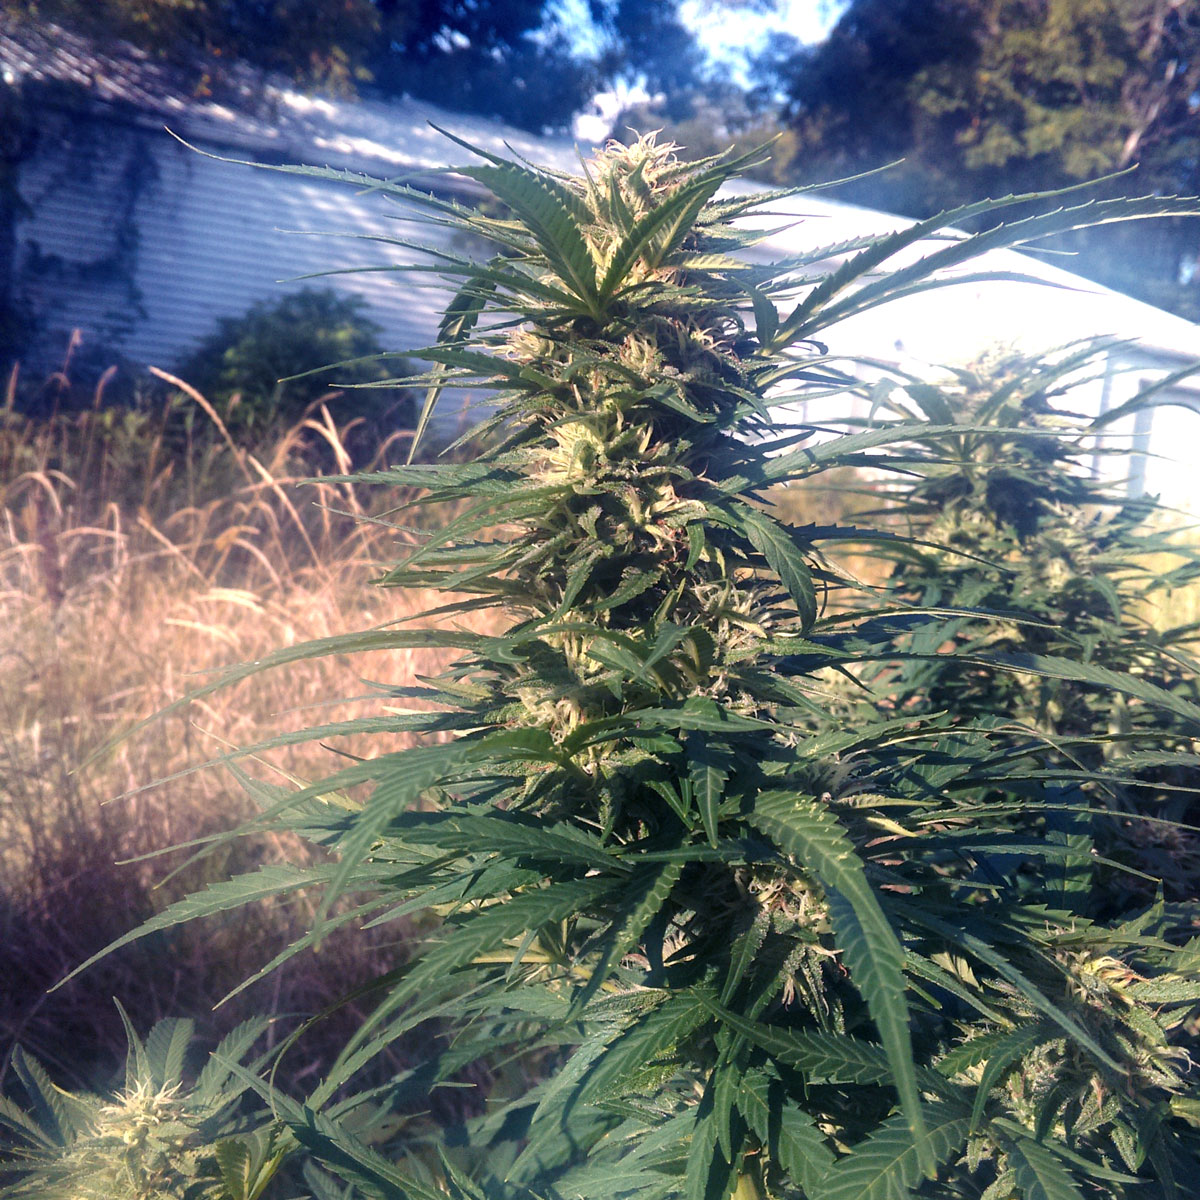
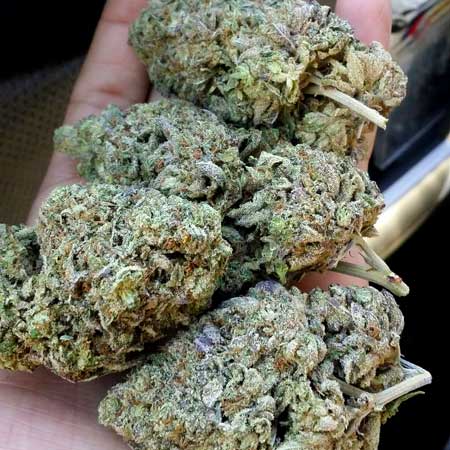
Ready to harvest – The following buds are all ready to harvest. Notice that the white hairs have darkened and curled in. Additionally, the buds look solid. See more pictures of ready-to-harvest outdoor cannabis buds.
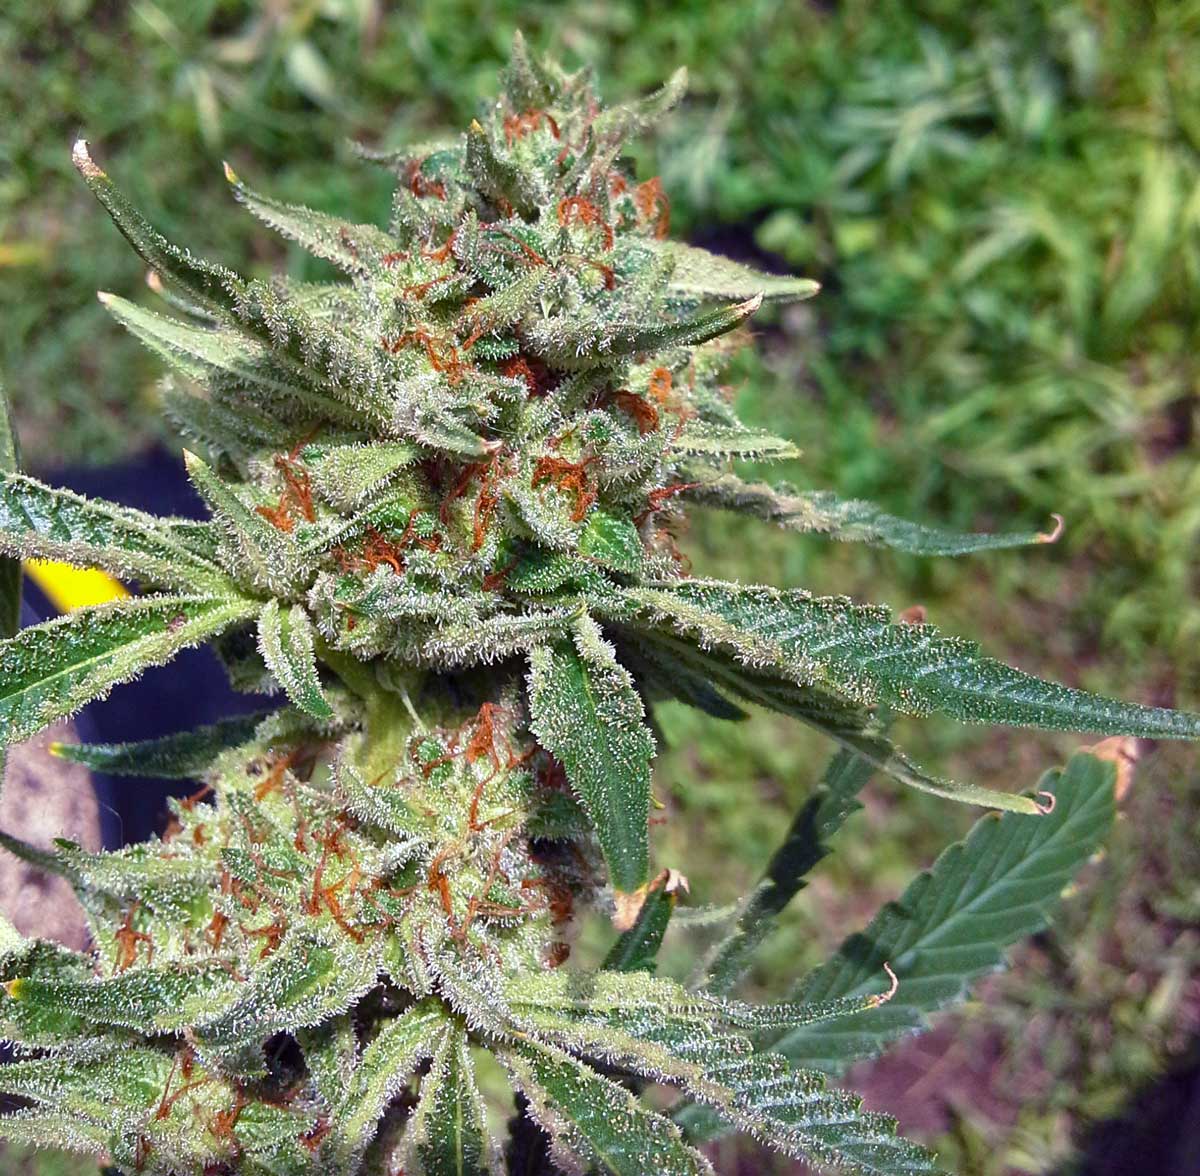
Solid buds with almost no white hairs – ready!
This outdoor cannabis bud is at the beginning of the harvest window as no white hairs are left. It’s normal for outdoor buds to be a bit more leafy than the same strain grown indoors.
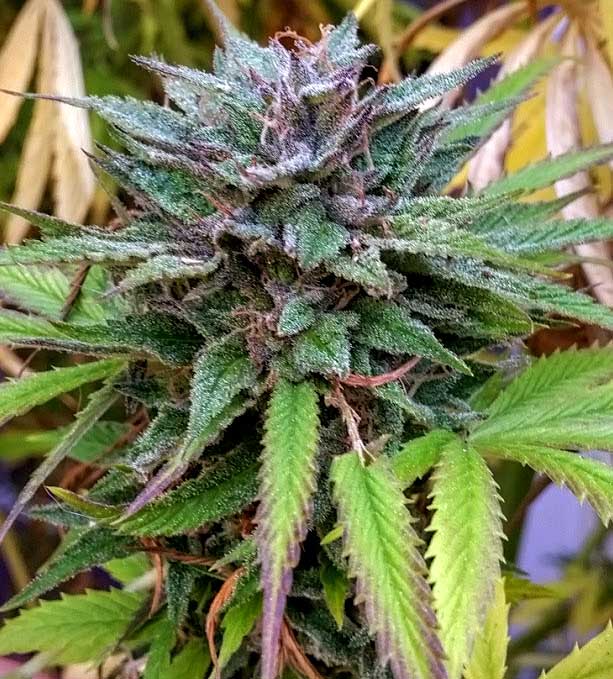
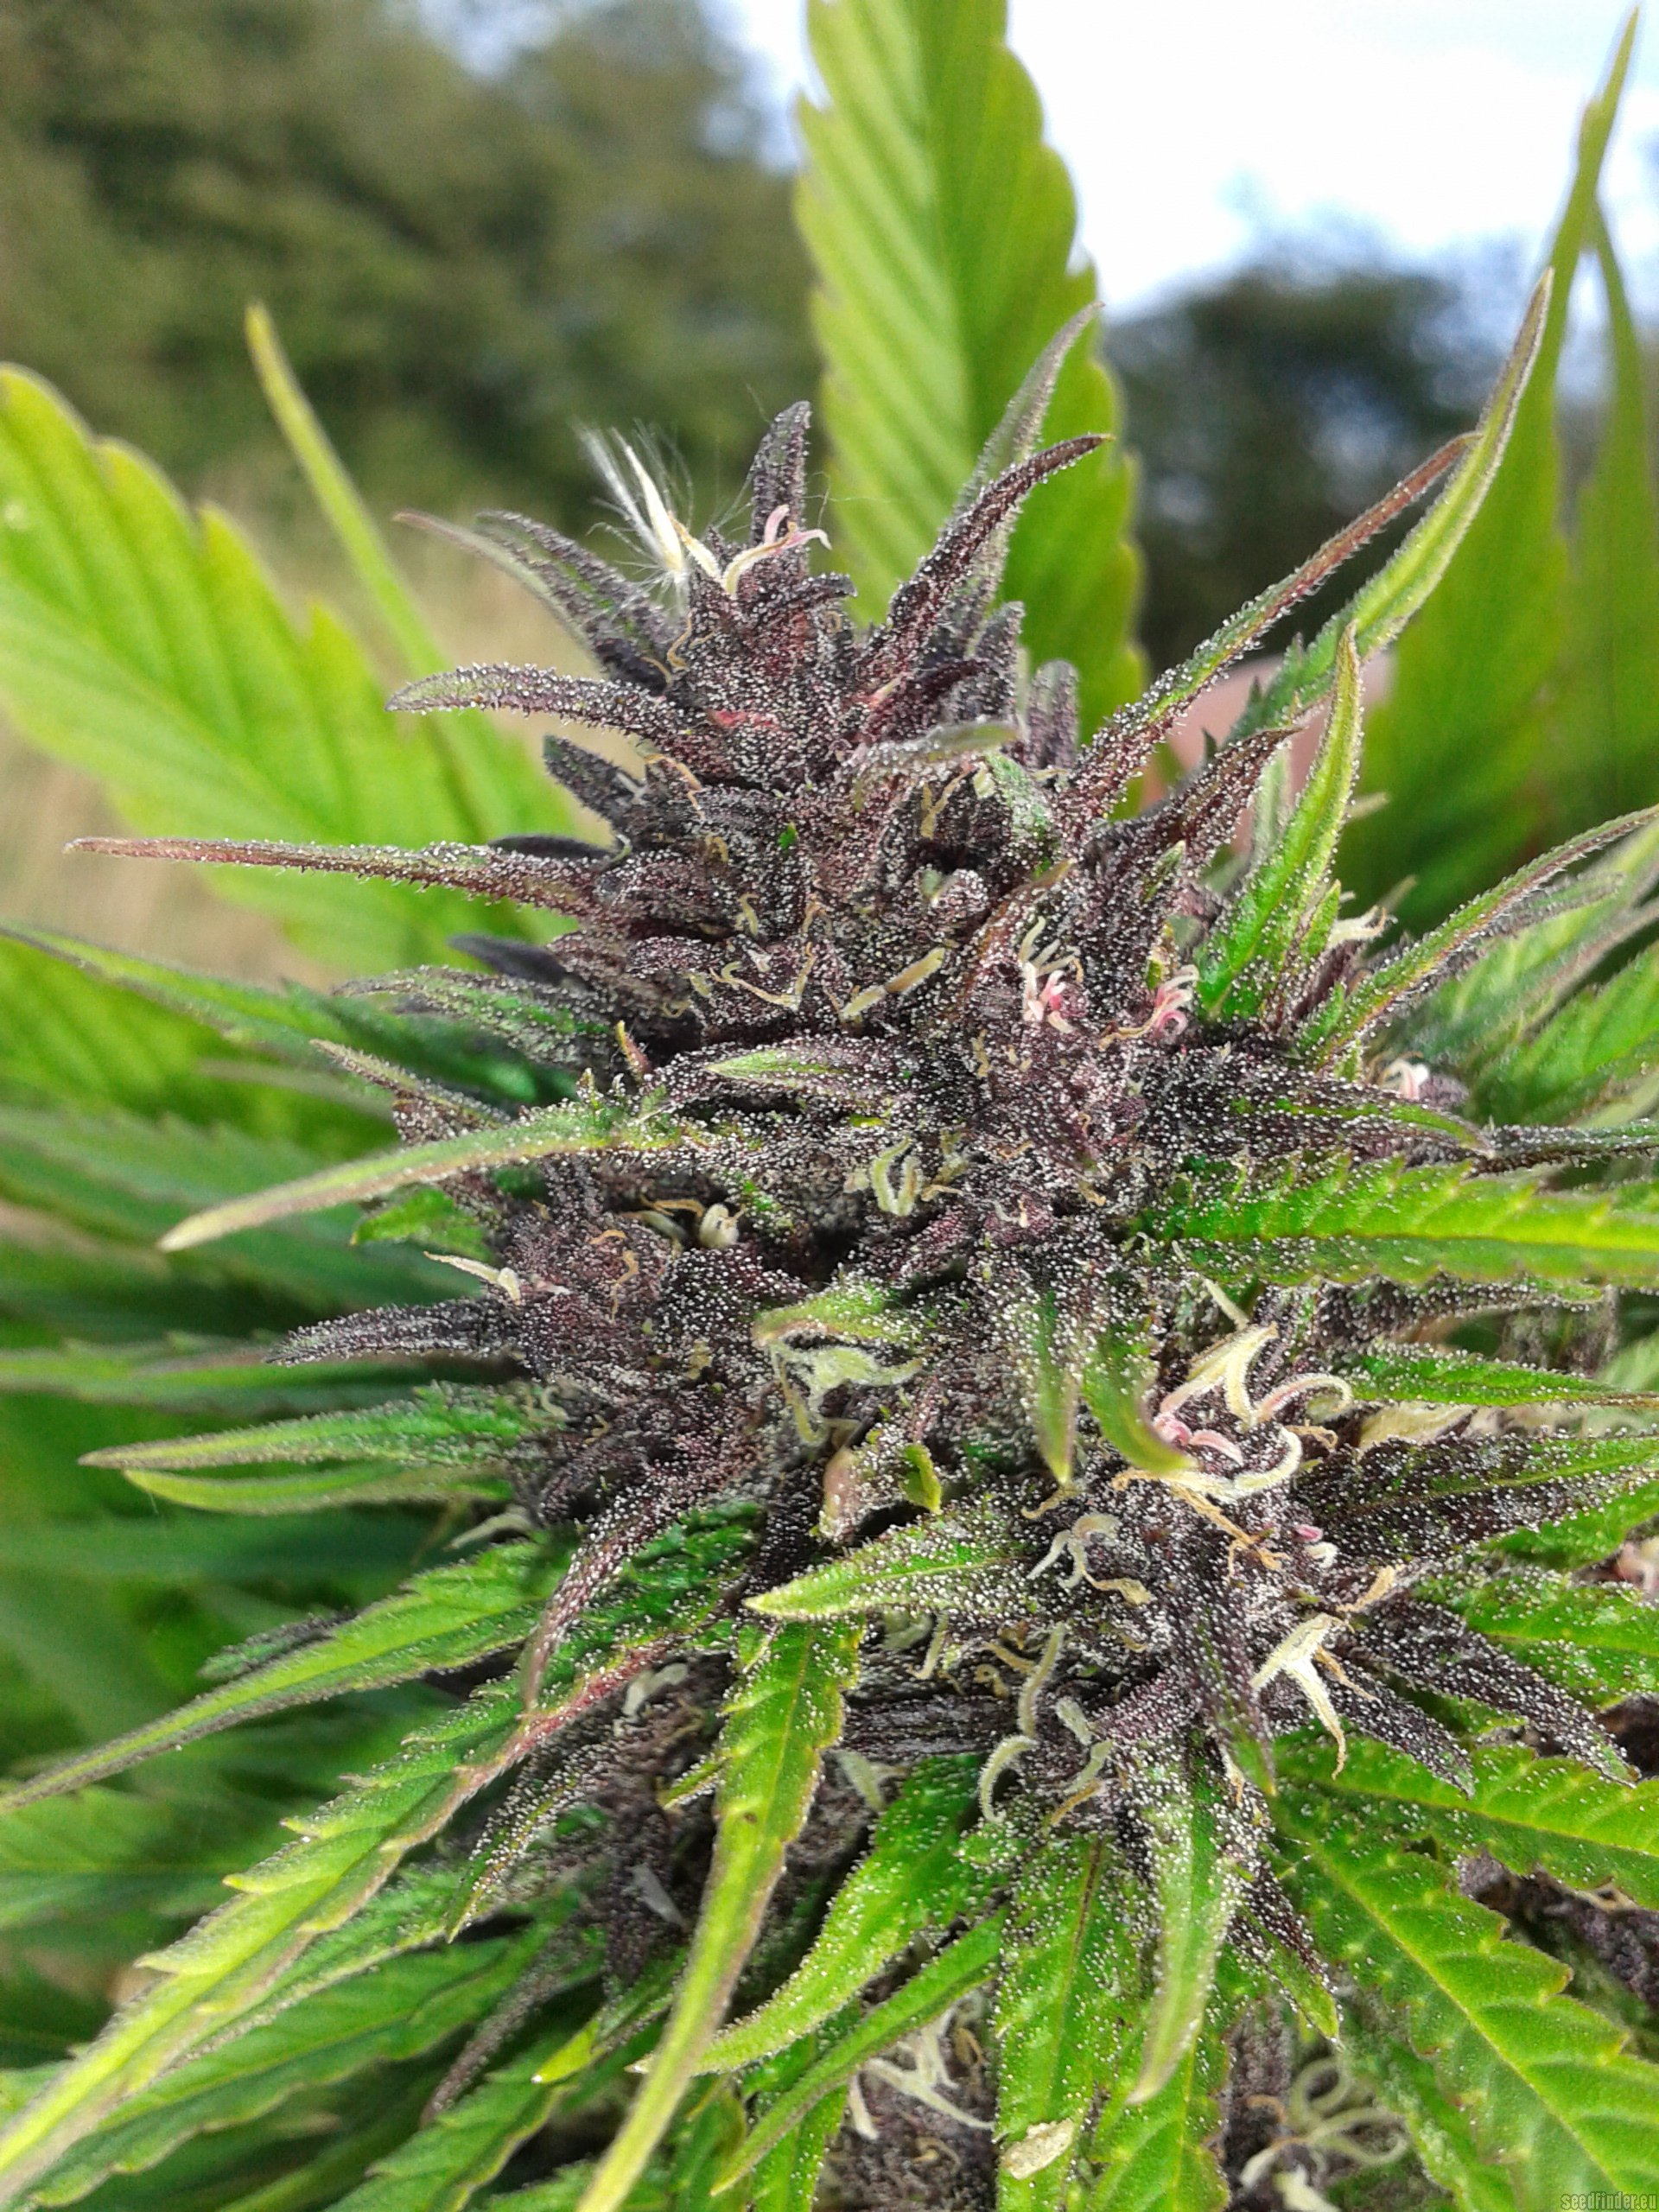
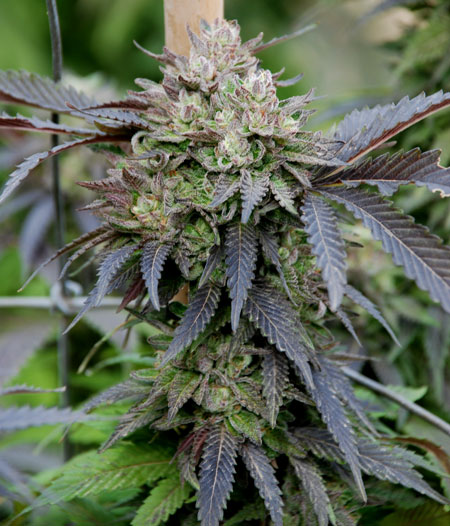
It’s easy to tell when no white hairs are left when the cannabis buds are bright purple!
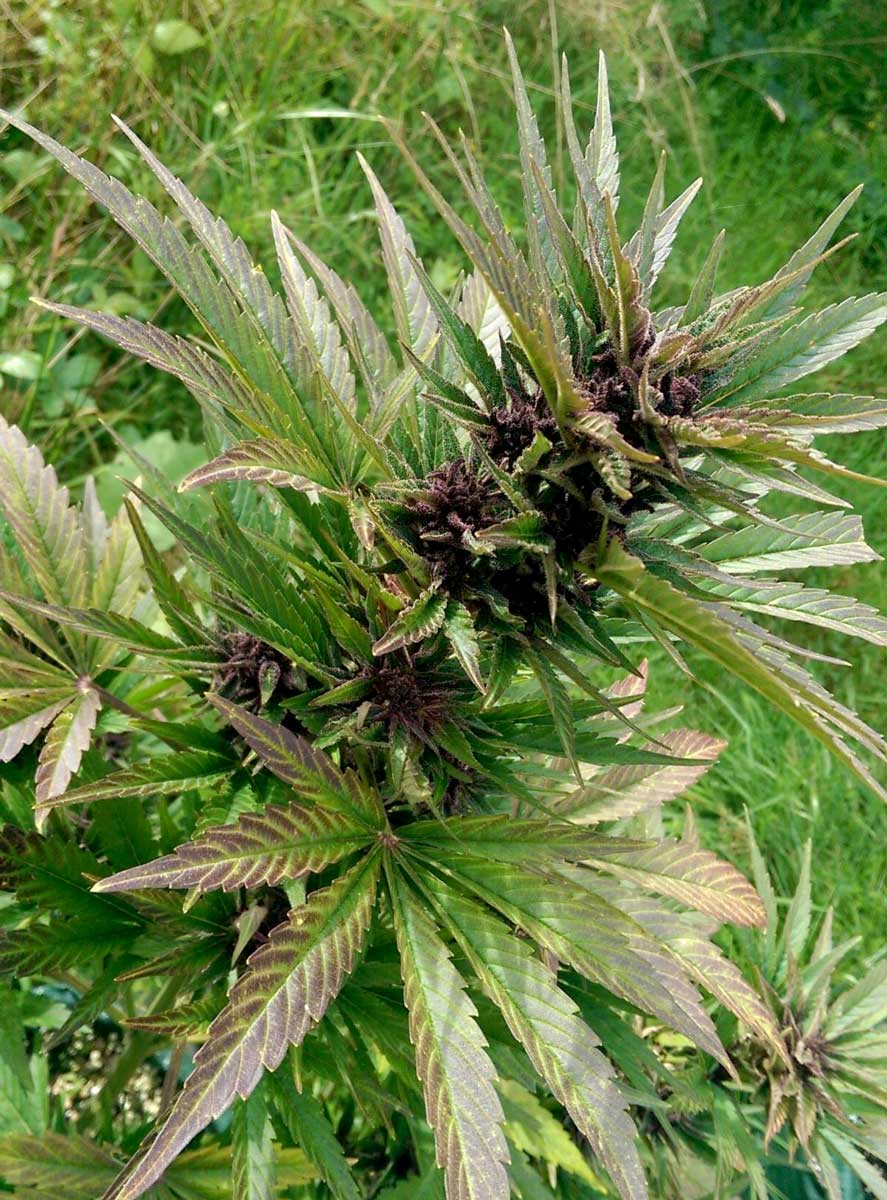
In this ready-to-harvest plant, the buds didn’t change color, but all the leaves turned purple. Some strains do this naturally, and it also often happens in response to big temperature fluctuations, especially hot days or cold nights.
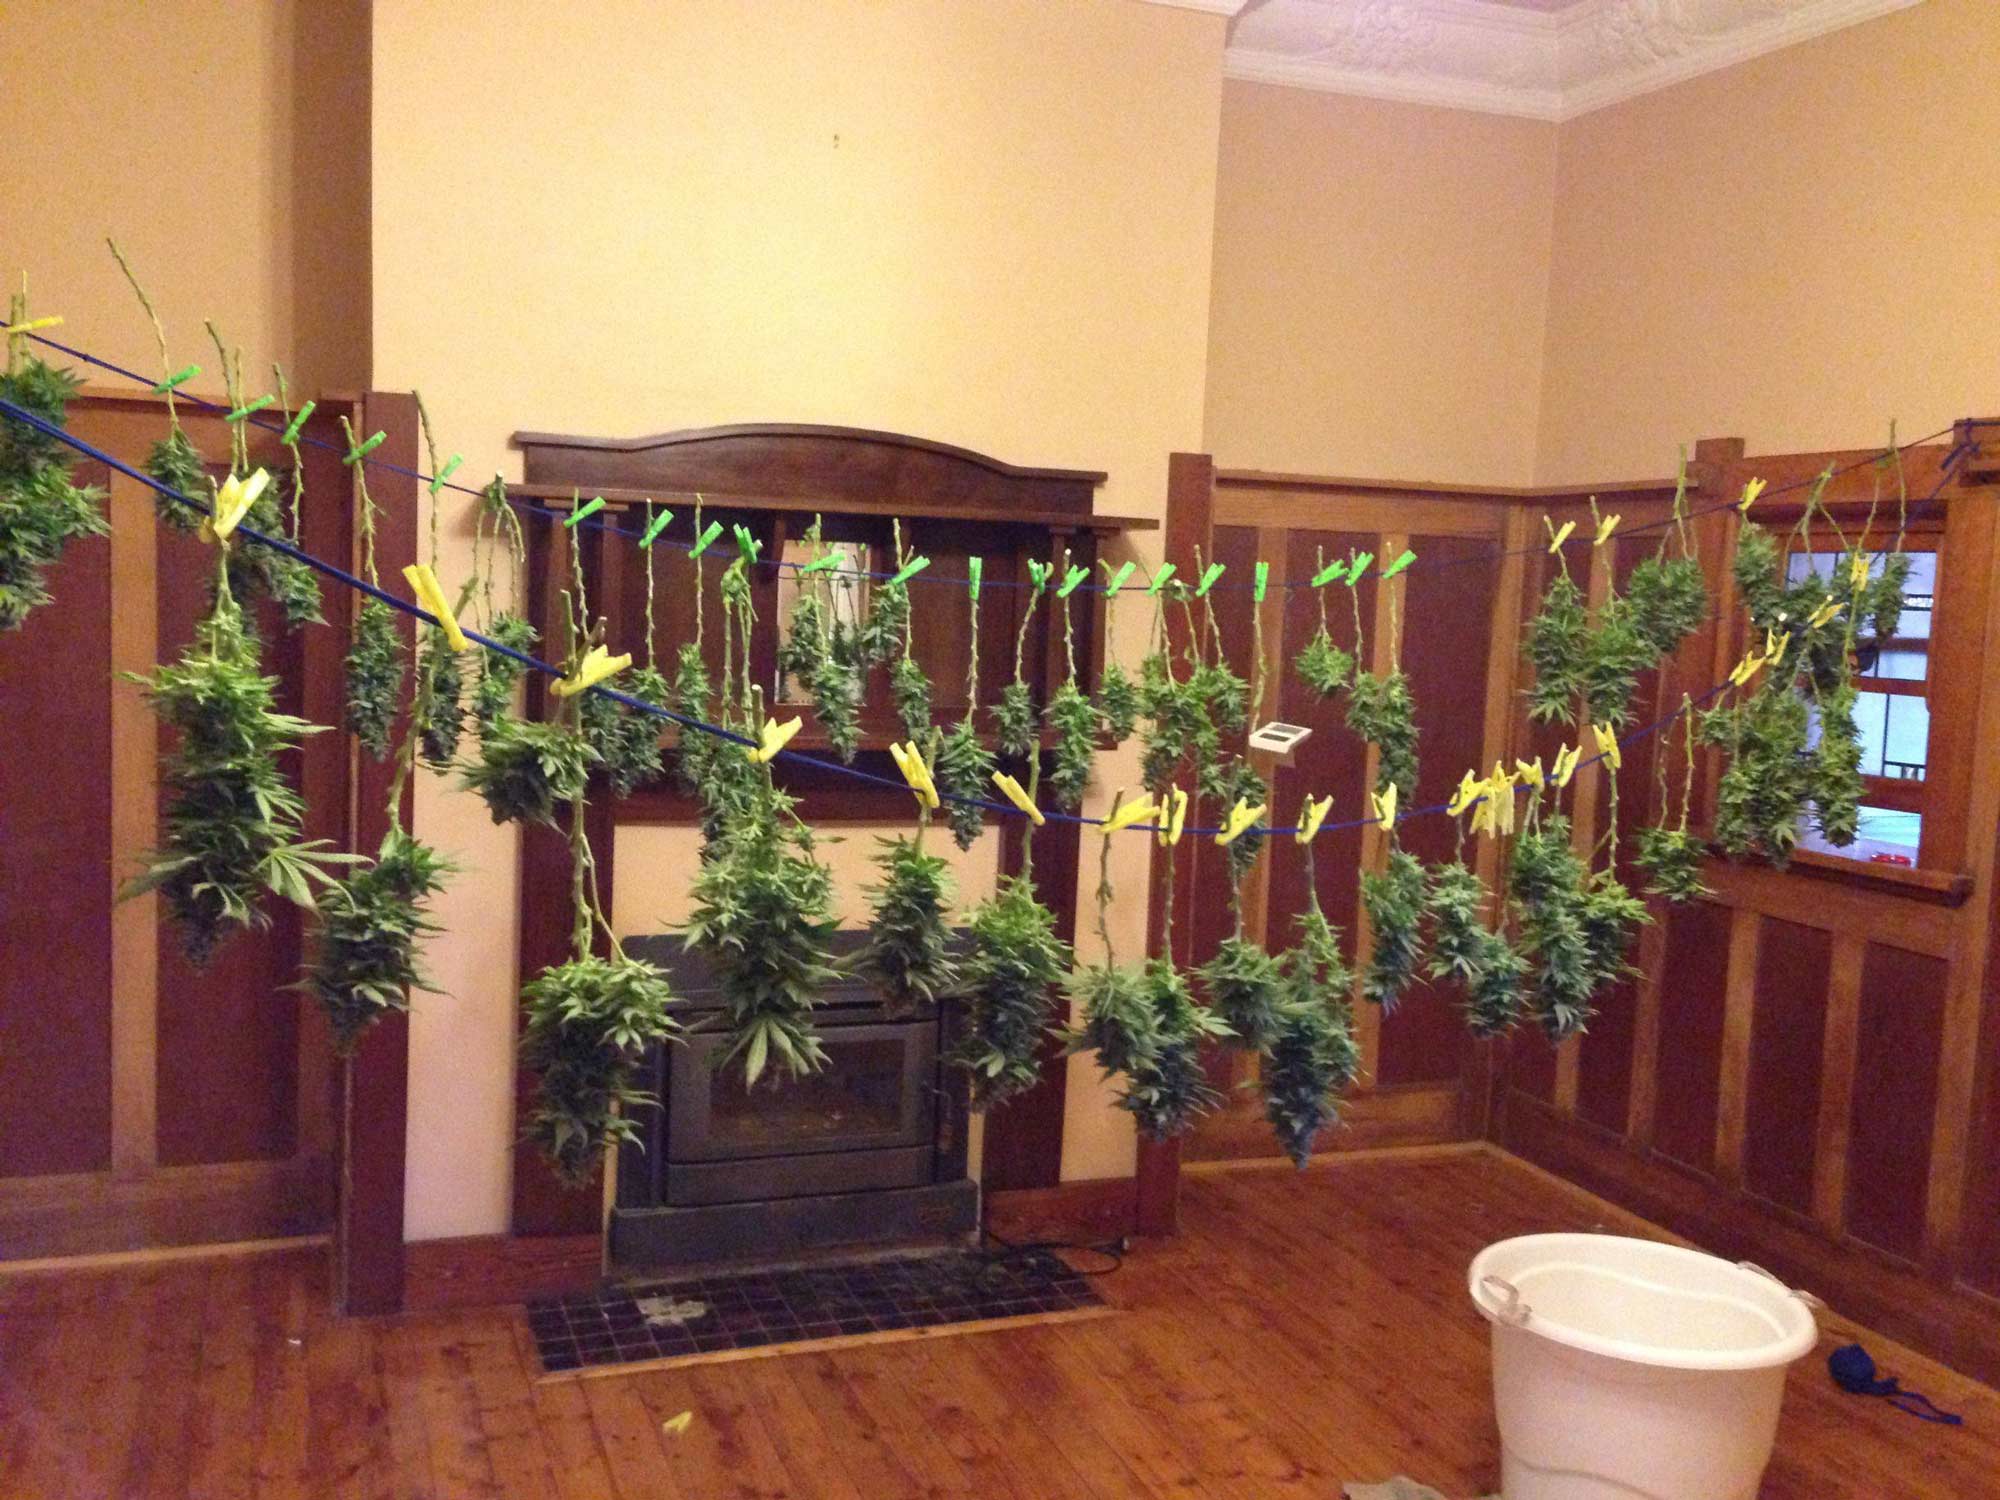
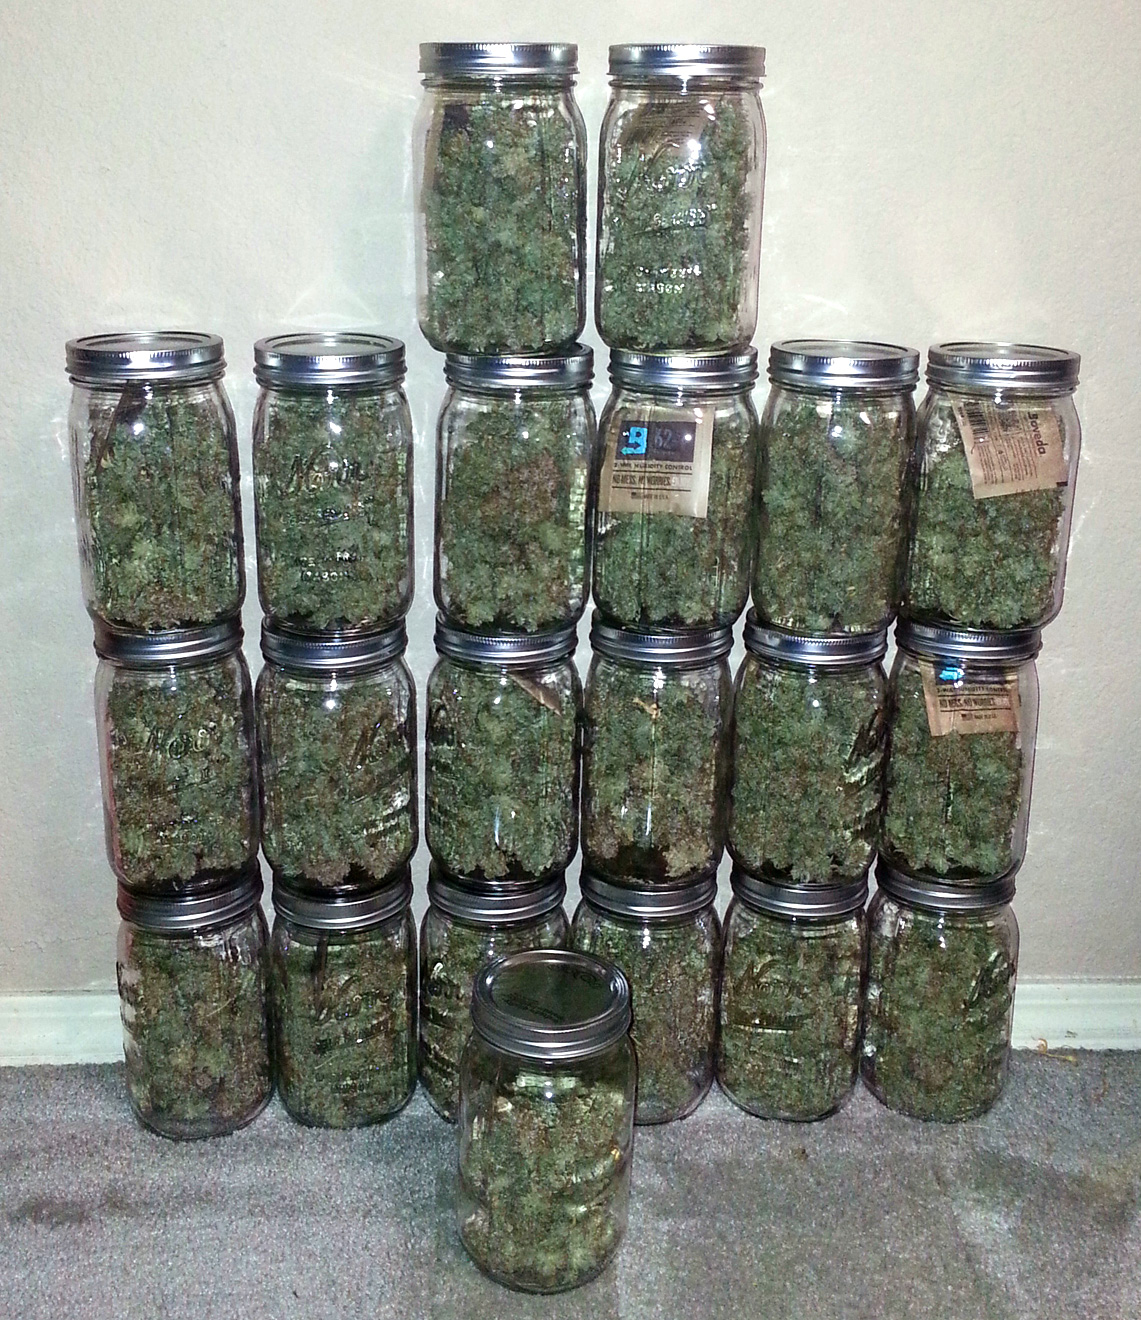
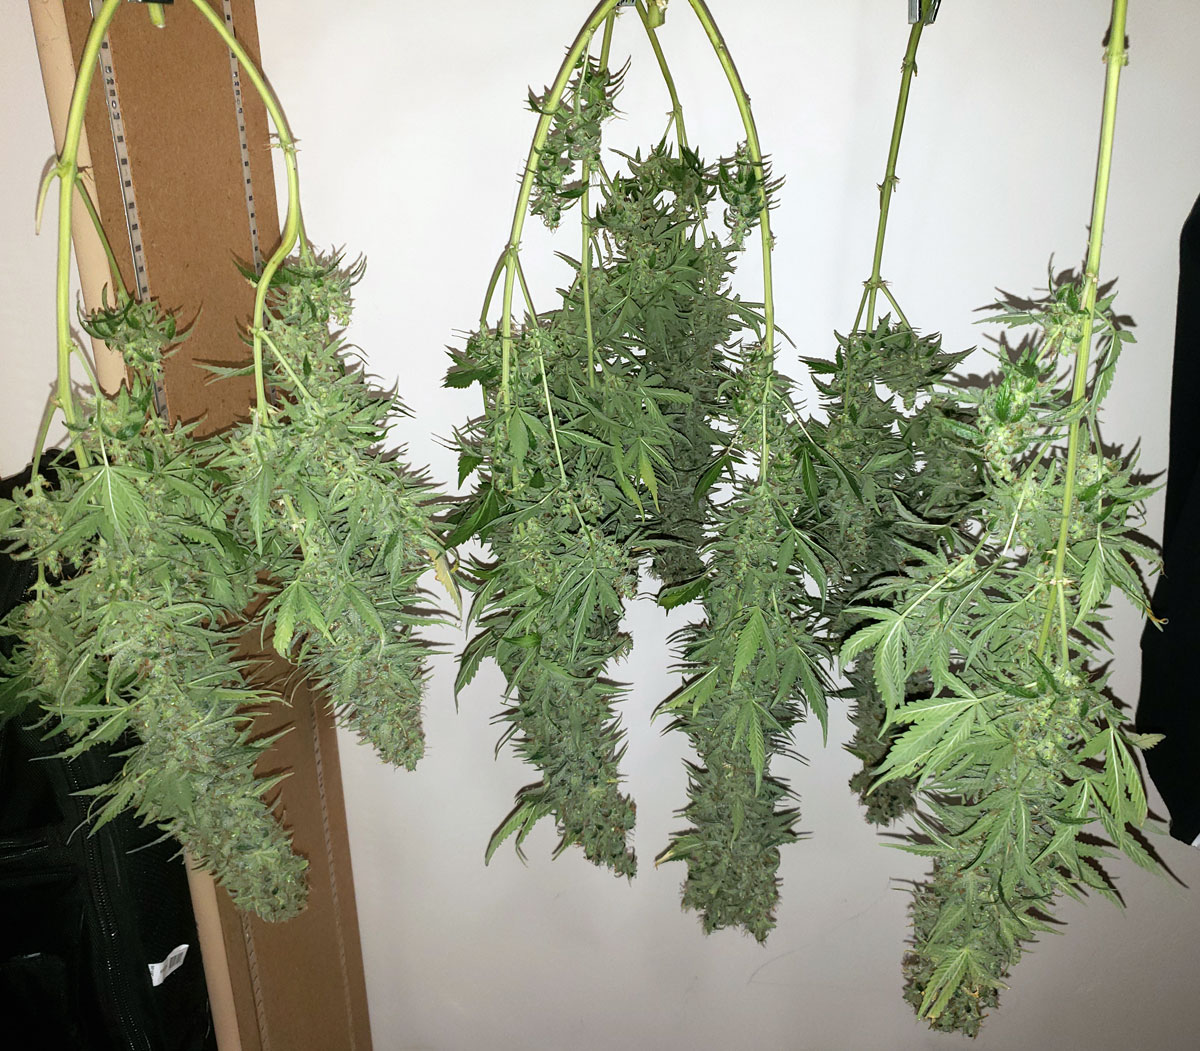
Cut down plants and dry the buds by hanging them upside down. Trim off all the leaves. Then put the buds in jars, so they “cure” and improve for 2+ weeks to further increase the bud quality.
Read the full cannabis drying & curing tutorial.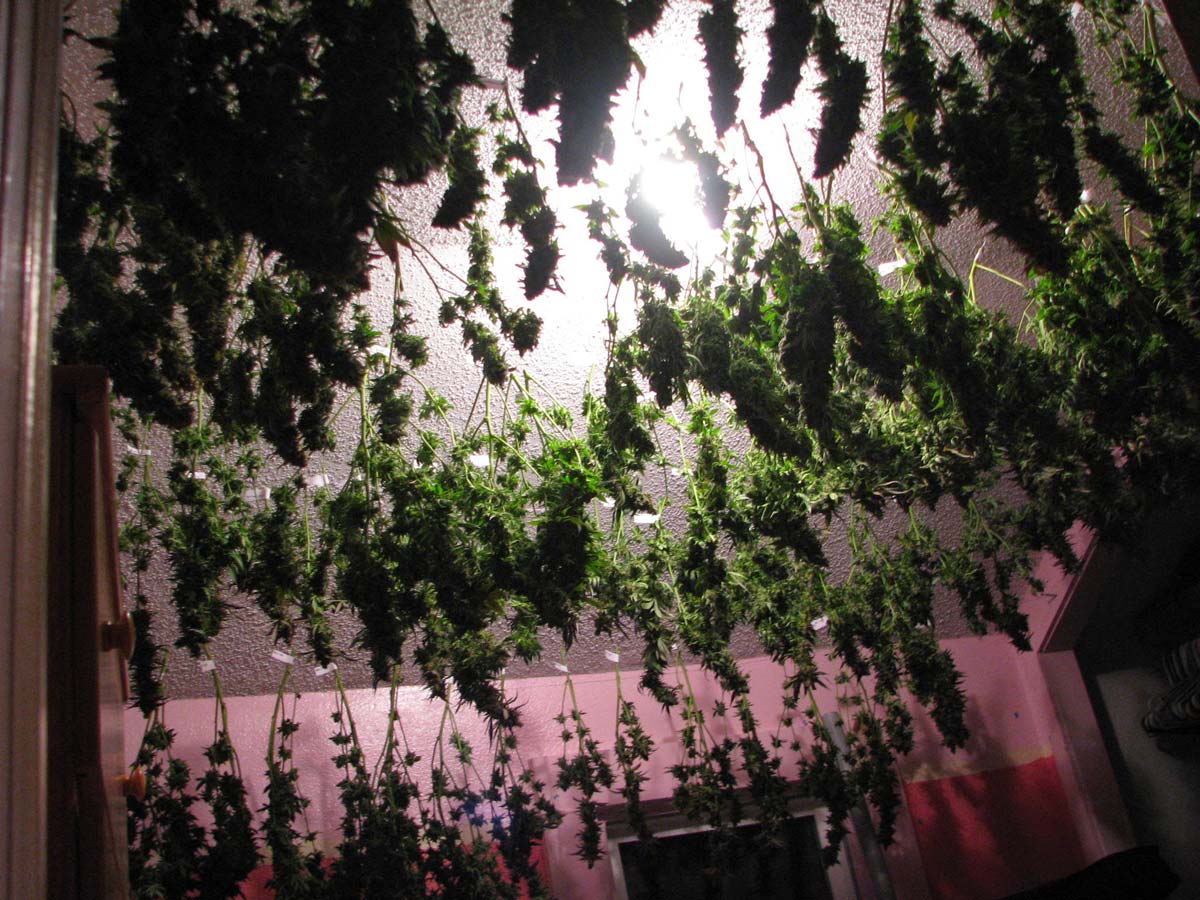
Cheat Sheet to Prevent the Most Common Outdoor Growing Problems
Remember these principles to prevent most problems growing cannabis outdoors:
How to Avoid Bugs Outdoors
- Keep area clean. Don’t leave piles of leave around. Keep everything trimmed and clear. If you have other plants in the grow area, don’t let them get infested with bugs.
- React quickly at the first sign of bugs or bites in the leaves. If your plant leaves start looking unhealthy with spots, you see bite marks, or you physically see bugs on your plants, don’t ignore it! Diagnose your plant using our plant doctor tool, or identify the pests via this page. You can treat most bugs successfully as long as you spot it quickly and don’t ignore it until it gets worse.
- Learn about IPM (Integrated Pest Management) – Essentially, these are steps you can take to make your grow space less hospitable to pests, and a paradise for the types of bug predators that tend to eat common cannabis pests.
- Take time to learn about your local pests. See if your local gardening center offers any information or resources on common pests where you live. Often locals have some of the best insight.
- Don’t forget to spray plants with a safe insecticide right before they start flowering, or right after you see the first signs of buds. Especially a BT spray for caterpillars, and some kind of horticultural oil or horticultural soap to deter most other pests. It will save you so many headaches later from horrible pests that are hard to treat after buds start forming.
- Consider row covers if you struggle with insects that are eating your plants, such as caterpillars and grasshoppers.

How to Avoid Other Common Problems That Hurt Outdoor Yields or Bud Quality
- Don’t put out plants too early. Wait until 1-2 months after the Spring Equinox (when days are 12 hours and nights are 12 hours) to prevent plants from flowering immediately due to the long 12-hour nights. The reason you don’t want plants to flower early is they will start re-vegging as soon as the days start getting longer. When photoperiod cannabis plants go outside, day length should be about 13.5 hours (and nights about 10.5 hours long), whenever that is in the Spring where you live. In addition to making sure nights are short enough, the temperature matters too. When cannabis plants go outside, it should also be safely after the last frost, because freezing temperatures or frost can kill young cannabis plants. In the Northern hemisphere, the earliest time to put cannabis plants outside is typically late April or early May. In the Southern hemisphere, the time to put plants outside is late October or Early November.
- React quickly to nutrient deficiencies. If your plant leaves start looking unhealthy with spots or otherwise don’t look green healthy, react to it immediately! Diagnose your plant using our plant doctor tool if you’re not sure what’s going on. You can fix almost any problem as long as you don’t ignore it until it gets worse.
- Watch out for male plants and hermies. Watch your plants closely when buds start forming to make sure they all look like little white puffballs, without any signs of male pollen sacs or hermie bananas.This will maximize the amount of good buds you produce, especially by reducing the chance of harvesting seedy buds.
- Pay attention to the weather and try to protect plants from extreme heat or rain. Shake off the plants if there is rain or dew. Consider harvesting early if plants are close to harvest and the weather looks rainy or cold for the next few weeks.
- Know the signs of bud rot, such as random yellow/brown/red/purple or dying leaves that appear overnight on the buds, especially if the symptoms are in patches instead of affecting buds evenly. Also just make sure to just overall watch the buds for signs of healthy development. Remember, if buds or leaves look funny, or very different from what you see in pictures, oftentimes it’s a sign of something wrong. Take a little time to research and see what other outdoor growers say on the symptoms you’re seeing.
If plants get put out too early, they do something known as re-vegging (pictured here), which will stunt your plant’s growth.
Conclusion: The Rewarding Journey of Outdoor Cannabis Cultivation
If you’ve made it this far, you already have the knowledge you need to start growing weed outdoors and achieve a good harvest. The resources on GrowWeedEasy.com listed below can help ensure you stay on track, and help you deal with any issues you encounter.
Are you ready to turn your outdoor space into a thriving cannabis garden? The perfect time to start is now!
More helpful outdoor growing resources:
Getting Good Seeds for Outdoors
- Where to Buy Cannabis Seeds Safely Online
- Cold-Resistant Cannabis Strains
- Heat-Resistant Cannabis Strains
- Best Outdoor Autoflowering Strains for 2024
Dealing with Plant Problems Outdoors
- How to Deal with Heat and Humidity Outdoors
- Prevent Outdoor Cannabis Heat Stress
- How to Prevent Bugs Outdoors with IPM (Integrated Pest Management)
- Complete Guide to Cannabis Bugs, Mold, and Pests
- Cannabis Plant Doctor: Diagnose Your Symptoms
Outdoor Growing: Additional Tutorials
- Stealth Ideas for Growing Weed Outdoors
- Is it Time to Harvest My Outdoor Cannabis Plants?
- Outdoor Cannabis Growing Basics by LuckyAcres