by Nebula Haze
What is an automatic watering system?
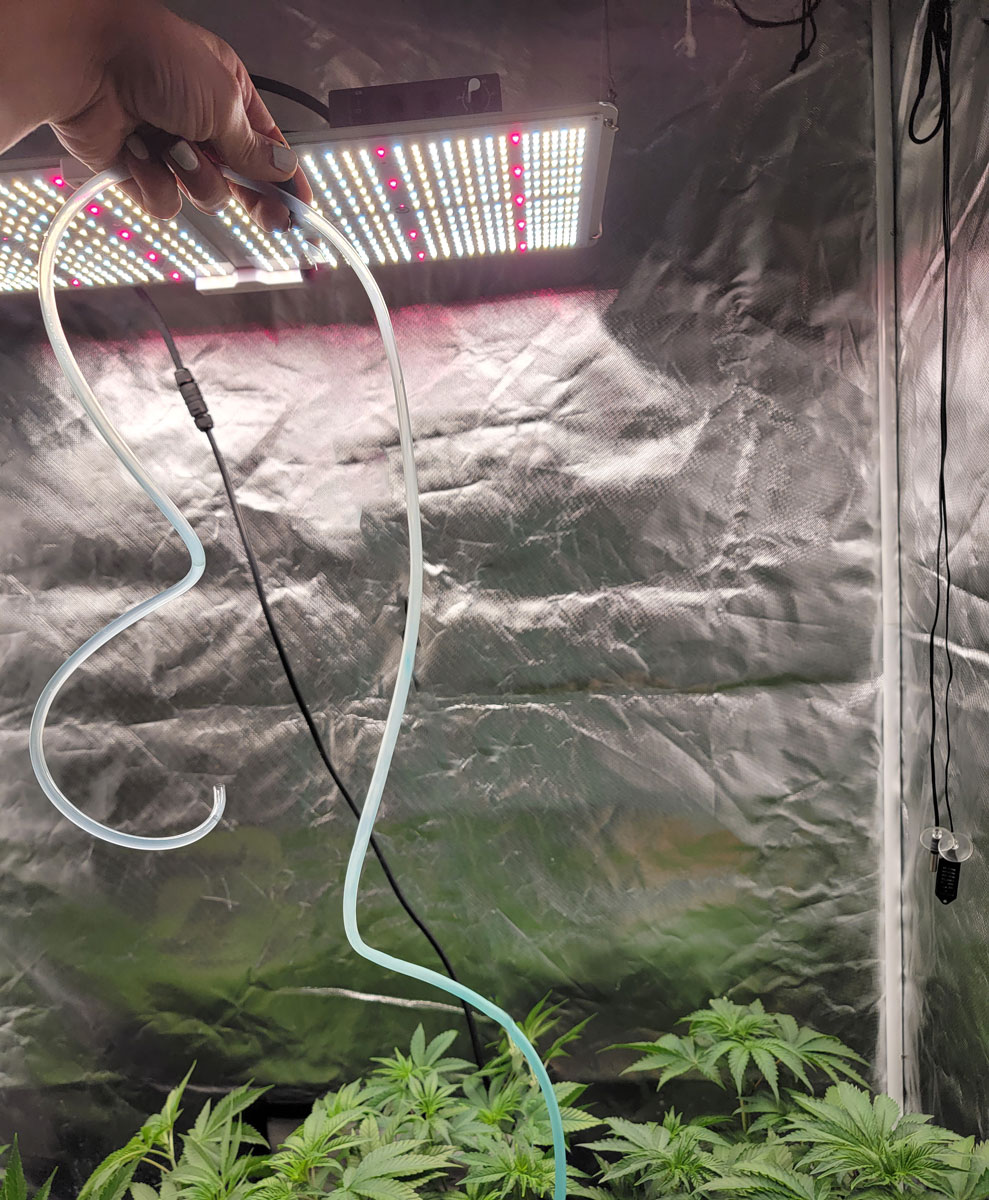
Do you want to “auto water” your cannabis plants? An automatic watering system for your cannabis plants is essentially any setup that delivers water to your plants without you having to do it manually. There are essentially two main ways to accomplish automated water (this article goes over both). One is using a gravity-fed system with clay stakes, and the other, which I’ll be going over today, is an automatic drip irrigation system. Essentially you set up a water pump to automatically give water to your plant roots on a timer. As a result, you can deliver the exact desired amount of water to your cannabis roots for a week or longer without needing any input from you.
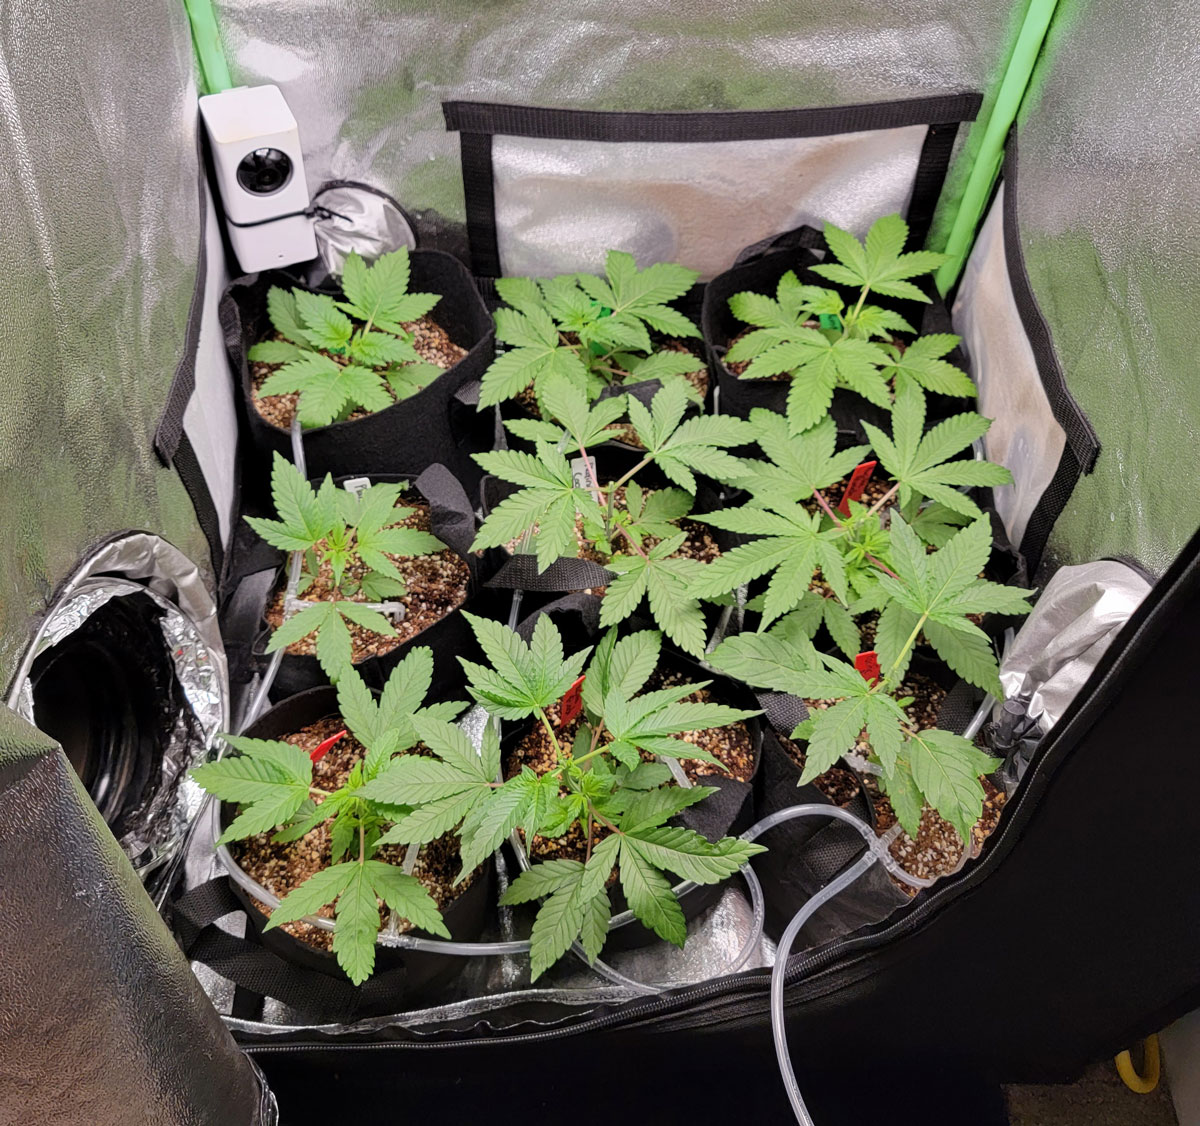
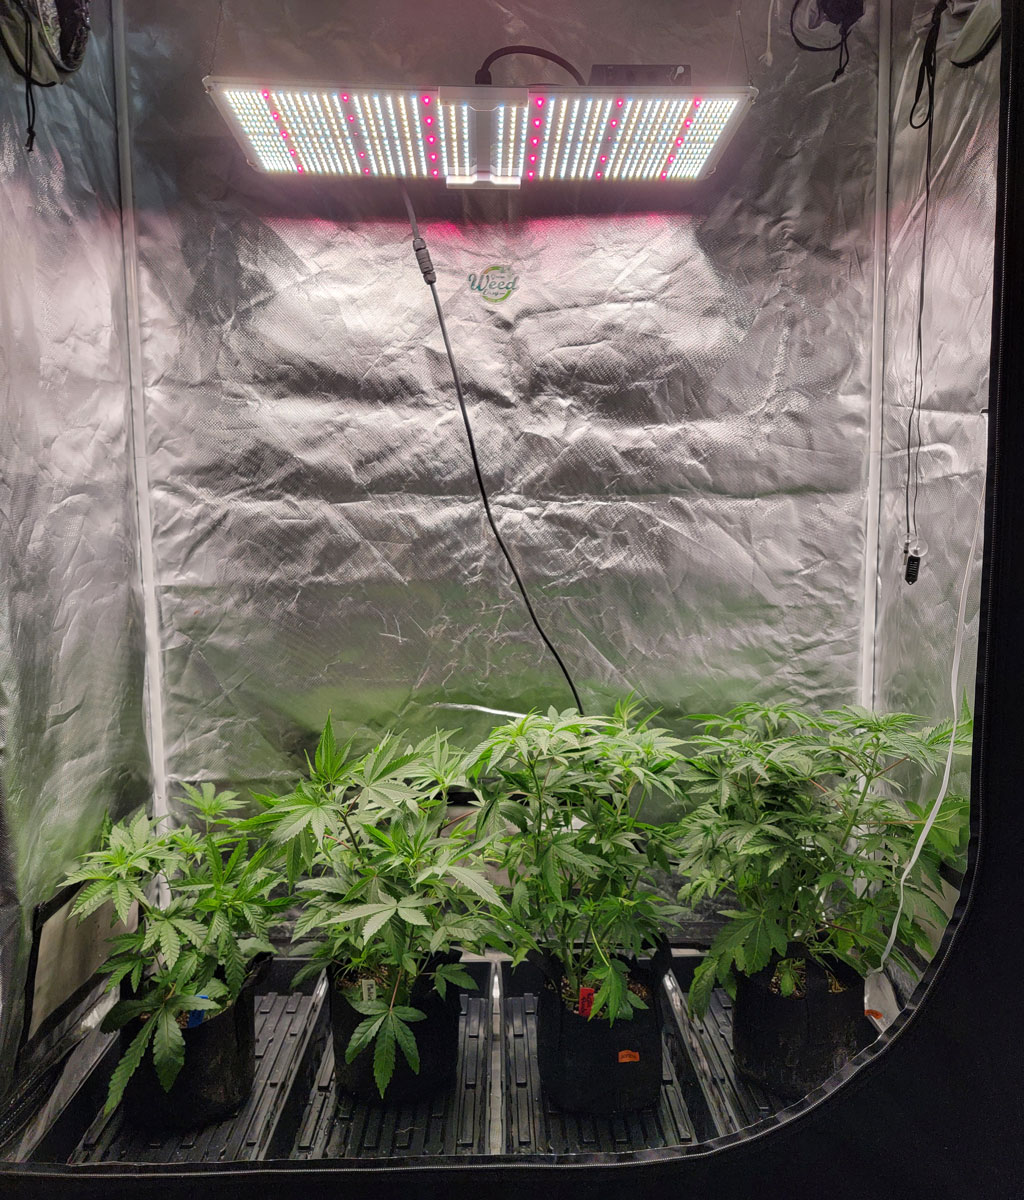
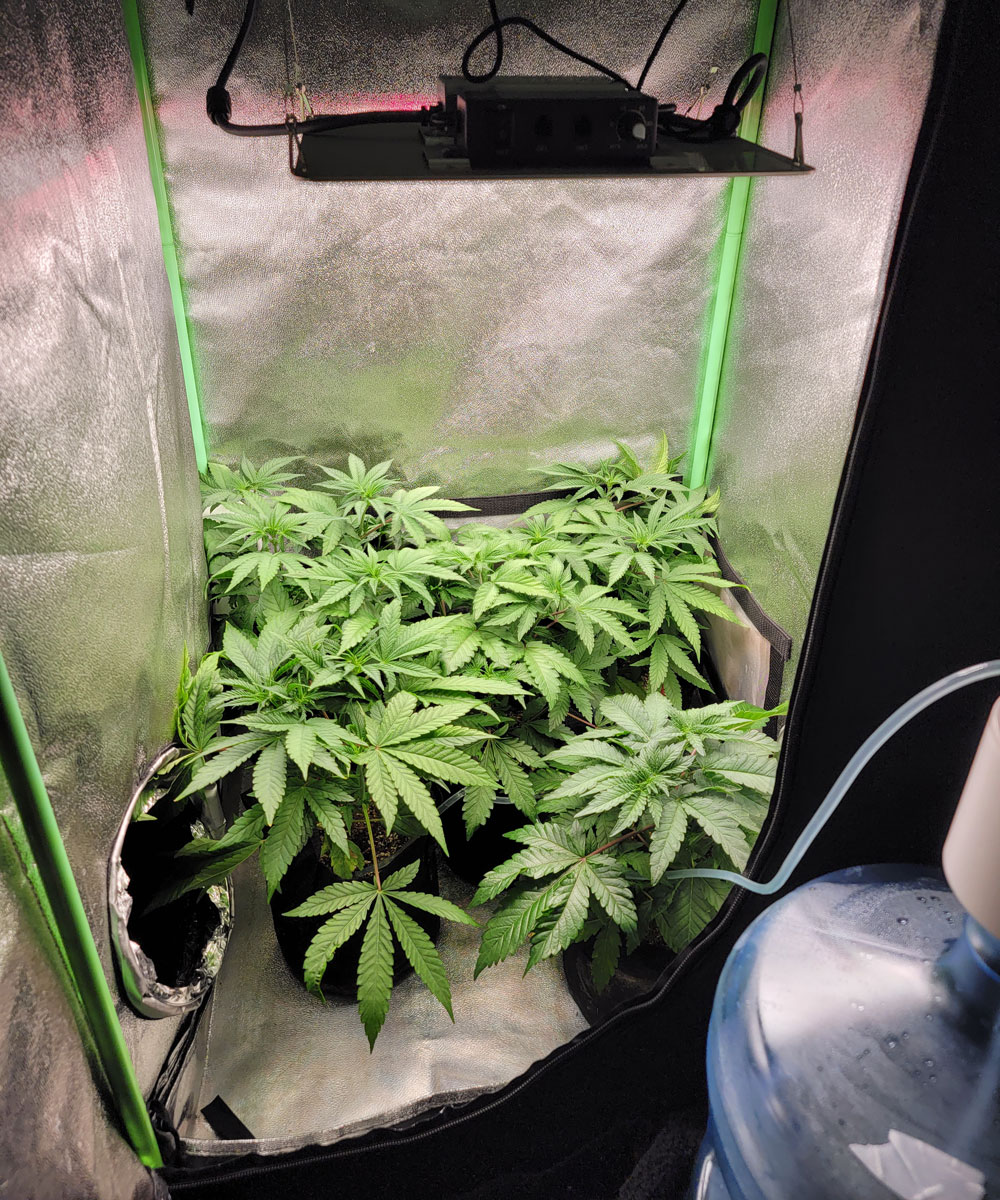
Here’s an example of an automatic watering system. I had germinated a bunch of valuable seeds when suddenly I had to leave for an unexpected 7-day trip. I was able to use this system to give water on a schedule and the plants looked beautiful when I got back.
If you’re interested in pumping water to your marijuana plants on a timer with tubing, read on for a step-by-step tutorial.
Automatic Drip Irrigation Kit (pump water to plants on a timer)
This tutorial will walk you through setting up this automatic watering system, but the directions apply to nearly all auto-watering systems.
I recommend using this type of system in a grow tent because most come with a water-proof tray at the bottom that can hold many gallons of water if something goes wrong and the pump doesn’t turn off. You don’t want 5 gallons of water pumped directly onto your carpet due to something springing a leak.
What You Need
- Automatic watering kit with a water pump – This kit should contain everything you need to get started including the pump, tubing, a weight to hold down the tubing in your reservoir, and little plastic pieces that connect everything together. I’ve been using this kit and another kit that’s not available anymore, but they all seem to work about the same. This kit is a good option as it’s highly rated and used by many people. Just check the ratings to make sure the one you’re getting is reliable and you’re good to go with most models.
- Important note: If the automatic watering kit doesn’t include a water pump, that means it’s a gravity-fed system. These control the water flow by adjusting how high the water reservoir is kept off the ground compared to the plants(as opposed to using a pump and timer).
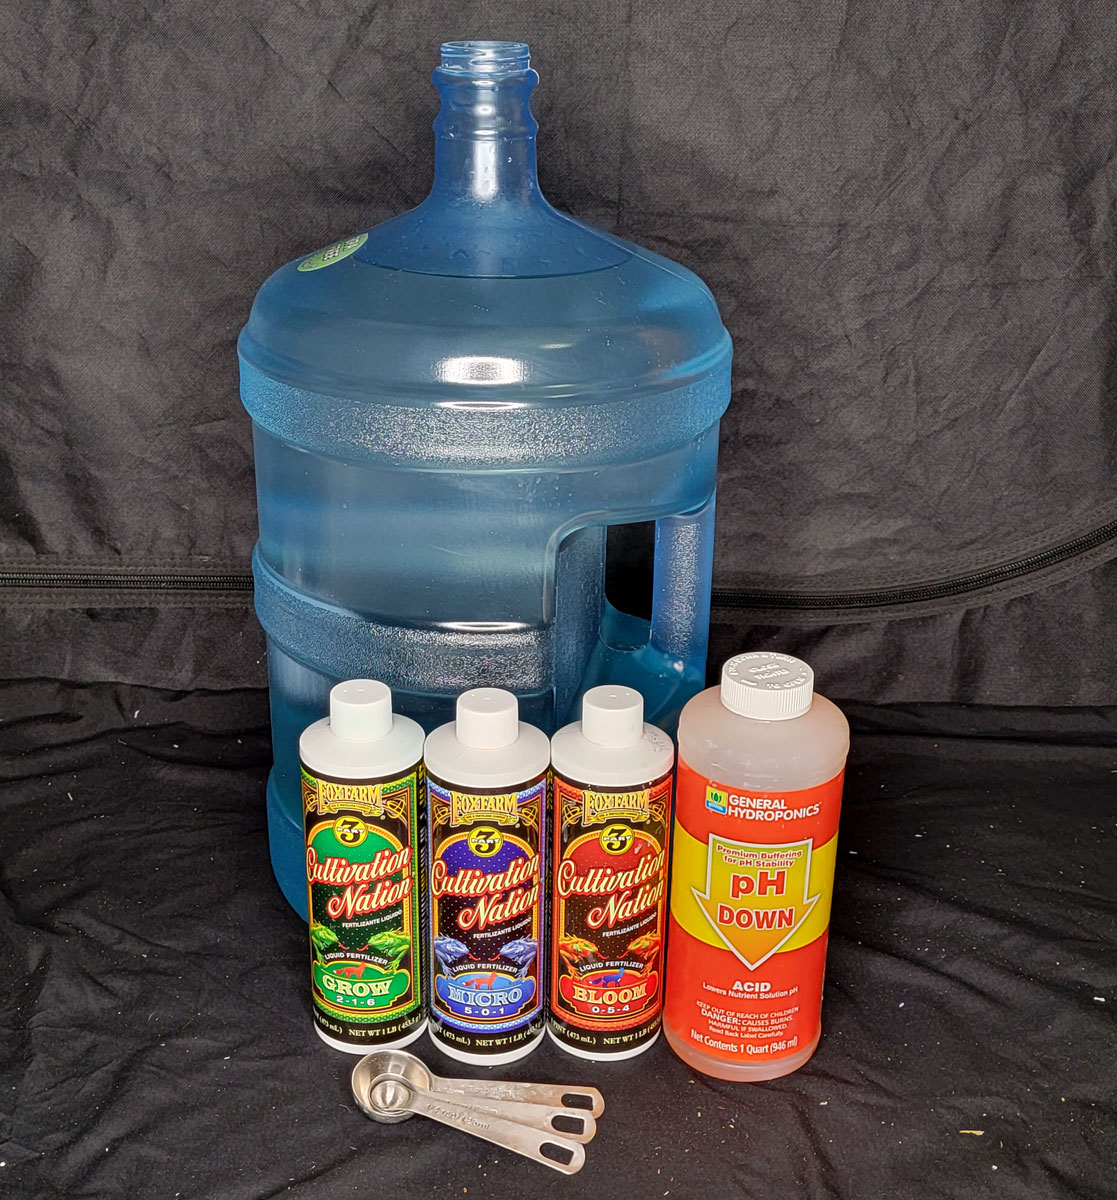
- Something to hold water – I used a 5-gallon water jug but you can use almost anything if it holds water and can be covered from the light. These are usually much cheaper to buy in person and are available to buy at stores like Walmart or Home Depot. You could also use a bucket or other container to hold water, but water jugs may be better because they’re harder to spill and let in less air (helps discourage bad organisms from growing)
- Something to catch extra water – Your plant pots need a way for water to come out the bottom. Most plastic pots come with holes and fabric pots (I love these for cannabis) let water seep out. Therefore you should have some sort of tray or saucer to catch extra water that may spill out the bottom. I love these super heavy-duty 1020 trays even though they’re ridiculously expensive because they’ve lasted me years and I’ve used them over and over. You can fit 4 x 10²⁰ trays in a 2’x4′ tent, perfect for 4 plants in 3-gallon pots (or 8 small plants in 2-gallon pots). If you put a little piece of plastic or something under the trays at the back, the slight slope causes all water to pool to the front for easy collection with a wet vacuum or big syringe.
- Scissors – Cut the tubing to the size you want
- (optional) Extra tubing and joints – If you plan on doing this for a lot of plants long term, it’s helpful to have extra parts so you’re not worried about having to reuse old tubing if they aren’t suitable for a new setup with different pot sizes or a different number of plants. Cheap enough I think it’s worth buying just to have.
Step 1: Set up water reservoir
Get your water reservoir where you plan to keep it. If growing in a tent a great place is typically right outside the tent door next to a port or peeking through the bottom zipper. Most importantly, you want to keep it in the coolest available place with a way to hide it from the light like covering the tub with a blanket. Dark and cold helps prevent bad stuff from growing in your water reservoir. Heat and light make bad things grow in the water.
- Fill with water and add nutrients and supplements (if using any)
- Place water reservoir outside grow space
Step 2: Connect pump to water reservoir
In this step you will connect your water pump to the reservoir with tubing.
- Most models have ports on the side, top, or back of the device
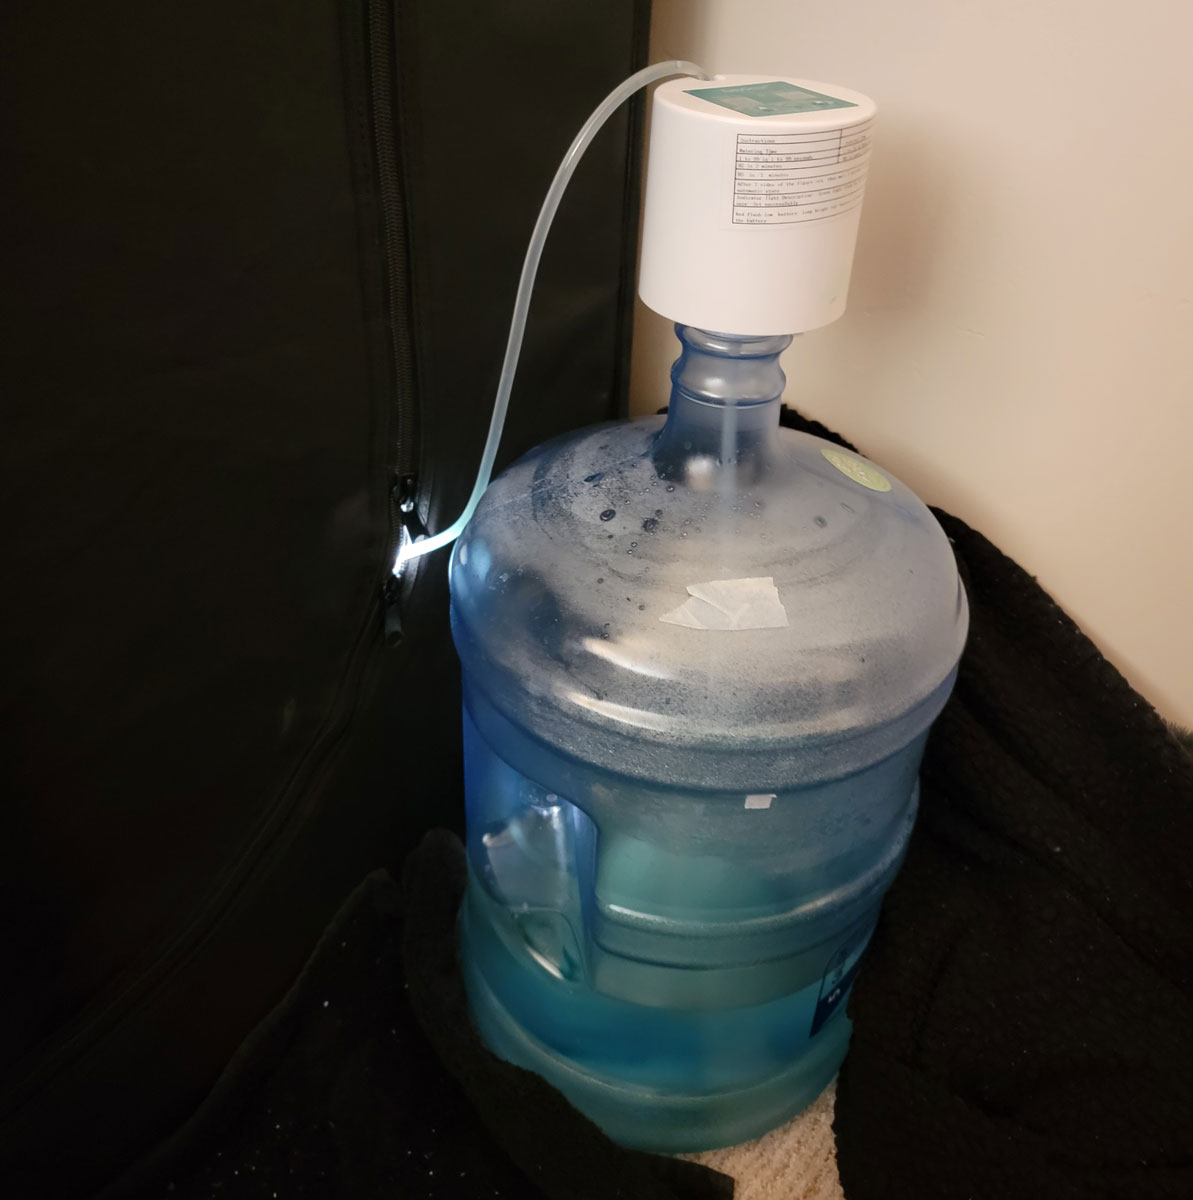
- Some models let you place the pump directly on top of your water reservoir
- If the tubing that collects the water doesn’t naturally fall to the bottom of the water container, you may need to add a weight to force it to go to the bottom (that way it uses all the water)
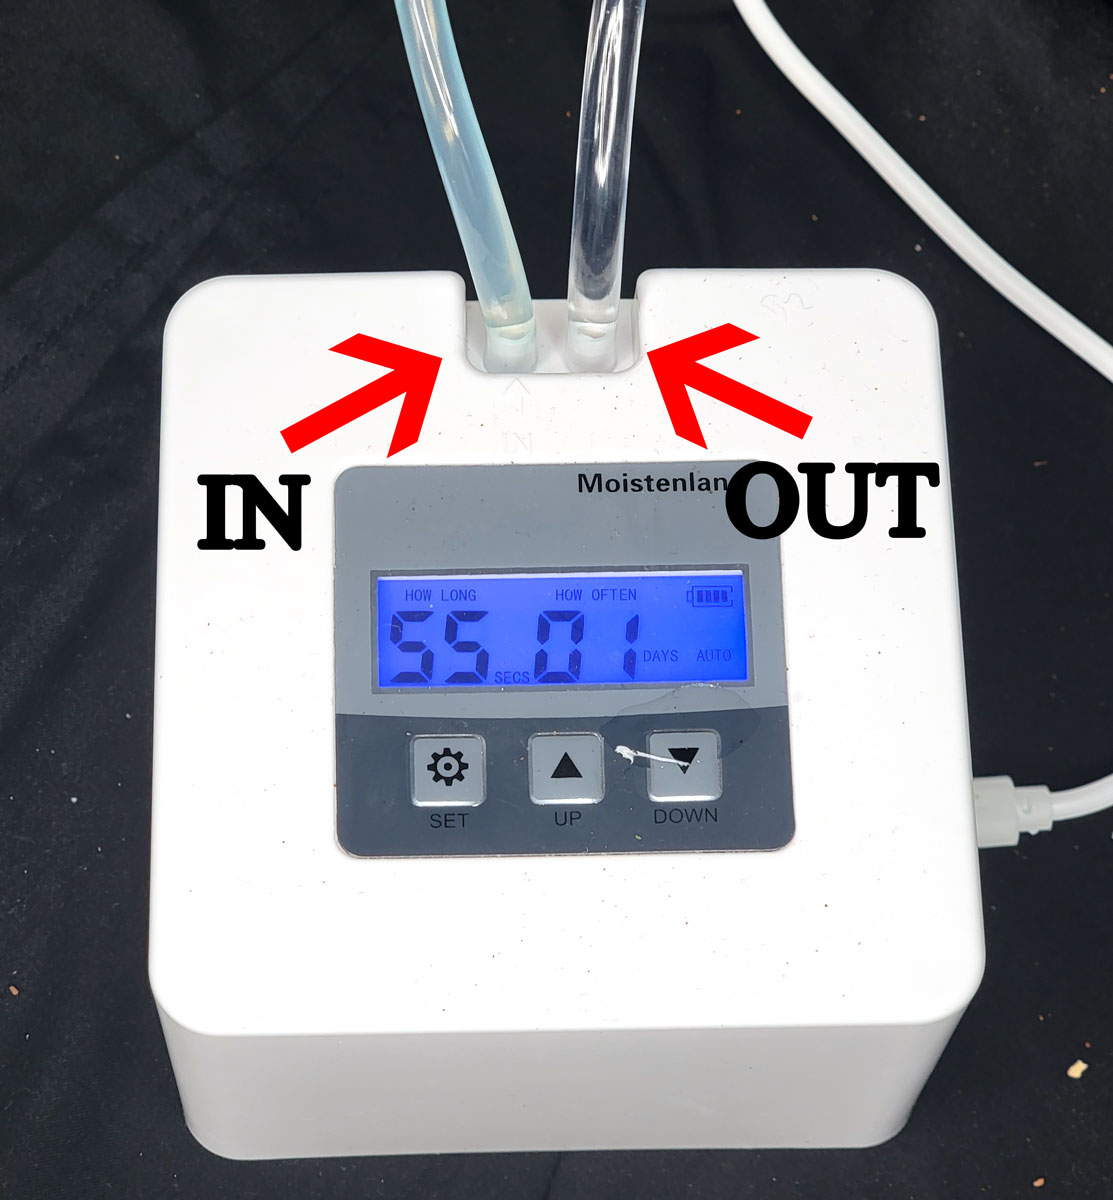
Most pumps have ports on the side, top, or back. One for water going in, and the other for water going out.
This model lets you place the pump on top
Kits often include a tiny air stone like this or other weight to help tubing fall to the bottom of the reservoir.
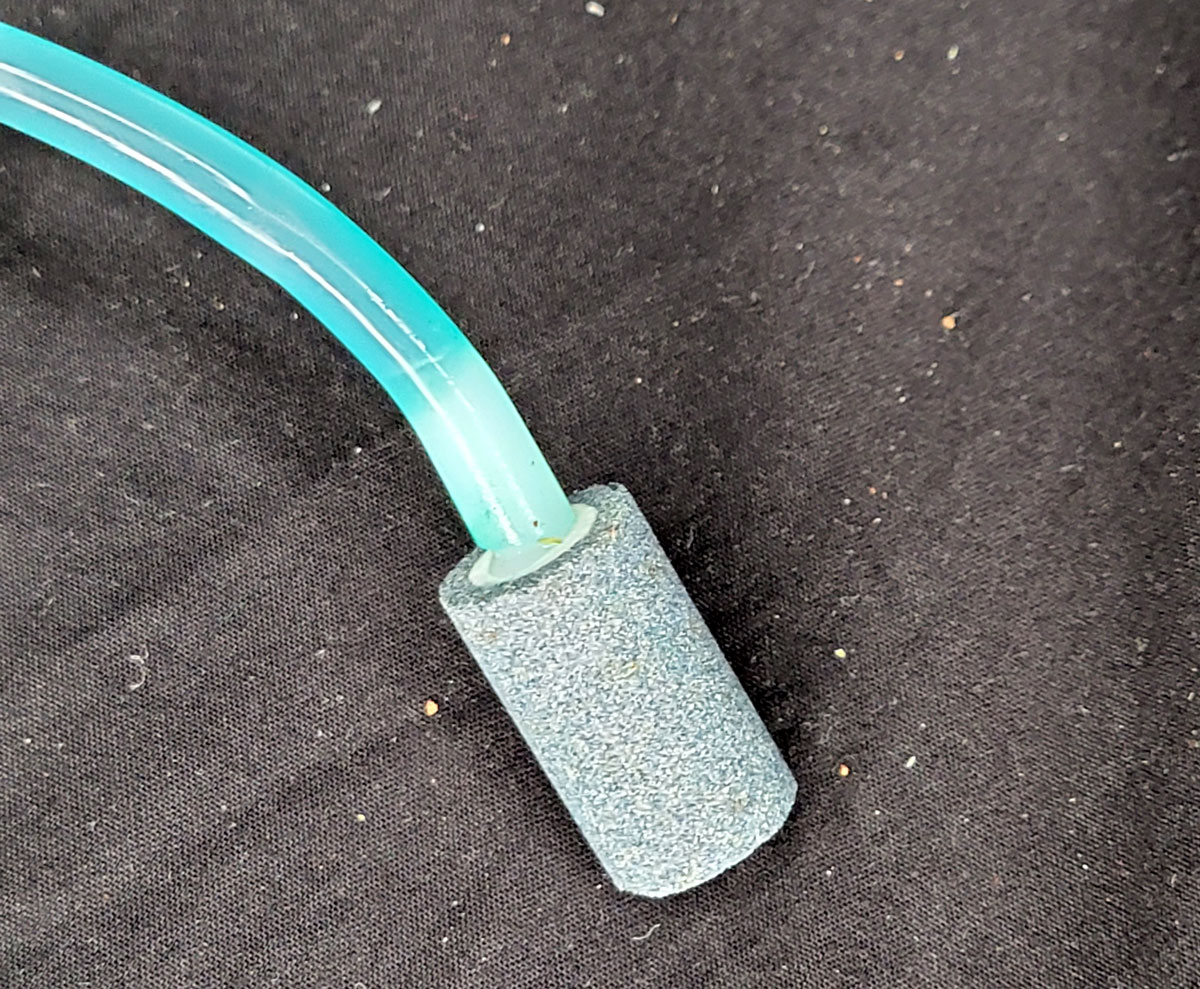
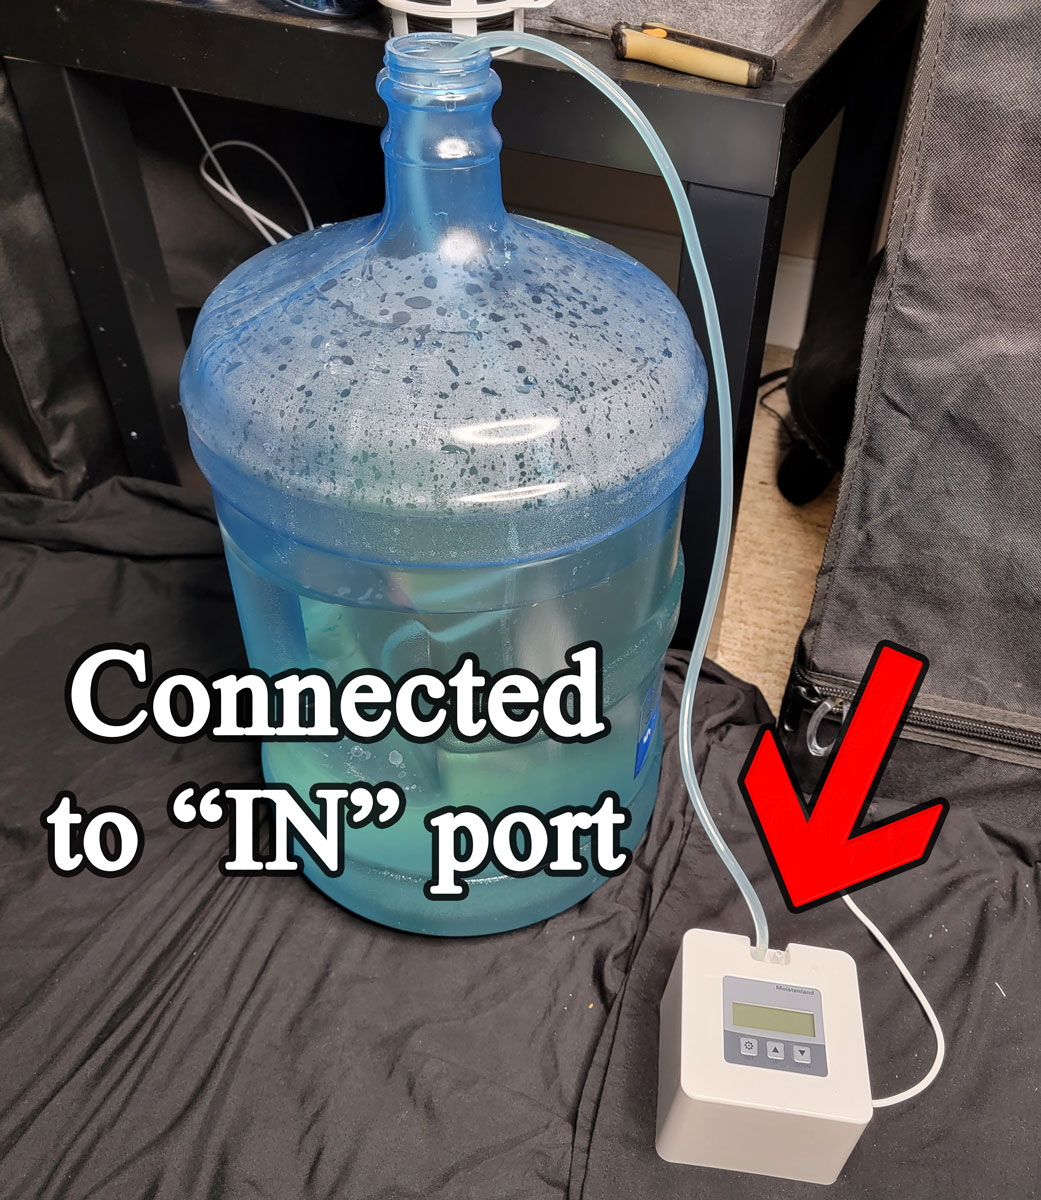
Connect one side of the tubing to the airstone, then drop it in the water reservoir. Take the tubing and feed it into the reservoir until the airstone touches the bottom. Then lead it to the “IN” port of your water pump and cut your tubing to that size and connect to the IN port. When cutting tubing, it’s better to leave too much tubing than too little because you can always cut it again later.
At the end of this step, you should have tubing that goes from the bottom of your water reservoir to the “IN” port of your water pump.
Step 3: Set up tubing to go to all your plants
This is actually the hardest step, but luckily it’s still really simple. Essentially you have one tube coming out of your pump and you need to split it to deliver water to all your plants. This is done by cutting tubing to size, and using joints to split the water multiple ways. Here’s that all laid out step by step with pictures.
First, put down your plant pots where they will be when you’re done so you can ensure all the tubing is the proper size to get water to where it needs to be. You will have to redo this part later if you change the number of plants or how they are positioned. That’s not a huge deal but it’s best if you have everything set up from the beginning so you’re not doing any work twice.
Put plants where you want them
Next, you’ll make sure you have a piece of tubing that’s long enough to reach from the water pump to where your plants are. This will carry water from the reservoir to your garden.
Cut a piece of tubing long enough to reach from the “OUT” port of your water pump to the plants.
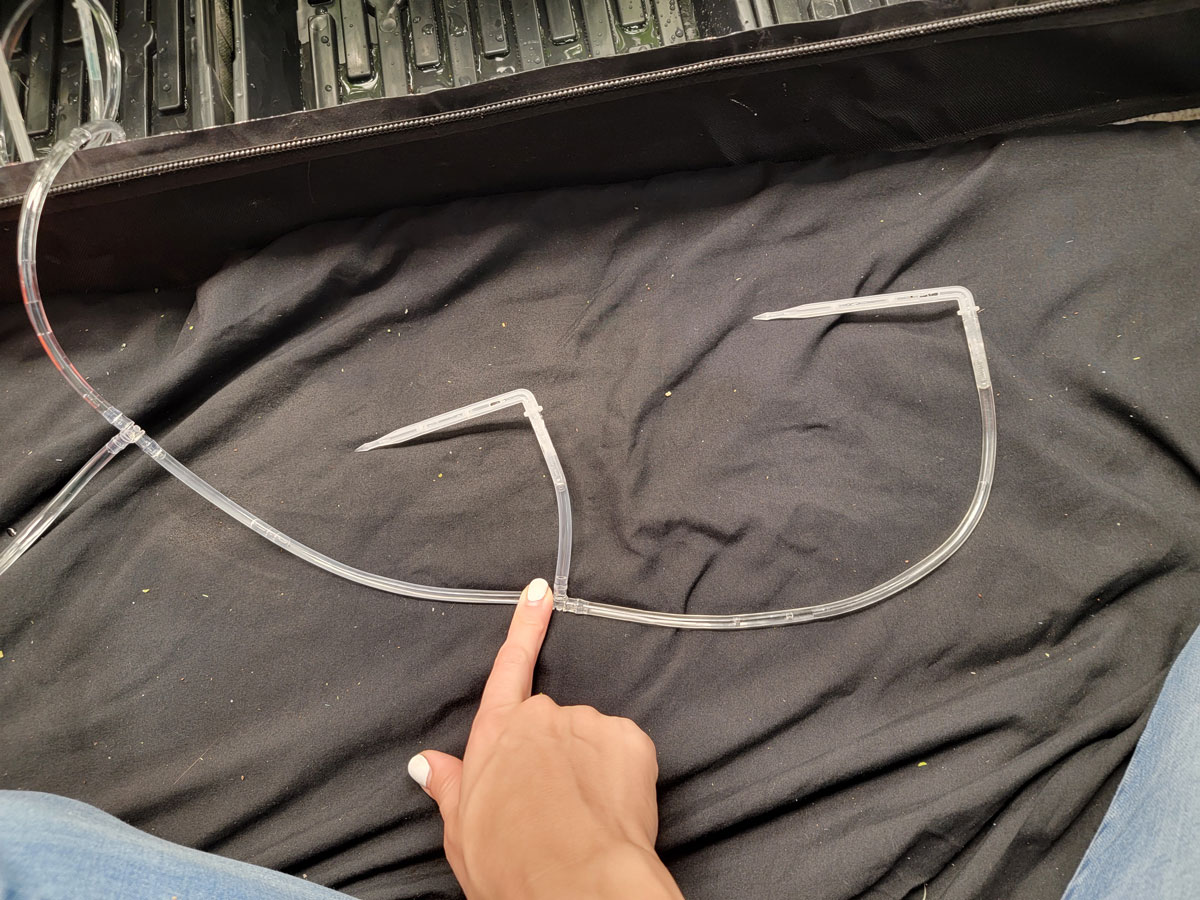
Then you split this main supply of water multiple ways and cut tubing to go to each plant.
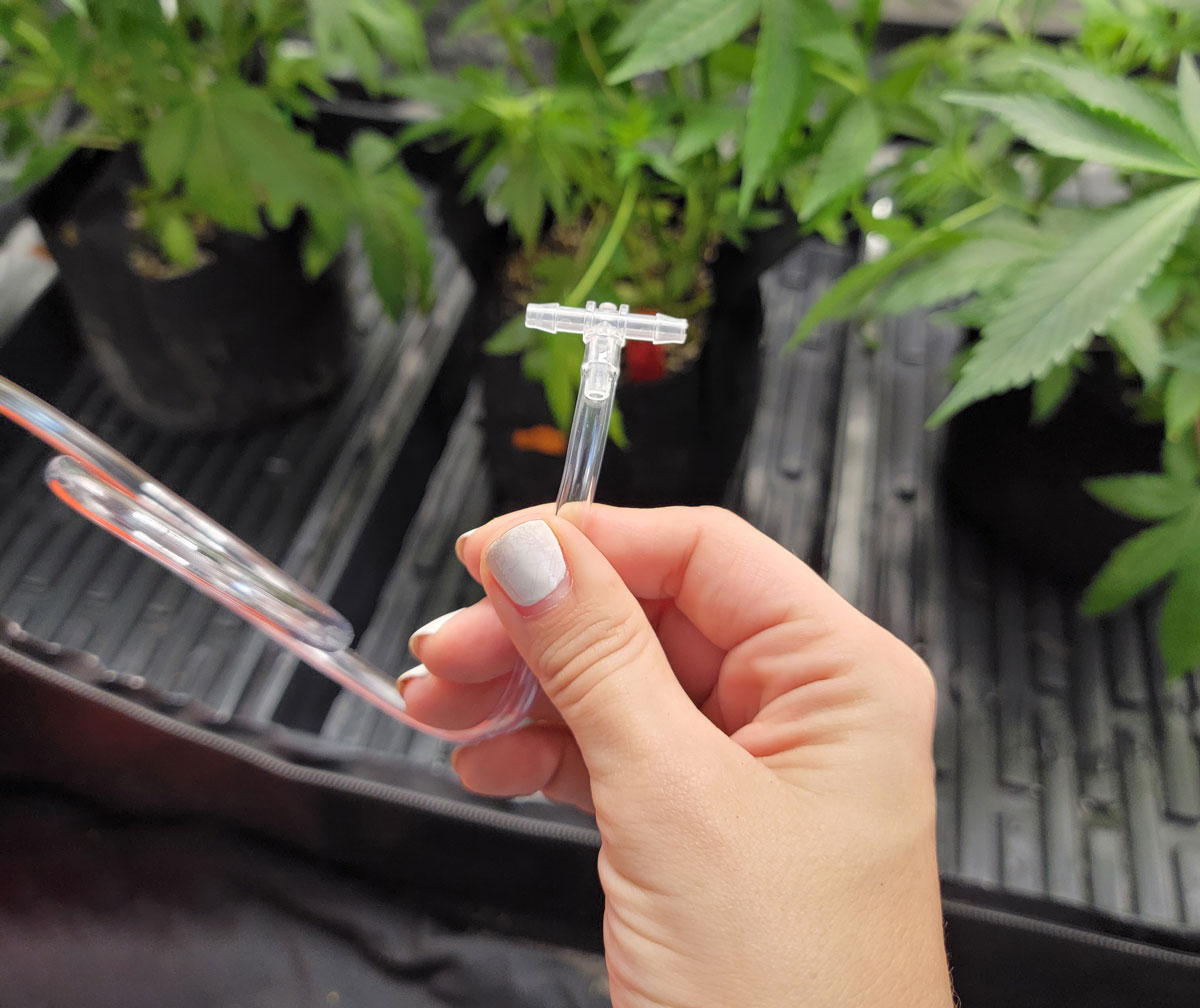
Add a 3-way plastic joint (should be in your kit) to split the water 2 ways.

One side will deliver water to half the plants, and the other side will deliver water to the other half. You could also split the stream 3 ways if that makes more sense in your setup.
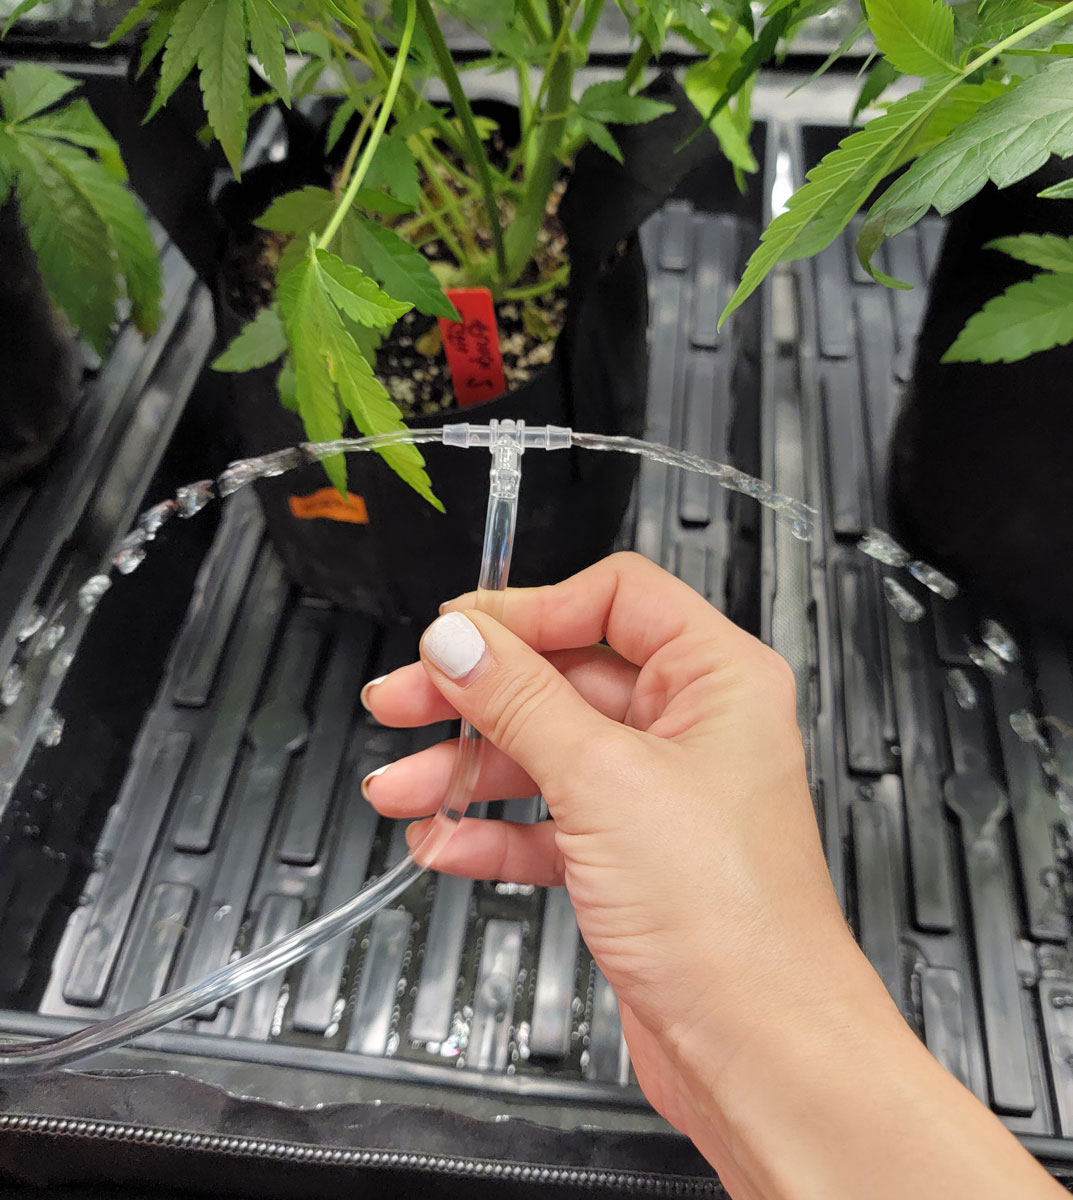
STOP BEFORE GOING FURTHER: Take a second to turn on the pump for a second and make sure water is coming out of the main tube through both splits before you go any further. If the water isn’t coming out evenly at this point, you need to figure out why before continuing to the next step. If everything seems to be working okay, you’re good to go!
Turn on the pump and make sure everything works before going further
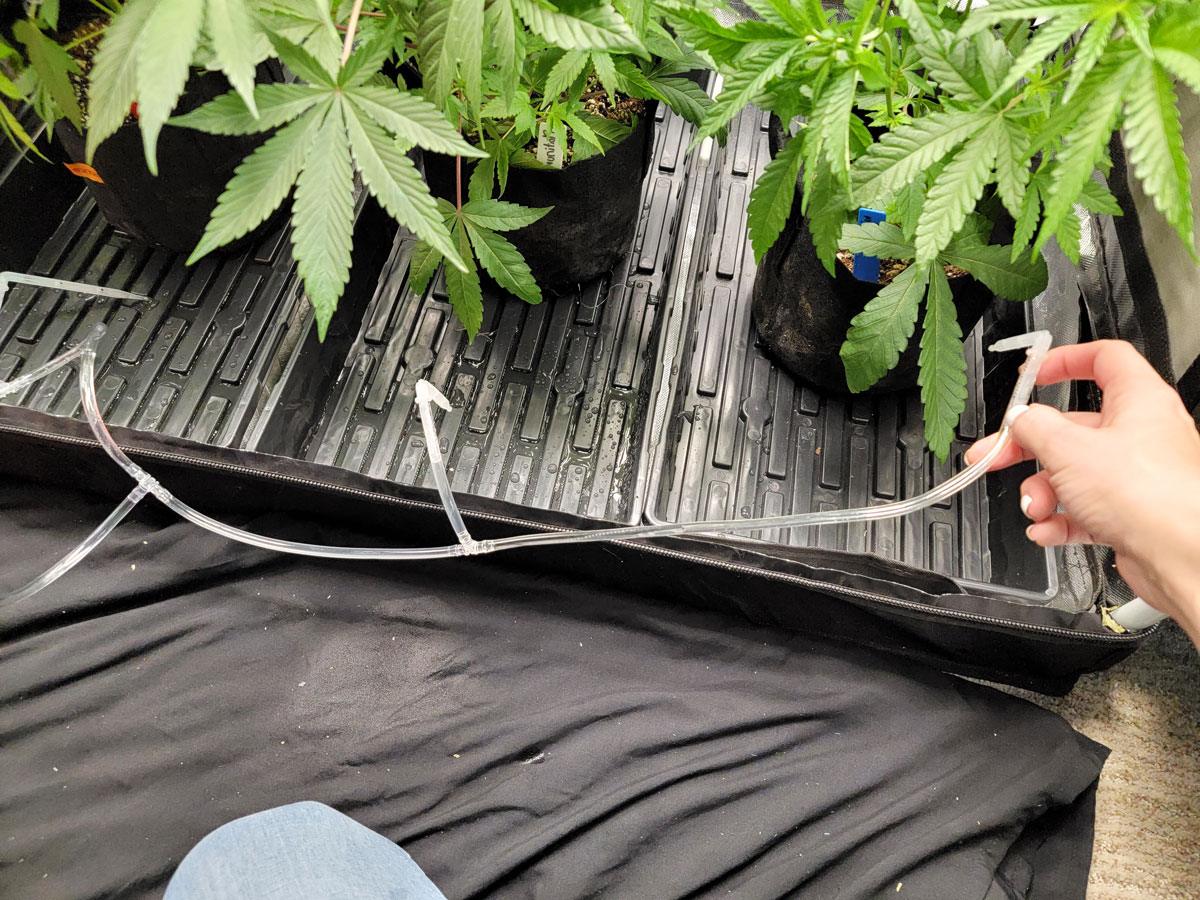
Count how many plants you have. In this case, I have 4 plants in total. So each side will deliver water to 2 plants. You need to set up tubing that will split off 2 times.
Cut pieces of tubing so it reaches from plant to plant. Use a 3-way splitter for the first plants, then end with a naked tube that’s going to connect directly to the final plant.
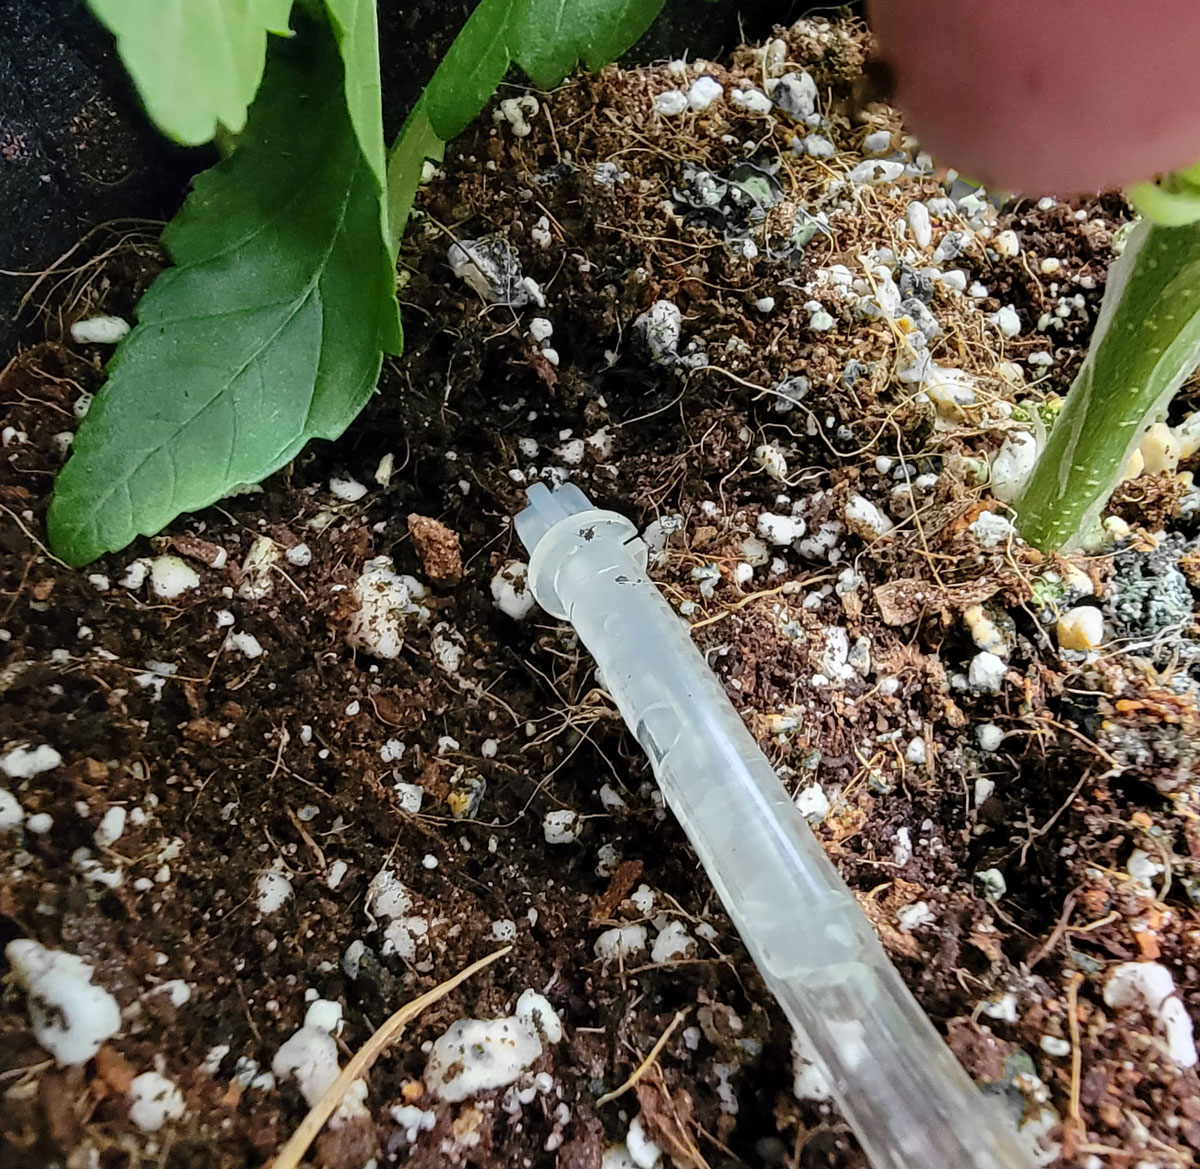
Now for the stakes. These should also be in your kit.
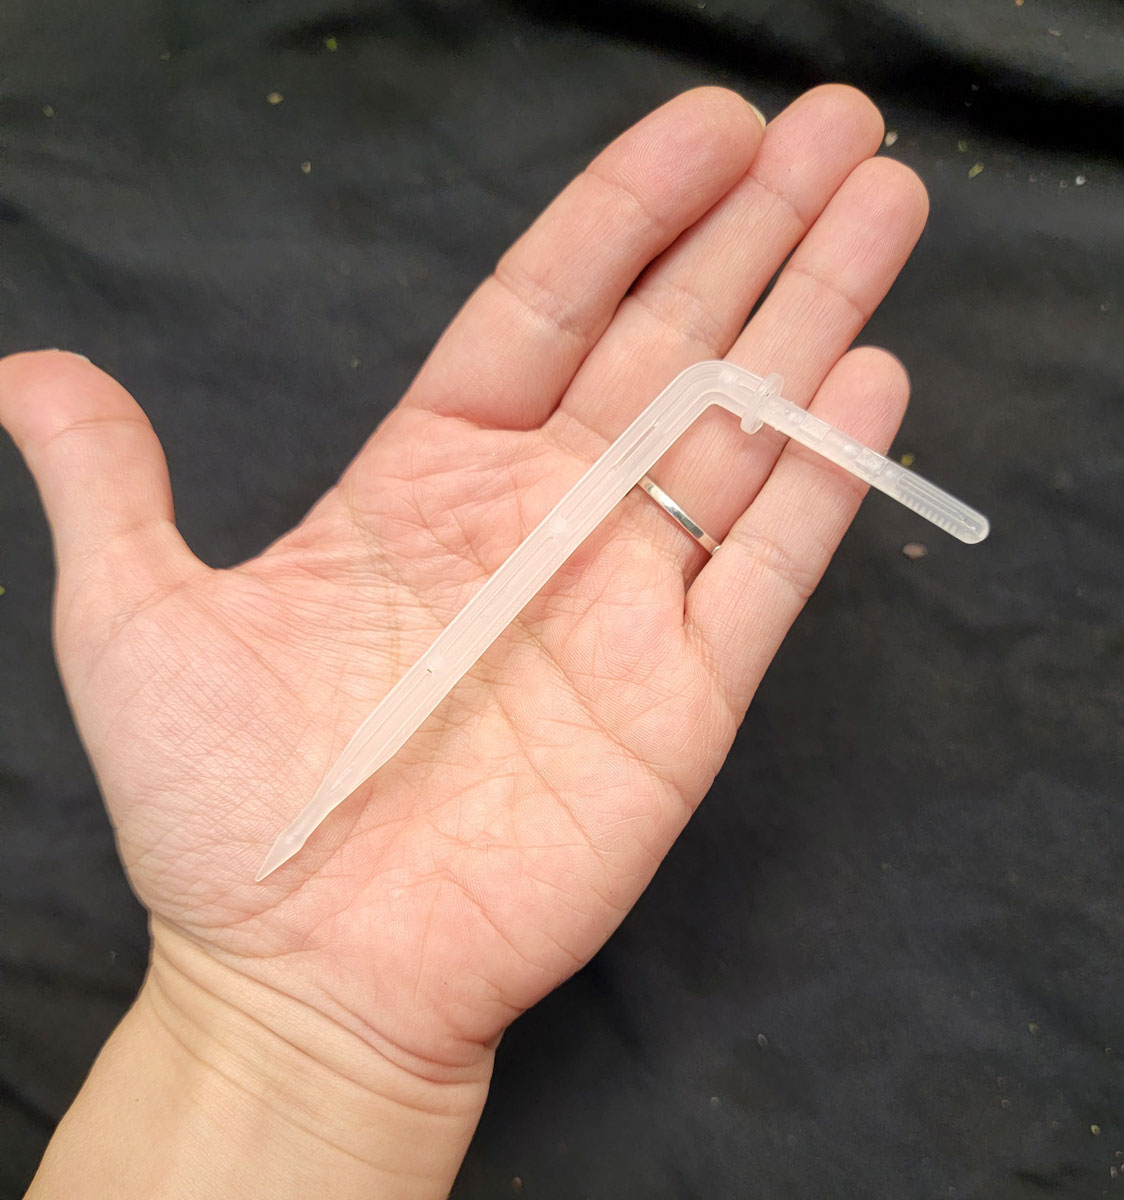
Add the stakes to each point where there will be a plant.
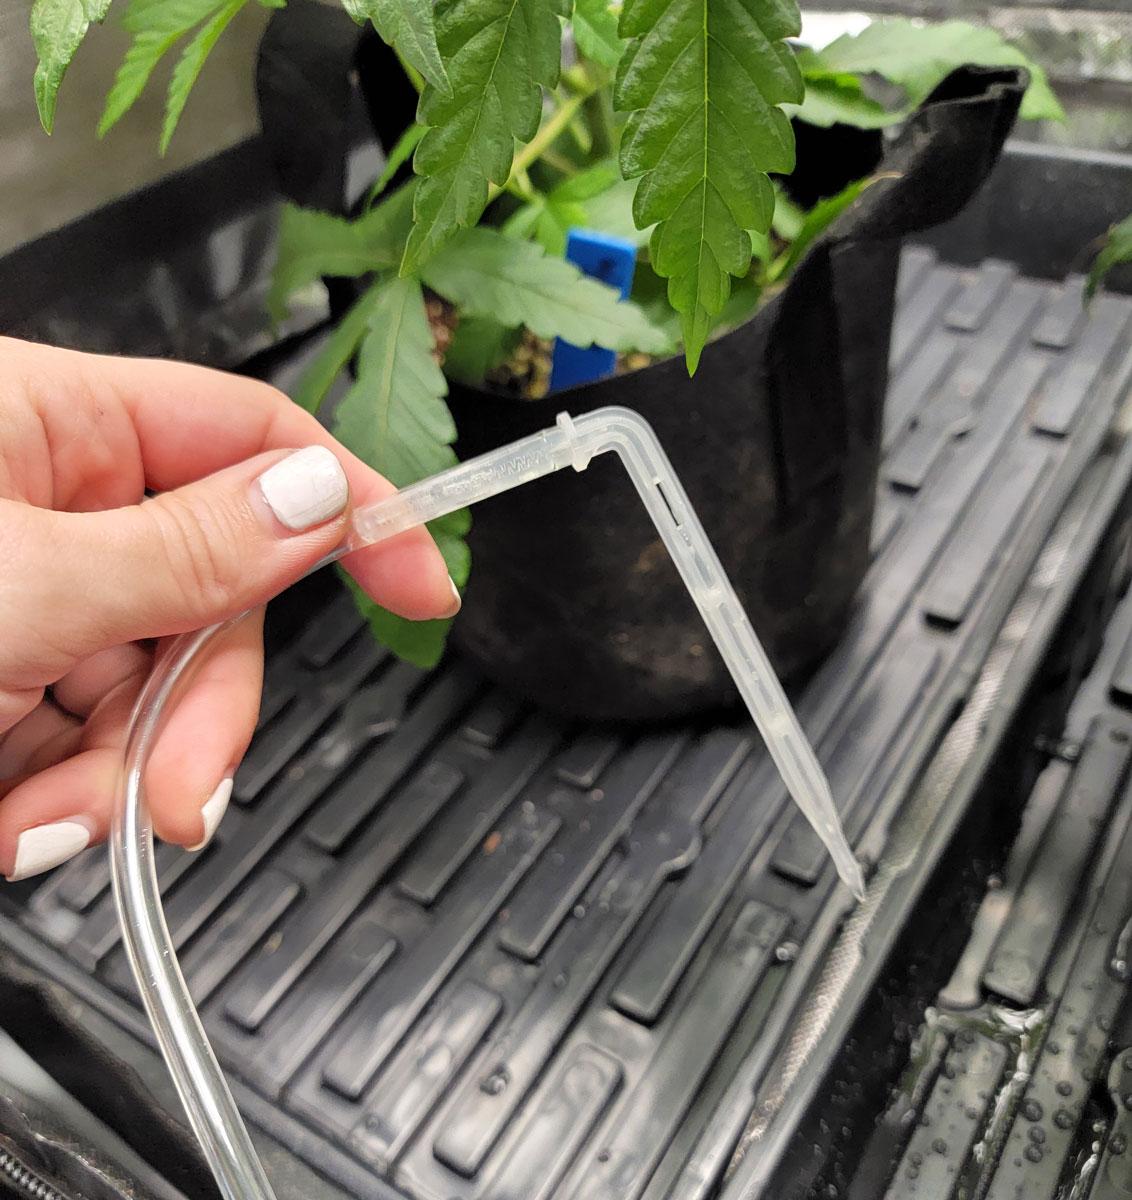
Put the stake down into the soil so it delivers water to the roots of your plants. Make sure the stakes are pressed fully down.
At the end of this, your setup should look something like this.
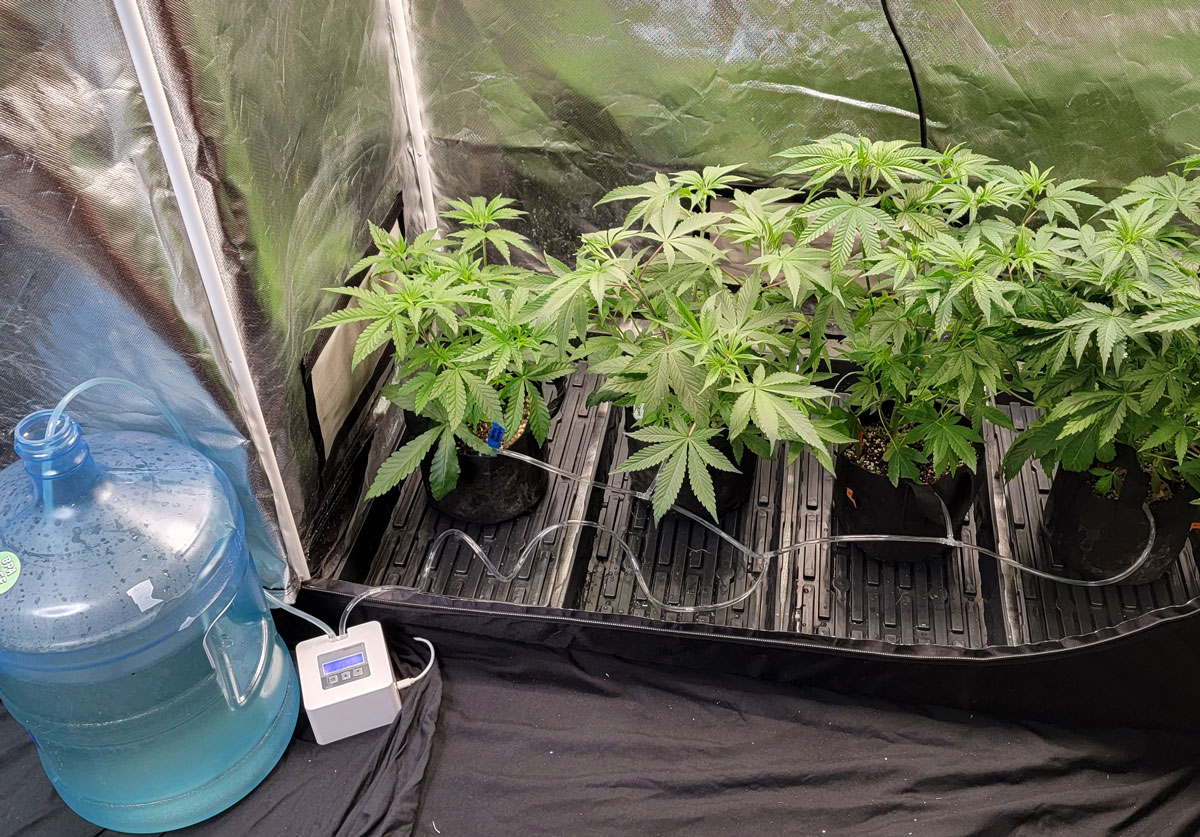
Close your grow space and throw a blanket over the top of your reservoir to protect the water from being exposed to heat or light, which tends to cause bad stuff to grow in your reservoir.
![]()
Step 4: Program timer to water plants on a schedule
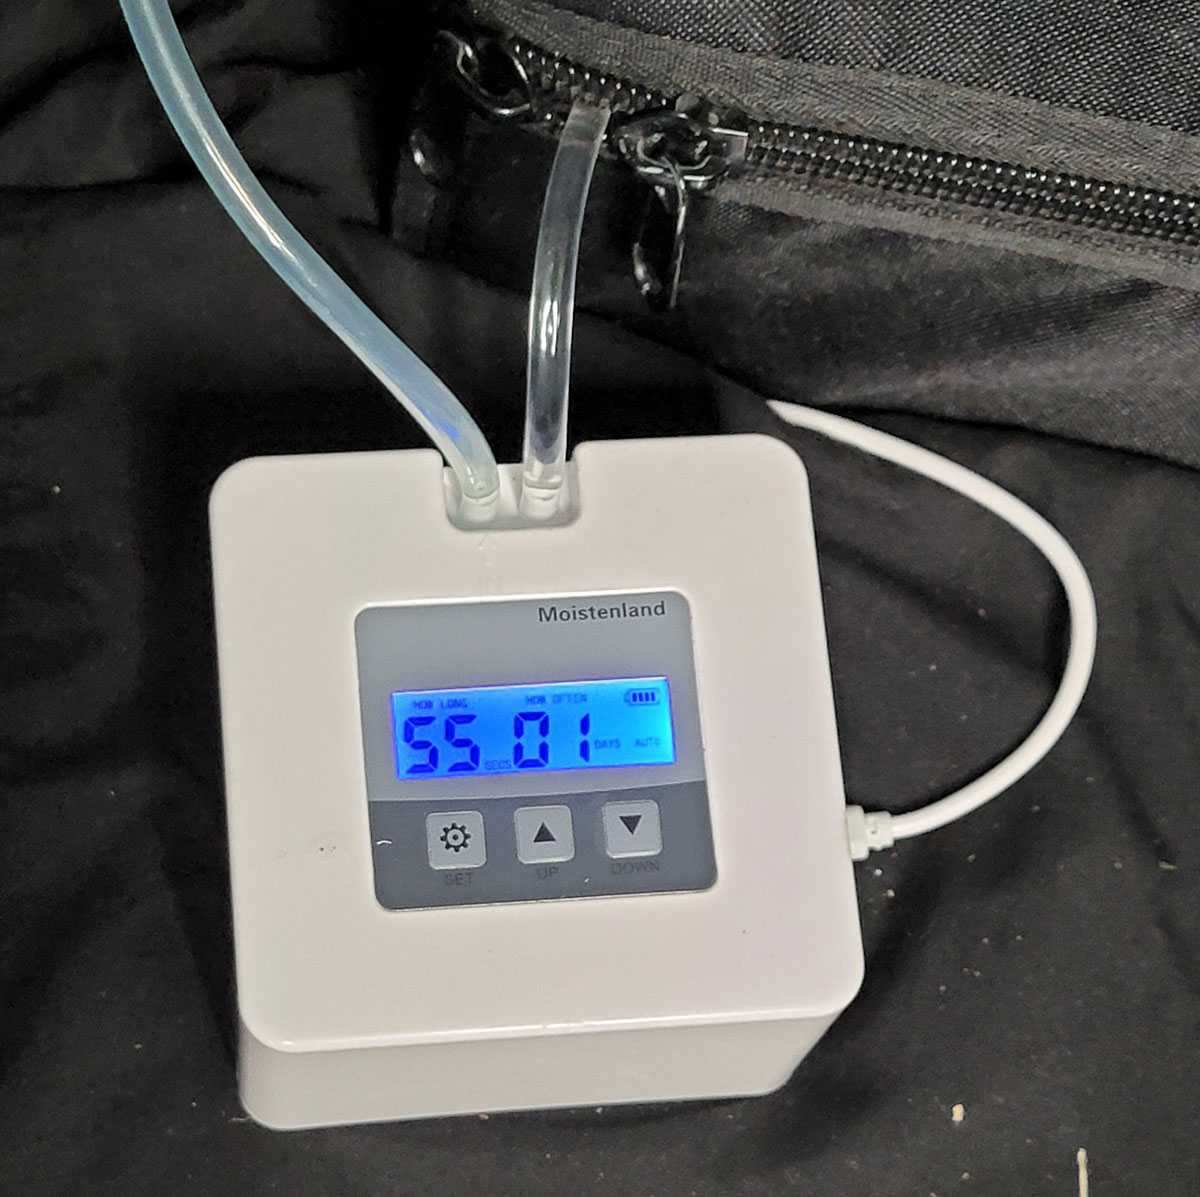
A good starting point is to water for 60 seconds once or twice a day. Plants are different and each kit pumps water at a different speed so you may need a little trial and error. You’ll be checking back tomorrow and the next day to see how this goes and whether the timing seems like it needs to be adjusted. If you’ve got a lot of plants or really big plants, you’ll need to water more often or more at a time. If you’ve got small plants or only a few, you’ll need to water less at a time and less often.
This water pump was set to water for 55 seconds once a day. But I have a different pump that needs to water for 80 seconds a day to move the same amount of water. Make sure to experiment.
Something that may help you figure out your settings is to think about how much water you normally give your plants if you’re watering them by hand. If you’re normally giving them a gallon of water a day, you’ll be trying to adjust your timer to deliver about that much. If you’re really scientific you could experiment with the pump to determine just how long it needs to run to move a gallon of water. But I just played it by ear with my plants and was able to get it adjusted to the right schedule in a few days.
- Every digital pump is a little different to program. Typically they come with some sort of instructions.
- Usually, you adjust the amount of time it waters (in seconds or minutes) and then how often (twice a day, every day, every other day, every week, etc.)
- Different pumps move water at different rates, so make sure to experiment. If you’re using different kits, you may need to give them different settings to move the same amount of water per day.
Step 5: Test on plants before leaving them alone
Before you step away from your plants (for example if you’re going on vacation) it’s best to give yourself a few days to monitor how it goes so you can tell if plants need more water or if they’re getting too much. When in doubt, it’s better to water them a little too much than too little because they’ll drink more as they get bigger, and because overwatering typically causes plants less damage than if they dry out.
You’re done!
Extra Ideas and Tips
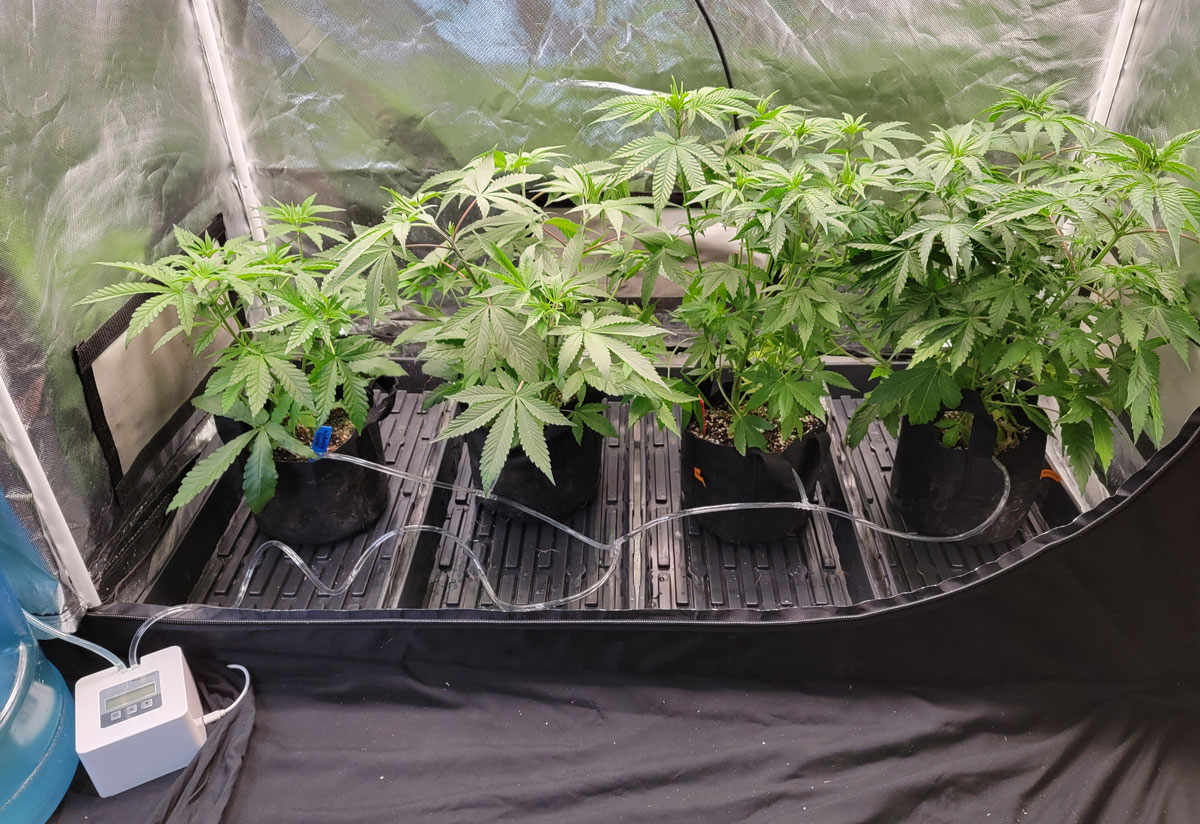
Example of an alternative setup
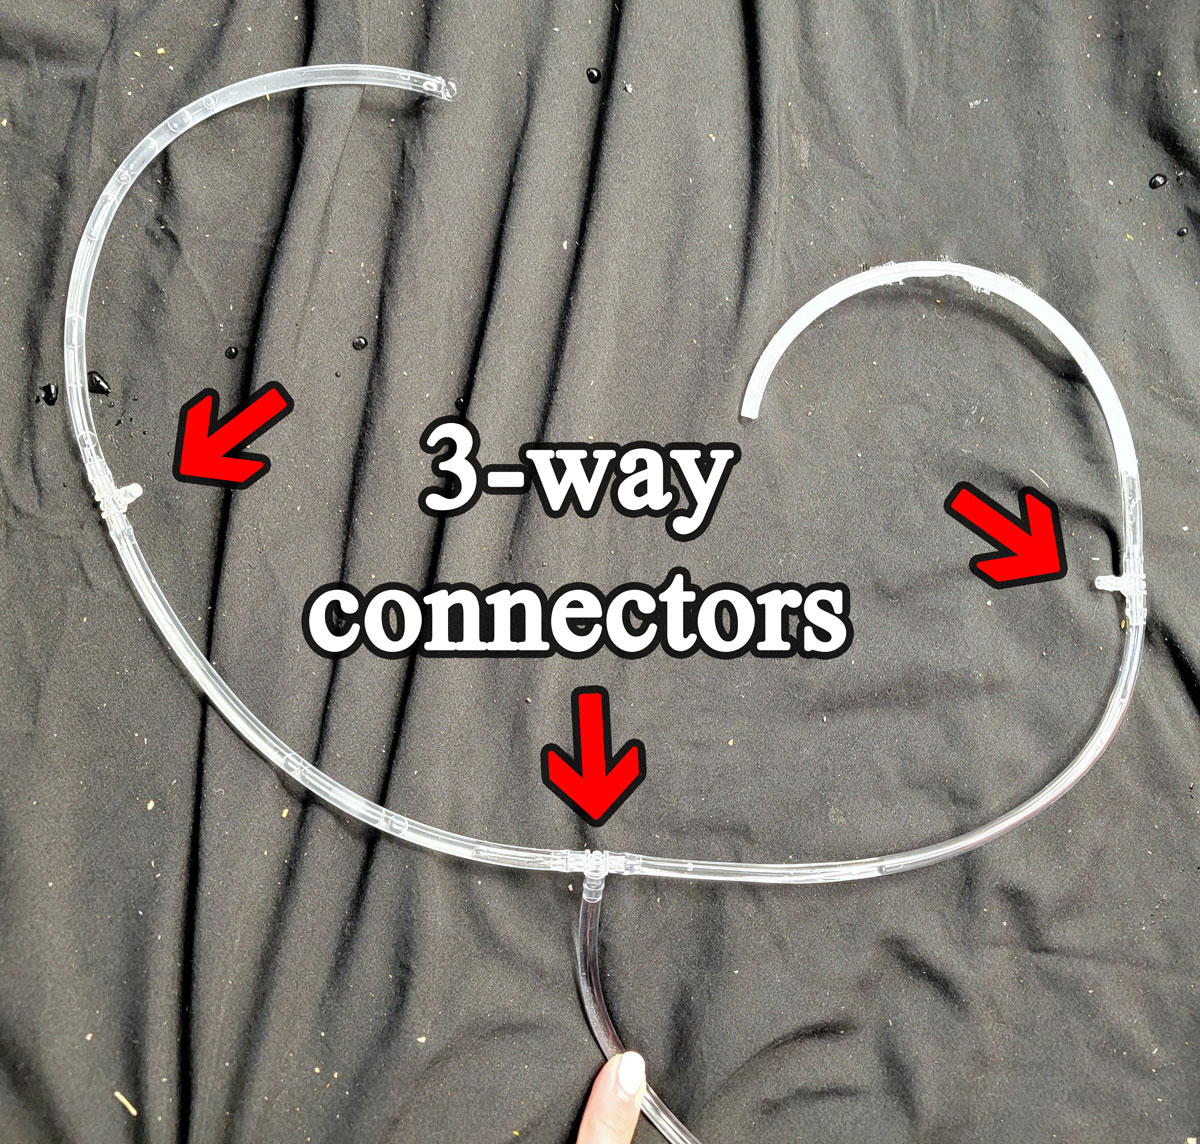
Here’s a different way to connect tubing to give an idea of an alternative setup. This was for 5 plants in a small tent.
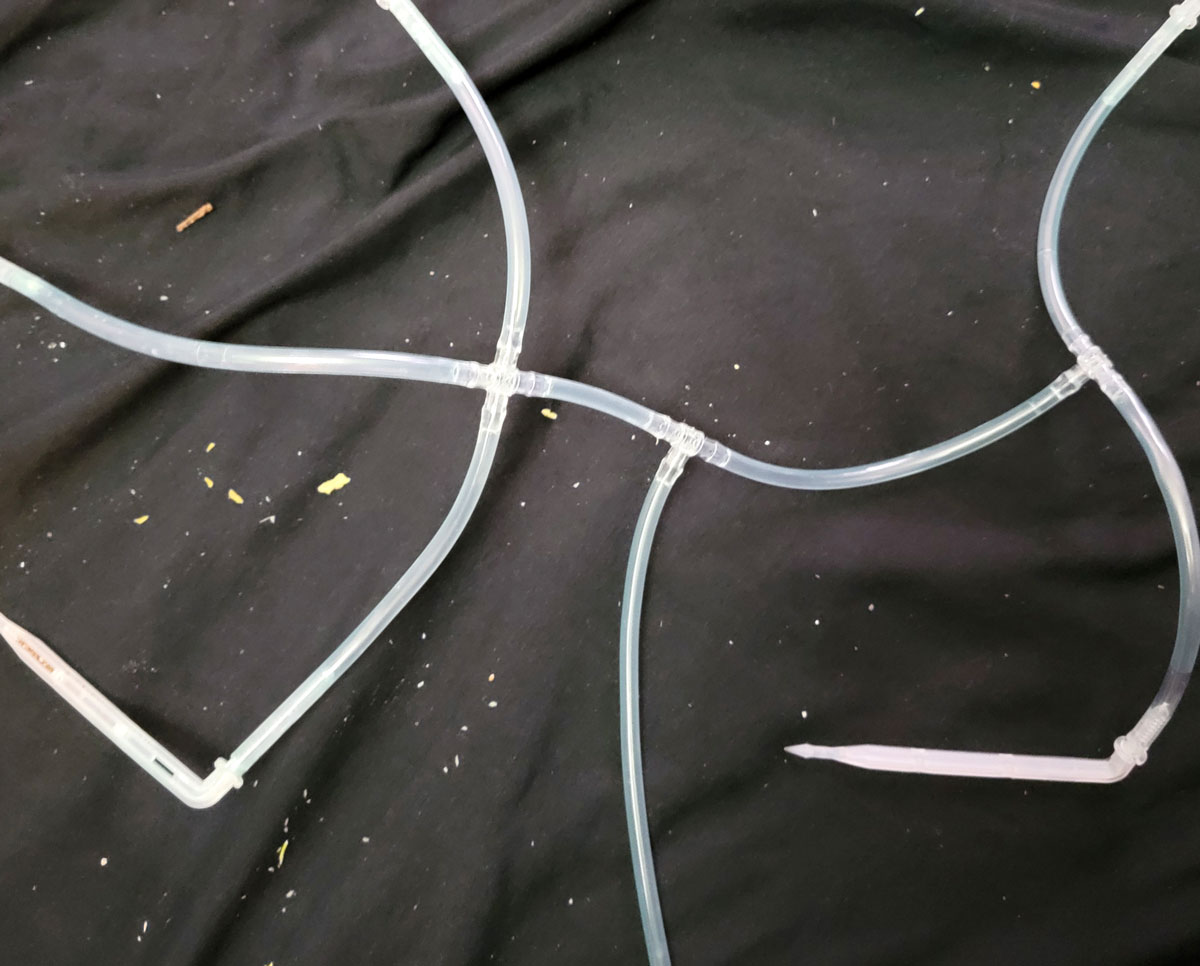
The tubing is split two ways from the main line. Then on one side it’s split again for 3 plants, on the other side it’s split for two plants.
Problems with PH
When the pH is too high or low at the roots, it causes nutrient deficiencies. Here are some things to consider when it comes to pH with an automatic watering system.
- Some people have found the tubing changes the pH of their water. I have tested this on a system that’s run for a few days and I didn’t notice this, but if you’re seeing nutrient deficiencies it’s worth testing the water that comes out of the tube to make sure it’s the same pH as what’s in the reservoir.
- Don’t let plants sit in water. Unless you’re removing runoff water regularly after they’re done being watered, try to keep plants the perfect moisture without runoff coming out the bottom. Sitting in water for too long or too often can cause root problems and nutrient deficiencies.
- However, if you’re watering plants in a way that they never get runoff water out the bottom, that can cause them to develop pH issues over time because nutrients may start building up in the soil. In that case, make sure to give your plants enough water to get runoff out the bottom and remove the runoff water immediately, just like you would any time you suspect nutrient or pH problems at the roots
Test for a few days before leaving
It’s always a good idea to check on your plants for the first few days after setting a system like this up before leaving them alone. If you’re going on vacation, don’t wait until the last hour to get set up.
Monitor moisture levels on a regular basis
Keep an eye on the moisture levels of individual plants. Some tend to drink more than others. If one plant is particularly dry and another is particularly wet, move the stake over for a day or two to give extra water to the dry one and give the wet plant a break from watering for a few days.
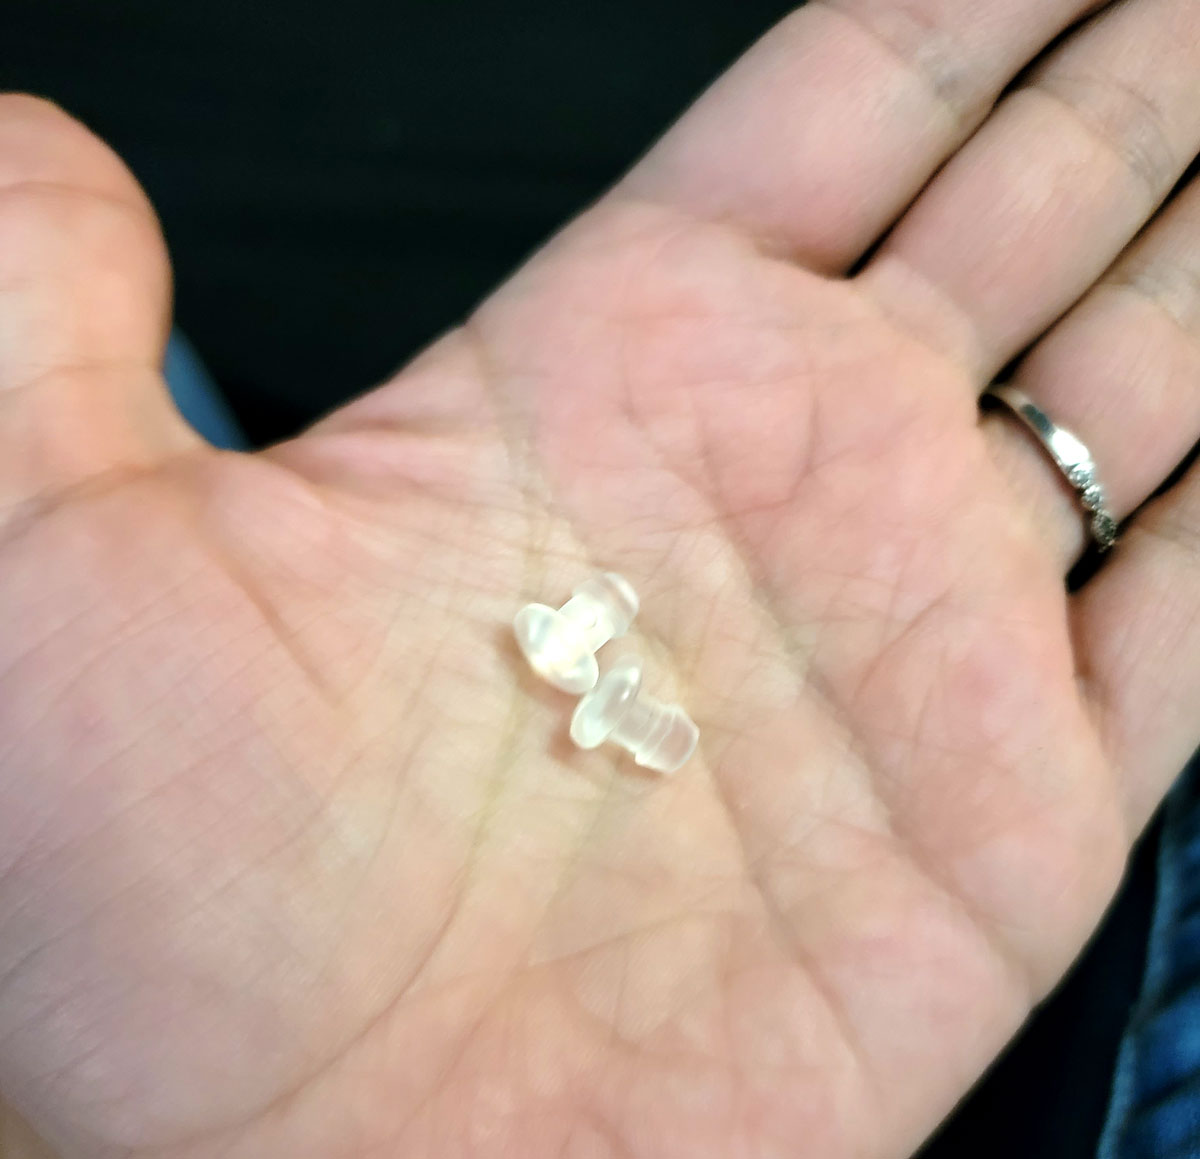
This kit of extra parts came with stoppers you could use to plug a port temporarily or permanently without having to recut all the tubing.
- Over-water as opposed to underwater (best if you get it perfect)
In the best-case scenario, you want to give the perfect amount of water to each plant. But it is better to have them be a little too wet as opposed to dry out. Dry plants die while wet plants just get a little droopy and some nutrient deficiencies unless it goes on too long and they are totally drowned.