by Nebula Haze
Here’s an easy way to water cannabis plants and remove runoff water at home. It’s cheap, simple, and effective!
Instead of a watering can, water your cannabis plants with a battery-powered water transfer pump.
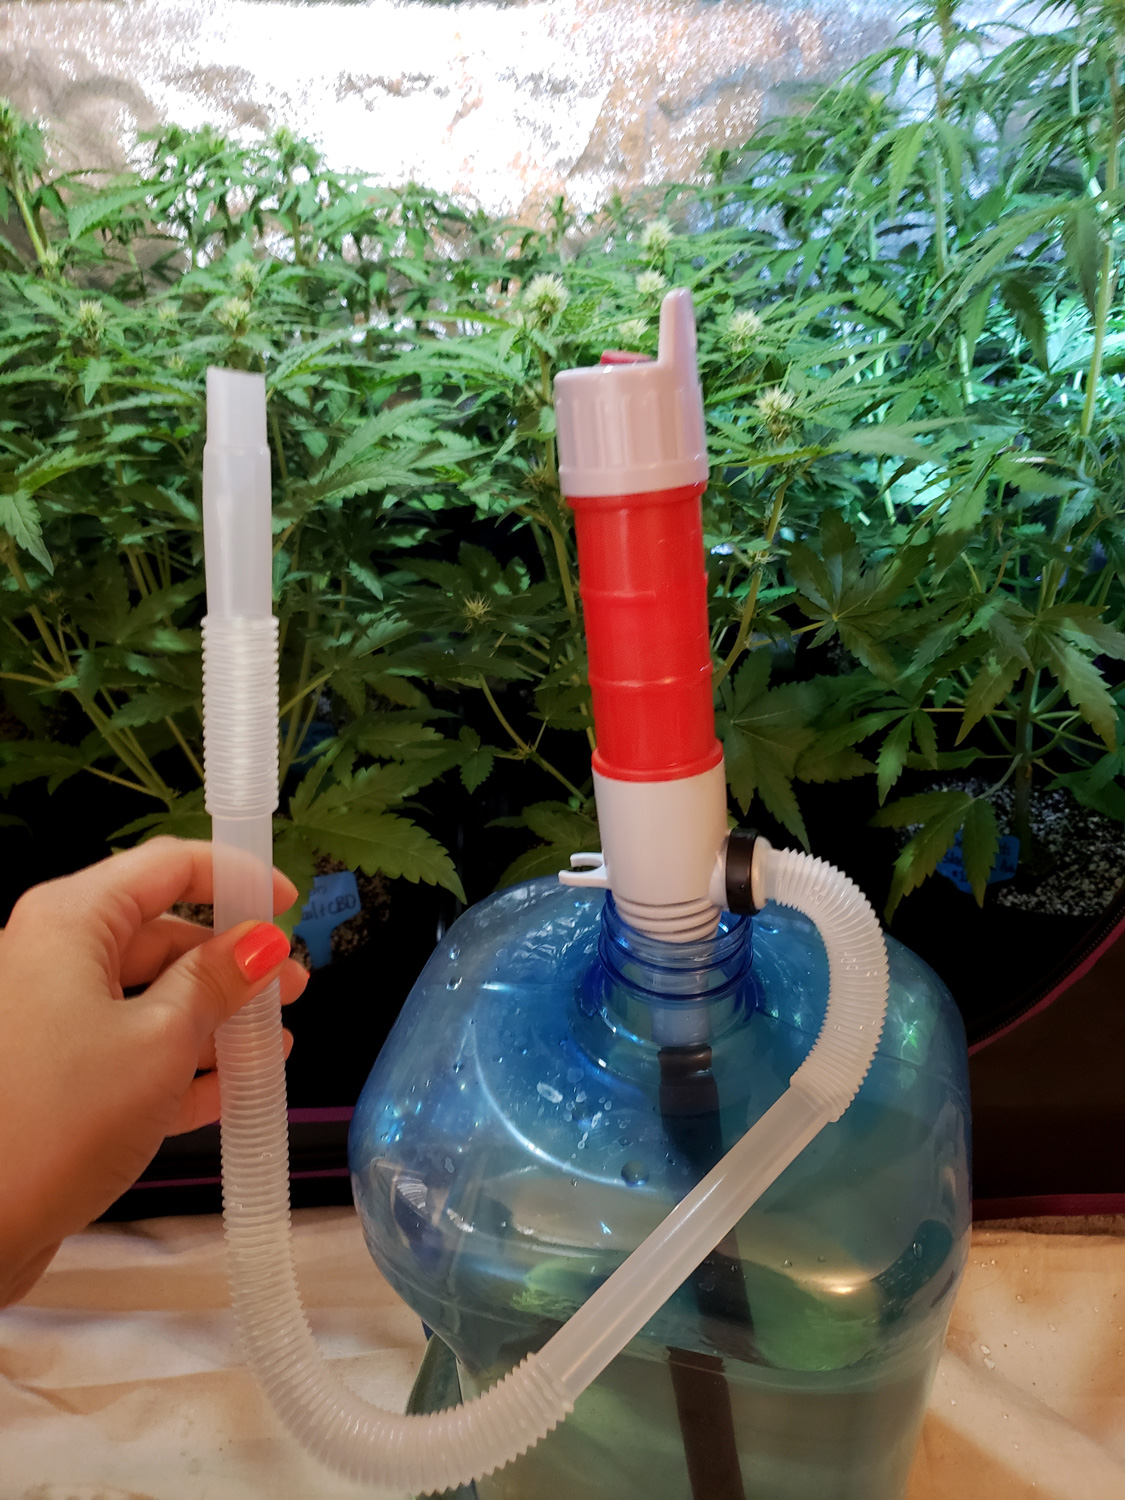
The hose makes it easy to reach all your cannabis plants. Including any plants in the back!

Use plant saucers to catch runoff water…

…or plant trays to catch runoff water. Can be more convenient if you’ve got lots of cannabis plants.
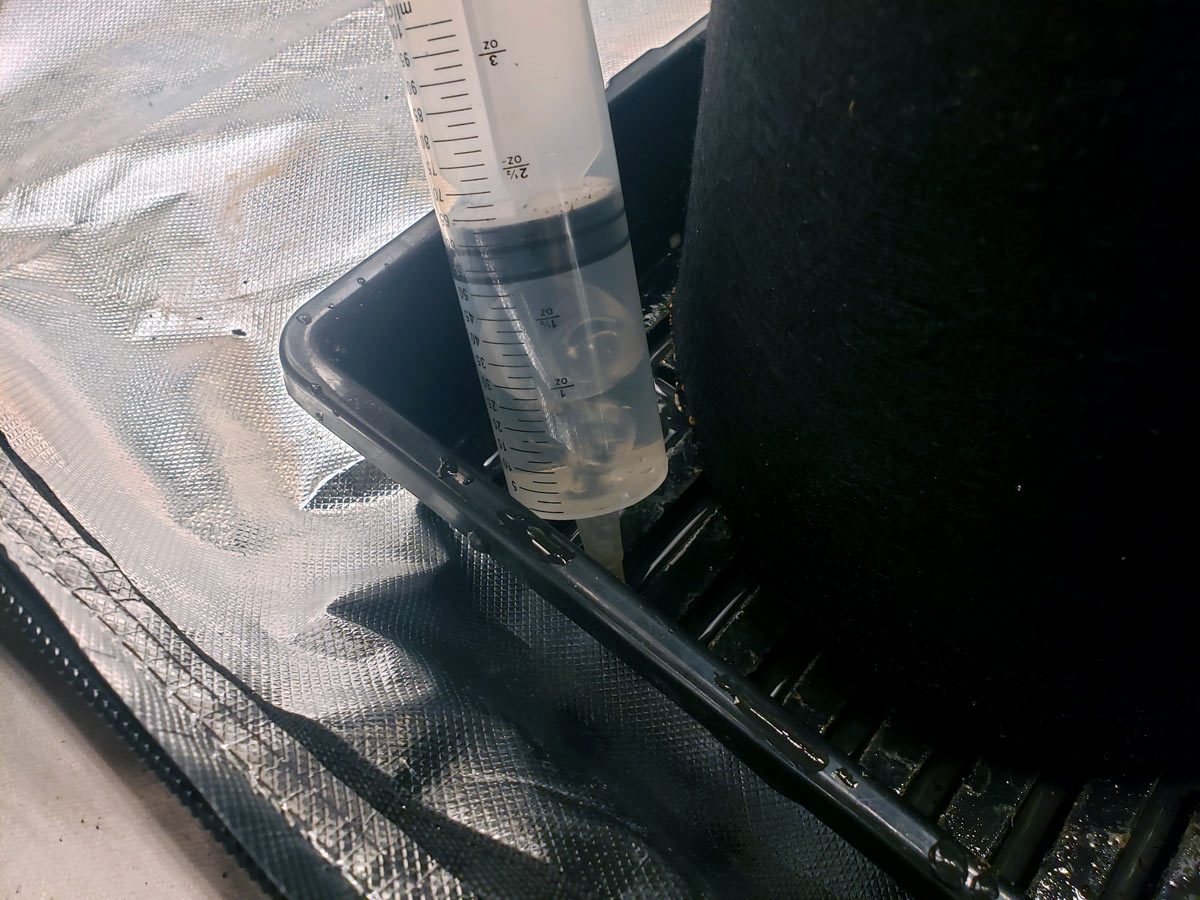
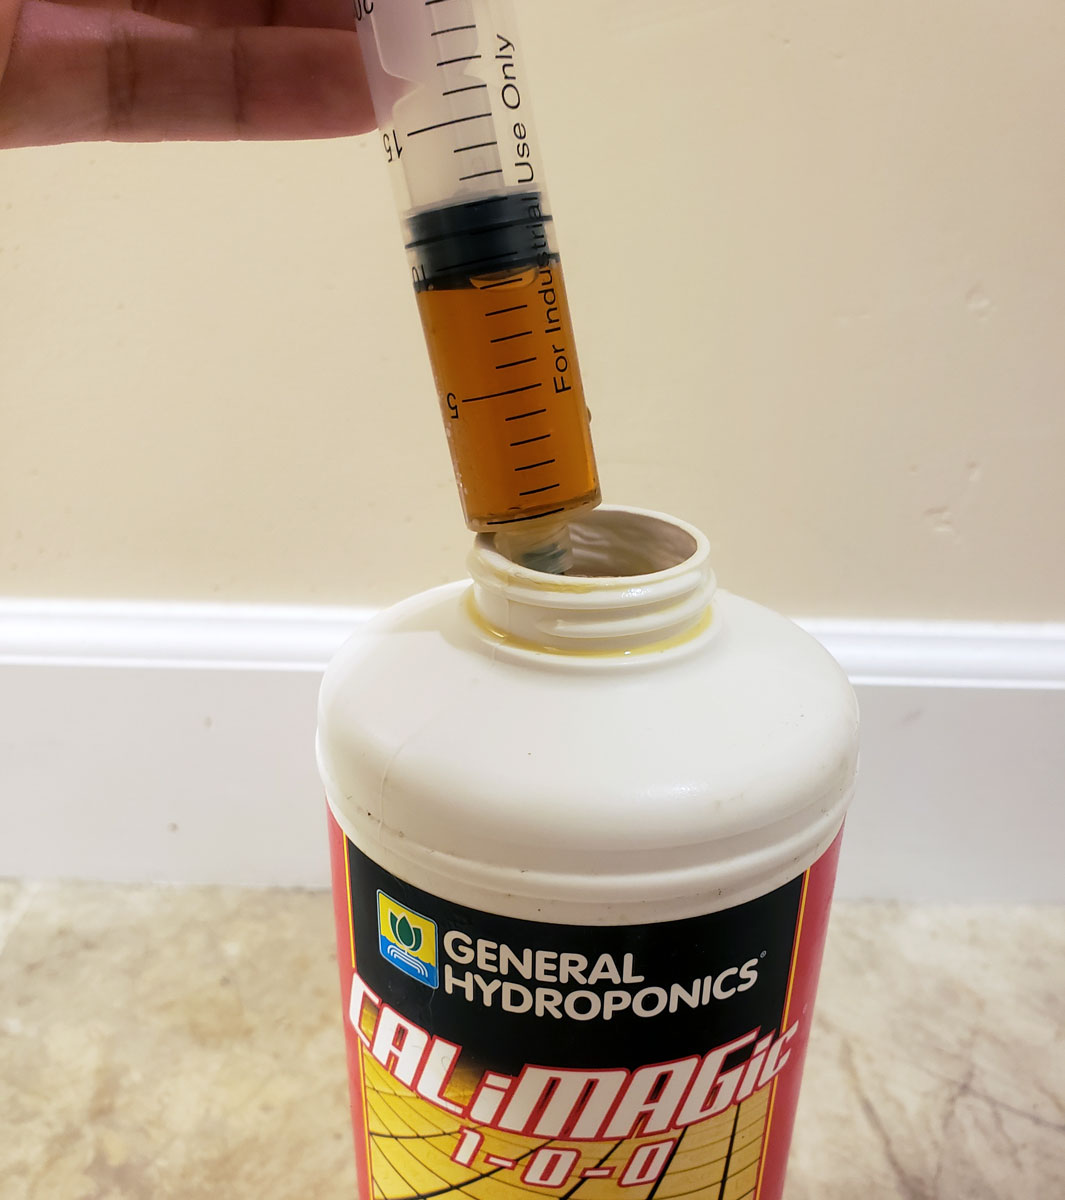
Use a big syringe to suck up the runoff water. Easy and silent!

Idea: Make it easier to remove runoff by putting a tiny waterproof item (water jug caps, plastic game pieces, coins, etc.) under the back of the tray or saucer. This puts the tray or saucer on a slight tilt, so water drains forward.
Just a few centimeters of lift is all you need, and water pools to the front.

This is the watering method I personally use and recommend it for cannabis growers. If you want to go deeper into the topic of watering, keep reading! This comprehensive watering tutorial teaches you everything about how to water your cannabis plants. Plus learn about specialty watering tools you may not know about!
Watering cannabis plants can be a pain… but only if you don’t know what to do.
Watering a plant may seem simple, but when I first started growing cannabis it actually felt like one of the hardest parts. Seedlings drooped, plants got inexplicable nutrient deficiencies, I was breaking my back carrying big jugs of water, and removing runoff water felt like a chore.
Today you’ll learn tactics on how to water cannabis plants perfectly with barely any effort.

Over the years, I figured out how to water cannabis plants perfectly with barely any effort. I also learned an important secret: as long as you start with good genetics and create a nice environment, you can skip almost every part of growing besides proper watering and still produce a great harvest with exceptional bud quality. However, your watering system is key to fantastic results at harvest.
Today I’ll teach you 3 cannabis watering tactics that maximize growth, increase yields, and improve bud quality while reducing time and effort. Stop worrying about watering so you can pay more attention to your marijuana plants and have more fun.
1.) Get the Right Watering Tools
Water transfer pump (battery-powered)
A battery-powered water transfer pump can be used to water plants as long as the hose can reach. These allow you to easily pump water from a container to the base of your plants. They’re also super handy for hydroponic growers who need to pump water in and out of their reservoir.
A water transfer pump moves water from one place to another.
![]()
A water transfer pump allows you to give water directly at the base of your cannabis plants.
Struggling to reach the plants in the back? If you’ve got lots of cannabis plants out of reach, get a water transfer pump with a longer hose. The following pump has a longer hose that reaches plants much further away than the model pictured above. However, it does cost a bit more.
Note: Stick around, as you’ll learn the easiest ways to remove runoff water in part 3 of this tutorial.
Automatic watering
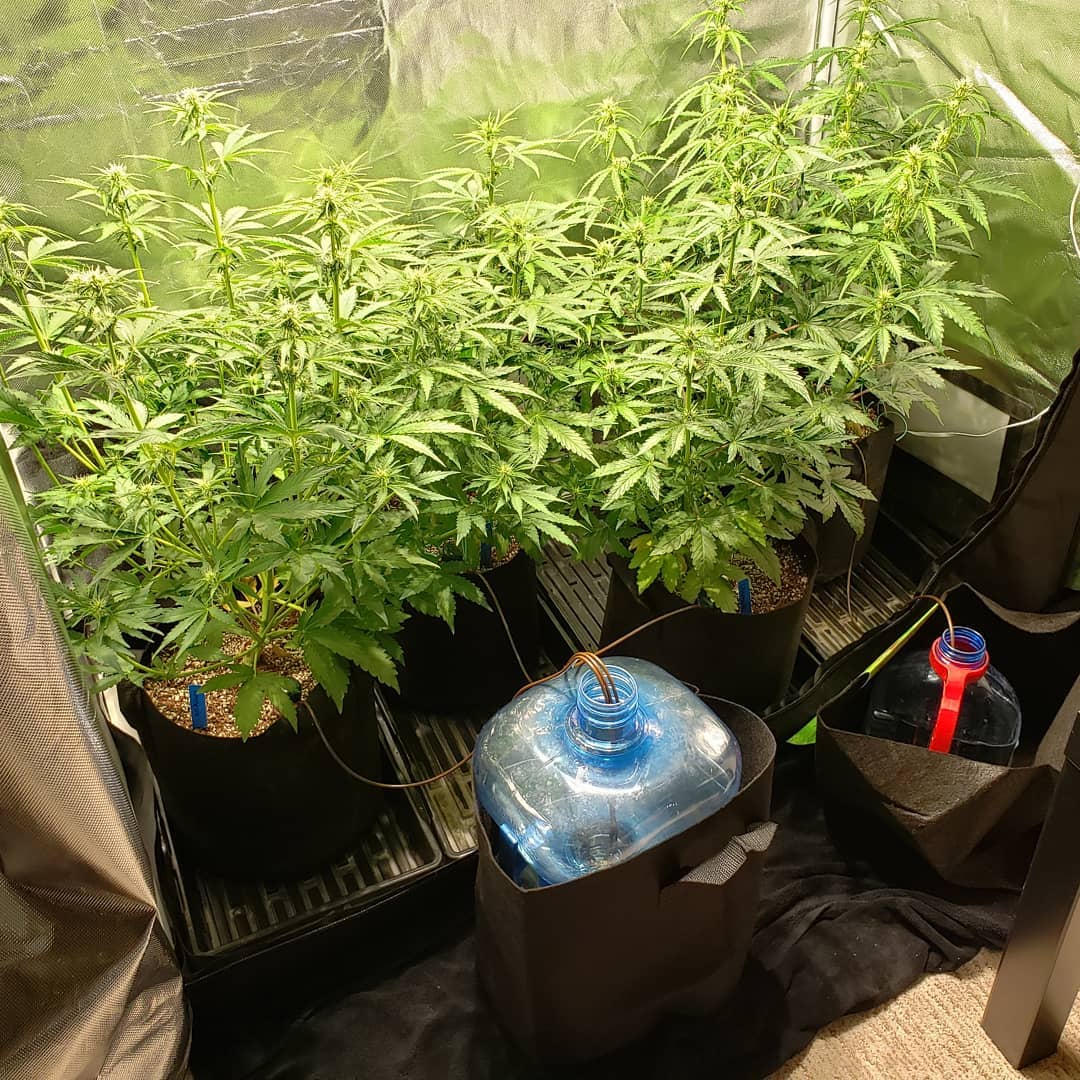
If you want to avoid watering altogether, there are several options that allow automatic watering. The most common options are clay stakes (which slowly provide water as the substrate dries out) or drip feeders (which are kind of like your own personal sprinkler system to water plants on a schedule). I’ve used the Blumat brand, which offers great options for both. There are also many generic versions of these tools that are cheaper but I haven’t personally tried yet.
One way to automatically water plants is with Blumat clay stakes connected to your water container via a tube.
Soak the stakes then stick them right into your plant container.
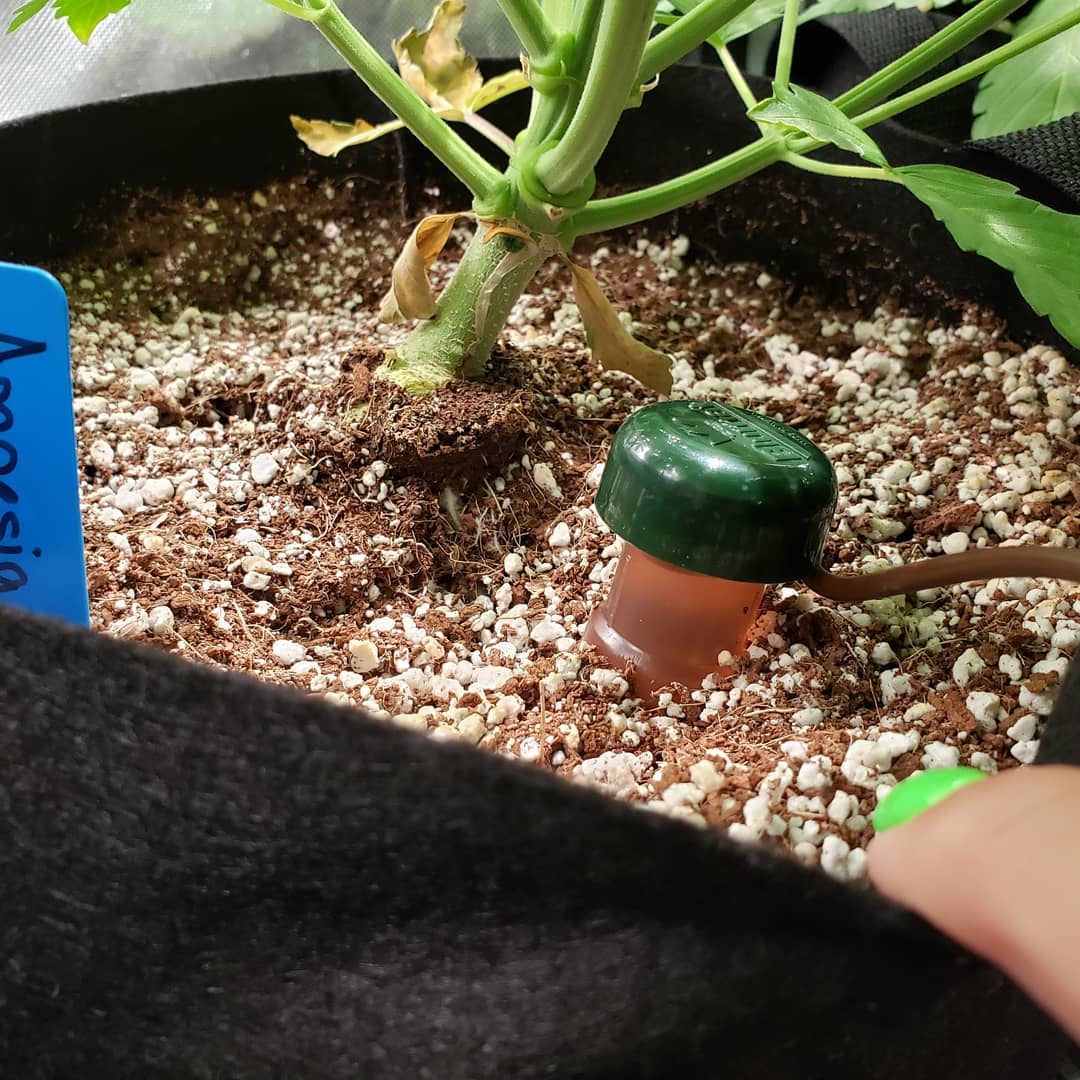
The stakes are connected to tubes that are placed in your water container.
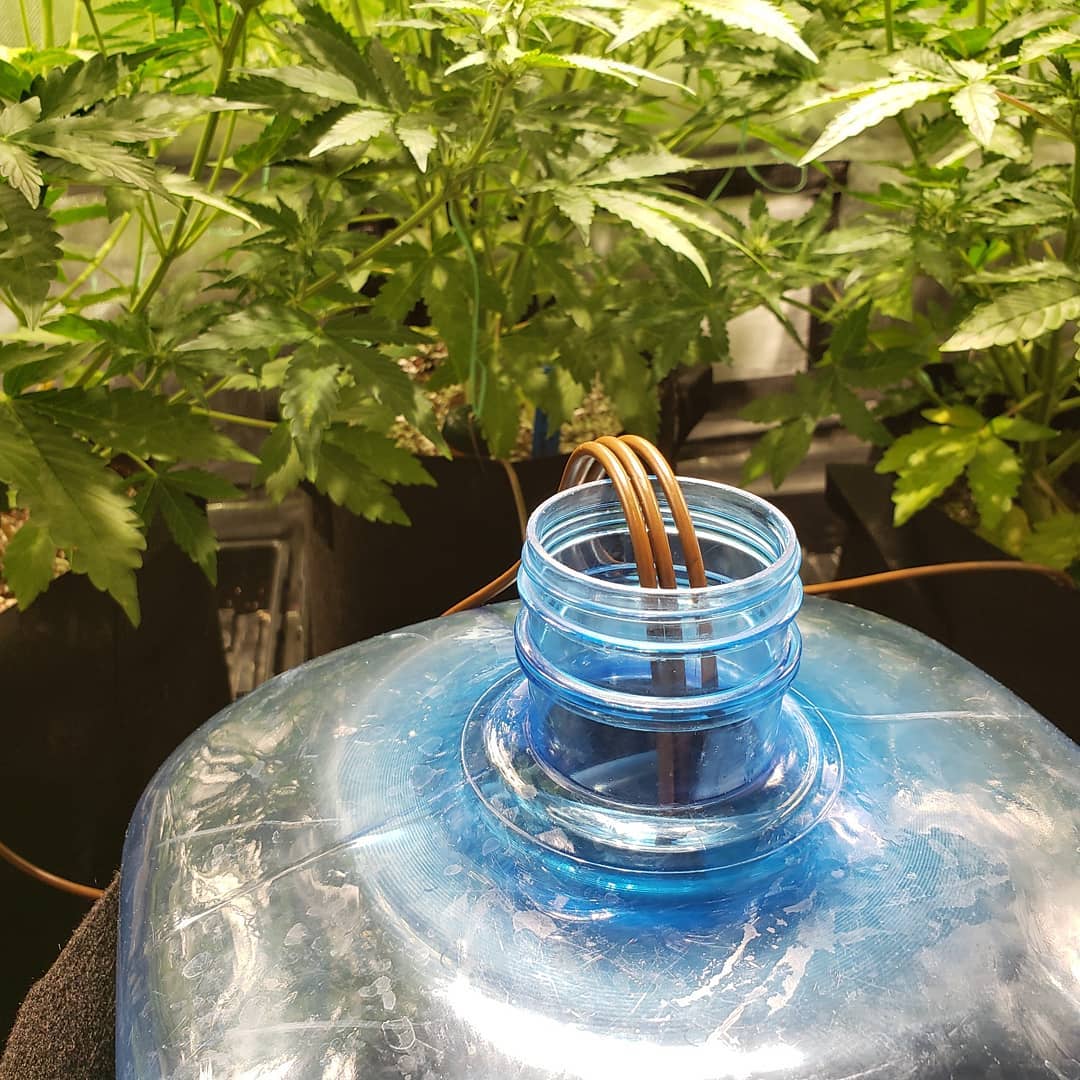
Water is automatically pulled from your container as the grow medium dries. Raise the water container to increase the overall wetness, and lower it to reduce the moisture. I use these to keep plants watered every time I need to leave the house for a trip.
Learn how to water your cannabis plants while on vacation.
The other main automatic watering option is using “drip irrigation” or a “drip feed”. In this setup, water is dripped directly onto the base of cannabis plants as opposed through a stake. Kind of like giving each plant their own personal sprinkling system. Once this is set up, all you have to do is refill your main water container and watch plants for signs they need more or less water.
Summary: There are many types of drip irrigation systems, from gravity-based versions to elaborate systems that give water to plants on a timer. I’ve also seen many growers build automatic drip-feed systems using pumps and tubes from the sprinkler section of a hardware store. The sky is the limit!
Learn more about automatic watering in our “how to water plants during vacation” article.
Faucet adapter (connect sink faucet to a garden host)
If you don’t want to lug water back and forth between your water source and grow space, there are adapters you can use to attach a garden hose to your faucet. This lets you add water to a container without having to carry anything. If you struggle carrying big containers of water, this can be a life-saver.
Get a faucet adapter that lets you connect your sink to a garden hose. This lets you fill up your water container in the grow space without needing to carry water between the sink and your garden.
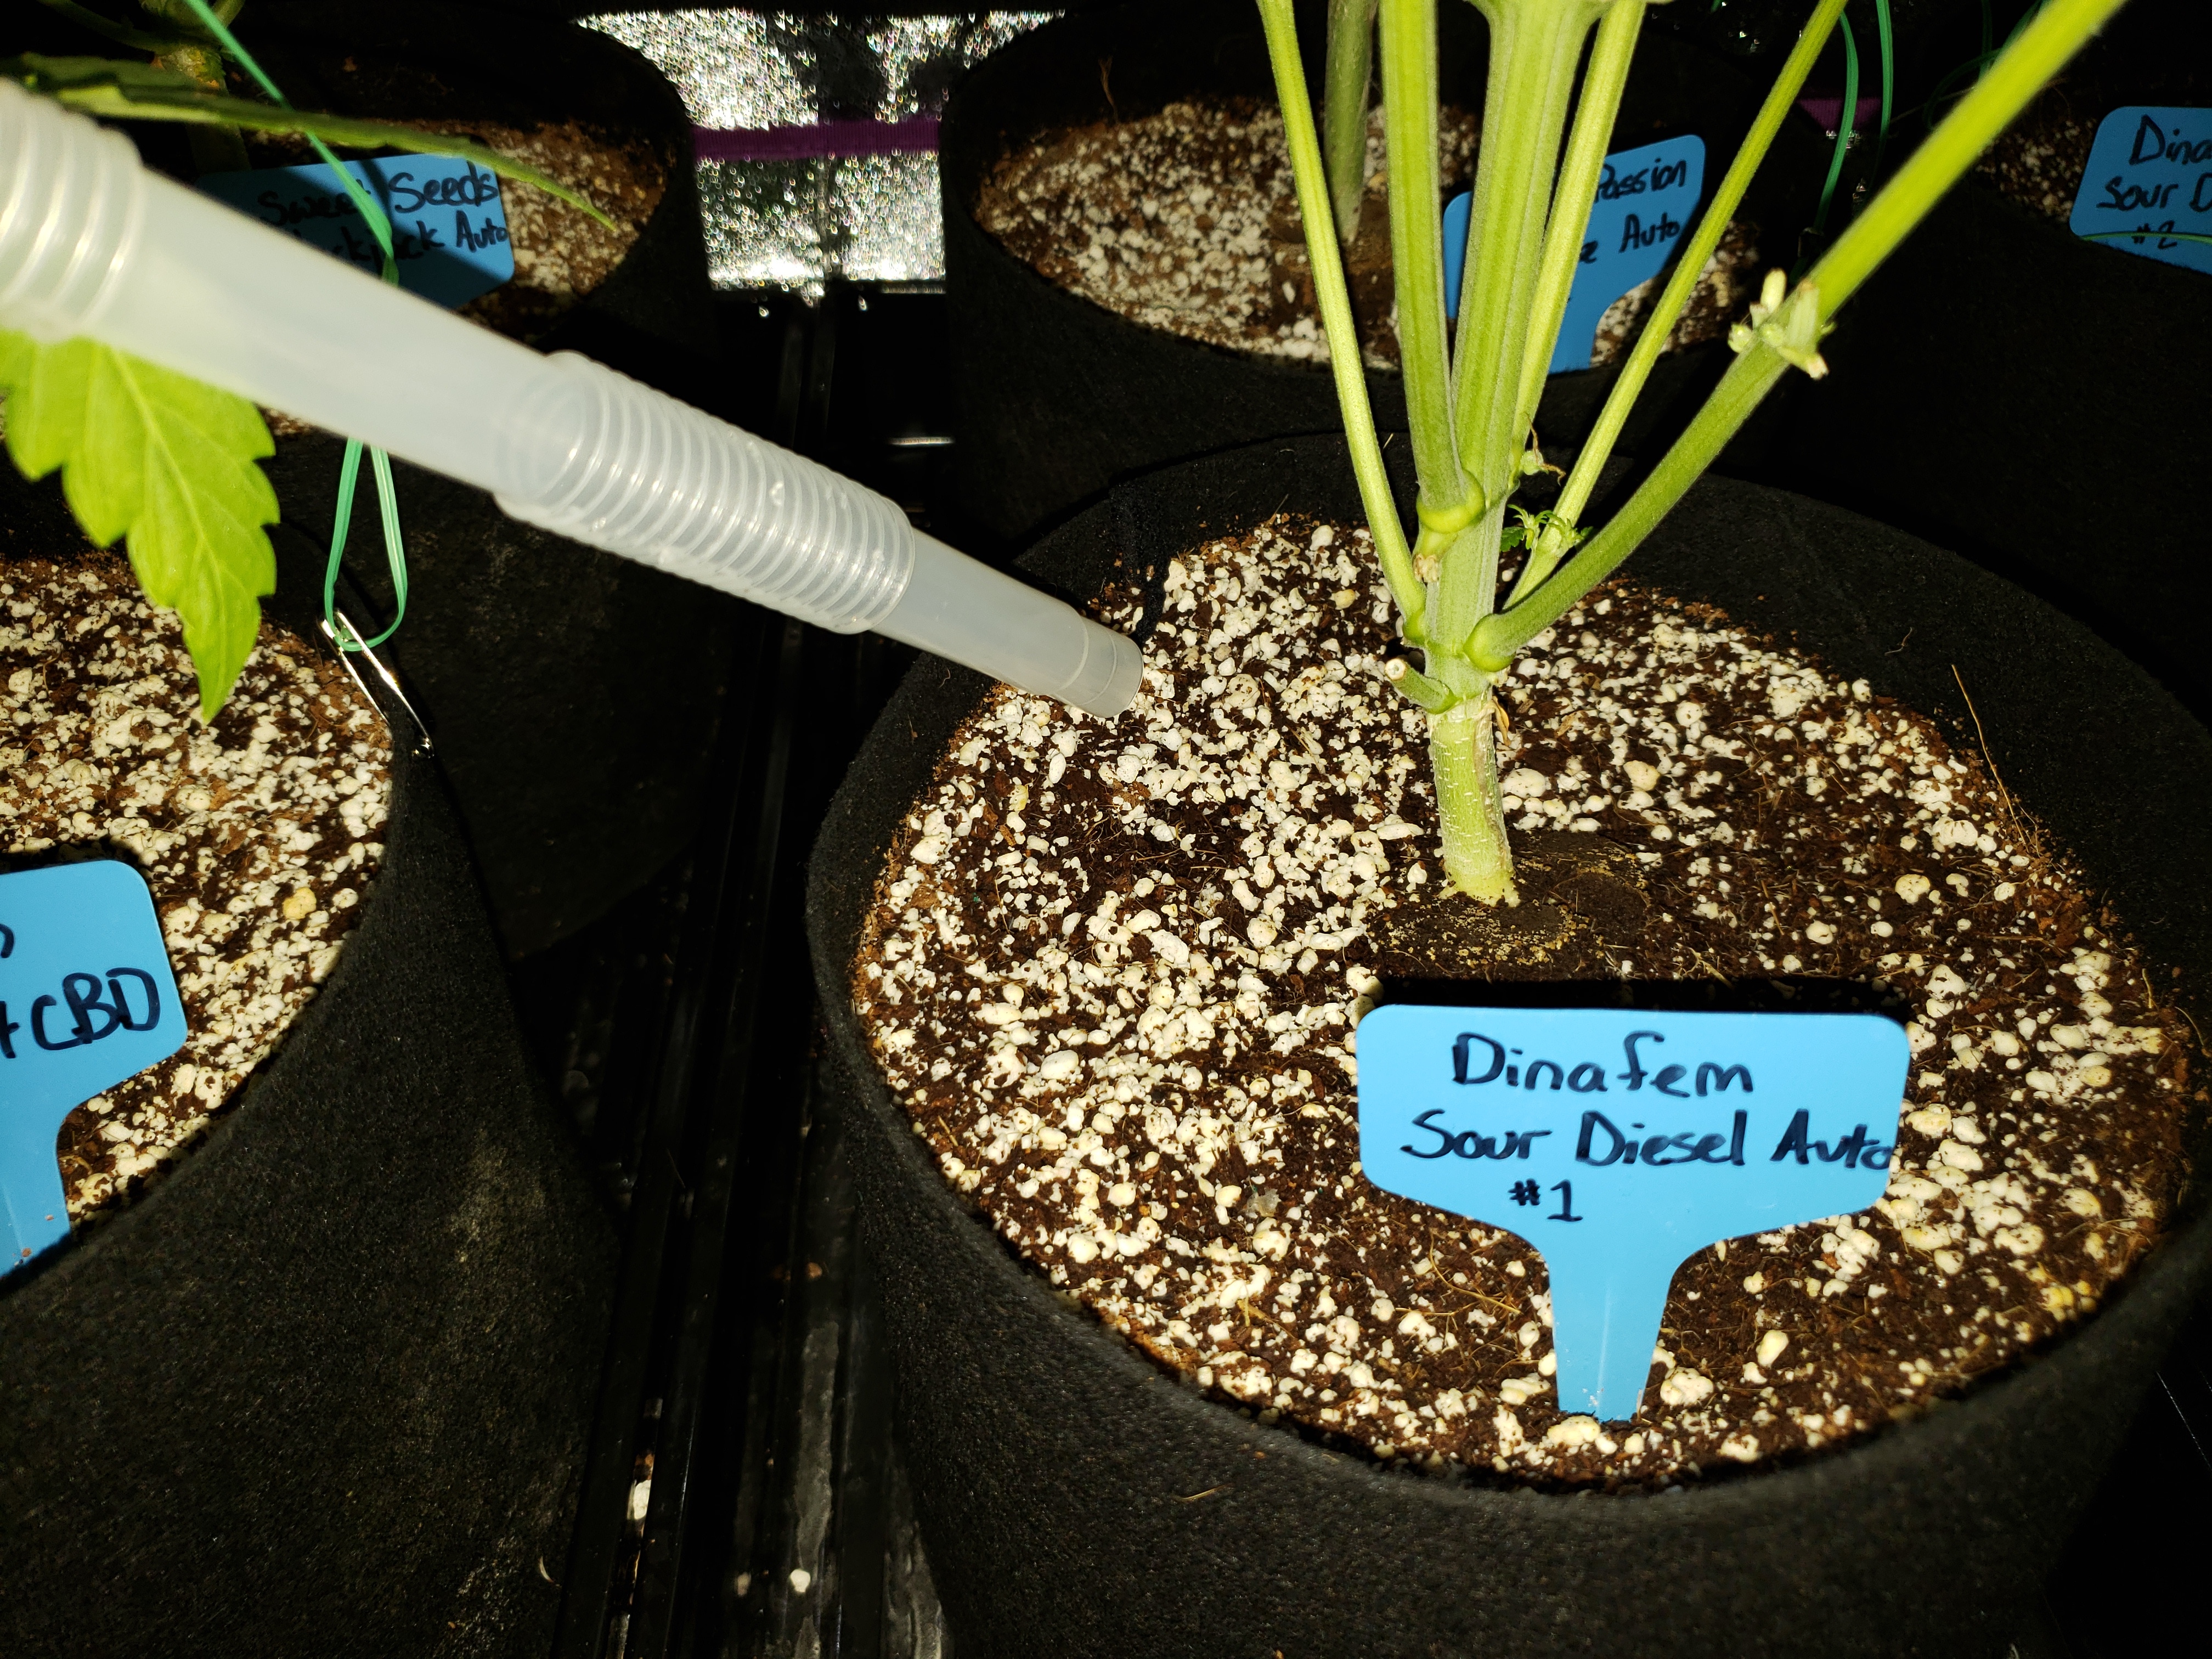
Giant syringes to remove runoff water
Use these syringes (don’t worry, there’s no needle) to suck up runoff water. These are a great choice if you don’t want the noise of a wet vacuum. I started using syringes instead of a wet vacuum ro remove runoff water when we moved to a place with downstairs neighbors.
Make sure to get a convenient container to put your runoff water. Best if you only have a handful of plants or relatively little runoff at a time. You probably don’t want to move a ton of water with a syringe.
I use a 200ml syringe (pictured here) to remove runoff water. However, if you plan to remove a lot of water at a time they come in 250ml and even 500ml (half a liter!) size with tubing so you can remove a lot more water at a time from further away.
A 200ml syringe (pictured here) is an quiet, easy way to remove runoff water!
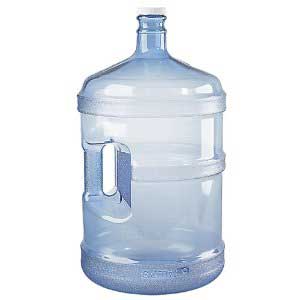
Get the right size water container
I recommend getting a water container that’s easy to use, move, and carry. I personally like 3-gallon water containers because I can carry them much more easily than a 5-gallon, and 3 gallons is usually enough to water my plants once or twice. You may find it more convenient to use multiple 1-gallon containers.
Use water containers that you can safely carry. Don’t hurt your back carrying too-big containers!
Money-saving tip: Water containers tend to be the cheapest in-person, for example at Wal-mart or a water store. Avoid buying these online as they are often far more expensive due to shipping costs.
If a container feels too heavy to carry comfortably with water, don’t ignore it. Use the suggestions in this section to prevent having to lug water around.
2.) Set Up So Watering is Easier
Take a moment to think about your watering setup. How do you water your cannabis plants now? Keeping that in mind, read through the following tactics. A little forethought and planning can save you a ton of time and effort in the long run.
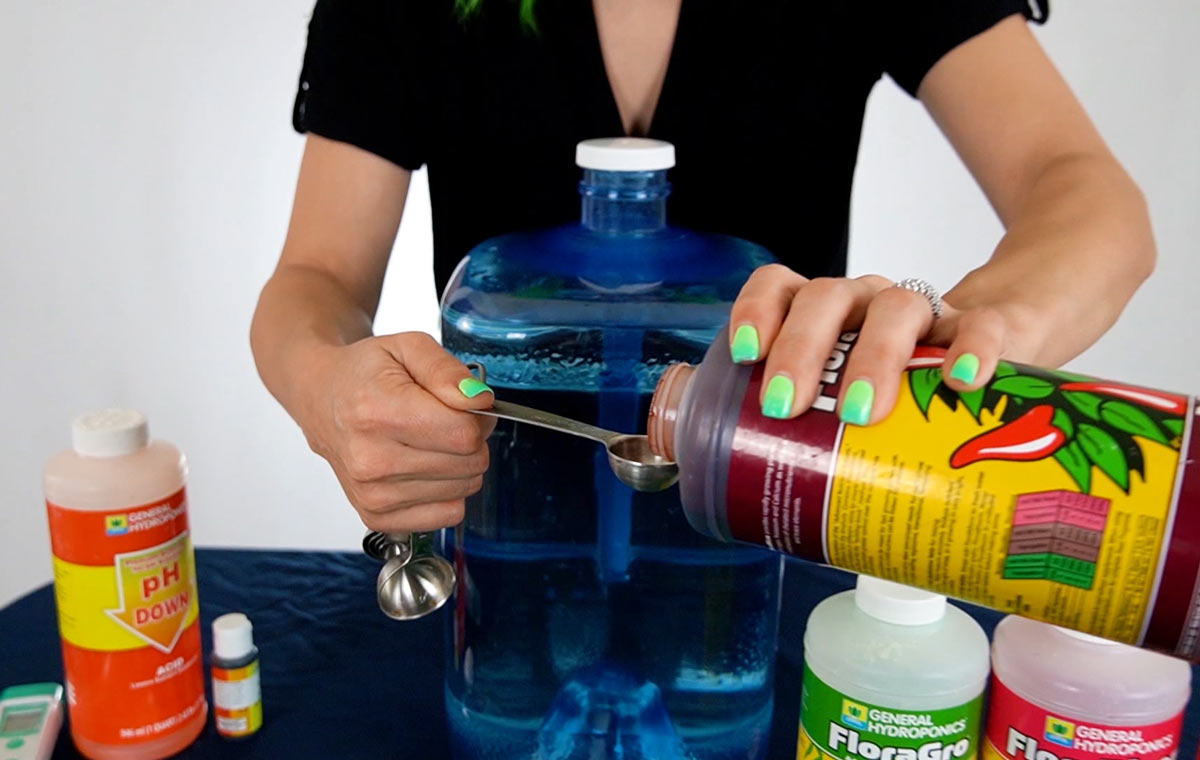
Make a spot to mix water and nutrients
Set up a table or specific spot to mix up nutrients, check pH, and otherwise prepare water before giving it to your plants.
You should have a convenient place that holds these things within arms reach:
- Your water container
- Bottles (nutrients, supplements, etc.)
- Measuring spoons or pipettes
- Anything else you need to prepare water
Being able to reach everything saves time and effort compared to haphazardly mixing nutrients, especially compared to mixing nutrients on the floor (which is weirdly what I did for years).
Set up a table or other convenient spot to store and mix nutrients.
Rich airy potting mix so water drains easily
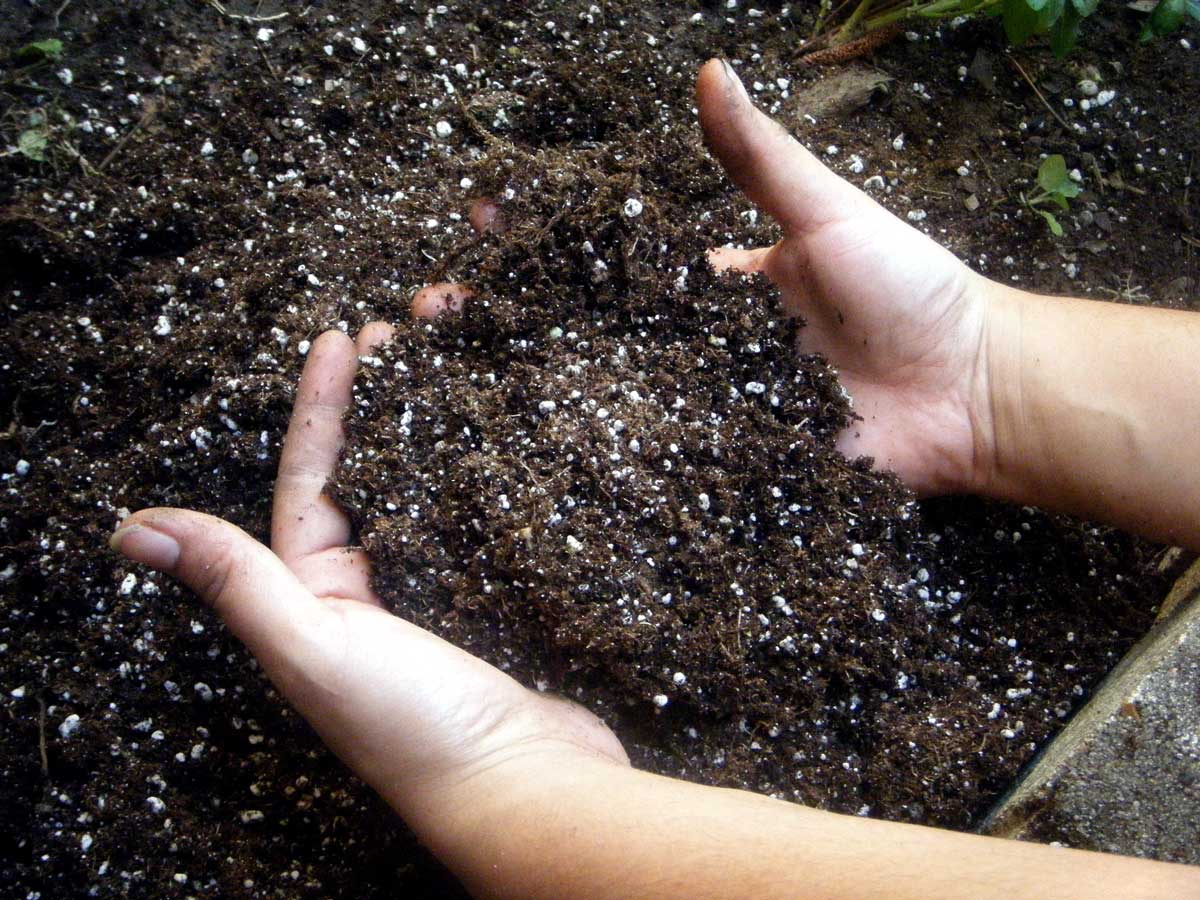
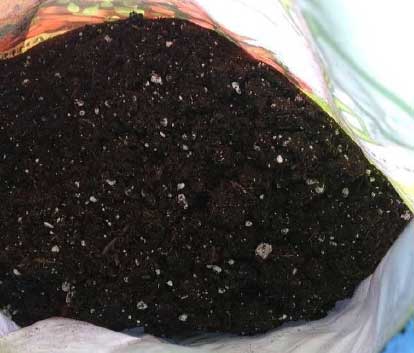
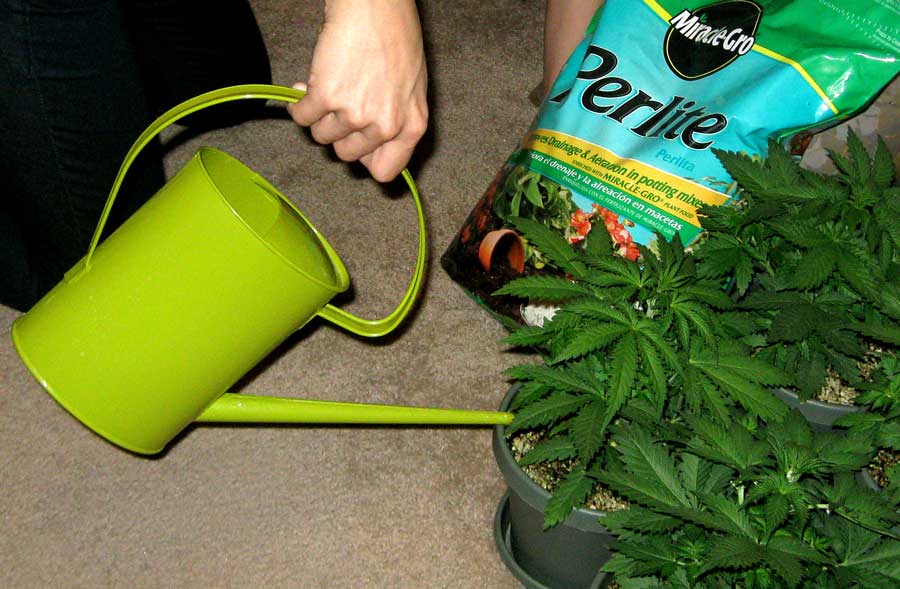
Start with a good soil or coco mix. This not only helps cannabis grow faster but also helps prevent problems like overwatering or underwatering. Most importantly, never use dirt you find outside to grow your cannabis plants. Choose potting mixes that appear rich, dark, and fluffy. If your main goal is to water as infrequently as possible, choose soil over coco coir (on average, coco needs to be watered more often than soil). If you see little white rocks in the potting mix, it’s usually a good sign as this is “perlite”, a light airy stone that helps make the soil fluffier, hold more oxygen, and drain easier. Typically good cannabis soil contains 10-30% perlite.
Choose a rich-yet-fluffy potting mix so cannabis plants are harder to overwater or underwater.
Choose the right nutrients
Mixing up nutrients can take up a lot of time if you’re using multiple bottles or supplements at the same time.
Easy Nutrients Option 1: “Just Add Water” soil
If time is of the essence, choose a “just add water” soil. This lets you avoid having to deal with nutrients altogether because all the nutrients are already contained in the soil.
Learn how to grow cannabis with “just add water” soil.
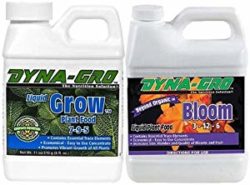
Easy Nutrients Option 2: All-In-One Nutrient Bottles for Vegetative and Flowering Stage
An all-in-one nutrient system is formulated to give everything your cannabis plants need in one bottle for each stage of life. This is different from most nutrient systems which have you use multiple bottles at a time to deliver the right nutrient ratios, and may even have extra supplements to add, too.
I’ve had excellent results using Dyna-Gro Grow and Bloom as a cannabis nutrient time saver. You only use one bottle at a time, and it can be used in soil, coco, or hydroponic setups. Cheap and easy yet great yields and the resulting buds are top tier.
Basic directions for using Dyna-Gro Grow & Bloom with cannabis plants:
- Use 1 tsp/gallon of “Grow” during the vegetative stage.
- Use 1 tsp/gallon of “Bloom” after buds start forming, until harvest.
Read my complete guide to growing cannabis with Dyna-Gro nutrients. Plus get my custom Dyna-Gro cannabis nutrient schedule!
Dyna-Gro nutrients are easy. “Grow” at first. Then “Bloom” once you see buds.
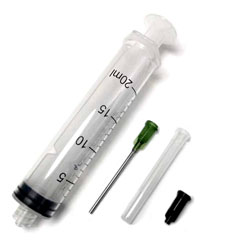
Blunt tip syringe for measuring nutrients
I know this is a second kind of syringe, but these are surprisingly useful for a grower. A blunt tip (not sharp!) can make it easier to quickly and accurately measure out nutrients. Not only can they save time, but they’re also the perfect solution if your nutrient schedule uses metric units and you’ve only got measuring spoons for imperial (US) amounts. I also like to use syringes for certain nutrients (GH Micro I’m looking at you!) that have high “fluidity” (the opposite of high viscosity) which basically means these liquids tend to dribble along the sides of the container instead of pour normally.
These blunt tip syringes are sometimes labeled as printer refill syringes or glue applicators.
Note: Every 5ml (aka 5 cc) is about equal to 1 tsp.
Get 20ml blunt tip syringes for measuring nutrients. The tips are blunted which means they are not sharp. The 20 ml version (sometimes labeled “20 cc”) holds up to 4 tsp.
Regular pots or specialty pots?
There are a few different types of plant containers for growing cannabis plants.
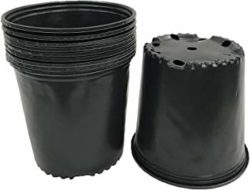
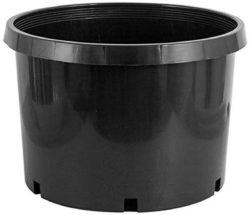
Hard-sided pots – Your standard hard-sided container needs to be watered the least often as they help prevent water evaporation. Choose standard hard-side plant pots to water as infrequently as possible. Even the cheapest ones are effective. This type often referred to as “nursery pots” since they are often used for plants that are growing. There are also decorative plant pots that are meant more as the final resting place for a plant that’s going to be around for a while. But your cannabis harvest will come before you know it!
Nursery pots – Lets you water less often. Often cheaper to buy in person.
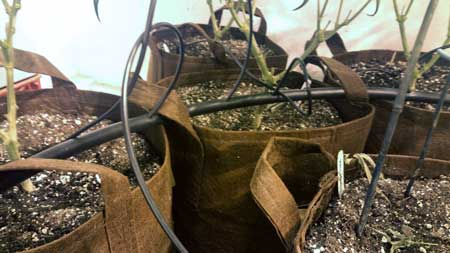
Fabric Pots or Air Pots – There are also specialty containers that let air in from the sides. The most popular are fabric pots and air pruning pots. These tend to increase cannabis growth rates and reduce the chance of overwatering. Although fabric and air pruning pots are common in cannabis gardens and offer great results growing cannabis, that extra air means soil drys out much more quickly and plants need to be watered more often. If you’re looking for ways to water plants less often, sticking to hard-sided pots can help.
Air pots and fabric pots result in slightly faster growth but need to be watered more often because the potting mix dries from the sides.
Fabric Pots – Cannabis grows faster, but needs to be watered more often.
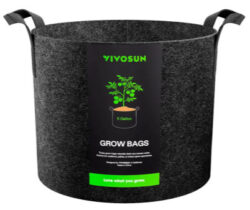
Fabric pots are popular among cannabis growers. Cheap and effective. Any brand works.
Air pruning pots – Fast growth like fabric pots. Made of plastic.
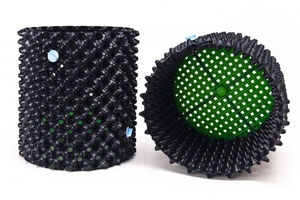
Air pruning pots are more reusable than fabric pots. They are also better for transplanting because they can be popped open to release the plant. No digging around the soil to remove your plant.
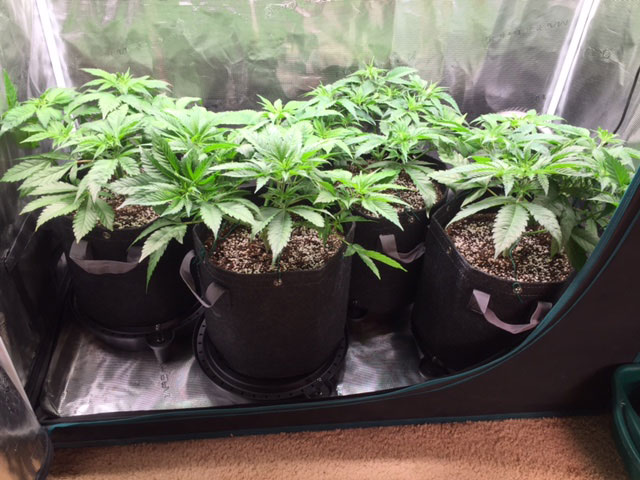
Choose a bigger pot to water less often.
While you’re thinking about how often you want to water your plants, also consider the size of the plant pot. If you want to be able to water your plants just once or twice a week, choose bigger plant pots (5+ gallons each). Big containers need to be watered less frequently than smaller ones.
Hard-sided 5-gallon plant pots (often called “nursery” pots) only need to be watered once or twice a week. You can usually find really cheap ones at a local garden center or plant nursery.
Don’t forget to get a matching plant saucer or tray to catch your runoff water!
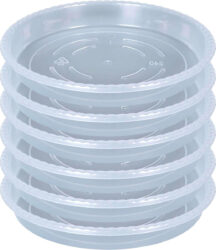
Use plant saucers to catch runoff water after watering cannabis plants. Get a size that accommodates your pots.
Inclined trays (alternative to saucers)
If your plant trays are on a slight incline, runoff water is easy to collect and dispose of since it naturally pools to the front. You can also do this with saucers, but it can get a bit tippy.
As a bonus, the water typically flows away from under your plants so they never sit in runoff water even if you forget to remove it. Putting plants on trays makes this easiest, but you can also do it on a smaller scale with big saucers.
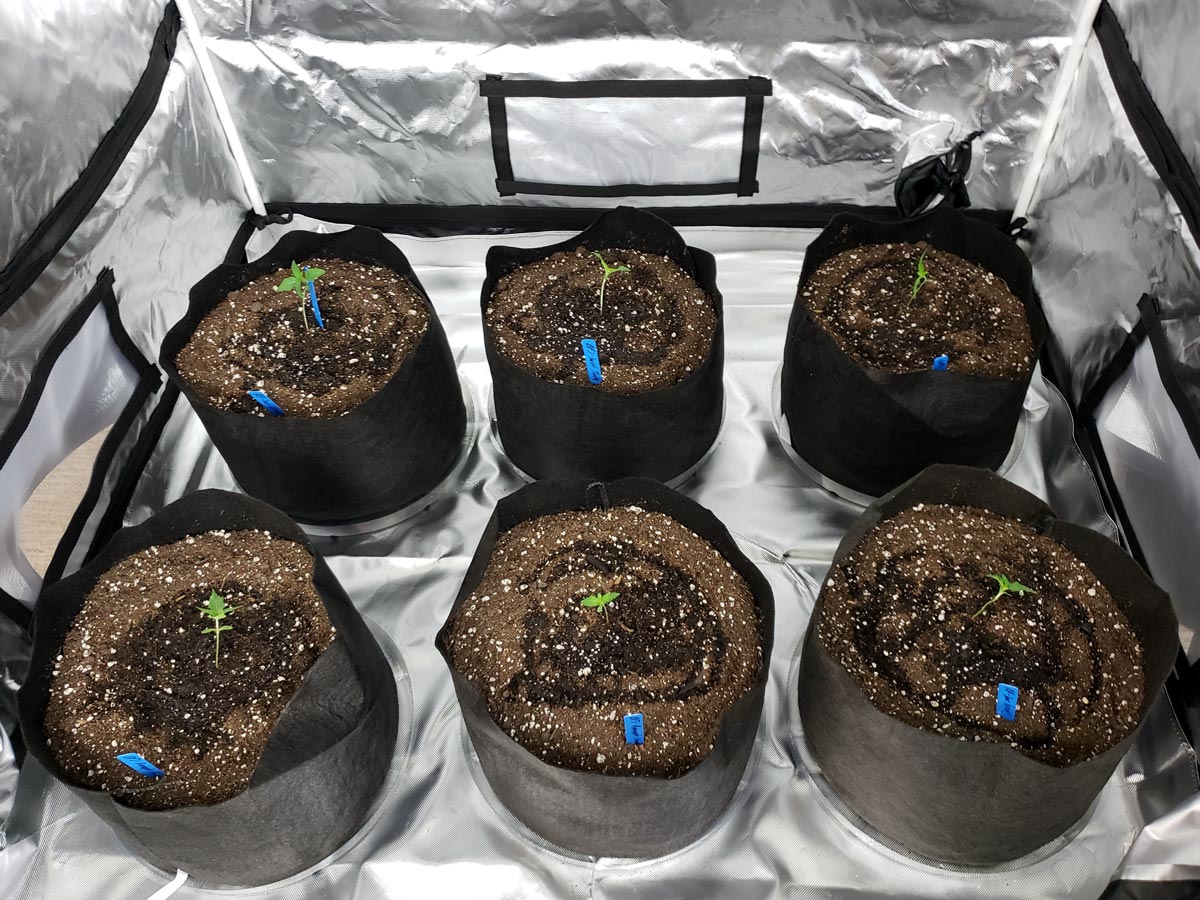
First, put your cannabis plants on trays to catch runoff water.
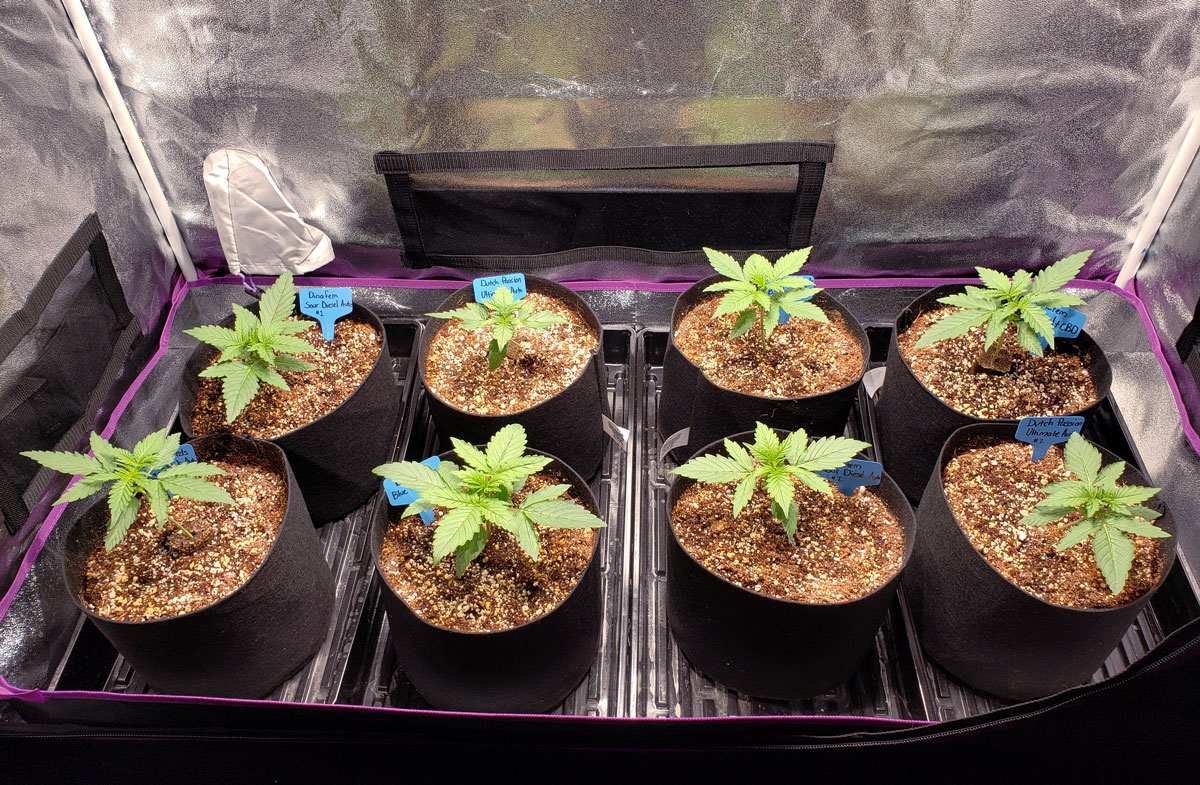
This setup use 4 x 10²⁰ trays (10″ x 20″ trays), which fit perfectly in a 2×4 grow tent.
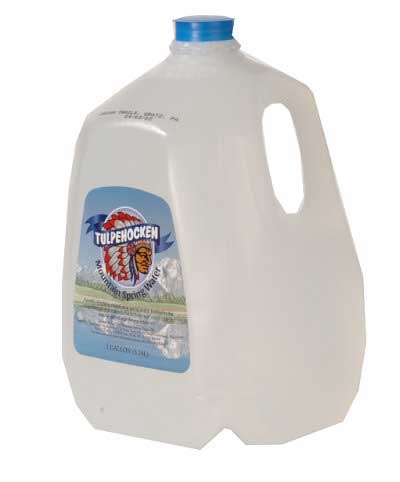
Put something small and waterproof under each tray in the back to put the trays on a slight incline. I used a cap from a one-gallon water container.
What to use to create an incline? Anything small and waterproof works great. A small piece of metal, plastic game piece, or even some coins will work. Use your imagination and look around the house for something small that won’t be damaged by water. Avoid anything too big/tall. Even a tiny amount of incline (just a few cm) is enough to move all the water forward, and too much incline can cause plants to grow off-kilter.
3.) How to Remove Runoff Water
After watering plants, you don’t want to let your plants sit in the runoff water. Roots sitting in water can give plants “wet feet” which causes root disease and stem rot. Another reason is that excess nutrients are typically flushed out in the runoff water, and you don’t want the plant absorbing them back in. The problem is that removing runoff water can be a pain. Inconvenience is the main reason cannabis growers don’t do it. I’ll show you some ways to avoid this problem and make the process more convenient and easy.
Removing runoff water can be easy. Here are 5 common runoff water strategies.
Giant syringes – Recommended
Use these syringes (don’t worry, there’s no needle) to suck up runoff water. These are a great choice if you don’t want the noise of a wet vacuum. I started using syringes instead of a wet vacuum ro remove runoff water when we moved to a place with downstairs neighbors.
Make sure to get a convenient container to put your runoff water. Best if you only have a handful of plants or relatively little runoff at a time. You probably don’t want to move a ton of water with a syringe.
I use a 200ml syringe (pictured here) to remove runoff water. However, if you plan to remove a lot of water at a time they come in 250ml and even 500ml (half a liter!) size with tubing so you can remove a lot more water at a time from further away.
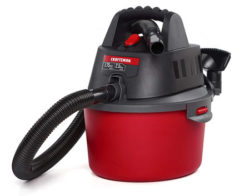
Wet vacuum – Recommended
With your plants on an incline, you can use a wet vacuum to quickly and easily suck up all runoff water for easy disposal.
A wet vacuum is loud but quickly sucks up water for easy disposal.
Inclined trays (or saucers) – Recommended
If your plant trays or saucers are on a slight incline, runoff water is easy to collect and dispose of since it naturally pools to the front. Additionally, the water will typically flow away from under your plants so they never sit in runoff water even if you forget to remove it. Putting plants on trays makes this easiest, but you can also do it on a smaller scale with big saucers.
First, put your plants on trays to catch runoff water. This setup use four 1020 trays, which fit perfectly in a 2×4 grow tent.
Put something small and waterproof under each tray in the back to put the trays on a slight incline. I used a cap from a one-gallon water container.
What to use to create an incline? Anything small and waterproof works great. A small piece of metal or even some coins will work. Use your imagination and look around the house for something small that won’t be damaged by water. Avoid anything too big/tall. Even a tiny amount of incline (just a few cm) is enough to move all the water forward, and too much incline can cause plants to grow off-kilter.
Avoid runoff altogether – Monitor carefully
There are a few techniques you can use to avoid ever dealing with runoff water. With these setups, you basically give just enough water to saturate the grow medium to the base of the container, but not enough that extra runoff water comes out the bottom.
Keep in mind when you avoid runoff…
- Best when not using nutrients – For example in a “just add water” soil setup. In fact, it’s actually beneficial to avoid getting runoff water in these setups because it can drain away extra nutrients.
- Can be done when adding nutrients but requires careful monitoring – Since extra nutrients are not getting washed out every watering, you need to watch plants closely for signs of nutrient buildup. If leaves are getting dark or you see nutrient burn, it means that there is more nutrients in the coco or soil than the plant can use. In that case either lower your nutrient dosage or give plants enough water to cause 10-20% runoff. This flushes out buildup. Don’t forget to remove the runoff water so the nutrients don’t get sucked back up.
- Don’t ignore pH – If you’re adding PH Up or PH Down liquid to adjust the pH of your water, they can build up in the grow medium just like nutrients. If you’re seeing nutrient deficiencies, one of the first things to check is the pH. One of the easiest things to do is capture a few drops of runoff water and check the pH. If it’s much higher or lower than the pH you’re putting in, you have a problem. Give water with pH at the opposite of the acceptable range until it comes out normal. So for example, if using PH Down, which is an acid, you may notice the pH is too low in the grow medium. In that case, give high pH water within the recommended range. In coco, it’s recommended to keep pH between 5.5-6.5, so if pH is coming out low, give at 6.5 until it normalizes. In soil 6-7 pH is recommended so give at 7 pH if it’s coming out too low.
- Pay attention to moisture level at bottom of pot – If you’re not getting any runoff water, you may not realize if the grow medium is getting overly saturated or drying out. At least occasionally, feel the bottom of the pot after watering to make sure it feels moist but not soaking wet (most effective with fabric). If the bottom feels bone dry after watering, chances are you’re not giving enough water at a time. Giving enough water to get runoff will help prevent this issue, but if not giving runoff it’s up to you to monitor the moisture at the bottom of the pot.
- Produce runoff when experiencing nutrient problems to help give yourself a blank slate, but typically there is no need to “flush” (give a ton of water at a time).
Some growers try to give an amount of water that saturates the pot but does not result in extra runoff water out the bottom. This saves the step of removing runoff.
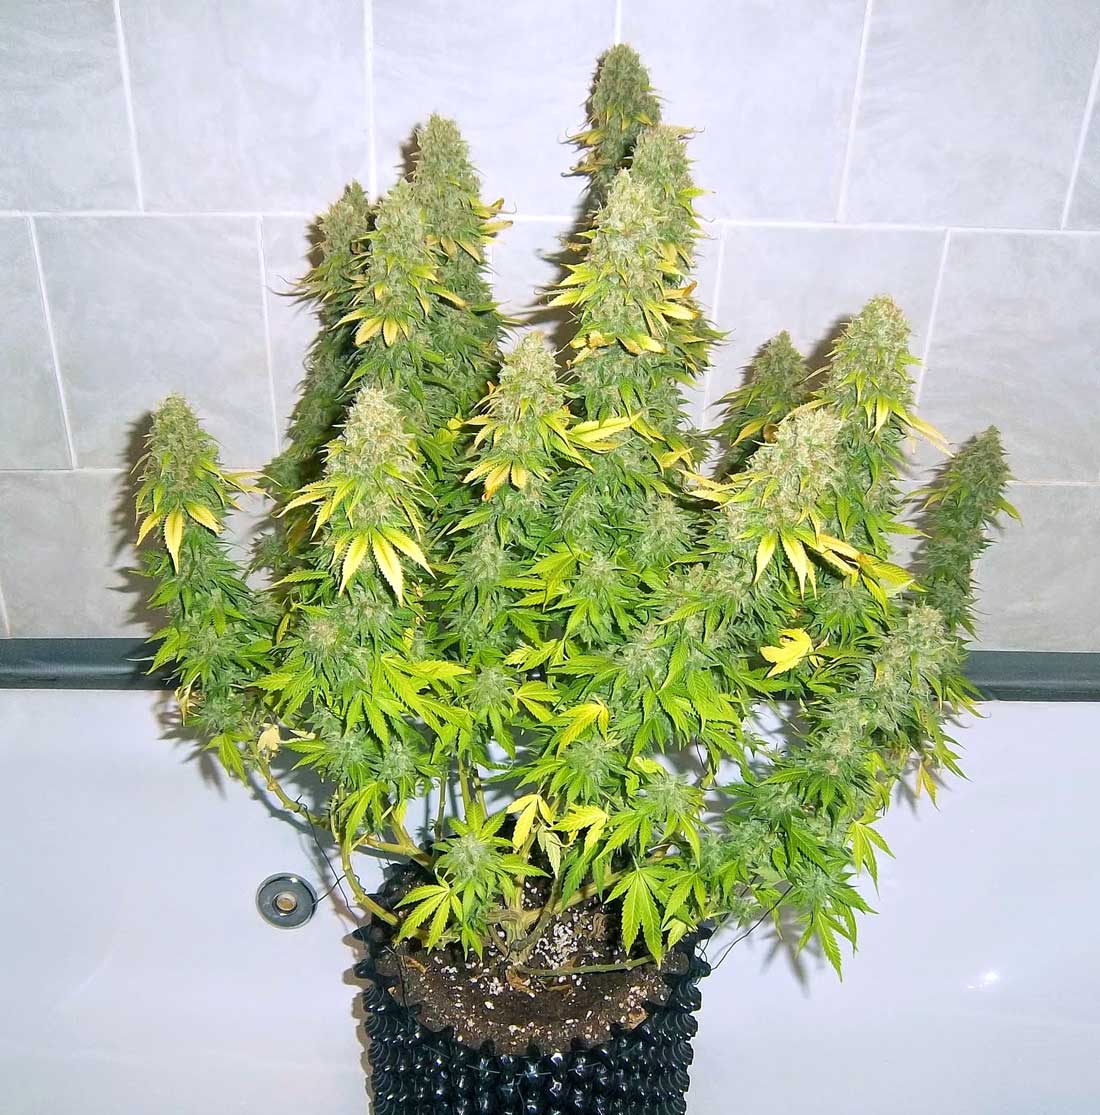
Using Evaporation or a Drain – Special setup required
It’s possible to remove runoff water via evaporation or down a drain. You should never allow pots to sit in water (this causes nutrient problems, droopiness, and root rot), so allowing runoff to evaporate isn’t a good choice when plants are in saucers.
This is only an effective strategy if the water is running away from pots, for example when trays are on an incline or above a drain. Chances are you will start to see crusty nutrient buildup where the water is evaporating, so it’s recommended to clean the evaporation area on a regular basis to avoid it getting brought back to the plants.
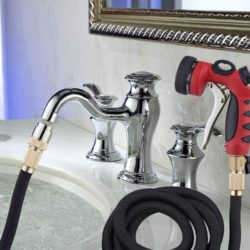
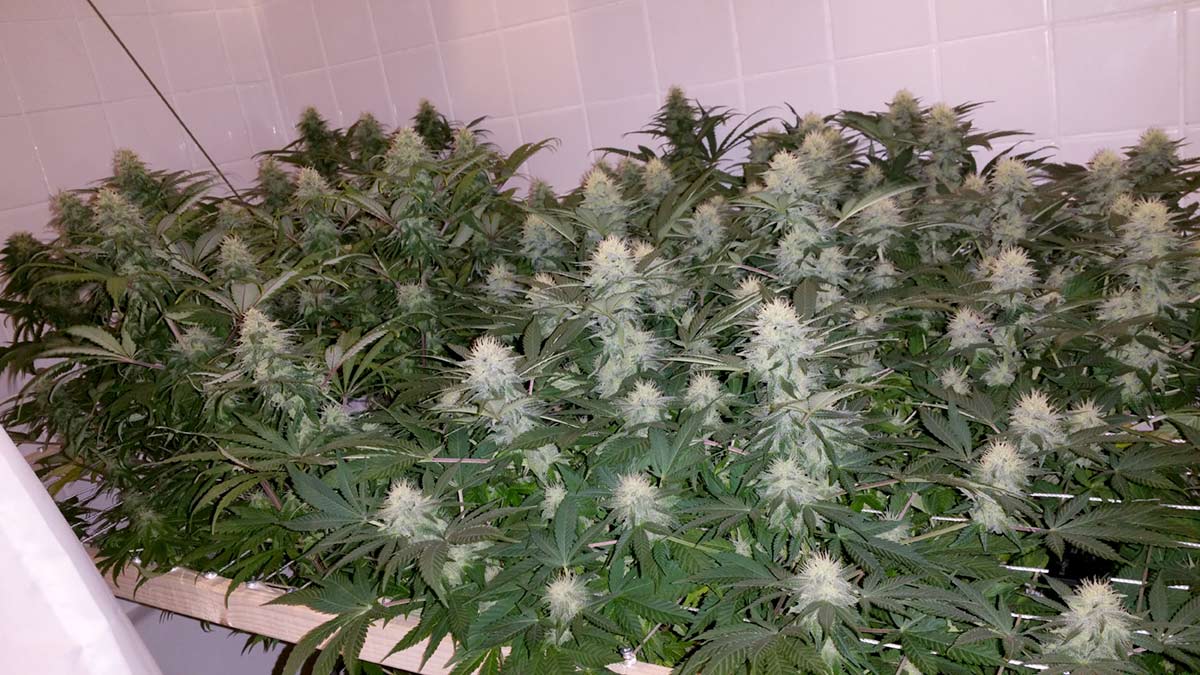
These cannabis plants are growing in a bathtub. No need to worry about runoff water in a setup like this… it goes directly down the drain!
Pick up plants and water them somewhere else – Too hard, no need!
Some cannabis growers move plants to water them. For example, they might move the plants to a sink or bathtub before watering, so that all the runoff water naturally drains away. This gets the job done, but the process is cumbersome and time-consuming, especially if you have more than one or two plants.
There is no need to pick up your plants and move them to collect runoff water, if you don’t want to. To me this adds unnecessary time and can be a pain compared to the options above.
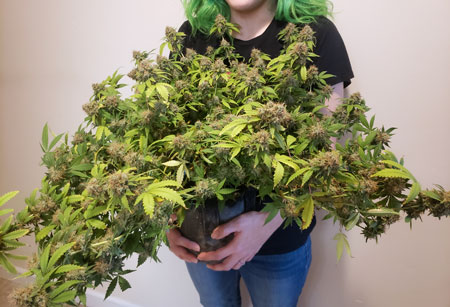
The bigger plants get, the more annoying it is to pick them up and move them around. They may even “collapse” and branches may fall over like this, especially if buds are heavy.
How Often to Water Cannabis Plants
Now that you know how to water and remove runoff, let’s quickly go over how much water to give, and how often. After this, watering your cannabis plants will never be a challenge again!
Seedling watering tips & tricks
Seedlings are super easy to over-water. Use a cup to give just a little water at a time in a circle around the base of your seedling. Learn how to water seedlings in a big pot so they don’t get over-watered. Check out this page with answers and tips for most common seedling problems.
Water cannabis seedlings with a few cups of water in a circle around the base of the plant. Seedlings don’t drink much so you don’t want to completely saturate the soil just yet.
How much water at a time
We have a complete “how to water” tutorial but check out this example schedule for watering plants in 5-gallon fabric pot.
- Day 1 – Give 2 cups (500ml) water per plant
- Day 3 – Give 2 cups (500ml) water per plant
- Day 6 – Give 2 cups (500ml) water per plant
- Day 8 – Give 3 cups (750ml) water per plant (every 3 days after this)
- Day 11 – Give 3 cups (750ml) water per plant
- Day 14 – Give 4 cups (1 liter) water per plant
- Day 17 – Give 4 cups (1 liter) water per plant
- Day 20 – Give 5 cups (1.25 liter) water per plant
- Day 23 – Give 6 cups (1.5 liter) water per plant
- Day 26 – Give 6 cups (1.5 liter) water per plant
- Day 29 – Give 8 cups or 1/2 gallon (2 liter) water per plant
- Continue giving 1/2 gallon (2 liters) per plant every 3 days. You may need to give more at a time or more often as plants get bigger. If you’re getting a lot of runoff out the bottom (more than 20%) or plants droop after watering, it means you should be giving less water at a time. If plants get droopy before being watered, you should give more water at a time, or water more often.
Note: This is the schedule that I use for a 5-gallon fabric pot, but your environment will affect how much plants drink. If plants are in hard-sided pots as opposed to fabric pots, you may need to water less often. If you would like to water less often than every 3 days, you’ll need to give more water at a time.
How often to water (tips)
General idea: Water when pots feel light or the top is drying out. Don’t let plants run out of water, but make sure roots get access to plenty of air. If the grow medium is waterlogged and looks super wet, the roots likely aren’t getting enough oxygen for the fastest growth. With over-moist soil, you should give less water at a time or water less often.
- For coco, water when you start seeing dry patches. Never let pots fully dry out. Check out this watering tutorial for coco.
- For soil, wait until the top is mostly dry before watering again unless the plant pot feels light. Read the complete watering tutorial.
Know the Signs of Overwatering/Underwatering
Droopiness is the main sign. Here are examples of leaf symptoms that also commonly appear when cannabis plants are over-watered vs under-watered.
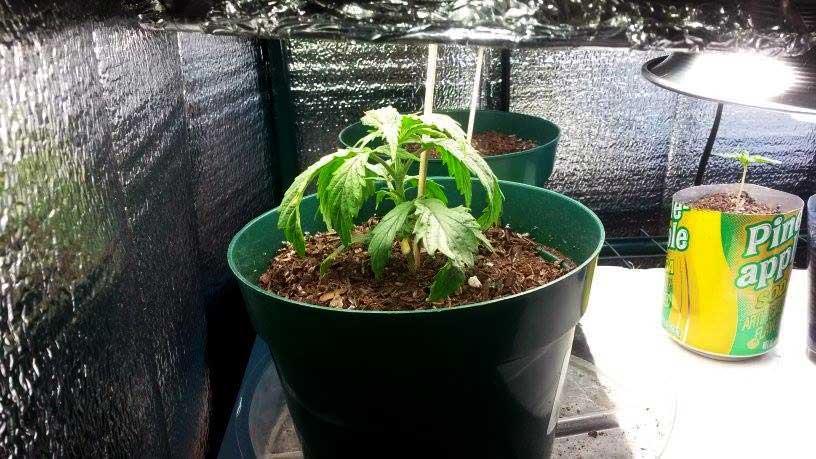
This seedling is droopy and getting nutrient deficiencies due to overwatering.
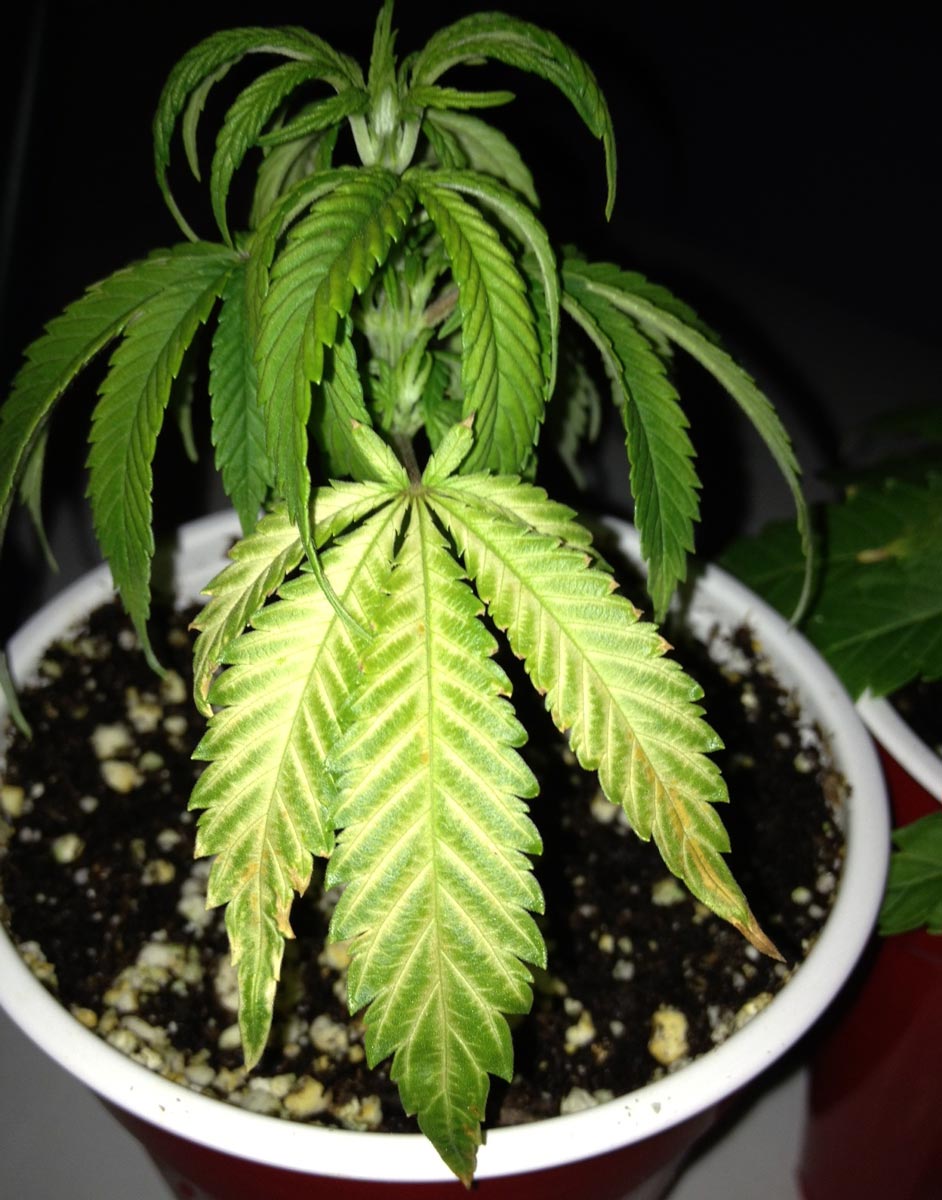
Sometimes brown edges can be mistaken for nutrient burn. If you’re seeing the edges turn brown, that may be a sign of overwatering, especially if combined with droopiness.
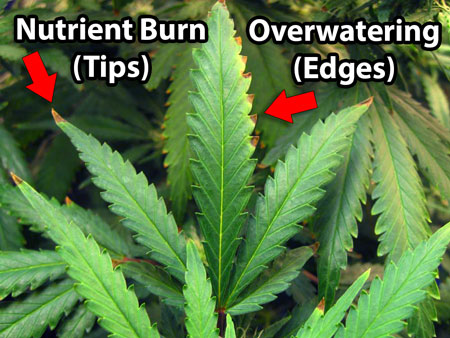
Example of an underwatered plant. Underwatering is very similar in appearance to overwatering. The main clue is the plant is getting droopy before being watered (not after).
If you’re seeing droopiness, it almost always means there’s some sort of issue with the roots or watering.

How to avoid nutrient deficiencies
Nutrient deficiencies can be really hard to pin down at a times. It often has to do with watering habits (and occasionally your environment).
5 ways to prevent nutrient deficiencies:
- Avoid over/under watering (this is surprisingly the most common reason for nutrient deficiencies in younger plants)
- Give the right nutrients for the grow medium (don’t give soil-specific nutrients to plants in hydroponics, etc.)
- Check the root pH if you notice spots or discoloration on your leaves. Learn what symptoms are caused by pH (with pictures).
- Be aware of light burn, which is the result of the grow light being too close, but is sometimes confused for a nutrient problem.
- Use the free plant doctor tool whenever you’re stuck!
Today you got a crash course in watering your cannabis plants so it’s easy, doesn’t take much time, and gives you the flexibility to have more fun with your plants. Contact us if you have any watering tips you’d like to see added to this tutorial!