by Nebula Haze
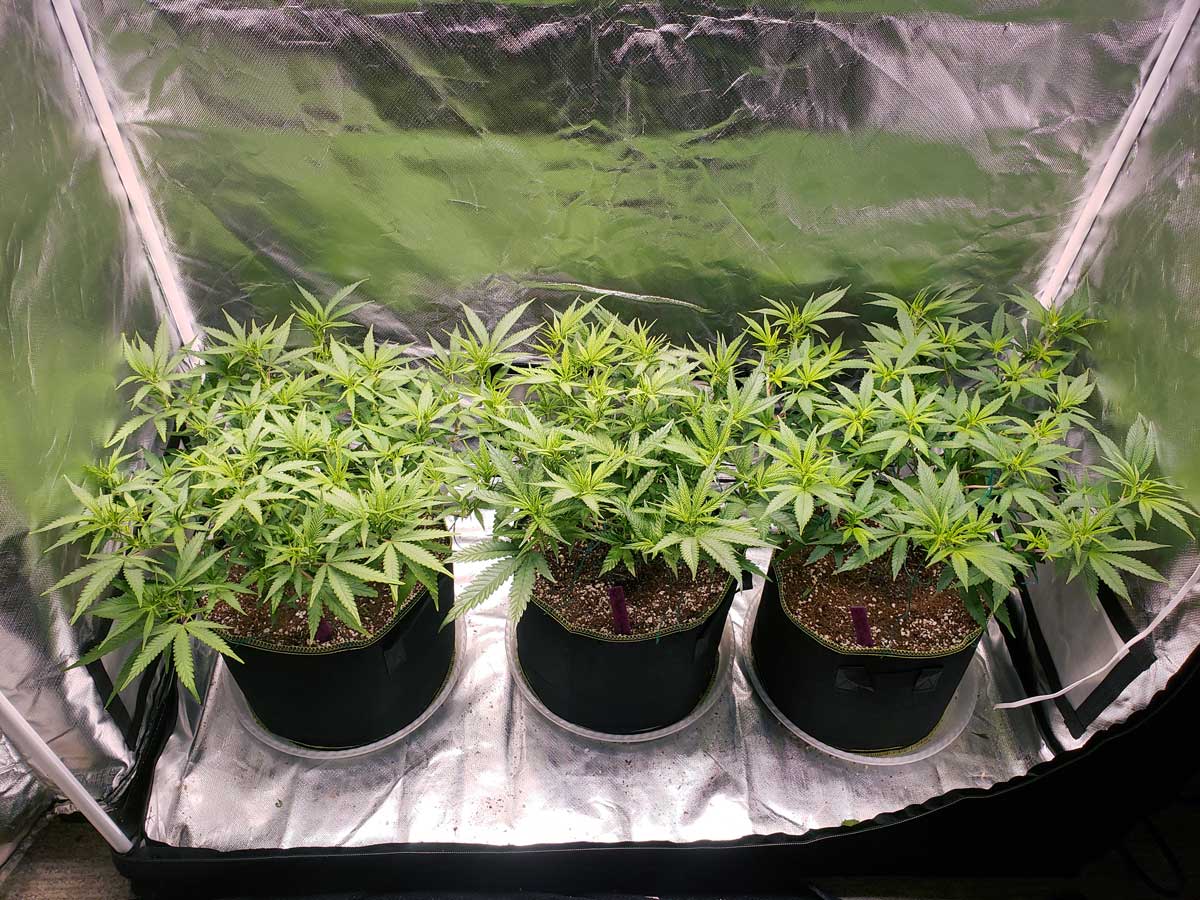
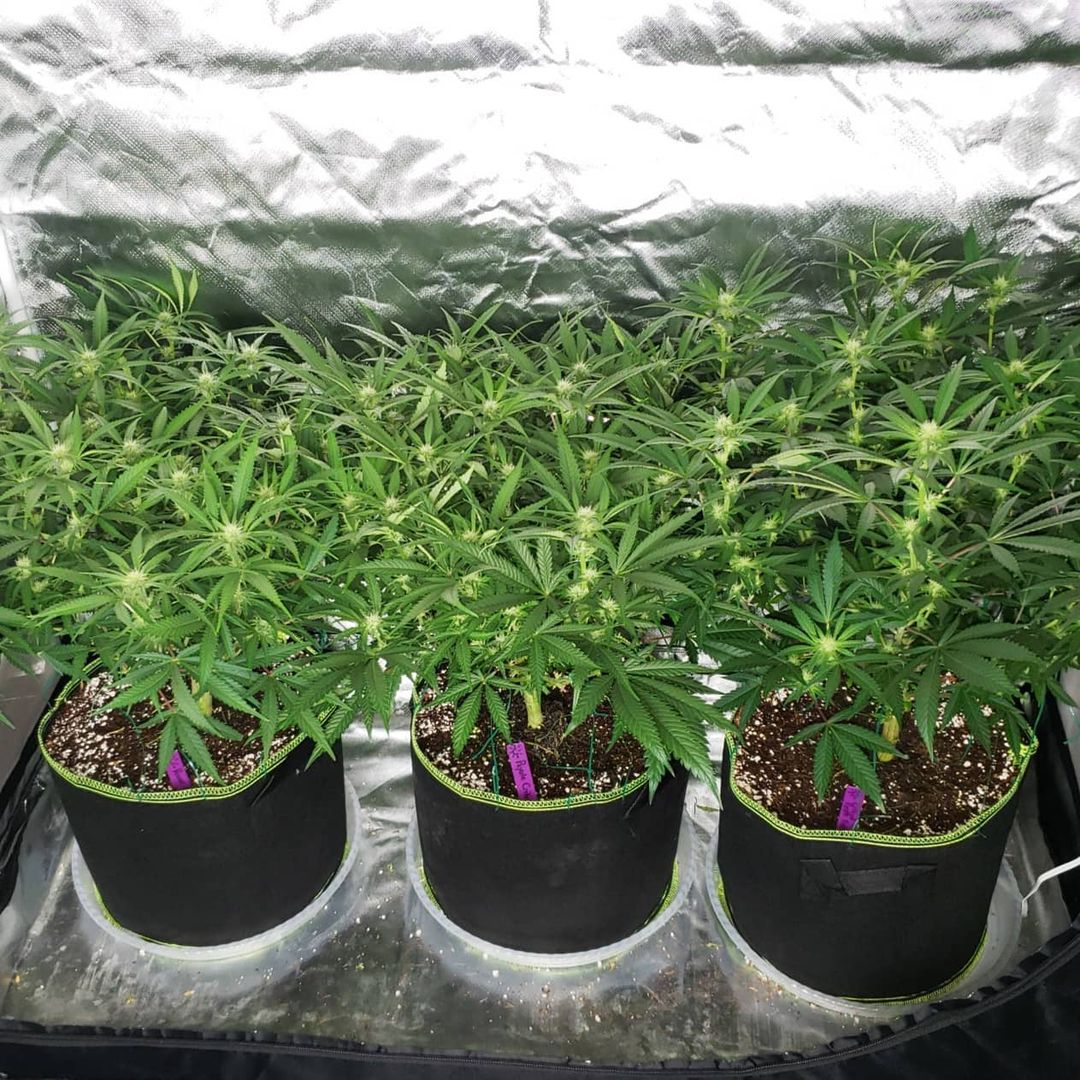
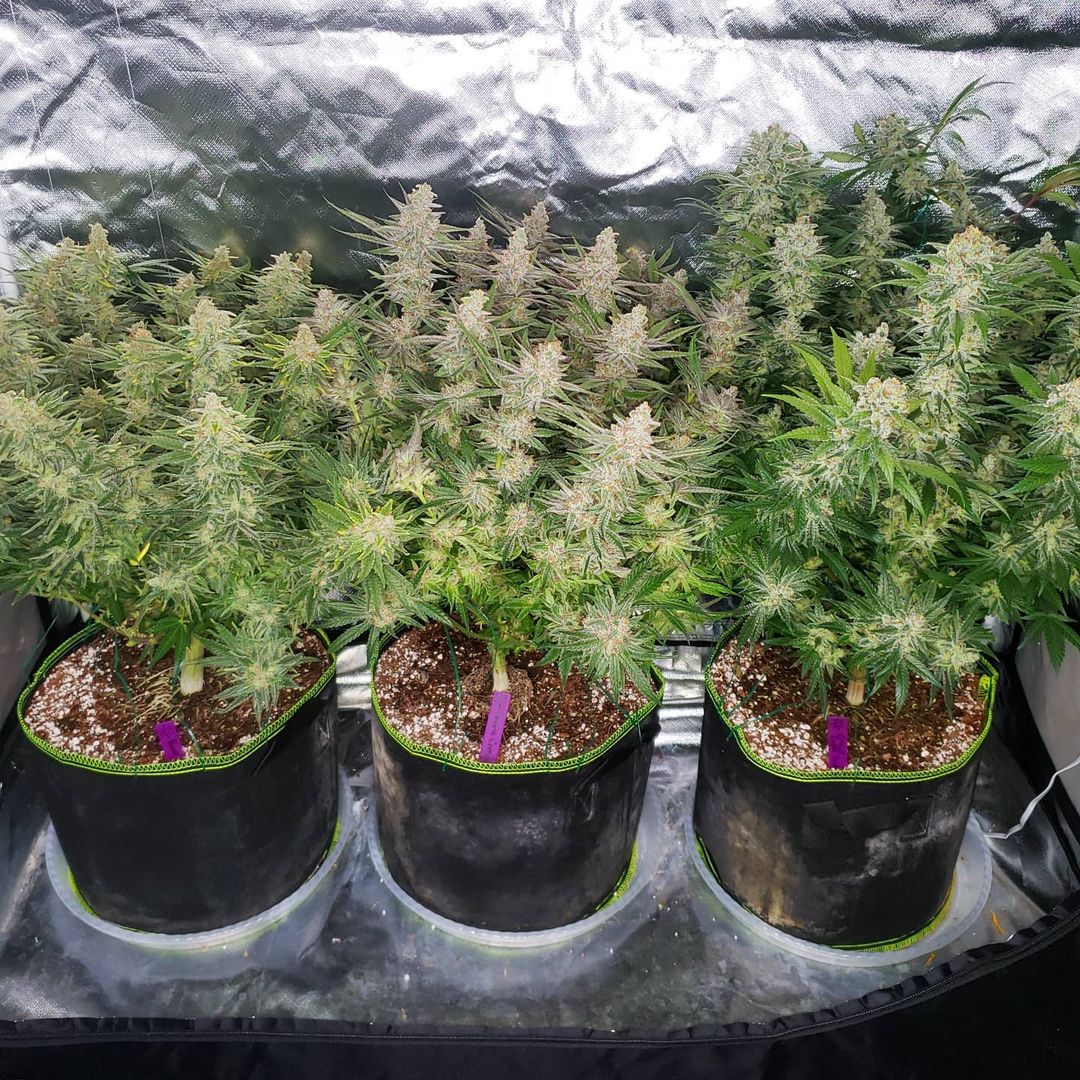
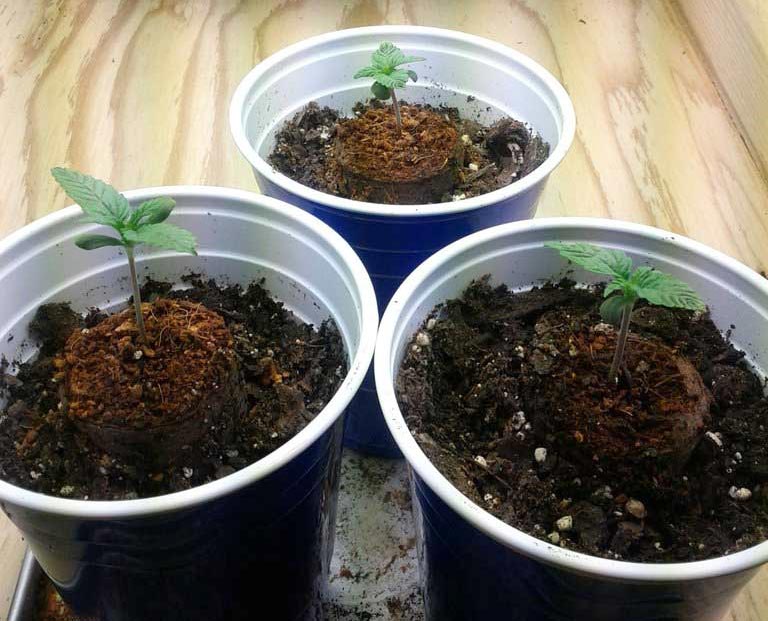
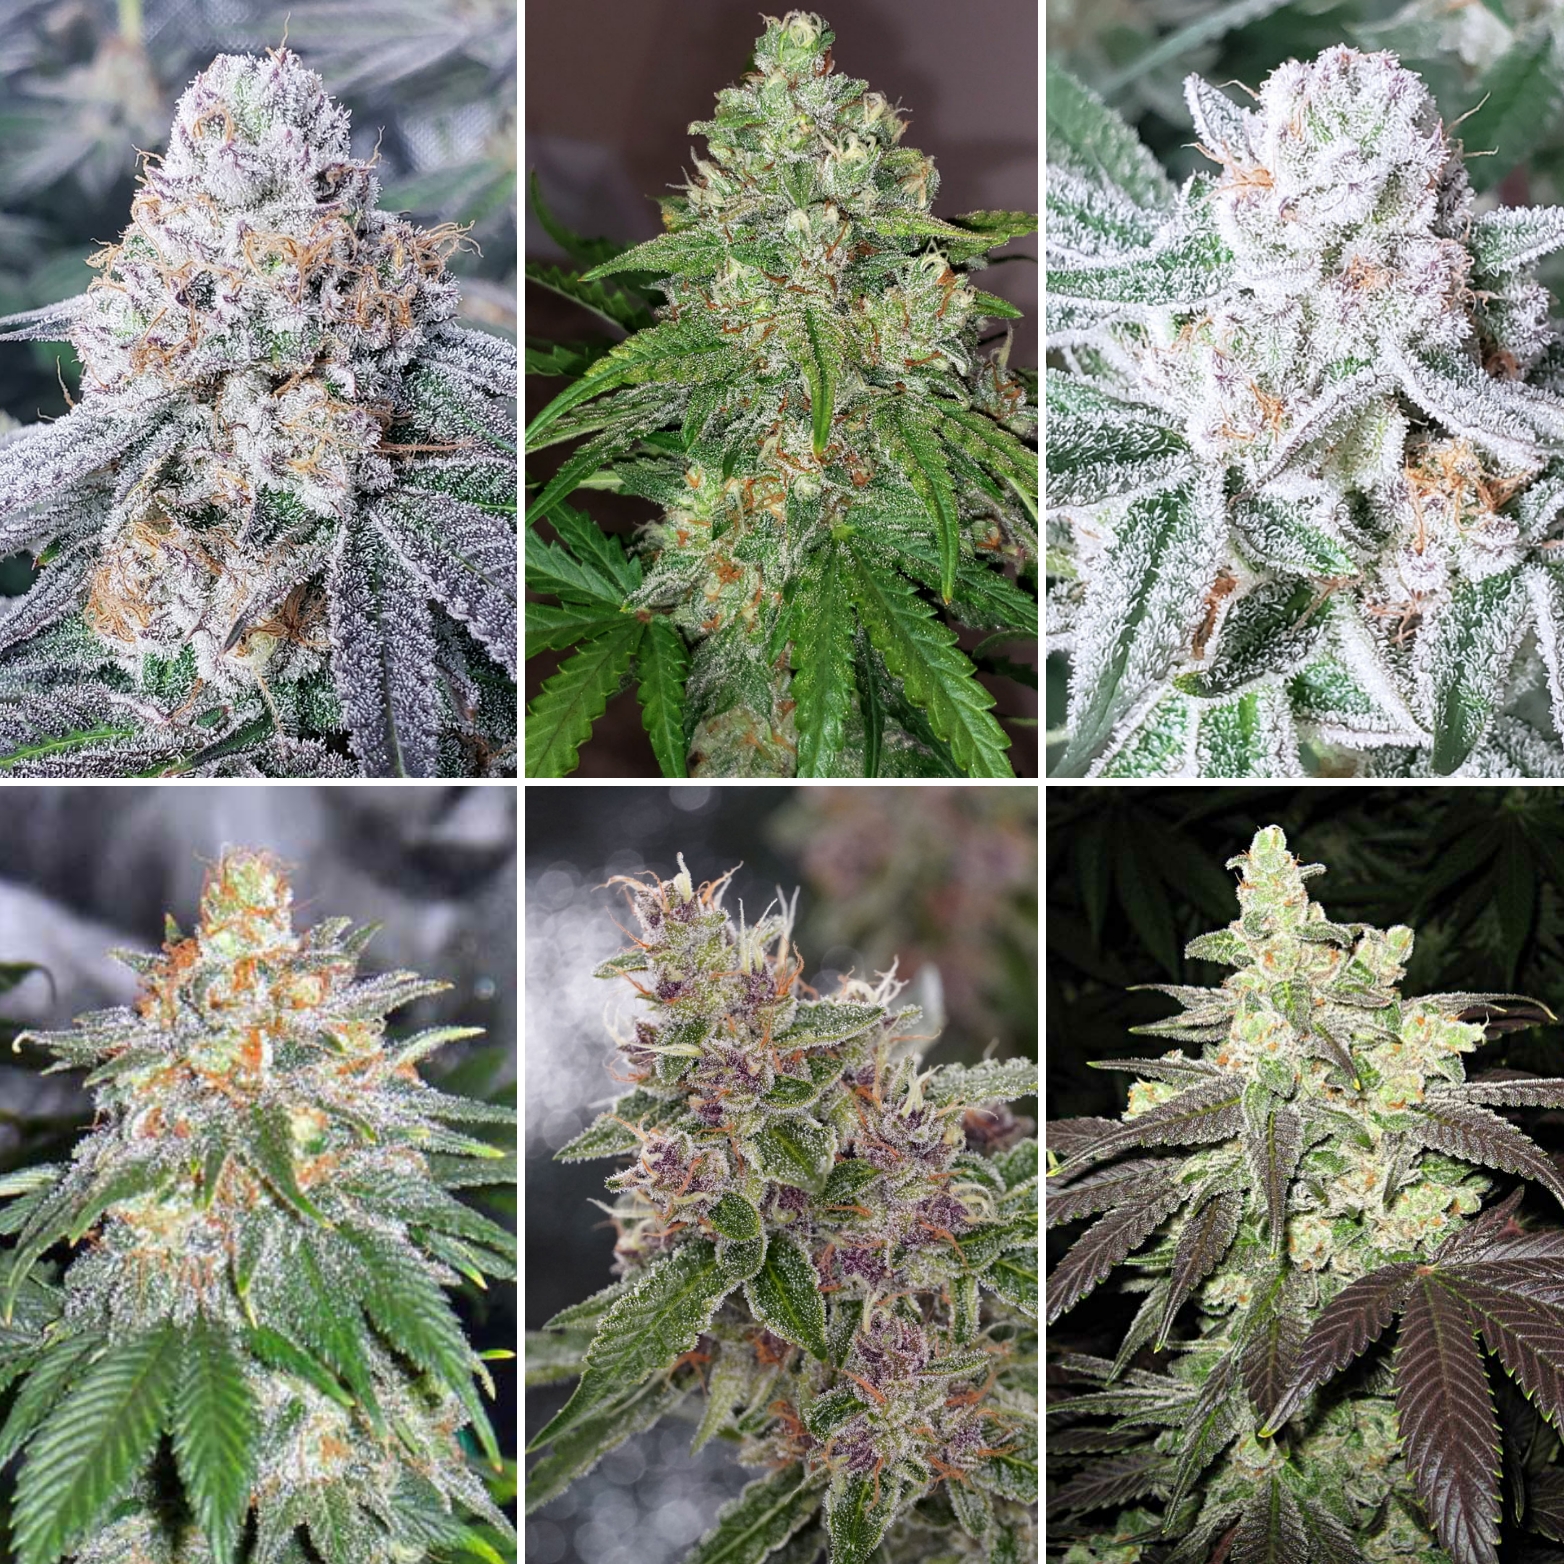
Here are cannabis plants grown with this coco tutorial: Coco 70:30 mix with Flora Trio nutrients. Strains are Planet of the Grapes, Mandarin Cookies, Zweet Inzanity.
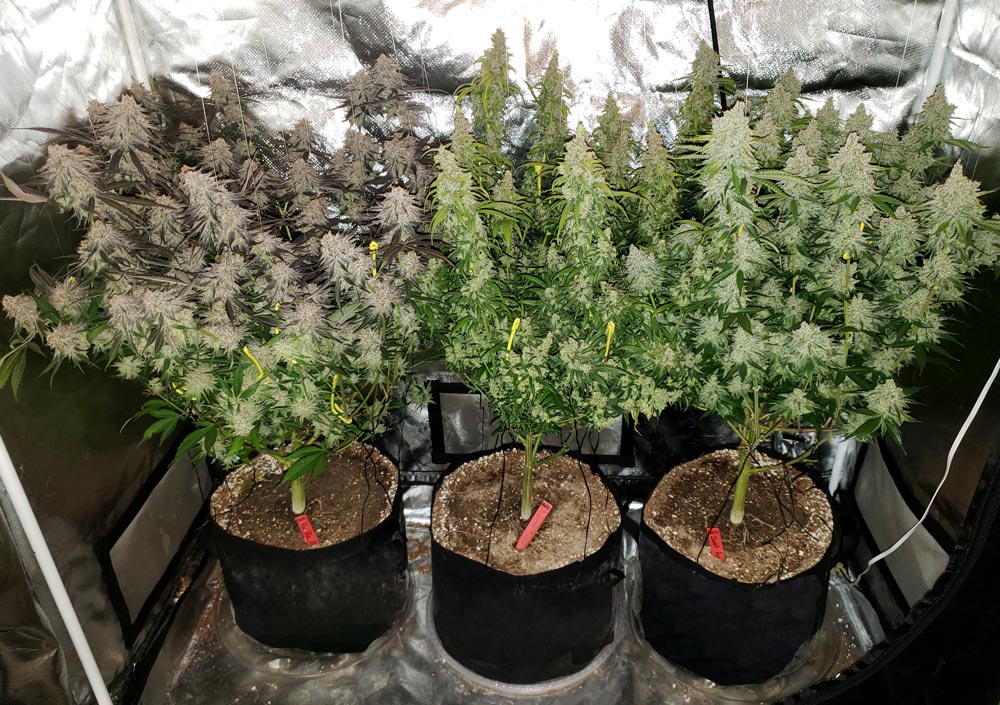
Table of Contents
Overview: How to Grow Cannabis with Coco Coir
Coco Coir Rehydration Tutorial – Make an Excellent Coco Coir Mix at Home
Coco coir may be my favorite cannabis growing medium (though I love them all for different reasons). Coco coir gives a hand-watered experience similar to growing in soil, but with faster growth rates and more protection against overwatering.
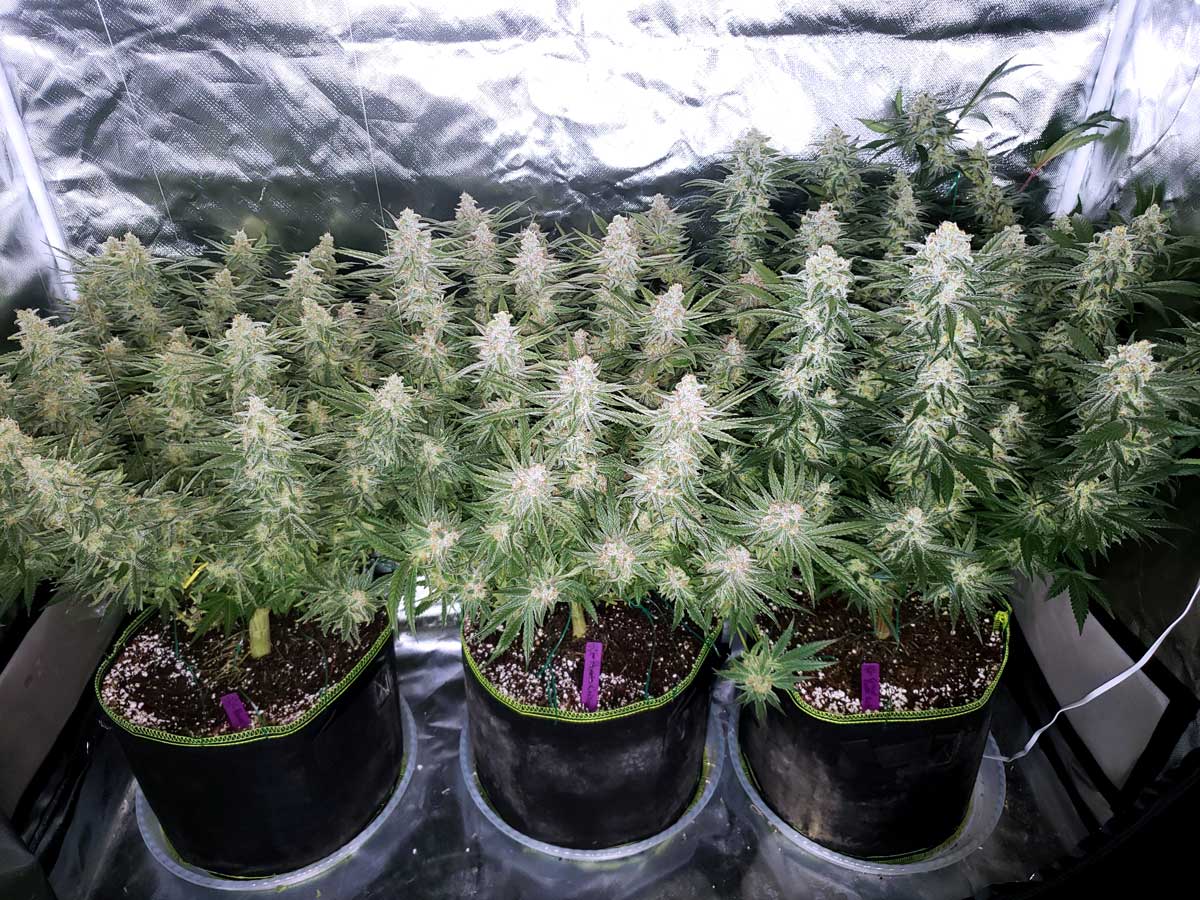
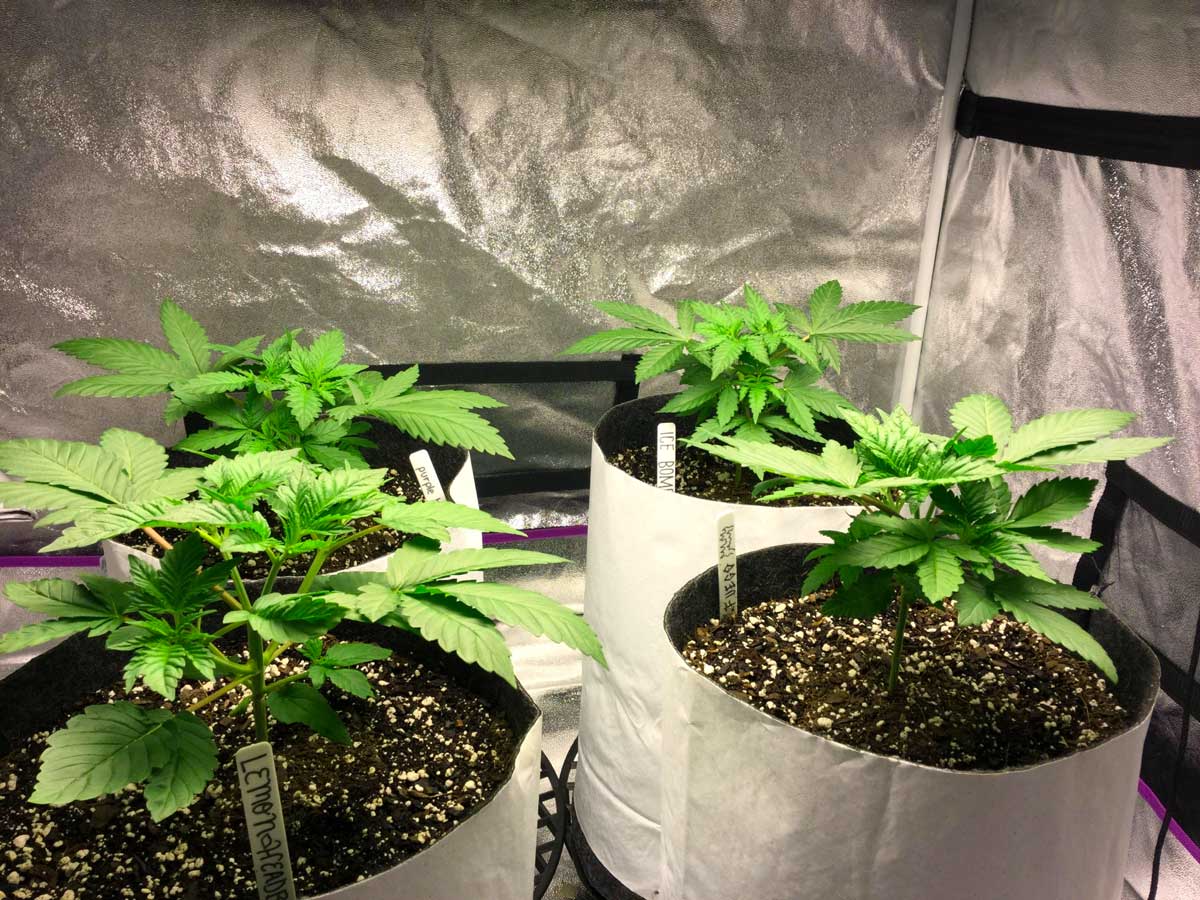
Grown in Coco 70:30 mix with Flora Trio nutrients: Power Plant, Peyote Critical, Critical Purple Kush
Follow the step-by-step instructions in this tutorial to for ultra fast-growing cannabis plants in coco…

Your reward? Big, fat, potent buds at harvest!
Coco also comes with many benefits of growing weed in hydro, such as fewer bugs and bigger harvests. Coco coir seems almost tailor-made for growing cannabis!
What is Coco Coir?
Coco coir is made of ground-up coconut husks and works surprisingly well as a medium for growing lots of plants, not just cannabis. Plant roots love it. As a bonus, coco is more environmentally friendly than peat moss (one of its main competitors). As a result, coco is slowly replacing peat in many soil potting mixes.
Dried and compressed coco coir. Just add water to turn into “soil” for cannabis plants..
Note: “Coir” is officially pronounced “coy-er” but I’ve noticed most cannabis growers say “kwar” (so it rhymes with “car”).
Coco offers a hand-watered grow experience similar to soil.

Coco coir is a versatile growing medium which can be used by itself or mixed with other ingredients. It’s often included in soil potting mixes to help prevent compaction and loosen the soil while still retaining plenty of water. For example, Fox Farm Coco Loco is a great choice for soil growers who want some of the benefits of coco.
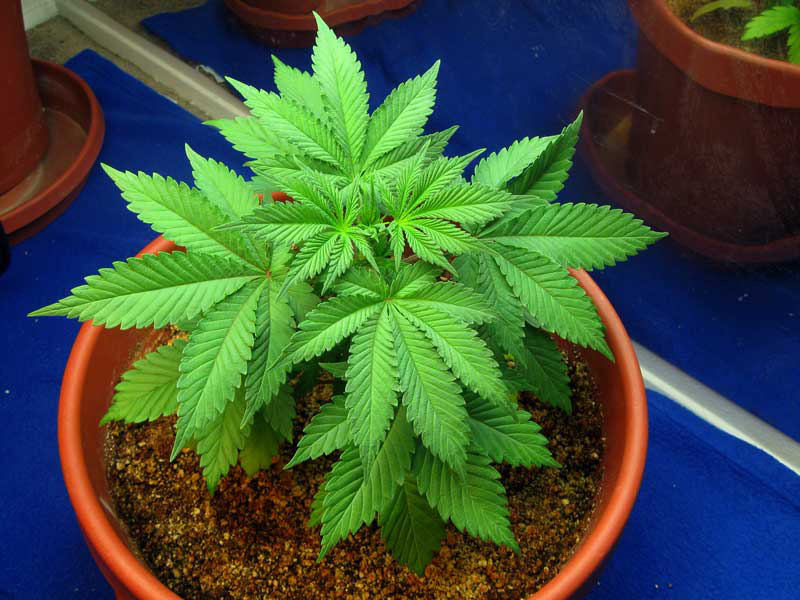
Cannabis plants grown in Fox Farm Coco Loco thrive.
However, this tutorial focuses on coco growing that doesn’t involve any soil or non-inert ingredients. Growing in pure coco plus perlite (no soil) is what achieves the fastest growth.
Today, you learn how to grow with a coco/perlite mix and provide nutrients in the water. This root environment creates thriving cannabis plants.
As long as you remember to water your plants with nutrients as directed, coco plants tend to be more hardy than cannabis plants in other grow mediums. You are less likely to get bugs than in soil, or root rot like in hydro. It’s rare for a coco grower to run into major problems that prevent them from getting to harvest when they follow these directions.
Because of that, I believe coco is one of the best grow mediums for beginner growers. Plus, you’ll learn almost all the skills you need to grow in soil or hydro in the future. Coco gives you a great base of knowledge for growing cannabis that will serve you well even if you branch out to other grow mediums.
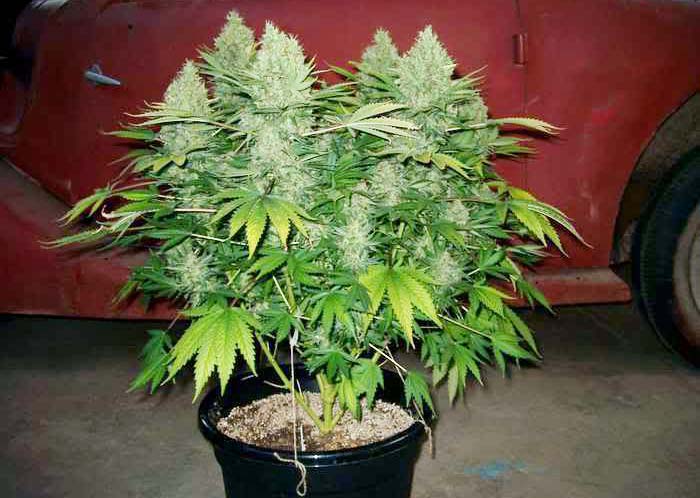
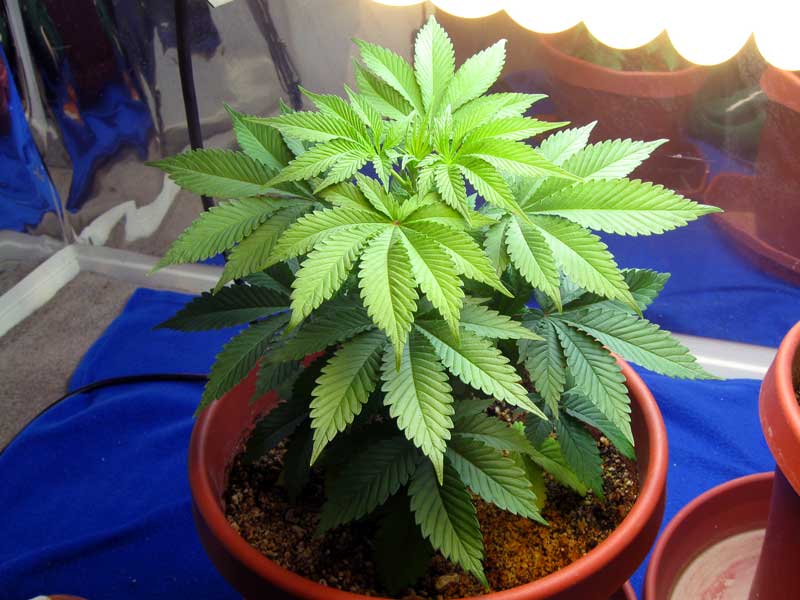
Cannabis plants produce excellent yields and bud quality in coco coir.
Pros – Why Use Coco Coir for Growing Cannabis?
- Feels Like Growing in Soil – Coco coir is a soilless growing medium that gives the experience of growing in soil. Plants are kept in regular pots, and growers simply water their plants with nutrient water. In many ways, coco coir can be treated basically the same as soil for growing cannabis.
- Harder to Overwater Than Soil – Coco coir tends to promote healthy and fast root development compared to other potting mixes. It holds onto moisture and nutrients, yet also has a light texture that gives roots access to oxygen. This makes plants less likely to experience symptoms from over or under-watering.
- Doesn’t Hurt the Environment – Coco coir is sustainable for the environment (unlike some other options, like peat moss), since it’s made of ground coconut husks. It also breaks down naturally.
- Does Not Attract Insects – Coco coir does not make a good home for many garden pests that affect soil growers. Cannabis growing in coco coir are less likely to be attacked by pests or bugs.
- Plants Grow Very Fast – Since you provide easy-to-absorb nutrients in the water, plant roots don’t have to go out and search for nutrients like they do in soil. This saves the plant precious energy, similar to growing in hydroponics. As a result, coco coir gives many of the benefits of hydro with a soil experience. You get faster growth and bigger yields than soil for the same amount of time and effort.
Cons – Downsides of Growing Cannabis in Coco Coir
- Must Give Nutrients with Every Watering – Unlike soil, coco coir is an inert growing medium with no inherent nutritional value. That means growers must provide all necessary nutrients in the water, even when plants are seedlings. On the other hand, soil naturally gives plants some nutrients (at least until all the nutrients in the soil get used up).*
- May Need to Adjust pH of Water – Although you also need to manage pH in soil to prevent nutrient deficiencies, coco plants need a slightly more acidic root environment than soil. Coco plants grow fastest with a relatively acidic root zone of 5.5-6.5 pH, while soil needs a closer-to-neutral 6-7 pH. That means unless you naturally have slightly acidic water, you typically need to add a bit of PH Down to the water to get it into the right pH range for growing weed in coco. Note: You can use a pH Kit to easily test and adjust the pH of your water. Learn more about pH for growing cannabis.
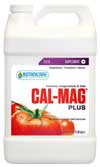
- May Need a Cal-Mag Supplement – If you’re growing with “soft” water, filtered water, reverse osmosis water, or any kind of particularly pure water, you may need to give plants a Cal-Mag supplement. Coco naturally binds to calcium, so extra Calcium may be needed, unless you have a lot of minerals in your water. If you have “hard” water, spring water, or other mineral-rich water, you probably do not need a Cal-Mag supplement.
*Don’t want to deal with nutrients? If you start with a nutrient-heavy composted “just add water” super soil, you may not have to add any nutrients at all from seed to harvest.
Coco coir holds onto a lot of moisture but also holds onto more air than similar materials, ensuring your plant roots get the oxygen they need to thrive. When coco is mixed with perlite, it provides an ideal amount of water and air for cannabis roots. Coco coir drains well so plants are less likely to get overwatered, but it also holds onto nutrients so you don’t need a ton of fertilizer.
Which Pre-Made Coco Mix is Best for Growing Cannabis?
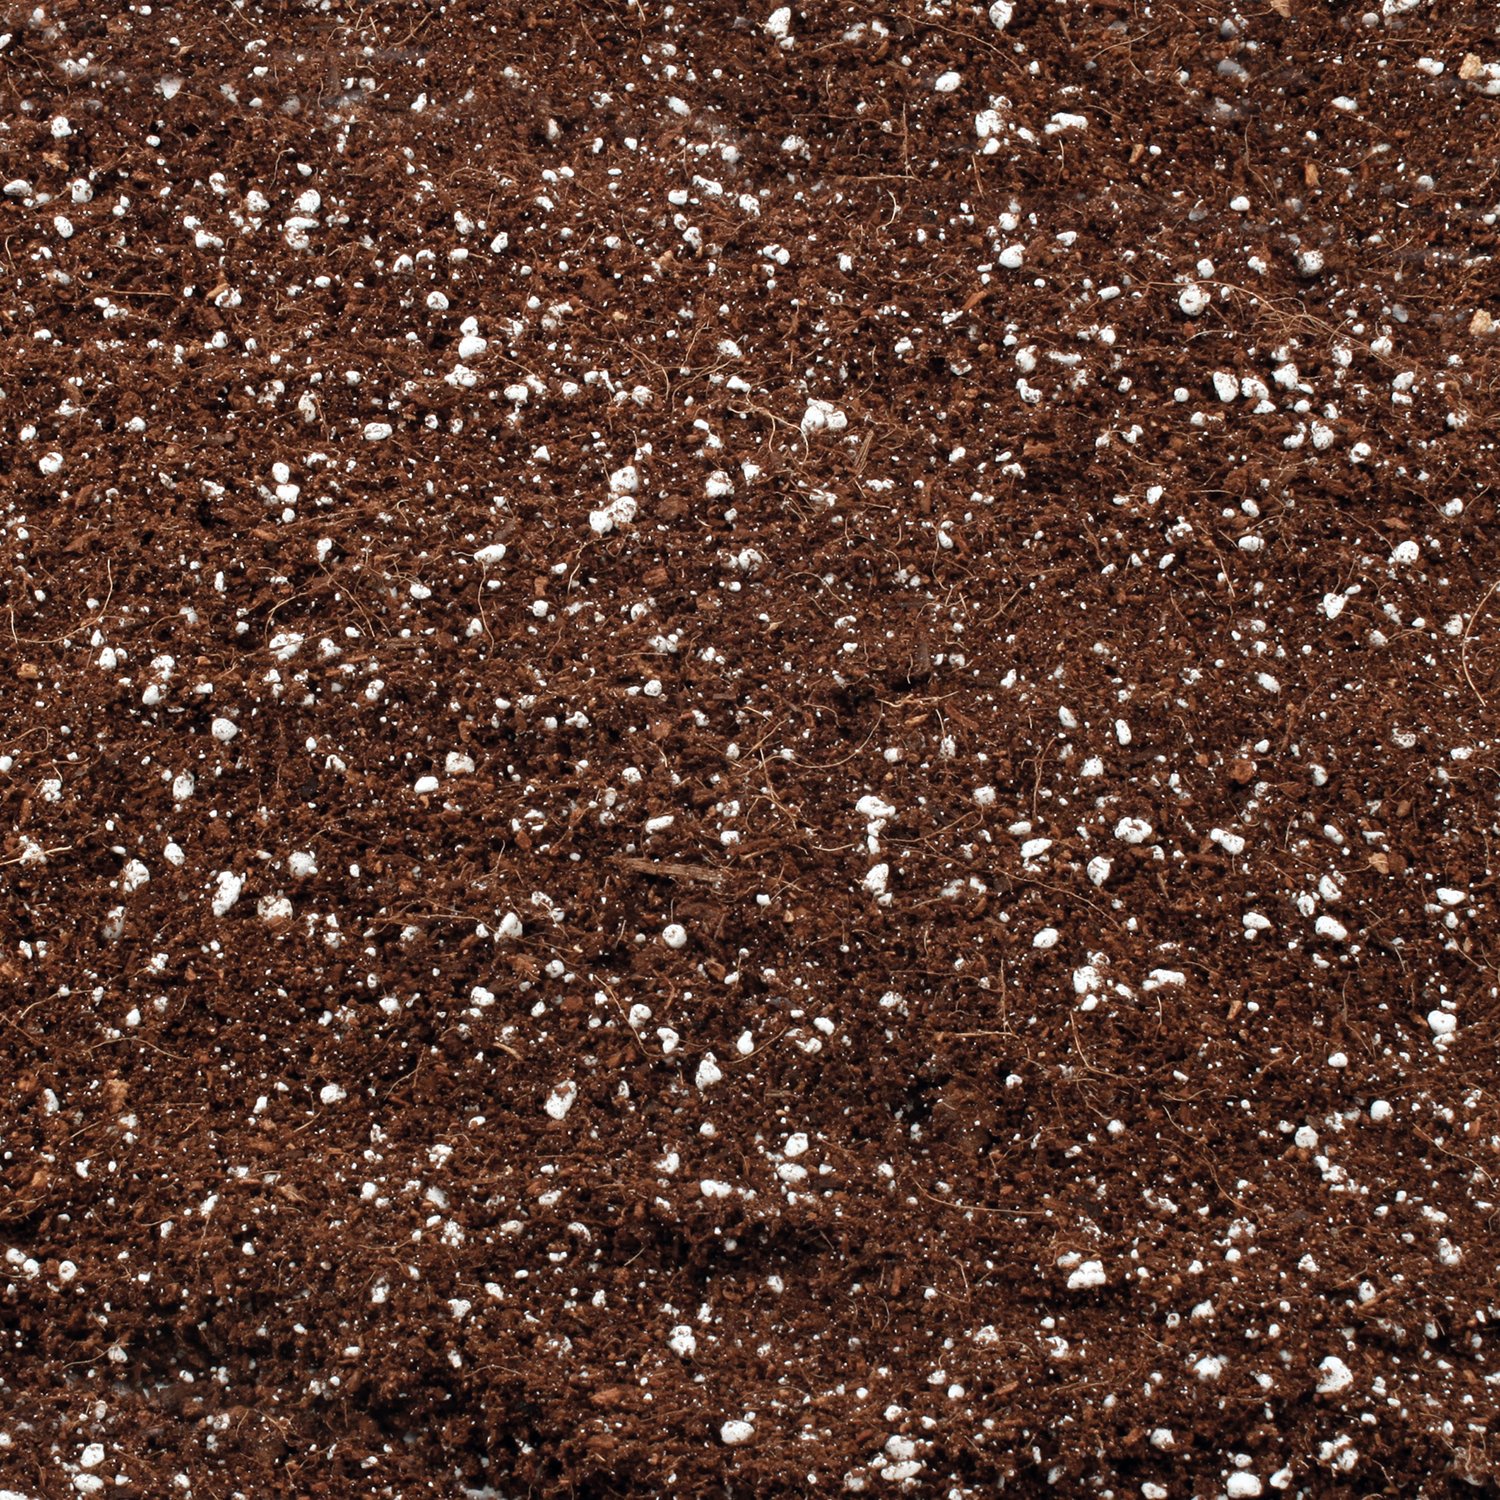
Although you can re-hydrate coco bricks at home, a pre-made coco mix takes out all the work! If you decide to go with a pre-made mix, I highly recommend choosing one that contains both coco and perlite. A 70/30 ratio of coco/perlite works great for hand-watered cannabis plants.
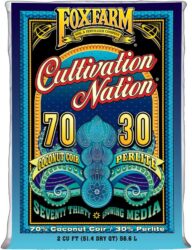
Here are examples of pre-made mixes that I’ve personally tested and recommend: Mother Earth Coco Mix (70% coco / 30% perlite) was the first pre-made coco mix I ever used for growing cannabis. I’ve grown with Mother Earth at least a dozen times and always get great results. Another pre-made coco mix I’ve tried that works great for growing marijuana is FoxFarm Cultivation Nation 70/30 Coco. It’s newer but a bit cheaper, and works just as well in my experience.

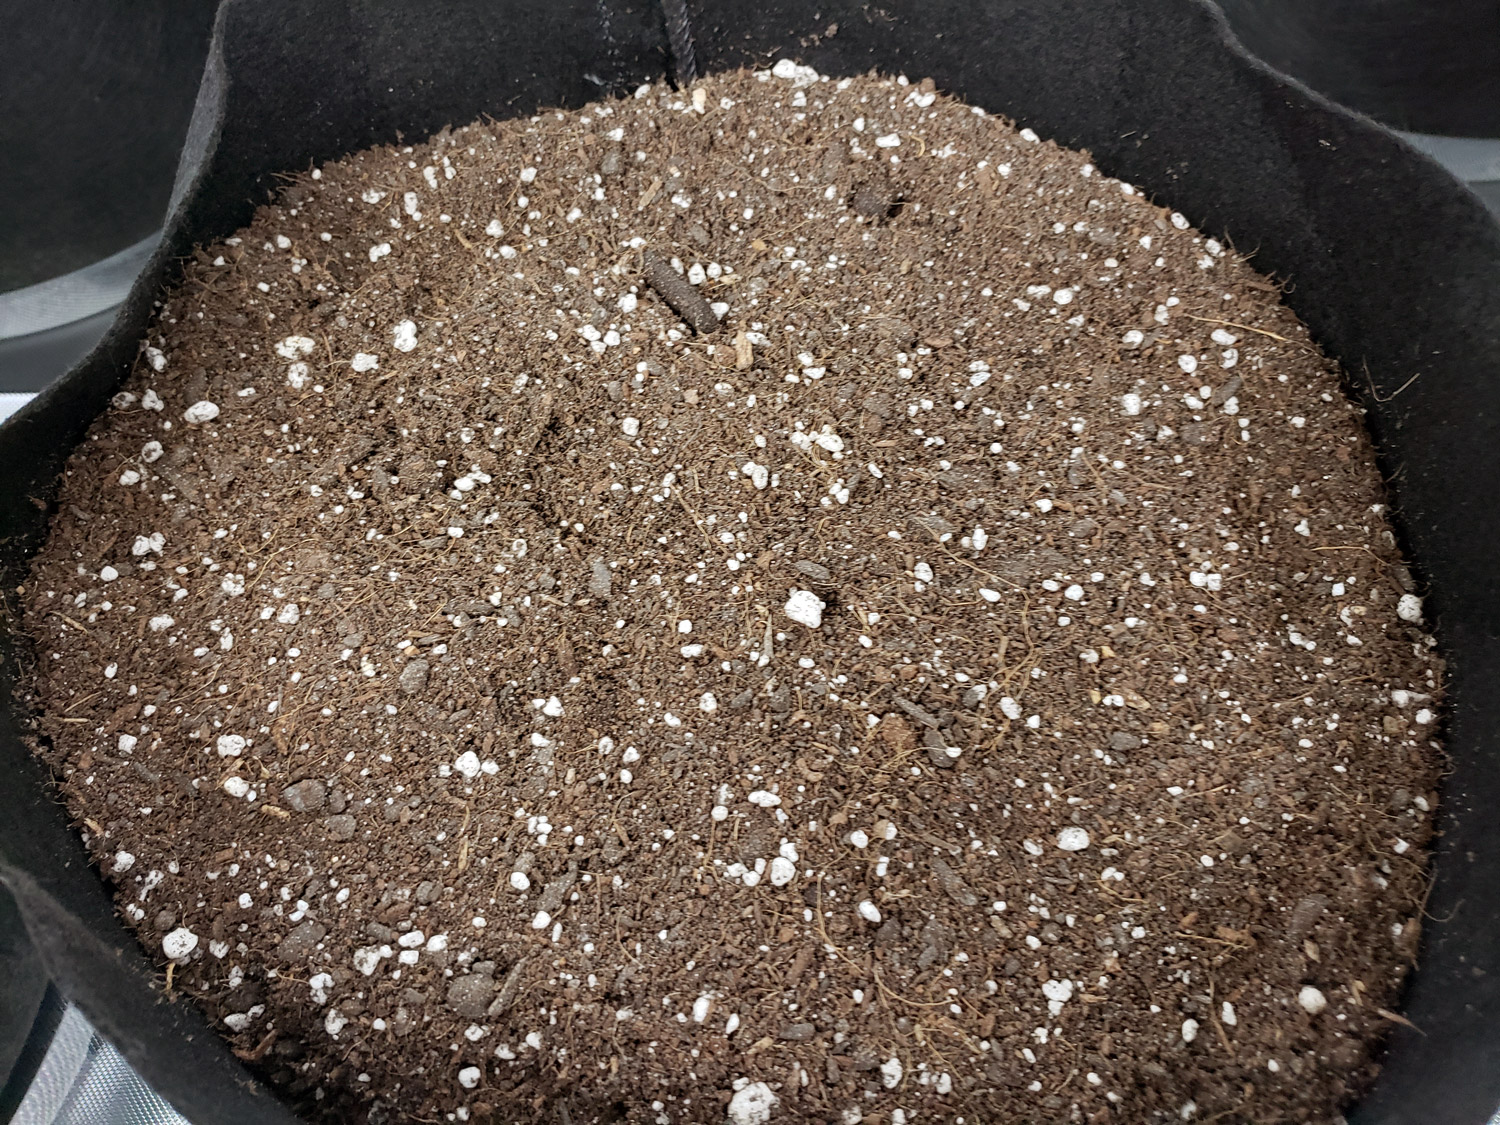
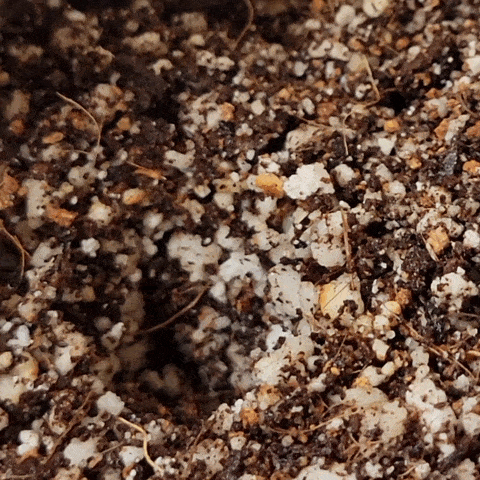
Here’s what a good 70/30 coco mix looks like.
Did you know you can make your own coco mix at home? The pre-made mixes with coco coir that are formulated specifically for plants like cannabis. They’re convenient, but take up room in the house. A cheaper coco option is to buy dry coco bricks, which need to be re-hydrated with water before you can use it to grow plants. The process to use coco bricks is explained at the end of the article. It’s actually pretty easy! Another benefit is the bricks are small and easy to store, so you can make your own mix any time without having to store bags of coco mix.
Once your cannabis is in a good coco coir mix, like the options above, your job is simple. Just add nutrients, water, and light for happy plants.
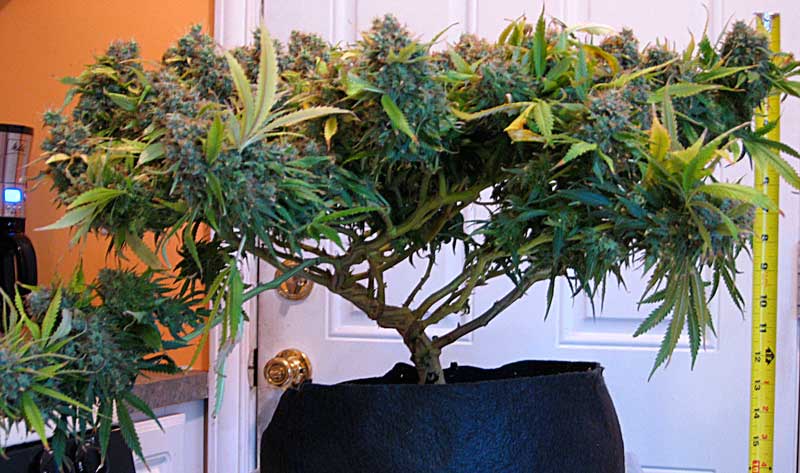
Grower FirstDescent shows how he was able to get a ton of weed from a small plant in coco.
Although growing cannabis in coco coir is getting more popular, one of the problems is that there’s not enough free information to help new growers know what to do. A few simple steps ensures your coco plants stay in tip-top shape, and this tutorial will show you exactly what to do.
Ready to treat your plants to a luxurious life in coco coir? Your harvest will thank you for it!
Overview: Growing Cannabis in Coco Coir
This isn’t the only way to grow cannabis in coco coir, but this is what I do and it achieves fast growth, excellent yields, and top-shelf bud quality.
Which Nutrients for Coco Coir?
When growing cannabis in coco coir, always use nutrients made for coco coir or hydroponics. Many growers also benefit from adding a “Cal-Mag” supplement, which is a common gardening supplement that provides extra calcium. Learn more about which nutrients you should use for growing cannabis in coco coir.
Learn about different cannabis nutrients: https://www.growweedeasy.com/nutrients
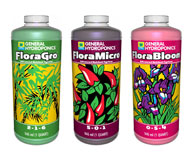
I personally like the General Hydroponics Flora trio plus Calimagic (a Cal-Mag supplement) for growing in coco coir.
This is a tried and tested nutrient system for any type of hydroponic growing including coco coir. You can actually follow their nutrient schedule listed on the included nutrient schedule; it’s formulated for plants like cannabis.


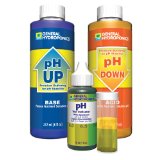
Note: After adding nutrients (or even if you’re giving just plain water), always pH your water to 5.5-6.5 before giving it to your plants. This is important!
Like many cannabis base nutrients, the included dosage recommendations is aggressive and can burn your plants if given at full strength. No matter what base nutrient system you’re using with your coco coir, I recommend starting at half-strength nutrients at first, and only raising the dosage if you noticed plants look “hungry” for more nutrients. It’s also good to give enough water that some extra runoff comes out the bottom, to prevent nutrient buildup.
Here is the coco coir nutrient schedule I’m using right now (pdf)
Whenever using liquid nutrients, you will need a way to test pH so your plant roots are able to easily absorb all the nutrients they need. I use a simple General Hydroponics pH test kit. Learn more about managing pH here: https://www.growweedeasy.com/ph
How much Cal-Mag should I use for coco coir?
Here are instructions if using a Cal-Mag Supplement:
- Give Cal-Mag at full strength (unlike base nutrients, which typically should be given at half strength to start) alongside your nutrients for at least two weeks at the beginning of your grow. You may also add Cal-Mag with your other other nutrients throughout the grow, especially if you’re using soft or filtered water.
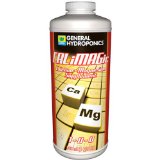
- Example of a Good Cal-Mag Supplement – One great Cal-Mag supplement for cannabis is CaliMagic by General Hydroponics. CaliMagic can be used at 1 tsp/gallon (2.5 mL per 2L).
See more coco coir nutrient suggestions.
Do you Need a Cal-Mag Supplement?
Unless you have very “hard” water that naturally contains lots of minerals, you likely need to use a standard plant “Cal-Mag” plant supplement to make sure your cannabis gets all the calcium they need. That’s because cannabis plants grown in coco coir tends to require more calcium compared to other growing mediums.
These plant supplements typically come in liquid form and contain calcium as well as magnesium. The extra magnesium is needed for your plant to be able to use the calcium properly. One great Cal-Mag supplement for cannabis is CaliMagic by General Hydroponics. CaliMagic can be used at 1 tsp/gallon (2.5 mL per 2L).
If you’re using a different nutrient company, chances are they have their own version of a Cal-Mag supplement. Whenever using any supplements, it’s a great idea to stick with the same company as your base nutrients in order to prevent the chance of unexpected interactions between two different brands.
Now that you’ve got a hand on what you need for you coco mix and nutrients, it’s time to start growing!
All Supplies Needed to Grow Cannabis in Coco
Basic Supplies
- Grow Light – I recommend using a cannabis-tested LED grow light.
- Coco Mix – Either make it yourself (tutorial – makes 10 gallons coco) or buy a pre-made 70/30 coco mix (1.8 cu. ft. of coco fills a 12-13 gallons worth of pots).
- Nutrients (base nutrients) – General Hydroponics Flora trio is my favorite nutrient option for growing weed.
- Alternative: Dyna-Gro Superthrive Foliage-Pro & Bloom is a cheap-but-effective alternative.
- Plant Containers – I like fabric pots. They offer faster growth and less a chance of overwatering than hard-sided pots.
- Seeds – Learn where I buy seeds. Any cannabis strain can thrive in coco.
Here are some proven cannabis strains that work well with this coco tutorial:
Planet of the Grapes, Mandarin Cookies, Zweet Inzanity
Power Plant, Peyote Critical, Critical Purple Kush
Optional Supplies
- Cal-Mag Supplement – Calimagic is a good one. Get this if you are using RO (reverse osmosis) water, filtered water, or otherwise “soft” water without many natural minerals.
- Grow Tent – A grow tent is a good house for your plants. Learn about grow tents for cannabis.
- Solo Cups – To start seedlings (explained below).
- Seedling Plugs – I like Rapid Rooters to start seedlings. You can also plant seeds directly in the coco.
If you got my recommended pre-made mix, which contains 1.8 cu. ft. of coco, it will fill about 12 gallons worth of pots. If you followed the tutorial at the bottom of the article to make your own coco mix, you’ll have about 10 gallons of potting mix. This can be used to fill 2 x 5 gallon pots, 3 x 3 gallon pots, or 5 x 2-gallon containers.
I recommend larger containers for larger plants and to water less often. I recommend smaller containers for smaller plants, and when the grower is willing to water more often.
Step-by-Step Grow Cannabis Coco Coir Tutorial
Whether you’re using pre-made or rehydrated coco, here’s what to do to grow cannabis effectively.
1.) Fill your containers with potting mix
Don’t fill containers to the brim. Leave a little extra space inside, so that the sides of the pots act as a “fence” around the coco coir. This is useful when you start watering plants. It helps ensure all the water goes down into the coco and not spill off the edges.
2.) Prepare solo cups for seedlings (optional)
If you do use solo cups, make sure to cut holes into the bottom so that water can drain out after you’ve watered your plants. Always test to make sure water runs through cup freely. If you have a hard time filling up an empty solo cup with water because it’s running out the bottom, you have added the right amount of drainage.
3.) Germinate Cannabis Seeds (3 options)
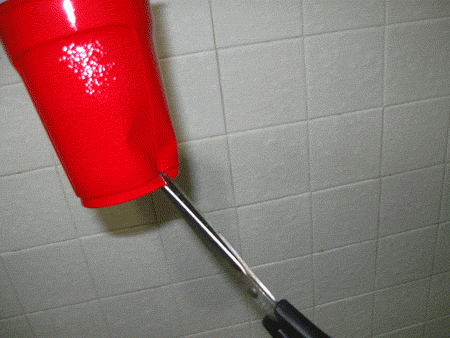
Option 1: Germinate seeds in fresh Rapid Rooters. If you place the Rapid Rooters in a tray, making sure there’s a very shallow pool of water at the bottom to keep them moist.
Option 2: You can also place the Rapid Rooter on top of the moist but not soaking coco coir in your solo cups or plant pot. This ensures they stay moist and saves you from the step of having to plant the Rapid Rooters.
Fresh Rapid Rooters give some of the best germination rates, but of course there’s other ways to start your plants.
Option 3: Plant seeds directly in coco mix.
Some growers plant their seeds directly in the coco coir, and that works well, too.
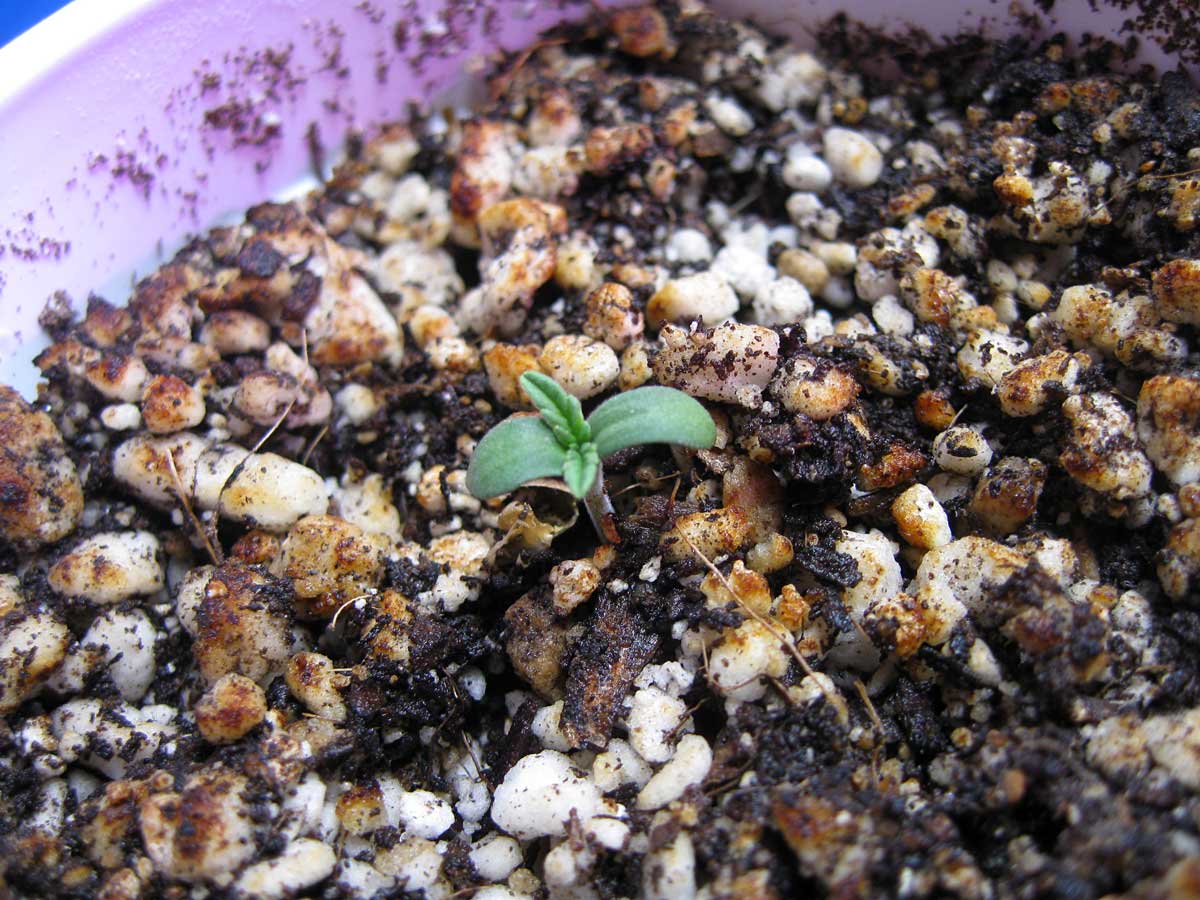
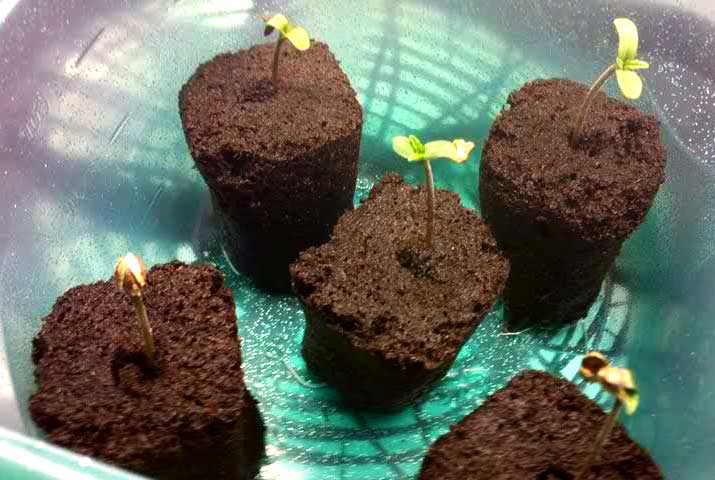
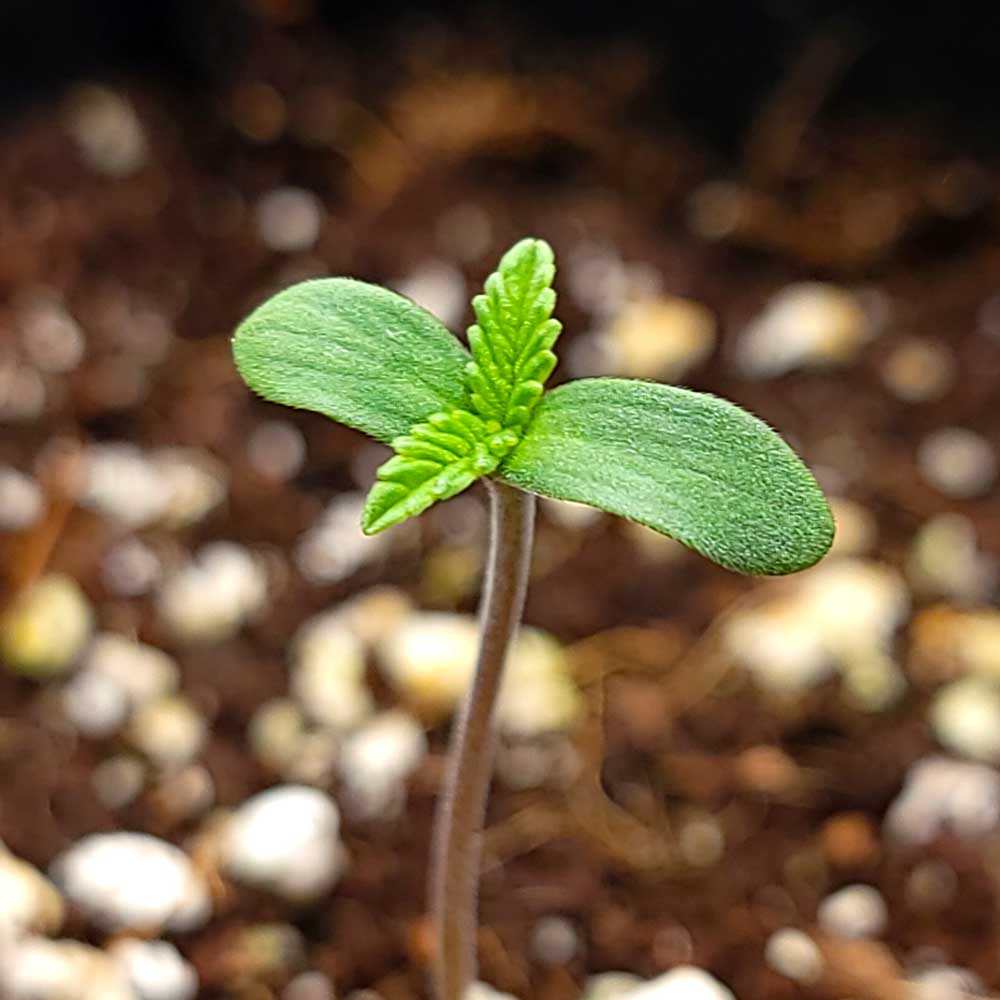
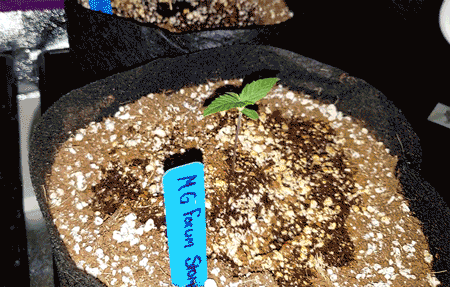
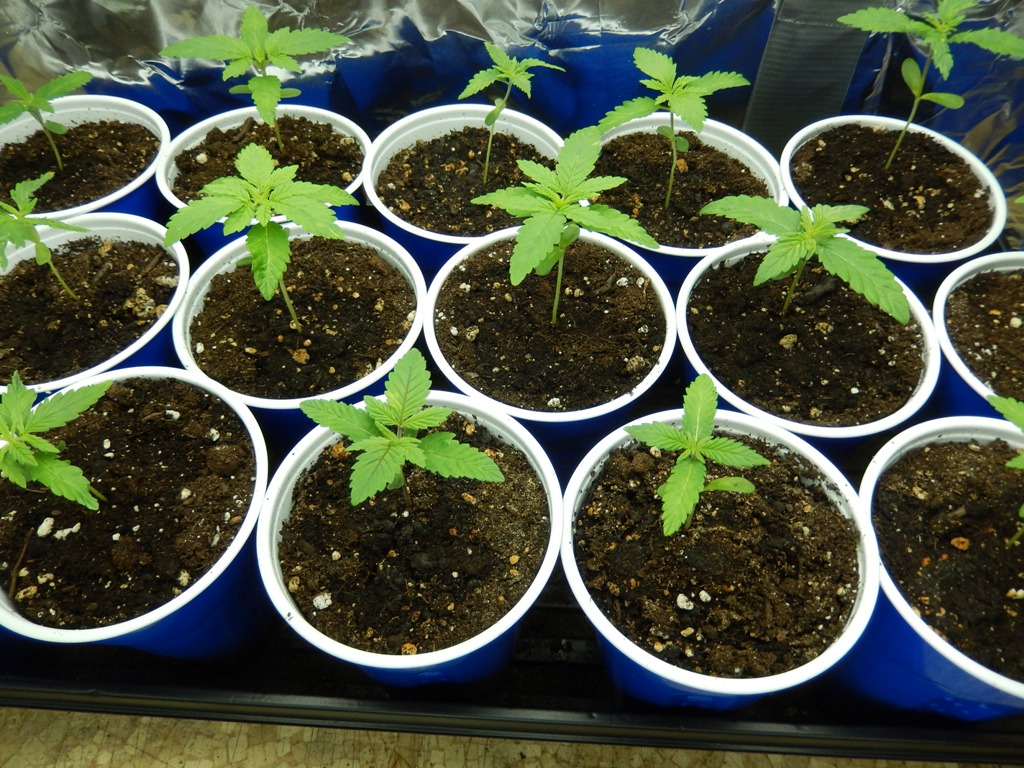
Happy little seedlings are so cute!
Learn about other ways to germinate cannabis seeds here: https://www.growweedeasy.com/germinate
4.) Start Seedling-Strength Nutrients
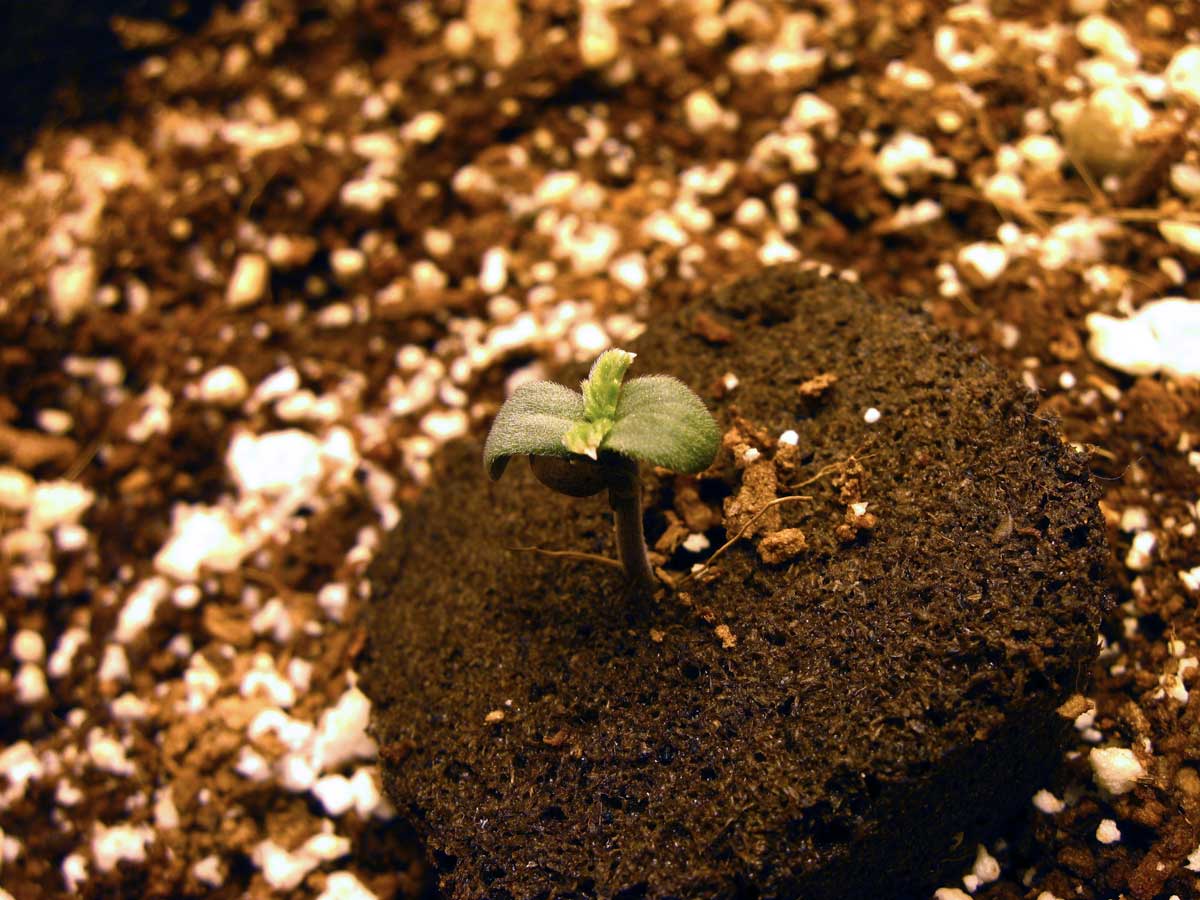
After seedling grows first set of “real” (serrated) leaves, water with nutrients at normal seedling strength, and add a regular dose of Cal-Mag (Calimagic). Keep giving water until you get about 20% runoff ut the bottom of the solo cup. The first set of leaves are round, but the second set are serrated and pointy. Once you see those leaves, it’s time to water your seedling with nutrients.
5.) Nurture Your Seedlings
Some growers will put their Rapid Rooters in solo cups, while others put their seedlings directly in their final container. Either way, your job is the same. Make sure your seedlings get plenty of light while making sure that it’s never too hot for your seedlings. Place your hands where your seedlings are and wait 10 seconds, if it’s too hot for you, it’s too hot for your plants.
- Seedling Strength Nutrients – Continue to water plants at full seedling strength of the included nutrient schedule for the General Hydroponics Flora Series plus Cal-Mag.
- 2 cups (500 mL) water every 2 days – When watering seedlings, give just 2 cups (500 mL) of water every 2 days at first. Make sure any extra water can drain freely soon through holes out the bottom
- In general, don’t give water again until the top looks mostly dry.
Water seedlings in a small circle around the base.
6.) Transplant to Final Plant Pots (If Necessary)
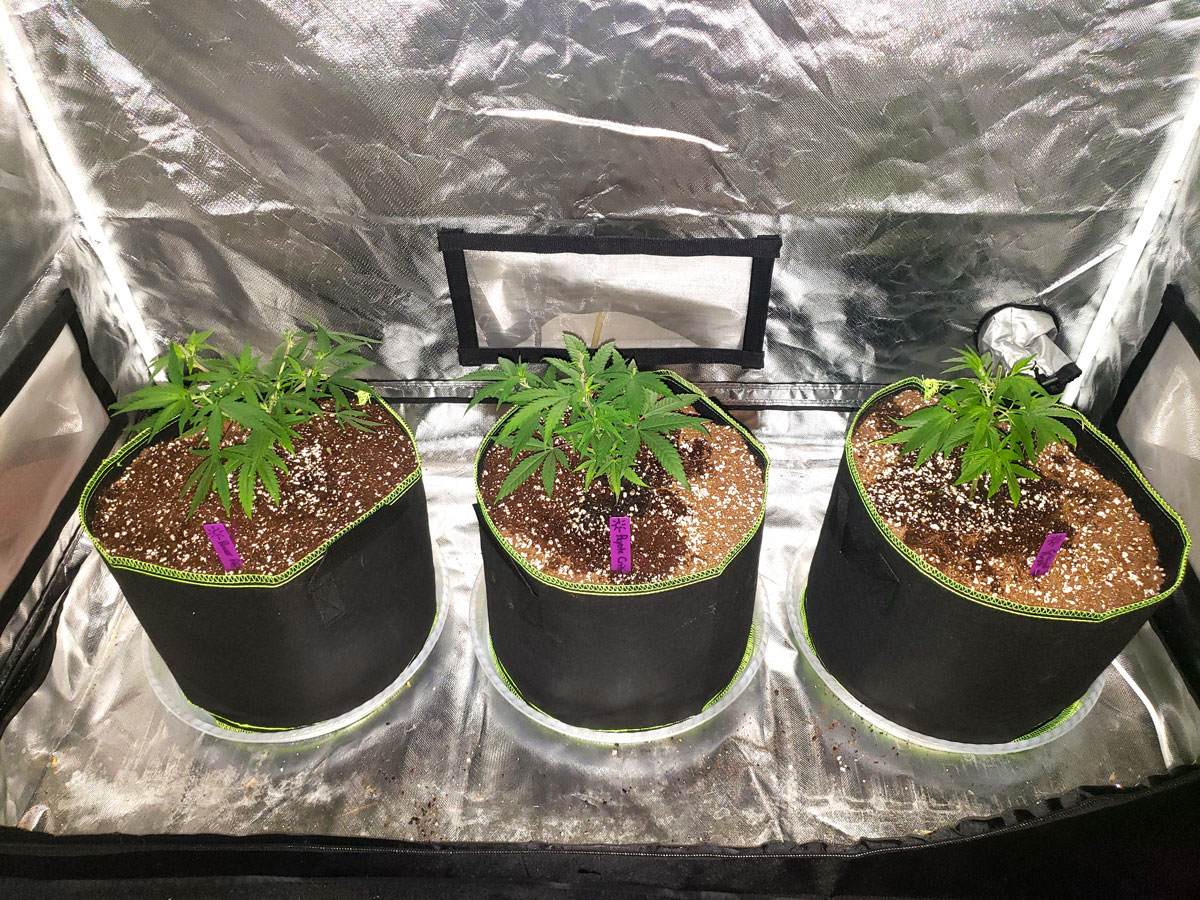
If you started in solo cups, you should transplant to bigger containers once the seedlings have grown grown a few sets of leaves.
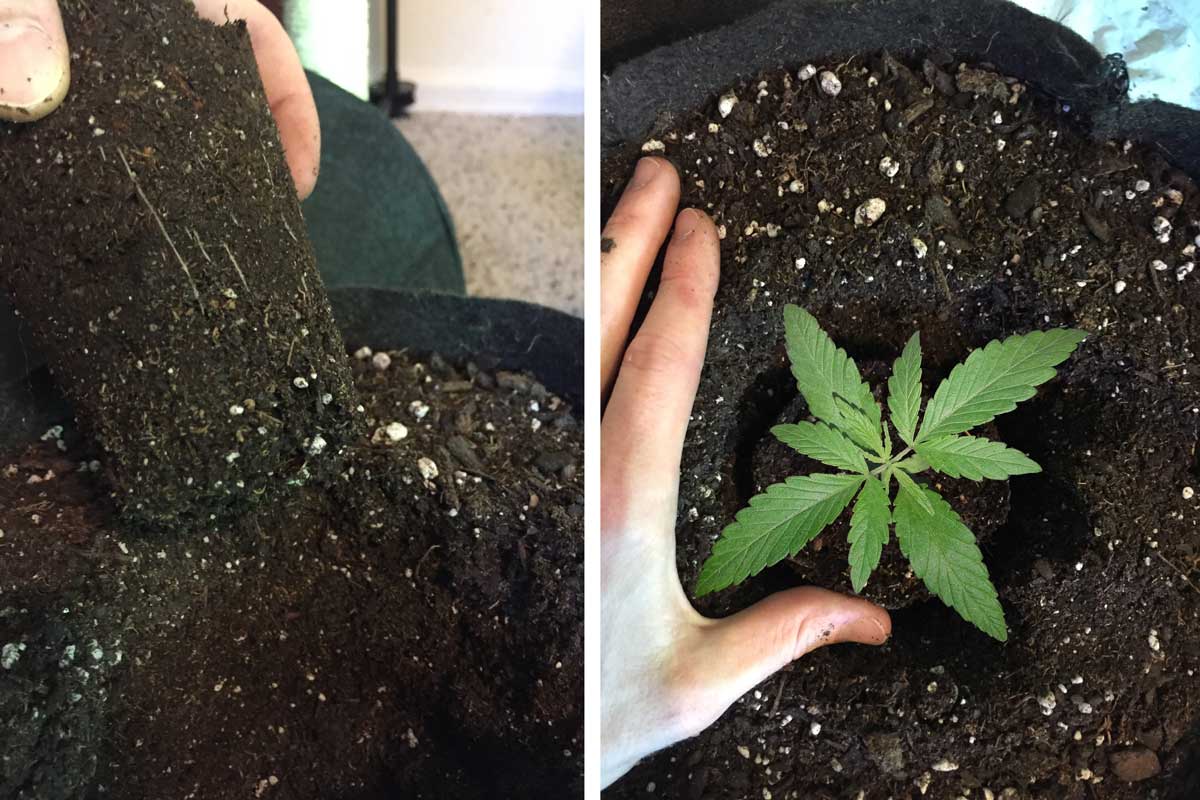
Once your seedling has grown a few sets of leaves, it’s time to transplant to a bigger container!
Dig a small hole in your coco coir containers so there’s room for the new seedlings. Take a butter knife and carefully slide it all around the edges of each solo cup, then carefully transplant your seedling into your bigger coco coir containers.
7.) Vegetative Stage – What to Do
The vegetative stage is your plant’s first stage of life. Here’s your complete guide to the vegetative stage when growing marijuana in coco coir.
Your Goal in the Vegetative Stage: Maintain happy plants until they are half the final desired size. In this stage, they only grow stems and leaves. They need to get big and strong before they start making buds in the flowering stage.
Nutrients: Cannabis nutrients often recommend too high levels of nutrients for proper growth. If you’re using the custom nutrient schedule I created for you above, you can simply follow the instructions. But if you’re using a different nutrient system, I encourage you to start providing all nutrients in the water at half strength.
Watering: Water plants with vegetative stage nutrients with about 10% extra runoff. Don’t water again until the top of the coco is mostly dry. Continue to always adjust pH water to 5.5-6.5 before giving it to plants.
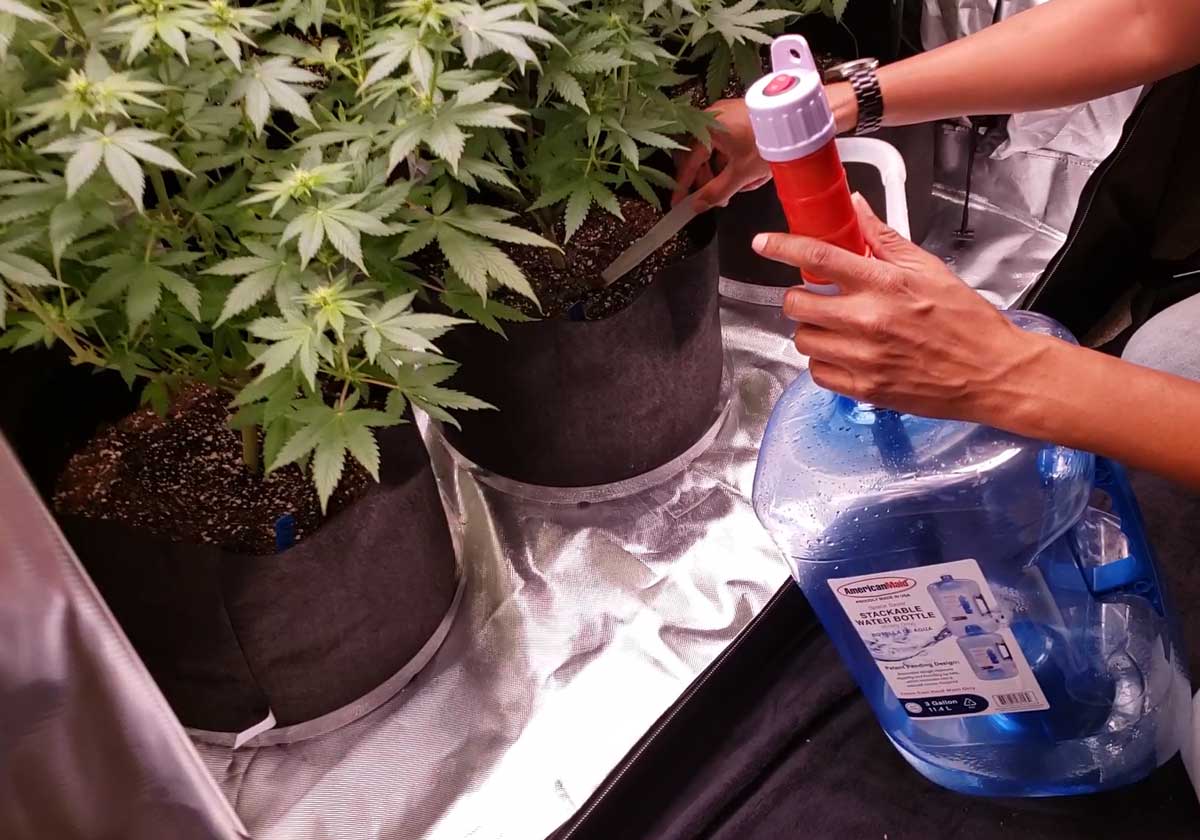
I use a water transfer pump. (Learn easy ways to water plants)
What to Do If You See Nutrient Deficiencies
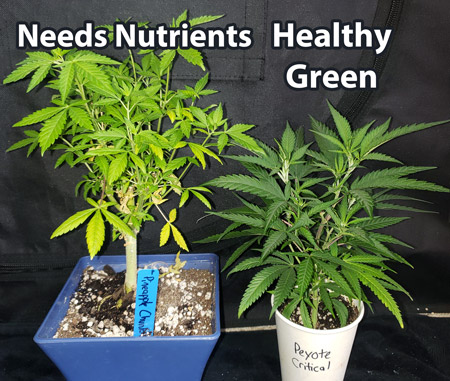
- See yellow? If you notice the leaves are starting to yellow or turn lime green, it’s usually a sign your plants is “hungry” for more nutrients. Especially the yellowing seems to be climbing up the plant from the bottom.
- Look at the nitrogen deficiency page for more information. If you have a nitrogen deficiency at this stage, it means your plants need higher levels of nutrients. If so, increase your nutrient levels slowly, watching closely for signs of nutrient burn (which means too high levels of nutrients).
- Some leaves will likely turn green again once the plant gets more nutrients, but some may stay yellow, especially towards the bottom of the plant. So look at the new leaves for signs of recovery. Most important, make sure the yellowing has stopped spreading to different leaves.
- It’s also likely that any improvement may take a few days after you provide increased nutrient levels. So don’t keep upping your dose until you’ve given your plant a few days to a week at the new level!
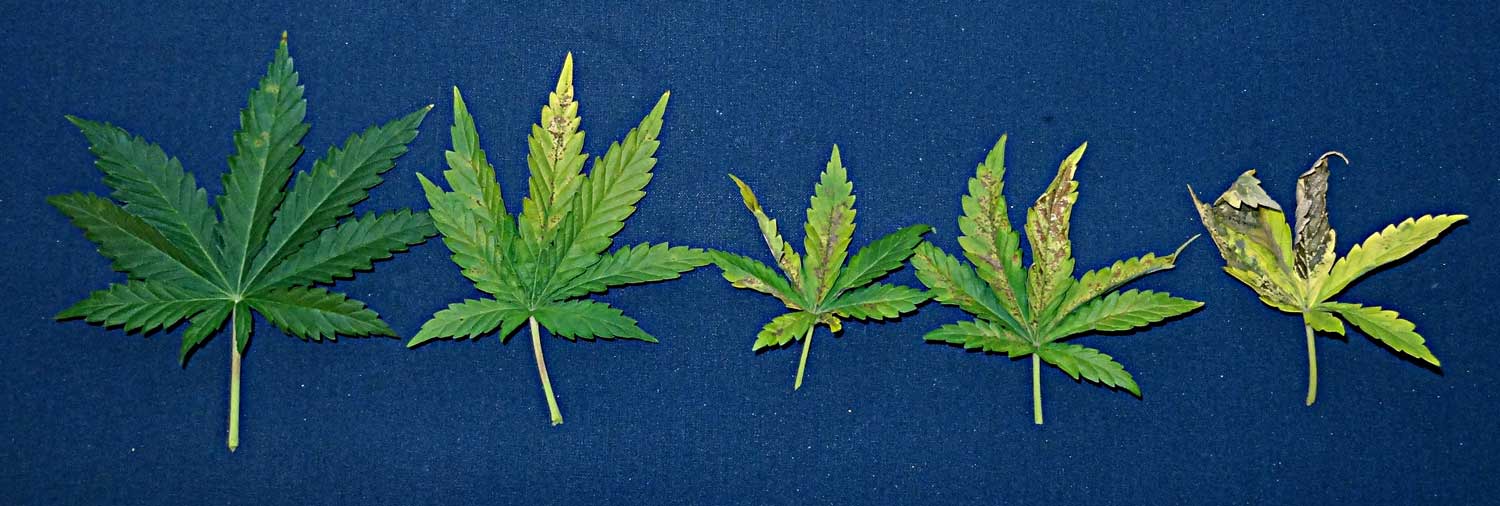
- Other Nutrient Deficiencies – If you have any other problems besides a nitrogen deficiency, it’s likely a pH problem. But if you’ve been giving nutrients and properly pH’ed water, yet are still seeing leaf symptoms, consult this page: Plant Doctor – Diagnose Your Sick Cannabis Plants.
If your plant is yellowing or lime green all over, it’s a sign it needs more nutrients overall.
See other leaf deficiencies? It’s likely a pH problem. If not, check the Cannabis Plant Doctor!
Optional Plant “Training” for Bigger YIelds
You can let cannabis plants grow naturally, and that works well. However, most cannabis plants naturally only grow one main buds, instead of many buds per plant. If you want to increase your yields and produce a sea of buds, these are the steps to take.
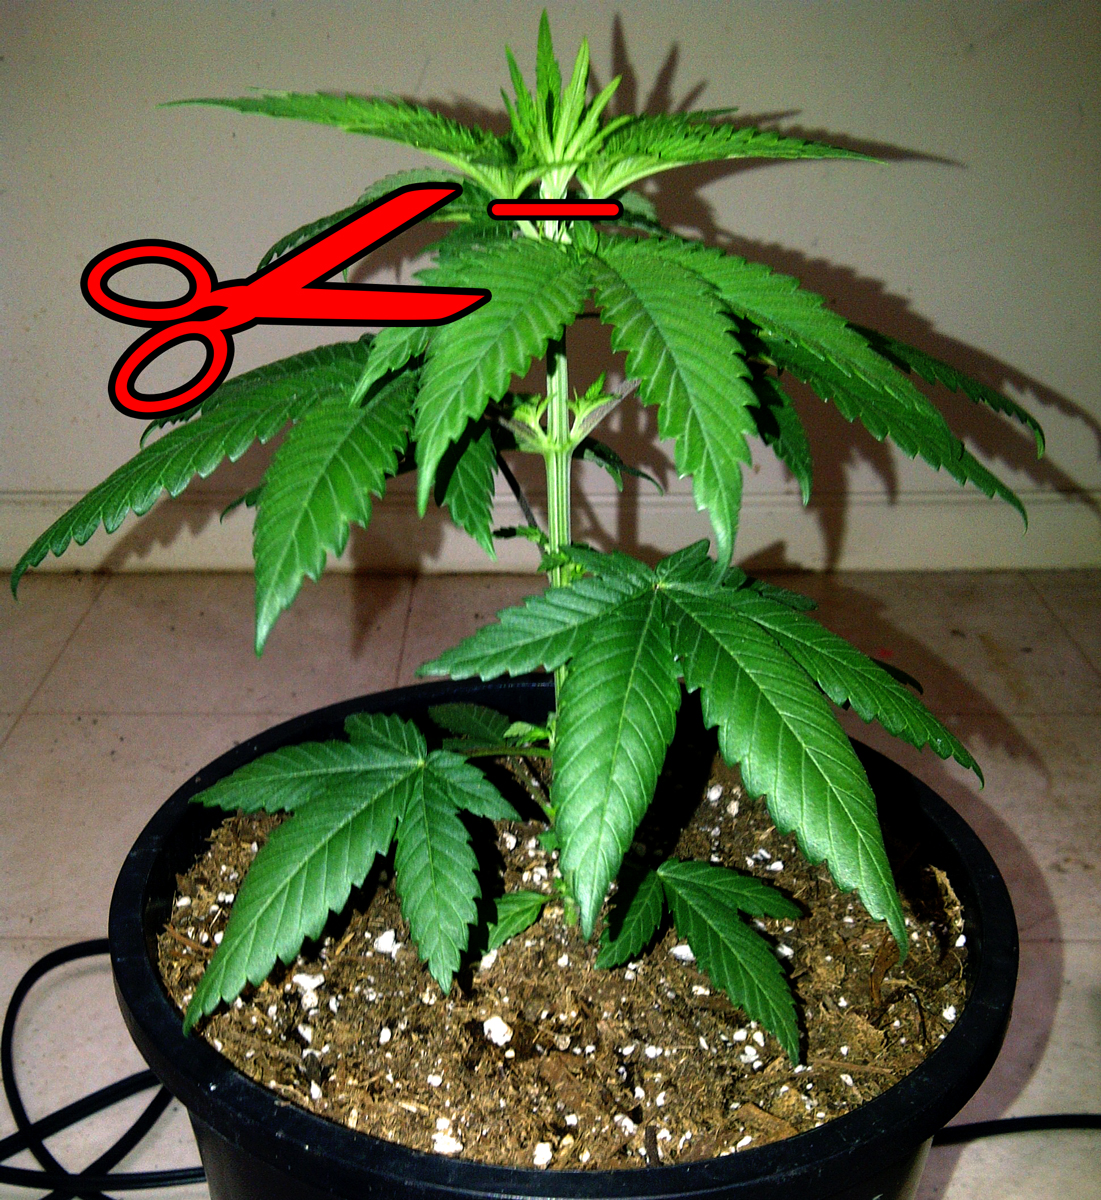
- “Top” the Plant (Optional But Helpful) – Cut off the top of the young plant above the 5th set of leaves with a clean pair of scissors. This helps cause the plants to “bush out” and produce more buds per plant. Learn how to top an autoflowering plant.
- Bend Over Tall Stems to Make Plants Grow Flat (Plant “Training” for Bigger Yields) – If desired, the vegetative stage is when you start plant training (I recommend waiting a few days after the transplant to make sure plant isn’t stressed before starting any training).
Note: If you are growing auto-flowering plants from seed, follow these autoflowering-specific training instructions.
Cut off the top of the plant above the 5th set of leaves. (Optional but helpful!)
This videos shows you how to top a cannabis plant.
This next video shows the whole cannabis topping process, in a timelapse format, showing what topping looks like in 10 days. This helps you see how the plant starts “bushing out” (the lower growth tips begin rising up). I think it also helps you see how topping splits the main stem into two stems.
Topping makes it much easier to train the plant to grow flat since you can bend each of the two new main stems down and away from the center.
Here’s a video showing what a plant looks like in the 10 days after being topped. Thanks to grower fuzzygrow for this awesome cannabis topping timelapse!
Read the complete guide to topping cannabis plants!
Whether you top or not, you should still make sure to bend over tall stems as they grow, to try to create a flat, tabletop shape.
Use bending and tying down (low stress training) to keep plants flat and wide like a table as they grow.
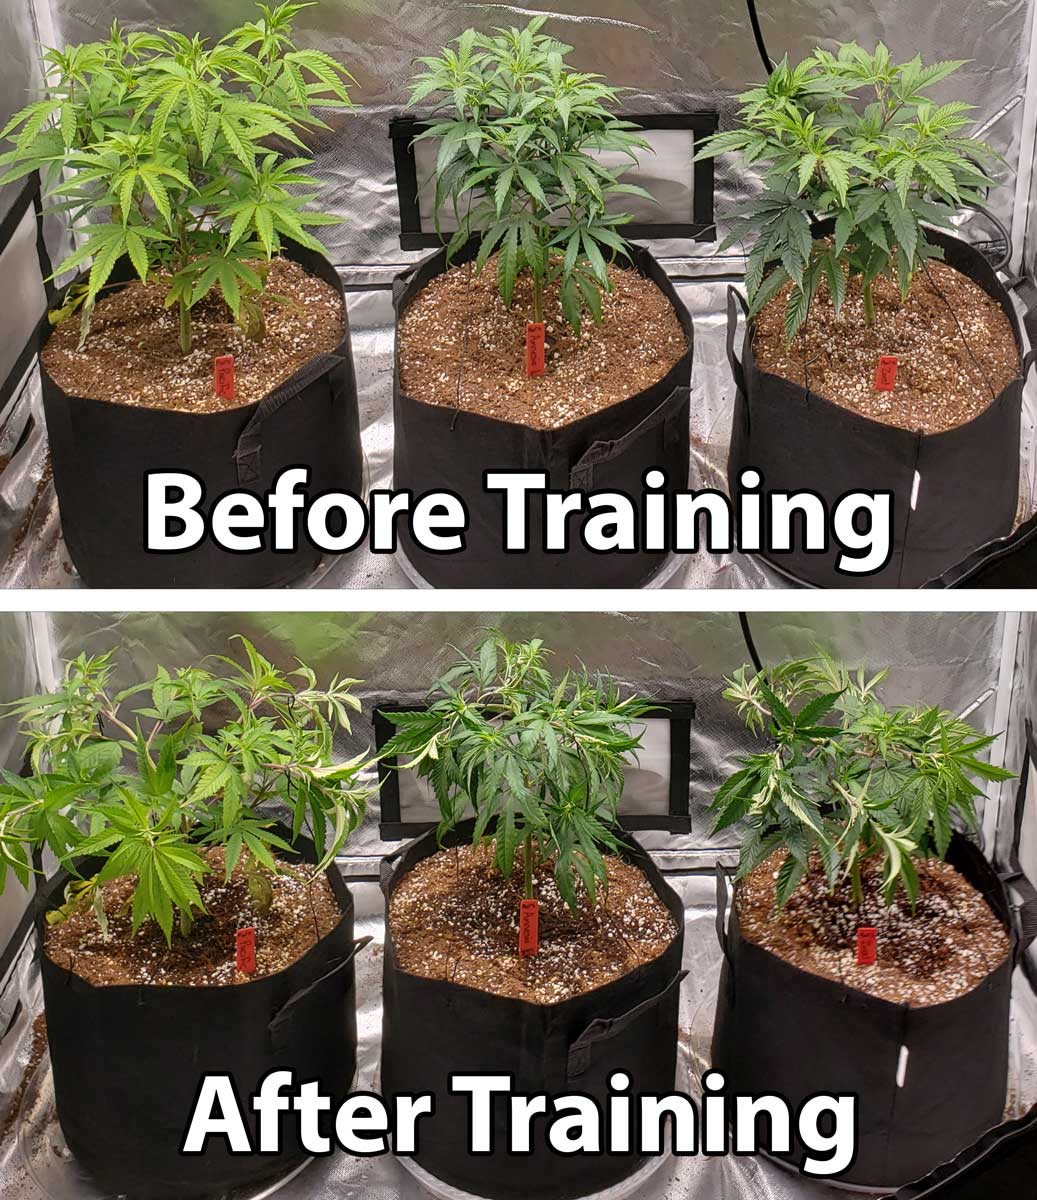
It doesn’t seem like much, but this process of bending over tall stems is key to getting the best cannabis yields later.
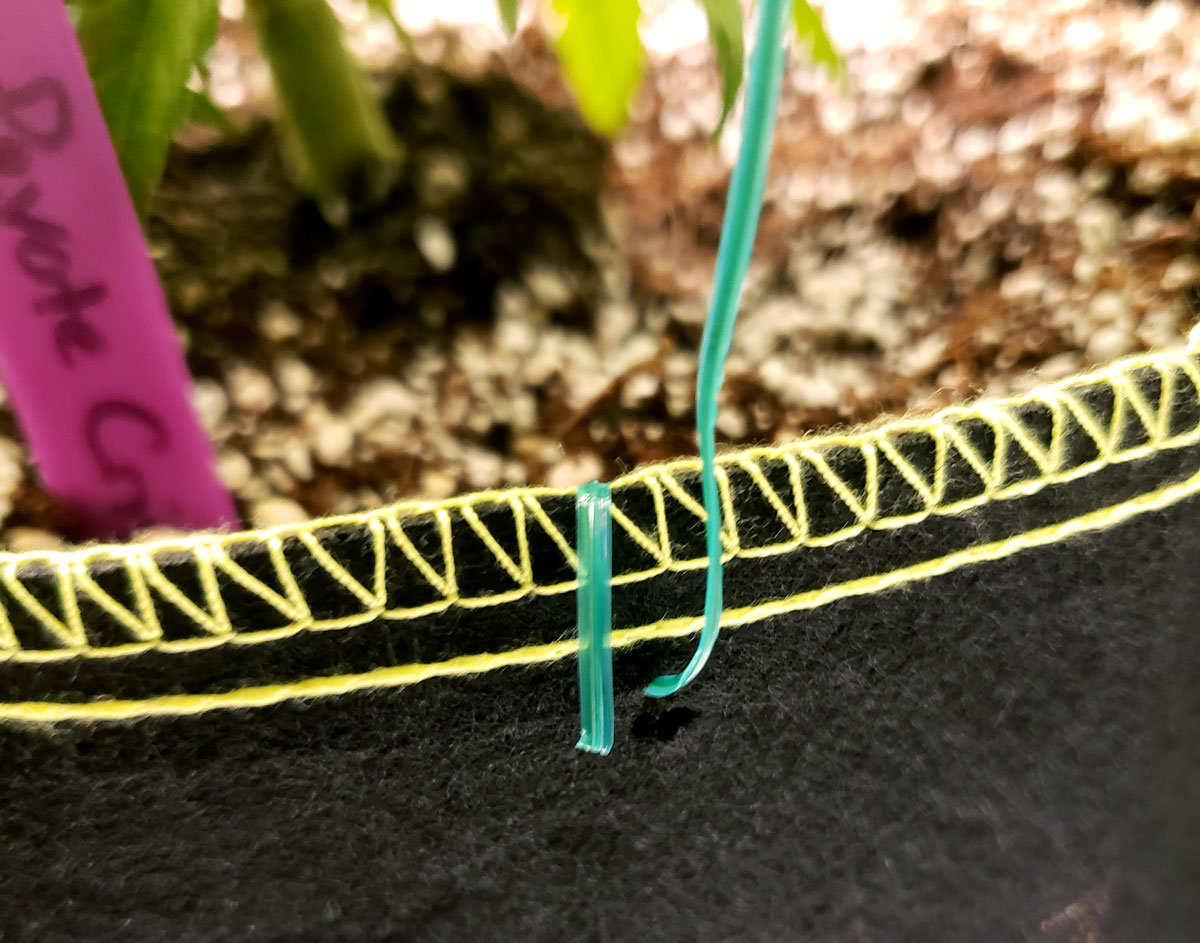
I gently bend tall stems down and away from the center of the plant, and use plant twist tie to hold them in place.
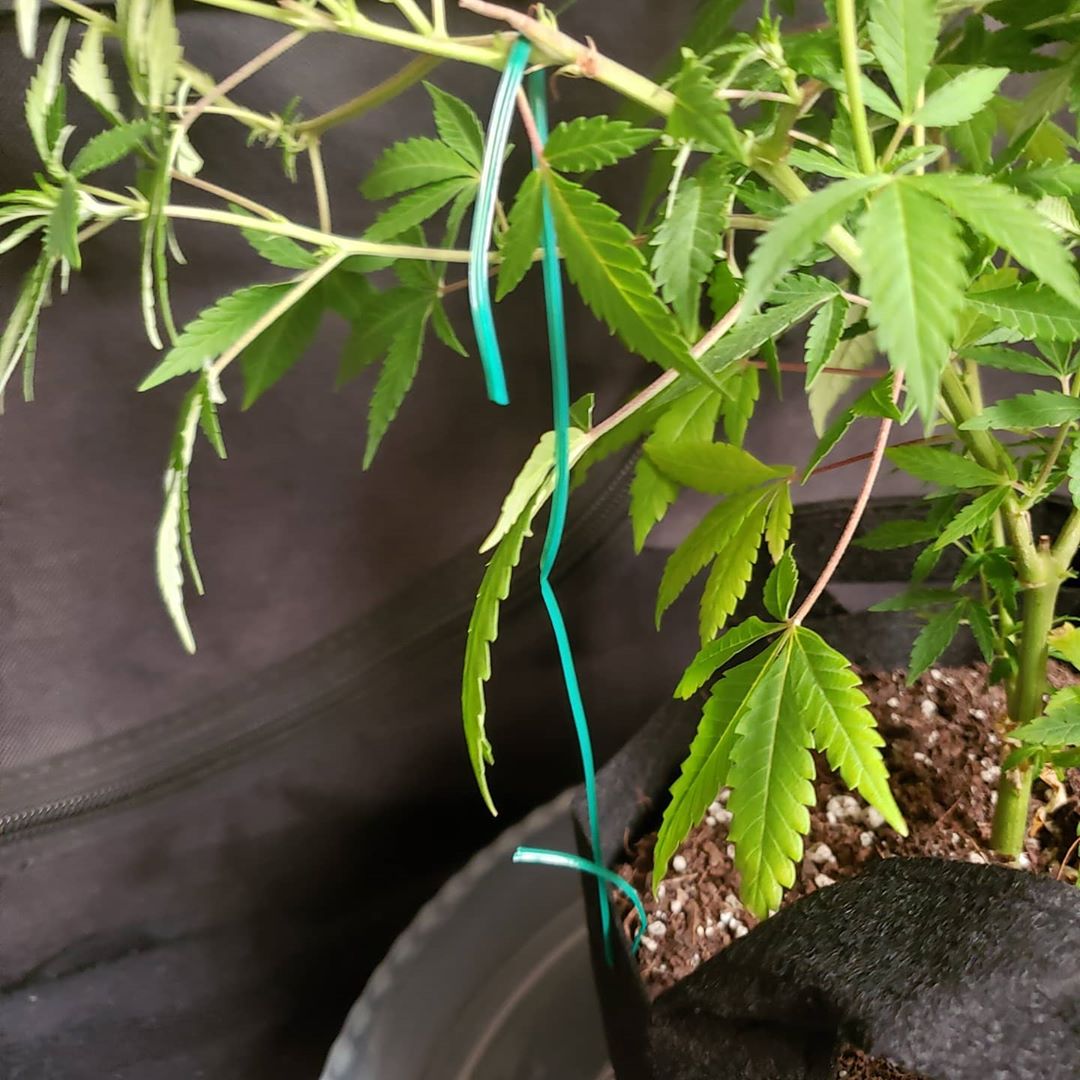
If using fabric pots, just poke a hole where you want to attach the twist tie. I use Gardening Snips (useful for plant training and trimming!)
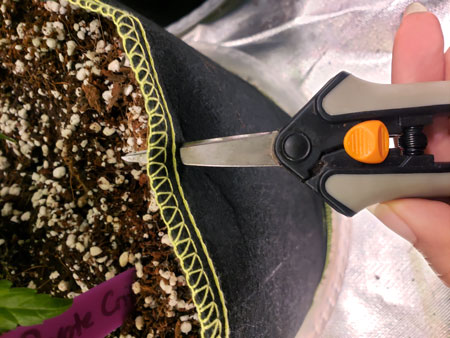
Wrap the twist tie around the hole to give it some extra holding power.
Continue always bending over and tying down tall branches to maintain that tabletop shape.
The vegetative stage lasts until your plant is about half the size you want it to be in the end (or when they start flowering on their own). After your plant has grown half the desired size, it’s time for the next step.
- Wait Until Plants Are 1/2 the Final Size – Once plants are half the desired size, switch to the flowering stage (if you have auto-flowering plants, they will automatically start flowering after 3-5 weeks).
Why when plants are half the final size? Because on average they will about double in size during the flowering stage.
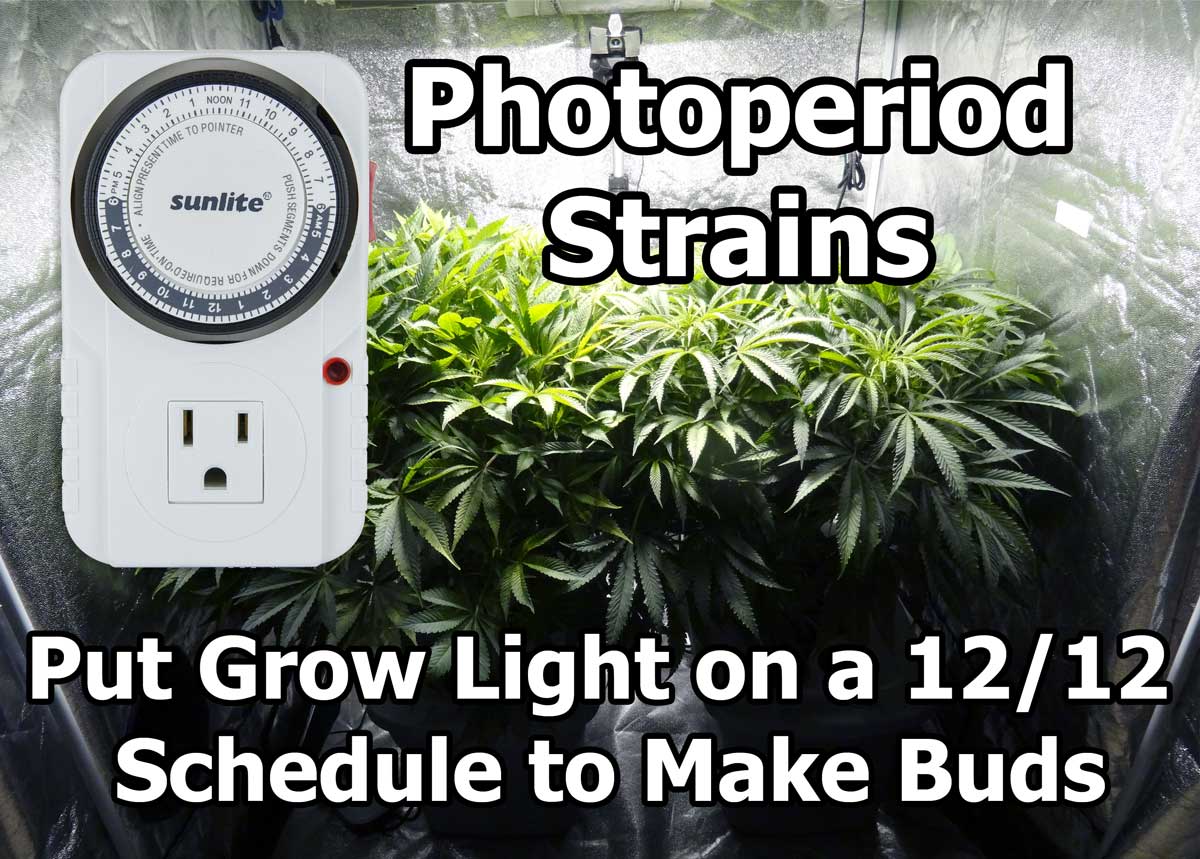
8.) Initiate Flowering Stage with a 12/12 Light Schedule (to get buds to form)
Now that your plants are half the final size, it’s time to switch to the flowering stage. With standard photoperiod plants, you do this by changing your light schedule to 12-12 (12 hours of light, plus 12 hours of uninterrupted darkness). This is done by plugging your grow lights into an electrical timer set to turn the lights off for 12 hours a day.
With auto-flowering strains, the switch to the flowering stage happens without you needing to do anything special.
Learn more about cannabis life stages and switching the flowering stage.
9.) Flowering Stage – What to Do
The flowering stage is your cannabis plant’s second (and last) stage of life. Buds are the flowers of a cannabis plant, and the flowering stage lasts until harvest. You’re at the home stretch!
Your Goal in the Flowering Stage: Keep plants healthy until they are ready to harvest. Plant care is basically the same as before, except during the flowering stage it becomes more important to control temperature and humidity than ever.
- Remember: Flowering Plants Are More Sensitive – Cannabis plants are much more finicky in the flowering stage, especially in the second half after they stop growing new leaves and focus totally on growing buds. It’s easy to trigger problems if you aren’t controlling your environment. Watch over plants closely, and make every effort to expose all bud sites to light and a breeze.
Nutrients: Now it the time to switch to “flowering” or “bloom” nutrients.
- Multi-Part Nutrient Systems – If using a multi-part nutrient system like the Flora trio (or other “trios”), then just follow the instructions to give the proper ratios for flowering. Their schedules slowly switch from vegetative to flowering nutrient ratios, with a “transition” stage in between.
- One-Bottle-Per-Stage Nutrients – If you’re using one-part nutrients like Dyna-Gro, switch to the “Bloom” bottle once you notice plants stop getting taller every day (typically 2-3 weeks after initiating 12/12). You need to give vegetative nutrients for the first few weeks because your plants will still be growing vegetatively for a while. Plants need those vegetative nutrients to grow all the new leaves and stems.
Watering: Water plants with 10-20% extra runoff. Don’t water again until the top of the coco is mostly dry. Continue to always adjust pH water to 5.5-6.5 before giving it to plants. Plants typically drink a LOT of water for the first few weeks, but slow down once they stop getting taller.
Training: You can still train plants by gently bending too-tall colas, but avoid any major training once the plant has started making buds.
Keep gently bending over any tall branches to keep cannabis plants flat and wide like a table.
This helps make tons of buds, and keeps them all the right distance from the grow light.
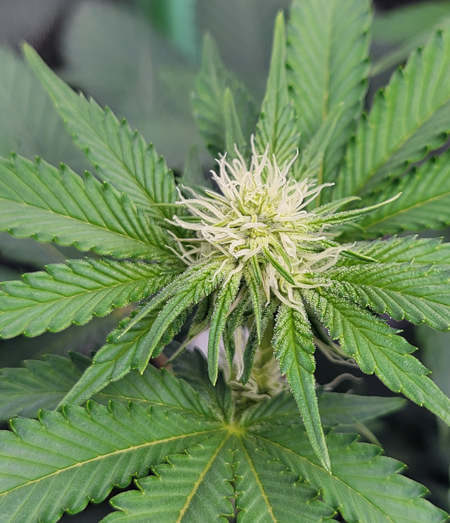
First, you’ll see little fuzzy white hairs growing all over the plants. These are the beginnings of buds, and will eventually fatten into hard nugs.
Cannabis buds look like bunches of white hairs at first.
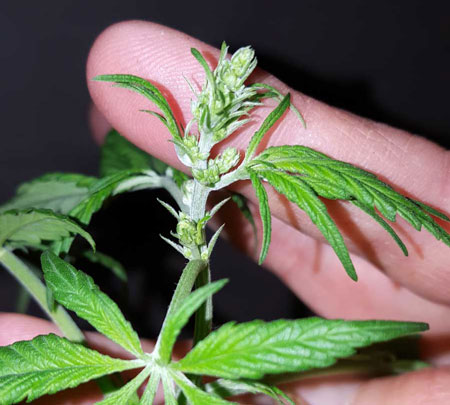
If you see bunches of grapes instead of fluffy white hairs, that means you have a male plant. These should be removed from the grow space immediately or they cause all your buds to become full of seeds.
If you see little balls instead of fluffy hairs, remove the plant from the grow space! Learn more about male flowers.
Buds slowly gain both size and potency. The fuzzy hairs will eventually darken and curl in as the buds mature.
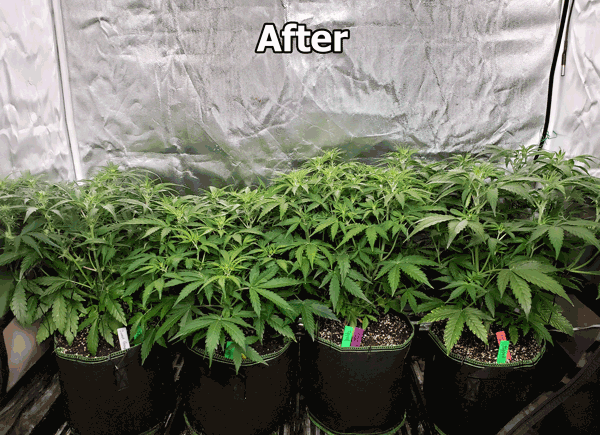
These buds are 6 weeks from initiating 12/12, but each strain develops at a different pace.
Now you’re just watering and caring for your plants until the buds are ready to harvest!
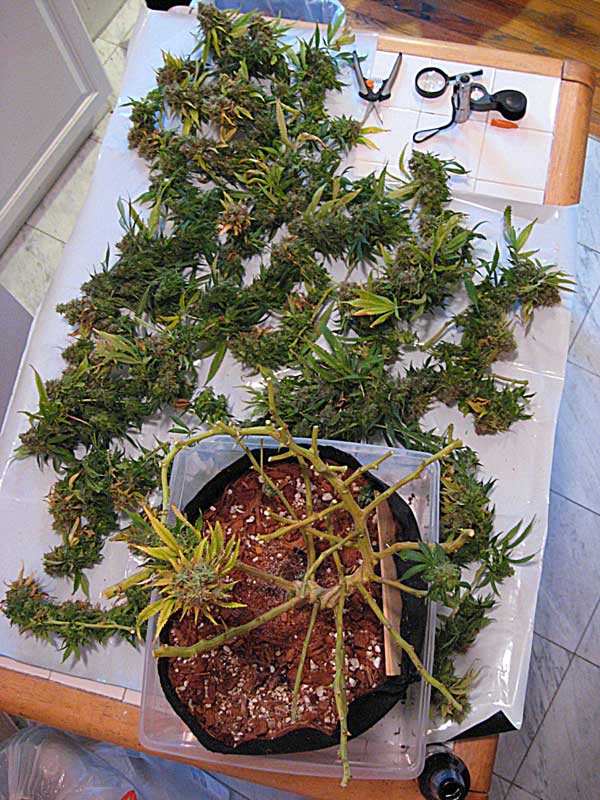
10.) Harvest Time!
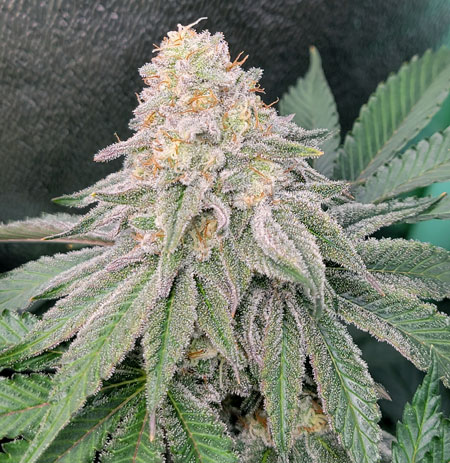
Harvest buds when ready. At this point, all the hairs will have darkened and curled in. The buds should look solid.
These buds are all ready to harvest (each strain looks a little different).
This tutorial will explain everything you need to know about when to harvest your plants: https://www.growweedeasy.com/harvest
Now it’s time to enjoy the fruits!
Happy Growing!
Here are some additional nutrient suggestions for growing in coco coir:
More Nutrient Picks For Growing in Coco Coir
Often when growing cannabis in coco coir, it is helpful to supplement with extra Calcium and Magnesium as calcium deficiencies & magnesium deficiencies are relatively common in coco coir. There are many supplements that provide a boost of these nutrients, and pretty much all of them will work fine. A commonly seen one called “Cal-Mag” by Botanicare works well (and is pretty inexpensive), and so does “CaliMagic” from General Hydroponics. Coco coir is an excellent growing medium as long as you maintain the pH between 5.5 – 6.5 and make sure the plants have enough calcium and magnesium.
Any quality cannabis nutrients made for hydroponics will work well for growing in coco coir as long as you also use a Cal-Mag supplement.
I personally like the General Hydroponics Flora trio plus Calimagic (a Cal-Mag supplement) for growing in coco coir. This is what I use for my coco coir grow. You can follow the nutrient schedule provided by GH as long as you provide plain water every other watering. Or…
Here’s the custom Flora Series + CaliMagic nutrient schedule I use for coco coir [PDF]
You don’t need any other nutrients to grow marijuana; the Flora trio + Cal-Mag will give your cannabis plants what they need to flourish through the vegetative and flowering stages.
For the easiest coco coir growing, get a smart pot (pot made out of fabric – they work perfectly for growing cannabis and have good drainage).
IMPORTANT: Root pH Affects How Well Your Cannabis Plants Can Aborb Nutrients!
- General Hydroponics Flora Series Nutrient Trio & CaliMagic – Tried and tested nutrient system for any type of hydroponic growing including growing in coco coir. This version of Cal-Mag (CaliMagic) has been created by General Hydroponics, the same company that makes the nutrients. I use this combination for my grow.
Here is the coco coir nutrient schedule I’m using right now [PDF]
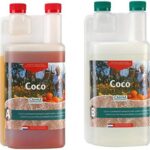
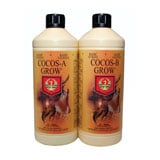
- Canna Coco A + B & Cal-Mag – This combo is a crowd favorite – many coco coir growers write in to tell us this is their favorite cannabis nutrient for growing in coco coir. From a grower: “Canna is a Dutch company and one of the best IMO. They make a great product line for growing in coco coir and test their products on real cannabis plants.” Another grower said, “Canna products are one of the only nutrient lines to be developed primarily for cannabis (and tested on live plants). They’ve been doing so for almost 30 years. Cost is a little higher than competitors but worth every penny.” A different grower added, “Canna – I have only used their coco line, but it is the the highest quality you will find.”
- Get a custom nutrient schedule from Canna or use this pre-made one [JPG].
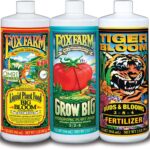
- Fox Farms Nutrient Trio for Hydroponics & Cal-Mag – Very concentrated, less is more. This is what I used for my first few coco coir grows, and I was very happy with my results. “Grow Big” & “Tiger Bloom” provide most of the major nutrients your cannabis needs, while “Big Bloom” has many micro nutrients and beneficial compounds that help nutrient uptake and root health. This trio works extremely well by itself, just follow the feeding schedule (here’s a PDF, here’s a JPG) from Fox Farms. They offer a lot of supplements, but the only bottles you need to be successful growing cannabis is the FF trio, which is highlighted in green on the schedule. The trio tends to be strong, so use it sparingly (especially “Grow Big” & “Tiger Bloom”). Generally the Fox Farms nutrient system will prevent Cal-Mag deficiencies, but it’s good to have extra Cal-Mag on hand just in case whenever growing cannabis in coco coir.
- Dyna-Gro (Foliage-Pro, Bloom) & Cal-Mag – Cheapest nutrients that work well for growing cannabis in coco coir. Use “Foliage-Pro” during the vegetative stage, and “Bloom” during the flowering stage. Just follow the instructions on the bottles!


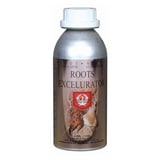
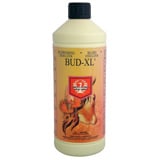
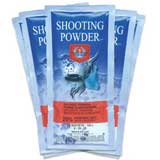
- House & Garden Line-up (expensive yet remarkably effective) Coco A + B, Roots Excelurator, Algen Extract, Bud XL, shooting powder <– Get a custom nutrient schedule directly from the people at House & Garden via their free online nutrient calculator.From a grower: “H&G was started by a top researcher from Canna. They are right outside of Amsterdam and because cannabis is legal there, so both Canna and H&G are able to do R&D using cannabis. I don’t know about Canna, but I know that House and Garden makes all their own nutrients in house and they work great.”

Make the Coco Yourself (Instructions Below) or Buy a Pre-Made Coco Coir Mix!
Mother Earth Coco Mix is a highly recommended pre-made coco coir mix for growing cannabis. However, many coco mixes work great for growing marijuana, including FoxFarm Cultivation Nation 70/30 Coco.
Coco Coir Rehydration Tutorial: What You Need
There are pre-made coco coir mixes, but they are usually more expensive than the cost to make a mix yourself. A pre-made mix is heavy like soil because it’s already been hydrated with water. This makes pre-made coco coir mixes expensive to ship, and heavy to carry around. If you’re willing to rehydrate your coco at home, you can skip paying a premium for water.
Everything you need to make your coco coir mix can be sent discreetly to your house. You just need some coir bricks and an airy bag of perlite which can be bought at any garden store. With this method, there’s no lugging a huge bag of potting mix home, or paying for shipping to have it delivered.
This tutorial will show you how to re-hydrate coco coir bricks and mix with perlite to create a rich, cannabis-friendly potting mix. I will also share some hints about growing cannabis in coco coir and how to take care of your plants for the best results.
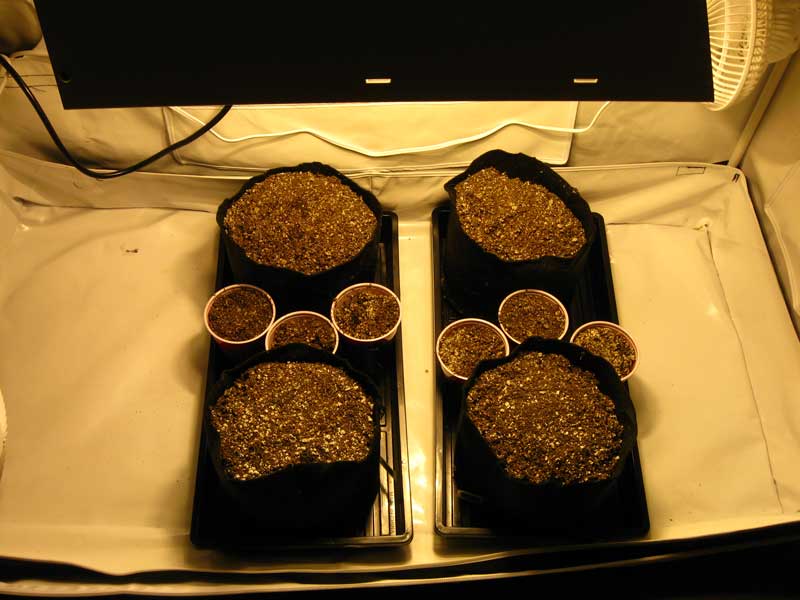
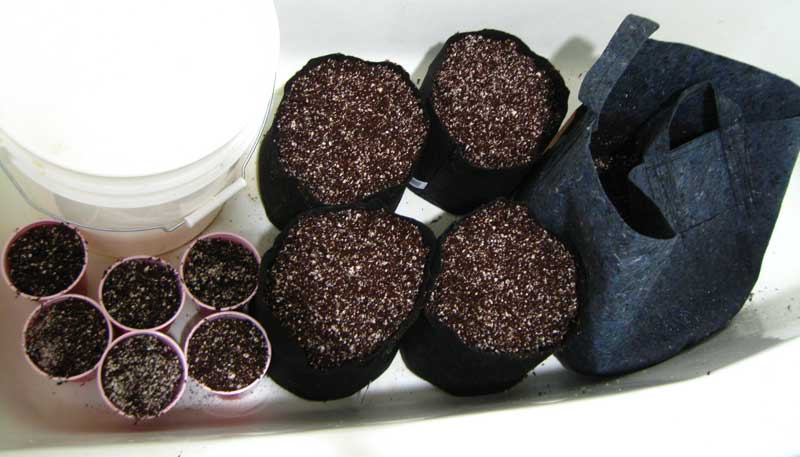
If you follow these instructions, you will end up with 9-10 gallons of potting mix. I used this to fill four 2-gallon pots plus six solo cups, which is a good amount of soil for me to grow 4 small plants. Alternative options: Three 3-gallon pots or two 5-gallon pots.
Recap: Do you have everything you need to make your coco coir mix? You’ll need the following items to complete the tutorial above.
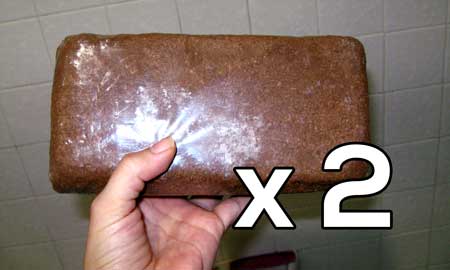
- 2 x 650g coco coir bricks
- 8-quart bag of perlite
- 10-gallon fabric pot
- 4 x 2-gallon fabric pots – Or any combination under 10 gallons.
- 5-gallon bucket <– Available locally (Home Depot, Lowes, etc)
The above tutorial should leave you with 9-10 gallons of potting mix.
The following tutorial makes about 10 gallons of potting mix. Double the recipe for 20 gallons!
2 x coco coir bricks (650g each)
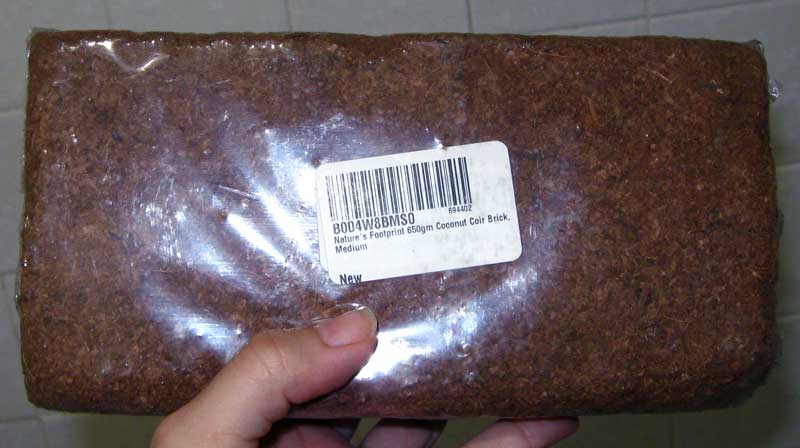
For this tutorial, I used two bricks of a standard 650g Coconut Coir Brick. Any similarly sized bricks from a reputable company will also work.
I used “Nature’s Footprint” Coco Coir, but any 650g Coconut Coir Brick will work great!
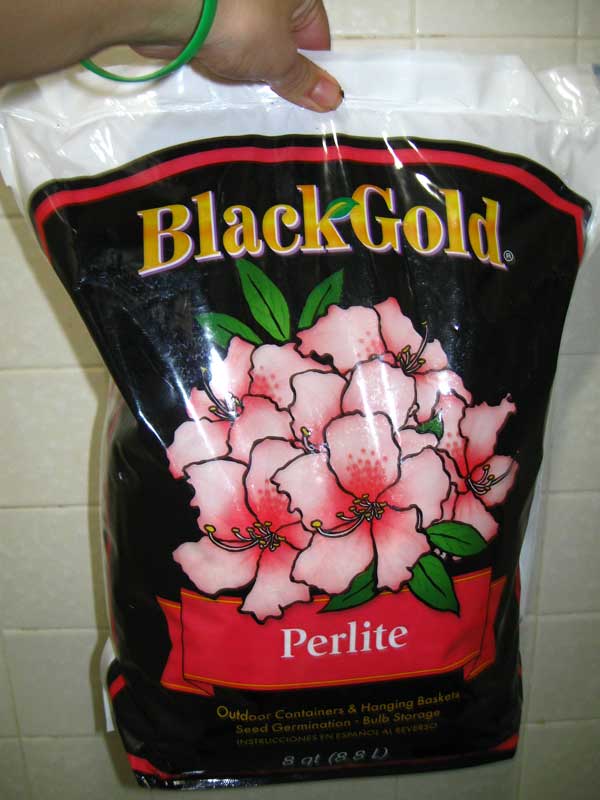
I have used Shultz, Espoma, Black Gold, and even Miracle-Gro brand perlite. Any 8-quart bag of perlite will work. Perlite can often be found in garden stores or the garden section of places like Home Depot and Lowes. I normally advise against all things Miracle-Gro, but their 8-quart bag of perlite is okay for this tutorial if you can’t find anything else. But remember, never use Miracle-Gro soil or their standard nutrient formula!
Any bag of horticultural perlite from any manufacturer will work for this tutorial!
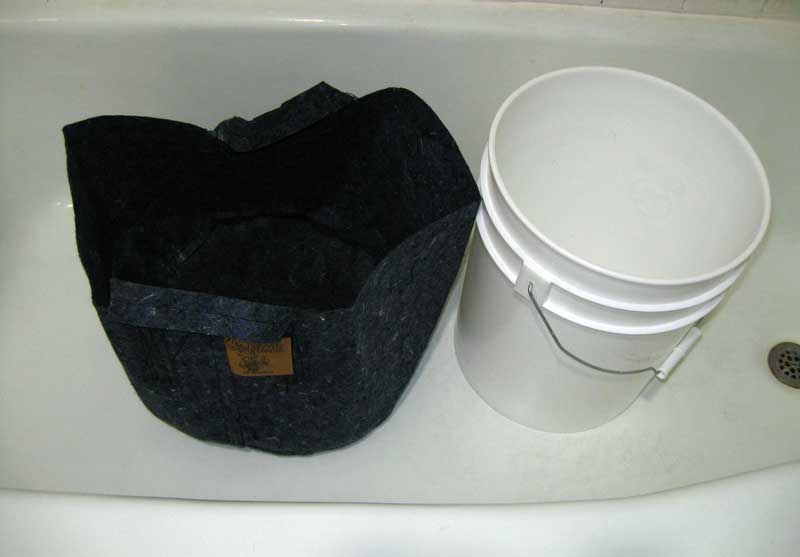
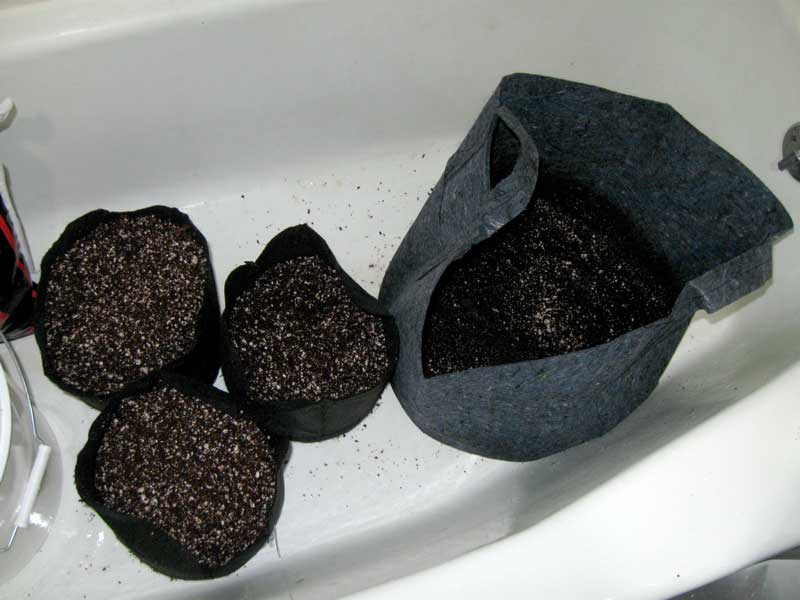
10-gallon fabric container & 5-gallon bucket
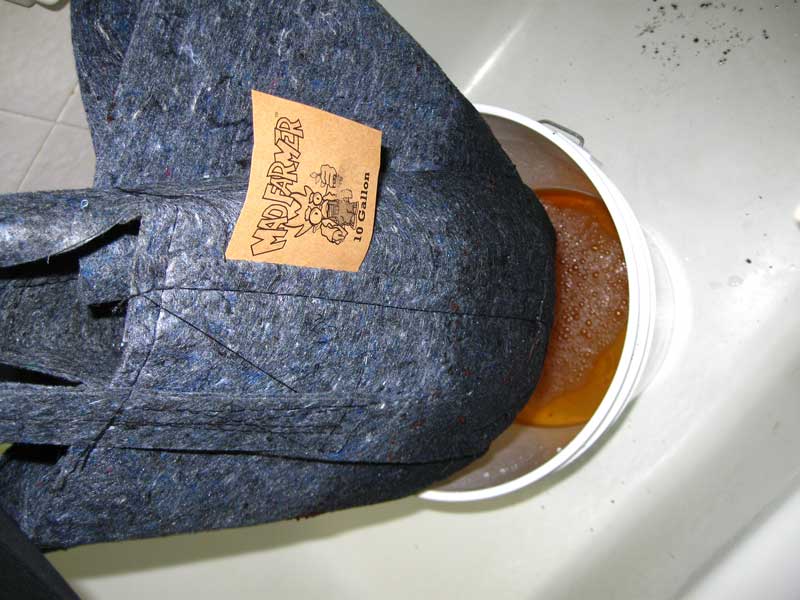
I use a 10-gallon fabric container from Mad Farmer (basically a Smart Pot by a different company) because it’s sturdy, has handles and will stand up on its own after adding coco coir. You could use a 10-gallon Smart Pot, two pillow cases stacked inside each other, or any other fabric container that lets water through and is tough enough to hold 5 gallons of soil.
Here’s the 10-gallon fabric pot & 5-gallon bucket in a bathtub.
Note: You also need access to water and a drain for this coco coir tutorial.
Before You Get Started
(optional)
Run your finger nails over a bar of soap. This adds a layer of soap under your finger nails, which will prevent coco coir from getting stuck under your nails. Save yourself the time it takes to clean your nails after you’re all done!
See What You’re Making
(Makes about 10 gallons of potting mix_
This will make about 10 gallons of potting mix, just enough potting mix for…
- 2 x 5-gallon containers
- OR 3 x 3-gallon containers plus a little extra
- OR 4 x 2-gallon containers plus extra
- OR any setup that uses about 10 gallons of potting mix
Note: I hydrate the two bricks one at a time in the 5-gallon bucket because the 5-gallon buckets are easier for mixing in perlite, and the whole process goes by in less than a half hour anyway even if you do bricks one at a time. If you wanted, you could hydrate both bricks at once in a 10 gallon container, but that’s too heavy for me to work with 🙂
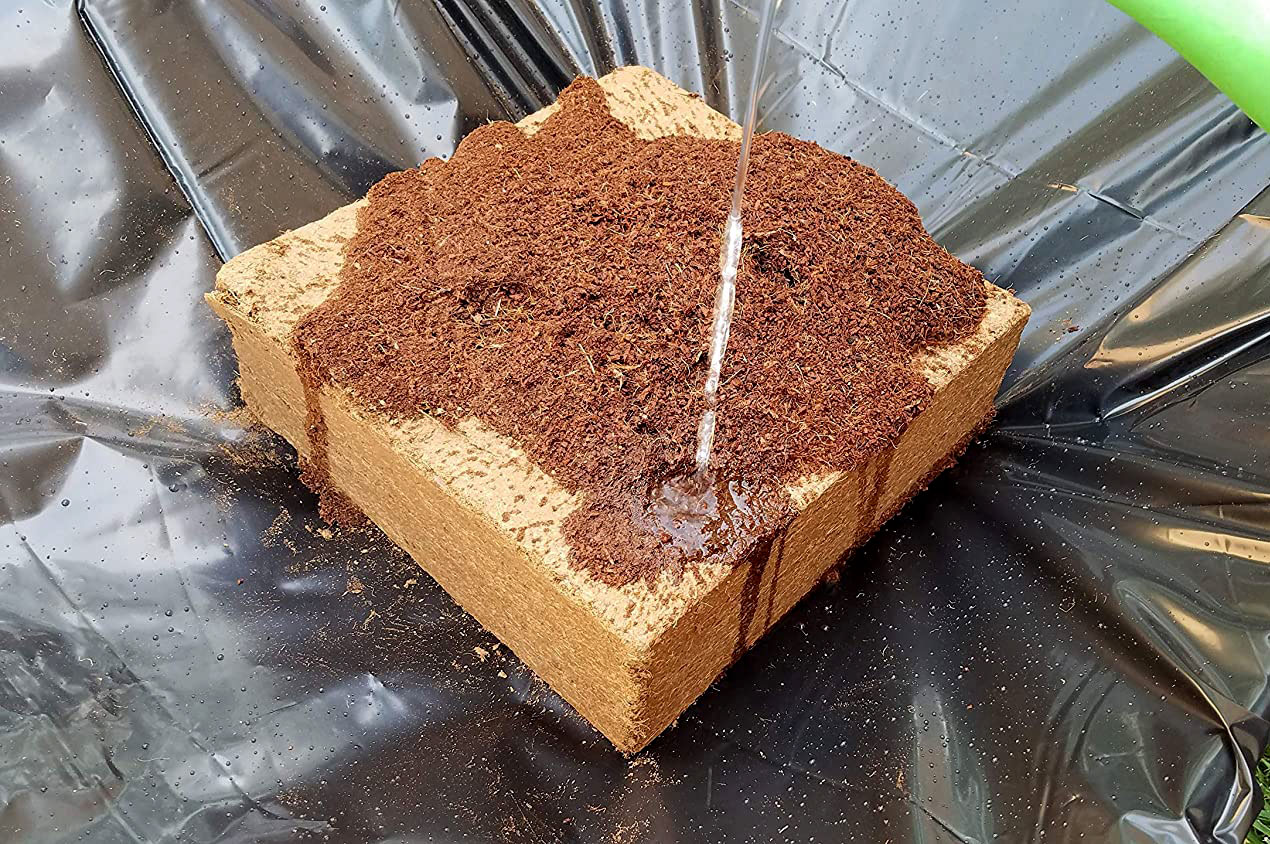
How to Rehydrate Coco Coir & Mix in Perlite
1.) Gather all materials and place everything near your tub (or wherever you’re going to rehydrate to coco coir bricks)
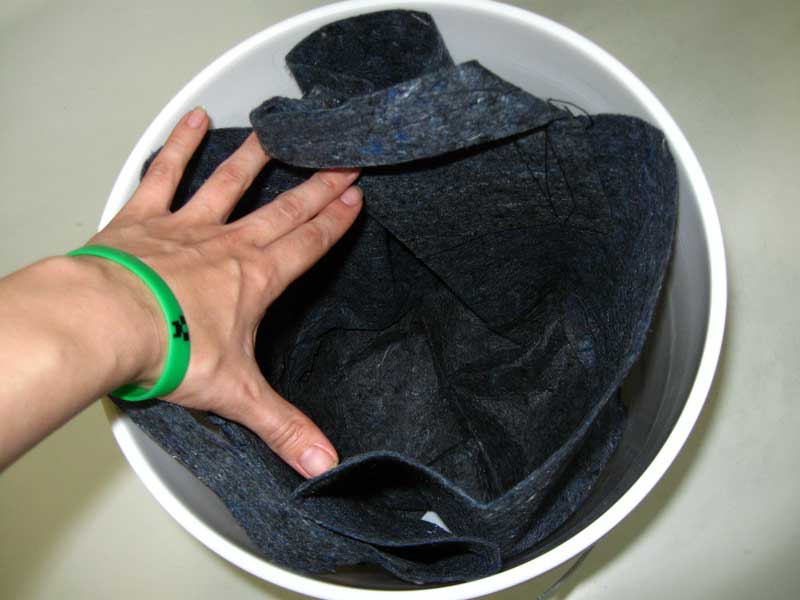
2.) Line inside of 5-gallon bucket with fabric container.
The inside of the bucket should be lined all the way to the top, and you need to have enough extra to be able to easily grab the top so you can lift it up later.
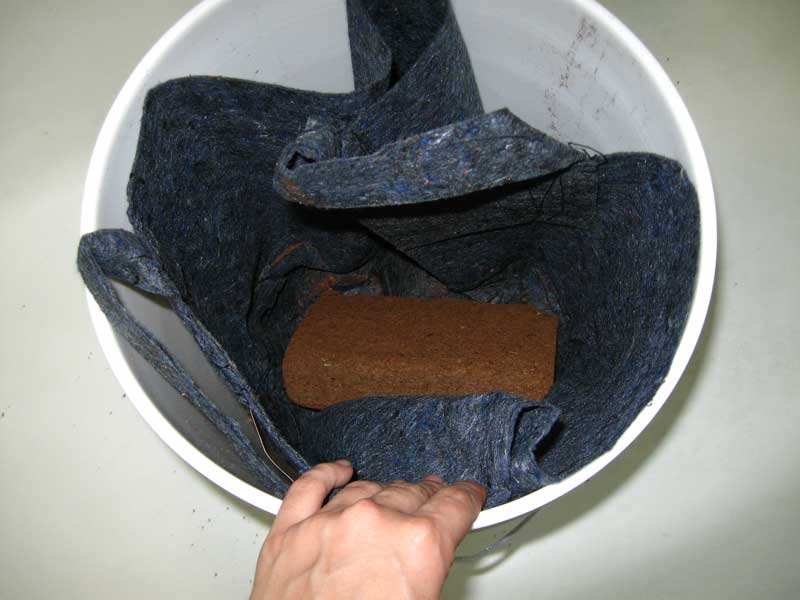
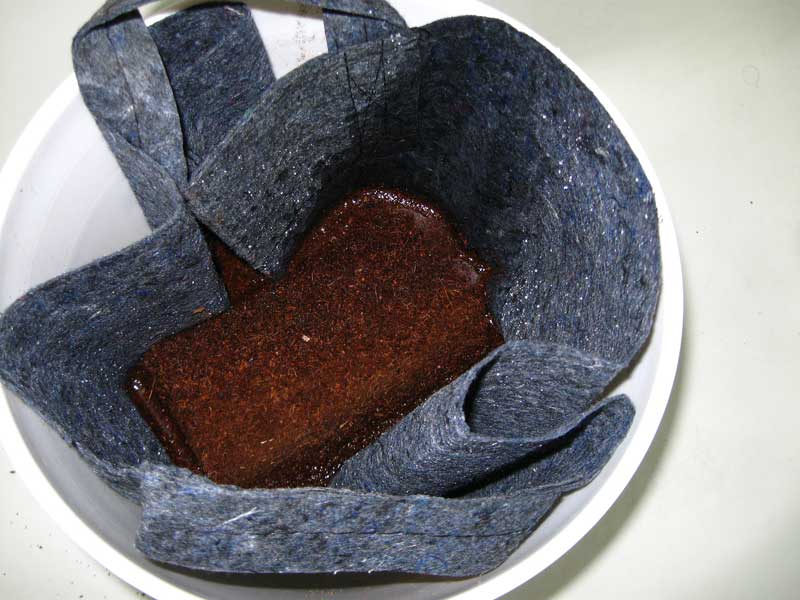
3.) Put the first coco brick inside the liner
4.) Fill the bucket halfway with water.
Optimally, you can add a Cal-Mag supplement and pH this water to 6.0 before soaking. This can help make sure your coco coir has extra Calcium and also help it get into the right pH range right from the beginning.
Honestly though I often use water right out the tap. You’ll be adding Cal-Mag and setting the pH later, but the “best” way is to start supplementing your coco coir now, and it definitely may save you time and trouble later.
You’ll see the brick almost instantly starts getting soft once it makes contact with the water.
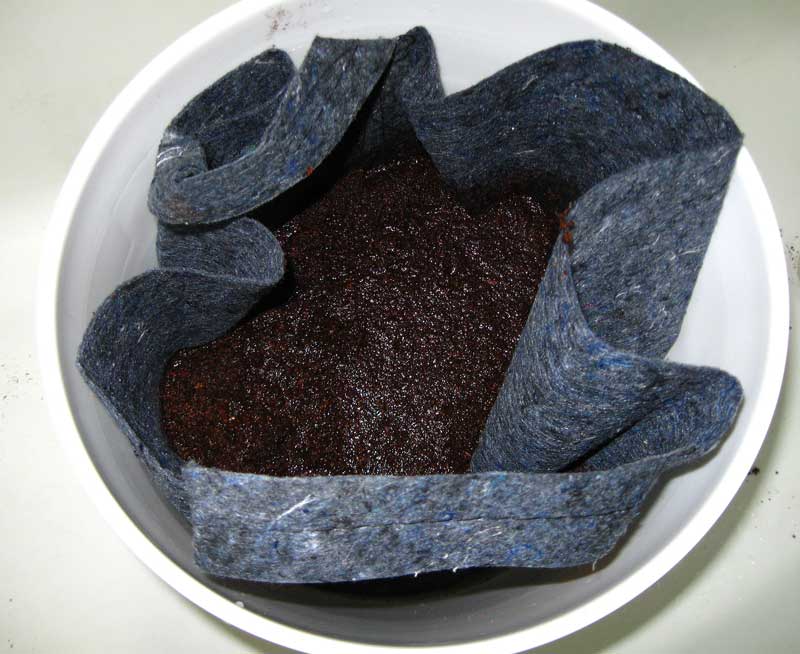
5.) Wait 10 minutes (or until the coco coir gets fully hydrated)
If you stick your hand in and there’s no more hard parts left, then you’ve waited long enough. The coco coir should feel soft all the way through the bucket. You can mix the slurry around with your hands to get it to break up faster if you’re in a hurry.
Some growers let it soak longer, especially if they’re using pH’ed water that’s been supplemented with a Cal-Mag supplement, giving the coco more time to “take in” the good stuff. But I usually wait about 10 minutes and go to the next step.
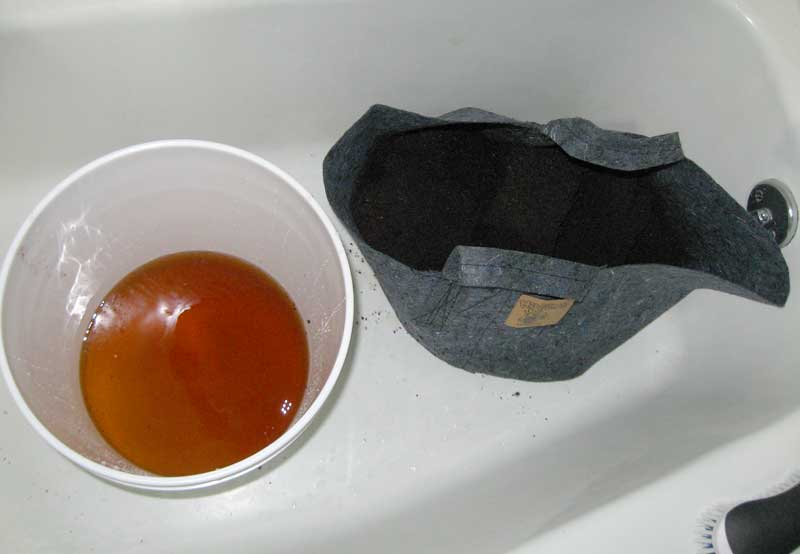
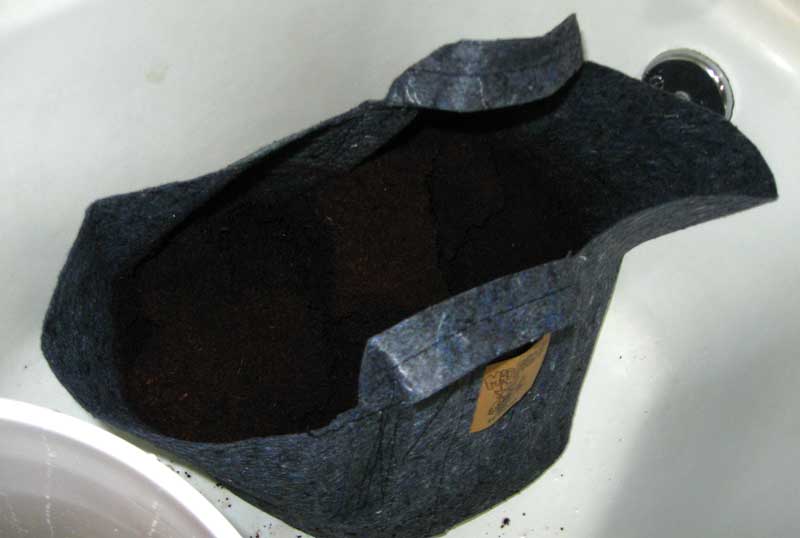
6.) Pull liner up and out, letting water drain.
First let the majority of the extra water drain out into the bucket, then place the liner in the tub or on the ground so it can continue to let water drain out slowly.
7.) Pour half the 8-quart bag of perlite on top of your coco coir
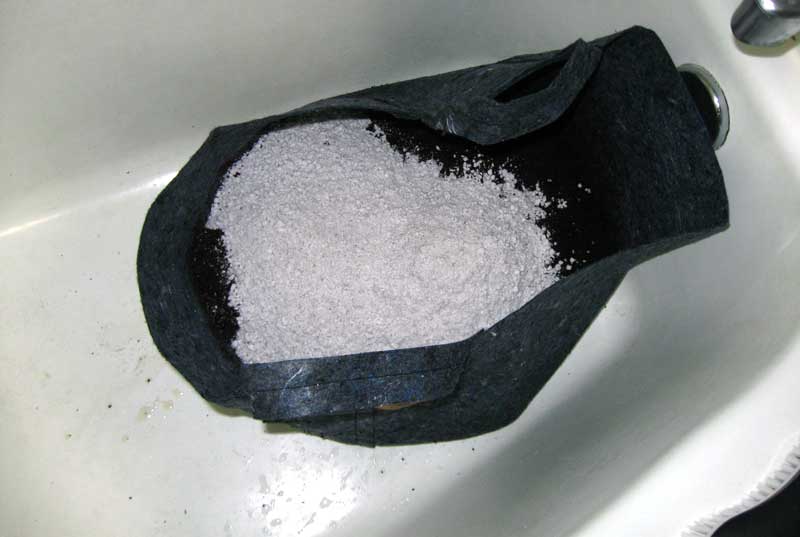
8.) Mix in perlite with hands
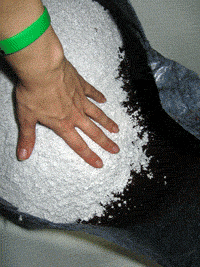
Make sure to mix everything thoroughly, and check around the sides too, where you’ll often find pockets of perlite or straight coco coir. It’s really easy and quick. Just stick your hands in and mix everything together until it looks even all the way through 🙂
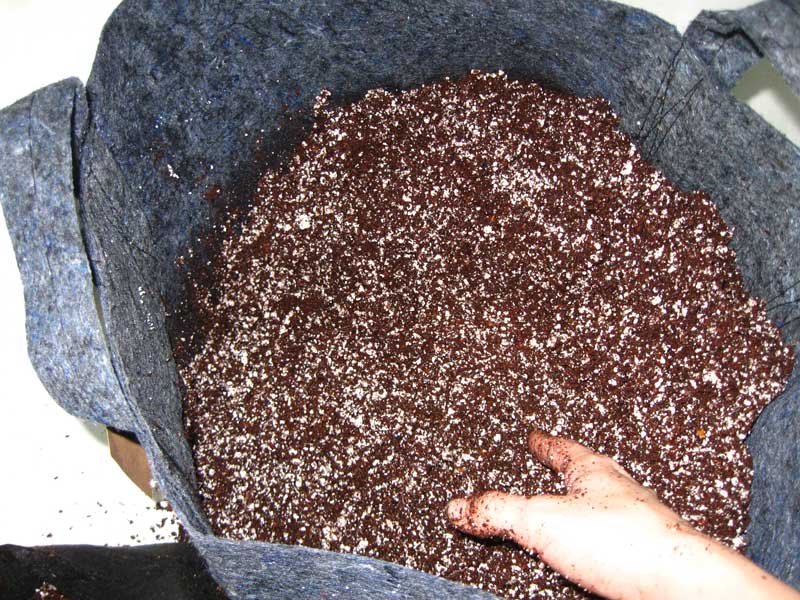
This moving gif should hopefully give you an idea.
After mixing, your potting mix will feel light and kind of soggy. You should end up with something that looks like this.
9.) Fill your containers with potting mix
One batch makes about 5 gallons of potting mix, so it should easily fill a 5-gallon container. You could also use it to fill 3 x 2-gallon containers or 2 x 3-gallon containers, though in both cases you’ll be a little short.
Don’t worry if the mix feels soaking wet, it will dry in the fabric pots once you have a fan blowing over them in your grow tent.
10.) Repeat steps for second brick of coco coir & remaining half of perlite bag
Now you fill the rest of your fabric containers and possibly solo cups for seedlings.
Note: If you do use solo cups, make sure to cut holes into the bottom so that water can drain out after you’ve watered your plants. Always test to make sure water runs through cup freely. If you have a hard time filling up an empty solo cup with water because it’s running out the bottom, you have added the right amount of drainage.
Now you can continue directly with the above cannabis coco grow tutorial! It directly follows the tutorial above for rehydrating coco coir and creating a coir-perlite potting mix.
Jump to…
10-Step Quick Start Guide to Growing Cannabis
Which Grow Light Should You Get?