by Nebula Haze
This tutorial is Part 2 of our “how to grow weed for beginners” series:
Part 1: Get Your Cannabis Grow Supplies > Part 2: Seed-to-Weed Grow Guide
This 10-minute tutorial teaches you how to grow weed indoors once you have your cannabis seeds and equipment. Follow all 5 steps in today’s how to grow weed tutorial, and you will harvest superior weed even if it’s your first grow.
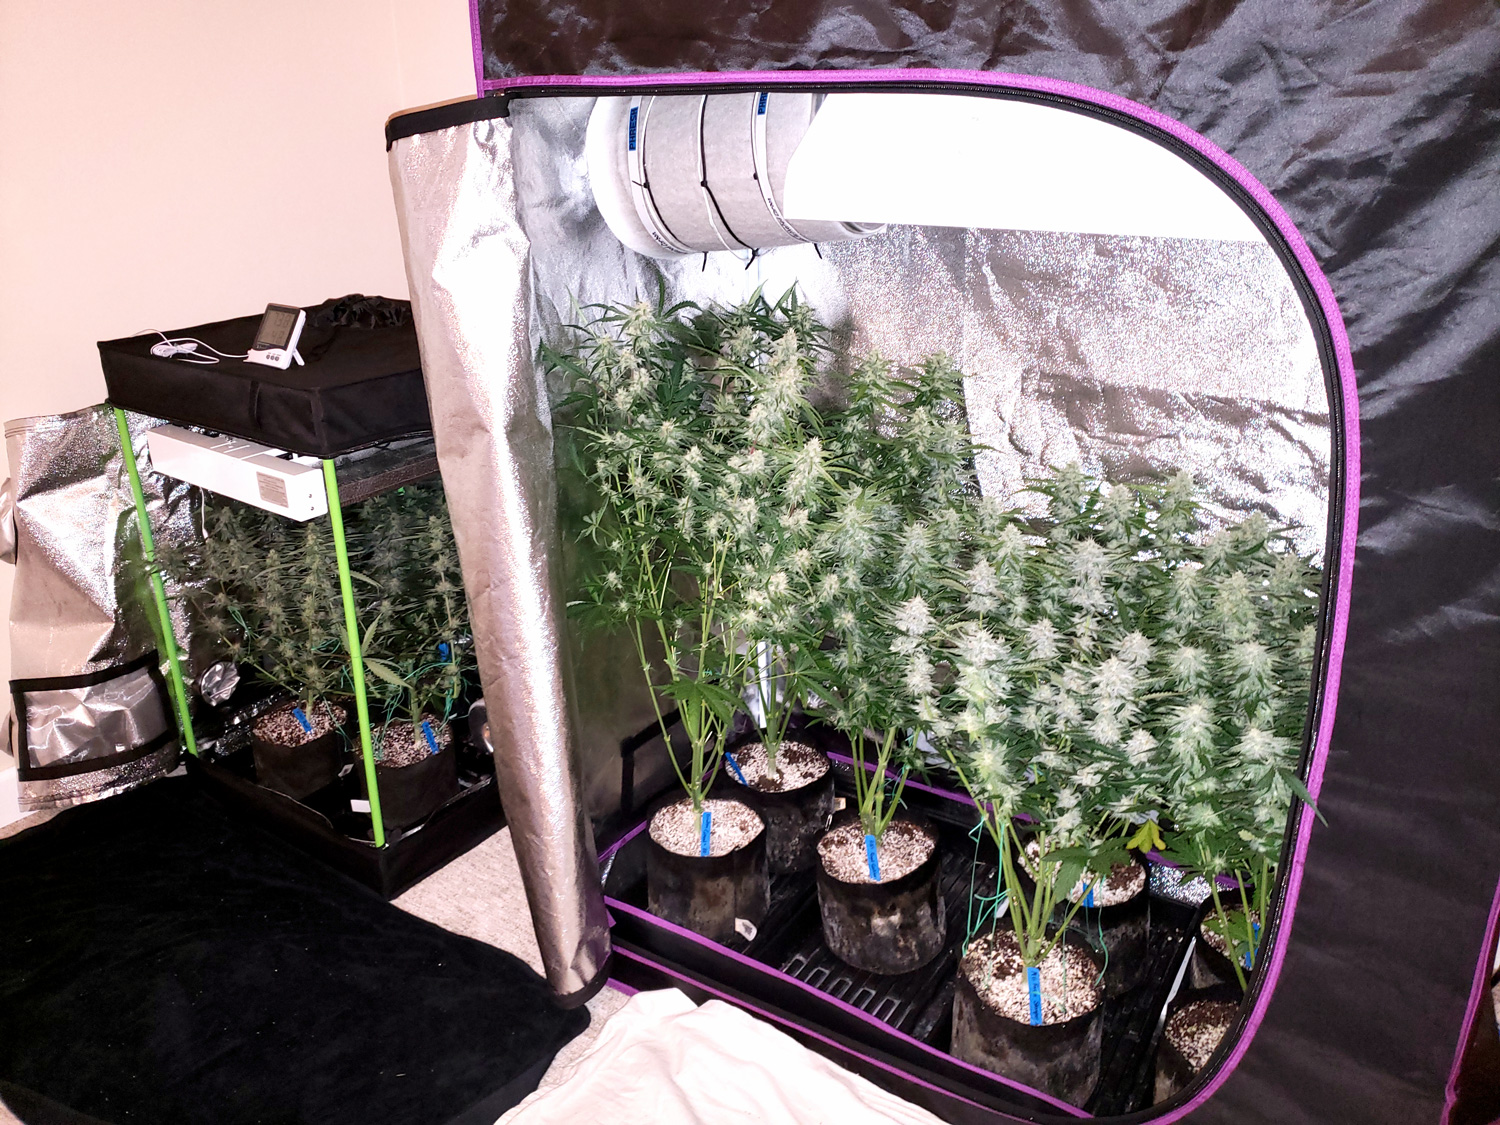
Learn how to grow weed and harvest buds like this Candy Games #38.

Growing weed at home lets you keep yourself safe, save money, and get better quality buds than most people can buy.
Other helpful resources:
- Where to Get Weed Seeds Online: https://www.growweedeasy.com/seeds
- Complete Guide on How to Grow Weed: https://www.growweedeasy.com/basics
- Marijuana Grow Timeline: https://www.growweedeasy.com/timeline
- Cannabis Plant Doctor (get help for sick plants!): https://www.growweedeasy.com/plant-doctor
My #1 recommended strain for beginners is this version of Blue Dream by Seed Supreme. Great germination, easy to grow, huge yields, and dreamy buds with a great smell.

Table of Contents
Step 1: Get Set Up
Step 2: Germinate Your Seeds
Step 3: Vegetative Stage – Only Stems and Leaves
Step 4: Flowering Stage – Buds Start Growing!
Step 5: Harvest, Dry, and Cure Buds
10-Minute Cannabis Grow Tutorial
Step 1: Get Set Up
Once you have these items, you’re ready to start growing weed indoors.
- A place to grow weed (for example a closet, grow tent in a room, a spare room, or garage/attic/cellar)
- Grow light (LEDs recommended for most beginners and indoor grow situations)
- Grow medium (soil, coco, or hydro)
- Cannabis-friendly nutrients (nutrients improve yields, growth rates, and bud potency)
- Seeds or Clones
Want a quick crash course? Read the 10-minute guide to setting up to grow cannabis indoors: https://www.growweedeasy.com/indoor-setup
I recommend beginners get a grow tent (usually under $100) to create a waterproof, light-proof, reflective, portable, “pop-up” grow area with a bar to hang your grow light and help protect plants from bugs or spiders. Grow tents also give you the ability to prevent any smells from leaking out if you set it up with a carbon filter. A grow tent is much cheaper and easier to set up than creating a comparable space from scratch.
A grow tent makes growing weed plug-and-play.
Additional resources:
- Where to get cannabis seeds: https://www.growweedeasy.com/seeds
- Recommended beginner setups (with cost and yield estimates): https://www.growweedeasy.com/setup
Step 2: Germination & Seedling Care
The easiest and most simple way to germinate is to plant your seed directly in the grow medium. Just like in nature. Another common option is to germinate seeds in a seedling plug, then plant the whole plug after germination (if growing in hydro, you should always use a seedling plug).
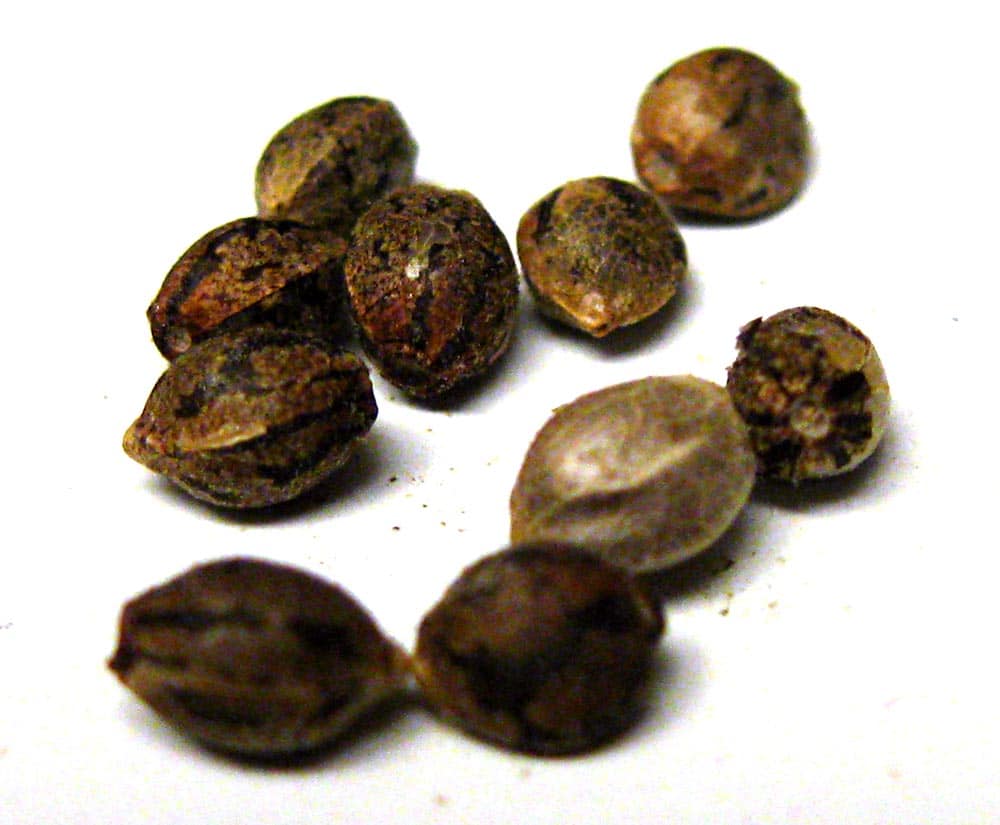
Cannabis seeds often appear dark brown with tiger stripes. However, that outer coating can rub off and the seeds are tan underneath. Tan vs dark seed color is not a sign of quality.
Cannabis Germination Tips
- Plant seed about a half knuckle deep (1/2″ or 1.5 cm)
- Seeds usually take 1-7 days to germinate (2-4 days average)
- Keep moist but not soaking
- Germination goes much faster when seeds are warm
- Never let seeds dry out!
Note: Older seeds germinate slower and often have lower germination rates. Even with fresh seeds, some strains germinate better/faster than others.
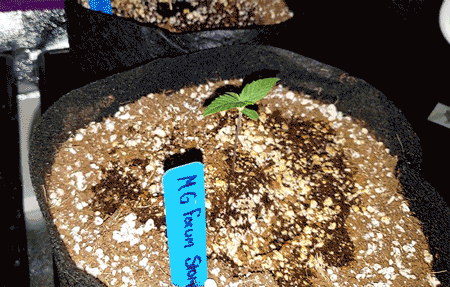
Place seed about a half-knuckle deep
Keep moist and warm until seedling appears

Many beginner growers accidentally overwater their seedlings, which causes slow growth, droopiness, and nutrient deficiencies. Here’s how to water cannabis seedlings properly.
- Give 2 cups (500ml) water per seedling at first
- Pour water slowly in a small circle around the base of the seedling. I first pour my water into a cup so it’s easier to pour water around each seedling.
- The water circle should be ~2 inches (5 cm) in every direction from the base of your seedling
- Don’t give water again until the top part of the soil is mostly dry
- As your seedling grows, slowly ramp up the water amount so the circle around the base is always about the width of the leaves
- Each grow medium and environment is different, which changes how much water your seedlings drink. On average, seedlings need to be watered every 2-3 days
Note: If growing in coco or hydroponics, you need to give nutrients in the water from the beginning (coco and water don’t contain nutrients). With potting soil, you don’t need to give nutrients for several weeks while the plant uses up the nutrients in the soil. With a super soil setup, you don’t ever provide extra nutrients because this type of soil has been designed to “slow release” organic nutrients over the course of the grow.
Water seedlings slowly in a circle around the base of the plant. Give 2 cups (500ml) water per seedling at this stage.
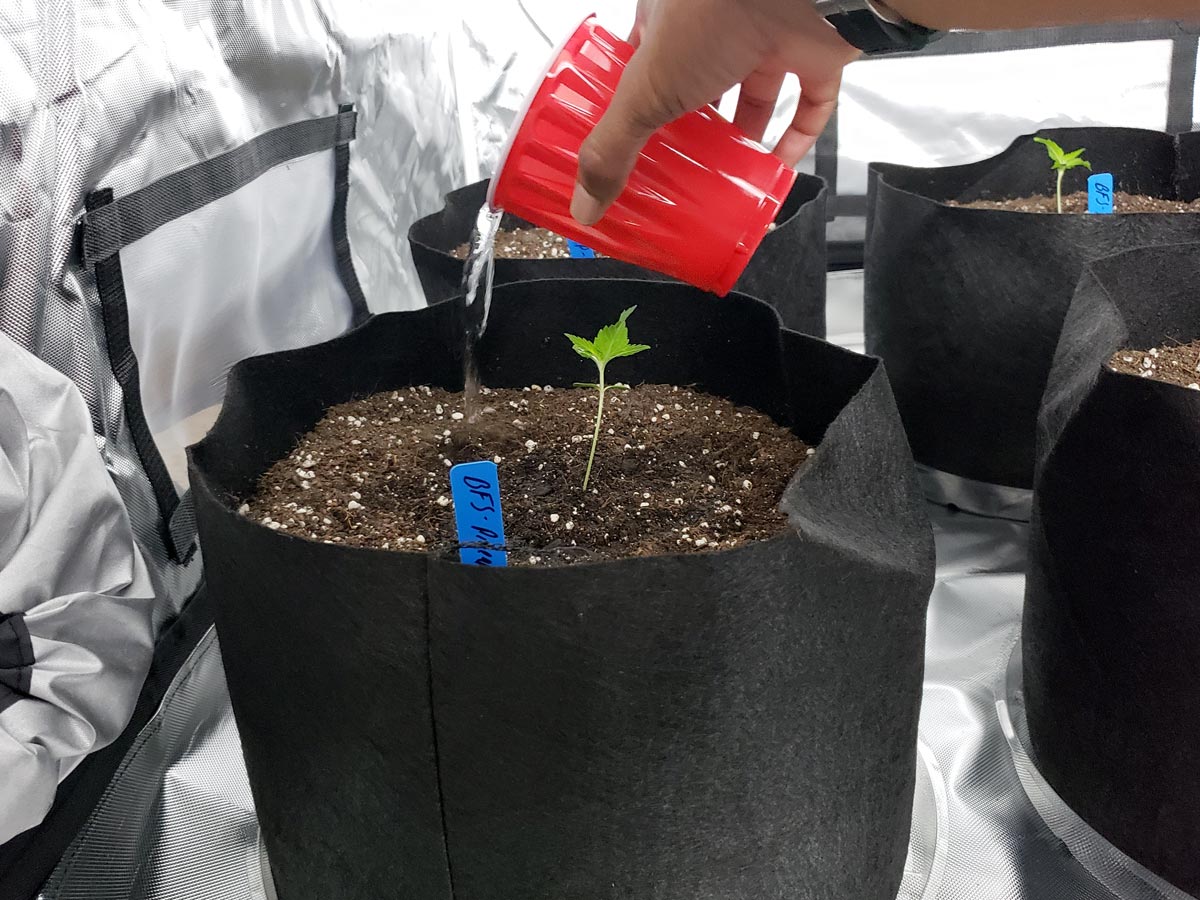
Here’s an example of watering a marijuana seedling
Slowly increase the amount of water as the seedling grows. Try to get the water circle around the width of the leaves
Additional resources:
- More ways to germinate seeds: https://www.growweedeasy.com/germinate
- Common seedling problems and mistakes: https://www.growweedeasy.com/seedling-problems
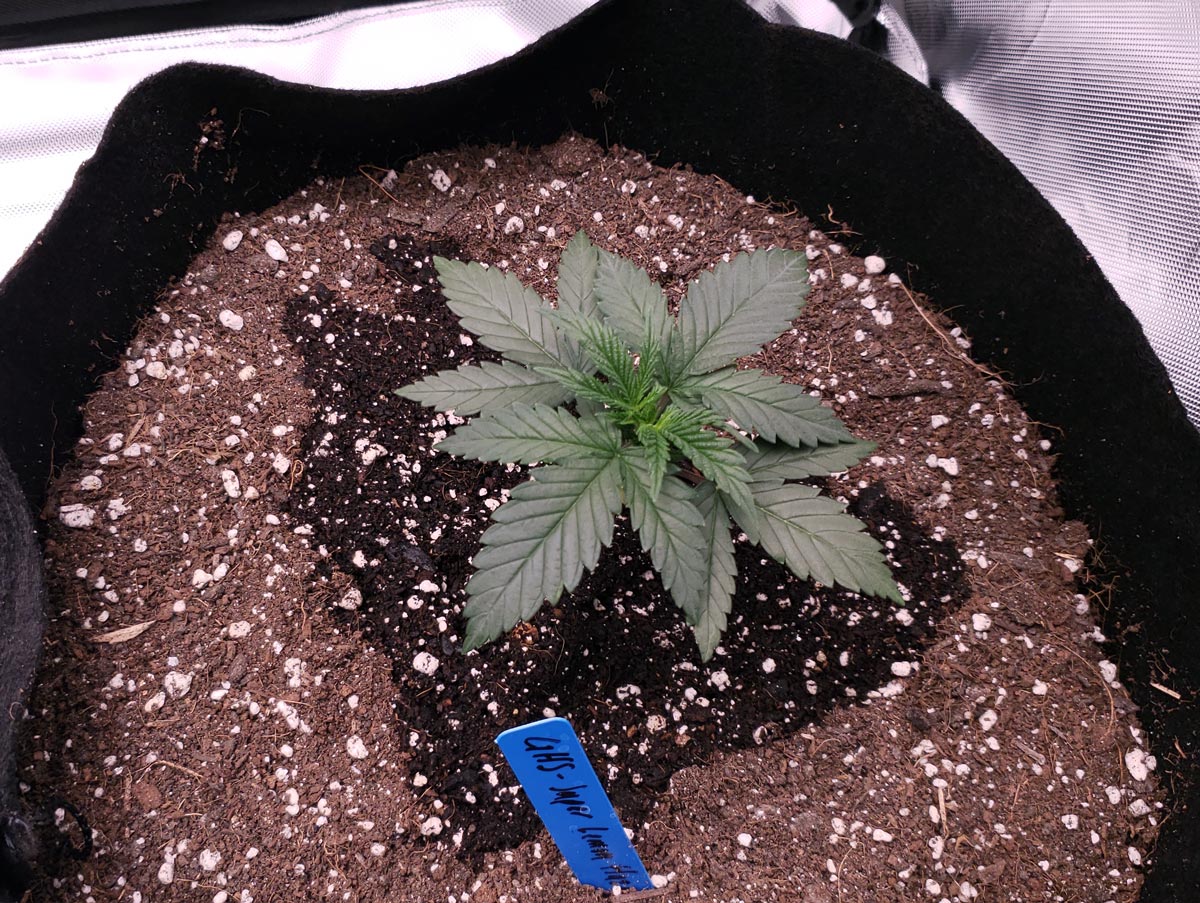
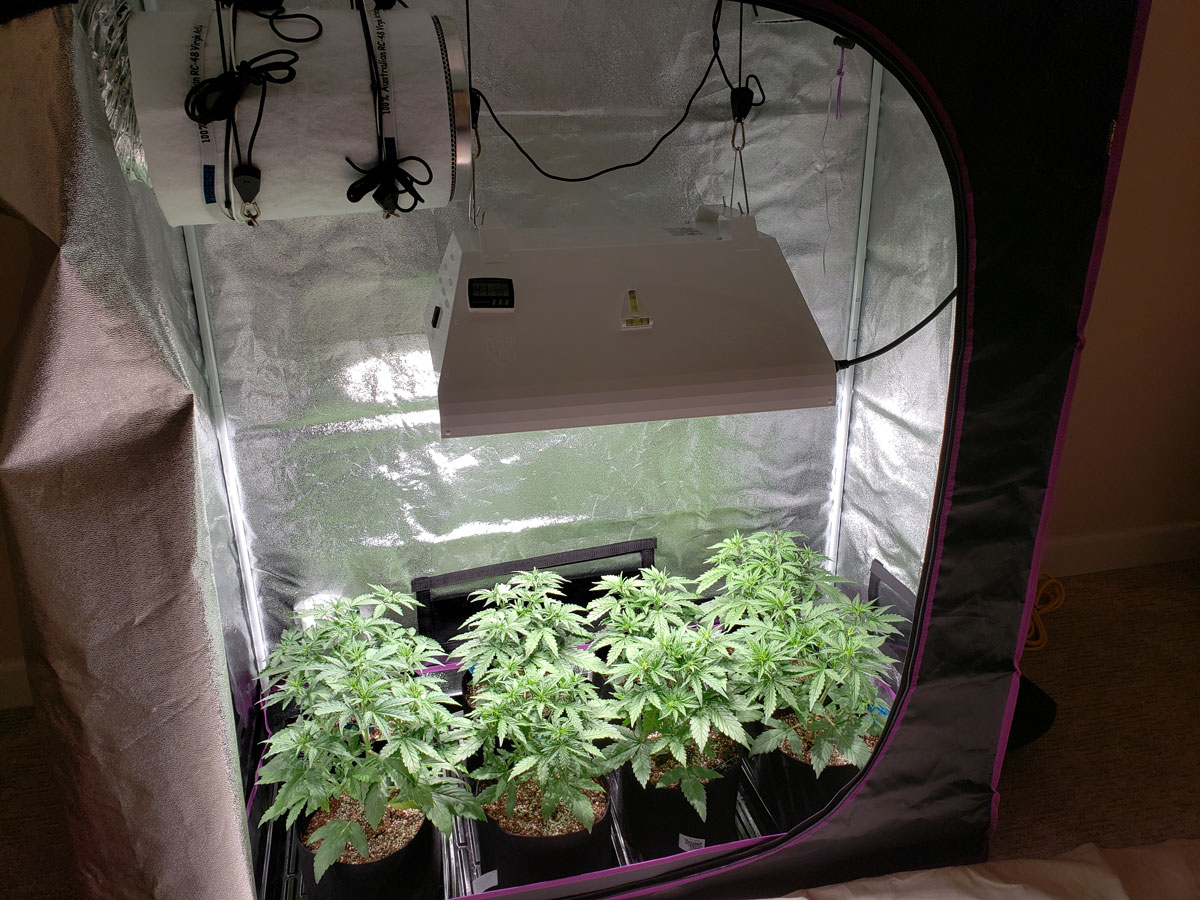
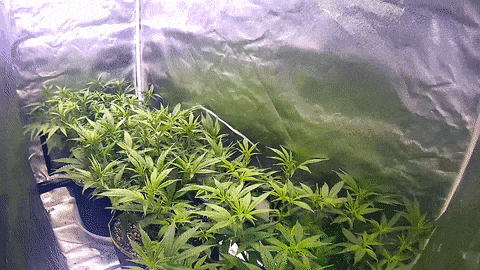
Step 3: Vegetative Stage – Only Stems and Leaves
Now that you’ve got a growing cannabis plant, you’re officially in the “vegetative stage” of your plant’s life. During this first stage of life, plants will grow stems and leaves, but no buds. Plant care is almost like a regular houseplant in this stage.
How to care for vegetative cannabis plants:
- Water plants regularly (or maintain the water reservoir if in hydro)
- If using nutrients, add nutrients according to directions for the vegetative stage
- Periodically adjust grow light to keep it the recommended distance from plants as they grow
- Watch out for problems like discolored leaves or droopiness
- Enjoy their beauty
In the vegetative stage, a cannabis plant can recover from a lot even if you mess up. It’s kind of like the “training wheels” stage of growing weed. Your main job is simply to water your plants and make sure they’re getting the right amount of nutrients and light. If using high levels of nutrients and supplements, try to give plain water sometimes to prevent nutrient build-up.
Note: Auto-flowering strains of cannabis have a short vegetative stage. These plants automatically start making buds about 3-6 weeks from germination. Learn more about auto-flowering cannabis strains.
Cannabis plants in the vegetative stage only grow stems and leaves, no buds!
How to water plants
By the time your seedling is a few weeks old (5+ sets of leaves), it should have an established, healthy root system that can handle more water at a time. At this point, switch to normal watering practices:
- Give enough water that you get a little bit of runoff out the bottom
- Remove any runoff (never let plant roots sit in water)
- Wait until the top inch (up to your first knuckle) feels dry to the touch
- Repeat
If plants dry out in less than 2 days, it means you should give more water at a time (or they may have overgrown the pot). If they take more than 3 days to dry between waterings, give less water at a time until they’re drinking more.
Nutrients (if you’re using them)
- Follow the nutrient schedule or recommended dosage for “vegetative” growth
- It’s a good idea to start at half-strength at first since most nutrient recommendations are too strong for marijuana plants
- Only raise the nutrient dosage if you notice plants are looking pale or lime green, which are signs the plant needs higher levels of nutrients overall
- Typically you’ll only use full-strength nutrients under strong grow lights with healthy fast-growing plants
When to switch to the flowering stage
Once your plant has reached half the final desired size, it’s time to move on to the next step. Otherwise, your plants keep getting bigger and bigger.
Plants typically double in size during the next stage of life. That means you should move on to the next step once plants have reached half the final desired height
Additional resources:
- Complete guide to the vegetative stage: https://www.growweedeasy.com/vegetative
- How often to water plants? https://www.growweedeasy.com/how-often-water
- Nutrient problems? Check the pH of your water: https://www.growweedeasy.com/ph
- Diagnose a sick plant: https://www.growweedeasy.com/plant-doctor
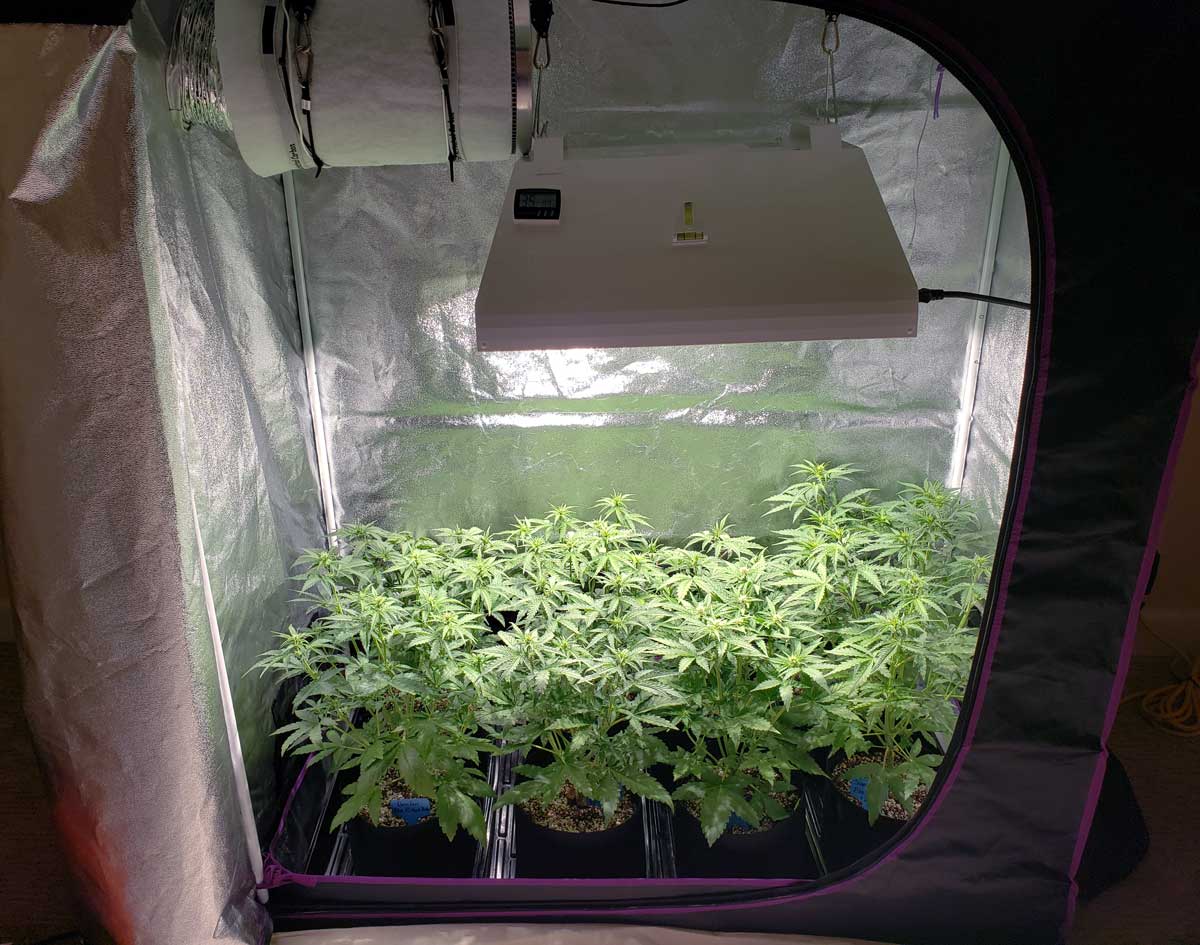
Step 4: Flowering Stage – It’s Bud Time!
When your plant has reached half the final desired size, it’s time to start making buds. This stage of life is known as the “flowering stage”.
- The flowering stage should be initiated when your plant has reached half the final desired height. Plants often double in size after they start flowering, so don’t wait too long!
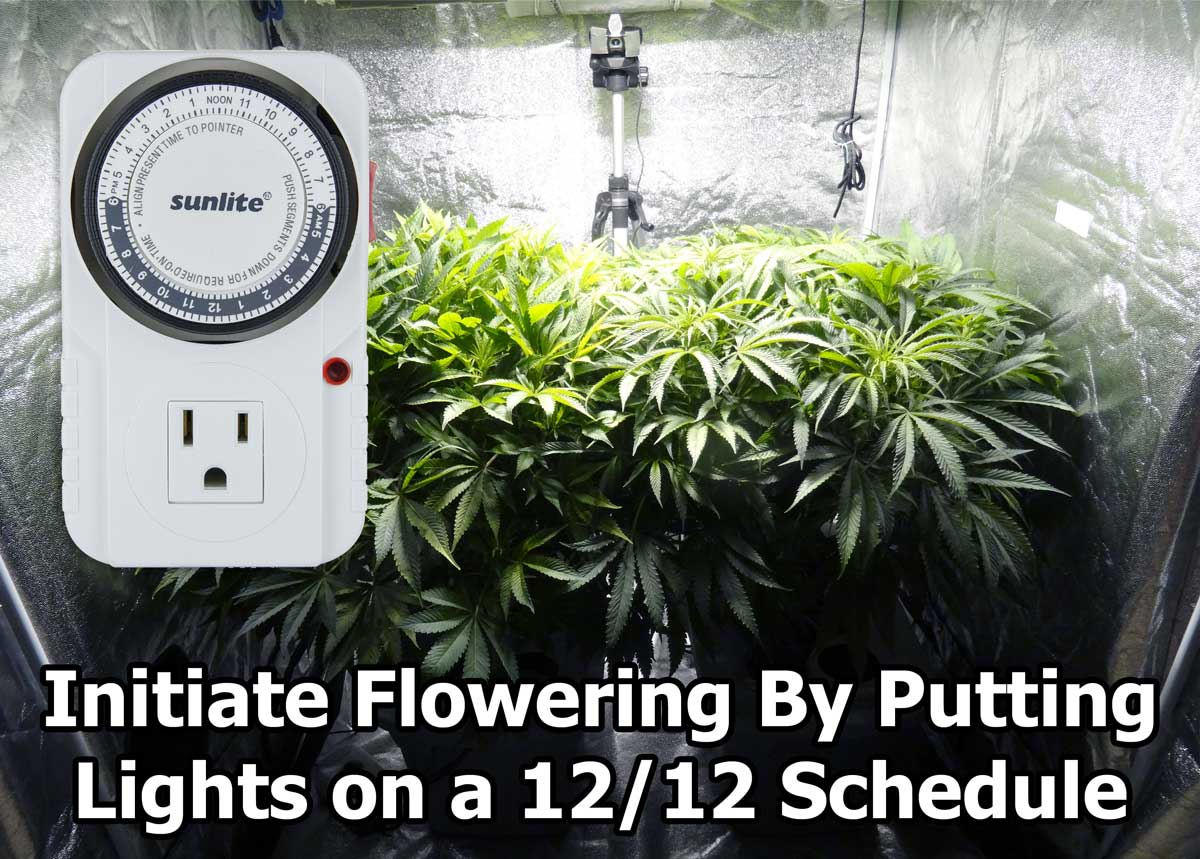
- Initiate the flowering stage by putting grow lights on a timer with a 12/12 light schedule (12 hours off, 12 hours on)
- Make sure the plant gets total darkness during the dark period or it won’t make buds. Ensure the grow space is totally light-proof without any light leaks
- The first few weeks after the switch to 12/12, your plant will be growing fast. This extra-fast growth period is known as the flowering stretch.
This daily dark period is like a message that tells your plant that winter is coming. Plants will typically start growing buds within 2-3 weeks after the switch to a 12/12 light schedule.
Flowering stage care:
- If using nutrients, now is the time to switch to “bloom” nutrients.
- Other than the 12/12 light schedule and using flowering nutrients, plant care is basically the same as it was in the vegetative stage
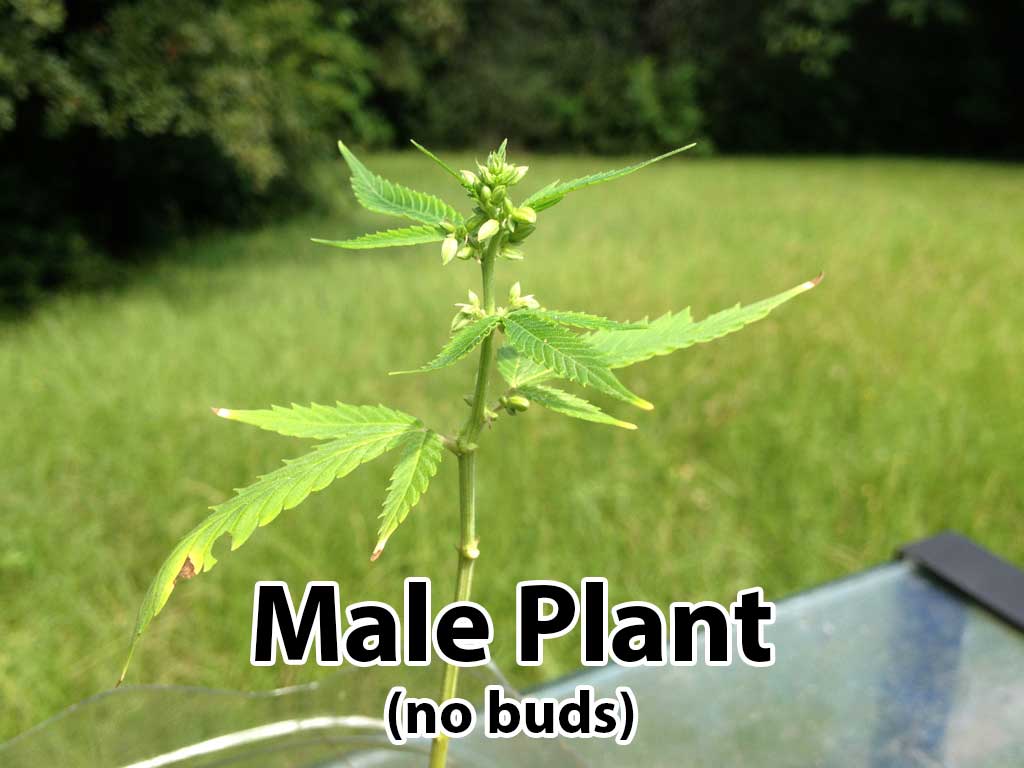
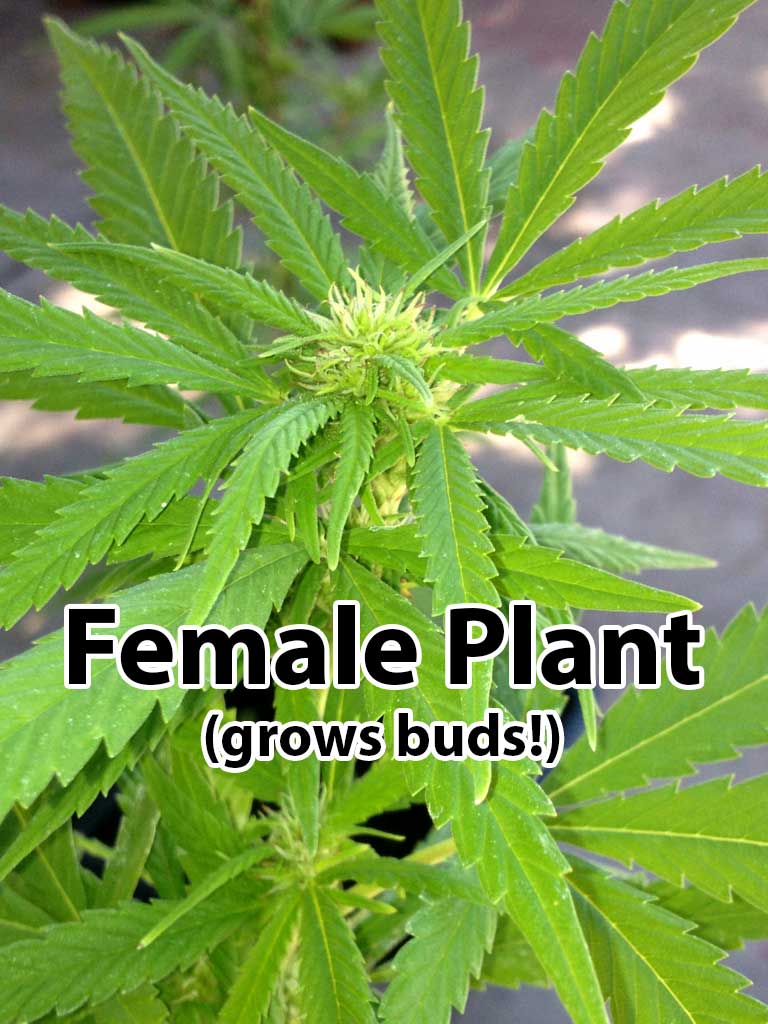
- When your plant starts flowering, you need to double-check that it’s making female flowers (buds) and not male flowers (pollen sacs). You can skip this step if you started with feminized seeds since all plants will be female.
Note: “Bloom” and “flowering” mean the same thing when it comes to cannabis plants. Buds are the flowers of the cannabis plant.
Buds should start growing within 2-3 weeks of initiating 12/12
Male vs Female Identification
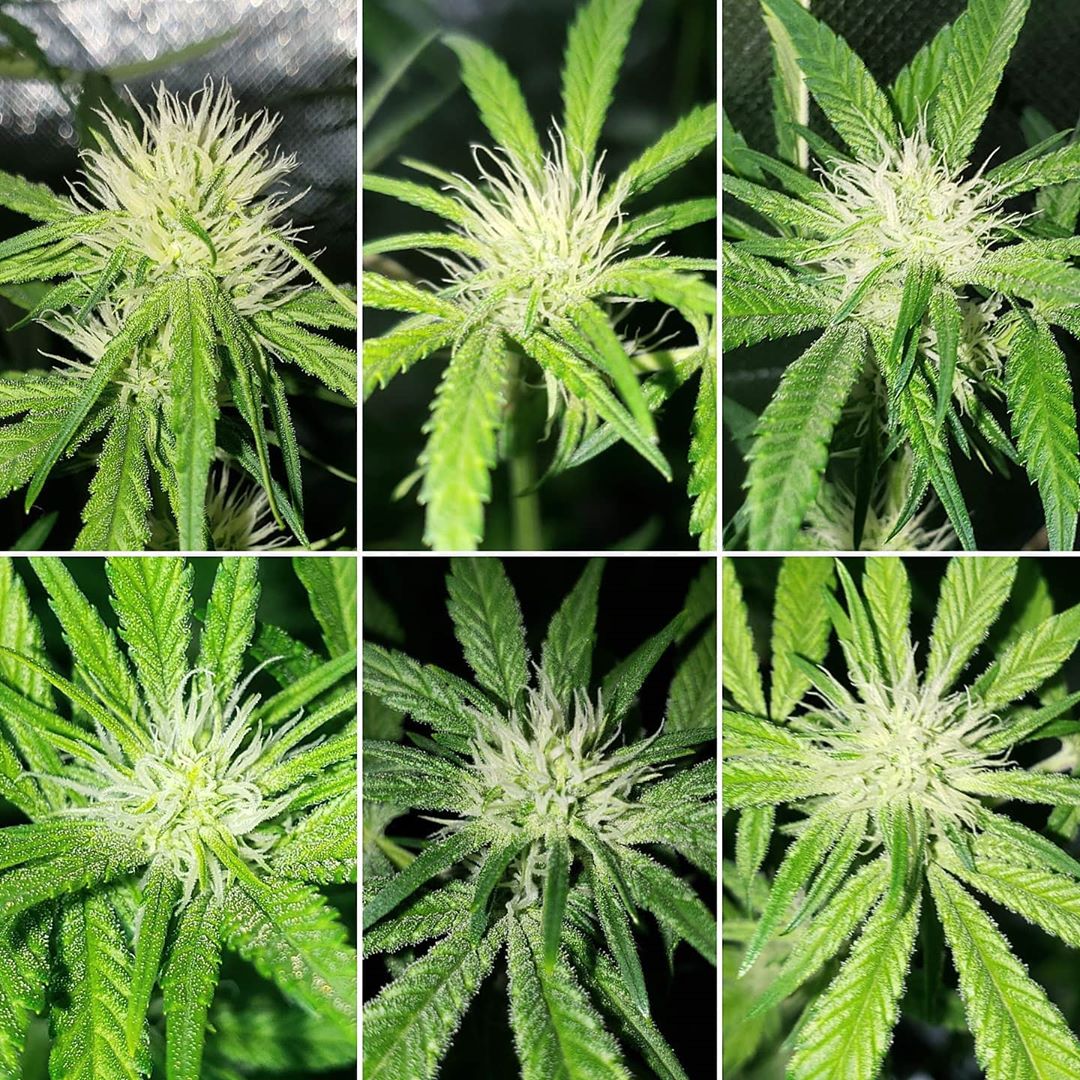
- Female flowers look like wispy white hairs at first. These eventually fatten into the buds we know and love
- Male plants grow pollen sacs that look like bunches of grapes
- Pollen sacs aren’t good to smoke and if the pollen is released it makes your buds grow seeds
- Unless you want seeds, it’s recommended to remove male plants on sight, before their pollen sacs open up
Identify male plants as soon as possible and separate them to prevent seedy buds.
Flowering Stage Tips
- Watch plants closely and react quickly to any problems so you cruise to the finish line
- Most plants stop growing taller around 5-8 weeks after 12/12 starts, but buds still need time to fatten and reach peak potency
- It’s hard to be patient while buds fatten and mature. It might seem like buds are ready to harvest once plants stop growing vegetatively. But even though you might not see it, buds are getting bigger and more potent each day.
- Most plants are ready to harvest about 8-12 weeks after the switch to 12/12 though some strains take more or less time.
- In the next step, you’ll learn how to determine when your plant is ready to harvest
A female plant starts by growing wispy white hairs where buds will form.
Buds take a while to slowly fatten up.
Most strains are ready to harvest 8-12 weeks after initiating 12/12 (the length of time is mostly dependent on the strain)

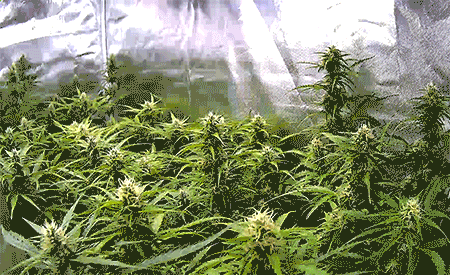
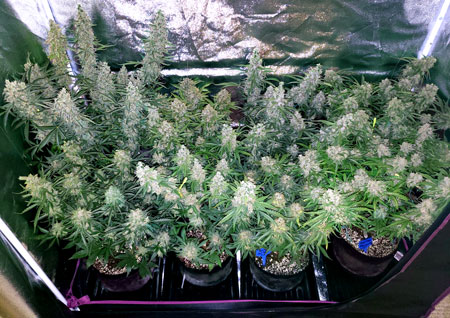
A bountiful harvest!
Additional resources:
- What to expect in the flowering stage week-by-week: https://www.growweedeasy.com/flowering
- More about Male vs Female Plants: https://www.growweedeasy.com/plant-sex
Step 5: Harvest Your Cannabis
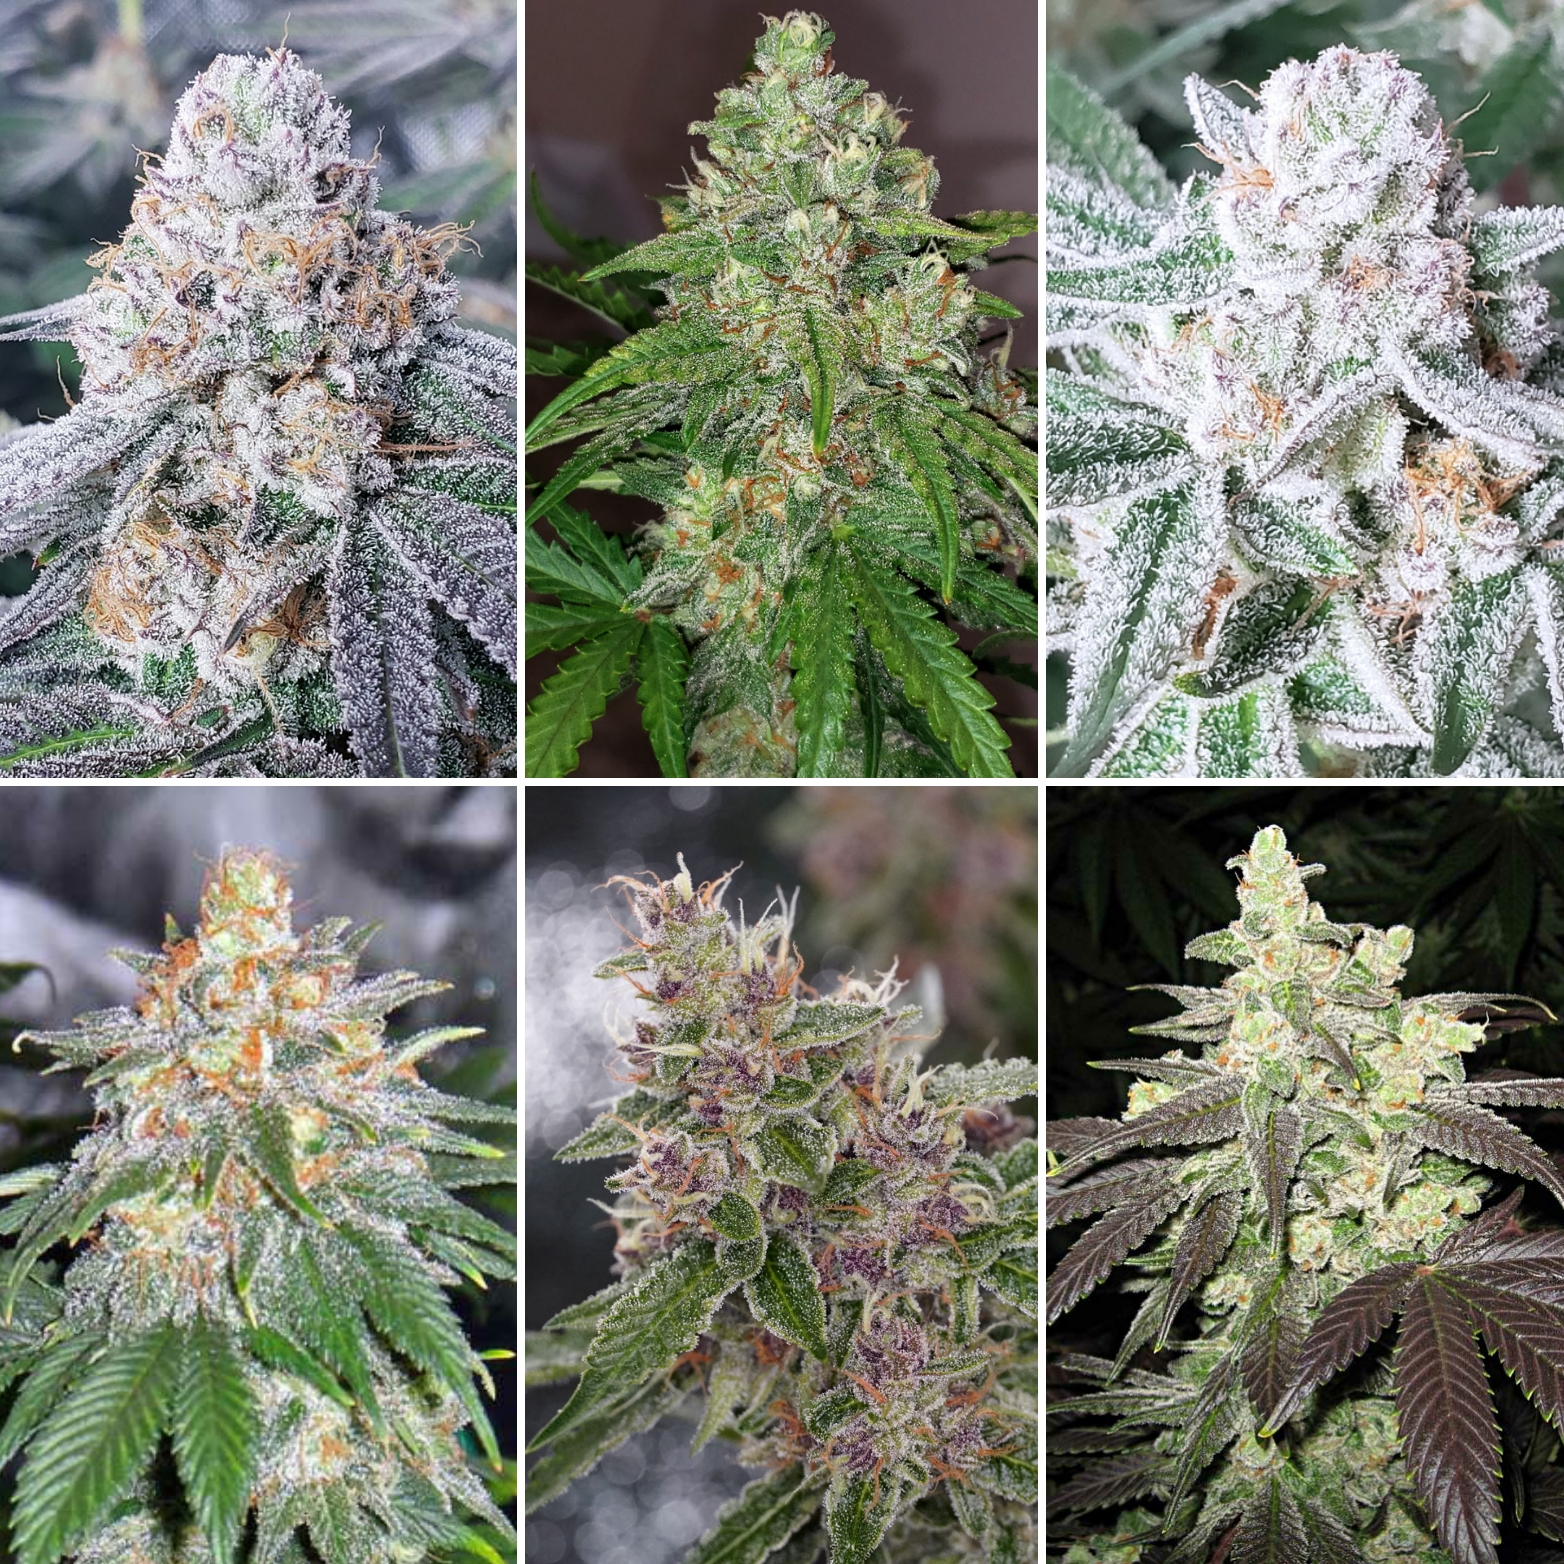
When plants are ready to harvest, the white hairs on the buds will have darkened and will have mostly curled in.
Examples of marijuana buds that are ready to harvest. Every strain looks a little different.
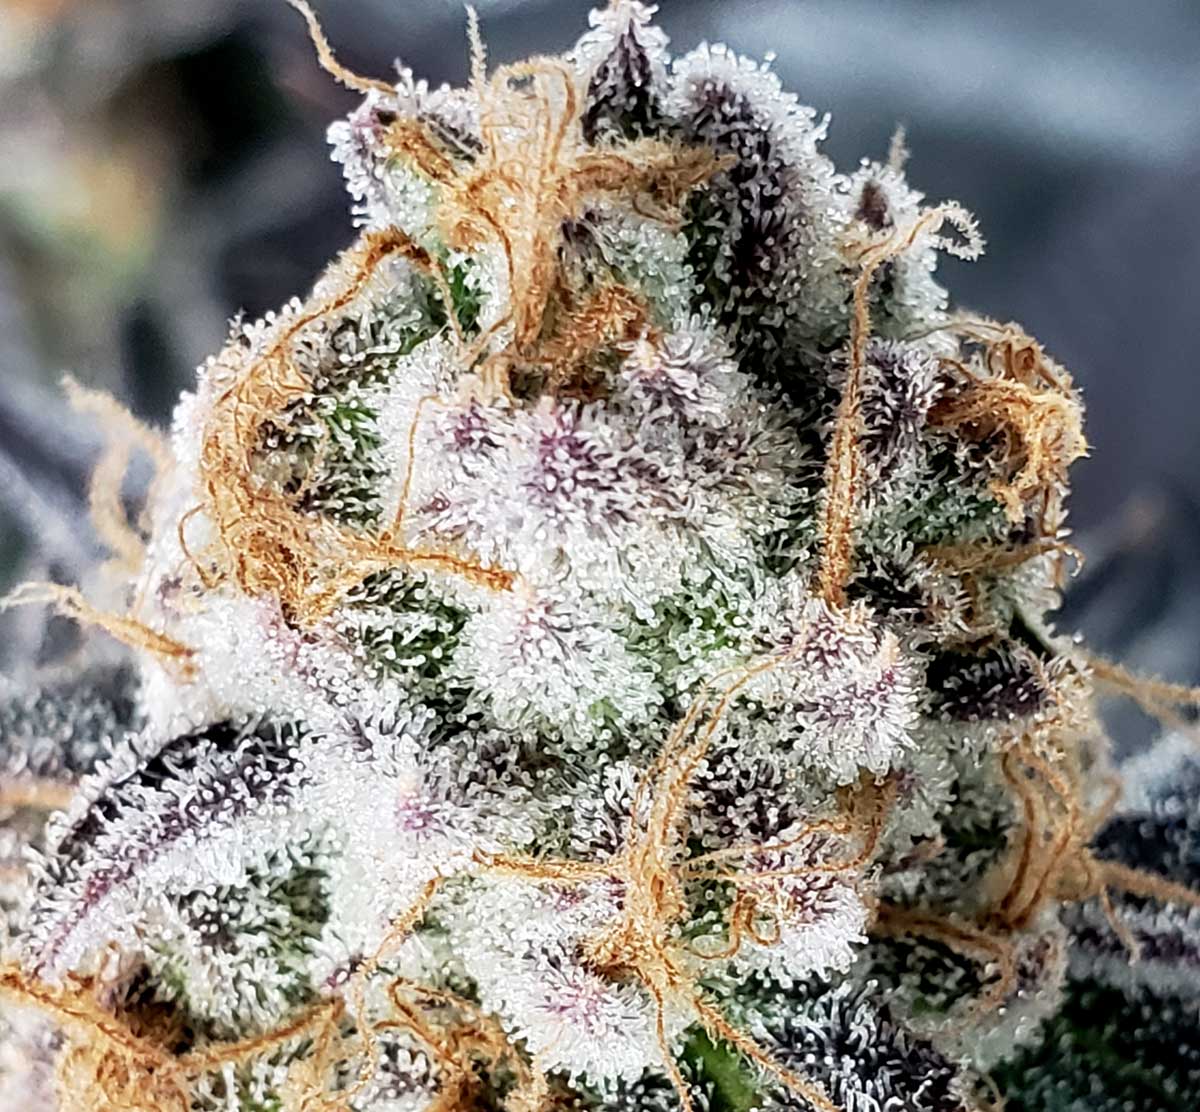
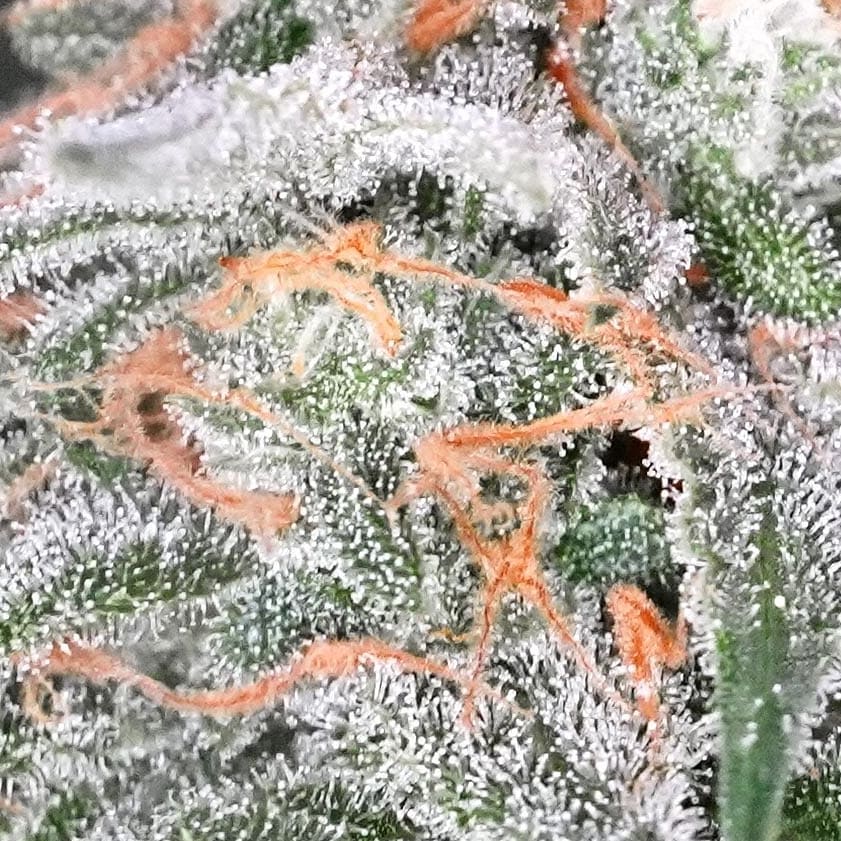
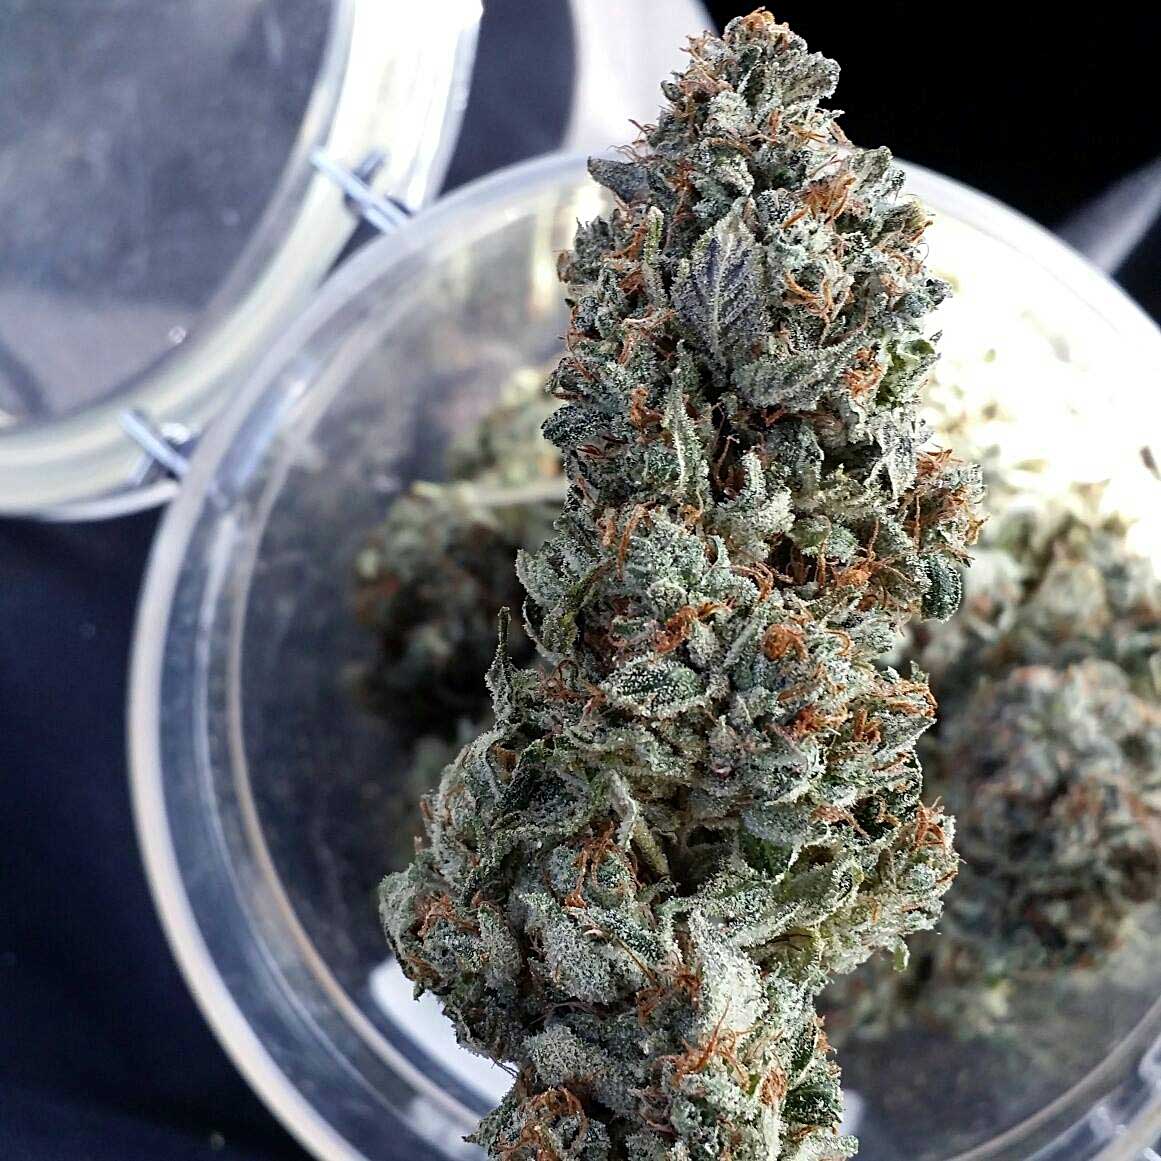
You can choose when to harvest your buds based purely on how they look, but you need to look at buds under a magnifier to most accurately determine when they’ve reached peak potency. This is done by looking at the “trichomes” or glitter that grows on buds at high magnification. When buds have reached the highest levels of THC the heads of trichomes turn milky white. Waiting until a few trichomes turn amber/yellow can give buds more of a body or relaxation effect.
When trichome heads look milky white under magnification, the buds have reached the highest level of THC and other cannabinoids
Additional resources:
- Complete harvest guide: https://www.growweedeasy.com/harvest
- Ready-to-harvest buds (picture gallery): https://www.growweedeasy.com/ready-for-harvest-pictures
- Ready-to-harvest trichomes (picture gallery): https://www.growweedeasy.com/what-do-trichomes-look-like-when-ready-to-harvest
Dry & Cure Your Buds
What’s the “magic ingredient” that makes buds burn smoothly, get white ash, smell dank, and feel as potent as possible? A proper dry & cure! Drying and curing buds can increase their quality by up to 50% or more compared to improperly drying or not curing.
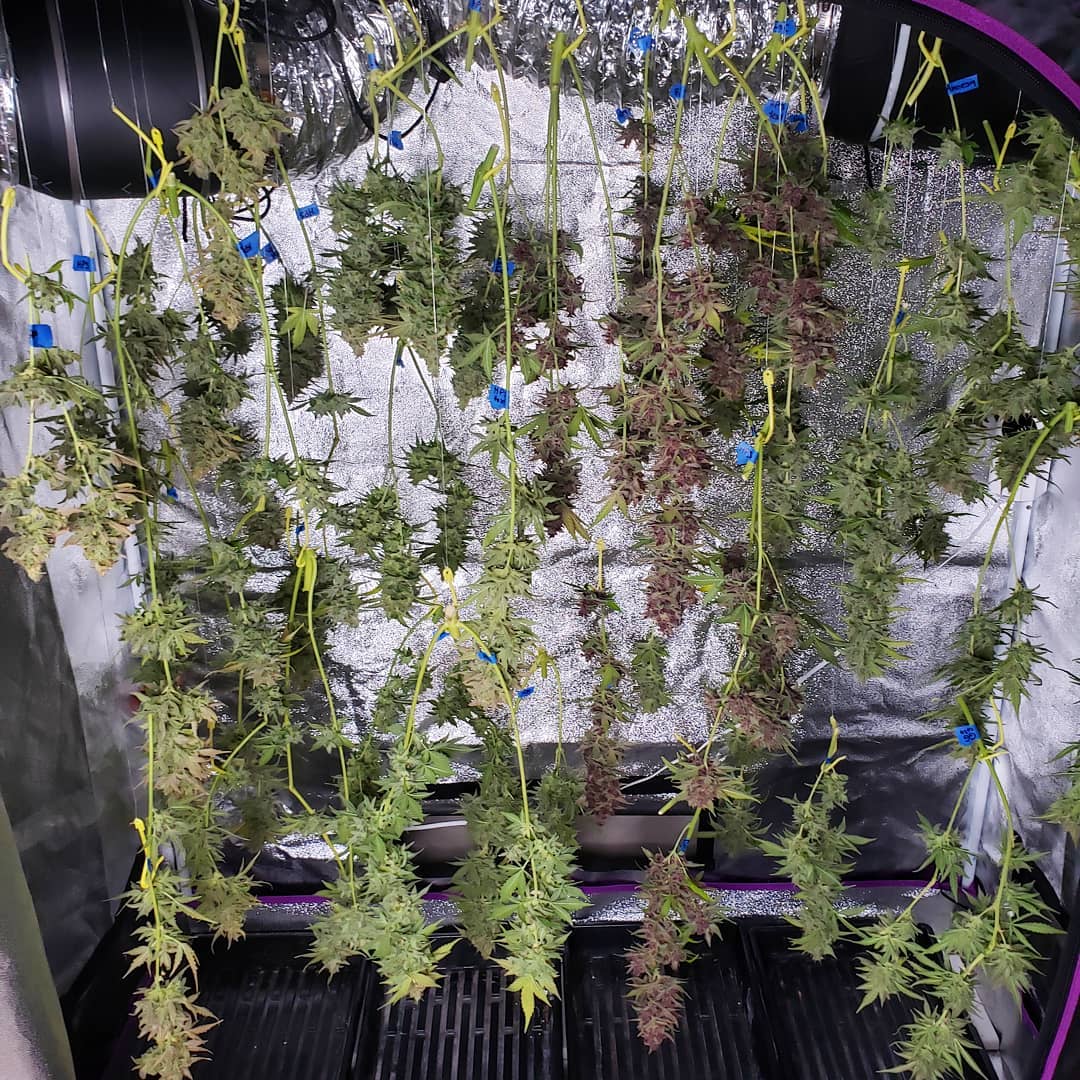
Air-Dry Buds by Hanging Them Upside Down (this is the most popular drying method)
- Cut off branches and remove all the big fan leaves.
- Hang buds upside down in an enclosed space like a grow tent or a closet.
- Monitor temperature and humidity for best results.
- Ideal temperature: 60-70°F (16-21°C) <– Focus on this if possible
- Ideal humidity: 60% RH
- If humidity is too low, dry buds by hanging them from inside a large cardboard box. This creates a humid pocket around the buds.
- If humidity is too high, mold is a concern. Consider using a dehumidifier or possibly a drying aid like the HerbsNow.
- Cold temperature (keeping buds cold but not freezing) during air-drying lowers the chance of running into problems.
- Gentle air circulation
- Buds should have a little bit of space between them. They are more likely to grow mold if they’re touching.
- Buds are done drying when small stems snap instead of bend, and buds pop off cleanly without strings.
- Drying usually takes about 4-10 days depending on the environment and thickness of buds
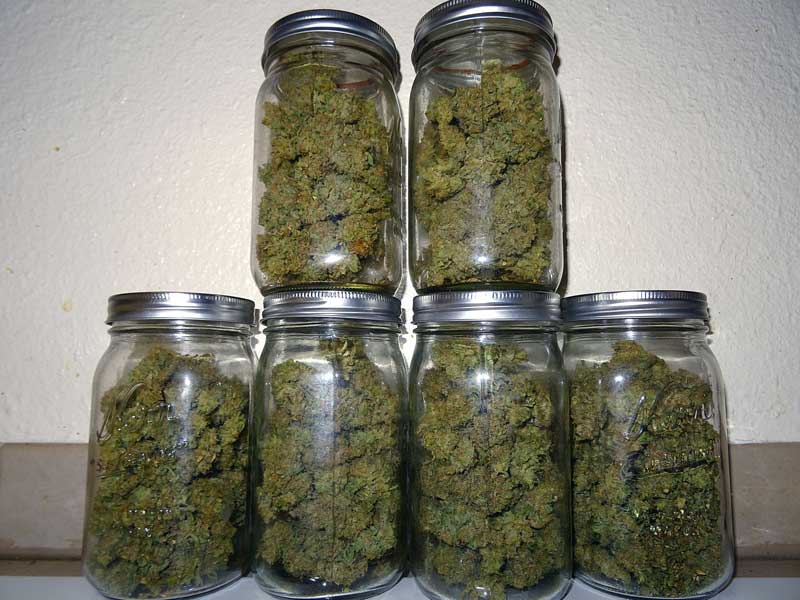
Curing
- Once buds are dry, trim away extra leaves
- Then put the newly-trimmed buds in quart-sized glass mason jars filled about 80% full
- Open jars once a day to let in fresh air and make sure the buds don’t feel wet or stick together
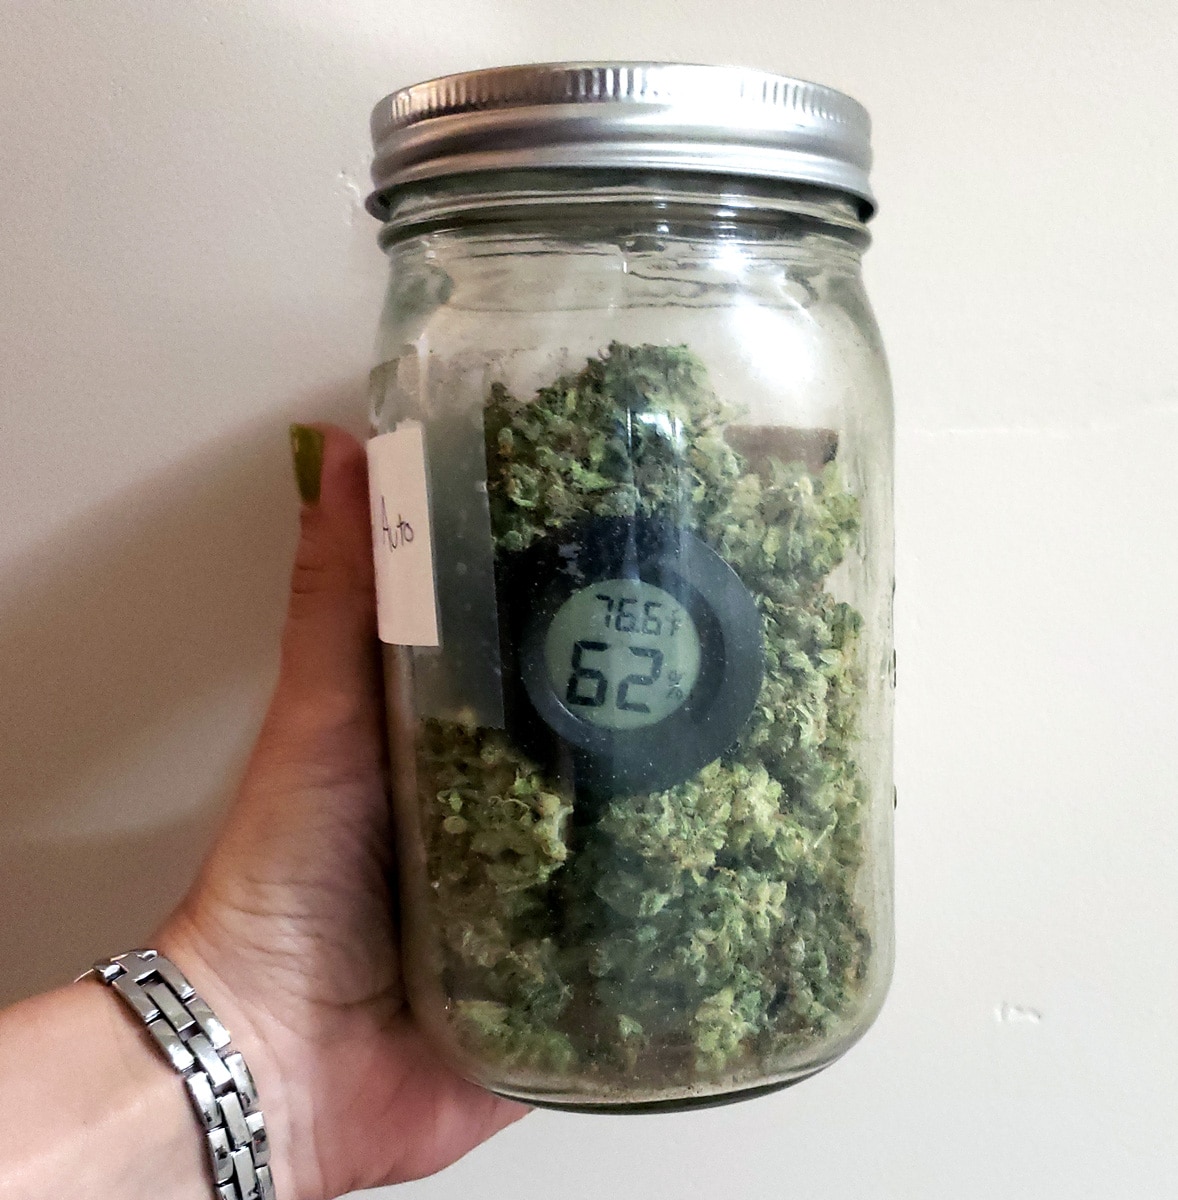
- Use a mini hygrometer to monitor humidity. Ideal humidity is 55-62% RH
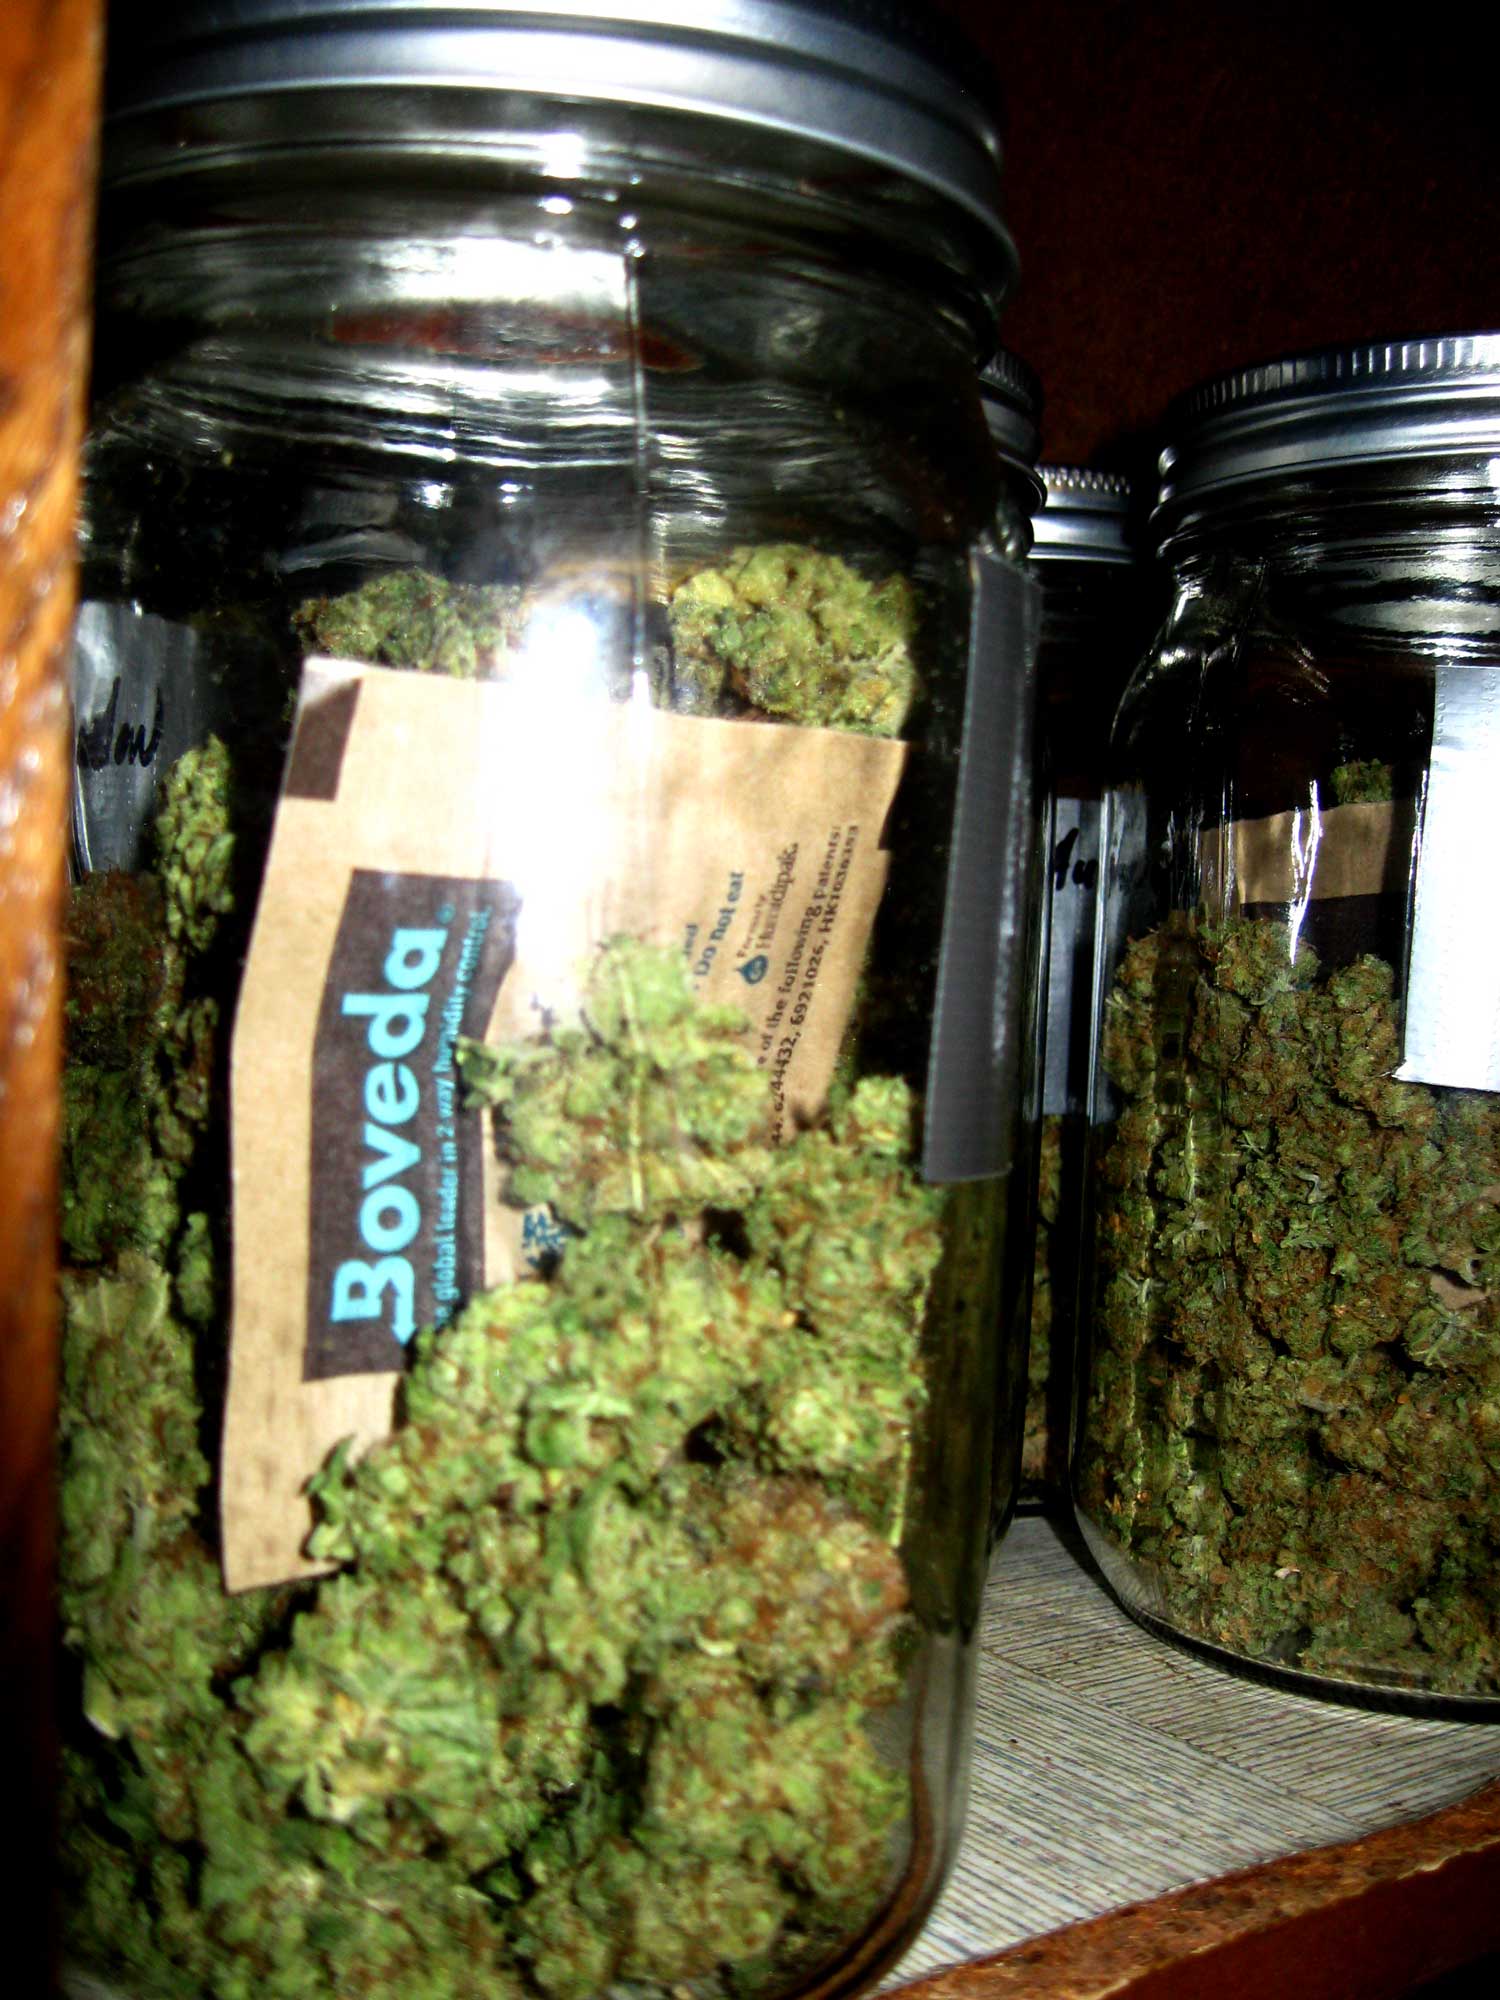
- Add a “Boveda” or “Boost” humidipak to jars if desired. These automatically maintain the proper humidity for curing.
- After the first 2 weeks, you can open jars once every few days, and slowly taper off to less often
- Curing is considered done after 2 weeks, but the quality (and perceived potency) of buds may continue to improve for up to a few months.
- Some strains benefit more from a long cure than others.
Use a mini hygrometer to monitor humidity
Use a “Boveda” or “Boost” humidipak to automatically maintain humidity in the 55-62% range
Now it’s time to enjoy the fruits of your labor!
Additional resources:
- Complete Drying & Curing Tutorial: https://www.growweedeasy.com/drying-curing
Jump to…
Complete Basics Guide: How to Grow Cannabis!
How To Get To Harvest As Fast As Possible
The Life of a Marijuana Plant (timeline)
How to Improve the Overall Quality of Your Bud

🌟 $200 Off Special Offer: Enroll today in Home Grow Masterclass!
FOR SERIOUS GROWERS ONLY
I know you are dedicated to growing the best cannabis possible or you wouldn’t be reading this right now.
Cannabis plants are quite a bit more complex than a regular house plant, but my partner Sirius and I have dedicated years to showing the world that learning how to grow isn’t as crazy complicated as a lot of growers make it seem.
Still, you need to learn this plant’s language if you want to grow high-quality buds and get great yields.
So you could spend years learning the hard way…
Or you can take the shortcut to consistently producing outstanding results by learning from real growers who have done all the work for you.
Our course will show you how to grow a sea of fat, dense, beautiful buds that you feel proud of. At home!
If you simply follow our highly-rated, 5-week course, we give you literally everything you need to know, and walk you through each part step-by-step. Developed by expert home growers and honed with hundreds of students since 2019, our course ensures you’ll achieve great results on your very next harvest.
Learn How To Grow Top-Shelf Weed at Home!
Your buds will be covered in so many THC-filled trichomes they look like this under a magnifier!

This course is recommended for growers who want to go pro with their growing skills. The investment will pay you back over and over via increased yields and saved time/frustration.
If you’re ready to grow professional quality buds at home for as cheap and easy as possible, look no further than this ultimate guide to growing.
Ready to Go Pro With Your Garden? Invest In Your Future Yields Today!
You came at the perfect time.
🌟 $200 Off Special Offer: Enroll today in Home Grow Masterclass!
👉 Start Your First Class TODAY!