by Sirius Fourside
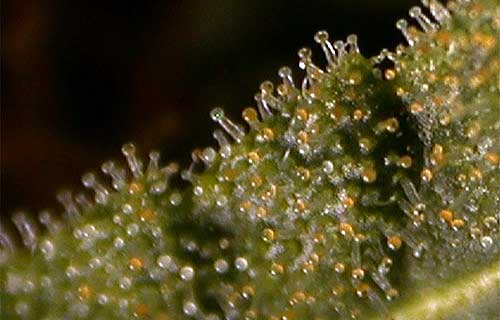
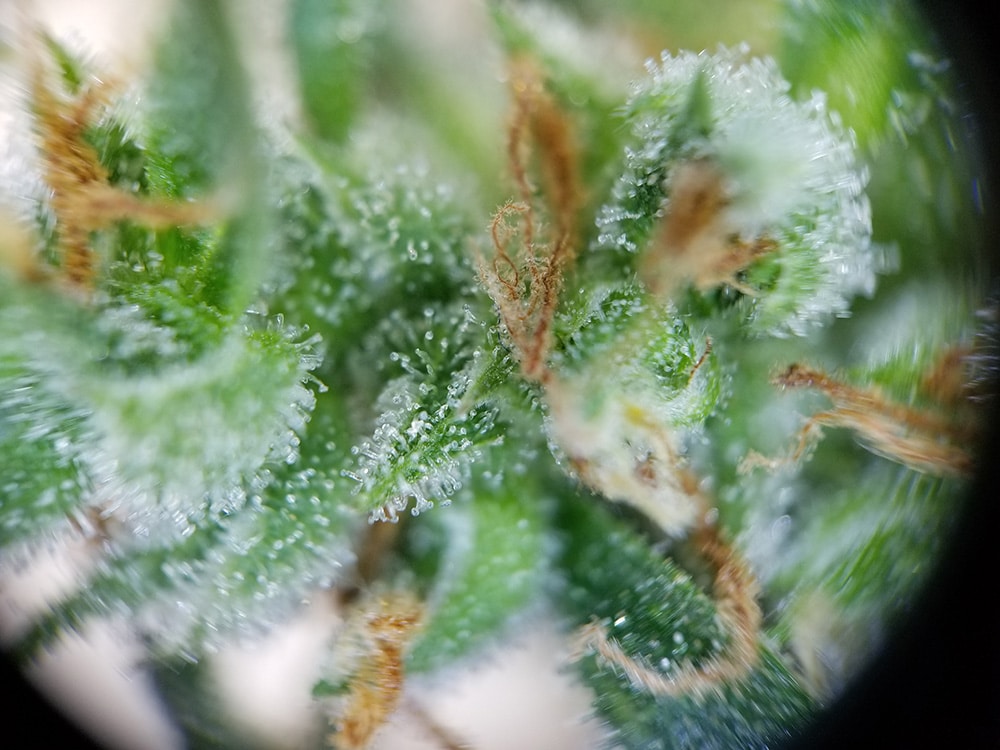
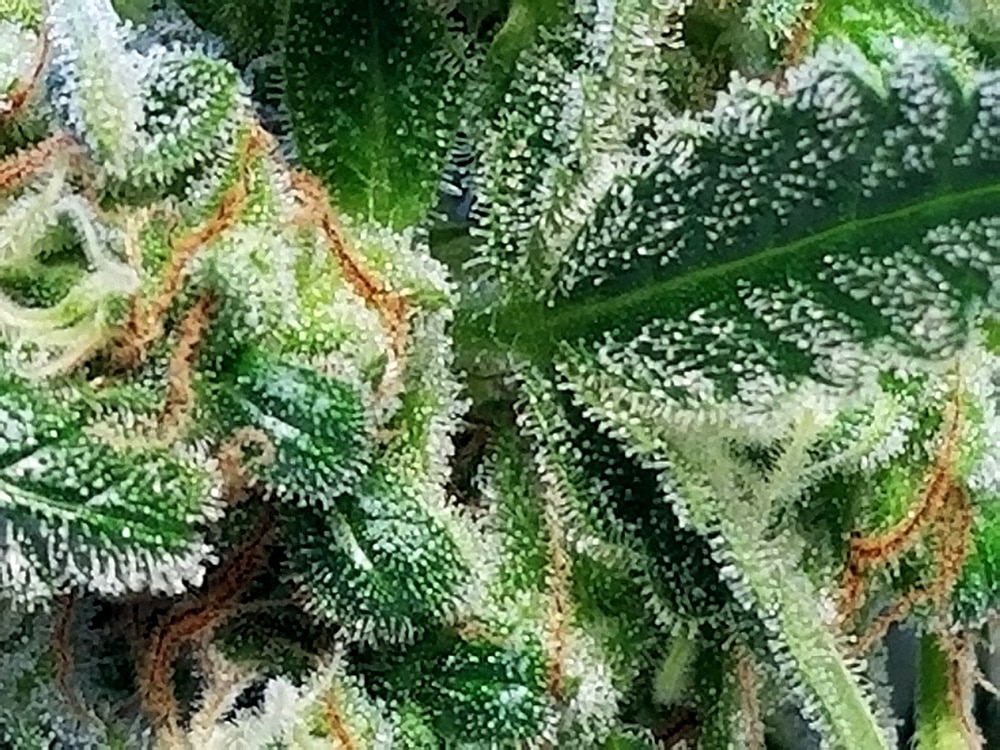
Learn how to look at cannabis trichomes under magnification in this tutorial! (This trichome video was taken with a USB Microscope)
Table of Contents
Introduction: Trichome Color Tells You When to Harvest
Find the Best Magnification Tools to Check Cannabis Trichomes
- Handheld Magnifiers <– Avoid
- Jeweler’s Loupes <– Best cheap option
- Smartphones <– Free if your phone has a great camera
- Small/Phone Microscopes <– Hit or miss depending on your phone
- Big/Handheld Microscopes <– A decent cheap option
- Endoscopes <– Avoid
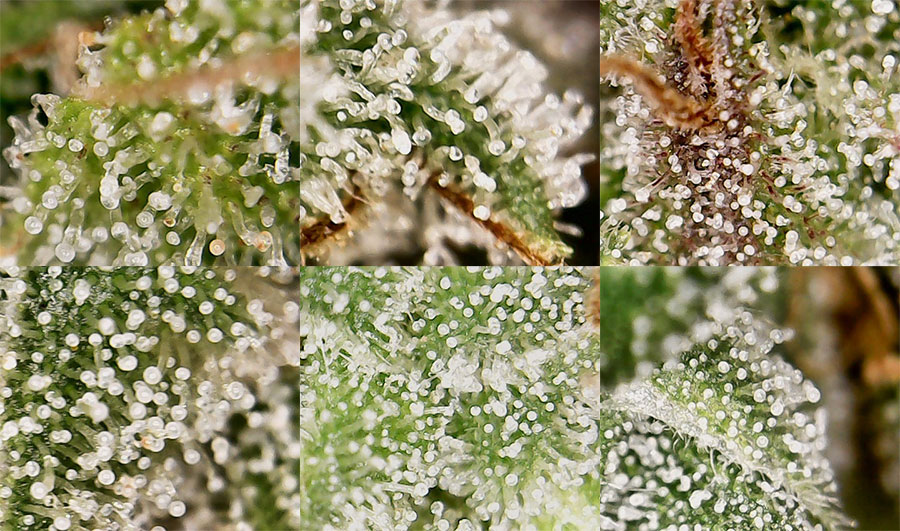
- USB Microscopes <– Best choice (Just look at the trichomes above!)
- Stereo Microscopes <– Not great
Our Top Picks: Best Magnifiers for Growers
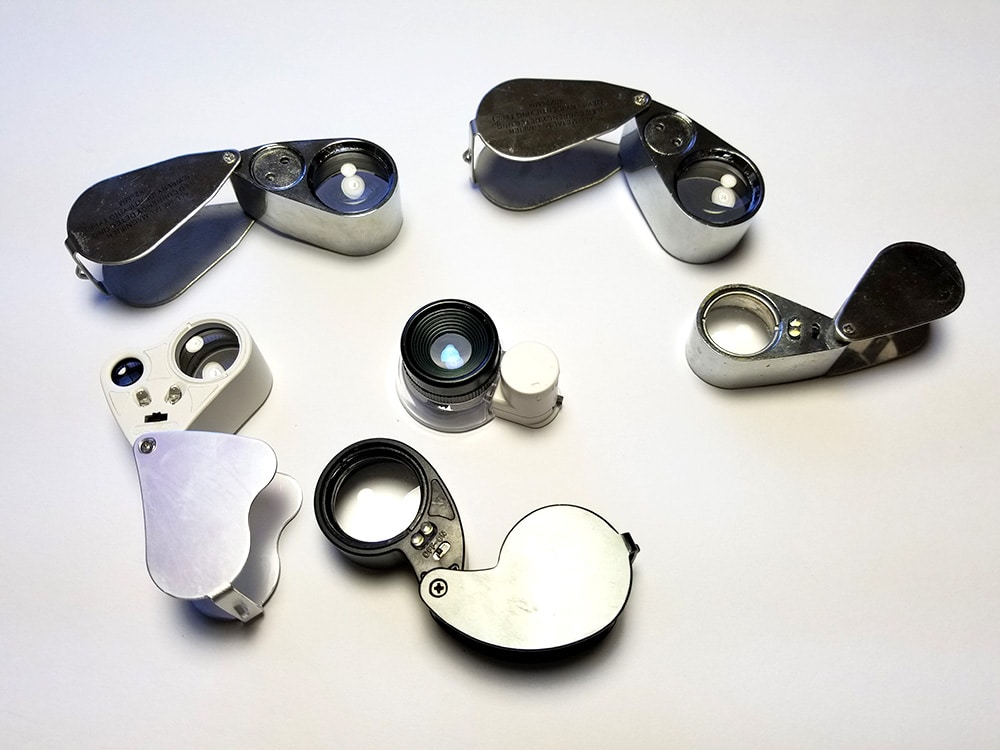
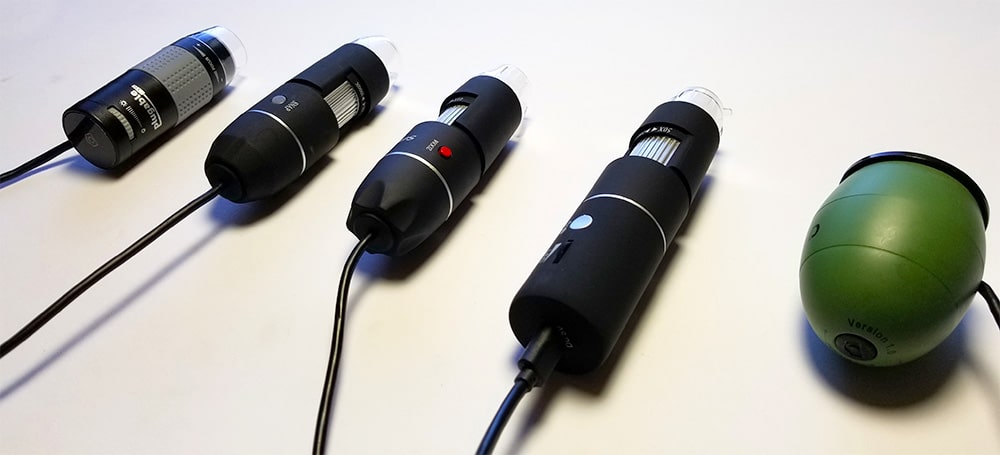
As you can see, we’ve purchased many magnifiers/microscopes to look at cannabis trichomes over the years…

This tutorial shares which magnifiers are the best for looking at cannabis trichomes!

Why Look at Trichomes? (Trichome Color Tells You When to Harvest)
It’s so rewarding to harvest your own weed. Not only does it mark the end of a cannabis grow and a lot of work, but you’ll soon be able to enjoy the fruits of your labor… awesome weed!
Any cannabis grower who has made it through the cannabis flowering phase knows that waiting for the right time to harvest can be a major test of a grower’s patience. But don’t worry, trichomes are here to save the day! The color of trichomes can help tell you when it’s time to harvest and get the effects you desire.
Clear trichomes mean the bud is still immature and hasn’t reached full potency or size yet. Cloudy white trichomes have typically achieved their peak THC levels. As the bud continues to mature, the trichomes start turning “amber” (a nice word for yellow). If you’re looking for a more sedative or couchlock effect, amber-colored trichomes are your choice. Check below for pictures!
Trichome inspection: Look closely at the trichomes with a magnifier to know when to harvest your cannabis buds.
Quick Overview – How to Use Trichomes to Determine When to Harvest Cannabis
By looking closely at the sparkly trichomes on cannabis buds under magnification, you can determine when to harvest your plants for the highest potency. Here’s a quick guide, or read the full tutorial on harvesting cannabis based on trichome color. Today’s article teaches you how to magnify your trichomes, and here is what you’re looking for when checking cannabis trichomes:
Buds are not ready to harvest (low potency) – Clear trichome heads look like glass.
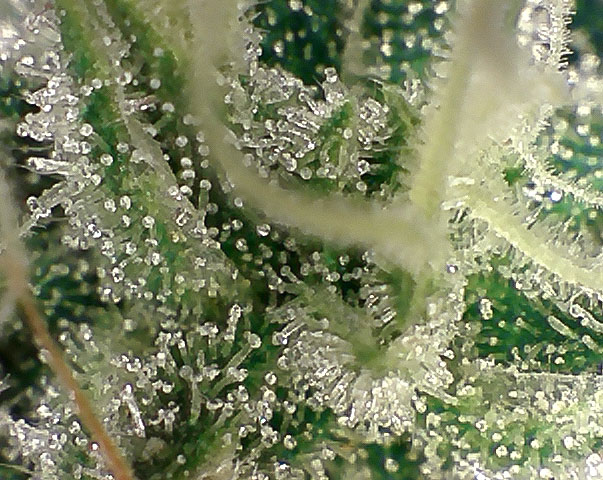
Highest Levels of THC (strong psychoactive effects) – Milky trichome heads look like white plastic.
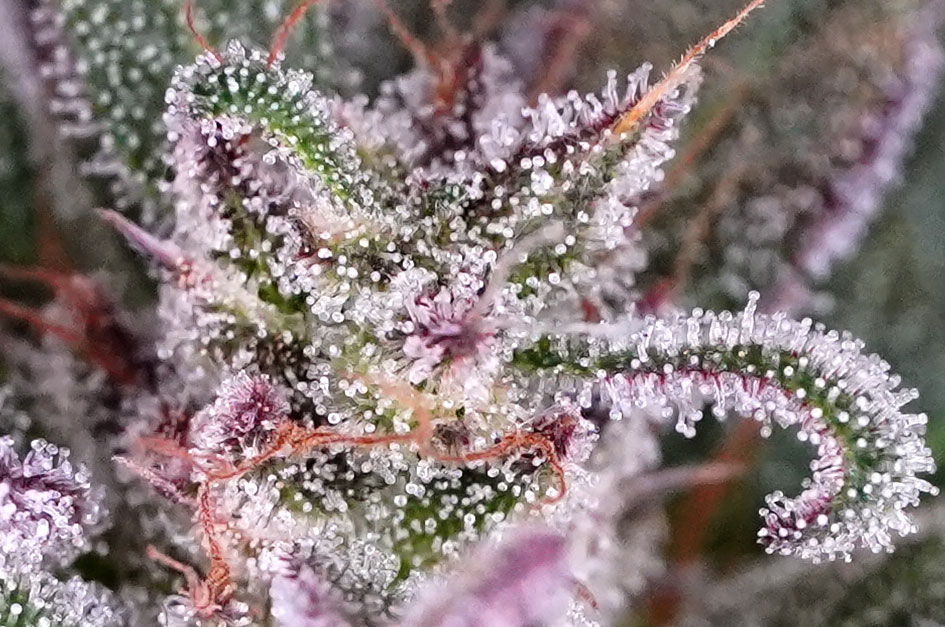
Most Narcotic (stronger body/stone effect, some people feel sleepy) – These trichomes look yellow or gold (often referred to as “amber” trichomes in the cannabis grow world).
Check out the complete trichome harvest tutorial to learn more.
The Trichome Method is an Effective Harvest “Tool”
Here are your options for knowing when to harvest your cannabis, and why the trichome method is a great tool in every grower’s arsenal:
- Breeder Estimate: This is done by just waiting and harvesting when the breeder-specified flowering time is up. An example would be if the strain details say “10 week flowering stage” and you just harvest your cannabis plants exactly 10 weeks after buds start forming. Please, don’t do this! Sometimes breeders are just wrong, and even if it’s a good estimate, many factors may affect the flowering time of cannabis plants before buds have reached their maximum potential. That’s why it’s best to examine the buds themselves and harvest when buds physically look ready. At least if you want the best yields and potency.
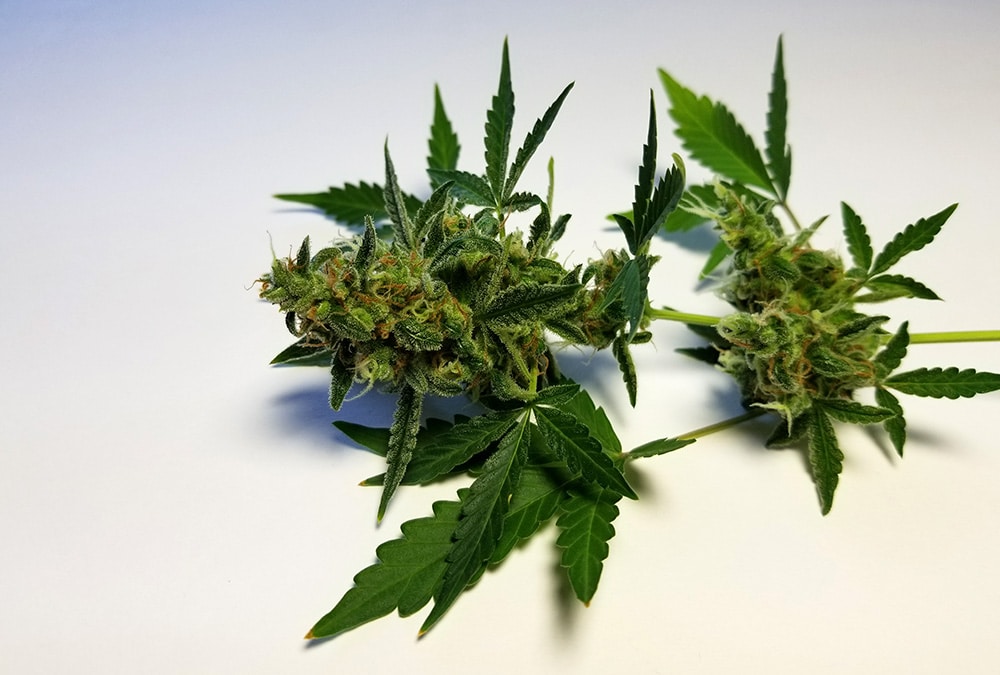
- Pistil Method: Pistils are the “hairs” that grow on buds. They typically start out white, sticking straight out. Pistils slowly begin to darken and curl in as the buds mature. When at least 80% of the pistils have darkened and curled in, the harvest window is open. The pistil method has a huge advantage over the next option in that it requires no tools. And the pistil method is already MUCH better than using the breeder-specified cannabis harvest timing, which is a rough estimate. However, the pistil method is not the most accurate or dependable, especially for certain strains. Inaccuracy in harvesting can result in lower yields and lower-potency buds if you’re not careful, so if possible, you want to get a magnifier to look at the trichomes. See what buds look like when they’re ready to harvest.
- Trichome Method: This is what’s covered in today’s tutorial. Trichomes are the “glitter” on buds (sometimes trichomes are called “trichs”). When most of the trichomes appear cloudy-white under a microscope, the harvest window is open. While this method isn’t perfect, in my opinion, it’s the best method we have right now by far. Especially if you combine this with the pistil method, you get excellent accuracy. The downside is you need more than just your eyeballs to clearly see the trichomes. Since trichomes are so tiny, you will need a magnifier to use the trichome method. Luckily, a decent magnifier costs as little as $8, and great ones only cost about $40. Your reward: increased bud potency and yields!
Today, we’re going to focus on the best tools to use to look at cannabis trichomes for the trichome harvest method. You’ll learn what to expect from each type of tool (with pictures) so you can get better potency and yields in your next cannabis grow. Let’s get to it!
8 Ways to Magnify Cannabis Trichomes
Do you need a microscope for cannabis trichome inspection? Here are 8 different types of magnifiers a cannabis grower might use to look closely at trichomes. For each category of magnifier, I will explain the pros and cons, and offer the best option we tried.
Handheld Magnifiers (Not Great)
Handheld magnifiers let you see cannabis buds closer, but they don’t get close enough to easily judge the color of trichomes.

None of the handheld magnifiers we tested got in close enough to see the color of cannabis trichomes. (Our tests showed it magnified about 3x)
Notes: Handheld magnifiers are the easiest to use and have the widest viewing angle, but they don’t zoom in close enough to be useful for this purpose. Some magnifiers have a smaller lens built-in with a higher zoom, but these small lenses are inconvenient and hard to see through.
Best example: If you simply must have one, this magnifier is one of the better ones we tried. However, it claims to have 30x magnification but that is false advertising. Our tests showed closer to 3x magnification. Honestly, I recommend you choose any other tool on this list. For example, a jeweler’s loupe costs about the same price and way better at viewing trichomes.
Jeweler’s Loupes
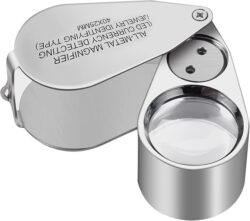
Jeweler’s loupes are designed to look closely at fine stones and jewelry and make it much easier to see trichomes. They’re cheap and convenient, but trichomes may still be too small to see for some people. Additionally, they have a very small viewing window, which makes it much harder to see through them clearly.
Example of looking at a bud through a 40X Jewelers Loupe. (Note: our tests showed it actually magnifies about 10x)
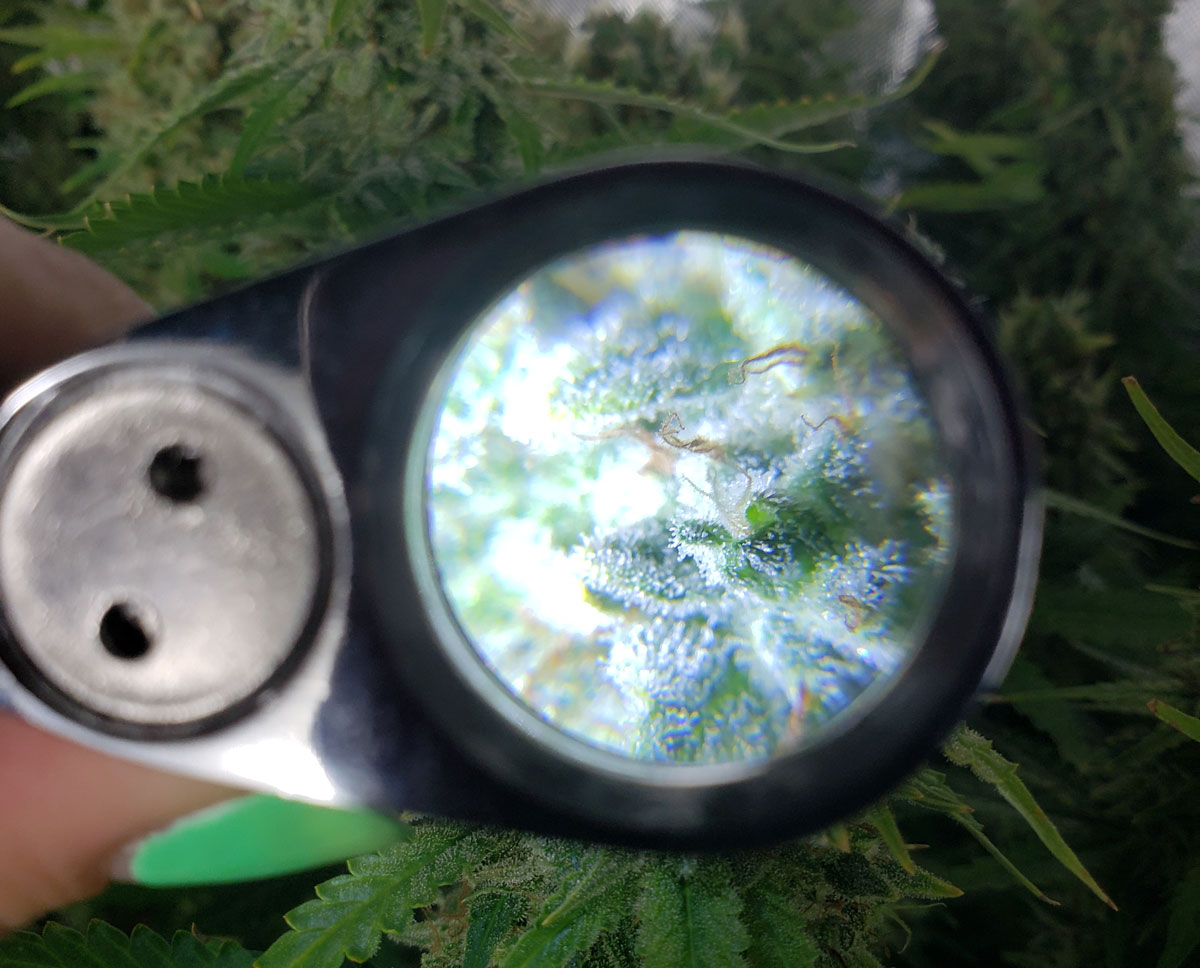
When I press a cannabis bud close, this is the view through the jeweler’s loupe.
Notes: Jeweler’s loupes are cheap and deceptively effective. You can use them to get a pretty good look at the state of your trichomes, and you can also put them up to the camera lens of a smartphone and take pictures like the ones above. The zoom feature on cameras make trichomes easier to see clearly. Loupes are also very easy to use and made from tough materials, so if you buy one, you’ll probably have it for years and years.
Best example: You can’t go wrong with a loupe. Almost any loupe you get from a local hydro store or online will suffice and they only cost about $10. We did try several and this is the one we liked best and used in the pictures above: Jeweler’s Loupe
Pro Tip – Never Trust the Listed Magnification! I don’t know why, but all jeweler’s loupe listings seem to lie about their magnification abilities. Cheap jeweler’s loupes are commonly advertised as 30-40x magnification, but in my experience they’re all the same and the magnification is about 10x. I think it’s just shady marketing, but something to keep in mind. If a jeweler’s loupe costs about $10, it’s very unlikely you’re getting more than 10x magnification. The types of loupes that can even magnify to 28x need two lenses on top of each other to get that close, and cost almost $500 (this is the type of loupe a truly serious jeweler would use, for example to look at diamonds). I think the $500 price tag on a real 28x loupe helps illustrate just how unlikely it is that a $10 loupe will magnify to 30x or 40x.
Recommended: 40X Jewelers Loupe (Actual magnification 10x, but still super handy!)
Smartphones
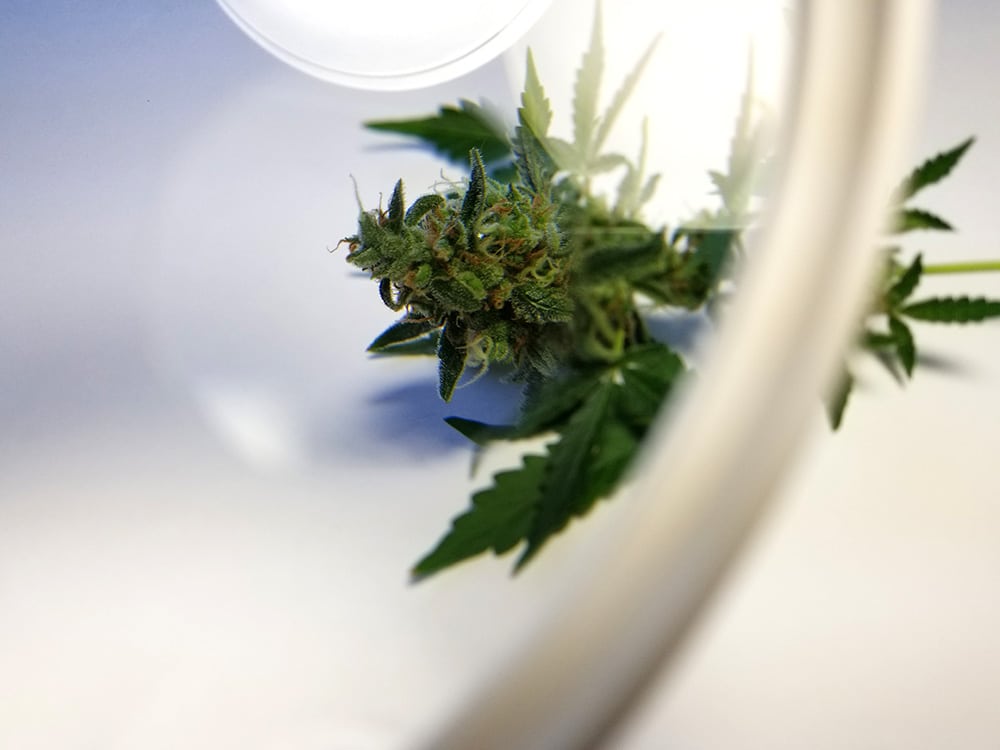
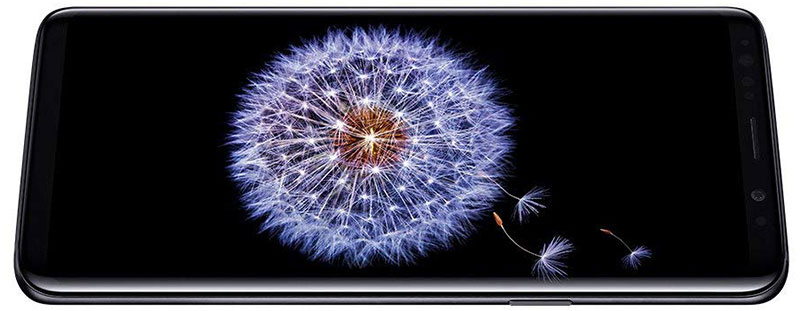
Smartphones can be a great choice for cannabis trichome magnification because many growers already have one with a decent camera. Another cool thing about smartphones is that the picture quality tends to get better as newer phones are released, so some newer phones can produce surprisingly high-quality cannabis trichome pictures without needing anything extra but a lot of light and a still hand.
Example pictures:

Click images for larger versions
Tips for clear cannabis trichome pictures with a smartphone camera (or any camera):
- Plenty of light – Use lots of bright natural light for the best trichome pictures. Low light produces blurry pictures and makes it harder to see the true trichome color.
- Don’t move – Keep the phone as still as humanly possible when taking shots. Not everyone has a tripod, but leaning or bracing your phone against something can help keep it steady compared to holding it with your hands.
- Try different angles – Try taking pictures from different angles to see which works best.
- Adjust distance – Try moving the phone both closer and further to take pictures. Weirdly, sometimes you get better pictures by moving the phone camera a little further away.
- Camera zoom – Try zooming in and out with the camera software. Each camera is a little different as far as focusing and different levels of zoom can work best for different phones. Some phones have excellent magnification.
- Take extra pictures – The more pictures you take, the greater the chance you’ll get a really good shot. Sometimes you just happen to get a super clear shot compared to the others. So don’t be shy. Keep clicking!
- Use a magnifier – Some growers take pictures through a magnifier or jeweler’s loupe for even closer pictures (more info on that next).
Best example: Many people already have a smartphone that will take pretty good pictures. Especially when combined with the tips above. The best phones for magnifying trichomes have some amount of optical zoom, as opposed to only digital zoom, which means they can take bigger pictures without losing resolution. The pictures above were taken with a Samsung Galaxy S8+ (an almost 7-year-old phone now), and it still did a good job even though it only has digital zoom. The best smartphone options include iPhones (all models after iPhone 7 have optical zoom), the Samsung Galaxy phones (Galaxy 9 and later have optical zoom) and Google Pixel phones (Pixel 7 and later have optical zoom). Any of these phones, plus many more, can take excellent close-up trichome pictures if you follow the above tips. Give it a try!
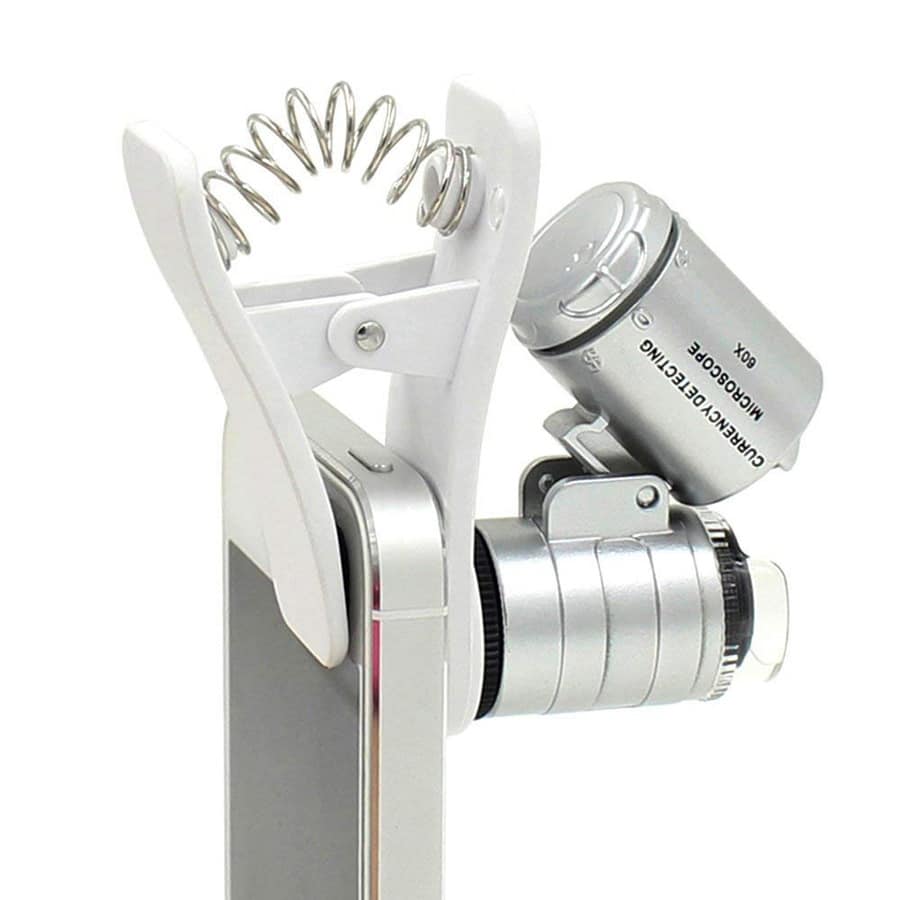
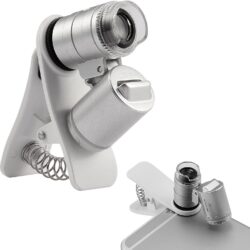
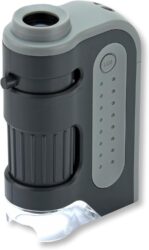
Small Pocket/Phone Microscopes
Example pictures:
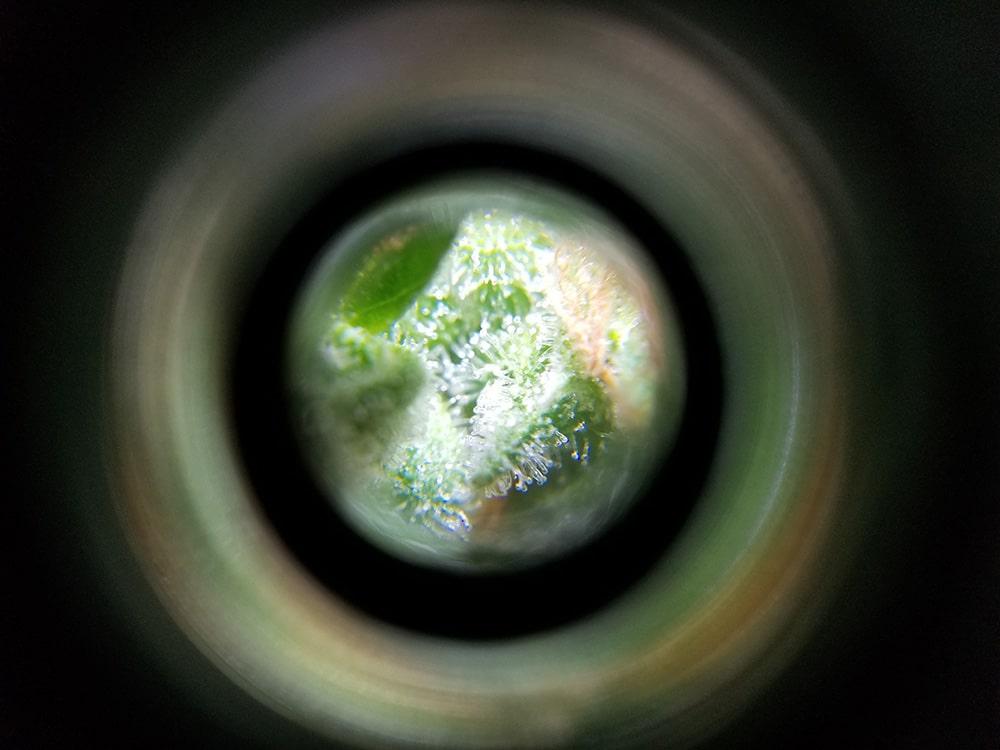
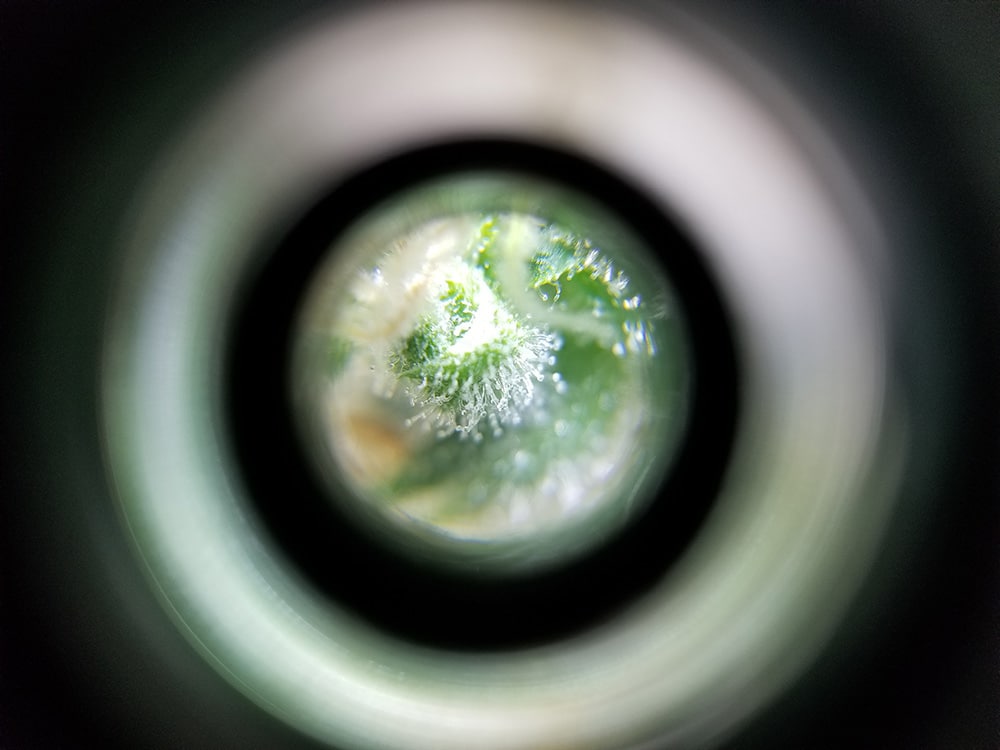
Click images for larger versions
Notes: These types of tiny pocket-microscopes are relatively cheap and can be used alone or with a smartphone. If you have a smartphone, make sure to get one with a phone attachment like the ones in the picture above. This makes for better pictures and it also makes it way easier to focus on the piece of plant you want. Pro-tip: these are great for video if you don’t have a USB camera available.
Best example: First and foremost, if you get a microscope meant to clip on to your phone, make sure you get one that fits. If the clip isn’t the right size for your phone, the camera won’t be able to focus on your beautiful trichomes. Luckily they’re cheap. Nebula and I both use this pocket microscope since it fits our phones. Clip-on microscope
Clip-on microscopes are nice for looking at cannabis trichomes, but make sure to find one that fits your particular phone!
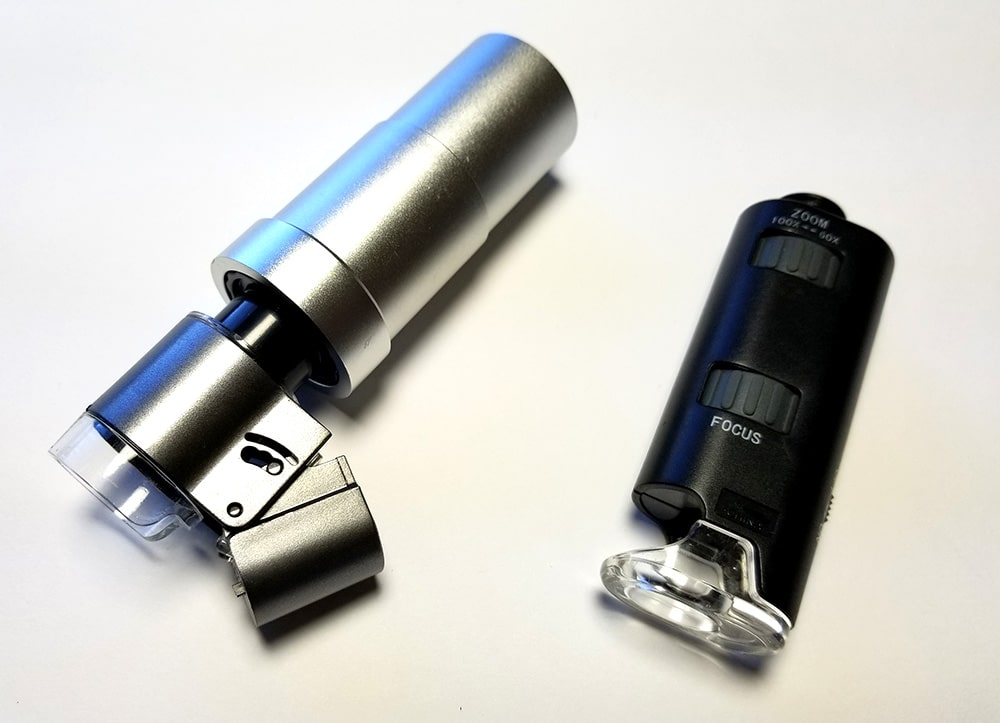
Big Pocket Microscopes
 Example pictures:
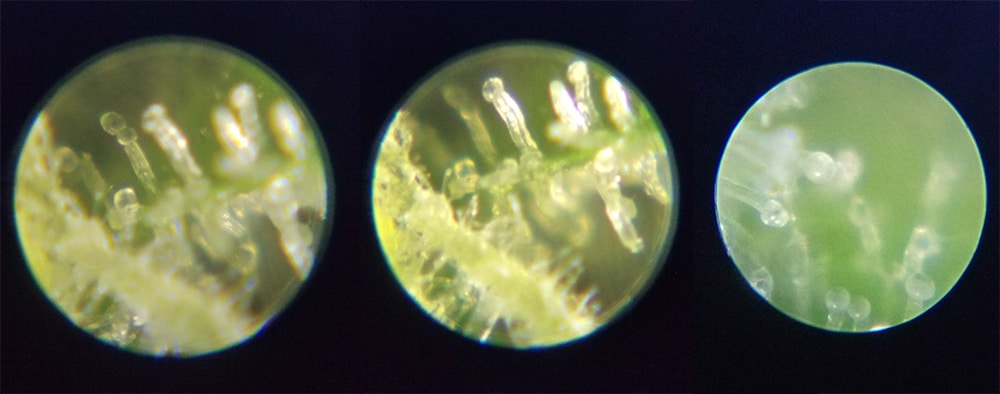
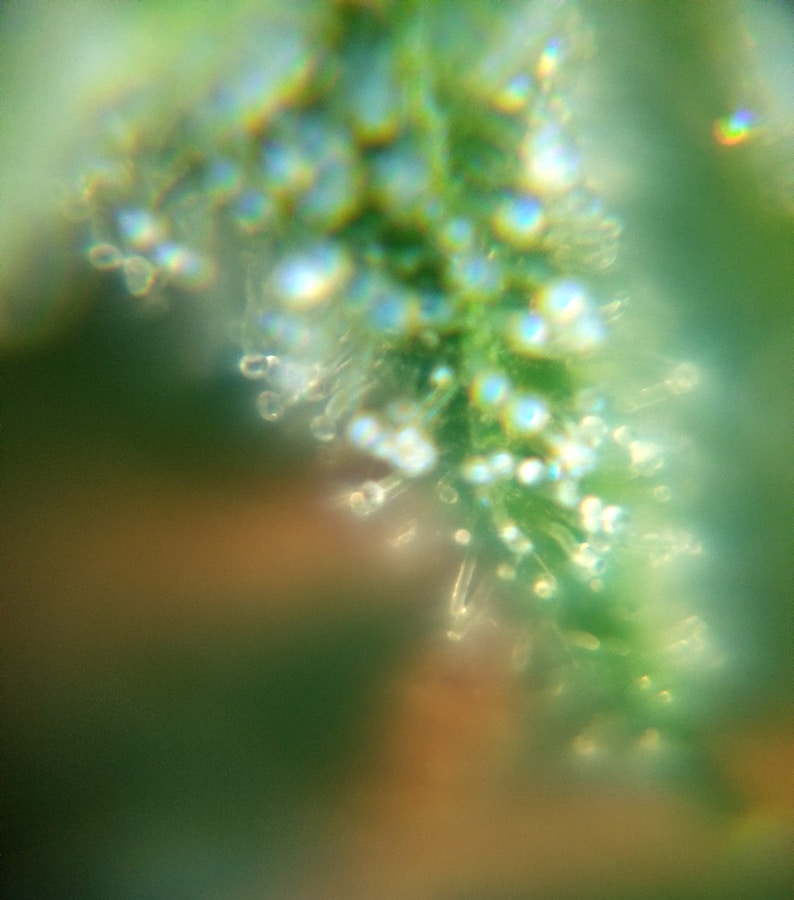
Click images for larger versions
Notes: The larger class of pocket microscopes can produce some really impressive pictures. That’s because they combine the power of two lenses together, as opposed to having just one like a jeweler’s loupe. The only problem is that they can be frustrating to use, especially when you’re trying to inspect something like a live branch on a cannabis plant. If you can afford to cut off a small piece of plant matter so you can place it down somewhere still (or if you’re trying to inspect an already harvested bud), this tool becomes a lot more handy.
Best example: We tried several of these, and overall our favorite is still our old Carson Pocket Microscope, which we originally bought over a decade ago. We bought a new one for this article, and it doesn’t seem to have changed any since then. Have patience with learning how to use one if you decide to take the dive, as these takes some fiddling and practice to really see the trichomes. Personally, I prefer a jeweler’s loupe because I have a hard time seeing through the little viewing window, which has a tiny field of view, but these magnify more than a loupe so you can see the trichomes closer. Even though they’re not for me, many growers swear by this type of magnifier. They cost less than $20, so not a huge investment if you want to give it a try. Carson Pocket Microscope
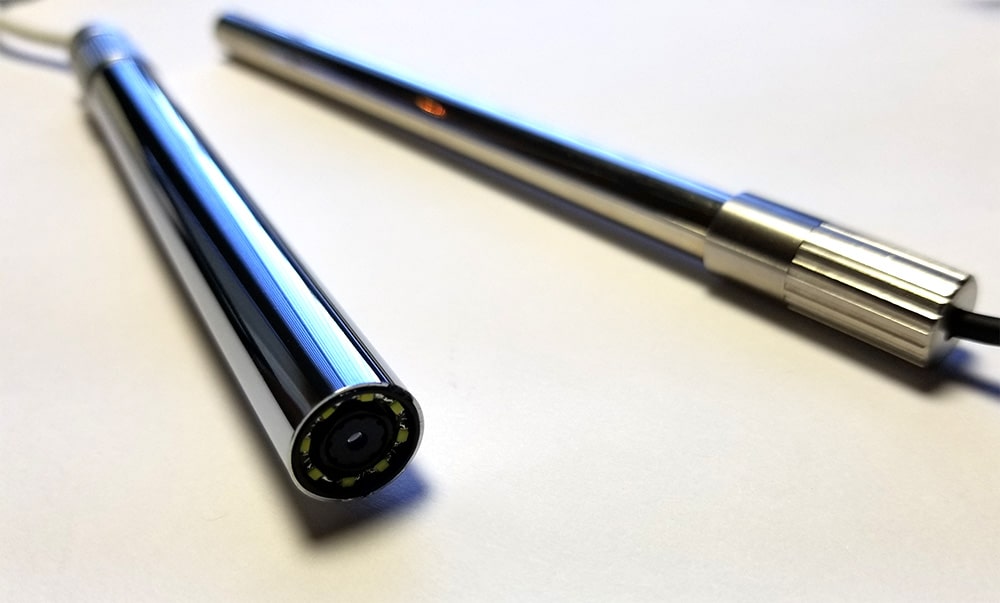
Endoscopes
Example pictures:

Click images for larger versions
-also-
Click this link to see a short animated .gif of an endoscope in action!
Notes: Endoscopes are made for inspecting things like ears and teeth. Their long thin shape lets the user see into tiny spaces. They definitely aren’t meant for inspecting cannabis. But since it is a magnifier, we tried a few anyway. They’re fun and easy to use, but not good at seeing trichomes or figuring out if it’s time to harvest your plants. There are much better alternatives for the price unless you’re also aching to see what’s in your ear or on your teeth. In addition to not enough magnification, endoscopes require a connection to a smartphone or laptop. This is one of the worst options on this list considering the price and effectivness. You’re much better off with a USB microscope (next) which costs about the same and is actually one of the best options for looking at cannabis trichomes.
Best example: There isn’t a ‘best’ since it won’t help you harvest, but this one definitely works as an endoscope…especially if you want to be reminded to wash your hands often. USB Endoscope
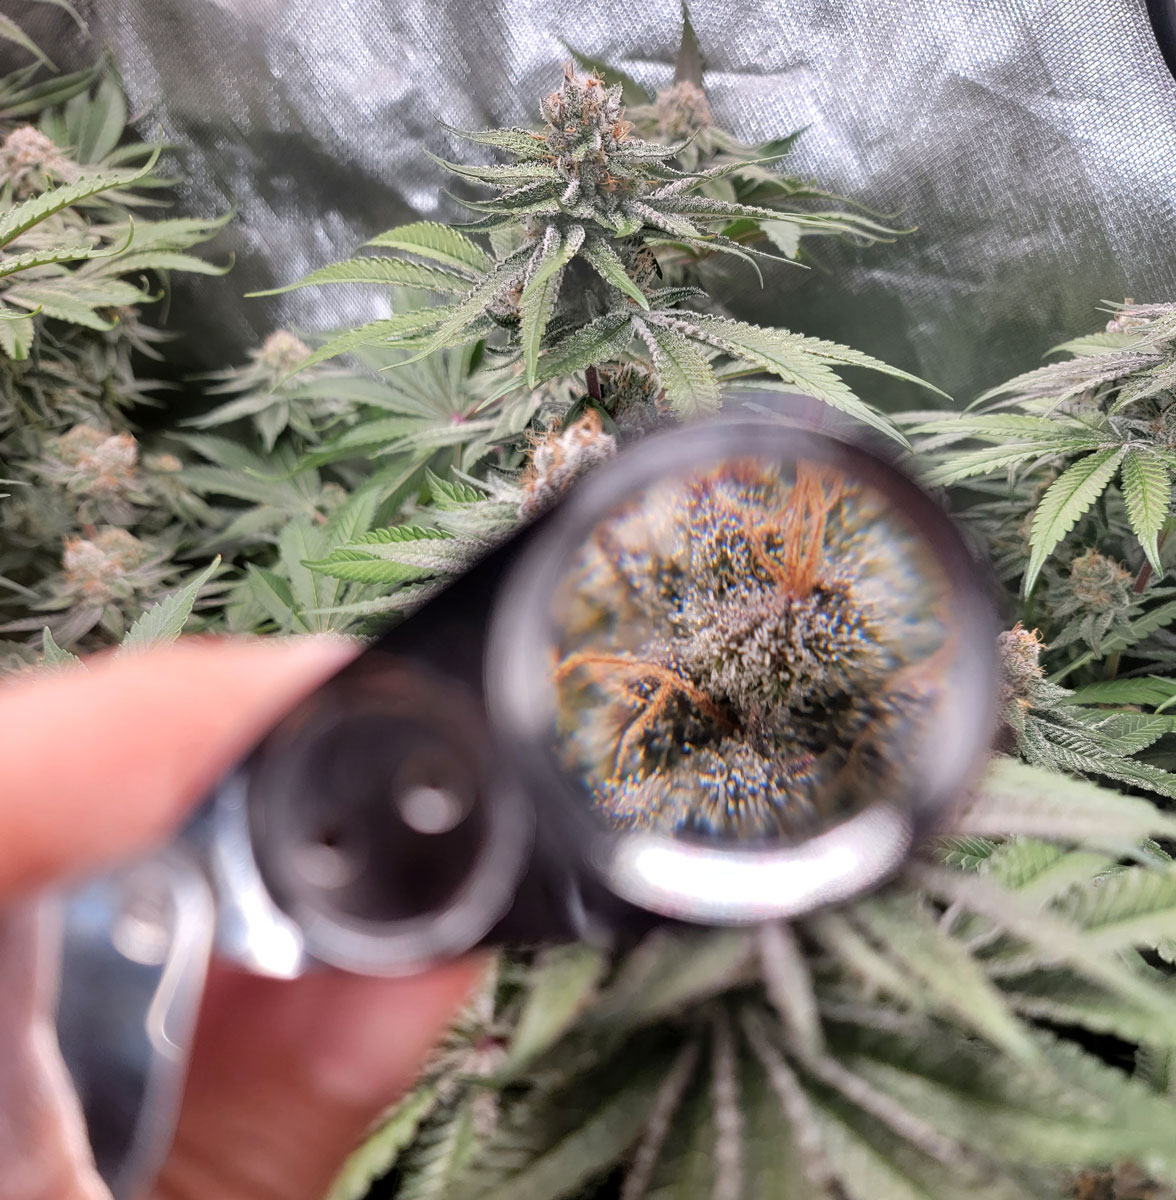
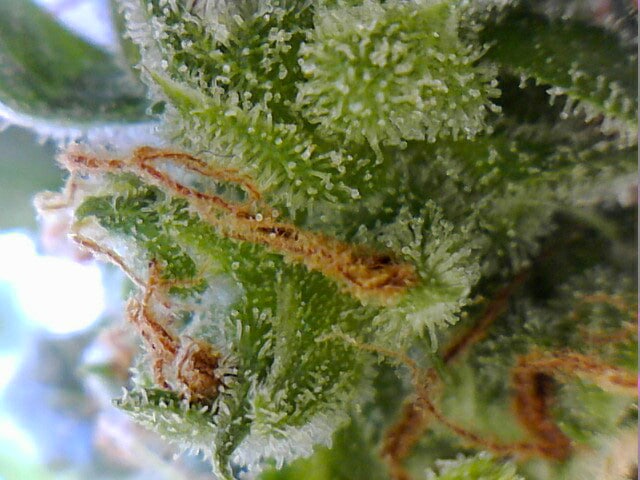
USB Microscopes
Example pictures:
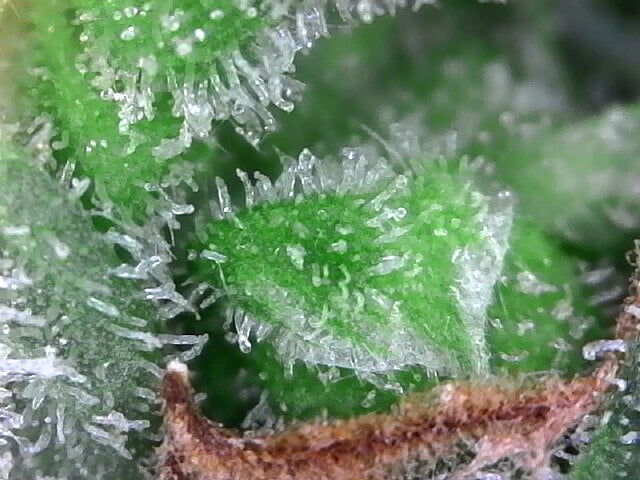
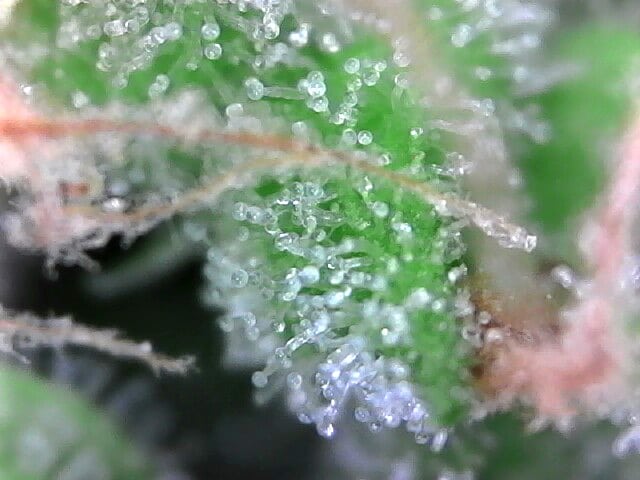
Click images for larger versions
Click the image above to see an animated .gif of a USB microscope in action (~3MB file)
Notes: If you can afford it, USB microscopes are likely your best option for magnifying cannabis trichomes so you can clearly see them. USB microscopes were cutting-edge when they first came out, but they were also a burden because they had to be connected to a laptop or computer. These days, many newer Android smartphones have a feature called “OTG” (which stands for “on-the-go”), which means that they can be connected to USB devices just like a computer. The combination of a smartphone with a USB microscope is tough to compete with since images come in so clearly without a steep learning curve or having to lug a laptop into the grow space. Make sure your phone can support OTG before getting a USB microscope, or get an adapter. Unfortunately, all iPhone/iPad users need to use an adapter. Not sure if your phone has OTG? Type your phone model plus “OTG support” into Google and you’ll likely be able to find out.
Best example: Get an OTG adapter if your phone doesn’t natively support USB. If a USB microscope works with your phone, it’ll probably do a decent job regardless of which company you buy from. That being said, I have yet to try a better USB microscope than this one. I wish the focus feature was easier to use with one hand, but it’s worth it for the pictures/video it produces. Pluggable USB Microscope
Here is another USB microscope that didn’t work as good when it comes to magnification, but costs less and has a special plug that supports USB-C and micro-USB without an adapter, in addition to regular USB. However, it still won’t work if your phone doesn’t have OTG capability.
Help for Different Types of Phones: What adapter you need
- iPhone with lightning port – get an OTG USB-to-lightning port adapter to use with the microscope below, or any microscope that has a regular USB connector.
- iPhone with USB-C port (iPhone 15) – get an OTG USB to USB-C port adapter to use with a USB microscope for examining trichomes.
- Android phone with a Micro USB port (older phones) – get a OTG USB to Micro USB adapter to use with a USB microscope to look at your marijuana trichomes.
- Android Phone with USB-C port (newer phones) – Many Android phones natively support OTG, but very few have a full USB port so you’ll need an adapter anyway to use a USB microscope. I recommend getting an OTG USB to USB-C port adapter even if you think you already have OTG. That way you know it will definitely work regardless of whether your model support OTG.
When in doubt, contact the seller and ask about your phone model!
We liked this USB microscope the best. It produced very clear magnification.
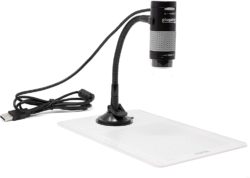
Example of it in action:
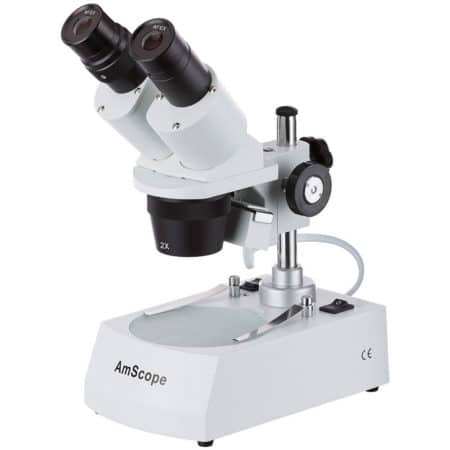
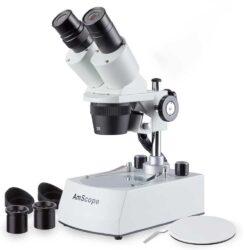
Stereo Microscopes
Example pictures:
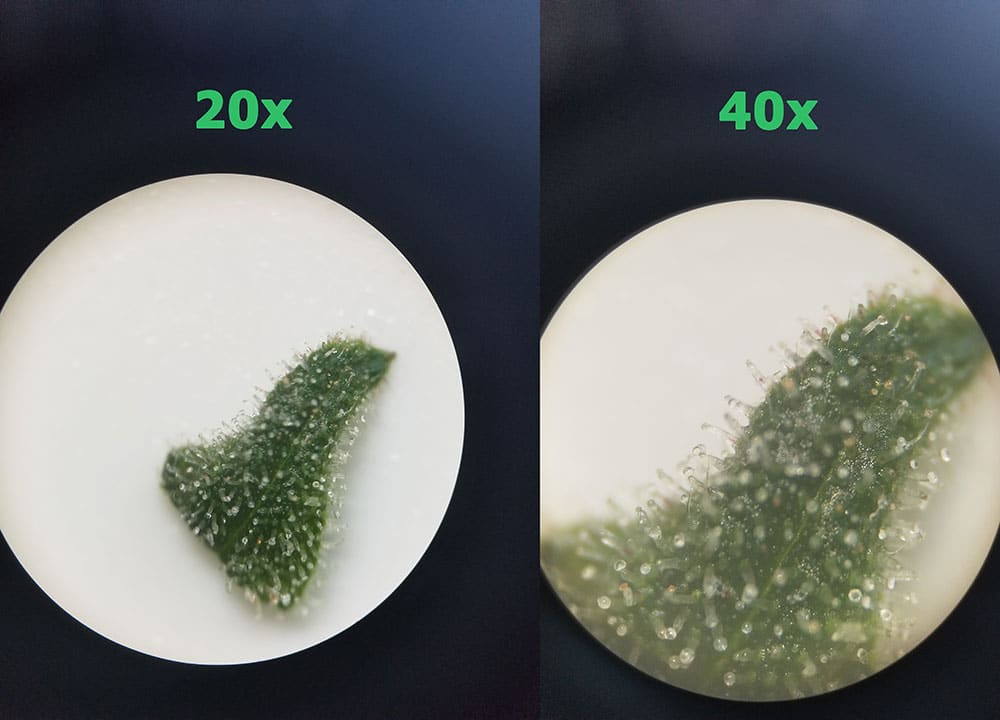
Click images for larger versions (second images is a 1.3MB animated .gif)
Notes: Using a stereo microscope to view cannabis trichomes is going overboard. Although they’re a blast to use and cool in a very nerdy way, it’s difficult to fit a full bud so you can see it. We could only fit a small piece of leaf (check the picture above).This means it’s a poor choice for checking trichomes and there’s almost no chance that one of these will ever pay for itself in terms of making your harvest better.
Best example: We have an AMScope-306R and it definitely takes some cool shots. So much money and work, though!
Now that you’ve see all the magnifiers available for cannabis growers to view trichomes, let’s share our top picks!
Best Magnifier for Marijuana Trichomes: Our Top Picks
Best Overall Magnifier/Loupe/Microscope:
- When your budget is tight: Jeweler’s Loupe
- Great for quickly looking at trichomes without needing any technology.
- Can’t beat the price for what you get!
- A USB Microscope is the best option, but a jeweler’s loupe is the next best thing in our book.
- For those with a smartphone or laptop: Plugable USB Microscope – Phone users probably need an adapter to connect phone to a USB cord, and require OTG support, check below:
- Android phones with a USB-C port: you need a USB-C adapter (this listing has OTG so it works for just about any phone with a USB-C port even if it lacks native OTG support)
- Android phone with a Micro USB port (older phones) – get a OTG USB to Micro USB adapter to use with a USB microscope (gives OTG if your phone doesn’t support it natively).
- iPhone with USB-C port (iPhone 15) – get an OTG USB to USB-C port adapter (absolutely must use an “OTG” adapter on iPhone or USB microscopes won’t work)
- iPhone with lightning port – get an OTG USB-to-lightning port adapter (must use an “OTG” adapter one iPhone or USB microscopes won’t work)
Best Value Magnifier/Loupe/Microscope:
- Jeweler’s Loupe: They’re cheap, easy to use, durable and they magnify enough to help determine harvest time. A jeweler’s loupe and a phone together are better than either one is on its own. It’s really hard to beat this much value and dependability!
- Handheld Magnifier
- Jeweler’s Loupe
- Smartphones (the one you already own)
- Small/Phone Microscopes
- Big/Handheld Microscopes
- Endoscopes
- USB Microscopes
- Stereo Microscopes
We tested quite a few microscopes, loupes, magnifiers, etc., but there’s a good chance we missed some good stuff! If we didn’t cover a tool that you use to look at trichomes, make sure to drop us a line and let us know. We love an excuse to look at our cannabis buds under magnification, and we’ll add any good suggestions to this page. Happy Growing!
~Sirius Fourside (co-founder of GrowWeedEasy.com)