by Nebula Haze
Besides cheap cannabis seeds, how do you grow weed cheaply without sacrificing bud quality or yields? Maybe this is you: You want to try growing weed but refuse to spend a fortune. You don’t need the biggest harvest ever, but your time or effort must be rewarded with a good amount of high-quality buds the very first time.
Step 1: Cheap cannabis seeds (this is a trustworthy seed company that offers a small selection of $5 seeds from proven breeders).
If you’re looking for the cheapest way to grow world-class weed, you’ve come to the right place. I have grown weed at home in almost every way imaginable, and the following method works to produce amazing weed on a shoestring budget. Just get the supplies and then follow the step-by-step tutorial below to grow several ounces of your own dense, potent, almost free weed.
The method in this tutorial isn’t the most futuristic way to grow weed, but it will give you…
- High-quality genetics as cheap as $5 per cannabis seed. Sometimes you can find good seed deals that bring the per-seed cost even lower. Especially around April 20 (popular marijuana holiday) and major holidays. Even without a ton of money, if you order from a reputable seed breeder like the ones I linked tom you can grow potent high-grade buds without a ton of money.
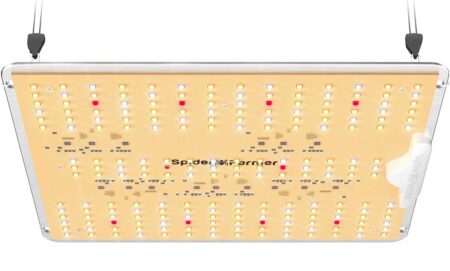
- 100W LED grow light – $70 grow light (Spider Farmer 100W LED with a 2’x2′ footprint – “D” version) – I have used a Spider Farmer 100W light multiple times (this page has pictures, or look below). The “D” version is the cheaper non-dimmable model, but dimming isn’t important for such a small LED grow light. In other words, the dimmable version costs a little bit more, but isn’t necessary for your results. Spider Farmer’s 100W LEDs don’t get hot or use much electricity, but have enough juice to produce up to 5 oz of dense, top-shelf bud per harvest. (2-4 ounce average)
- Soil that Powers Fast Growth – $40 high quality cannabis potting soil (don’t skimp on good soil!) in 2-gallon fabric pots ($9 for a 6-pack).
- Bud-Building Nutrients – You can get excellent cannabis nutrients for just $15. Start with “Grow” at 1 tsp/gallon. Then once buds start forming, give “Bloom” at 1 tsp/gallon until harvest.
- Fast Harvest – Seed to harvest in as little as 2 months if you grow with an ultra-fast auto-flowering strain like Purple Lemonade Auto.
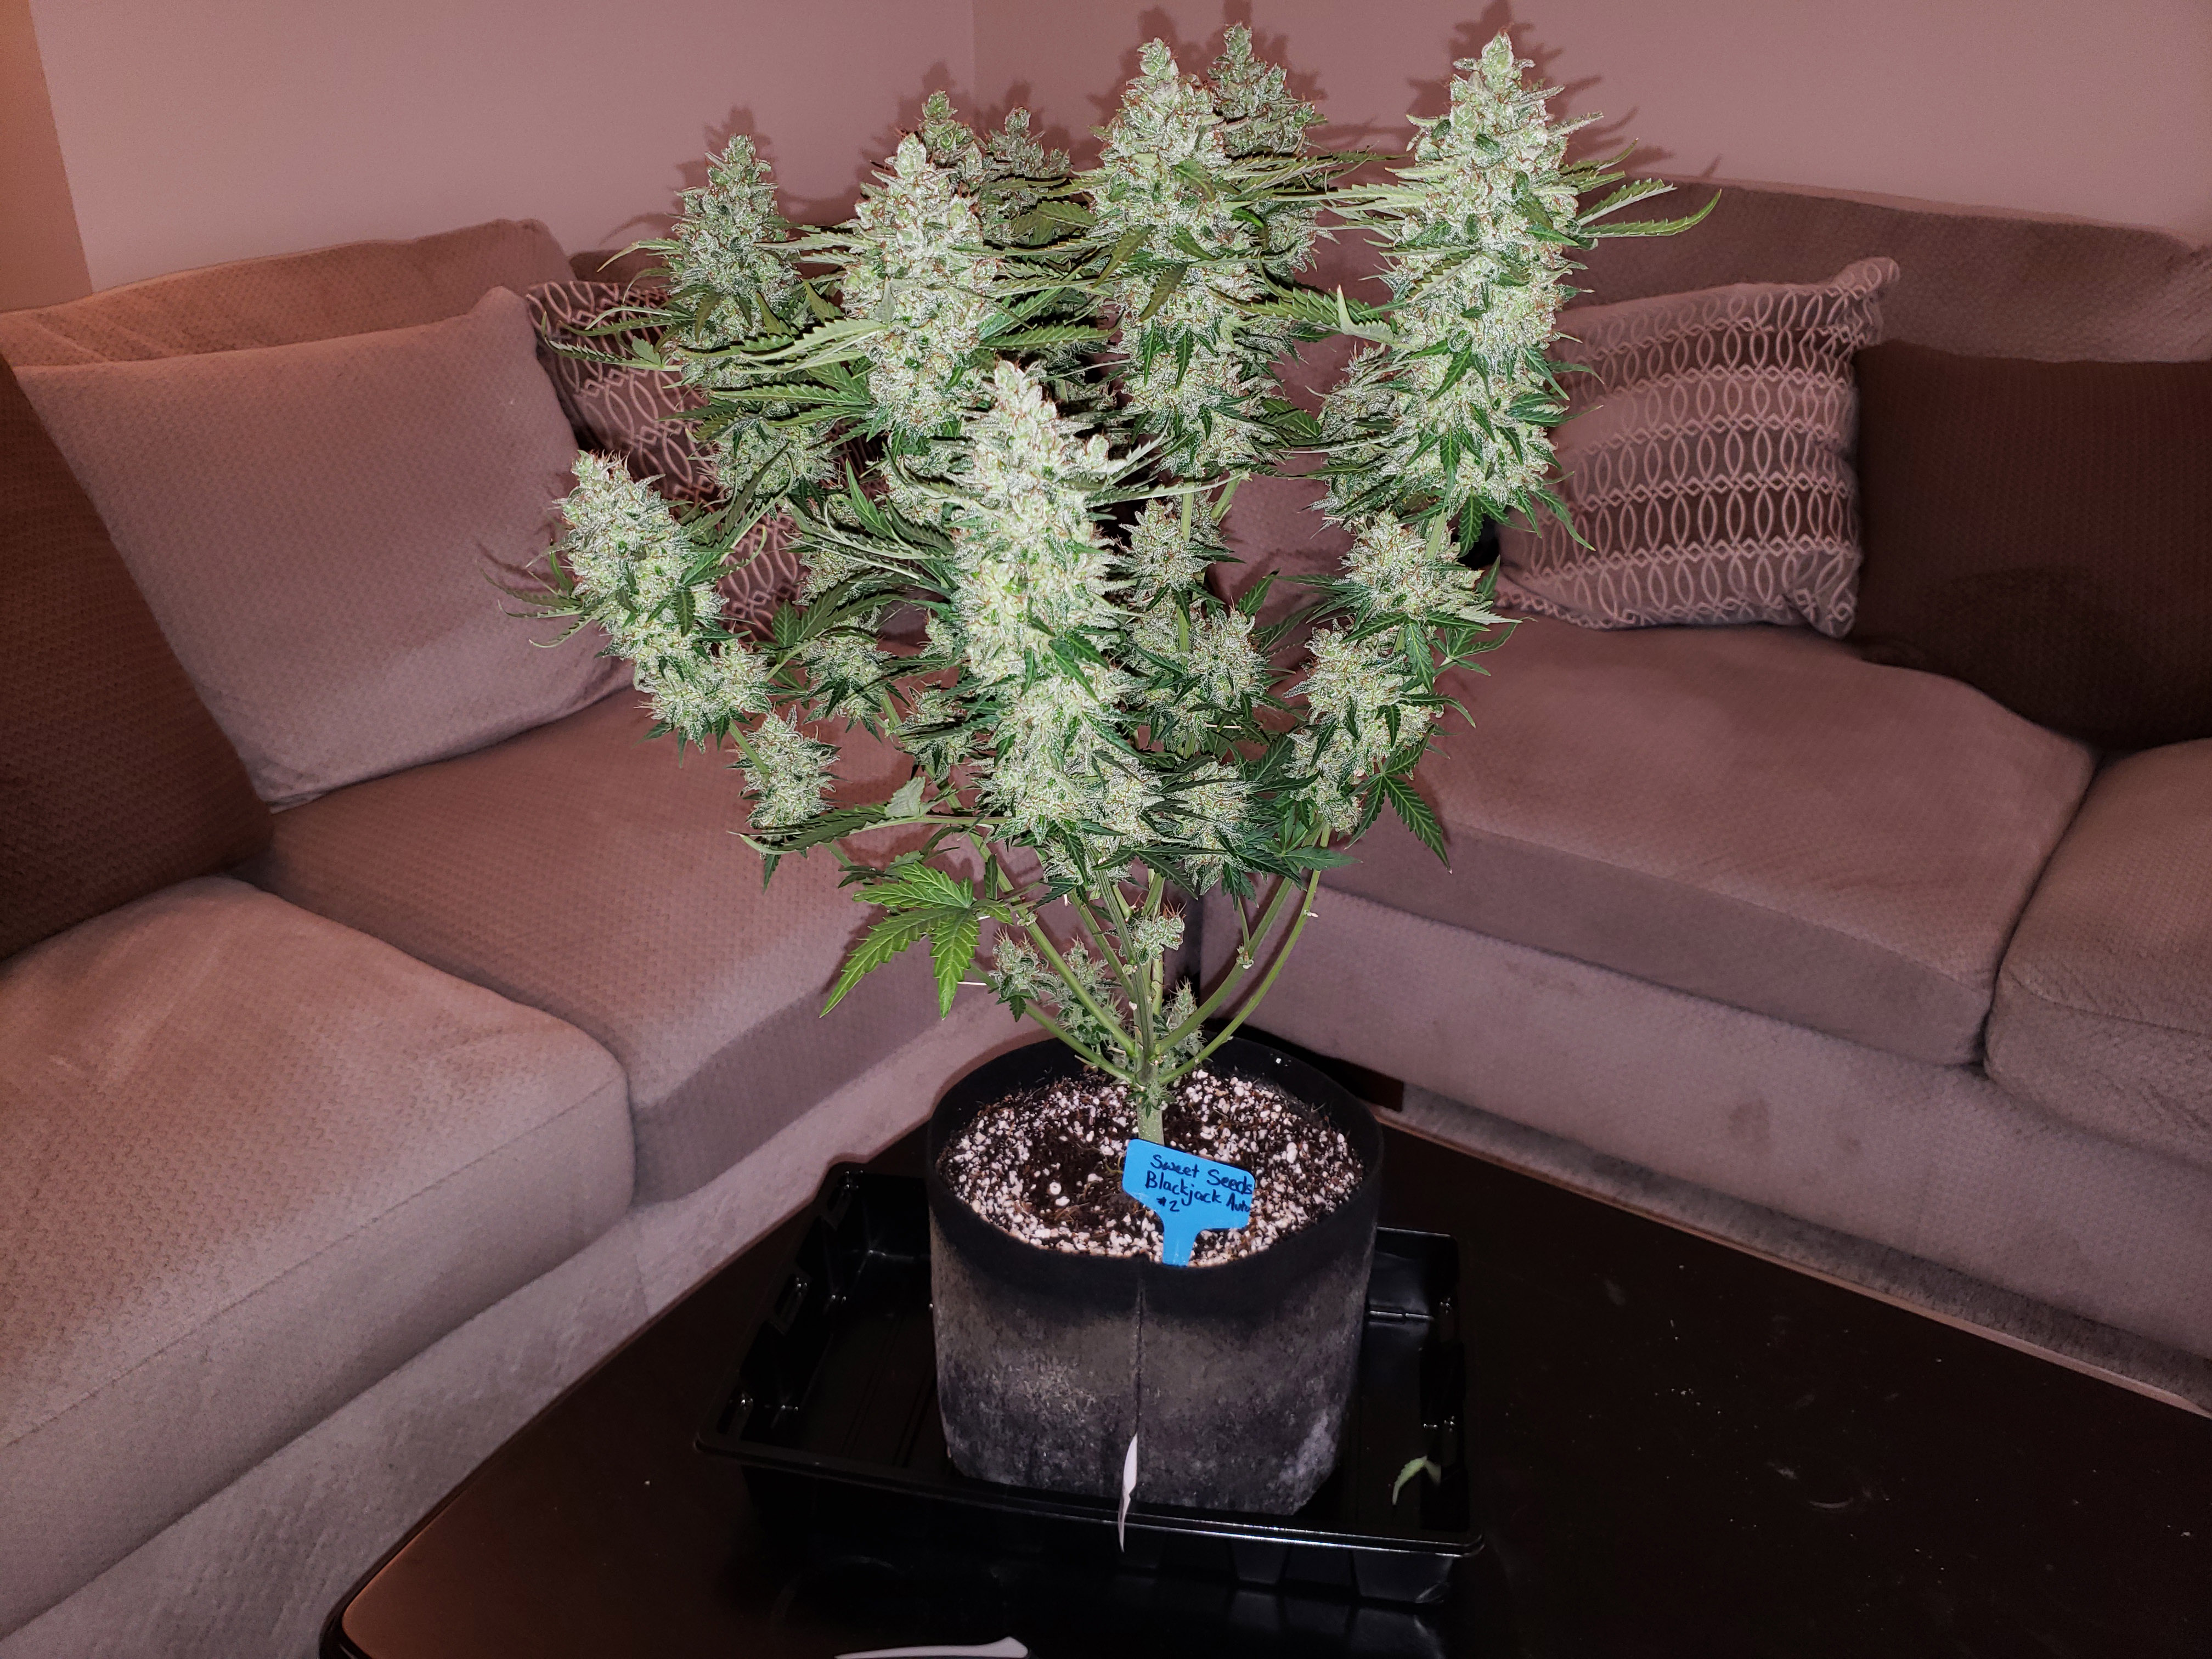
This is Black Jack Auto by Sweet Seeds
$150 to Start, Then Ultra-Cheap Almost Free Weed After That
- Supplies – Under $150 to get started growing weed (full supplies list with details and links below)
- Electricity – $7/month (for USA average electricity cost of $0.12/kWh)
- For a 2 month grow, including electricity, you get to harvest having spent a total of around $165. It will be even cheaper the following harvest since you won’t have to buy an LED grow light again.
- Up to 5 ounces of good weed per harvest (2-4 ounce average) with this 100W LED grow light.
Basically free weed after your first grow!
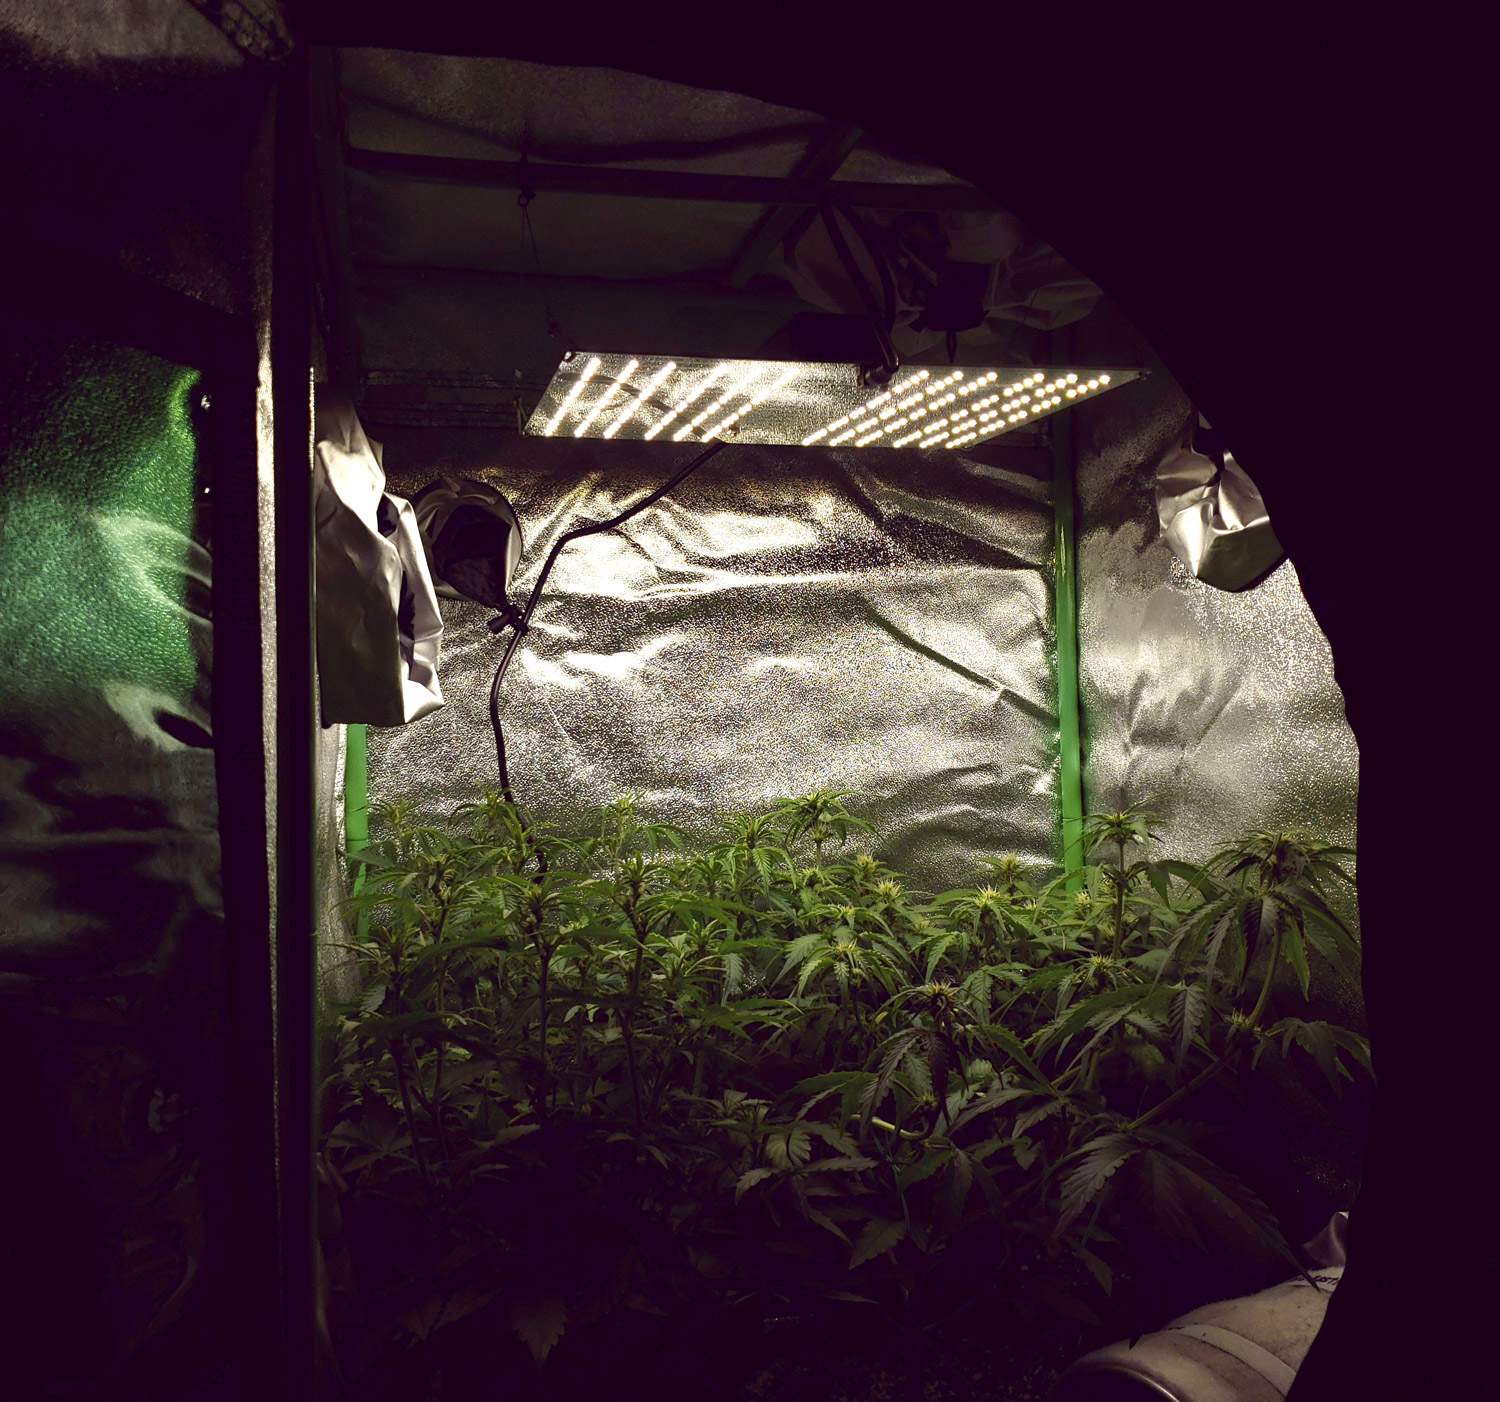
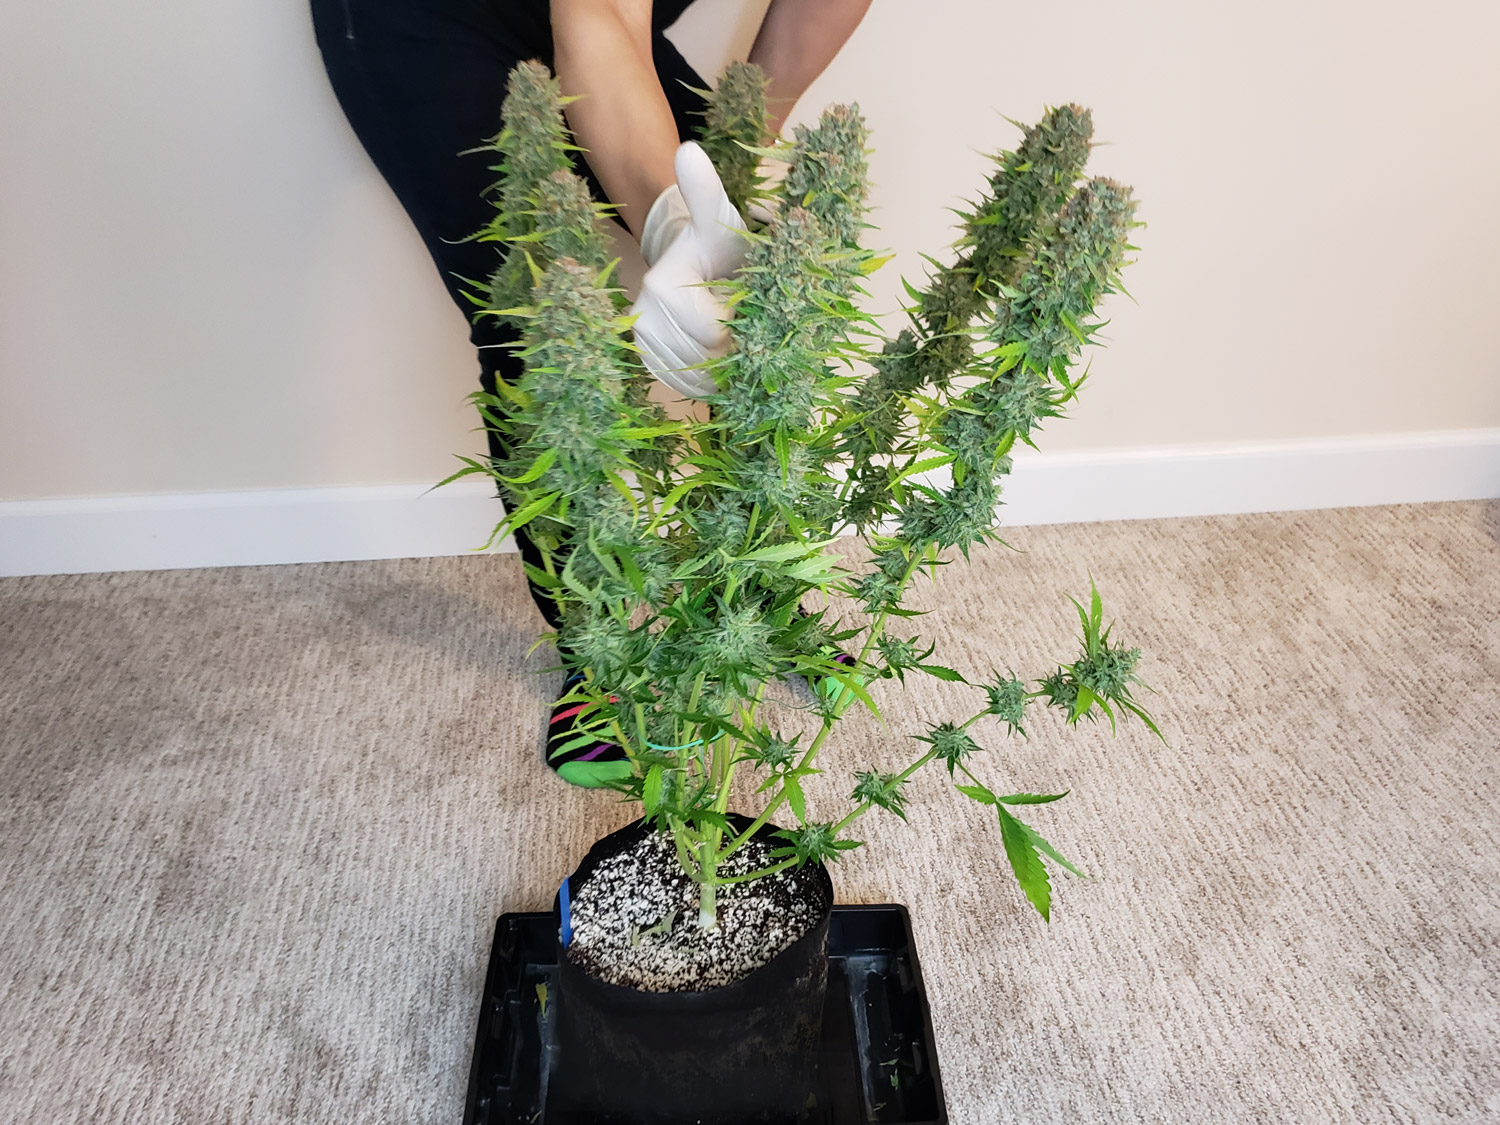
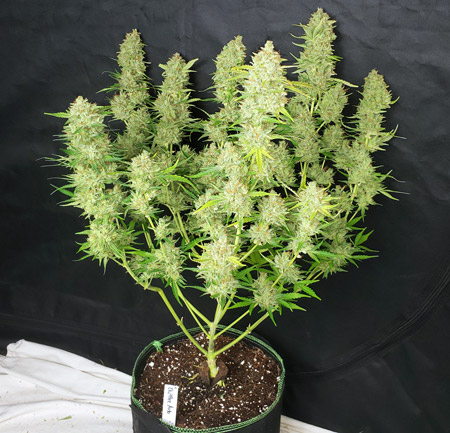
This is the basic setup (total estimated cost includes seeds, grow light, grow medium, plant containers, and nutrients), with a Runtz plant.
Example of buds produced (this strain is Auto Amnesia).

Supplies Needed
Here’s an overview of all the supplies you need to start growing cannabis via this method:
Grow light – Starting at $70-80
The average cost of electricity in the USA is $0.12/kWh. At 18 hours/day, that’s an electricity cost of about $10/month for the 150W HPS.
- 100W LED Grow Light: Spider Farmer SF1000D LED grow light ($7/month for electricity, yields the same or more, less heat, no need to replace a bulb every 3-4 grows) – $70-80 (price has fluctuated up and down between these prices since 2022, continuing into 2025 when I wrote this).
- Check out more examples of grow lights with estimated costs and yields.
This $80 grow light can yield up to 5 oz (average of 2-4 oz) of cannabis and produces excellent bud quality. It doesn’t make much heat and gives you a solid powerful grow light under $100 that reliably makes several ounces of good dense weed with any cannabis strain.
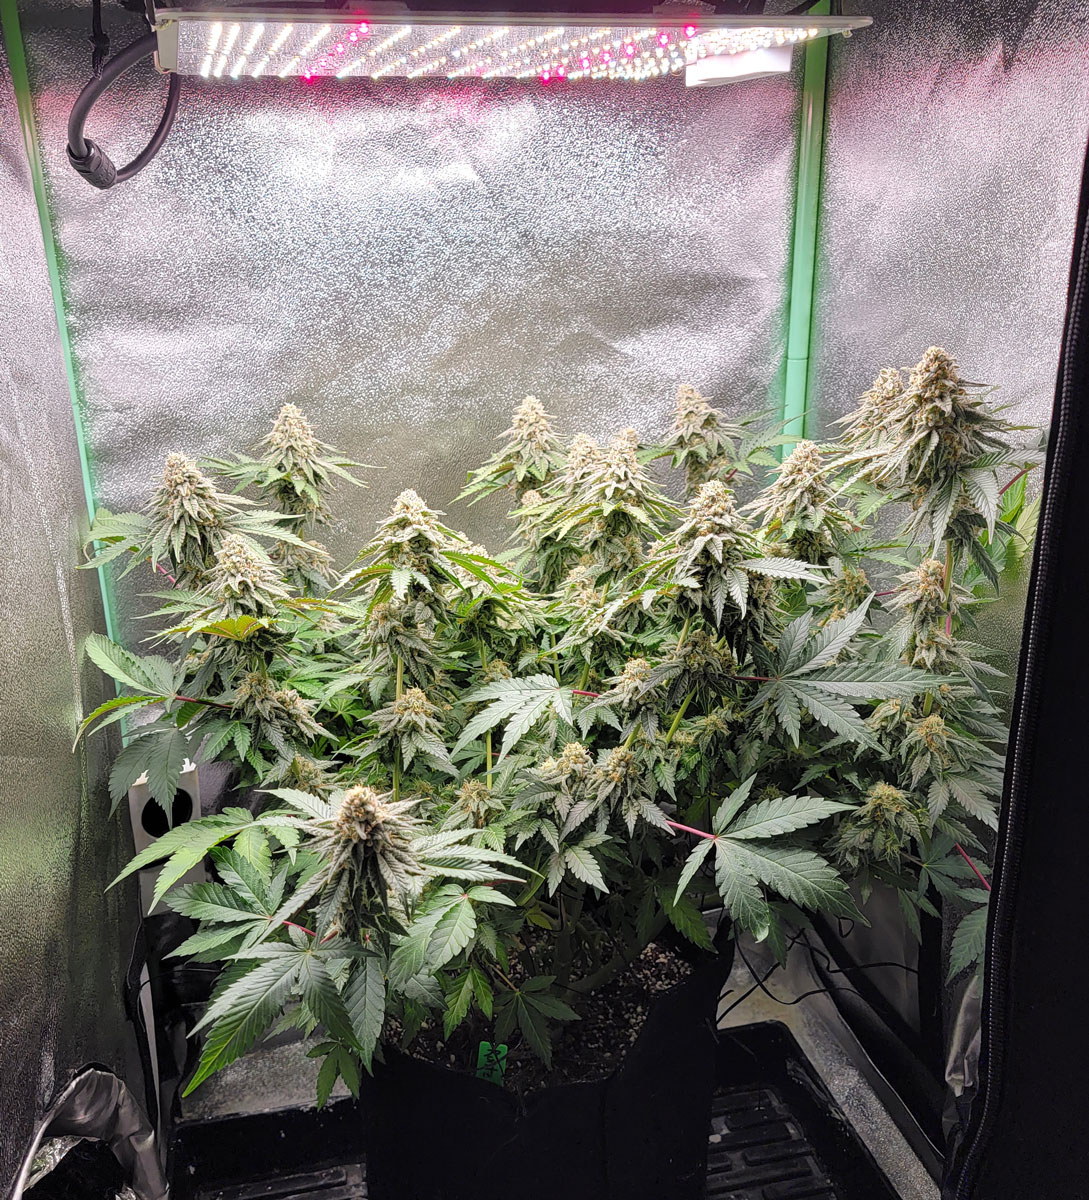
A Spider Farmer 100W LED grow light is surprisingly effective at growing dense, potent cannabis buds.
An LED grow light has no bulbs to replace so they’re super cheap in the long run. However, it does not make enough heat to keep plants warm if it gets cold in the grow space. So if you know your grow space gets chilly sometimes, choose a bigger LED like the Spider Farmer SF-2000, which is ideal for a 2×4 closet and can produce up to 11 ounces of weed.
Plant pots or containers – Starting at $10 if you go to a physical store (usually must buy multiples online)
- 2-gallon pots with saucers for 1-4 plants is recommended. 3-gallon could also work but you might have to squeeze the plants close together. A 5-gallon size take up more room and would be suitable for just 1 plant under this size grow light.
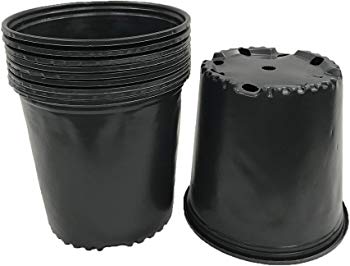
- $5-10 for a plastic nursery pot with a saucer at a garden store or plant nursery. If you try to buy plastic nursery pots online, typically you can only find multiple pots at once ($30) as opposed to individually like at a physical store.
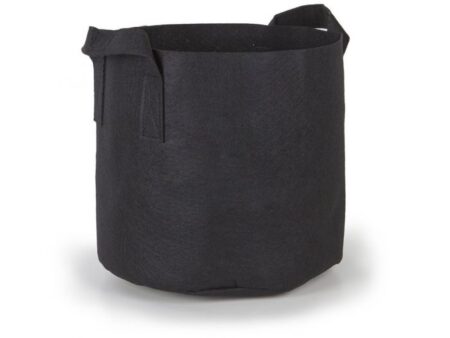
- Fabric pots are easier to find in smaller numbers online. Fabric pots are excellent for growing cannabis with the one downside being they need to be watered more often than hard-sided pots as they tend to dry out fast due to losing water from the sides. Sizing up to a 3-gallon or 5-gallon is recommended for fabric pots if you don’t want to water plants every day during periods of fast growth. Every brand of fabric air pot I’ve ever tried works great so don’t worry too much about the brand. Examples:
- Six 2-gallon fabric pots ($8) + six 10″ saucers ($8) = $16
- Six 3-gallon fabric pots ($8) + six 12″ saucers ($13) = $21
- Six 5-gallon fabric pots ($10) + six 14″ saucers ($20) = $30
- You may be able to find these cheaper in person at a plant nursery, especially if you get fewer pots.
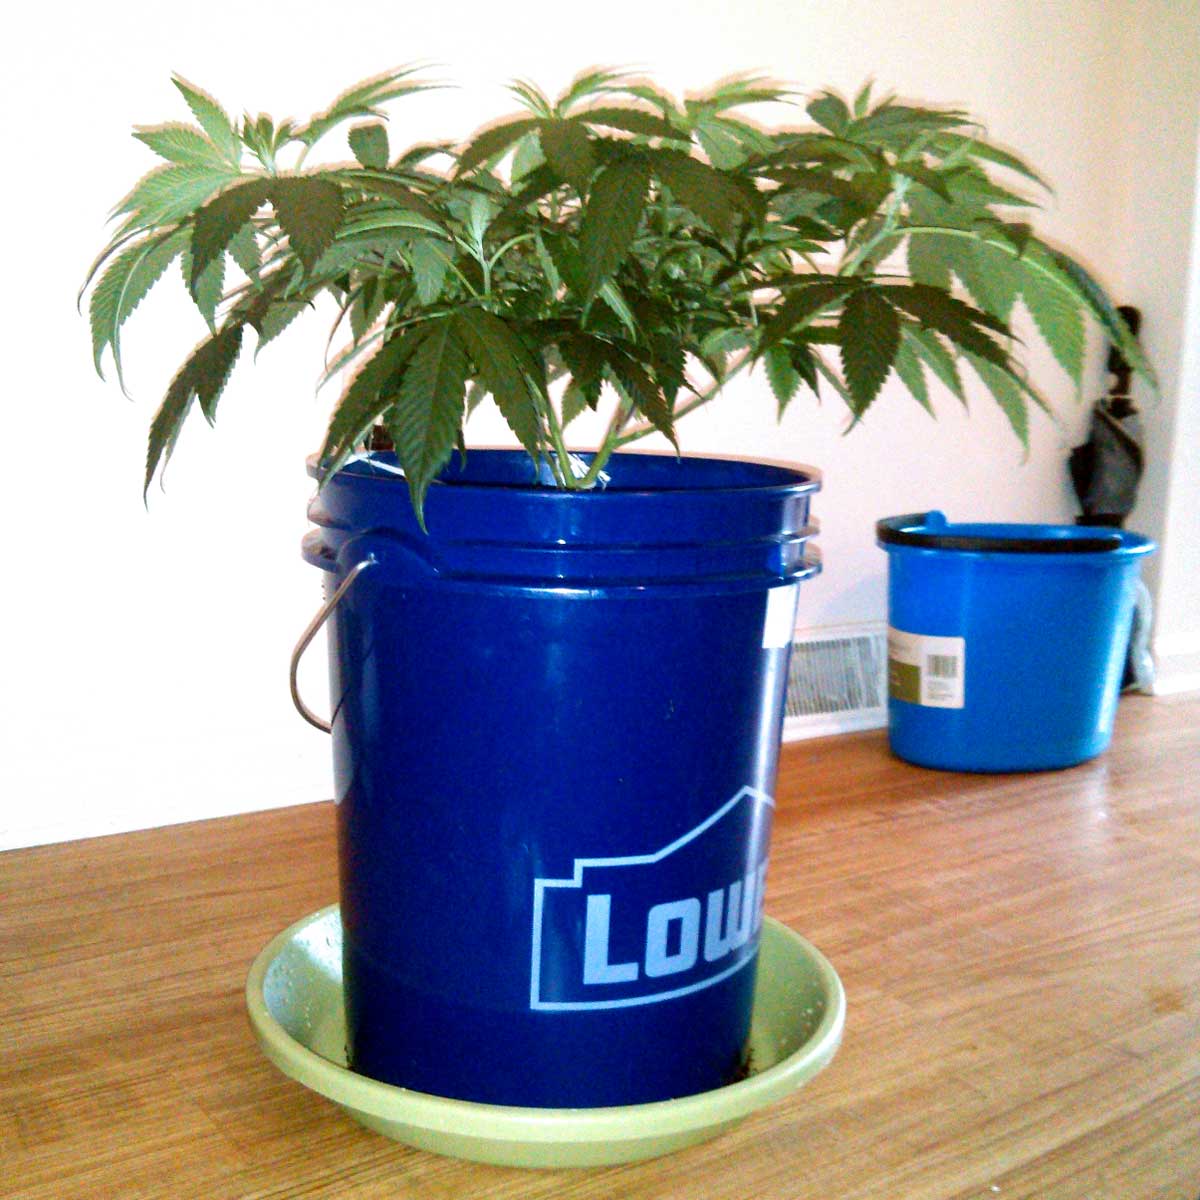
- Free alternative: you can use almost any container or bucket to hold your plants as long as you drill holes out the bottom to let extra water drain through. You also want some sort of tray to catch runoff water and make sure it doesn’t spill on your floor.
Plastic nursery plant pots are usually sold as a set online, but garden stores usually sell individual pots for cheaper.
A good beginner-friendly cannabis pot size is 3-gallon fabric pots + 12″ saucers.
Or DIY your own pot for free! A container or bucket with holes drilled in the bottom makes a great cannabis plant pot. Just make sure there’s something to catch the runoff water that comes out the bottom.
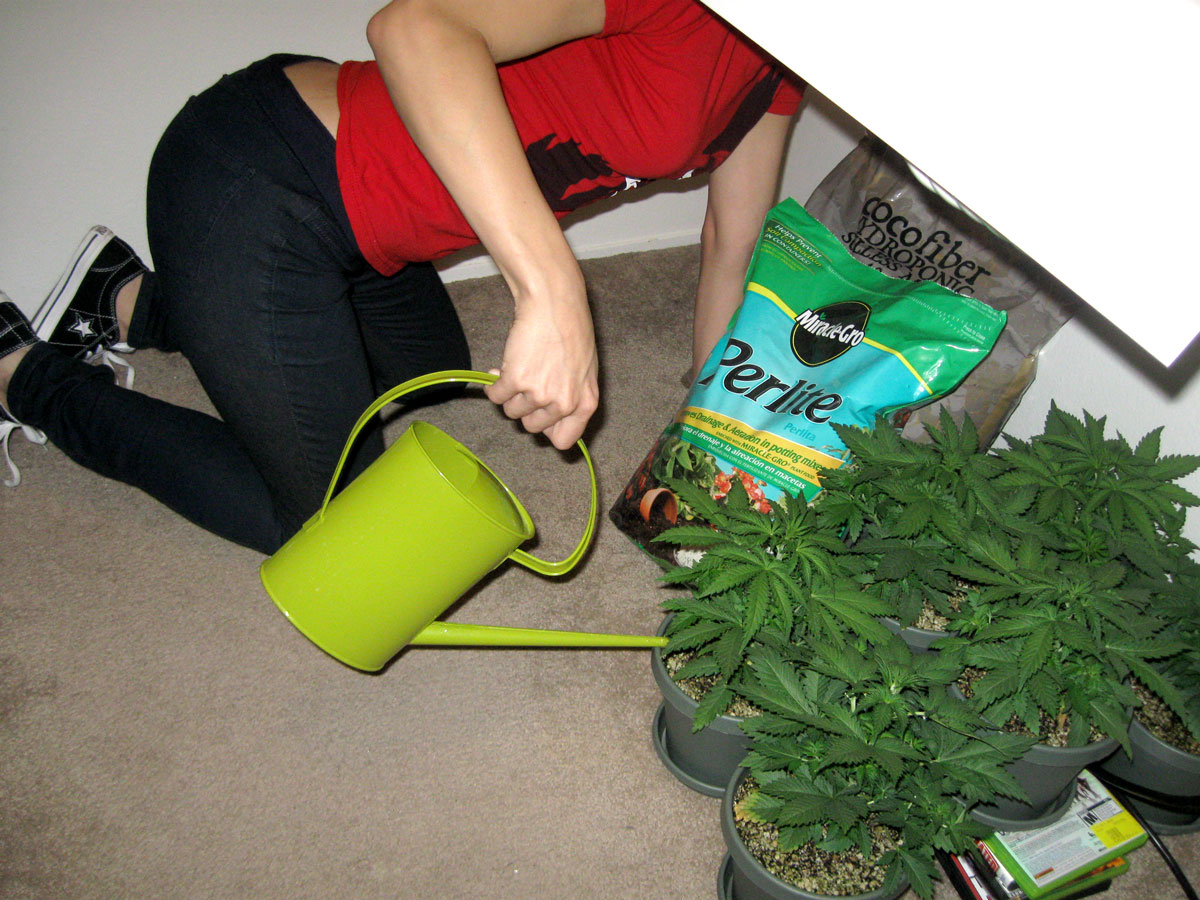
Grow medium (soil, coco, hydro, etc) – Starting at $30
Your plants need a place to put their roots. You have lots of different grow medium options for growing weed, and the most common is good old-fashioned soil.
Soil
- Just about any organic potting mix or light airy soil mix can work. Avoid any soil with “slow-release” nutrients unless they’re organic and have been composted into the soil.
- Examples of great cannabis soil:
- Roots Organic Soil (0.75 cubic ft) – organic, note the smaller bag size compared to the others. Two bags equals 1.5 Cubic ft, which will fill about 10 gallons worth of pots, for example, three 3-gallon pots or two 5-gallon pots – $52
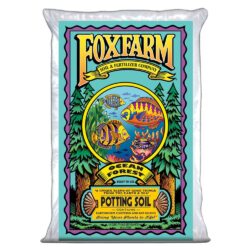
- Ocean Forest Soil (1.5 cubic ft) – rich, effective soil. One 1.5 Cubic ft bag will fill about 10 gallons – $35
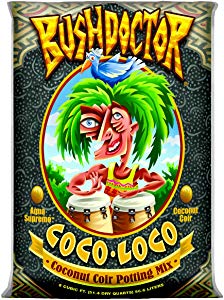
- Coco Loco Soil (2 cubic ft) – This is my favorite soil mix. This soil is called “Coco Loco” because it’s mixed with coco (ground up coconut husks) to make a beautiful airy soil mix. I have found that cannabis plants absolutely love this stuff. One 2 cubic ft bag fills about 15 gallons worth of pots – $40
- Often cheaper to buy soil in person than online (especially with shipping costs)
Learn more about growing weed in soil.
My favorite “Hot” cannabis soil: Ocean Forest Soil for $35
Coco (alone without any soil)- Growing cannabis in coco is more expensive to start than soil and requires more nutrients, but it tends to produce faster growth and bigger yields.
- Coco potting mix of 70/30 Coco to Perlite is recommended (50/50 is better for high-frequency fertigation)
- Examples of great coco potting mixes for growing cannabis
- Mother Earth Coco + Perlite Mix – one 1.8 cubic ft bag fills about 12 gallons – $45
- Cultivation Nation Coco + Perlite Mix – one 2 cubic ft bag fills about 15 gallons – $40
- Or make your own coco potting mix by mixing a coco brick with 30-50% perlite
- Always use nutrients with coco. Examples of suitable nutrients for cannabis in coco:
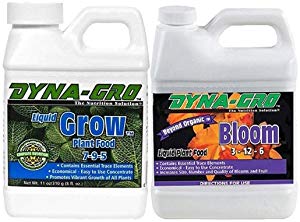
- Dyna-Gro Grow + Bloom – $15 (easiest & cheapest cannabis nutrients) – Use 1 tsp/gallon of Grow at first, then switch to 1 tsp/gallon of Bloom after buds start forming. Works in any grow medium.
- General Hydroponics Flora Trio – $40 👈 My personal favorite nutrients, and what I am currently using to grow weed in coco. Follow the directions on the side of the bottle at half the recommended dose. Makes amazing buds in any grow medium.
- Fox Farm trio (hydro formula) – $70 – Almost all organic ingredients, except for a few key flowering ingredients come from non-organic mineral sources to help speed growth and improve yields. Get the best of both worlds (faster growth from a few key mineral sources of nutrients to supplement the organic goodness).
- Learn more about growing weed in coco.
Adventurous alternative: Growing cannabis in hydroponics.
Nutrients – Starting at $15
If you’re starting with soil, you may be able to avoid using nutrients at all. Yet if plants use up the nutrients in the soil you’ll start seeing nutrient deficiencies and slow growth. To help ensure the best yields and bud quality, I recommend you get at least a Bloom nutrient (low in Nitrogen and high in Phosphorus/Potassium) for plants that are actively growing buds.
- Recommended: Dyna-Gro Grow & Bloom – $15 (great for cannabis in any setup, any grow style) – although originally developed for orchids, this simple nutrient duo excels at growing cannabis and is now marketed directly to pot growers.
- If you are growing in soil, you can get away with no nutrients at first since there is some in the soil, but plants will grow faster with Grow. You should definitely start giving Bloom once buds start forming.
- If growing in coco or hydro, you need to use nutrients from beginning to end, and Dyna-Gro Grow + Bloom excels at that.
- Give at 1 tsp/gallon. Only increase the amount if you notice the plant is getting lime green or pale all over, which is the main symptom when a plant needs overall higher levels of nutrients.
Dyna-Gro Grow & Bloom offers complete nutrition from seed to weed.
Ultra Cheap Nutrients – Shultz cactus nutrients
In a pinch, you can use Shultz cactus/succulent nutrients 2-7-7 (available at most garden stores and online for under $10) in the budding stage since this particular formula happens to have similar nutrient ratios to what cannabis plants ned in the flowering stage. However, cactus nutrients don’t contain many micronutrients, which means they do not perform as well as something more complete like Dyna-Gro.
Learn more about cannabis nutrients.
A place to grow weed
You can put your cannabis plants almost anywhere as long as you have access to water, fresh air, and a way to hang the light. Some common examples:
- closet (common)
- spare bathroom (easy access to water and a drain)
- spare room
- garage, basement, or attic
- Read more about choosing the right spot to grow weed
This is one of my first grows (circa 2008). I put the plants right on the floor in a walk-in closet and hung the light from the bar you hang clothes from. This setup produced great weed, though I highly recommend putting something down to protect your carpet!
I’ve seen some growers DIY some pretty amazing cannabis grow spaces.
Possible upgrades for your grow environment (all are optional but nice)
- Grow tent – super convenient way to set up a “pop-up” grow area, costs $50-100 on average.
- Clip-on fan(s) or small table fan – for extra air movement.
- A carbon filter and exhaust fan for smell control (the more weed you grow, the bigger the smell)
- Reflective walls – use sheets of mylar, paint walls white, etc.
- Rope ratchets – helpful for raising/lowering your grow light, carbon filter, or anything else you’d like to hang in the grow area. Much more convenient than using rope.
- Thermometer/Hygrometer to measure the temperature and humidity. I like models that let you hang a probe in the grow area so you can accurately measure the air exactly where the cannabis plants are.
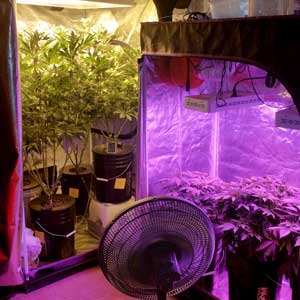
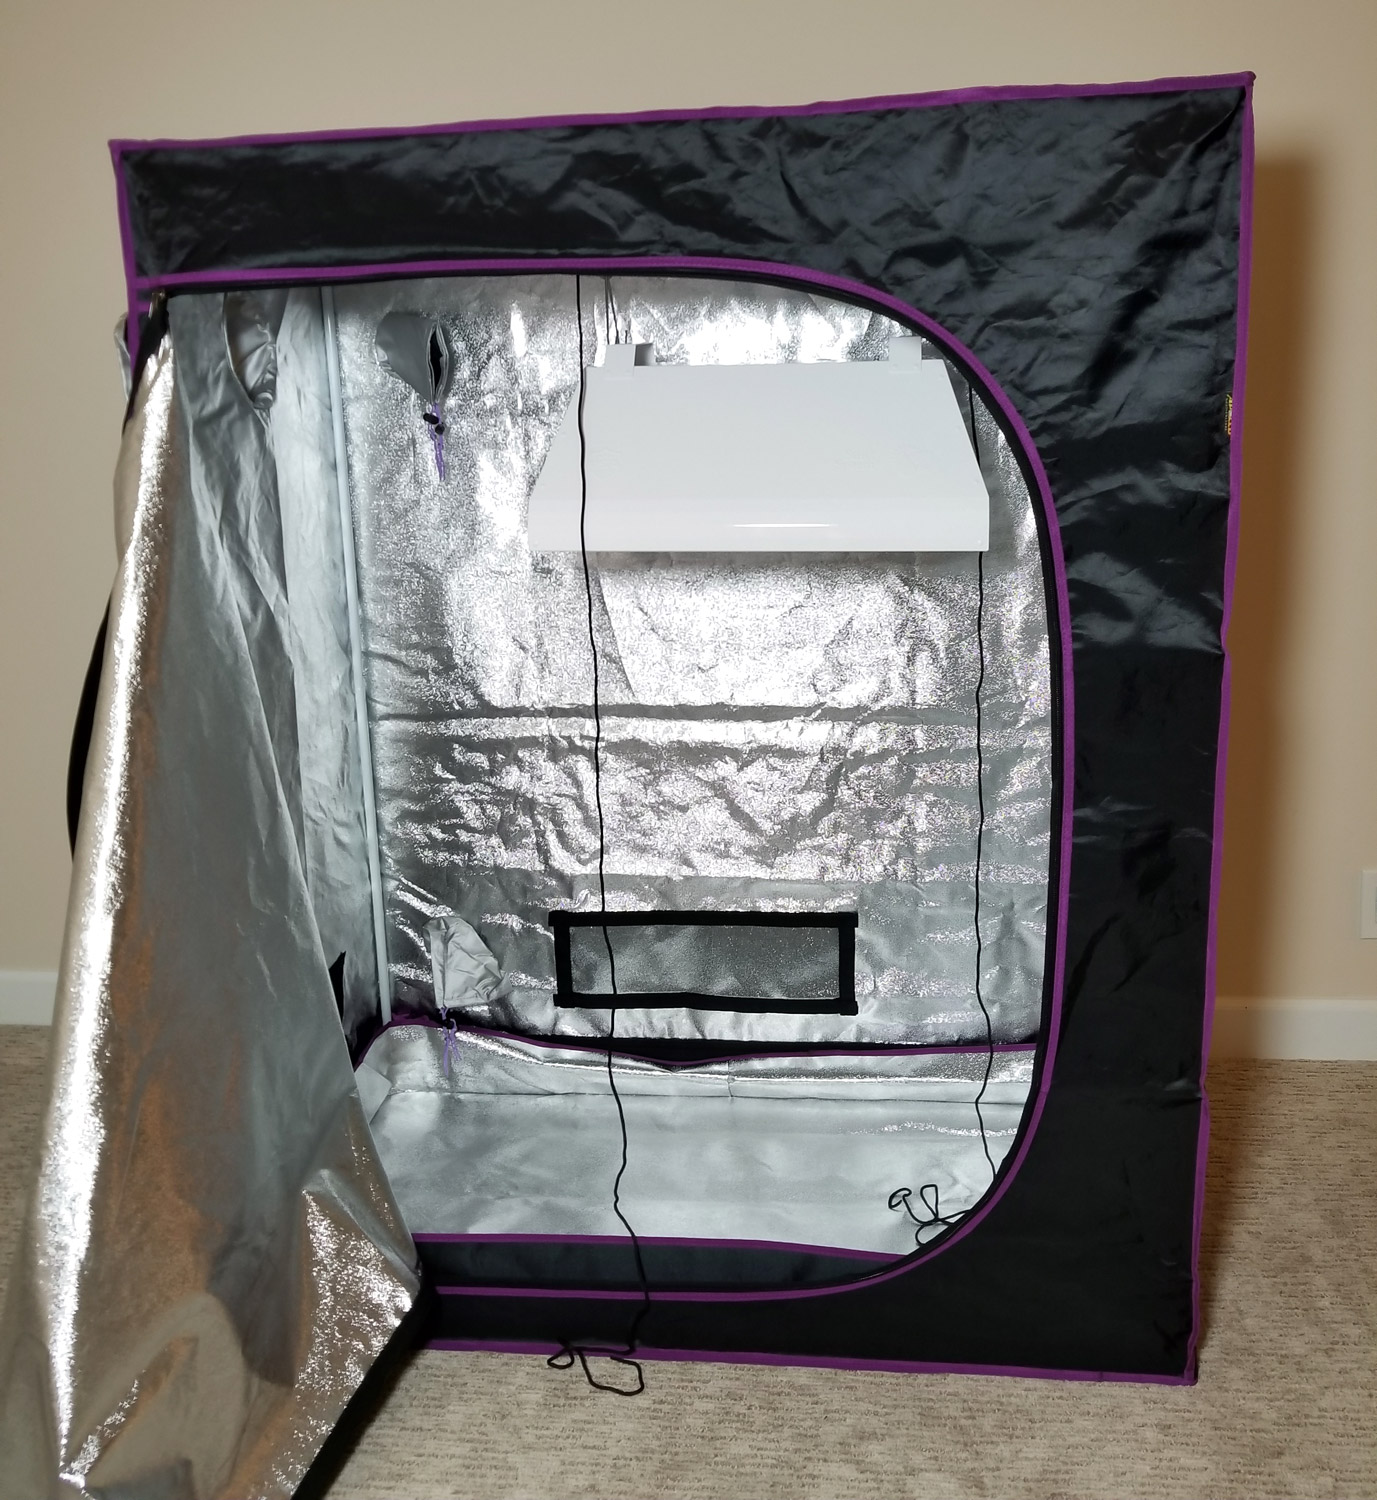
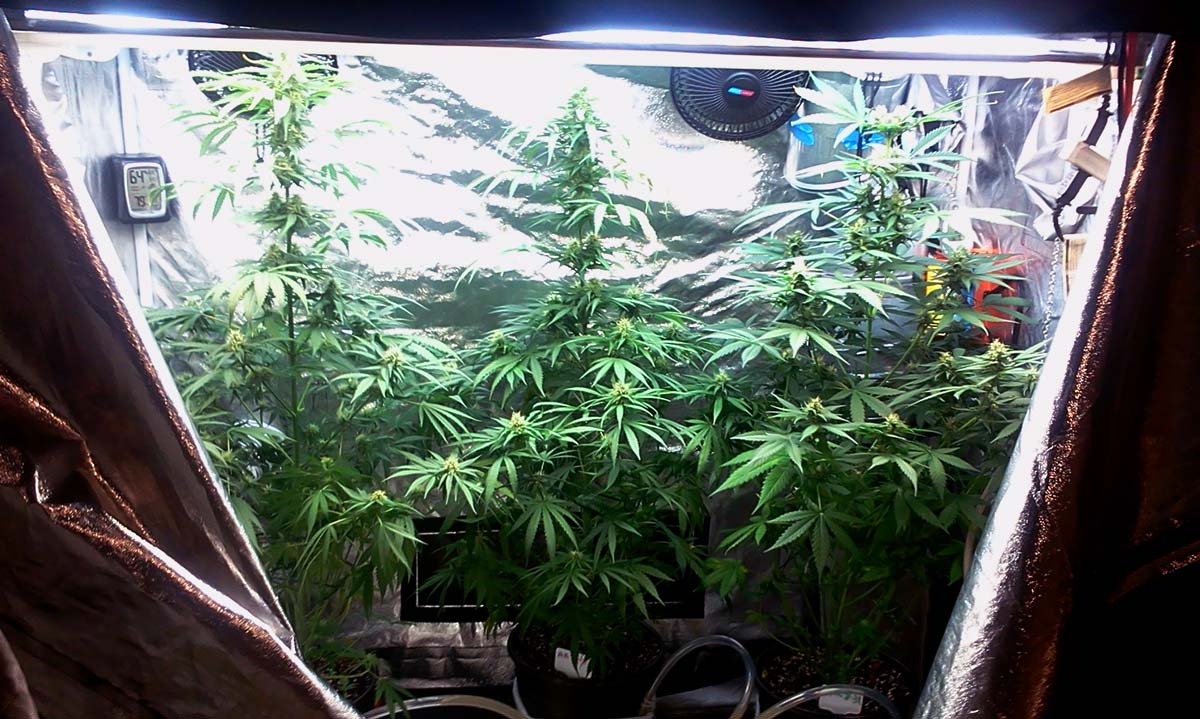
It’s hard to beat the convenience of a grow tent when it comes to growing weed indoors. While not necessary to success, grow tents can be put anywhere for an instant “pop-up” waterproof grow space that reflects light at plants while helping contain heat, light, and smells. Also great for maintaining multiple grow spaces at the same time, as pictured here.
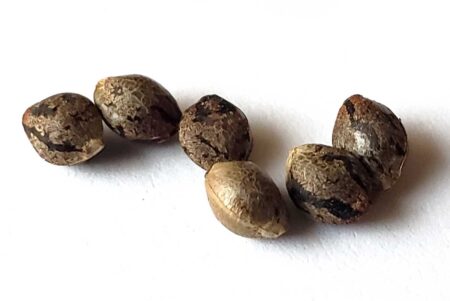
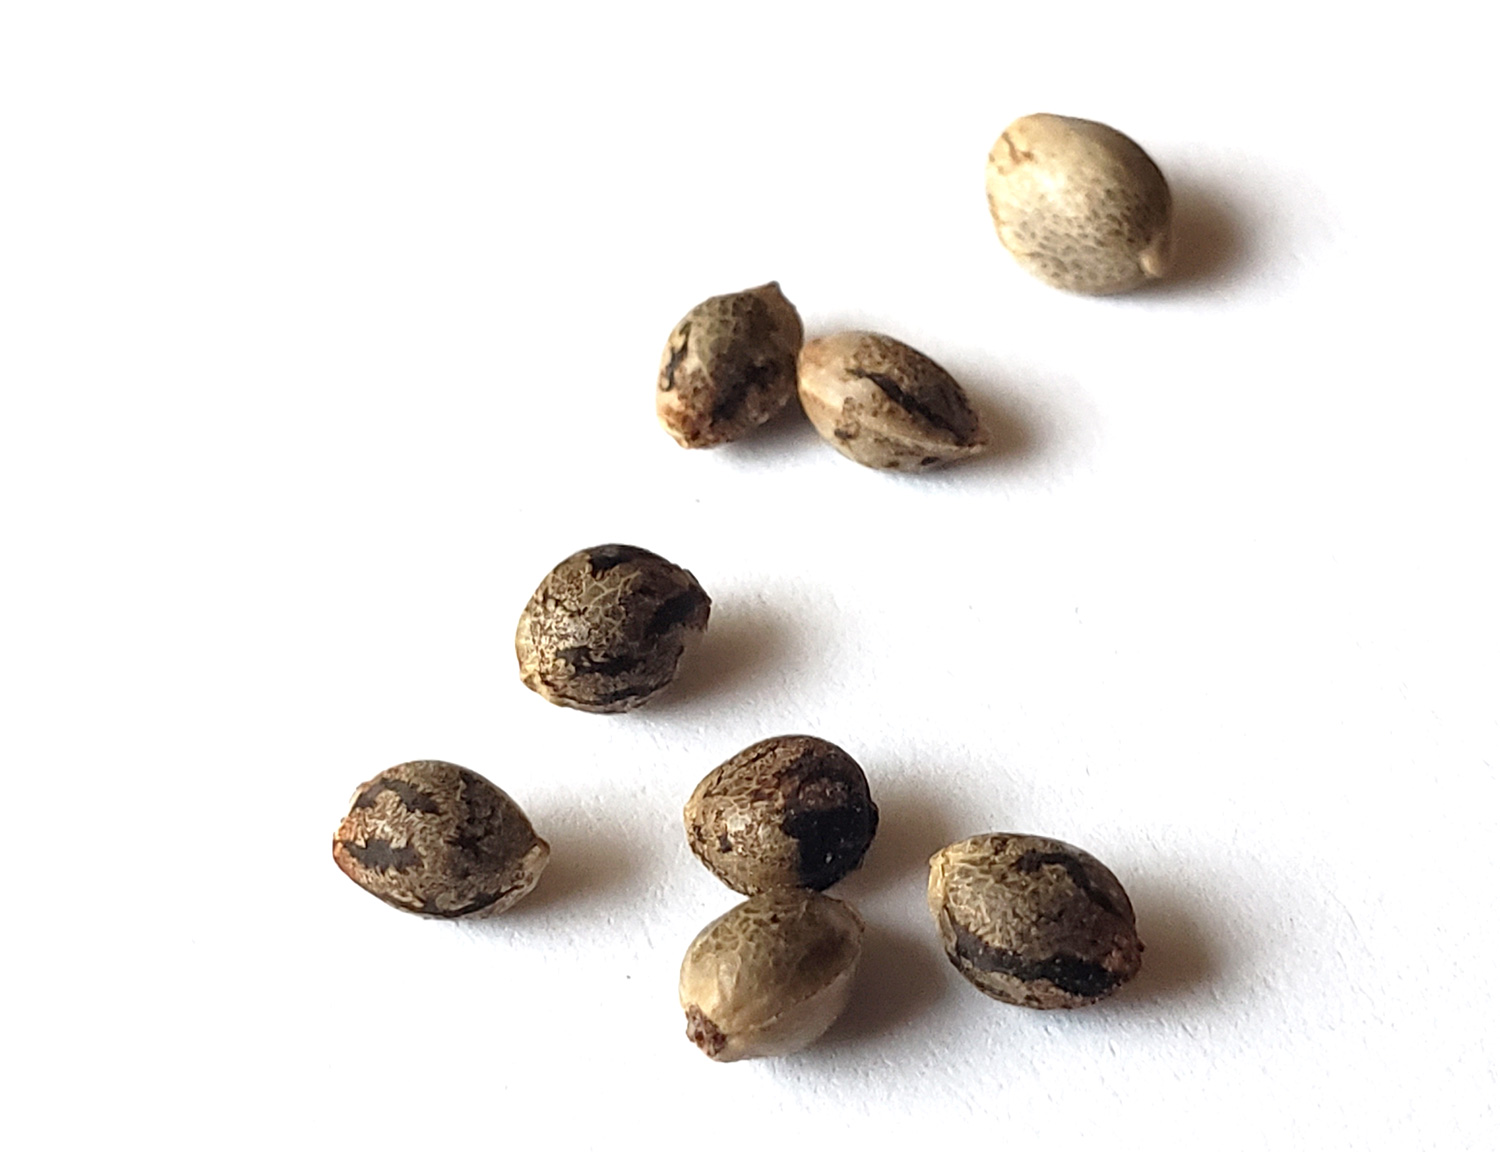
Seeds or clones – Starting as little as $5 per seed
My recommended strains start at as little as $5 per cannabis seed (sometimes you can find even cheaper per-seed costs if you shop around for seed deals). The most expensive strain I recommend in this list goes for $60 for 3 seeds, or $20 per seed. You probably won’t find many cheaper strains than $5 per seed (especially individual seeds as opposed to a pack) from a reputable company. At least not without some kind of special sale or promotion. As of 2024, $10-15/seed is pretty standard for good cannabis seeds, and $20/seed is a typical price for newer strains in high demand.
3 Main Ways to Get Cannabis Plants
- Buy cannabis seeds online and have them shipped to you.
- Get seeds or clones in person, for example from a dispensary or grower.
- Use seeds you find in buds (also known as bagseed).
Did you know you can buy cannabis seeds online and get them shipped to you?
For the best results with this tutorial…
- Order from a reputable breeder to ensure you get the buds you want at harvest.
- Choose auto-flowering seeds to harvest in under 90 days. I like auto-flowering strains for first-time growers because plants are ready to harvest quickly, tend to stay on the smaller side, and automatically make buds without you doing anything special. They are simple: give water, nutrients, and light, then wait for harvest. However, you probably won’t run into any auto-flowering seeds unless you get them from a breeder.
- Choose feminized seeds to ensure all plants are female and grow buds. Save yourself the trouble of dealing with male plants or the possibility of seedy buds. Learn more about feminized seeds. Just about all auto-flowering seeds are feminized unless they specifically are listed as “regular”.
Choose autoflowering feminized seeds from a trustworthy breeder to ensure every plant grows buds and is ready to harvest in under 90 days. This Cinderella Jack Auto by Dutch Passion produced many dense potent buds and was harvested 79 days from germination
 Looking for auto-flowering seed recommendations?
- $5 seeds – North Atlantic Seed Co. keeps these pretty amazing clearance lists of cannabis seeds currently going for just $5 each. It is not a huge selection, and regularly changes, but the strains are always excellent (North Atlantic only sells seeds from great breeders) and there is almost always at least one feminized, auto-flowering option on each list. $5 per seed.
- Purple Lemonade Auto by North Atlantic Seed Co. – Super purple buds (picture below), citrus smell, excellent yields, ready to harvest 60-70 days from germination. I recommend growers wait until the full 70 days for the best potency of about 22% THC. $30 for 3 seeds.
- Bruce Banner Autoflower by MSNL – Over 25% THC, ready to harvest in about 70 days, big yields. Ships from Europe. $65 for 5 seeds.
- Blackberry Auto by Fastbuds – Super fast strain. Plants are ready to harvest as soon as 56 days from germination (yes, that’s under 2 months!). Purple buds, great smell, and excellent yields. $37 for 3 seeds.
- Banana Purple Punch Auto by Fastbuds – Ready in 60 days, super purple, good yields, high potency/strong effects. $15 for 1 seed.
- Zkittlez Auto by White Label – This easy-to-grow Zkittlez autoflowering strain is popular because buds are potent, smell surprisingly sweet, and taste fruity. Great for someone who wants high potency combined with the taste and smell of new genetics – $10 for 1 seed.
- Cookies Gelato Auto by Royal Queen Seeds – This may be the best autoflowering version of the trendy and euphoric Gelato strain. Plants tend to stay on the shorter side and buds occasionally turn purple. For someone who wants strong mental and physical effects above all else – $30 for 3 seeds.
- Auto Amnesia by Seed Supreme- Forgiving and easy to grow, buds always come out glittery and potent. I’ve grown this strain multiple times and it responds remarkably well to every light and grow medium I’ve tried. In fact, Auto Amnesia almost seems to perform best in extreme conditions as some of the best buds came from a plant that grew too close to the light. The one downside is that plants tend to grow a bit stretchy/tall compared to the others on this list (though they respond well to bending/LST to keep them short and are resistant to light stress) – $55 for 4 seeds.
- Forbidden Runtz Auto – I’ve had really good experiences with this autoflowering strain. This particular strain sometimes turns purple and buds come out dense with stellar effects and a spicy-sweet smell. You can help promote purple coloring by giving plants warm days and cool nights in the last 2-3 weeks before harvest, as well as making sure to use strong grow lights. – $42 for 3 seeds.
- White Widow Auto by Seedsman – I’m super impressed by this strain every time I grow it. It thrives under many different types of lights and plants grow fast and bushy. Good-to-great yields and the buds get encrusted in trichomes/glitter. – $30 for 3 seeds.
- Cinderella Jack Auto by Dutch Passion – I first grew this strain after a representative from the company told me it was Dutch Passion’s most potent autoflowering strain. I was beyond pleased with the results I got every time I grew it. Dense and glittery buds, high-yielding, ultra-high potency (couchlock) and plants are overall forgiving to growing mistakes – $45 for 3 seeds.
- Pluto Cut Auto R F3 by Ethos Genetics – Over 25% THC plus about 5% other more exotic cannabinoids for a total cannabinoid content around 30%. Feels very potent, strong body effects. Tends to stay relatively short, with excellent yields. Ready in 80 days. Ships out of the US. This strain is an investment compared to some other options, but the bud quality at harvest is absolutely worth it. $60 for 3 seeds.
It’s hard to beat the smell, looks, and just overall high-quality impression of buds from Purple Lemonade Auto by North Atlantic.
I hope that list helps you get started!
Learn more about buying seeds online
This Zkittlez Auto plant was harvested 80 days from germination

Glossary of Most Important Terms When Shopping for Seeds or Clones
- Auto-flowering Strains – Auto-flowering plants grow buds automatically and are usually ready to harvest in under 90 days from germination. Can be a good choice for a first grow, but auto-flowering seeds are only available from specialized breeders.
- Photoperiod Strains – Most cannabis seeds are photoperiod. If you find seeds, they are likely photoperiod seeds. Photoperiod plants need daily 12-hour dark periods to grow buds (usually done by putting grow lights on a timer). Photoperiod plants typically take between 3-5 months to grow from seed to harvest. Read more on how long it takes to grow weed. Don’t worry if you’ve got photoperiod seeds. This tutorial recommends auto-flowering strains, but I’ve also included instructions for photoperiod plants in the step-by-step directions.
- Feminized seeds – All resulting plants are female, which means they grow buds. I highly recommend starting with feminized seeds for your first grow so every plant produces buds for you.
- Regular seeds (non-feminized) – Half the plants will be male, which grow pollen sacs instead of buds. Male plants are non-potent and make nearby buds seedy. If growing with regular seeds, you should identify and remove male plants as soon as possible.
- Clones are basically small plants and don’t need any special treatment. A clone is usually known to be male or female (ask to be sure it’s female if you want to grow buds!). You can also take clones of your plants and use them as free plants in future grows.
- Bag seeds (seeds you randomly find in buds) can be hit or miss. Some growers get lucky with bagseed, but unknown genetics can be a confidence killer if buds turn out poorly even though you did everything right. Start with trustworthy genetics to help ensure plants are predictable and produce the results you want. Learn more about starting with “found” seeds.
Now that you’ve got everything, it’s time to start growing!
Here’s an HPS-grown bud from a THC Bomb Auto plant. This strain always makes beautiful buds but for some reason they got especially glittery under the small HPS. One of my favorite smokes from that grow!

Quick Step-By-Step Grow Guide
The hardest part of growing is choosing a good setup. Once you create a nice growing environment, nature will do a lot of the work for you.
1.) Set up your grow space
- Get the items listed above.
- Set up your grow tent if using one.
- Hang your grow light. Both the HLG 100 and 150W HPS recommended for this tutorial should be kept about 12″ away from the tops of plants.
- Fill your plant pots with potting mix.
- Assemble your area and turn the grow light on for 24 hours before germinating seeds (make sure everything works before you actually start your grow).
- Temperature should stay be between 70-85F (20-30C) day and night. If it feels comfortable to you, it’s probably comfortable for your plants.
Tips for creating a great cannabis plant environment.
Whether you’re using a grow tent or a closet, the main idea is to first hang your grow light.
Then get your plant pots ready (or set up your hydroponic reservoir). If you plan on setting up an exhaust to remove heat and/or get rid of smells, now is the time. A venting system can be as simple as adding a fan pointing out.

If you want to ensure you never smell your plants when the tent is closed, you’ll also have to connect the exhaust fan to a carbon filter with ducting.
Don’t forget to turn everything on for at least 24 hours before you start germinating! You want to know what to expect from the environment before you have live plants on your hands.
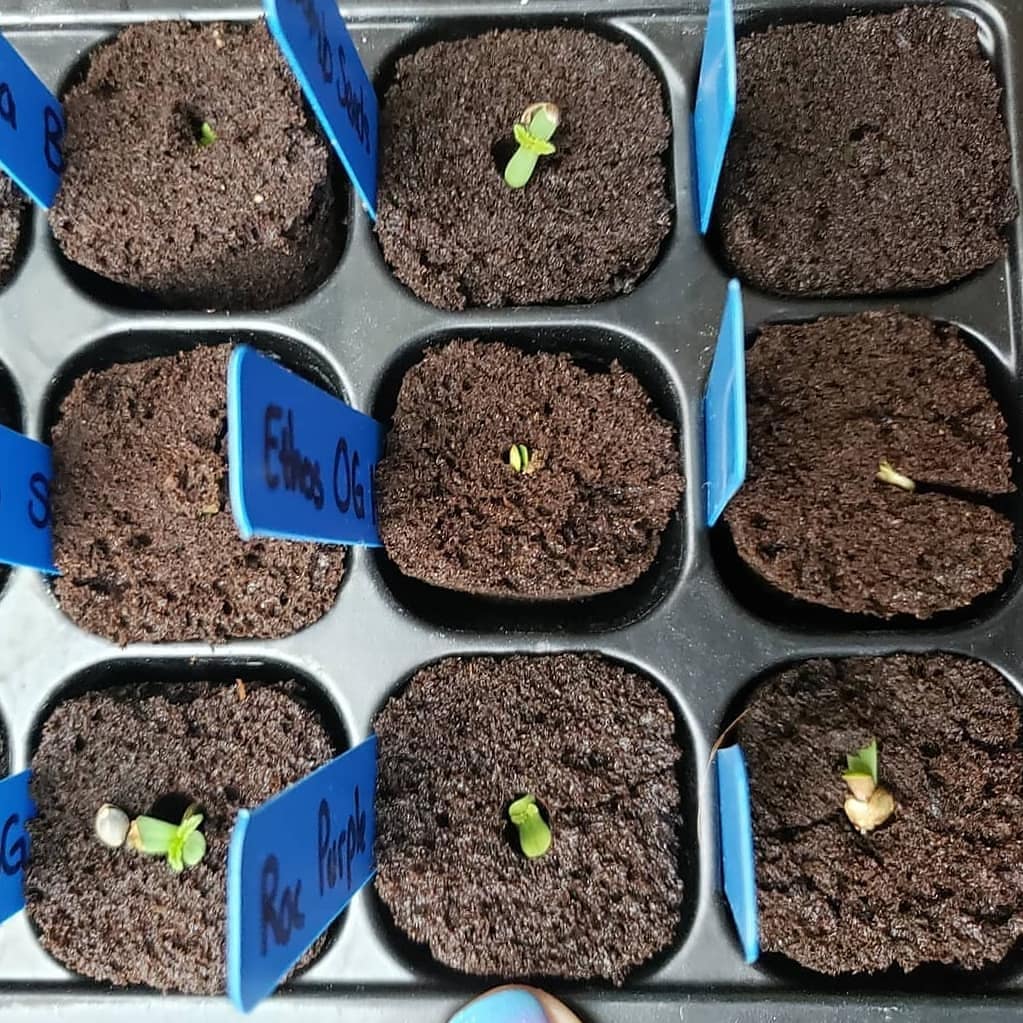
2.) Germinate Your Seeds
I like this germination method, but there are many ways to germinate seeds (including planting them directly in the soil). If starting with rooted clones, you can skip directly to the next step.
It’s always a good idea to germinate at least one extra seed in case you happen to have a dud. I recommend growing 1-2 plants for your first grow to keep things small and simple, so start by germinating 2-3 seeds.
There are tons of ways to germinate seeds and they all work. The most important thing with any germination method is to make sure seeds stay moist and warm.
3.) Vegetative Stage – Plants Grow Only Stems and Leaves
At first, your cannabis plants will only grow new stems and leaves (no buds yet).
Your main tasks in this stage are:
- Water your plants regularly (or tend to the hydroponic reservoir)
- Give nutrients at half the listed strength (if using nutrients)
- Watch for plant problems and react quickly if you see anything odd
- (Optional) Get familiar with plant training to increase yields
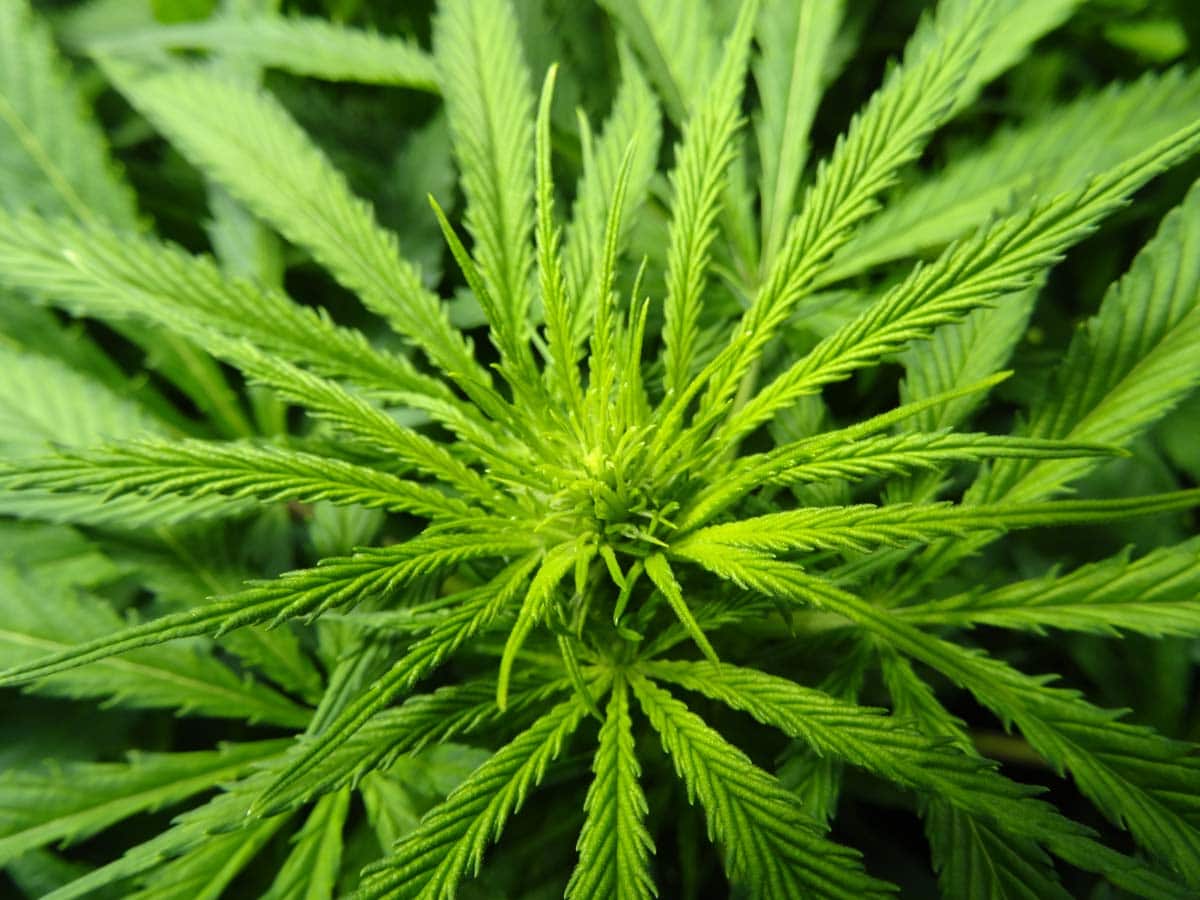
Your plants will only grow stems and leaves at first. In the vegetative stage, plants keep getting bigger but don’t grow any buds
 Most cannabis plants naturally grow in a “Christmas tree” shape in the vegetative stage unless you take action to change it
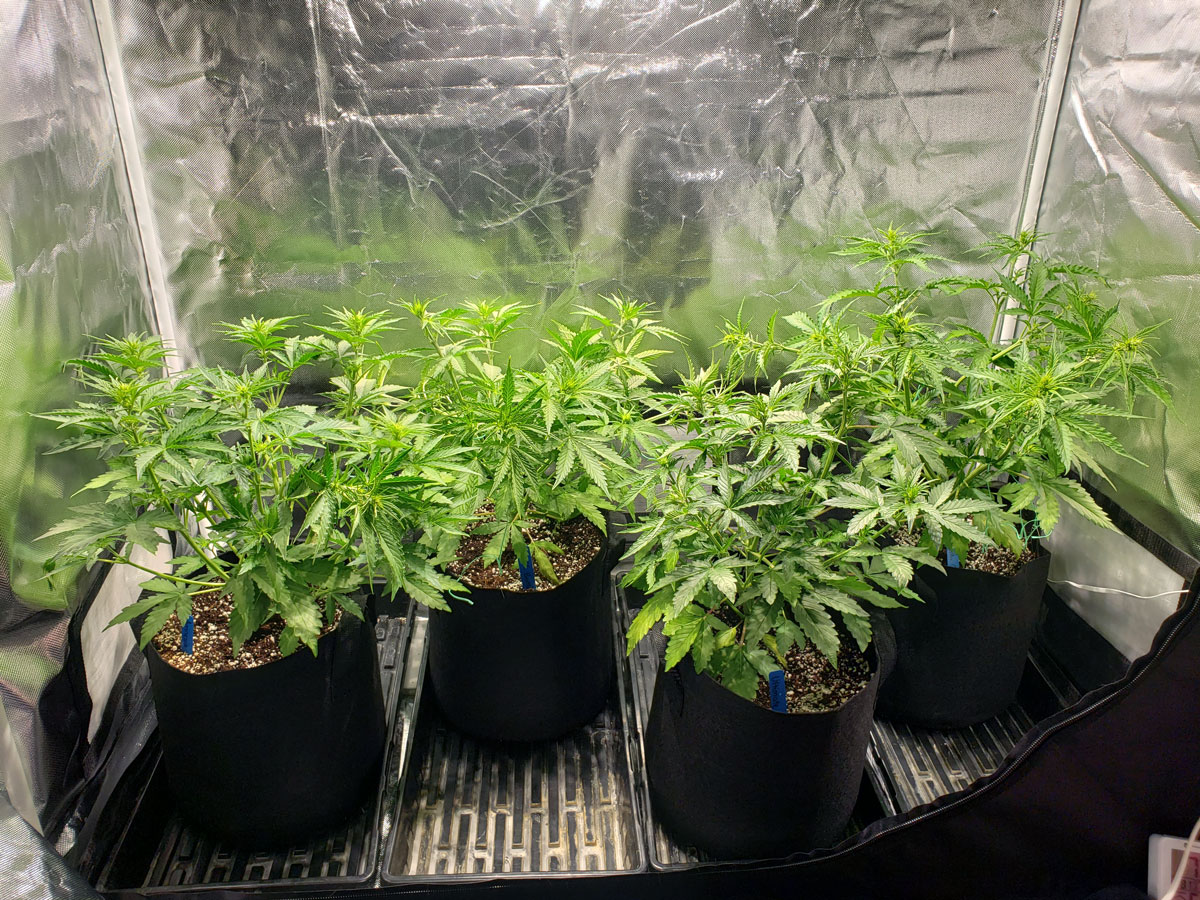
 For example, these autoflowering plants are bushy and short because I trained them to grow in that shape (starting when they were just 3 weeks old). This bushy shape forces cannabis plants to grow many bud sites as opposed to just one main bud site at the top of the “Christmas tree”.
There’s nothing wrong with letting plants grow naturally, especially for your first few grows. But if you plan to keep growing inside under grow lights, plant training is important to achieving the best yields.
Learn how to train autoflowering plants (or photoperiod plants).
4.) Flowering Stage – Buds Start Growing!
This is the stage where plants start growing buds. It’s exciting! You’re getting closer to harvest every day.
If you started with auto-flowering seeds…
- Auto-flowering plants will automatically start growing buds around 3-4 weeks from germination
- Besides switching to using flowering nutrients, plant care doesn’t really change from the vegetative stage.
- Buds are typically ready to harvest 2-3 months after germination
Auto-flowering plants start making buds when they’re 3-4 weeks old from germination. You don’t need to do anything special. This autoflowering plant is 4.5 weeks old.
If you started with photoperiod seeds…
- Photoperiod plants require you to put grow lights on a timer and give them 12-hour dark periods every day in order to grow buds. The term “photoperiod” actually refers to the fact they respond to light periods (“photo” can mean light + “period”). Photoperiod plants won’t make buds until you initiate the flowering stage with a 12/12 light schedule.
- Since you “tell” the plant when to start flowering, the vegetative stage can be as long as you want.
- While auto-flowering plants naturally tend to stay relatively short, photoperiod plants can easily get huge and out of control if you wait too long to initiate the flowering stage. On average, plants about double in size after the switch to 12/12, so you should initiate the flowering stage when plants are about half the final desired size.
- Be careful to not let any light get to the grow space during the “night” period or plants may revert to the vegetative stage (which takes time to fix) or herm (causing seedy buds).
- Photoperiod plants typically have an 8-14 week flowering stage (length of the flowering stage depends on strain)
- Example photoperiod timeline: 6-week vegetative stage + 8-14 week flowering stage gives a total grow period of 3-5 months from seed to harvest.
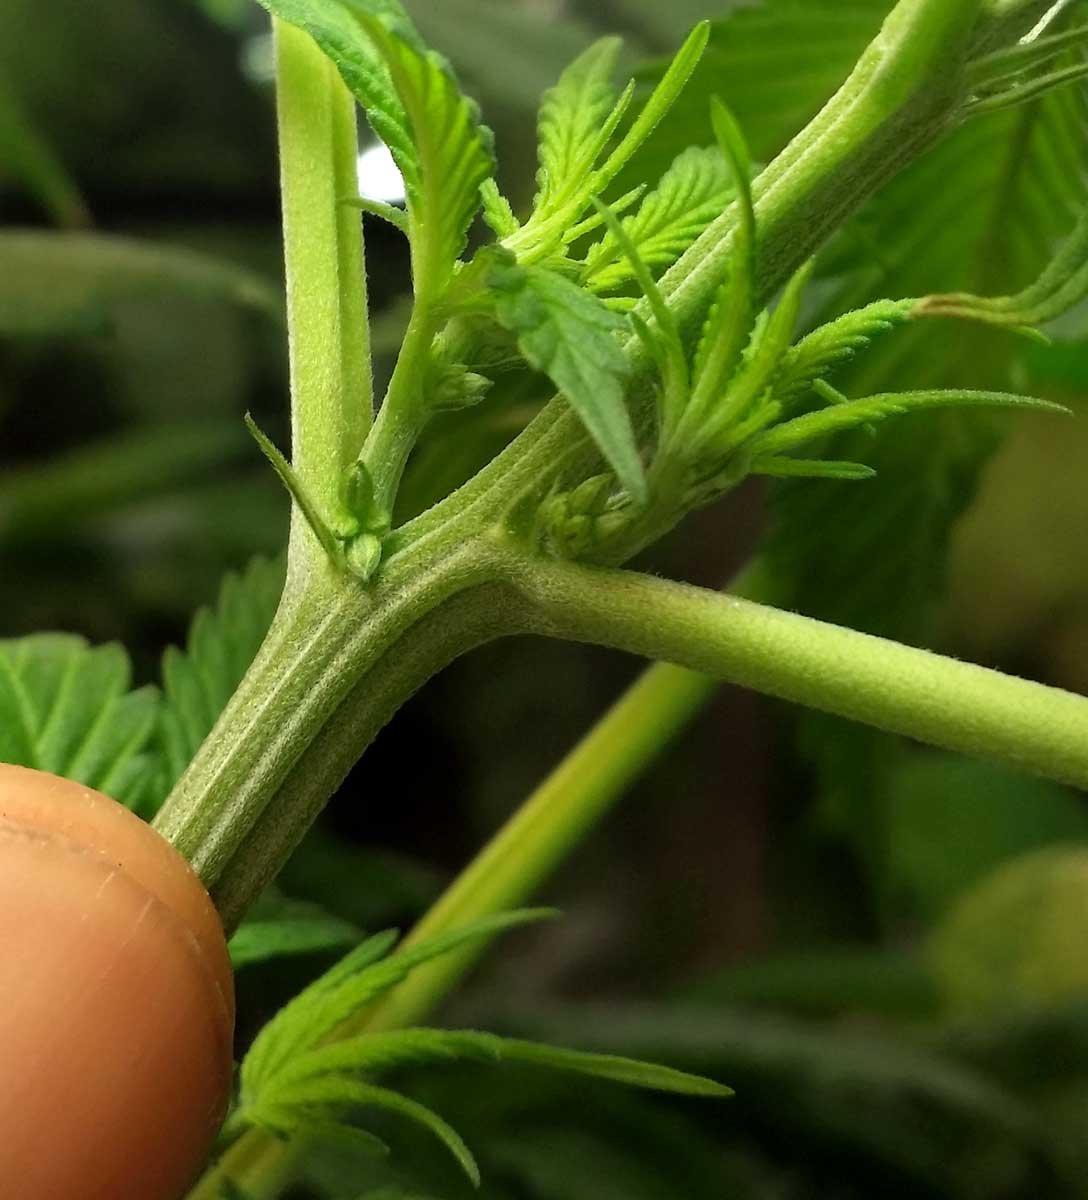
Photoperiod plants typically take 1-3 weeks after switching to 12/12 before they start making buds. At first, the buds look like bunches of leaves in a star shape, then white hairs start growing from the middle
After plants start flowering, double-check to make sure all your plants are only growing white hairs at the joints. This ensures your plants are female and forming buds.
If you see what looks like little bunches of spade-shaped balls with no hairs, that means the plant is male and should be removed from the grow room so it doesn’t pollinate your female plants.
If you see pollen sacs (look like bunches of pointy grapes), remove the plant immediately from the grow area. Why?
Nutrients – Switch to flowering nutrients
- Once you see buds forming, it’s time to start using the Dyna-Gro “Bloom” bottle for nutrients (or whatever Bloom nutrients you’re using)
- Start at half strength compared to the suggested dosage. Supplementing your plant with extra nutrients can help produce the biggest and most potent buds possible, but it’s easy to overdo it.
- Note: Suitable flowering nutrients are low in Nitrogen, and rich in Phosphorus/Potassium.
- Learn more about cannabis nutrients
More resources: Week-by-Week: What to Expect During the Cannabis Flowering Stage
An example of untrained autoflowering plants (notice how they have a “Christmas tree” shape)
 These autoflowering plants were trained to grow short and bushy
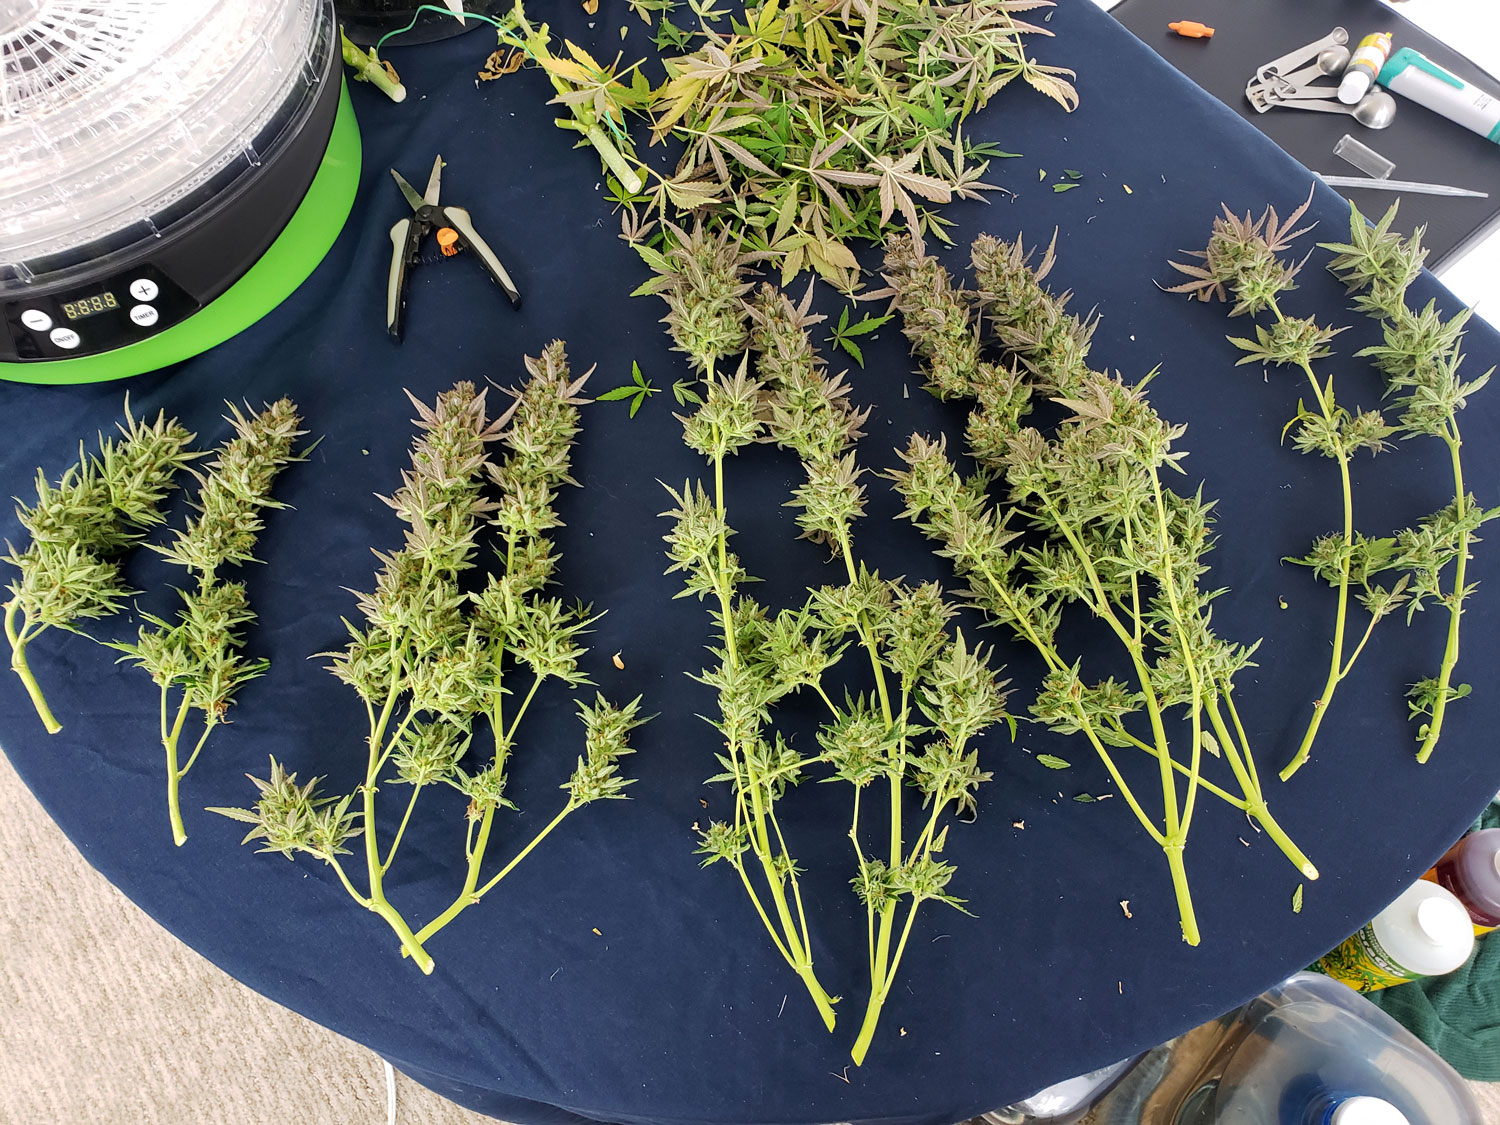
5.) Harvest Time
If you have followed the instructions so far, you’re now approaching harvest! I’ve created a complete guide to harvesting your weed but here’s a quick summary of when to harvest:
- Wait until the buds on your plants stop growing new white “hairs” (pistils). At this point, you probably still have a few weeks left.
- When 90% of the pistils have darkened and started curling in, your buds should be fat and ready for harvest.
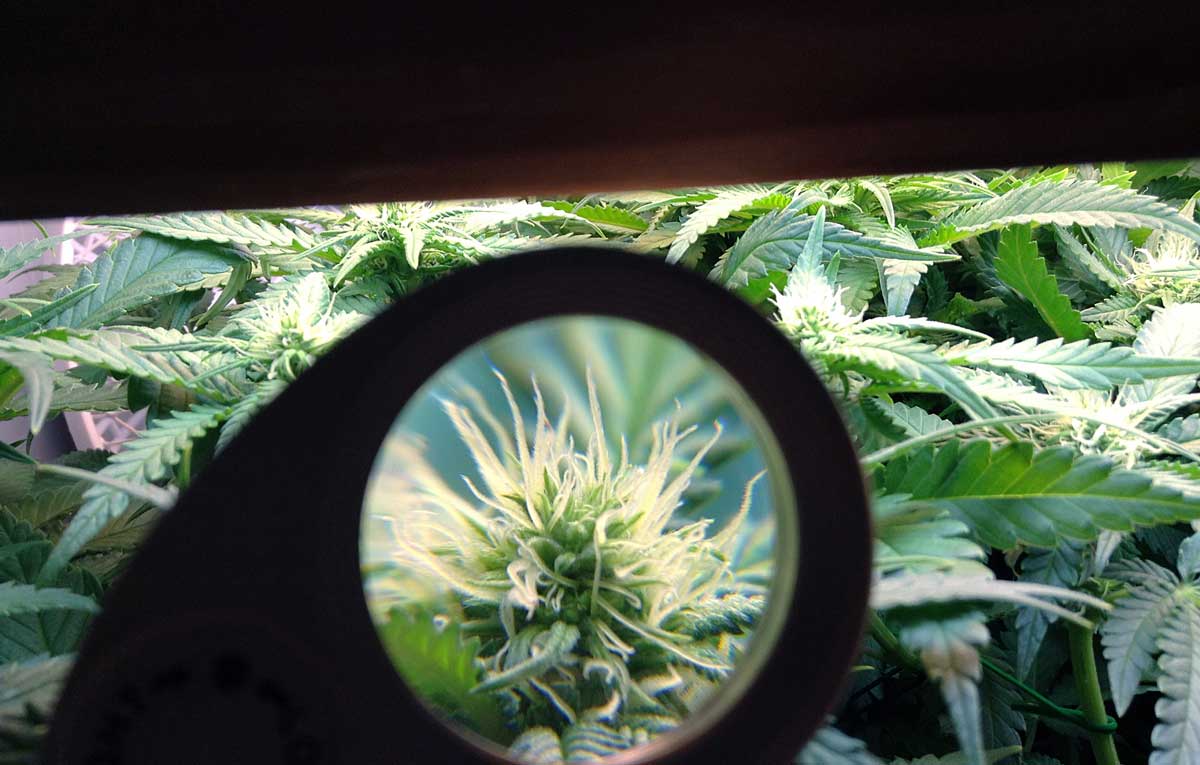
- You can get even more accurate results by looking at the glittery “trichomes” on the buds under a magnifier, as these turn cloudy white when the buds have reached their highest potency.
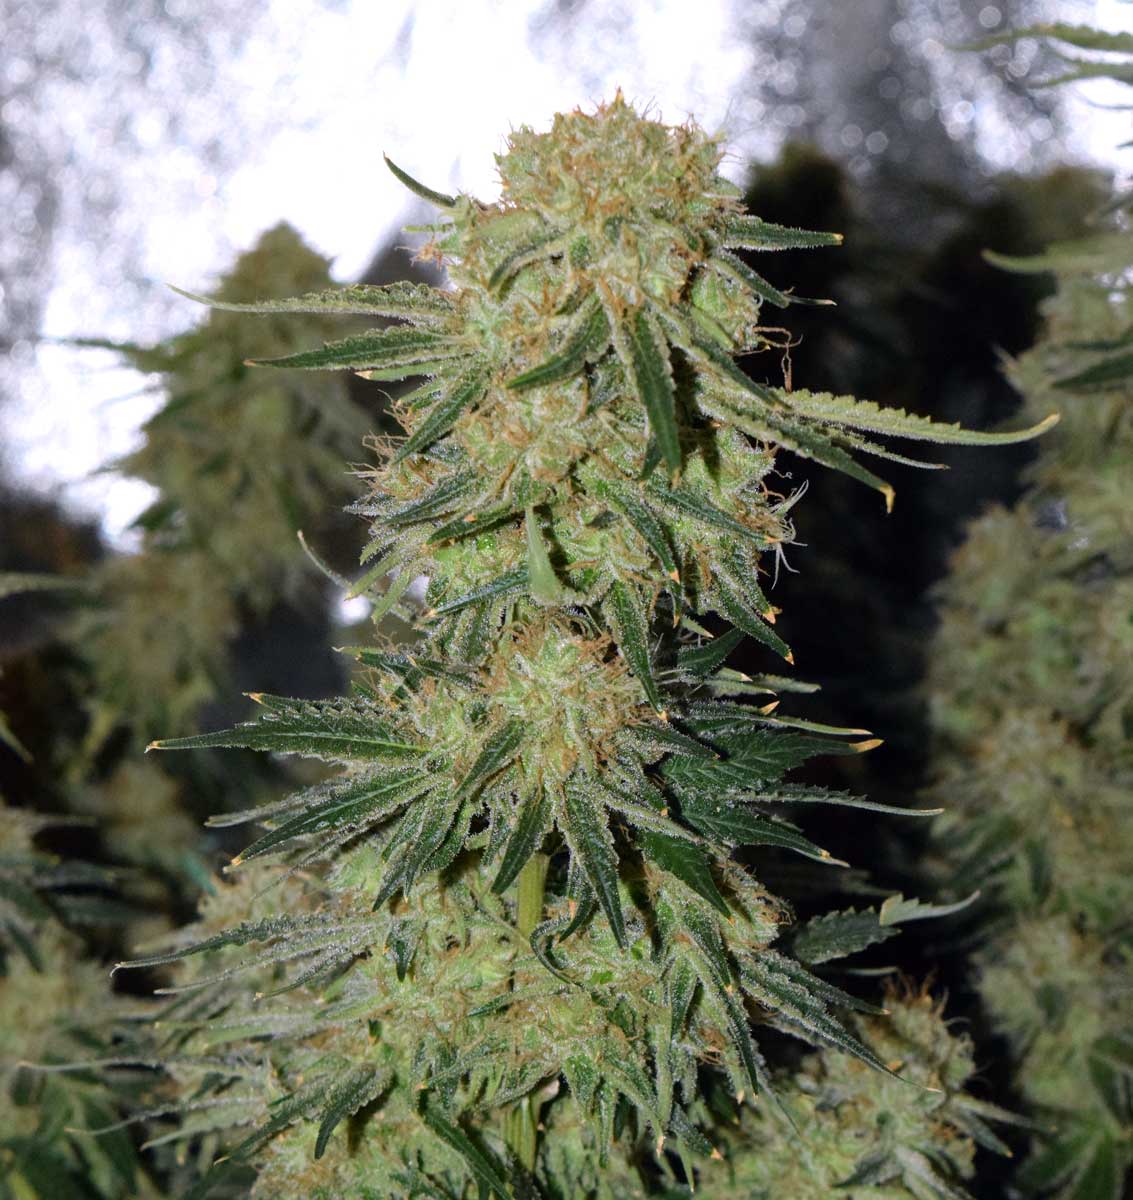
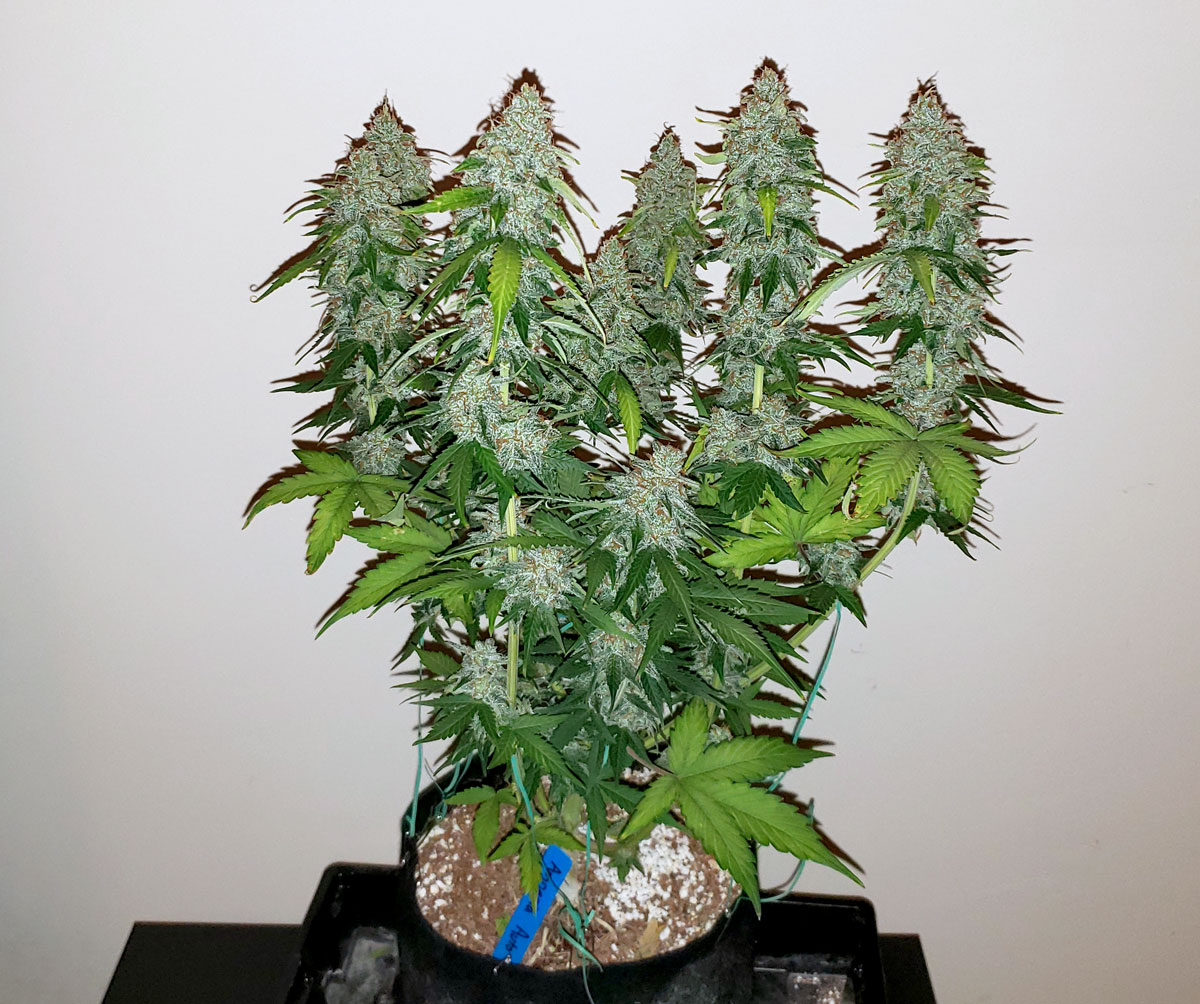
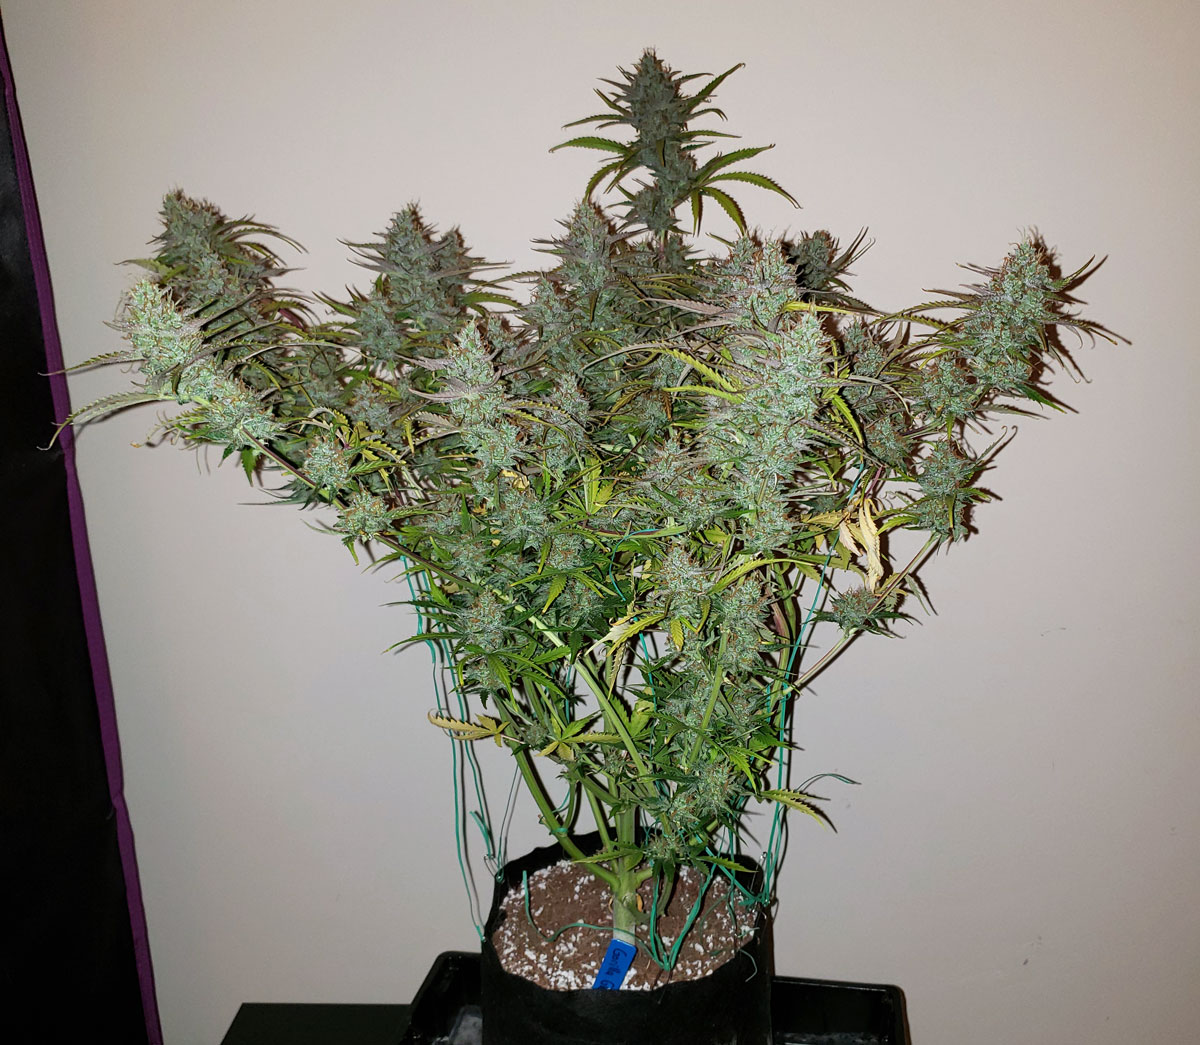
This bud is ready to harvest. All the white hairs have darkened and curled in. If you click the picture and zoom in, you can see that nearly all the sparkly trichomes are milky white, indicating that this bud has reached the highest level of THC.

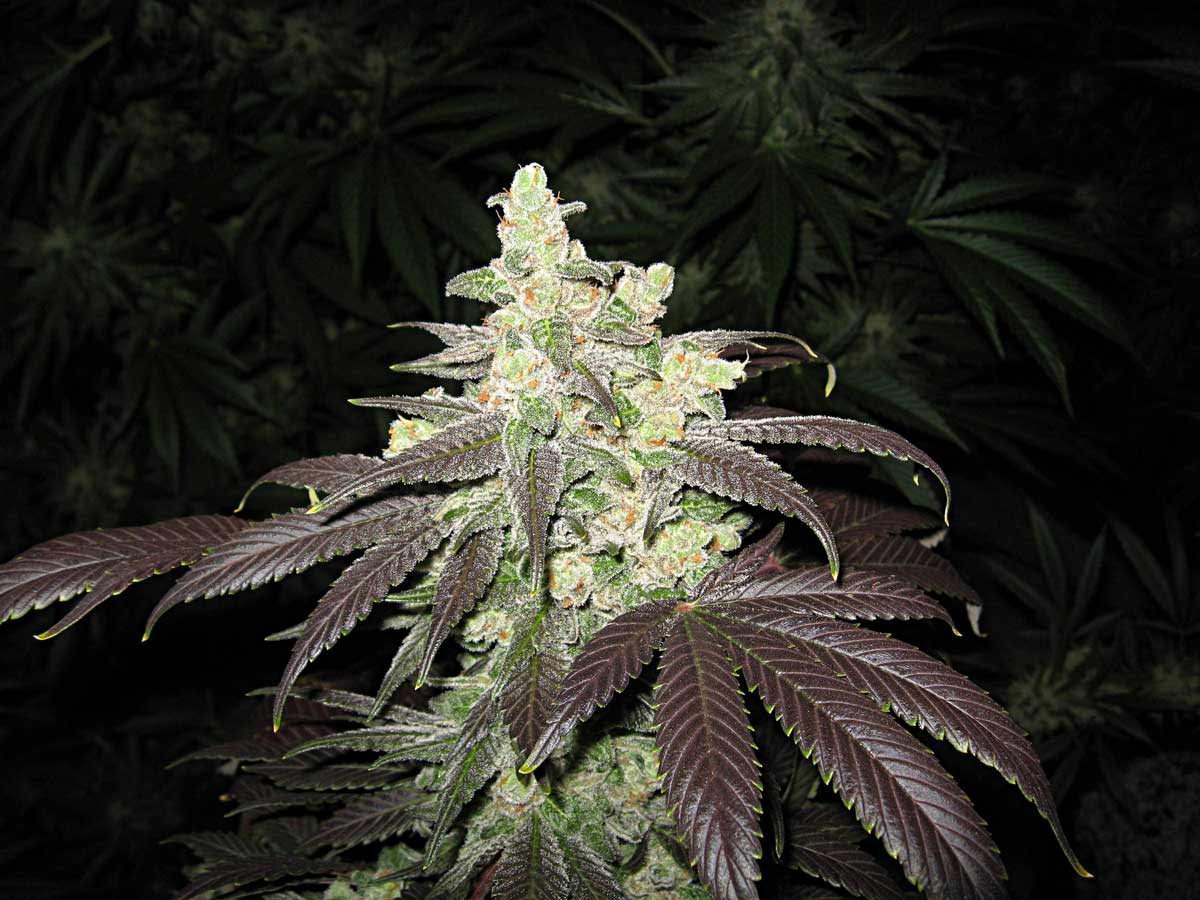
Another bud that’s ready to harvest. Notice how most of the hairs have darkened and curled in
 Different strains may have a different bud appearance at harvest, but the general idea is the same (hairs darken and curl in, buds are fat)
More ready-to-harvest pictures
At that point, buds only need to be dried and cured before they are ready to be enjoyed.
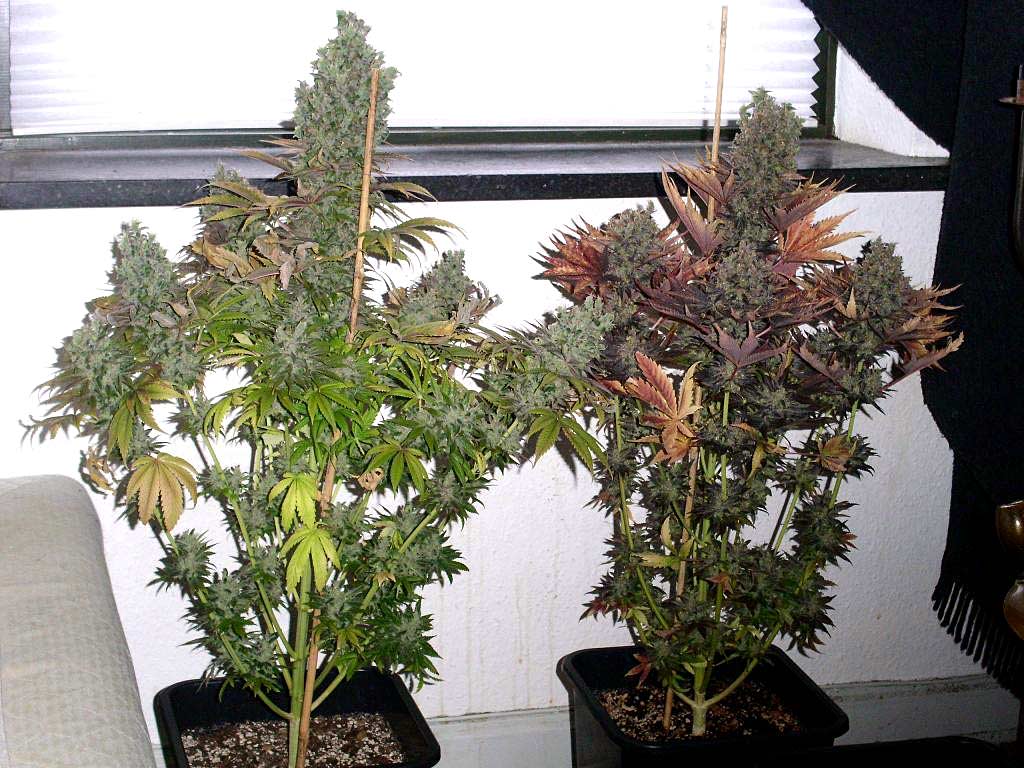
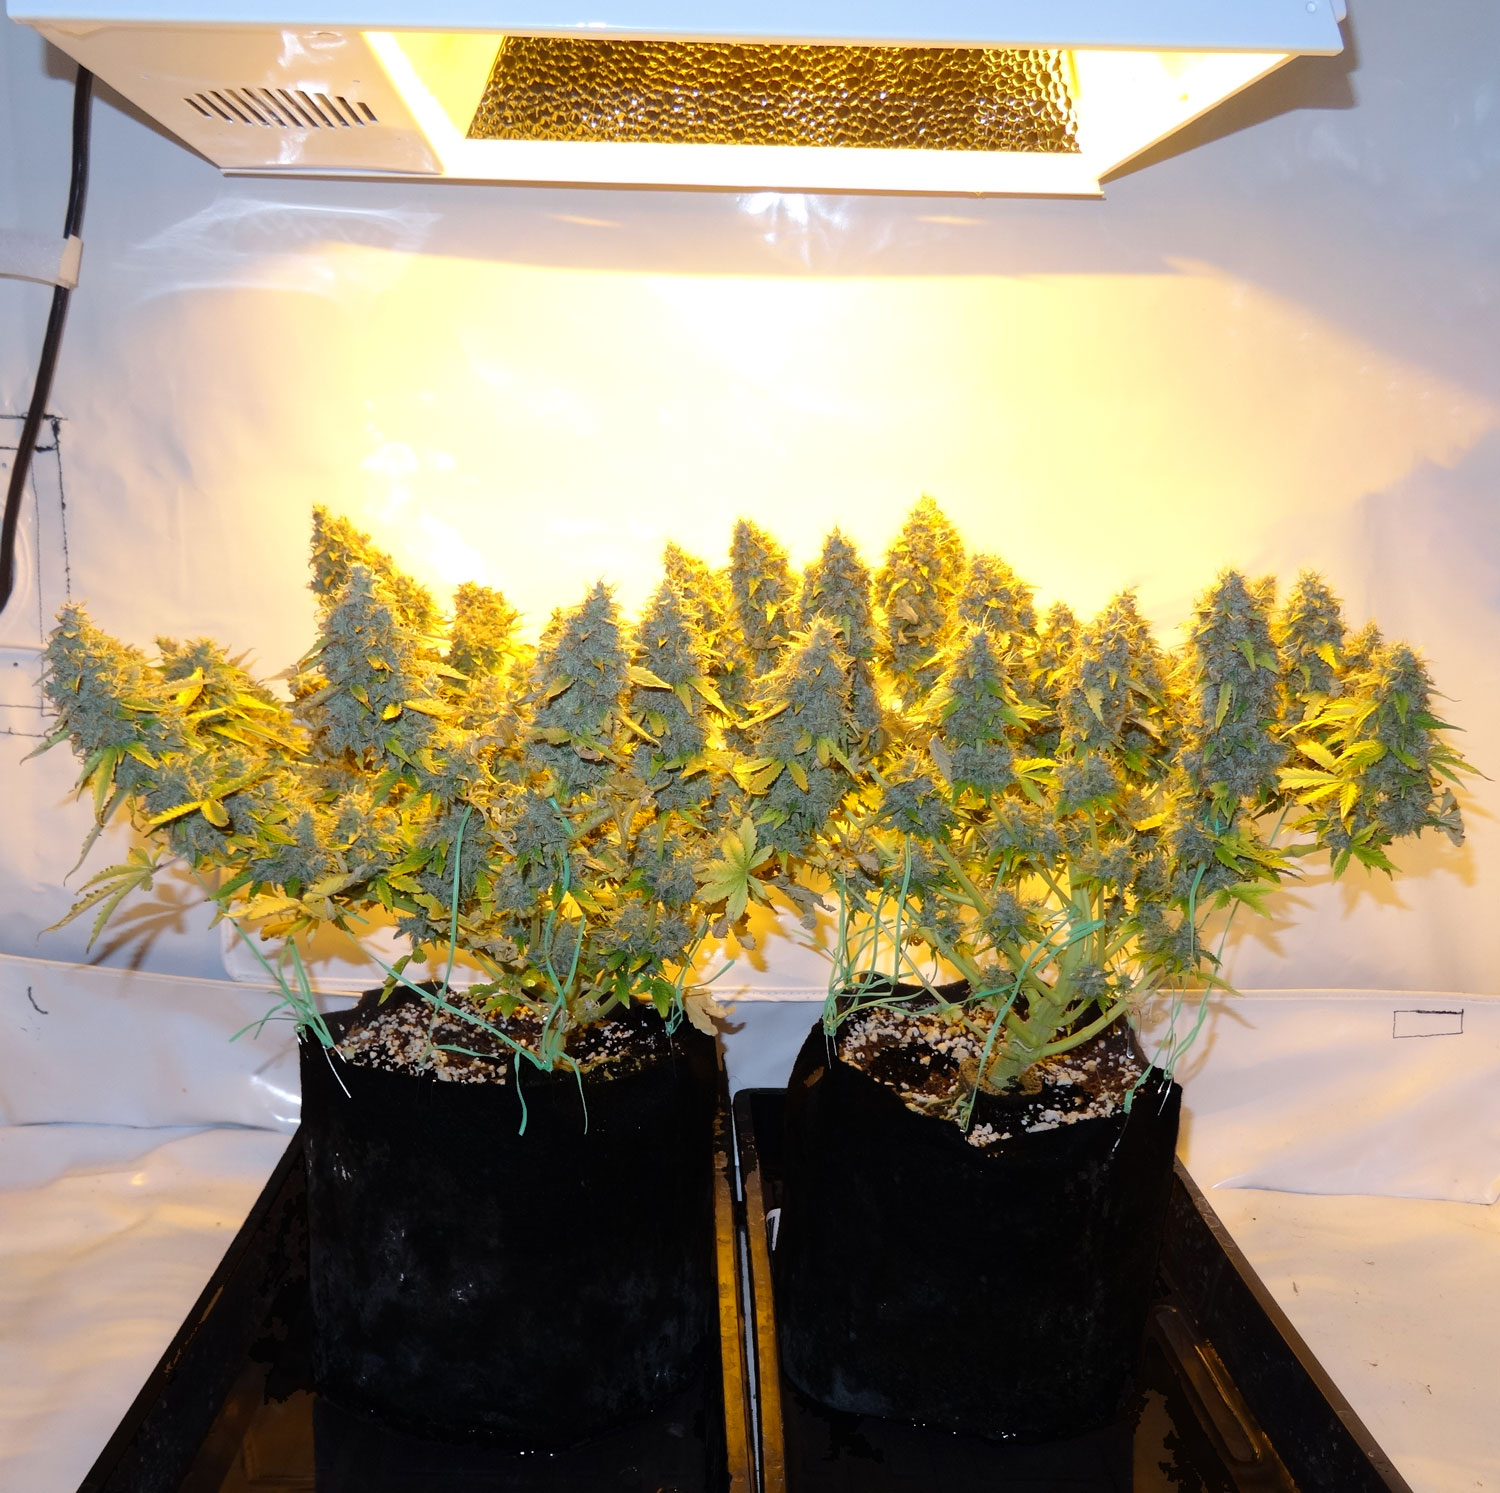
Example yield from 150W HPS – 2 Autoflowering Plants – 3.5 oz
Each plant produced just under 2 ounces and height was about 1 foot (30 cm) at harvest. Left plant was Critical Jack Auto by Dinafem (unique smell and thoroughly enjoyable effects) and the right was Sour Diesel Auto by Humboldt Seed Organization (classic sativa effect in auto-flowering form). I grew these in my bedroom (didn’t have an available closet) so I kept them in a 2x4x5 grow tent to contain the heat/light. Other than the tent, there weren’t really any upgrades compared to the base supplies list. I didn’t use an exhaust fan and it stayed about 80F (27C) in the tent.
This is a good harvest but does show what’s possible for growers who follow all the steps in this article including the optional plant training to create multiple main buds instead of just one.
This is the final yield of the 2 plants pictured above (about 3.5 oz)
 Closeup of the Critical Jack buds
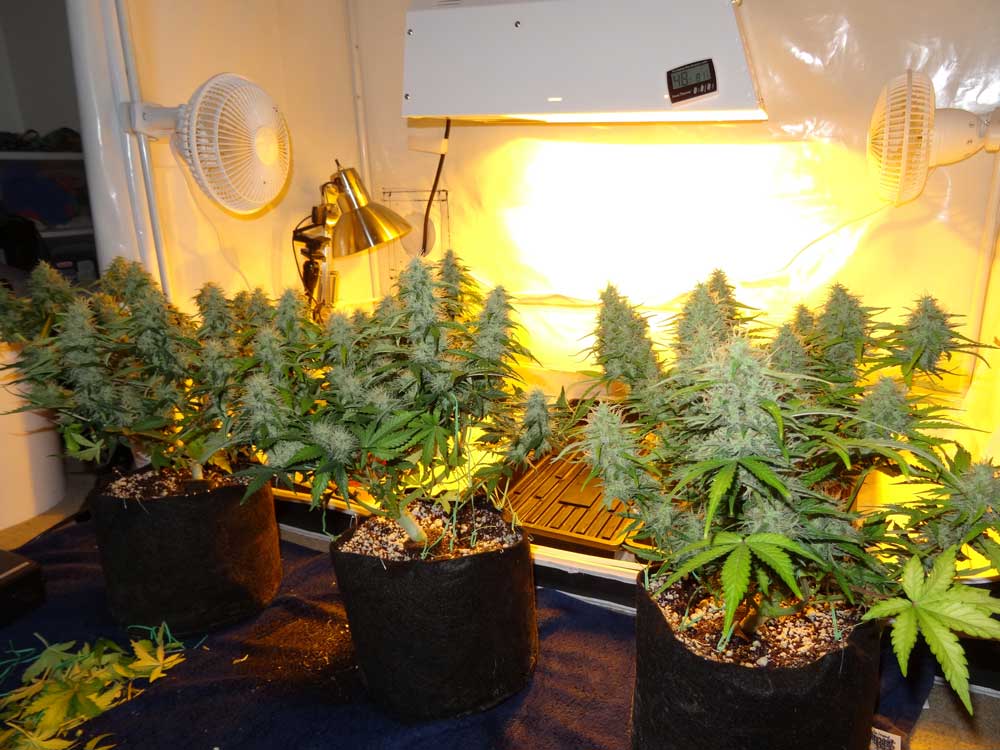
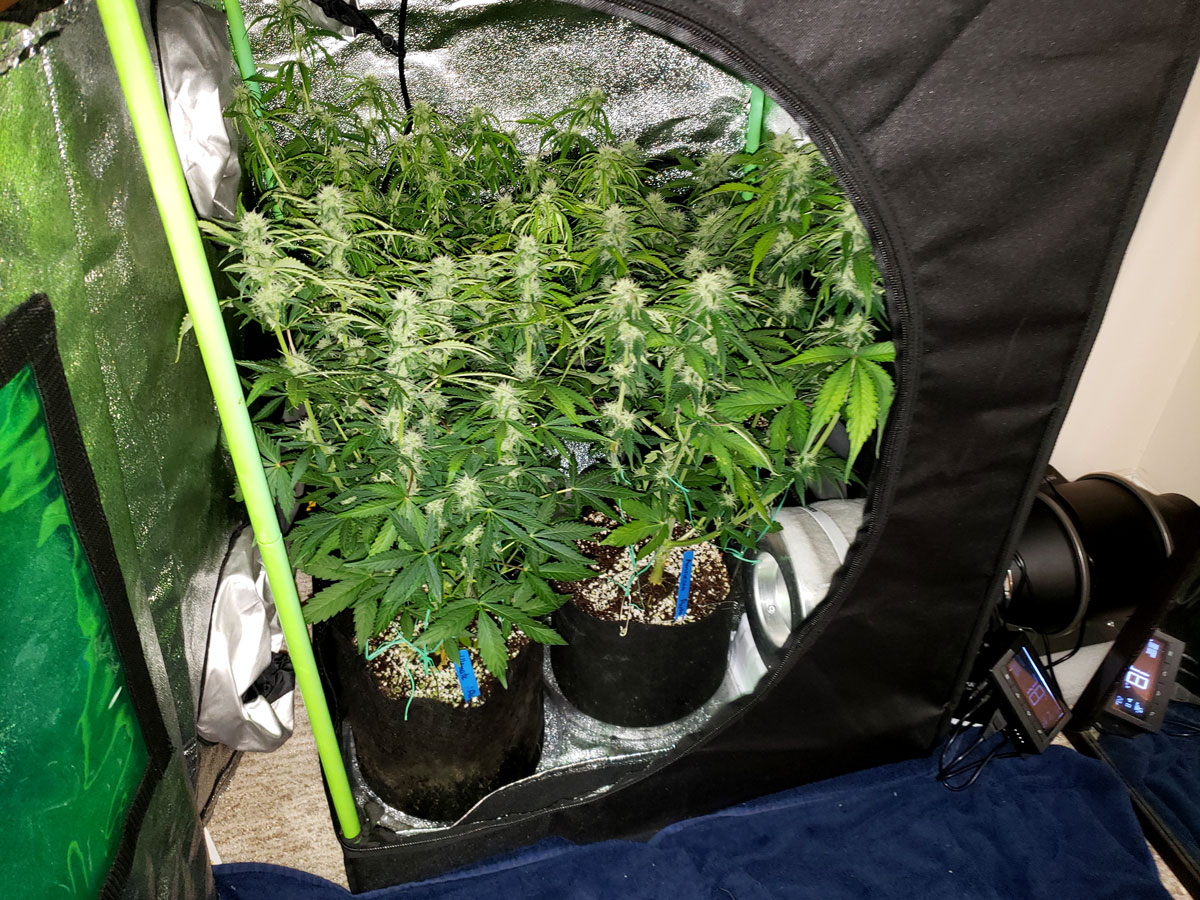
Example yield from HLG 100 LED Grow Light – 4 Autoflowering Plants – 5.5 oz
Here’s an example harvest from the HLG 100 Quantum Board Grow Light (the premium $150 alternative to the HPS). Instead of Dyna-Gro nutrients, this grow used the General Hydroponics Flora trio + Calimagic as nutrients. Grow medium was Mother Earth Coco + Perlite mix (my favorite pre-made coco mix).
The total yield under the HLG 100 was 156.12 grams or about 5.5 ounces.
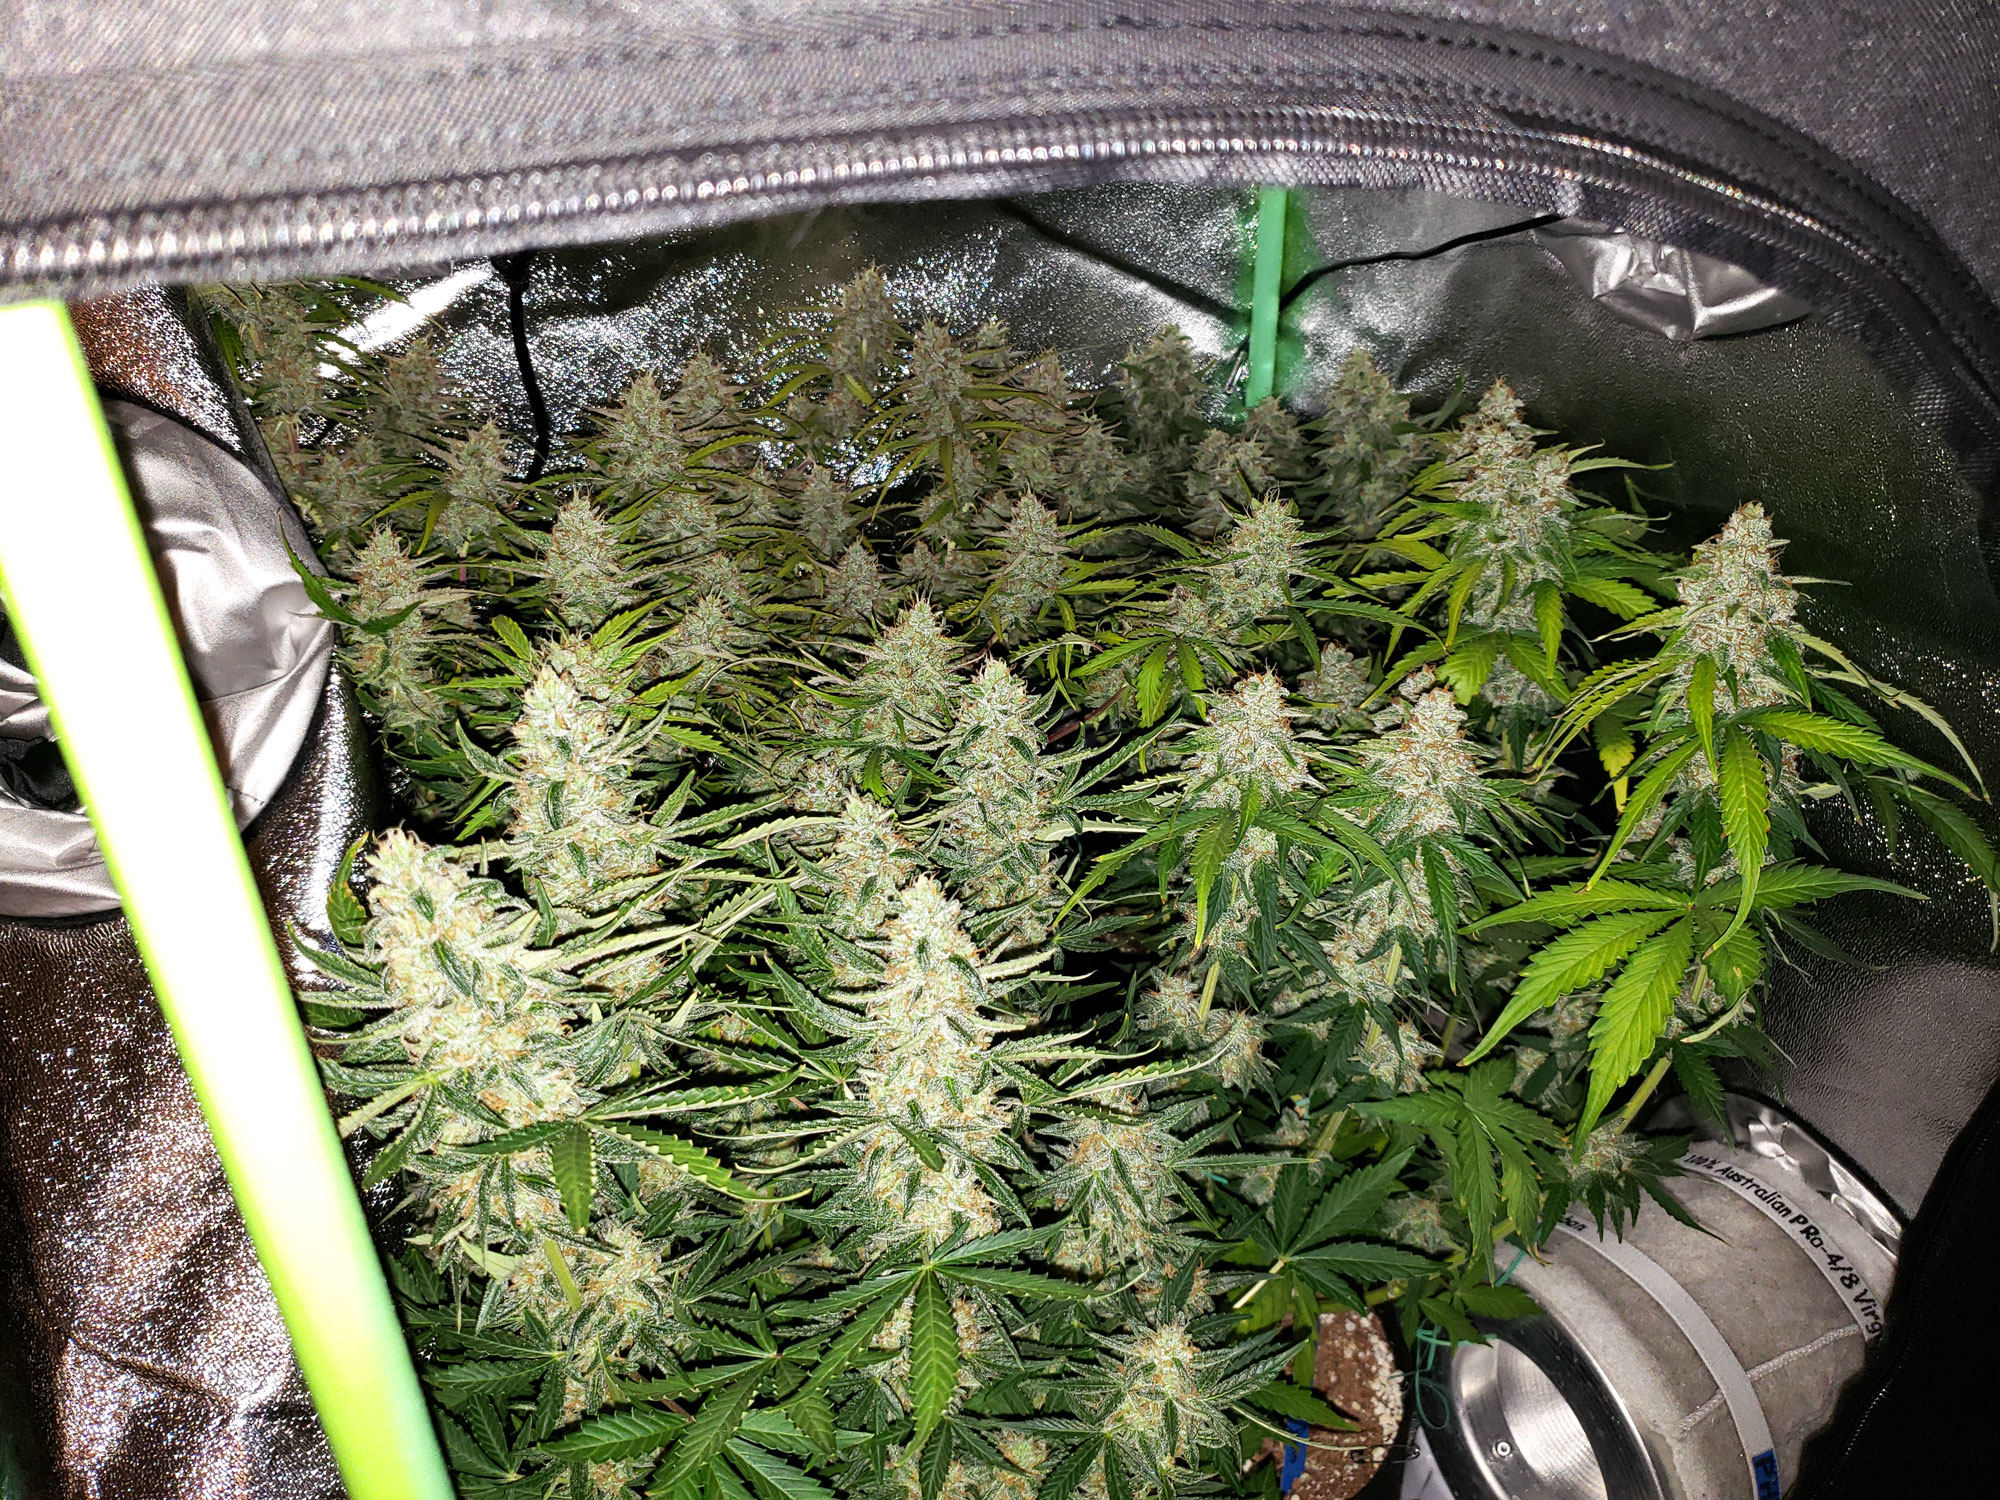 These 4 autoflowering plants were kept in a 2x2x3 grow tent with a carbon filter/exhaust fan (lower right) to remove smells. I later upgraded the fan to an Infinity Cloudline so it would run silent (this was also kept in my bedroom so I want zero light and sound when I’m sleeping). These plants could have been grown in a closet or spare room as long as the smell didn’t bother you.
Main upgrades: A grow tent, carbon filter, and exhaust fan to contain light and smell.
 I first harvested the Auto Amnesia (beautiful strain every time I grow it)
Closeup of the Auto Amnesia buds. Pretty thick for growing under a 100W light with 3 other plants!

A bud from the Auto Amnesia after being dried and cured
Next was the Gorilla Glue Auto plant. I’ve never been happy with this strain and I wouldn’t recommend it. Bud effects and smell are good, but plants grow weird and buds are ugly and airy. Two other examples of Gorilla Glue Auto plants I grew for comparison.
 The THC Bomb Auto plant made fat sticky buds, as usual.

This is the Ultimate Auto plant. This strain also yields well no matter how you grow it.

Those last 2 plants at harvest (THC Bomb Auto and Ultimate Auto).
You got this! Even if you follow just 80% of the directions in this tutorial, if you can keep your plant alive you should easily be able to yield at least 1 ounce!
6.) Prepare for next grow
You’ve already got some of your growing supplies, so your second grow will be cheaper than the first one.
Possible ongoing costs:
- $5/grow to replace HPS bulb – The 150W HPS bulb needs to be replaced every 3-4 grows as they begin to lose brightness over time (not applicable if using an LED grow light) – $15 for a new bulb every 3 grows, or ~$5/grow
- $8-20/grow for soil – Unless you’re growing in hydroponics, you will need to replace your grow medium after each harvest. The cheap soil mix recommended above costs about $20/grow. Pre-made potting mixes tend to be cheaper at garden stores and nurseries than anywhere else, especially if you buy in bulk, but if you’re serious about cutting costs then buying pre-made soil becomes one of your main ongoing expenses. Some growers reuse their grow medium (remove the root ball after harvest and keep the rest) but even in that case, you still have to “top off” with fresh potting mix. It’s not too hard to create your own mix, and that can cut costs dramatically if you choose the right ingredients. For example, a 70/30 coco/perlite mix creates a beautiful soilless potting mix that works great with Dyna-Gro nutrients. Rehydrate a 10-lb block of coco and mix with 18 quarts of perlite costs for about $40 to get about 3 cubic feet of mix (22 gallons). That’s enough for 5+ harvests if using 4 gallons per grow, or $8/grow. That gives you some serious savings over time, and you don’t have to send huge bags of potting mix through the mail. Some growers take the next step and actually mix and compost their own soil at home.
- $5-10/grow for nutrients – Growers can spend hundreds of dollars on expensive nutrients and supplements, but oftentimes less glamorous nutrients seem to work just as well. Dyna-Gro (the nutrient recommended in this article) is an example of an inexpensive but surprisingly effective cannabis nutrient system. Another economical option is the General Hydroponics Flora trio. The Flora trio costs about $35 for the quart size, and the 3 bottles will give dozens of plants everything needed from seed to harvest. For this size grow, the 3 bottles will last for years.
- $30/grow for electricity – If using the 150W HPS, the average cost of electricity is about $10/month. For a 3 month grow, that equals a total of $30. (The HLG 100 only uses about $7/month for electricity so it would cost $21/grow).
Future grows: As little as $48/harvest (for electricity, nutrients, mixing your own coco/perlite mix, and a new HPS bulb every few grows) – only $34/harvest if using the suggested LED grow light (it uses less electricity and you don’t have to replace any bulbs).

What about buying seeds?
If you’re buying new seeds every grow, it becomes an ongoing cost. Buying seeds can get expensive! If you stick to auto-flowering strains, you’ll probably have to buy seeds every new grow. However, after your first grow, you’ll have experience under your belt and be prepared to grow photoperiod strains. Initiating the flowering stage can be a little trickier but overall care is basically the same. Photoperiod plants give you the ability to take clones, which is the easiest source of basically free plants. Another way to get basically free plants is to breed your own seeds or even make your own feminized seeds at home.
As time goes on, your costs go down while your yields go up

Other differences after first grow
- Better yields and bud quality – It’s common for growers to get higher yields and better buds on their 2nd and 3rd grows, even if the setup stays exactly the same. That’s because a little time and experience help you dial in your personal grow style. It’s also common for indoor growers to learn about plant training, which is a free technique to dramatically increase yields under grow lights.
- More confidence – If you decide to upgrade your grow (get a grow tent, bigger light, better strains, etc.) you’ll actually have the experience to know what’s needed to accomplish your goals.
IMPORTANT: Always keep learning!
After a few grows, many growers become convinced there’s nothing left to learn about growing. Believe me, there is always more to learn. I learn something new almost every day. A lot of “common” grow knowledge that’s been passed down for generations is being proven wrong. People are learning about better cultivation practices, developing new strains, and creating new techniques to get better yields and bud quality. Never mind all the new growing equipment aimed at home growers. Keep your mind open and remember to question everything. That’s the only way to ensure each harvest is better than the last!
Check out GrowWeedEasy.com’s friendly growing forum to chat about growing weed and ask growing questions