by Nebula Haze
Table of Contents
Introduction: How to Get to Harvest in 10 Steps
Step 1: Choose Your Place to Grow
Step 2: Choose Your Light
Step 3: Choose Your Growing Medium
Step 4: Get Cannabis-Friendly Nutrients
Step 5: Get Good Seeds (or Clones)
Step 6: Germinate Your Seeds / Start Your Clones
Step 7: Vegetative Stage – Only Stems and Leaves
Step 8: Flowering Stage – Cannabis Buds Grow
Step 9: Harvest Your Cannabis Buds
Step 10: Dry & Cure Your Buds Like a Professional
Your Growing Cannabis Information Kit:
How to Grow Great Weed in 10 Steps!
Cannabis legalization has spread across the US, Canada, and in many other countries in the world. Many people are finally allowed to legally grow their own supply of cannabis. In many parts of the world, you can safely buy cannabis seeds online and get them shipped to your house.
Are you ready to grow your own weed at home?
Growing cannabis can seem like it’s complicated, but often it only seems that way because you haven’t been given the right information. A lot of people unintentionally make growing harder than it needs to be, but that ends now.
This cannabis growing guide will help you discover the best way to grow cannabis, for your unique situation.
Find a grow style for…
- Your grow space
- Your budget
- Your desired yields
Outdoors is the most cost-effective way to grow. Sunlight is free.
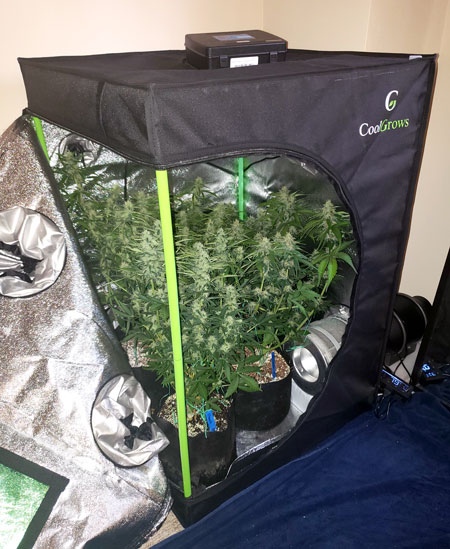
For indoor growers, a grow tent is worth the small investment. Grow tents give you bigger yields from the same grow light because reflective walls reflect back up to 97% of light. Plus a grow tent with a carbon filter lets you contain the smell of weed so no one knows you’re growing weed but you.
A small 2’x2′ grow tent with 100W LED can grow up to 4 ounces.
A bigger 4’x4′ grow tent with 450W+ LED can grow over a pound of weed.
Growing cannabis plants is actually pretty straightforward, and almost anyone with a few extra minutes a day and a spare closet, a corner of a room, or a garden in the backyard can grow their own professional-quality buds at home.
If you can follow basic instructions and remember to water your plants, you already have what it takes to grow great weed.
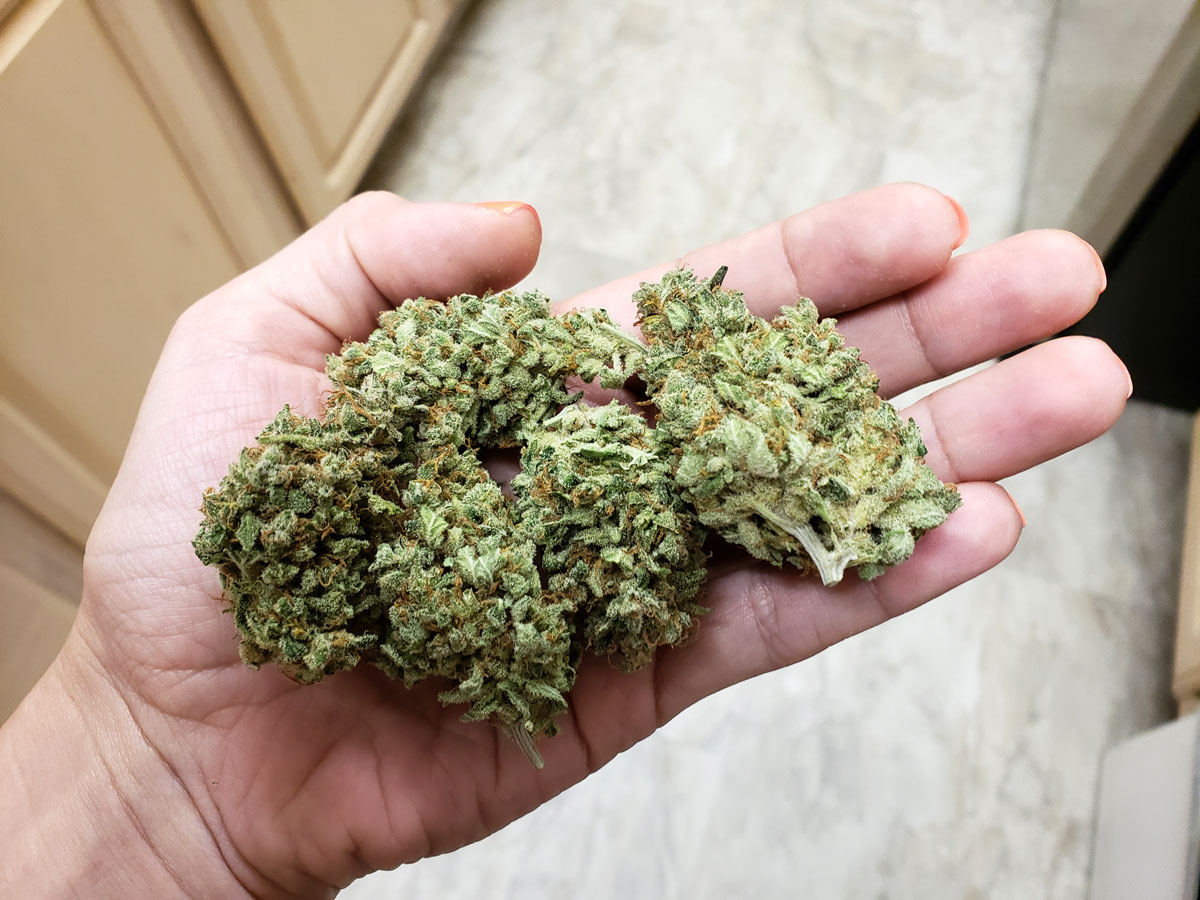
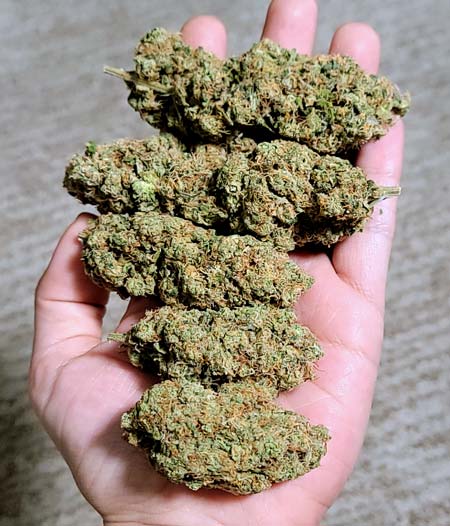
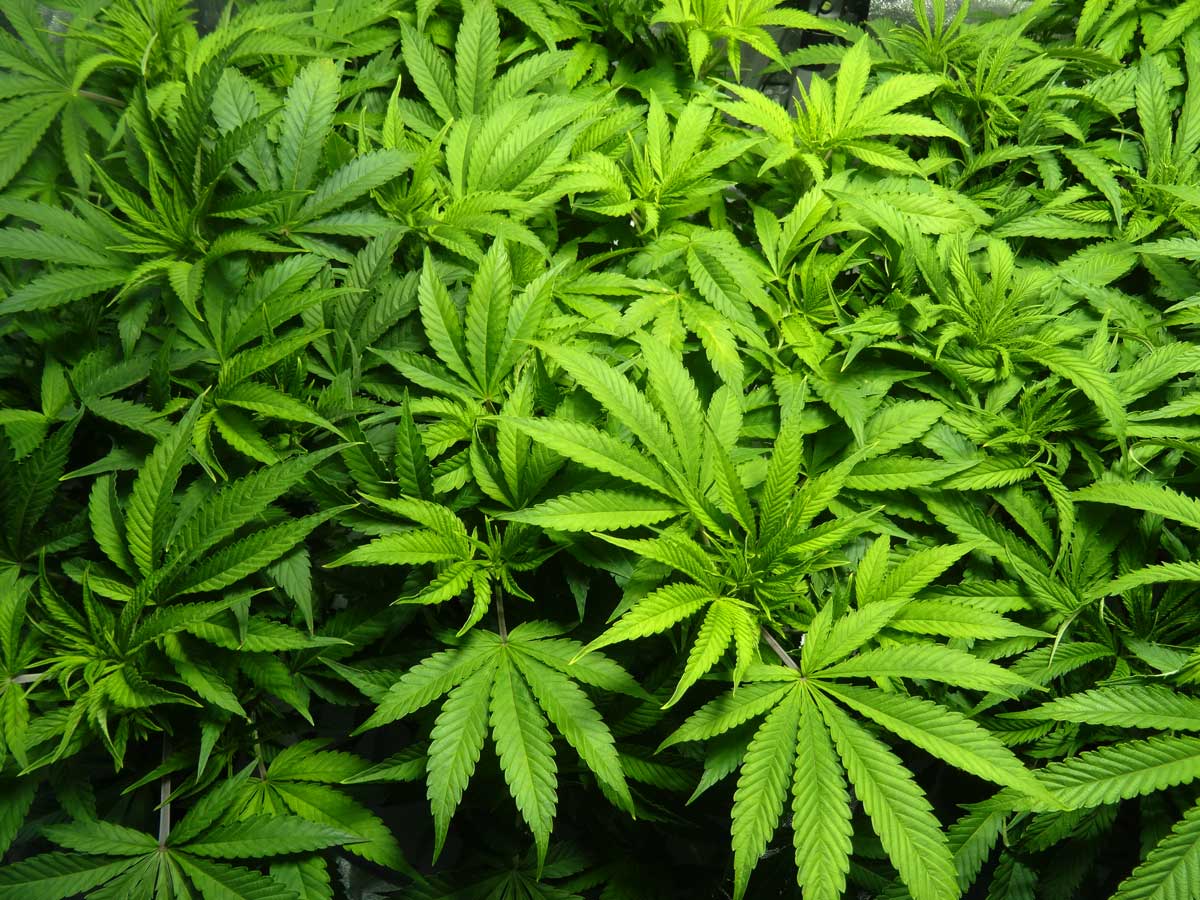
Homegrown Blue Dream buds.
What does a cannabis plant need to thrive?
In order to thrive and grow, every cannabis plant needs:
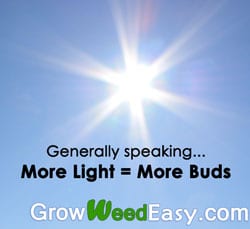
- Strong Light – Cannabis plants need a lot of light for the best bud quality & yields. Light = food for buds. Either strong cannabis LEDs or direct sunlight is best for most growers.
- Growing Medium – The stuff your cannabis plants grow in. Most growers choose soil, coco, or hydroponics.
- Fresh Air – A well-ventilated space with good air exchange and a slight breeze is best. A few well-placed fans makes all the difference.
- Warmth – Cannabis thrives at 70-85°F (20-30°C) between day and night. Think a warm, summer day. A thermometer makes it easy to keep track.
- Nutrients – Pre-formulated cannabis nutrients give you the fastest growth. Growers can also use composted super soil or organic amendments to deliver nutrients naturally.
- Water – Like all plants, cannabis needs water to survive and grow. Is my tap water “good enough” for growing cannabis? (Probably yes)
When growing cannabis indoors or outdoors, you will need to ensure that it gets the proper amount of these 6 resources.
How long does it take to grow cannabis?
If you planted a cannabis seed today, when is the soonest you could be actually smoking your harvest? Probably a little over 2 months with a quick-finishing autoflowering strain. (Learn how to get to harvest as fast as possible)
Indoor grows tend to be shorter than outdoor grows since you have more control over when the plant starts budding. Autoflower grows also tend to be very short. But with shorter grows, you also tend to get smaller yields. Certain “long-flowering” strains and outdoor grows can take 5+ months.
Example cannabis grow timelines:
- Quick Harvest Grow Journal: Seed to Weed in Under 90 Days
- 1+ Pound Harvest Grow Journal: Seed to Weed in 4 Months
On average, it takes a grower about 3 – 5 months to grow, harvest, and be holding ready-to-smoke buds in hand.
Learn more about how long it takes to grow cannabis.
Don’t Make the 3 Most Common Cannabis Growing Mistakes!
- Random experiments – One of the most common mistakes by new cannabis growers is conducting spur-of-the-moment experiments that hurt or possibly even kill their plants. Always take a second to Google your idea before you try it. Luckily when it comes to growing cannabis, there is a good chance that someone has tried it already!
- Skipping important steps – The next most common problem new growers have is the tendency to skip crucial steps like understanding light schedules, or why root pH levels are important for reducing nutrient deficiencies. While you can get lucky and succeed at growing weed without taking these steps, you are a lot more likely to end up with plants that are sickly or don’t produce well. Make sure you follow all the steps listed in this guide – you deserve to harvest your own top-quality bud!
- They don’t follow a proven guide – Don’t re-invent the wheel! If you follow the steps in this guide, you’ll grow great weed. Yes, even if it’s your very first grow and you’ve never grown a plant in your life. You can benefit from the mistakes of other growers and learn not to make the same mistakes. And of course, use the search bar to find your topic on GrowWeedEasy.com or ask a fellow grower.
10-Step Beginner’s Guide to Growing Cannabis
- Step 1: Choose Your Location
- Step 2: Choose Your Light
- Step 3: Choose Your Growing Medium
- Step 4: Determine Your Nutrient Schedule
- Step 5: Where to Get Cannabis Plants
- Step 6: Germinate Seeds… Life Begins!
- Step 7: Vegetative Stage – Grow Your Plant Big and Strong
- Step 8: Flowering Stage – Buds Start Growing!
- Step 9: Harvest Your Cannabis
- Step 10: Dry & Cure Your Buds Like a Professional
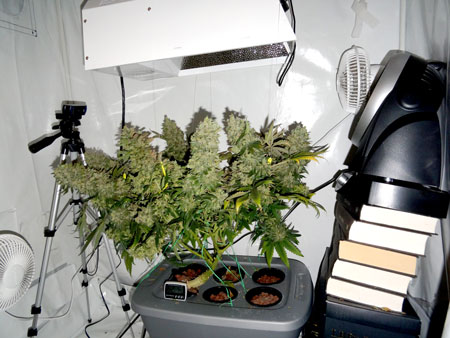
Step 1: Choose Where You Will Grow (Indoors or Outdoors)
Growing indoors is much more private than growing outdoors and you also get more control over your grow.
Indoor cannabis growing can be surprisingly cheap to get started and maintain, especially if you plan on growing just a few plants.

Take a look at a few completed indoor cannabis grow journals and my personal cannabis grow journals to get an idea of how much you can expect to harvest in different types of indoor setups. For example, in this recent grow journal, my 200W Spider Farmer LED grow light yielded 302.3 grams (over 10 oz) of dried and cured cannabis.
You have more control over everything in an indoor growing environment, which means that indoor growers can consistently produce dank buds. However, this dank weed-growing power comes with more responsibility. As an indoor grower, your plants are 100% reliant on your care to survive. If you don’t provide everything your plants need, they will die.
What space works best to grow cannabis?
You can grow cannabis almost anywhere that has easy access to water and fresh air…
- a spare room
- a closet
- garage
- grow tent – highly recommended! (a grow tent makes life easy)
- extra bathroom
- even the inside of a computer case!
(though I recommend a Space Bucket if you want to go the “micro-grow” route)
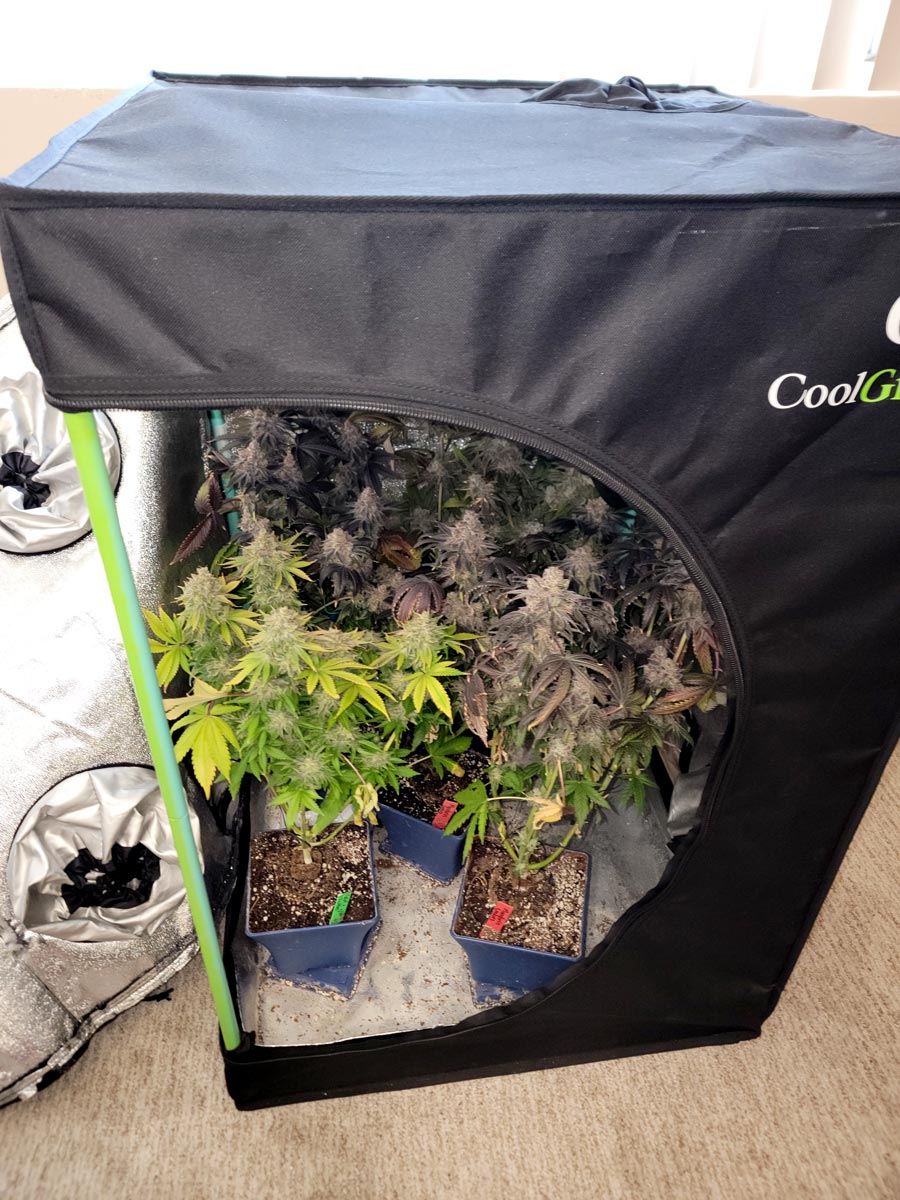
A grow tent is perfectly suited to grow cannabis, and a small grow tent can fit almost anywhere.
When thinking about where to grow indoors, you should also consider the temperature (also referred to as ‘temps’) of your grow space and remember your temps will rise once you have your grow lights running!.
Young growing cannabis plants grow fastest when temps are a bit warmer, in the 70-85°F (20-30°C) range.
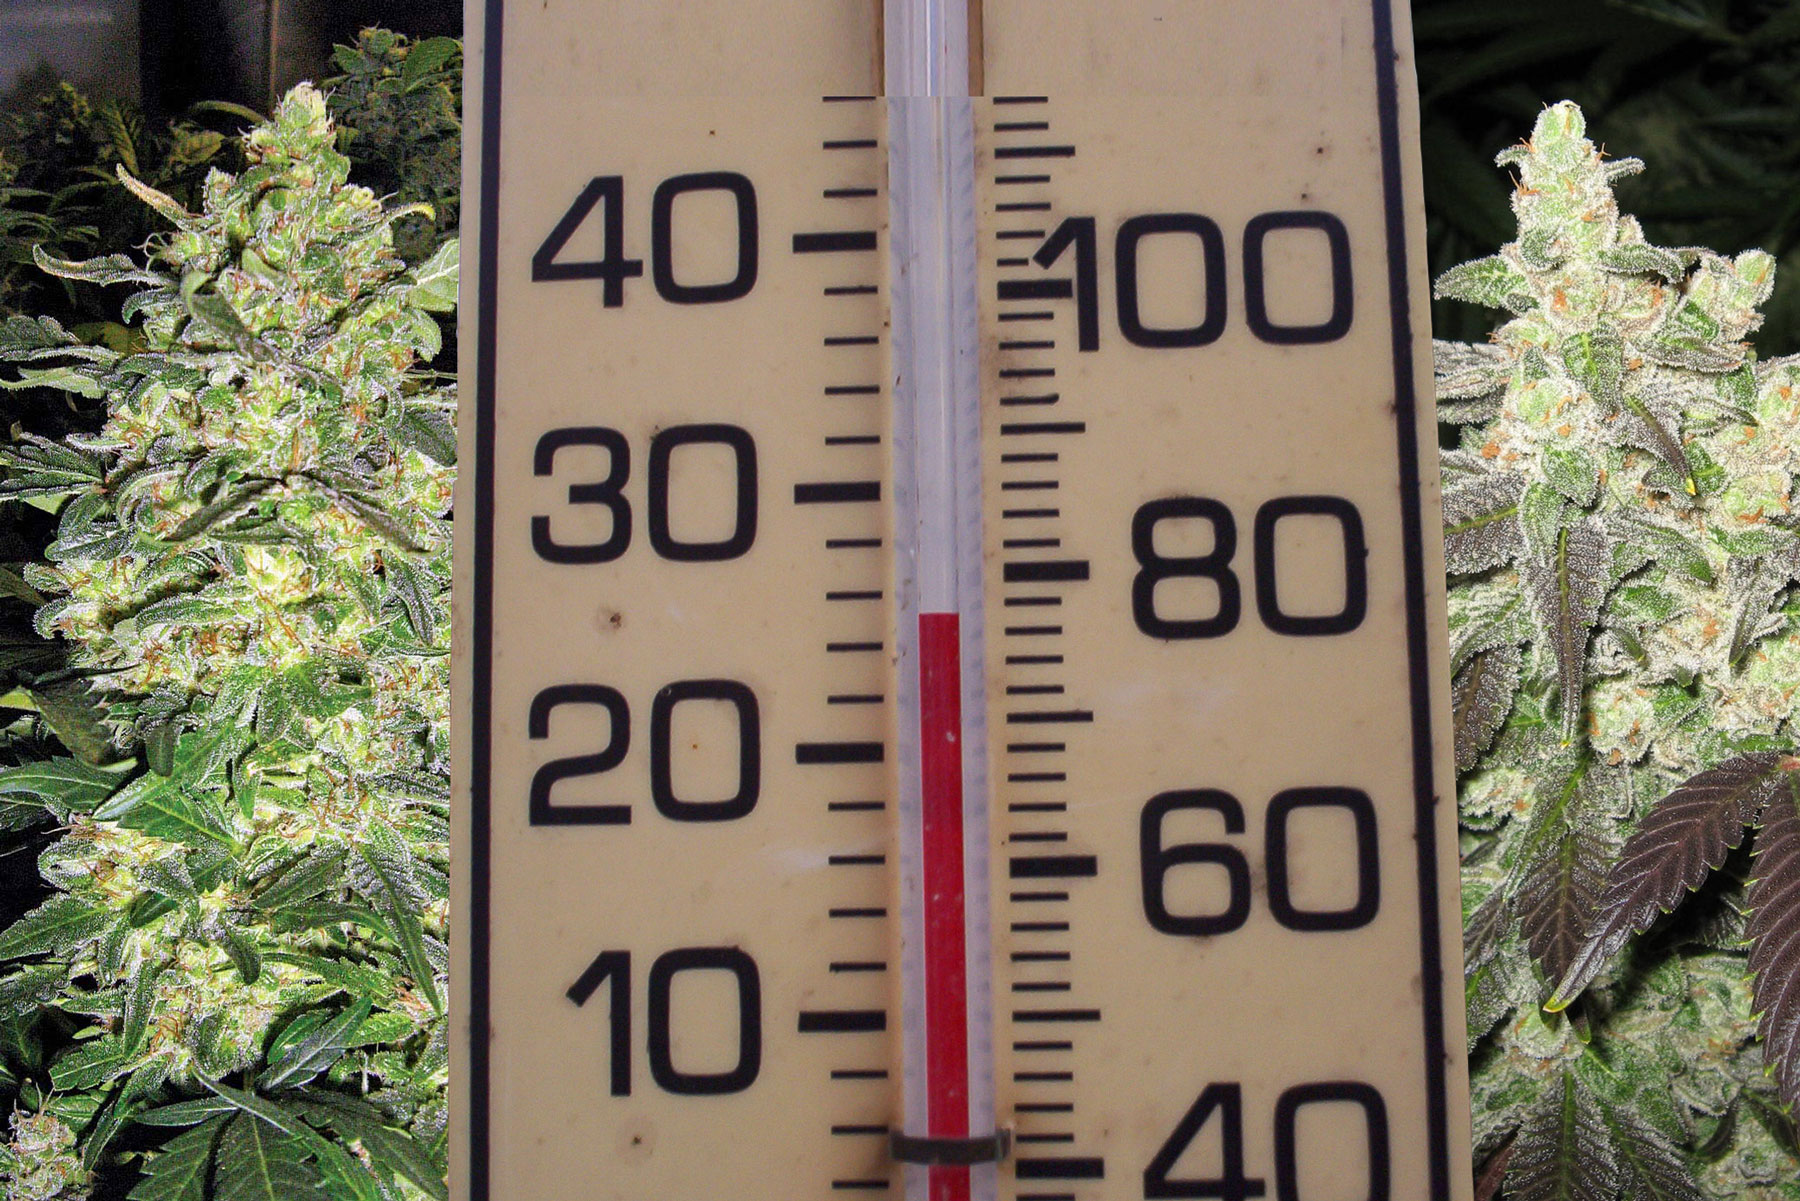
When plants are a bit older, in the budding/flowering stage, it’s best to keep temps slightly cooler, around 65-80°F (18-26°C) to produce buds with the best color, trichome production and smell.
Because temperature is so important, it’s best to be able to have some amount of control over the temperature of your grow area. When growing indoors, your grow lights will give off heat. Generally, the more powerful your lights, the more heat they give off. A small 100W LED might not make much heat, but a big 600W light can raise the temperature of a room by several degrees unless you vent the heat out.
If you want to install a lot of bright lights in a small space, you may need an air conditioner in addition to your exhaust system to make sure you keep your temps in the right range.
Some grow lights don’t produce much heat at all. If you’re growing just a few plants in a grow tent or box, you can use a fan to pull hot air away from the grow lights and into the room (or out a window) to keep cannabis plants cool enough.
I’ll help you find the right grow light for your space in Step 2.
Outdoor Growing
Growing outdoors costs far less money to get started since you don’t have to get grow lights or create an indoor grow area. Though you do have to worry about privacy/stealth, possible pollination, people stealing your plants, bugs, deer and other unexpected outdoor visitors.
Check out these outdoor auto-flowering plants by Raymond, one of our students from Home Grow Masterclass.
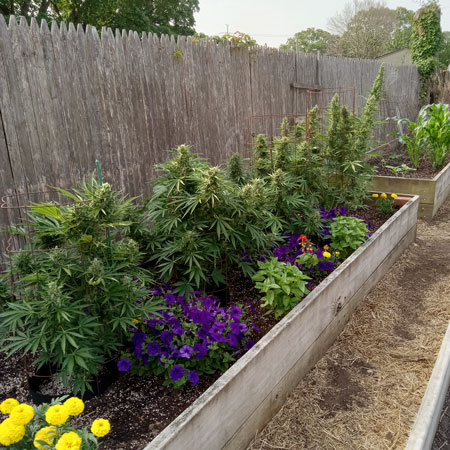
However, if you pick the right strain and live in a good environment, it can be much cheaper to grow outdoors. That’s because outdoors, you don’t have to provide everything for your plants. The sun will do a lot of the most cost-heavy work for you by providing a free grow light.
Of course, when you’re growing outside, it’s not always possible to control the environment perfectly. If it’s dry, you need to water your plants more. If it’s too rainy, you need to protect your plants from getting overwatered. Wind, bugs, and creatures can cause issues, and you have no control over the temperature.
When it comes to temperatures, a good rule of thumb about cannabis plants is if it’s too hot for you, it’s probably too hot for your plants. And just like humans, cannabis plants can die if exposed to freezing or too-hot temps.
So if you know it’s going to be extremely hot or cold where you live, you may need to take extra steps to protect your plants from the elements, like setting up a small greenhouse.
Learn more about the difference between growing cannabis indoors vs outdoors.
Step 2: Choose Your Grow Light – What kind of light do you need to grow cannabis successfully?
There are lots of different grow lights for cannabis, including:
3 Best Grow Lights for Growing Cannabis
- The Sun – free, powerful light source for outdoor growers.
- Big Bulb HID Grow Lights – high-intensity but gets very hot, needs venting.
- LED Grow Lights – best option for most indoor growers, energy-efficient and effective.
Poor Cannabis Grow Lights (avoid)
When you’re growing with the sun, you need to make sure that your plants are getting at least 8+ hours of direct sunlight each day for the best results.
It’s best that your plants get direct sunlight from at least 10am-4pm, and more light is better. Because of the high light needs of the cannabis plant (it needs more light than many other types of plants), it is not well suited to growing in a window. Though I’ve seen plenty of growers start their seeds in sunny windows before moving their plants to a more suitable final location.
Learn how to grow cannabis outdoors.

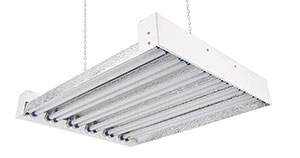
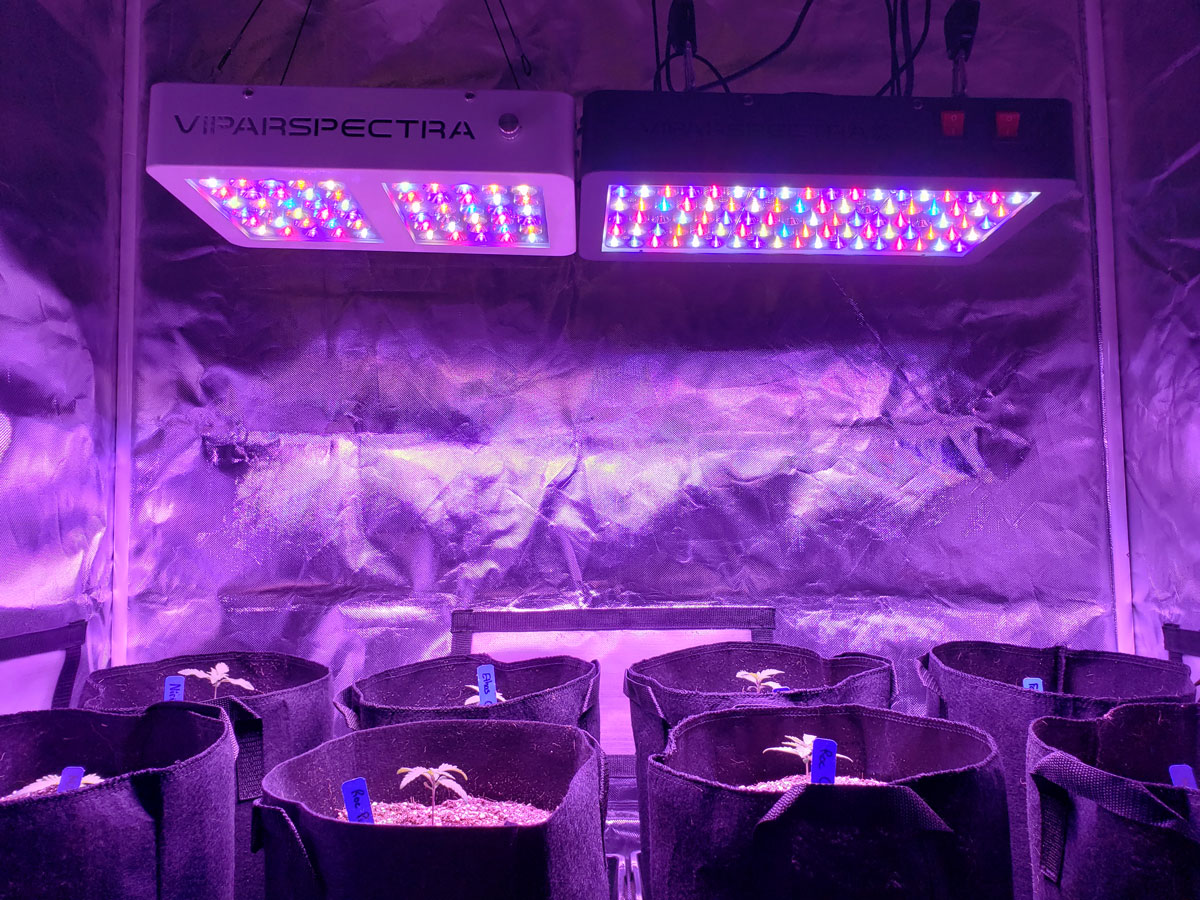
Metal Halide (MH) & High-Pressure Sodium (HPS)
Most often these are just called HPS grow lights. MH/HPS grow lights (like the light pictured below) are a type of “HID” light (“High Intensity Discharge” light). Whenever you see a cannabis grow light with one big light bulb, it’s likely an HID grow light. Besides LEDs, this is the most common type of light, especially for commercial growers that are growing cannabis indoors in a cooler climate. MH/HPS grow lights are surprisingly cheap to buy and set up, especially considering how incredibly powerful they are. For example, a 600W HPS grow light costs less than $200 and can produce up to 2 lbs of weed. That’s cheaper than a comparable LED grow light to get started.
HID lights work very well for growing cannabis and produce consistently good yields and bud quality indoors. However, they run hotter than LEDs and use a lot of electricity, leaving a bigger mark on your electricity bill. The cost for electricity and cooling costs more over time compared to using LEDs. If you do go with MH/HPS grow lights, you definitely want to make sure you’re getting the exact right lights for your space so you don’t pay for more light than you really need. HID lighting (HPS in particular) has another problem in that it’s much less popular than it used to be. While you used to be able to get them in a variety of sizes, typically now they only come in huge sizes (600W or 1000W) made for commercial growers.
HPS grow lights used to come in small sizes which didn’t get very hot.
But now, HPS grow lights pretty much only come in “extra large”, suitable for commercial growers.

LEC (Light Emitting Ceramic) is a brand name for a type of light (CMH – Ceramic Metal Halide). CMH grow lights are HIDs, which means they get hot. The technology has existed for quite a while (I remember first seeing CMH grow lights in the 2000s), but this type of grow light goes in and out of vogue every few years. Although they get very hot, they have some positive traits for growing cannabis. For one, LECs have a natural colored light that makes it easier to care for and diagnose plant problems. It’s overall better for security to have a light that doesn’t scream “WEED GROWING HERE!” like the unearthly yellow hue of an HPS or even the often-purple-tinted light of LEDs. One thing that’s unique is CMH produce significant levels of UV light, which results in significantly increased trichome production on buds. That makes them a good choice for growers looking to make extracts like hash, kief, rosin, etc. They don’t emit EMI (Electro-Magnetic Interference) as much as their noisy HPS cousins, which means you’re less likely to have a HAM radio enthusiast accidentally tracking down your grow. Plus, cannabis plants grow surprisingly fast under a 315 LEC, and produce impressive yields for the amount of electricity.

LED grow lights – Best choice for most indoor growers!
Modern LEDs are top-tier grow lights for growing cannabis indoors. LED grow lights are extremely energy-efficient and produce excellent cannabis yields, bud density, and overall potency. But it’s not just bud quality and size. LEDs use less electricity and give off less heat than other types of grow lights. They’re also easy to use, simplifying the grow experience for most indoor growers. Plus, in our side-by-side tests, LEDs often produce higher-THC buds than the same clones grown under other grow lights like HPS. So LEDs grow the most potent buds, too!
LEDs rock to grow weed! Check out our student Sandra from our Home Grow Masterclass, who grew these incredible cannabis plants with a 300W Mars Hydro TSL2000 LED grow light.
LEDs are the only type of grow light that has seen major technological research and development in the past few decades of growing cannabis. And LED grow light technology is still improving every day for cannabis growers. As of 2025, LED manufacturers are still constantly fine-tuning their LEDs with extensive testing on live cannabis plants, resulting in faster growth, better bud quality, and bigger yields. Especially cannabis-focused companies like HLG, Mars Hydro, and Spider Farmer.
Each LED model is different and needs to be kept a different distance away from your plants. It can sometimes be hard to find any “standard” advice about growing with LEDs, yet these days many brands are well-tested and trusted by cannabis growers. These brands tend to have good support for cannabis-growing questions if you contact them directly. When in doubt, it’s always a good idea to just ask the manufacturer about how far away the lights should be kept, as that’s where new growers are most likely to mess up.

Get a detailed breakdown of all the different types of cannabis grow lights.
→Don’t know what type of lighting to pick? Choose your grow type based on your desired yields and starting cost…
2’x2′ Grow Tent – Small
- 100W – SF-1000 LED Grow Light
- 2-4 oz per harvest
- $430 to get started
2’x4′ Grow Tent – Medium
- 200W – SF-2000 LED grow light
- 5-11 oz per harvest
- $555 to get started
- HLG 350R LED grow light
- 8-14 oz per harvest
- $700 to get started
- 315 LEC or 400W HPS (dimmable)
- 7-16 oz per harvest
- $745 to get started with 315 LEC
- $495 to get started with a 400W HPS
3’x3′ Grow Tent (Square shape is better in some spaces) – Medium
- 300W LED – Mars Hydro FC-E3000
- 7-13 oz per harvest
- $475 to get started with FC-E3000
- 315 LEC or 400W HPS (dimmable)
- 7-16 oz per harvest
- $745 to get started with 315 LEC
- $495 to get started with a 400W HPS
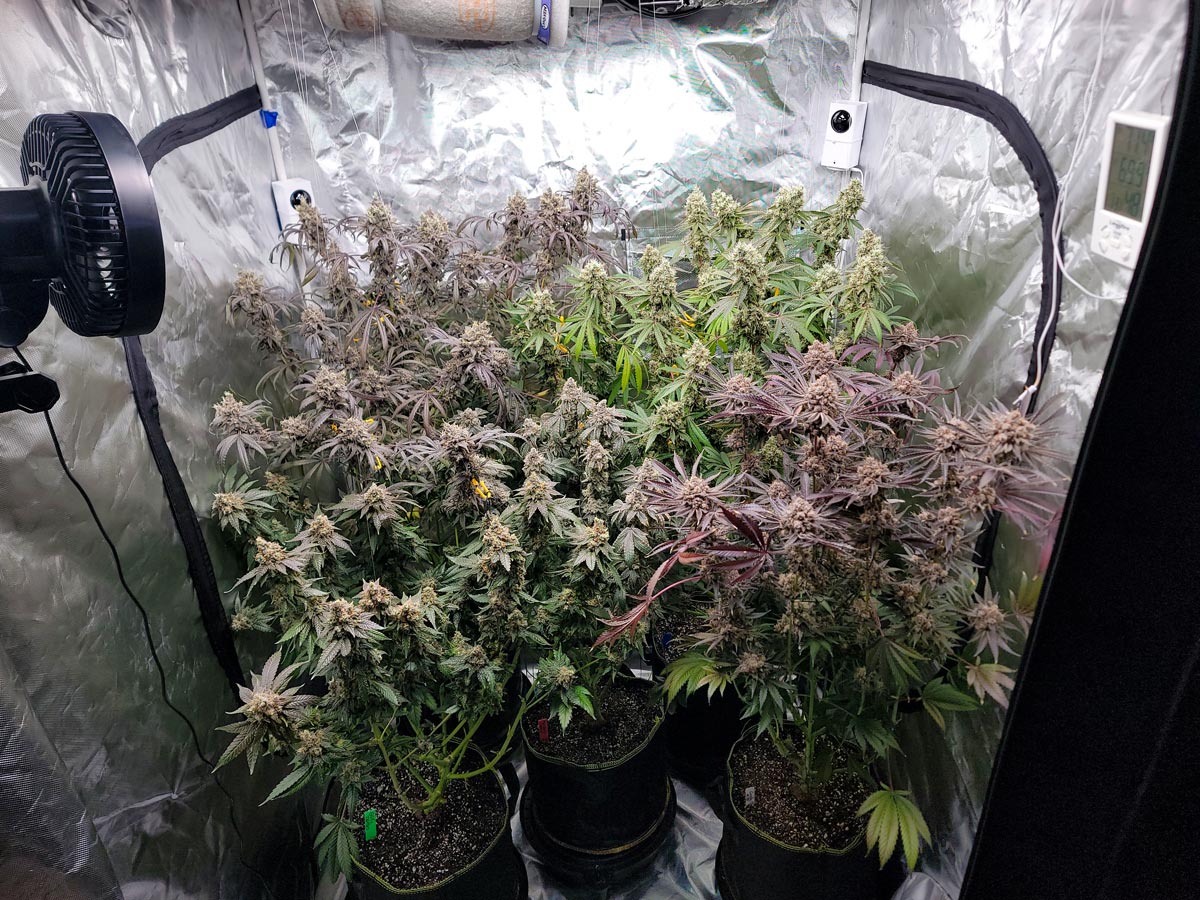
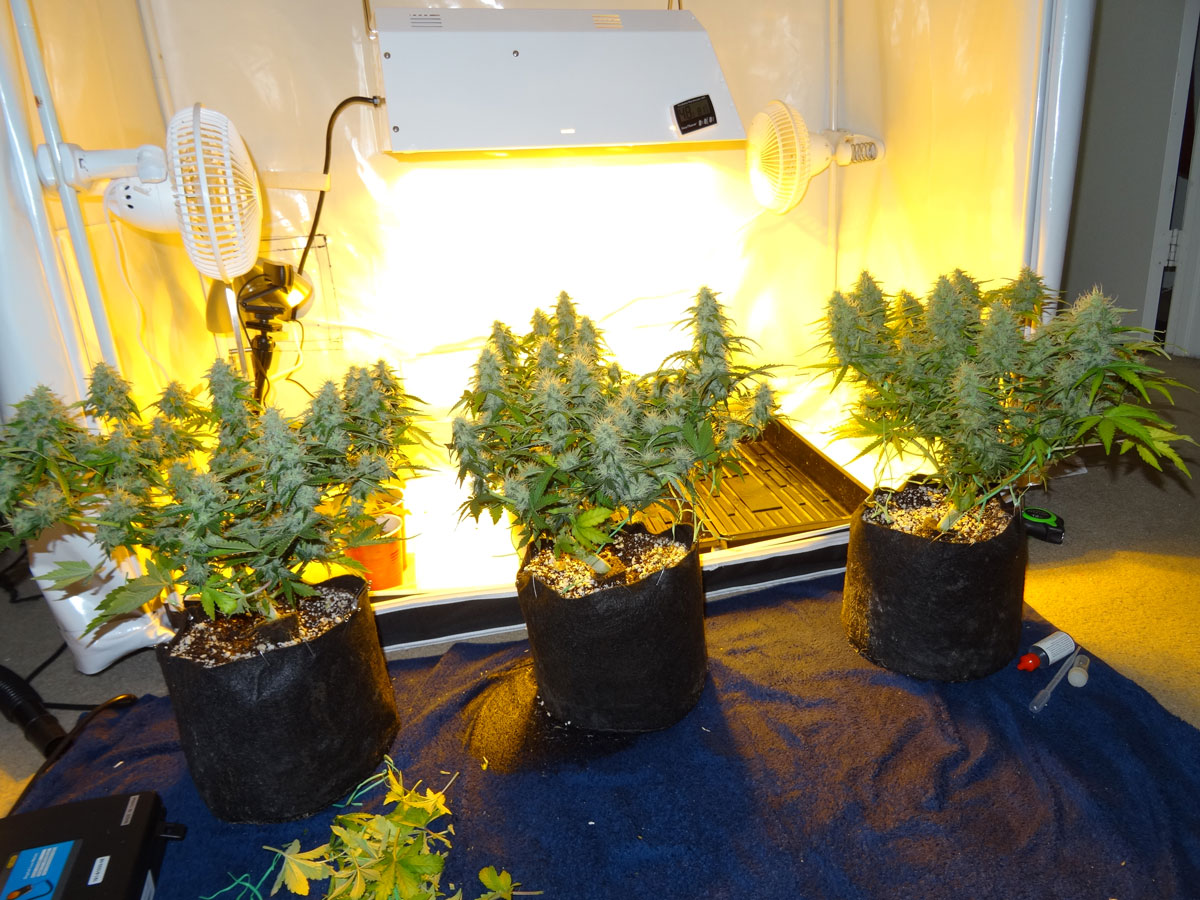
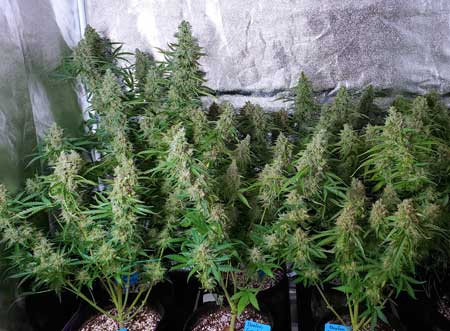
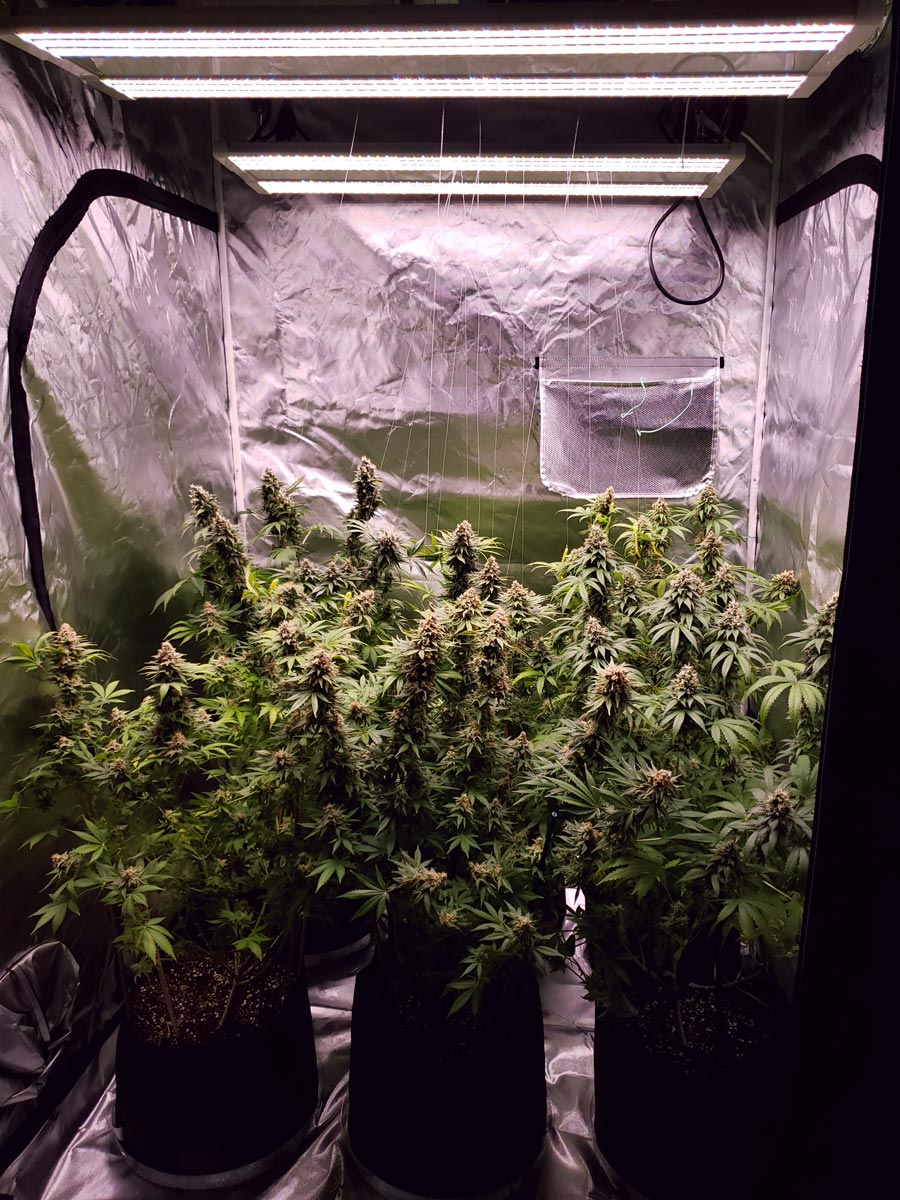
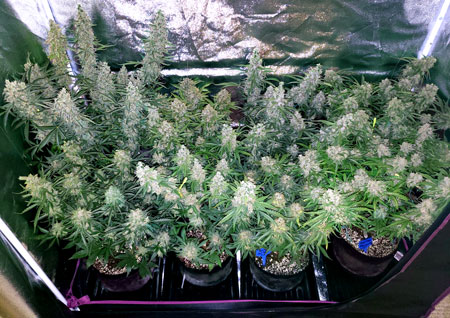
4’x4′ Grow Tent – Large
- HLG Blackbird 600W LED grow light
- 11-22 oz per harvest
- $995 to get started
- 600W HPS (dimmable)
- 10-21 oz per harvest
- $495 to get started
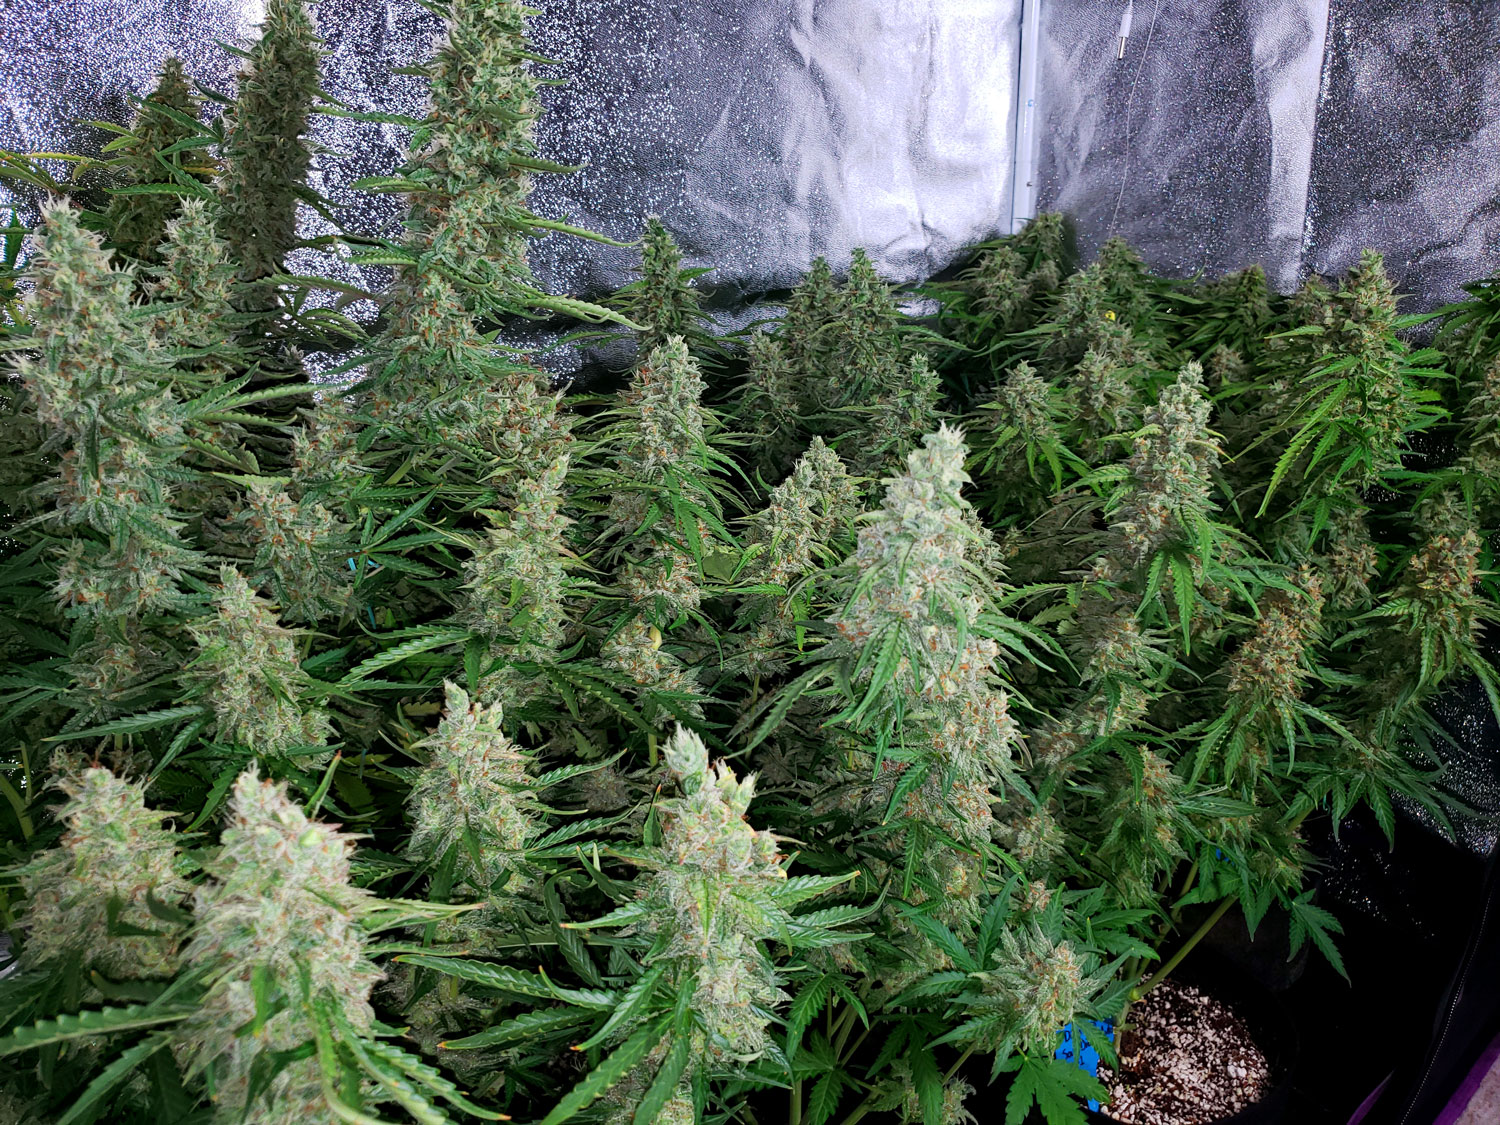
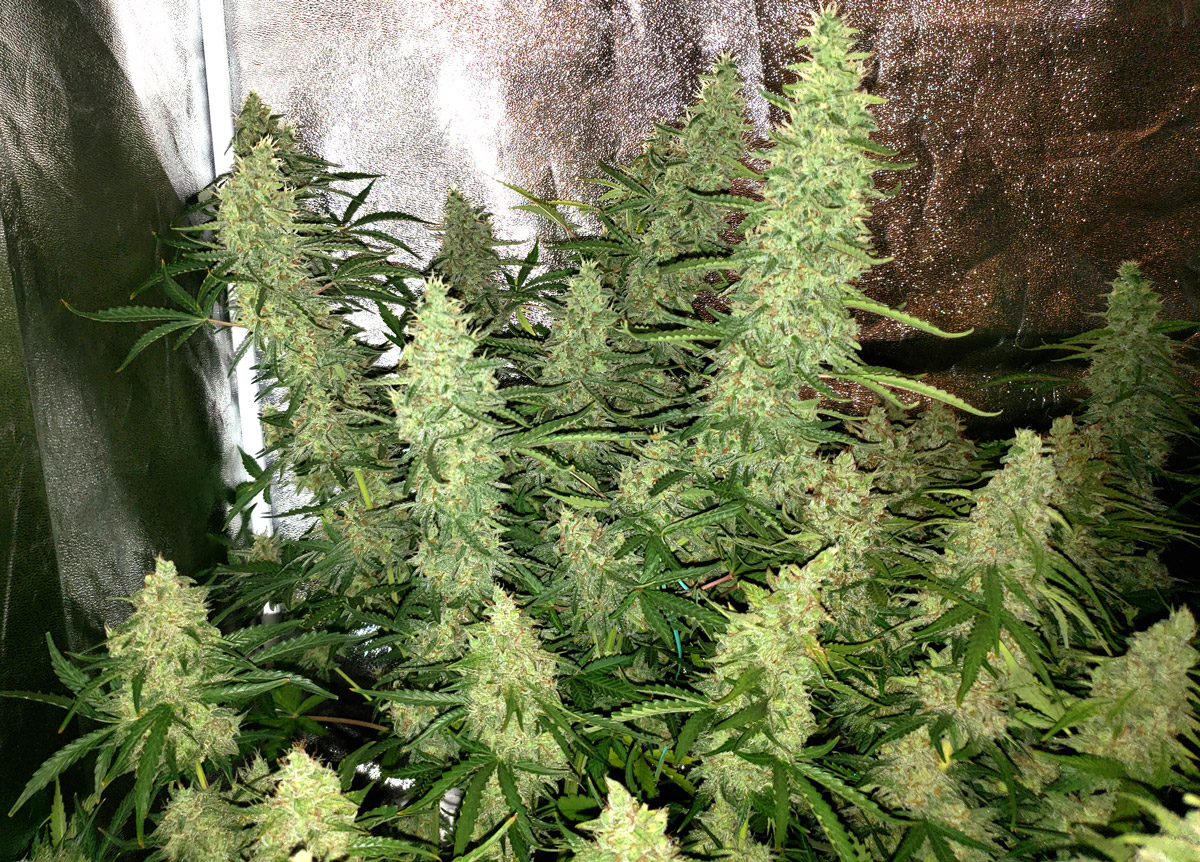
Example of a 4’x4′ grow tent (this size can easily yield a pound of weed).
Poor Grow Lighting Choices (Avoid these!)
These are examples of grow lights I’ve seen cannabis growers use, but generally should be avoided. Especially since LED grow lights are a thing!
Household Lighting: Compact Fluorescent Light Bulbs (CFLs) & Household LEDs
Household bulbs are commonly used to light up people’s homes, so you may wonder if they can grow weed. Unfortunately, they’re not a good choice for growing marijuana. They aren’t made for growing plants and don’t deliver much light from the perspective of a cannabis plant. But if you’re curious, they do “work” (kinda) if you use a ton of them. I once saw a grower use a dozen household LEDs to grow ~1 ounce of loose, airy buds. But let’s look at the cost, with 12 household LEDs and 12 light fixtures, his setup was over $250 to grow 1 ounce of subpar weed. Yet it costs under $100 to buy a small cannabis-friendly 100W LED grow light, which can grow up to 3.5 ounces of denser, better quality weed. Household lights just don’t make sense if your goal is to produce the best bud quality and cannabis yields.
Fluorescent Lighting (T5 High Output Grow Light)
These grow lights are traditionally made for seedlings and plants like lettuce, which need lower light intensity than cannabis. If you do get fluorescent lighting for some reason, use a High-Output T5 light since they are the brightest option in this group. Even so, I highly recommend using LED grow lights for growing cannabis. LEDs get better results in pretty much every way. Fluorescent lighting makes a lot more heat for the electricity, create lower bud density/potency, and produce only 1/4 -1/2 the yields per watt compared to LED grow lights. Learn more about growing cannabis with fluorescent lighting.
Summary: A cannabis-friendly LED grow light is much better for growing weed than household bulbs or fluorescent lights. For example, a small 100W LED grow light barely puts off any heat and can be kept in a space as short as 3 feet (learn how to grow mini plants) to yield up to 3.5 ounces of high quality weed. I highly recommend investing in a real LED grow light over household LEDs or fluorescent grow lights!
Step 3: Choose Your Growing Medium
Each growing medium that you can use has different care and watering requirements.

These are the most common grow mediums:
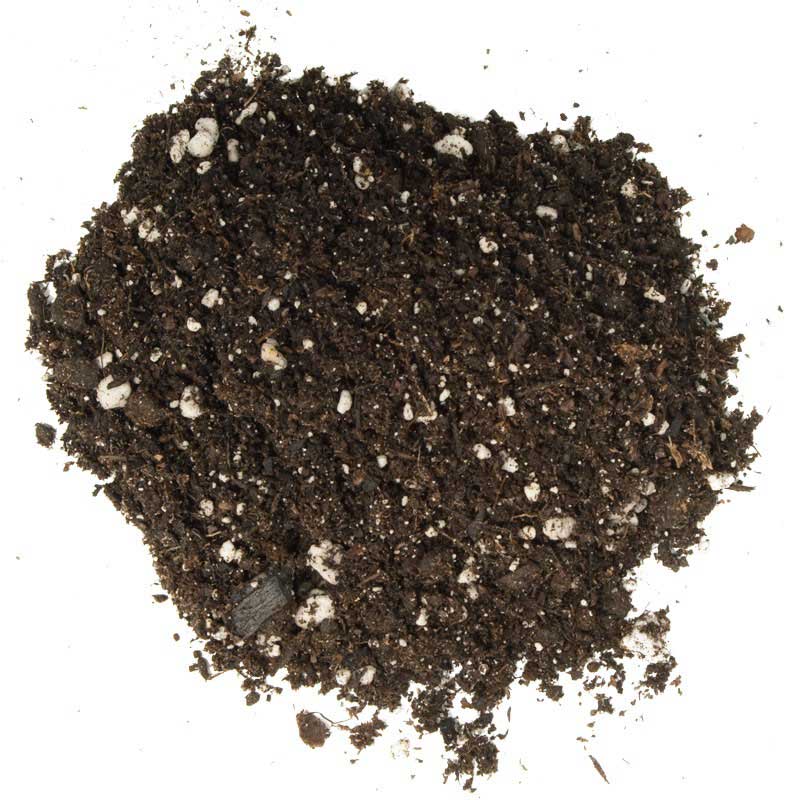
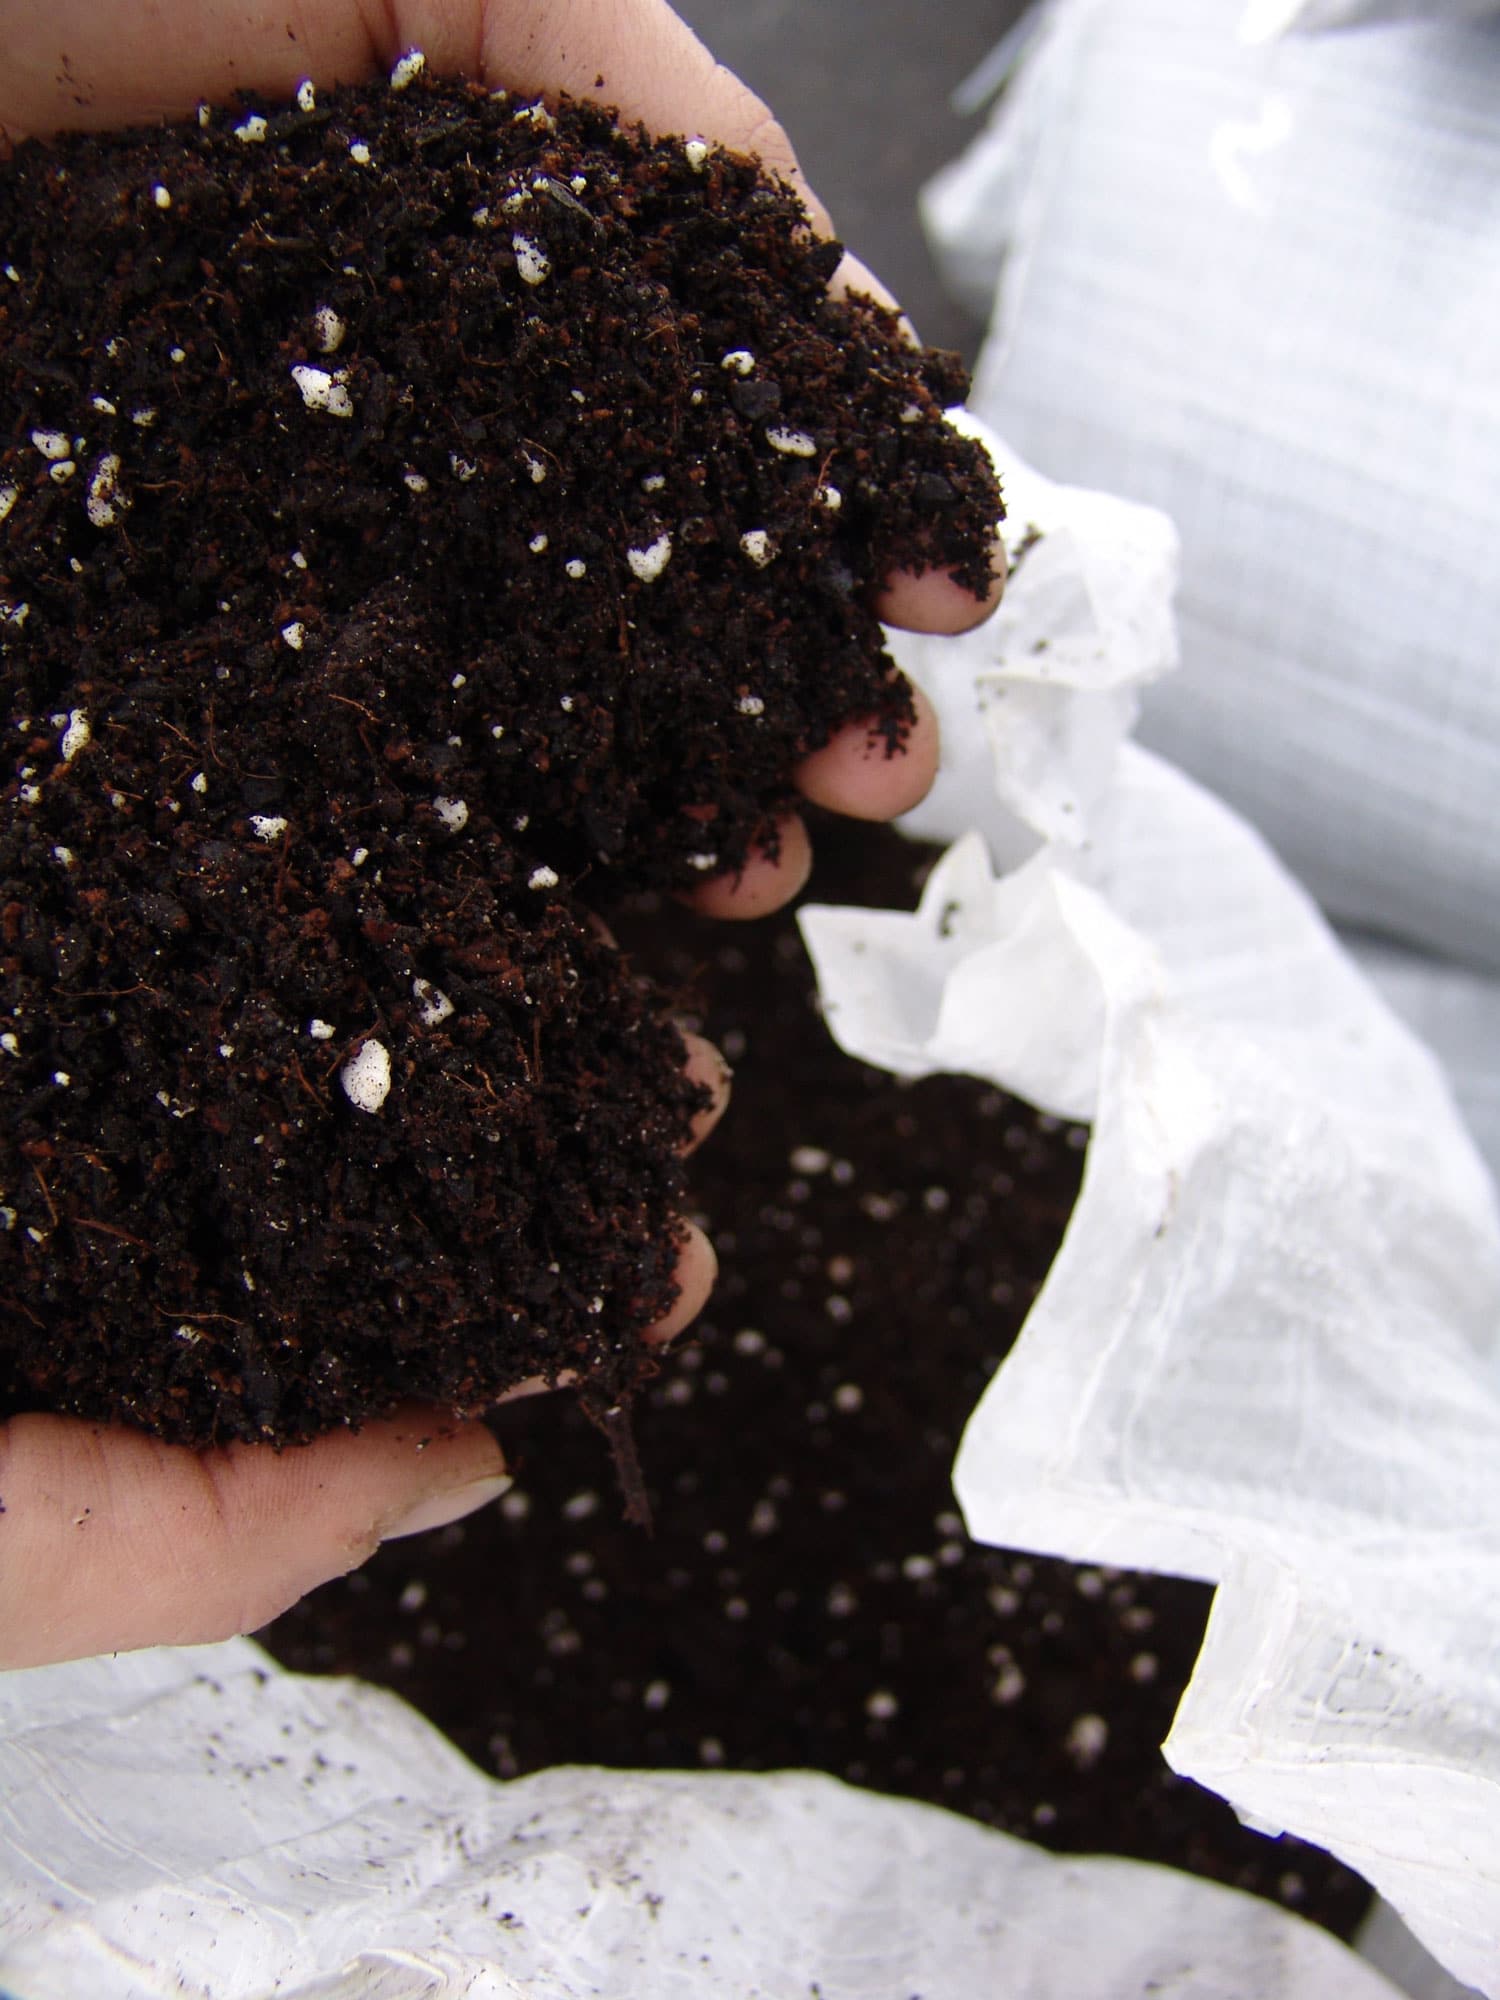
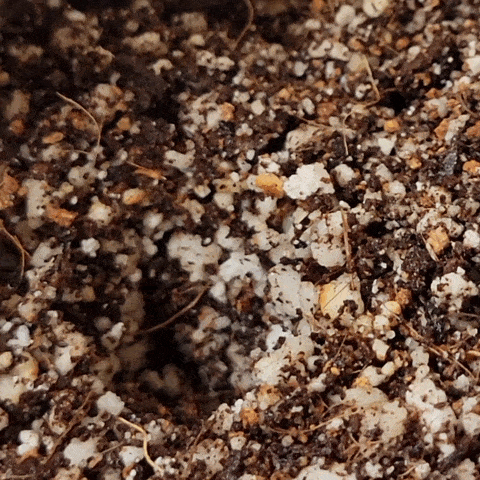
- Regular Soil – Most types of “organic potting mix” from the garden store will work great. It should be loose and fluffy with little white rocks known as “perlite” that loosen the mix and help prevent soil from getting muddy and thick. The example below shows what it should look like. A popular cannabis soil is Fox Farms Ocean Forest soil mix (FFOF), which contains enough nutrients to last the first 4-6 weeks of your young plant’s life.
- Super Soil – Add a concentrated organic “hot” compost mix to any good regular soil. This delivers nutrients slowly as the organic amendments break down, so you don’t have to add nutrients to the water. Learn more about “just add water” super soil.
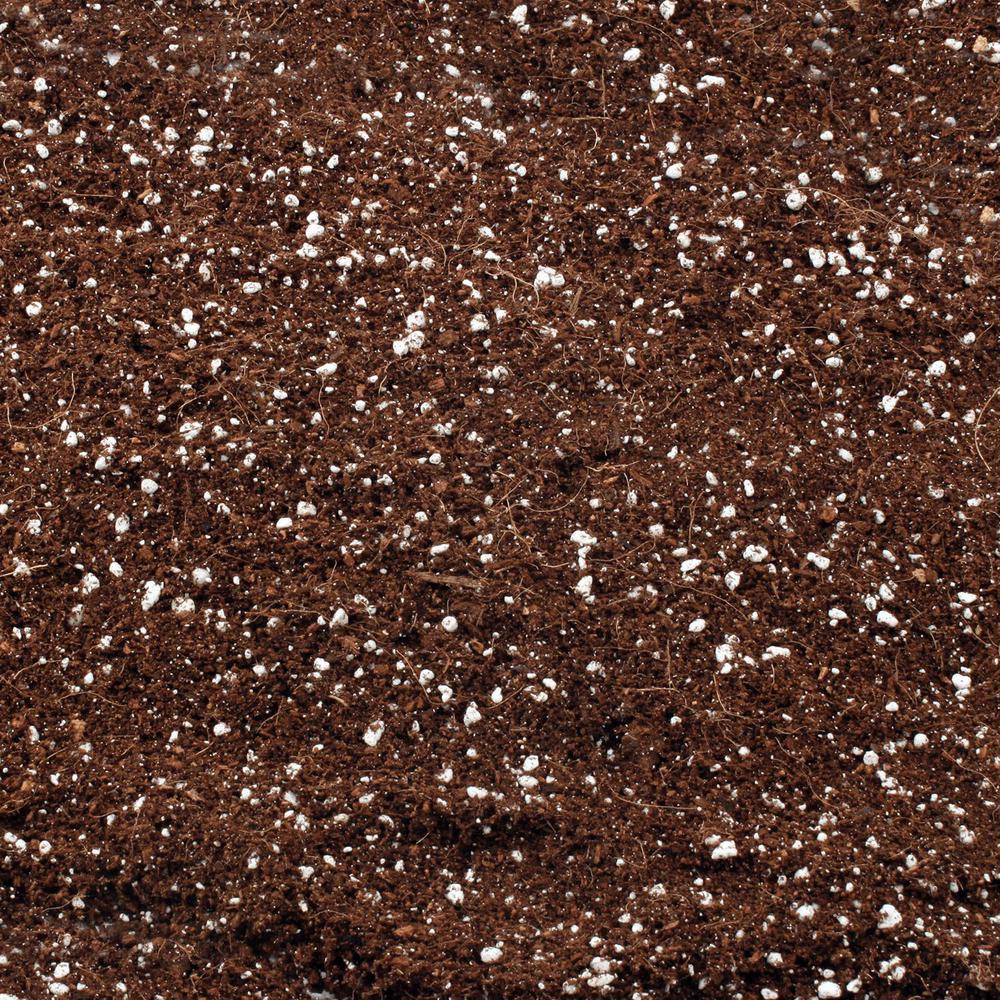
- Soilless Mix – Can be anything besides soil, but usually coco coir (coconut husks) mixed with about 30% perlite (those same fluffy white rocks as you see in good soil). For cannabis, I love this 70/30 coco/perlite mix. Note: All soilless mixes are technically considered hydroponic growing since it’s inert with no soil or nutrients. Plants grow faster in coco than soil, and get fewer bugs, but you must give nutrients in the water from germination.
- Directly in Water / Hydroponics – Get some of the fastest plant growth and biggest yields possible of any grow medium. The biggest downside is it can be difficult to get plants started, as roots get sick if you don’t set it up right. Here’s how to grow cannabis in hydro so plants start strong with healthy roots every time.
- Less Common Types of Hydro – Some people grow with plant roots suspended in misted air (aeroponics) or in a tank with fish (aquaponics), but these are relatively less common for cannabis growers and tend to be more work than the other options.
Example of good cannabis soil (this is Fox Farms Ocean Forest soil).
Example of a good cannabis coco coir mix – 70% coco and 30% perlite (this is Cultivation Nation 70/30 coco mix).
A cannabis plant growing in hydroponics (roots directly in water).
What’s the Best Cannabis Soil?
Your absolute best option would be to compost your own soil (or purchase “hot” compost to add to your regular soil) which gets incredible taste results. The cool thing about this option is, once you’re set up, you just add water and don’t need to worry about adding nutrients.
For those of us who prefer pre-made mixes, I recommend starting with the popular Fox Farms Ocean Forest soil (often referred to as FFOF) since it’s already supplemented with plenty of nutrients that work very well for young cannabis plants. It’s a rich yet still somewhat airy soil that is made for plants just like cannabis and has been used by growers for years. After 4-6 weeks, you should start giving nutrients in the water. Fox Farms offers a mostly-organic nutrient system that gets fast growth and great bud quality when growing cannabis in soil.
If you have limited soil options, choose an organic potting mix which is usually available in some form in the gardening section of any big-box store. As long as you use good cannabis nutrients (more on that below), a regular organic potting mix will work just fine.
Common cannabis-friendly potting mix brands in the US:
- Fox Farms Ocean Forest Soil (top-tier) – no nutrients needed for first 4-6 weeks.
- Fox Farm Coco Loco soil (top-tier) – another top-tier soil, but mixed with coco. Faster growth and less chance of overwatering than non-coco soils, but lowish on nutrients so needs you to add nutrients when watering plants after 2-3 weeks.
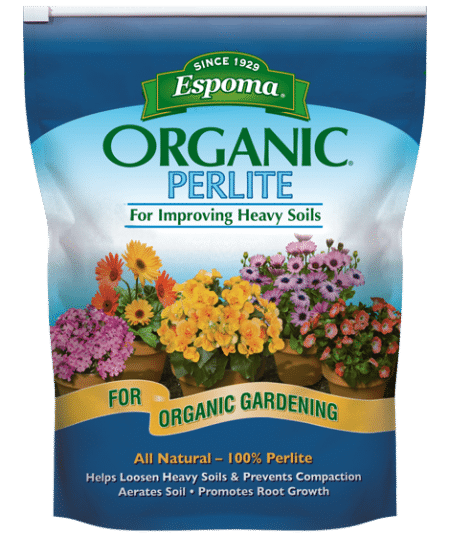
- Espoma Organic Potting Mix (decent) – easy to find and gets the job done, needs nutrients in the water after about 4 weeks.
- Miracle-Gro Organic Potting Mix (just okay) – If you say you’re growing in Miracle-Gro soil, a lot of cannabis growers will wag their fingers at you. In addition to poor drainage, the original Miracle-Gro soil contains slow-release Nitrogen which is good for vegetative plants but bad for bud growth in the flowering stage and you can’t really rinse it out. Too much Nitrogen in the flowering stage can lower yields as well as possibly add a green or chemical “taste” to buds. However, if you’re going to use Miracle-Gro, their Organic Potting Mix doesn’t have slow-release nutrients, which makes it a better option for growing cannabis than their standard version. It still drains poorly even with perlite, but if you’re desperate it does the job and you can get good results if you use good nutrients. The truth is that many growers have made it to harvest over the years with Miracle-Gro, despite some problems along the way, and even though it’s definitely not optimal, sometimes you have to do what you have to do!
Pick up a bag of perlite (found in the garden section) to help the soil drain better if it doesn’t already contain perlite. Perlite looks like little white rocks and should be mixed in so you have about 70% soil and 30% perlite. Should you add perlite to your soil?
What type of pot should I use for soil or soilless growing mediums?
If you’re having a tough time deciding on a grow medium, you might want to think about starting with a mix of coco coir and perlite. It’s easy and low-maintenance. That’s how I got started growing and I love how fast cannabis plants grow and how big the buds get when you combine it with good nutrients.
Growing with coco coir can be a good choice for beginners because it’s cheap, holds water well, and doesn’t have as many of the problems associated with soil (bugs, root problems, etc.). Yet since it’s hand-watered, it’s intuitive and has a lot of the ease of soil growing.
What about hydro? I’ve heard many people recommend against growing cannabis hydroponically for your first time because it’s “too complicated,” yet I’ve seen growers succeed at every grow type even on their very first grow. If you really want to grow hydroponically, I recommend you don’t waste your time doing something else first. If you’re passionate about hydroponic growing and do your research before you get started, there’s no reason you won’t be able to do incredibly well your first time. Read our bubbleponics tutorial to see how GrowWeedEasy.com co-creator Sirius got started growing cannabis with top-fed DWC on his very first grow.
Learn more about different cannabis grow mediums here.
Step 4: Choose Your Nutrients
Soil growers – If you’re growing with composted super soil, you don’t really need to worry much about nutrients. If growing in regular soil, your plants will use up the nutrients after a while, and you should use cannabis nutrients made for soil to make sure your plants produce at their best. You don’t want plants to run out of nutrients during the crucial bud-building phase, as a lack of nutrients in the budding stage reduces your yields and bud quality.
Even if you started with an amended soil like FFOF, you will still need to start adding nutrients once you reach the flowering/budding stage as cannabis plants are heavy feeders and your plants will have already used up most of the nutrients in the soil by the time budding begins.
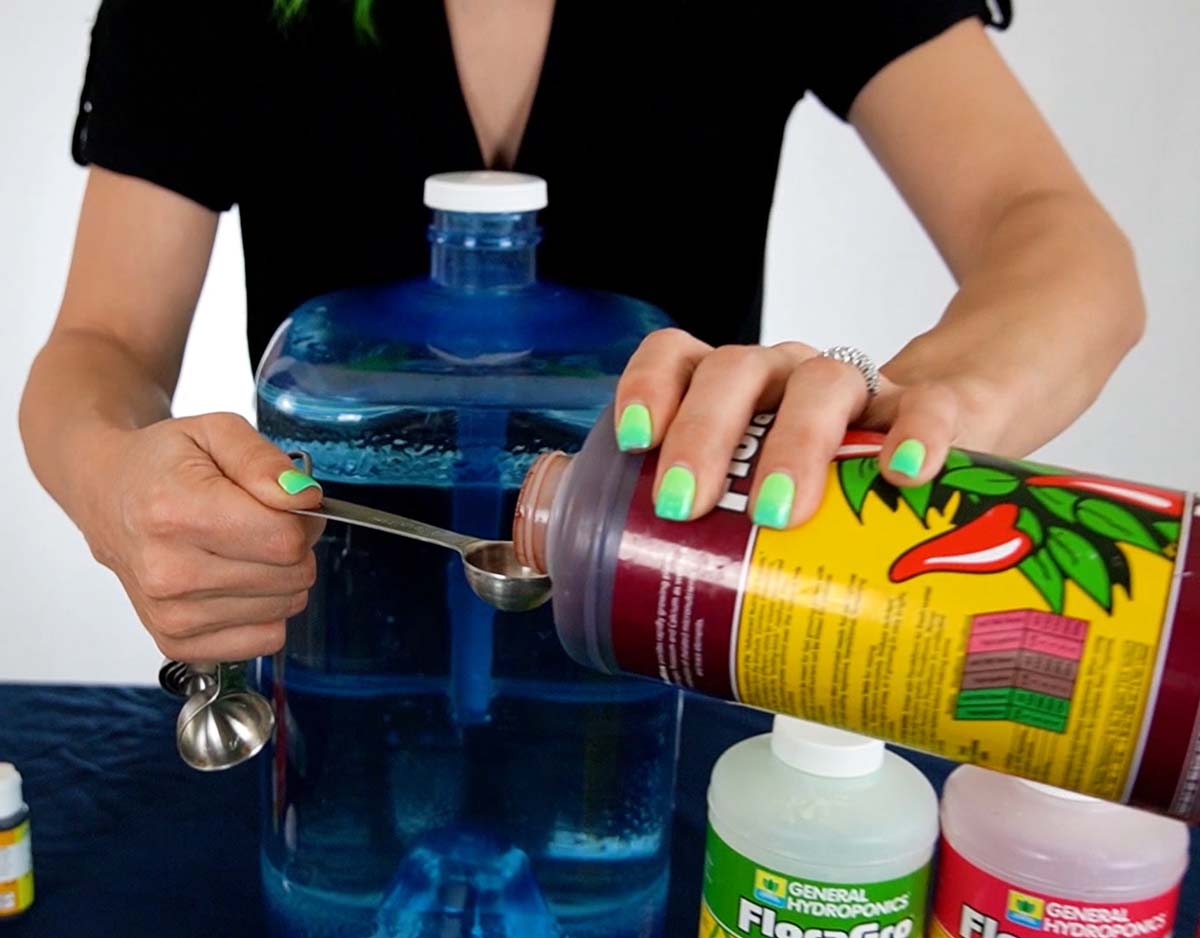
Soilless & Hydroponic growers – If you are growing in any medium besides soil, like a soilless mix or directly in water, you will want to get cannabis nutrients specifically made for hydroponics. Some nutrients are even more specific; for example, Canna Coco is formulated to work best for growing weed in Coco Coir. For coco or hydroponic grows, I highly recommend the General Hydroponics Nutrient Trio – here’s a guide on how to use the cannabis-friendly GH trio w/ nutrient schedule. These are the nutrients I most often use with my cannabis plants.
One nutrient system to rule them all…
Looking for a suggestion? One of the simplest (yet inexpensive) nutrient systems that work extremely well for beginning cannabis growers is Dyna-Gro Superthrive Grow + Bloom.
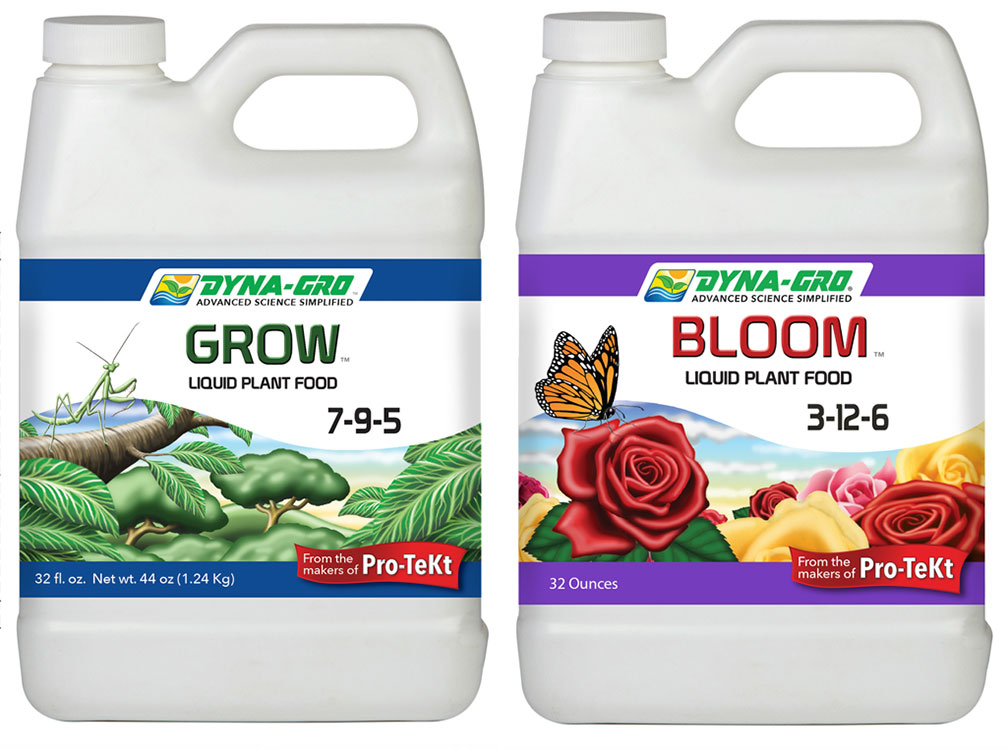 Dyna-Gro is used at 1 tsp/gallon in soil, water, coco coir, or any growing medium and works amazingly well for growing cannabis. It does not build up salt in your growing medium like many other inexpensive fertilizers, and it will never clog your hydroponic system.
Just use the “Grow” bottle during the Vegetative stage and the “Bloom” bottle during the Flowering stage. You can actually follow the instructions on the bottle. It’s super simple.
How much nutrients to give to cannabis plants
Most nutrient systems come with a “schedule” you can follow. You should see it recommends different nutrients for the vegetative stage (often called “grow” or “all-purpose”) vs the flowering stage (often called “bloom” or “fruiting”).
With most nutrient systems, avoid starting at full strength with seedlings or it can burn your plants. Always start at “seedling strength” which is typically 1/4 to 1/2 of regular strength. Learn more about nutrient burn (the most visual result of too high levels of nutrients).
With some sensitive plants and less powerful grow lights, you may only have to use nutrients at 1/2 strength compared to the included schedule. With nutrient-hungry plants, especially under powerful grow lights, plants thrive with full-strength nutrients.
What to lower or raise the nutrient dose:
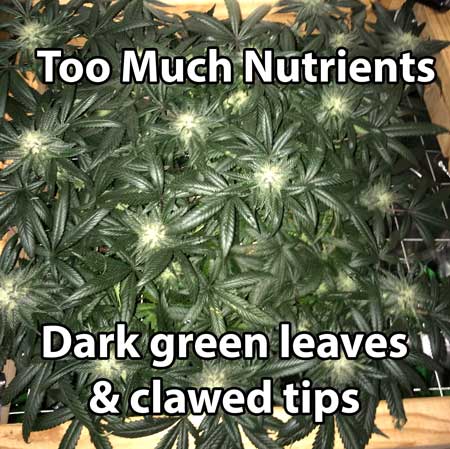
- Lower the dosage if you see nutrient burn. Especially if leaves appear dark green.
- Raise the dosage if you notice that your plant looks pale or lime green, especially if lower leaves are turning yellow and falling off on their own.
Learn more about cannabis-friendly nutrient systems.
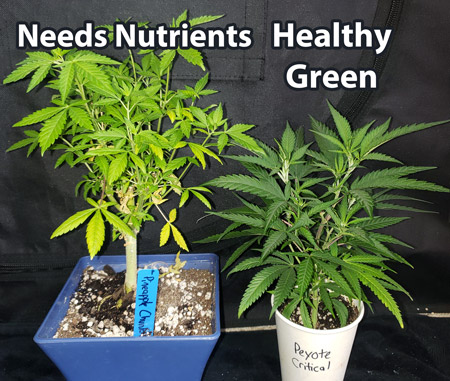
Healthy green vs needs more nutrients – Look at the color of leaves to determine whether you need to adjust nutrient dosage.

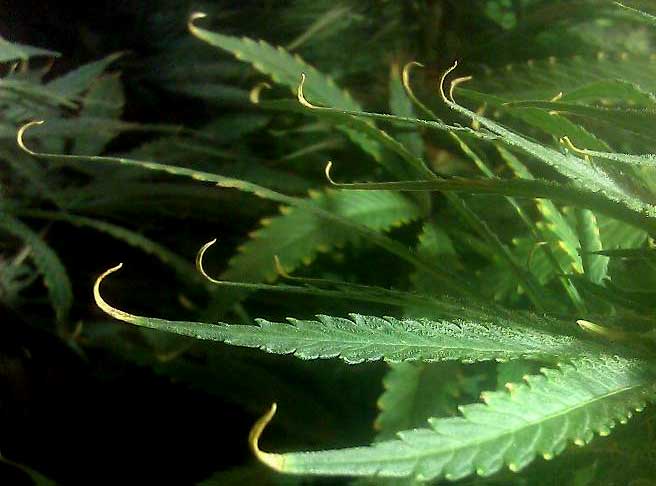
Too much nutrients – leaves appear dark green and ends may curve downwards.
Too much nutrients – Leaf tips turn brown and dry, often referred to as “nutrient burn”. However, other problems besides nutrient burn can affect leaf tips. Check this out: Is it nutrient burn or something else?
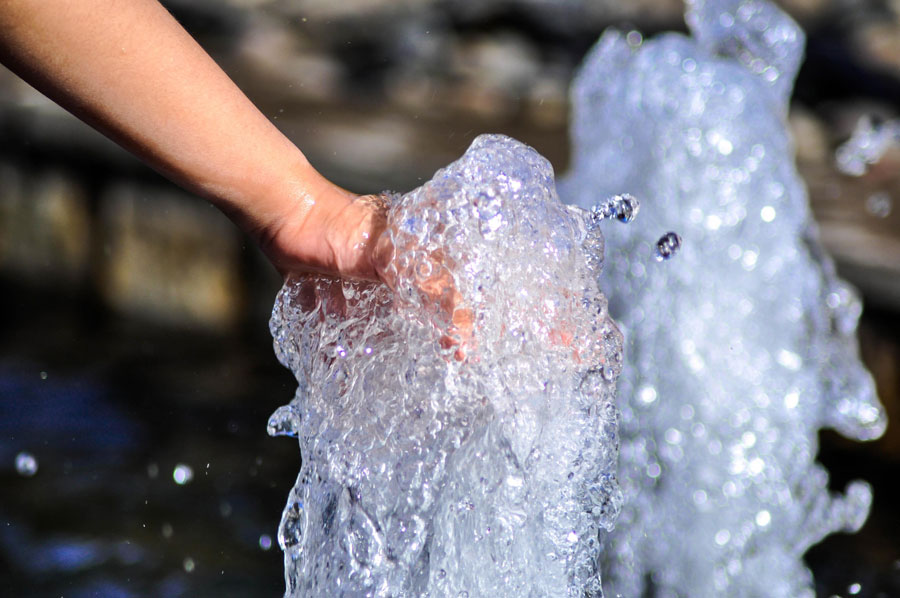
Is my tap water “good enough” for growing cannabis?
Most growers can use their tap water. But when is tap water “bad” for growing cannabis?
First off, if your water is not safe to drink, you shouldn’t use it for your plants. But even if your tap water is safe, you may wonder if it’s the best choice.
When it comes to water sources for growing cannabis, let’s first talk about the “hardness” of your water. The “hardness” of water describes how much extra “stuff” (like minerals and/or impurities) is contained in your regular tap water. You can contact your local water supplier for more information (ask for a “municipal water report”), or you can test the PPM of your water at home.
Generally, as long as your water has less than 200-300 PPM (parts per millions) of extra stuff, it should be okay to use it for growing. If you are worried about the quality of your tap water, you can choose to use purified or Reverse Osmosis (RO) water, but you may then need to add extra Cal-Mag and possibly a few other supplements to help make up for the random minerals and nutrients that are normally found in tap water.
If you’re looking to buy water at the store, your best option for growing cannabis is usually “spring water” as opposed to purified water. Spring water is not only clean with a neutral pH, but has some natural minerals and micronutrients that cannabis plants adore.
Tap water is usually just fine to grow cannabis plants. However, some places have very hard water or tap water with unacceptable impurities, and growers in these areas will likely need to use purified or spring water to get the best results.
Summary: Tap water is usually okay. But if you must buy water, choose “spring water” for cannabis plants (instead of purified or reverse osmosis water).
Step 4B: Nutrients, continued: The Importance of Root pH
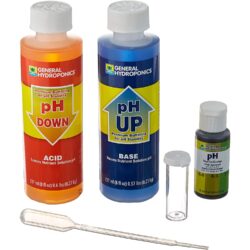
It’s important to maintain the pH of your root environment to prevent nutrient problems.

The easiest way to do that is to test the pH of your water before you water your plants or add water to your reservoir.
There are certain types of grows (such as when growing cannabis in organic composted super soil) where you don’t need to test your pH unless you run into problems. This is because with a properly composted super soil, you actually have a microbial colony living in the soil that will take care of the pH and hand-deliver the nutrients to the roots of your plants for you. However, this is a rare exception to the pH testing rule, and almost all growers need to regularly test and maintain pH for a successful grow. If you’re not growing in super soil that you have amended and composted (or purchased) yourself, testing and maintaining pH is a MUST.
Some growers will always get lucky and successfully grow weed without testing the pH of their water, but most people who don’t test for pH will start seeing signs of nutrient deficiencies and other nutrient problems.
If the pH at the plant roots is too high or too low, your plants won’t be able to absorb nutrients properly.
Even if plants do fine in the vegetative stage, cannabis plants tend to be more picky and prone to problems in the flowering/budding stage. Many growers have written in to tell me they got all the way to the flowering stage without testing pH, then were surprised that they start running into nutrient problems as soon as the plants start budding. In order to make sure this doesn’t happen to you, it’s important to get in the habit of testing pH right from the beginning!
Even if the right amounts of nutrients are present, your cannabis plants simply cannot absorb them if the pH isn’t in the correct range.
It’s actually really easy, quick, and cheap to learn how to check and adjust the pH of your water, and there are “pH test kits” specifically made for this purpose.
After you get the hang of it, checking and adjusting the pH and will take you less than 3 minutes each time you water your plants. And once you really get the hang of it, adjusting the pH takes only seconds. The results speak for themselves: monster yields with huge buds from healthy, fast-growing plants.
Soil: Maintain 6.0 – 7.0 pH
Hydroponics: Maintain 5.5 – 6.5 pH
Getting the pH exactly right isn’t nearly as important as checking regularly and making sure it stays within these ranges.
Click here for more information on pH testing.
Leaves stay green and healthy when you check the pH of your water.
Step 5: Get Your Cannabis Plants (& Choose Your Strain)
For those growers lucky enough to know other cannabis growers in real life, getting plants is usually pretty simple. Many cannabis collectives and dispensaries happily sell you clones, and these days some even sell cannabis seeds. A great advantage of purchasing clones or seeds from a trusted source is that you can trust the genetics are at least decent.
Starting cannabis with seeds vs clones.
Yet many people do not know any other growers in real life. For these soon-to-be growers, the best option may be to purchase clones or cannabis seeds online from a breeder or seed bank.
In countries like the US, Canada, and Germany, it is reliable and safe to buy your cannabis seeds online from a reputable seed bank. Many seed banks also ship seeds worldwide, though may have exceptions for specific countries. Learn more about safety precautions when ordering seeds online.
Get Seeds – These days you can buy almost any strain online as seeds. I pretty much always start with seeds. They last for years in storage, and I like trying new strains every grow. View a list of tested & trusted seed vendors here: https://www.growweedeasy.com/seeds
Get Clones – A clone or “cutting” is a small living plant. Clones are made by cutting off a stem and then letting it grow roots. At that point, it’s a small, living plant. Many cannabis dispensaries and collectives sell clones to prospective growers. You might know someone who can give you a clone. Additionally, some seed banks also ship clones through the mail.
Seeds are great for first time growers. One downside to clones is they could come with bugs or diseases. They also need to be planted and grown immediately. For your first grow, I highly recommend starting with seeds. Seeds are simple and predictable, easy to store, and never arrive with unwanted pests. Some great beginner strains, such as autoflowering strains, can only be started as seeds.
That being said, cannabis plants are super easy to clone, and many growers start with clones. Learn how to make your own cannabis clones.
You might enjoy…
- Choose the Right Cannabis Strain
- Trustworthy Breeders
- 10 Things I Wish I’d Known Before I Started Growing
Step 6: How to Germinate Cannabis Seeds
- If you have already a rooted clone (a live cannabis plant) please skip right to Step 7.
There are many methods for cannabis seed germination.
Germination Specifics
- Keep seeds moist – Once seeds get wet, the germination process has begun. Don’t let them dry out after this point!
- Keep seeds warm – Cannabis seeds germinate best in warm conditions, round 80°F (27°C). Warmth gives you not just faster germination but also higher overall germination rates.
- Seeds pop in a few days – On average, cannabis seedlings pop in 2-3 days. Fresh seeds in good germination conditions can germinate in as little as 24 hours. Older seeds can take up to a week to germinate.
The easiest ways to germinate a cannabis seed is to stick it in the soil or coco. This is how mother nature does it. Learn more about how to germinate seeds in soil or coco.
Another easy option is to place seeds directly in a specialized starter cube like a Rapid Rooter.

Just keep the Rapid Rooters moist (but not soaking) and warm, around 80°F (27°C). So far, Rapid Rooters on a seedling heat mat or under a warm light (protected from the light of course) have given me the best germination rates of any method. They work with any growing medium, too. Once the seedling has emerged, you can stick the cube directly into your growing medium or hydroponic system.
Learn more about germinating seeds via Rapid Rooter.
Another popular way to germinate seeds is via the paper towel method.
Paper Towel Method:
You will need…
- Cannabis seeds
- 2 plates
- Paper towels
- Water
- A place to plant sprouted seeds

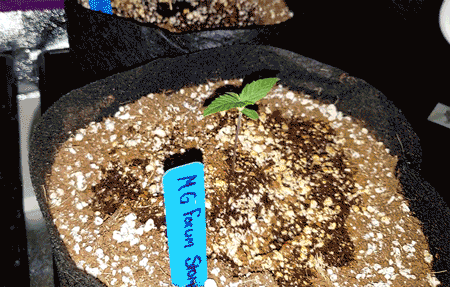
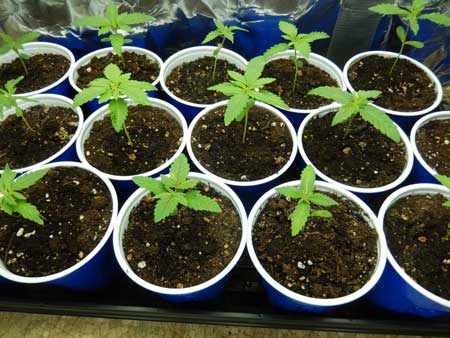
Happy cannabis seedlings look like this:

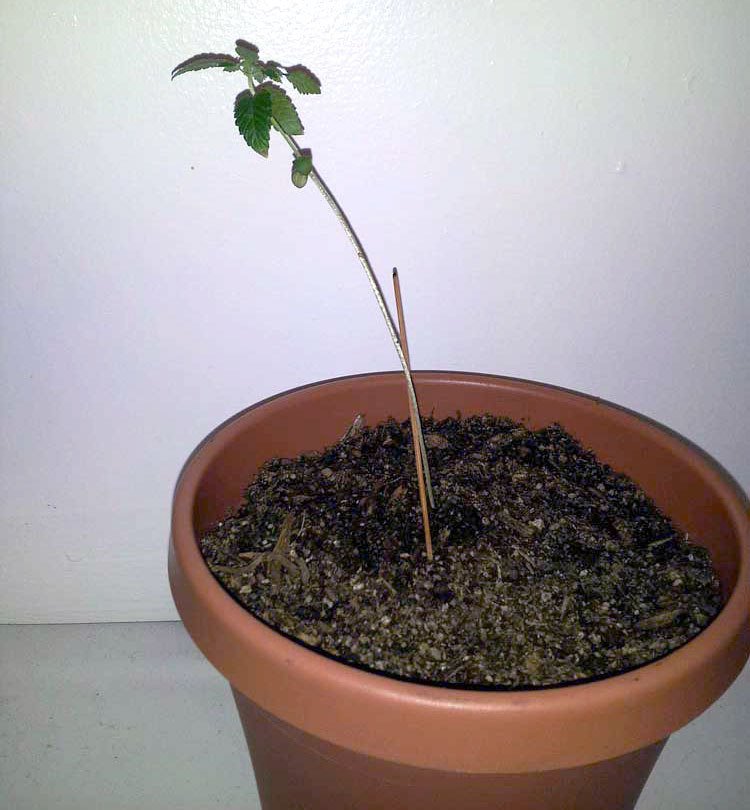
If seedlings seem to be “stretching” upwards or growing very tall or leggy, usually it’s because they want more light. Don’t let them go hungry! They’ll start growing normally once you give them proper light levels.
Tall, stretchy seedlings need more light.
Seedlings barely drink any water at all yet. As a result, new growers tend to overwater seedlings. We love our little seedlings and want to give them the world. The fact that you care is the sign of a good grower.
Luckily, watering seedlings is a skill that’s easy to learn. Just give a little water in a small circle around your seedling to start, every few days.
Cannabis seedlings don’t need much water at first.
If you want to take out all the guesswork, follow a proven seedling watering schedule.
Not sure how much water to give seedlings? Learn how to water cannabis seedlings perfectly every time.
These are happy, healthy cannabis seedlings.
Step 7: Vegetative Stage – Grow Your Plant Big and Strong
Once your plant grows the first “regular” set of leaves, it’s pretty much officially in the vegetative stage. How long is the vegetative stage?
Cannabis plants keep getting bigger and bigger with long days (vegetative stage) and start making buds when they get long nights (flowering stage).
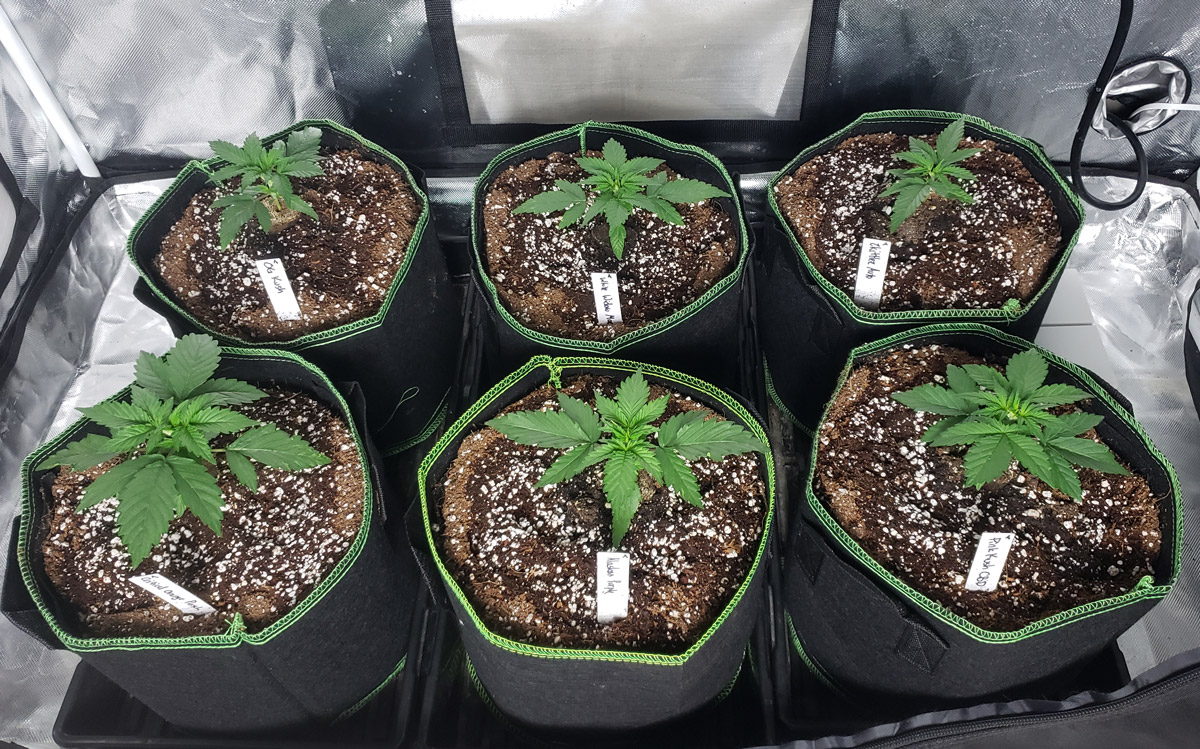
Healthy 3-week old cannabis plants.
Young growing cannabis plants grow fastest and healthiest when the temperature is a bit warm, about 70-85°F (20-30°C) between day and night.
If using LEDs, vegetative cannabis plants like it on the warmer side of that range. If you’re using “bulb” style lights (like fluorescents or HIDs), plants prefer it on the cooler end. Most important is just to make sure it doesn’t get freezing cold or burning hot.
Temperature between 70-85°F (20-30°C) and humidity around 40-60% RH.
How often do I water my cannabis plants?
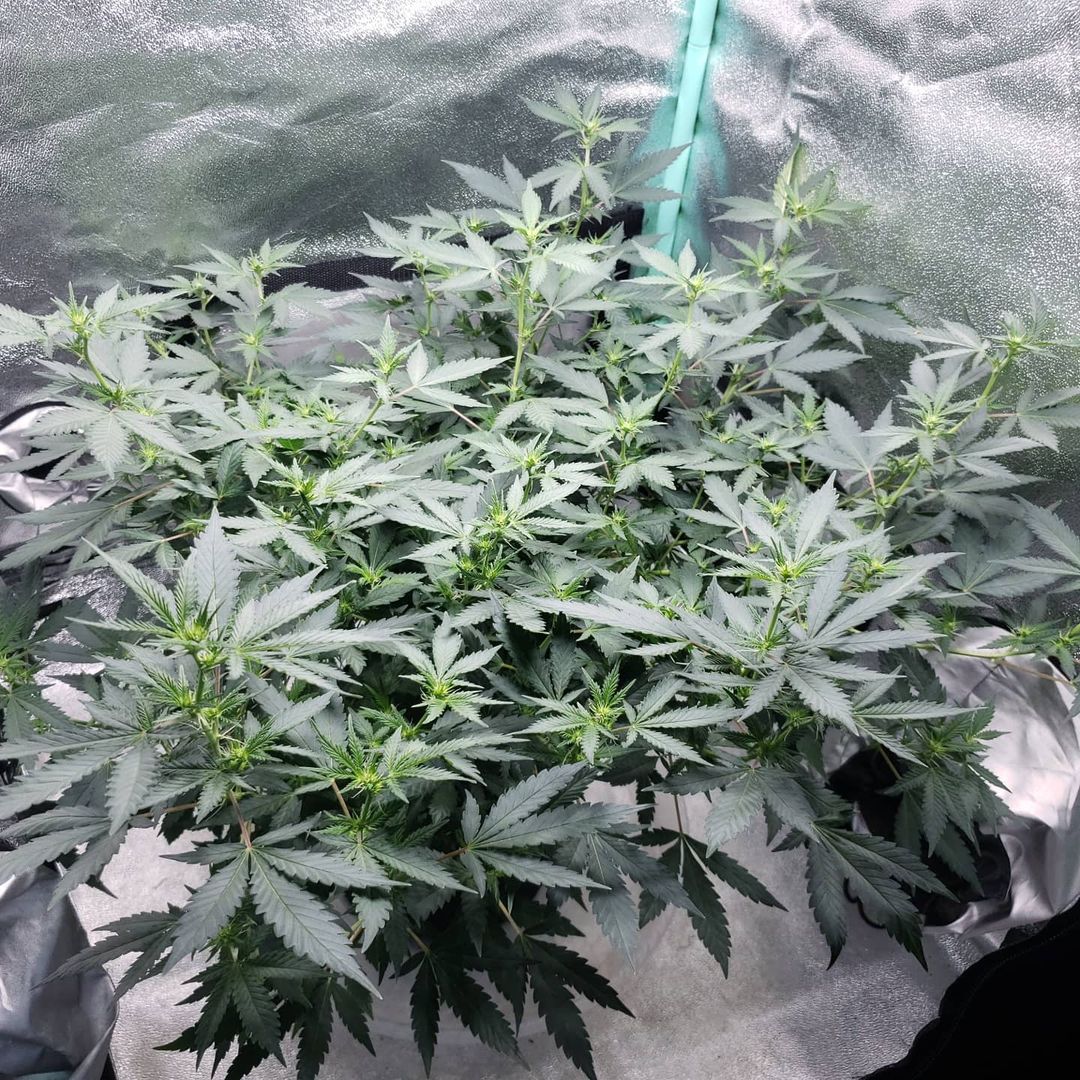
In the vegetative stage, plants focus ONLY on getting big and strong. Buds and flowers are not part of a cannabis plant’s vocabulary yet.
Only leaves and stems in the vegetative stage (no buds yet).
If you’re feeding your plant with additional nutrients, start at half strength as it can be easy to burn your young cannabis plants. Bring to 3/4 strength one plant starts growing vigorously. If your plant seems pale or displays signs of needing more nutrients (even though the pH is in a good range), then you can raise nutrient levels to full strength.
Why do different plants want different amounts of nutrients? There is some natural variation between different plants or strains as far as nutrient needs. Environment also plays a role. With bigger grow lights above 300W, cannabis plants often need full-strength nutrients. With smaller lights in the 100W range, you may need to stick to 1/2 or 3/4 strength to prevent nutrient burn.
Leaf Color: Only ever raise nutrient levels above full strength if the plant is showing signs that it needs more nutrients.
The main sign of needing overall higher nutrients is pale or lime green leaves. Often with nutrient-hungry plants, the lower leaves start turning yellow and falling off. This is the first sign of a nitrogen deficiency, the most common type of deficiency caused by overall lack of nutrients.
“Kelly green” leaves are happy, healthy leaves.
At this stage, you can’t tell if a cannabis plant is going to be a boy or a girl yet. Wait, why do I care if my plant is a boy or a girl? That comes next, in the flowering stage.
Light in the Vegetative Stage
- Give indoor plants 18-24 hours/light a day in the vegetative stage. 18 hours of light a day is preferable and, 24 is for the experimental type of grower.
- If growing outdoors, try to make sure your plant gets strong, direct light for most of the day, at least from 10am-4pm. And more if possible!
How do I control the way my cannabis plants grow during the vegetative stage?
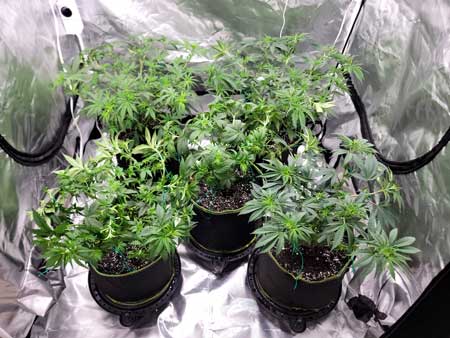
Spread vegetative plants out as they grow, to get more bud sites later.
Indoor growers – When do I switch my plant from the vegetative stage to the flowering stage?
How can I tell when the vegging stage ends?
What do I do if I run into problems?
The size your plant reaches in this stage has a huge impact on the final size of your plant. That’s because once the vegetative stage ends, on average a cannabis plant doubles in size.
That means you should try to start the flowering stage when your plants are 1/2 the final desired size.
Keep reading to learn what that means!
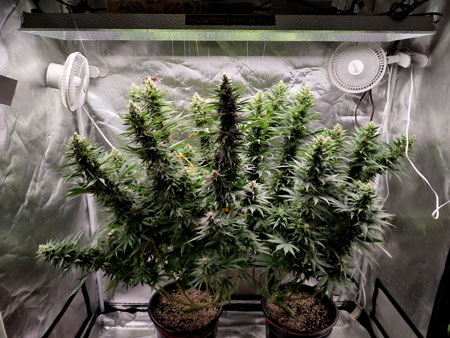
Step 8: Flowering Stage
This is the stage where your cannabis plants start making buds. This stage will last until harvest. You’re at the home stretch!
Buds start growing in the flowering stage. At first, it’s a few white hairs.
But soon you have white puffballs. These are baby buds.
During the flowering stage, you need to…
- 12-12 light schedule – Put grow lights on a timer so they turn on for 12 hours a day, and turn off for 12 hours a day. Except for auto-flowering plants, which should get the same light schedule from germination to harvest. This “tells” your cannabis plants to start making buds.
- Determine sex of your plants – Identify whether your cannabis plants are male or female. With regular cannabis seeds, half of plants are male, which don’t make buds. This step is not necessary if you start with feminized seeds. Feminized seeds only grow female plants, which means if you start feminized seeds that every plant makes buds.
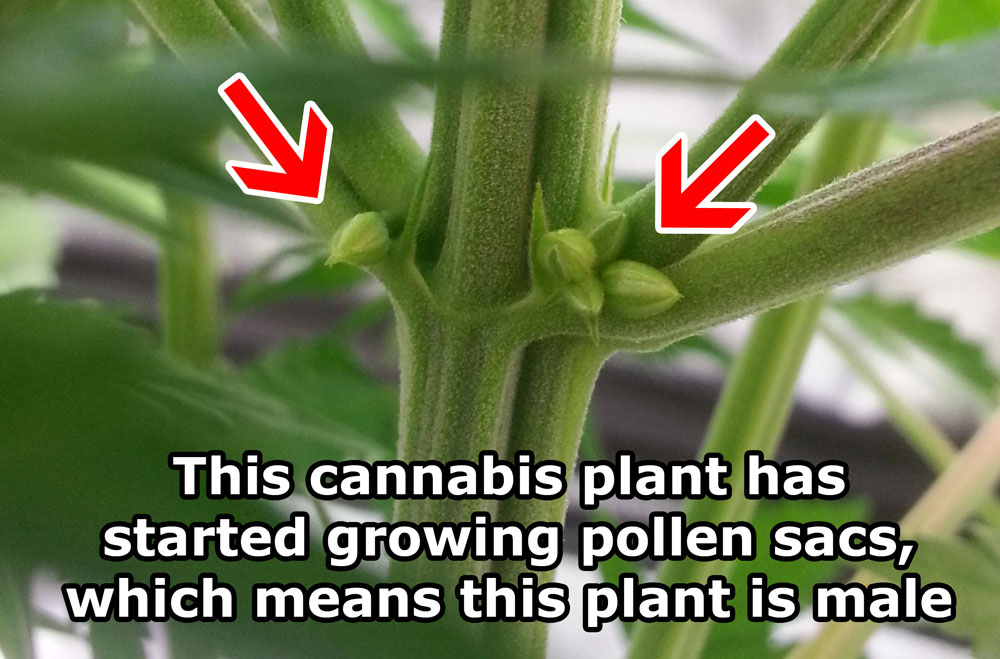
- Remove male plants – Male cannabis plants cause seedy buds. So as soon as you see a male plant, you should get rid of them unless your goal is to make seeds. Male plants grow pollen sacs, which are low in THC and not good to smoke.
We’re getting to the most exciting part.
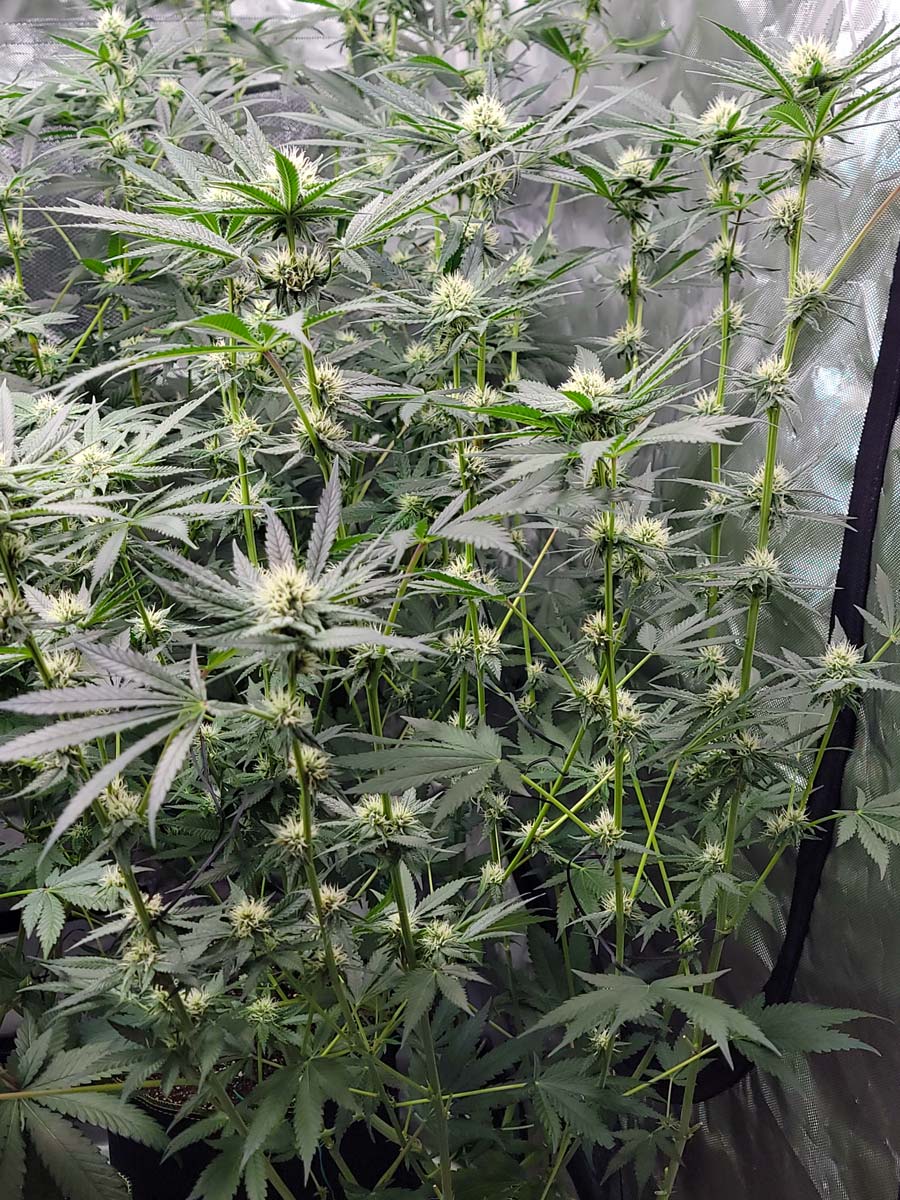
29 days after initiating 12/12, this Candy Games #38 plant is covered in buds
Photoperiod strains (most cannabis strains) begin flowering once they get 12 hours of uninterrupted darkness every day. The exception is auto-flowering cannabis strains, which start the flowering stage automatically without any lighting change.
Light
- Indoors, you must change to a 12-12 light schedule, with 12 hours of light & 12 hours of uninterrupted darkness each day. This is usually done by putting your grow lights on a timer. A 12/12 light schedule gets your cannabis to start flowering (making buds). When should I change my light schedule to 12-12?
- Outdoors, your weed will naturally start flowering when the days get short enough, usually a few months before winter. Just make sure they don’t get any light during their night period.
- Auto-flowering plants automatically start flowering on their own after about a month. Just keep giving them the same amount of light as the vegetative stage (18-24 hours of light a day).
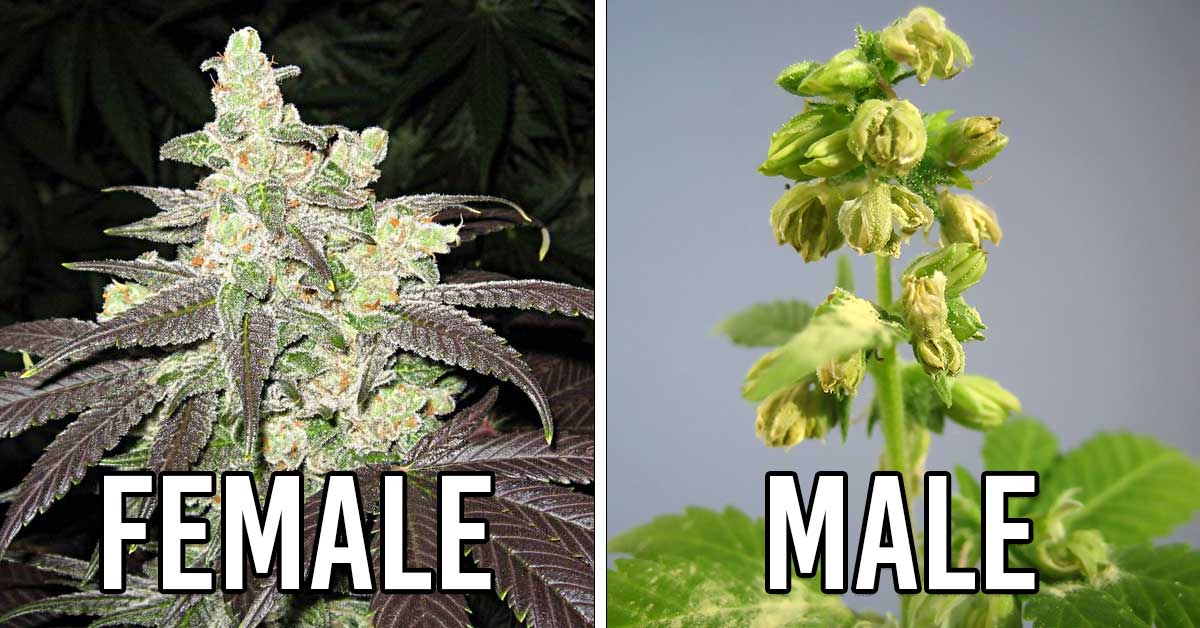
The flowering stage is where your plant goes through “puberty” and basically reveals whether they are a boy or a girl. Until a plant starts flowering, it’s difficult to determine the sex because male and female plants look the same in the vegetative stage.
Unfortunately, for regular seeds, half your plants will end up female and half will end up male. That’s why a lot of growers prefer starting with clones or buying feminized seeds. Feminized seeds ensure all the resulting plants grow into females.
As cannabis growers, we’re only looking for females as female plants are the only ones that make buds. Male plants just make pollen sacs (balls) that cannot be used for smoking.
A week or two after you initiate the 12-12 light schedule (or naturally in the wild), your plants will reveal their gender…
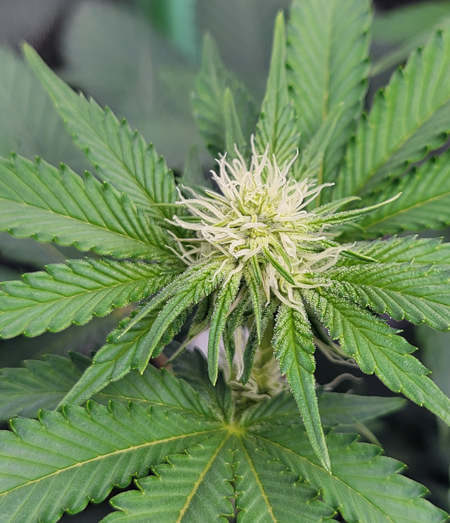
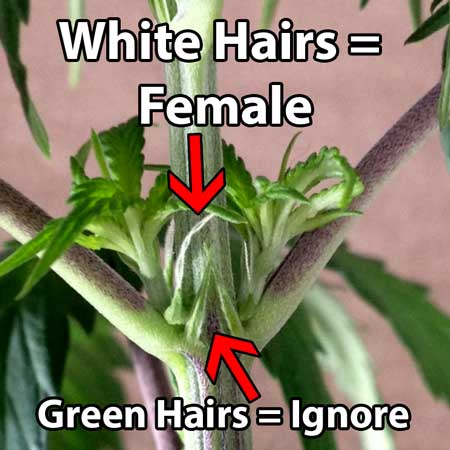
Female plants start growing wispy white hairs at the tops of branch joints. These hairs are the pistils (sometimes called “stigmas”) of her flowers (which are made up of “calyxes”). You get bunches of these calyxes growing on top of each other to make buds. Each calyx has two white hairs coming out of it. This is great news! It means this plant will eventually grow beautiful weed with buds/flowers/ganja that you can smoke.
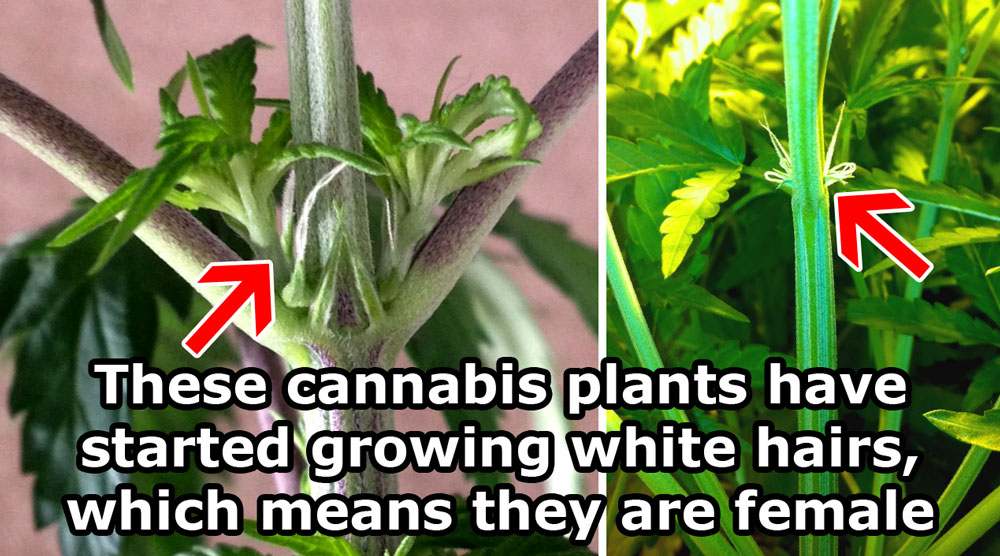
Ignore any green “hairs” you see. These are “stipules” and appear on male and female plants.
White hairs = female cannabis flowers.
Male plants start growing balls/pollen sacs with no white hairs/pistils. Unfortunately, most male plants do not develop psychoactive properties like girls do in their flowers. Plus, male plants can pollinate your female plants and cause them to make less bud and more seeds. Therefore, most serious cannabis growers choose to remove and dispose of male plants as soon as they show their sex.
Note: The sturdy green growths are not pistils, they are always there on both boy and girl plants. When looking for gender, you’re specifically looking for white wispy hairs (pistils).
Learn more: Is my plant a boy or a girl?
Ok, so you’ve gotten rid of your male plants. Your female plants will be growing more and more white hairs and before you know it, actual buds/flowers/trees are forming. Woohoo!
Now that you’re fully in the flowering stage, it’s best to keep temps slightly cooler, around 70-80°F (20-26°C) to produce buds with the best color, trichome production and smell. Learn more about what you need to do in the flowering stage to produce top-shelf buds.
How to Increase Overall Bud Quality and Appearance
It’s important to pay close attention to your cannabis plants during the flowering stage. This is because in this stage your plant is much more likely to suffer from nutrient problems as they’re focusing all their energy on growing buds.
“Flushing” Your Plants Before Harvest
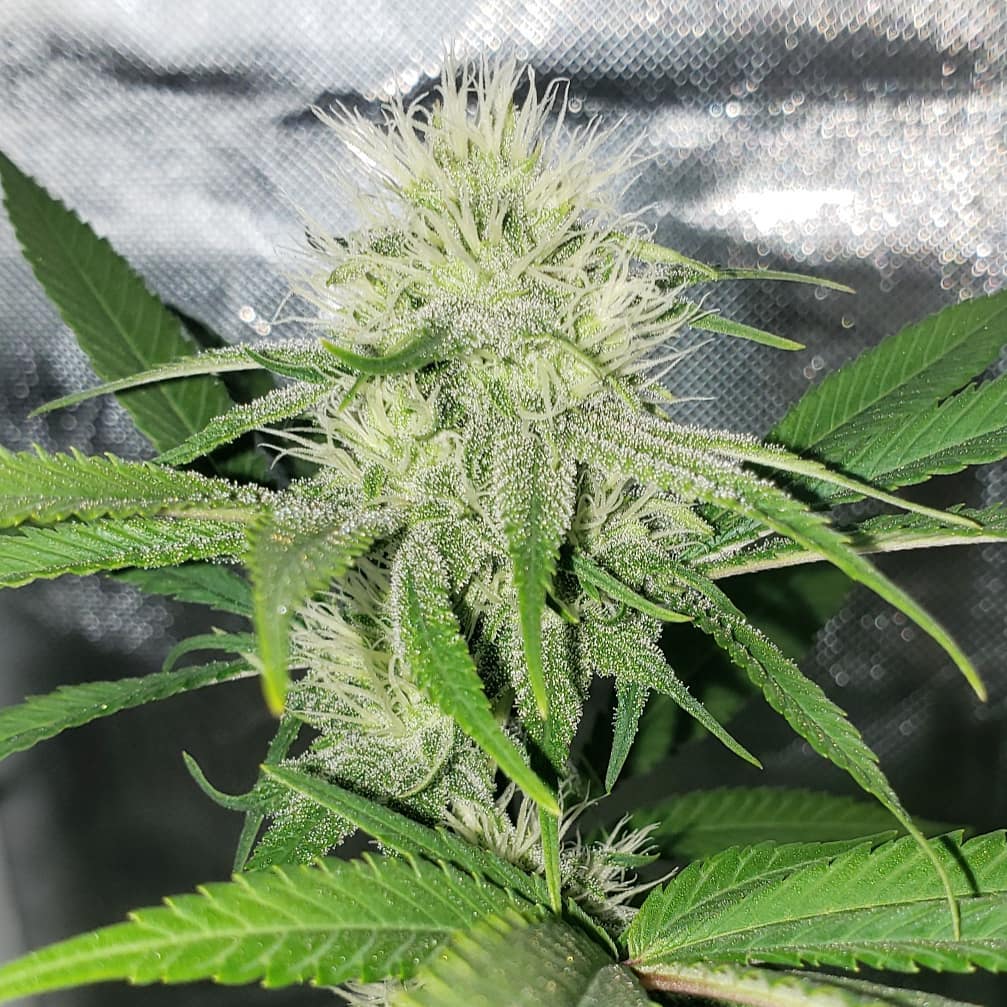
Buds start as white hairs
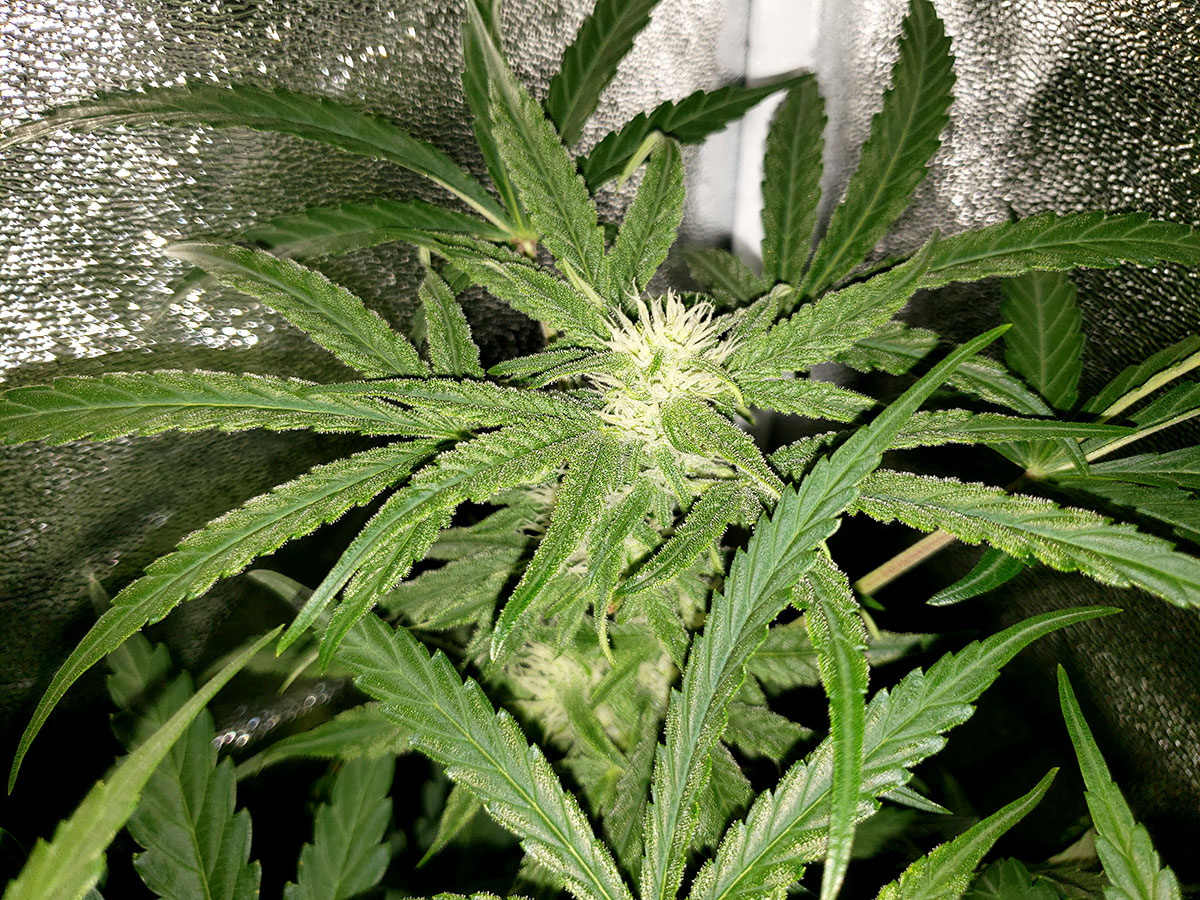
But these bunches of hairs soon develop into buds.
Zweet Inzanity (pictured here) produces excellent buds, and this strain was also very easy to grow.
With good care and lots of light, cannabis buds can get huge! Especially certain strains like Ultimate Auto (pictured here).
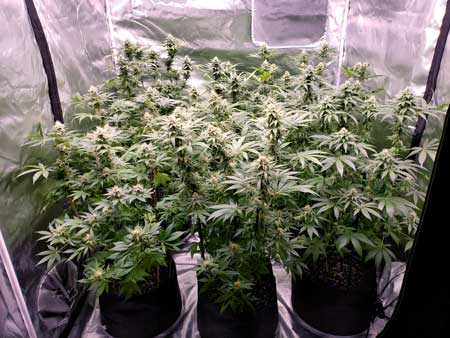
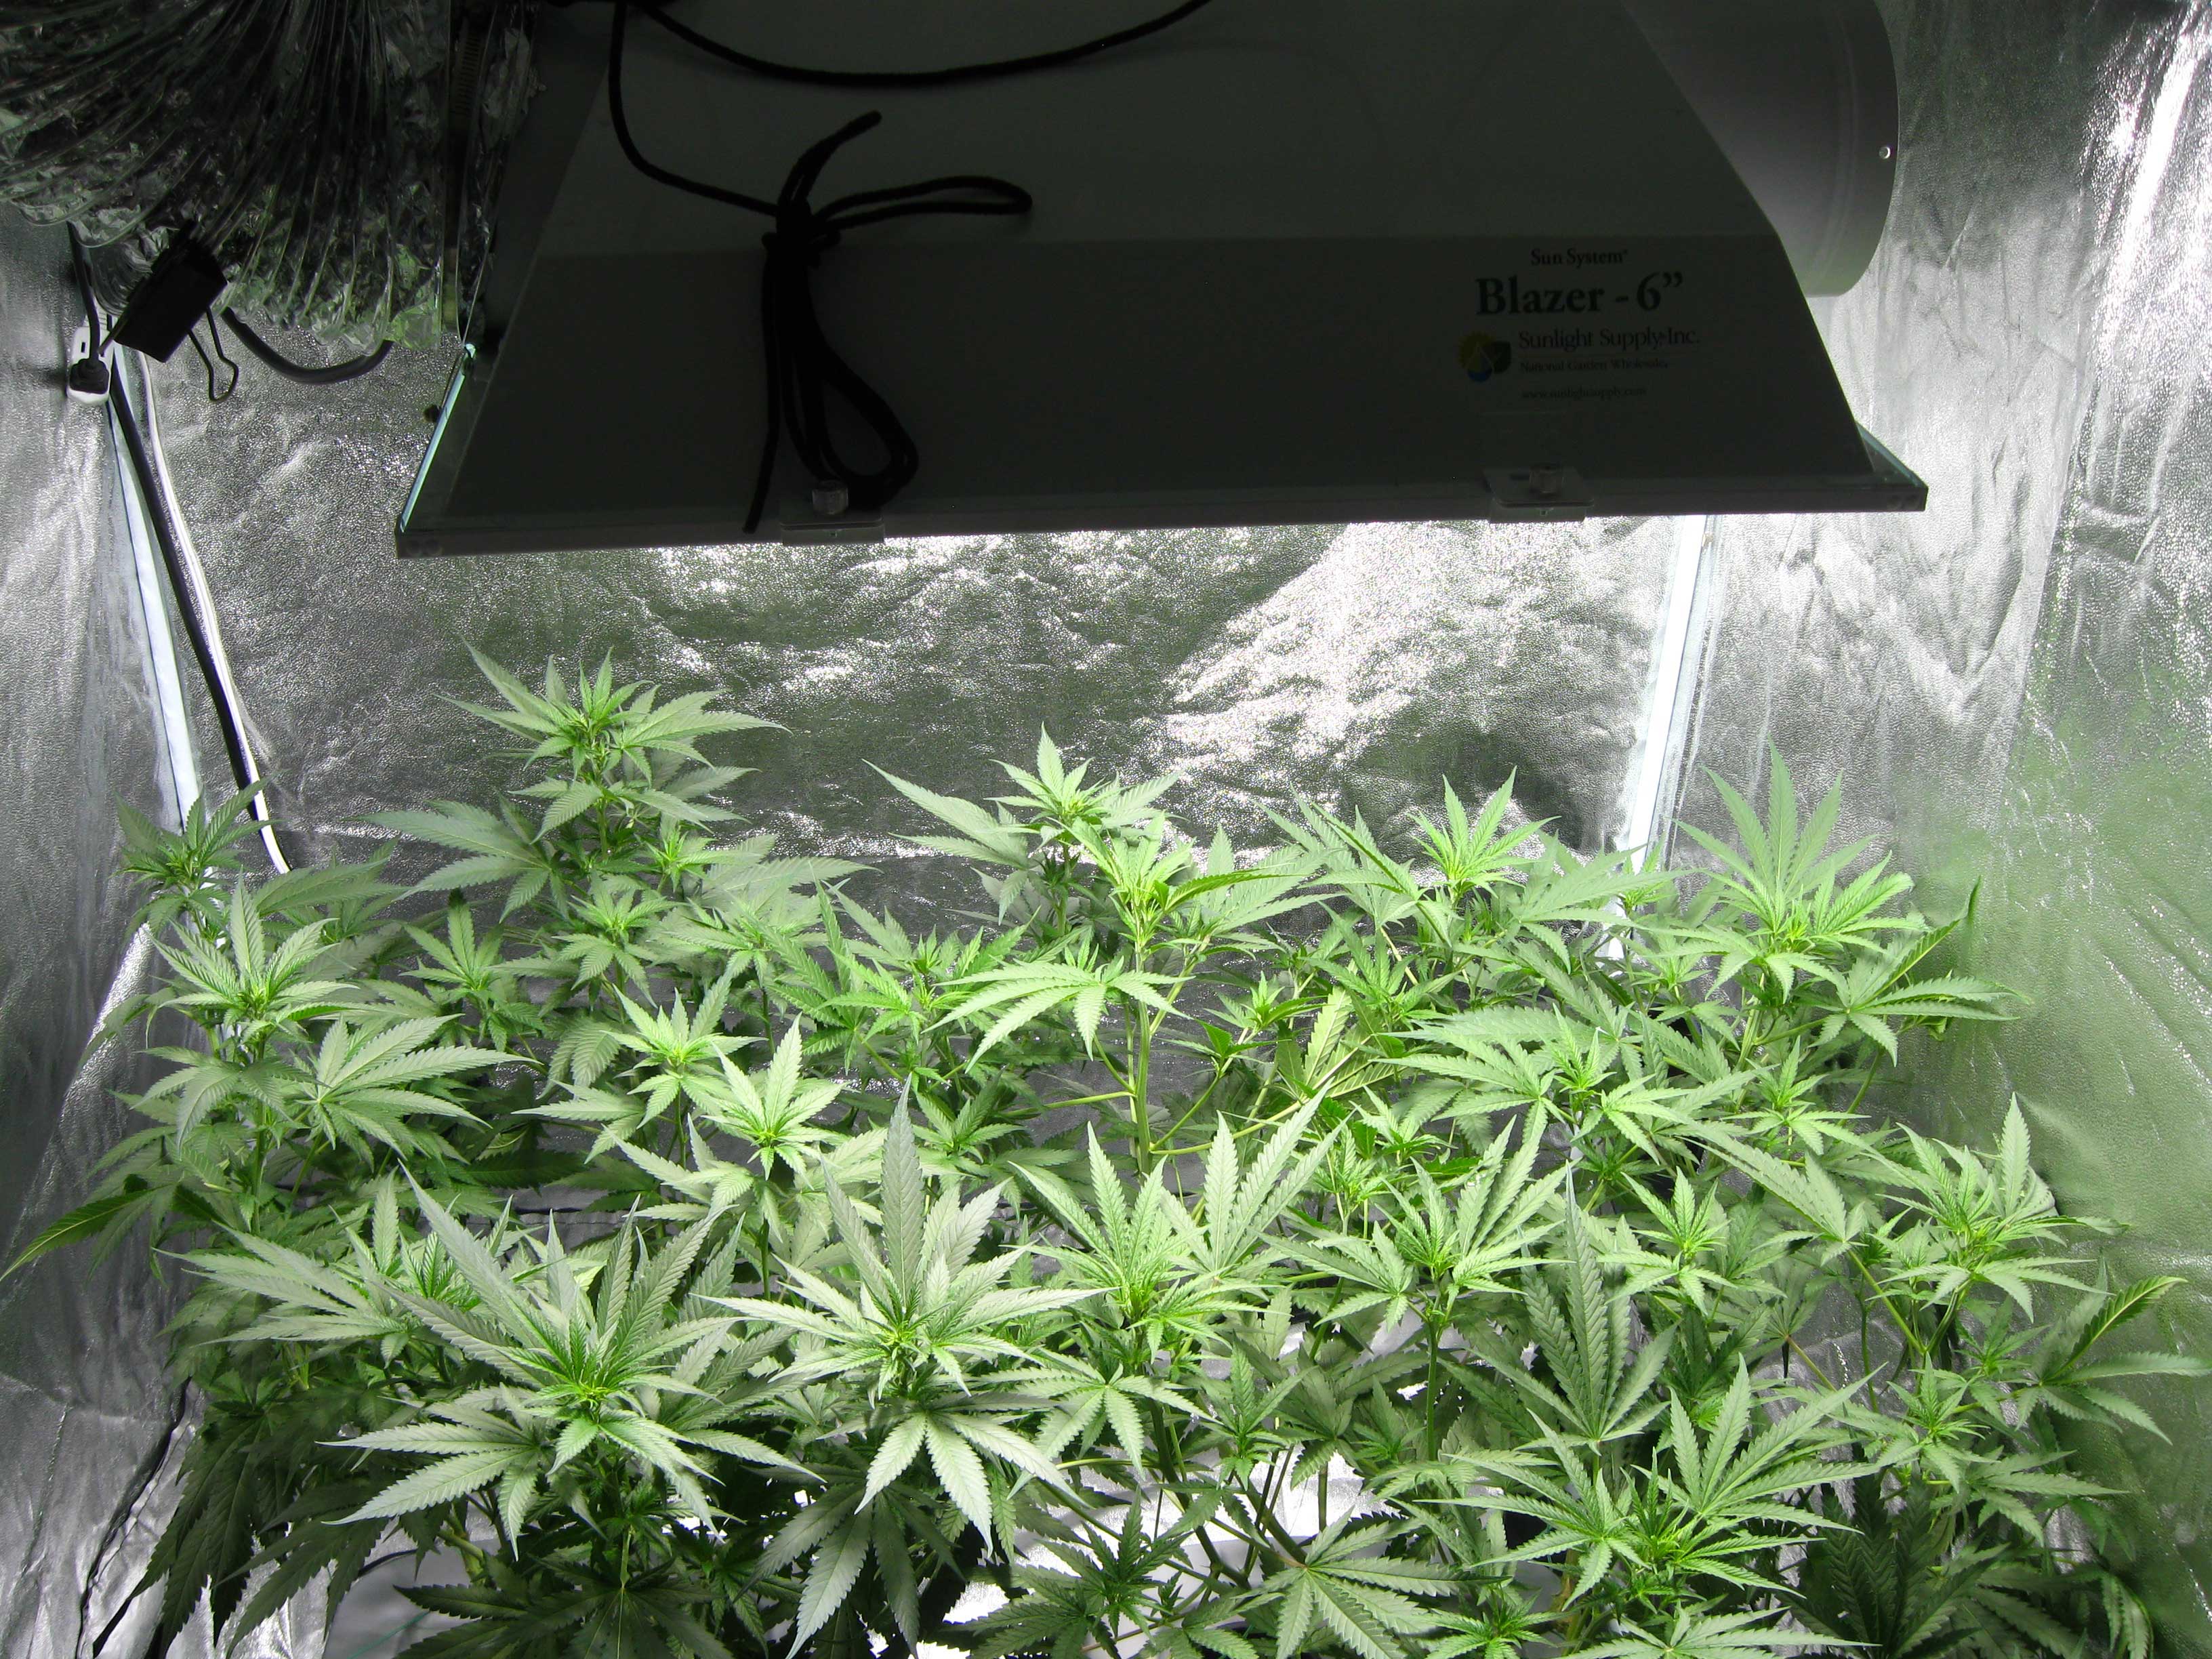
Keep plants healthy with lots of light, and soon your flowering cannabis plants are covered in thick, chunky buds!
Step 9: Harvest Your Weed
When to Harvest Weed? Is She Ready for Harvest?
- First, buds stop growing new, white hairs. By this point, your buds should be fragrant (the whole grow room or area will likely smell strongly of cannabis), plump, and ‘filled out’.
- Next, hairs darken and curl in.
- Low potency – If less than 65% of hairs have darkened and curled in, it’s too early. Early harvested buds may have more of a speedy effect, and have not reached full THC potency.
- Highest THC levels – Harvest when most hairs have darkened and buds look solid. This is when buds have the highest THC levels.
- Most relaxing – Harvest 1-2 weeks later for more a couchlock, anti-anxiety effect (some of the THC has turned into the more relaxing CBN).
Too early – 4-6 weeks left until harvest.
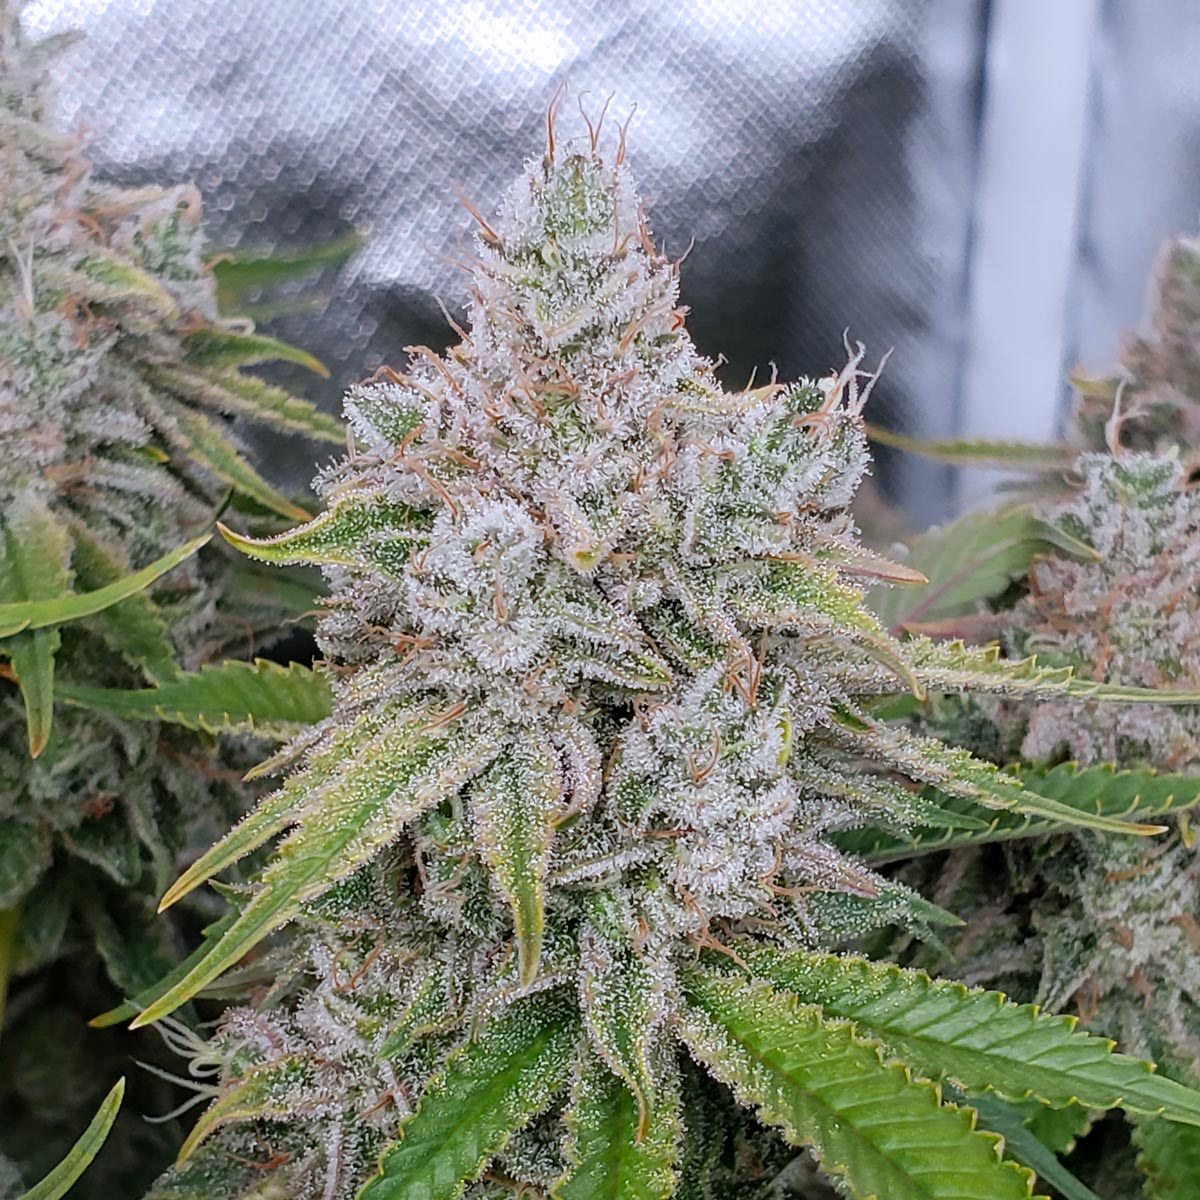
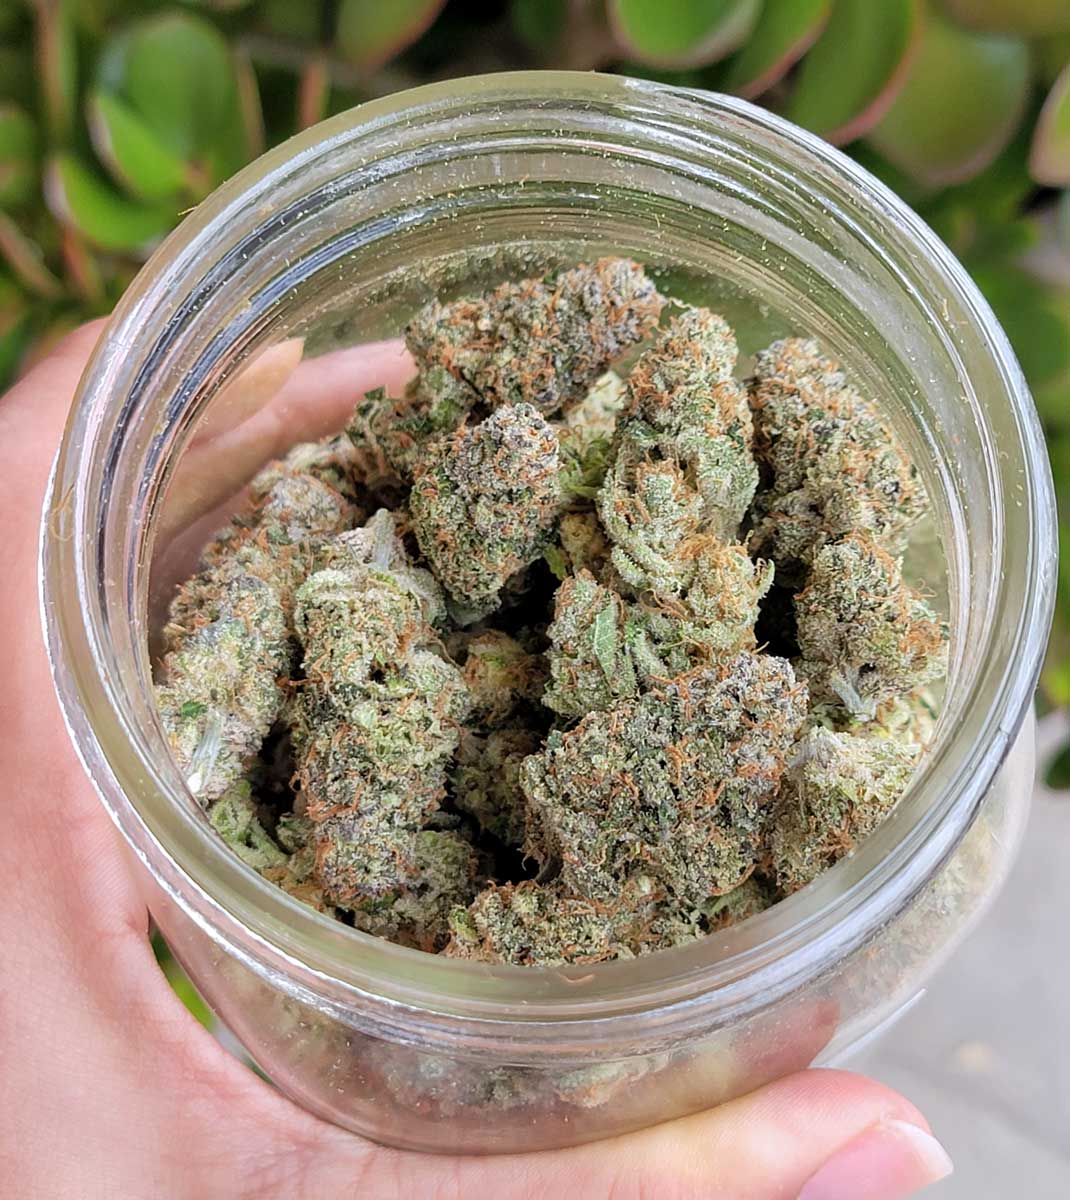
Ready to harvest – full potency. Buds appear solid.
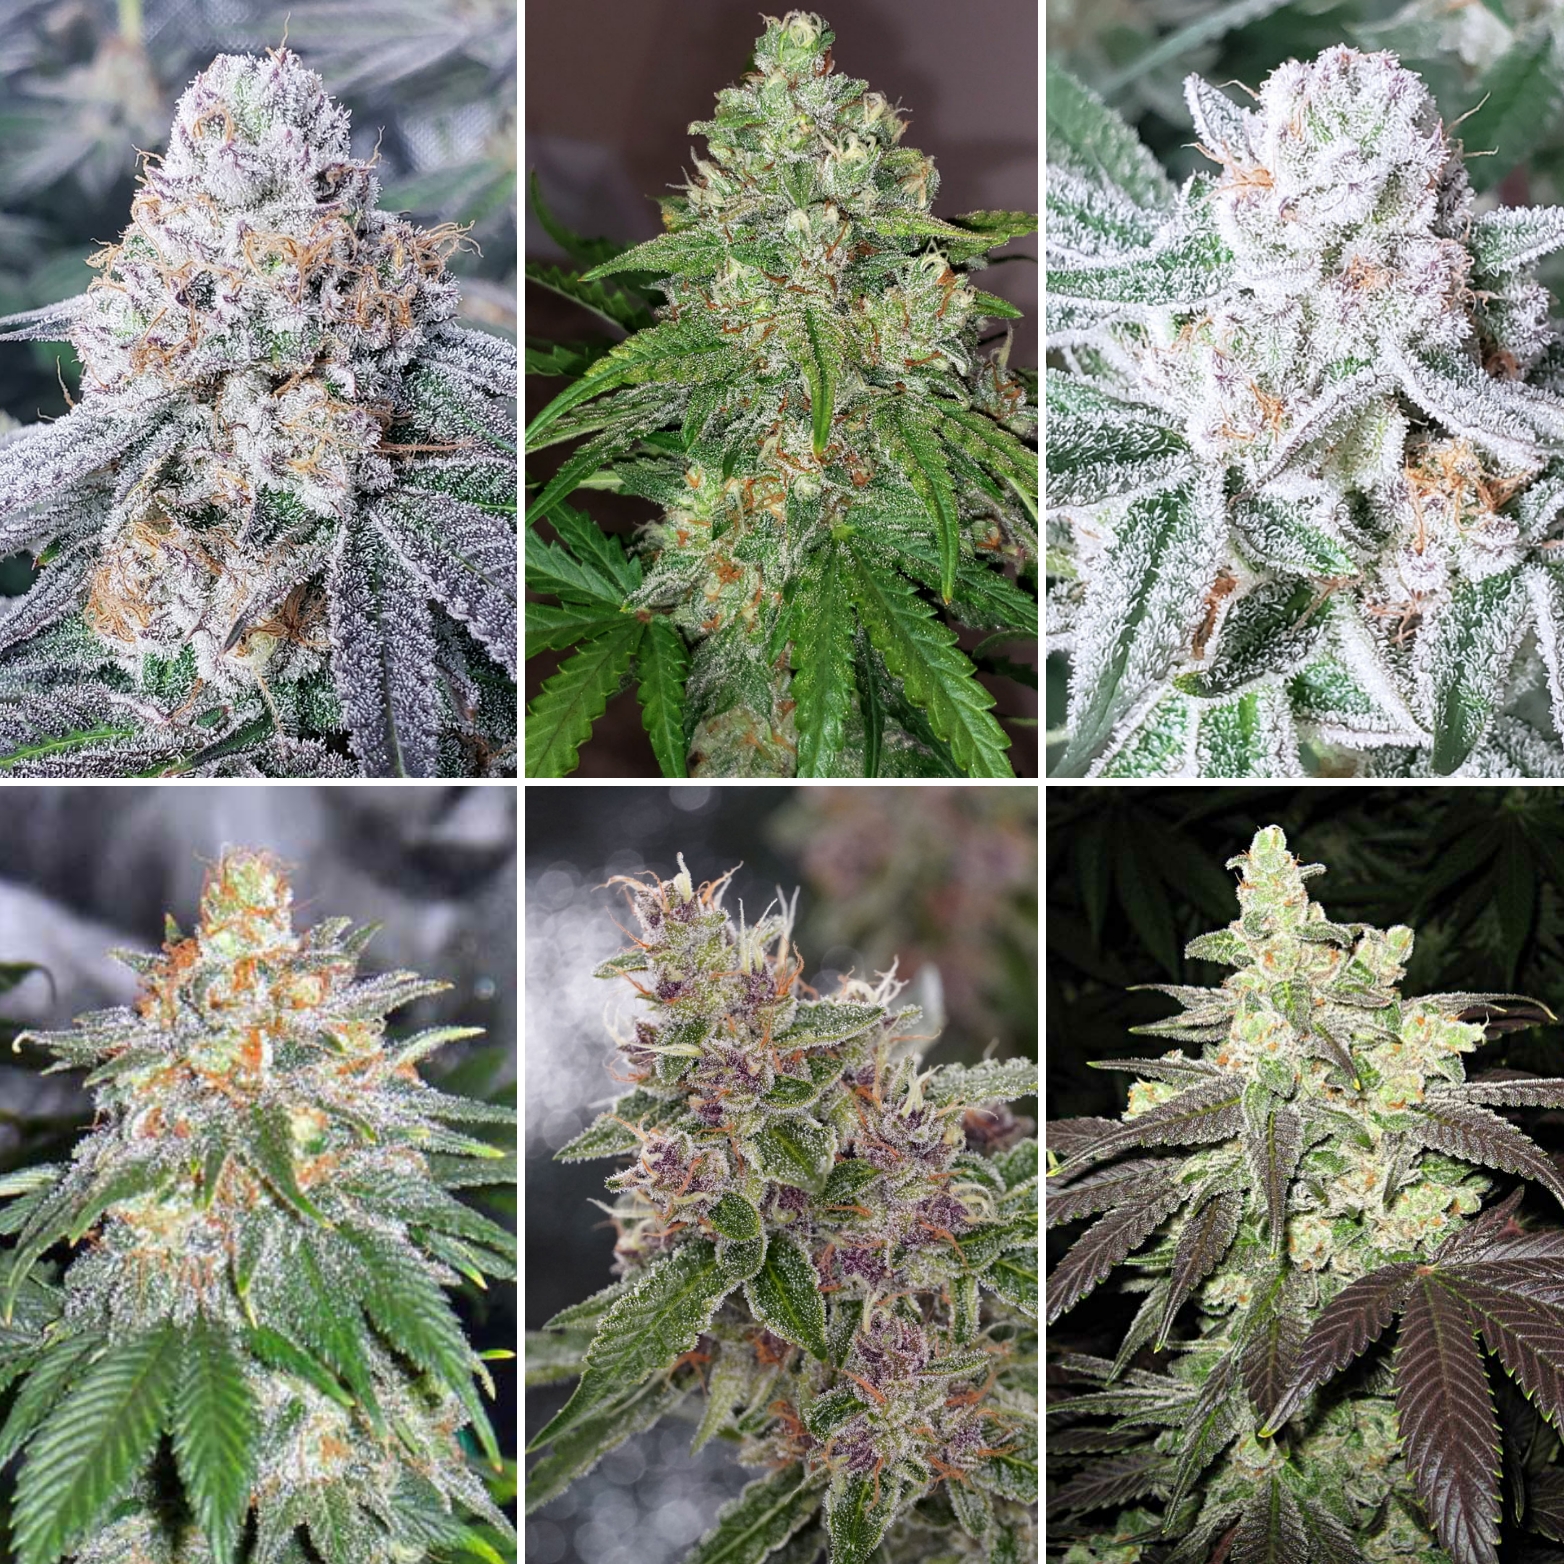
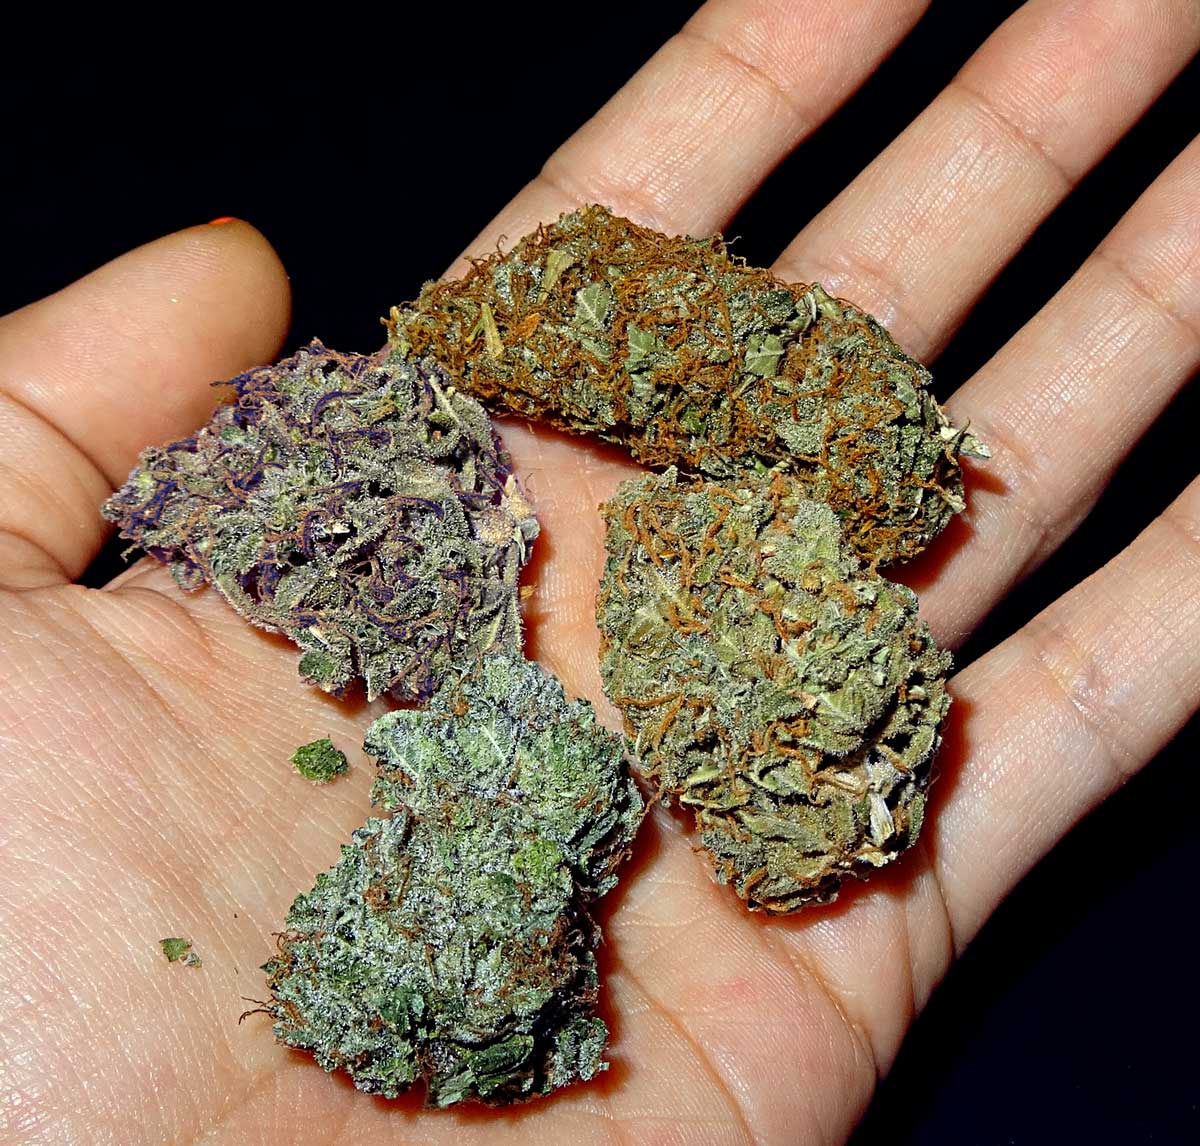
See lots more pictures of ready-to-harvest buds. Every strain is a little different, so it can help to see lots of examples.
Want extra guidance next harvest? Use a proven system with our book HARVEST.

The hardest part of growing cannabis for many new growers is waiting for the right time to harvest.
There are additional cannabis harvest methods that are much more precise, such as looking at trichomes under a magnifier, to know when to harvest your cannabis buds.
Learn exactly when to harvest your cannabis (with tons of pictures and explanations).
I sometimes get asked how to harvest weed… (i.e. cut it down from the plant)
Just get a sturdy pair of scissors and cut the plant down in the most convenient way possible. Seriously… that’s it!
Trimming comes next; it’s one of the most rewarding and physically taxing parts of the entire grow, but it’ll be worth it!
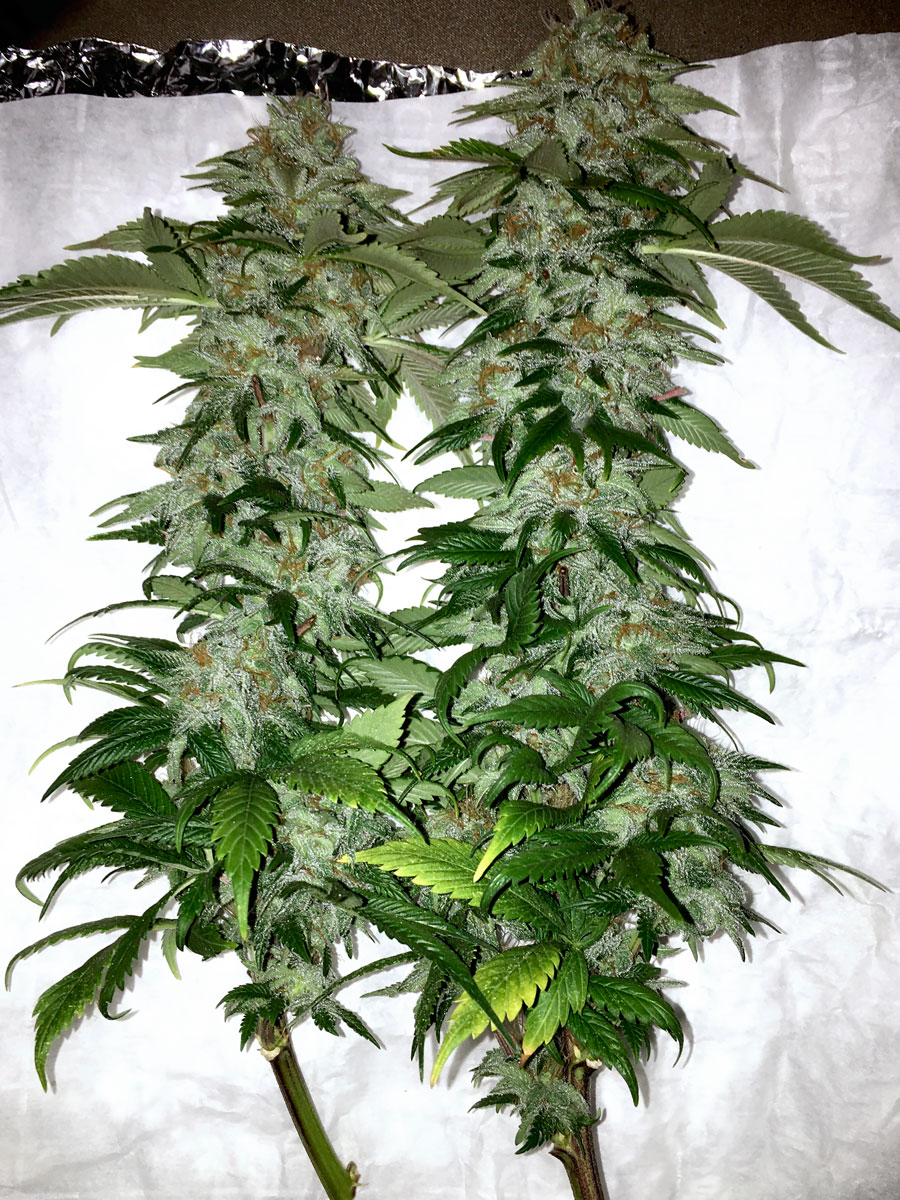
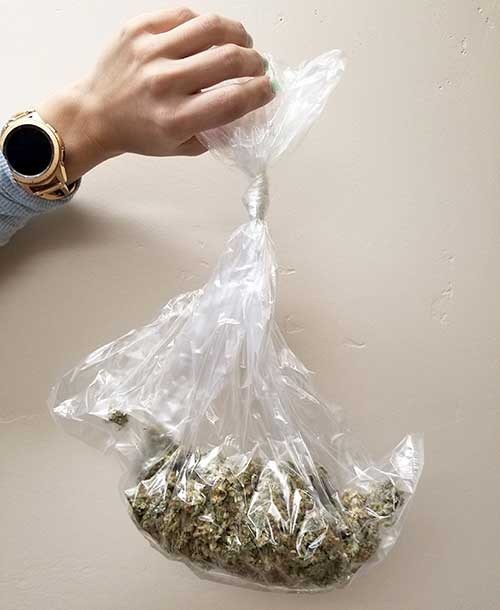
Fat buds that were just harvested.
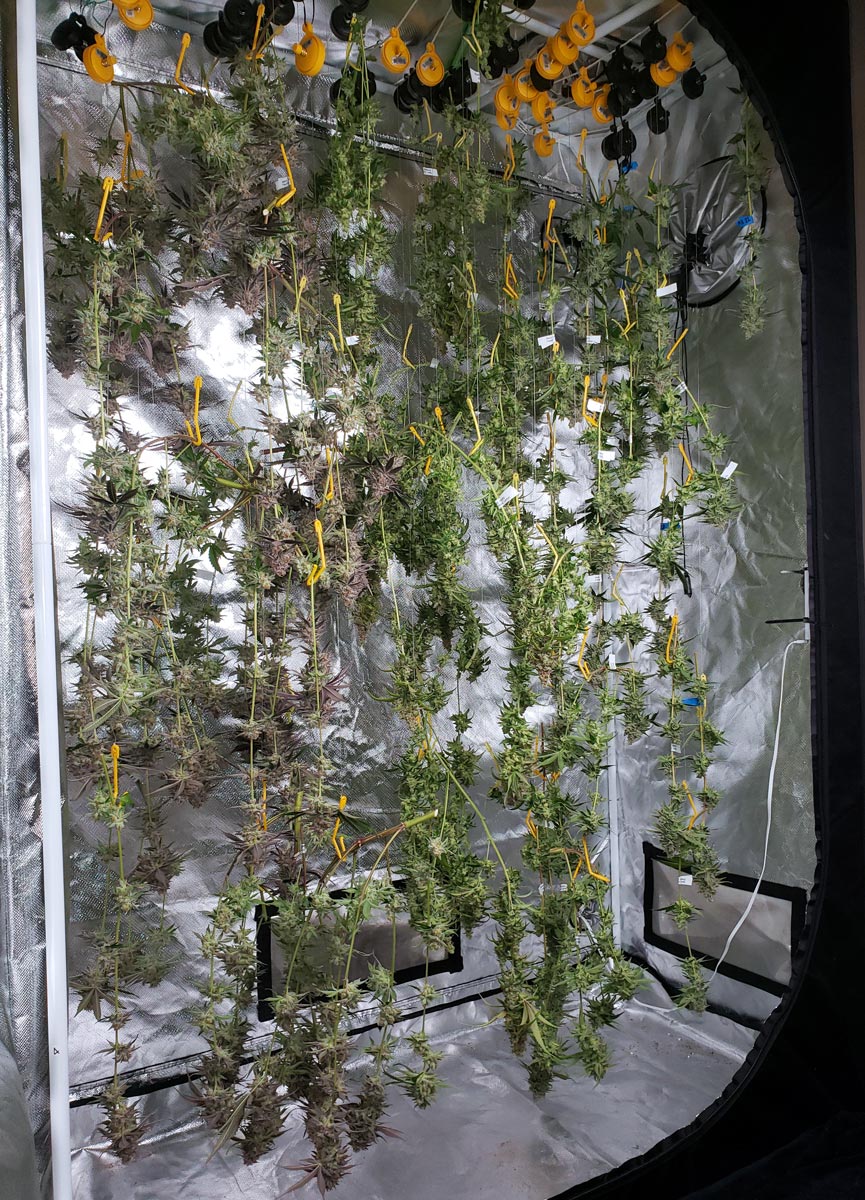
Step 10: Dry and Cure Your Newly Harvested Buds
After you have cut off and trimmed all of your glittery, beautiful fat buds, you will want to hang them upside down in a cool, dark place with plenty of ventilation so that they can dry out.
Learn how to dry and cure your buds perfectly, every time.
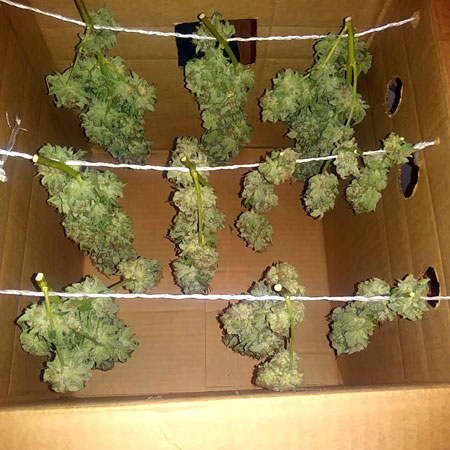
Buds drying in a cardboard box (good choice if the air is dry, or for a smaller harvest)
Buds drying in a closet (convenient, but make sure they get gentle airflow)
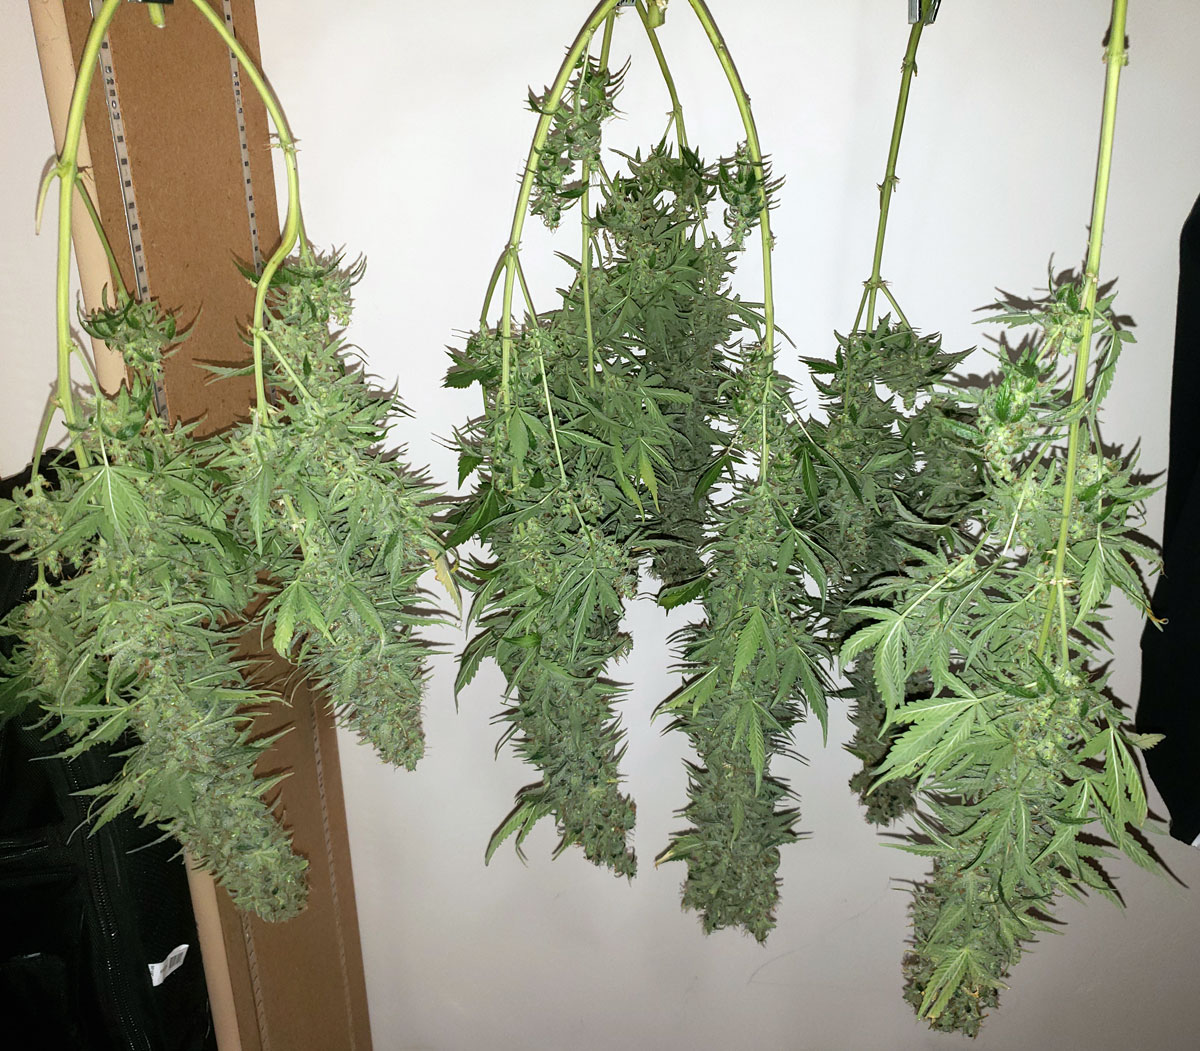
Buds drying in the same grow tent I grew them in (my favorite place to dry buds)
Learn more about drying cannabis buds.
Dry buds slowly for best results and check often for mold or overdrying. You’ve worked way too hard to lose your crop now!
When are buds fully dry?
At the perfect dryness, the thin stems snap if you bend them, though the thicker stems are still a bit bendy. If you try to pull the buds off the stem, they pop off cleanly. If buds come off with strings, it means they’re not fully dry yet.
Fully dry buds…
- Small stems snap if you try to bend them. Thicker stems may still be slightly bendy.
- Buds easily “pop” off the branch, without leaving strings behind.
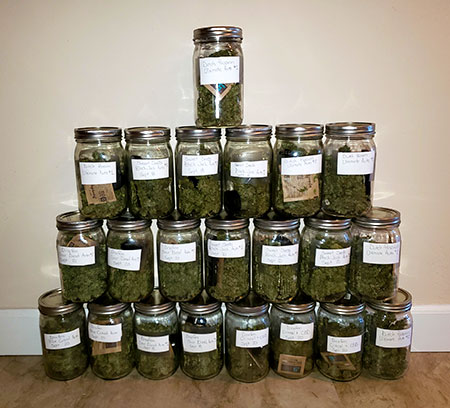
After your cannabis buds have dried, it’s time to start curing them so they’re smooth, taste good, smell good, and have the best effects.
To cure your buds, put them in tightly closed quart-sized mason jars in a cool dark place. Fill each jar loosely about 75-85% of the way full.
A harvest curing in jars. The bag is full of leaves I plan to turn into concentrates.
For the first 2 weeks of curing, open the jars once a day for several seconds to get fresh air in your jars and release any moisture. Many growers call this “burping” your jars.
Larry here had a TON of jars to burp every day.

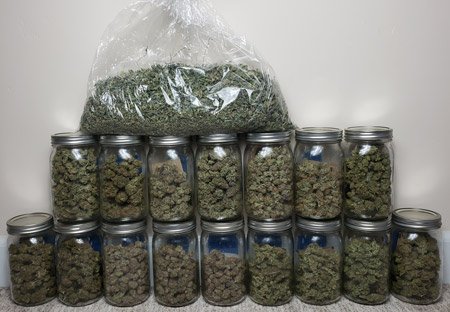
With an enormous harvest, turkey oven bags can be a convenient choice for the first 2 weeks of curing. It’s easier to burp buds in a bag than opening dozens of jars. However, they aren’t suitable for long-term storage since they’re not totally airtight. So after 2 weeks, buds should be transferred into an airtight space like glass jars.
If your buds feel even slightly moist when you check on them, leave the tops of the jars off until the outsides of the buds feel dry to the touch. Too-moist buds can cause mold!
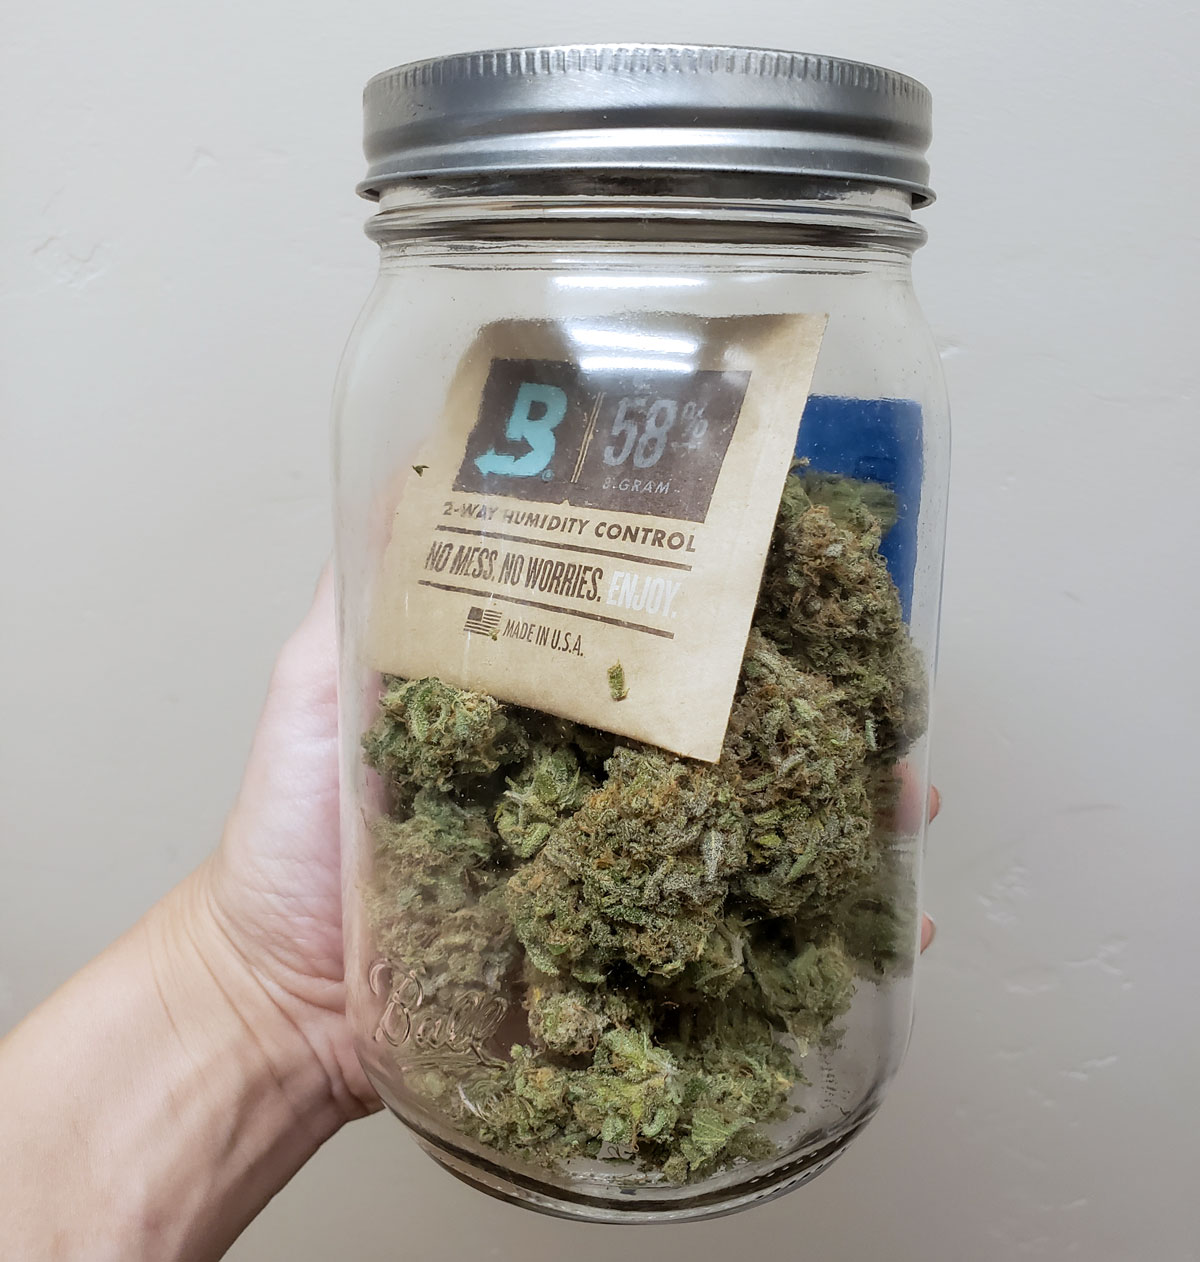
Special products like Boveda 58% Humidipaks make curing a lot easier by automatically regulating the humidity (air moisture level) in your jars.
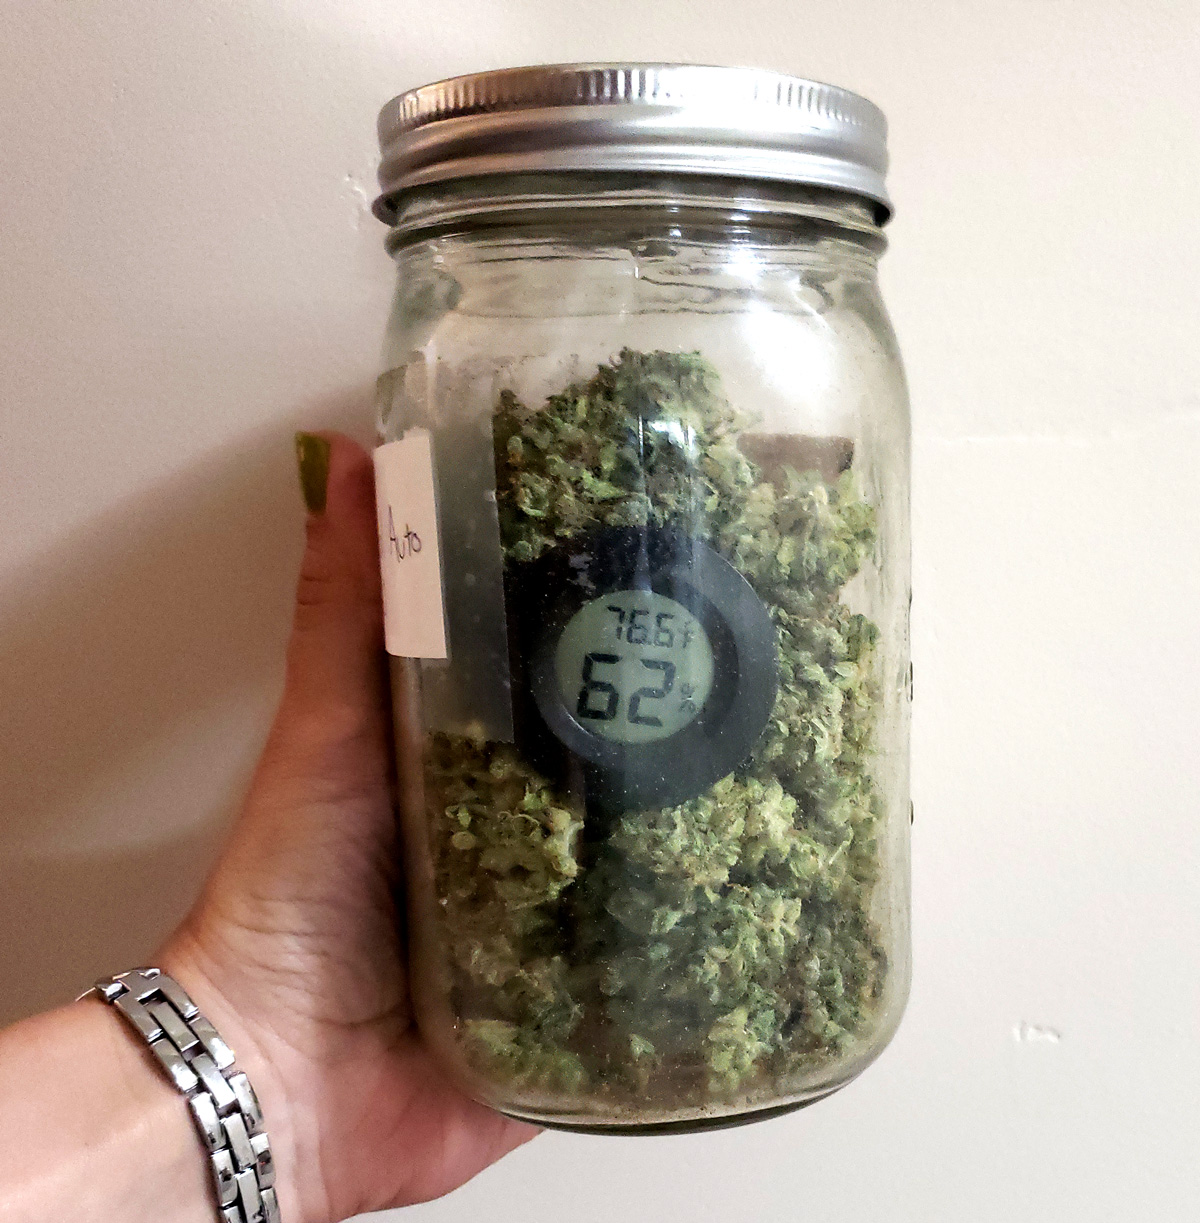
You can also get small humidity monitors (“hygrometers”) to put in the jars. Try to keep the humidity in the 58-62% range if possible. This is the optimum humidity for curing cannabis buds. Using humidity packs as mentioned above pretty much takes care of this for you.
58-62% RH is ideal for curing (it’s okay if it’s a little lower, but not higher)
After your cannabis has been curing for at least 2 weeks, and they haven’t felt wet every time you’ve checked the jars for at least a week, you can start opening the lid once a week instead of once a day.
Some people only cure their bud for 1-2 weeks total while others cure their bud for 30 days or more. Because you need to open the jar regularly, you can always sample some as it’s curing to get a feel for whether it’s done or not.
I personally think that cannabis tends to be more potent if you cure it for at least a month.
If you plan to store your weed for longer than a few months… Dry them out more, until the humidity in the jar is closer to 50% before putting buds in long term storage. Then keep your jars in a cool, dark place until it’s time to enjoy the buds.
Read the complete drying and curing tutorial – no more guesswork!
That’s it! 10 Simple Steps and You’ve Got Your Very First Cannabis Harvest!
Check It Out!
FOR SERIOUS GROWERS ONLY
Are you interested in… LED Grow Lights?
As I mentioned earlier, many models of LED grow lights are not suitable for cannabis growers, especially old LEDs and generic LEDs which weren’t tuned for a plant like cannabis.
Avoid old-technology “blurple” LEDs. They don’t get the best yields or growth when growing cannabis. When I’ve done side-by-side tests, the buds grown under blurple LEDs were also lower in THC than the same strains grown under another grow light
But when you’ve seen someone produce great cannabis with a particular brand or model of LED grow light, you know that the lights will work for growing cannabis. And if you have access to their grow notes, you’ll also know exactly how to use the LED to get the best results.
And you’ve probably heard the incredible benefits of LEDs… low electricity usage, low heat, no ballast… you just plug the LED panel directly in the wall. Fans are built right in, and many high-quality models don’t need any additional cooling.
But which LED companies can you trust?
Modern LEDs that are good for growing weed produce wide-spectrum light that often has a pinkish tint, but never the “blurple” you saw on old LEDs
Jump to…
Complete Basics Guide: Learn How to Grow Cannabis
How Long Does It Take to Grow Cannabis?
Where can I safely get medical strains?
Advanced cannabis growing techniques
Want extra help growing?
GrowWeedEasy.com’s book teaches you our complete harvest system.
For Serious Growers Only – Self-Study 5-week Home Grow Course.
Attention Home Growers!
I know you are dedicated to growing the best cannabis possible or you wouldn’t be reading this right now.
Cannabis plants are quite a bit more complex than a regular house plant, but my partner Sirius and I have dedicated years to showing the world that learning how to grow isn’t as crazy complicated as a lot of growers make it seem.
Still, you need to learn this plant’s language if you want to grow high-quality buds and get great yields.
So you could spend years learning the hard way…
Or you can take the shortcut to consistently producing outstanding results by learning from real growers who have done all the work for you.
Our course will show you how to grow a sea of fat, dense, beautiful buds that you feel proud of. At home!
If you simply follow our highly-rated, 5-week course, we give you literally everything you need to know, and walk you through each part step-by-step. Developed by expert home growers and honed with hundreds of students since 2019, our course ensures you’ll achieve great results on your very next harvest.
Learn How To Grow Top-Shelf Weed at Home! (on your schedule)
Your buds will be covered in so many THC-filled trichomes they look like this under a magnifier!

This course is recommended for growers who want to go pro with their growing skills. The investment will pay you back over and over via increased yields and saved time/frustration.
If you’re ready to grow professional quality buds at home for as cheap and easy as possible, look no further than this ultimate guide to growing.
Ready to Go Pro With Your Garden? Invest In Your Future Yields Today!
You came at the perfect time.
🌟 $200 Off Special Offer: Enroll today in Home Grow Masterclass!
👉 Start Your First Class TODAY!