by Nebula Haze
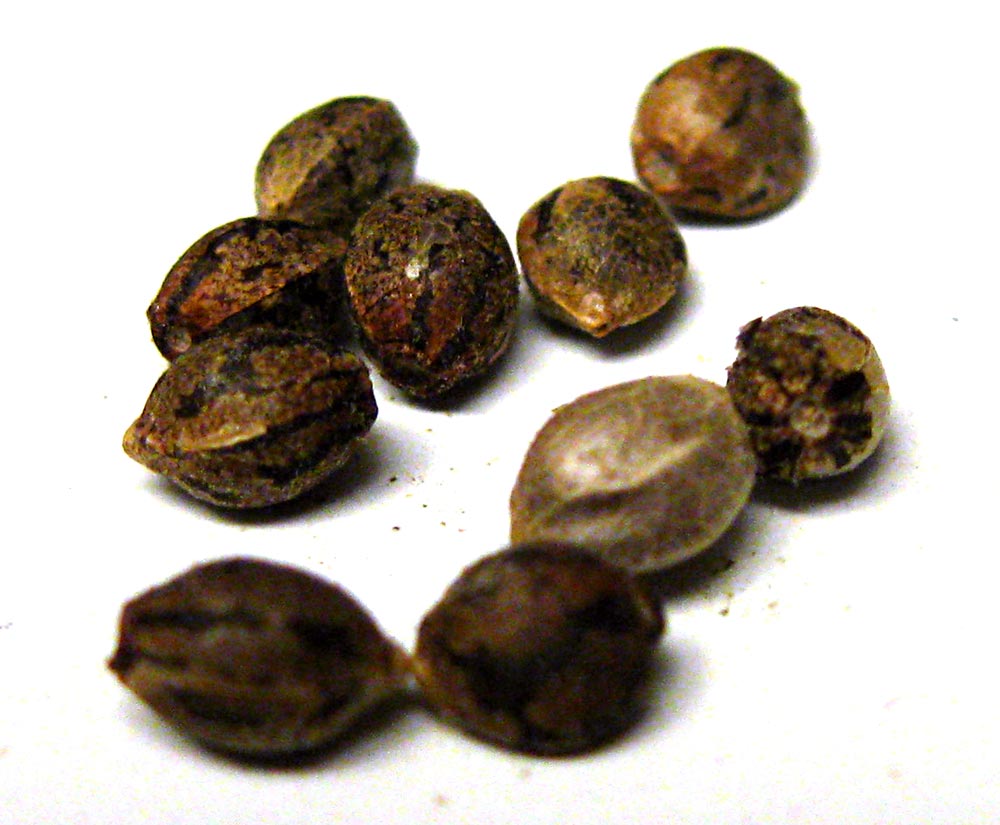
Time to sprout your cannabis seeds! (Some proven seeds that germinate well: Mandarin Cookies, Purple Ghost Candy, and Candy Games #38). There are lots of ways to germinate cannabis seeds. Which cannabis seed germination method is the easiest? How can you sprout almost 100% of marijuana seeds with almost zero effort?
The answer is to plant your cannabis seed directly in the soil or coco.
Plant cannabis seeds directly in the soil: this method is easy and effective when done right.
Today’s germination tutorial will teach you how to plant your seeds in soil and still get excellent germination rates. (I recently used this technique on 8 seeds that were over 4 years old, and got a 100% germination rate!)
After planting cannabis seeds to germinate, keep them warm and moist.
The result? Cannabis seeds pop up as beautiful seedlings in just a few days.
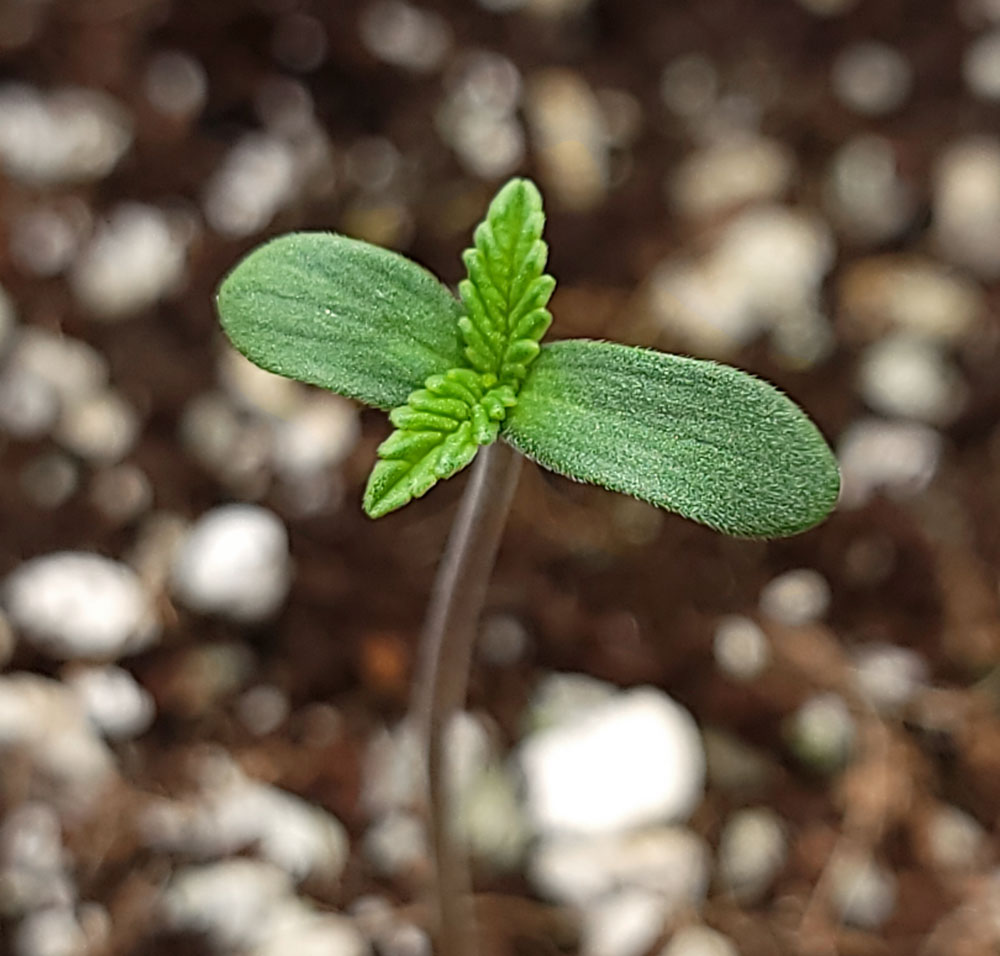
Table of Contents
What next? (learn how to care for your cannabis plants)
Supplies List
- Seeds (where to get cannabis seeds)
- Plant Pots with Soil or Coco
- Place for plants to grow (here are 9 proven cannabis grow setups)
Did you know strain affects germination rates? It’s not just a matter of seed storage or freshness that affects how well seeds germinate. Some cannabis strains produce seeds that germinate better than other strains.
This makes sense when you consider breeders develop cannabis strains for the resulting buds and not the seeds. Some cannabis breeders are selecting plants based purely on how the buds turn out, and don’t select for seeds that germinate particularly well. That’s why you sometimes get cannabis seeds that look flimsy and thin, yet grow into beautiful productive plants.
However, for beginners, I highly recommend choosing a strain that’s been specifically bred to germinate well, too. There are tons of amazing breeders with great germination rates across the board. But if you’re looking for particular suggestions, I’ve found that seeds from Ethos Genetics and Seedsman tend to have above-average germination.
GG4 x Zkittles is a cannabis strain with excellent bud quality that tends to germinate well in even non-ideal conditions.
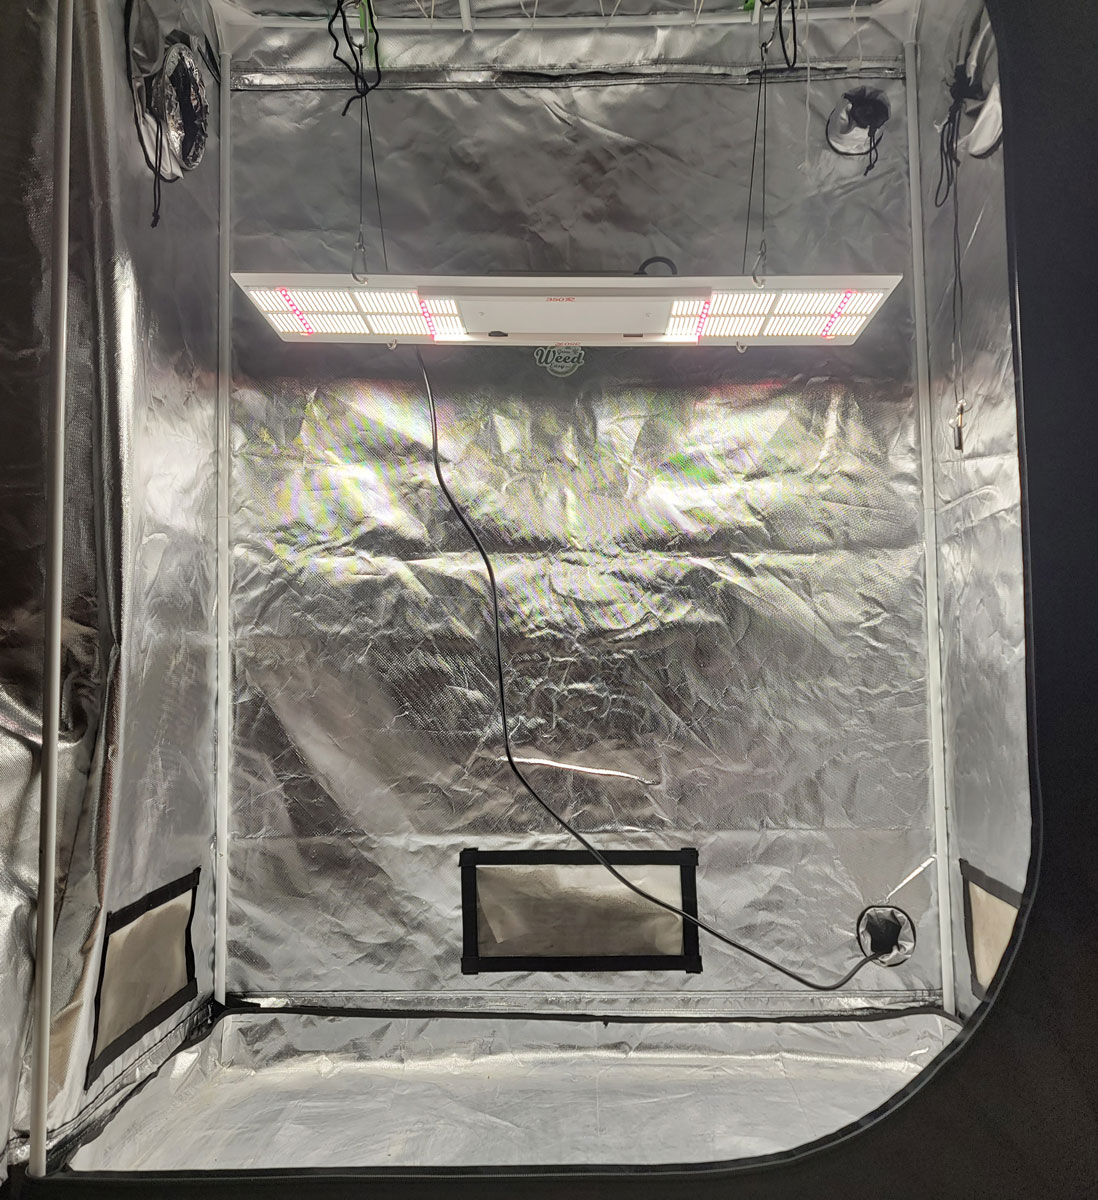
1.) Prepare the grow space (get set up)
This step is about making sure your seedlings have a home after they’ve sprouted. Better to make sure everything runs okay now before you’ve got live plants.
- Set up your grow space like you’re going to put plants in it
- Turn everything on and let run for 24 hours before you germinate your seeds
- Learn about proven cannabis grow setups with expected yields
Get your marijuana seeds (if you haven’t yet). Are bag seeds okay?
Set up grow space with grow light and fans, then (if possible) let everything run for 24 hours to make sure all equipment works okay and the grow space doesn’t overheat.
I recommend the 200W Spider Farmer LED Setup for first-time growers (pictured here).
2.) Prepare the grow medium
The purpose of this section is to get your soil or coco wet and prepare for seedlings.
A.) Water your plant pots after you’ve added your soil or coco, and let any excess water drain out the bottom.
- The goal of this step is to make sure to create a nice evenly moist grow medium before introducing seeds
- You don’t want to have to add a lot of water when seedlings are still young because they’re fragile and easily washed away.
- Since you’re watering the soil or coco now, you likely won’t have to water seedlings for at least several days.
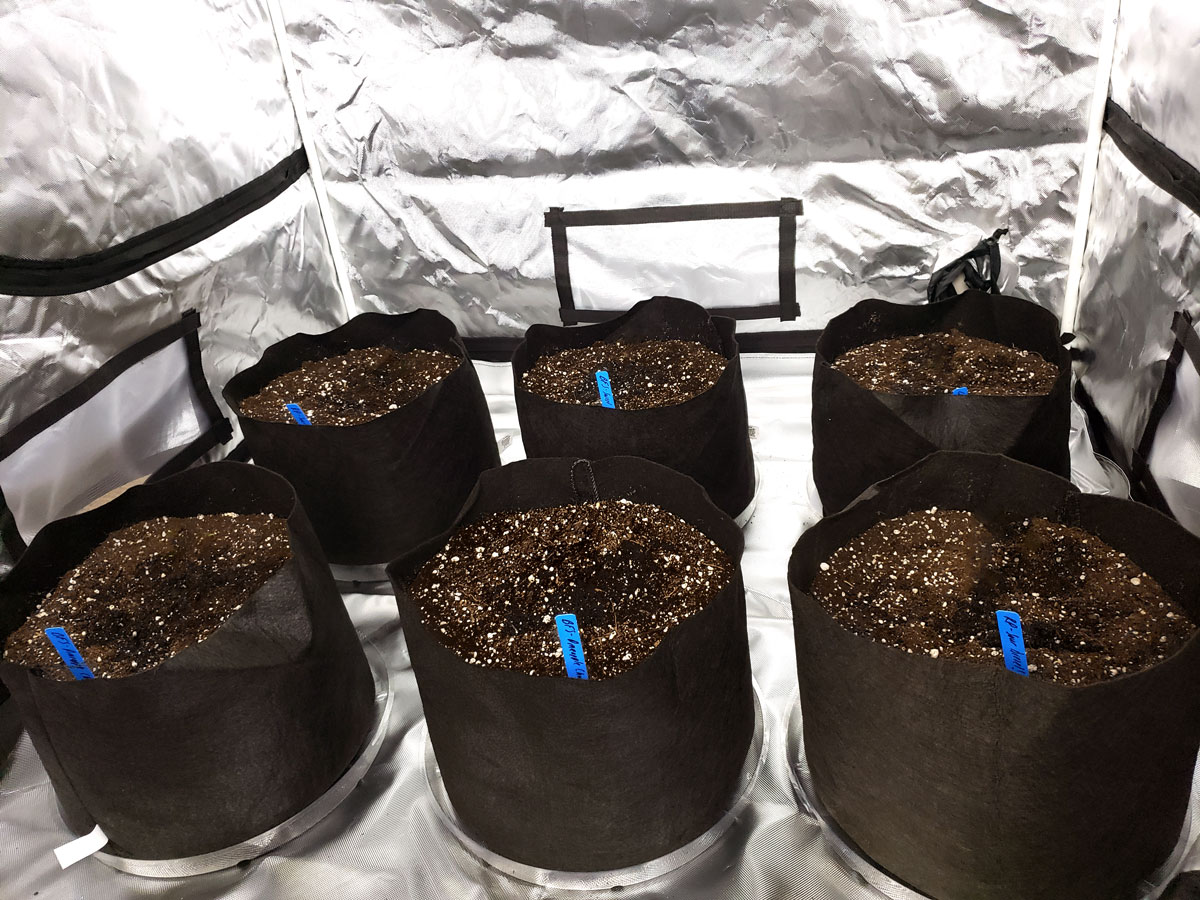
B.) Add labels so you know which cannabis strain is going into each pot
- You can buy plant labels, or even just some tape to the side of the pot and write the name on the tape with permanent marker
- Don’t forget to label your pots or it’s hard to remember which seed is which strain!
C.) Set up heat source (put under grow lights)
- Warmth is crucial to fast germination and high germination rates. Seedlings have evolved to sprout on a warm sunny day.
- The easiest way to get heat to the seedlings is to put your plant pots in the grow space with the grow lights on. Grow lights should create a warm space, and since you tested your setup with everything on for 24 hours, you know it won’t overheat.
- Keep grow lights 2-3x further away than recommended for live plants. Seedlings are fragile at first.
- You need to watch closely to make sure the soil doesn’t dry out. Grow lights tend to dry out the topsoil quickly.
D.) Wait 24 hours then do a final moisture check
- This helps equalize all the moisture in the grow medium before seeds get introduced.
- Make sure grow medium seems nice and evenly moist (should be fine if you followed the steps so far)
Set up your plant pots with soil or coco and heavily water them. If possible, give 24 hours for any excess water to drain and moisture to equalize throughout the pots.
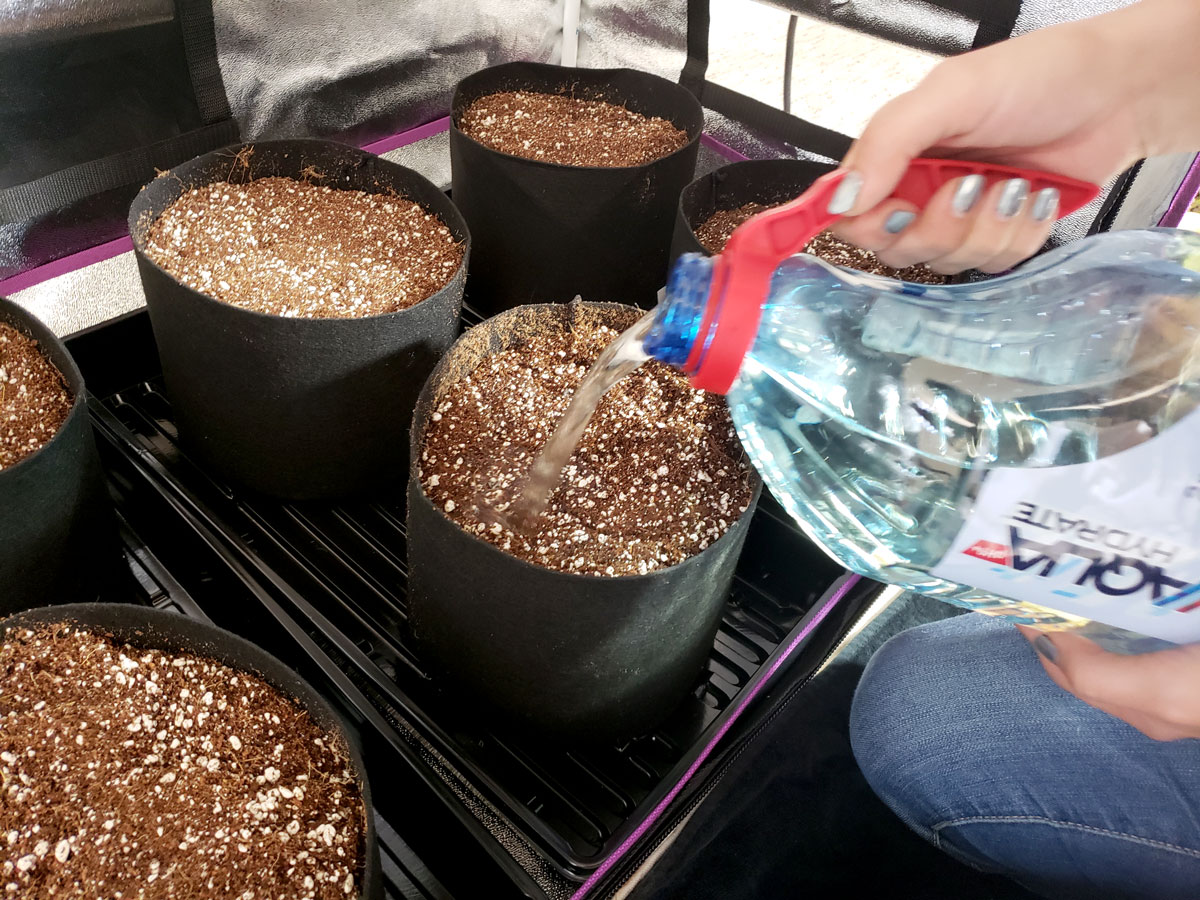
Add labels (I like using plant labels) so you’ll know which cannabis seedling is which strain. Check to make sure the pots are moist all the way through, especially in the top-middle where you’re going to add the seeds. You don’t want to have to water the seedlings again until a few days after they’ve popped up so it’s important your soil or coco is moist before adding seeds. Turn on your grow light, but keep it 2-3x further than the recommended difference. You want heat in the grow space and some light, but not necessarily a lot of light getting to the fragile seedlings.
3.) Put seeds in the soil
A.) Add a little more water (~1/4 cup) to the center of the pot where you’re going to put your seeds.
- You want the seed’s spot to be the wettest spot.
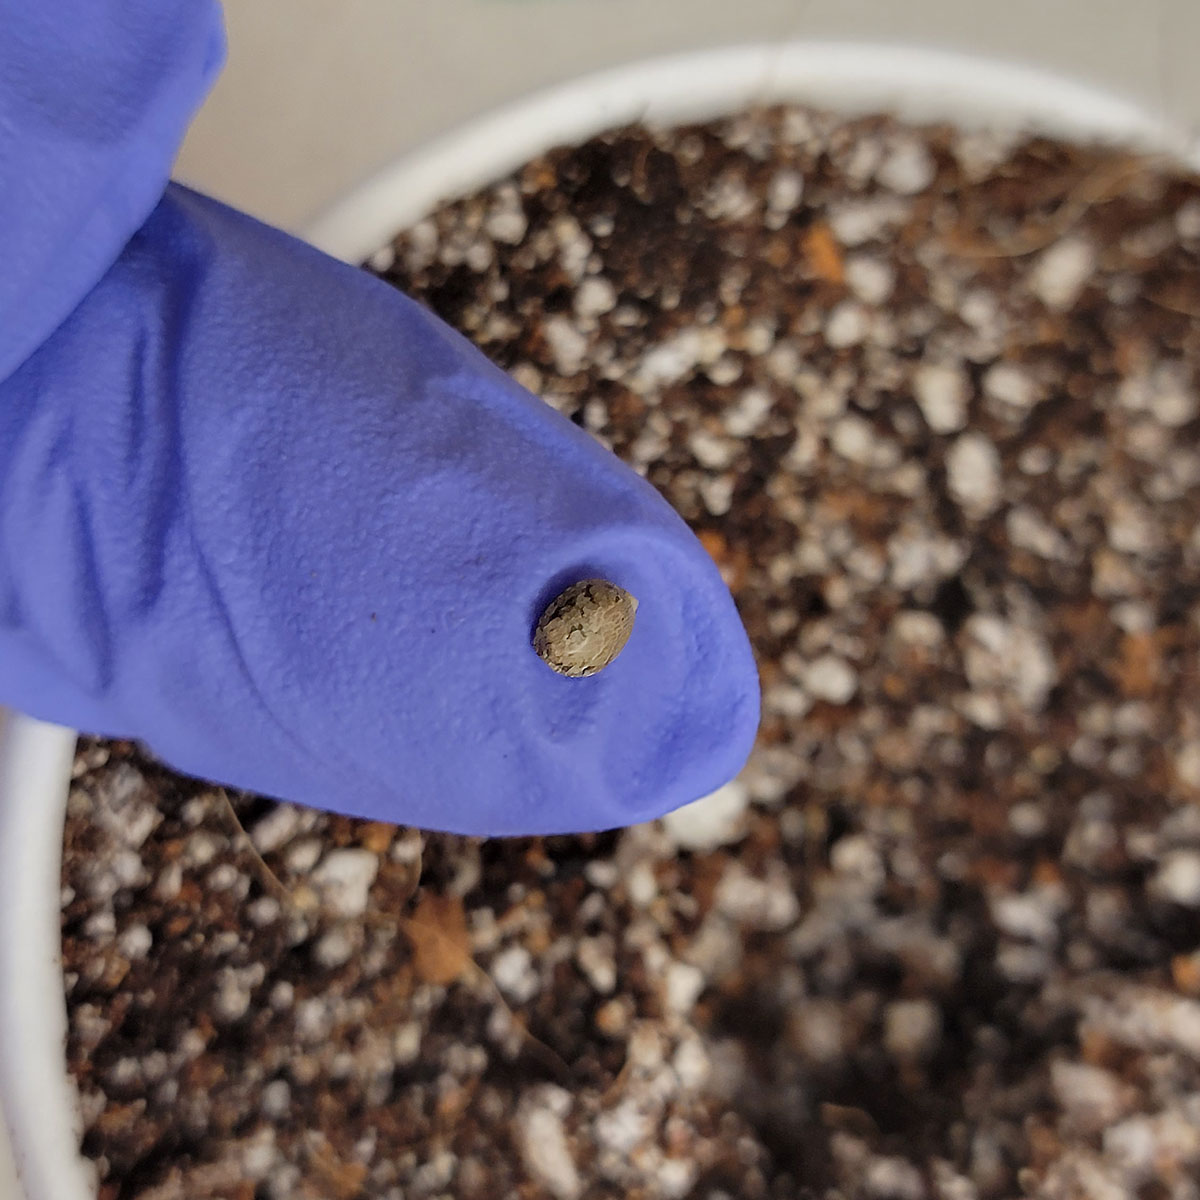
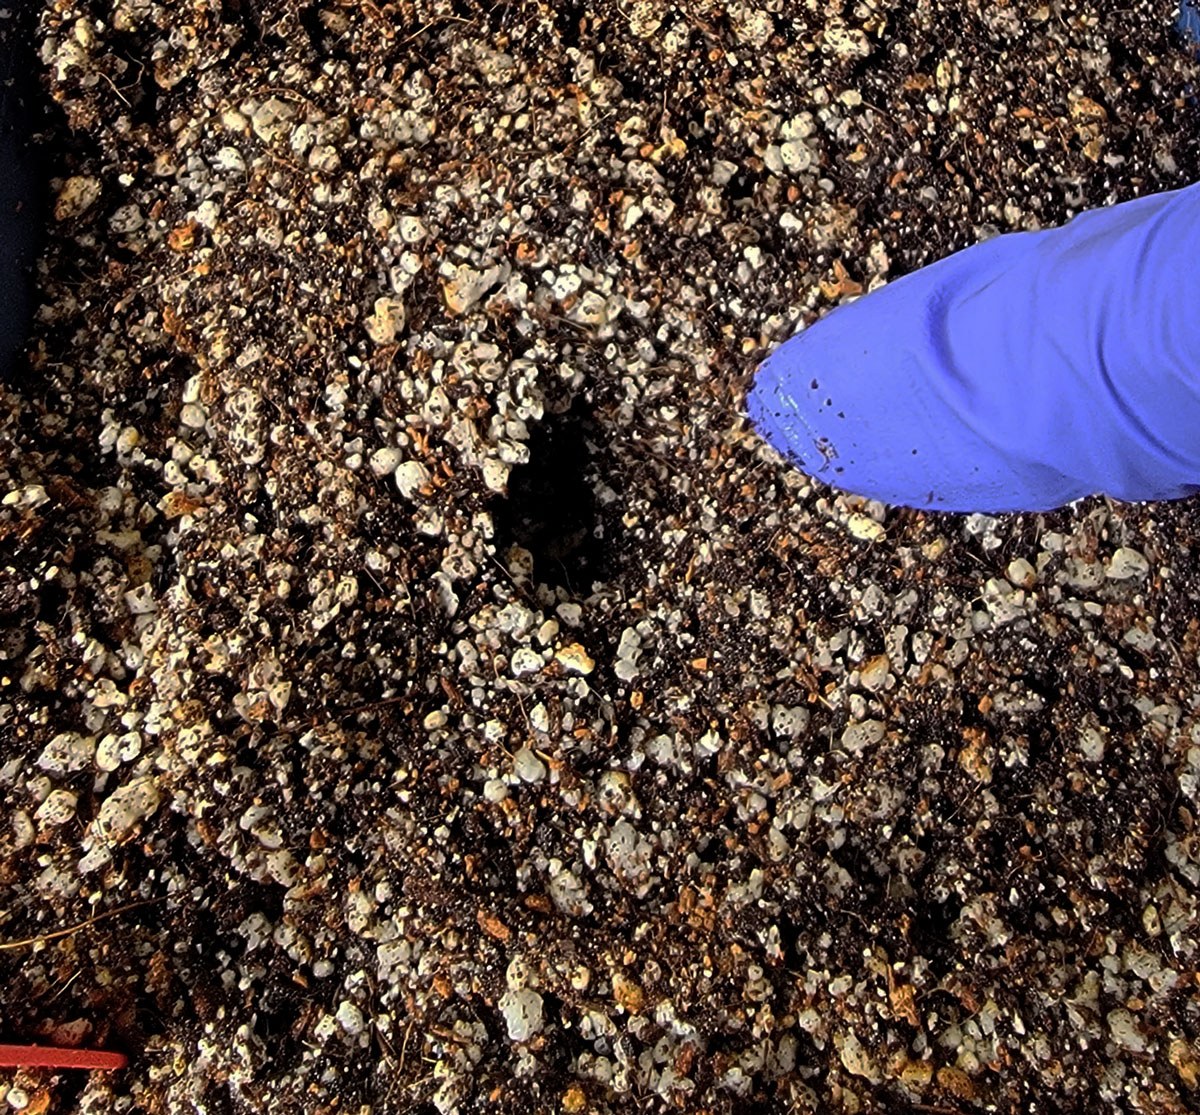
B.) Make a hole 1 cm (0.4″) deep
- Stick your finger into the soil in the middle of the pot and make a hole about 1 cm (0.4″) deep
C.) Plant your seed in the hole
D.) Carefully cover seed with wet soil
- It’s better to have the seed be too shallow than too deep, but it should be completely covered so the seed isn’t getting any light.
E.) Press the soil down gently on top of the seed
You’re done!
Make a hole 1 cm (0.4″) deep
Carefully get your seed (make sure you have a matching label on your plant pot so you remember which strain is which)
Plant seed in the hole
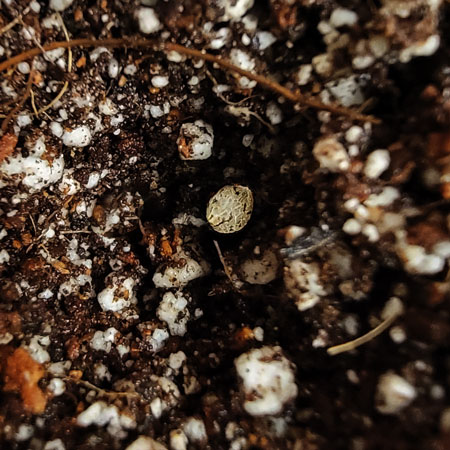
Cover seed with wet soil and gently pat down
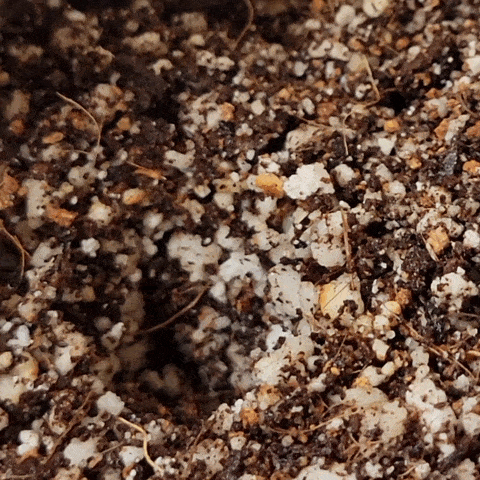
4.) Care for seeds while they germinate
A.) Don’t let soil dry out near the seeds.
- Check on your seeds at least once (but preferably twice) a day
- The soil or coco around the seed needs to always be wet.
- If you must add water, only add a few drops at a time gently around the seed location so you don’t disturb the seeds.
- Don’t water the whole pot. It should be plenty moist from when you watered it originally.
B.) Keep seeds warm. Don’t let seeds get cold!
C.) Don’t disturb seeds once they’re planted.
D.) Seedlings should pop up within a few days.
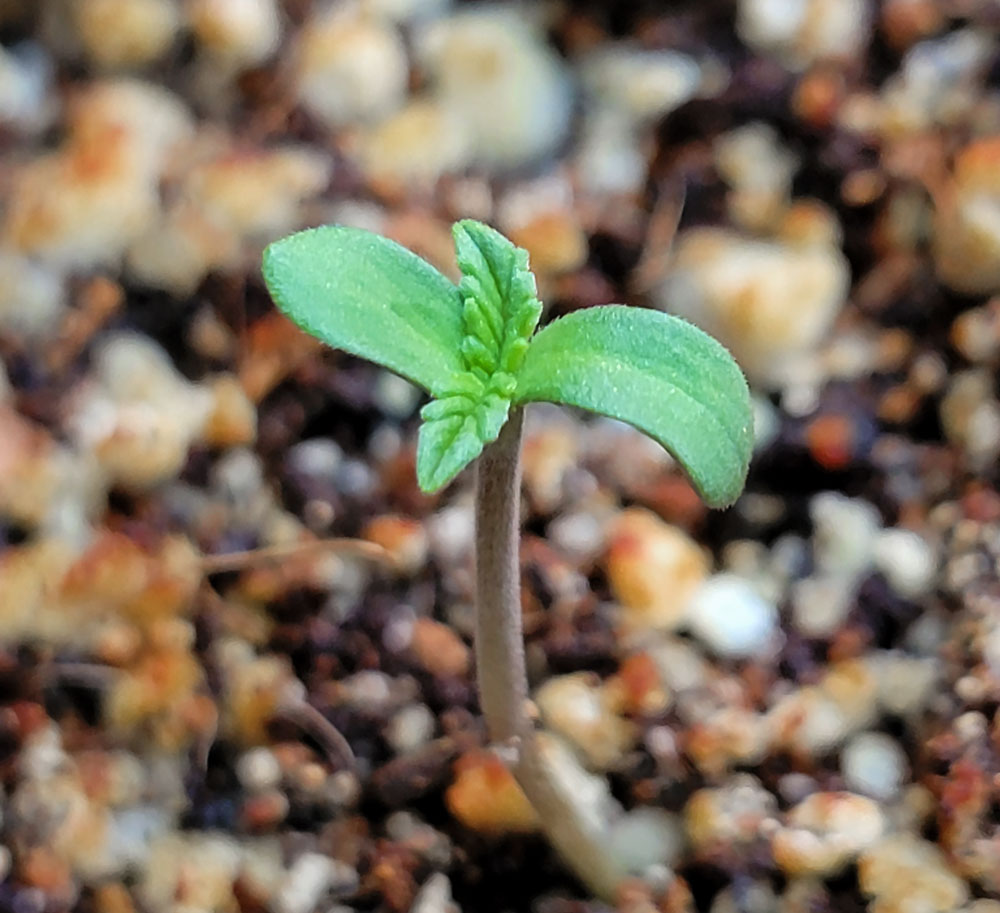
If you check at just the right time, you can see the leaves emerging from the soil. Leaves start closed but quickly open up once they “see” light.
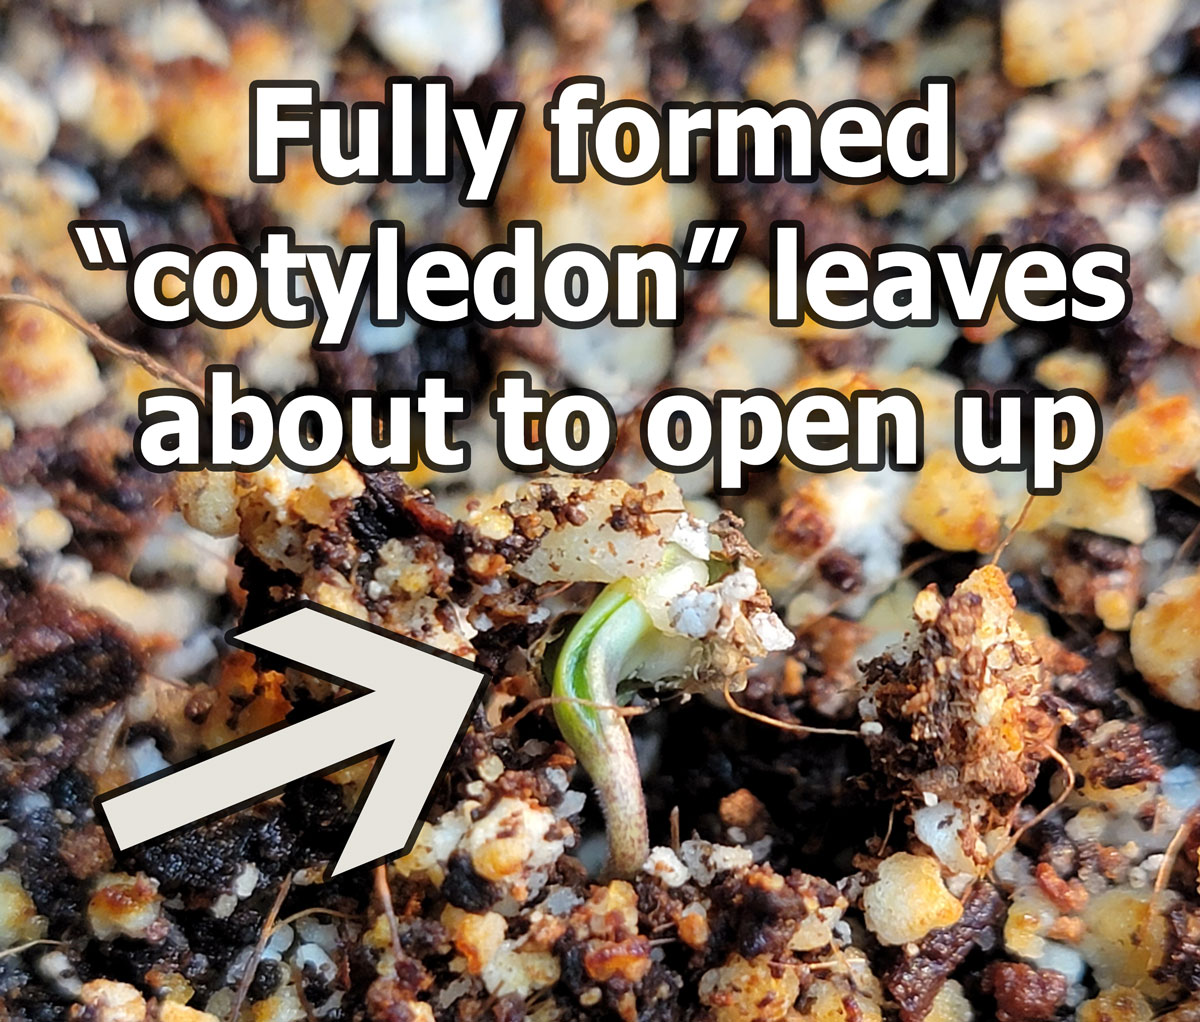
The first set of leaves are round (they’re called “cotyledon” leaves) and were already fully formed in the shell. However, the new serrated leaves in the middle were grown by the seedling!
As long as the marijuana seedling is getting light from above, it will straighten and open its leaves to the light.
What to do if the leaves are stuck together, or the seedlings gets stuck inside the shell?
5.) Take care of seedlings
A.) Keep the grow light 2x the recommended distance by the manufacturer.
- Young seedlings can’t use a lot of light yet, but they need some amount of light to grow.
- Remember, light is “food” for your plants, and light also helps them know which way is “up”. If a new seedling is kept in the dark, its first leaves will stay yellow and it won’t grow new leaves.
B.) Move light closer if you notice the seedlings “stretching”.
- If you see the stem is getting longer and longer without growing more leaves, it means the seedling is “searching” for the light. That’s a sign you should increase light levels by moving the grow light closer.
C.) Young seedlings don’t need a lot of nutrients, but they do need some.
- If you’re growing in soil, there should be plenty of nutrients in the soil for the first week.
- If you’re growing in coco, you should start introducing nutrients in the water at 1/4 strength as soon as you see signs of life.
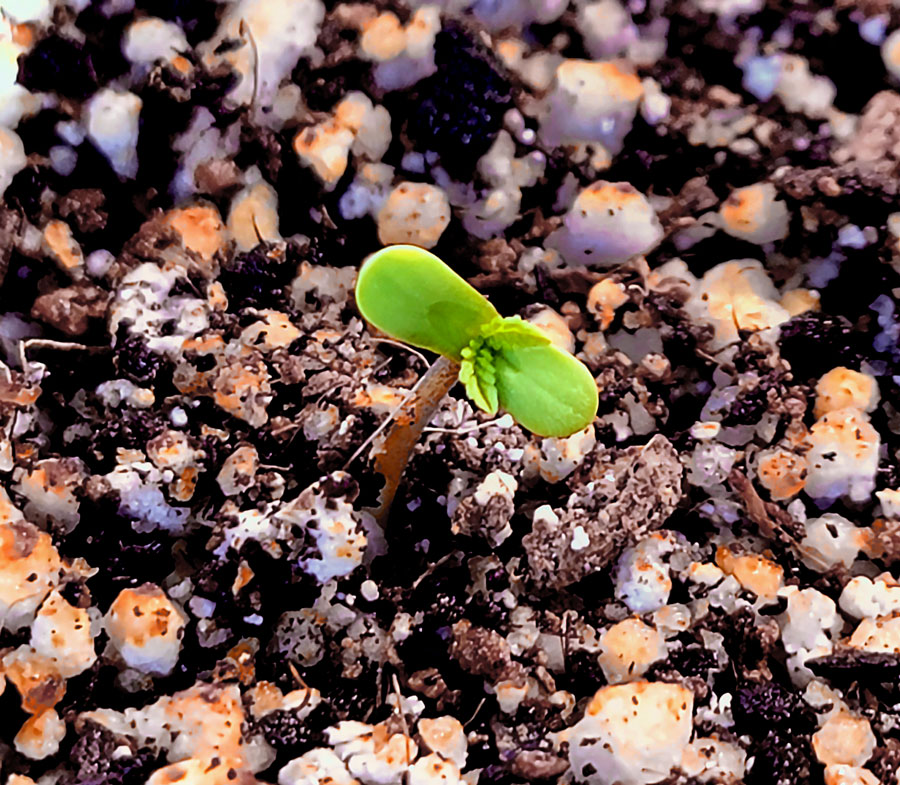
D.) The first set of leaves are round.
- These are known as “cotyledon” leaves and were already fully formed inside the shell.
- However, the second set of leaves has serrated edges. These are the first “real” leaves and if you see them it means your plant grew them all on its own with the nutrients and light you’ve provided. Yay!
E.) You’re in the vegetative stage once the next set of leaves open up.
F.) At this point, you can slowly start ramping up light levels and nutrient strength to normal levels.
G.) Watch seedlings for signs of stress. Check out this list of common seedling problems for help with any issues.
Care for your seedlings and watch them grow!
What next?
Follow the following guides to grow big and strong, fast-growing cannabis plants.
Cannabis Seedling Care
- Day-by-Day Seedling Watering Tutorial – Follow this watering schedule for happy fast-growing seedlings.
- Seedling Help Handbook – A complete guidebook to seedling care.
- Common Seedling Problems (and Solutions) – Can’t hurt to give this a quick peek if you’re about to germinate seeds.
How to Grow Weed at Home
- 10-Minute Cannabis Grow Guide – Complete seed-to-weed grow guide that takes only 10 minutes to read!
- How to Water Cannabis Plants – This is your main responsibility as a grower. Get this right and you’re halfway there.
- When to Harvest Weed – Harvest buds at the right time for the best yields and potency.
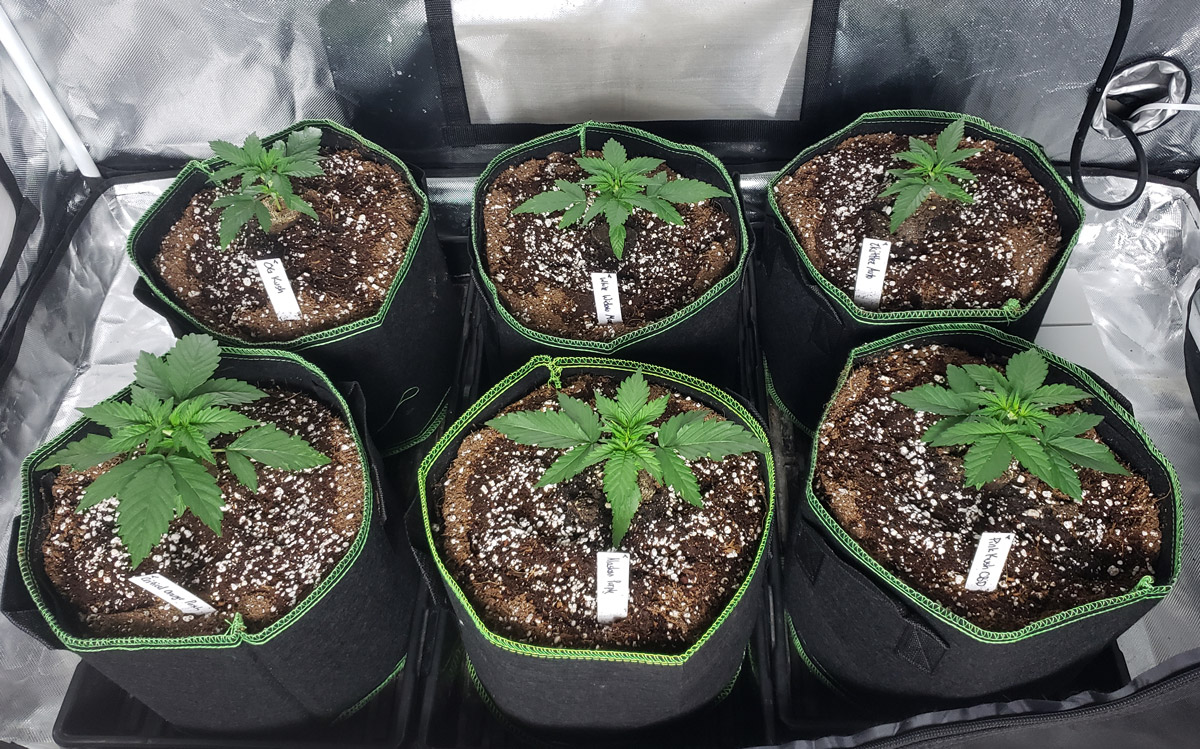
Here’s an example of a home grow using the above methods.
These plants are grown in this setup with a SF-2000 LED grow light.
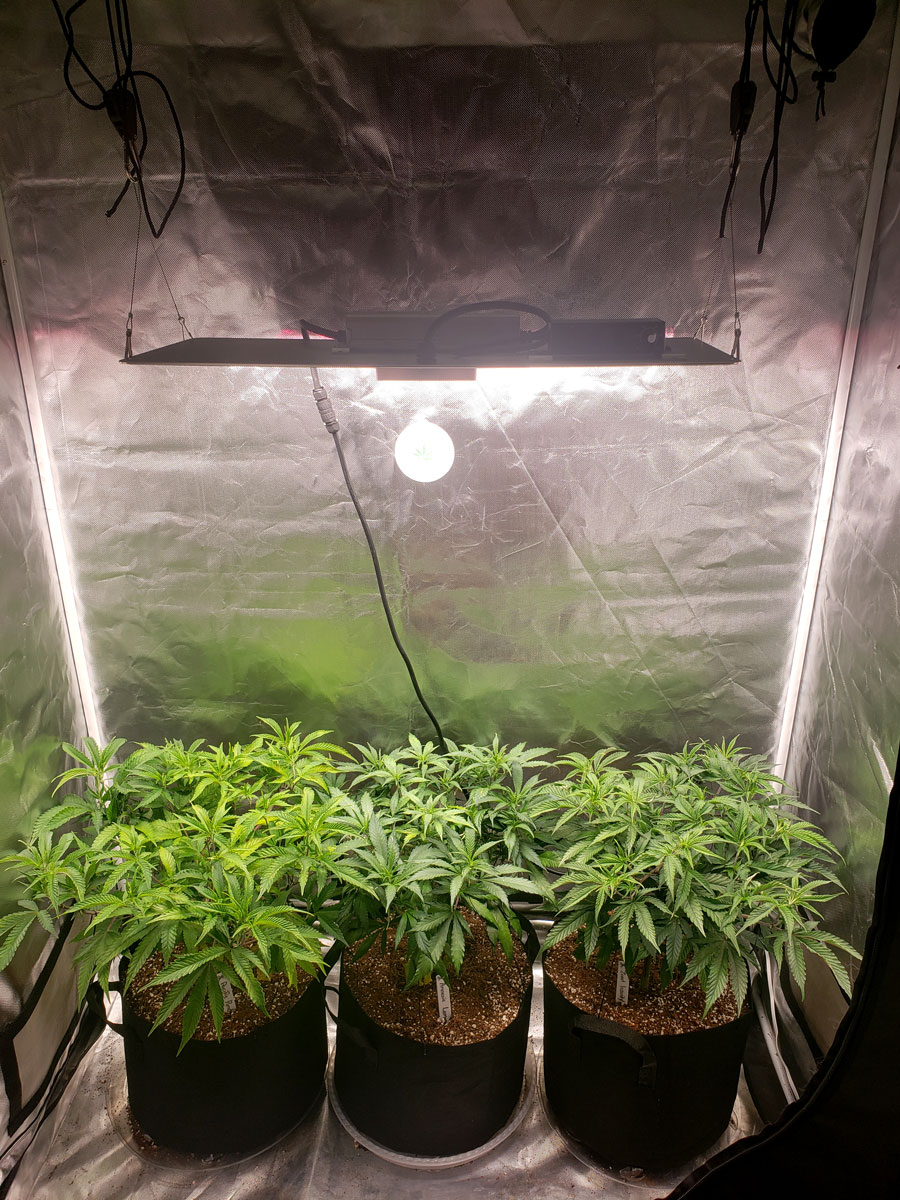
Once plants are half the final desired size, it’s time to start growing buds! What should I expect as cannabis plants start making buds?
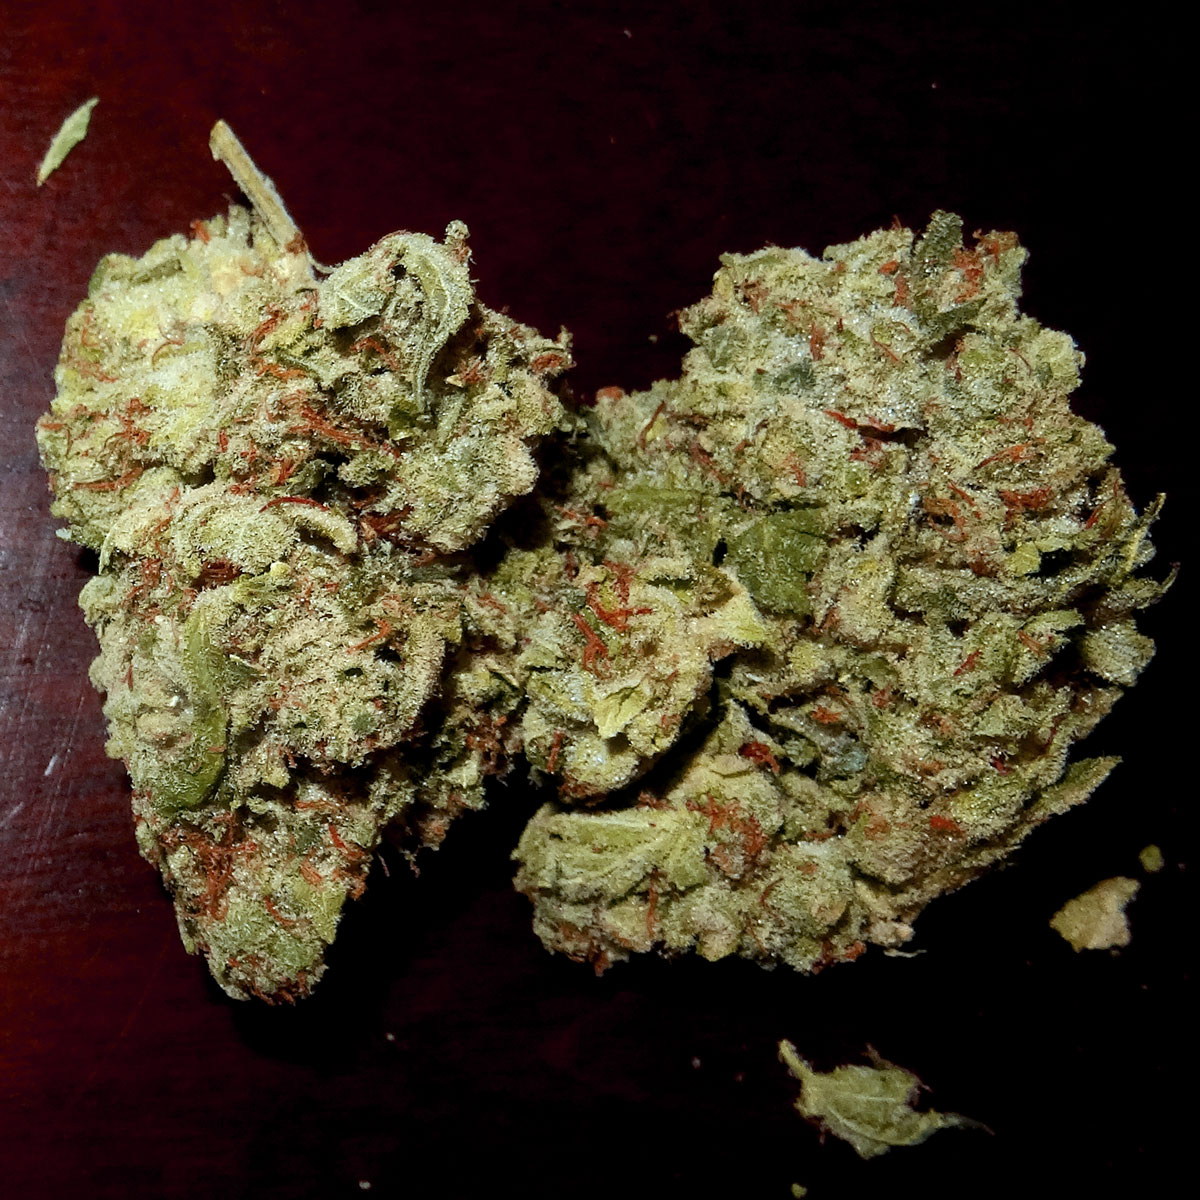
Those plants at harvest!
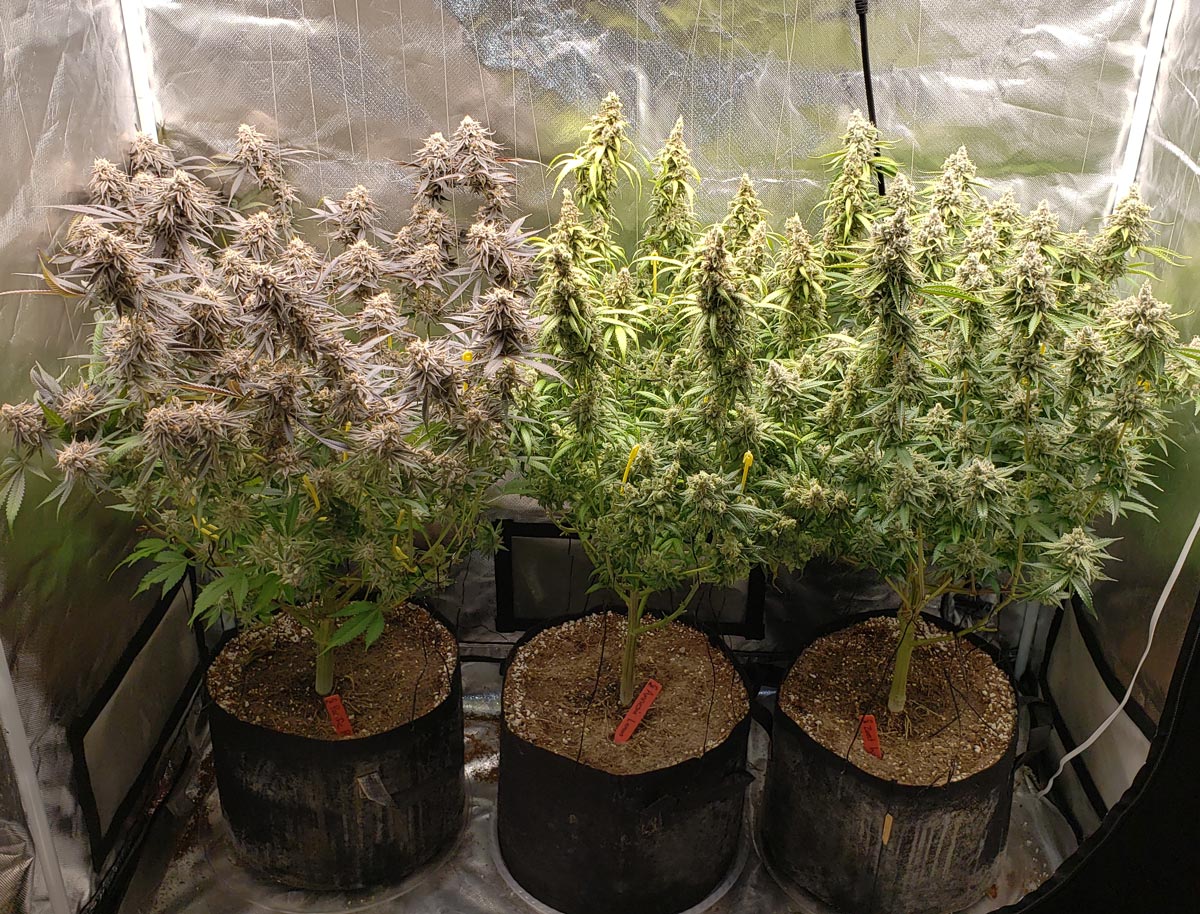
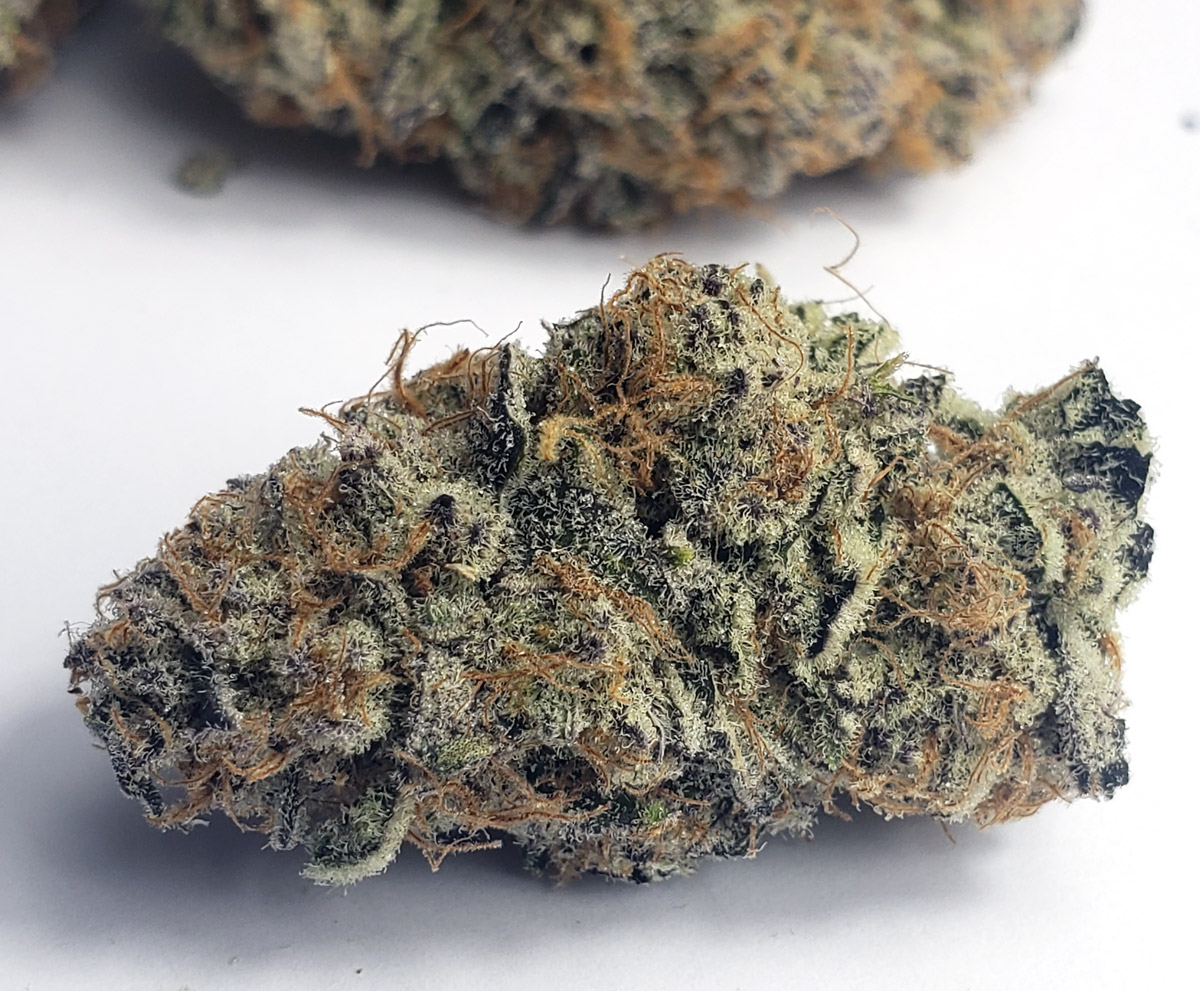
And the resulting buds.
Helpful Flowering Stage Tutorials
- 7 Common Flowering Stage Goofs (and how to prevent them)
- How to Increase Yields at Home
- How to Increase Overall Bud Quality
- How to Increase THC Levels (Potency)