by Sirius Fourside
Table of Contents
Pros & Cons of Bubbleponics Method
Overview of Growing Cannabis with Bubbleponics
- Bubbleponics Diagram
- Quick Answers to Common Questions
- Area Setup & Space Requirements
- Which Grow Light?
- Best Hydroponic Nutrients
- Reservoir Maintenance
How to Make Your Bubbleponics System
Introduction
Welcome, fellow cannabis growers!
This Bubbleponics grow guide will show you how to go from planting your seed to actually enjoying your cannabis buds in just 3-4 months using an efficient hydroponic system that fits in your closet. I decided to make a tutorial about growing marijuana with Bubbleponics because I’ve found it is not only one of the best ways to produce consistently huge yields, it also allows for a quicker harvest than pretty much any other grow method!
![]()
Did You Know? One of the major advantages to Bubbleponics and DWC is actually the air being bubbled up through the water. The bubbles give your roots more oxygen than they could normally get in soil which contributes to getting significantly faster vegetative growth!
Before I get started, I want to give a quick shout-out to a gracious fellow named Roseman who, long ago in the vast reaches of the internet, wrote a tutorial on Bubbleponics that actually made growing cannabis in water seem accessible. That simple guide made it possible for someone like me (who’d never grown any type of plant before) to succeed and I’ve grown cannabis with Bubbleponics ever since!
Over the years I’ve learned exactly what you need to do to get consistently great results (as well as what doesn’t work), so I decided it’s time to pass the knowledge on!
Hopefully, this step-by-step walkthrough will make growing weed with bubbleponics even easier for you to get into!
If you follow the simple steps outlined in this tutorial, you will great yields on your very first attempt!
Pros of Growing Cannabis with Bubbleponics:
- Yields – Very high yields compared to the amount of light/nutrients/time that goes into each plant
- Faster Growth – Super fast vegetative growth. (I’ve personally seen marijuana plants grow over 3 inches in a single day using this system). In particular, plants grow faster in the first few weeks of the vegetative stage than with any other method
- No Bugs – Much less likely to get bugs or other pests
- Potency – Perceived potency seems to be higher with cannabis grown in hydroponics vs. soil
- Big Plants – Larger plants can be supported by smaller containers since water takes up less space in the container than soil
- Simple to Maintain – Not hard to maintain once it’s set up; can be left alone for a couple of days
- Fits in Your Closet – Doesn’t need much room for cannabis plants to thrive
Cons of Growing Cannabis with Bubbleponics:
- Getting Set Up – Setting up a bubbleponic reservoir takes more time and effort than starting with soil
- Top-Feed is Most Effective for the First Few Weeks – The top-feed takes the most time during the setup process and can be skipped, but it’s recommended because it causes your plant to grow faster during the first few weeks of life. Unfortunately, the benefits of the top-feed decrease as the plant’s root system grows larger, and after a certain point the top-feed becomes unnecessary.
- Root Rot – Your cannabis roots are more likely to suffer from root problems like root rot when growing directly in water. However, root problems are easy to prevent with a little preparation! Most importantly, give roots tons of bubbles, and don’t let heat and light get into the reservoir.
- Must Keep Heat Under Control – Maintaining a proper temperature is important for the fastest growth and healthiest roots in hydroponics. That means you will likely need a proper venting/exhaust system to control the heat if you’re using hot grow lights. However, bubbleponics works astonishingly well with high-powered lights if temps are kept under control!
- Smell – The smell of hydroponically grown buds may not be as complex as organically grown buds.
“Bubbleponics” is just a fun word to describe a top-fed Deep Water Culture (DWC) hydroponic system, which is a slightly fancier version of DWC (Deep Water Culture).
In DWC, your plant roots are grown in a reservoir of aerated nutrient water that’s been adjusted to the correct pH. The roots are allowed to hang with only oxygenated nutrient water as a medium in order to get the best access to water, oxygen, and nutrients. This allows your plants to grow much faster as a result!
Bubbleponics/Top-fed DWC is basically the same thing as DWC except for one small, but important, addition. A small stream of that same aerated, pH-balanced nutrient water is trickled over the young roots of your cannabis plants. This encourages the roots to grow faster and reach the reservoir water in less time, making for faster growth during the first part of the vegetative period.
The roots are allowed to hang with just aerated nutrient water as a medium in order to get the best access to water, oxygen, and nutrients.
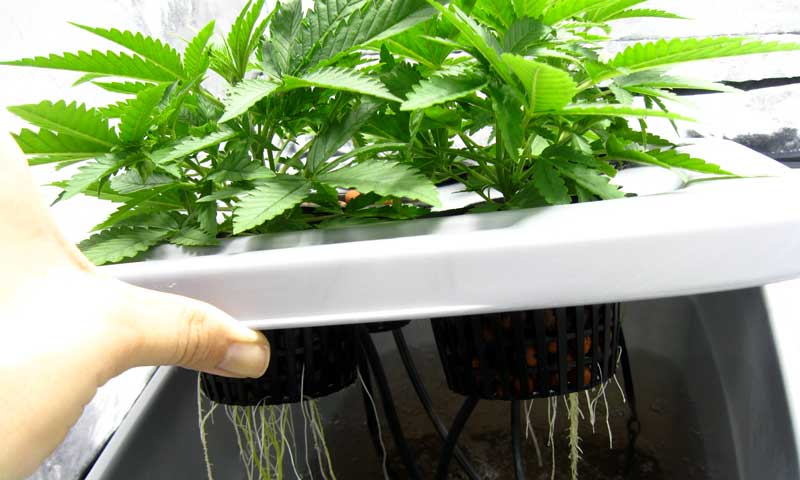
View grow journal for this DWC plant with step-by-step instructions
Here are a few journals of growers using Bubbleponics:
- First Timer CFL Bubbleponics Grow – 5 oz in 3 months
- 600W Hydroponic Grow Journal – 23.09 oz Harvest!
- 250W HPS Cannabis Grow Journal – 6.2 oz Yield
Overview of Growing Cannabis with Bubbleponics
Here’s a simple diagram to show you how growing cannabis with bubbleponics works:

As you can see from the diagram, the cannabis roots have unlimited access to the oxygenated, nutrient-filled water, as well as plenty of access to the oxygen from the air space in the reservoir.
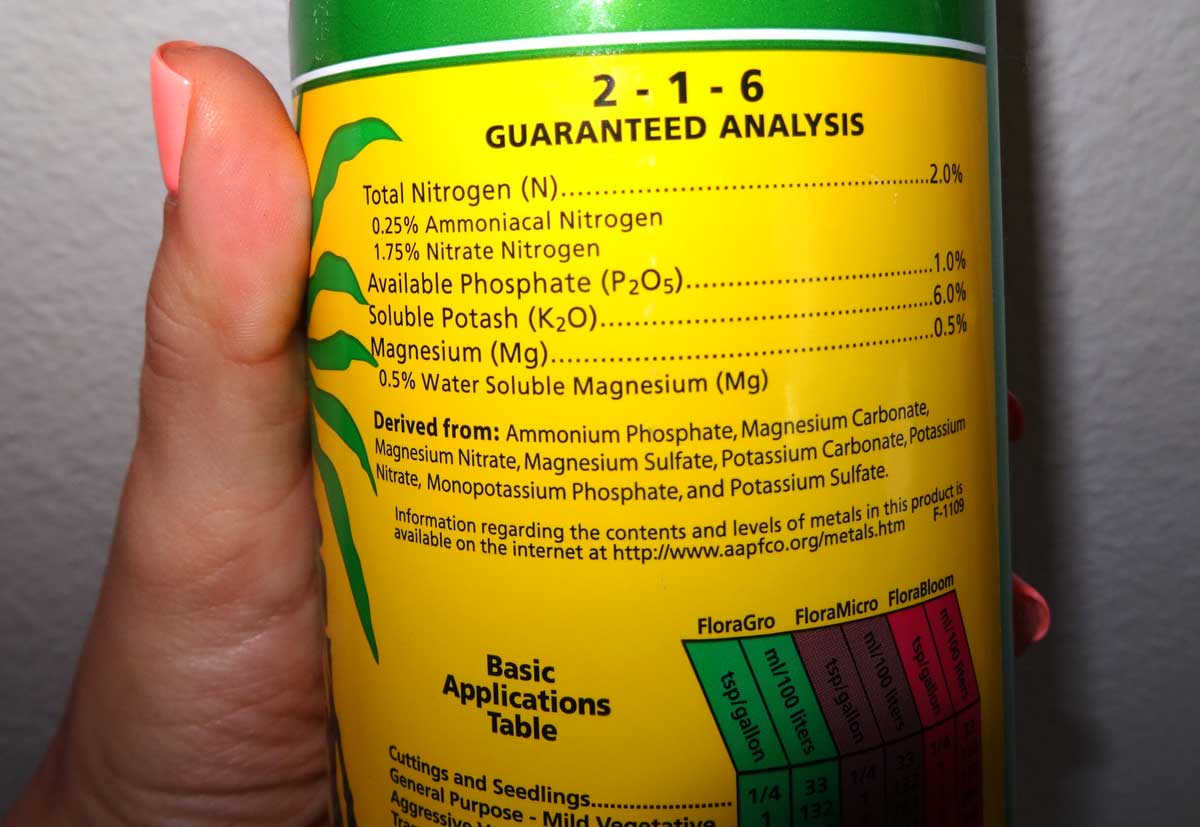
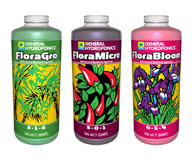
You can use almost any hydroponic nutrients formulated for cannabis that doesn’t have organic stuff to clog the pumps, but I recommend the General Hydroponics Flora Nutrient System since it’s simple and relatively inexpensive, yet very effective.
A Few Starting Tips:
- Growing marijuana really isn’t that complicated, people just make it seem that way!
- Marijuana is a fairly resilient plant and can survive a fair amount of stress. Ideally, you want your cannabis plants to look pristine through the whole grow but don’t worry if your plants get a little beat up along the way. I’ve had plants look rough towards the end and still produce high-quality bud!
- If something is wrong with your plants but you can’t figure out what it is, change the reservoir water. There is a wide array of problems that can be fixed by a reservoir change!
- Use less nutrients than indicated by nutrient labels. Feel free to experiment and see how your plants react to different amounts, but treat the amount specified on the label as the maximum amount. I suggest starting off at 1/2 of the amount specified.
- Be nice to yourself! This is likely a new skill to you and there’s no shame in making mistakes… I made many!
Answers to a few questions we get a lot:
- “How do I make the holes in the lid?”
- Unfortunately, there’s no easy answer here. A power drill and a hole saw is the quickest way but you can get creative (carefully!) with a box cutter or sharp scissors.
- “Why do you make 6 holes in the lid if you only grow one plant? Should I just drill one hole?”
- I make 6 ports so I can start a bunch of seeds and only grow the strongest-looking one. After thinning out to just one or a few plants, I still use the extra holes for easy access to the reservoir/roots. However, you could definitely just drill one larger hole, or any combination of holes depending on your needs.
- “Do I really need to do the top-feed? Is it even worth it?”
- The short answer: No, you don’t need it. Yes, it is worth it!
- Longer answer: Bubbleponics without the top-feed is just DWC (Deep Water Culture) which is already amazing for growing cannabis. The top feed takes the same idea and speeds up the beginning at the cost of a little extra setup/power. It ends up being a personal choice, but I use it every time I do DWC.
How It Works:
Here’s the short version. Cannabis Plants have five factors that are important to good growth: Light, Water, Nutrients, Air (including temperature and humidity), and a “medium” (like soil) to grow in.
Growing cannabis with bubbleponics works just like growing cannabis any other way. The main difference is that instead of using soil as the medium, you use nutrient-filled, oxygenated water.
The plants also get the added bonus of having some of this water pumped over the base of their roots. These two things make it so that your plants will grow MUCH faster than if they were in soil, coco coir, perlite, or pretty much any other medium.
Your cannabis roots would drown in the water except that you pump in and dissolve oxygen directly into the water; this is why you need an air pump and an airstone for your reservoir running 24/7.
Setup
Area Setup:
You should always clean and vacuum out your growing area before you start a grow (for bugs, dust, mold, etc.). You may also need to have your reservoir raised off the ground depending on how you plan to drain it; we’ll cover that in a bit. I use a battery-powered pump (which I recommend), so in my case raising the reservoir isn’t necessary.
You need to be able to keep your grow area in complete, uninterrupted darkness for 12 hours a day during the flowering period. Giving your plants even small bursts of light during their dark period can cause weird things to happen and none of them are fun. There are different advantages to setting your dark period for a certain part of the day (electricity cost, heat management), but it’s a good idea to plan your dark period around your schedule so you can make sure to see your plants while the lights are still on.
About Cannabis Size and Height:
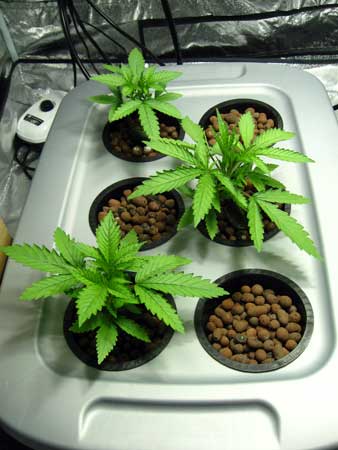
Your cannabis will need room to spread out a bit, so you’ll want to keep the total number of plants to 3 or less in a single system. The more plants that go into a single reservoir, the smaller each plant will need to be. I generally grow only 1 or 2 cannabis plants in a top-fed DWC system at a time.
You want to keep your plants short, and should therefore start the flowering stage when your plants are around 1/2 of their final (desired) height. So, if you want cannabis plants with a final height of 48″, start flowering them when they are 24″ tall.
Why flower so early? To account for the flowering stretch! These numbers aren’t set in stone, but some cannabis plants will double or (rarely) even triple in height after changing the light schedule to 12/12.
The aim is generally to try to get your cannabis to grow wide and flat like a table. However, you don’t want the plants to get crowded and end up having them compete for space, so it’s a good idea to make sure that each cola (main stem) has a few inches of open space around it.
Because your cannabis can grow so fast in this setup, it’s imperative that you keep a close eye and don’t let them stay in the vegetative stage too long or they will grow into out-of-control monsters that take over your grow space!
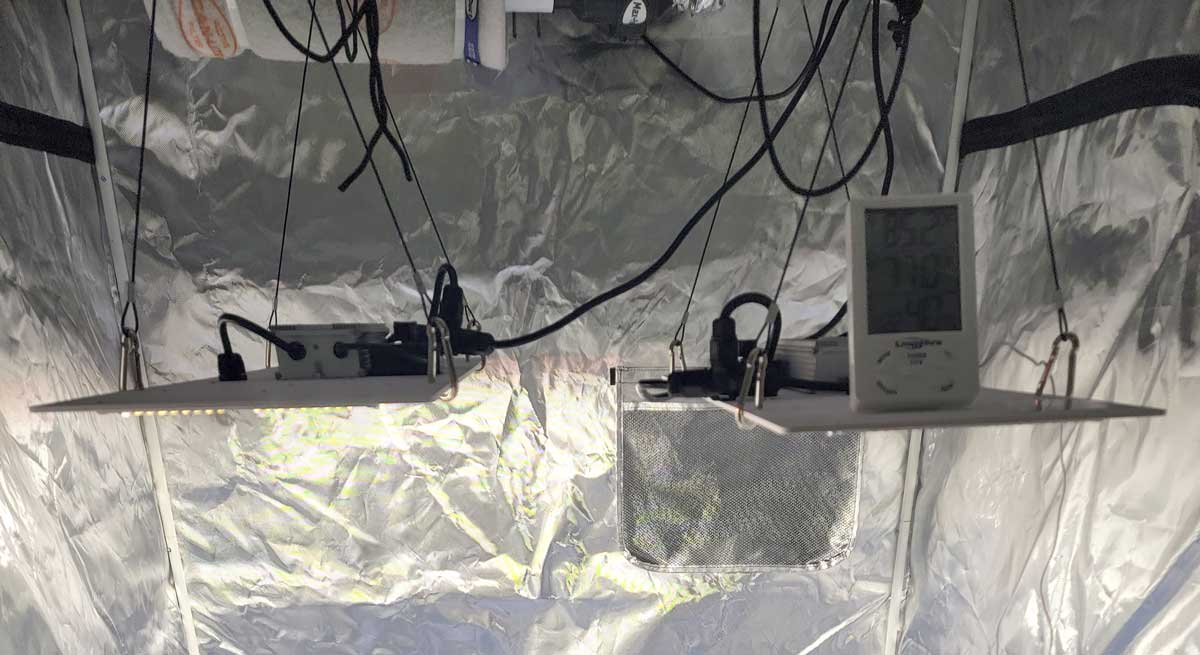
Grow Lights:
There are many lights to choose from and a large number of ways to hang them.
This page about different cannabis grow lights goes over the options in more detail, but we’ll give you the basics here.
I initially started with CFLs for my first grow. These are small fluorescent house light bulbs that were great for a small scale grow due to their low setup/maintenance costs and the fact that they don’t give off very much heat. These days, they’ve been totally replaced by LEDs when it comes to growing cannabis. If you’re worried about getting your feet wet in growing cannabis and don’t want to spend too much money, a small LED grow light from brands like Spider Farmer or Mars Hydro are a good place to start.
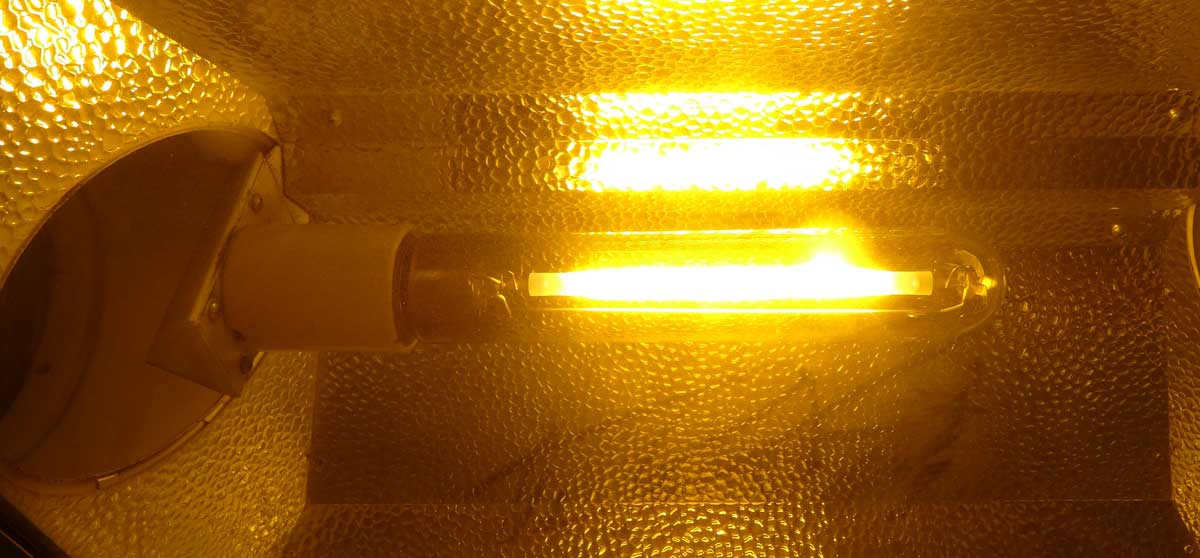
Metal Halide/High Pressure Sodium (MH/HPS)
These grow lights get better yields and density than most other grow lights, including most LEDs I’ve tried. Check out a grow journal using bubbleponics under a 600W MH/HPS grow light.
These powerful lights used to the golden standard for indoor growing lights, though they’ve fallen out of favor for LEDs. HPS grow lights will definitely give your plants what they need to grow huge, but they also make a lot of heat and can dramatically raise your energy bill depending on where you live.
Maintaining proper temperatures is so crucial to hydroponic grows that you should not attempt to grow cannabis using MH/HPS grow lights without a proper ventilation and exhaust system to vent out all the heat and bring in cool, fresh air. Smaller MH/HPS systems (150W or 250W) can be run without real ventilation like in this example by Nebula. Learn more about growing cannabis with HPS or MH grow lights.
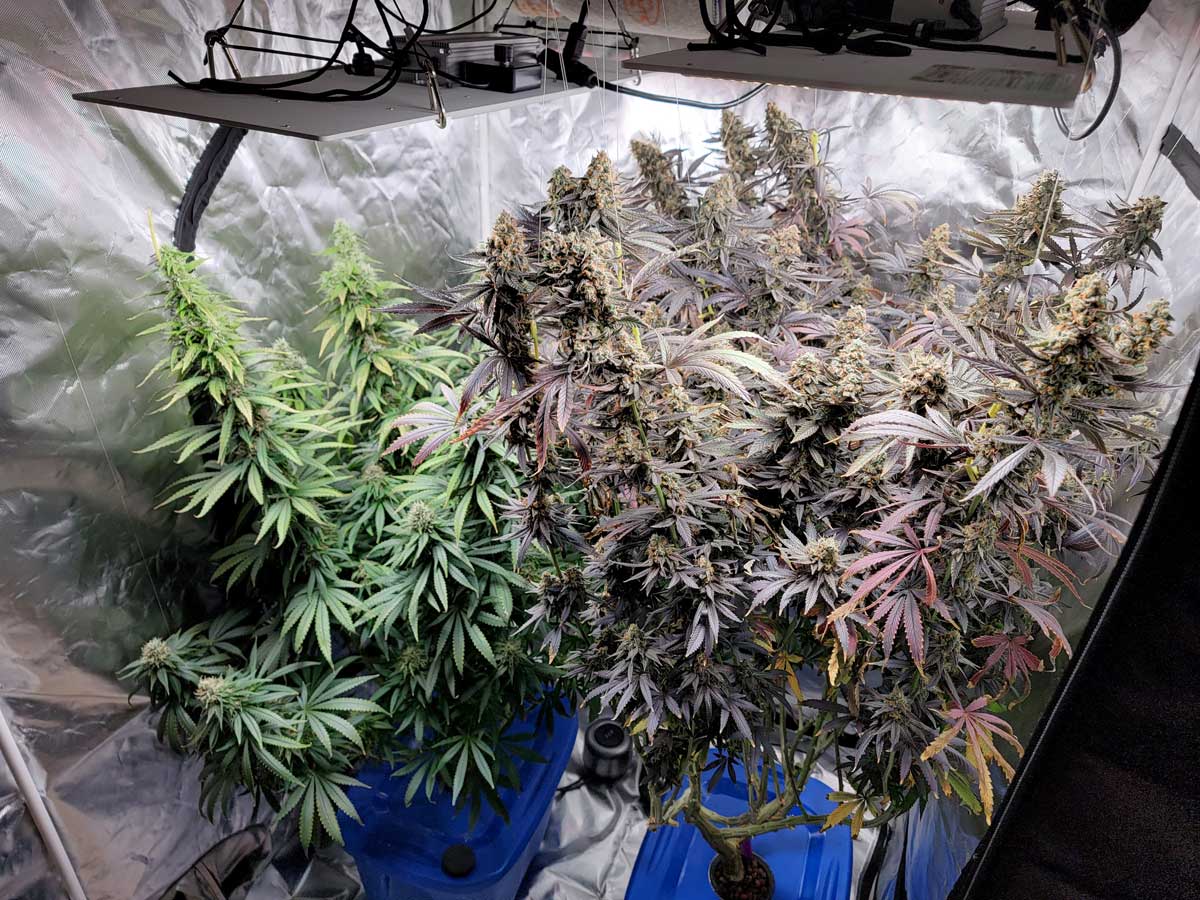
Light Emitting Diodes (LEDs)
LEDs are a popular alternative to using a HID system (MH/HPS). Although they tend to yield slightly less than HIDs, the bud quality is often better, and they tend to bring out colors and sparkle on buds. The technology LED grow lights use is still improving and the current models are much better than their older counterparts. Check out recommended LED grow lights for growing cannabis.
These two DWC cannabis plants were grown under HLG LED grow lights.
Light Emitting Ceramic/Ceramic Metal Halide (LEC/CMH)
These were a craze in the world of cannabis grow lights around 2019-2021, though the technology has actually been around in some form since the 2000s. They’re much less popular these days, but they’re still around and produce great results when you control the heat, just like HPS grow lights. Ceramic Metal Halide grow lights naturally produce UV rays, like the sun, which makes them attractive to cannabis growers who are looking to maximize trichome production. More info on LECs/CMHs here: What Are LEC Grow Lights?
Nutrients:
 Which Nutrients to Use:
You can use any nutrients you prefer as long as they’re formulated for hydroponic systems (as opposed to soil) and are also specifically made for plants that have a vegetative and flowering stage (if you see tomatoes on the label, you’re golden!).
If you don’t know which nutrients to use, I suggest General Hydroponics Flora Trio Nutrients.
How Much Nutrients To Use:
The nutrients that you purchase will most likely come with a feeding schedule, and I would recommend treating that amount as a maximum.
With this grow, you’ll start with a fraction of your maximum nutrients and work your way up. However, in my experience, most people end up using significantly less than what the feeding schedule recommends.
When growing with cannabis-friendly hydroponic nutrients, I feed my plants about half of the recommended dosage in the beginning and slowly work my way up if necessary. Some plants are sensitive to nutrients and will show sign of nutrient burn (too much nutrients) at half strength, while other plants can handle the full-strength dose.
Mixing Nutrients:
You can use an old five-gallon water jug as a container to mix your nutrients. You can use tap water, rain water or well water. Some growers use RO (Reverse Osmosis) water to grow cannabis since it has the least amount of extra ‘stuff’ in the water, though with RO you may want to supply your plants with a CaliMagic supplement to make up for the calcium and magnesium that’s normally found in most regular water sources. Either way, always make sure to “pH” your nutrient water before you pour it into the reservoir (see below).
The Importance of Managing pH:
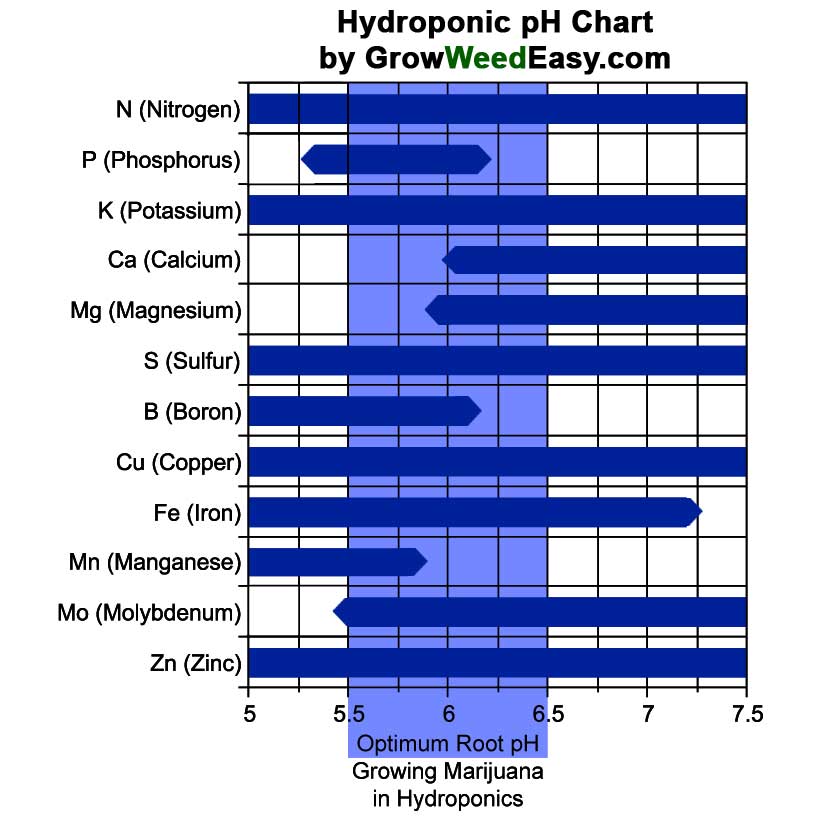
pH’ing Your Water:
After you’ve mixed all of your nutrients and supplements into your water, it’s important to ensure that the nutrient water is the correct pH so your plants are able to properly absorb nutrients.
You will need a pH kit or an electronic pH tester to test the pH of your water. Most pH kits come with instructions, so you should follow those if they’re available.
Basically, you want to get a sample of the water you’re pH’ing and test it (put some pH test drops in it/place some on a test strip/use your electronic tester). This will tell you the current pH of your water.
You can then use small amounts of pH up/down to adjust your water to the right level, but don’t be afraid to leave the pH within a range. Some nutrients are better absorbed by the roots at a lower pH, while other nutrients need a higher pH to be properly absorbed by the plant’s roots.
Therefore, when you’re making your water, you want to adjust to a pH within the range of 5.5 – 6.5 to ensure proper nutrient absorption.
Step-by-step instructions on how to adjust the pH of your water.
How to Manage the Water Reservoir
Replenishing Reservoir Water:
- Make sure to add water when it looks like the reservoir has lost about a gallon of water (if you have a smaller reservoir, you will want to top off sooner).
- Be sure to leave at least a few inches of air space below the net pot.
- When replacing water, you’ll want to replace the nutrients in it too, especially after your plants mature and start drinking more than a gallon of water a day. In the beginning, you can probably get away with topping off your water with plain, pH’ed water. You can figure out how much nutrients to add to your top-off water by applying the following formula: Take the number of gallons you’re putting back in the reservoir, and divide that number by the total number of gallons in your reservoir. So, if you’re adding in 1 gallon, and your total number of gallons is 5, your number is 1/5. The resulting number is the fraction of your normal nutrient dose you’ll need to put back in the tank (I always like to put a little less than whatever number I ended up with). If you end up with a fraction of 1/5 like in the example, you’ll add 1/5 of your normal nutrients (or a little less) to the 1 gallon of water that you’re using to top off the reservoir.
- The easier way to do this is to make an extra batch of nutrient water and use that to top off your reservoir. Nutrient water can last for at least 2 weeks after being mixed.
- Minerals will build up in the reservoir and your plants may not use all the nutrients equally, so you’ll definitely want to change the entire reservoir of water at least once every 7 days.
- The plants like the 10-15min of oxygen they get while you’re changing the water, but don’t let any of the roots dry out.
Draining Reservoir Water:
You will need to fully drain and replace your reservoir water once a week. The method you use to drain the water will be determined by your space/height/financial limitations. Here are some ideas for methods to drain the reservoir:
- I recommend getting a battery-powered water transfer pump. They’re cheap and do the job in a matter of minutes. I use rechargeable batteries with D battery spacers so there’s no need to keep buying expensive batteries for it.
- For about $80, you can get an electric water transfer pump to get the water out
- If you can have your tank sitting high off the ground without running out of future space for lights, you can just drain it into a container, or get a siphon
Bubbleponics Materials – Supply List
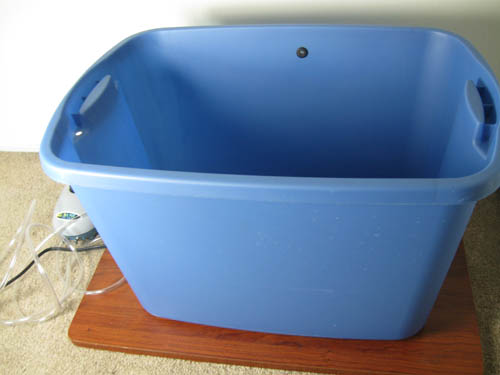
- Reservoir with lid – I get 10-gallon storage tote containers, you can buy in bulk online or get individual containers from stores like Wal-Mart where they are a few bucks a set – these containers can be filled comfortably with about 5 gallons of water.
- Net pots – I use 3.75″ NGW net pots.
- Water pump – I use the EcoPlus 185 Submersible Pump.
- Hub aka “drip manifold” – used to split water stream from pump and deliver to each net pot – I use the DiG Corps 6-outlet Adjustable Drip Manifold)
- 1/2″ Male NPT to 1/2 Barb – This weird piece of plastic will make it so your drip manifold has something to connect to. This piece is absolutely necessary if you’re making a manifold as shown in the pics below.
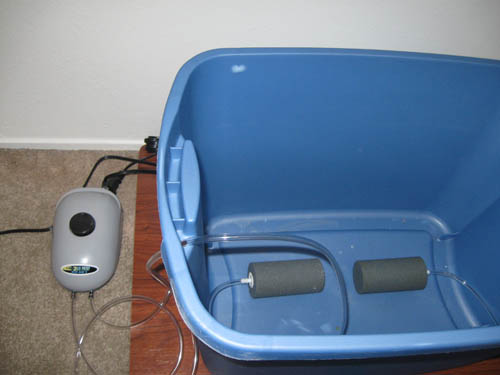
- Air pump – at least one powerful air pump per container; – I use one EcoPlus 2 Air Pump w/ 2 Outlets w/ 2 airstones for each 10-gallon container.
- Tubing for air pump & water pump – 3/16″ internal diameter (1/4″ outer diameter) vinyl tubing works great with the manifold and the air pump listed above. Usually comes in black and clear.
- Tubing to connect manifold to water pump – a single 5″ piece of 1/2” inside diameter (5/8” outside diameter) vinyl tubing is all you need. Usually comes in black and clear.
- Large air stones – I use 2 x large air stones per air pump since the one I use has 2 outlets – this helps make sure there’s plenty of oxygen in the water for healthy roots and faster growth)
- 24-hour timer (I use the Titan Controls 734100 Apollo 8 2-Outlet 24-Hour Analog Timer)
- Hydro starter cubes (Rapid Rooters or Rockwool cubes)
- Hydroponic Nutrients – I use the General Hydroponics Flora Nutrient trio
- pH testing kit, with a bottle of ‘PH Up” and “PH Down” (or an electronic pH tester)
- Rope Ratchets to hold up your grow light
- Small spool of twisty tie (I use a combination of gardening twisty ties and soft wire ties)
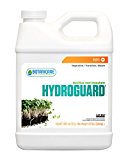
- Hydroguard (highly recommended) – supplement for root health and protection against root rot. Optional but highly recommended.
- mister/sprayer (optional) – for foliar feeding and to treat problems
How to Setup Your Bubbleponics System – Device Setup:
Important: Do not plug in anything just yet
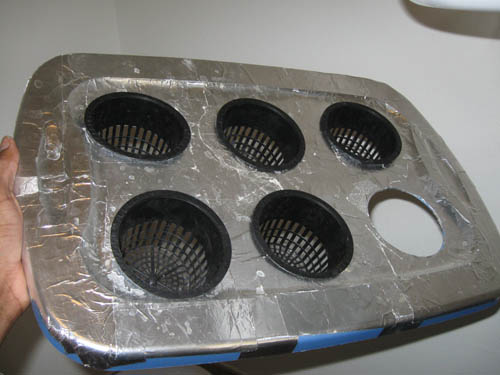
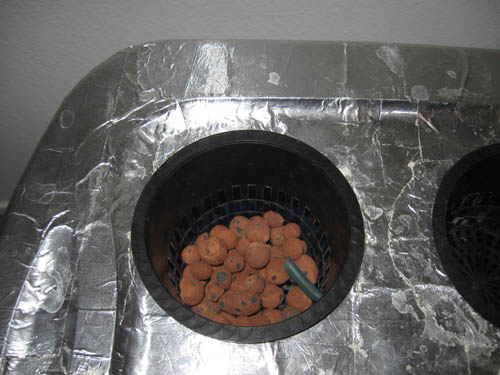
Note: You’ll notice that the lid for my system is covered in reflective tape. I did this to reduce the amount of light/heat that gets into the reservoir, however, you don’t have to do this. The tape costs ~$5, and you can find it at Home Depot.
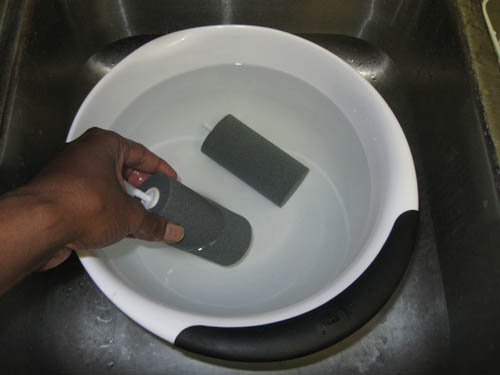
- Start soaking your airstone.

- Set up your lights.

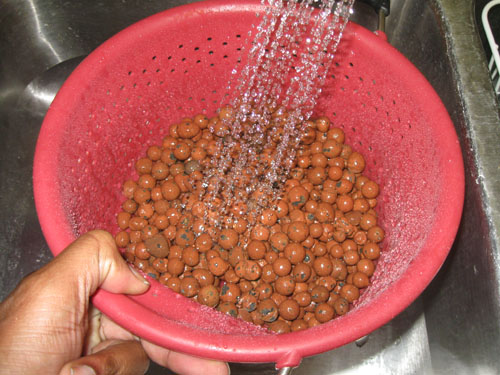
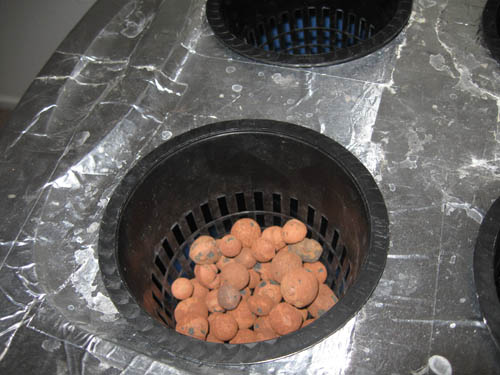
- Thoroughly rinse your hydroton rocks before you start using them. Rinse them until the water runs clear and set them aside for now.
- If your system is going to be raised off the ground, set up the ‘table’ your tank will be sitting on and place it under your lights. In the picture below, we’re just making it so the reservoir isn’t directly on the ground.
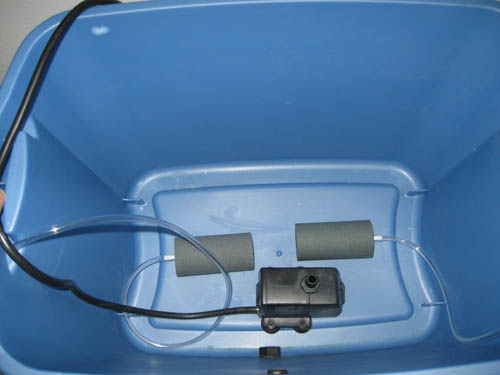
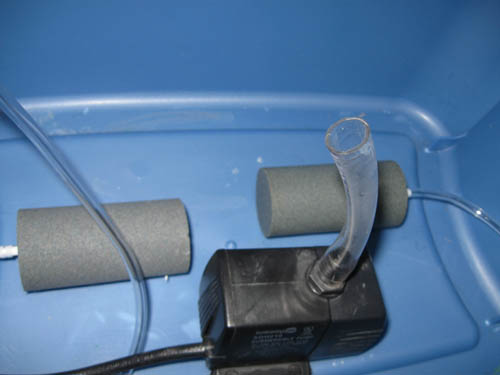
- Place the airstones on the bottom of your reservoir. Run tubing from airstone out to the air pump. Do not plug the air pump in yet.
- Place the water pump in your tank.
- Connect thick hose to top of the water pump.
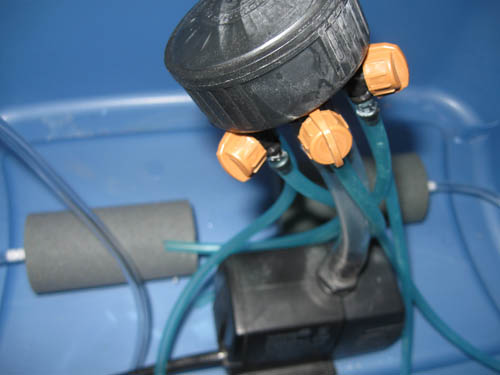
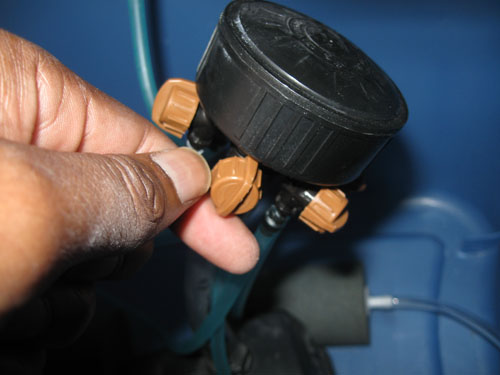
- Attach the barb to the bottom of the drip manifold. Next, cut six 1′ pieces of 1/4″ tubing and attach them to the ports on the drip manifold.
- Connect the hub (drip manifold with tubing attached) to the clear hose on top of the water pump. The purpose of the hub is to split the stream of water from the water pump into multiple smaller streams of water.
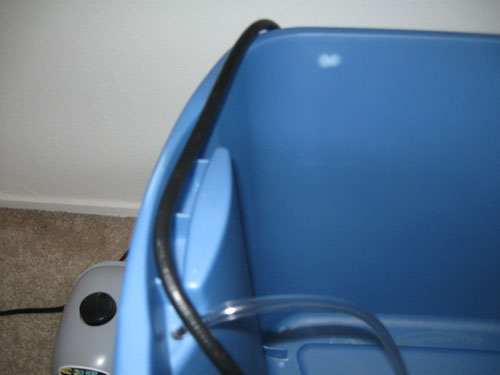
- With a home-made top-fed DWC system, you’ll notice there isn’t a good place for the cord for the water pump to exit of the reservoir. You can cut a small slot in the reservoir for it, or you can just kind of mash it in near the handles.
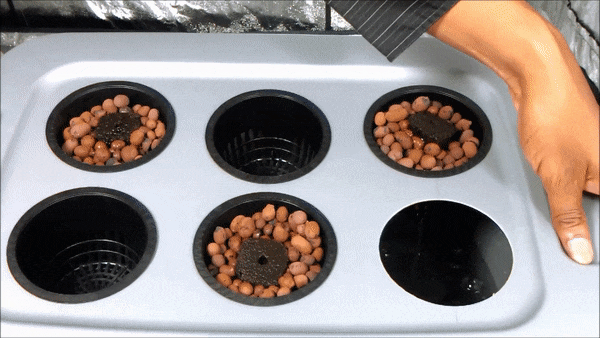
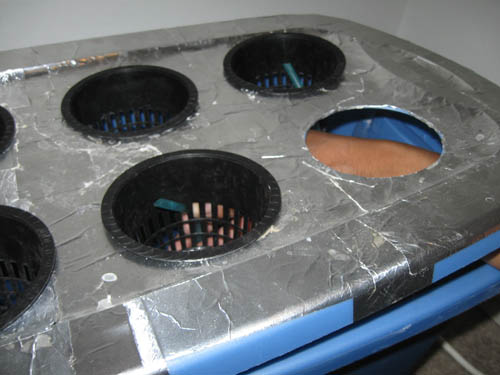
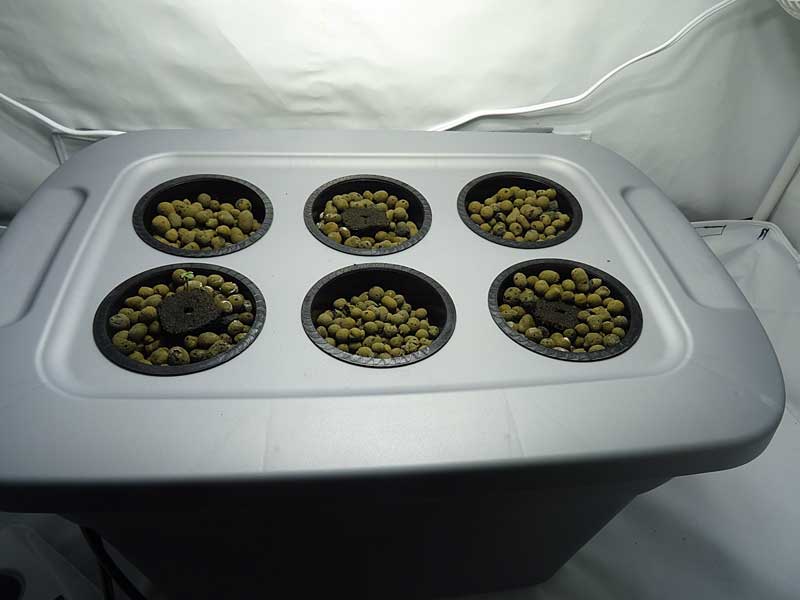
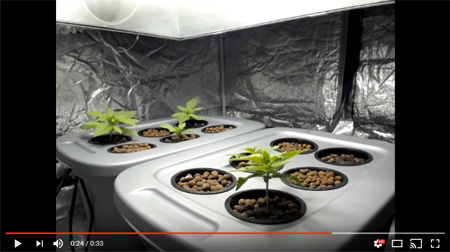
- Place 5 of the 6 net pots in the lid, and put the lid on the container. You will use the empty slot to pour your pH’d water into the container later.
- Now we need to get water to the net pots which will have plants in them. Lift up a corner of the lid and run one of each of the tubes (from the hub) over into any net pot that will have a plant in it.
- Twist the little orange-ish valve on the hub for each tube that will be going to an occupied net pot. Make the line on the valve parallel to the blue tube to open it.
[The valve I’m touching in the picture is set to ‘On’] - Pour 5 gallons of pH’d water into the reservoir. In order to easily mix up 5 gallons of pH’ed water with nutrients, I recommend getting one of those 5-gallon drinking water containers.
Note: I use tap water and it works fine. This may vary depending on where you live, but it seems that a lot of people have success with tap water. - Place the last net pot in and run a tube to it if necessary.
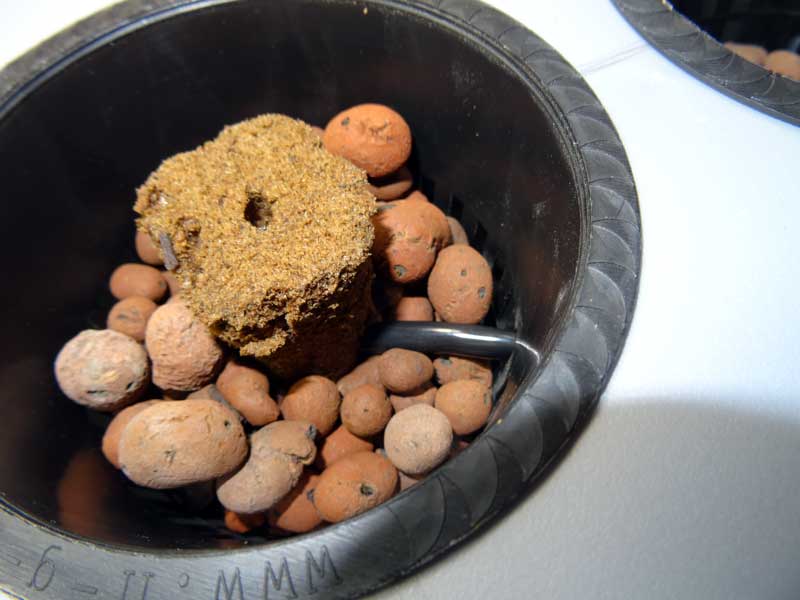
- Now, without dislodging the tubes, pour 1 inch of thoroughly rinsed hydroton rocks into the net pots.
- Remove a Rapid Rooter from its container and push a seed down into the opening on the top. Pushing it down about 1/2″ should be more than enough distance.
- Place the Rapid Rooter on top of the 1″ of rocks, and run the tube close to it so the Rooter and tube are barely touching.
- With the tube in place touching the Rapid Rooter, fill up more of the cup with rocks so that the rocks are even with the top of the Rapid Rooter. Make sure that the tube stays up against the Rapid Rooter while you do this so that the tube will expel water into the cube (and thus, the plant and its roots).
- Repeat this process for any other net pots you’ll be growing in.
- Use hydroton rocks to completely fill up any net pots that won’t have plants growing in them. You don’t want any light to get down into the reservoir because light encourages root rot and other root problems.
- Pour some water on the Rapid Rooters so they get a little wet all over, but don’t drench them. I use plain pH’d water, but you can also use water with light (< 50% dose) nutrients.
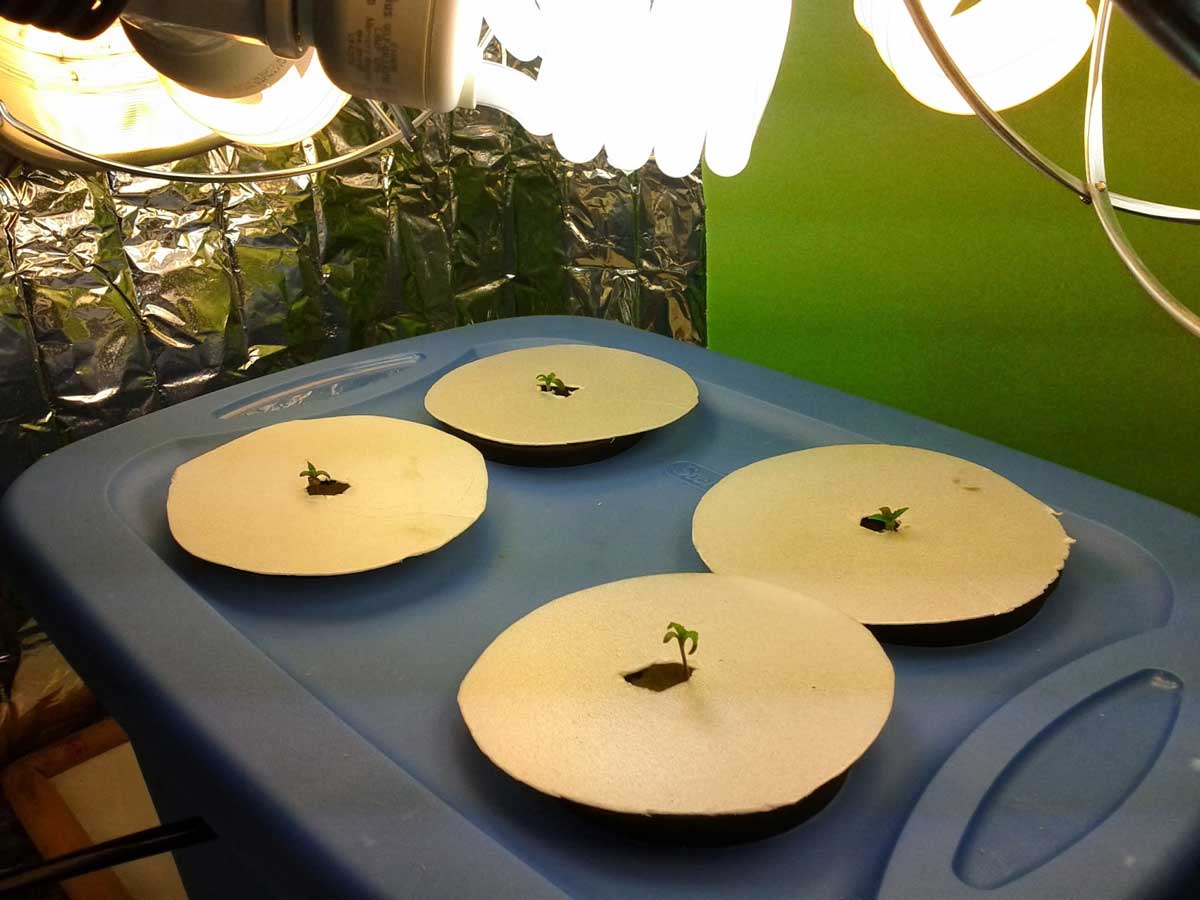
- Another great Roseman trick: Cover the cups with small sized disposable plates. Cut a hole about 1/2 the width of a Rapid Rooter in the center for the new plants to grow through. I find this useful for blocking light from getting to the cubes and tank, and the paper plates also help keep the rockwool cubes moist.

- Make sure that your lights are plugged into your timer. The rest of your devices (air pump, water pump, fans) should be running 24 hours a day and therefore should not be on a timer.
- Turn everything on except for the lights. You want to leave the seeds in the dark until you see a sprout coming out of the Rapid Rooter. If you’re starting with clones, they should get reduced light for 3-4 days before slowly increasing to full-strength light.
Before You Start:
Now that you’re all set to go, you should make start trying to make it a habit to check on your plants regularly, daily is best!
Get familiar with the setup of your container so that eventually, you can check it without looking inside. It’s a good idea to regularly check to make sure everything is still connected the way it should be. Make sure the tubes still go to the net pots, and that water is dripping from the occupied pots. You’ll also want to make sure nothing is floating in the reservoir water (which should smell clean, or at least neutral). Doing this every so often will help you spot problems if they pop up!
Daily Care – Plant Life Cycles:
Youth (Seedling/Clone):
This is the stage where your cannabis is weakest, but luckily, seedlings don’t need much help in the beginning. The key is to be gentle with nutrients, and maintain a pH in the 5.5 – 6.3 range.
Learn how to germinate your seeds
Click here to see some seedlings starting their lives!
Lights:
Seedlings:
Leave your lights off until you see a sprout break the surface. After that point, you’ll want to give them light for 18-24 hours a day until it’s flowering time.
I leave the lights on for 18 hours a day during the vegetative stage though I’ve also had success leaving them on for 24 hours a day. Fluorescent lights should be ~6 inches away from the plants, LEDs can vary, but you’ll typically want them double the regular distance away from seedlings, possibly at reduced power (consult the manufacturer’s instructions for specifics on your particular LED grow light model for specific distances). For HPS/MH users, you should have the MH bulb in and powered on, although HPS bulbs can be used for the entire grow. MH/HPS lights should be 12-18 inches away. You can test how hot it is where your plants are with the palm of your hand. If it’s hot for you, it’s too hot for your cannabis. Learn how far to keep grow lights from plants.
Clones:
Give them reduced light (fewer bulbs if you can) for 3-4 days. This will give your clones time to adjust.
Nutrients:
Seedlings and Clones:
Add 1/4 of the recommended nutrients after 1 week (during your first reservoir change), then work your way up to 1/2 over the next few weeks. Watch the tips of your leaves and back off if they start to appear yellow, brown or crispy. Giving plants too much nutrients is a common mistake and if you do notice signs of nutrient burn, you will want to drain their water and replace it with water that contains lower amounts of nutrients. However, if they seem pale and the pH is in the correct range, they might need more nutrients instead.
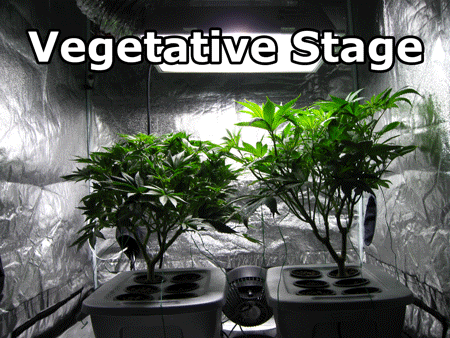
Vegetative Stage:
This is where your cannabis plants grow their fastest and drink heavily. They are also their sturdiest and most resilient to problems during this grow stage. The vegetative stage of cannabis growth is the easiest phase since all you have to do is replenish their water (with nutes included) and keep your lights adjusted.

Lights:
Your cannabis grow lights should still be on 18 hours a day. If you went the MH/HPS route, you should still be using your MH bulb. If you’re using an LED, LEC or HPS, then just try to keep the lights the right distance away from plants..
Nutrients:
Since your cannabis plants are their sturdiest now, this is the best time to learn how much nutrients they like. You can move closer to giving them the maximum recommended dose and back off whenever you see the tips of their leaves starting to turn brown or yellow. If this happens, top off with plain pH’ed water to reduce the nutrient concentration. When it comes to giving cannabis nutrients in hydro, it’s a good idea to grow by the “If it ain’t broke, don’t fix it” principle if you have some happy looking plants.
Flowering Stage:
Flowering is the most worrying time for growers because the plants have more of a visible reaction to stress. Don’t worry about minor slip-ups; just make sure to pay attention to your plants and you’ll be fine! Remember to keep changing your reservoir water weekly and check your roots for color (healthy roots appear white or cream-colored, and should never be brown, smelly, or slimy).
Lights:
Set your timer so that the lights are on for 12 hours a day. If you went for HPS/MH, now’s the time for that HPS bulb. If you have an LED grow light you plan to use just for the flowering stage, now is the time to make the switch.
Nutrients:
Continue with the same schedule as recommended by your nutrients. Most nutrients will have you change to some sort of “flowering” schedule which contains the nutrients a plant needs during flowering. A lot of people will add more nutrients at this stage thinking that the plant will take it in and grow bigger buds, but too many nutrients will only burn your plant so you’ll just want to keep doing things the way you have been.
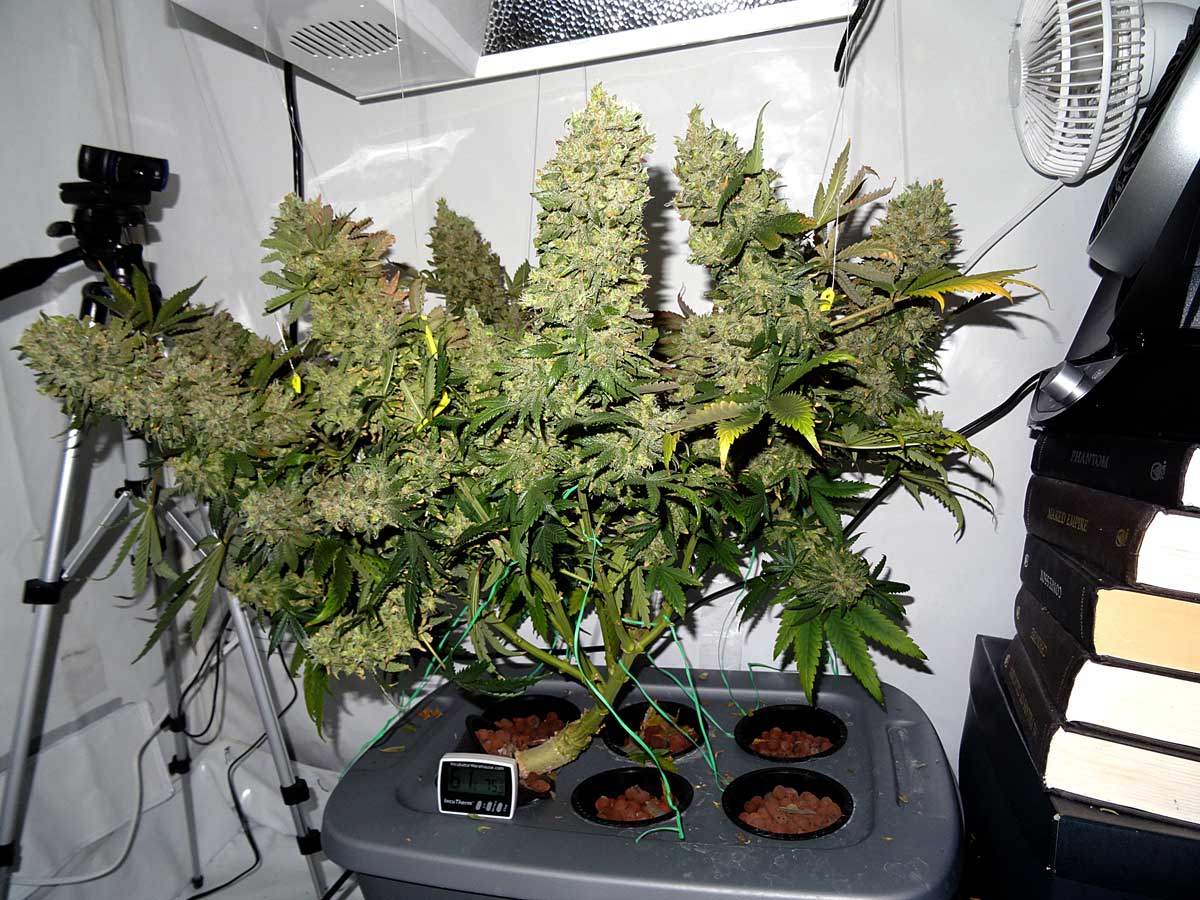
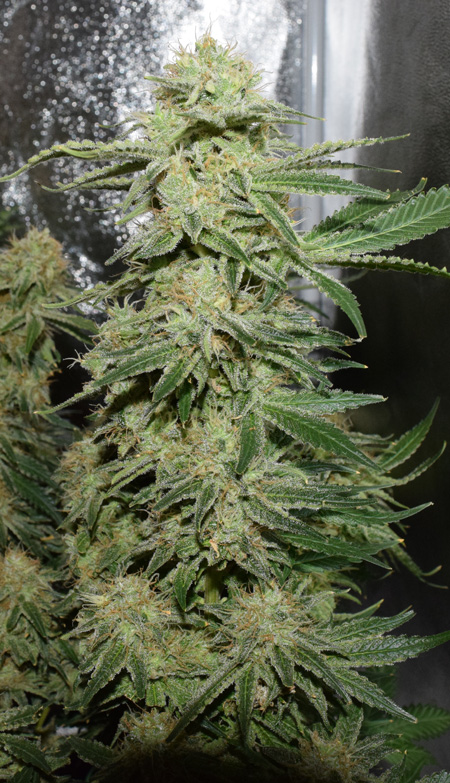
Harvest:
The best thing to remember with harvesting is to be patient. A lot of people get too eager to harvest buds, and they end up taking their plants down too early. Wait for a few signs before you take the leap:
- The hairs on the buds should curl and retract a bit.
- Use a jeweler’s loupe, handheld microscope, or (my personal favorite) a USB microscope, to look at your buds. The trichomes (little mushroom-looking growths) should be mostly cloudy, with a few amber ones, and some clear ones. When they’re ready, they’ll start to lean over from the weight of the bulbs on top.
Click here if you’d like a more detailed explanation of when and how to harvest and cure your buds.
Other Stuff:
Basic Prevention:
Light
Place your hands palms up where your plants are with your palms facing upward. If it’s too warm for your hands, it’s too warm for your cannabis. In that case, move your grow lights farther away. The “hand test” is good for bulb grow lights (like fluorescents, HPS, CMH, etc.) but LEDs run very cool and can burn a plant even though it’s not producing enough heat to burn your hands. This is why it’s important to know the manufacturer’s specifications with LEDs before using them. What happens if I keep LED grow lights too close to cannabis plants?
Water
Check your reservoir water to make sure there are no odd smells or objects floating in it. Check your tubes for brownish buildup which could be bacteria.
Nutrients
Too much nutrients can be just as bad as too little. The tips of your plants will tell you if you’re using too much nutrients by turning brown. The leaves will turn a more faded color if they’re getting too little nutrients or they may show other signs of nutrition deficiencies.
Air
Make sure to have fans circulating air in your grow area. Good circulation will benefit your plants in many ways, including helping prevent mold from growing on their leaves and helping the plant get the CO2 it needs. Direct air from a fan will most likely cause ‘wind burn’, so aim the fan above or away the plants. You just want the plants to be rustling lightly in the breeze, not fighting to hold themselves up.
Temperature
75 degrees (+/- 5 degrees) is optimal. With this type of growing system, high temperatures can be a huge problem (especially in warmer areas). Bacteria loves nutrients and warm water, so your reservoir will be the perfect place for them to reproduce if you can’t keep them out. There are two main ways to go about fighting bacteria/algae.
- The Clean Room Approach: Keep your reservoir totally bacteria-free.
Keeping the tank water cool and using something like Hydrogen Peroxide to stop bacteria can help ensure your reservoir is a sterile growing environment.
- The Better Bacteria Approach: Introduce bacteria that your plants actually like.
You can buy ‘beneficial bacteria’ to introduce to your reservoir. These bacteria will not only outcompete (and thus destroy) the bad bacteria, but it will form a symbiotic relationship with your plants and help them grow. Hydroguard works extremely well for this task, I can’t stress that enough!
Quick Troubleshooting:
Leaves color fading; lime-ish color:
This can mean that your plants need more nutes, but more likely it means that the pH of your reservoir water is out of the desired range.
Leaves turn brown on tips and edges; leaves curl down on tips:
Too much nutrients; change water and add less nutrients.
Plants drinking less water than normal:
Plant may be in shock from pH being off. Drain/Replace water and pay close attention to pH level. Your plants will also start drinking less water when they start developing root problems, which brings me to the next point…
Reservoir smells bad, roots are brown, weird stuff floating in reservoir water:
You may have root rot. If you have brown roots, cut off the brown parts. Replace tank water and add SM90 or Hydroguard to help fight growth. If you’ve been using SM90, don’t switch to Hydroguard or vice versa. Reportedly, SM90 kills all bacteria, so using these two products together is counter-intuitive since the SM90 will kill the beneficial bacteria too.
A lot of people recommend using 35% Hydrogen Peroxide to deal with root rot. I’ve had root rot quite a few times and tried 35% Hydrogen Peroxide to fix this problem. All I’ll say is that for me, it didn’t work even close to well enough for me to recommend it to anyone. Even if the roots seemed to be doing temporarily better after being treated with H2O2, the root rot would come back with a vengeance in only 1-2 days. SM-90 and Hydroguard (Hydroguard especially) are both methods I’ve used which will cure your system of root rot long-term and are highly recommended over using Hydrogen Peroxide.
White, flour-like substance appearing on leaves:
Most likely white powdery mold. You can make a foliar spray with SM-90 that takes care of that pretty quickly. To prevent a re-occurrence of white powdery mold, increase circulation in the grow area by having a fan or two in the area, control high humidity, and ensure that the temperature of the grow area doesn’t climb above a comfortable room temperature.
I hope my bubbleponics cannabis grow guide was helpful! Suggestions, corrections, and feedback are greatly appreciated! Just click the Contact Us link!
More nutrient suggestions that work well for DWC/bubbleponics:
A time-tested, simple nutrient system for growing marijuana hydroponically is the General Hydroponics Trio.
Here are the General Hydroponics nutrient schedules I use…
DWC/Hydro/Recirculating – GH Flora Nutrient Trio DWC schedule [PDF]
This complete nutrient system can be used in any cannabis growing medium, including hydroponics, coco coir, and even soil. The Flora series works amazingly well for growing cannabis, without needing a lot of fuss.
You don’t need any other nutrients to grow marijuana; this trio alone will give your cannabis plants what they need to flourish through the vegetative and flowering stages.
I love growing with General Hydroponics Trio because I don’t have to worry about nutrients and can focus on creating a great growing environment and harvesting my fat buds.
Simply follow the included nutrient schedule or the custom nutrient schedules listed above (start at half strength and increase as needed) and keep the pH of your water between 5.5-6.5 at the plant roots for best results. Or feel free to use my custom DWC schedule for the GH trio [PDF].
PPM in Hydroponics: What It Is and How to Track It
IMPORTANT: Root pH Affects How Well Your Cannabis Plants Can Absorb Nutrients!
Nutrient Picks for Growing Hydroponically
(Hydroponic systems including DWC, Recirculating Systems, Ebb & Flow, etc.)
Unlike some nutrient systems, these nutrients are great for growing hydroponically with your plant roots directly in water. They don’t contain loose particles and will not clog up your tubes, pumps or other hydroponic equipment.
If you’re growing hydroponically, you will want to learn about measuring PPM: What It Is and How to Track It
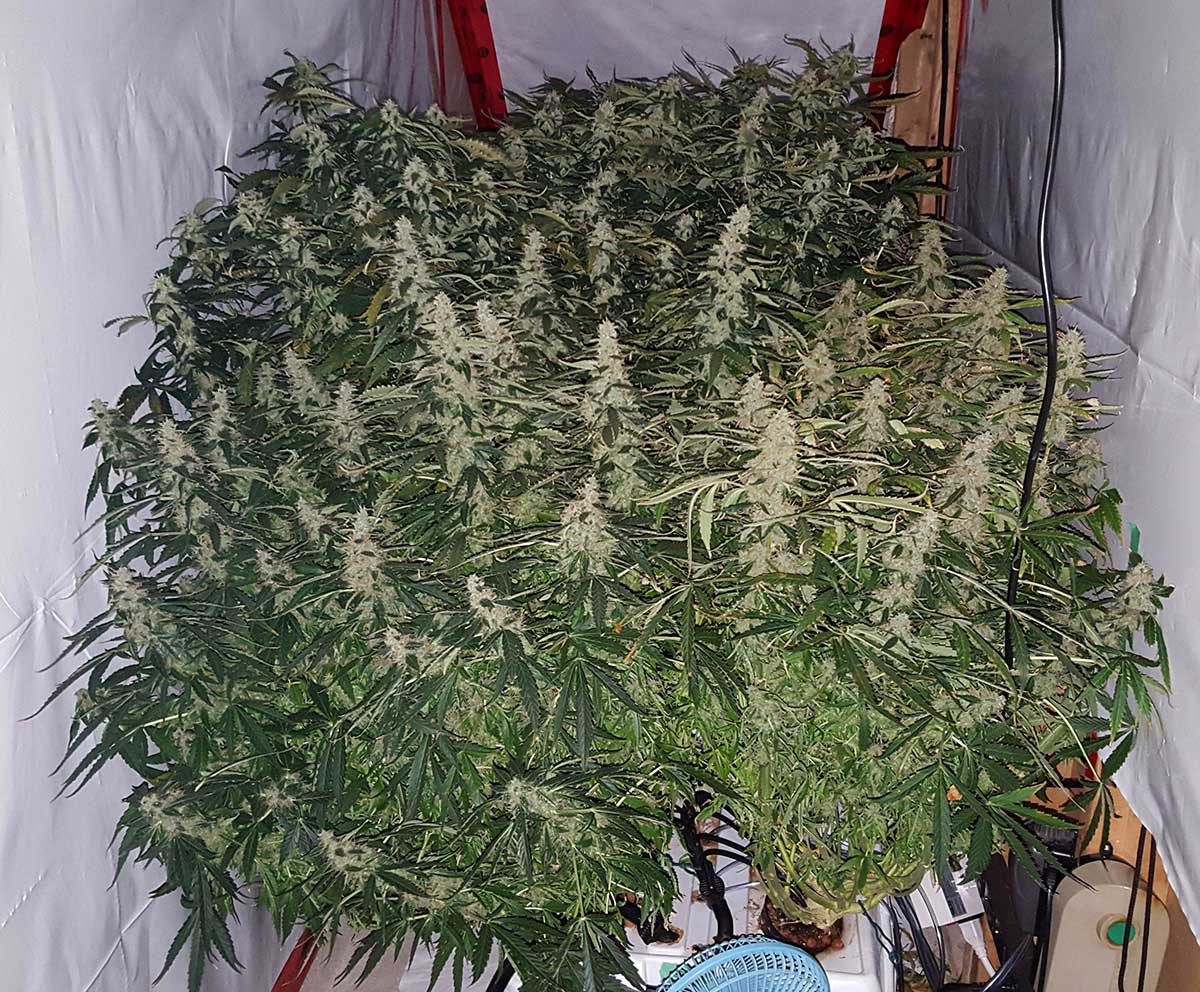
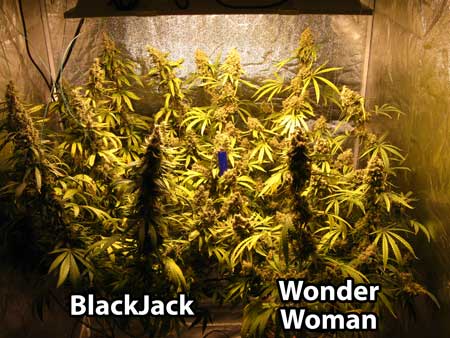
- General Hydroponics Flora Series Nutrient Trio <– Recommended for Beginners. This is the system I use when growing hydroponically (can also be used in coco coir and soil). General Hydroponics is a trusted nutrient company and their Flora Trio works very well for beginners and advanced cannabis growers. They now offer a complete “performance pack” that includes everything needed to get started including a pH test kit. That way you don’t have to buy a bunch of huge nutrient bottles at once. Feel free to check out a grow journal where I pulled in over 20 ounces from a single 600W tent using just this trio plus Hydroguard for the roots (pic below). I didn’t use anything else for the whole grow and was very happy with my results.
Here’s my custom DWC cannabis schedule for the GH Flora trio [PDF].

These plants grown using just the GH Trio + Hydroguard (formally known as Aquashield)
Feel free to check out the complete grow journal (23.09 oz Harvest)
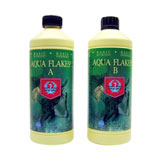
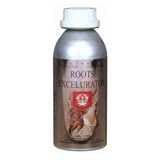
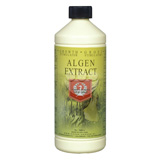
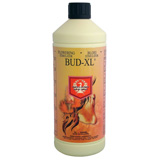
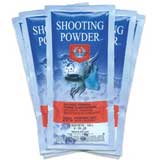
- House & Garden Line-up (expensive yet remarkably effective) Aqua Flakes A + B, Roots Excelurator, Algen Extract, Bud XL, shooting powder <– Get a custom nutrient schedule directly from the people at House & Garden via their free online nutrient calculator.From a grower: “H&G was started by a top researcher from Canna. They are right outside of Amsterdam and because cannabis is legal there, so both Canna and H&G are able to do R&D using cannabis. I don’t know about Canna, but I know that House and Garden makes all their own nutrients in house and they work great.”
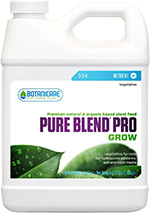
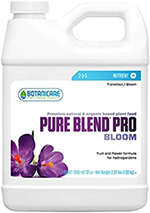
- Botanicare Pure Blend Pro (Grow, Bloom) The two bottles are all that’s needed to get your plants successfully to harvest time, just follow the feeding schedule from Botanicare (here’s a PDF, here’s a JPG) to start. They offer a lot of supplements, but the only bottles you need to be successful growing cannabis is the 3 listed (Grow, Bloom), which is what’s reflected in the “standard” version of their schedule. Repeat “Week 3” of the Vegetative part of their schedule until the end of the vegetative stage if it lasts longer than 3 weeks.
Great hydroponic supplements
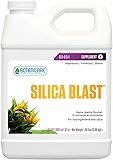
- Pro-tekt or Silica Blast (silica, stronger branches/sturdier plants, better heat/cold resistance, more resistant to mites)
- Hydroguard (formally known as Aquashield) – prevents and treats root rot. Root rot is one of the most common problems hydroponic growers run into. I’ll let you in on a secret: I nearly lost my very first plant in hydro to root rot… I can tell you that Hydroguard worked better at getting rid of root rot than H2O2 (hydrogen peroxide) or the 10x more expensive Great White supplement. To this day I still use Hydroguard with every reservoir change. You can see how I used Hydroguard to get rid of and prevent root rot here.