by Nebula Haze
Do you have legal plant limits? Cannabis cultivation is legal in many countries and several states in the USA. However, many growers are subject to legal plant limits. That means they can only grow a certain number of plants at a time. For example, California (where I live) allows 21+ adults to grow up to 6 plants. In Canada, adults can legally grow up to 4 plants.
Legal plant limits? No problem! Learn how to grow up to 1 pound (~0.5 kg) of weed with 1-4 plants.
Just follow the step-by-step LST instructions and harvest a bounty of weed!
Legal plant count limits can make it harder to get big yields when growing cannabis, especially if you’re also limited on space, but there are cultivation tricks and tactics to let you harvest huge amounts of bud from small grow spaces with just a few marijuana plants. In fact, it’s possible to produce over a pound (~0.5 kg) of weed from 1-4 plants when you do it right.
Get big cannabis yields with just a few plants!
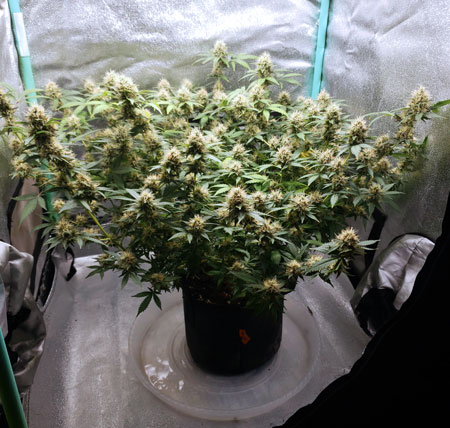
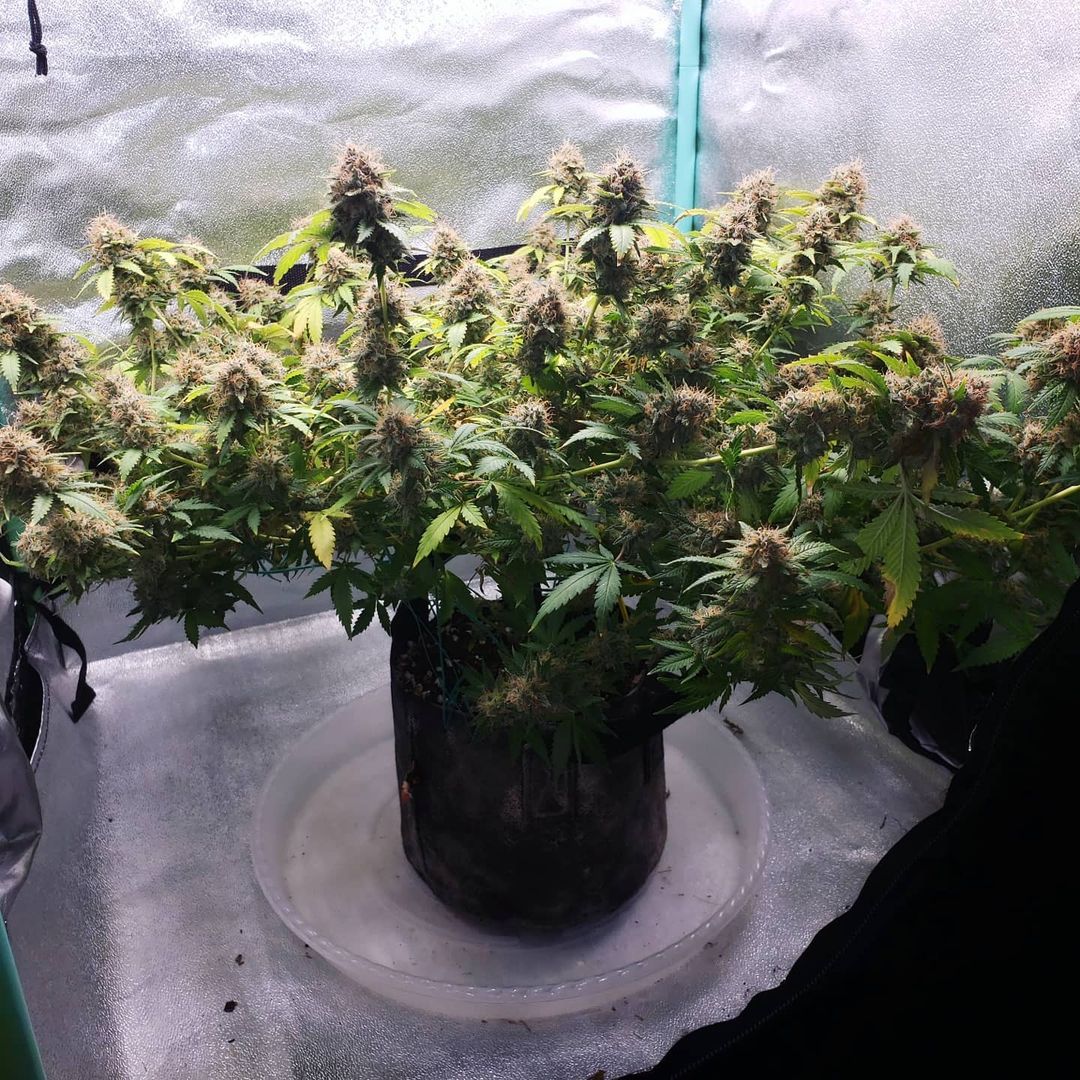
Pruning techniques like manifolding can force even one small plant to produce huge buds. This plant was less than 2 feet (0.6m) tall at harvest and produced 6.2 oz by itself.
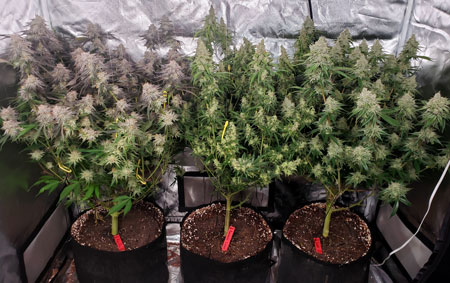
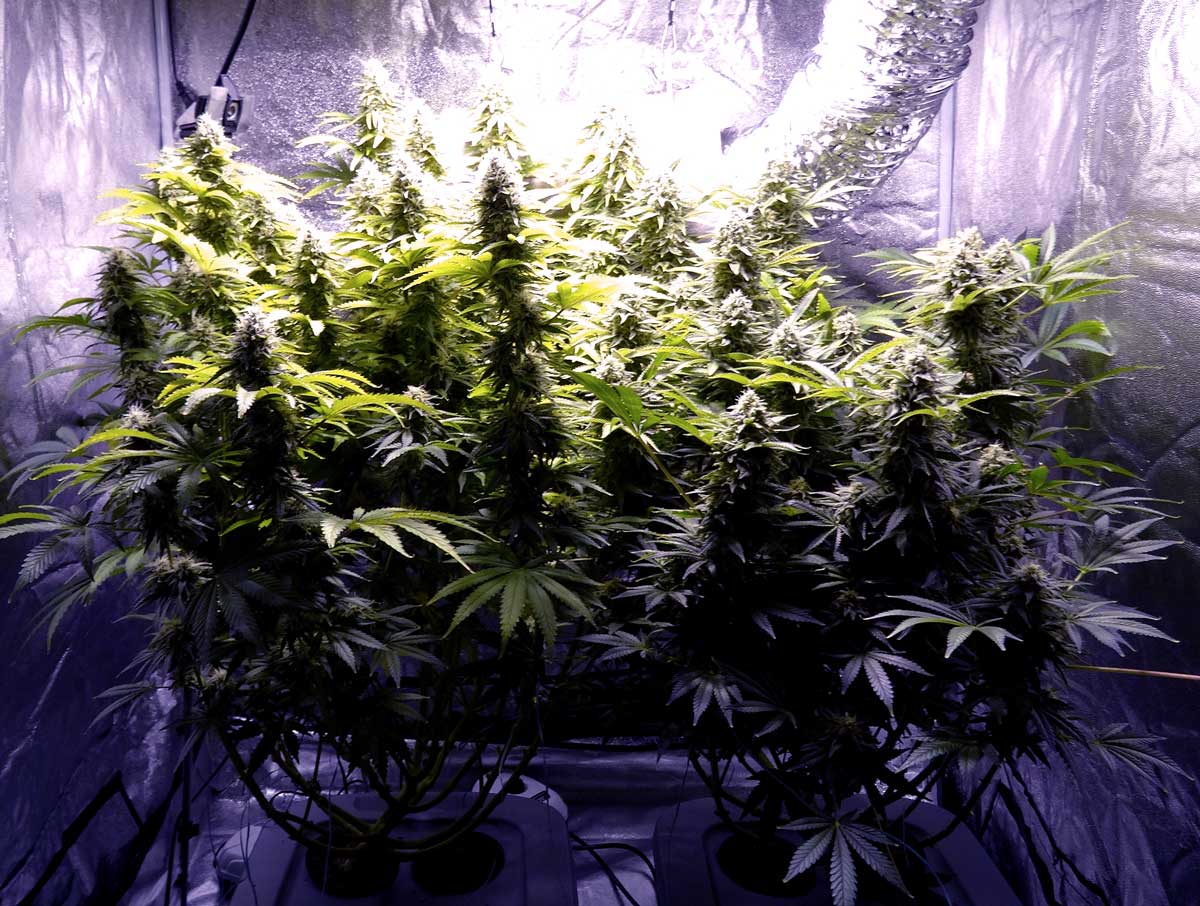
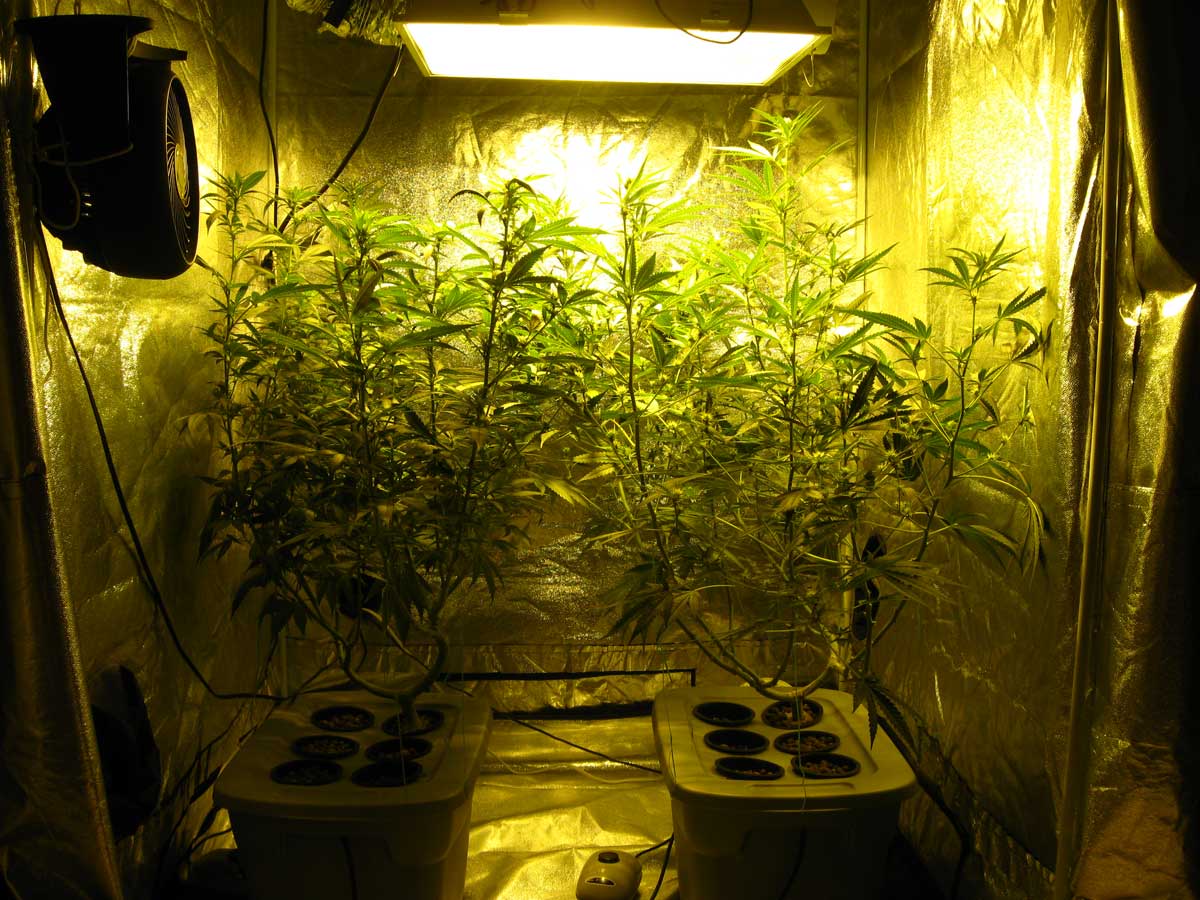
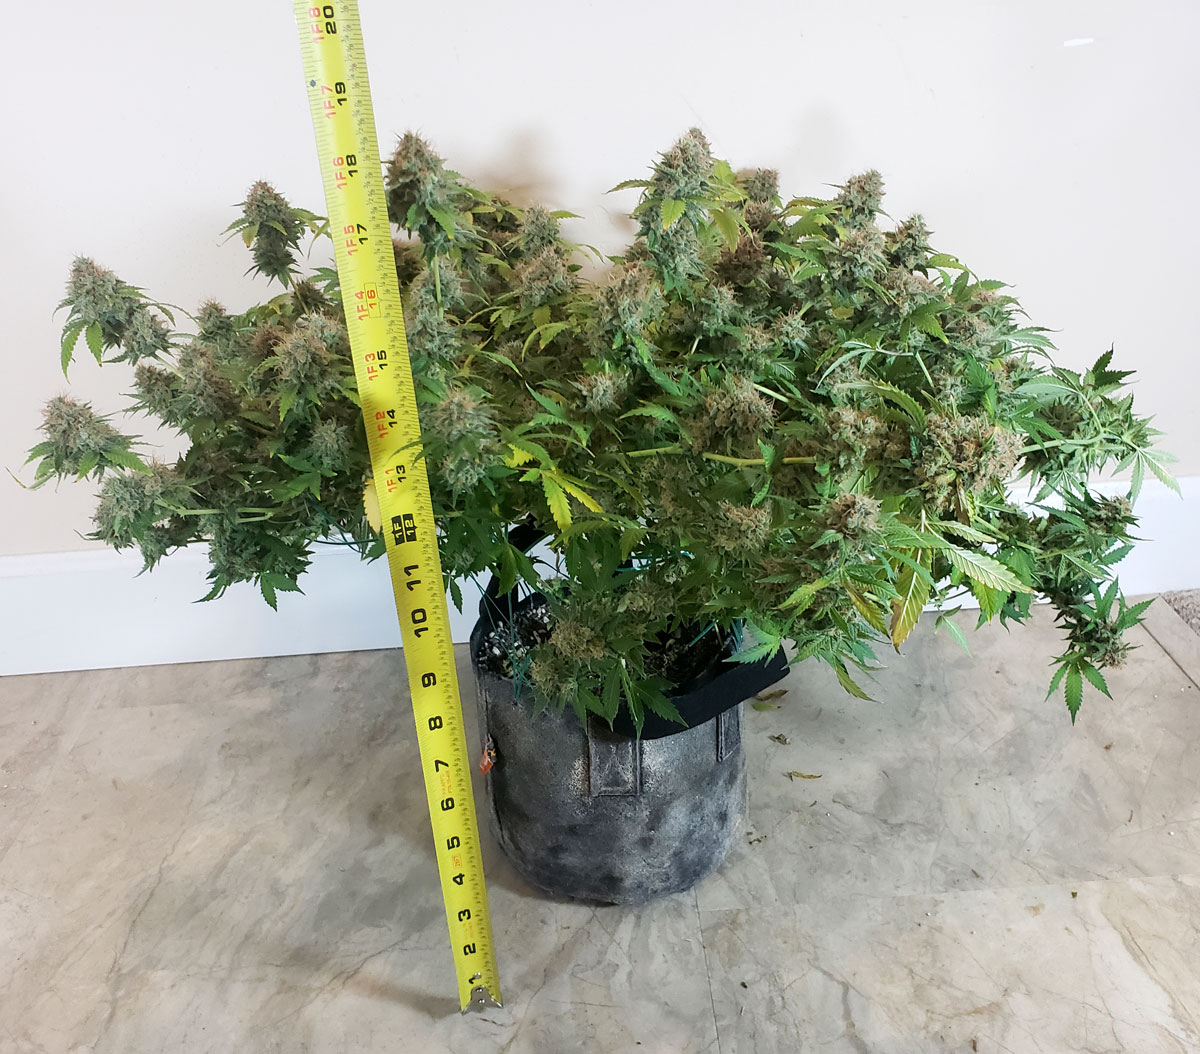
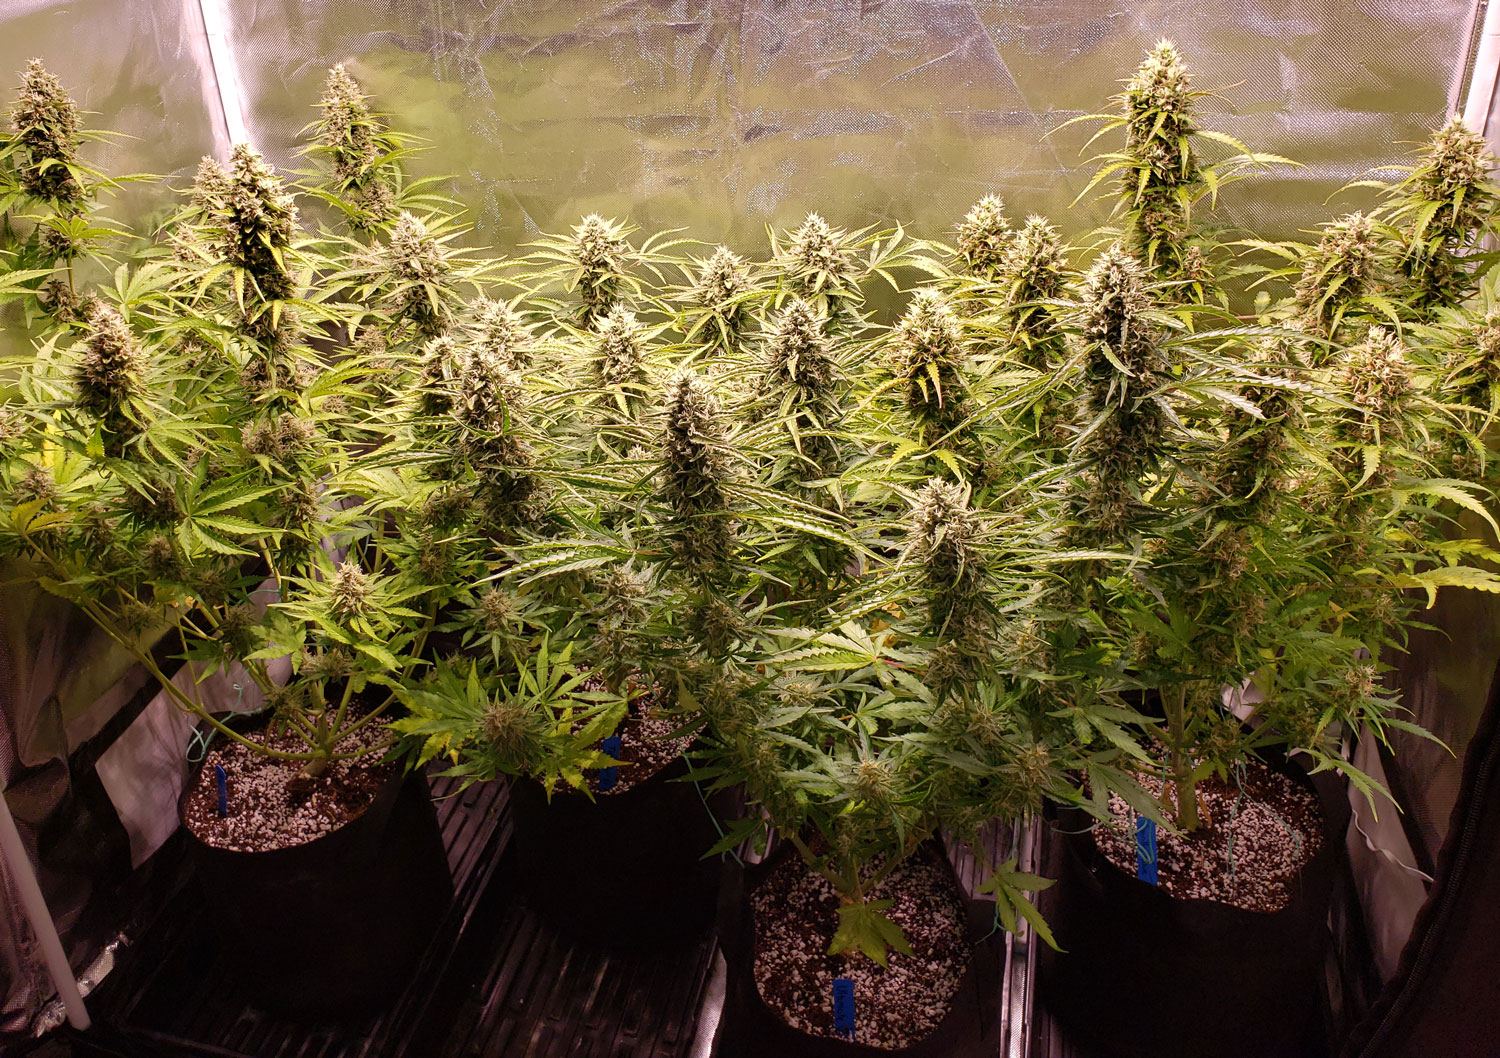
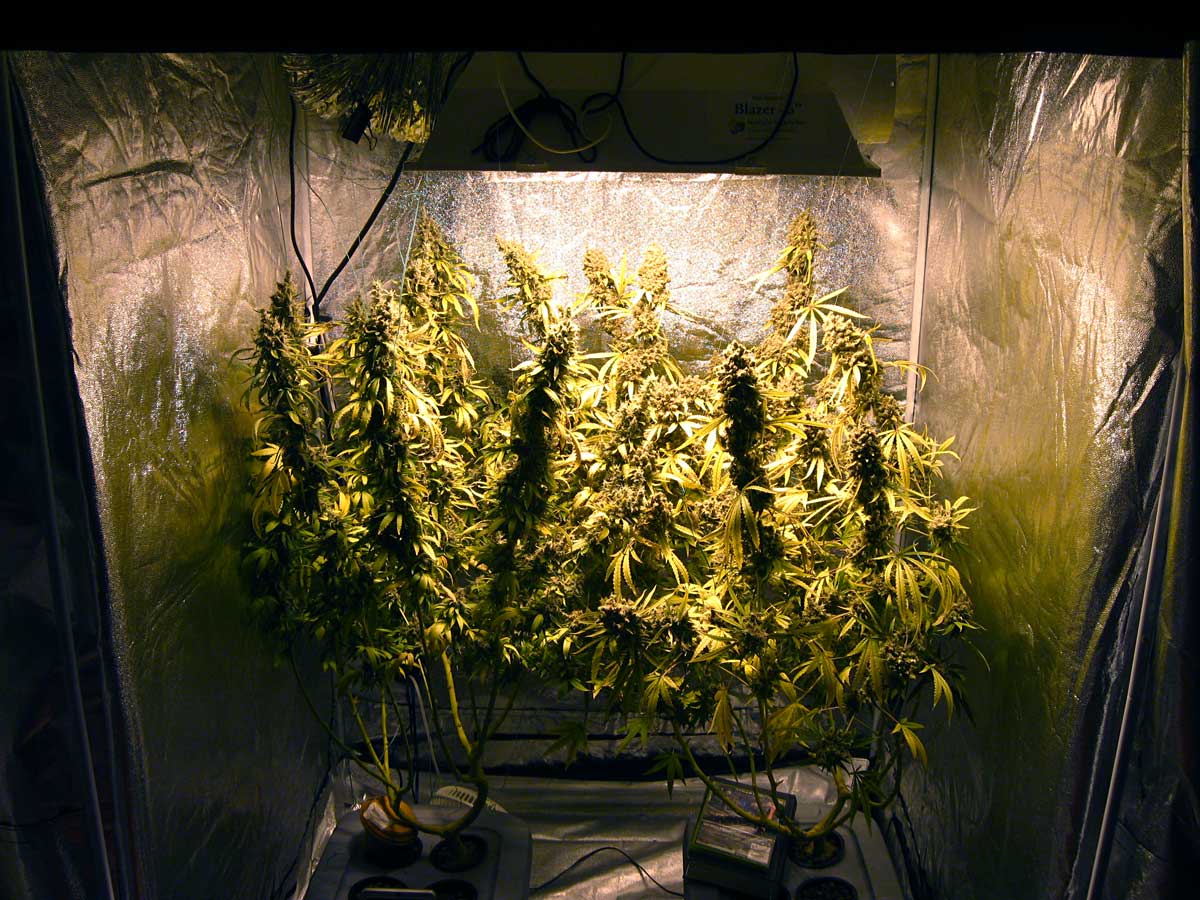
Let marijuana plants get bigger to increase your yields. This is especially effective when combined with pruning (as explained below). These two cannabis plants are about 4 feet (1.2m) tall and produced 18.6 oz (over 1 lb) of weed between them!
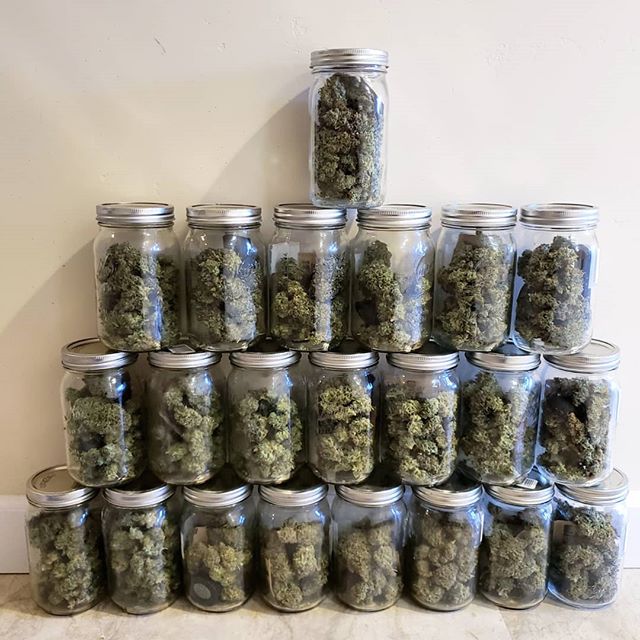
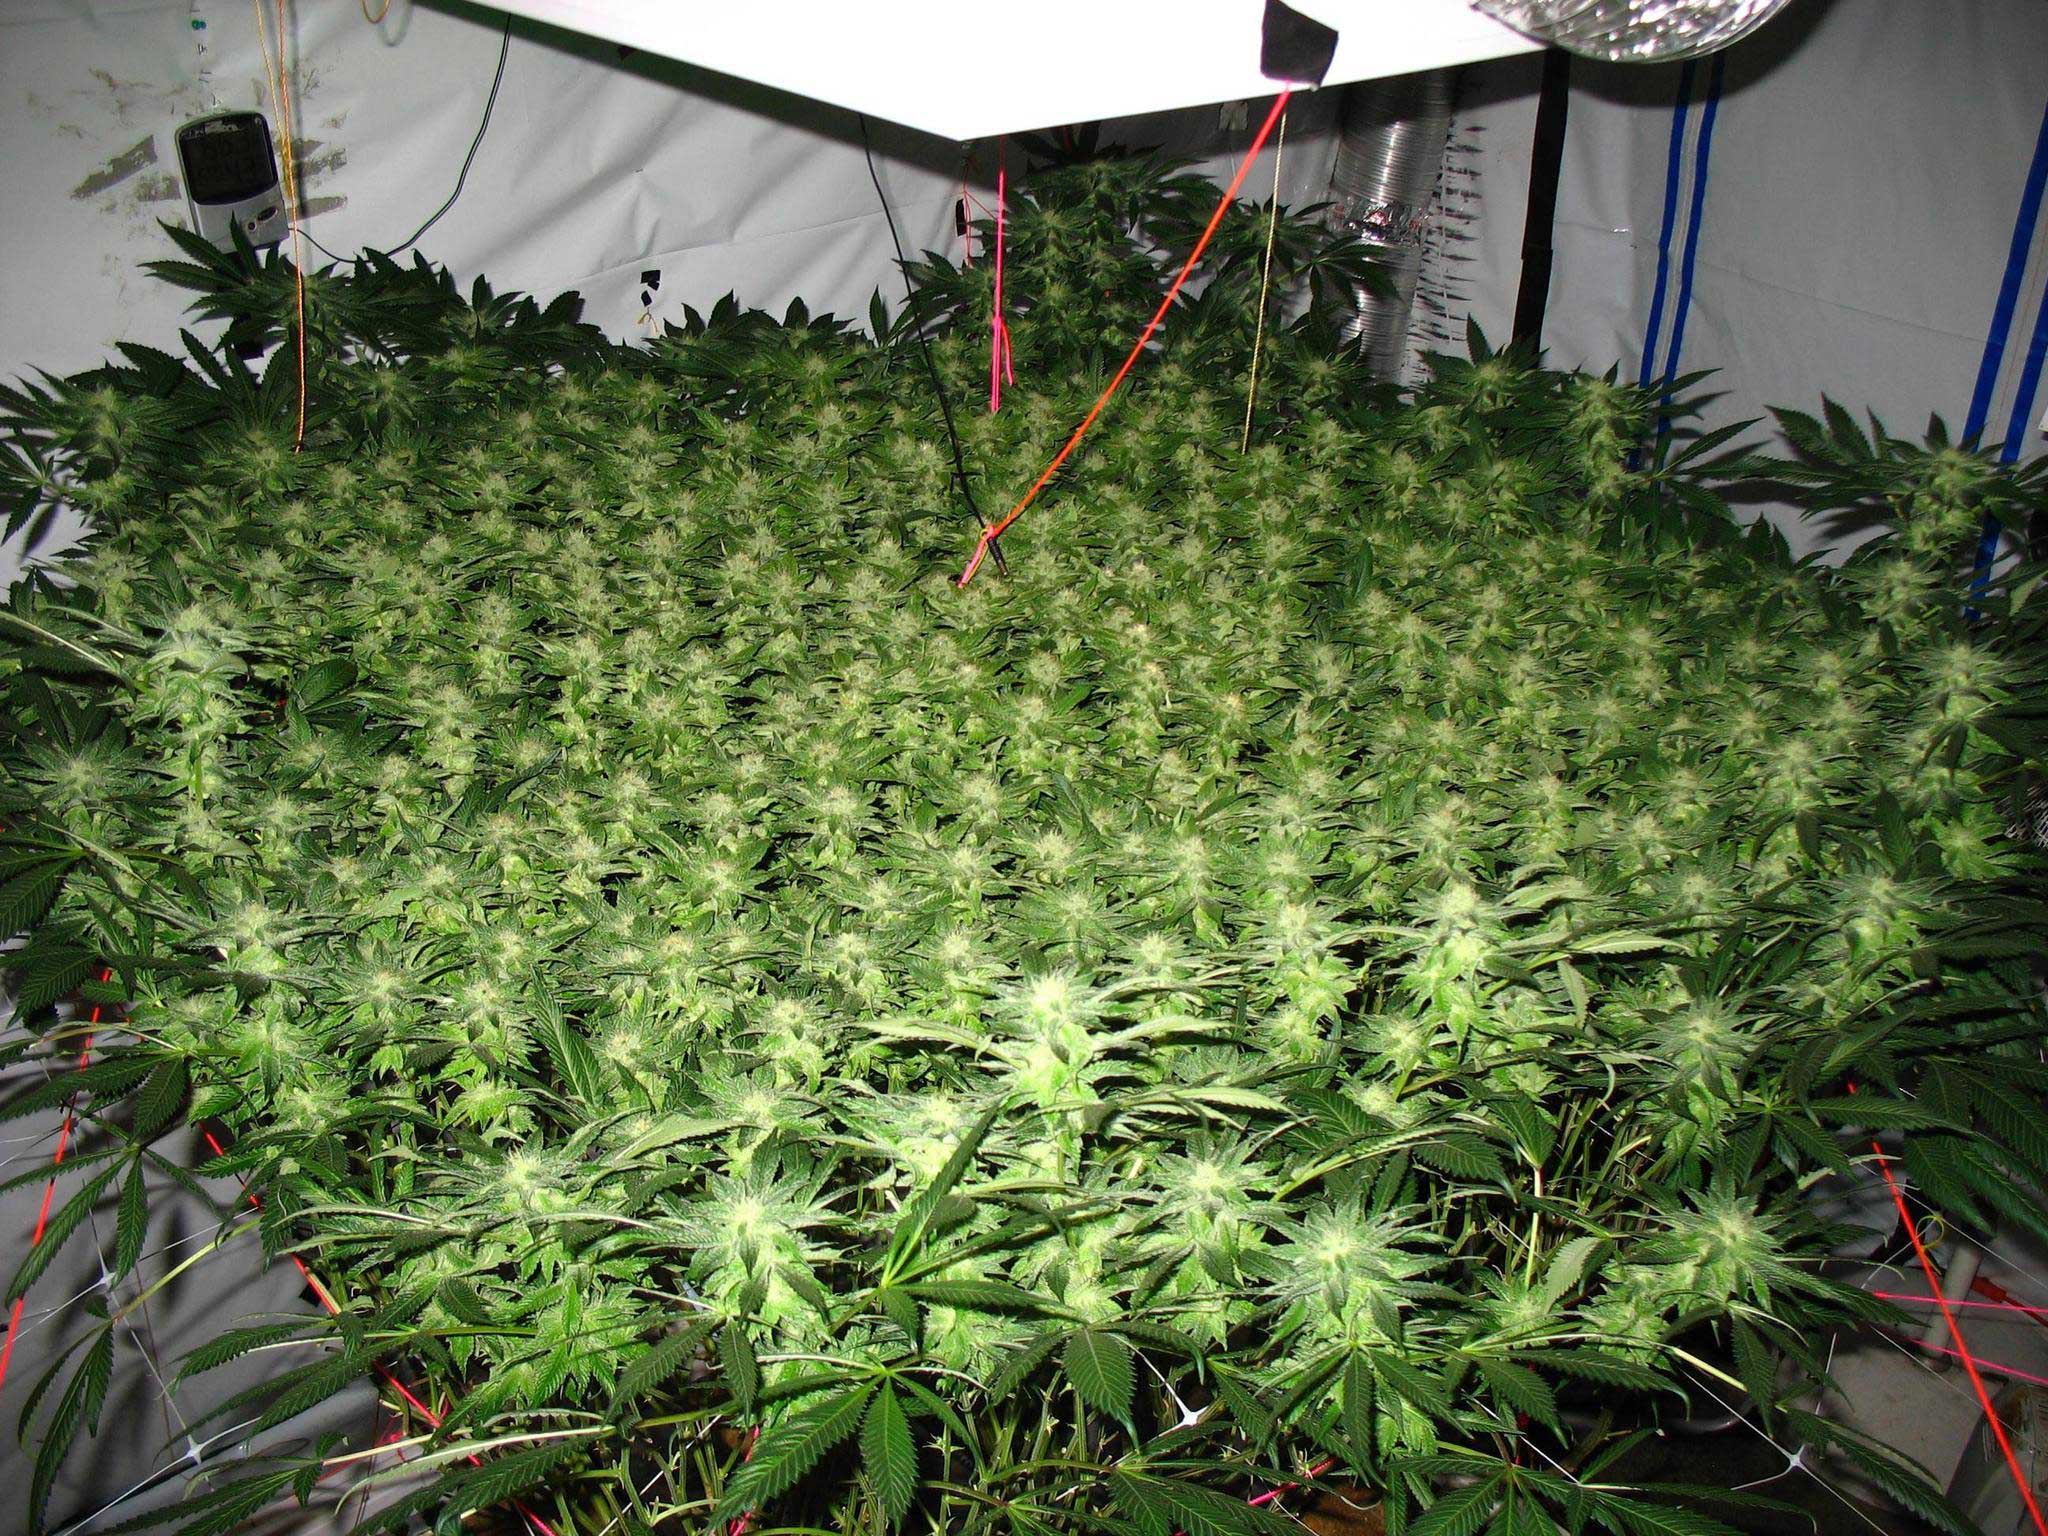
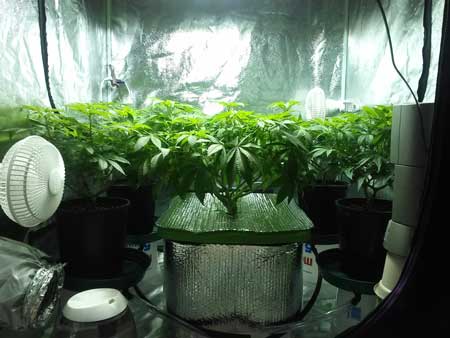
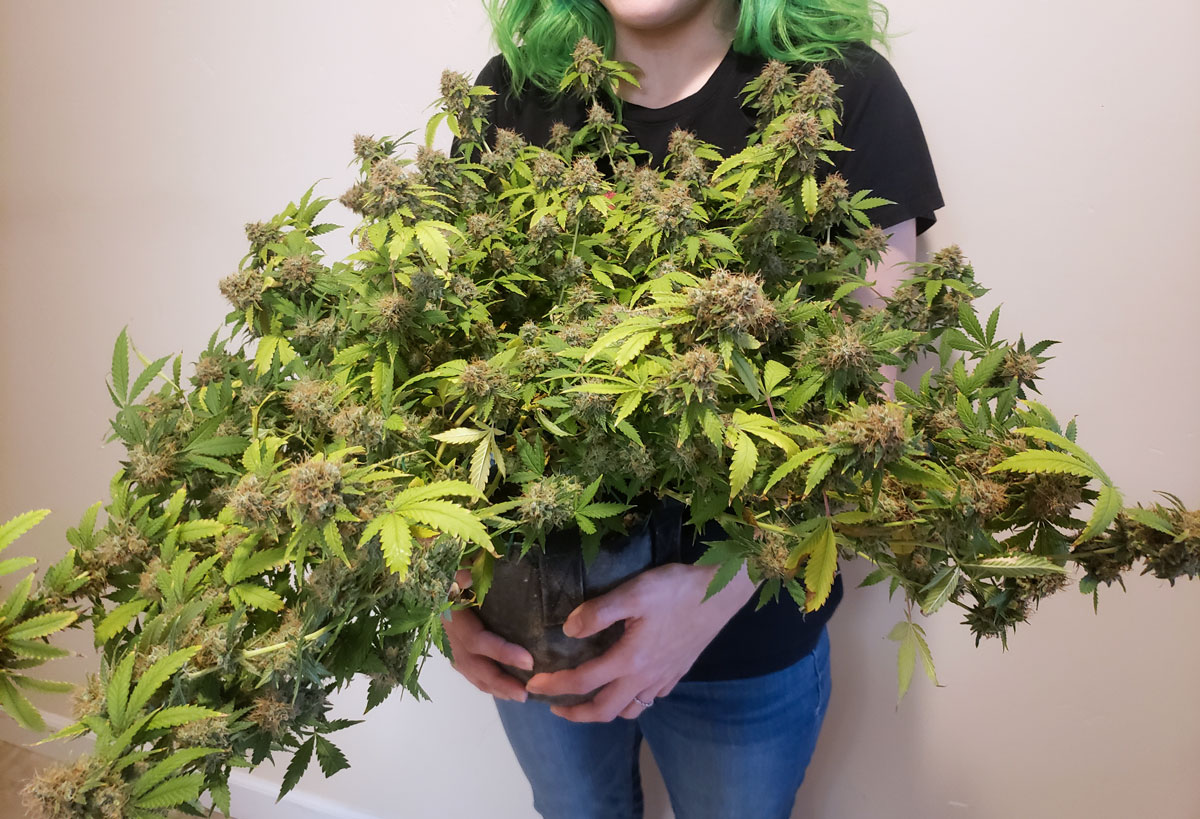
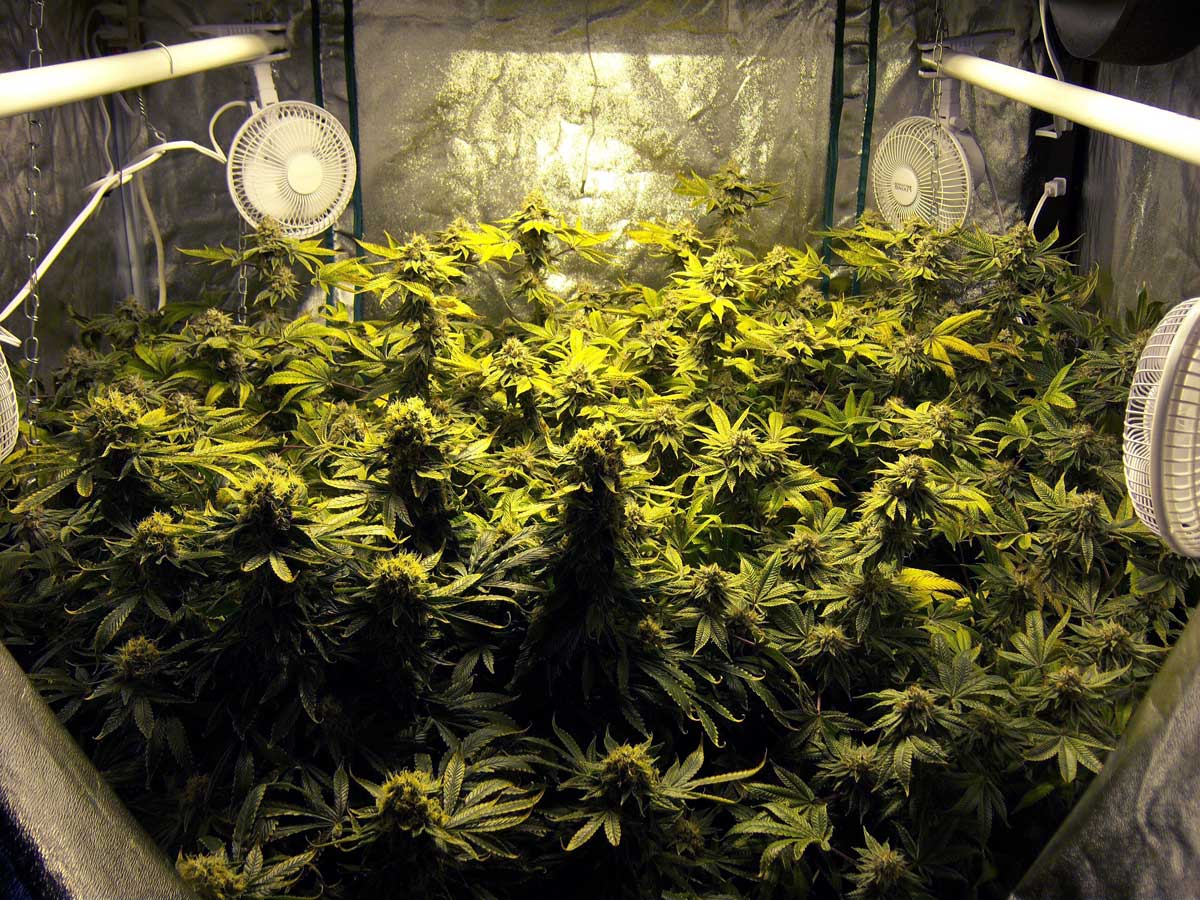
This giant mass is actually made of only 4 plants trained to grow flat over a screen.

Multi-pound harvest with just 4 plants!
It’s amazing what you can accomplish with a few plants. Let’s learn how to produce a ton of weed in your marijuana garden with 1-4 plants.
1.) Grow Bigger Plants
You can only yield so much from a small plant. Bigger plants can produce a lot more weed than small plants. Just make sure you don’t let plants get too big or your space quickly gets overgrown. Growing plants to the perfect size for your setup leads to the best harvest.
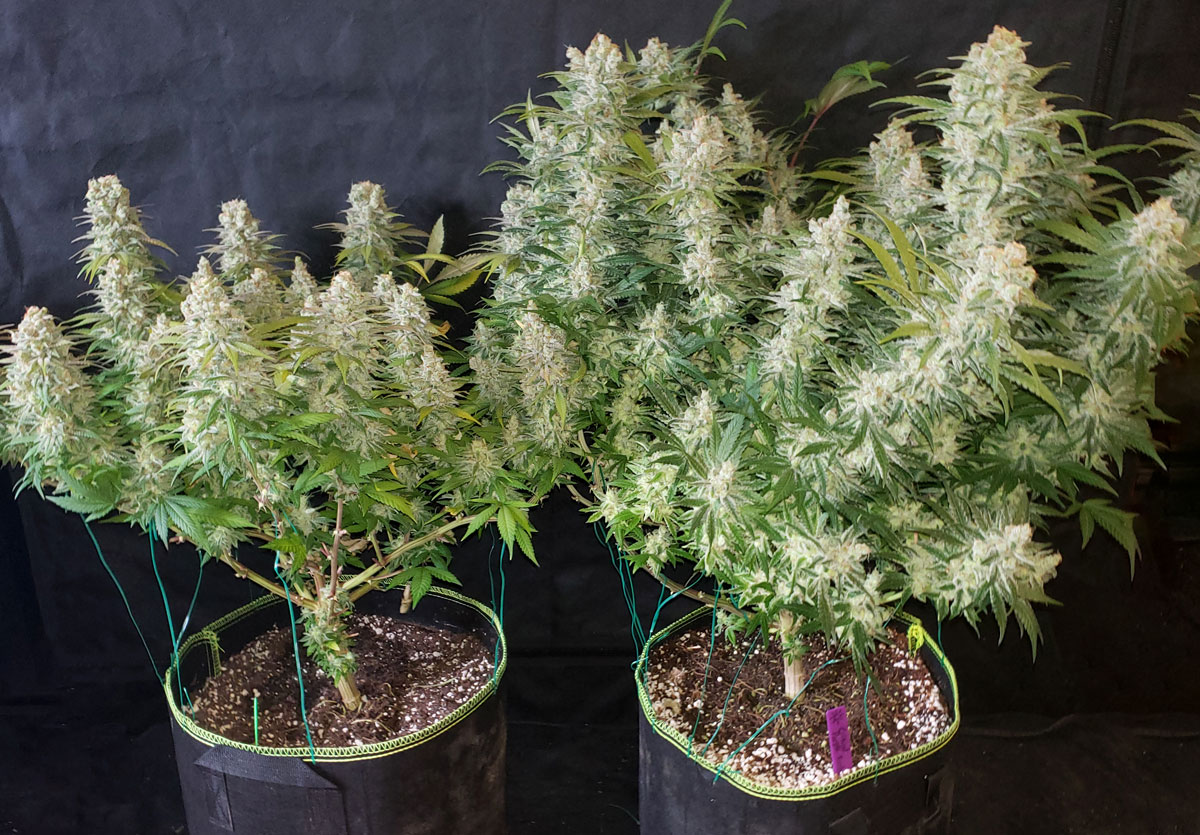
In this picture: One of these clones got much bigger than the other. Although buds are similar in width, the bigger plant with longer buds produced higher yields overall. Letting a plant get big enough to completely fill your grow space can dramatically improve your final bud weights.
On average, bigger plants produce more weed.
What to do: Wait to initiate the flowering stage until plants are 1/2 the final desired size. In other words:
- Photoperiod Plants: Change to a 12/12 light schedule when plants are half size. Most strains are photoperiod strains. Plants will about double in height on average.
- Auto-flowering Plants: Auto-flowering strains start flowering on their own. Their final size depends on the strain, size of the pot, light levels, and overall care.
- Know Your Strain: Different strains “stretch” a different amount. Strains listed as “tall” strains can triple in size after buds start forming. Check the strain details when buying seeds so you know what to expect.
Cannabis plants don’t immediately stop getting bigger once they start making buds. After entering the budding/flowering stage, most plants about double in size. That means you should start 12/12 when plants are about half the final desired size.
To maximize yields, you want plants that are as big as possible without overgrowing the space. It helps to calculate how tall plants can safely get in your grow space without being too close to your grow light. No matter the height you’re going for, try to create a nice wide plant canopy. Fill the entire space under your grow light with plants.
These two plants reached half the final desired size for this grow tent. At this point, initiate the flowering stage by giving plants a 12/12 light schedule.
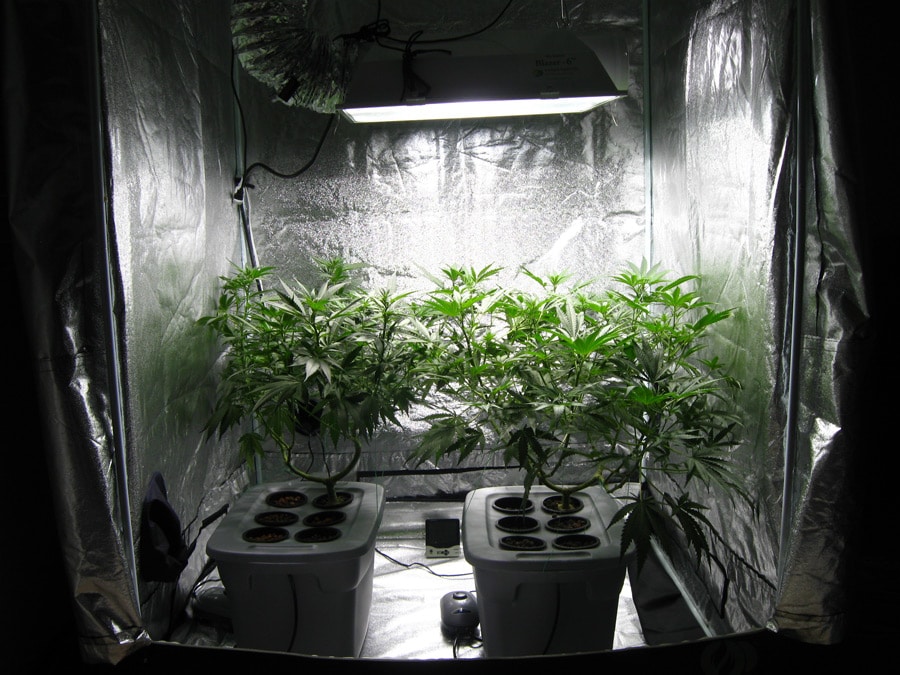
A few weeks later, the plants have about doubled in size. This is known as the flowering stretch. Use this knowledge to grow plants that are the right size for your grow space.
Tips to grow bigger plants
- Photoperiod strains help you control plant size – The main idea behind this step is to control the length of the vegetative stage so plants get to the optimal size. Auto-flowering strains only spend a few weeks in the vegetative stage, and therefore don’t give you much control over the final size. Learn more about the best strains to grow in Step 4.
- Use bigger pots – Bigger roots can support bigger plants. Plants in a small pot (under 2 gallons) tend to stay small while bigger pots (5-10 gallons) make it easier and faster to produce plants that are 3+ feet (1+ m) tall.
- Consider coco or hydro – Plants grown in hydroponics (and to a lesser extent coco) tend to grow faster than soil plants. If you want to get big plants fast, hydro or coco may be a good way to go. Soil or super soil can still be great choices, but they may add to the total time to harvest.
- Grow plants to 1/2 size before flowering – Initiate the flowering stage when plants are 1/2 the final desired size. This is done by using a timer to put grow lights on a 12/12 light schedule. On average, plants double in size after the switch to 12/12, though strains listed as “tall” or “short” may stretch more or less. Learn more about the flowering stretch.
- Total plant coverage – Completely fill your space before you initiate the flowering stage. Think of sculpting a plant canopy that is wide and flat like a table…
2.) Train Plants to Grow Flat
You just learned about good plant coverage. This step takes that to the next level. In addition to making sure your entire grow area is filled with plants, you increase yields even more by training them to grow wide and flat (like a table) before you initiate the flowering stage.
While plants are in the vegetative stage, bend branches down and tie them in place to maintain as flat and wide a canopy as possible. Try to make plants shaped like a table.
Why do growers train plants to grow flat? The biggest buds grow at the top of a cannabis plant, close to the grow light, Buds that are lower on the plant, or further from the light, tend to stay small. A flat canopy means you get many buds the perfect distance away. This ensures your plant grows tons of buds, and every single bud swells to a big size.
Main Idea: Train plants to grow flat and wide like a table in the vegetative stage.
Tips to grow wide, flat plants.
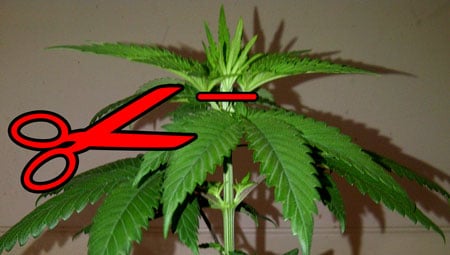
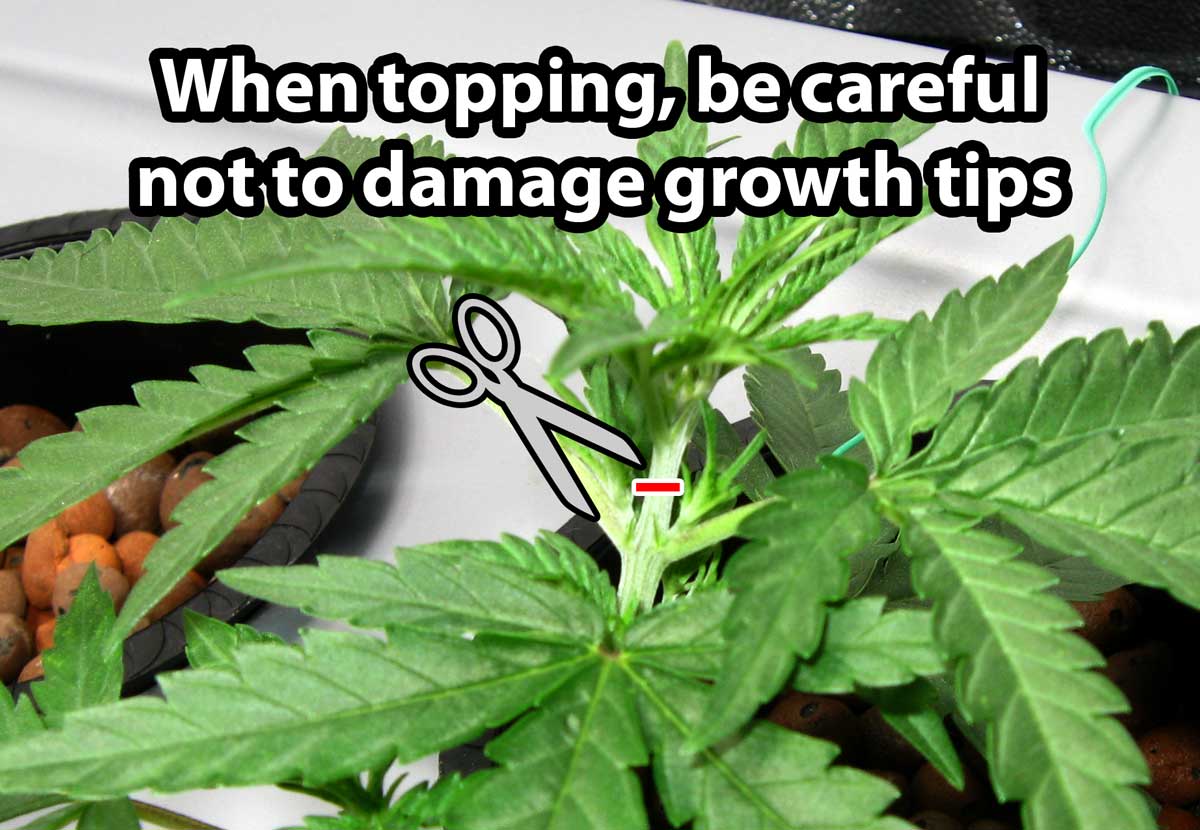
- Cut off the top of young plants – Cut off the top of young plants in the vegetative stage. Cutting off the top of a plant is often called “topping” in the cannabis growing world. Topping splits any stem into two, and a plant with two tops is easier to spread out to create flat plants than a plant with one main top
- Beginner tip: Wait until the seedling has grown 6 sets of leaves. Cut off the top through the main stem above the 5th set of leaves (pictures below). Easy and simple, yet won’t stress plants. After being topped, your plant is easier to spread out and naturally grows more bushy and wide.
- Tall stems should also be “topped” – Cut off the ends of any stem that’s growing much faster than the rest. Each new pair of stems grows slower than the original one. Topping is a great tool to curb fast-growing stems in the vegetative stage.
- Spread out – As the plant grows, spread out the stems by bending them down and away from the center of the plant. Don’t forget to tie branches down with something like plant twist tie or they’ll spring right back up the next day!
- Supercrop (if necessary) – Cannabis stems get hard and woody as time goes on. If you find you need to bend a stem that’s already stiff, use the supercropping technique to bend even the toughest stems at any angle. This is a bit advanced because you can accidentally split stems. But don’t worry if you do. Simply tape broken stems back together like a cast and the plant can heal. One of the things I love about cannabis plants is it can recover if you make big mistakes in the vegetative stage.
Here’s an example of training plants to grow wide and flat for more bud sites and bigger yields.
Cut off the top of a young plant right above the 5th set of leaves (“top” the seedling above the 5th node)
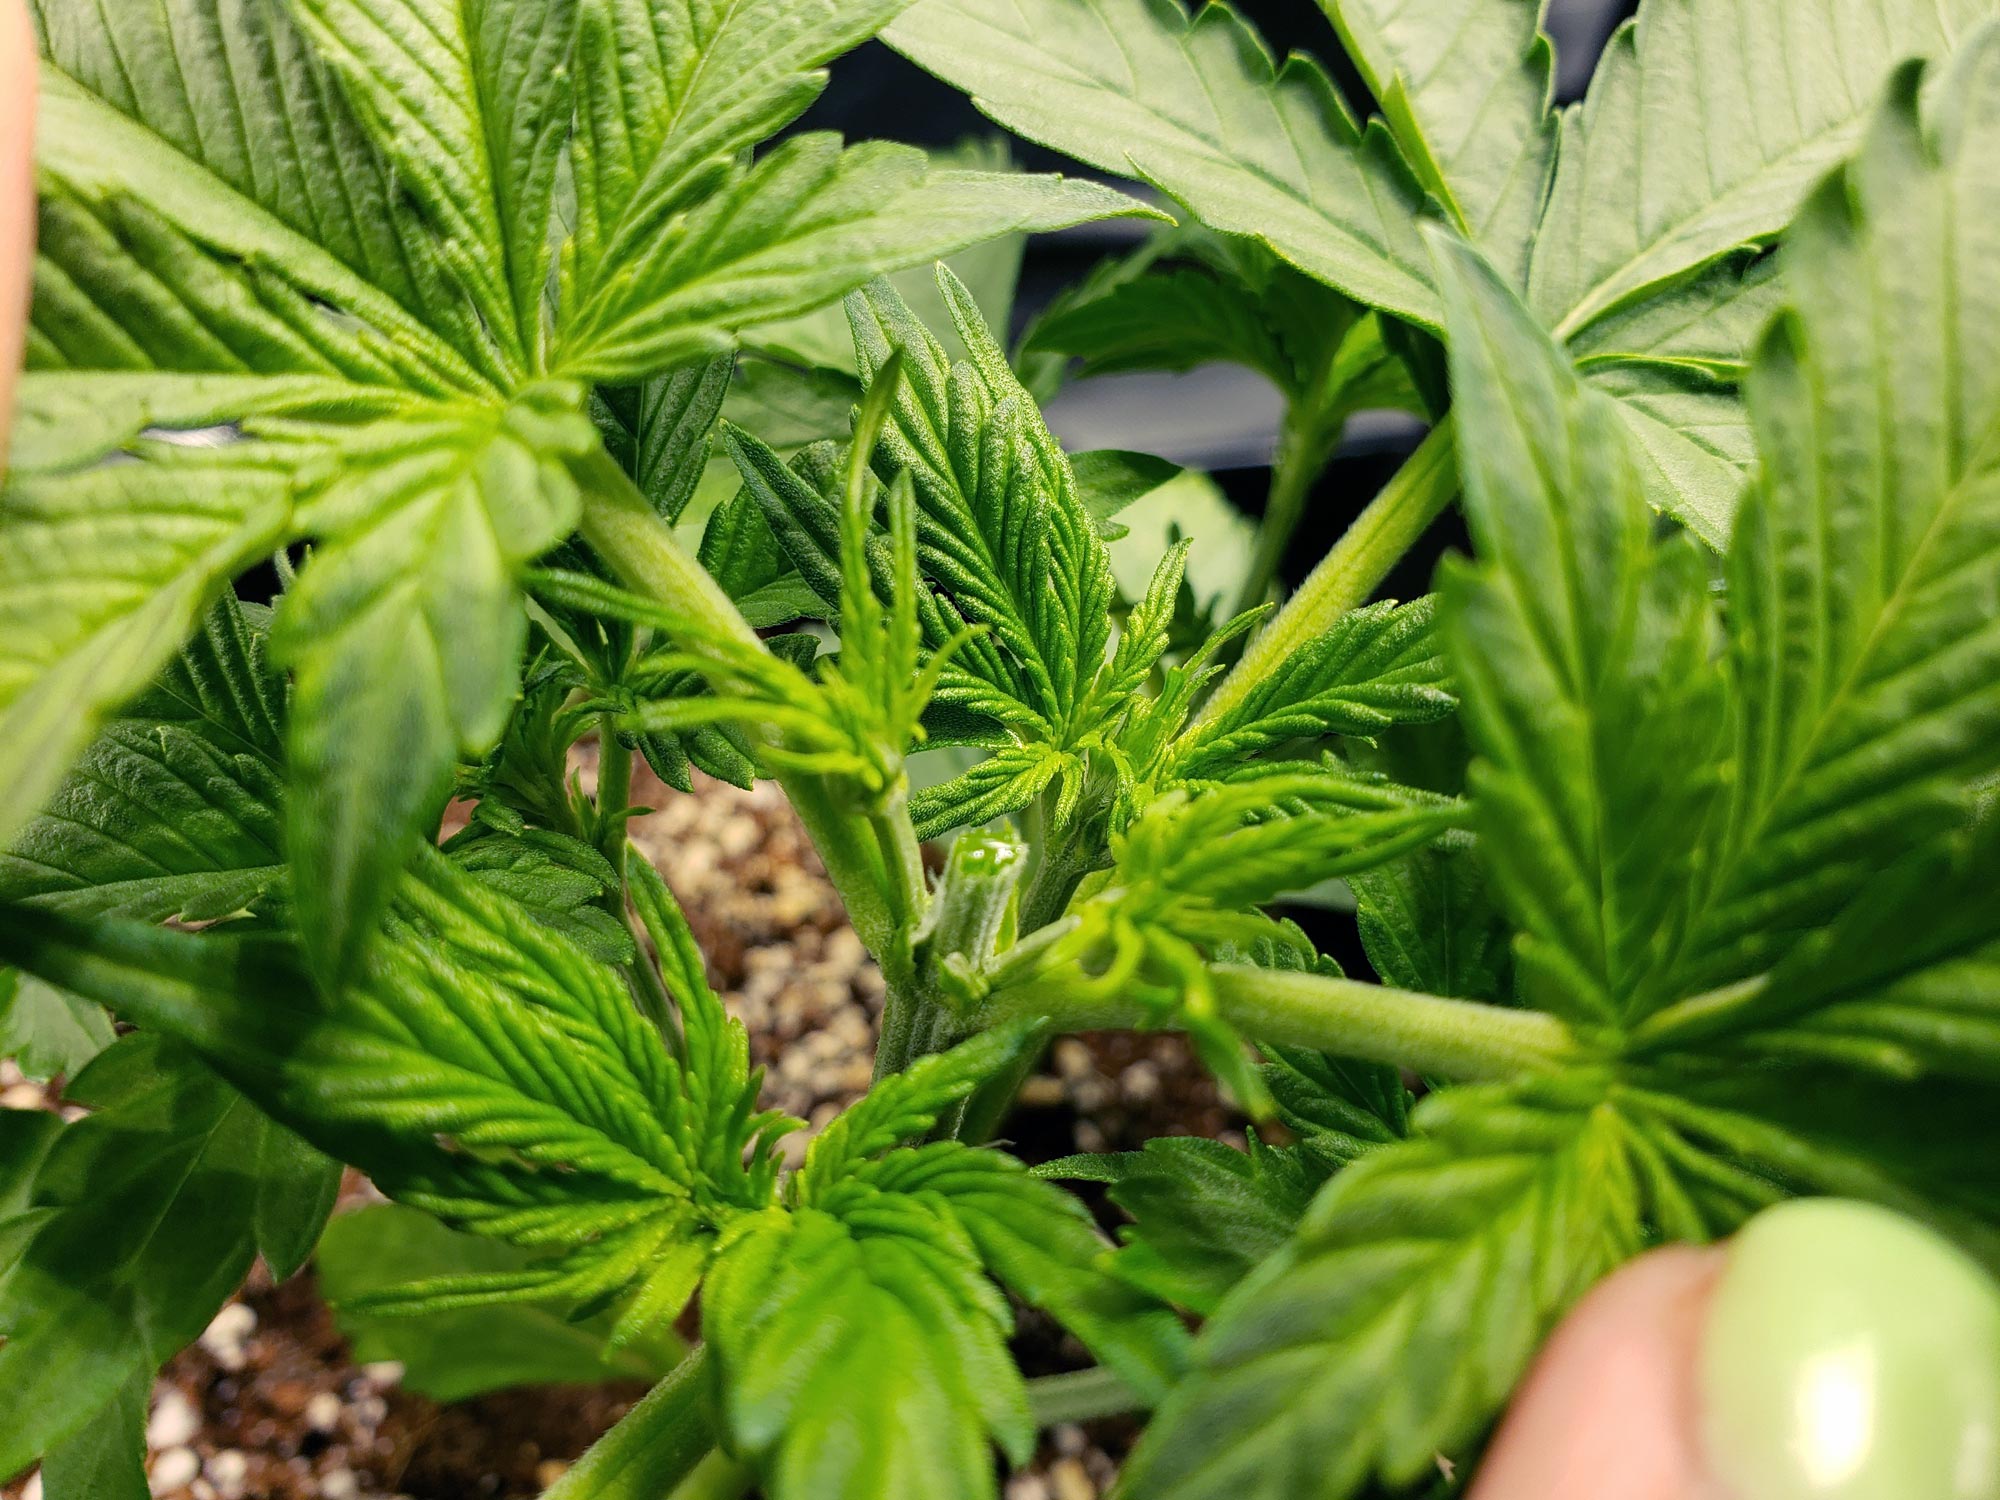
When cutting through a stem, be careful not to damage the growing tips at the base of each leaf. These will become your two new stems.
Topping splits the main stem into two. You can see the two new “main stems” on each side of the cut.
Since you waited until the plant had several sets of leaves before cutting a small piece off the top, it will continue growing like nothing happened.
As the plant grows, spread out the branches and cut off the top of any stem that’s getting bigger than the others. You don’t want your plant putting too much energy into any one branch.
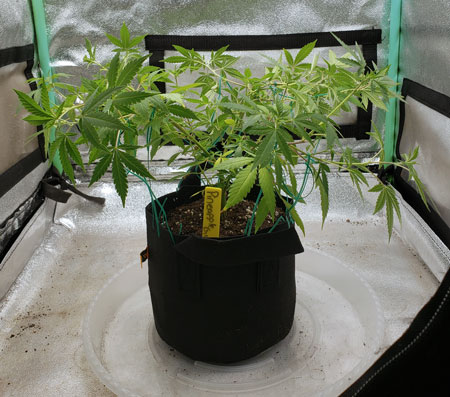
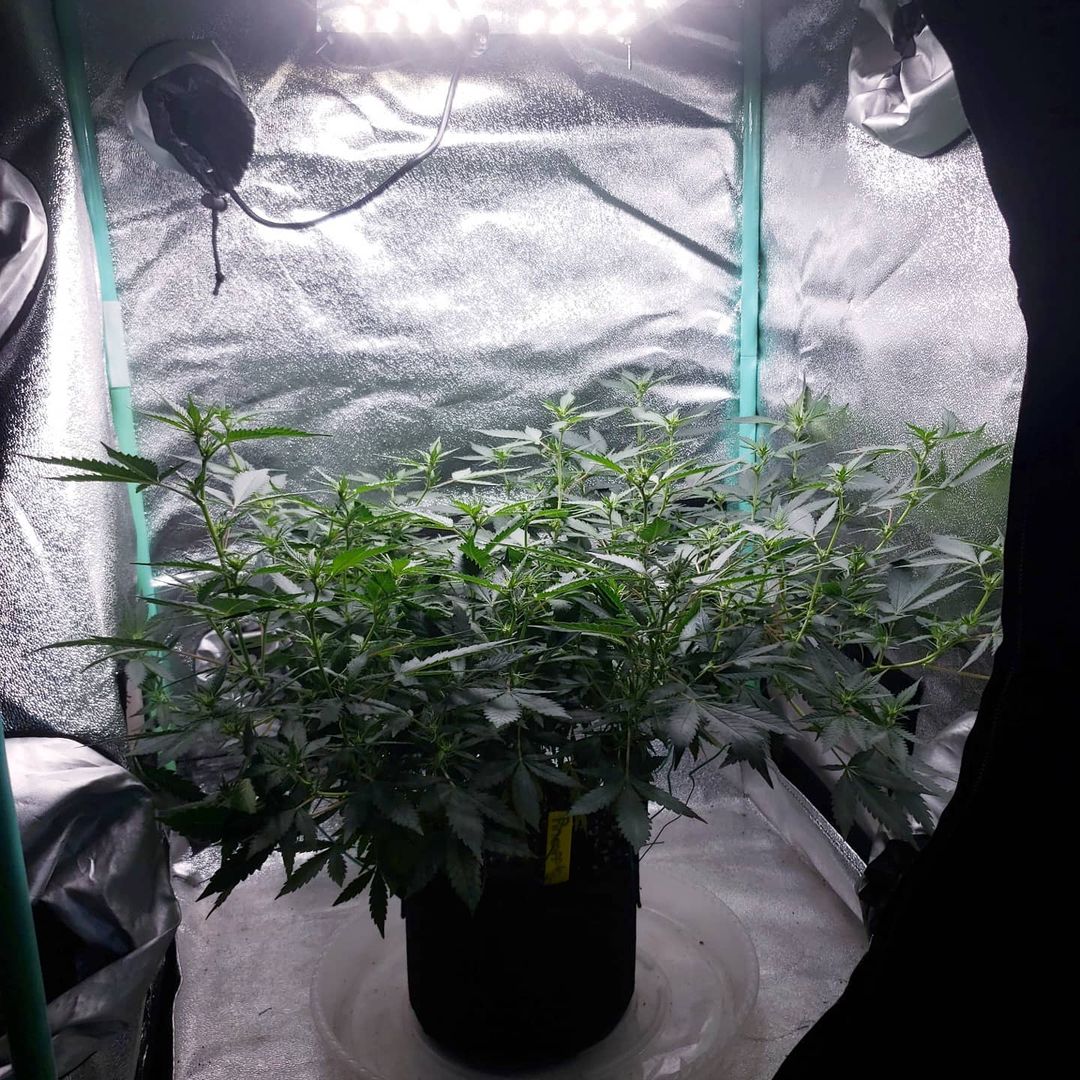
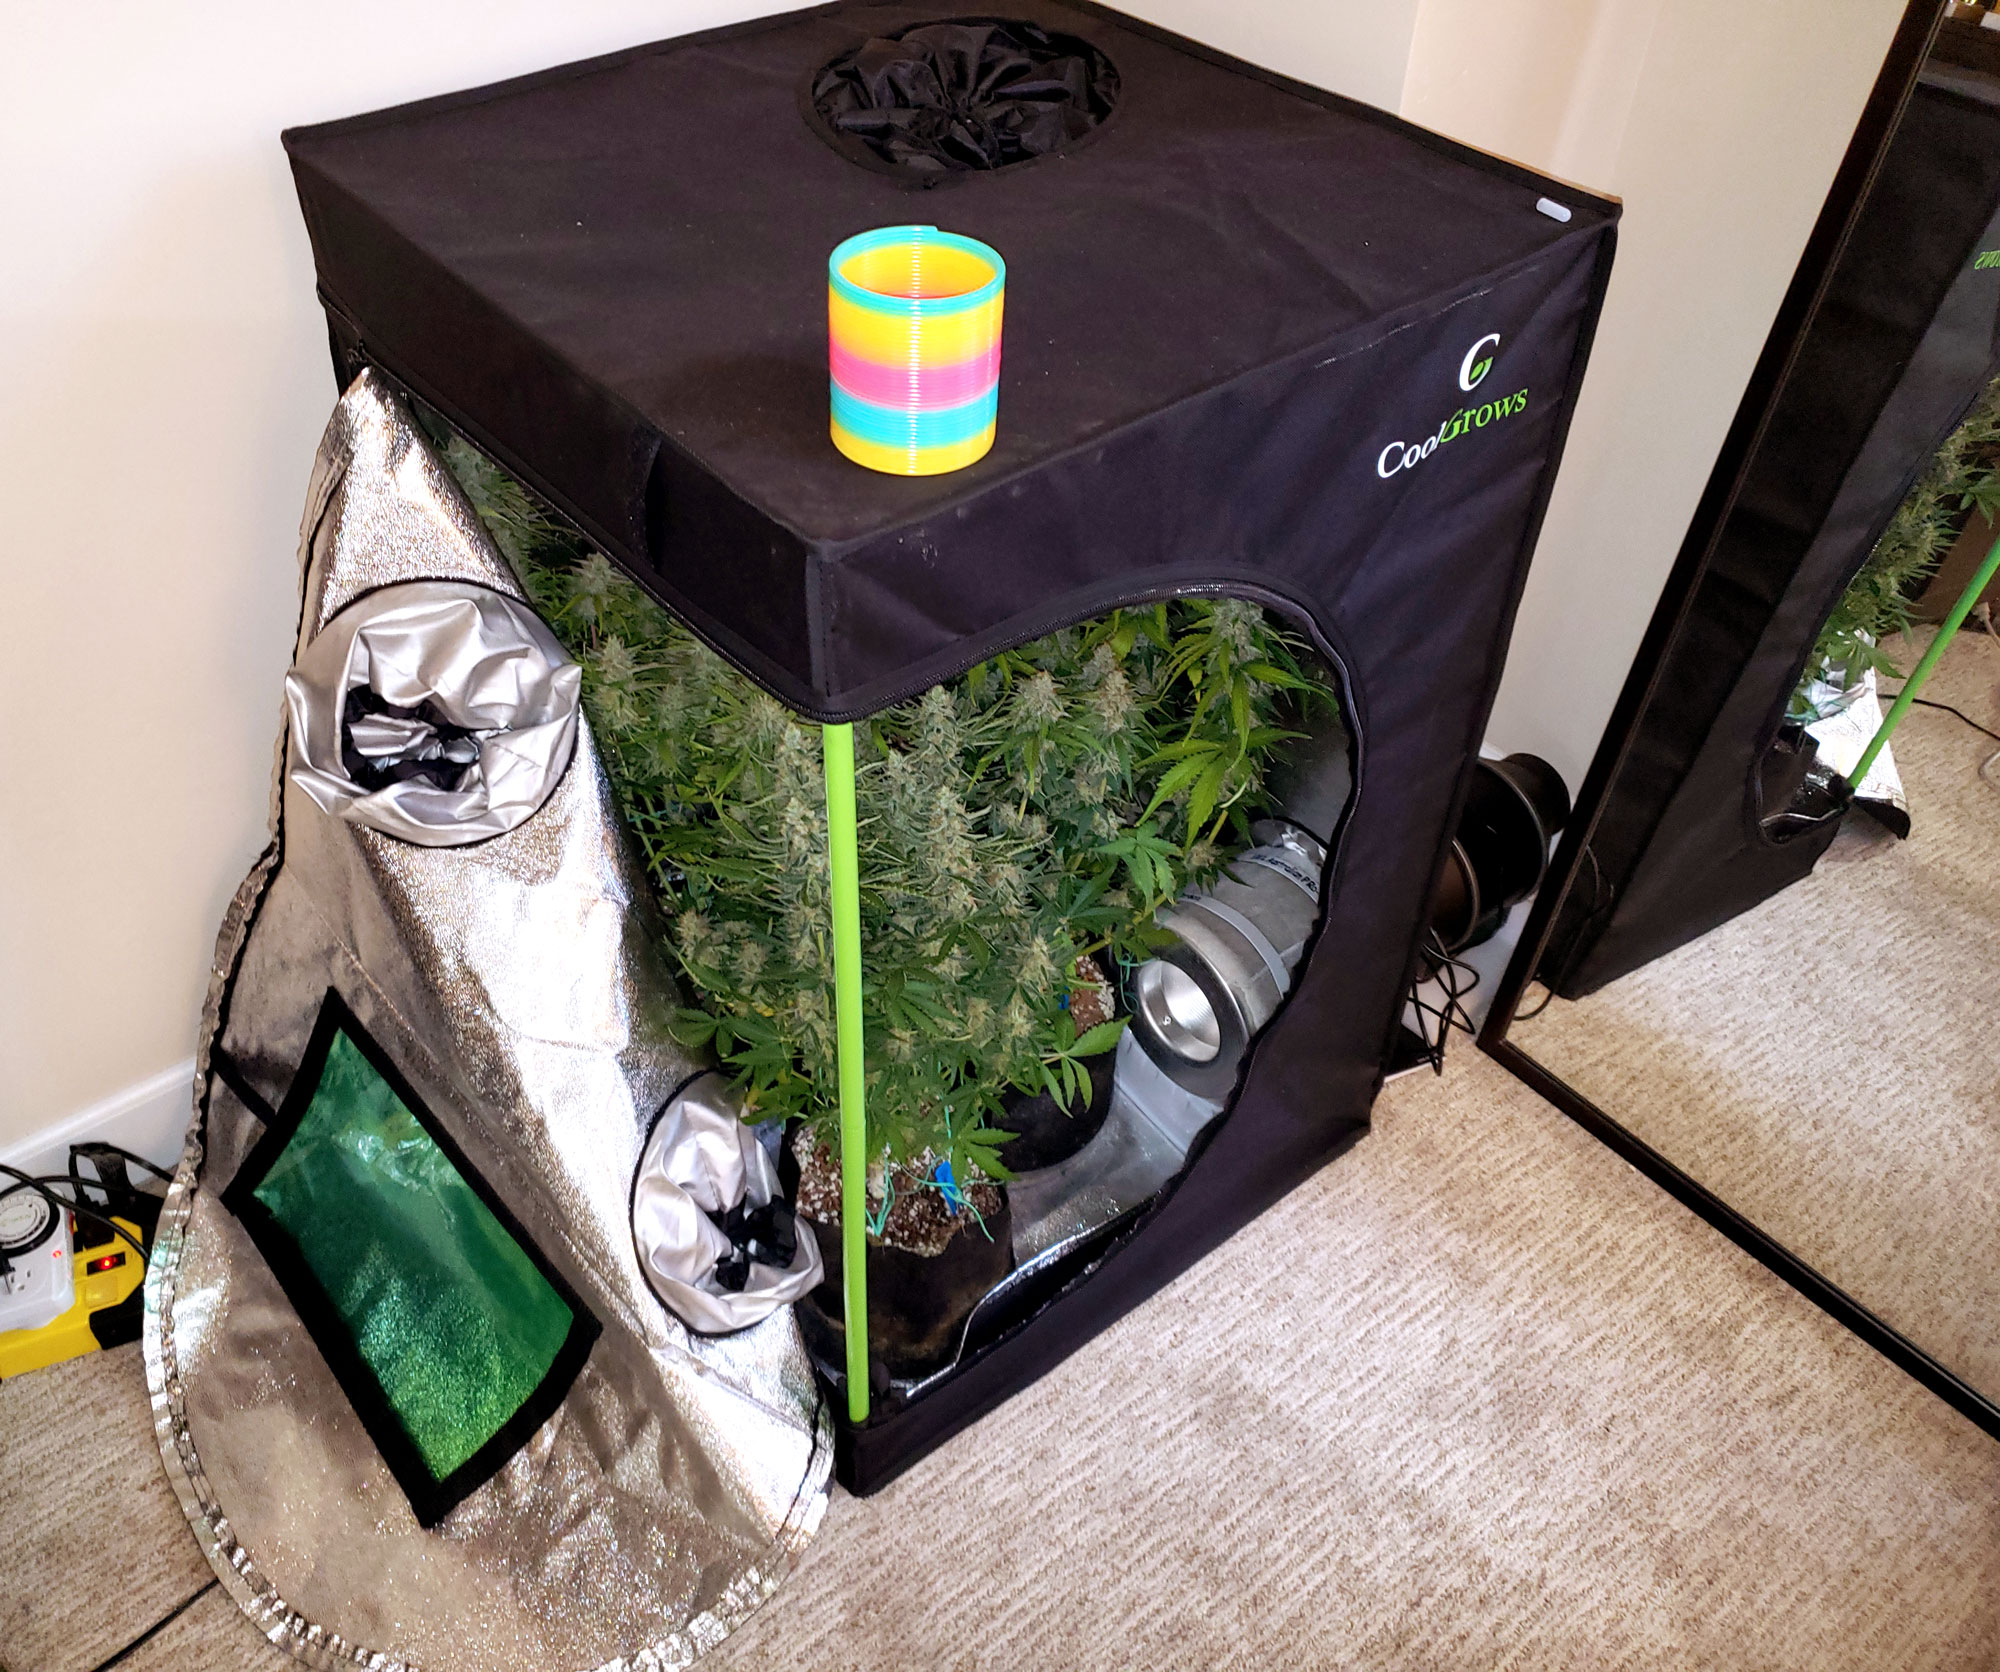
The plant was transplanted to a mini grow tent under an HLG 65 4000k LED grow light and given a week to adjust to the new environment.
Training time!
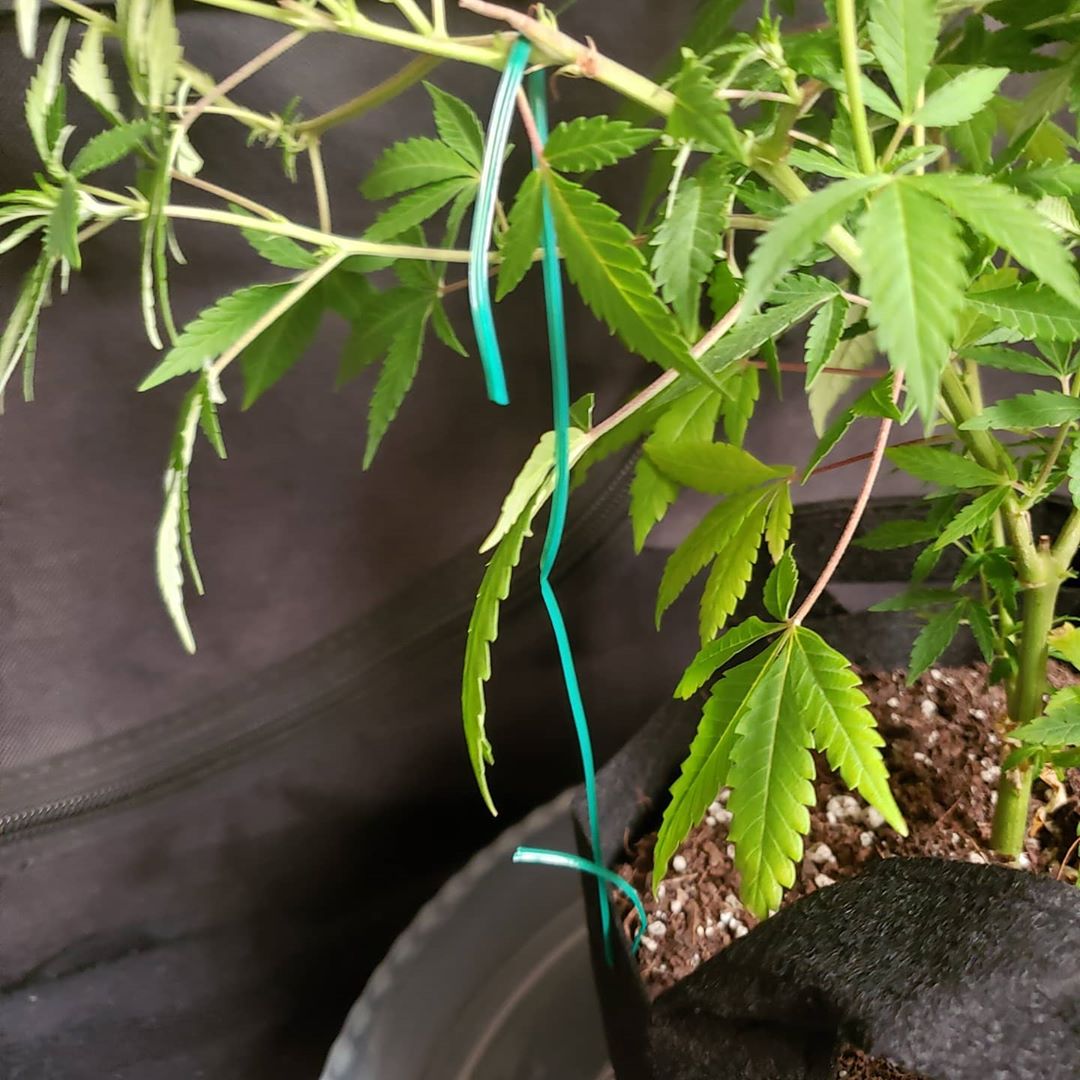
Bend over all the stems down and away from the center until it looks flat from the side
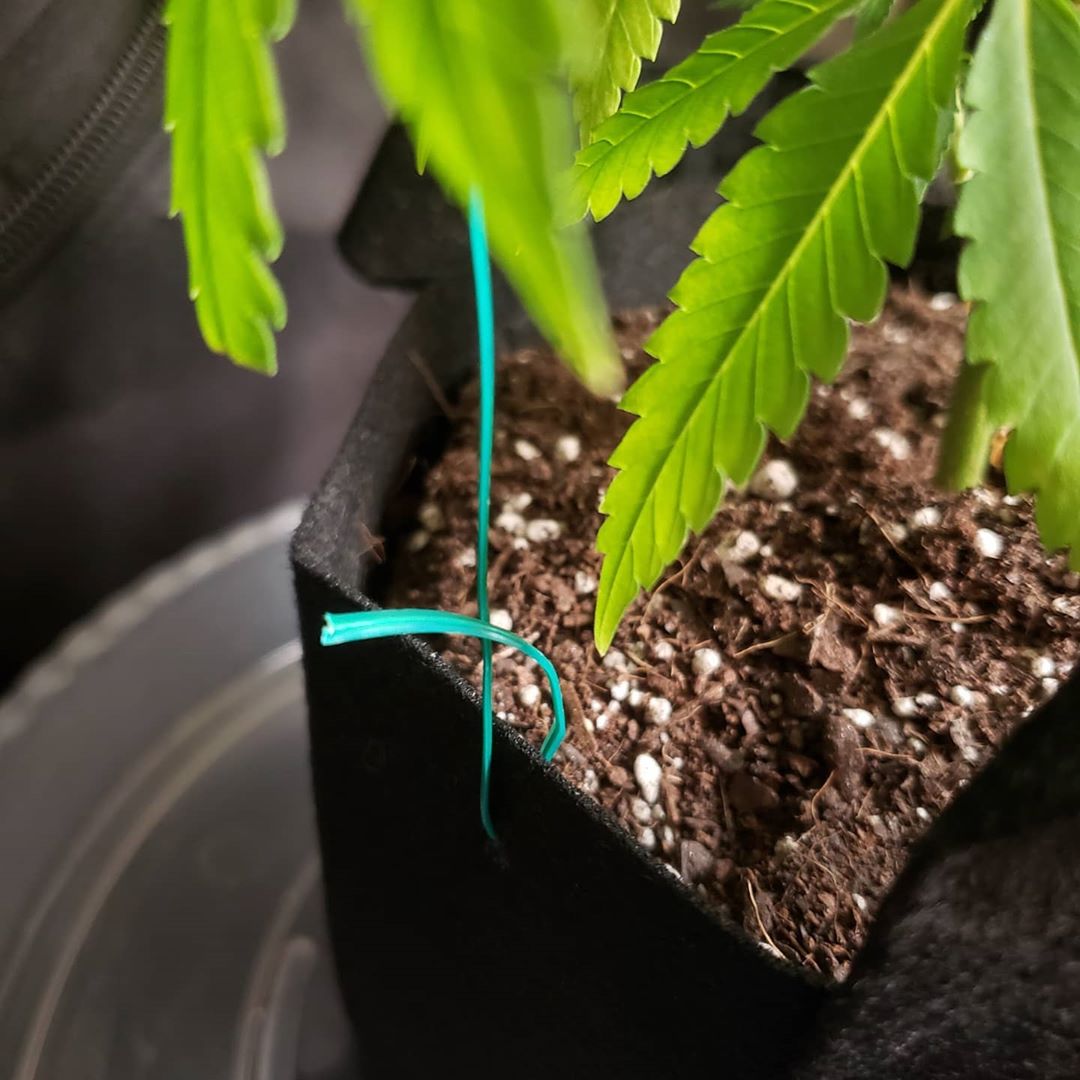
I used plant twist tie to hook on to each branch and tie it down where I wanted. I attached the other end to the fabric pot.
How to attach to the pot? You can use safety pins or binder clips but I think this is easier. Poke holes in the fabric using sharp pointy Fiskars pruning scissors and thread the twist tie through.
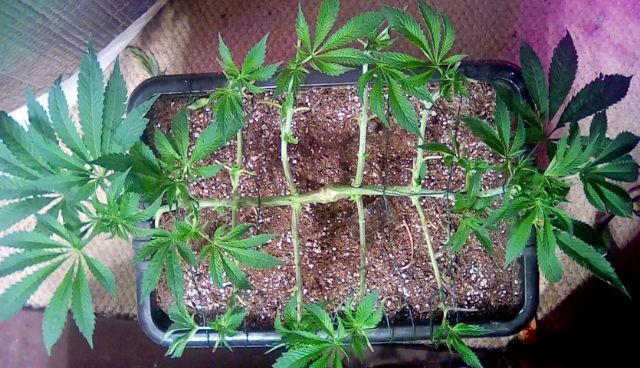
Back to training. Here’s a top view. We’re trying to fill the entire tent with this plant.
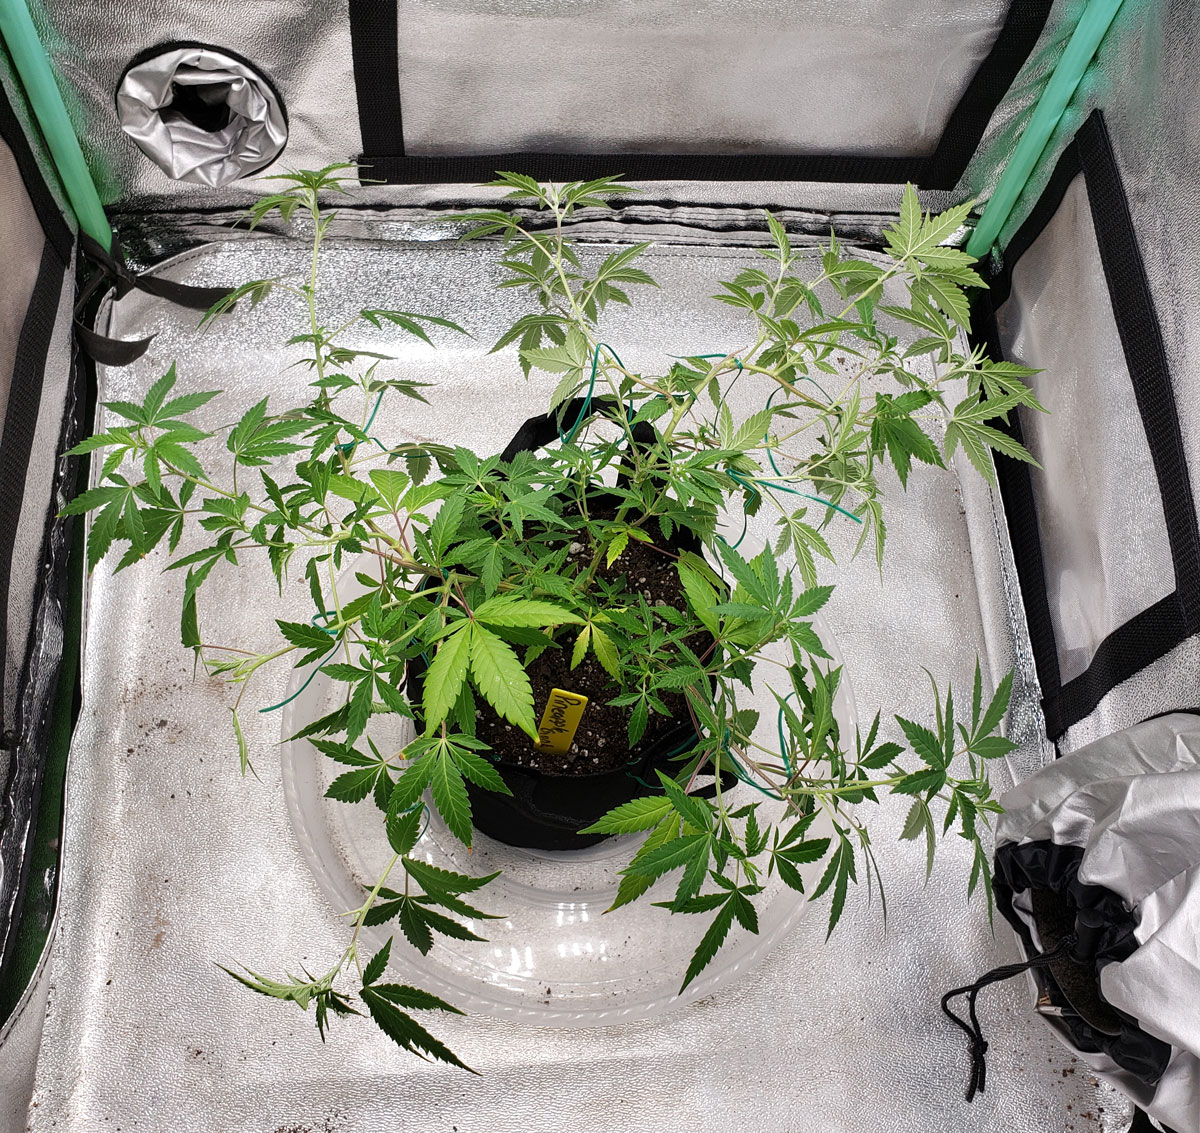
A few days later the plant has filled in nicely. Repeat the steps until you’ve filled your entire grow space.
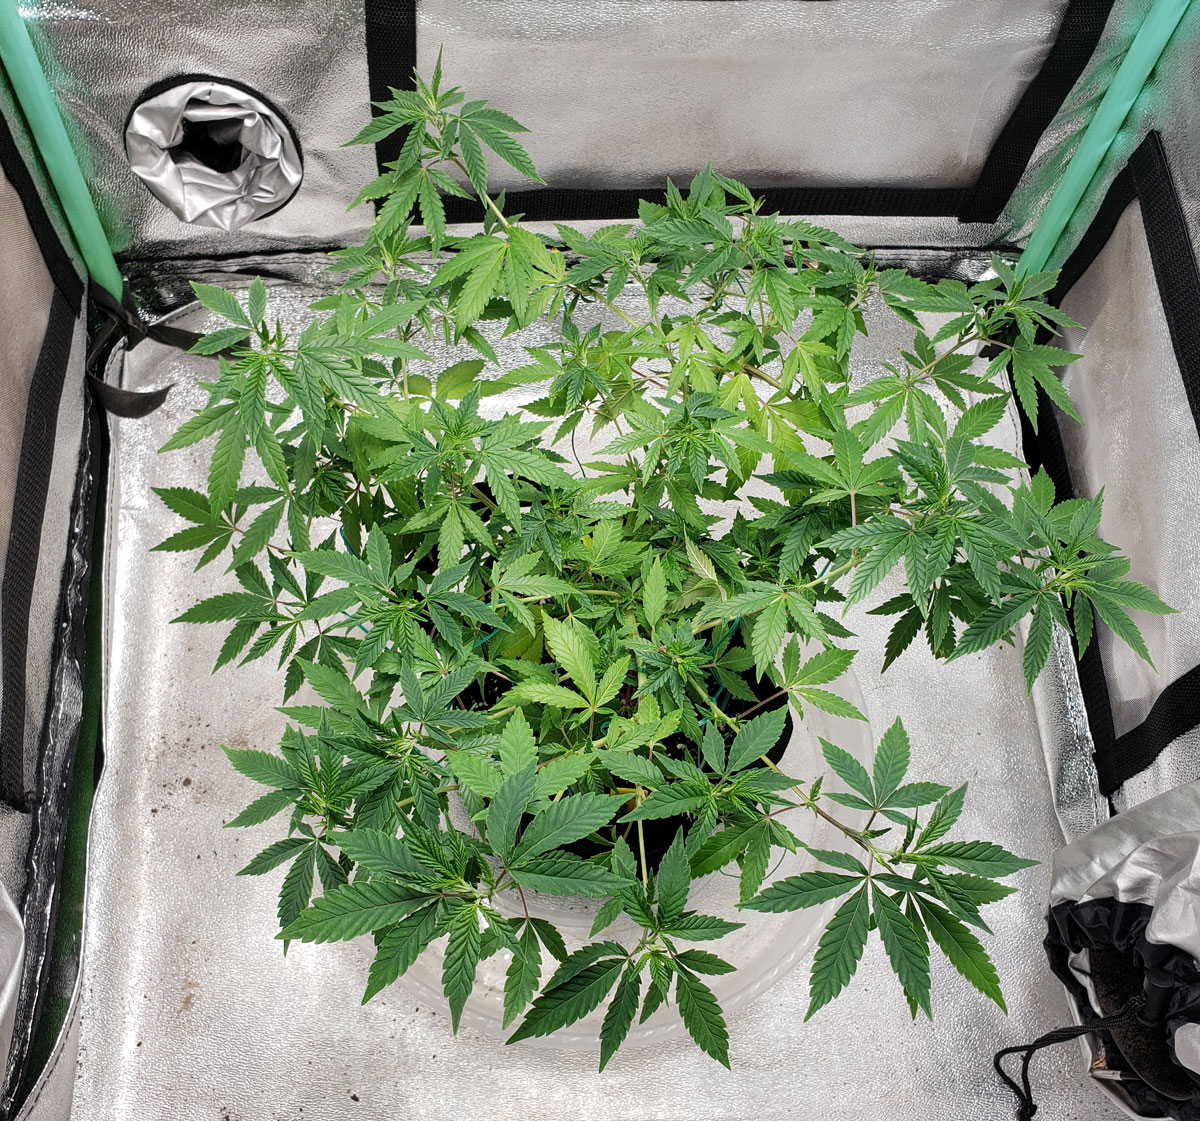
Initiate 12/12 when plants have complete coverage at the height you want. Look at all the bud sites on this 1 plant right as it starts flowering
Here’s a side view. At this point, the only thing to do is water the plant and give it nutrients until harvest.
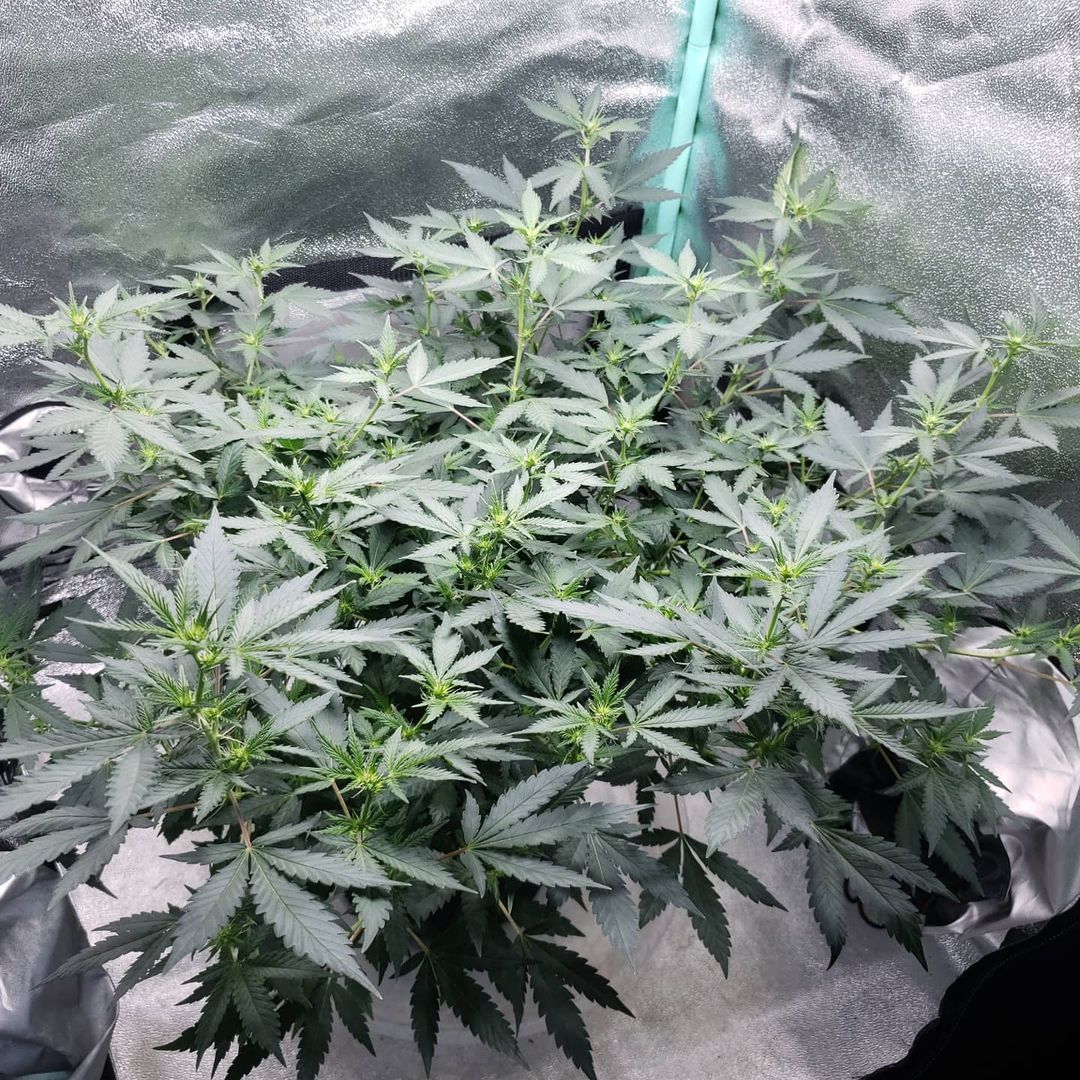
Partway through the flowering stage.
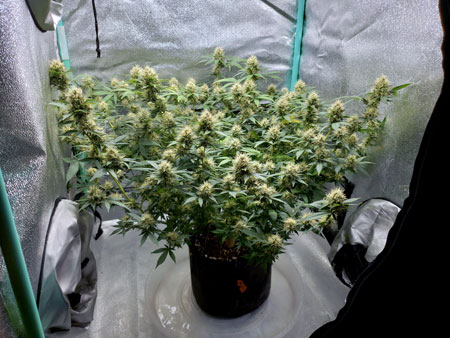
At harvest, this plant was just over 18″ (46 cm) tall, yet yielded several ounces because it was trained to grow wide and flat. Talk about making the most out of one small plant!
The buds started getting heavy, flattening the plant further.
Learn more about growing plants to be wide and flat.
3.) Grow Light is Key to Yields!
If you read step 1 and 2, you understand the value of plant coverage in your grow space. You’ve also learned how to produce plants that are the perfect height and shape to maximize yields.
This step is about your grow light, which is the other most important aspect of your setup when it comes to yields.
Main Idea: Pick a grow light that maximizes yields for your grow space.
Tips:
- Avoid fluorescent grow lights (CFLs and T5s) – If yields are a key factor for you, choose LEDs, HPS, or CMH/LEC grow lights. These are the most efficient grow lights for yields when it comes to growing cannabis. Fluorescent lights like T5s and CFLs produce excellent bud but get about half the yields per watt.
- Expect 0.5-1 gram per watt – You can use wattage to estimate yields so you pick the right grow light for your goal. With LEDs, HPS, or CMH/LEC, you can typically expect about 0.5-1 gram per watt of actual power draw. So if you’re using a 400W HPS, you could expect to yields 200-400 grams. If an LED grow light uses 300W, you could expect 150-300 grams. You can yield more or less, and some specific grow light models are better than others, but that’s a good rule of thumb for an average grower. Some modern cannabis LED grow lights like HLG or Spider Farmer LEDs can achieve 1-2 grams/watt.
- Proper grow light distance to plants – Each grow light has an optimal distance it should be kept from plants. Too close and plants will burn, too far and yields are reduced. Most grow light models list the recommended light distance in their product details. If you’re not sure, check out our tutorial on light distance.
- Good light coverage – Each grow light has an optimum amount of space it can cover (its recommended “light footprint”). If light doesn’t reach your plants on the edges, those plants will produce poor yields For example, if you have a 2’x3′ (or 0.5mx1m) grow space, get a light that’s made for that size space. Luckily, this is another detail that’s usually listed in the description when you buy a grow light.
Maximize yields with the right grow light for your space
A great LED grow light produces a ton of weed with just a few plants.
Check out examples of yields to expect for 3 popular cannabis grow lights I recommend for indoor growers.
Set and Go – 100W Quantum Board (LED Grow Light)
- Grow space: 2’x2′ grow space
- Heat: Fixture gets hot but will not warm up the room
- Average Yields – 1.5 – 3.5 ounces
- Bud Quality: Potent and pretty with great effects, but buds may be airy
- Recommended model: HLG 100 LED Grow Light
- 4000k version is best for seedlings, clones, and the vegetative stage
- 3000k version is best for the flowering stage
- both work from seed to harvest, but 3000k produces higher yields
- See an example setup with this grow light
If you want to start small, this light lets you hang up .a grow light and start growing decent amounts of high-quality weed in a small space. Flimsy but effective. It barely affects the electricity bill and doesn’t make much heat. Also an excellent choice for seedlings and clones.
HLG 100 should be kept about 10″ away from the tops of plants
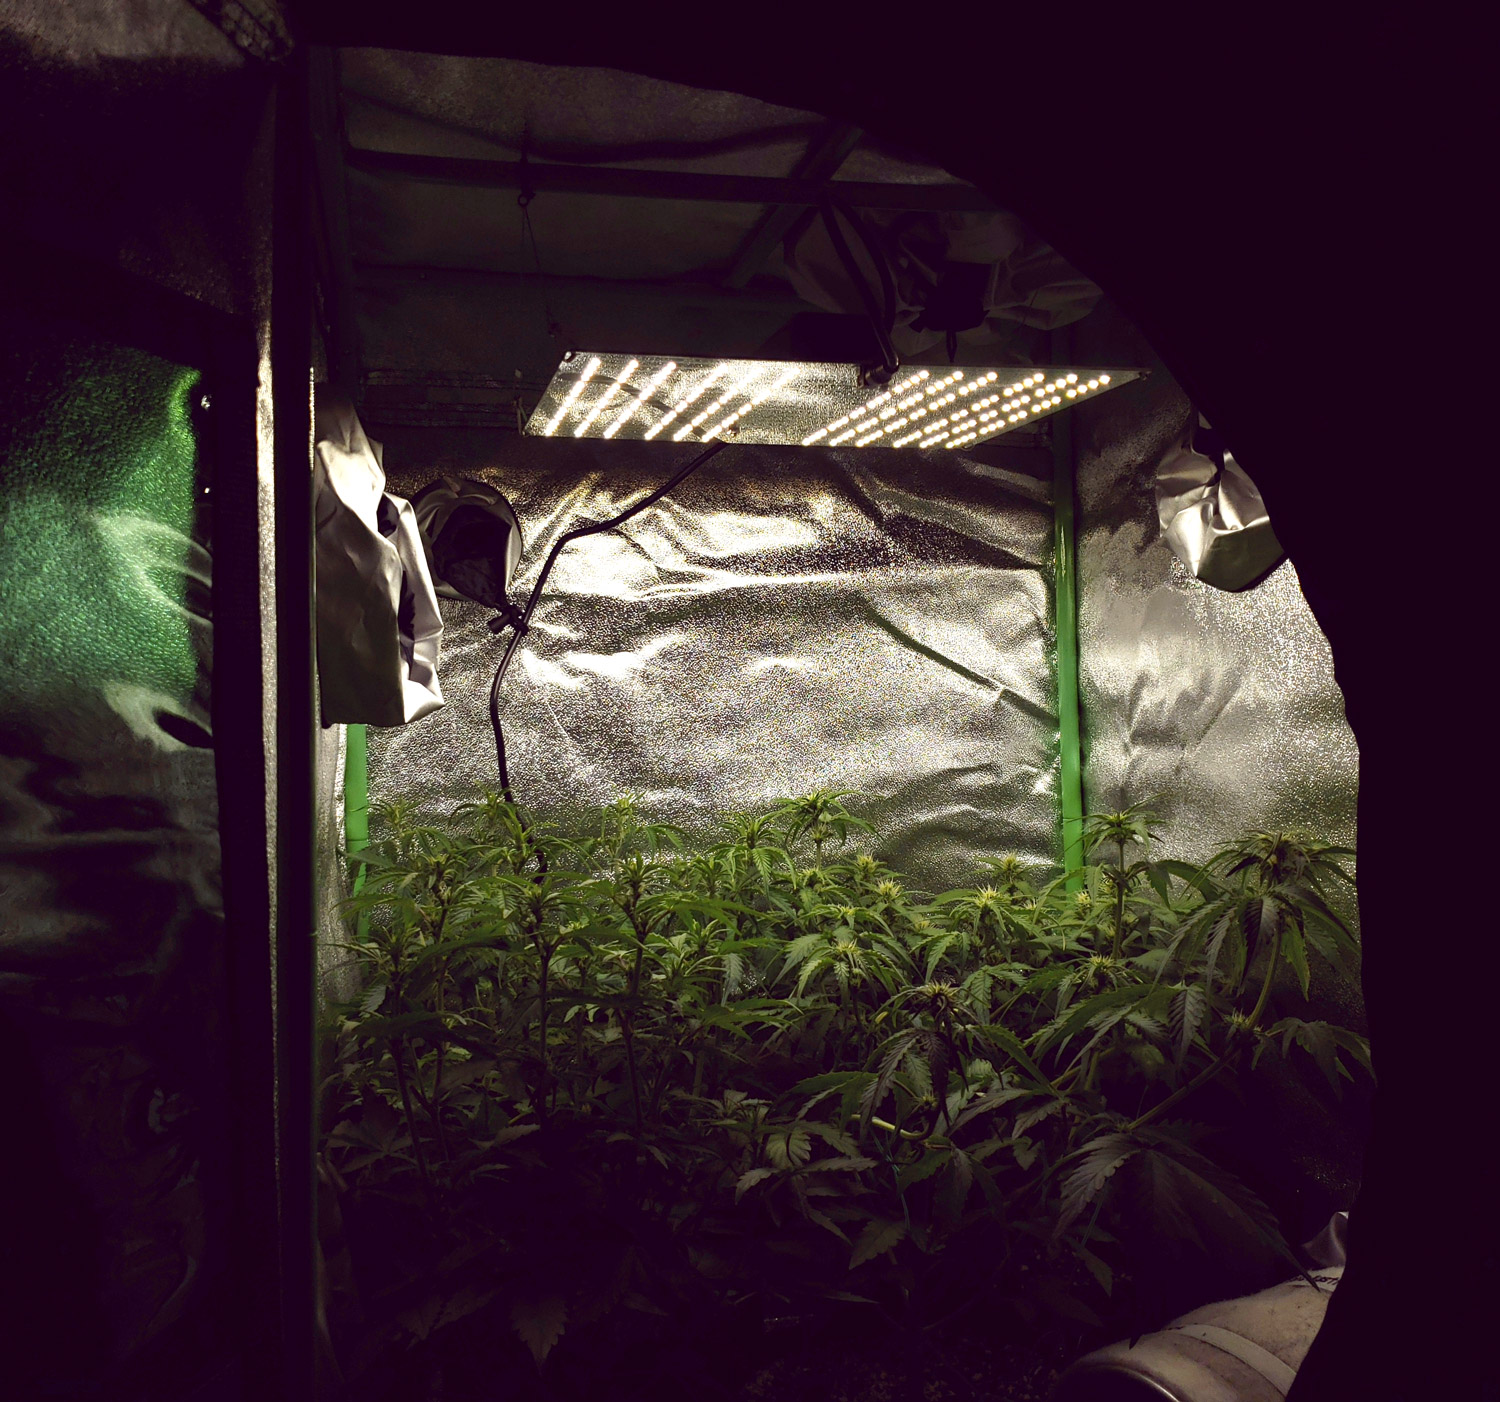
3 plants grown with the HLG 100 using the techniques above – 5.5 oz
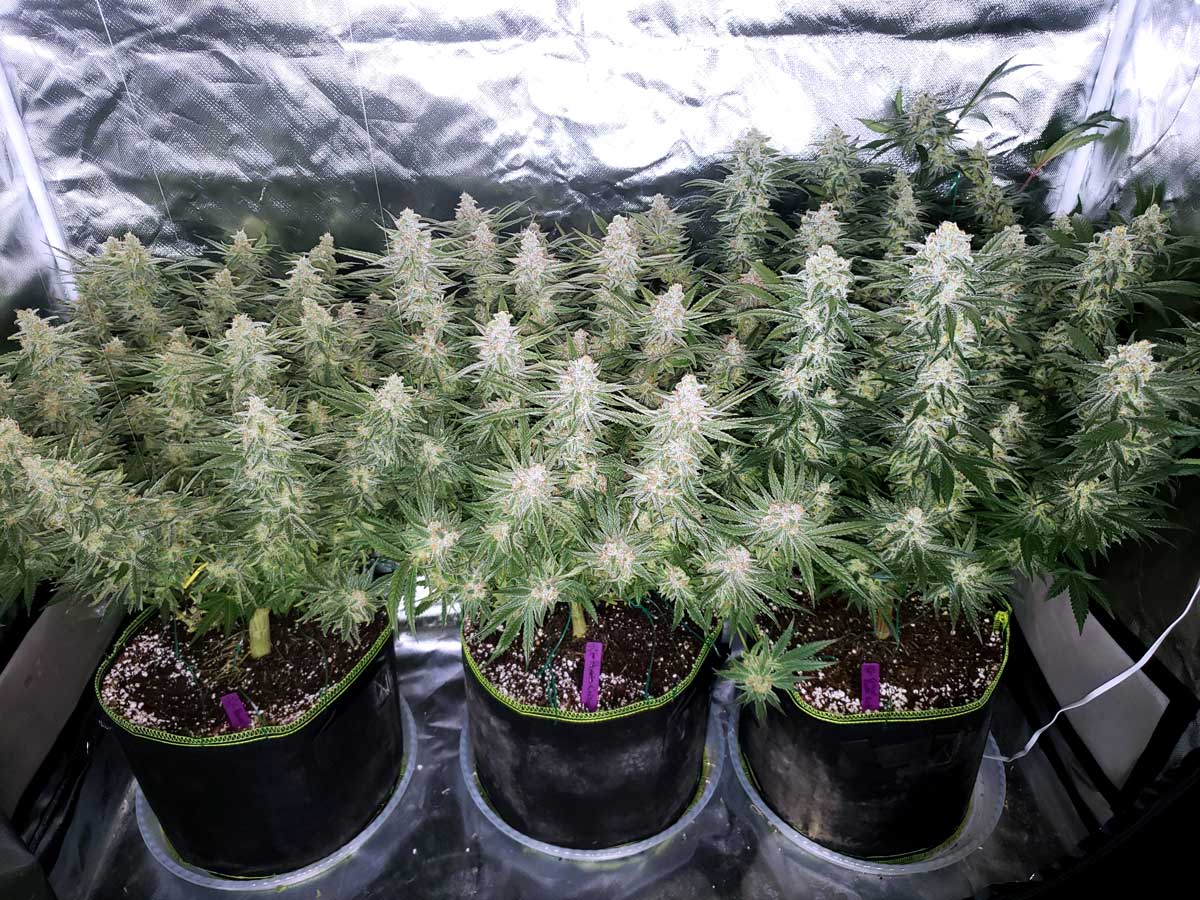
Great Yields Without Much Heat – 300W Quantum Board (LED Grow Light)
- Grow space: 2’x4′ or 3’x3′ grow space
- Heat: Warms up a room by a few degrees
- Average Yields – 5-10+ ounces
- Bud Quality- Dense, potent, sparkly nugs
- Recommended models: Mars Hydro SP3000 LED (2’x4′ space) or Mars Hydro FC-E3000 (3’x3′ space)
- See an example setup (with detailed yield estimates) for 2’x4′ space or 3’x3′ space.
For this size grow light, I’ve had really great results with Mars Hydro grow lights. They’re easy to use, powerful with big yields in the flowering stage, yet surprisingly gentle on young cannabis plants.
3 plants grown under a 300W LED grow light using the techniques listed above – 11.1 oz
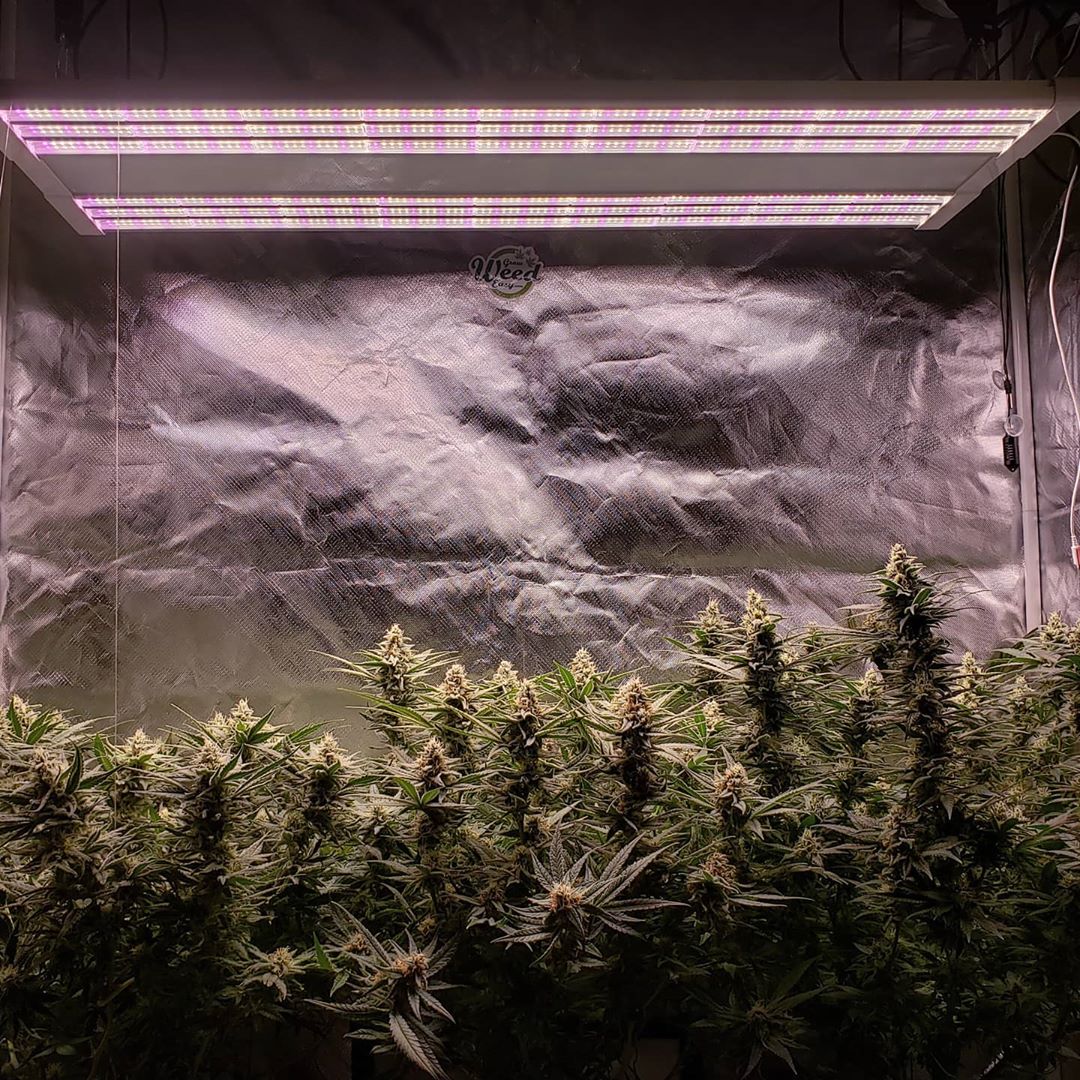
Big Producer – 315W CMH (sometimes called LEC)
- Grow space: 3’x3′ grow space
- Heat: Burning hot bulb raises the temperature of a room by several degrees
- Average Yields: 5-12 ounces (though I’ve yielded over a pound before)
- Recommended Model: Sun System Flower Power 315W LEC/CMH
- Bud Quality – Intense smells and unbelievable trichome production (get the most glitter by using the 4200k Philips or 4100k Eye Hortilux bulb in the flowering stage)
- See an example setup with a 315 CMH.
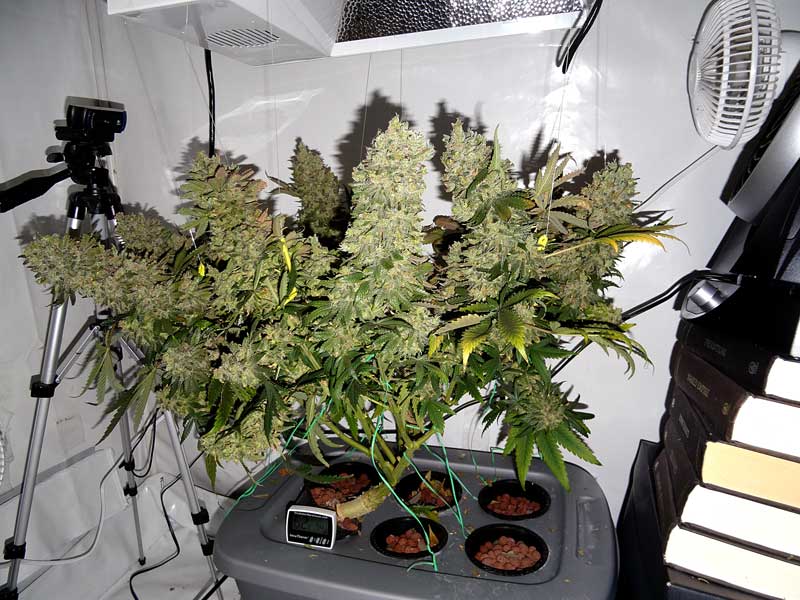
4 plants grown under a 315 LEC grow light using the above techniques – 12.57 oz
4.) Choose the Right Genetics (plus example strains)
If yields are a consideration, pay close attention to genetics. You can greatly increase yields by choosing a strain that is known to yield more than average.
- Photoperiod strains only – To follow this tutorial, you need to be able to control the length of the vegetative stage. Photoperiod plants give you total control because they won’t start flowering until you initiate a 12/12 light schedule. Most cannabis strains are photoperiod strains, so unless you buy “auto-flowering” seeds, you’re good to go.
- High-yielding – Some strains can yield 2-3x as much as other strains in the exact same grow space and conditions. It’s astounding how big of a difference genetics makes to yields.
- Avoid “short” strains – Short strains tend to yield less because plants are smaller.
Example cannabis strains that are heavy-yielders:
- Kushberry Moonrocks – ultra potent, purple, sparkly buds
- White Widow – high-yield version of the classic strain
- Fruity Pebbles – smells sweet and fruity
- Royal Gorilla – easy to grow, top-shelf buds
- Planet of the Grapes – some of the best yields of any strain I’ve grown.
- Thug Roze R1 – massive yields, tangy ‘Sativa’ smell that’s rare these day, unique effects.
- Dos Si Dos 33 (Barney’s Farm version) – huge yields, excellent buds, easy to grow.
- THC Bomb (MSNL version) – massive yields, excellent buds, developed by a geneticist
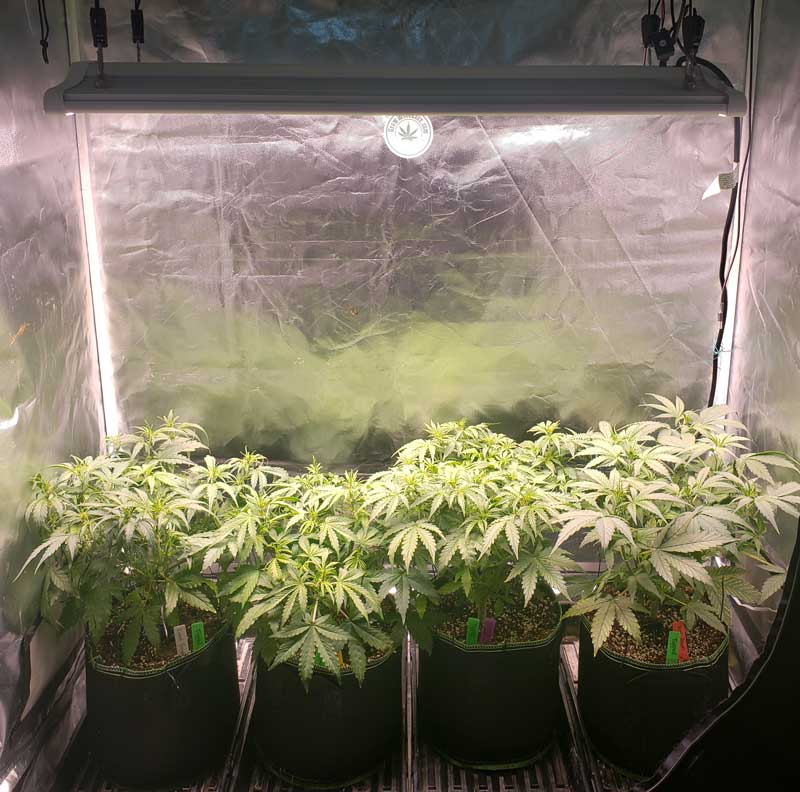
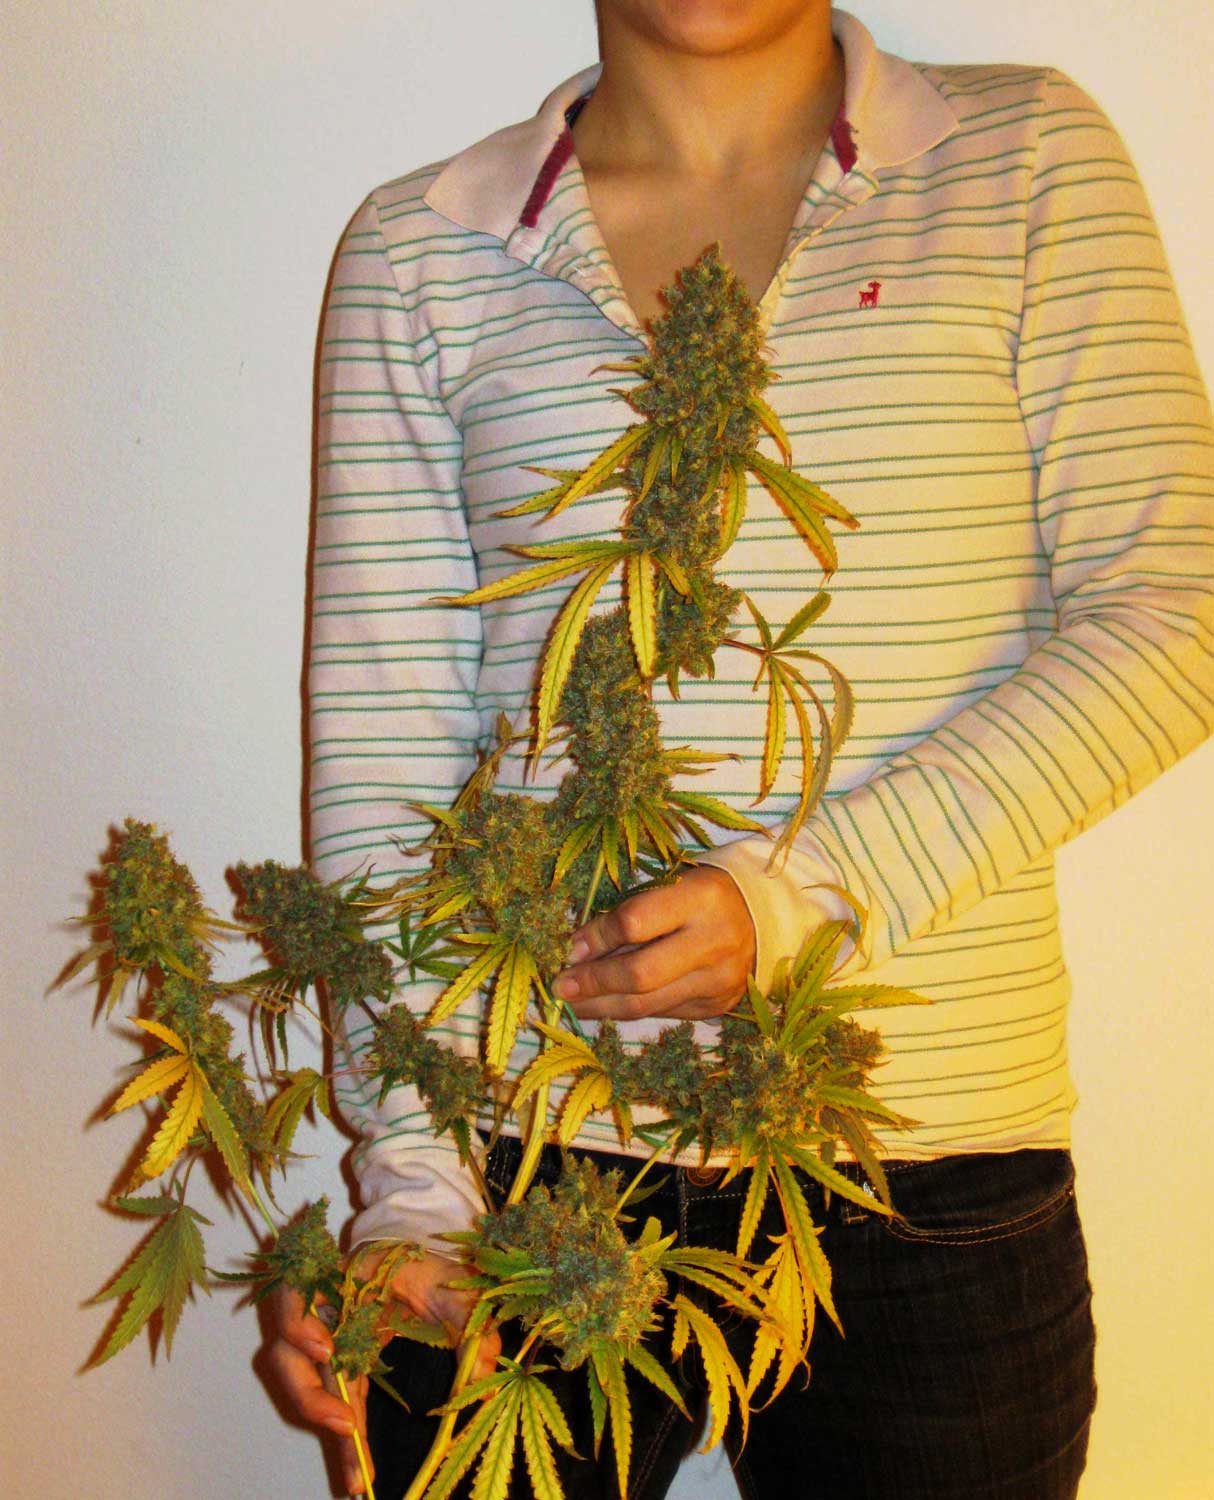
A single White Widow cannabis plant produced 12.57 oz of dense buds under 300W.
Many branches produced over an ounce of weed after being dried, and every bud was rock hard.
5.) Advanced Techniques
If you only follow the steps above, you can produce bountiful yields with just a few plants. But some growers want to maximize their yields even more. In that case, this section is for you.
These techniques require a bit more work and know-how, but they can produce incredibly high yielding plants indoors.
- ScrOG (Screen of Green)
- Manifolding or Fluxing
ScrOG (screen of green) means using a screen or netting to train plants to grow flat before flowering.
Manifolding or Fluxing are similar techniques with the goal of creating plants where all the branches meet at one part of a plant (the “manifold”). These techniques require extra time in the vegetative stage, but reward you with huge symmetrical buds. Plus these techniques are super fun!
With manifolding or fluxing, young plants are cut up in the vegetative stage so that all branches come from one main “manifold” on the main stem.
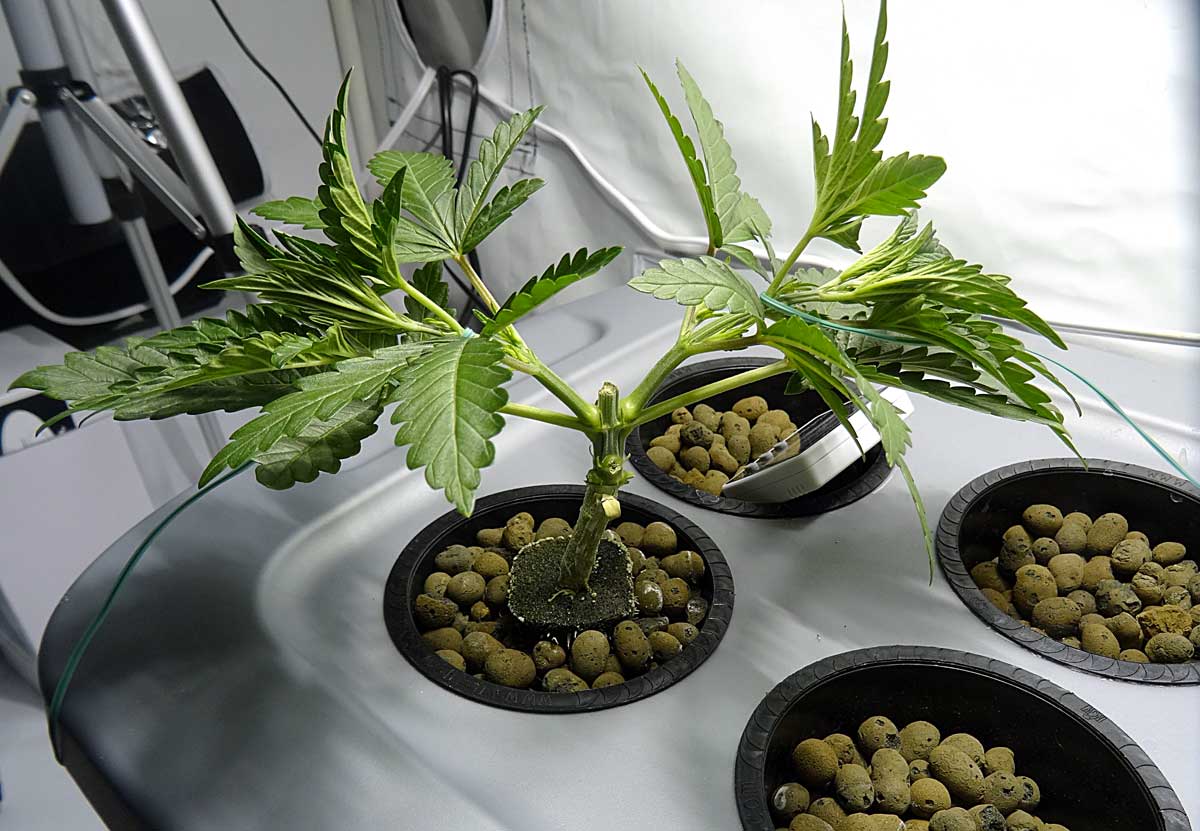
The base of a “manifolded” plant
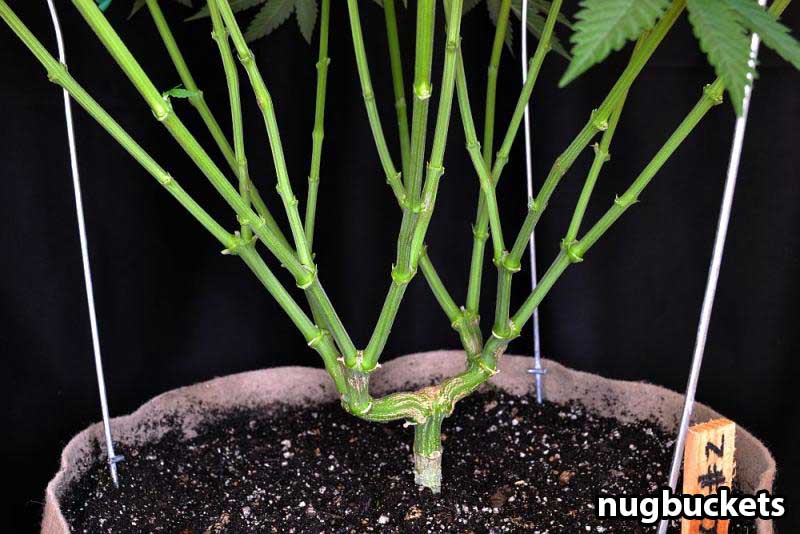
Fluxing is a different take on manifolding, but follows the same essential principles of splitting the main stem and creating a symmetrical plant structure
When followed step-by-step, these techniques produce outstanding harvests on every plant
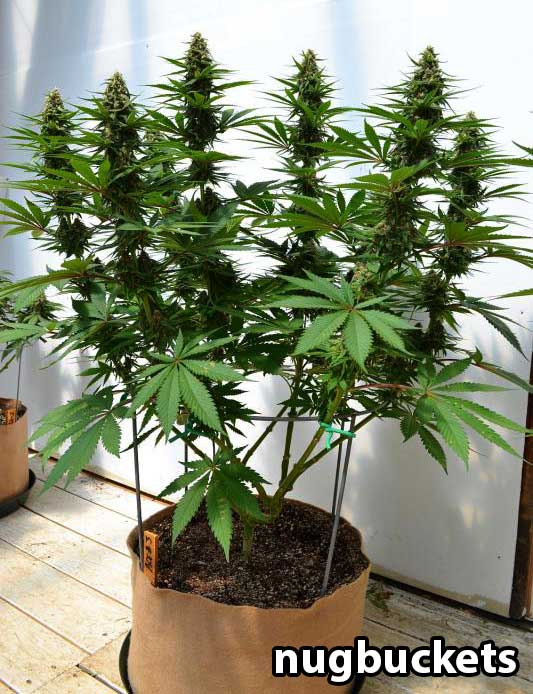
A grower named “nugbuckets” designed and popularized the manifolding technique (though he called it “main-lining” at the time) to maximize yields per plant. Here’s one of the manifolded plants from his original tutorial. A huge thank you to nugbuckets for sharing your knowledge with the home growing community!
Now you are armed with the knowledge to produce tons of marijuana even if you have plant limits. It’s time to grow the yields you want!
GrowWeedEasy.com has hundreds and hundreds of pages!
Check out some articles you may not have seen…
- Nebula’s Manifold – Cannabis “Main-Lining” – Turn your cannabis plants into a lean, mean, organized green producing machine! The technique is pretty keen if you know what I mean.
- How Long Does It Take to Grow Weed Indoors? – When we first started growing, we asked this question so many times only to get generic, non-specific answers. That won’t happen here! We only deal in details!
- Stealth Growing: How to NOT get Caught Growing Weed – Despite the ever-increasing legality of growing your own cannabis, it’s still be best to be on the safe side and remain as stealthy as possible. Even if it’s legal where you are, theives know that the police won’t investigate cannabis plant theft…
- How to Save Money When Growing Weed – When you grow your own weed, you should experience an increase in quality, but it should also cost drastically less than purchasing froma dispensary. If your weed isn’t dirt cheap (yet), let us help you get there!