by Nebula Haze
Table of Contents
Overview of the Cannabis Drying/Curing Process
Harvest: Harvest cannabis when the white hairs have darkened and curled in. Too early can sometimes trigger anxiousness or headaches for some people. When do I harvest? The most common way to harvest cannabis is: cut down branches, trim off unwanted leaves, then hang branches upside down in a ventilated area.
Drying: Dry buds slowly for 3-7 days. The amount of drying time will vary depending on your local temperature and humidity. Don’t let buds touch each other during drying, especially in high humidity. Watch buds closely to make sure they’re not drying to a crisp overnight (drying too fast), or parts of buds feel wet and don’t seem to be drying (drying too slow). Drying is finished when small stems start to snap instead of bend.
1st Level Curing: Put buds in quart-sized glass mason jars for at least 2 weeks. Curing for 2-4 weeks will reduce “harshness,” the fresh-cut-grass smell of newly dried buds, as well as help prevent headaches and anxious effects. Open jars at least once a day for a minute or two. The outside of cannabis buds should never feel wet; if they feel wet then leave lid off jar for an hour or two until they feel dry again, and go back to curing.
2nd Level Curing: Continue curing buds for 2-6 months to further increase smoothness and potency (while buds “feel stronger,” it’s unknown whether 2nd level curing has any effect on the medical benefits of cannabis)
Long-Term Storage: After 6 months, you should prepare your buds for long-term storage
Review: Timeline of the Entire Drying/Curing Process
Extra Tips and Tricks For a Perfect Cure Every Time
Our New $27 Digital Harvest Book
 It takes a lot of patience to wait for your buds to mature until they’re ready for harvest. Many cannabis growers (especially first-time growers) have a tendency to harvest their cannabis too early out of excitement.
To test your patience even more, after you’ve harvested your cannabis, buds still need to be dried and “cured” to achieve the proper taste, smell and potency most growers are looking for in high-quality buds.
Drying and curing your buds improperly (or not drying and curing at all) will result in buds that are harsh, taste/smell bad, and actually seem less potent. Improperly dried and cured buds can also give you a headache or increase your chances of feeling anxious or paranoid during use. This article will give you hints and tips to achieve the perfect dry/cure every time so you produce the best buds possible with every harvest.
Note: Read the full article with step-by-step instructions on how to dry/cure your cannabis buds here. This article provides extra tips and hints for the best cannabis curing results, but the above link will give you detailed step-by-step instructions.

Why Do Growers Cure Buds After Harvest?
Here’s what drying and curing cannabis will do for you…
Dramatically improves taste of buds after harvest
Gets rid of the unpleasant “fresh hay” or “cut grass” smell which is common on newly harvested buds
Brings out the subtle flavors and unique smell of your cannabis strain
Reduces “harshness” in buds; you’re less likely to start coughing or get a headache
Buds that are dried/cured properly are less likely to cause anxiety, racing thoughts, or paranoia
Increases storage time; you can store properly dried/cured buds for years and buds will retain a lot of their original potency
Reduce the chance of mold growing on your buds
Curing increases the perceived “potency” of your buds. Buds actually produce stronger effects!
Detailed Breakdown of the Dry/Cure Process
Harvesting your cannabis at the right time will dramatically increase the quality of your buds. When do I harvest? The first step of a great dry/cure is to harvest your cannabis the right way at the right time.
During harvest, you will cut the buds from your cannabis plant. How do I harvest the buds from the plant? For most growers, harvesting plants means cutting stems with buds on them away from the main plant.
At this point, most growers will trim the extra leaves off their newly harvested buds. Leaves do not contain as much THC and other cannabinoids as the buds themselves, and leaving too many leaves on the buds will contribute to “harshness.”
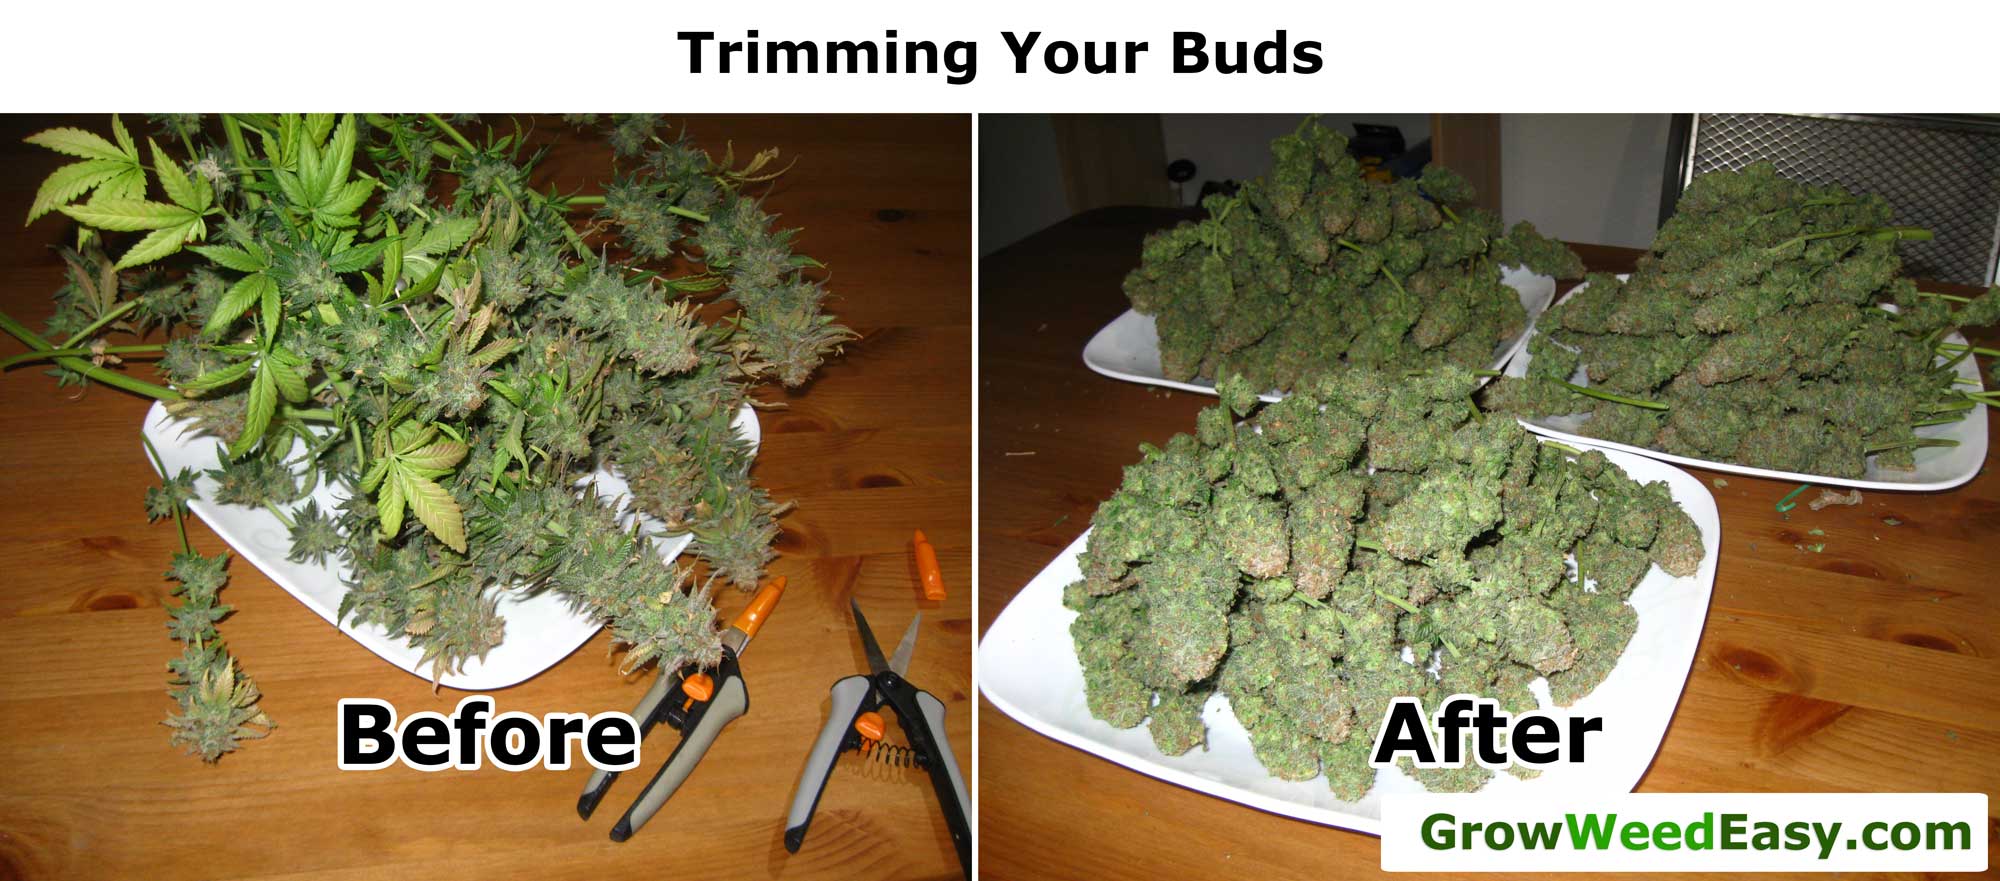
How do I trim the leaves off my buds?
Don’t worry, you can still use the extra leaves or “trim” to make hash or edibles (like Canna Caps, Cannabis Extract Oil or Dry Ice Hash). These processes extract the “good stuff” from the leaves of the plant, while getting rid of the inert matter in the leaves that can cause harshness.
Some growers choose to trim leaves off the buds after the drying process, but please note that trimming after drying is much more difficult! I only recommend waiting to trim if you live in a very dry area (extremely low humidity), and absolutely need the leaves to help slow down the drying process. Otherwise it’s recommended that most growers trim their cannabis buds immediately after harvest.
Here’s some examples to help show you what I mean.
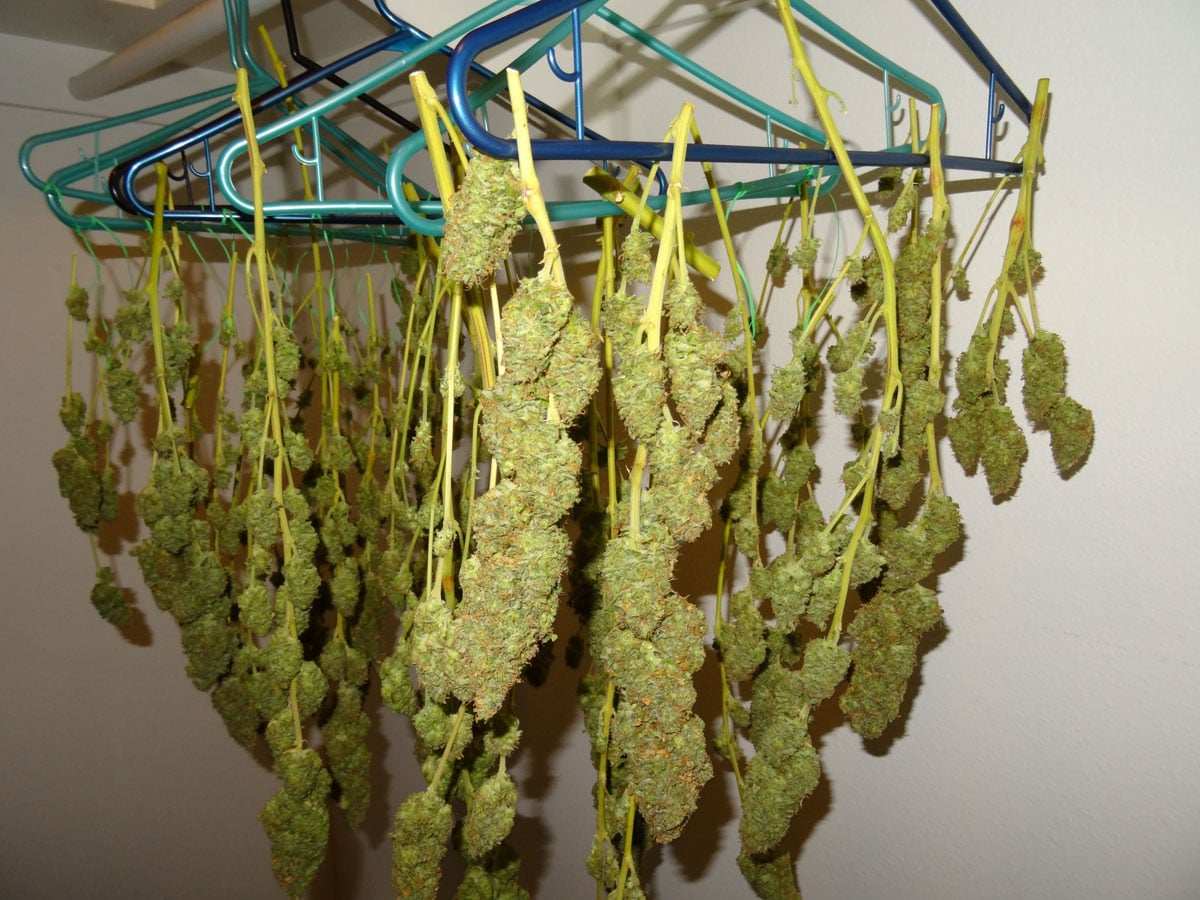
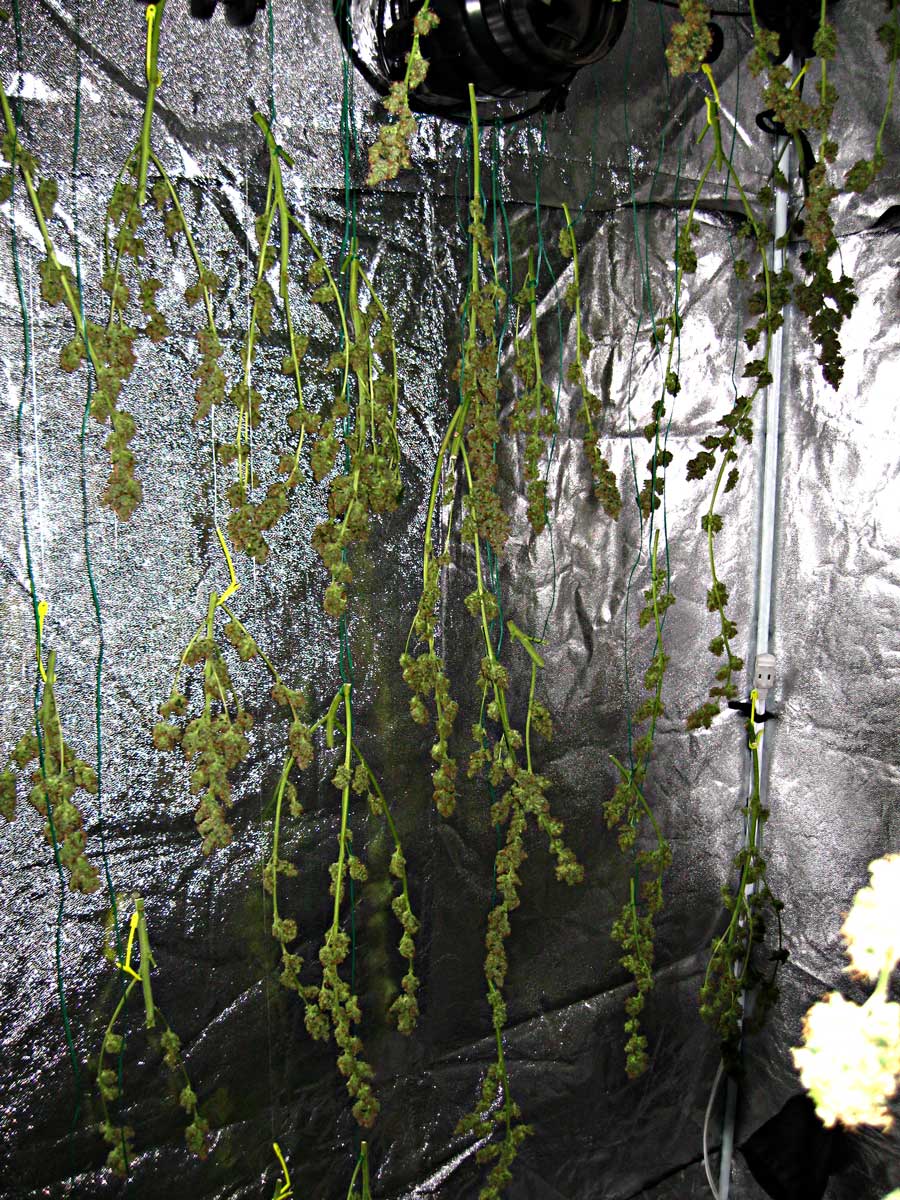
Drying before trimming (not recommended unless you live in a extremely dry environment)
The buds still have all of their leaves because they were not trimmed before being hung to dry
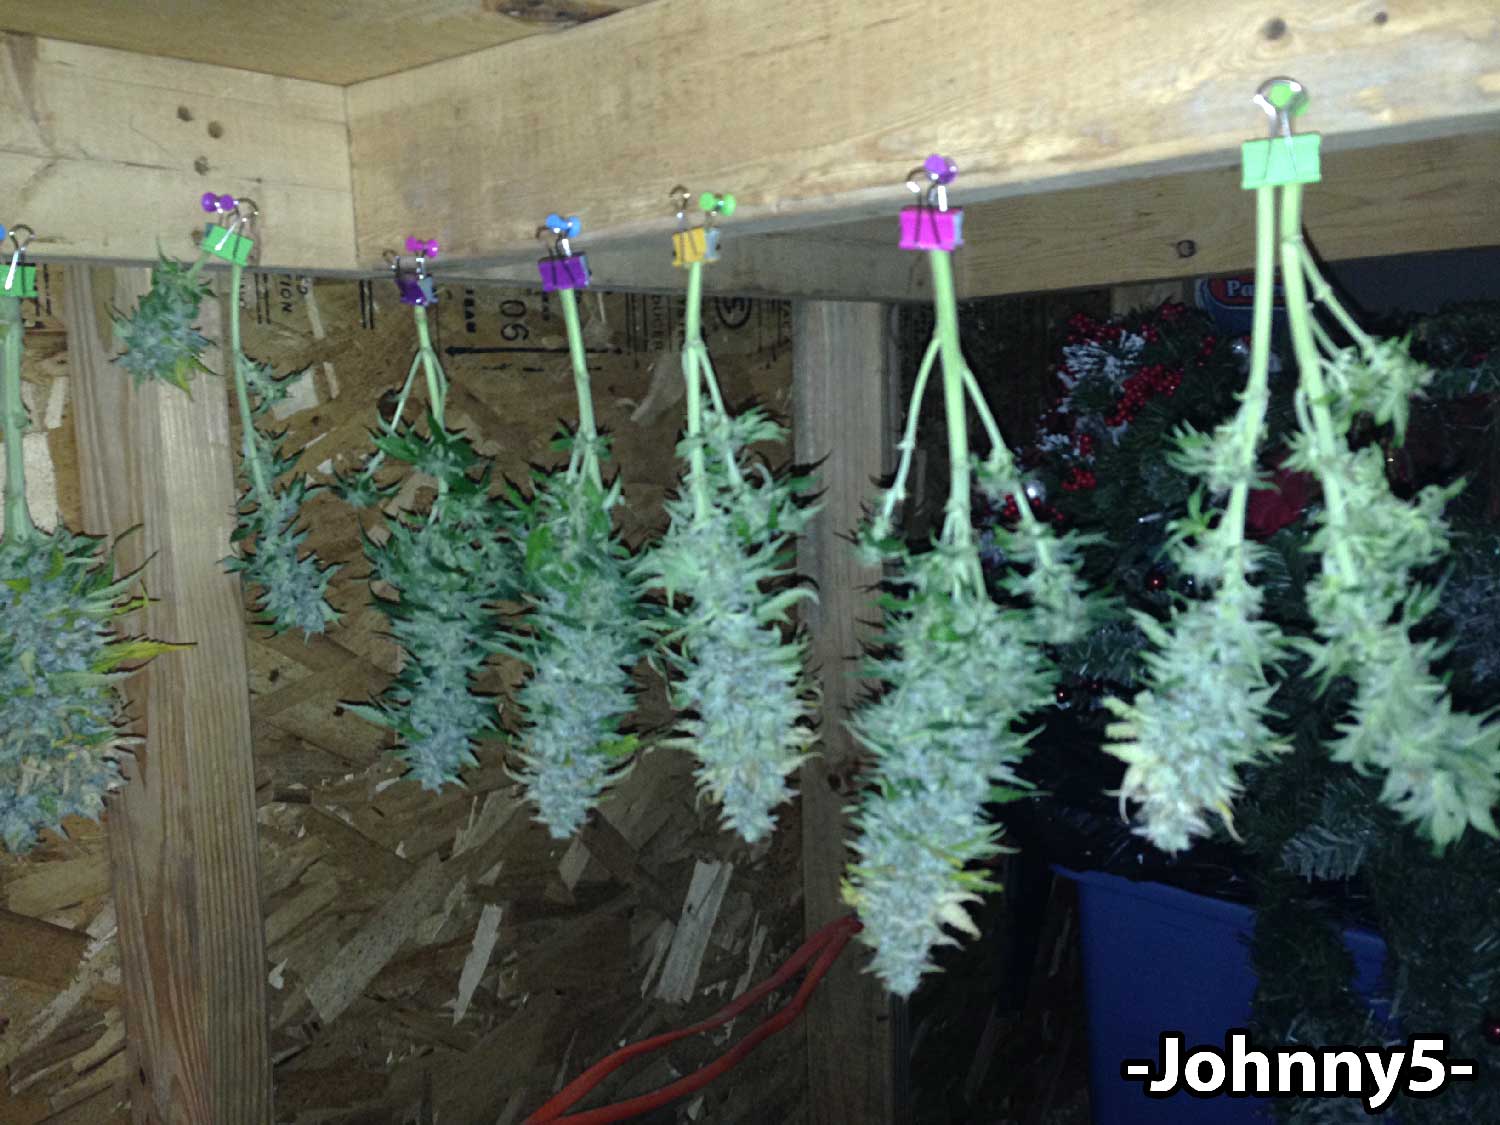
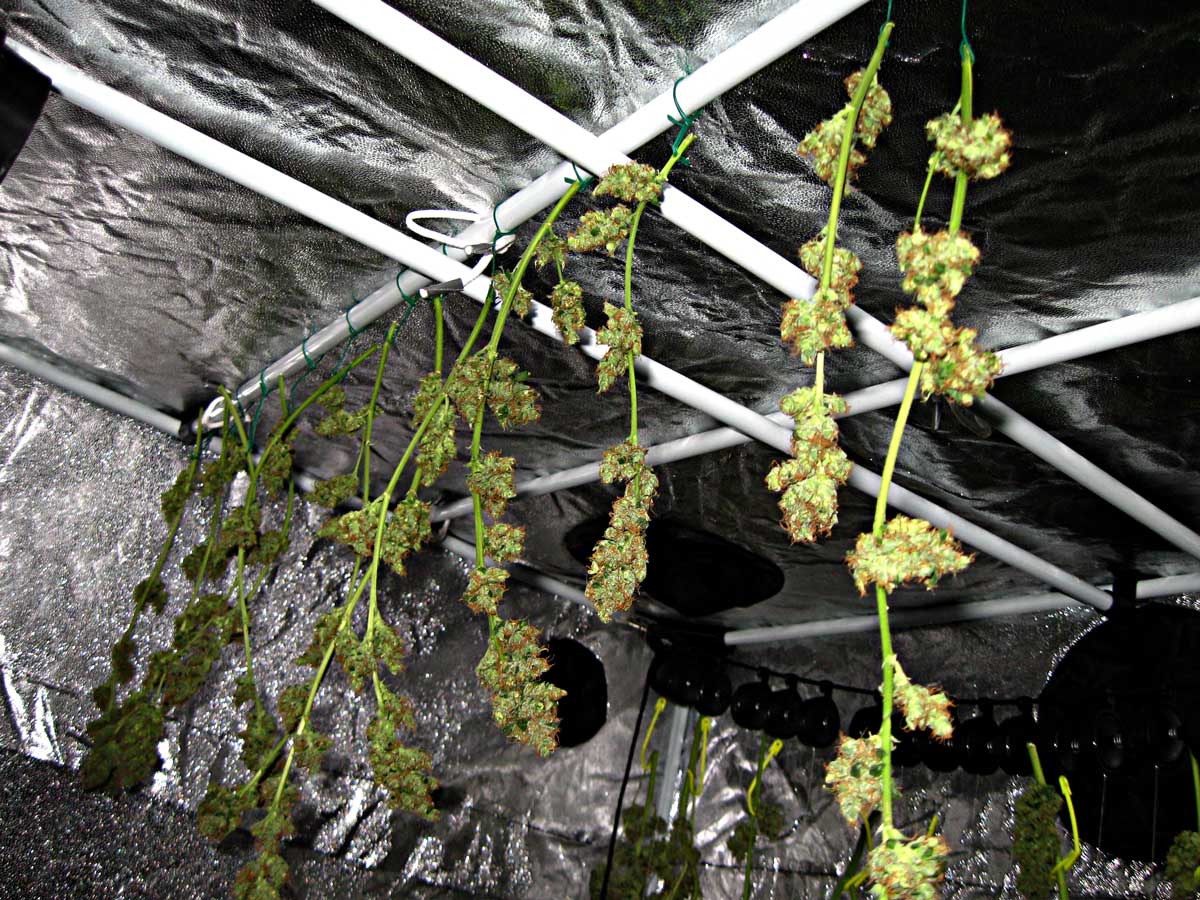
Drying after trimming (recommended)
Notice how the leaves have been mostly trimmed away before the buds were hung up to dry
Drying: Dry buds slowly, for 3-7 days
While “drying” and “curing” are usually thought of as two separate events, the “curing” process actually starts as soon as you cut your buds from your plants. Drying your cannabis buds slowly is a part of achieving the best cure.
It’s important to leave just the right amount of moisture before taking buds down. If you dry the buds too quickly, or too much, it can actually halt the whole curing process so you don’t get as much benefits or improvement from jarring your buds.
When deciding when to pull buds down during the drying process, it’s better to err on the side of leaving buds too wet than too dry. You can always dry buds more, but the curing process will not go as well if you’ve dried your buds too much.
 Some growers like to use mesh racks for the drying process. I personally believe most growers, especially small-scale growers, will get the best results by drying their buds hanging upside down with buds still attached to their stems.
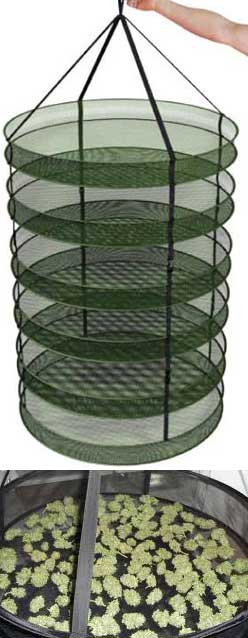
When using mesh racks, buds will dry quicker because you cut the buds off the stems (which contain moisture and help the buds dry slowly). Being horizontal (as buds will be on a mesh rack) also seems to make buds dry more quickly. Additionally, buds tend to flatten on the side that’s lying on the mesh due to gravity and the softness of buds.
Racks will help your buds dry faster (and prevent mold), so they are a great choice if you live in a high humidity area, and/or if you’re drying a LOT of buds in a small area. If you’re drying a pound or more of buds in a small space, you may want to invest in a mesh rack to make sure buds don’t mold.
Remember how we had to trim the buds earlier? Racks are also useful for those who have huge harvests because it is easier/faster to trim buds when they’ve been separated from the stems. Some growers even use trimming machines to trim buds, but machines need the buds to be separated from their stems. Trimming buds while still on the stems can be time-consuming. A rack allows you to dry buds no matter how they’ve been trimmed, even if they’ve been separated from the stems.
That being said, I highly recommend trimming your buds while still on their stems, then hanging them upside down if possible. You want your buds to dry relatively slowly to achieve the best cure, and I’ve always achieved the best results by drying my cannabis buds by hanging them upside down by their stems. When I’ve used mesh racks to dry my buds, they’ve always tended to dry too quickly.
Whether your hanging your buds or drying them on a mesh rack, don’t let buds touch each other during the drying process! This increases the likelihood that your buds will get mold. Throughout the drying/curing process, it’s a battle between drying too fast and the possibility of mold. One of the best things you can do to prevent mold is to never let buds that feel wet on the outside touch each other.
Never let buds touch each other during the drying process
(arrange them so buds don’t touch)
When it comes to drying slowly, it’s good to aim for a drying process that has your buds ready to put in jars after about 7 days. That being said, growers have dried buds for only a few days, and up to a few weeks and still gotten great results.
The most important thing to remember is to always take buds down and put them in the jars before they’re too dry. If they’re too wet, there’s still a lot you can do to dry them out more, but you can’t fix overdried buds.
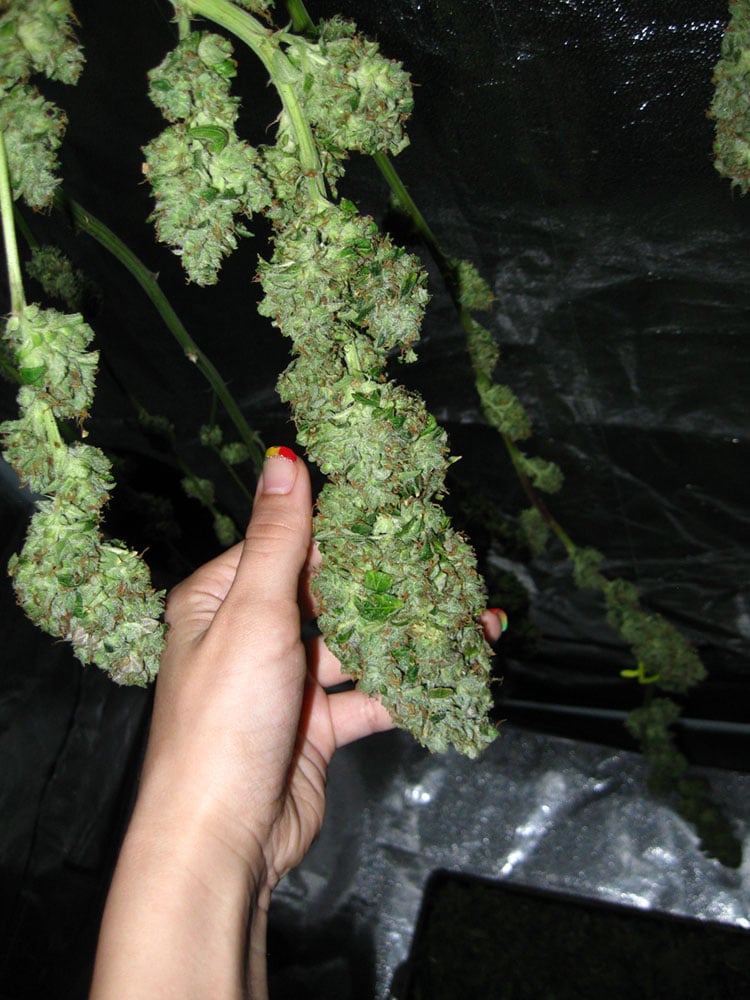
When are buds done drying? Your buds are ready to be placed in jars when the outsides of buds start to feel dry to the touch. At this point, some of the small stems will snap, though the thicker stems should still have a small amount of flex when you try to bend them in half. This flex indicates that there’s still moisture contained inside the stems, which is what you need for the curing process.
1st Level Curing: Keep buds in glass mason jars for 2-4 Weeks
When buds have just finished drying, they tend to have a “fresh cut grass” smell instead of the skunky or sweet scent they carried during the flowering stage. If smoked, newly dried buds which haven’t been cured tend to be “harsh” and are more likely to cause headaches, racing thoughts or anxiety.
1st level curing will reduce harshness and bring out the natural taste and smell of your cannabis. It will make your buds smoother and can actually increase the perceived potency compared to newly dried buds.
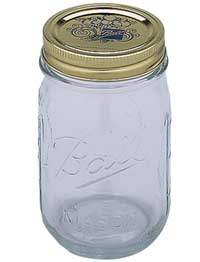
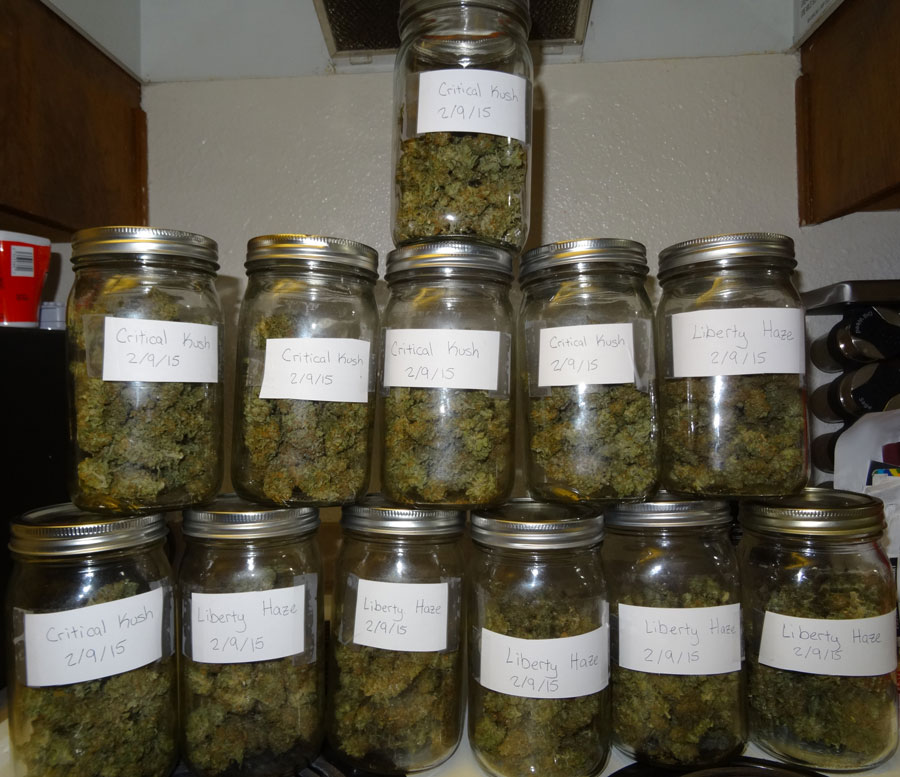
The first step of 1st level curing is to place buds in quart-sized, wide mouth glass mason jars for at least 2-4 weeks.
Use glass mason jars that are quart-sized with a wide mouth, like this:
Never leave buds closed in jars for long periods of time if they feel moist or wet! You need to open your jars at least daily and monitor your buds closely for the first few weeks, and this gives you a perfect chance to check on the moisture levels of your buds.
If you ever notice that buds feel moist or wet, you should leave jars open for 20 minutes to an hour (or until the outsides of the buds feel dry to the touch). If buds ever are left in jars while they feel wet on the outside, they are much more likely to get mold! Buds should feel dry on the outside every time you close them in your jars.
During the first few weeks of the curing process, it’s normal for buds to periodically feel wet as the moisture from the inside of the buds works its way to the outside. That’s a good thing because it means you didn’t overdry the buds, but this is also part of why it’s so important to open jars at least daily for the first few weeks – you need to check on them and control the moisture levels.
2 weeks of curing is generally considered the “minimum” amount of time for acceptable curing. 4 weeks of curing is a great goal. I personally do not start sampling my buds until they’ve been curing for at least 4 weeks.
It’s crucial to open jars daily for at least the first 2-3 weeks of curing, and to continue to open jars regularly throughout the rest of the 1st level curing process. Even if you’ve overdried your buds, it’s still important to open jars daily for the first few weeks to achieve the best results.
Almost all growers agree that there are additional benefits to curing your cannabis buds past 4 weeks. In my experience, buds will continue to improve from additional curing for about 6 months.
When I say “improve” I mean that buds subjectively seem to get “stronger” or more potent. Buds seem to get “smoother” after a long cure. The smell continues to change during the curing process, and most growers seem to agree that the changes in smell are a big improvement that brings out the natural taste and smell of your cannabis.
That said, buds are good to go after 2-4 weeks. Getting to the end of the 1st level cure is the most important part of the drying/curing process, and the remaining benefits of further curing are all gravy as far as I’m concerned.
2nd Level Curing: Continue keeping buds in mason jars for 4 weeks – 6 months
Continue curing buds for up to 6 months to further increase smoothness and potency (though it’s currently unknown if 2nd level curing has an effect on medical benefits of cannabis). Yes, buds actually seem to get more potent if you continue curing past 4 weeks. The exact process is not well understood, but it’s true. I encourage you to test your buds at all stages of curing so you can see for yourself!
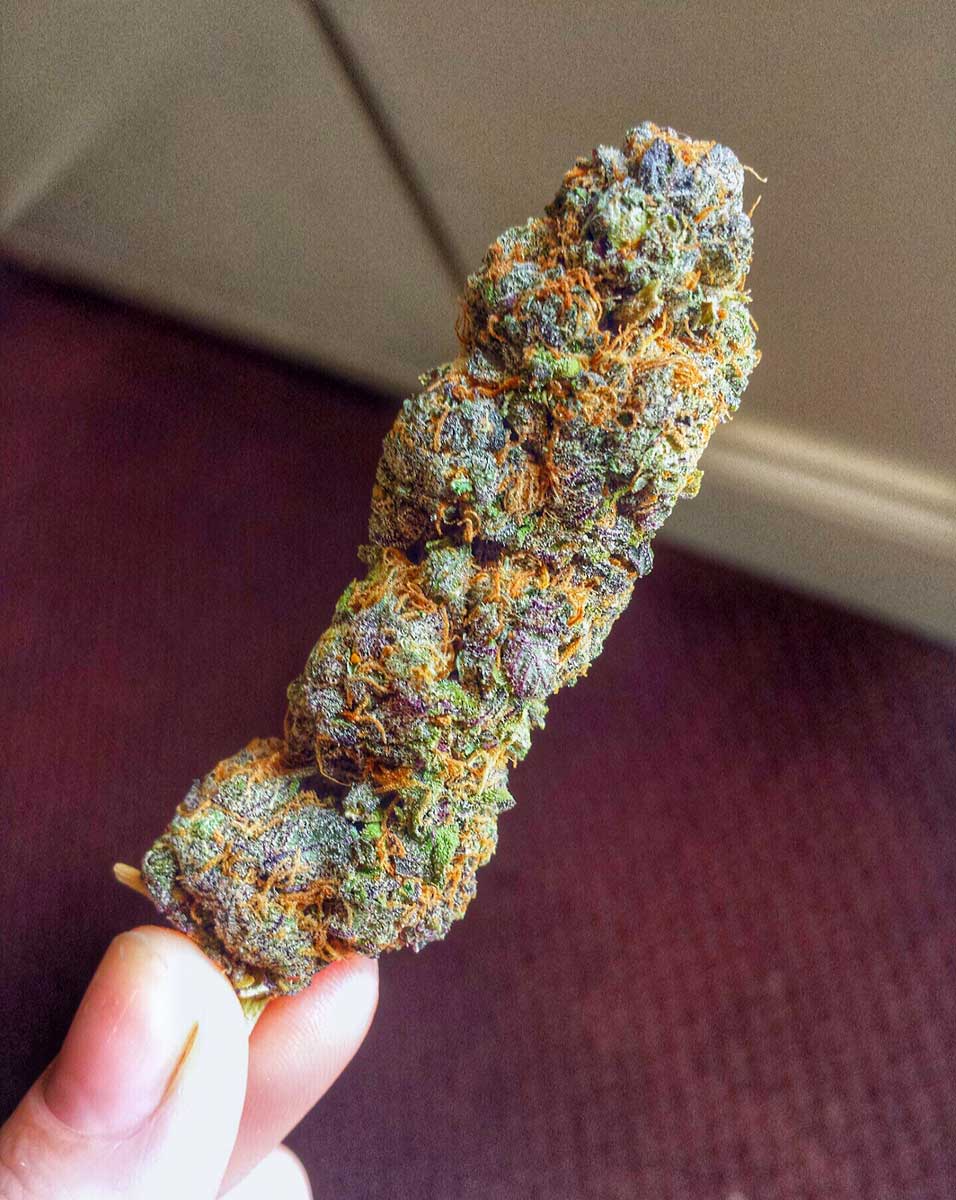
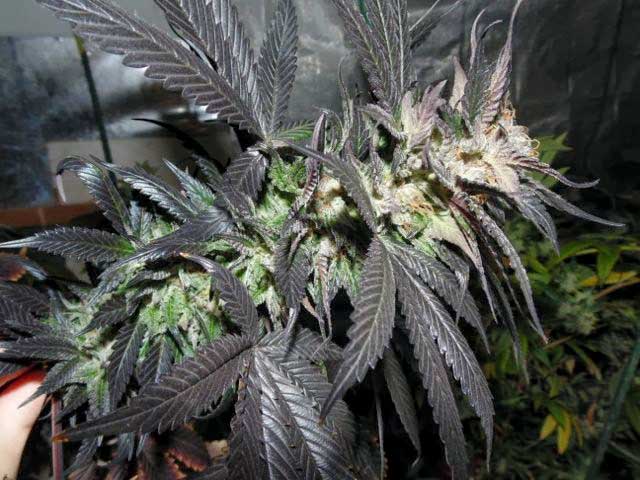
Once you hit 2+ months of curing, buds will begin losing some of their color. Bright greens and purples will become darker and less vibrant, though potency continues to improve. There is a common misconception that brighter or more vibrant colors indicates more potent buds, but that’s not the case. This myth may have started because buds that have actually turned brown (not just muted green or purple) usually have been harvested at the wrong time, overdried and/or not stored properly. You don’t want brown buds. Yet muted greens and purples do not mean the bud has lost any potency.

What do medical cannabis dispensaries do? I’ve noticed that dispensaries around here (in California) do a very short cure, only 2-4 weeks. I think this is because it’s easier and cheaper to have a fast turnaround as opposed to doing a long cure. A fast cure allows businesses to get rid of their stock sooner, so they don’t need to store buds for as long. A quick cure also allows dispensaries to sell buds that are still bright green or purple. People like bright colors in their buds, even if the colors don’t necessarily indicate a better product.
After about 6 months of curing, I haven’t really noticed more improvement in potency. Buds may continue to get smoother, but they stop getting stronger. So with a long cure, you gain potency and smoothness but lose some of the color. I recommend preparing your buds for long term storage after 6 months of curing to maintain the most potency.
After a very long cure (12+ months), the buds begin to lose their potency and smell unless you’ve prepared them for long-term storage. Over-cured buds will tend to make you feel sleepy. Unfortunately, buds don’t continue improving forever.
After 6 months, you should prepare your buds for long-term storage. If it’s just going to be a few months, this means storing your jarred buds in a cool, dry place. If you plan on storing buds for longer than that, it’s recommended that you use a vacuum seal.
Learn how to store your buds long-term
Review: Timeline for Drying & Curing
Harvest: Cut down your buds
Drying: Dry buds for 3-7 days
Start Curing: Put buds in glass jars and open daily for 2+ weeks.
Continue to cure buds (while opening jars occasionally) for as long as you want, up to 6 months.
After 6 months, you should prepare your buds for long-term storage
After 12+ months, buds will begin to lose their potency and smell unless they’ve been stored properly
Trim your buds to prevent harshness (leaves left on buds tend to be harsh). I recommend trimming leaves immediately after harvest (before drying) unless you need to leave them on to help buds dry slowly, for example if you live in a very dry area. It’s much more difficult to trim buds properly after drying.
Don’t over-dry buds or dry them too quickly – remember that drying is actually part of the curing process, and it’s better to dry buds slowly. Mostly importantly, never dry buds in an oven, a dehydrator, or in the microwave. These fast-drying methods will ruin the taste and smell of your buds, and prevent them from ever being able to cure properly.
Mesh Racks (or any way to dry buds horizontally) will help your buds dry faster, so they are a great choice if you…
- live in a high humidity area (faster drying will help prevent mold in high humidity)
- if you’re drying a LOT of buds in a small area, or
- if you just can’t make the time to trim buds on the stem. Otherwise…
Trim buds on the stem and dry them by hanging upside down for a long, slow cure. It’s the best way to do dry your buds!
Never let buds touch each other while drying! When buds that feel wet on the outside are touching, it increases the likelihood of mold. Throughout the drying/curing process, it’s a battle between drying too fast and the possibility of mold. One of the best things you can do to prevent mold is to never let buds that feel wet or moist touch each other. This goes for drying and curing. During drying, make sure you arrange your buds so that there is always some amount of air between buds that feel wet on the outside. During curing you will monitor your buds closely to make sure they never feel wet (more info below).
Notice how none of the buds are touching each other in these pics
(click for closeups)
5.) Do yourself a favor and get quart-sized glass mason jars for the curing process. Don’t get larger or smaller sized jars. Paradoxically, jars that are too large or too small will both increase the chances of mold showing up. The specific seal you get from mason jars seems to consistently get the best results when it comes to curing. It’s also important not to completely fill up your jars with bud; try to leave at least 1.5 – 2″ of air space at the top of your jars.
6.) Cure your buds for at least 2-4 weeks (1st level cure) – trust me it’s worth it! You can always sample buds along the way to see for yourself how big a difference it makes.
7.) Open all the jars daily (at least) for the first few weeks of curing, even if you’ve overdried your buds. This is an important part of the curing process and will also give you a chance to check on the buds.
8.) Never place anything wet in your jars during curing to try to “fix” overdried buds. I’ve heard of people sticking a piece of potato or other things like that to try to get more moisture to the buds. It doesn’t help the curing process, can negatively affect bud flavor, and may even cause mold. Even Humidipaks, which can help re-hydrate buds, will not improve the curing process for the first few weeks. If you’ve overdried you buds, just continue the curing process as normal for the first few weeks to achieve the best results.
9.) It’s normal for buds to occasionally feel wet or moist during the curing process as moisture from the inside of the cannabis buds works its way to the outside. This is actually what you want because it means that enough water was retained during the drying process for a great cure! Because you are opening all your buds daily for the first few weeks of curing, you will be able to identify this quickly. If buds ever feel wet or moist when you open the jars, you need to leave the jars open for 20 minutes to an hour (or until buds feel dry on the outside again) before closing jars again. You should also check buds (by opening all the jars) a few times a day when buds have recently seemed moist. This will help dry out the buds so they never feel moist on the outside while inside the jars. This will prevent mold while allowing the curing process to continue perfectly.
10.) 2 weeks of curing is generally considered the “minimum” amount of time for acceptable curing. 4 weeks of curing is a great goal. Letting buds cure for even longer is better, Yet after 6 months of curing, you won’t really see further gains. That’s why it’s recommended to prepare buds for long-term storage once you hit 6 months.
Read the complete article with step-by-step instructions on how to dry/cure your buds here: https://www.growweedeasy.com/how-to-cure-buds