by Nebula Haze
A beginner grower recently asked, “How do I grow cannabis in a grow cube like that?”
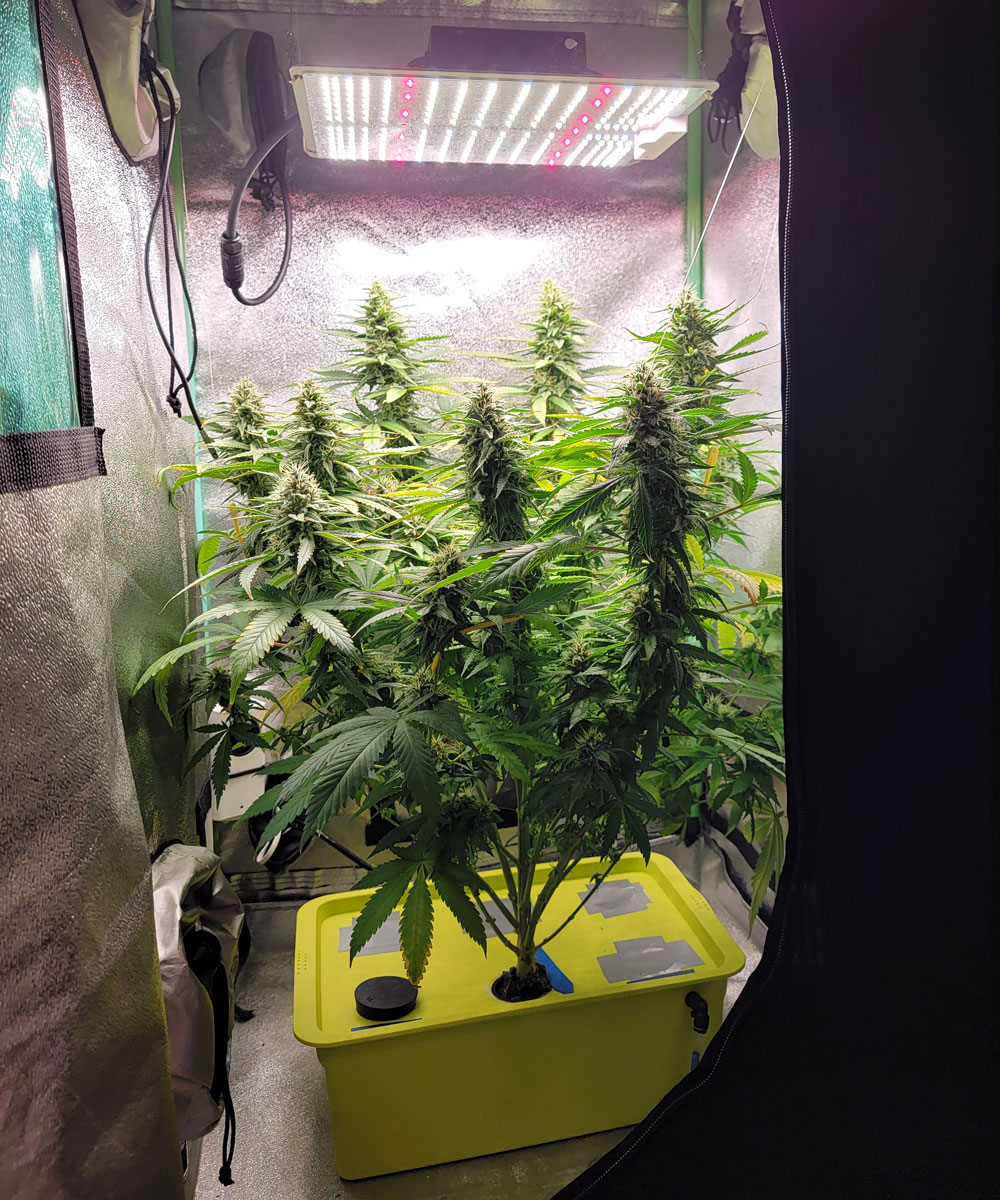
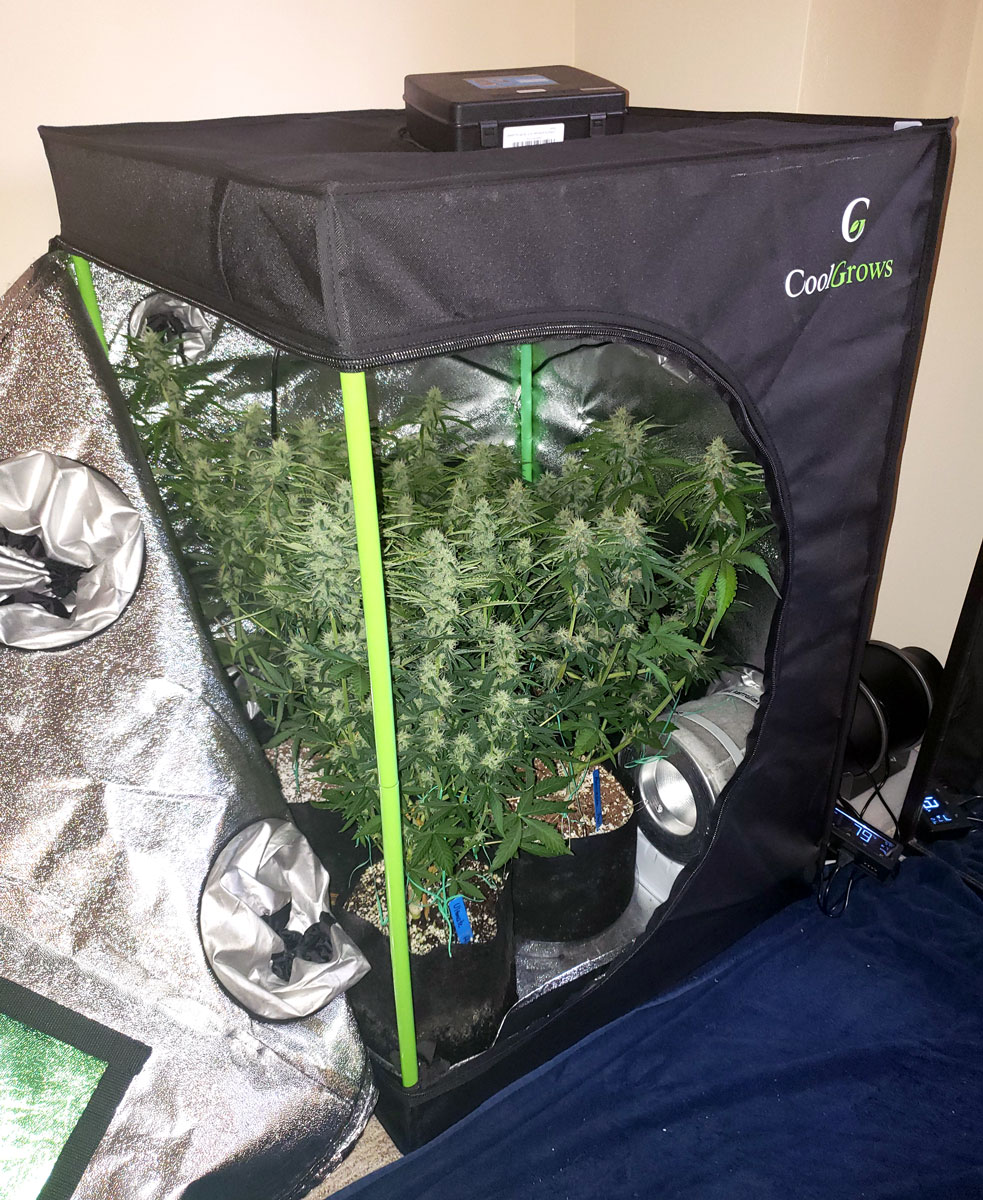
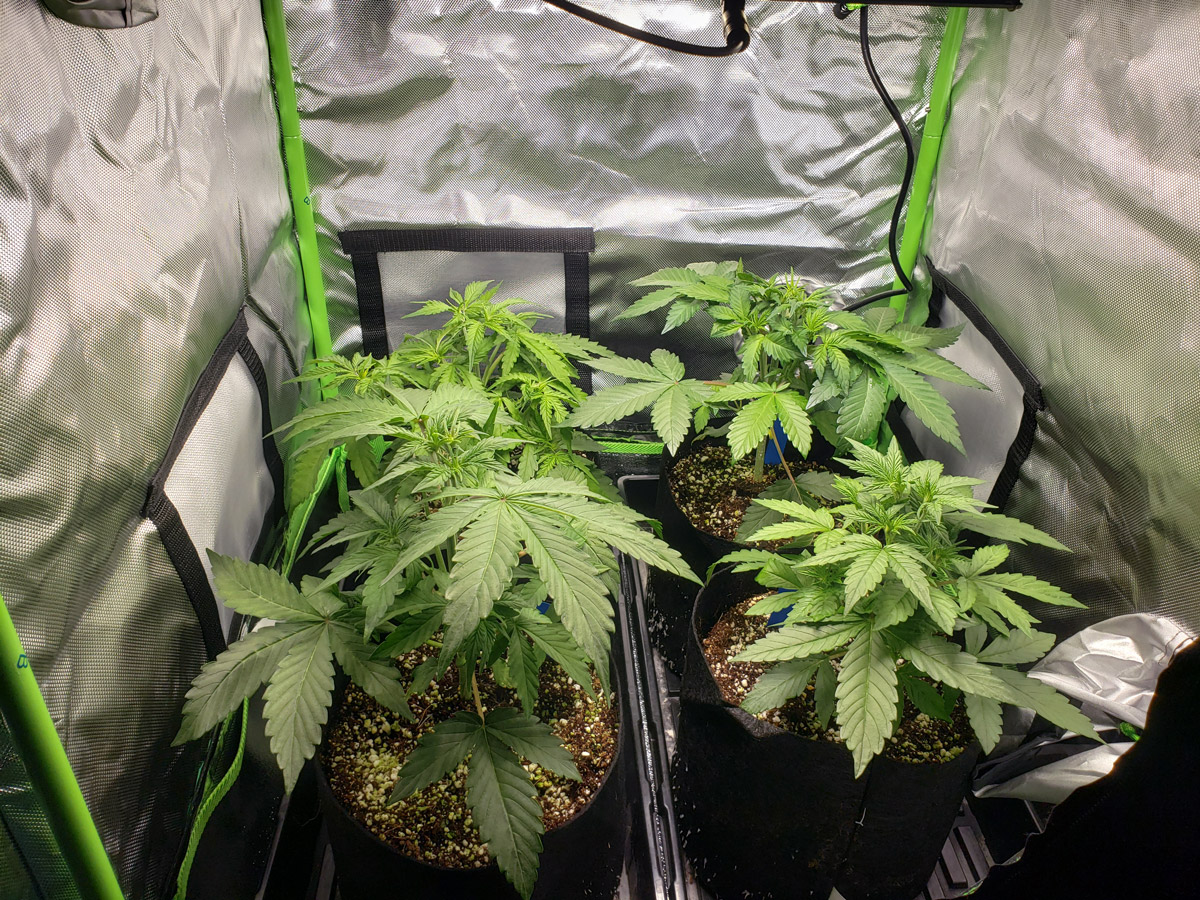
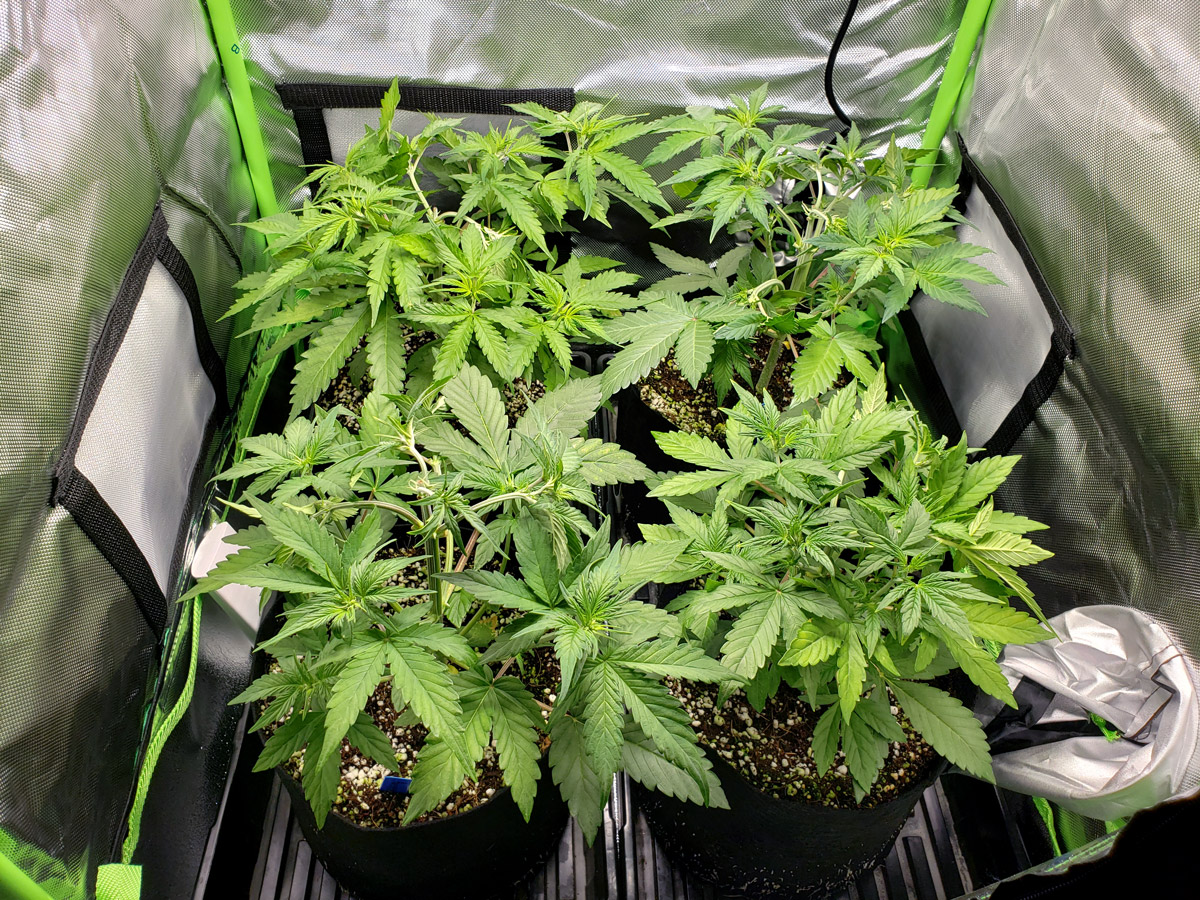
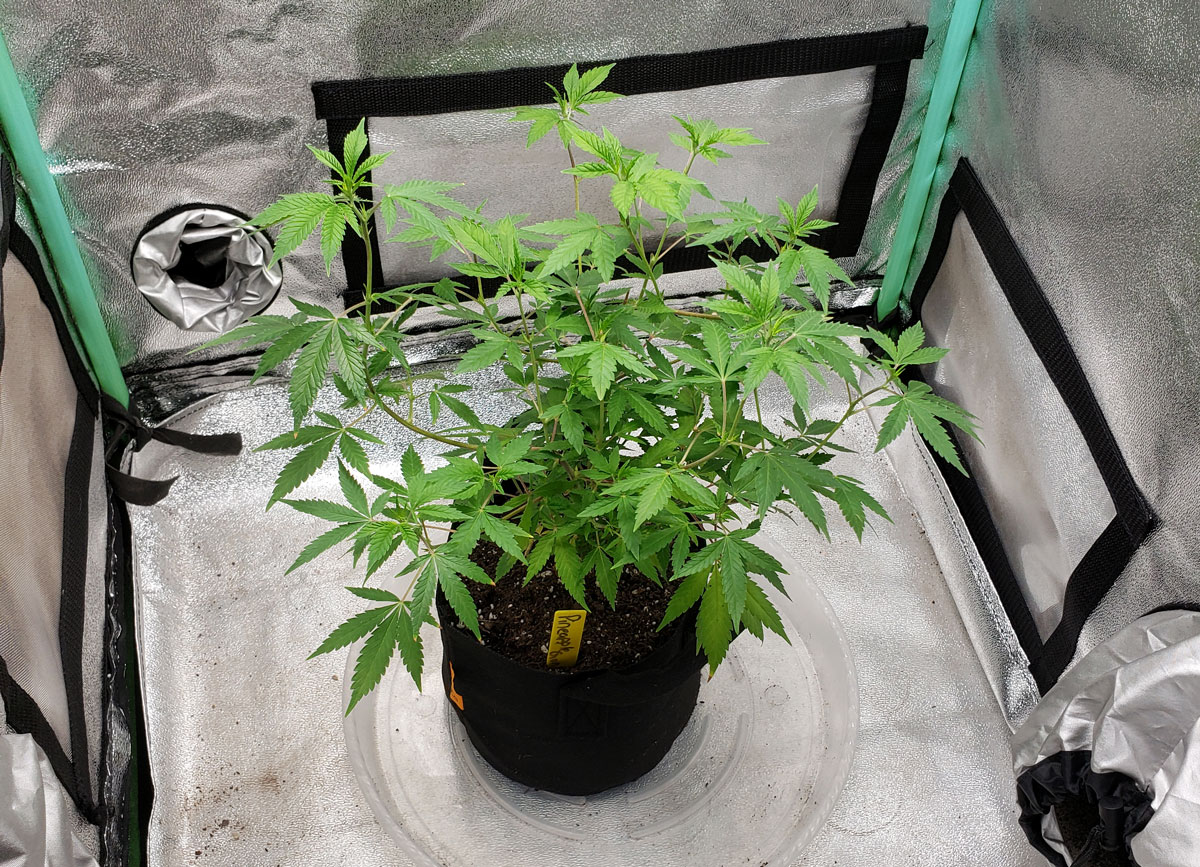
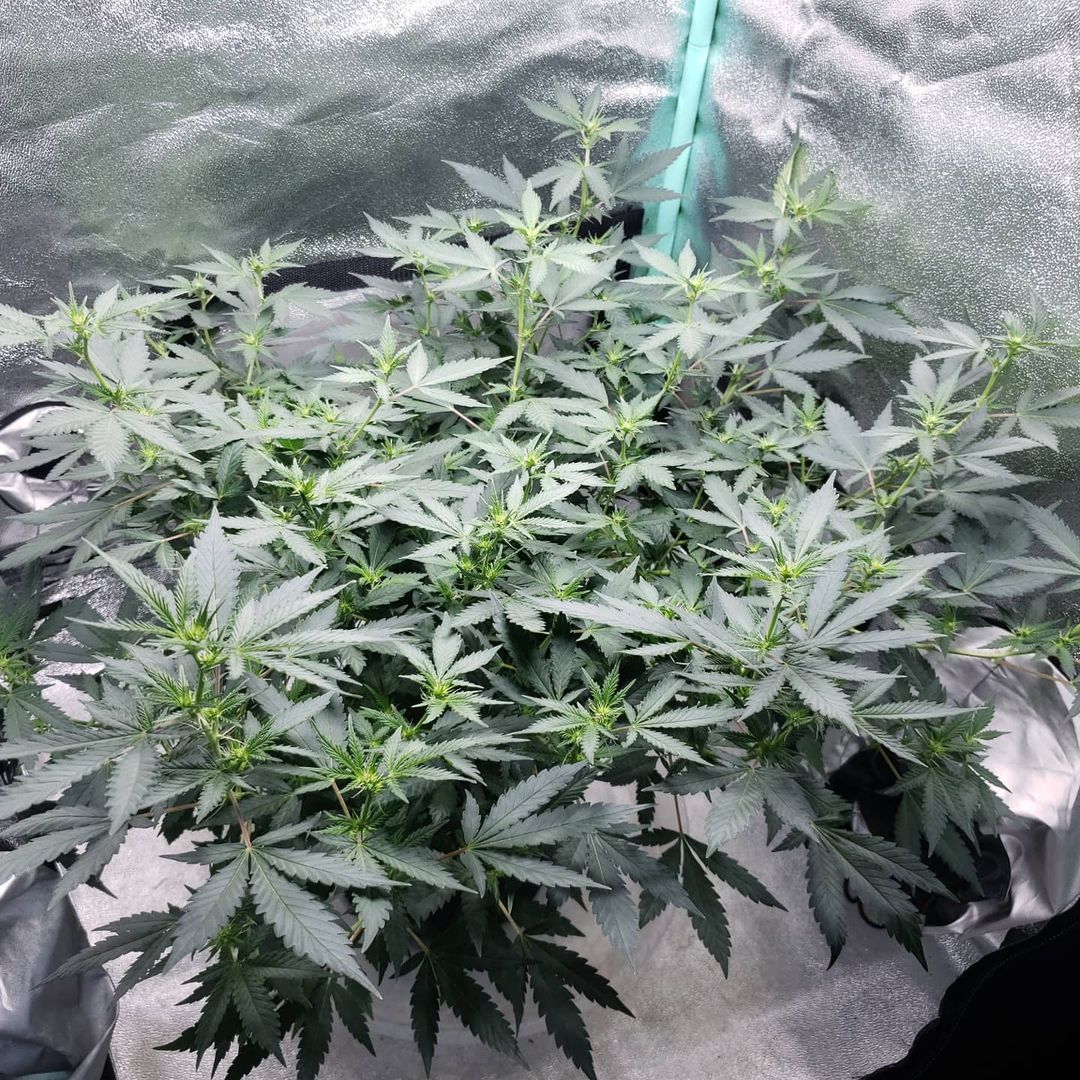
Cannabis plants in a 2’x2’x3′ grow tent under a Spider Farmer SF1000 LED grow light.
I realized this grow setup really is like a “grow cube” for marijuana plants. It’s a tiny “microgrowery” without any DIY aspects like a space bucket. It contains smells and nurtures small cannabis plants from when they’re seedlings to a productive harvest. Just follow the instructions on this tutorial to achieve similar results yourself at home.
A “Cannabis Grow Cube” with a good LED grow light can produce a ton of weed in a small space. For this size tent, I recommend an LED that uses about 100W of electricity. A bigger size tends to get a bit too hot for this small space. All of the pictures on this tutorial page feature either the HLG 100 V2 4000k or Spider Farmer SF1000 (which are both 100W LED grow lights) and those models get excellent yields and bud quality. However, any high-quality cannabis LED grow light in the 100W size range should work.
When set up right, you can produce a surprising amount of weed in a tiny space!
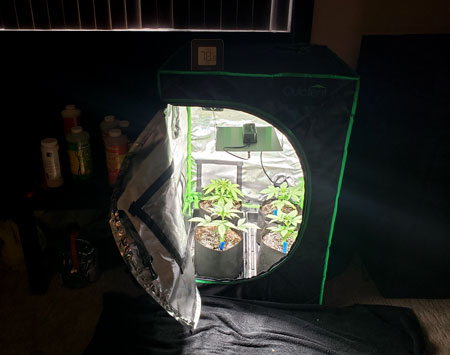
What is a cannabis “Grow Cube”? It’s just a cool way to refer to a small, versatile grow tent well-suited to growing weed.
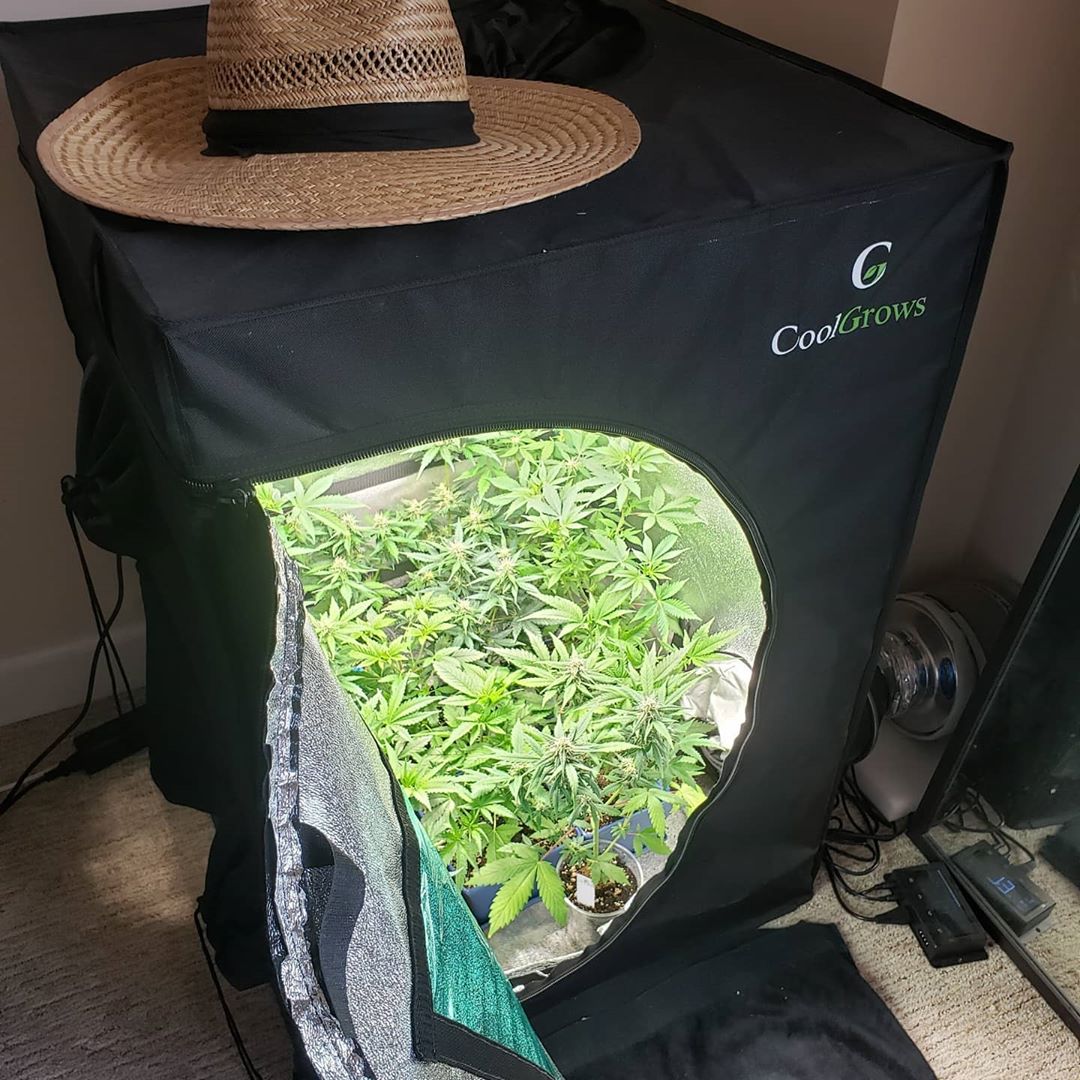
When it’s all closed up, it looks like a big black cube.
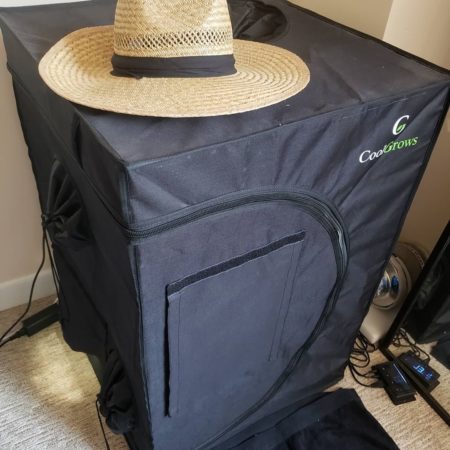
This is a remarkably easy way to grow weed and fits in the corner of your bedroom.
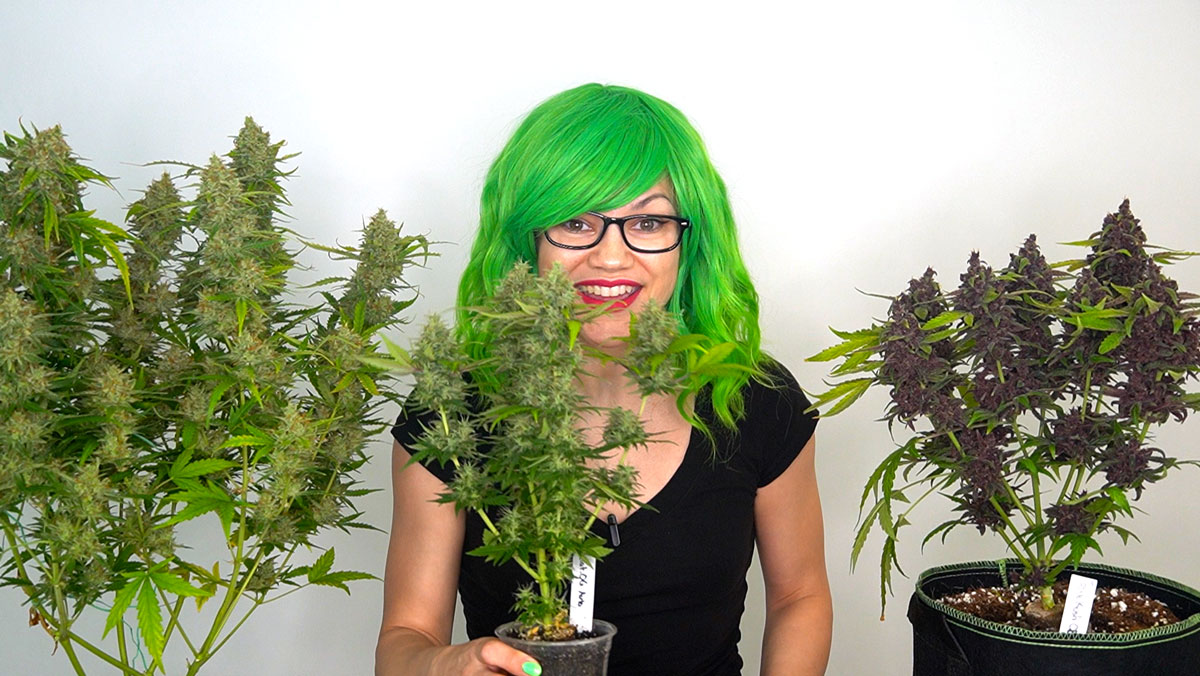
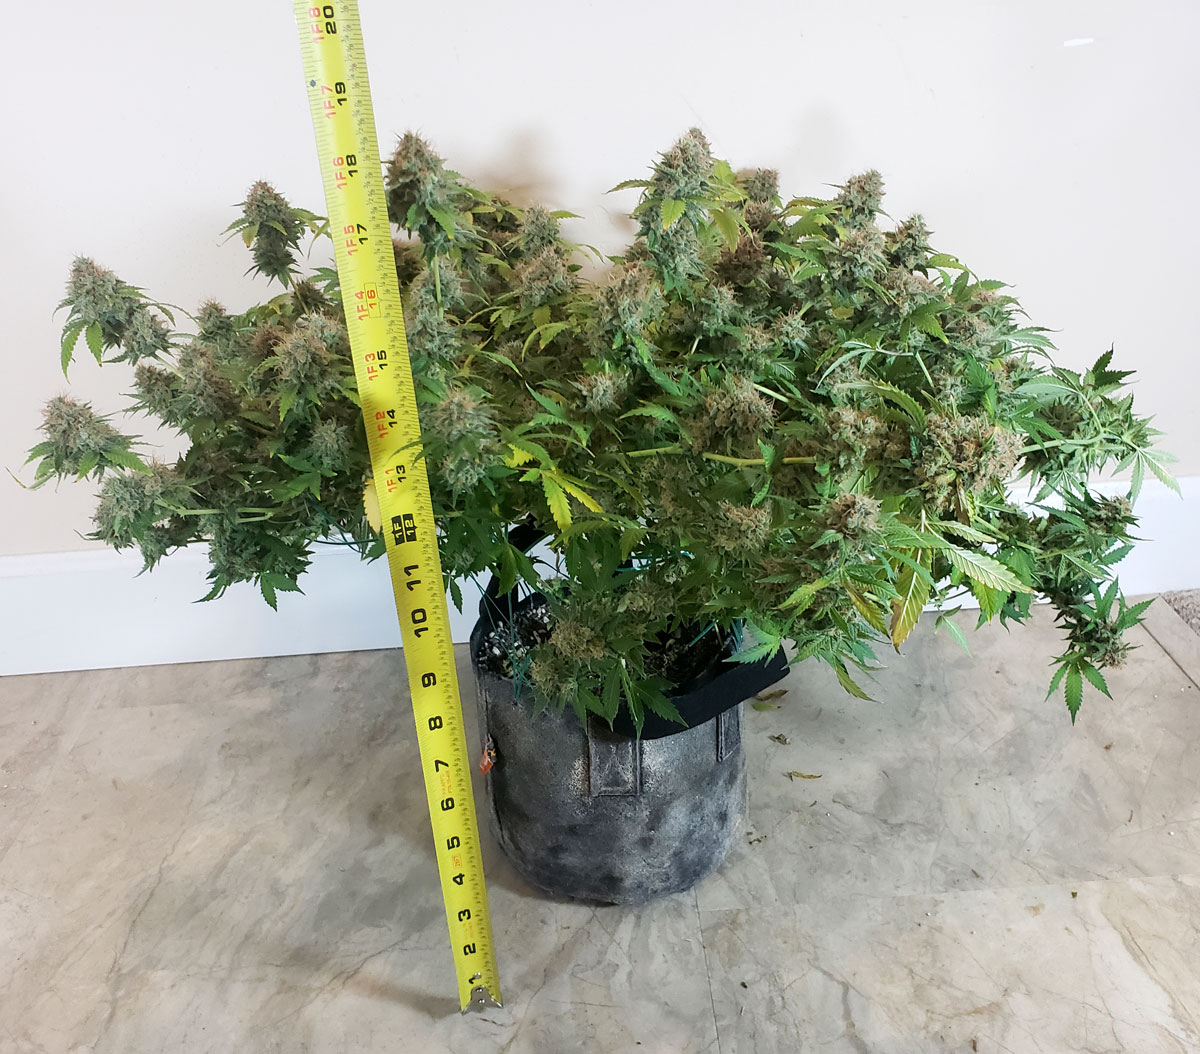
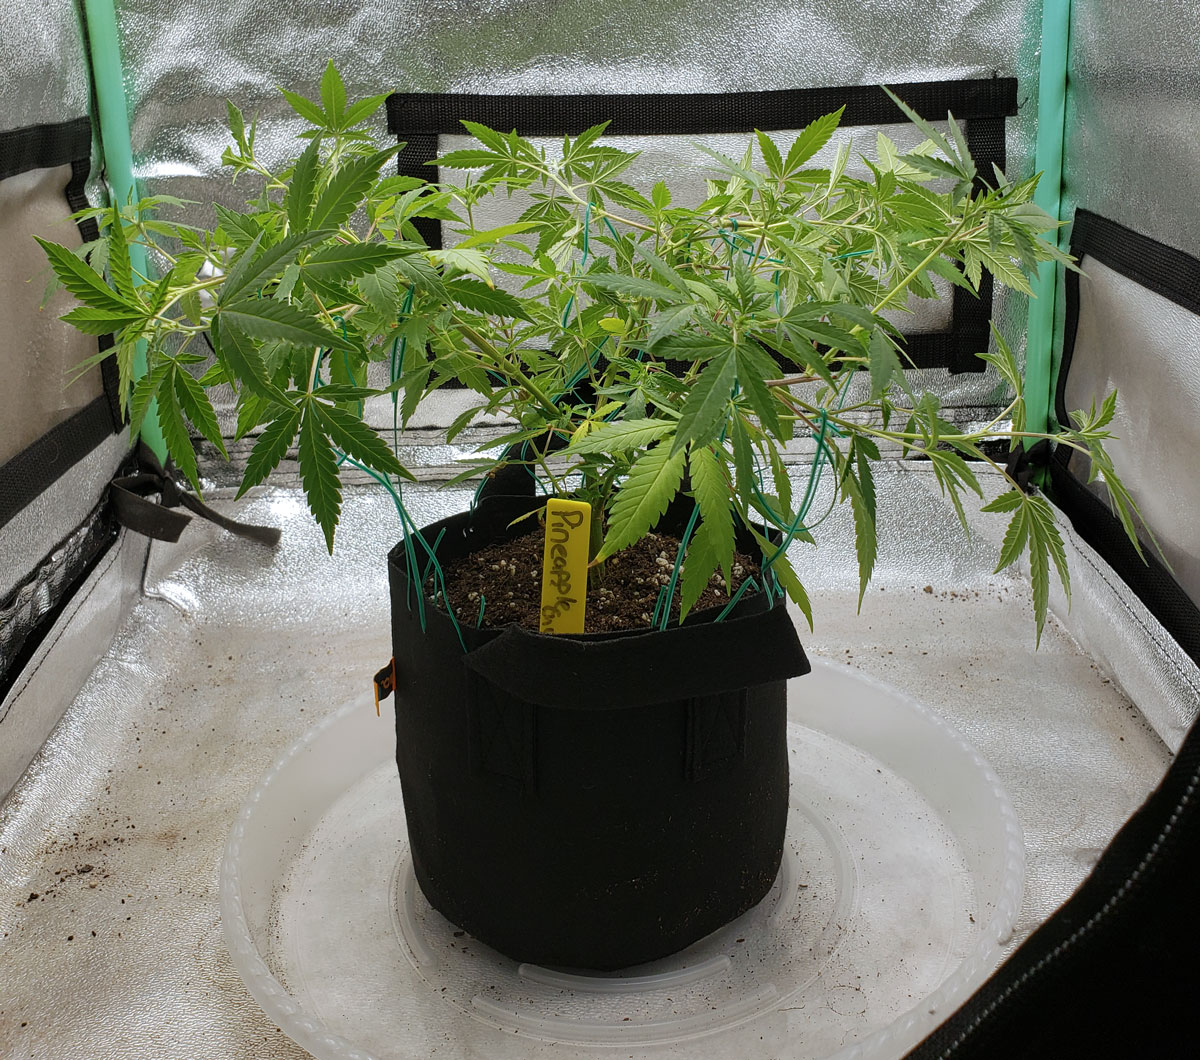
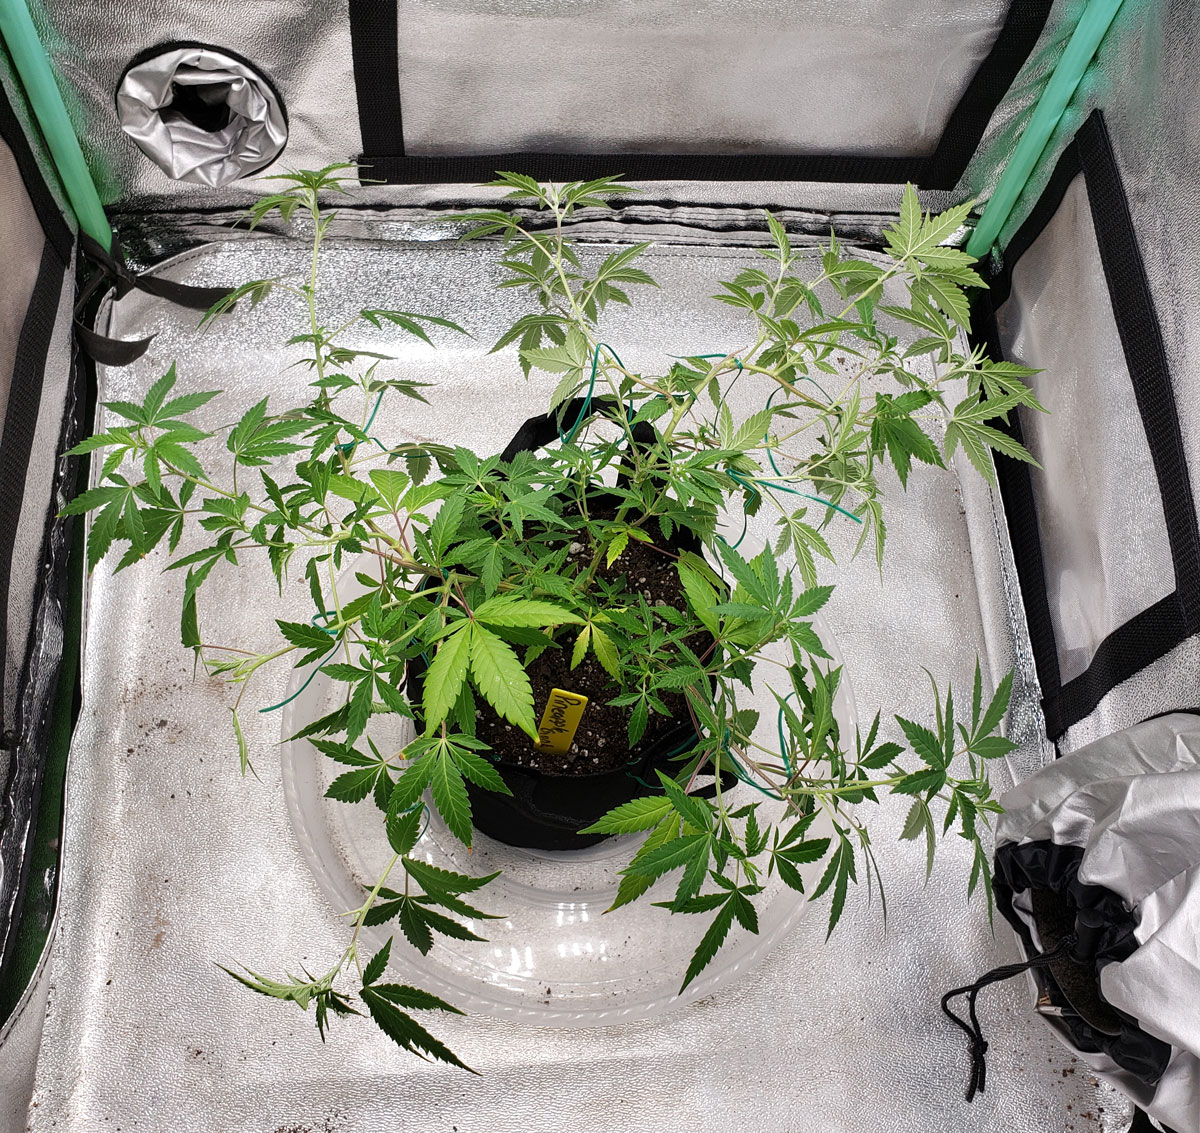
A Pineapple Chunk plant I grew in one of these cannabis Grow Cubes.

That cannabis plant above was only 18″ (45 cm) tall at harvest, and produced several ounces of weed!
Follow the step-by-step instructions below to copy these results.
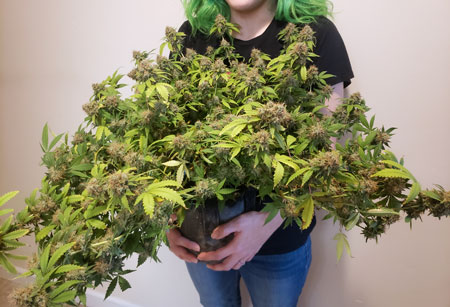
My partner Sirius took a picture of me holding it just before harvest. All the buds started falling over from their own weight.
I will show you exactly how to grow 1-4 plants successfully in this cannabis grow cube so you also make a ton of high-quality buds in one quick harvest, even in a really small space. Make sure to start with good genetics and follow the directions below to ensure you produce a top-shelf weed (and lots of it!).
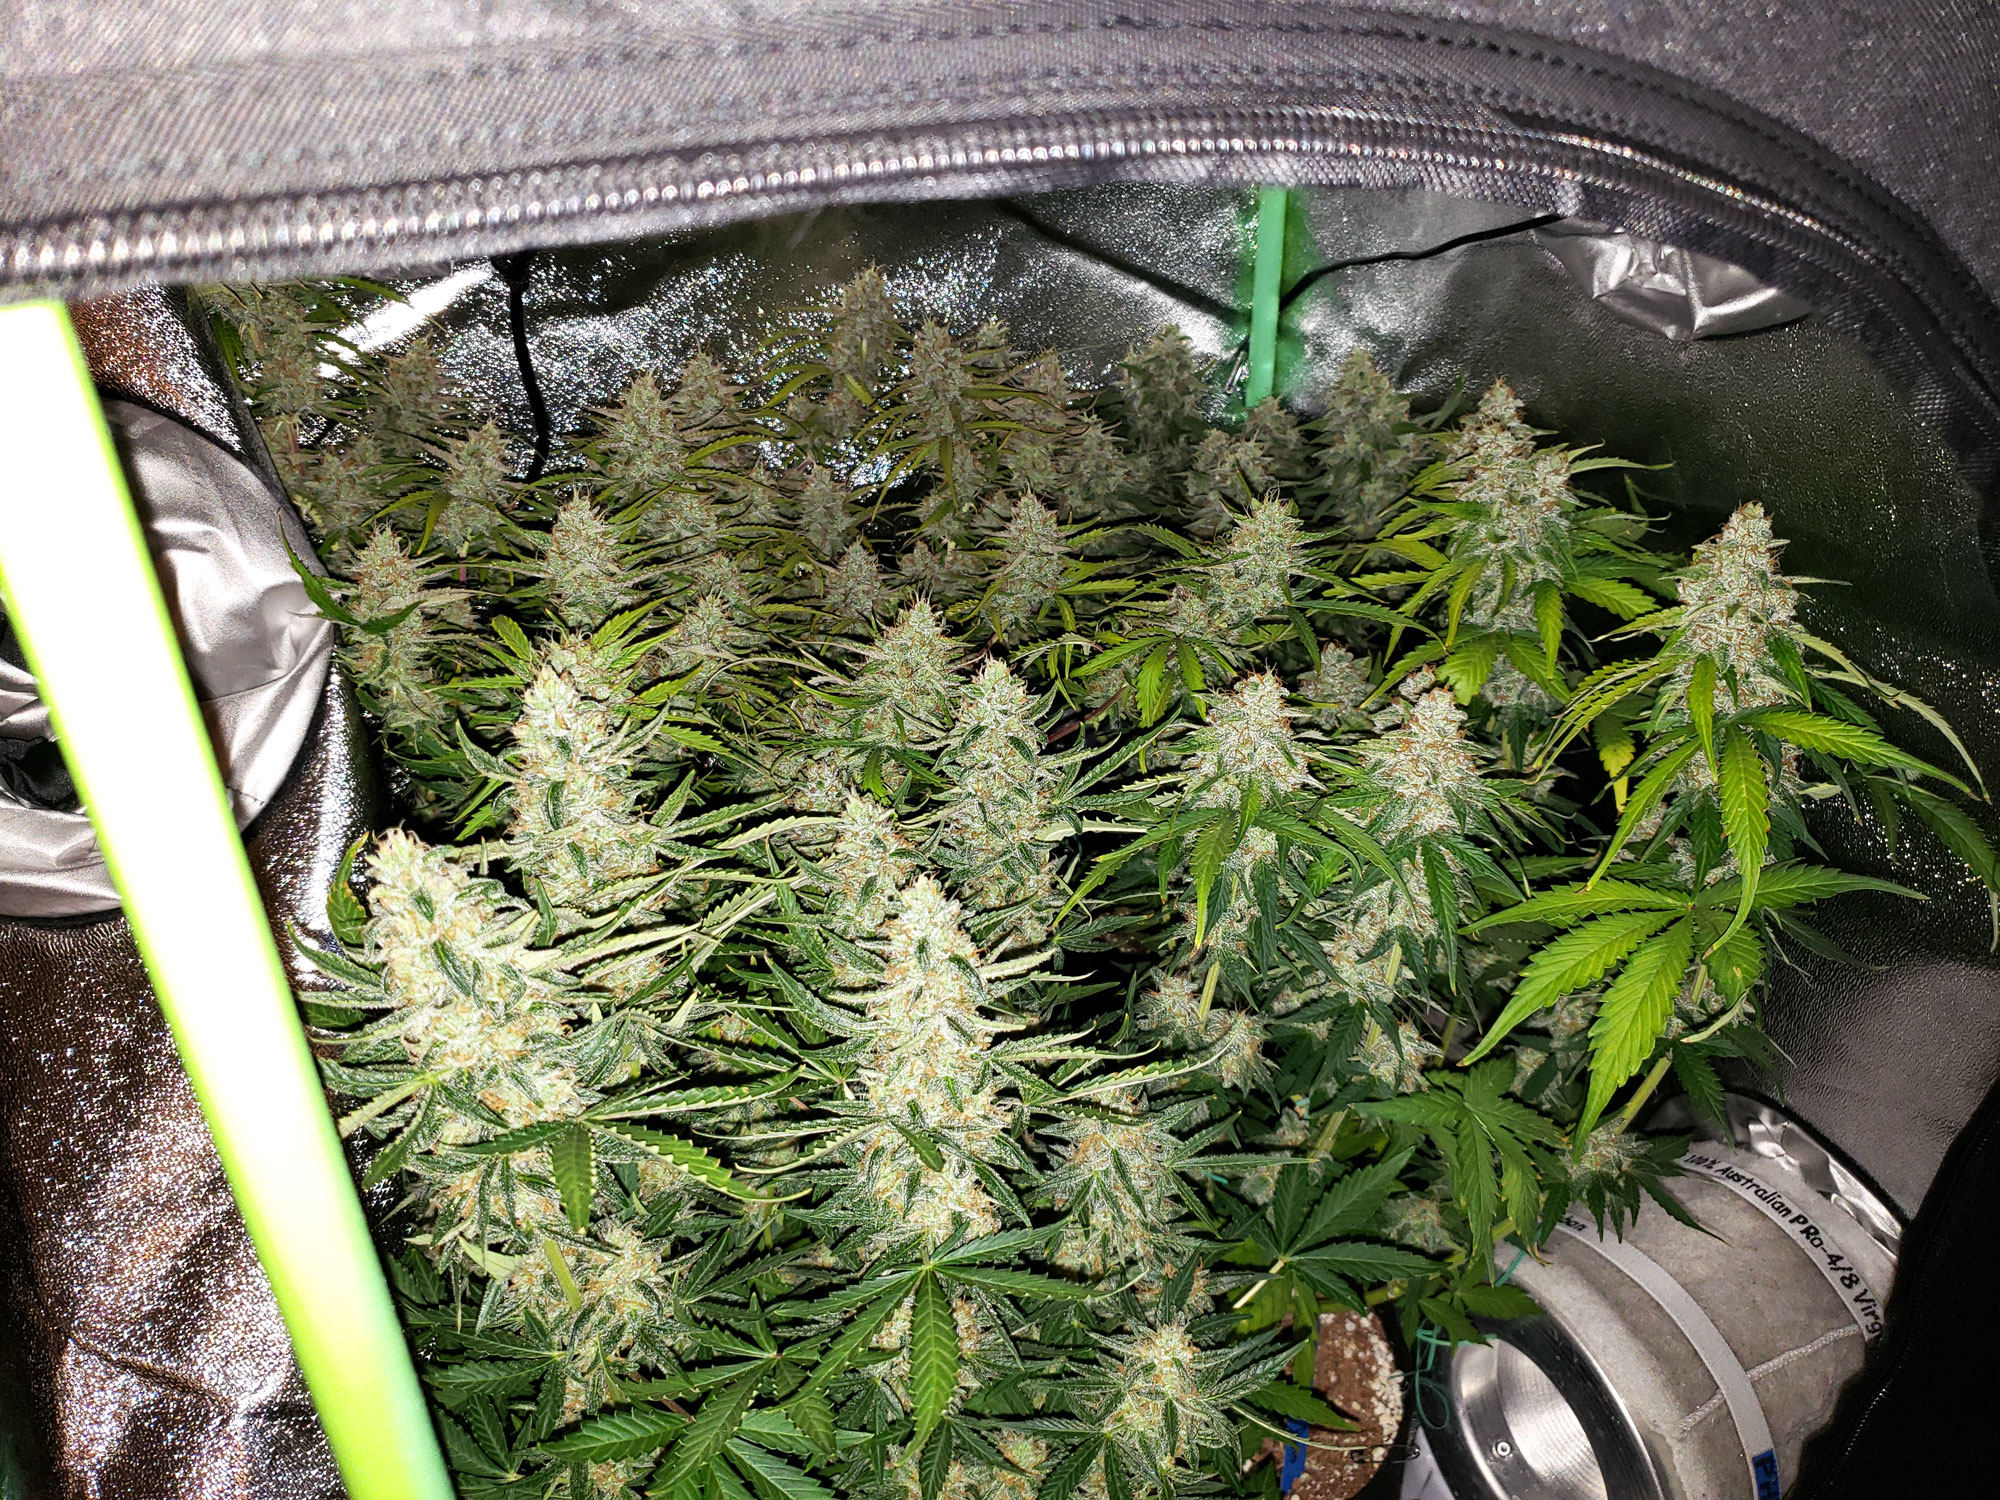
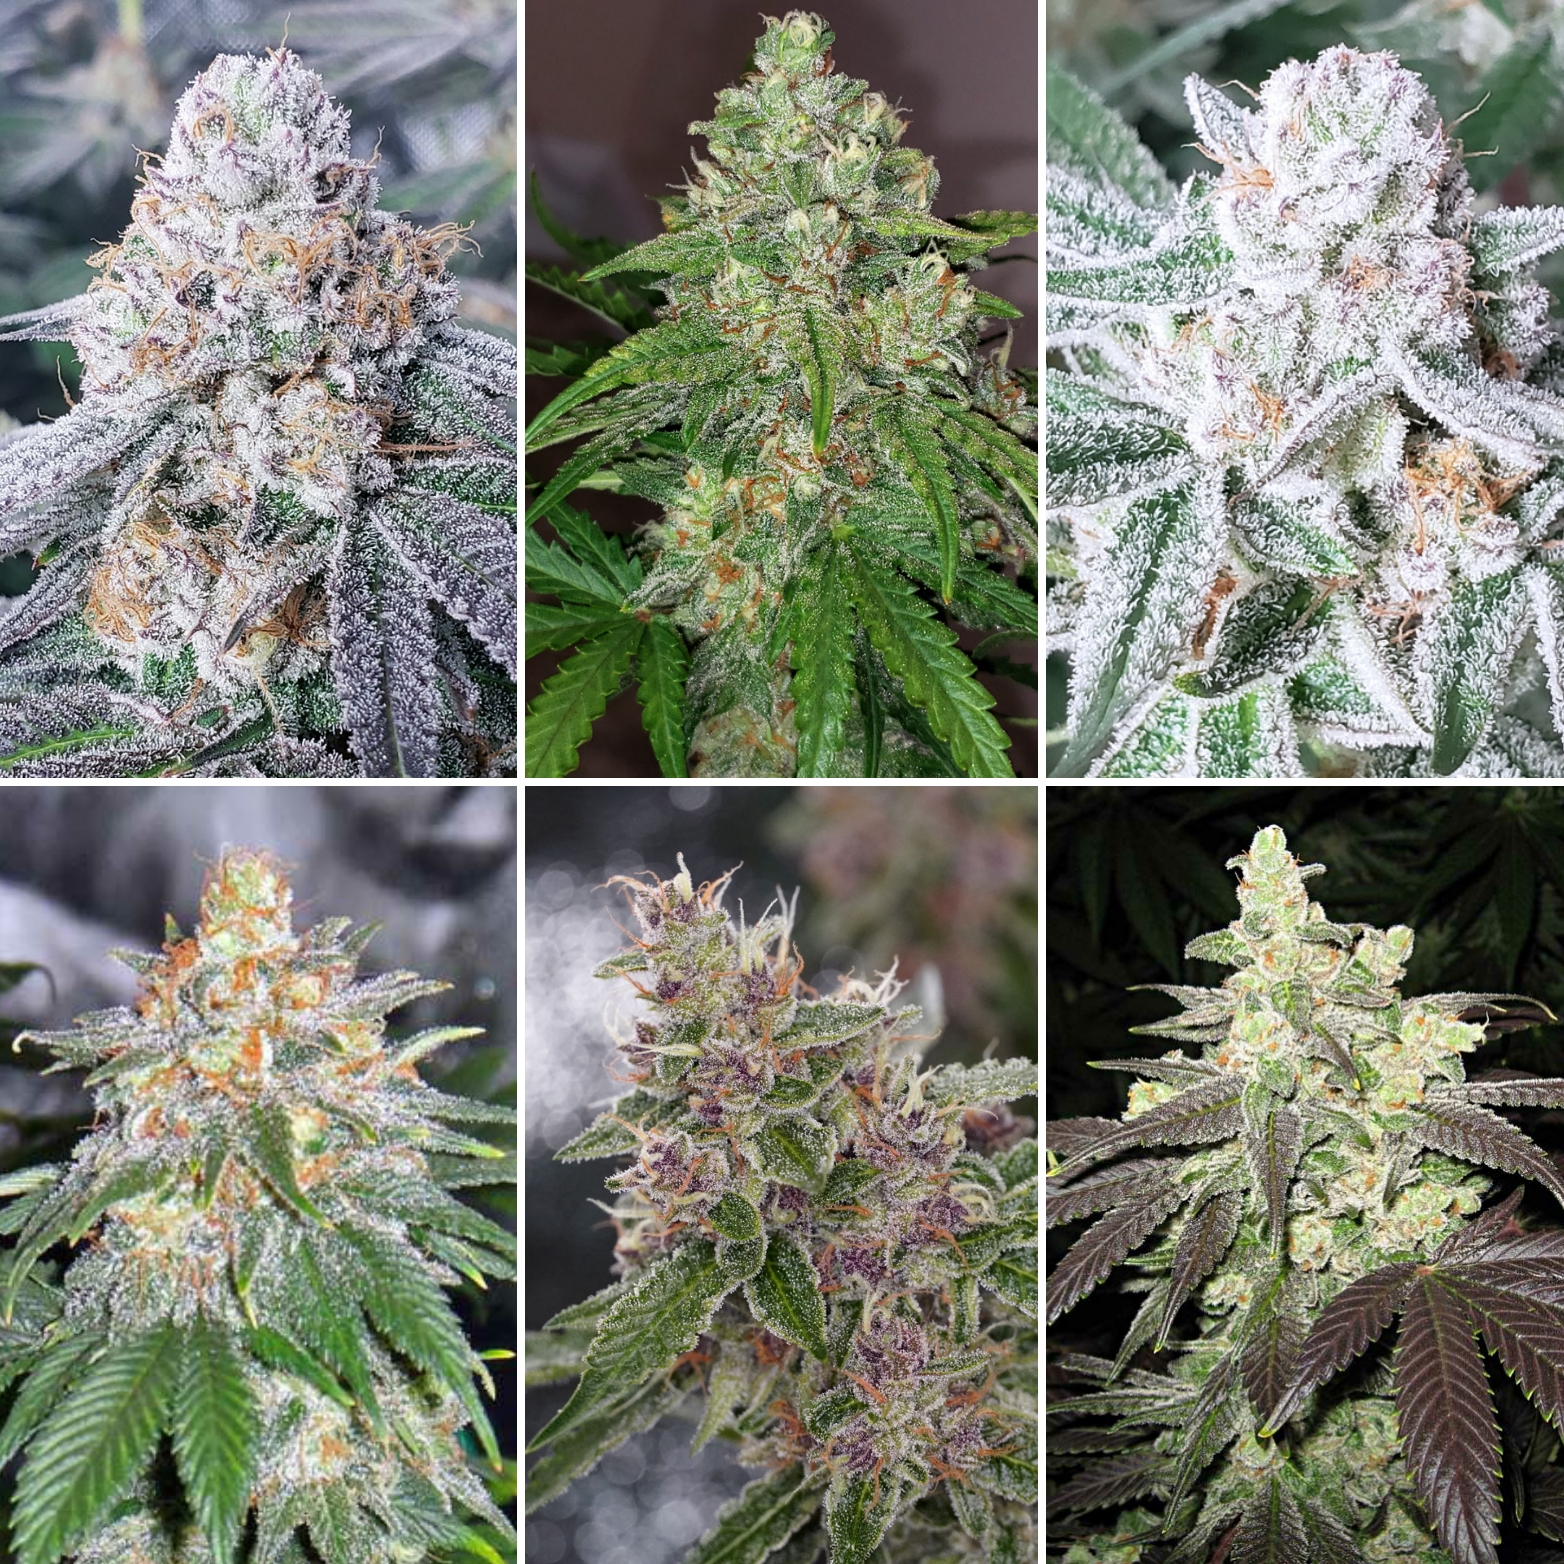
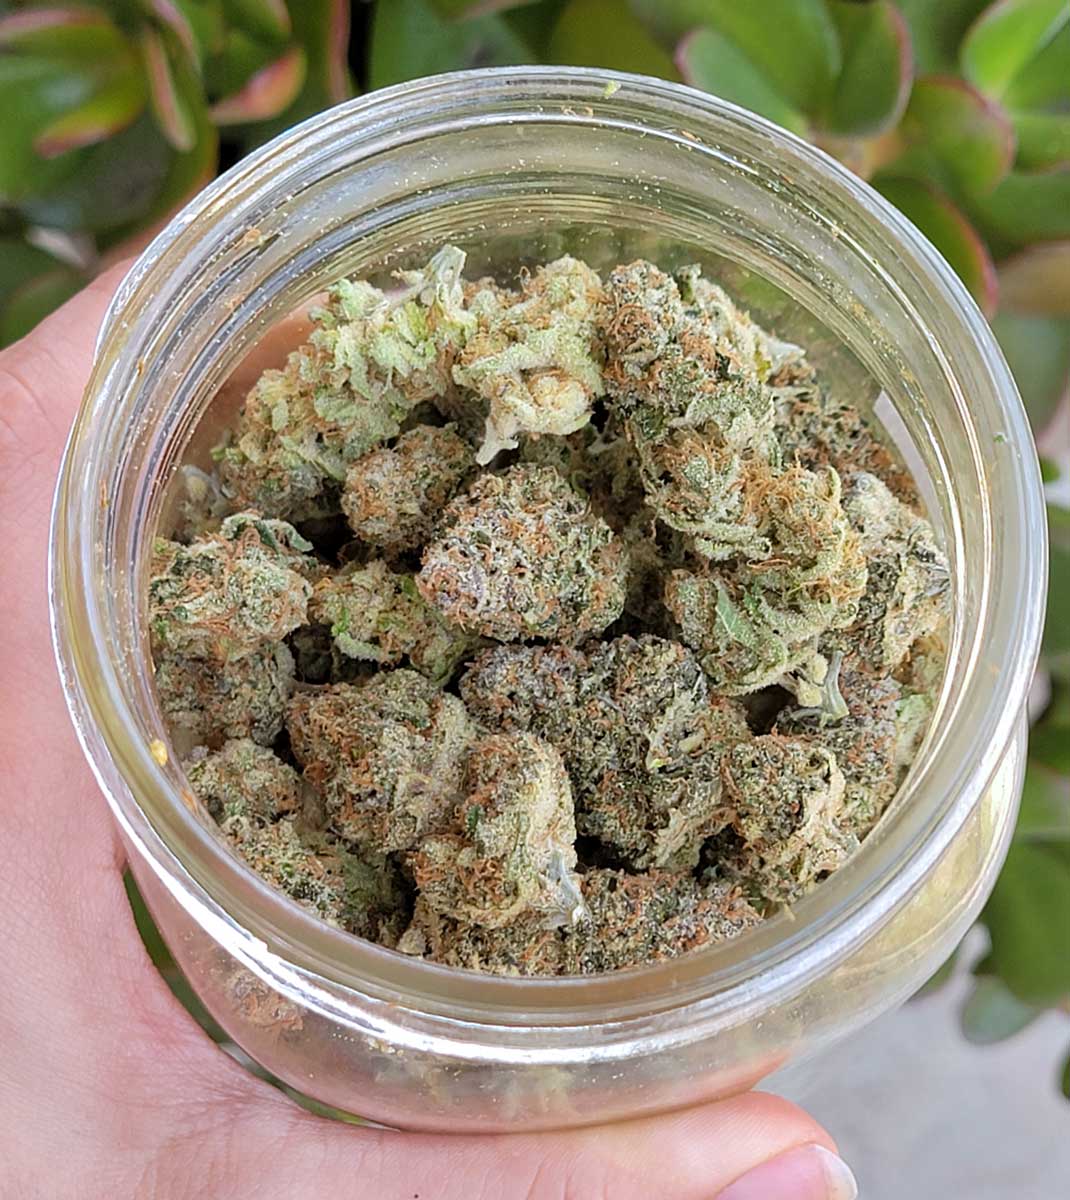
Here’s an example of bud quality grown in this setup.

Supplies for a Cannabis Grow Cube Setup
Here’s a complete supplies list to make your own cannabis grow cube.
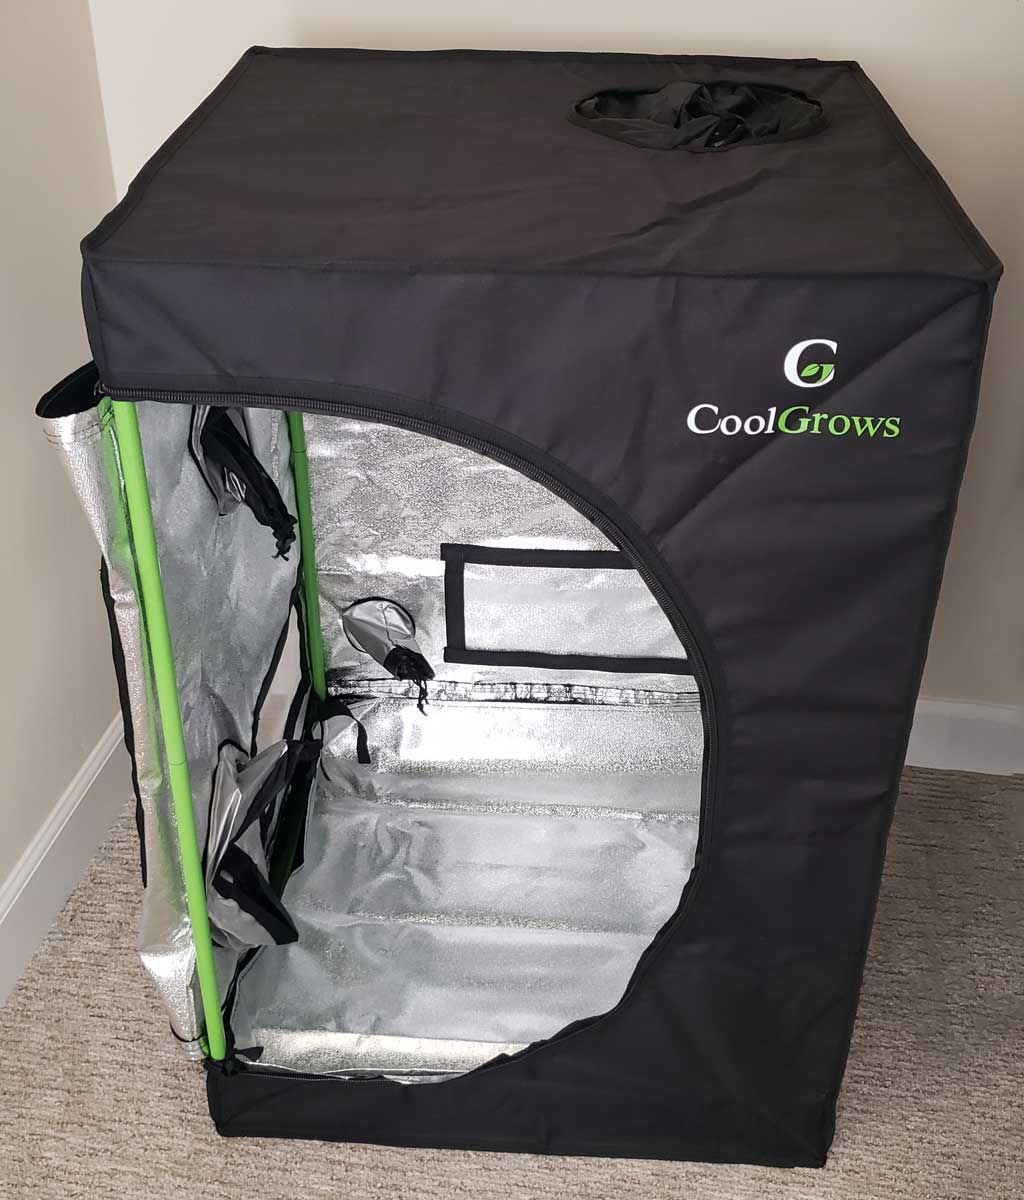
2’x2’x3′ Grow Tent
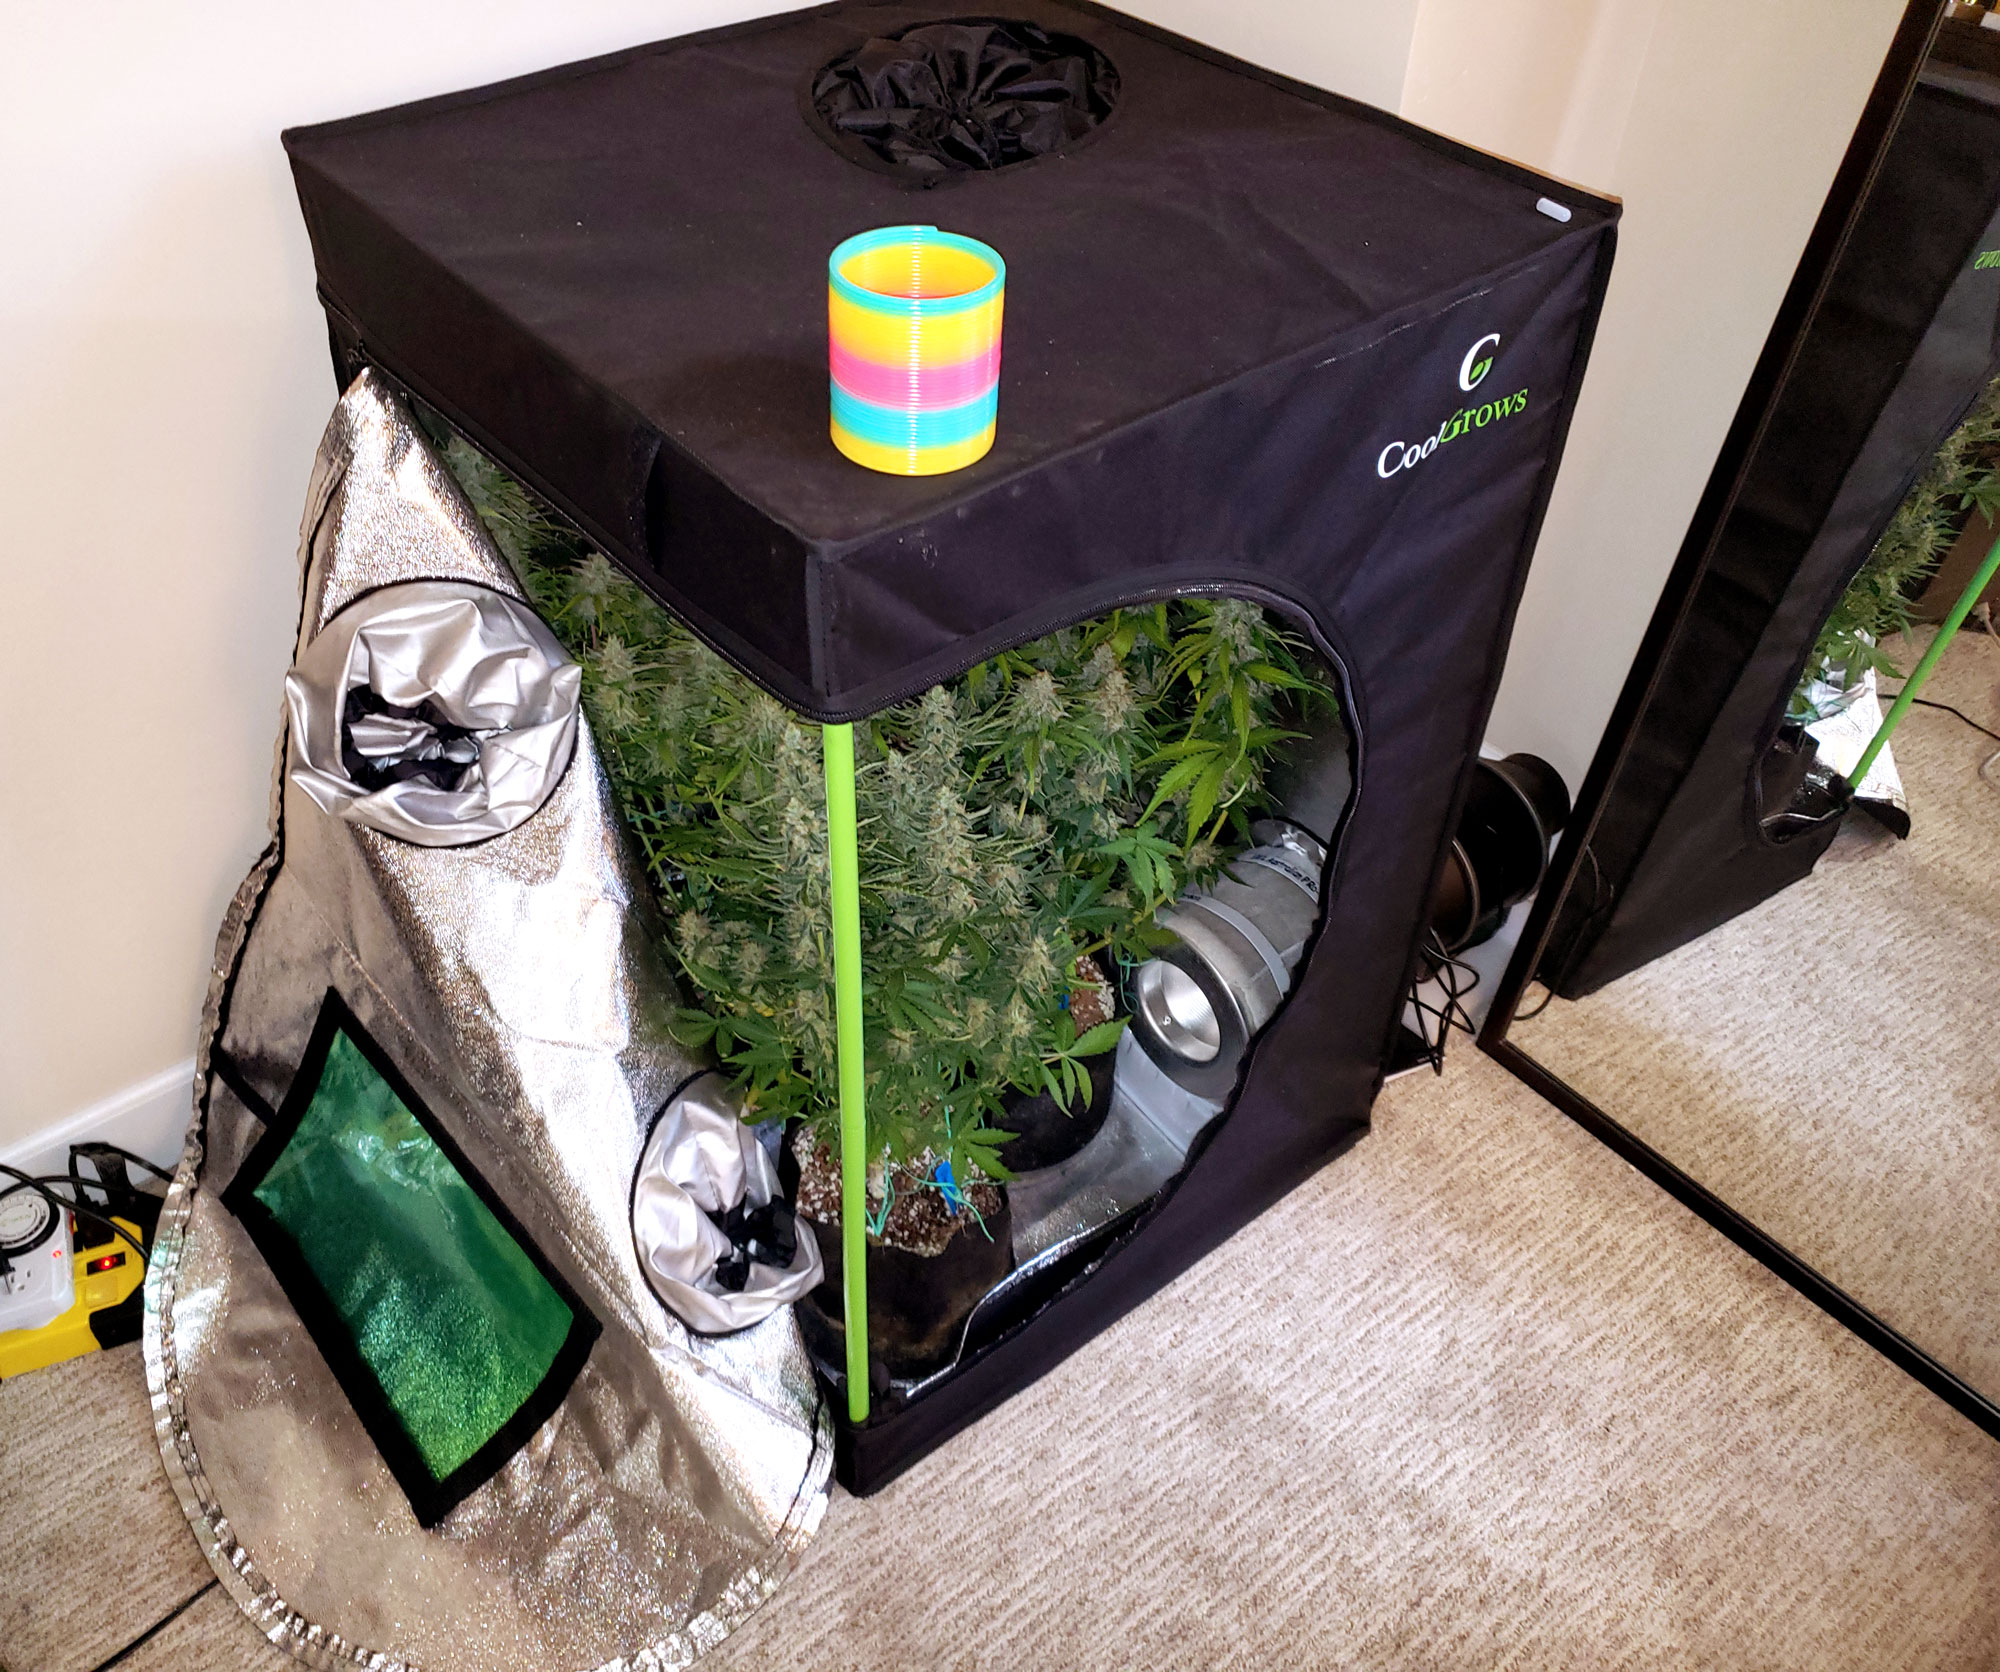
A small grow tent that is 2’x2′ and 3-4′ tall. Most pictures on this page use the 2’x2’x3′ Grow Tent by CoolGrows, and a few use the slightly taller 2’x2’x4′ grow tent. I have had good experiences with the CoolGrows, Vivosun, and Melonfarm brands for small grow tents. But any similarly sized grow tent will be perfect for this cannabis grow style.
Cost: $50
A 2’x2’x3′ Grow Tent is tiny but can produce several ounces of weed when used correctly. Get a slightly taller 2’x2’x4′ grow tent if you want to grow bigger plants.

Here’s my CoolGrows 2x2x3′ grow tent with cannabis plants inside. CoolGrows is a good brand, but any similar 2’x2′ grow tent should work with this tutorial. Vivosun’s version of this size grow tent is the most popular on Amazon.

100W LED Grow Light
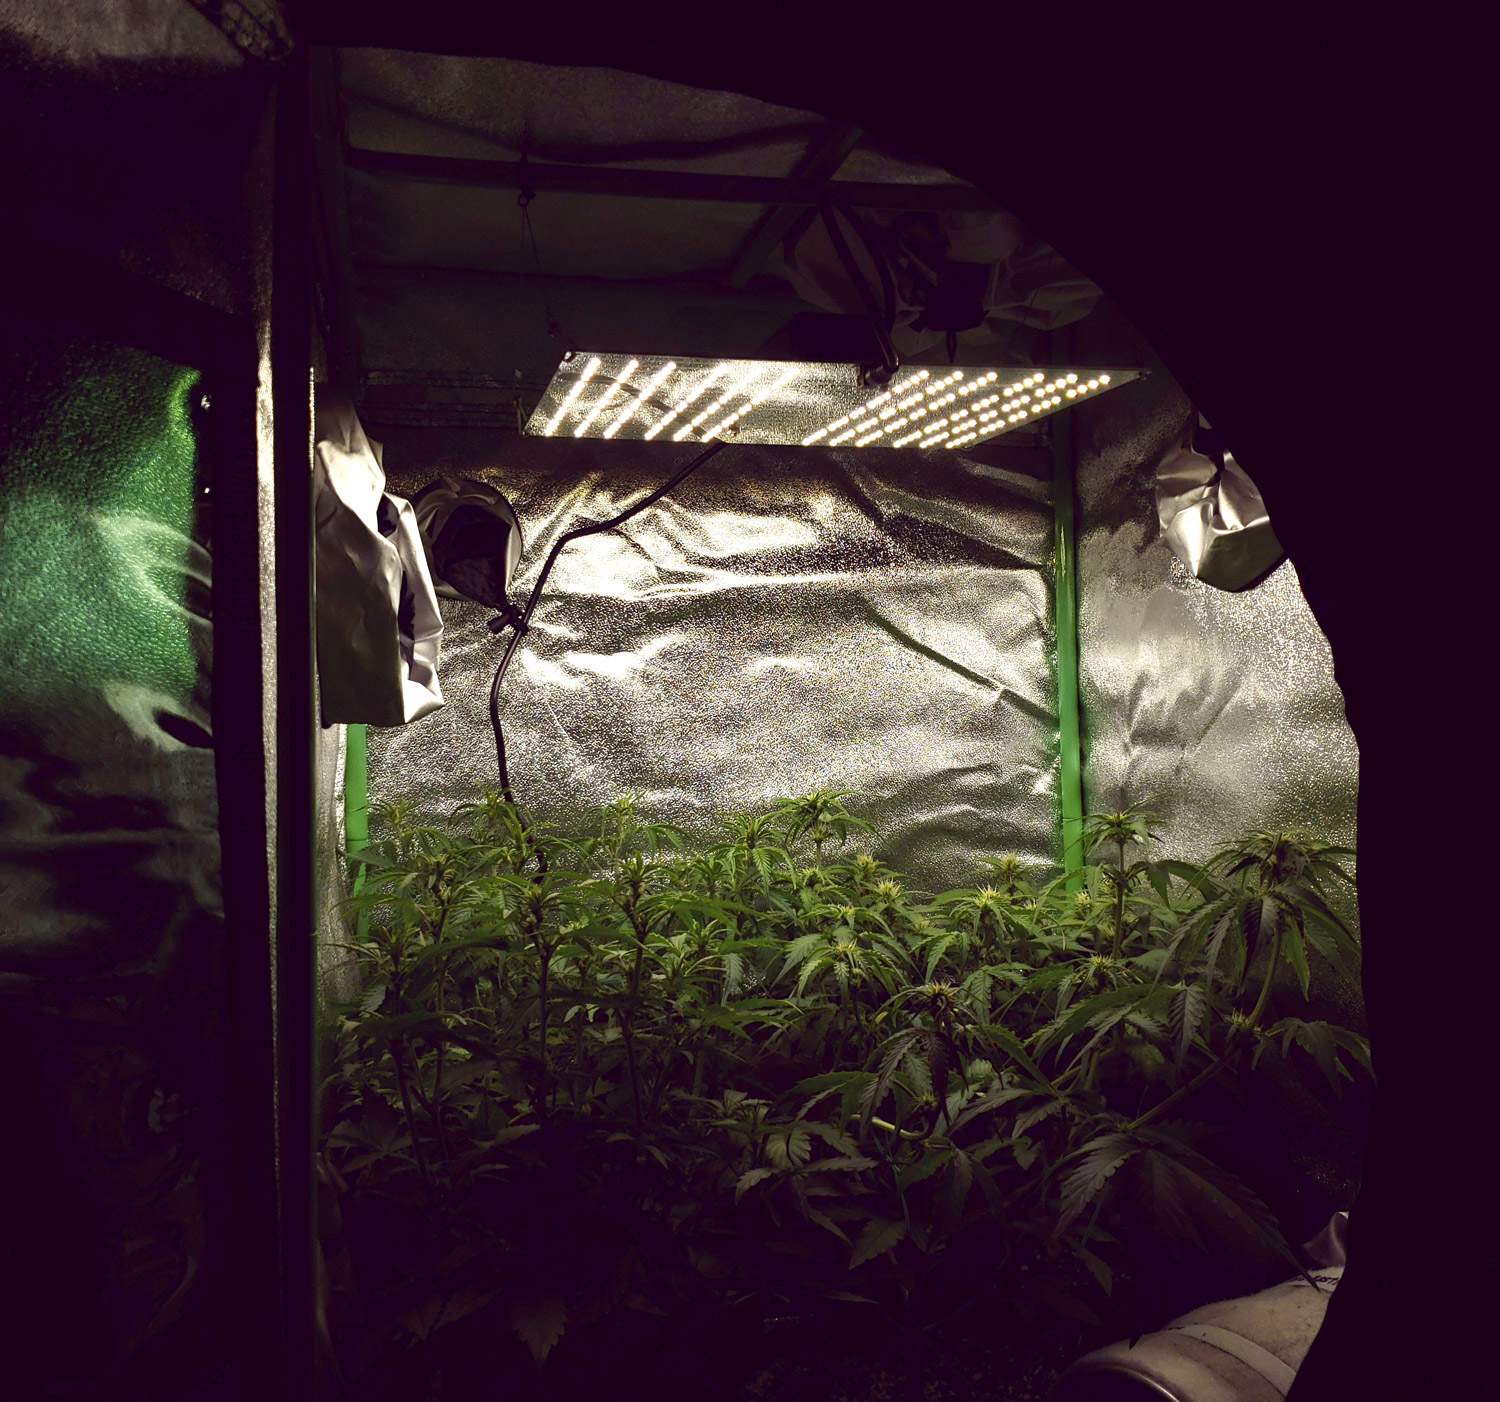
Cannabis plants grow fast and healthy under the Spider Farmer SF1000 LED grow light, which costs only $90 and comes with a handy dimmer to adjust the brightness.
Cost: $90
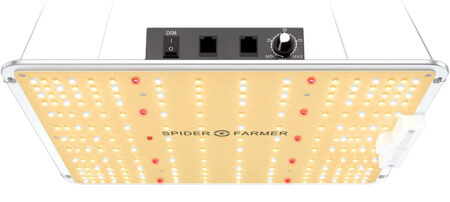
The Spider Farmer SF1000 LED grow light in action. (Can be surprisingly close to plants without light stress)
Alternative light: I also have had great results with the $150 HLG 100 Quantum Board (100W LED grow light) in this setup. However, it costs $50 more and doesn’t have a dimmer. Cannabis plants seem to respond really well to both, and both produce excellent bud quality/yields. I still need to do a side-by-side experiment to see if one outperforms the other when it comes to potency or yields.
HLG 100 LED grow light in action in this setup.
Exhaust Fan + Smell Filtering
Cannabis plants can create a lot of humidity in the tent (at least if your grow cube is filled with cannabis plants like in the pictures) and cannabis buds don’t form well in high humidity. You need a good exhaust fan to ensure that the humidity from all the plants doesn’t build up too much. An exhaust fan can also be hooked up to a carbon filter in order to filter smells from leaking out of the tent.
Option 1: Loud, But Cheap
This iPower 4 Inch 200 CFM Exhaust Inline Fan with Speed Controller and Air Carbon Filter costs $80 and includes a loud but effective exhaust fan and a matching carbon filter to scrub smells.
Cost: $80
The iPower 4 Inch kit is effective but the fan is kind of loud.

Option 2: Much Quieter, But Costs More
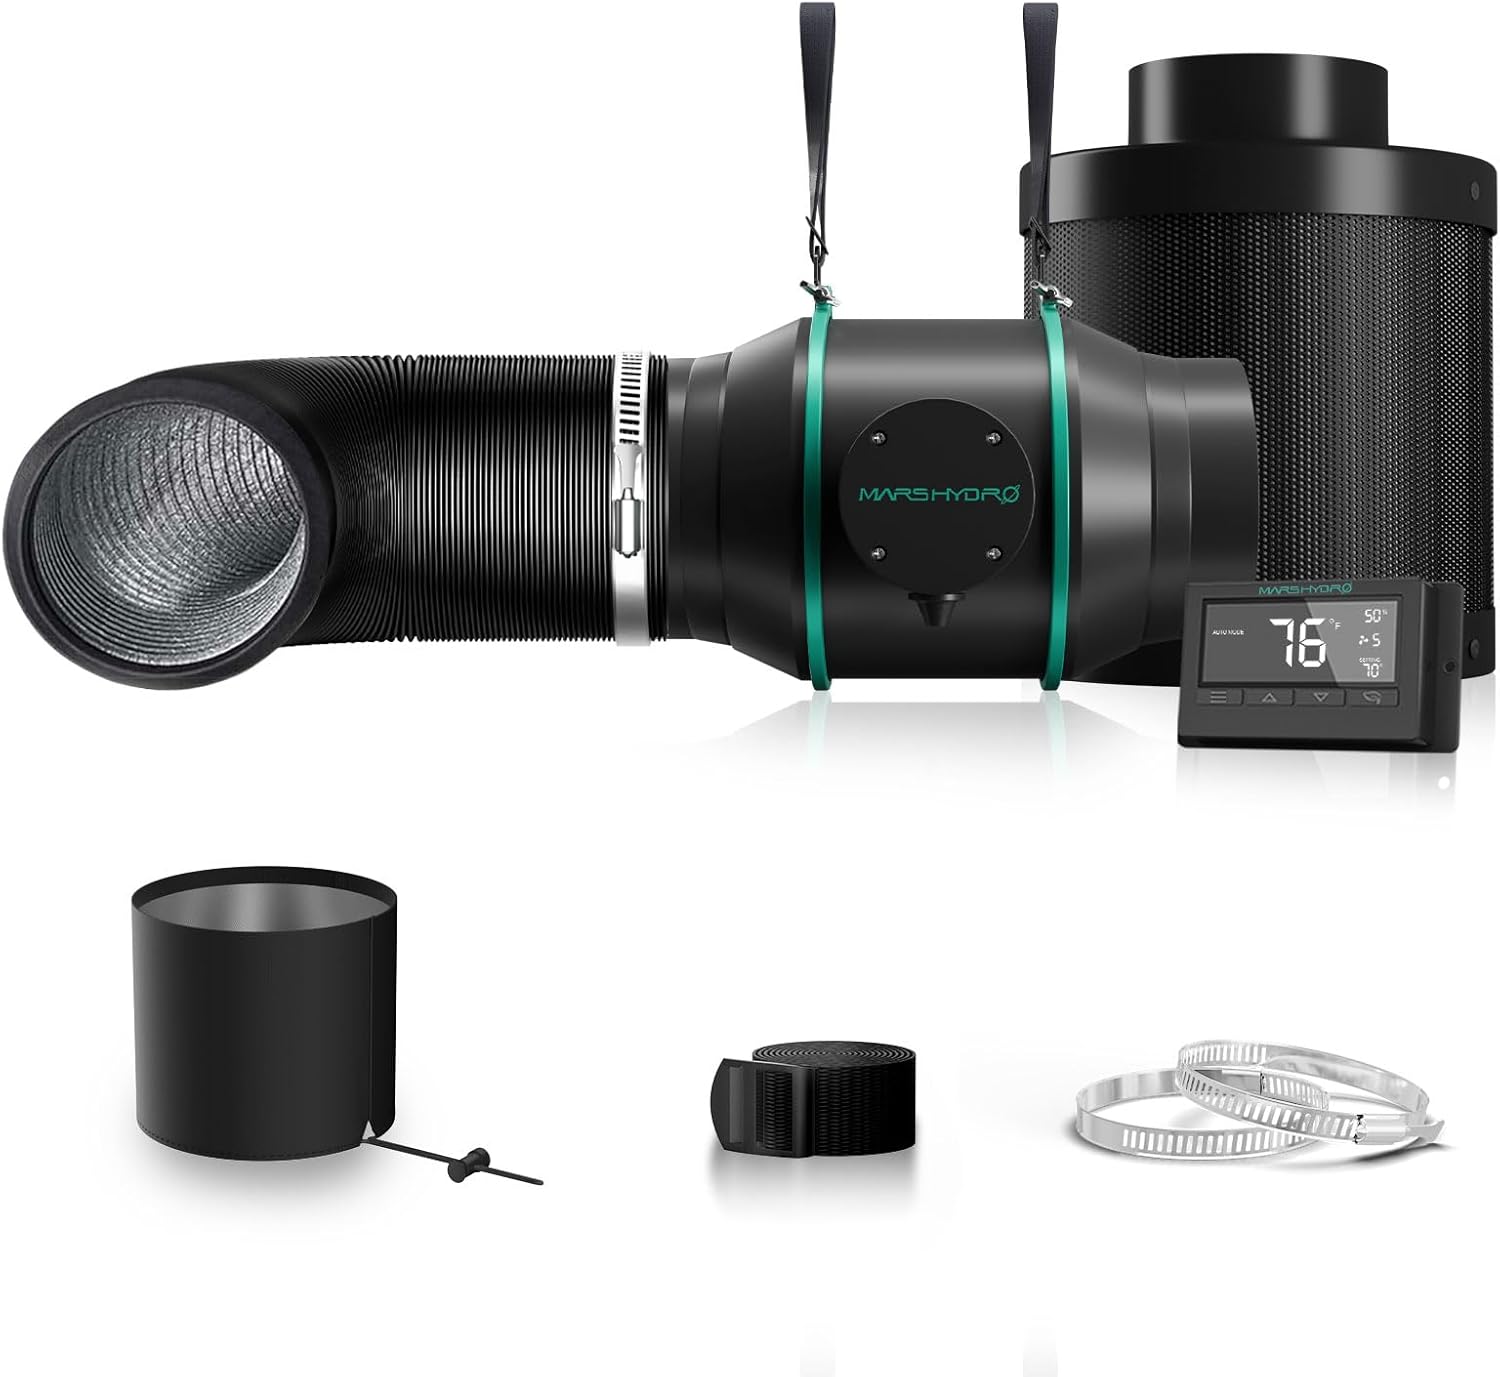
Mars Hydro 4″ Quiet Exhaust fan and Short Carbon Filter kit ($130 high-end alternative). If you want a fan that runs almost silently, you need to invest a bit more money and get a quiet fan like the AC Infinity version or this just-as-effective-but-cheaper Mars Hydro knockoff. The Mars Hydro 4″ kit includes the fan and a matching carbon filter. The reason I like this kit is it includes a small yet effective carbon filter. This is the kind of carbon filter I use, and I have a hard time finding them in this size anymore.
Cost: $130
The Mars Hydro 4″ kit is quieter but costs more. I use this in my bedroom.
Do I need a carbon filter to prevent weed smell?
Although a carbon filter is not necessary for cannabis plants to grow, if you don’t hook up a carbon filter to an exhaust fan, your tent may fill the surrounding area with a pungent weed smell as buds start forming. Normally it wouldn’t be such a big deal with such a small grow space, but you are going to be growing a surprising amount of weed in here!
Use a carbon filter for a smell-free cannabis garden!

Grow Medium + Pots
A cannabis grow cube can accommodate just about grow medium. I’ve grown in these with cannabis in soil, coco, or hydro (in a mini DWC kit). If you’re not sure what to use, here’s my recommendation:
- One $40 big bag of Coco Loco, a coco-based soil with perlite. This 2 cu ft bag should be enough to fill 14 gallons worth of pots (for example seven 2-gallon pots). You’ll have enough to last a few grows if you’re growing small, and any extra can be used later.
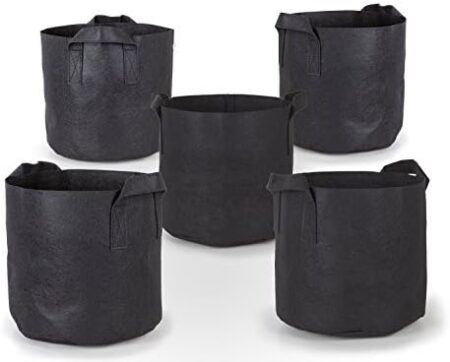
- 2-gallon fabric pots (here’s an example of a 5-pack for $14) – Just about any brand of fabric pot works great.
Cost: ~$55
Coco Loco is a coco-based soil that makes thriving cannabis plants.

Example of a 5-pack of 2-gallon fabric pots (any brand works great).
Containers: I like 2-gallon for this size. You can go bigger, but I recommend sticking to 3 gallons in size or less, to keep plants a bit smaller. Plant tend to get much bigger in a big pot then if kept in a small pot. Plus it’s more difficult to overwater plants in smaller pots.
My experience with each size pot in this setup.
- 1-gallon pots help keep plants small by restricting their root size. This is a great size if you want to grow multiple plants in a small grow tent. If you go with the 1-gallon size, make sure to get a hard-sided plant pot (like a plastic or clay pot). This helps hold in water so the soil is slower to dry out. I’ve found that 1-gallon fabric pots need to be watered all the time because the grow medium dries from the sides extremely quickly.
- 2-gallon fabric pots give the benefits of fabric (faster growth by getting more air to the roots) but are big enough they can be watered much less often than 1-gallon fabric pots. This is my preferred size for this setup.
- 3-gallon pots were the easiest to water, but the plant really wanted to grow big. I had to do a lot of bending to keep the branches from growing into the light. Best if you’re only going to grow one plant in the grow tent.
Nutrients
The soil recommended above, Coco Loco, contains some nutrients already, but cannabis plants will use it up by the time they get to the flowering stage. Growers should give extra nutrients while buds are forming to ensure the best yields, density, and overall potency. There are lots of awesome cannabis nutrient options, but if you’re not sure, the following option is cheap, effective, and easy to use.
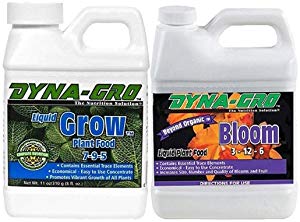
- Grow bottle: Give about 1 tsp per gallon of “Grow” during the vegetative stage
- Bloom bottle: Give 1 tsp/gallon of “Bloom” during the flowering stage
Cost: $15
Dyna-Gro Grow + Bloom is my recommended nutrient system for newbies. One bottle for veg, one for bloom. 1 tsp/gallon. Super simple and effective!
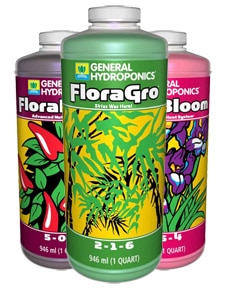
Professional Nutrients: My favorite nutrients for growing cannabis is the $40 General Hydroponics Flora trio. This is what I keep coming back to when I’m not testing out new nutrients. Unlike the 1-part Dyna-Gro bottles, it requires 3 bottles and you have to measure different amounts of each bottle depending on the stage of life. How to Use: Follow the instructions on the side of the bottles at half-strength. You typically don’t need to go up to full-strength nutrients under a smaller grow light like the 100W LED size in this tutorial.
My personal favorite cannabis nutrient system is the General Hydroponics Flora trio. Use at 1/2 strength what the bottles say.
Other Supplementary Items
- Get your seeds – $10-20/seed on average, but can be more or less depending on the breeder. Make sure to get “feminized” seeds to ensure every plant is female and makes buds. I personally like autoflowering strains for this setup because they are usually ready to harvest in 2-3 months from germination and tend to stay small. NASC is the seed vendor I’ve been using lately, and they have an excellent selection of autoflowering seeds.
- 24-Hour Timer – Growers put a grow light on a timer so the plants get a day and night period on a schedule – $9
- Water containers – You may have something already around the house. I personally use a 3-gallon or 5-gallon water jug to mix up nutrients, but anything can work. If you need to buy one, it’s much cheaper to buy these at Wal-Mart or a water container store ($5-15) than online.
- Thermometer/Humidity Monitor with a probe so you can keep track of the temperature inside the tent (unless you got the really fancy Cloudline exhaust fan with a temperature and humidity probe built-in). It’s nice to have more than one so you can measure the air in different parts of the grow space. – $15
- PH Test Kit – Prevent potential nutrient deficiencies by testing the water pH – $18
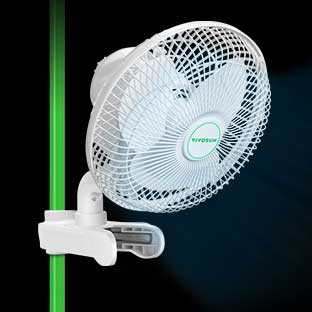
- Clip-On Fan – You can get a basic clip-on-fan for $13, but they’re a pain to clip onto the poles of a grow tent. I recommend spending a little extra for a small fan that is made to clip directly on the poles of your grow tent, like this $36 Vivosun Aerowave grow tent fan.
- Measuring spoons for measuring out your nutrients (many people already have these) – $10
- (Optional) Zip ties – the hanging apparatus that comes with many grow lights add several inches of height for no real reason. They just aren’t designed for height-limited growing. In a mini tent like this, height is at a premium and a few inches can make a big difference. When you need to get your light all the way to the top of your tent, nothing seems to work better than industrial zip ties! Once you start using zip ties you end up using them for everything. They’re weirdly permanent and strong for something so disposable – $10
Total: ~$80 plus seeds
Estimated Cost for Basic Setup: $370
How to Set Up a Cannabis Grow Cube
1.) Assemble the grow tent according to the instructions (similar to setting up a camping tent)
Here’s a quick idea of what that looks like.
A typical grow tent comes with these pieces, including the directions.
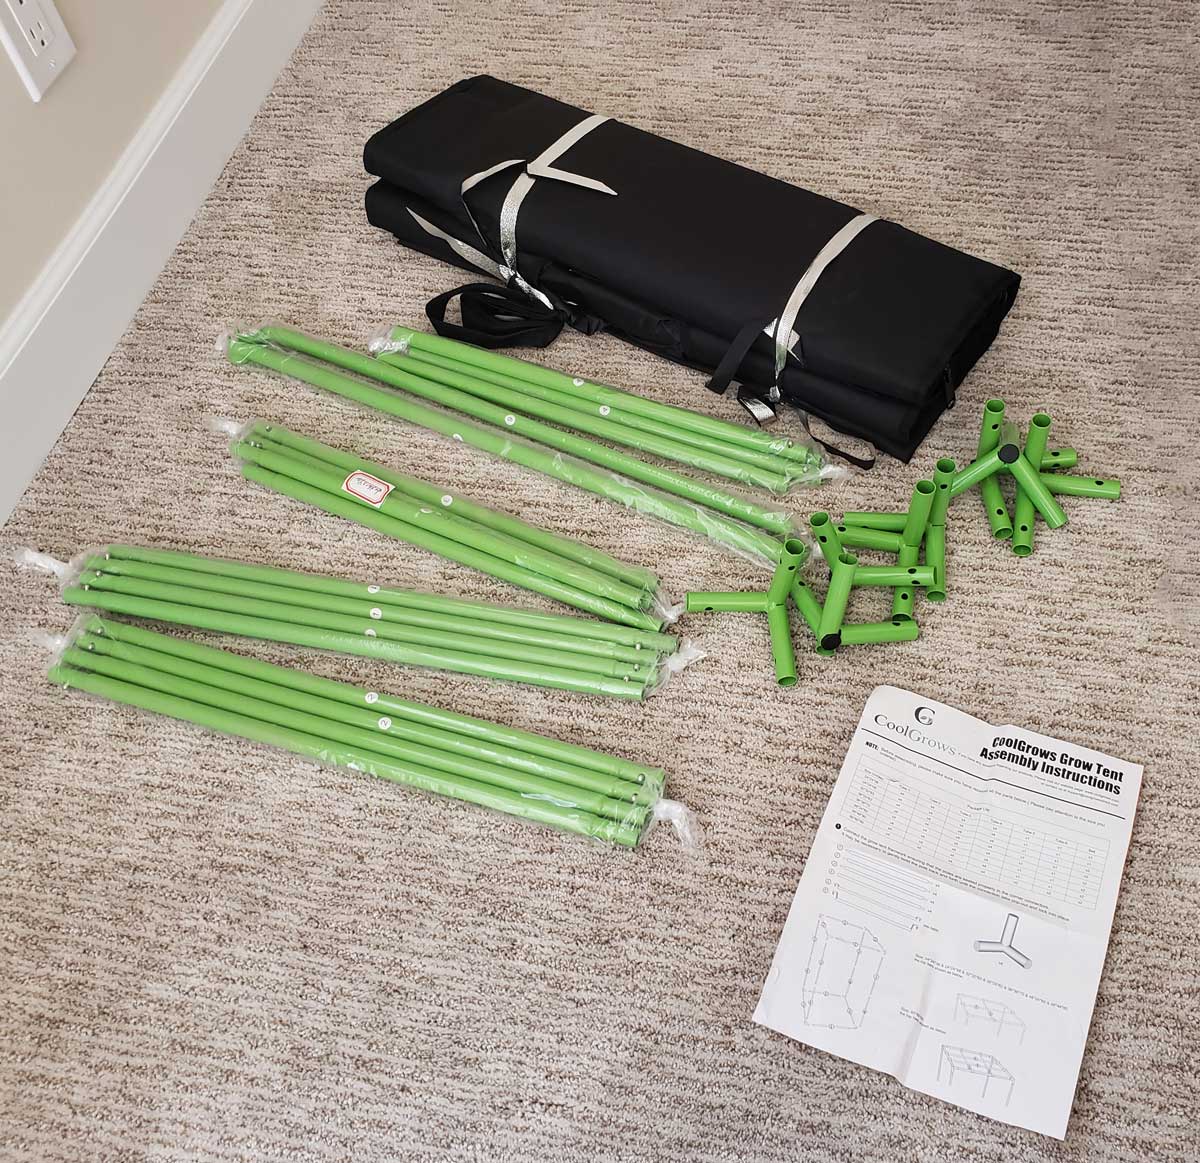
First set up the structure by clicking all the poles together.
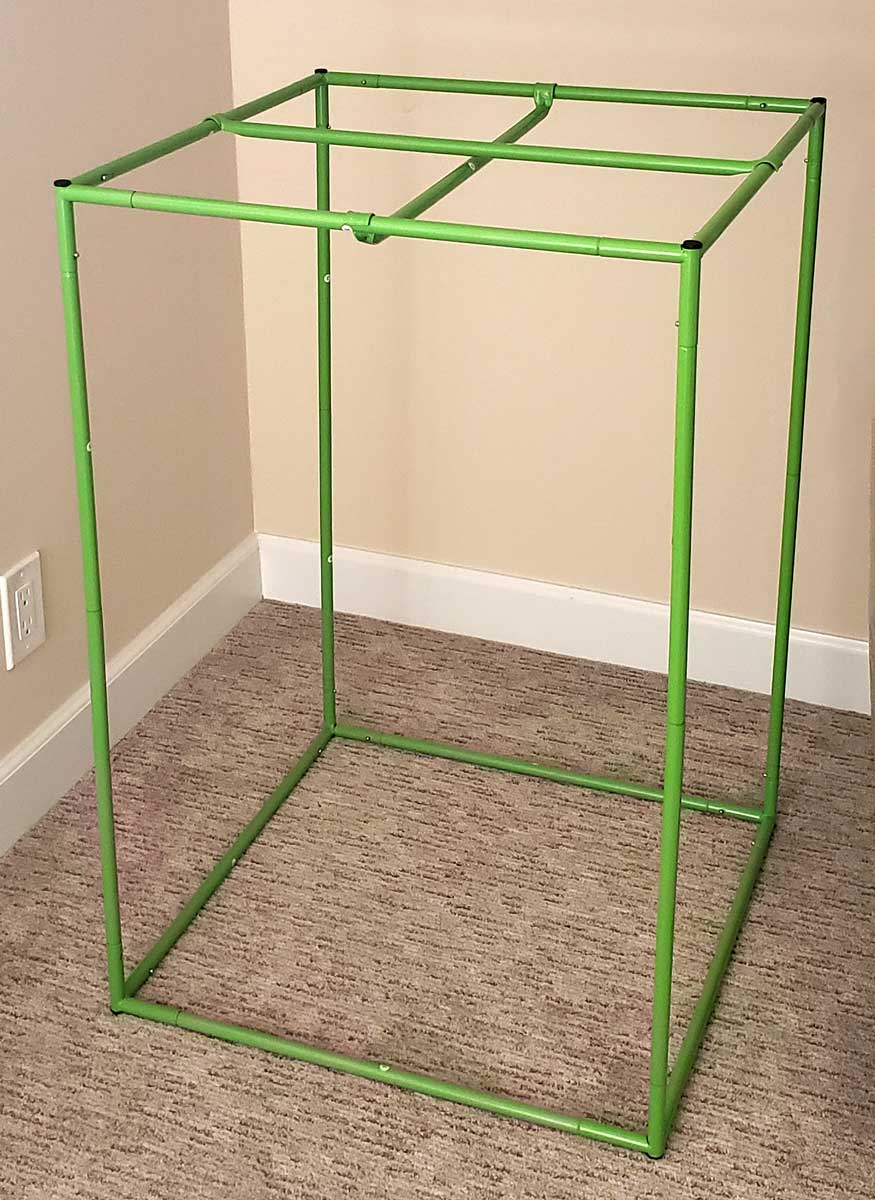
Then put the “tent” part over the outside, like you’re giving it clothes. Last, put the flexible waterproof tray in the bottom. You’re done!
Unlike most grow tents, this one is so little it’s easy to just pick it up and bring it anywhere in the house.
2.) Set up the carbon filter and exhaust fan in a bottom port
This step is needed to cool the grow cube, remove humidity, and stop smells from leaking out. This setup doesn’t have a whole lot of extra room inside. If you’ve got the smaller 3′ tall version, you have two main options to setup the fan and filter.
Option 1: Carbon filter inside tent in bottom port, connected to exhaust fan outside tent (with air pointing out).
Here’s what that looks like (lower right) The downside to this configuration is it causes you to lose a little room inside the tent. This pulls the air through the filter so the smells have already been filtered before leaving the tent.
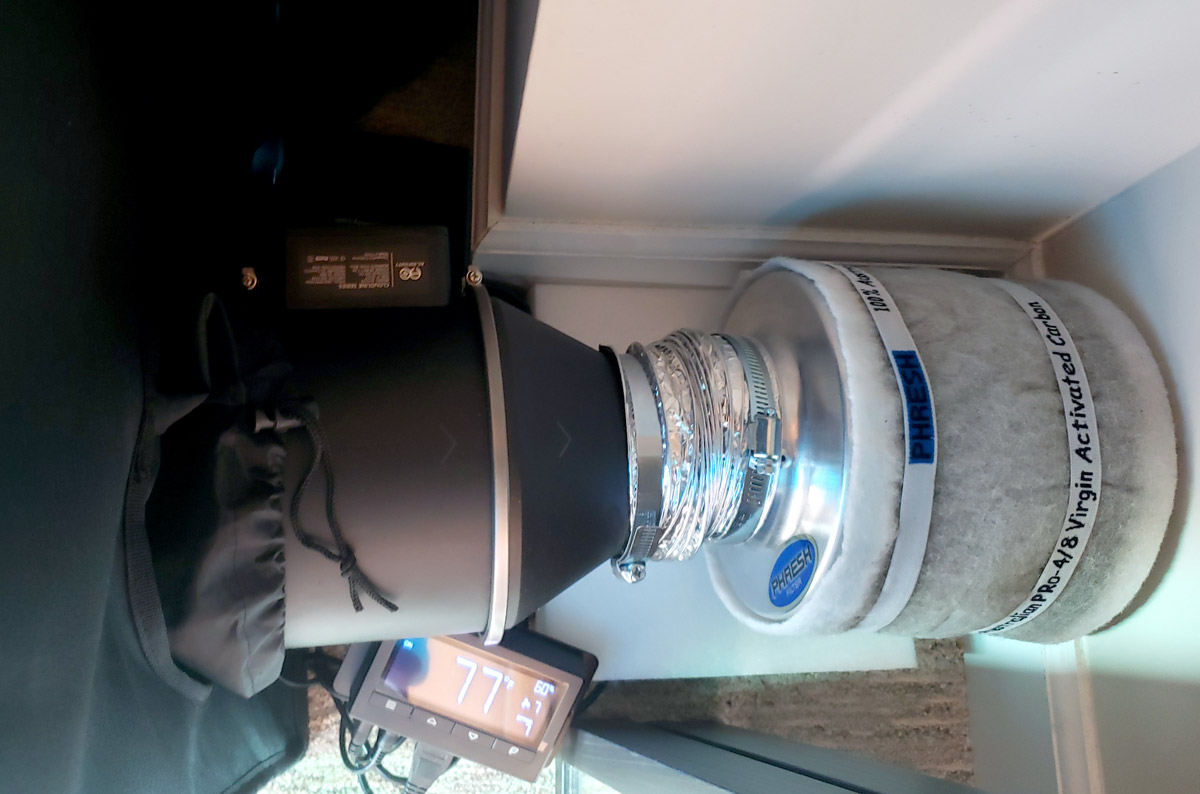
Option 2: Carbon filter and fan are outside of the tent.
This allows you to have the full inside of the space for your plants. To do this you have the fan in a port pointed out, and connect that to the filter. This pushes the air through the filter before it is released into the room. With this option, you can either have the fan and filter in a bottom port, and they’ll be laying on the floor. Or you could put them in a top port and have them both sitting on top of the tent.
This is what I ended up settling with, since I can easily hide these behind the tent it lets me keep the clean look of the grow cube and have full space for the plants inside. Note: this is using the small filter included in the Mars Hydro 4″ kit. If you got the cheaper kit, your carbon filter is likely several inches longer.
Don’t forget to install your small clip-on grow tent fan to blow over the tops of your plants.
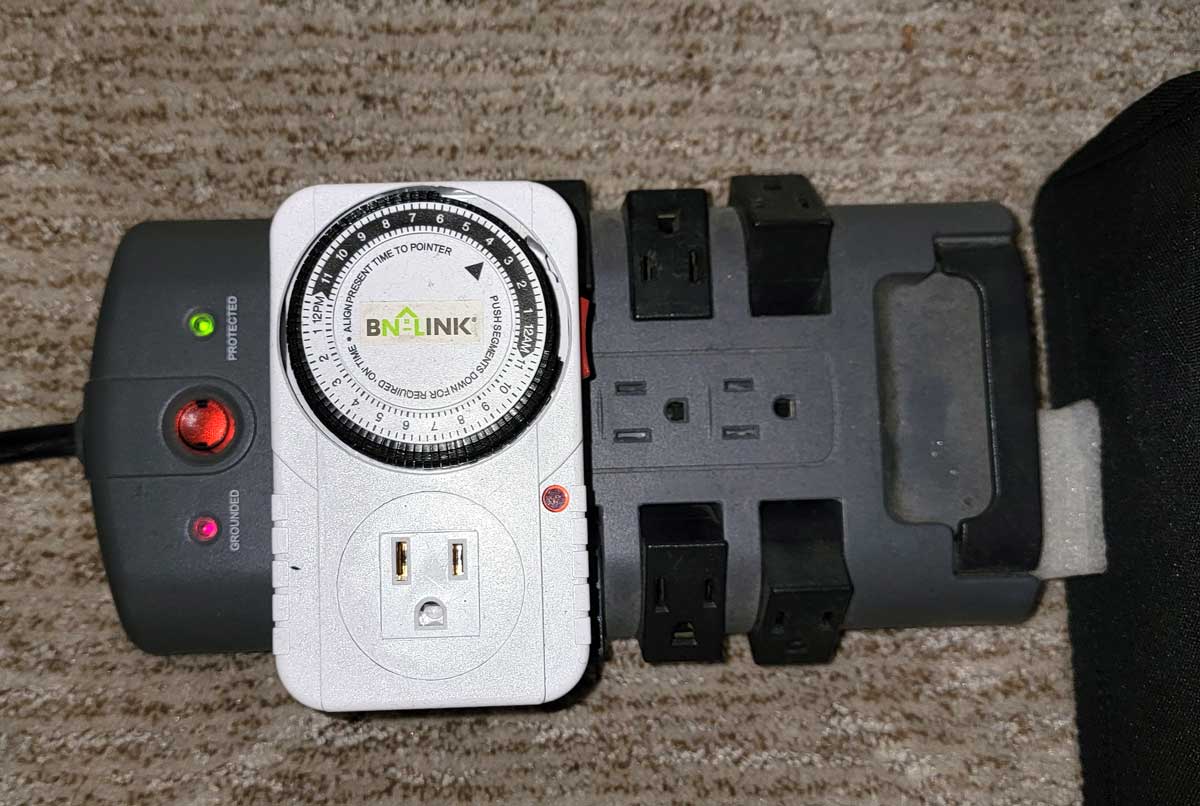
3.) Plug in the timer to an electrical outlet.
Plug in your electrical timer. I put my on a power strip for extra protection. Set it to the correct time, and then have it turn off the lights for 6 hours a day (so they’re on for 18 hours every day). This is known as an 18/6 time schedule. Whatever strain of cannabis you’re growing, 18/6 is a great light schedule to start plants on.
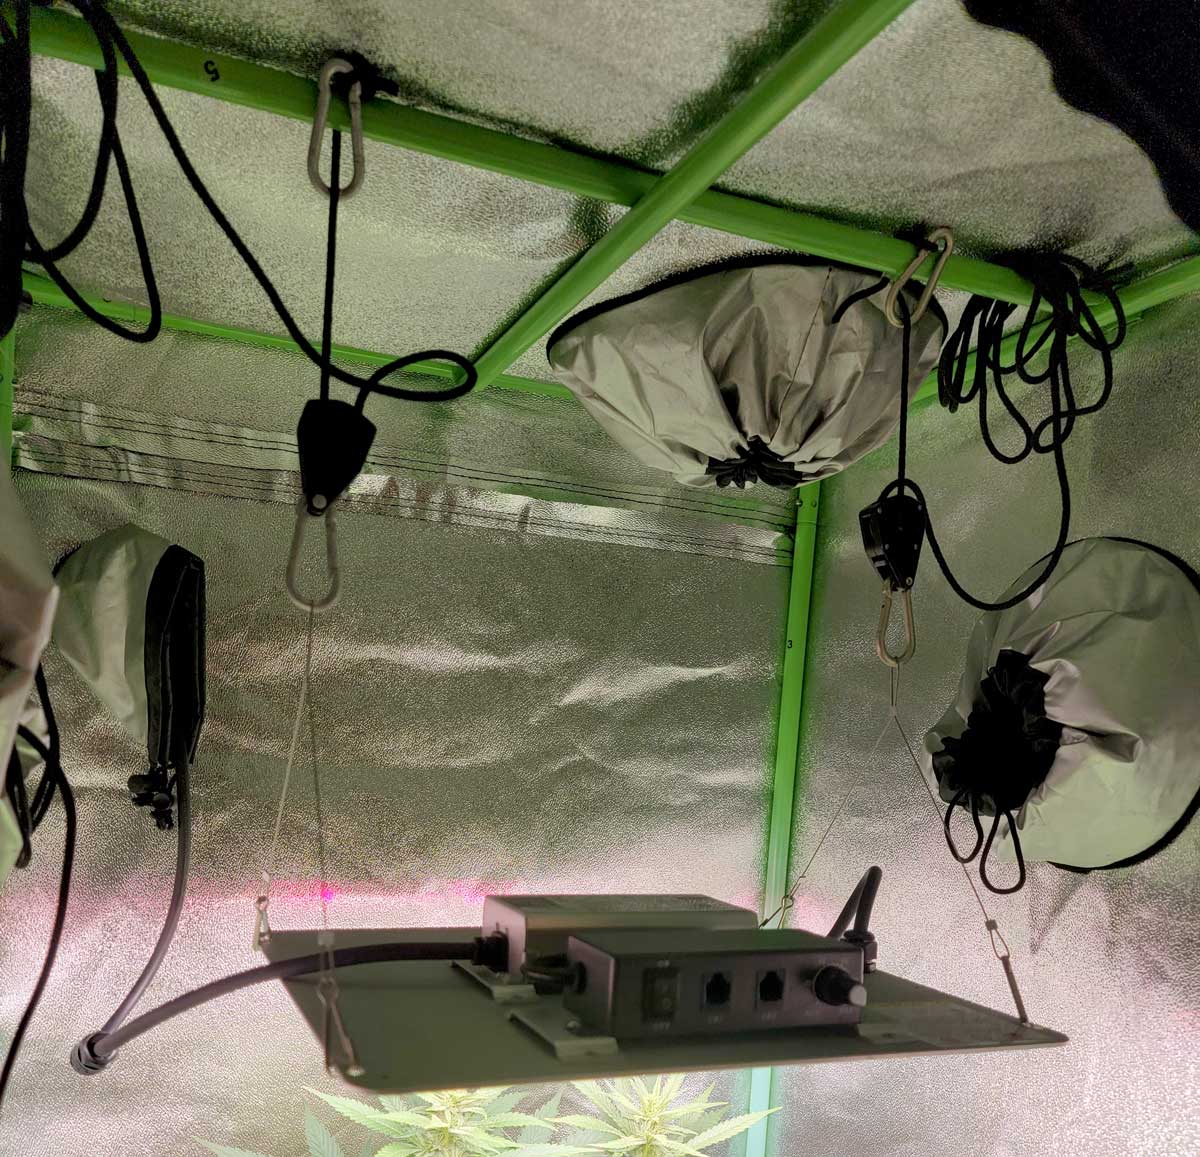
4.) Hang the LED from the top using the included hanging hardware and then plug it into the timer.
On the Spider Farmer SF1000, there is a dial to adjust the intensity of the light, and also a switch that lets you easily turn it on and off without having to unplug it.
5.) Turn everything on and let run for 24 hours before adding plants.
Let everything run for 24 hours, just to make sure everything works, and you’re ready for plants.
It’s cannabis time!
How to Grow a Ton of Weed in a Cannabis Grow Cube
Now it’s time to grow some cannabis. Follow the directions to achieve results like this:
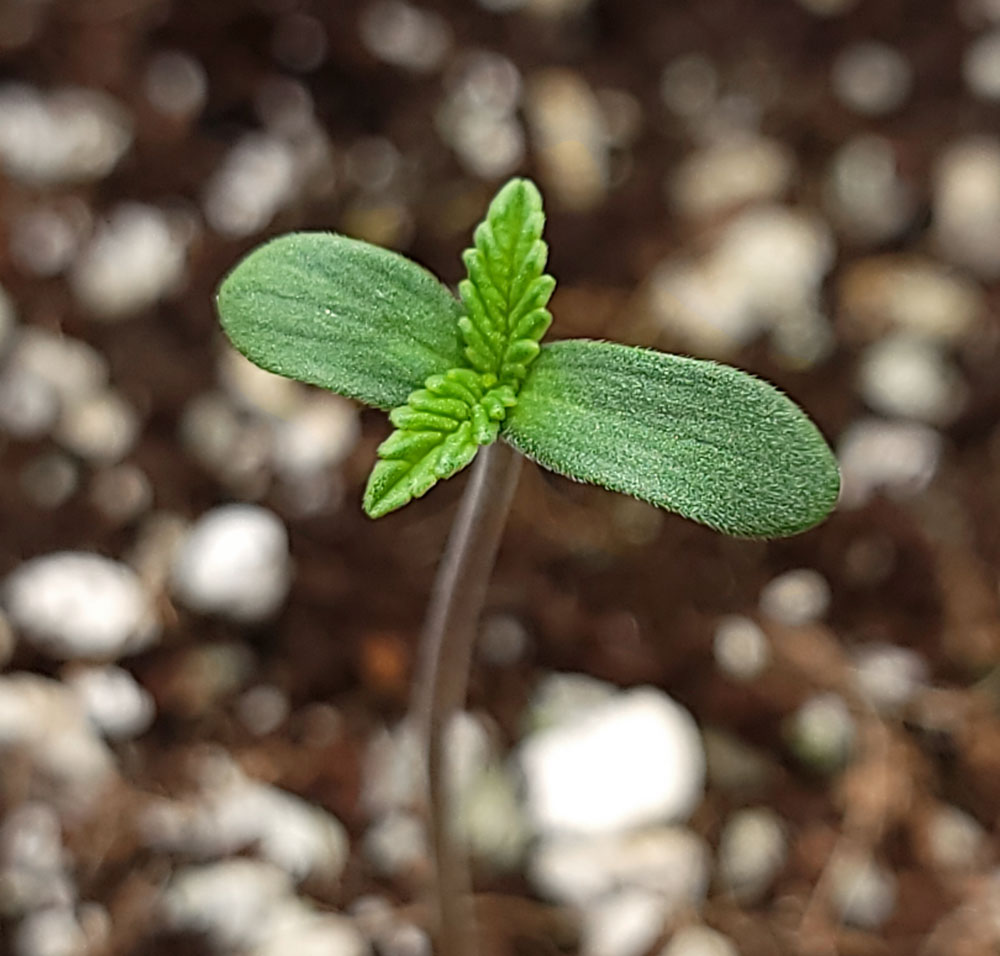
1.) Germinate Your Seeds
Easiest method is to just put the seeds directly in soil.
Dampen your soil then get your cannabis seed.
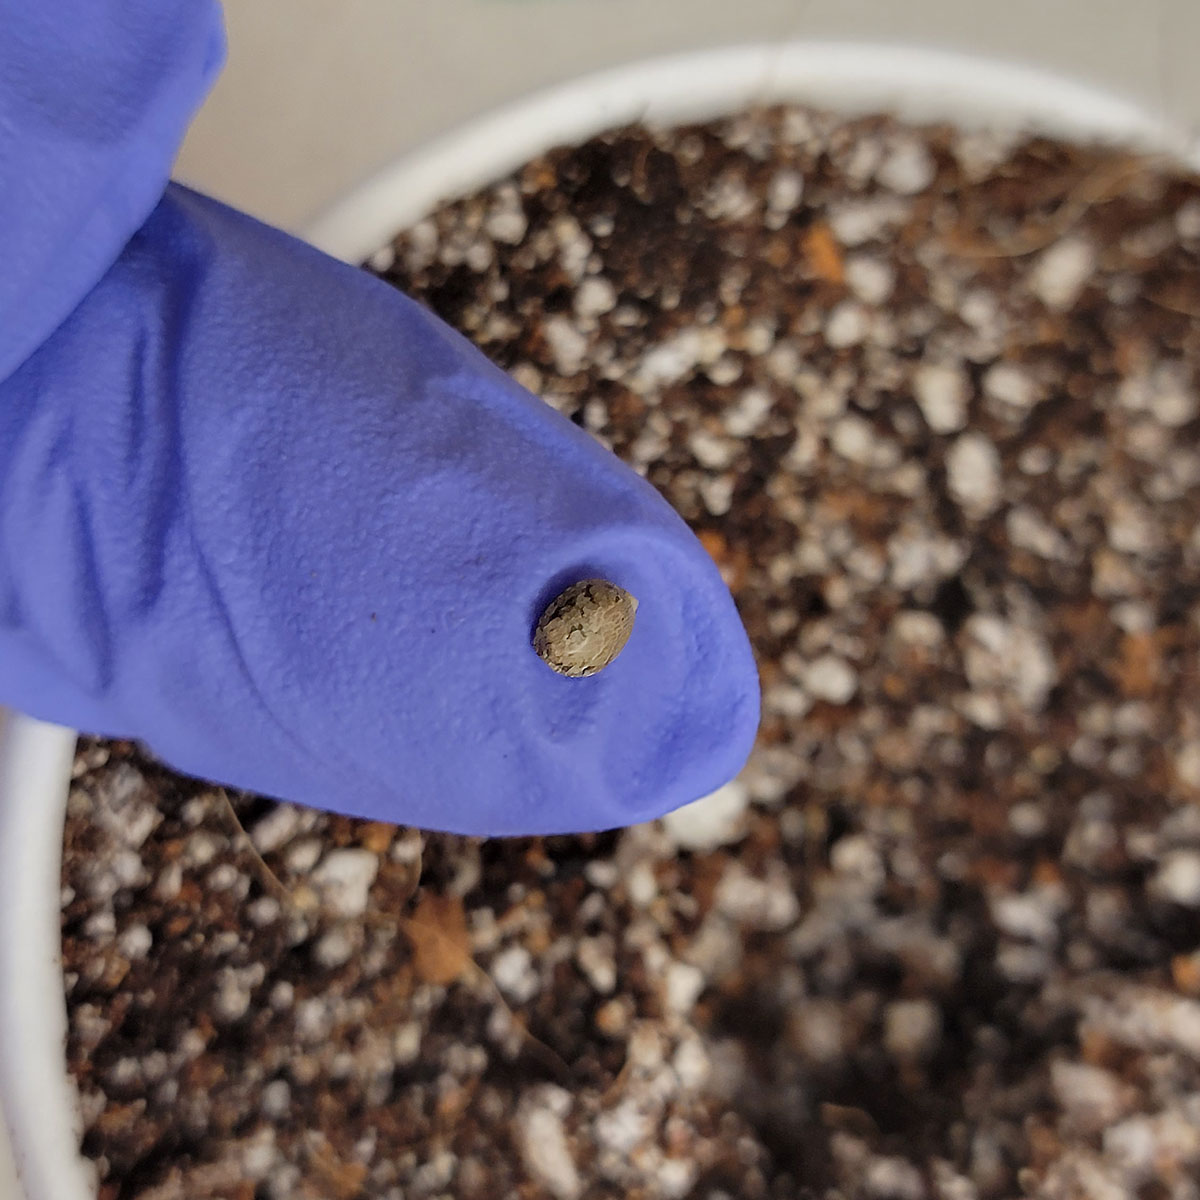
Poke a little hole and add your cannabis seed, then cover it up.
Put it in your cannabis grow cube with the lights on, make sure it doesn’t dry out, and you should see a seedling in a few days.
The key to watering cannabis seedlings is to give just a little water at a time, and wait a few days between waterings. Once the seedling grows bigger, it drinks more and can be watered normally.
We have a complete “how to water” tutorial but check out this example schedule for watering seedlings.
Day 1 – Give 1 cup (250ml) water per seedling
Day 3 – Give 2 cups (500ml) water per seedling
Day 6 – Give 2 cups (500ml) water per seedling
Day 8 – Give 2 cups (750ml) water per seedling
Day 10 – Give 3 cups (750ml) water per seedling
This is just a general starting guide. You need to watch your plants to see if they need more or less water at a time.

2.) Vegetative Stage
Main goals in the cannabis vegetative stage:
- Keep plants healthy – Keep watering plant regularly and giving nutrients. If using Dyna-Gro, give them 1 tsp of Grow per gallon of water. Check the pH if you notice any nutrient deficiencies. In soil, the water should be between 6-7 pH or you’ll see deficiencies (spots or markings on your leaves).
- Train plants to grow wide and flat like a table – Full instructions below
- Wait until they have reached half the final desired size – Once plants have reached half their final desired size, it’s time to move to the next stage. They double in size (on average) after they start the flowering stage.

Overview of how to train plants to grow flat and wide like a table
- Cut off the top of young plants – Cut off the top of young plants in the vegetative stage. Cutting off the top of a plant is often called “topping” in the cannabis growing world. Topping splits any stem into two, and a plant with two tops is easier to spread out to create flat plants than a plant with one main top
- Beginner tip: Wait until the seedling has grown 6 sets of leaves. Cut off the top through the main stem above the 5th set of leaves (pictures below). Easy and simple, yet won’t stress plants. After being topped, your plant is easier to spread out and naturally grows more bushy and wide.
- Tall stems should also be “topped” – Cut off the ends of any stem that’s growing much faster than the rest. Each new pair of stems grows slower than the original one. Topping is a great tool to curb fast-growing stems in the vegetative stage.
- Spread out – As the plant grows, spread out the stems by bending them down and away from the center of the plant. Don’t forget to tie branches down with something like plant twist tie or they’ll spring right back up the next day!
- Supercrop (if necessary) – Cannabis stems get hard and woody as time goes on. If you find you need to bend a stem that’s already stiff, use the supercropping technique to bend even the toughest stems at any angle. This is a bit advanced because you can accidentally split stems. But don’t worry if you do. Simply tape broken stems back together like a cast and the plant can heal. One of the things I love about cannabis plants is it can recover if you make big mistakes in the vegetative stage.
The main goal is to bend over tall steps to create flat plants…

…with full plant coverage from above.
Why? Later, this shape leads to a cannabis plant with tons of buds sites filling the mini tent.
Auto-flowering training guide
If you’re growing an autoflowering strain, follow this autoflowering-specific plant training guide. The following guide also works for autoflowering plants, but there are a few things you should watch out for and the full autoflowering training guide breaks it all down so you know exactly what to do.
Click here: How to Train Auto-Flowering Plants
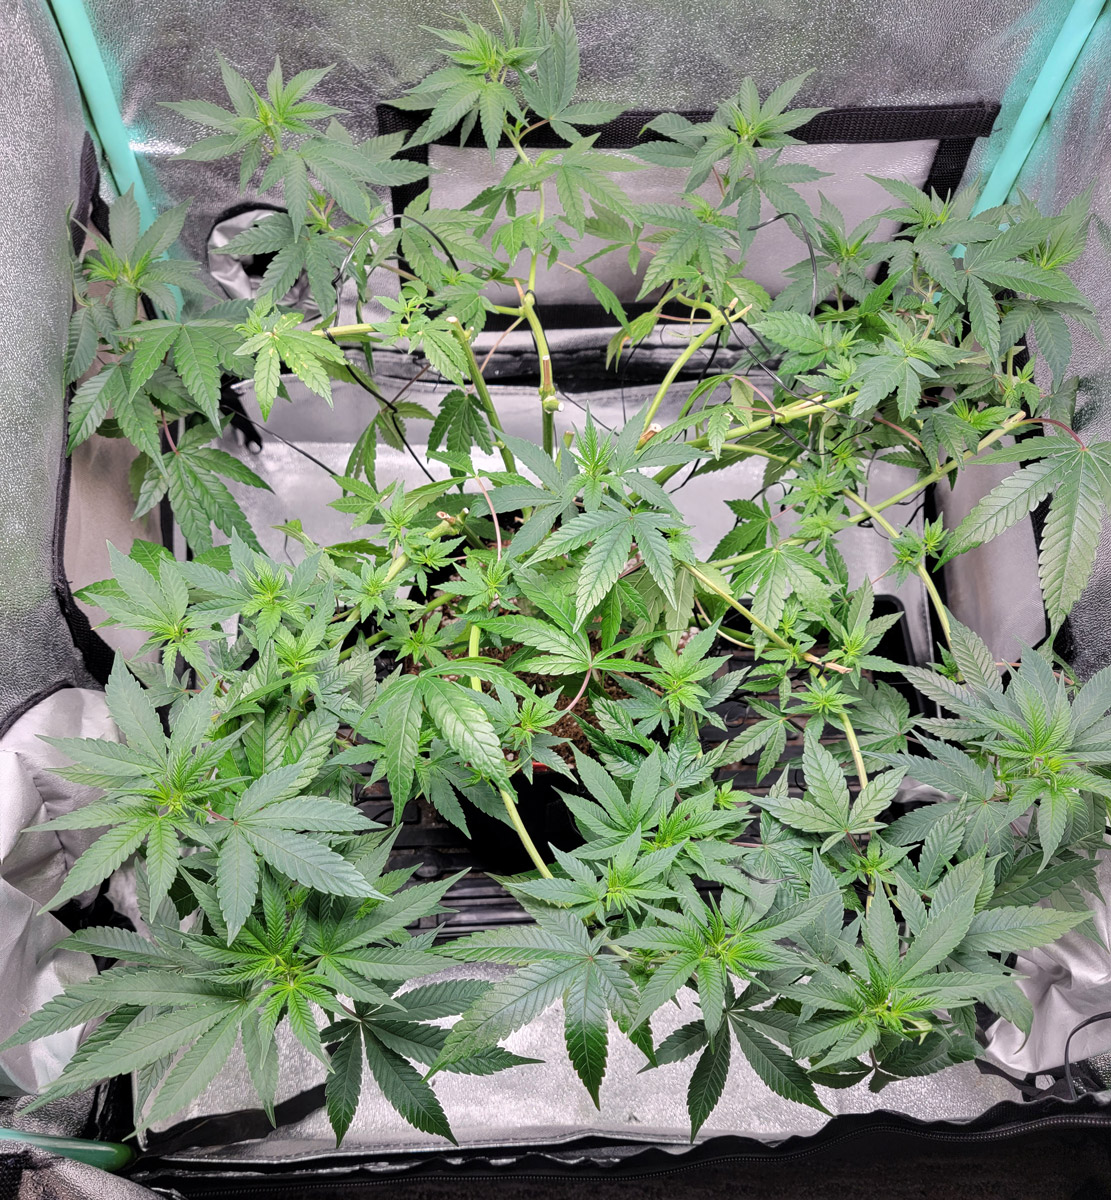
I’ve fit up to 4 autoflowering cannabis plants in one of these mini tents!
Main Idea: Bend over tall branches as they grow, so they fill up the whole space.
Your Goal: Total plant coverage in the grow tent.

Example of training a photoperiod plant in a cannabis grow cube:
Cut off the top of a young plant right above the 5th set of leaves (“top” the seedling above the 5th node).

When cutting through a stem, be careful not to damage the growing tips at the base of each leaf. These will become your two new stems.
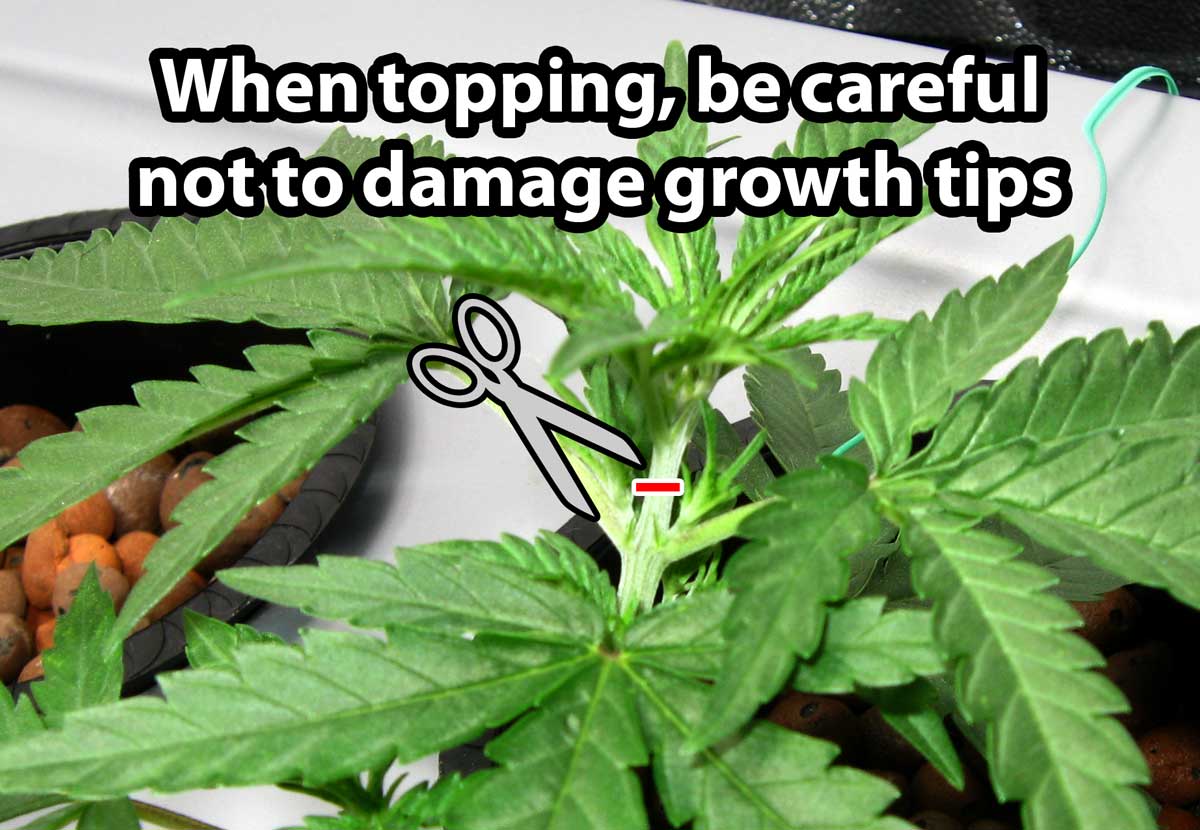
Topping splits the main stem into two. You can see the two new “main stems” on each side of the cut.
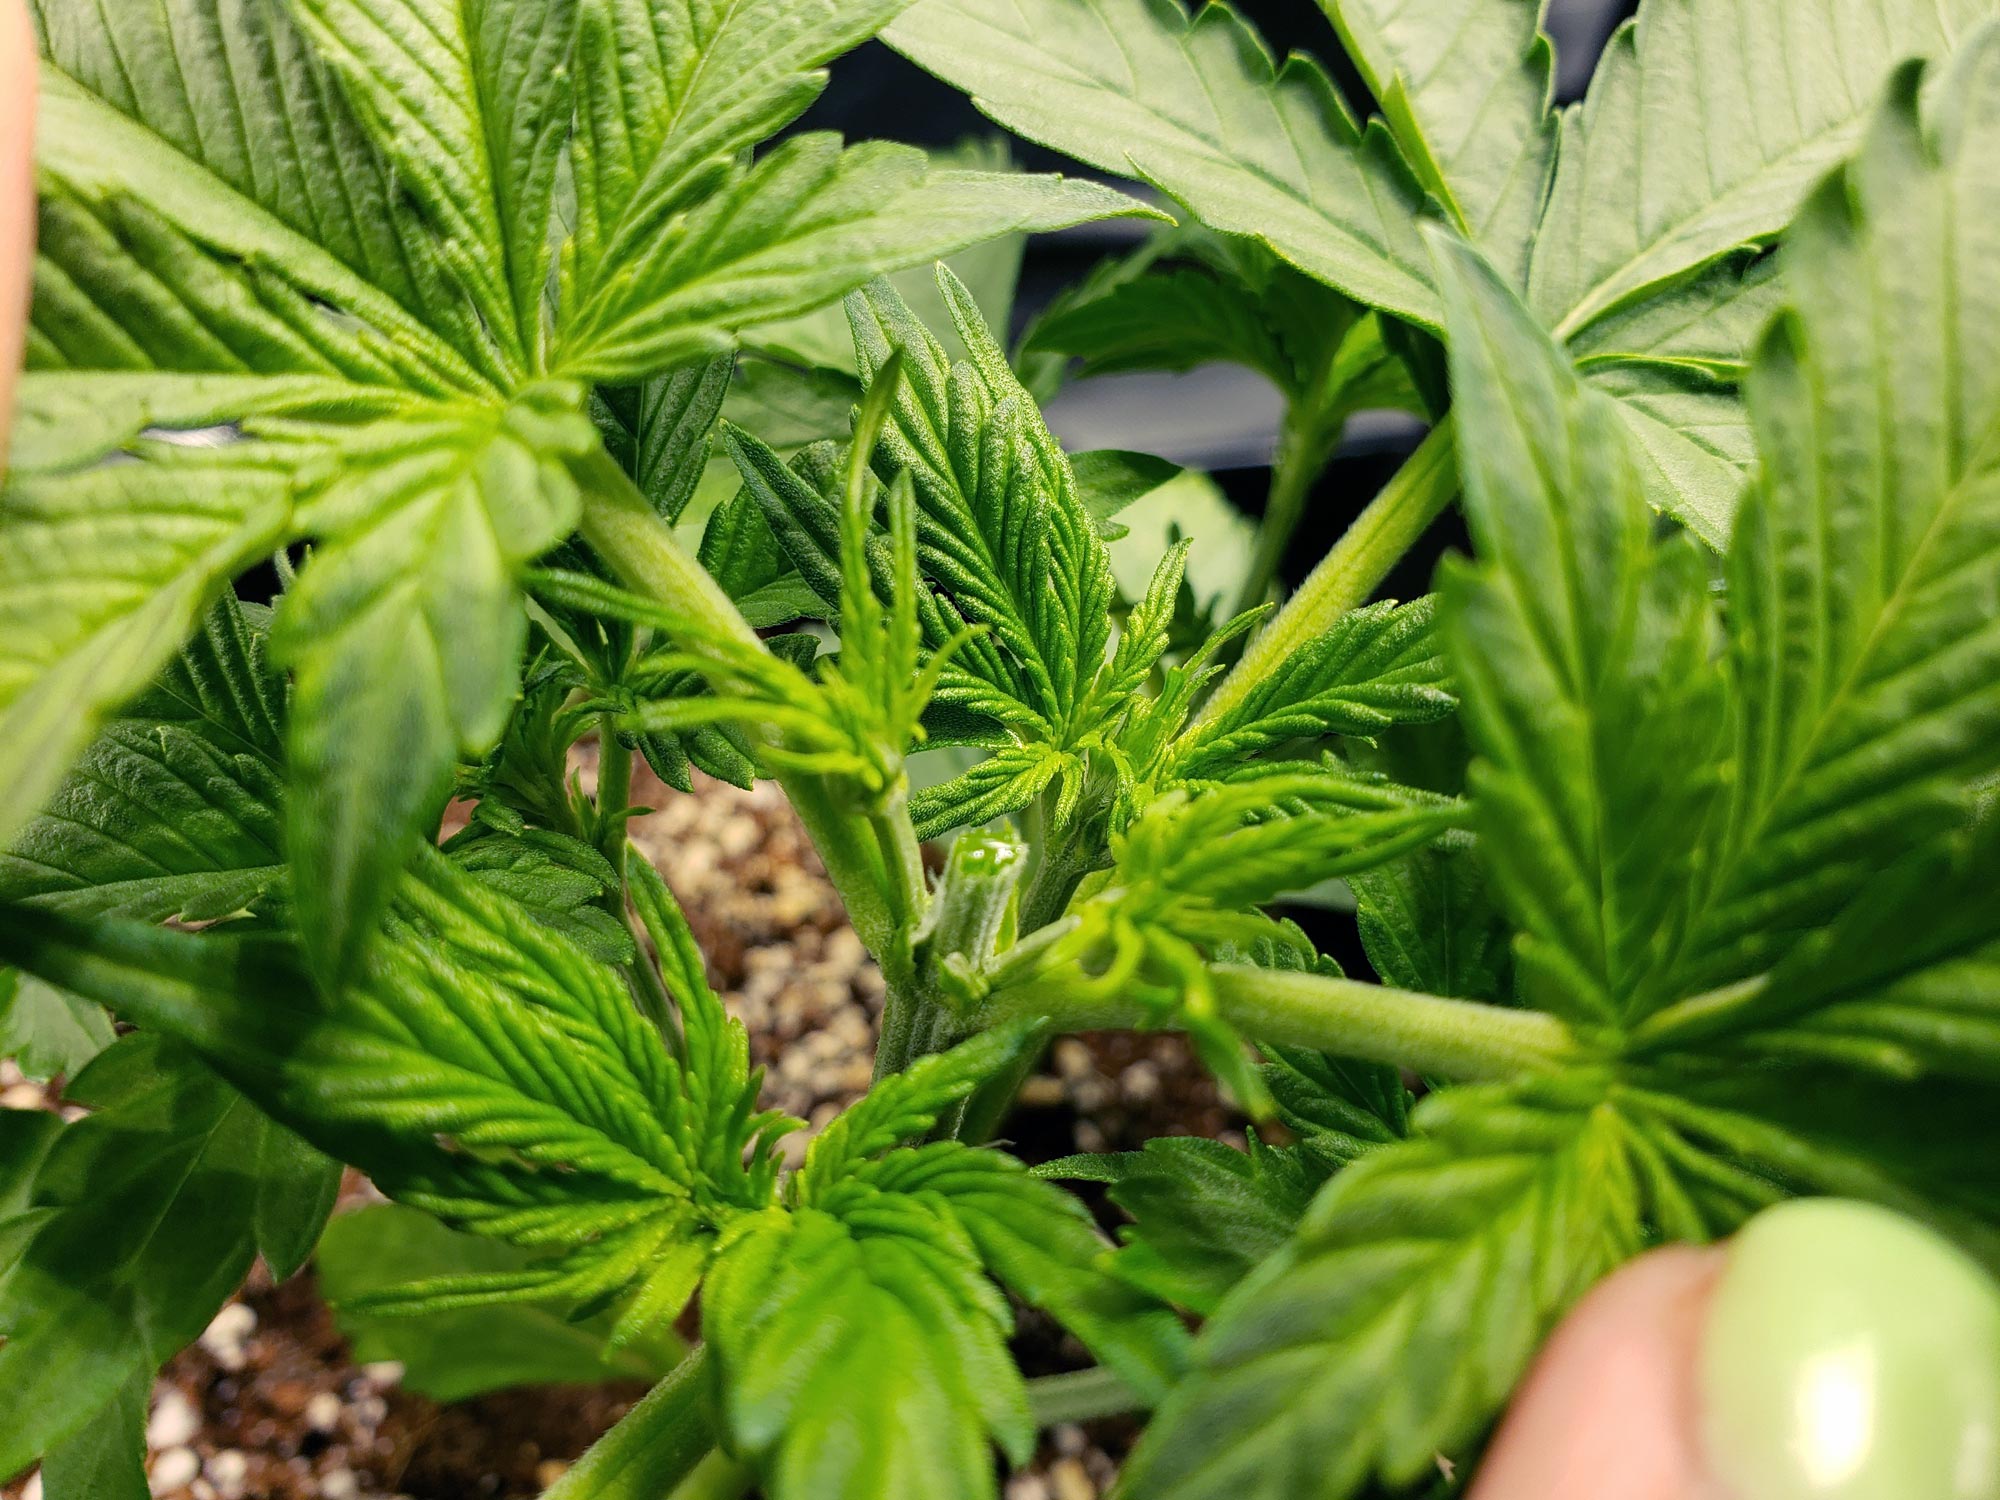
Since you waited until the plant had several sets of leaves before cutting a small piece off the top, it will continue growing as if nothing happened.
As the plant grows, spread out the branches and cut off the top of any stem that’s getting bigger than the others. You don’t want your plant putting too much energy into any one branch.
The plant was given a week to grow after being topped. Now it’s training time!
Bend over all the stems down and away from the center until it looks flat from the side.
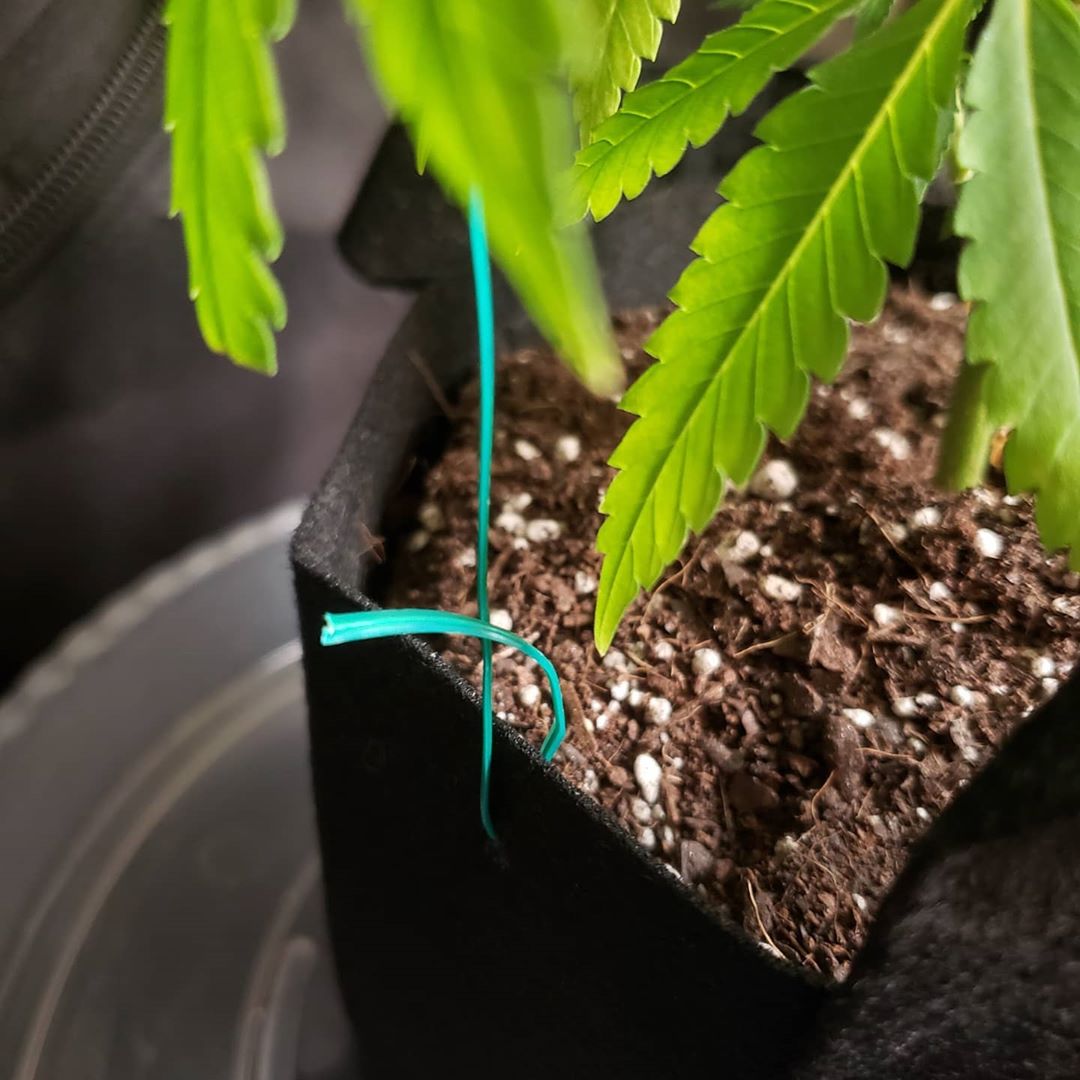
I used plant twist tie to hook on to each branch and tie it down where I wanted. I attached the other end to the fabric pot.
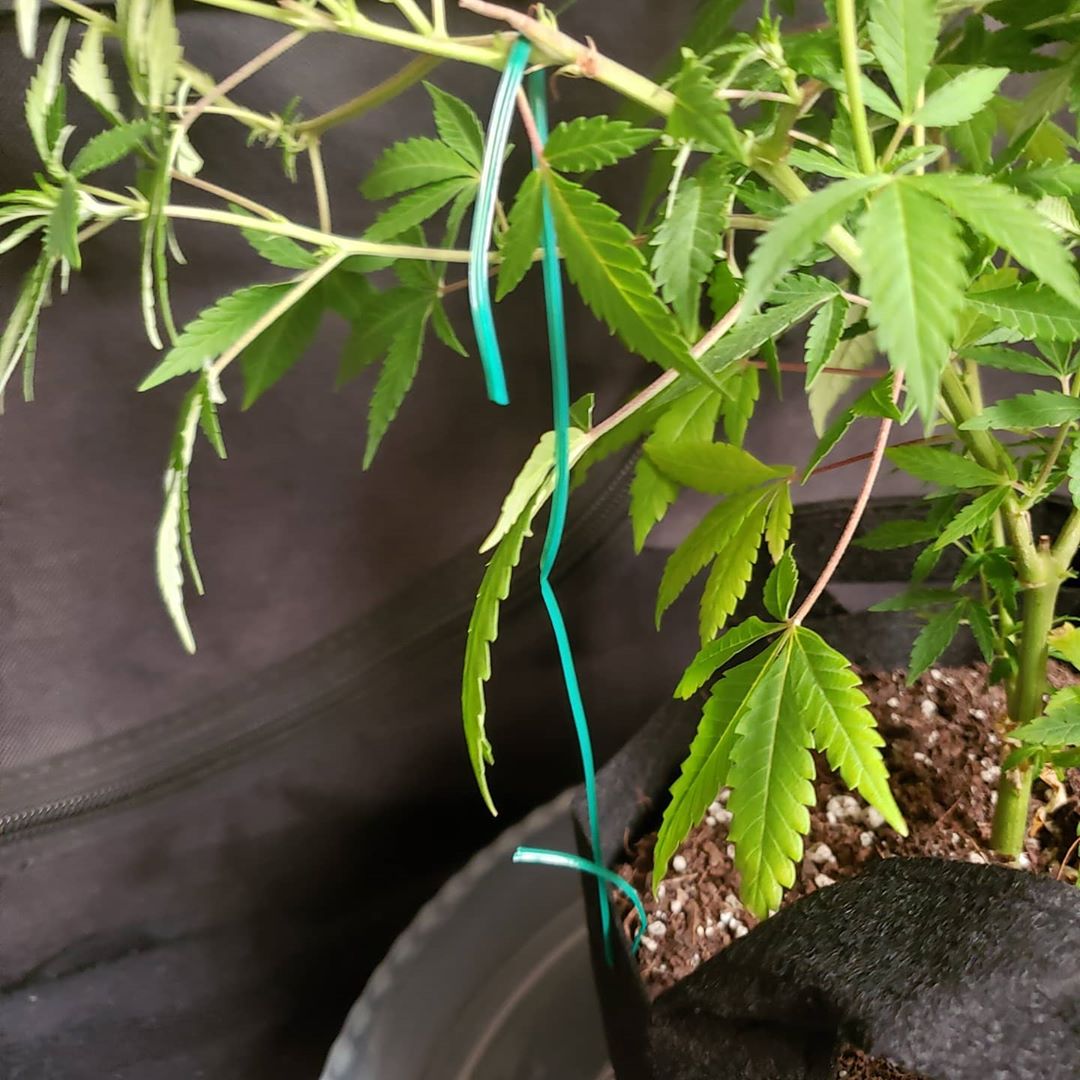
How to attach to the pot? You can use safety pins or binder clips but I think this is easier. Poke holes in the fabric using sharp pointy Fiskars pruning scissors and thread the twist tie through.
Back to training. Here’s a top view. We’re trying to fill the entire tent with this cannabis plant. If you’ve got multiple plants, then you’re trying to fill the whole space with them, too.
A few days later the plant has filled in nicely.
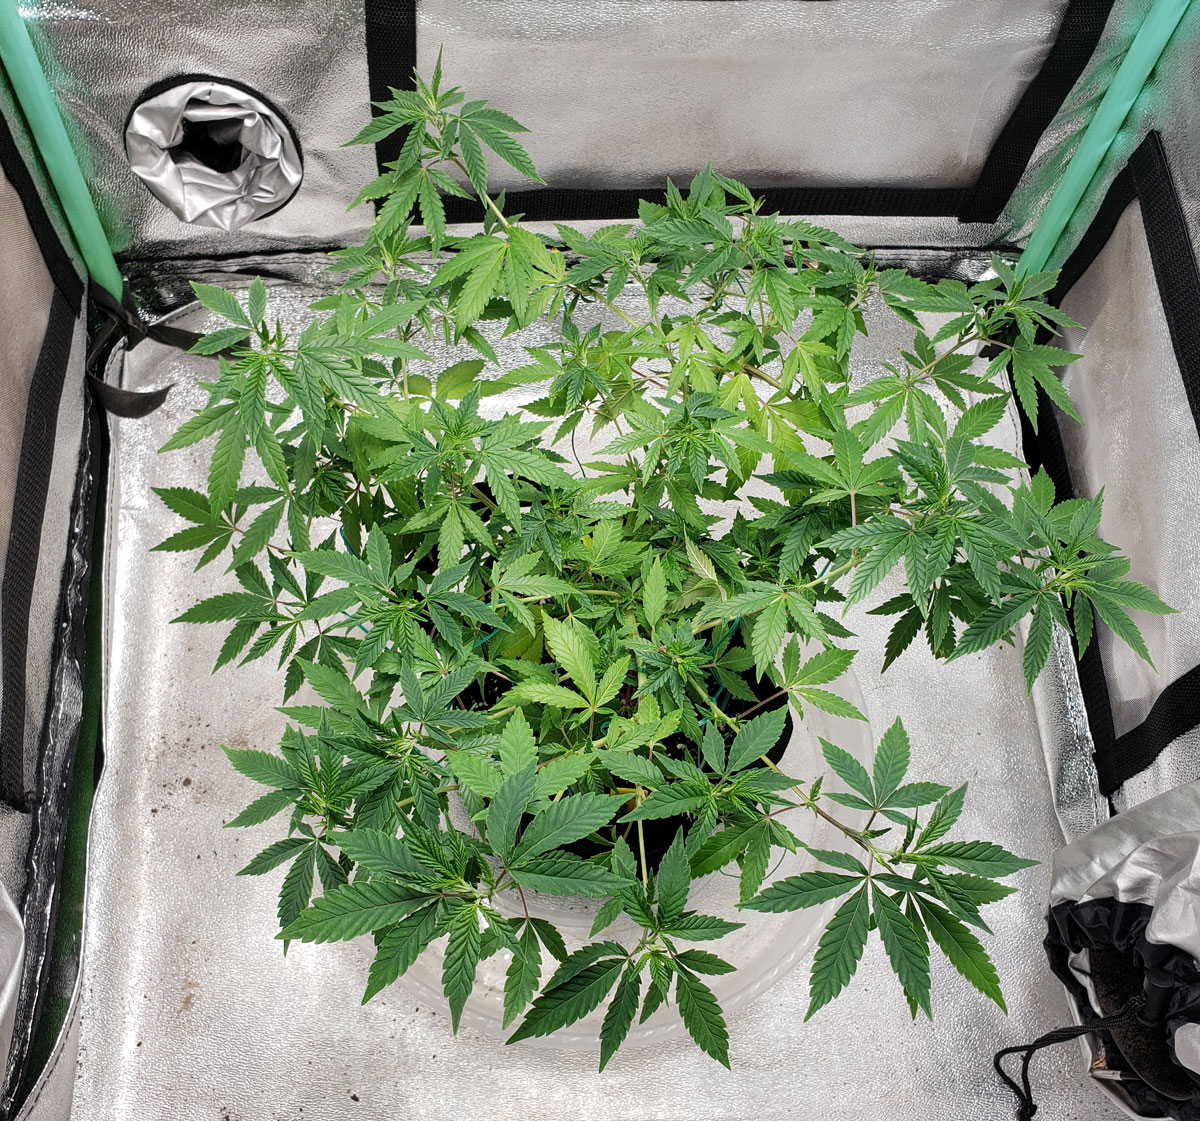
Repeat the steps until you’ve filled your entire grow space from above.
Regardless of the number of cannabis plants, just focus on achieving the a wide tabletop canopy. This makes it so that all your buds will be about the same distance from the grow light in the flowering stage.
When to go to the flowering stage:
- Auto-flowering strains – If you’re growing an autoflowering strain, the plant will automatically start making flowers/buds 4-6 weeks after germination. At that point, regardless of the plant size, you have to move to the next stage.
- Photoperiod strains – If you’re growing a photoperiod plant, then it will stay in the vegetative stage until you “tell” it to start flowering/making buds by giving it a 12/12 light schedule. The long nights simulate the late summer sun and cause the plant to “think” winter is coming so it starts its second stage of life.
3.) Flowering Stage
Main goals in the flowering stage:
- Initiate flowering by putting the lights on a 12/12 light schedule – Get plants to start making buds/flowers (this step is unnecessary if you’re growing autoflowering strains because they automatically start flowering after a few weeks regardless of the light schedule)
- Expose bud sites to light and air – Use strategic defoliation and/or tuck away extra leaves to make sure that your bud sites get access to a ton of direct light and gentle air circulation. Maximizing light to your buds will greatly increase both yields and THC levels/ potency.
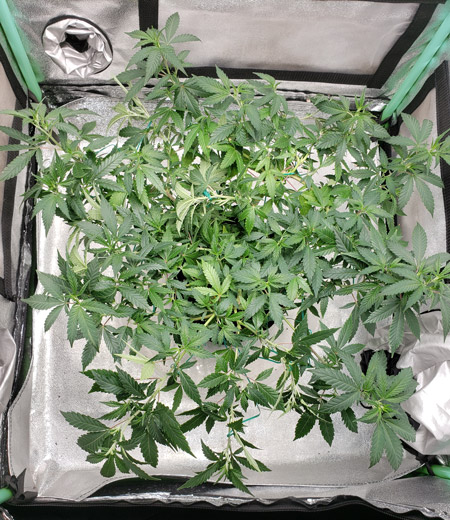
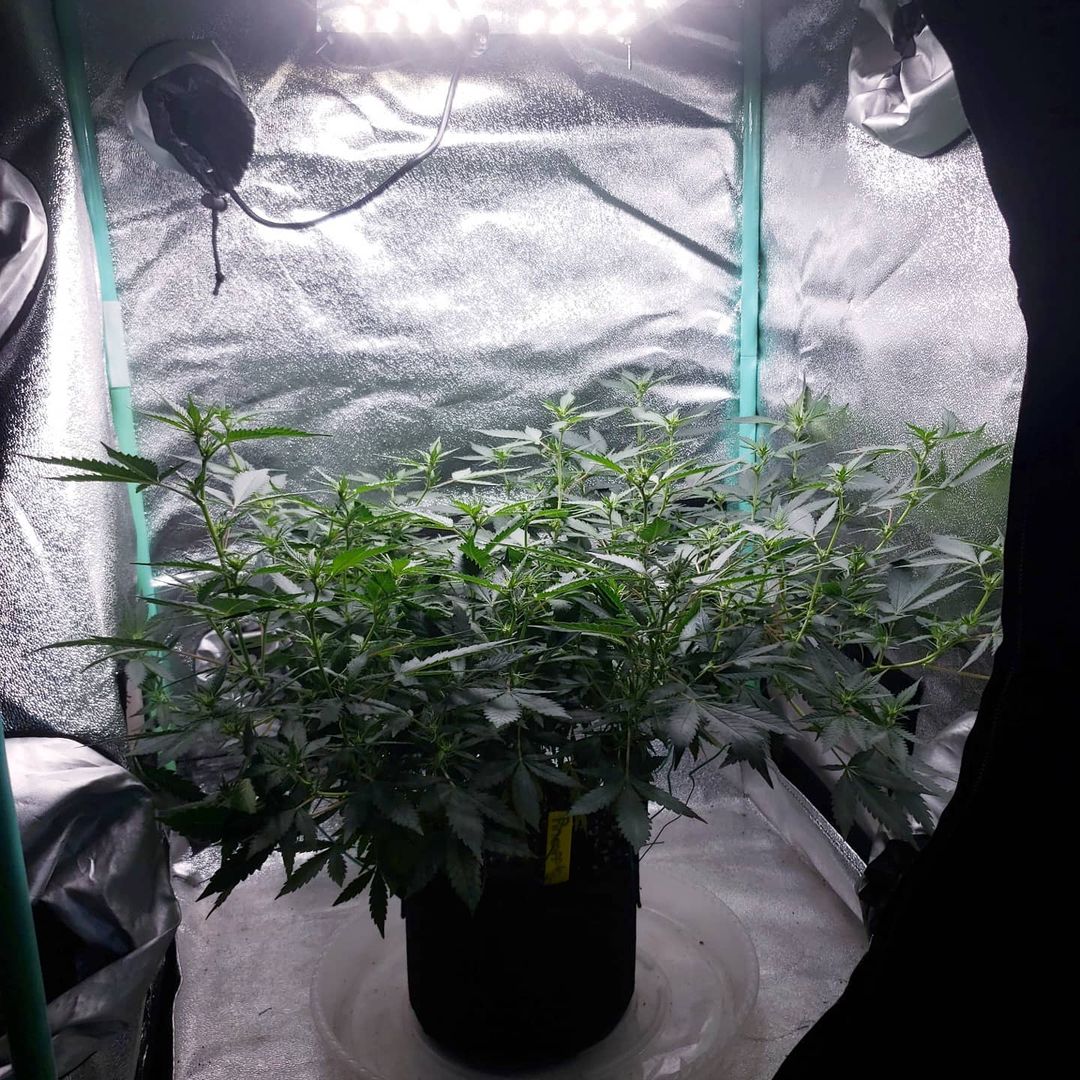
Initiate 12/12 when plants have complete coverage at the height you want. Look at all the bud sites on this 1 plant right as it starts flowering.
Here’s a side view. At this point, the only thing to do is water the plant and give it nutrients until harvest.
At harvest, this plant was just over 18″ (46 cm) tall, yet yielded several ounces because it was trained to grow wide and flat. Talk about making the most out of one small plant.
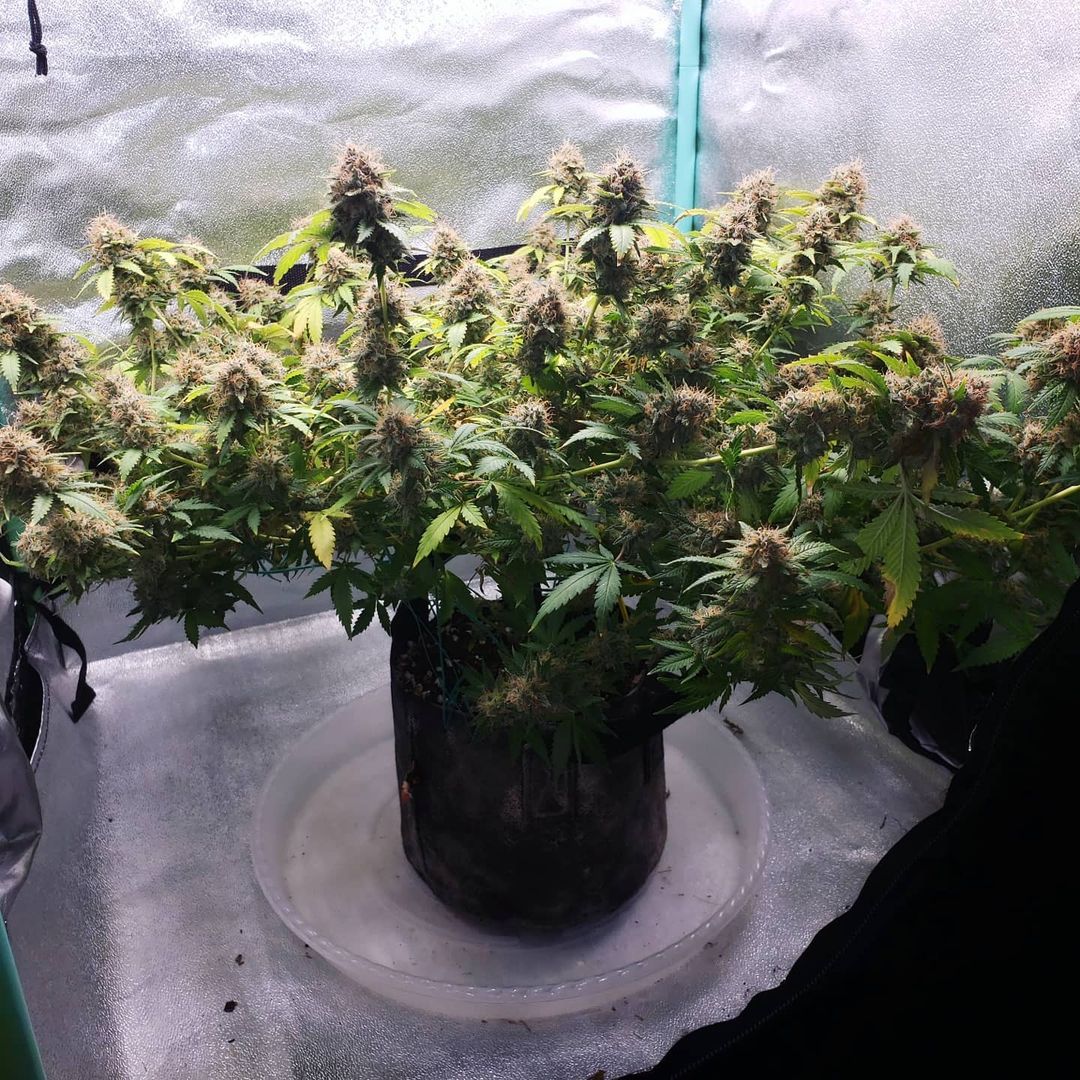
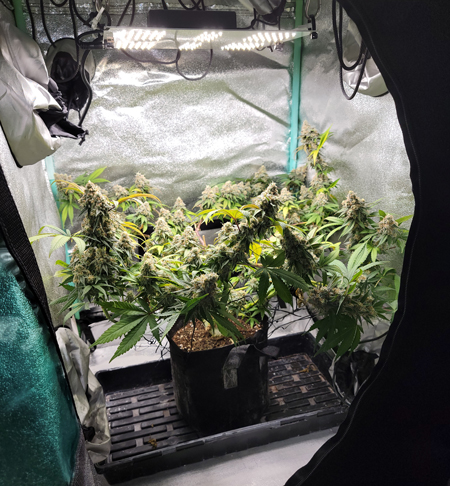
Here’s a cannabis grow cube with multiple plants at harvest.

4.) Harvest, Dry & Cure
Buds are ready to harvest when nearly all the white hairs have darkened and curled in.
This picture shows examples of ready-to-harvest cannabis buds. Buds should appear solid and the hairs should be curled in.
Read the tutorial on how to dry and cure your newly harvested buds!
5.) Enjoy your weed!
You’ve worked so hard. Now it’s time to enjoy your weed!
This was my first harvest out of the mini tent.

About the Author: Nebula Haze
Nebula Haze is an experienced cannabis cultivator and co-founder of GrowWeedEasy.com, the web’s most comprehensive online resource for growing marijuana indoors at home. Since creating the website in 2010, Nebula has dedicated her life to understanding the cannabis plant and teaching fellow growers how to produce huge yields and captivating bud quality at home. Stop paying other people a ton of money for sub-par weed and start growing better weed for a fraction of the cost today!
Check out my easy 10-step guide to growing cannabis.