by Nebula Haze
During the flowering stage, your marijuana plants are focused on making buds. They put no effort into staying healthy.
Cannabis plants need extra TLC (tender loving care) when they’re making buds.
That means you are much more likely to see yellow leaves, burnt tips, and other problems even though you’re giving the same level of care. This is especially common during the last 3-4 weeks before harvest time. Unfortunately, this is also when many beginning indoor growers get comfortable and aren’t paying as much attention to their plants.
Flowering cannabis plants are more sensitive. It’s not your fault.

Cannabis plants can also throw you a few curve balls in the flowering stage that you need to watch out for. Don’t worry, I made all the mistakes for you in the last decade of growing at home, so I can show you what to look for and how to prevent common problems before they become real problems.
I put together this list to prevent 7 common cannabis flowering issues or other goofs with simple and effective solutions. This guidebook will walk you through the flowering stage from beginning to end so your plants produce great yields and excellent buds even if it’s your first grow.
1.) No Buds Grow
What to Do: Know how to get cannabis plants to make buds.
A cannabis plant only grows leaves and stems for the first part of its life. This is known as the “vegetative stage” because you only see vegetative growth.
At first, cannabis plants grow only leaves and stems without any buds. This is the vegetative stage.
Your plant won’t actually start making buds until the flowering stage. Note: buds are the flowers of a female cannabis plant, which is why it’s called the flowering stage.
But how do you initiate the flowering stage?
With “auto-flowering” strains, cannabis plants start flowering automatically about 4-6 weeks from germination. The exact timing depends on the strain and care.
For traditional “photoperiod” strains (most common and what you probably have), plants need 12-hour dark periods every day to start flowering. This simulates the long nights of late summer and “tells” the plant that winter is coming and it’s time to make buds. Indoors, dark periods are easy to change by plugging grow lights into a wall timer that turns off the lights for 12 hours each night. Just make sure to light-proof the area so outside light doesn’t mess up your plant’s beauty sleep.
After you start giving plants a 12/12 light schedule, white hairs should appear at the joints within 1-3 weeks. These are the first signs of buds 🙂
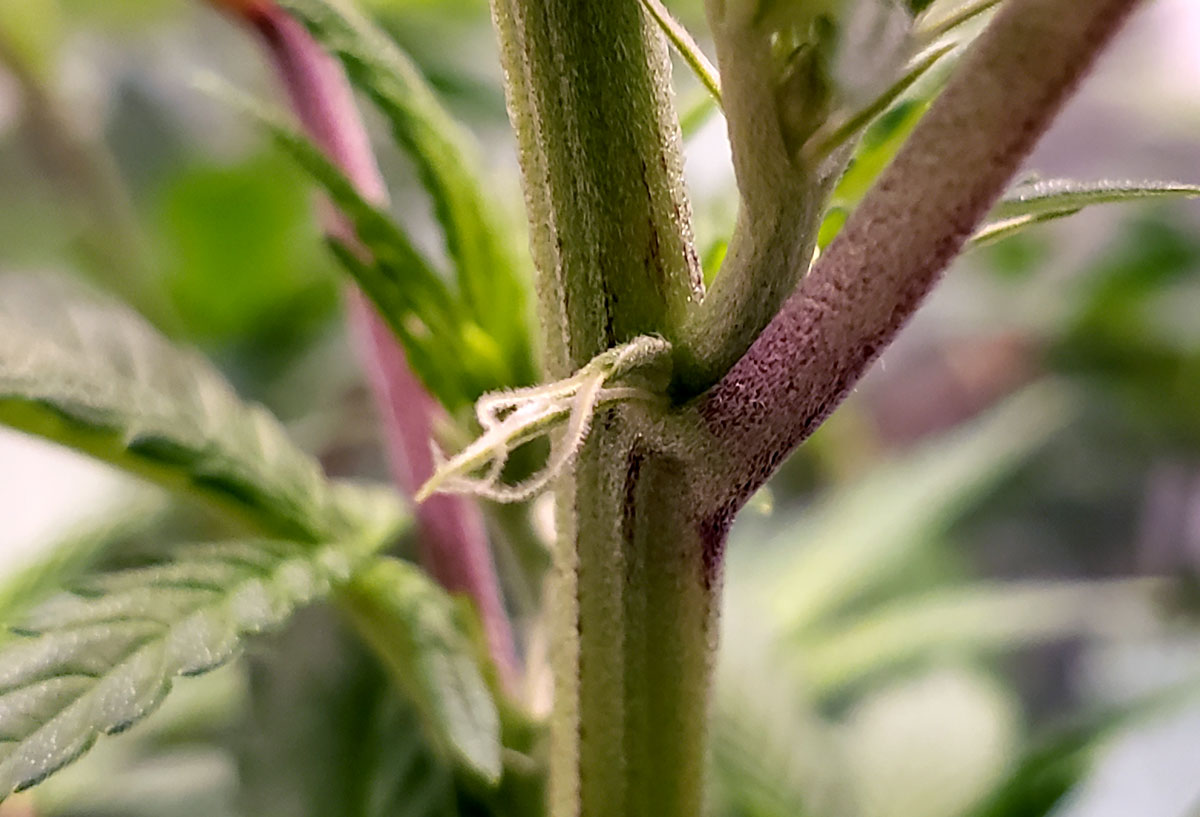
White fuzzy “budlets” start growing at the tops of every main branch. These little puffs will fatten and turn into buds over the next several weeks.

Now that you know how to get buds to form and what they look like at first, what should you watch out for?
2.) Seedy buds
How to Prevent: Watch out for male plants pollinating your female plants.
Unlike most plants, cannabis plants have a sex, and only female cannabis plants produce buds. With “regular” seeds, only half of plants are female. Luckily for home growers, if you start with feminized seeds (highly recommended!), you should get 100% female plants, which means every plant grows buds. However, if you start with non-feminized seeds, about half of all plants will start growing male flowers (pollen sacs) instead of buds and need to be immediately removed from the grow room.
Male cannabis plants grow pollen sacs instead of buds, which open and spill pollen.
Male flowers can be surprisingly pretty, but they don’t look like buds.
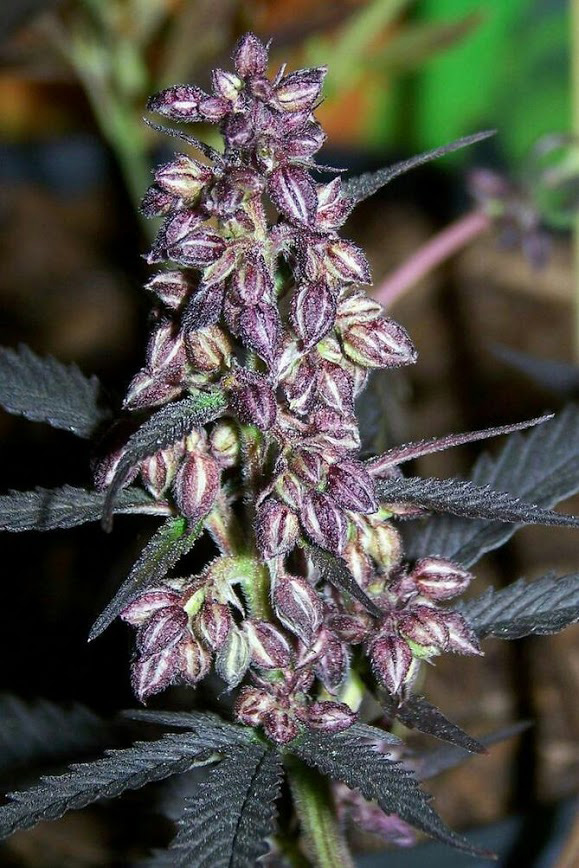
Pollen sacs eventually open and spill pollen, which is floaty and gets everywhere. Any pollent that touches buds will pollinate them, causing seeds to grow. So remove male plants from the grow space before the pollen sacs open.

Even if you’ve started with feminized seeds, it’s still a good idea to keep an eye out for unexpected male plants or hermaphrodite plants (lovingly called hermies by growers), which grow both male and female flowers. Hermies come in a few forms. They may look like male pollen sacs growing among your flowers, or you may see the signature hermie “yellow banana”. Hermies may appear in response to light stress (or other stress), or sometimes they appear for no reason at all as a result of genetics. Cannabis plants are natural things and don’t always do what growers want.
Always remove a plant that is growing pollen sacs or they will release pollen and make your buds seedy. Male plants and hermies are pollen factories. The sooner you catch and remove them, the less likely you’ll have seeds in your buds.
In this picture, there are pollen sacs growing where buds should be forming (bottom middle of the picture).

Here are yellow hermie “bananas” growing among the beautiful buds as a result of long-term heat stress 🙁

In botanical terms, a banana is a “stamen”. These produce pollen and are normally found inside a pollen sac. With hermies, you can get anything from fully formed pollen sacks down to a single stamen like the one below.
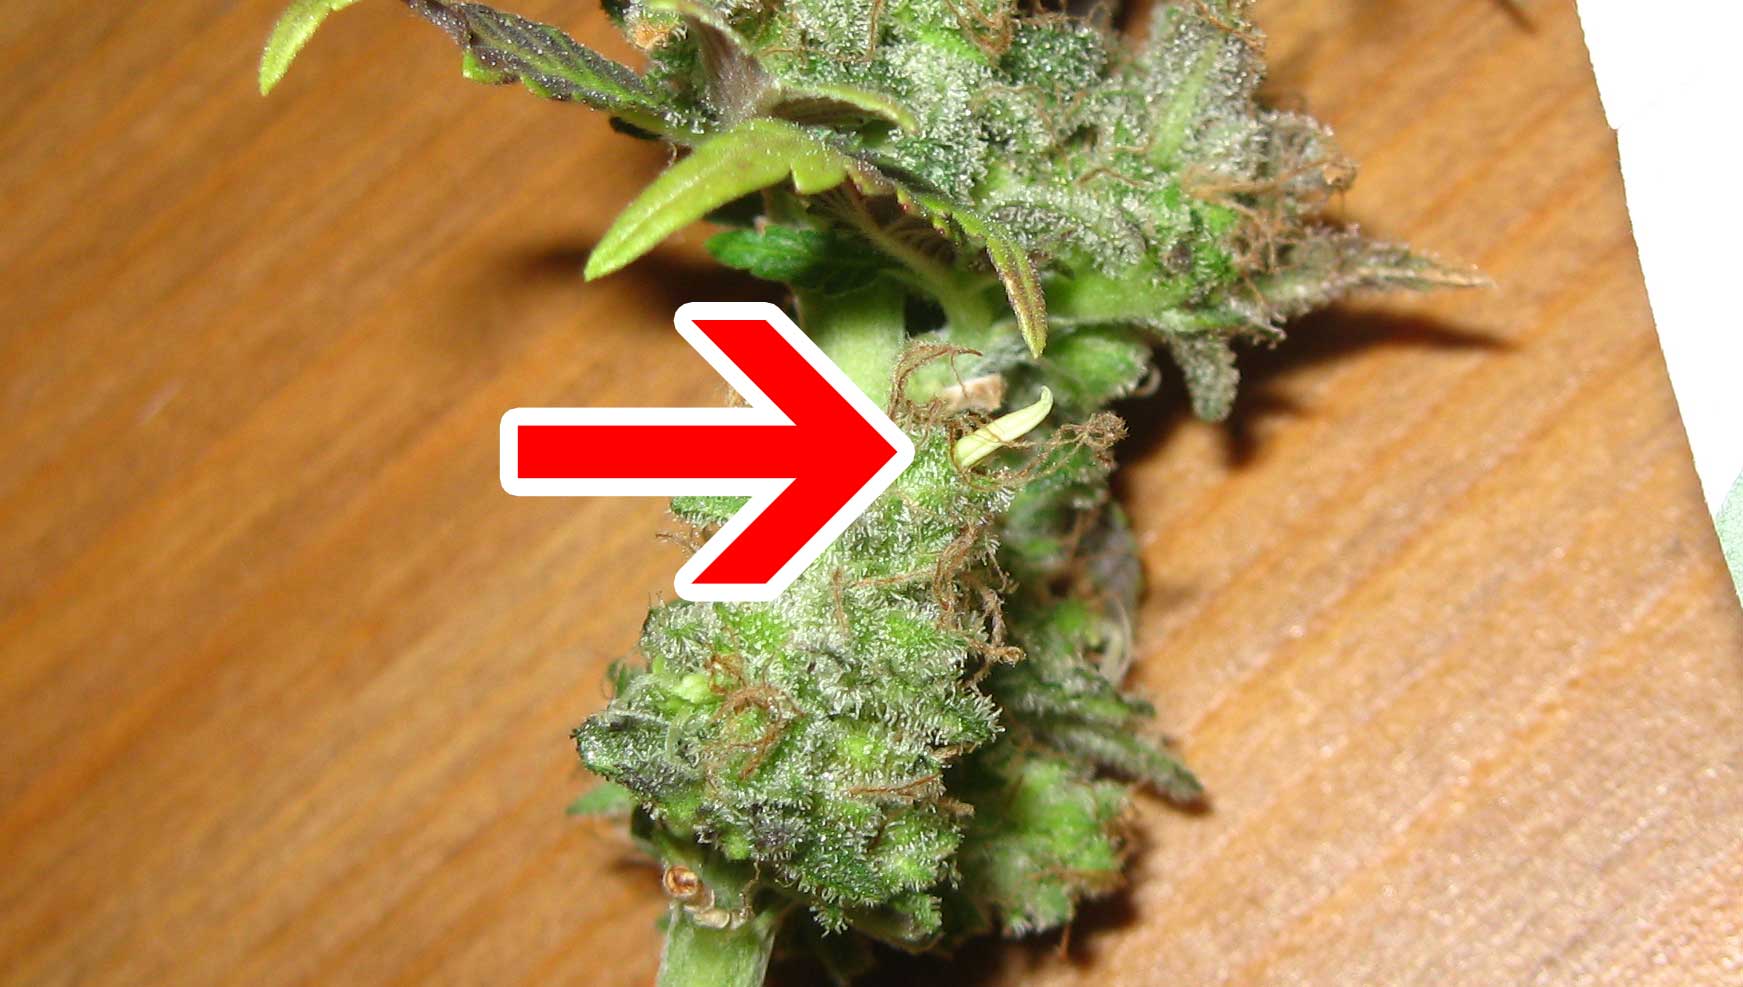
Even a single pollen sac or banana can affect your crop by spreading pollen and “seeding” the female plants, especially if the source of pollen goes unnoticed for a long time. Pollinated buds stop fattening up and focus on making seeds, resulting in seedy buds and low yields with reduced potency. So try to identify and remove all sources of pollen as soon as possible.
But there’s nothing terrible about seedy buds. It happens; it just isn’t ideal. Most of us have enjoyed some in the past! In fact, many of you may be growing from seeds you’ve found in your buds.
Learn more about male plants and hermies (with lots more pictures):
https://www.growweedeasy.com/male-plants-bananas-hermies
3.) Light stress
How to Prevent: Make sure indoor grow lights don’t get too hot/too close.
There is an ideal distance between your grow light and the plants, and it’s up to you as the grower to maintain that distance throughout the flowering stage. You don’t want Icarus flying into the sun. Light and heat stress can damage plant leaves and buds, so don’t ignore this step.
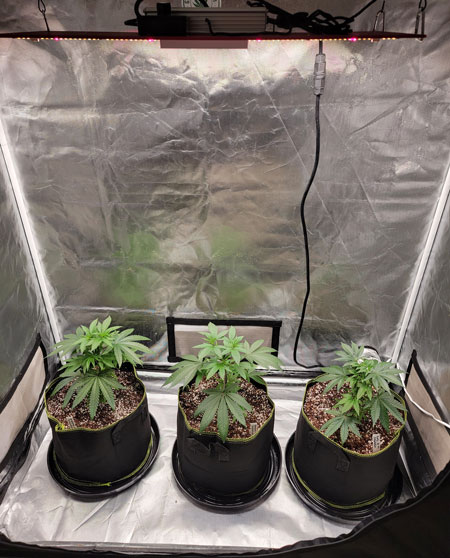
What should you expect after buds start forming? During the first 4-6 weeks of the flowering stage, many cannabis plants go through a dramatic upward growth known as “the flowering stretch“.
Example of the flowering stretch in action – your plant may double in size after the switch to 12/12 so make sure to adjust your grow lights.
Some strains stretch more than others, but breeders should be able to tell you what to expect so you can plan for it. It’s helpful to know what strain you’re growing. In general, it’s a good idea to initiate 12/12 when the plant is half the final desired size so you still have room to move up the lights if the plants double in size. Even after the flowering stretch is over, plants may keep inching closer and closer toward the grow light. Always keep an eye on the light distance so you maintain the right distance between your plants and your lights.
Learn how far to keep your grow light from your plant:
https://www.growweedeasy.com/how-far-grow-lights
4.) Nutrient deficiencies
How to Prevent: Avoid nutrient deficiencies by checking pH of your water.
Nutrient deficiencies are the most common flowering stage problem. Deficiencies often happen in the flowering stage even when you’re using good cannabis nutrients exactly according to directions.
So what do you do if you see a nutrient deficiency? Fix the pH.
Correct pH to fix nutrient problems before they spread to the buds!
Dig Deeper: Deficiencies in the Flowering Stage? How to Beat the Mid-Flower Curse.
As long as your cannabis plants are getting a source of basic nutrients, chances are any nutrient deficiencies you see are actually the result of incorrect pH at the roots.
In other words, the root area is too “acidic” or “alkaline” for your plant roots to absorb nutrients through the water. Some growers get lucky and their water has the perfect pH, but if your starting water has high or low pH considering your setup, you need to take steps to fix it.
More than half of the marijuana plant problems submitted to GrowWeedEasy.com end up being the result of too high or too low pH in the root zone.
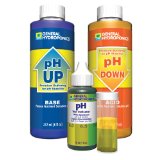
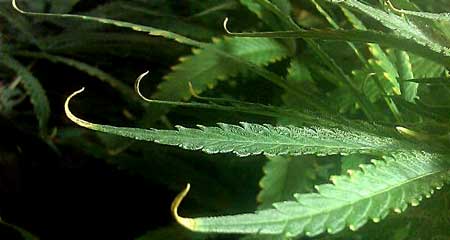
Use a PH kit to test the pH of your water. It only takes a minute!
PH problems can cause wrinkly leaves, curling, and what appears to be a wide variety of nutrient deficiencies. Plants can’t absorb nutrients when the pH is off at the roots, so symptoms can look like almost anything. In hydroponics, pH management is absolutely crucial to your success. Even when growing in soil, pH has a big effect.
Some growers may get lucky, but if you’re having unexplainable problems, I highly recommend at least checking the pH and eliminating that as a possible cause.
Problems from pH manifest in a variety of ways, and look like nutrient deficiencies
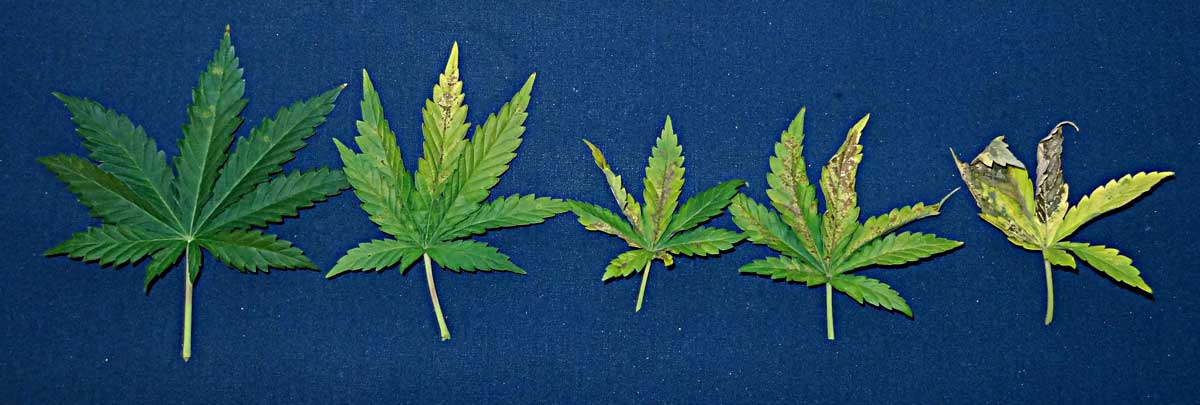
Although the symptoms can look different, most nutrient deficiencies can be traced back to incorrect pH.
Brown splotches on leaves are a common symptom of pH problems.

Many growers see burnt edges or tips and instantly think nutrient burn, but it could actually be a deficiency caused by pH imbalance. If more than just the tips are burnt it’s likely a sign of pH problems.

Cannabis want their water slightly acidic. Optimum pH varies a bit from strain to strain, but a good rule of thumb is to maintain a rootzone pH of 5.5-6.5 in hydroponics or coco, and 6.0-7.0 when growing marijuana in soil.
- Soil: Water should be 6-7 pH
- Coco or Hydro: Water should be 5.5-6.5 pH
If you’ve already been monitoring pH from the beginning, continue to monitor pH during the flowering stage. Don’t get too comfortable and get lax when you’re in the most important phase of your plant’s life. If you suddenly get a bunch of unexpected problems once your plants start flowering, check pH first before you take any other drastic measures.
A pH kit is cheap, and easy to use. Learn how in my ph tutorial.
Giving plants optimum pH at their roots makes it easy to absorb nutrients, so plants can focus their energy on making buds.
Learn what you need to know about pH right here (it’s simpler than you probably think!): https://www.growweedeasy.com/ph
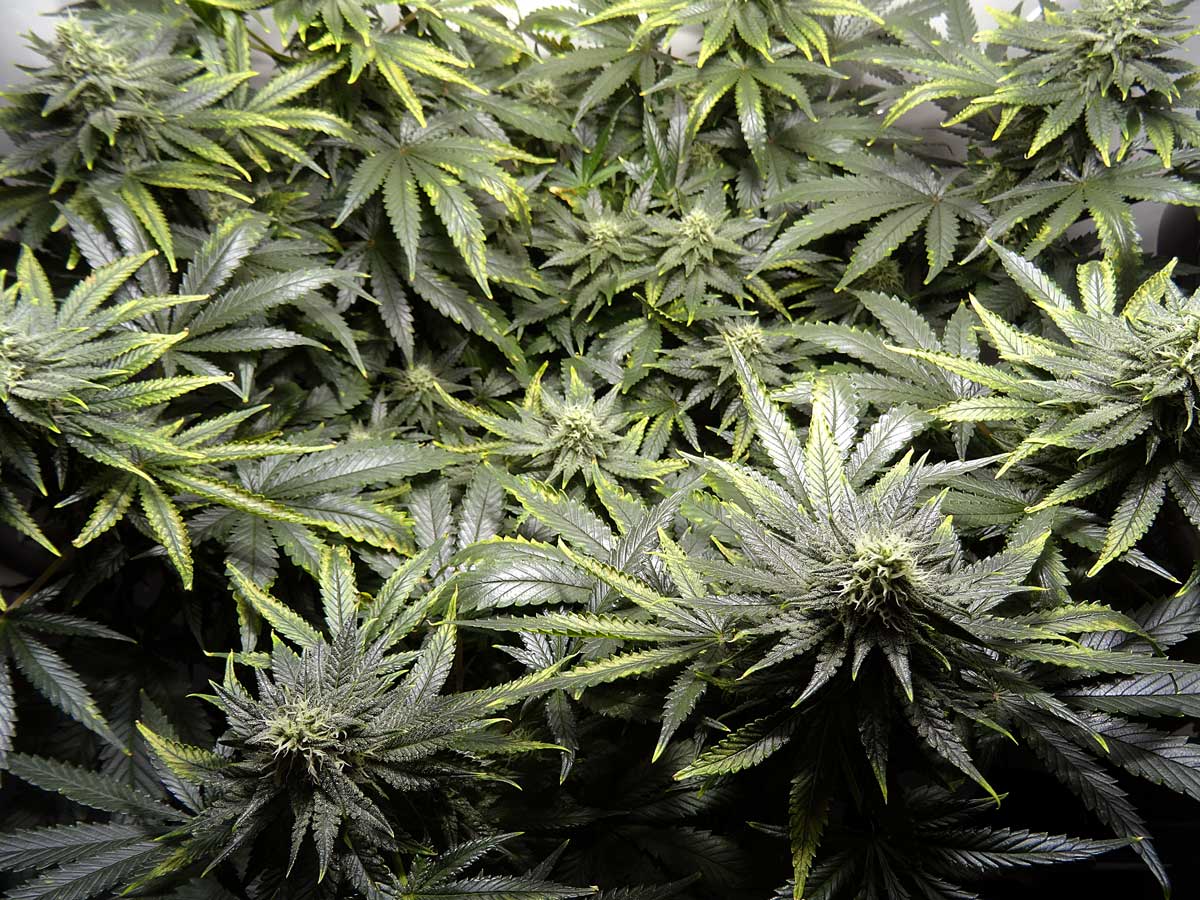
Don’t overdose plant with nutrients.
Going overboard on nutrients (even organic nutrients if they’re concentrated enough) burns the tips of leaves. If you ignore the issue and nutrient burn gets bad enough, it will discolor your buds, too.
Never raise nutrient levels unless you’ve ruled out a pH problem and even then, do so slowly.
It’s normal for your oldest, lower leaves to start yellowing and falling as harvest approaches. Don’t raise nutrient levels towards the end of the flowering stage (especially after buds already appear fully formed and close to harvest).
5.) Smell Overload
What to Do: Set up a carbon filter inside your grow tent.
The secret to staying stealthy when growing cannabis is “Don’t tell, don’t sell, don’t smell.” Basically, don’t tell anyone, and don’t let anyone see or smell your garden.
Some cannabis plants are a little stinky in the vegetative stage, but most cannabis plants produce a very strong smell in the flowering stage.
It’s worth the time and money to set up a carbon filter to prevent odors from escaping the grow space.
A carbon filter works best when paired with a grow tent, which is why they’re often sold together as a set with the grow light.
Most all-in-one-grow kits for cannabis come with a carbon filter.

Learn How to Control Smells in the Grow Room.
6.) Harvest at the wrong time
What to Do: Harvest cannabis plants at the right time.
How long does the flowering stage last? When do I harvest?
The time spent in flowering depends heavily on your strain, as well as the effects you’d like to produce. View a complete marijuana timeline.
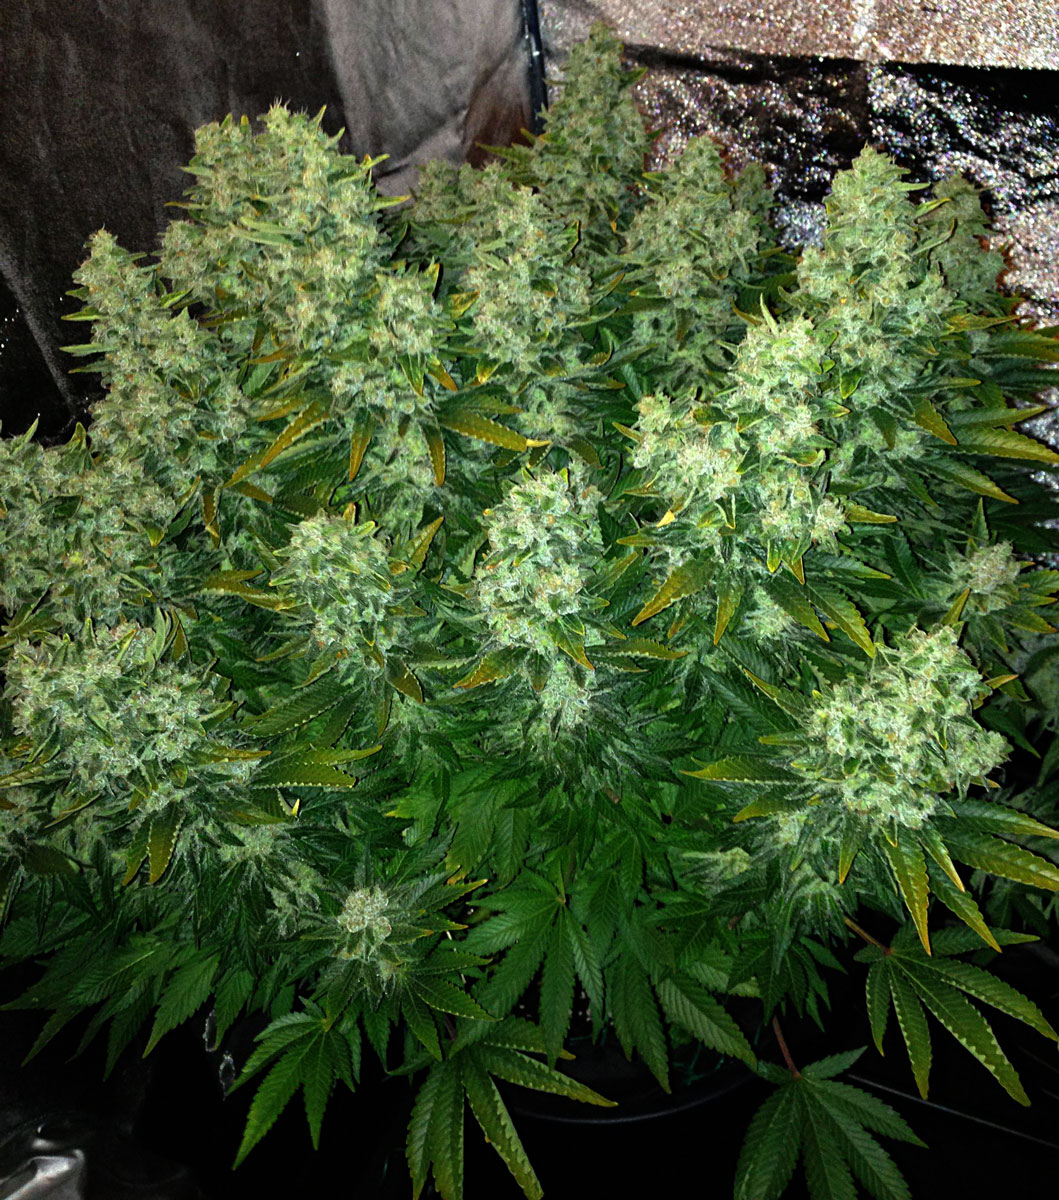
These cannabis plants are ready to harvest (grown under a Spider Farmer SF-2000 LED)
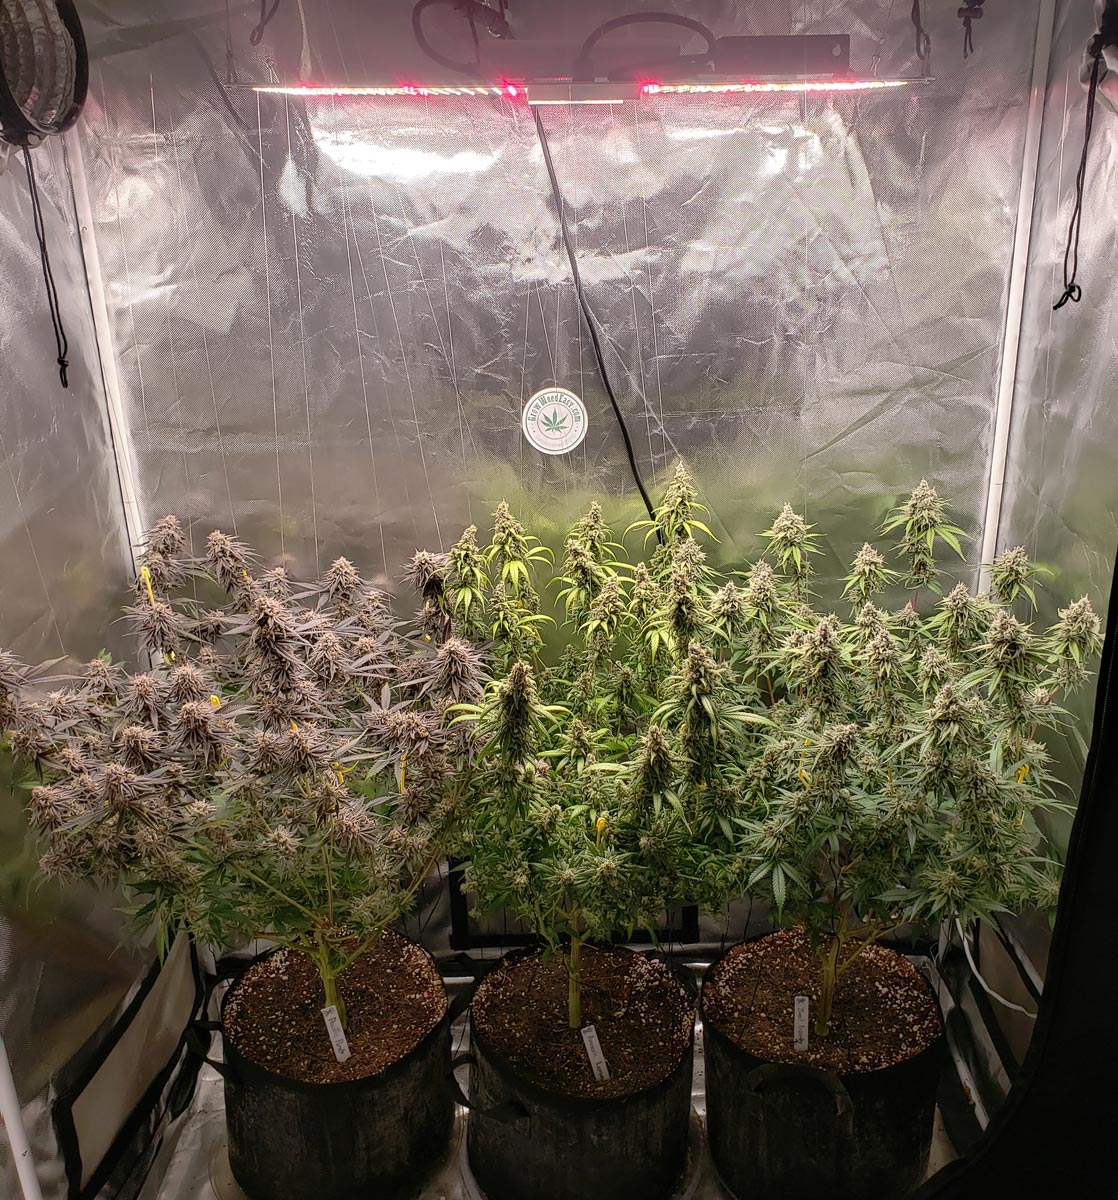
Most strains need 2-3 months in the flowering stage before they’re ready to harvest, though commercial strains are a bit faster and some strains may need as long as 4 months of flowering before buds are ready (though there are tricks to get these long-flowering strains to mature faster).
Some growers prefer to harvest on the earlier side for more of a “buzzy” weak high while other growers harvest later for more of a “couchlock” high.
- Harvesting too early causes low yields, low smell, and low potency buds.
- Harvesting very late produces less-potent buds that tend to cause sleepiness.
When you harvest at the right time, you get the best yields and the effects you want.
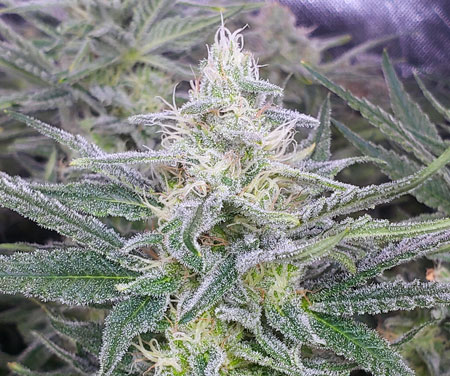
When you still see lots of white hairs, it means you’ve got several weeks to go
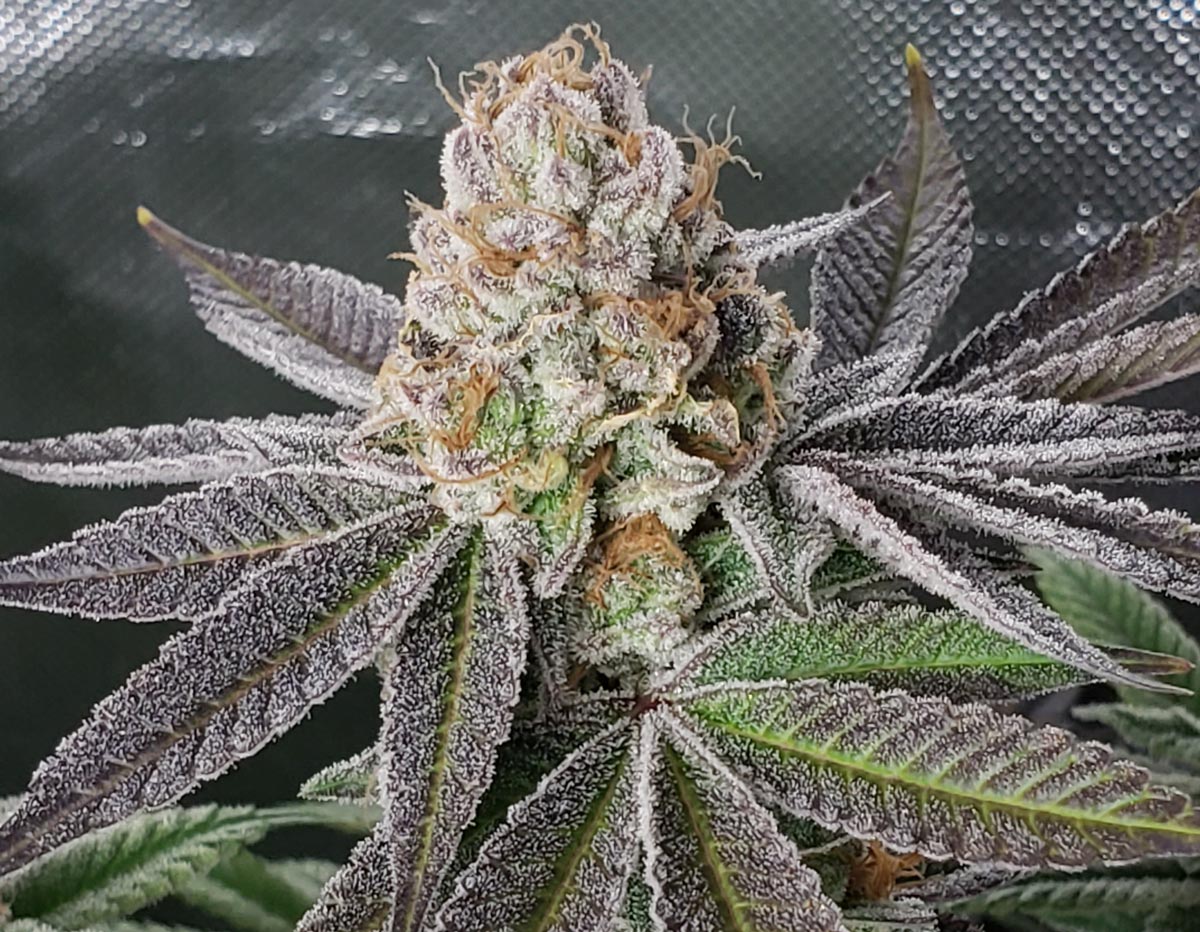
Buds fatten throughout the flowering stage and are ready to harvest when the white hairs darken and curl. This bud is ready to harvest.
The best thing to remember with harvesting is to be patient. A lot of people get too eager to harvest buds, and they end up taking their plants down too early. You’ve come this far, make sure to end strong!
Here’s a complete guide to knowing exactly when to harvest your marijuana:
https://www.growweedeasy.com/harvest
For the geeks like me… here’s an article explaining the science behind picking the right harvest time to achieve optimum cannabinoid levels:
https://www.growweedeasy.com/thc-cbd-cbn-when-to-harvest-marijuana
7.) Poor drying technique
What to Do: Dry and “cure” your newly harvested buds the right way.
Although it may seem like everything is over after harvest day, the next few days are incredibly important to your bud quality. Avoiding common problems in this phase will produce significantly higher-quality buds.
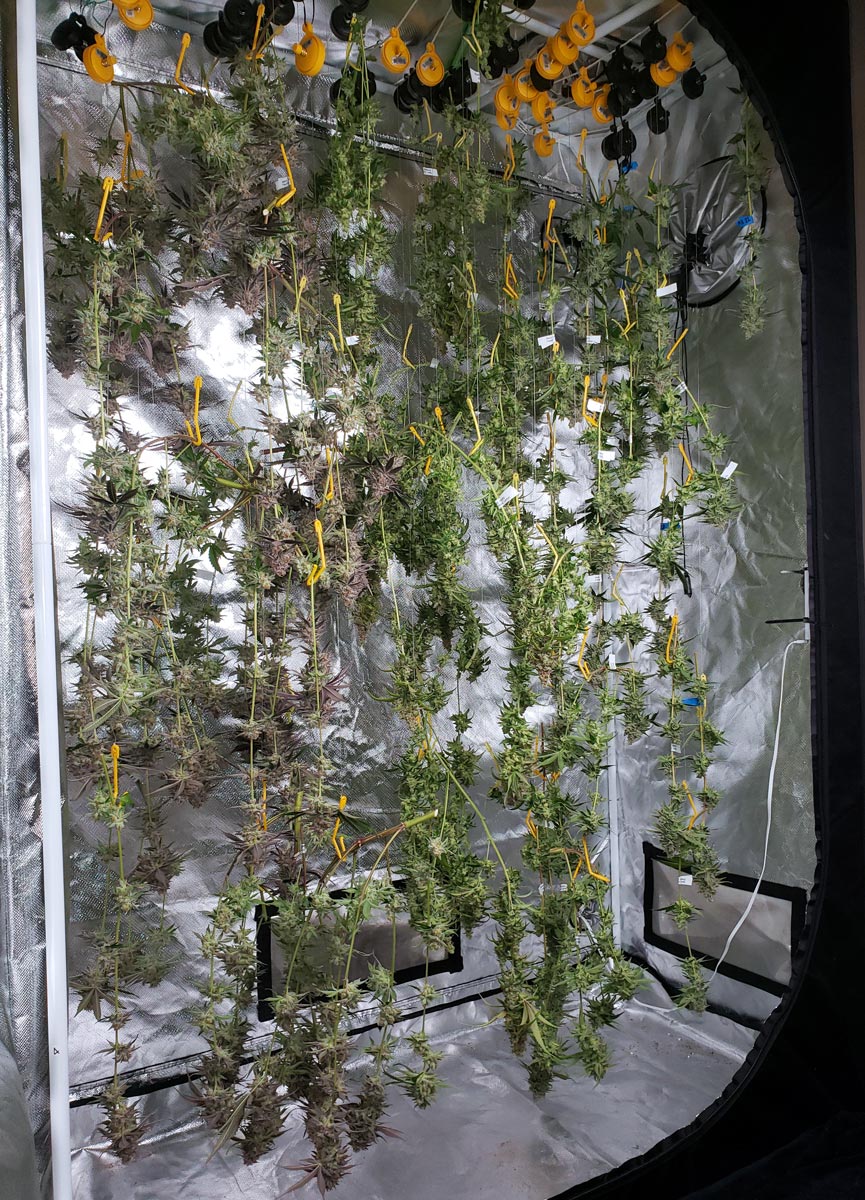
Once you’ve determined the plants are ready to harvest, you need to cut down the branches, remove excessive fan leaves, and hang the branches upside down to slowly dry over the course of 3-10 days. The total drying time depends on how dense your buds are and the drying environment.
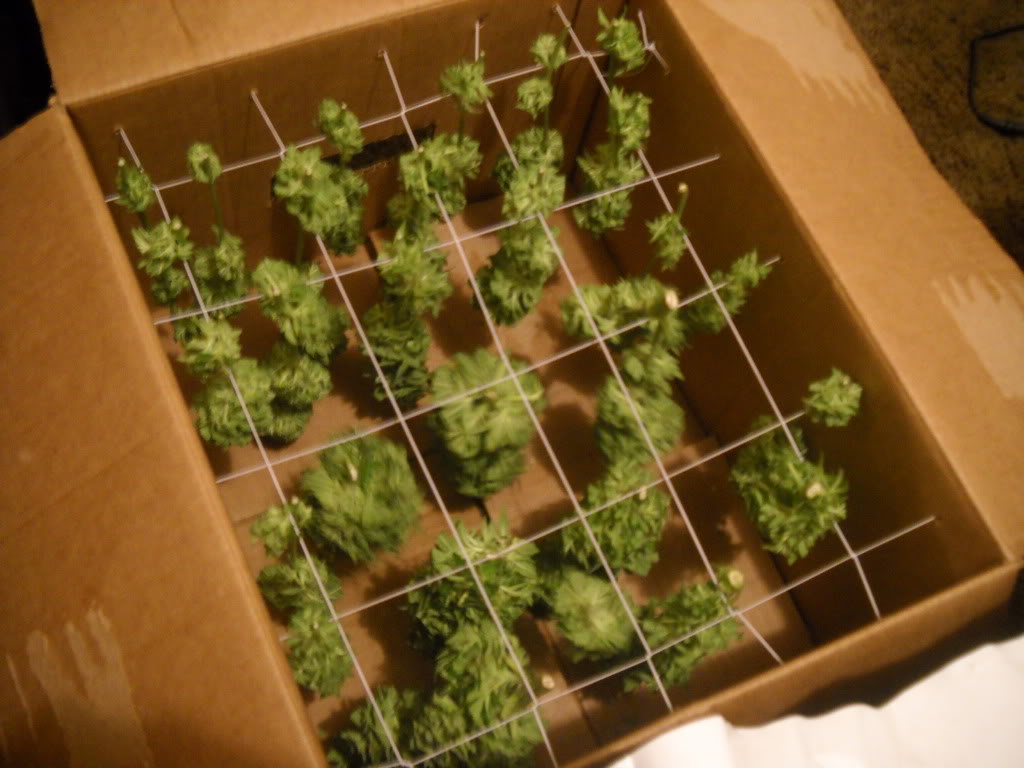
Some growers may dry weed in different ways, for example in cardboard boxes, on mesh netting, in paper bags, or even in a specialized weed dryer.
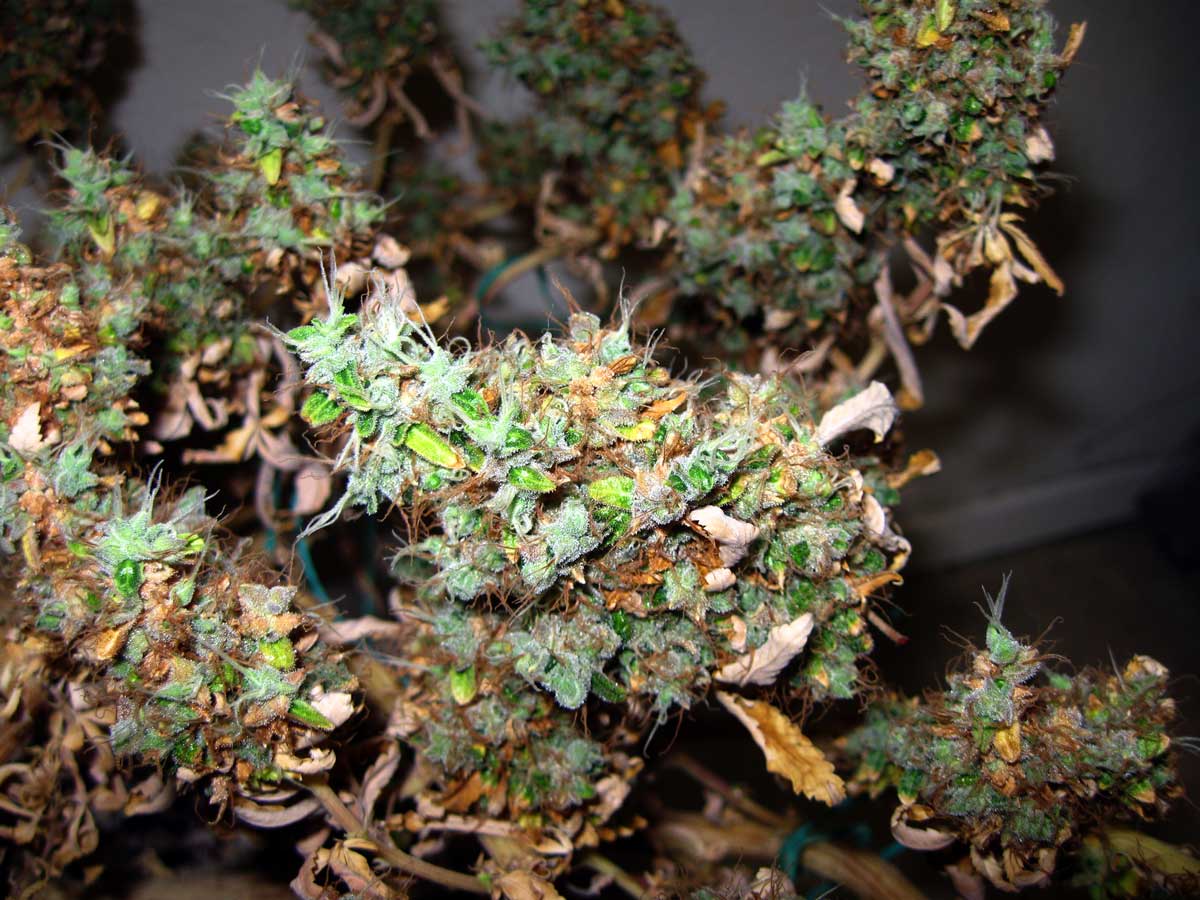
The ideal drying environment is cool with slight air movement. Buds want to dry slowly and evenly. Commercial growers dry buds in spaces controlled to 60°F and 60% RH. Obviously, that level of environmental control is not feasible for most home growers. Your best bet is to make sure you’re growing in a space that stays cool with some air circulation. Make sure the area is clean.
Smaller buds typically don’t mold but if you have any big fat buds, make sure there’s air movement around them while drying. Never dry buds in a warm or humid space to reduce the chance of mold. A good environment also helps prevent buds from drying unevenly or growing unwanted microorganisms. If the drying space must be warm or humid, make sure buds are spaced apart from each other, and there is gentle but measurable air movement between all the buds (point a fan at the wall), check often for mold.
Buds are done drying when…
- small stems snap instead of bend
- buds “pop” off the branch instead of coming off with strings
Once buds are dry, growers typically use scissors to trim away most of the leaves, so only the buds are left.
Curing Your Buds
After buds are dried, they can be smoked but they tend to be harsh. That’s where the curing process comes in. Curing buds in jars makes them smoke better, smell better, and feel more potent with nicer effects.
Once your buds are dried and trimmed, put them in airtight jars, and place the jar in a dark place.
For the next two weeks, open the jars every day and jostle the buds a bit. This is also a good time to make sure you don’t see/smell mold and buds still feel dry (they tend to get wetter over time as water from inside the buds works its way to the outside).
Tip: Get Boveda 58% RH humidipaks and put them in your jars with your buds to automatically regulate the humidity to the ideal level. A must for every home grower!
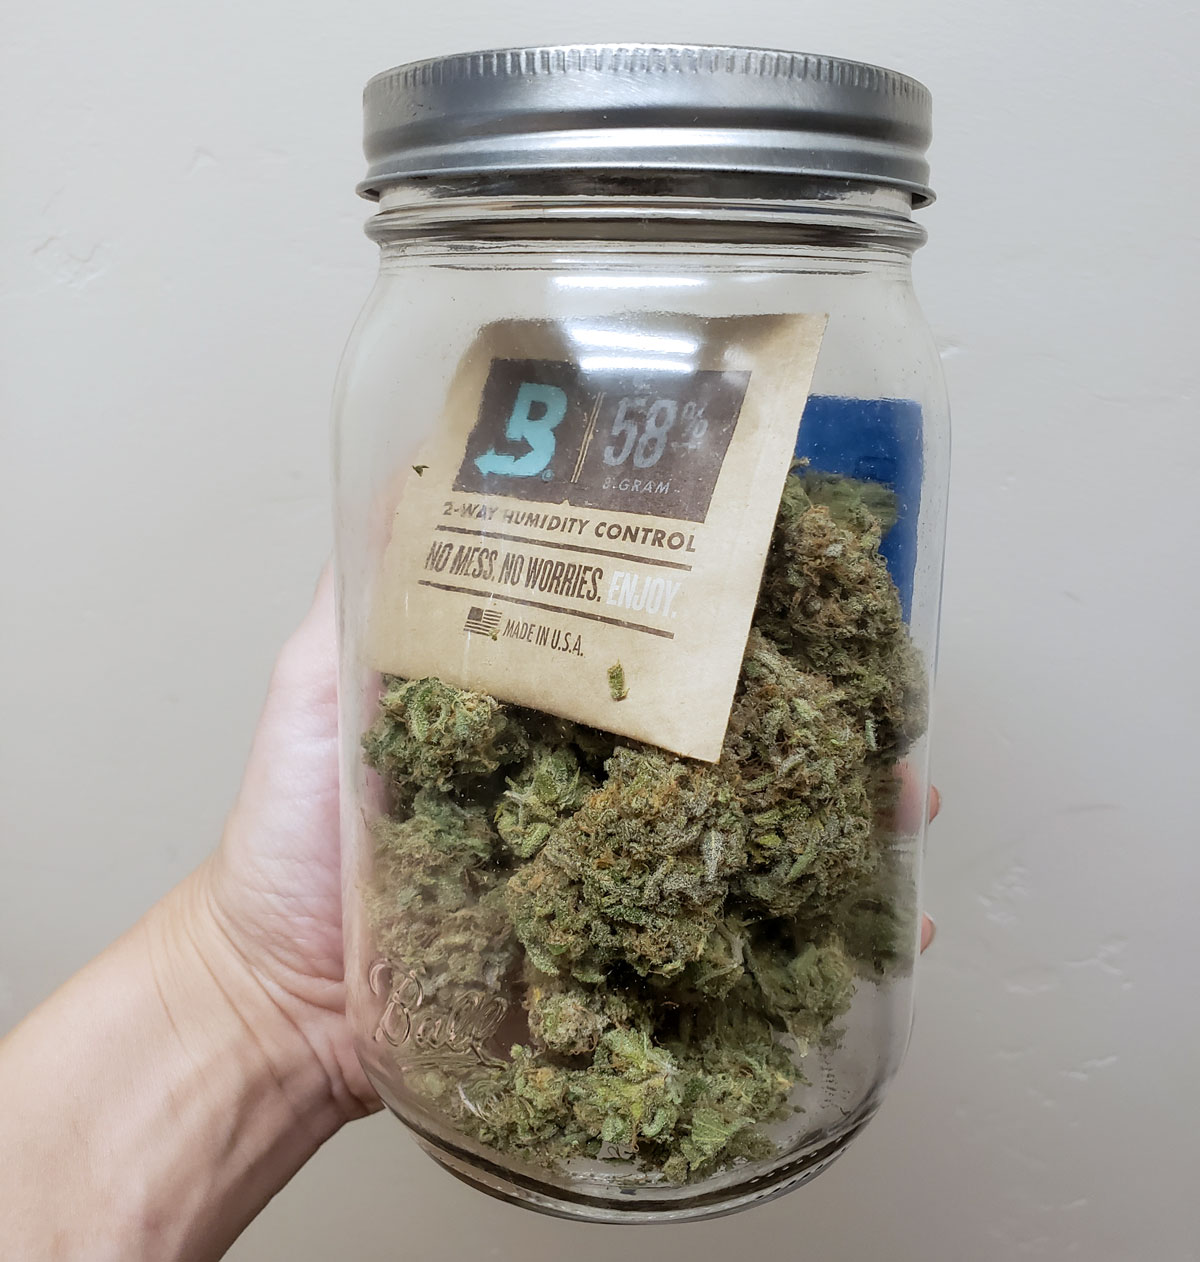
After about 2 weeks of this process, you have cured herb. You can stop burping the jars every day, though it’s a good idea to open them occasionally to check for mold or weird smells (which are the result of too much moisture). Some growers cure buds in jars even longer than 2 weeks, up to 6 months, for continued improvement in flavor/smell.
I hope you enjoyed this article, I wish I had known this stuff when I first started growing 🙂
About the Author: Nebula Haze
I believe adults should have safe access to marijuana, and GrowWeedEasy.com is dedicated to showing you how easy it can be to grow your own at home.
Please sign up for our weekly newsletter!
Delivered every Sunday since April 20, 2012. View past newsletters here.
GrowWeedEasy.com’s new book teaches you total Harvest Mastery.

Jump to…
Supercropping: Simple secret to bigger yields
View Pictures of Common Plant Problems
Learn about buying seeds online