by LBH – View original cannabis scrog tutorials by LBH on Rollitup: 4 Way LST tutorial & ScrOG tutorial
Table of Contents
- Topping Your Plants for ScrOG
- Step-By-Step Tutorial (with Pictures)
Introduction to ScrOG (Screen of Green)
“ScrOG” has become a term used for the “Screen of Green” cannabis training technique.
The purpose behind Scrogging is to manually change the plant’s natural growth patterns by putting all the buds on an even layer. This is accomplished by bringing the low stuff up (by getting screen good and low) and bringing the main cola down (by stopping it via topping) to the canopy.
The rough pics below illustrate my point.
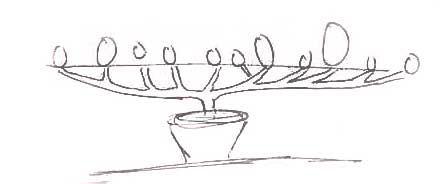
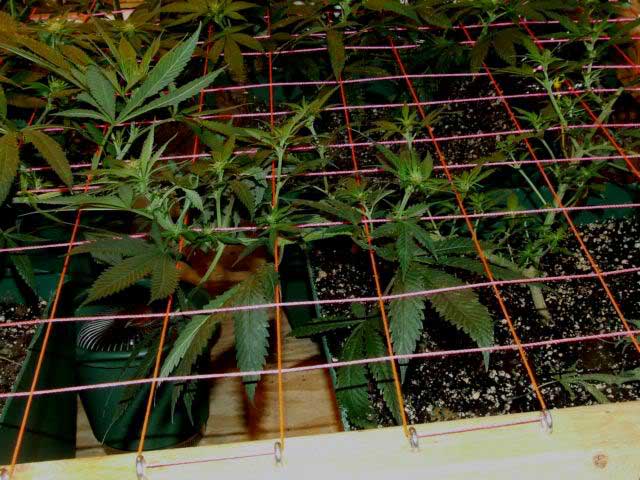
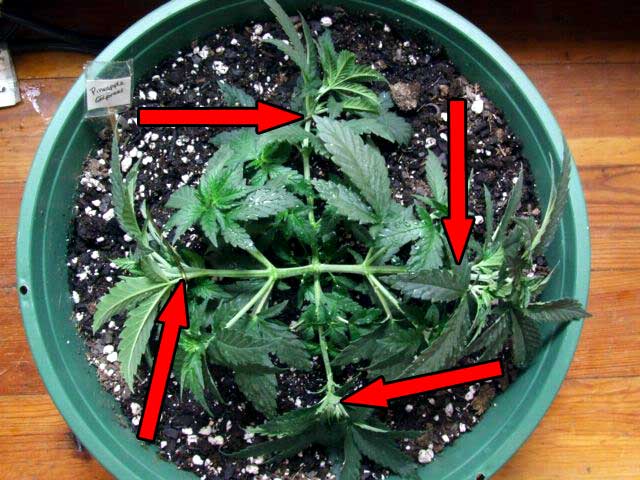
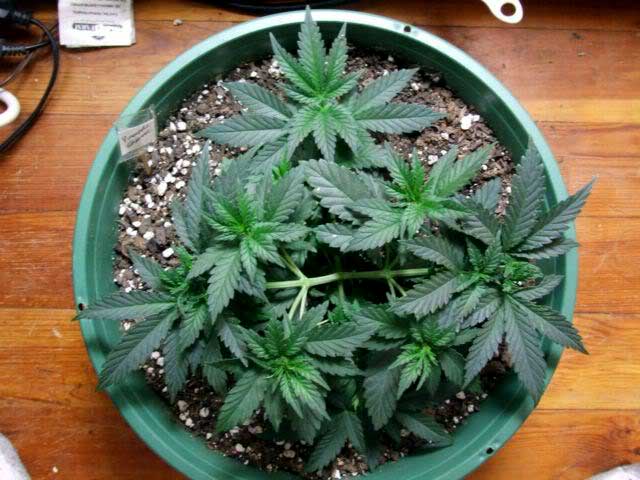
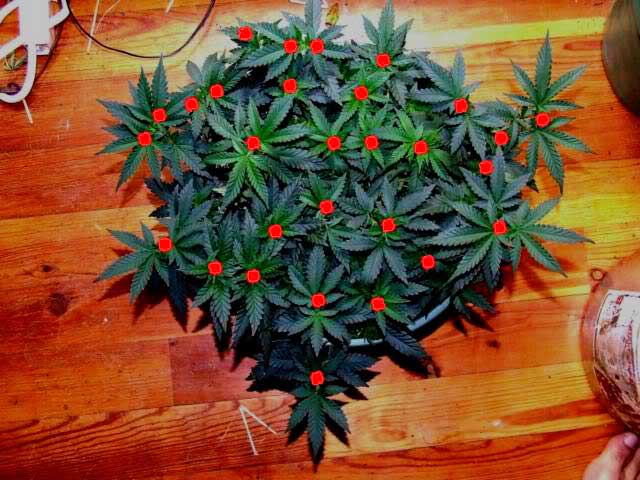
Group A – Scrog Examples
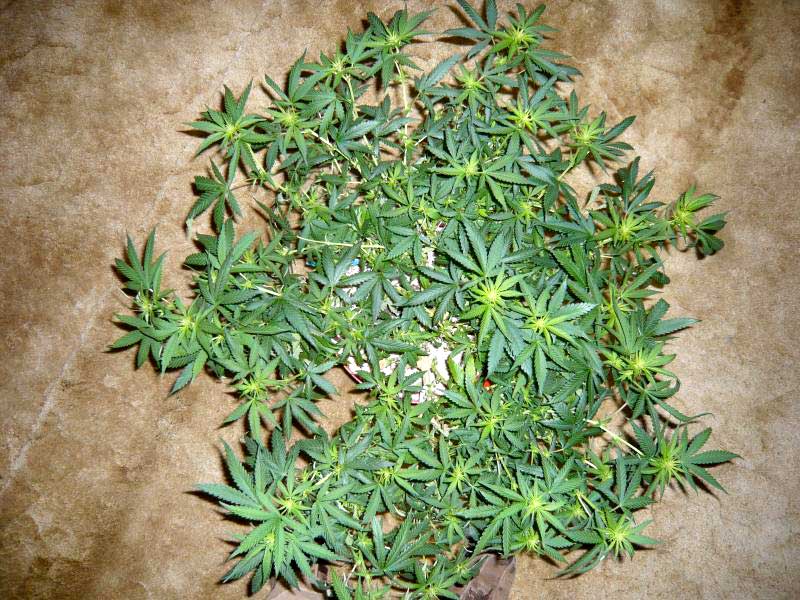
This diagram shows the structure of a proper Scrog
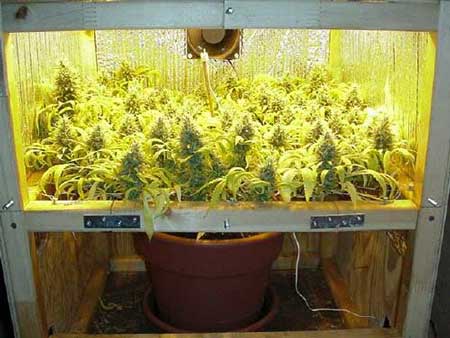
These plants have all been scrogged

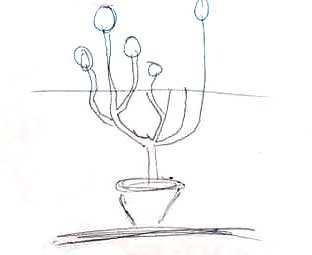
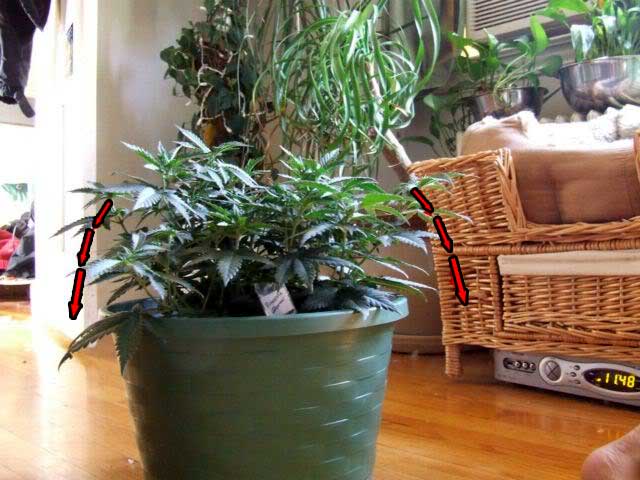
Group B – These are NOT Scrog!
This diagram shows the common structure of cannabis plants under screens which have not been properly scrogged.
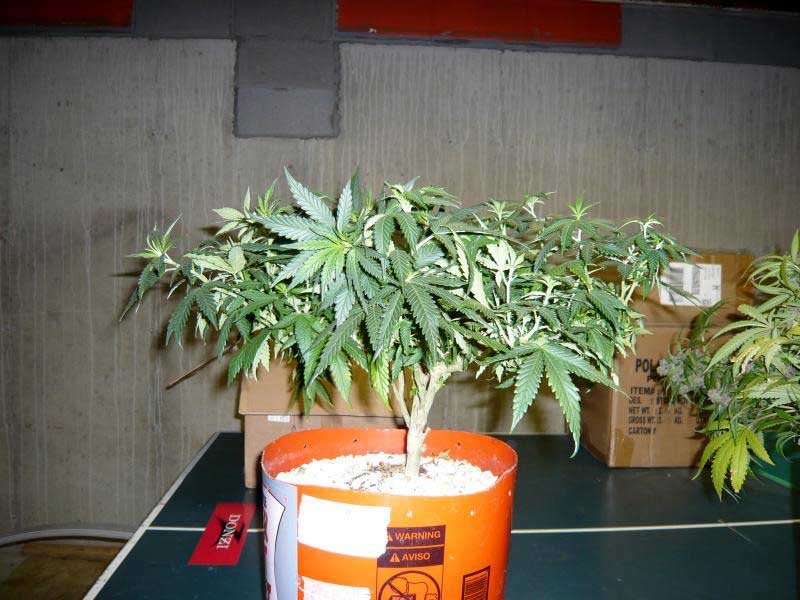
The following picture has a beautiful undercurrent, but this is not a Scrog. Skeletal support at best, but again, not an example of a real Scrog.

Now to break down the main cola and get the plant growing horizontally, I suggest trying my 4-way LST and ScrOG setup method…
Overview of ScrOG Process
Scrogging, or screen of green, is a form of LST (low stress training) where the main goal is to maximize the footprint of your light. With standard, Christmas tree style plants, you can only lower the light until it’s close enough to the top cola. ANY bud from there down is getting less light. With a traditional setup, the lower each bud is on the plant, the less light those buds get.
The scrog process is done by dividing, or breaking down the main cola, in conjunction with raising all the lower bud up to the canopy.
We grow the plant horizontally until we are a few weeks into the Flowering stage.
This is a key point as many attempts at Scrogging turns out to be merely a skeletal support structure for standard plants, not real Scrogs.
A Scrog is when you bring those arms up and run them lengthwise under the screen. All those would-be popcorn buds become real buds because they become part of the canopy and receive direct light.
Lower buds are brought up to the screen or the screen is lowered, allowing them to become a part of the canopy.
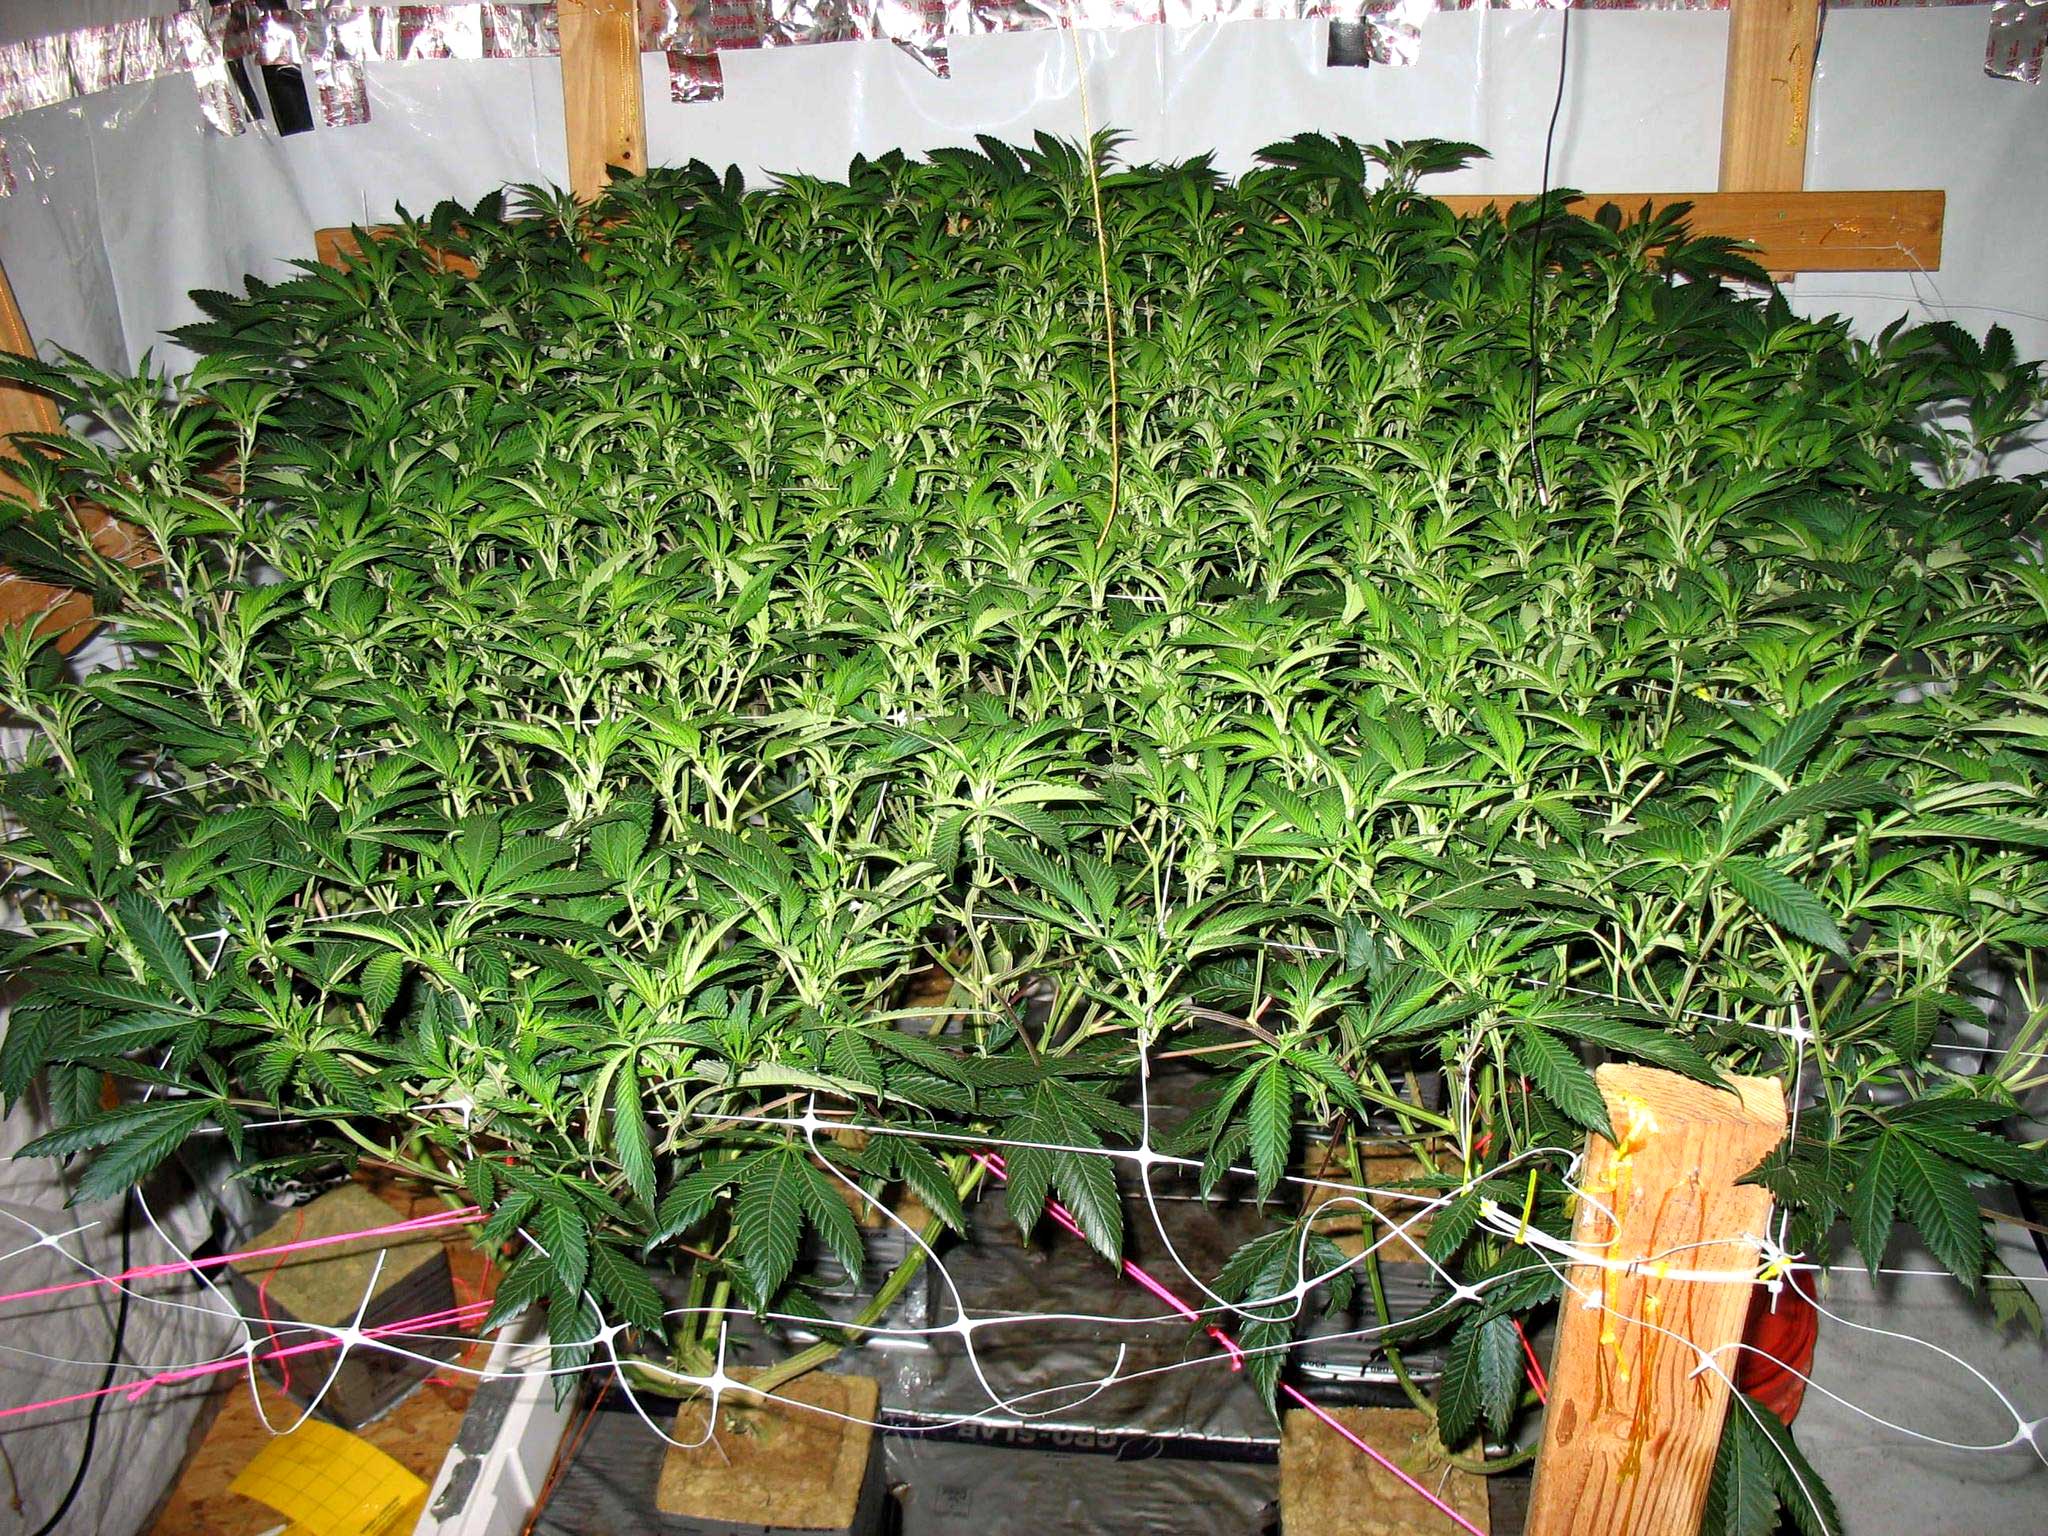
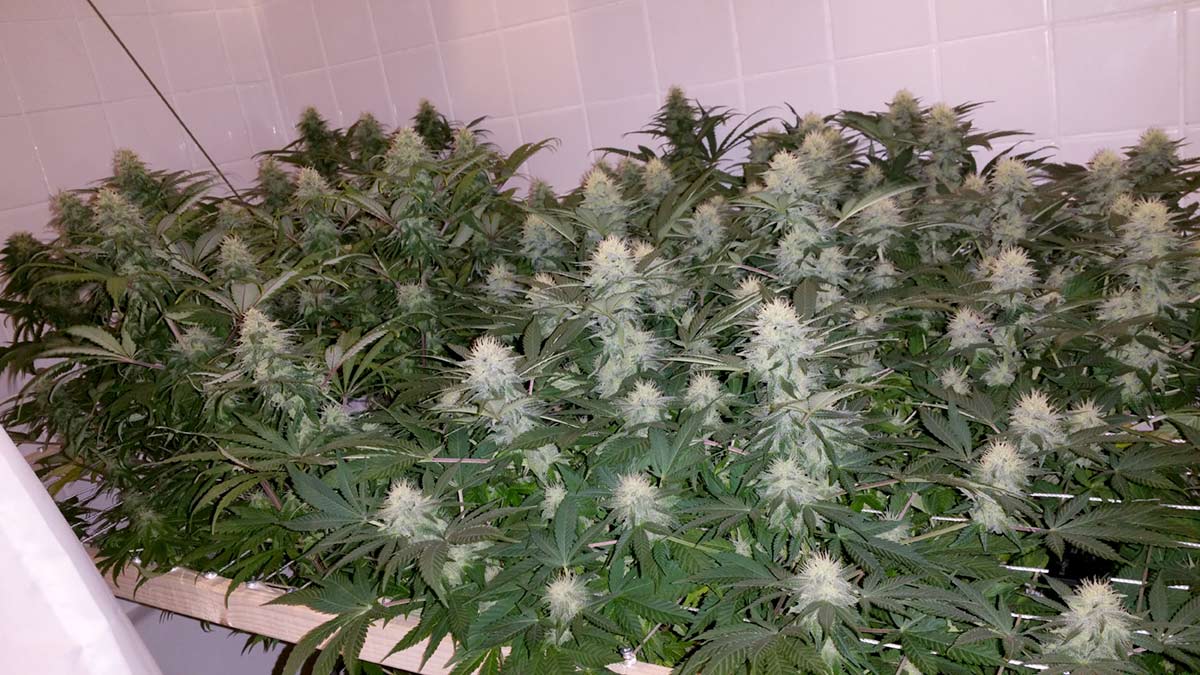
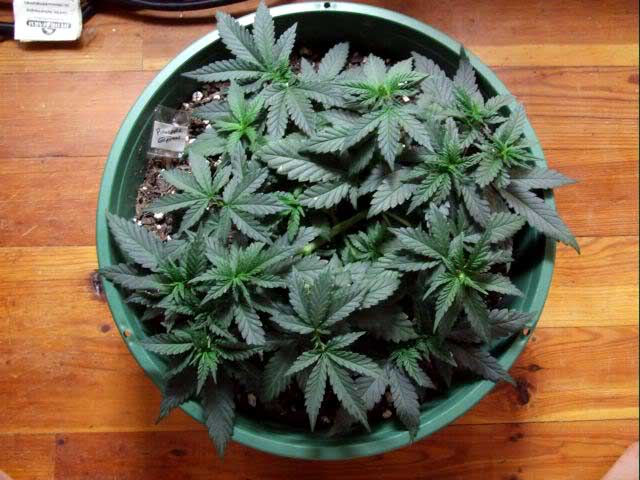
This is only a few weeks later, with more than a month left in the flowering stage
Now that you’ve learned how Scrogging works, are you ready to start using a screen during your next grow?
Make Your Screen
Screen materials
I have tried pretty much most of the standard things you can use for screen. Below are the 4 main ones used, listed in my order of preference.
1.) STRING – The very best. Laces up quick and easy and you just snip, snip, snip come harvest time. Throw it away and lace up a new one.
2.) Twine/hemp cord – Pretty much the same ease of use as string but you get hairs in the buds from fraying.
3.) Plastic fencing – works well but is kinda sloppy looking.
4.) Chicken wire/fishing line – The 2 worst
Chicken wire is terrible because the buds actually grow into it and you have to “cut” your harvest out. Snipping up chicken wire into a bunch of smaller pieces sucks, you get poked a lot and is an overall nightmare compared to string. Does it work as a screen? Quite well, but chicken wire sucks to remove.
The fishing line is also bad news as it can cut a stem, arm etc, very quickly and easily. Consider it to be “sharp”. I have only used 12 lb to test, I imagine something in the 30+ range might work pretty good though. Avoid any “braided” fishing lines especially.
This is my version of a screen that is both easy to work and re-usable forever. I simply lined a square of 2×4’s with eye hooks
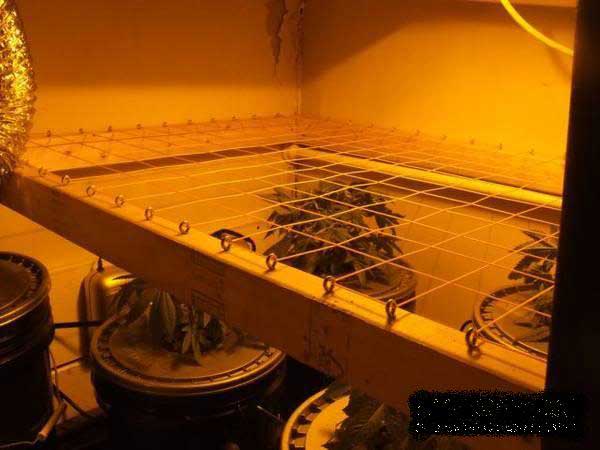
How to Make Frame
Making the frame is simple, simply get some lumber and measure it out. Make a square frame with 2×1 or 2×3 and then add eye hooks, every 2.5″ inches
I tie the cable ties loose around the screen. You want to anchor it but not restrict its growth in any way
Mounting
Many build feet for their screens. This somewhat limits you.
I like having screens where the height can be adjusted either by a peg system or some other ingenious way.
I use shower curtain rods for mine and they work well, but you have to get used to not leaning on the screen or disaster can be right around the corner. To me, it’s worth it not to have legs in the way. It allows more room for “under canopy” cleaning and maintenance.
How secure are these shower rods?
You have to get used to not putting pressure on them but they were handy because of all the extra room for cleaning by not having the 4 legs on the screen. I don’t have any problem with the plants lifting up the screen.
I have a set height now, 4″ above the bucket lid, so I just built in stops to rest it on, works great.
The shower rods were great too though…cheap, effective and adjustable. Like I said though, the key is to get that screen real low and I think at 4″, I’ve maxed that.
Do you have to build the screen to the exact length of the closet?
Yes, but it’s not THAT exact. It has about 5 inches of play side to side.
This is a quick vid I made to show folks how to maximize a small space, back when I was still learning to scrog (not that you ever stop learning…). It shows how the curtain rods are used.
Vegetative Stage
So now that we are all laced up and ready to go, let’s talk about a key element to Scrogging: Veg time.
Topping
Topping is a cannabis plant training technique that splits a main cola into two.
The topping we are doing here is strictly to spread the plant out horizontally and to do that, you need to split that man stalk into 2. That’s why we are topping here.
By topping, we create more of these arms to spread out across the screen.
That, to me, is the whole point of a Scrog.
If I didn’t top, I’d have 1 cola higher than the rest, thusly, limiting my light height.
By topping, that main cola gets pided (divided) down so all the buds are all level on the screen, allowing you to get that light right down on them for nice, even coverage. The expanse of the footprint will limit your height before heat does. (I have a/c lights)
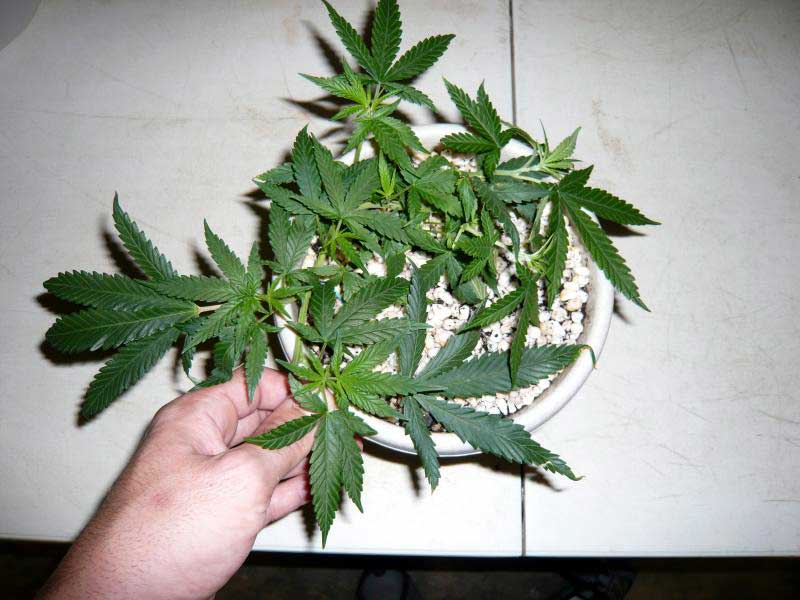
The above plant was topped once. This gave me 2 arms to run under the screen, split like a V at the base where I topped the plant.
I normally build a plant using my 4-way LST tutorial. I grew this one out specifically to illustrate how to run a branch horizontally under the screen. It will have 2 main colas, large, not XL as it was pided once already.
One more topping (4-way) and that pretty much pides the main into 4 med to med/lrg buds. Perfect.
As I said, this one was grown specifically so you could see how to grow an arm horizontally. This plant, if you wanted to name it, got “2-way” LST, which basically means it was only topped once. I run 4 plants under a 4×4 screen and top twice (in hydro) (4 times when I ran soil).
Top any more and you’ll get MORE…SMALLER buds.
4-way LST – Building the perfect plant for Scrogging
This style of LST (low-stress training) is meant to increase canopy square footage, not so much to make a plant fuller or bushier although that is definitely another side benefit. This style of LST is very good for ScrOG grows.
This method is not possible without topping and is not for auto-flowering strains or clones. Topping and 4-way LST go hand in hand and it really does help if you have a plant of good genetics, but it works on any and all plants.
Put simply, what we are doing is taking a plant that wants to grow straight up as 1 main arm and splitting it so it becomes 4 main arms and then we train them to grow horizontally, symmetrically, in preparation to go under the screen. This ensures a proper scrog where you maximize the footprint of your light to cover a perfect blanket of bud.
First thing you do is plant a seed.
Wait!
Can this technique be used for clones? Or just seeds?
Where can I buy seeds?
Learn how to germinate seeds
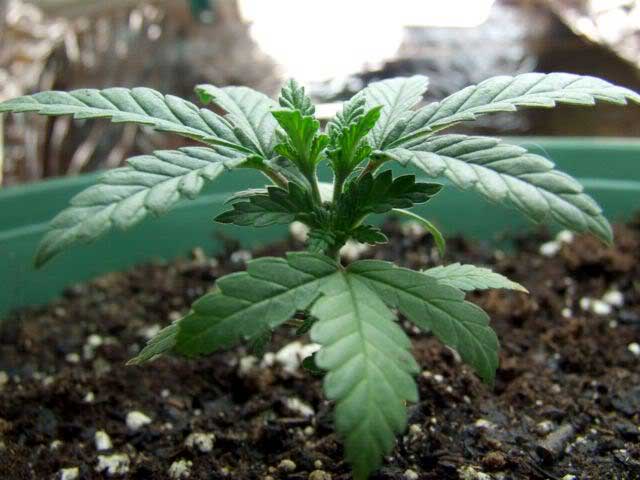
After your seed has sprouted, you will have a young marijuana seedling.
Like this:

Let your seedling continue to grow until the first set of full leaves have formed (5-leaf in this case).
When the 5th leaf set starts to come up between the 4th set be prepared to begin topping, let them (5th set) get about 1/4-1/2 inch and then squeeze the base and pluck them, both at once and this is what will be left with.

Soon, you’ll see the new growth.

The 2 new main branches will grow and thicken.
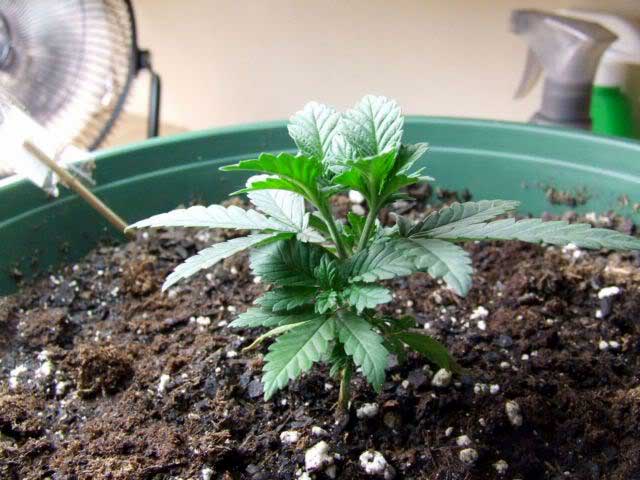
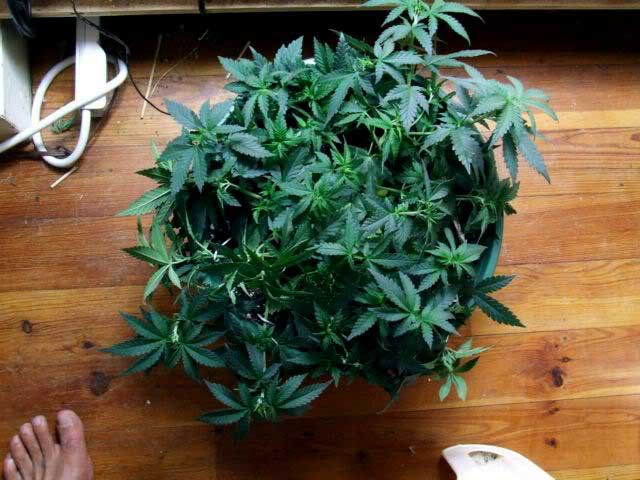
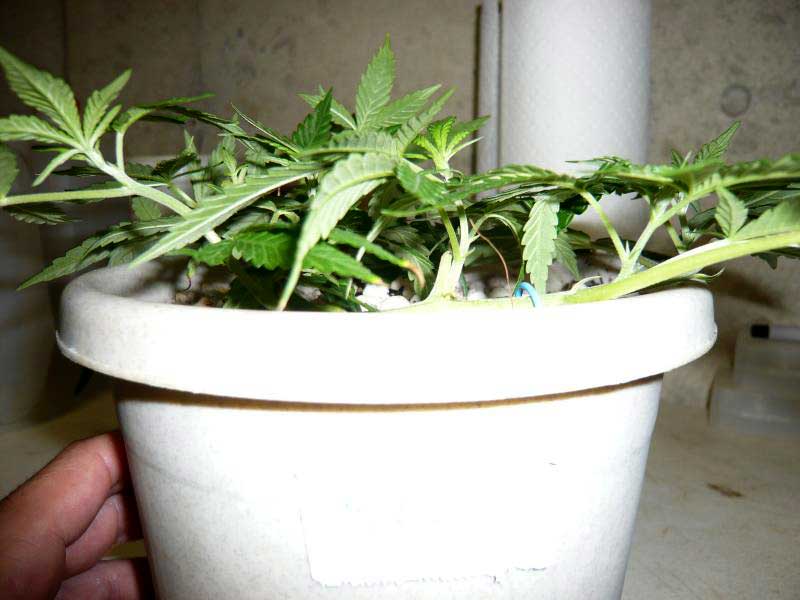
Now let it grow out a bit. During this time, I like to keep a fan right on the plant, lots of movement, building that main stem nice and thick and you’ll soon have a top view like this.
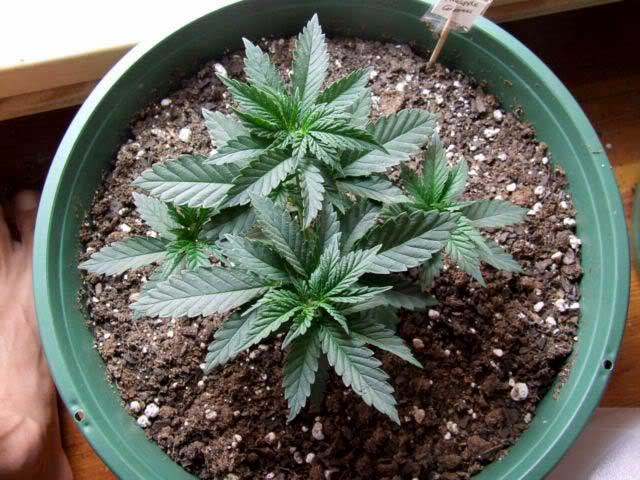
Now, normally, this plant would consist of 1 main with 2 secondaries coming out the sides. By topping it, we create 2 mains and by LST’ing those down, we allow those secondaries to come up and be full blown colas. So, the 2 mains you create from topping, plus the 2 secondaries gives you a “4-way” plant. You can clearly see above, how this plant is now “symmetrical”
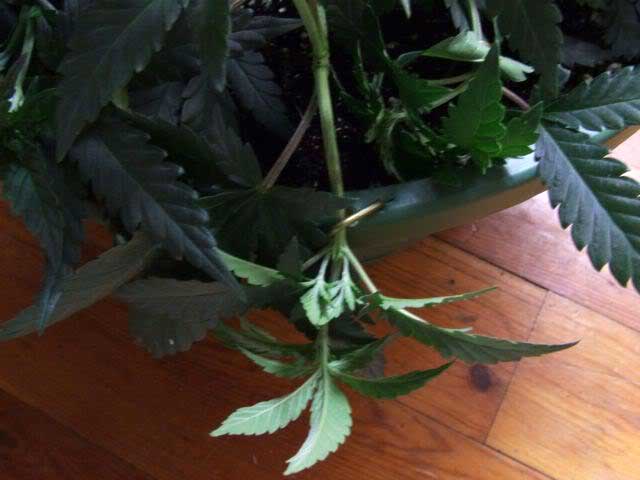
For the next step, you’ll need 4 “U” shaped spikes. I used clothes hanger wire like the one below (or anything that will hold down the 4 arms like you see in the pics, remember, get creative, be resourceful, making your grow your own isn’t a bad thing)
Gently fold down one of the 4 mains and spike it in place. When you do the other 3, make sure there is equal pressure on all 4 so the main stem isn’t getting pulled in any 1 direction.
You want that center stalk to be straight up and down. The arrows below show where the clothes hangar spikes are.
In a day or so, she’ll look like this
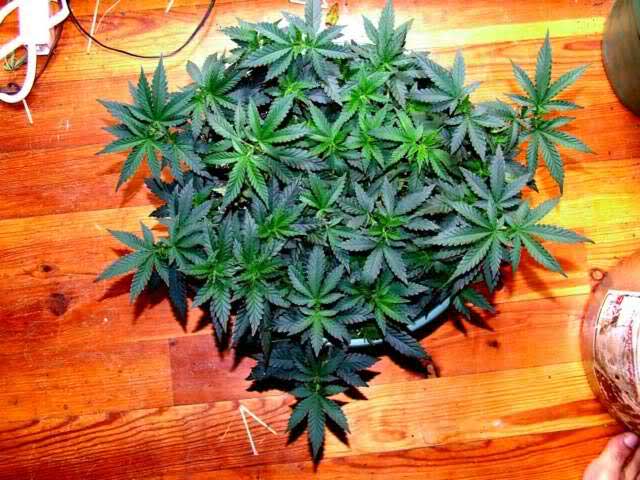
Now it’s time to do some topping again. All those nice new sprouts coming out of the middle of each arm……pull ’em! Everything DOUBLES again!! (below)
I personally stop here. I am leaving the rest of this tutorial up so people can see what you get if you keep topping.
One thing we need to understand is that when you “top”, you are dividing that main cola into 2 colas. They will not be of the same size the original one would have been but that’s ok, the 2 will weigh more than the 1 because of the increased leaf surface area getting direct access to the light. (explained better in the scrog tutorial below)
Based on the size of your ScrOG, stop topping and give plants a week before switching to 12/12.
But for scrogging purposes and the size of my screens, this is the point where we stop topping and give them a good week before switching to 12/12. From there, we continue on with the Scrog tutorial.
Additional topping CAN be of benefit to the few out there who are EXTREMELY limited height wise, but be warned, each time you top, you divide again so each time, you decrease the size of the buds.
Now let’s explore how the plant develops if you continue to top past the previous picture
First, you let it grow for a bit. Keep topping now about every 3rd set on the new stuff.
Let her start to grow vertically a bit. When she has a little height, LST again!!
I should have used the 6 or 9-gallon feed bucket for this plant. It’s shallower but wide. With this plant, I used the rim and the soil to anchor her down for the 2nd round of LST.
Here are some shots showing her vertical growth and a few close-ups to show how I used the rim and soil to spike her.
This time around, there should be 12-16 branches to fold down (remember, you’ve been dividing / “piding” and piding and piding)
And here is what she’ll look like when she’s all bent down
And here she is a few hours later, already recovered.
Now below is an illustration of how the growth changes exponentially with each topping and lst treatment. The 2 combined to build a plant that is low in height and full.
Before the 2nd LST, 18-19 bud sites
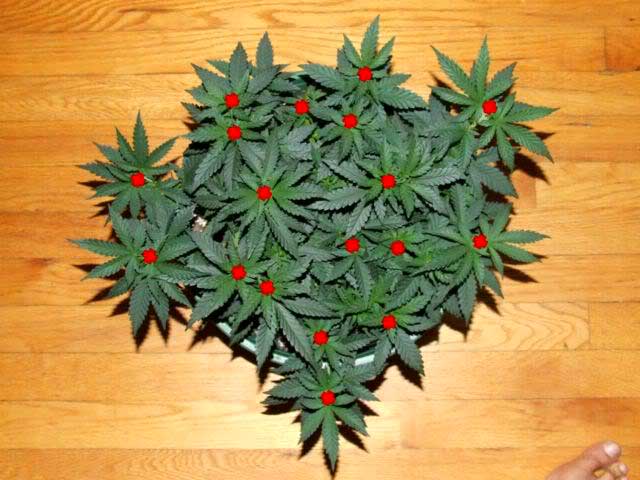
and AFTER the 2nd LST, the plant has 29-31 bud sites
Question: I broke a branch, what do I do?
I broke a stem doing this today =/ but that’s ok. What’s the best way to repair this? So far, I just gave it support and now I think I’m going to try Zip tying it.
Answer: I like to use duct tape to mend broken stems. Either that or just make it a cutting (clone) and move along! Good luck!
Question: What would happen if I FIM’ed rather than topped at the beginning stages of growth (In terms of bud production)?
Answer: Not much difference. You would get 2 more tops but I wouldn’t do it on purpose. If you top the plant, as described in this tutorial, the middle of the plant will fill the extra space with all those minor arms coming up.
Question: Is it too late to top?
My plants have been vegging for 4 weeks already… Is TOPPING still necessary? All my plants are far past the 5th leaf they are more like on the 10th leaf. Is it too late for me to top my plants? Can I do the scrog without topping or should I just not do scrog with this grow?
Answer: It’s not necessary but highly recommended to top. You can top any time during veg but to follow this particular technique, you need to do it as early as possible. You CAN still scrog but you’d probably be better off just growing it out and trying with the next one.
Question: How long should you spend in the vegetative stage when growing under a Scrog screen?
Answer: Veg time varies greatly mainly with method, and how well your plants respond to the topping/training process in your setup.
With Hydro, it’s much shorter. I used to veg 6-8 weeks in soil and now in hydro, that’s cut in half.
Here’s a general rule to follow: the screen should be no higher than 8” above the medium or plant base. You then fill your screen during the stretch by tucking (that’s coming) all those arms into the empty voids.
Important: In Scrog, the screen should not be more than 8″ above the base of the plant. Instead of letting plants grow tall, you must use tucking to “fill in” your screen during the flowering stretch.
The truth is, the length of time spent in the vegetative stage is something you just have to play with to really learn. You need to gain the experience of actually running a screen that could have taken more plant to fill (needed more veg time) and also running one that is too crowded.
Once you get these experiences under your belt, you’ll really have a feel for veg time. You must tailor the veg time according to how many plants you’re growing and how big the screen is. Sorry I can’t help more on this category, but this is the one you have to do to learn.
This is where the first part of the tutorial ends. Get them under the screens and check out my Scrogging Method tutorial below. This is a cumulative step-by-step Scrog tutorial with advice from a few of the gurus. Now that it’s been compiled, you can see the golden standard for those looking to scrog properly.
Believe it or not but the majority of the screens out there now are not scrogs, they are skeletal systems for standard plants. What we do is highly different and very specific with an amazing result. With Scrog, it really matters what you do in the flowering stage!
Flowering Stage
We grow the plant horizontally until we are a few weeks into the Flowering stage. This is important!
Until A Few Weeks into the Flowering Stage, Use Tucking to Keep Plants Growing Horizontally Under the Screen
This is a key point as many attempts at Scrogging turn out to be merely a skeletal support structure for standard plants, not real Scrogs.
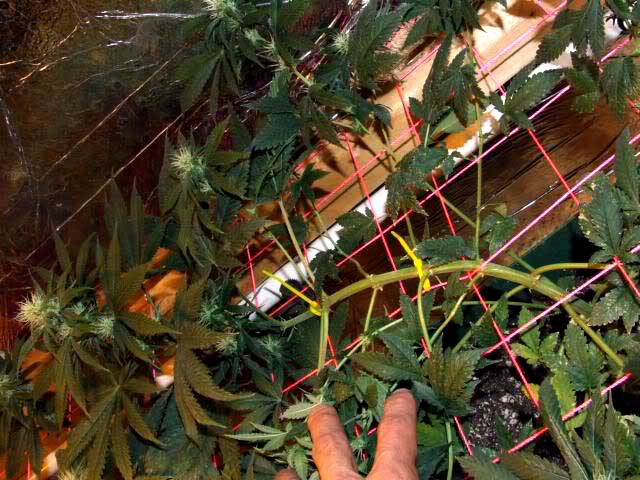
Tucking
Tucking is easy but takes care. ALWAYS TUCK SLOWLY AND CAUTIOUSLY
This is what I mean by tucking:
While those arms are stretching, you allow each one to grow up and through a square in the screen. I like to get them about 2”-3” above the screen and then I GENTLY, pull it below the screen and move it to the next square away.
You continue to do this all throughout the stretch, …continuing until about 2-3 weeks into the Flowering Stage.
Remember, you are controlling where that arm is going by moving it 1 square at a time. You can change your mind tomorrow if you see the need for it.
The screen takes constant manipulating until the last stretch is over but once it’s done, so are your Scrogging duties.
To obtain maximum control don’t be afraid to add more bondage if needed. Zip ties are awesome and can be easily cut out with Fiskars pruners later.
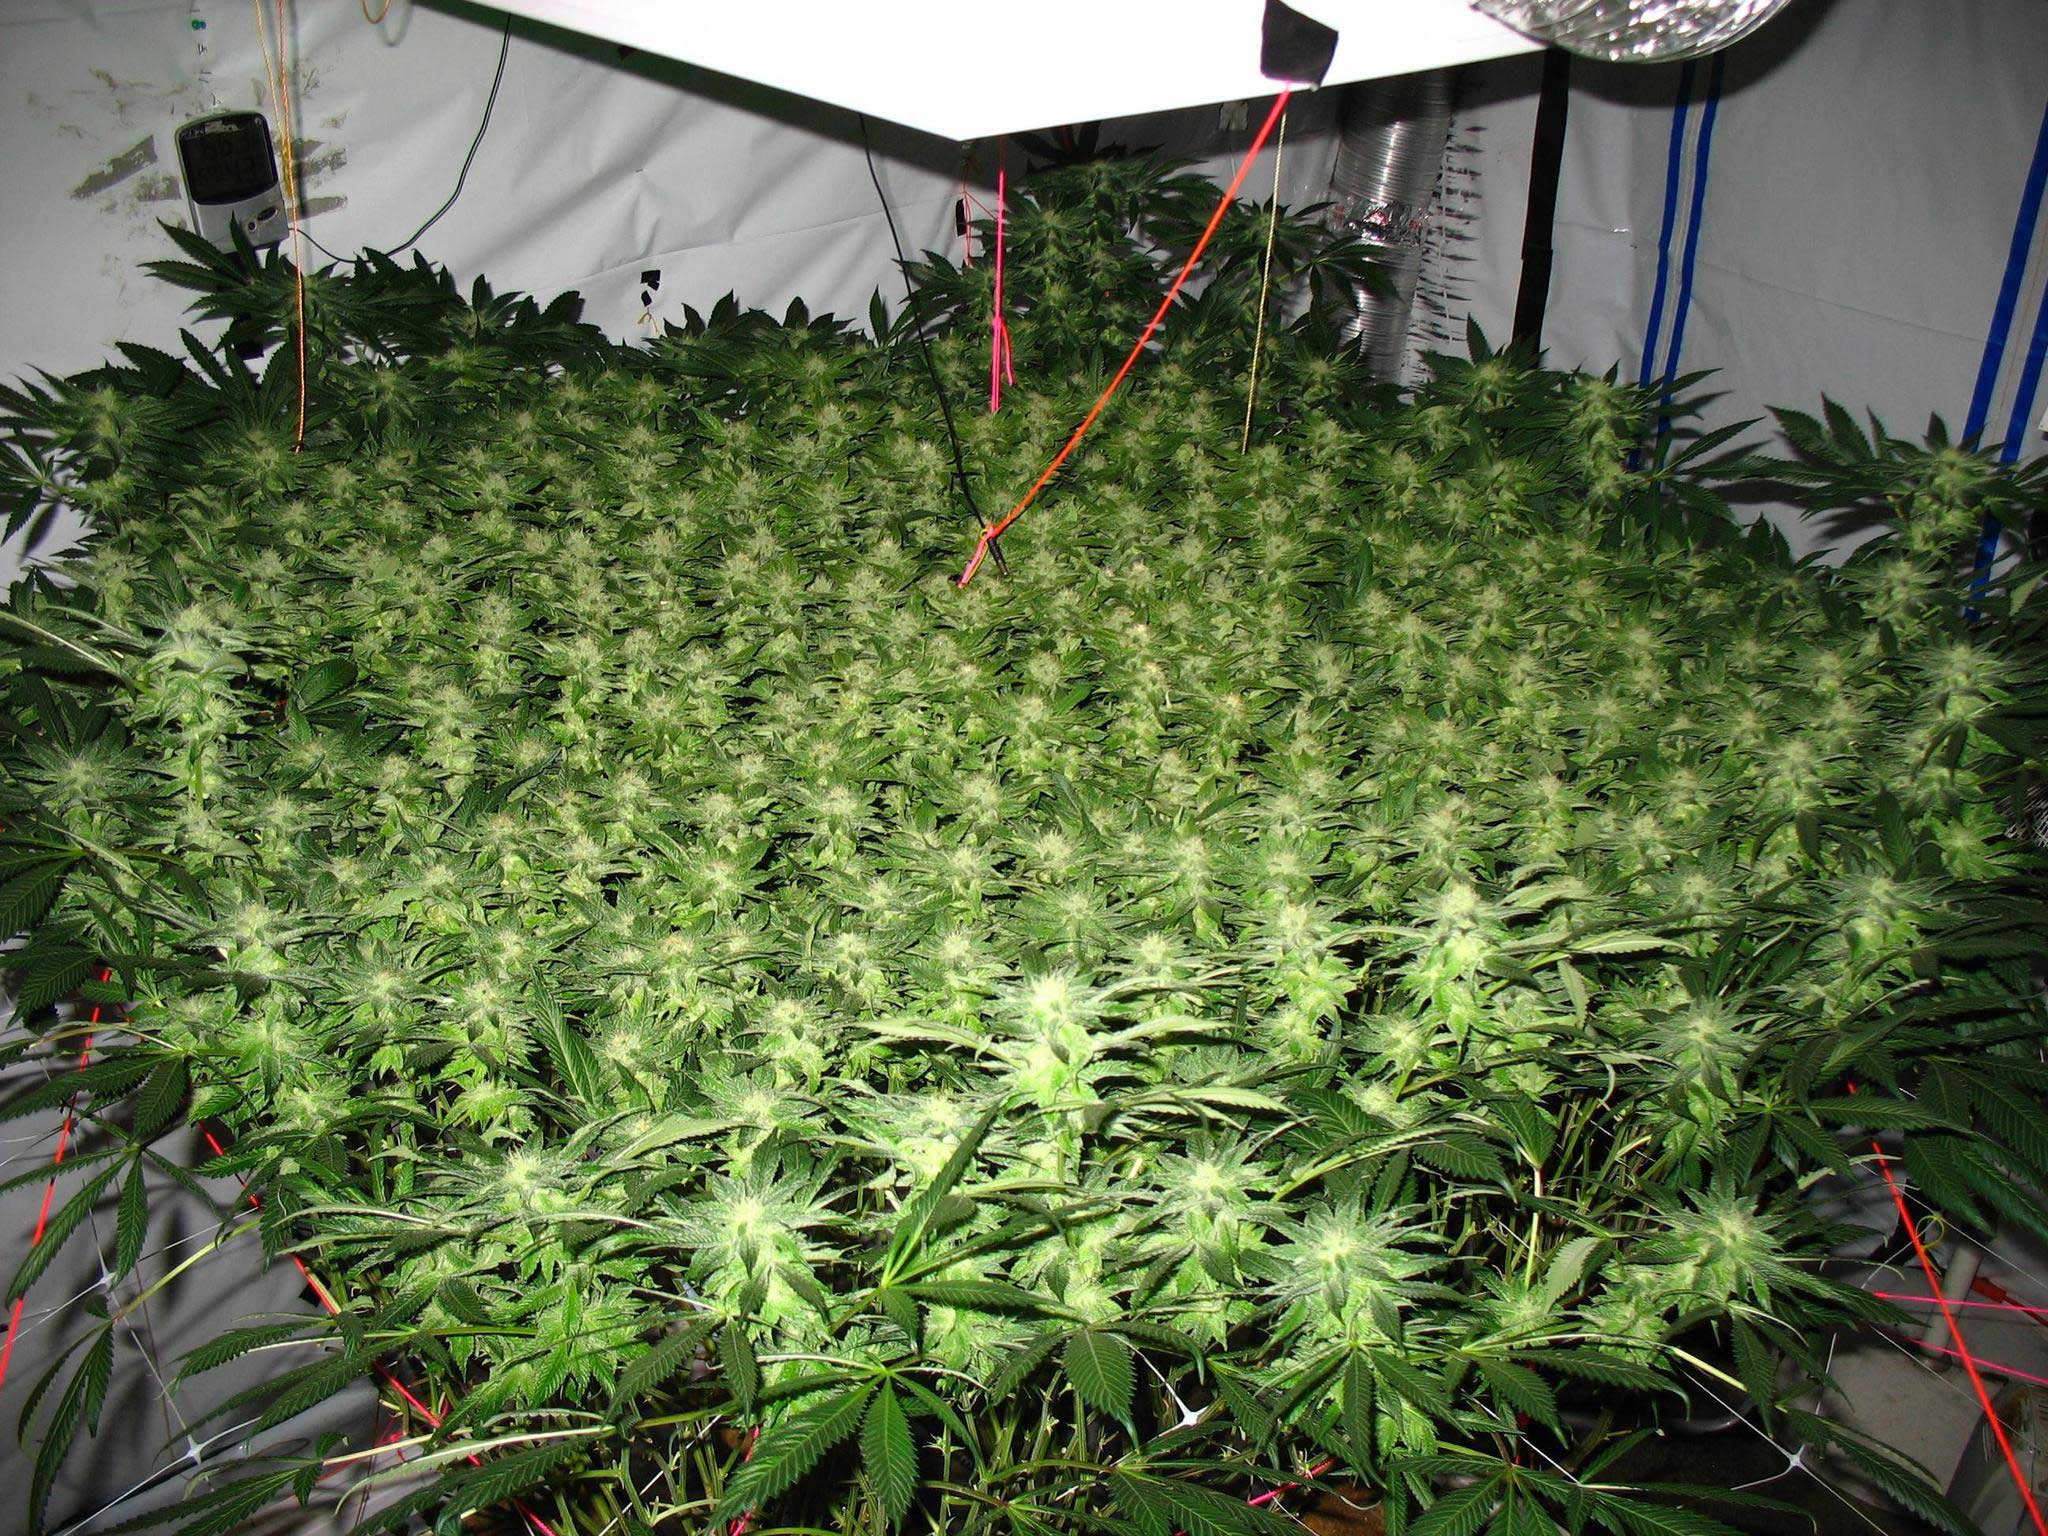
This is the final result, what you are looking for. You want a 6-8″ bud above the screen when the stretch is done.
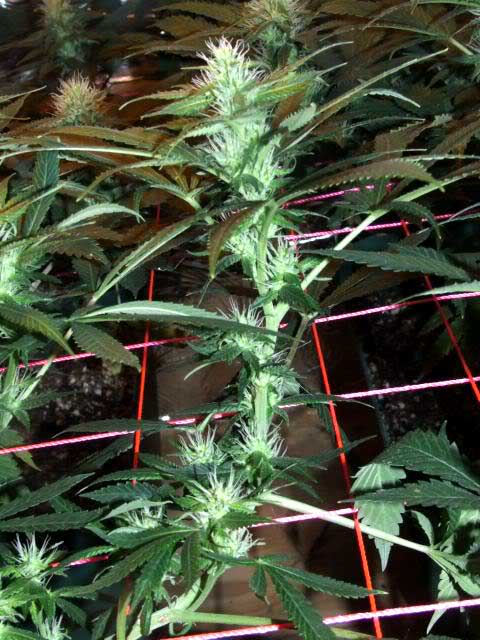
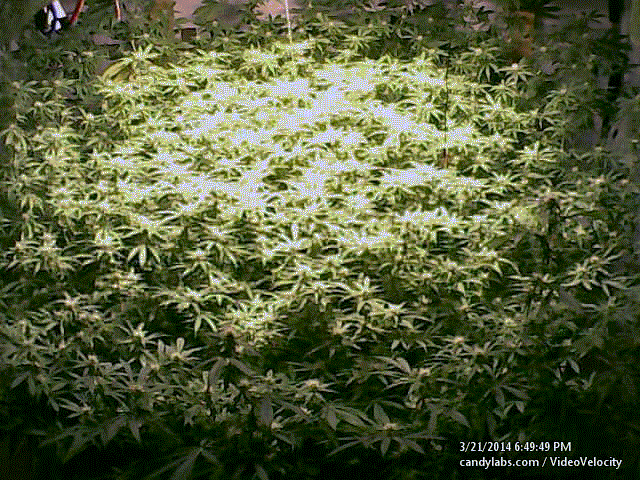
At this point, your Scrogging duties are over! You just let your beauties finish flowering.
Frequently Asked Questions
Question: Do you find that certain strains work better with this method? Like maybe Sativas due to their tendency to stretch?
Answer: It can be done with either, but the stretchers just make for a little more work.
I also like to control just what stretches and how much. By trimming very specific fans about a week before the flip depending on how they look. When you trim both fans at a node, you drastically limit its ability to stretch so if I’m running something with high sativa tendencies, there will be more lst, supercropping, and defoliation in preparation for the screen
Another tip…If you have some “not so planned for” stretching and it wants to now go towards an area of the screen that is already too full, you can redirect it by zip tying it to the actual screen itself in a few spots and send it in another direction
Question: It seems like a lot of people use Scrog with their hydro setup. What do I need to know about Scrogging in soil?
Answer: A key element to scrogging in soil is that you do need access to the dish under every pot for testing runoff, etc.
That’s one of the many reasons I switched to hydro. Watering them isn’t hard at all but testing the runoff in the back 2 plants was a pain in the ass (running 4 in a square, in a closet, so access to the front of screen only)
I’m sure there is a decent way to do it though, just a matter of getting creative. Right away, I’m thinking if all the plants were elevated a bit on a table, maybe 10″ off the floor, you could somehow fabricate a runoff drain for each pot or something like that…
Question: What’s the best way to tie plants down in a hydroponic setup?
I noticed this grow is in soil but I saw you mention that you have switched over to hydro. I grow in bubbleponics and wonder if you have any tips for holding the plant down (spikes won’t work so I was thinking string and tape). Also, do you have any other hydro specific tips (in addition) on how to shorten veg times.
Answer: Let me explain…
I’ve done hydro for a few years as well and found a few things that work.
The beauty of any LST type training is you can get creative as all hell. In hydro though, I always would put the plant under when it was about 5″ above the screen (height wise).
To get the plant in there I would lift the screen and drop it in the bucket and then have someone else inch the screen down as I would tuck. If you have multiple plants, do them all at once.
At 5″ above the screen, I had the perfect amount to fill a 3.5 x 3.5 screen after the stretch.
Many hydro setups are different…problem solve that shit. I was running 4 smaller plants per screen so my options were limited. Single bucket setups with independent screens… you have many options.
Grow ‘Em Up!!
Question: What size pot do you like to flower in? I know I like a large pot with a nice diameter for a wide canopy spread.
Answer: Let me explain how I do it, and I’ll also share how other growers do it.
First, remember, I do it a little differently than many scroggers, I like to get the screen as very low as possible and grow out all that understuff whereas most scroggers go a bit more vertical, trim the underbrush and max out just the tops.
With my method in mind, when I was in soil, I used 7 gallon deck pots (the plastic square pots for your deck at Lowes that you put a potted plant inside so you can take it out and bring inside if needed) and then went even lower when I found some 7 gallon horse feed buckets that were much shallower and wider, like an oil change catch pan, kind of, little higher on the sides.
In hydro, currently, I’m very limited with height, we came up with this method by tossing around ideas to squash the plant down and reduce height and not yield. The resulting yields were just a big benefit.
Running 3 flowering screens, 4 plants per screen, avg 3-5.5 per plant, we have more than enough meds to keep myself and (currently) 4 patients supplied.
So, in hydro I am currently using 3.5 buckets w/ 1/2″ plumbing in a closet with slanted roofs (3rd floor) but if I had room and were looking to really max out my numbers or space, I’d be in 5gals at least, if not 18g rubbermaids and 1″ plumbing. I’ll go as big as my space allows, if I were outdoor, I’d be in 350g smart pots.
More roots – more buds.
Can ScrOG Be Used for Perpetual Harvests?
Question: Do you run perpetual harvests with this method?
I do perpetual harvests, and I’m not sure if that would work with this method… You’re definitely right that more root = more bud! I’m diggin on the 7-gallon for the greater training possibilities. I totally agree it all depends on space though, everything is built around the space.
But since I do perpetual, I don’t screen anything. I just super crop and LST each plant individually. The last 7-gallon I did I got about 4 quality zips which is just fine by me. If I can dial it in and duplicate those results every time, I will be happy.
Answer: I run perpetual also, allowed 12/12 so I run 3 screens, 4 plants each, each offset by 4 weeks.
2 of the screens get 400W each and the third screen is longer and gets a 600W on a mover. 4 per plant is a perfect balance right there and damn skippy if ya ask me.
Sometimes you’ll get a strain that pumps it out, sometimes you’ll run one that spits golf balls, either way, you learn from each and every run. The 600W w/ a mover is the cat’s meow though.
I’m on run 3 with it and the gram/watt has gone up with each run, can’t wait to see where it tops out. Looking at hopefully 22-24 ounces for those 4 plants this run, that’ll be a personal best for me indoors.
Can ScrOG Be Used with Clones?
Question: Can this technique be used for clones? Or just seeds?
 I understand that the method you detailed here is specifically for seeds.
What would be the best way to get clones ready for a Scrog grow?
I saw your reply to another post that said clones have a different plant structure, so would it need less topping maybe or something completely different?
I’d totally be down for seeds but clones are a lot easier and cheaper for me to get. I’ve seen other Scrog grows with clones, but I like your style and want to know your input on it.
Also, how do I know where to top a clone (since the nodes aren’t symmetrical)?
Answer: This 4-way LST method is for “from seed” only. No clones or autos.
This exact method is only possible from seed like you read and if I were to give any advice about scrogging ANY other way, I would redirect you to the scrog thread by woodsmantoker in the advanced section of Rollitup.
Lots of different methods are discussed but the standard scrogging style is the main body of the discussion and some of those guys have it down quite well.
I do grow clones once in a while but don’t have a rhyme or reason to how, I just get the plant to a size I want and then just get it under the screen and start pulling arms through the holes.
Nothing fancy or specific but again, some guys have their ways, and their results are, quite frankly, better than mine when I attempt to grow their style.
4-way LST (as explained on this page) is the way for me with screens but if you don’t have beans and clones are available, don’t hesitate to get your hands wet there first. You’ll want to try both ways eventually anyway.
Note from grower Shwagbag:
Clones are a feel, you have to play around and go with the flow. Once you do it enough it will be a cinch!
There is basically no exact method to using clones for me. It’s mostly going with a feel and giving them a “haircut” from time to time.
Hope you don’t mind if I share a couple pics since you get this question a lot…
This clone was supercropped constantly, topped several times and given a few “haircuts” to keep growth even and consistent.
She’s a Bubble gum clone (topped, super cropped, LST with a paper clip and a little haircut to promote more consistent growth).
How I start my clones

She will stay in this 6″ pot for a bit longer.
End of Veg Pics

10 Days into Flower
Comment by LBH: That plant came out perfect for a Scrog screen! I didn’t mean you can’t scrog with clones, just that you can’t do the 4-way LST method exactly as I’ve described in this tutorial.
If anyone else out there is going to use clones in a screen, take the time to veg them up like this right here and you’ll be happy with your results.
For me, the time involved in veg, being a perpetual, a clone only gets to be one nice arm by the time I need to move it to the screen. With the 4-way LST, I can move them to flower a little quicker with similar to same results
Reader ScrOG Examples
From Shwagbag: Here is a Pure Power Plant a few days before chop using pretty much the same method.
Here is a different PPP (Pure Power Plant) before chop during her flush.

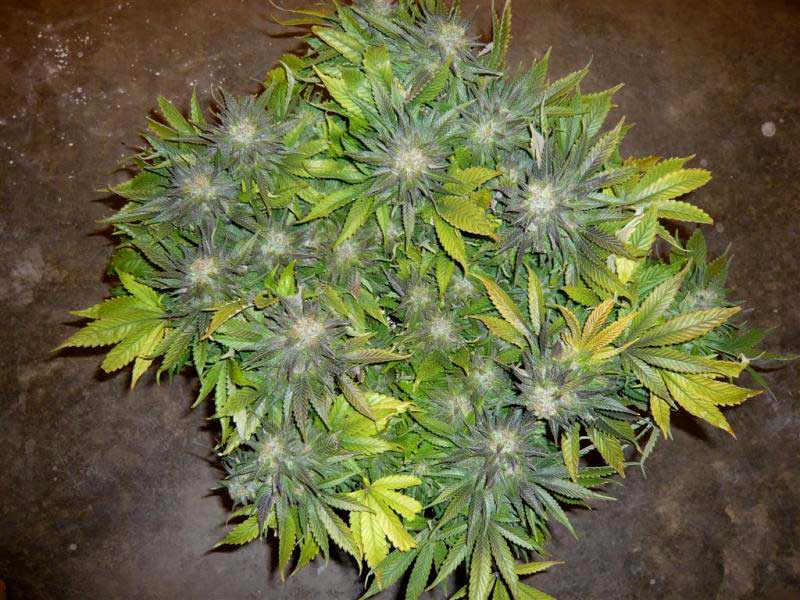
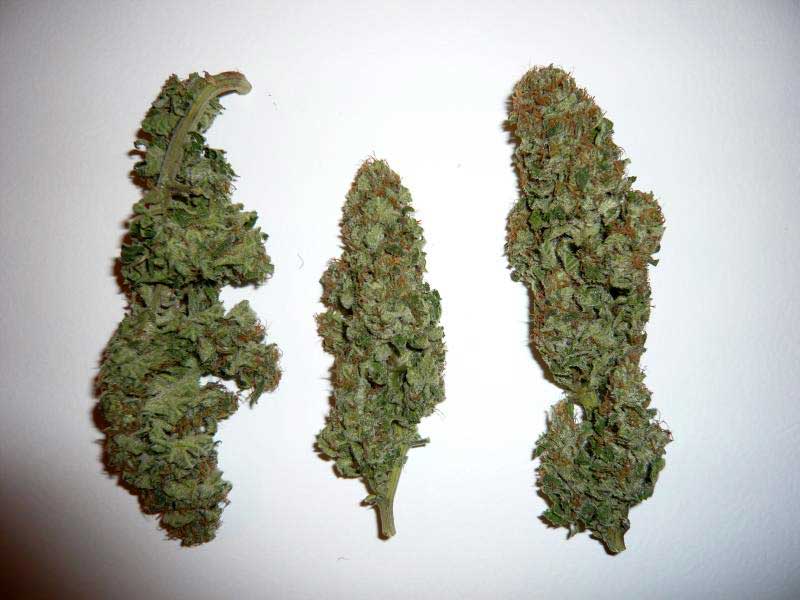
Some of the dried PPP
From wallnutmonkeys: Here’s a pic of my result. It might be a bit crowded… I will try to have fewer but bigger tops for my next one

Jump to…
Sour Kush ScrOG Grow in Pictures
Plant Training Techniques: Topping & More
Supercropping: Simple Secret for Bigger Yields