by Nebula Haze
“Curing” is a special process that makes cannabis better after you’re done harvesting and drying buds. A proper cure improves the density and smell of buds, but that’s not all. Curing cannabis actually increases the subjective potency of buds, and improves the overall subjective effects.
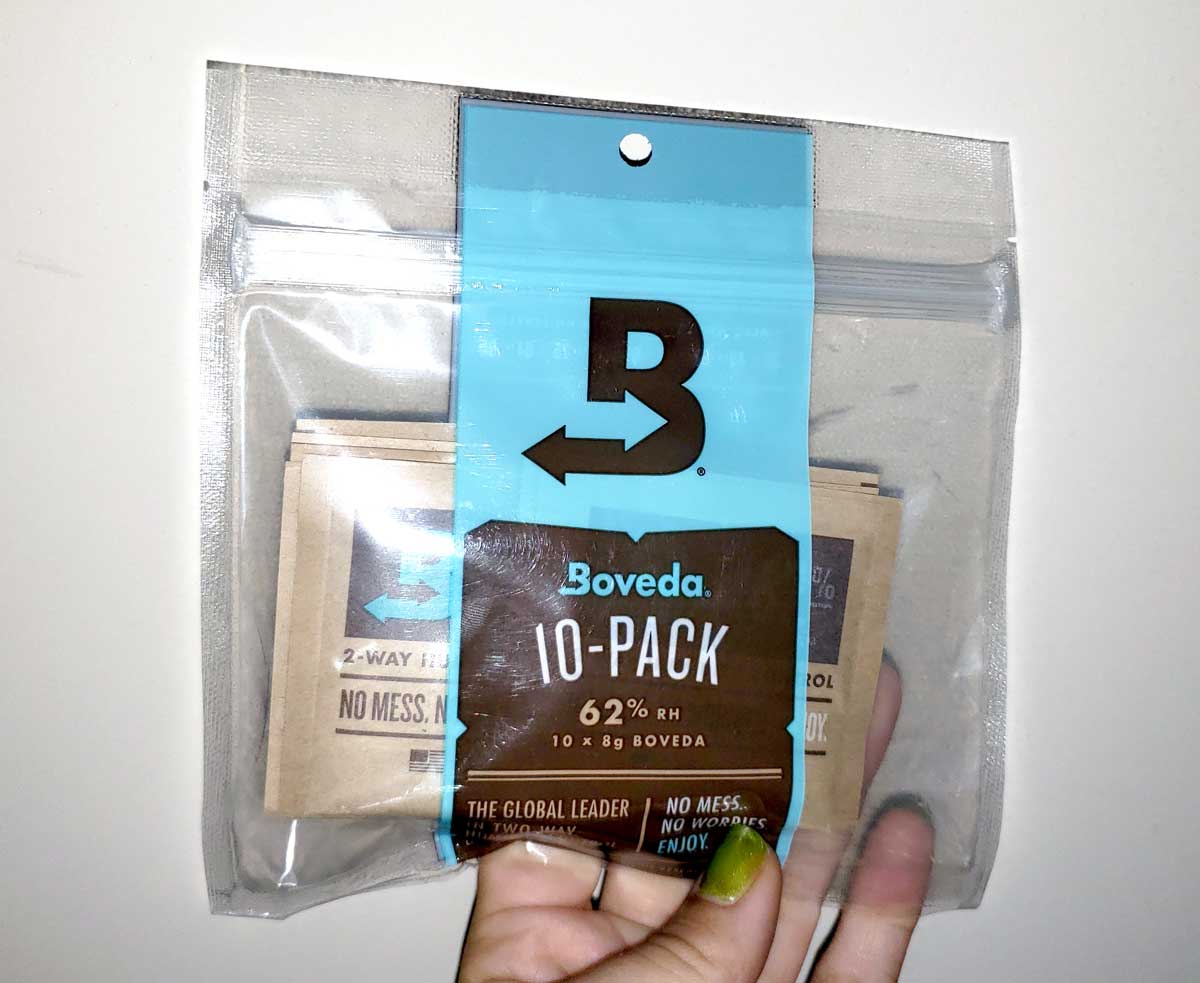
The #1 Most Important Tool for Curing Weed: Boveda Humidity Control Packs (automatically maintain humidity)
Why do growers cure weed in the first place?
- Higher Bud Density – Curing tends to tighten buds so they are overall more dense and feel more solid.
- Improve Smell – Sometimes the cannabis smell gets lost during the drying process. Curing helps bring those smells back. They also increase the overall complexity of smells.
- Increase Potency – After curing buds for two weeks, they typically feel “stronger” when smoking compared to smoking right after they are first dried.
- More Lovely Effects – Many growers feel the effects of cured buds are more captivating, more relaxing, or otherwise improved.
- Smoother to Smoke – Curing buds tend to make them less “harsh” to smoke, so they’re easier on your lungs.
Curing can make the difference between “good” and “out of this world” cannabis!
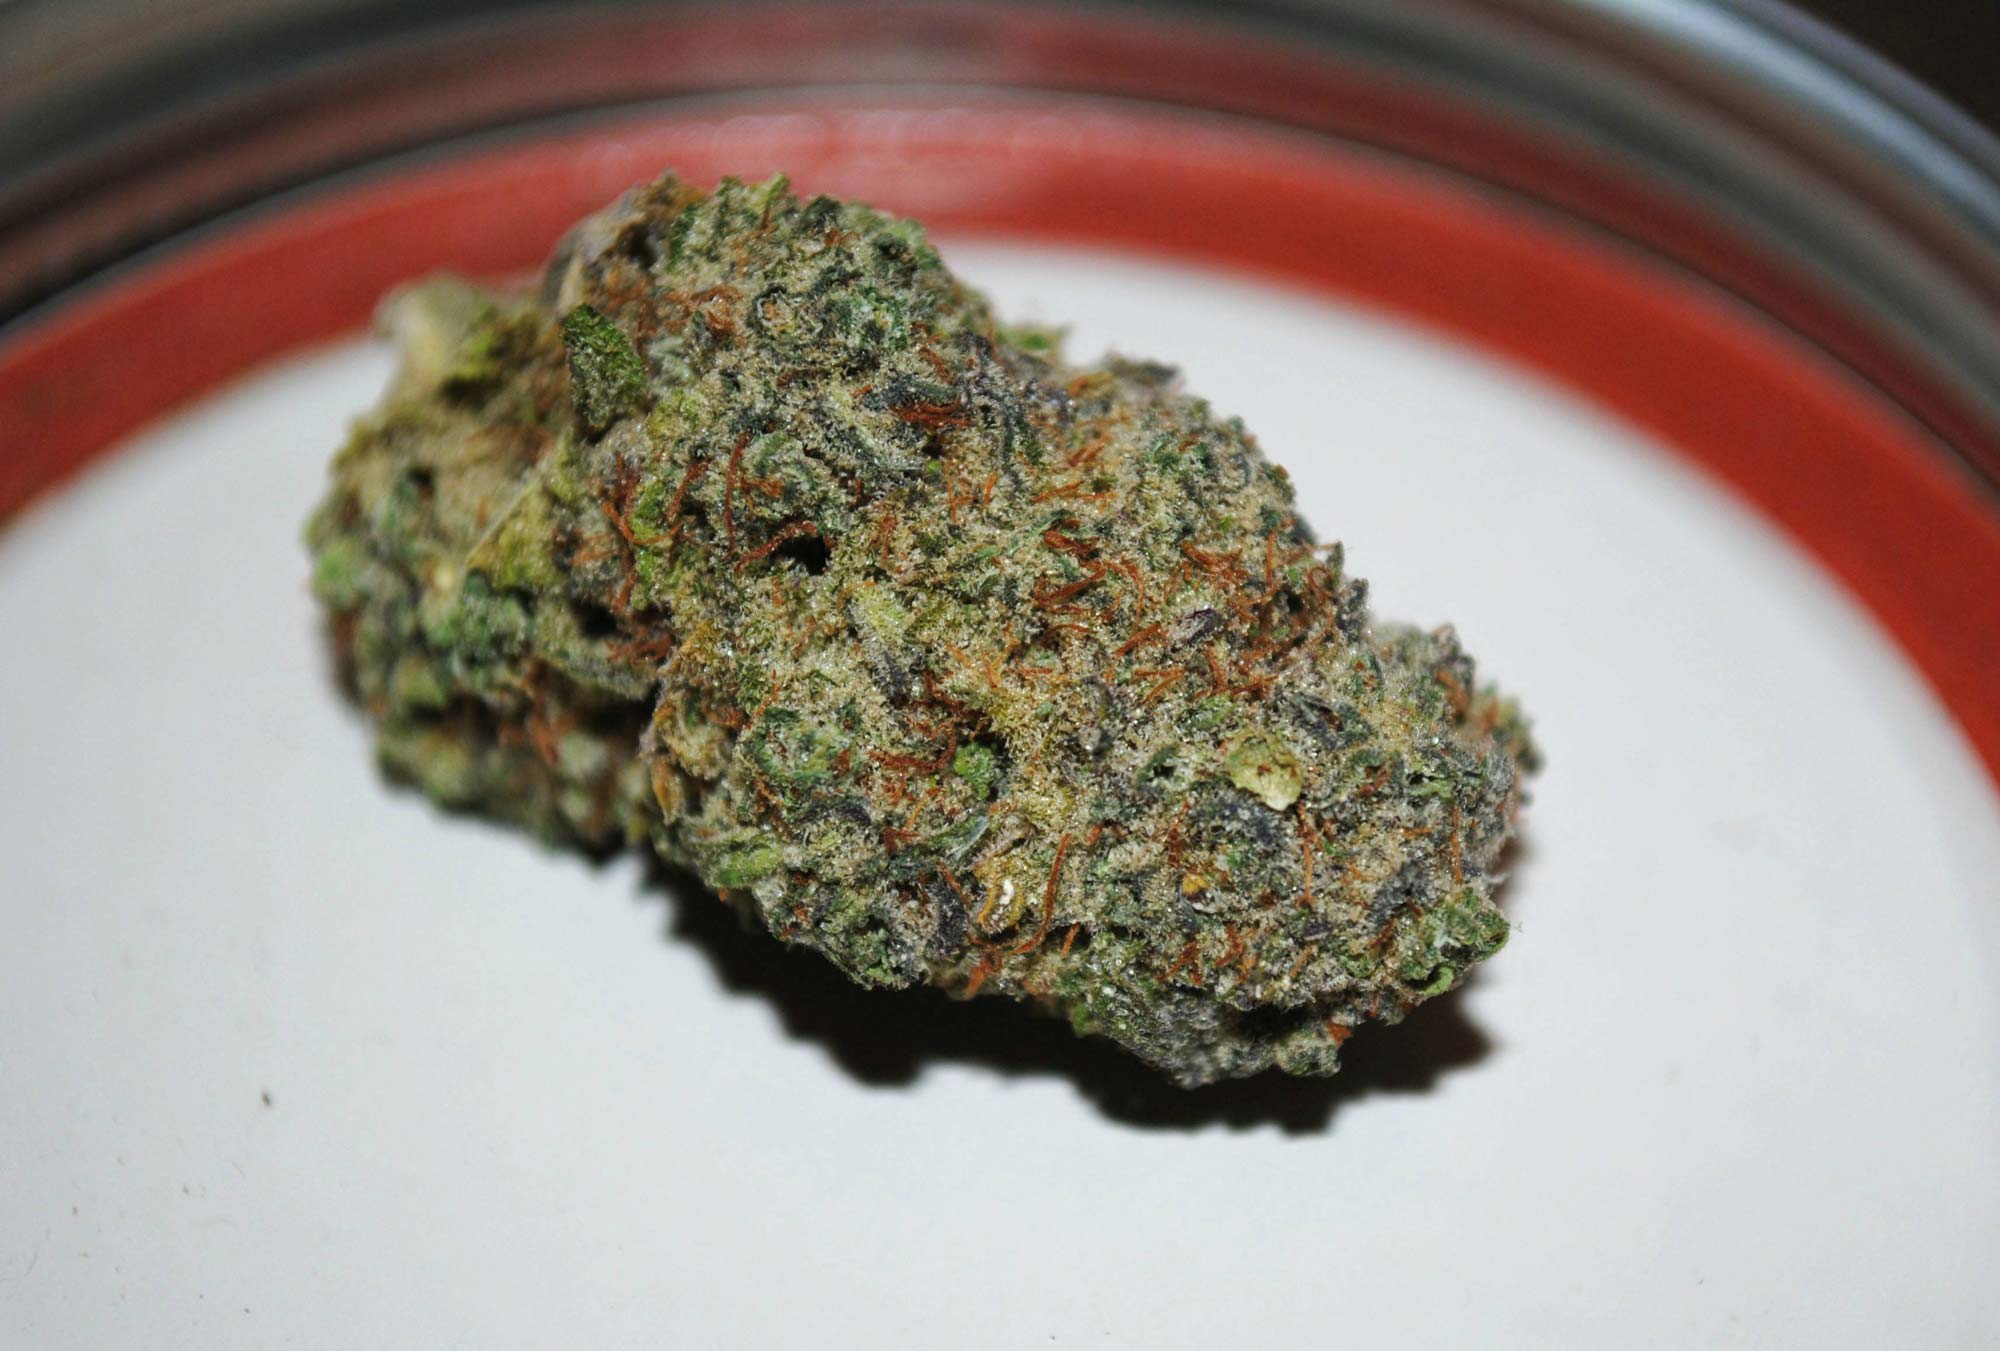
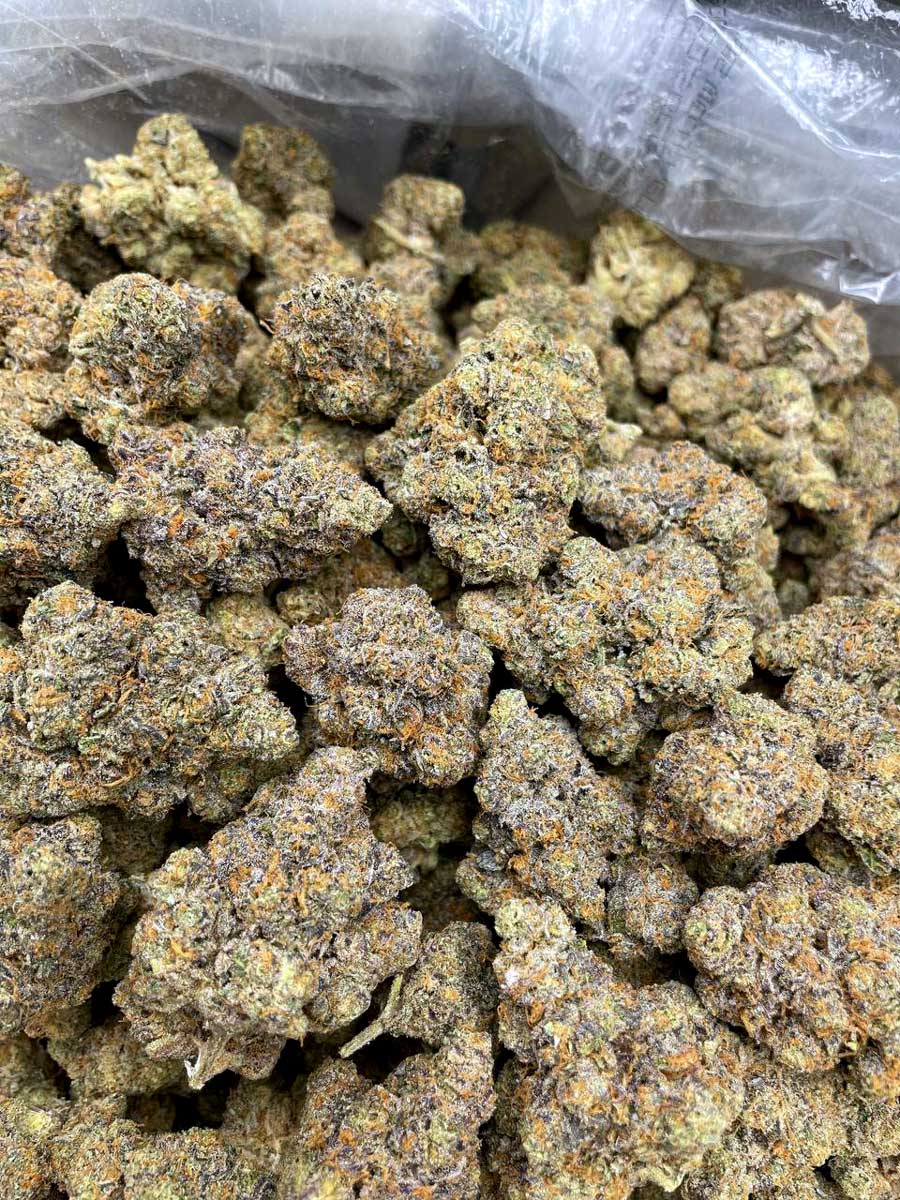
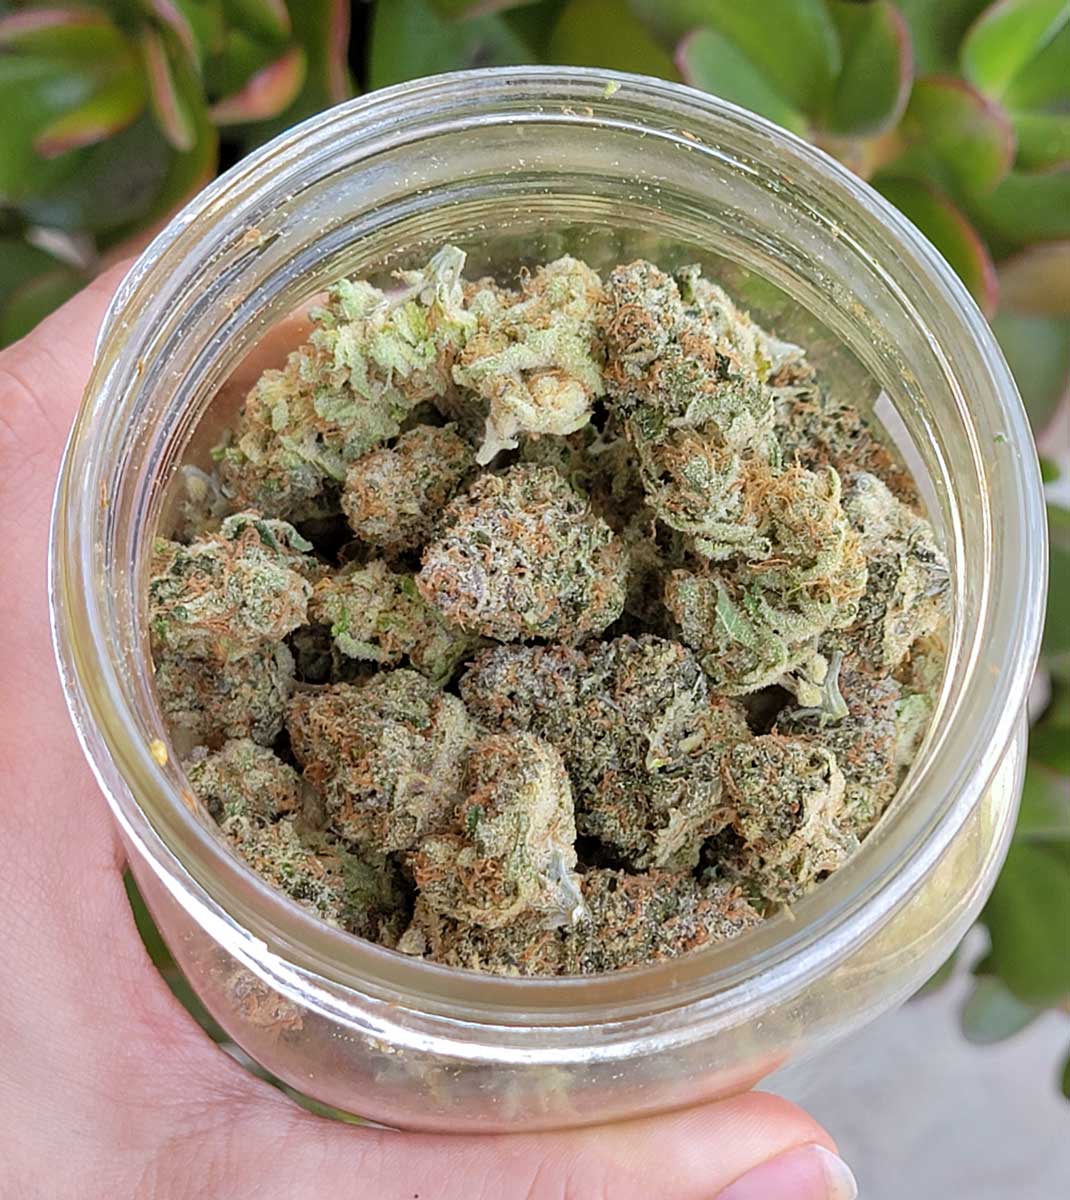
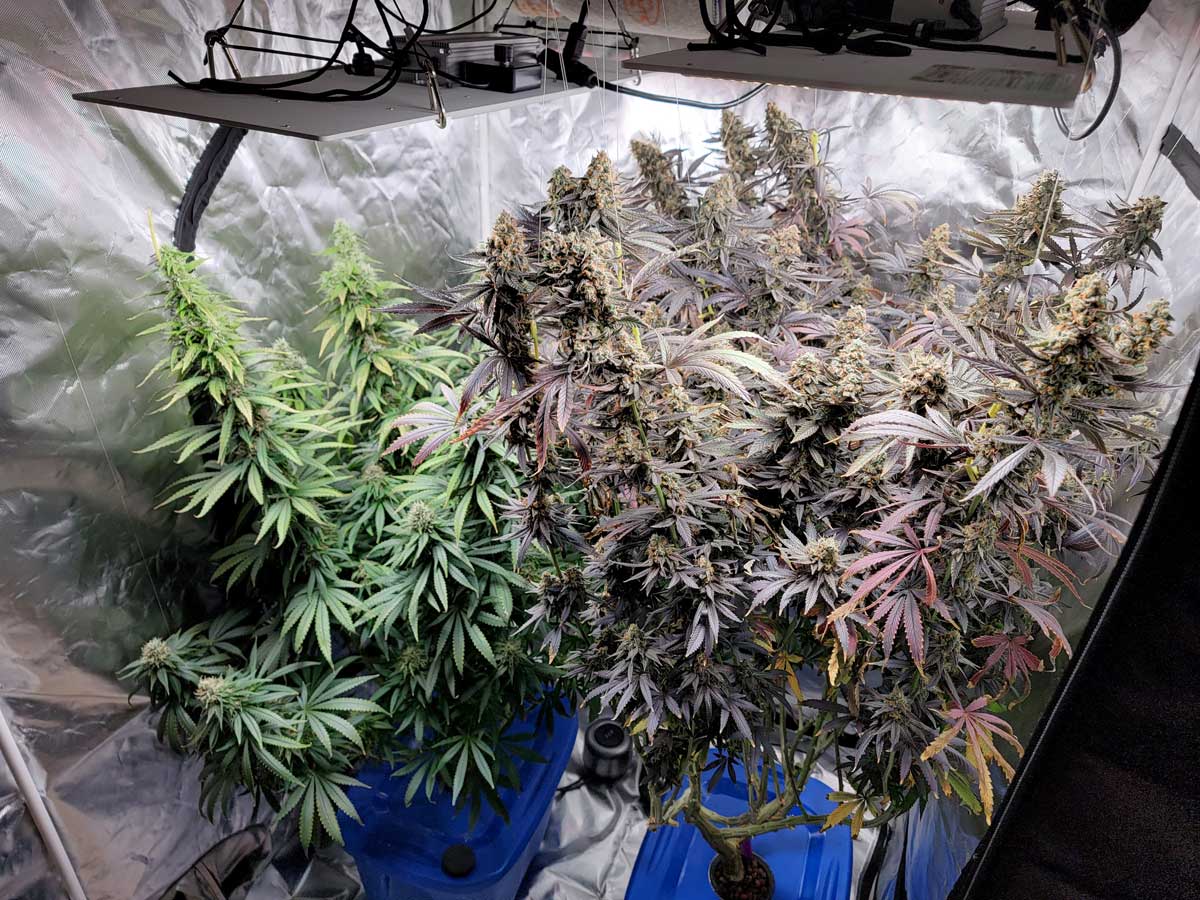
Curing gives you higher quality, more potent weed! (This is Alaskan Thunderf*ck after curing)
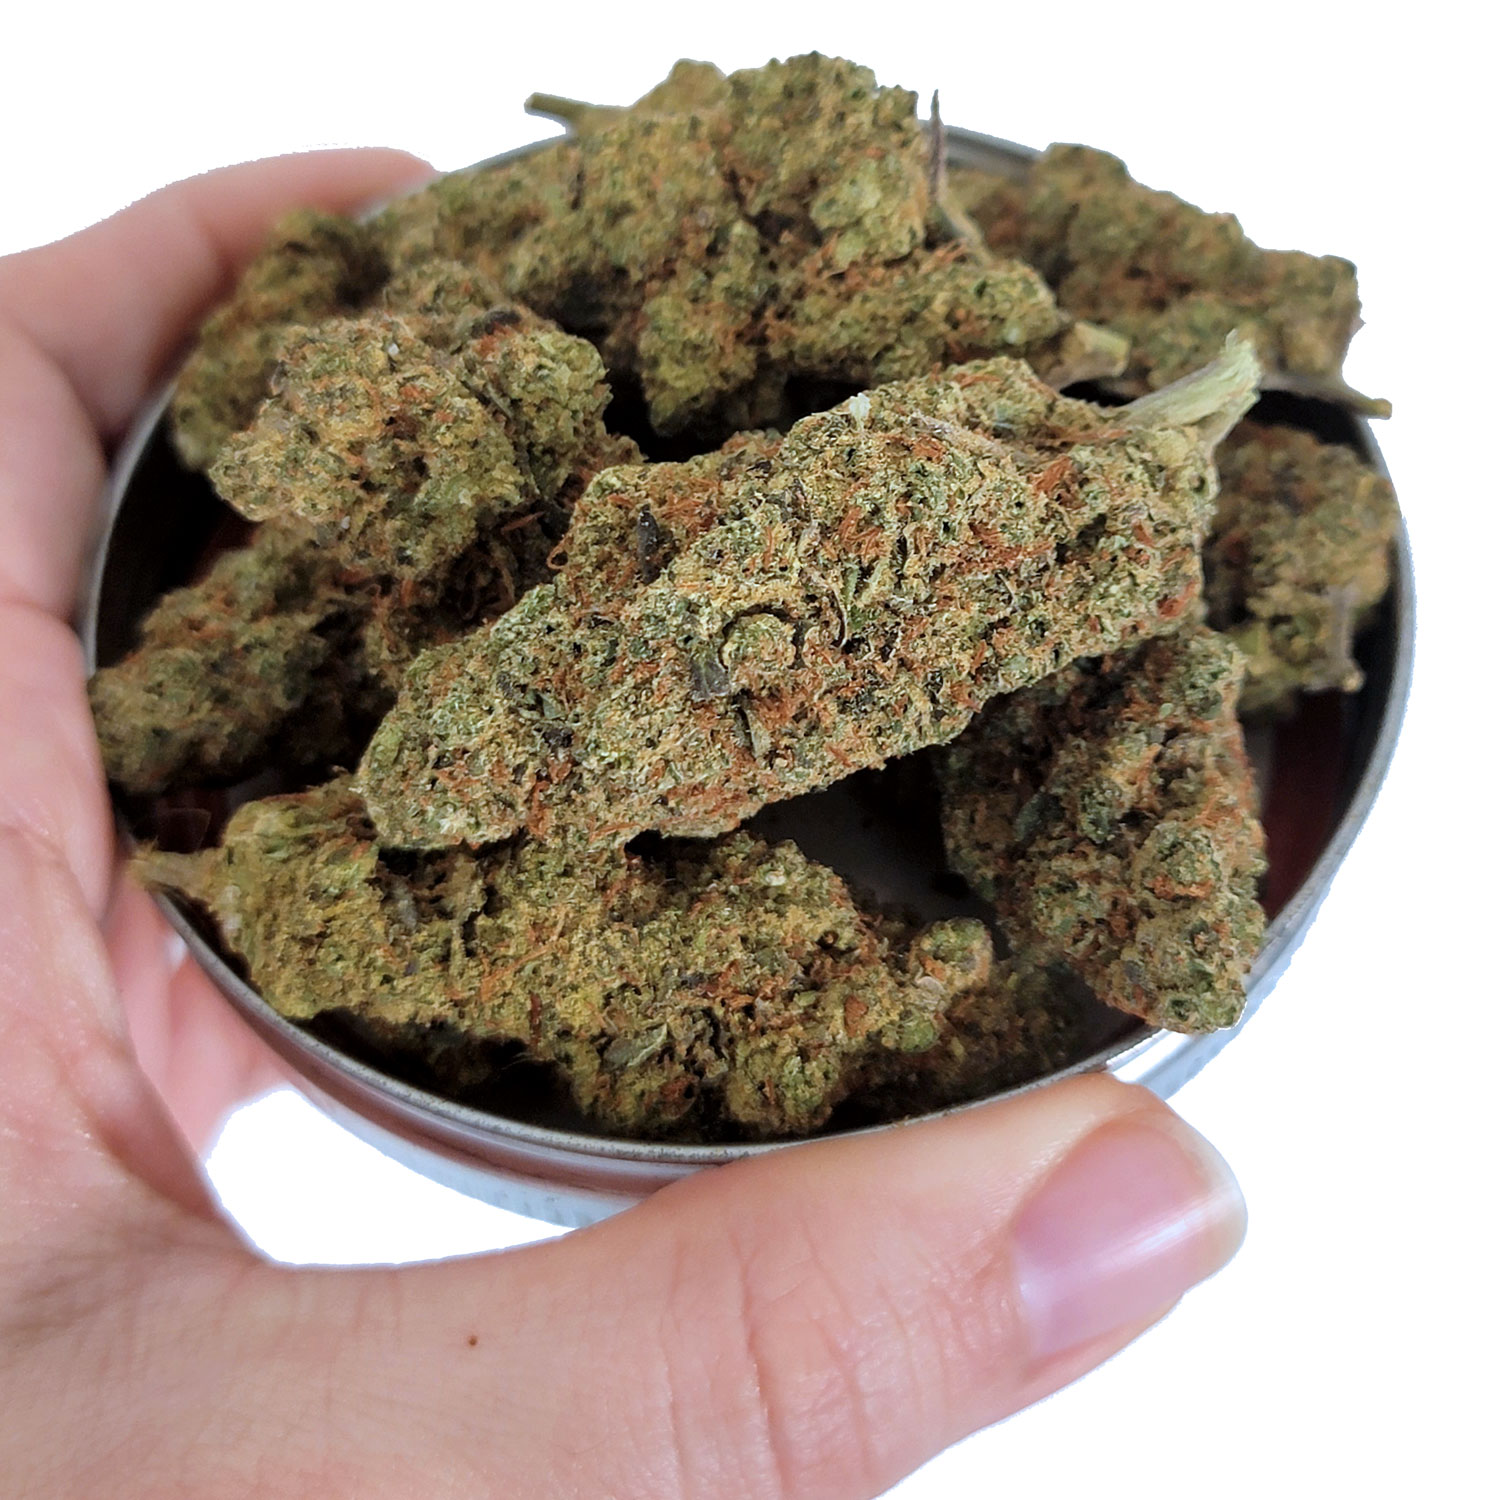
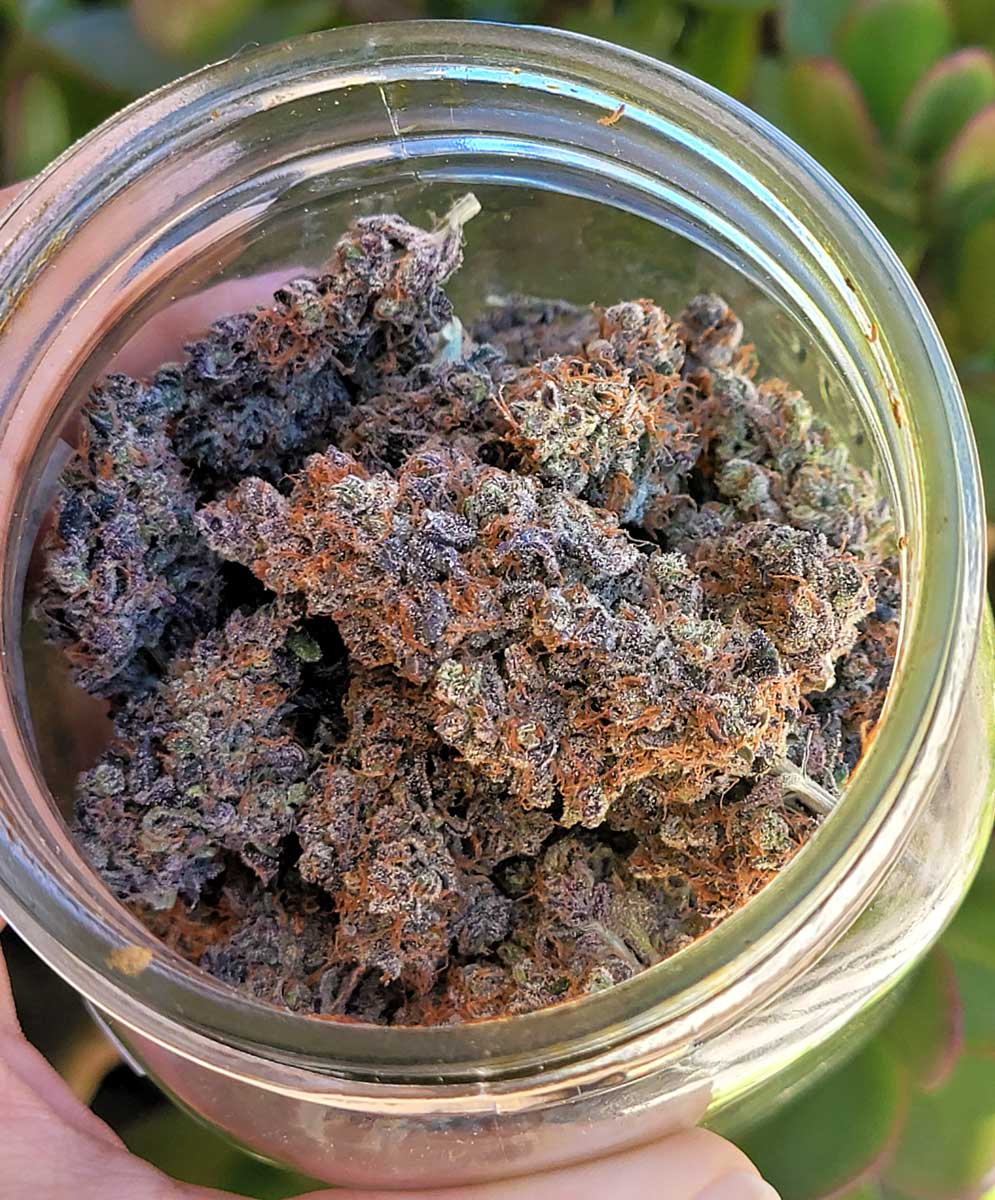
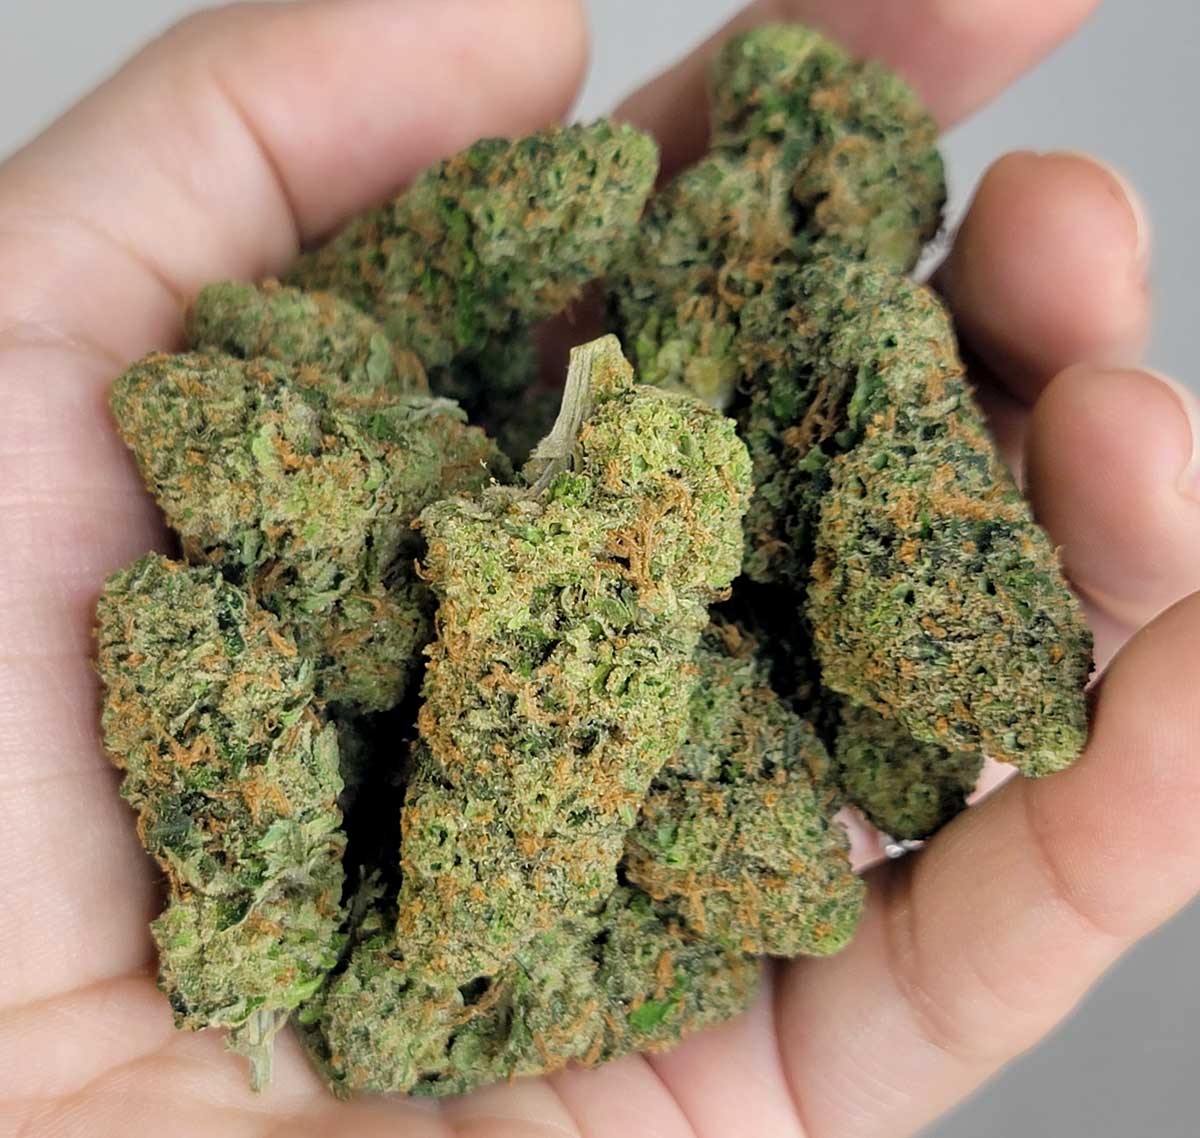
This Purple Ghost Candy got ultra dense after curing.
A cannabis grower’s 3 best curing tools:
- Boveda Curing Packs – Moisture levels in the air are key to a great cure, and these packs automatically maintain the humidity (amount of water in the air) to ensure buds never get too wet or too dry. The right humidity ensures buds are exposed to the perfect amount of moisture during the curing process.
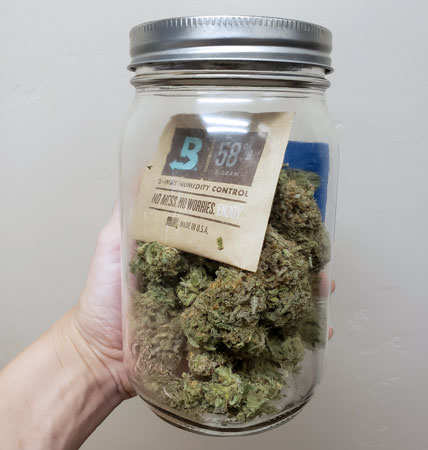
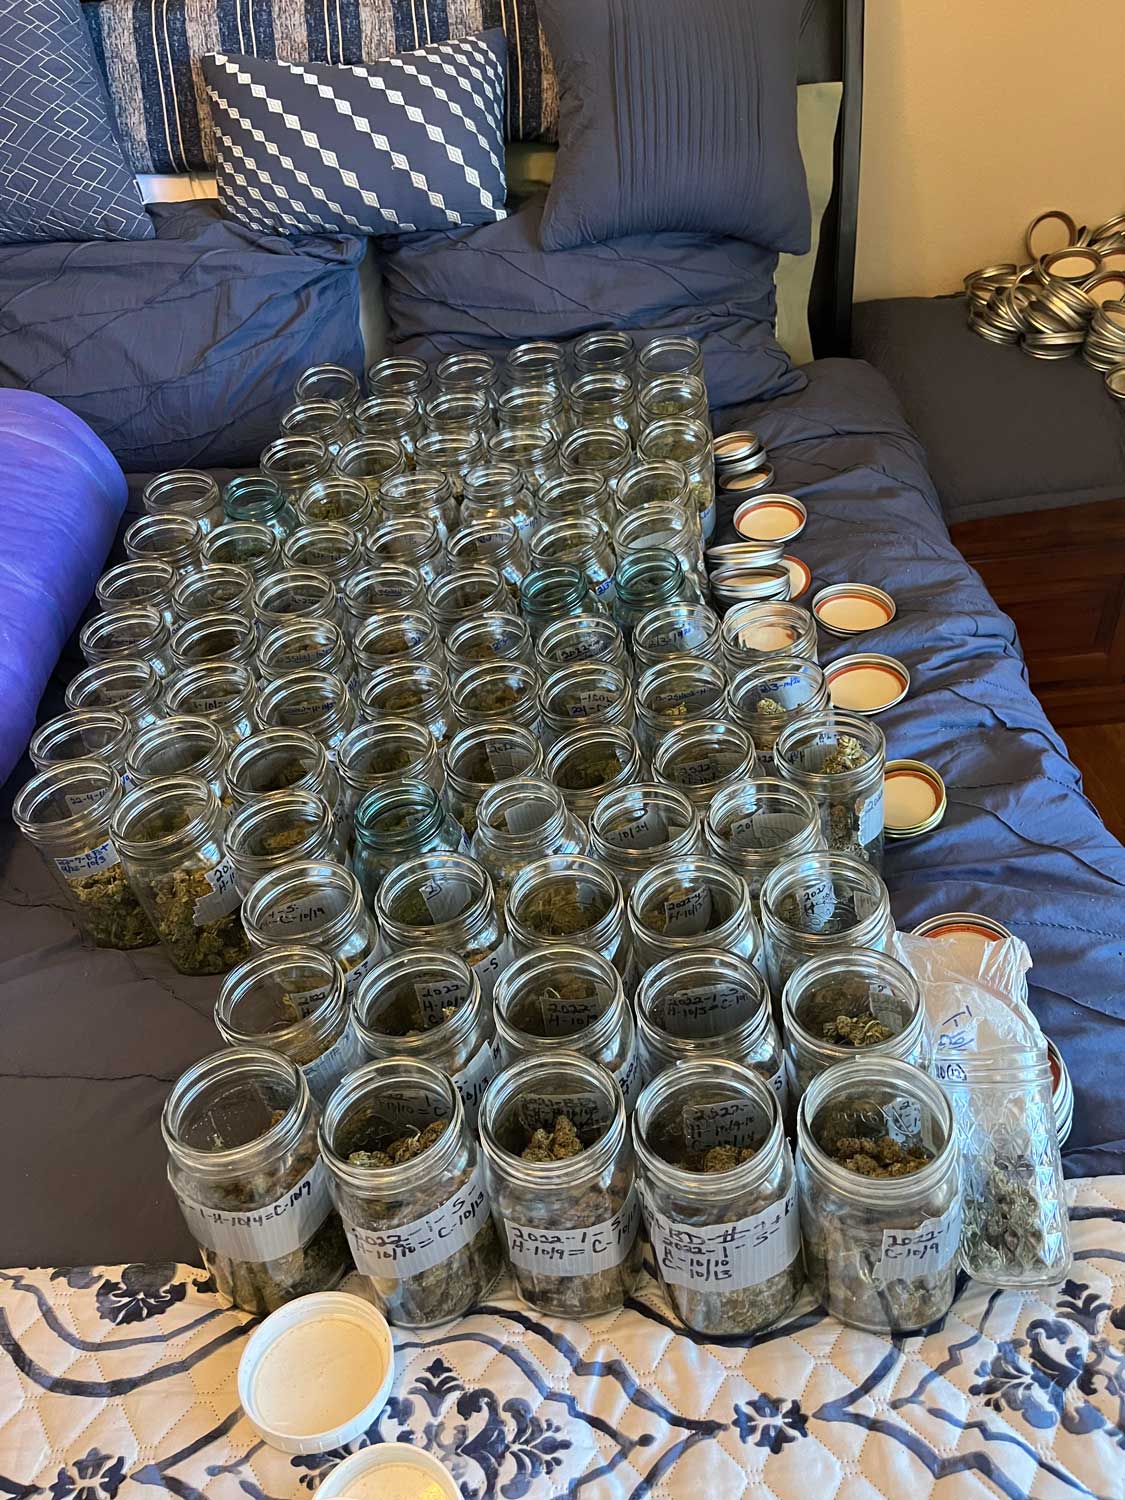
- Wide-Mouth Glass Mason Jars – Glass mason jars are perfect for curing and long term storage, as they are airtight but easy to open and close. The “wide mouth” version ensures you can fit your hands inside. Glass mason jars are what most cannabis growers use for curing, and what I use. The most popular size is 32 oz (1 quart), which holds about 1 ounce of weed. A few other types of containers can be used for curing, but are much less common (more info below).
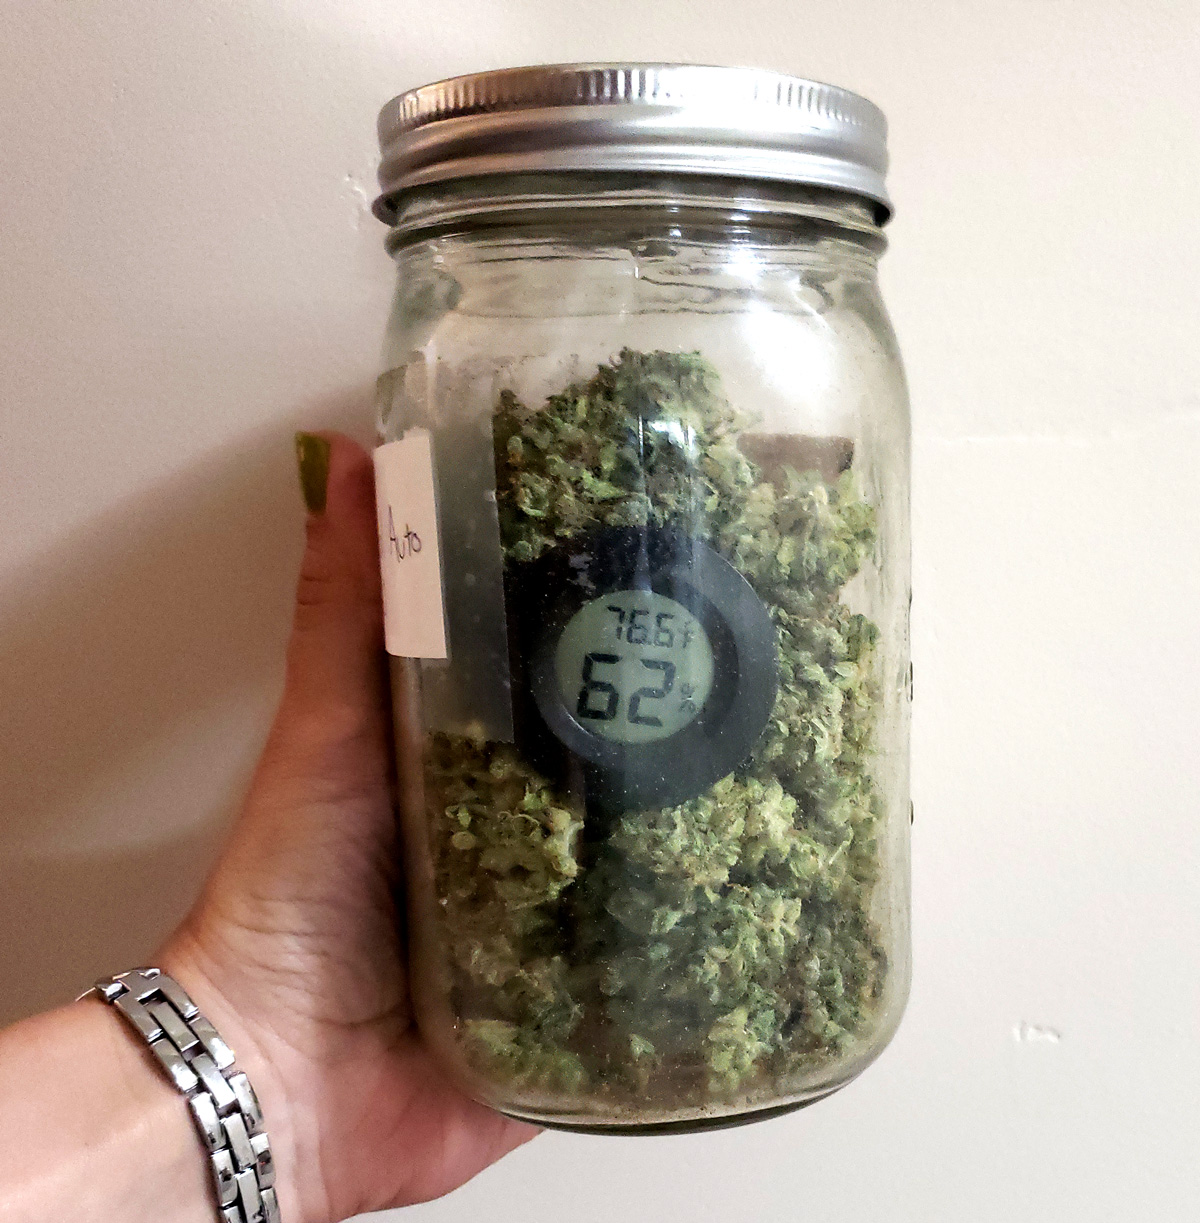
- Mini Hygrometers (Optional) – It’s nice to know the humidity inside your jars. However, the Boveda Humidity Packs automatically maintain the humidity, so this is the least important of the 3 tools.
With these three tools alone, you can achieve a fool-proof professional cannabis cure every harvest!
Complete Step-By-Step Guide to Cannabis Curing
Curing is actually one of the most straightforward parts of growing cannabis, especially if you invested in Boveda Humidity Packs. Before these packs were popularized, growers had to manually maintain the humidity, which can be a pain. Luckily, the packs take out the guesswork and do most of the work for you.
Step 1: Dry and Trim Your Buds After Harvest
Before putting jars is buds, it’s essential to make sure your buds are fully dried and most of the leaves have been trimmed off.
Why Dry Buds Before Curing?
Freshly harvested buds are mostly water (75-85% water). Although humidity packs can take out extra moisture, they don’t have the drying power to take all that water out of your buds. Too much water locked in the jars can grow unwanted stuff, so you must dry buds first.
Buds are dry and ready to jar when…
- Small stems snap instead of bend
- Buds “pop off” the stem, without leaving strings behind
If the small stems are still bendy, or buds are leaving strings behind when you try to pop them off, it means there is still water contained inside and they should be dried a bit more.
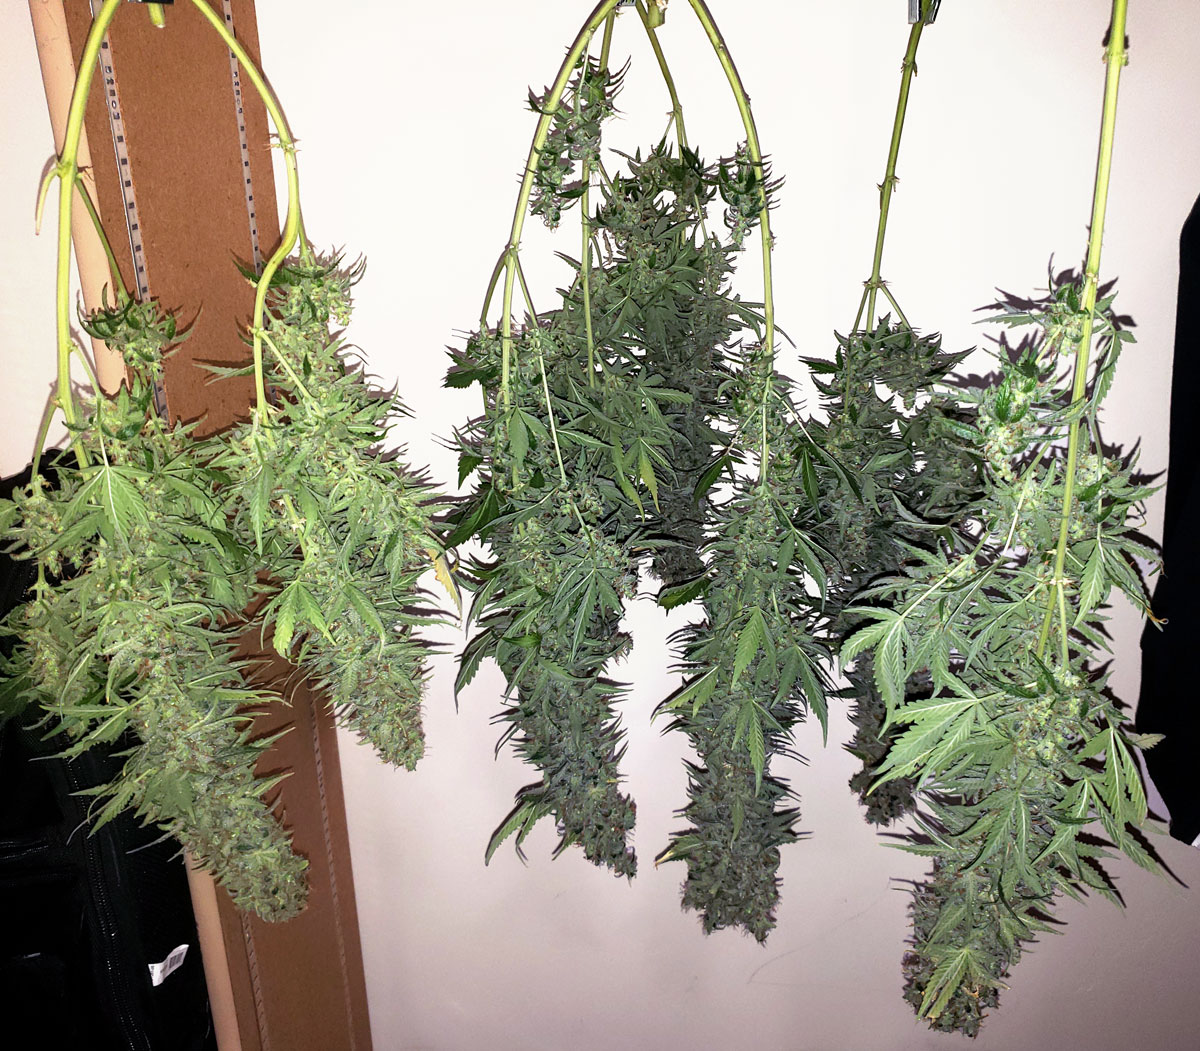
The most common way to dry weed is hang branches upside down and let them air-dry.
Why Trim Buds Before Curing?
Although you can trim your buds before or after drying, it’s crucial to trim your buds before curing. If a lot of leaf matter is put in the jars to cure, the buds get a grassy hay smell, and buds won’t be as smooth to smoke even if you trim the buds at that point.
Don’t skip trimming before jarring your buds! Buds respond well to curing in jars, but leaves don’t.
Example of trimmed vs untrimmed cannabis buds.

Helpful Tutorials
Step 2: Put Buds in Airtight Container with Humidity Pack (Optional: Add Hygrometer)
Once buds are trimmed and dried, it’s time to put them into an airtight container to start the curing process. These containers should be easy to open and close because you will be “burping” your jars once a day for a few weeks. Most cannabis growers use glass mason jars for curing cannabis.
During curing, it’s crucial to maintain the proper humidity. Luckily, this is easy with today’s curing tutorial! Just add a Boveda humidity control pack (sometimes called “Humidipaks”) to automatically maintain the humidity in the right range. They come in different versions, which I’ll explain below.
Lastly, you can optionally add a mini hygrometer to monitor the humidity in the jars.
Less than $20 for a 10-Pack of Humidity Control Packs – An investment worth EVERY penny!
There are two types of humidity packs you can choose to use for curing weed.
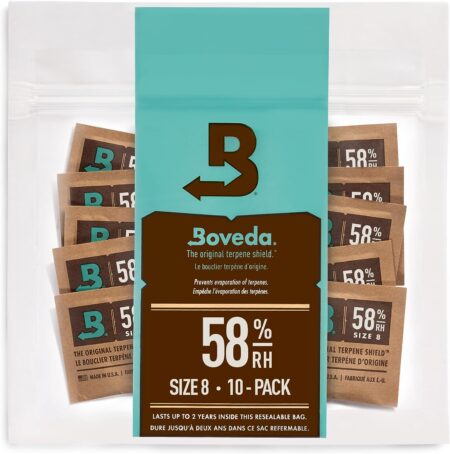
58% vs 62% Humidity Pack – Which is Better for Curing Weed?
- 58% Humidity Pack – The 58% version keeps things a little more dry than the 62% option. I personally prefer this version for curing weed. I think buds tend to smoke better, and it lowers the chance of any moisture building up in the jar, especially if you’ve got bigger or denser buds. It is also an ideal humidity for long-term storage, as weed should be a bit drier when stored for more than a month or two.
- 62% Humidity Pack – The 62% size is another great choice for curing weed. This is better if you prefer slightly softer weed, and also is an ideal choice for smaller buds (which tend to be easier to dry out). Although I like slightly drier buds, many cannabis enthusiasts prefer the texture of weed that has just a bit more moisture contained inside. However, if you plan on storing your weed for more than a month, you should opt for the 58% version (or switch after the 2-week cure).
Besides the humidity rating, these packs also come in different sizes. Boveda’s “Size 8” (this stands for 8 grams, which is the weight of each pack) is the perfect size to cure 1 ounce of weed. If you’re
Whether you get 58% or 62% packs, choose “Size 8” for 1 ounce of weed.
What containers to cure weed?
These are the most popular types of containers to cure your weed inside:
- Wide-Mouth Glass Mason Jars – These glass jars were originally made for cooking, but they’re also perfect for curing! These are what I use, and (by far) the most popular container for curing weed. They’re completely airtight, yet easy to open and close. You can easily see the weed inside.
- Turkey Bags – Also known as “oven bags”. These are what you would stick a turkey inside of to cook in your oven without drying out. They happen to work well for curing weed, especially if you’ve got a BIG harvest and don’t want to have to “burp” tons of jars once a day. The one downside is the trichomes may stick to the sides from static, but if a bag is full of a ton of weed that won’t make a significant difference.
- Other Airtight Containers – Glass tends to get the best results. Wood containers can leave a woody smell, and plastic tends to make static and can attract trichomes so they stick to the side instead of staying on your weed. Some growers get specially made curing containers that claim to automatically “burp” the weed for you, like the insanely expensive Herb Guard Auto-Cure Smart Jar or much more reasonably priced 2-Way Humidity Control Bags. However, in my experience these don’t work any better than the tried and true glass-jar-plus-humidity-pack combo.
Make sure to get the “wide mouth” version (not “regular mouth”) so your hands can easily fit inside.
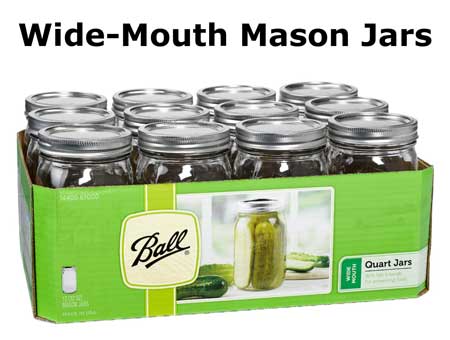
Glass mason jars – tried and true for awesome curing. The 32 oz (1 quart) size is most popular, and holds about 1 ounce of weed.

After buds are cured, they can be kept in the jars for long-term storage.
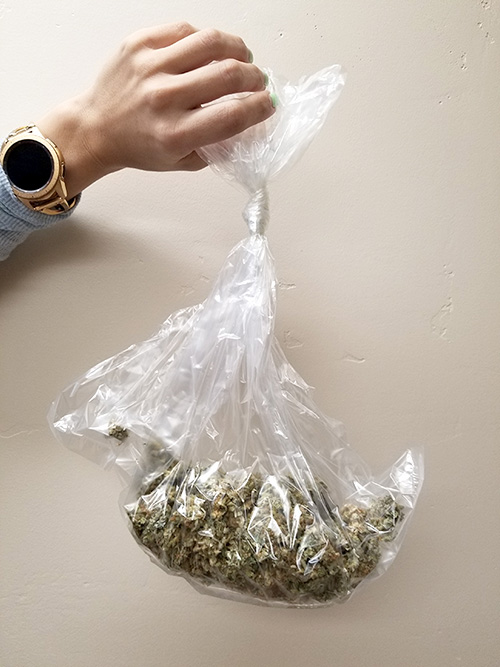
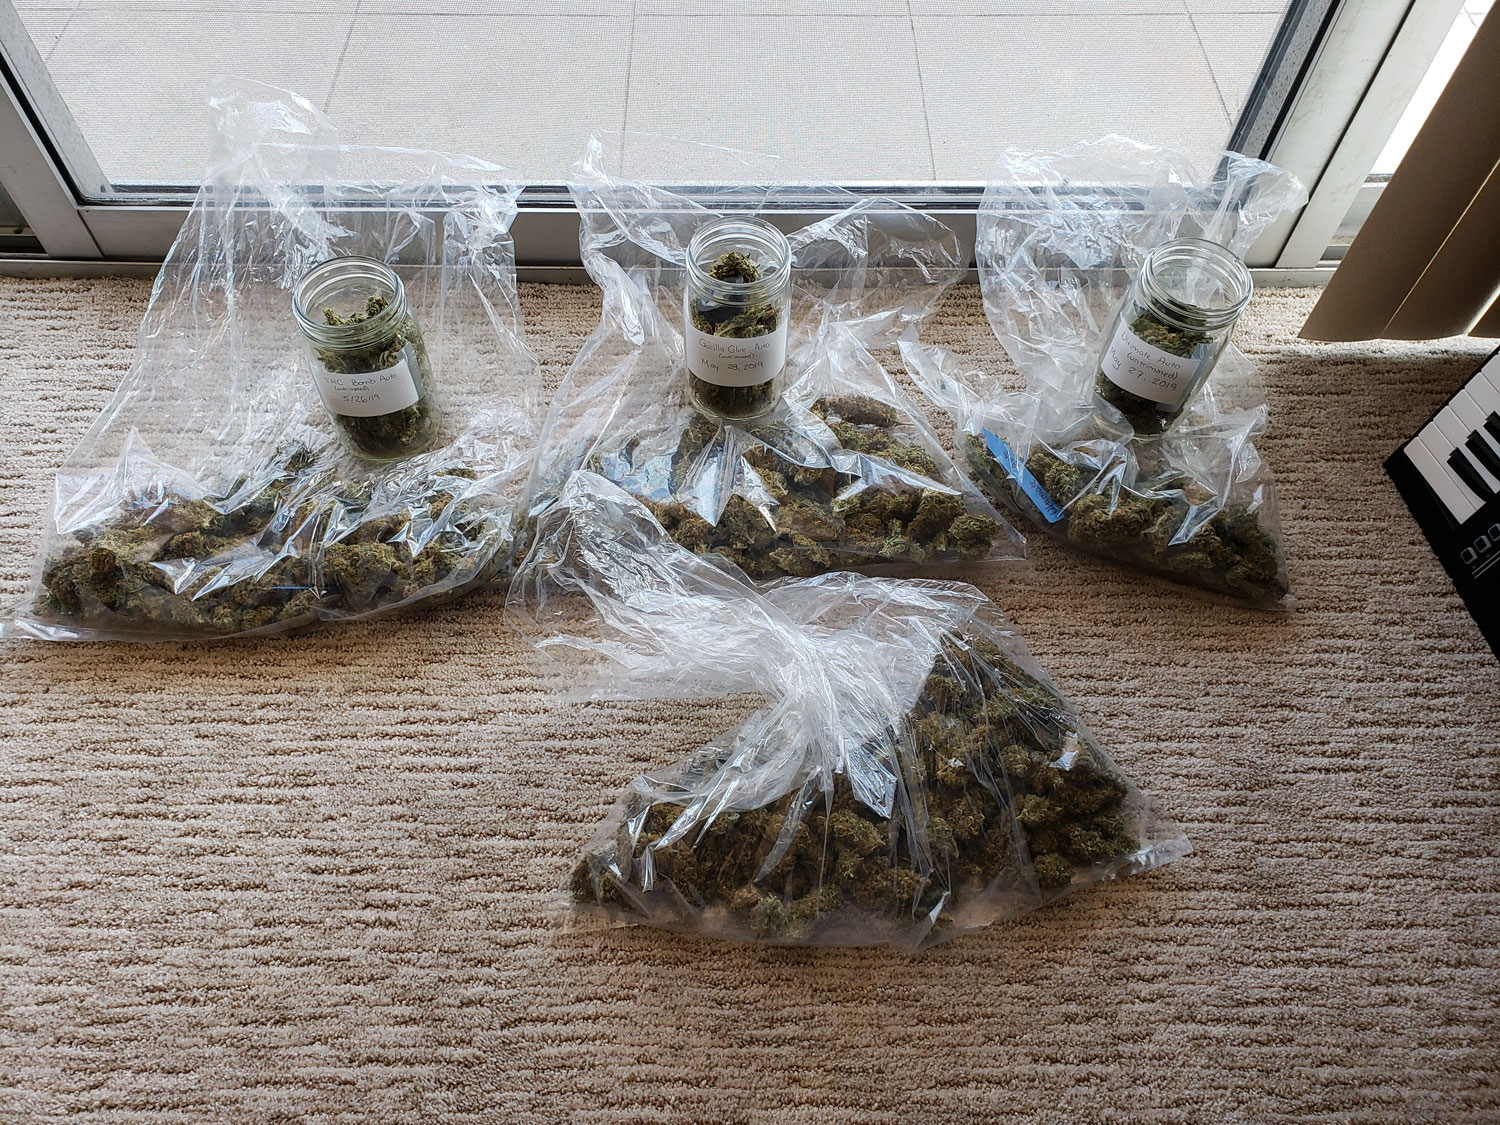
Another option that’s popular for a big harvest is to cure the buds in “turkey bags” (the kind of bag you would use to cook a turkey in the oven). Buds are put into the bag, and then you tie it closed tightly to make it airtight. The benefits of turkey bags are you can put a lot more weed in them, and they’re easier to open and close to “burp” than jars (which you’ll learn about in the next step).
If you’ve got 20 ounces of weed in 20 jars, it can actually get a bit time consuming to burp them all every day. But you could put that much weed in a few turkey bags, and opening/closing is easier.
With a large harvest, daily burping can feel a bit daunting. Turkey bags make burping easier.
The only thing to keep in mind with turkey bags is they’re not suitable for long-term storage. Even if you tie them tightly closed, they’re not airtight like glass mason jars. That’s fine during the curing process when buds still need a little fresh air. But once the buds have finished curing for 2 weeks, you should move them into a truly airtight container.
Turkey oven bags can also be used for curing cannabis the first 2 weeks.

Tie the bag as tight as you can. Note: Even tied tightly, they are not completely airtight.
Remember, buds need to be moved to an actual airtight container after 2 weeks of curing.
Hygrometers are optional, but fun. If you want to see the actual humidity in you jars, you can buy cheap mini hygrometers that fit right inside a glass mason jar! However, if you follow all the other steps including getting the Boveda humidity packs and burping the jars, you don’t really need them.
Mini hygrometers are unnecessary if you follow all the other steps.
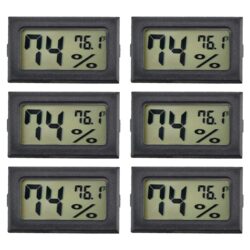
But they’re cheap and fun!
Step 3: “Burp” Jars Once a Day for 2 Weeks
While curing buds, the container should prevent air from going in and out, but buds do need some amount of fresh air. That’s why jars should be “burped” once a day during curing.
“Burping” means to open the jars and then close them. Larry had a LOT of jars to burp last harvest.
This step is pretty straightforward. Open your jars (or other curing container such as a turkey bag) once a day for the first 2 weeks. This ensures they get some amount of fresh air.
Don’t skip this step even if you feel like you overdried your weed. It’s crucial for the buds to get some fresh air to properly cure. The humidity packs ensure there is the right amount of moisture for a proper cure.
Sniff your weed! Burping is also a good time to enjoy the smell of your weed as it intensifies over the curing process. Maybe keep a nug for a smoke test 😉
Some strains like Platinum Cookies smell like a tasty dessert!
If buds smell musty or feel wet on the outside, pay attention! Buds should feel dry to the touch. Also, if buds smell like something besides weed (ammonia, vinegar, musty, or otherwise like something unwanted is growing in there), don’t ignore it! Typically, this happens when the weed was still too wet when jarred.
A humidity pack can remove some amount of moisture, but if the buds weren’t fully dried before being put in the jar, it may not be able to pull enough water out. Or the moisture may be building in the bottom of the jar, away from the humidity pack.
If you think your buds aren’t dry enough, dump them out of the jars onto a clean surface and let them dry for a few hours. Don’t put them back in the jars unless the outside of each bud feels completely dry. You may need to repeat this process again the next day if you still notice a musty smell or the buds feel wet again.
If buds seem wet in the jars, lay them out on a clean surface and let them dry for a few hours.
Step 4: Enjoy Your Cured Buds!
After 2 weeks, your buds are done their initial cure. At this point, they’re ready to smoke!
After 2 weeks, you don’t need to keep burping the jars every day. But it’s not a bad idea to open the jars once a week for a few more weeks to keep the curing process going. Buds may continue to improve for several more weeks or even months of curing.
Is it worth curing buds for longer than 2 weeks?
I’ve noticed certain strains keep getting more and more potent for months, while other strains don’t seem to improve much past the first 2-4 weeks of curing.
For example, we grew some Full Moon and Purple Ghost Candy plants together. The harvest was enormous, and we were smoking it for over a year. We noticed that the Full Moon maintained its potency, but for the Purple Ghost Candy continued getting more and more potent until we used it all up. We actually started calling it the “Day Ender” because if you smoked some of it you weren’t going to be doing anything else that day!
Some strains continue improving from longer curing, like this Purple Ghost Candy.
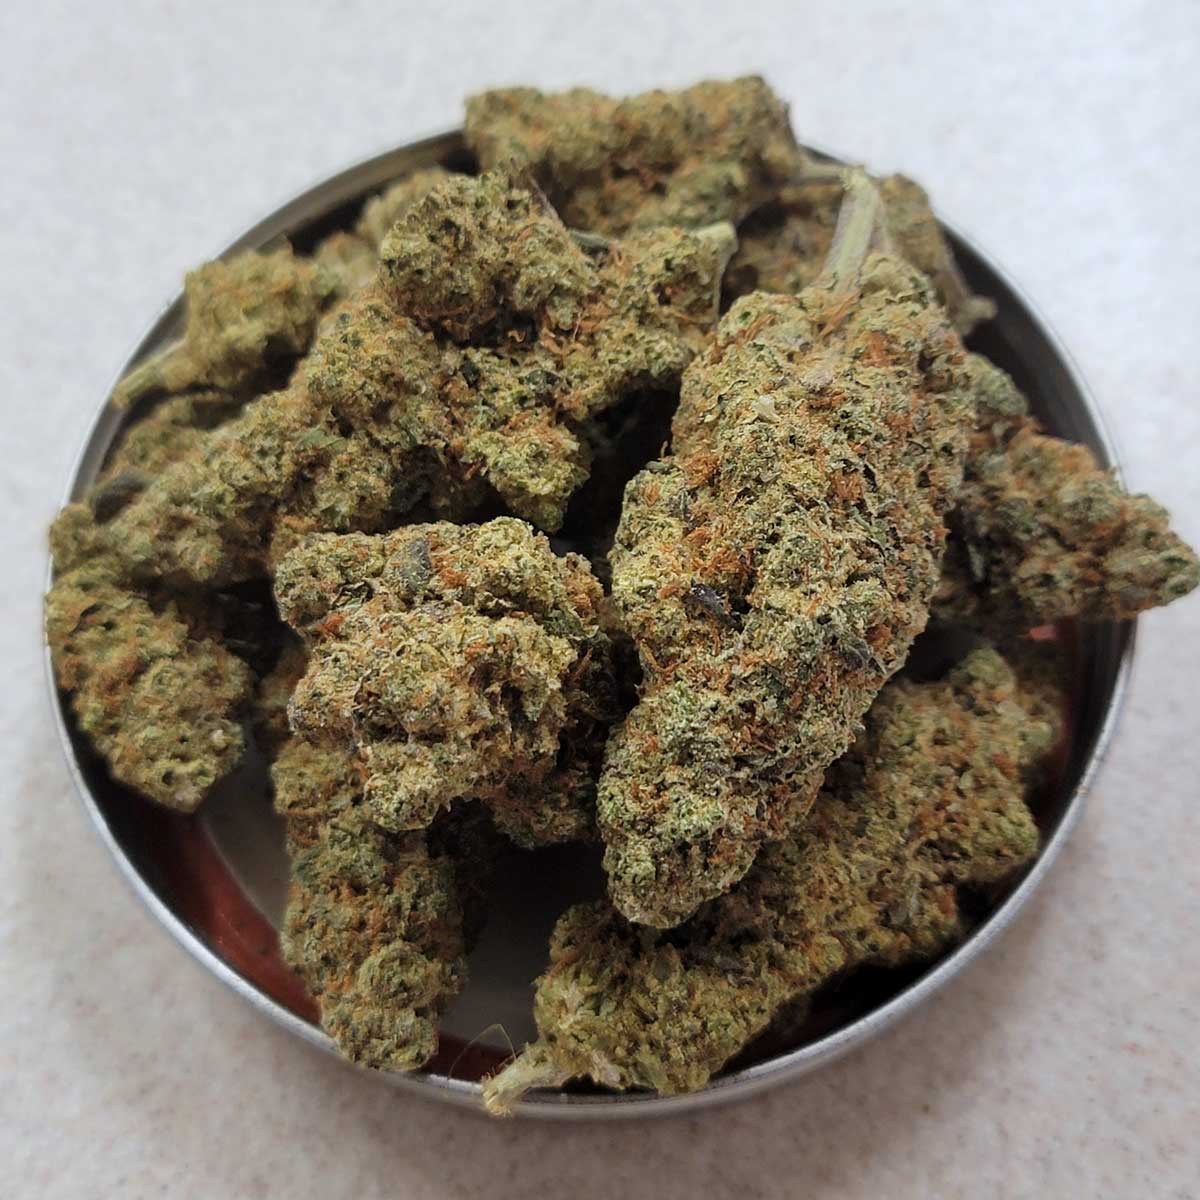
Buds were super potent after 2 weeks of curing. (Note: although the leaves were purple, the buds were mostly green)
But after curing in jars for a few more months, the Purple Ghost Candy potency reached “day-ender” status!
On the other hand, the Full Moon buds (plant on the left from the same grow) only maintained the same potency after a long cure.
So strain and genetics seem to play an important role on the effects of long-term curing.
What about long-term storage?
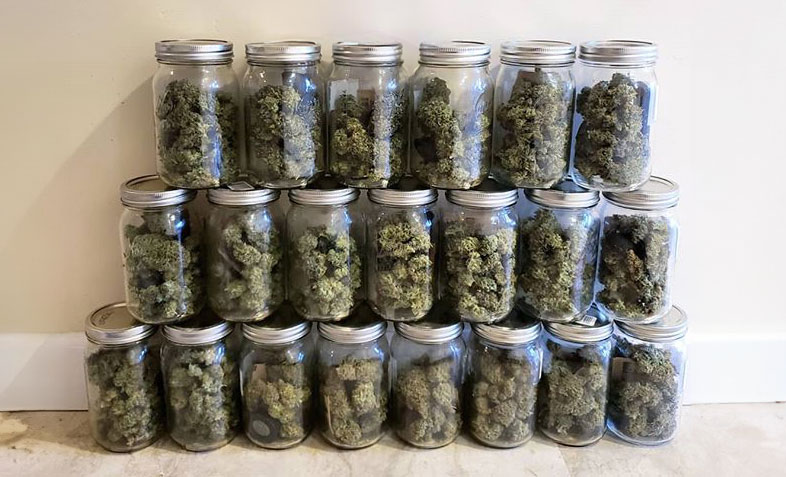
One of the coolest parts of being a home grower is after you’ve gotten the hang of it, each harvest results in way more weed than you can use. Even for daily smokers!
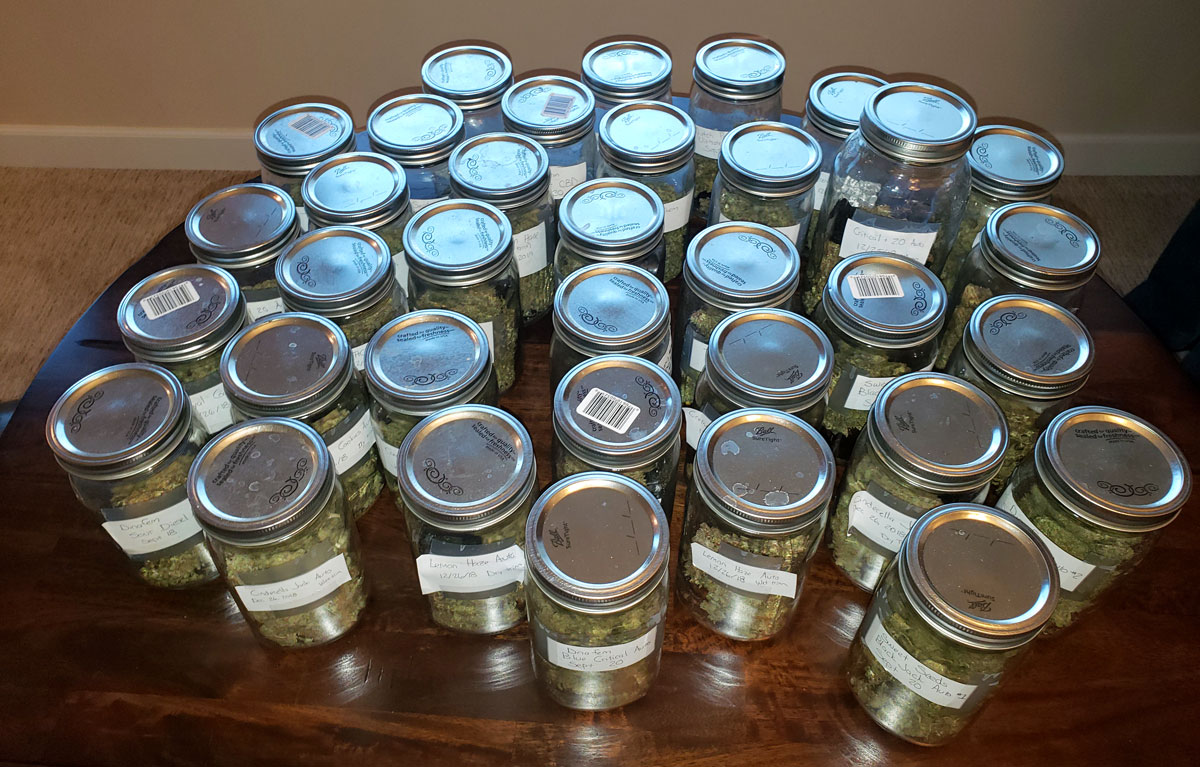
Check out this unbelievable harvest by our friend Mr. K!
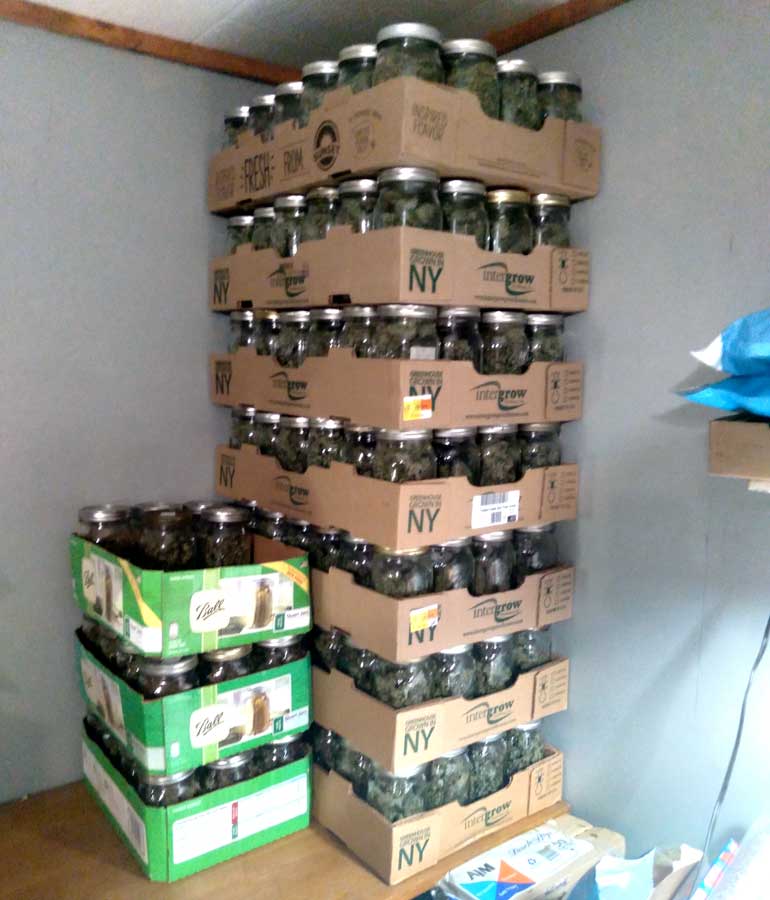
So you may end up in a situation where you want to store your weed for a long time. Properly stored weed maintains its potency for years.
Here’s what’s most important for long term storage:
- Buds are completely dry – It’s a good idea to open jars once a week for a little while to ensure that moisture isn’t building up inside. After a few weeks, if buds seem totally dry every time you check, they’re ready for long term storage.
- Add a Boveda 58% Pack – For long term storage, moisture is your enemy, so you want to keep buds on the drier side. A 58% Boveda pack works great.
- Cool, dark place – Besides moisture, the biggest enemy to weed in storage are heat and light. Both tend to degrade THC levels. Ideally, you want to keep your buds completely in the dark, in a place that stays cool all the time. Don’t store your weed jars next to a window with the sun shining on them, or a room that gets hot!
If you followed all the steps, buds can be stored for years without losing potency. And as mentioned before, in some cases, you may find they’ve actually gotten more potent!
If you follow today’s 4 easy steps, you’ll end up with perfectly cured cannabis every single harvest!
Happy Growing!
Looking for some awesome new cannabis strains to grow? Wondering where to buy marijuana seeds? There are lot of choices, but learn about the marijuana seed banks we recommend here: https://www.growweedeasy.com/seeds
Want free cannabis grow tips delivered to your inbox every Sunday? Join our weekly newsletter!
About the Author: Nebula Haze
Nebula Haze founded GrowWeedEasy.com with her husband Sirius in 2010. Our mission is to demystify the world of indoor marijuana cultivation. We’ve shared our passion and knowledge through hundreds of tutorials covering every aspect of growing, both in print and online. We’ve also guided numerous students through our comprehensive online courses. For us, it’s not just about growing cannabis; it’s about empowering every grower to discover the simplicity and joy of nurturing cannabis plants to an outstanding harvest. Growing is easy, you just need to know what to do!
Keep smiling and growing,
~Nebula Haze