by Nebula Haze
Table of Contents
- Supplements That Protect Against Heat Damage
- Environment Hacks
- Optimize Your Grow Light
- Change Your Light Schedule
- Heat Resistant Strains
Are your indoor cannabis plants stressed out by the heat? Controlling heat in the grow room is one aspect of growing marijuana indoors that can be difficult for many of us growers. Grow lights provide our plants with lots of life-giving light, but they also get hot, and big grow lights (even some LEDs) can raise the temperature of a room by several degrees.
Quick Heat Stress Tip: Of course, the best thing you can do is control the heat. But if that’s not possible, sea kelp extract can help cannabis plants deal with heat and quickly recover from heat stress (use at 1 tsp/gallon).
Each cannabis strain is a little different and some plants can handle hotter temperatures than others, but most plants start suffering from heat stress when their temperature gets over 85°F / 30°C.
Temperatures above 85°F / 30°C often causes problems, but if it’s not too severe plants may still grow slowly.
Some sensitive cannabis strains from cold climates (most often the short, squat, Indica strains with huge leaves) may start showing heat stress if the temperature rises above 80°F / 27°C. To avoid heat stress, you must keep your grow space below a particular plant’s comfort threshold.
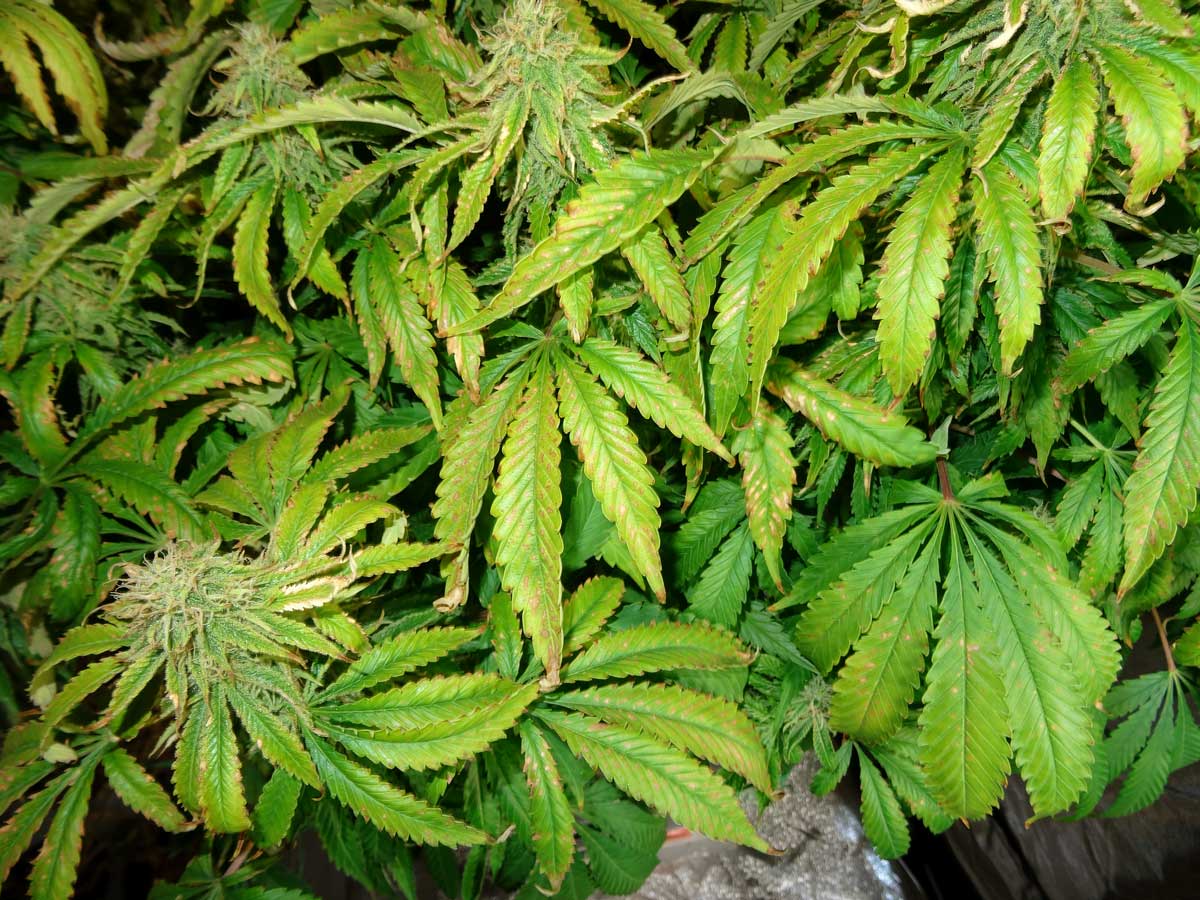
Too much heat, especially over time, can greatly harm or even kill your cannabis plants.
But it’s not just plant growth that benefits from ideal temperatures. Controlling the temperature in the flowering stage has immense benefits to bud quality.
Buds that develop in a good environment reward you with increased density, terpene levels, and overall THC levels/potency.
On the flip side, too much heat harms bud development in the flowering stage by burning off smell/potency, discoloring buds, and causing buds to grow loose or airy.
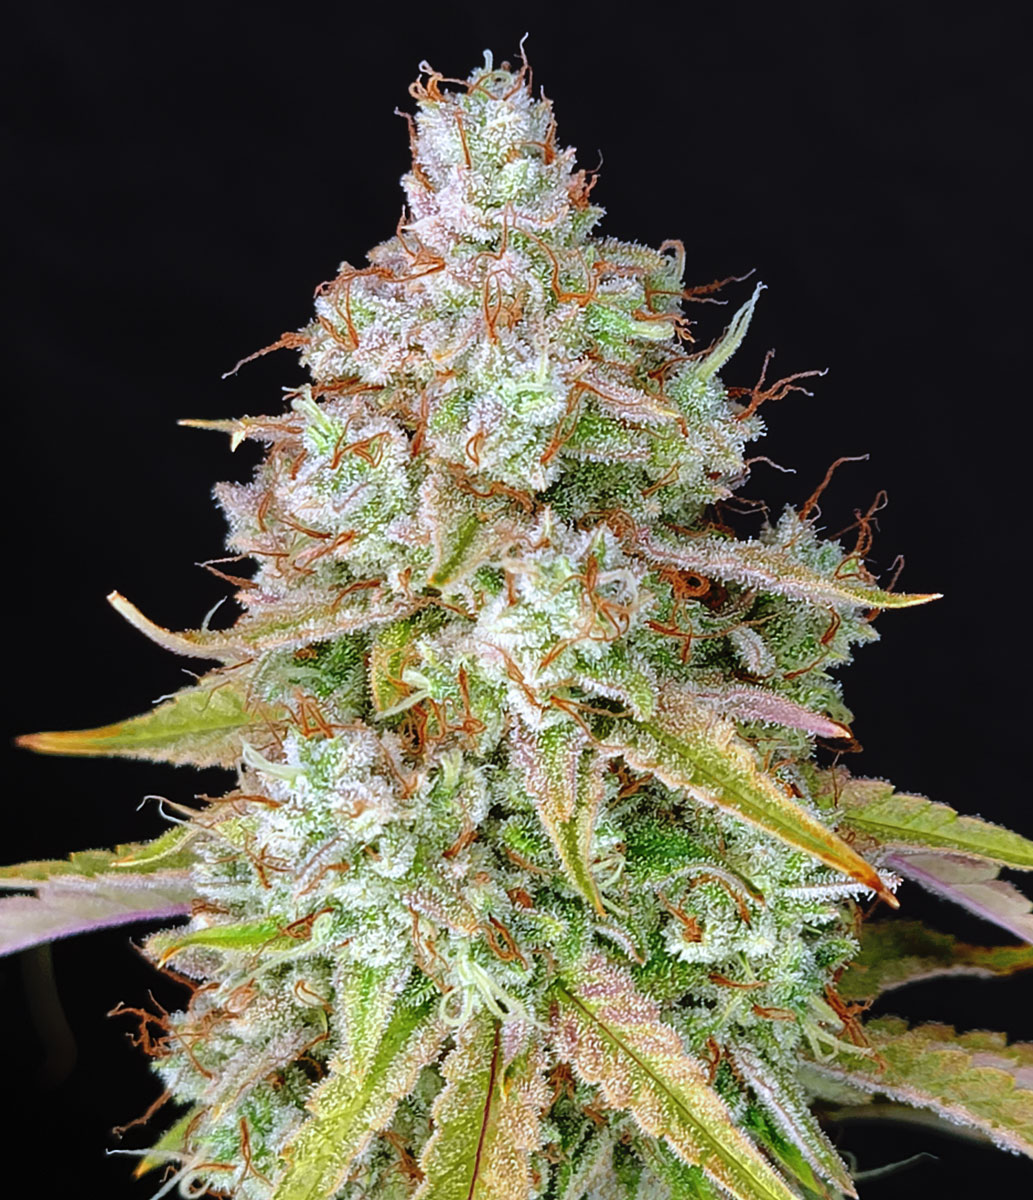
Developing in heat can make buds look “ugly”.
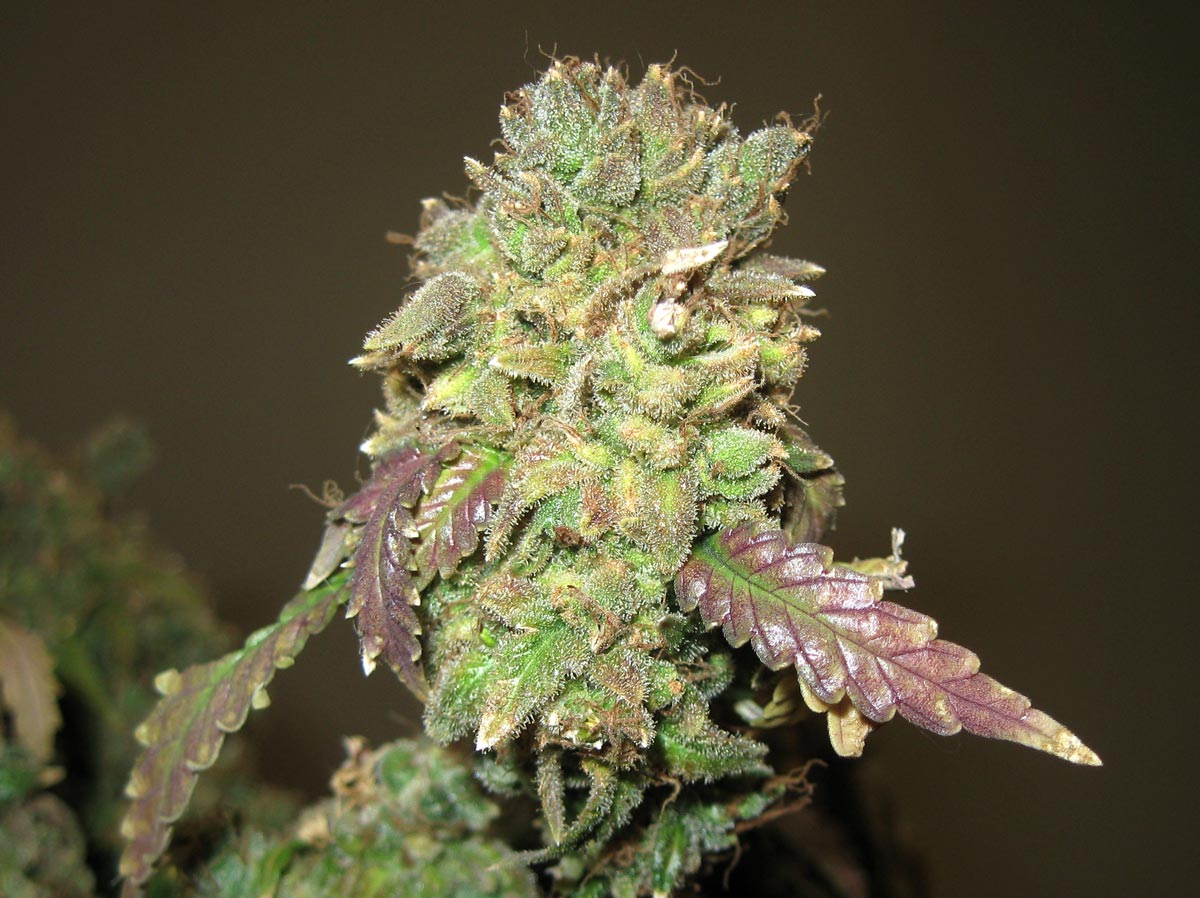
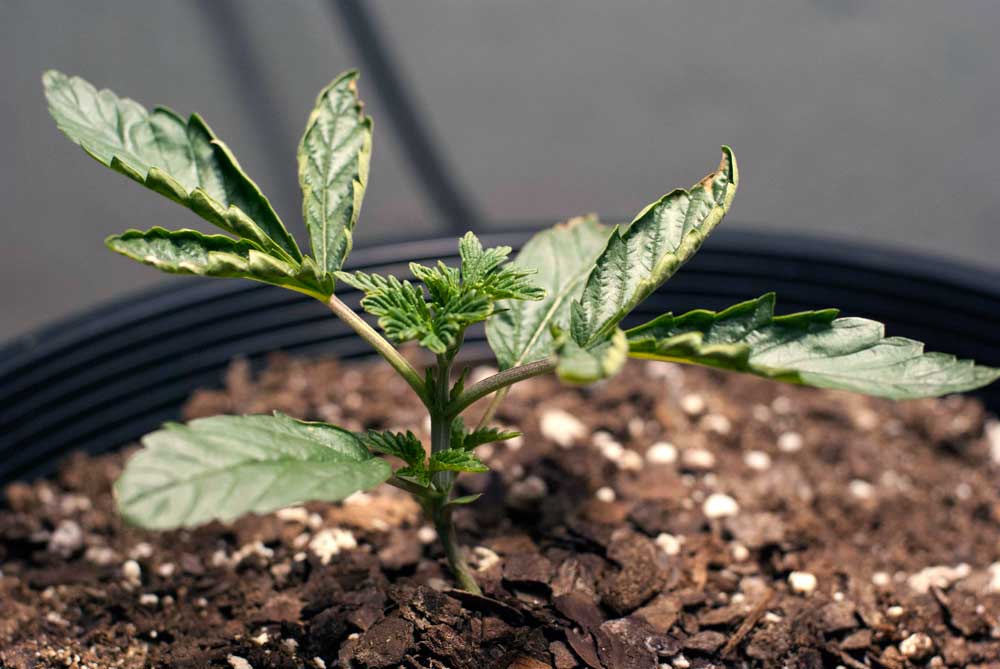
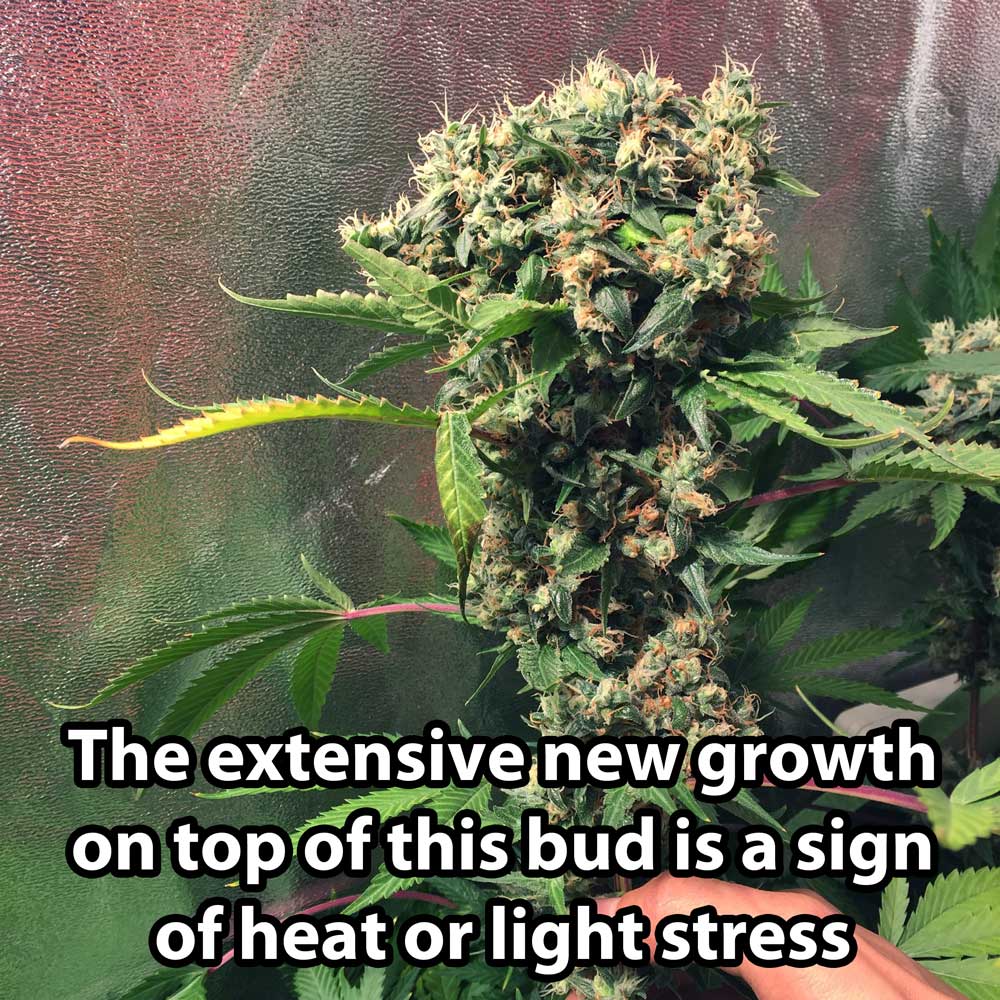
Heat or light stress can cause a plant to keep making new growth on the parts of the buds that are closest to the light. When you see these top-heavy oddly-shaped “fist” buds, it’s usually the result of heat and/or light stress.
What can you do to protect your cannabis plants from heat damage?
This tutorial will teach you tactics that you can use to control temperature and fix heat problems to produce a plant paradise. You also get tips to help your cannabis plants thrive even if the grow space is getting too hot.
This tutorial shows you how to deal with heat so you grow healthy plants with beautiful potent top-shelf buds.

1.) Supplements That Protect Against Heat Damage
Some supplements can help protect your cannabis plants so they are more resistant and/or recover more quickly from heat stress.
However, many different companies offer supplements and it can be confusing to decide which one – if any – is best for your garden.
Try to get supplements and nutrients from the same company
For the most part, there is no best supplement for heat (or anything really). A lot of different supplements will get you to the same place in the end. Because of that, when possible it’s a good idea to choose supplements made by the same company as your nutrients instead of trying to find the “best” supplement.
This is because during the process of creating a complete nutrient lineup, nutrient companies specifically test their supplements to make sure they work together with the nutrients in their lineup nutrients without causing lockout or other unexpected problems.
So if you’re using the General Hydroponics Flora Trio nutrients, for example, it’s much safer for your plants to add supplements by General Hydroponics if possible. If you were using Botanicare nutrients you’d look at the supplements that Botanicare carries, etc. Learn about different types of nutrients for growing cannabis.
Use supplements to help protect your plants from heat damage if temperatures are rising too high
One of the best inoculants against heat stress is a surprising gift from the ocean; seaweed! As a bonus it contains small amounts of trace nutrients and minerals. Many different nutrient companies use seaweed kelp extract as part of their supplement lineup, which means you have a lot of choices to choose from if you want to incorporate seaweed into your grow.
A few companies offer seaweed extract by itself, like organic Bloom City Liquid Seaweed. Liquid Kelp is a lovely choice for those growing outdoors or in super soil as they contribute to a healthy soil web matrix. Suitable for soil growers who want to avoid using mineral-based nutrients, but can also be used in coco or hydro (just make sure it doesn’t clog any nozzles).
Pure sea kelp extract is a great organic heat stress supplement. Use at 1 tsp/gallon.
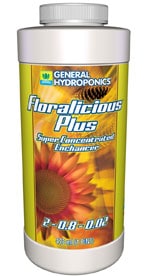
If your nutrient company doesn’t offer a specific Sea Kelp product, you can almost always find sea kelp extract as an ingredient in one or many of their supplements. For example, General Hydroponics has a great all-in-one supplement called Floralicious Plus that contains several ingredients that work together to not only protect your plant against heat with seaweed extract, but can help it to produce better in other situations, too.
Or if you’re growing with Fox Farms nutrients, their Kelp Me Kelp You supplement not only has seaweed but also other ingredients that can make cannabis plants more hardy. So a great marijuana supplement for heat stress.
When starting out with supplements, it’s often best to start with something that matches your base nutrients and has sea kelp extract as an ingredient, like Floralicious Plus by General Hydroponics.
Supplementing your plants with extra silica (listed on the label of supplements as Potassium silicate) is not usually needed for healthy plant growth. There is almost always some amount of silica available, and plants don’t need a whole lot of silica to survive.
That means if your plants aren’t stricken with a (super rare) silica deficiency and are living in a great environment, adding extra silica might not give you tangible benefits. However, if your cannabis plants are under specific types of stress or are generally living in adverse conditions, extra silica can make life easier for your plant.
Silica (listed as Potassium silicate ) helps make plants more resistant to heat. Examples: General Hydroponics Armor Si and Dyna-Gro Pro-Tekt. It’s especially helpful to give extra Silica while your plants are still growing stems and leaves, as the silica gets incorporated into the cell walls.
The most popular silica supplement for marijuana plants may be Bloom City Silica Boost. (Use at 1 tsp/gallon, stop several weeks before harvest)

Plant roots with access to silica (Si) happily drink it up and the silica gets incorporated into plant cells, increasing the strength of individual cell walls. These “armored” cells help improve the hardiness, vigor, and structure of the plant. Kind of like sending your plants to the gym.
Benefits of Silica Supplements
- Plants supplemented with silica are generally more resistant to heat or cold stress as well as some types of disease.
- Silica increases the microscopic “abrasiveness” of leaves, which can act as a deterrent to pests and herbivores (like deer). In fact, if you’ve ever been given a paper cut by a piece of grass, you can thank silica for making those “sharp” edges.
- Silica helps plants get the nutrients they need. Silica is effective at making phosphorus more available to the plant, which can be helpful in the flowering stage when the plant is going through phosphorus at a much higher rate due to the process of making buds.
- Silica can also help the plant roots better absorb micronutrients (including boron, copper, iron, manganese and zinc) while making it harder for the plant to absorb certain toxic substances like aluminum and salt/sodium.
So again, silica won’t magically increase your plant growth, but it can help make up for some problems with the environment. Because of this, nearly all professional nutrient companies carry a quality silica supplement as part of their lineup.
I like Armor Si by General Hydroponics, but again that’s because they make my base nutrients. There is a silica supplement available from almost every major nutrient company out there and you’re least likely to run into problems if you go with the company that matches your nutrients.
Armor Si by General Hydroponics is an excellent silica supplement, especially if the rest of your nutrients are from General Hydroponics.

Note: Silica supplements (or more specifically, their main ingredient Potassium silicate) will raise the pH of your water, so you may need to use a little bit extra PH Down. Learn more about pH.
Root Health Supplement (Essential for Hydroponic Growing in Heat)
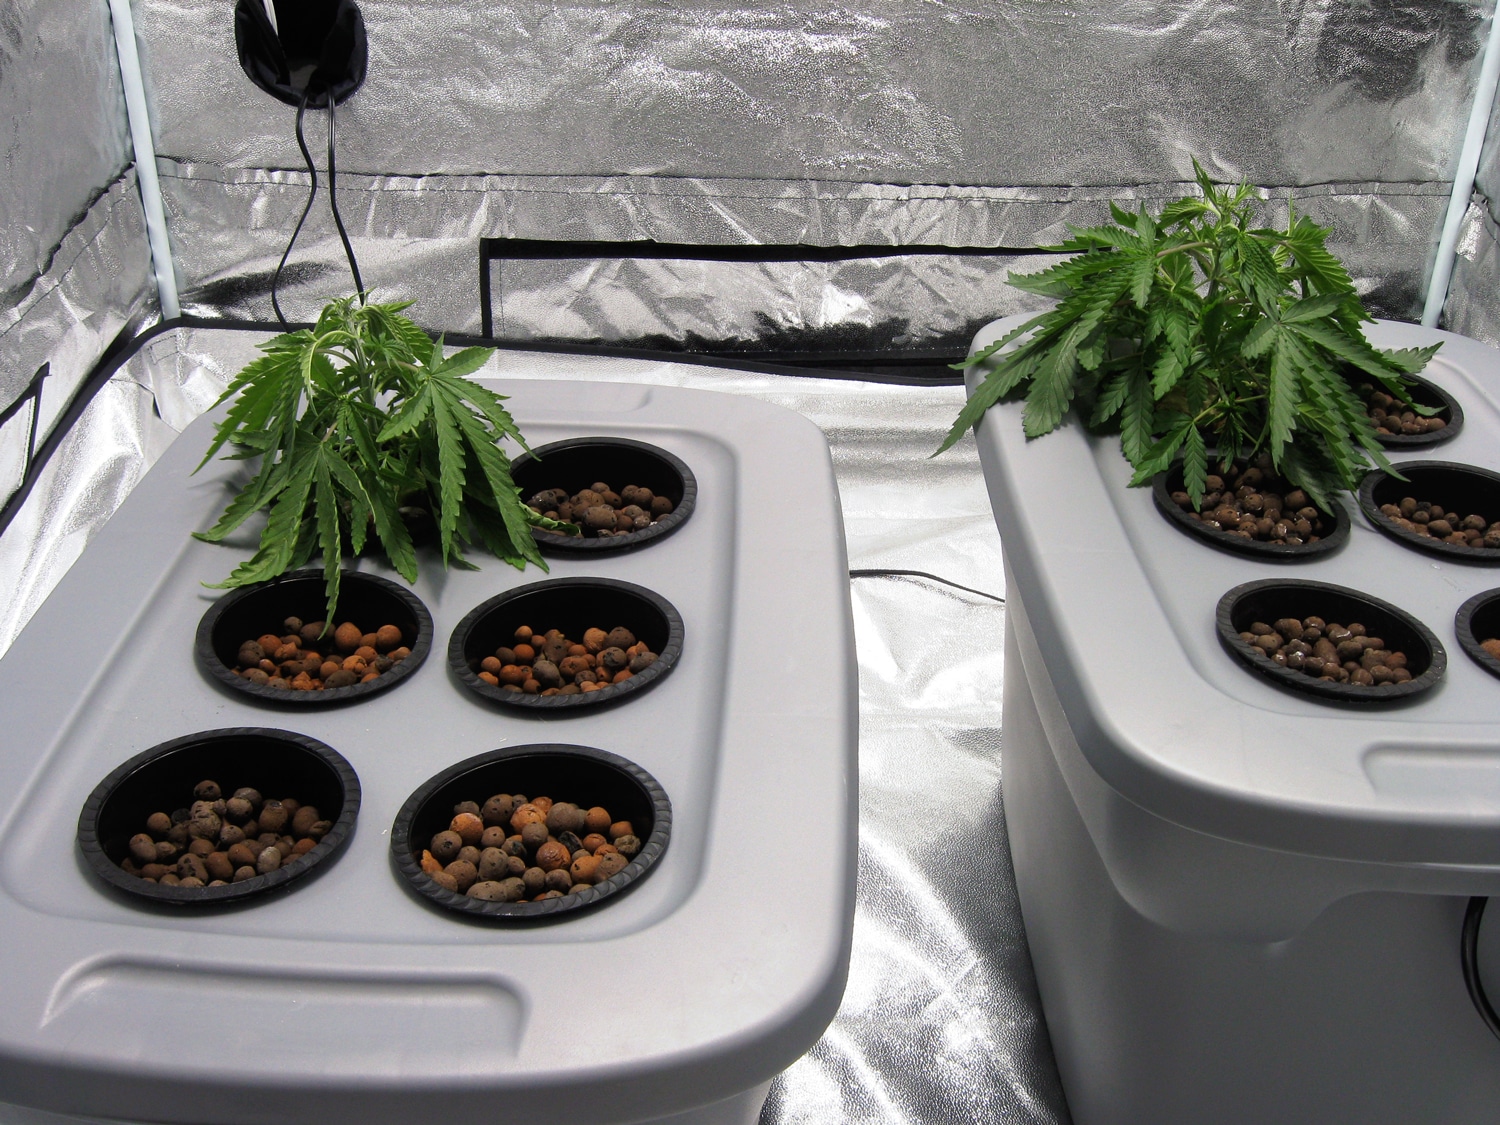
Not only does heat bother your plants above ground, but the roots may also become diseased. When growing cannabis hydroponically (and to a lesser extent when growing in soil or coco) it’s very easy for your roots to start running into problems like root rot when the temperature starts getting too high.
Cannabis plants in hydroponic systems are prone to root rot if you don’t give them a root supplement. Especially if it’s hot!
 Full Tutorial – How to Get Rid of Root Rot
The types of microorganisms that attack roots thrive in hot, wet conditions without much oxygen. Unfortunately, in hydroponics your water can’t hold as much dissolved oxygen when it’s hot, and dissolved oxygen is one of the best ways to fight off root disease.
So it’s sort of a double-whammy for plants grown hydroponically when it gets too hot in the grow room: they’re getting less oxygen AND becoming more vulnerable to root rot.
Besides using an air pump with large air stones to create lots of bubbles in your reservoir (learn more about growing cannabis hydroponically), the best thing you can do to keep roots healthy is control the heat.
Unfortunately, as you know, controlling the heat is often easier said than done.
There are some products that are made up of beneficial bacteria and other microorganisms that specifically fight root rot. These work by out-competing the bad microorganisms in your water reservoir and populating your reservoir with friendly ones that actually help your roots.
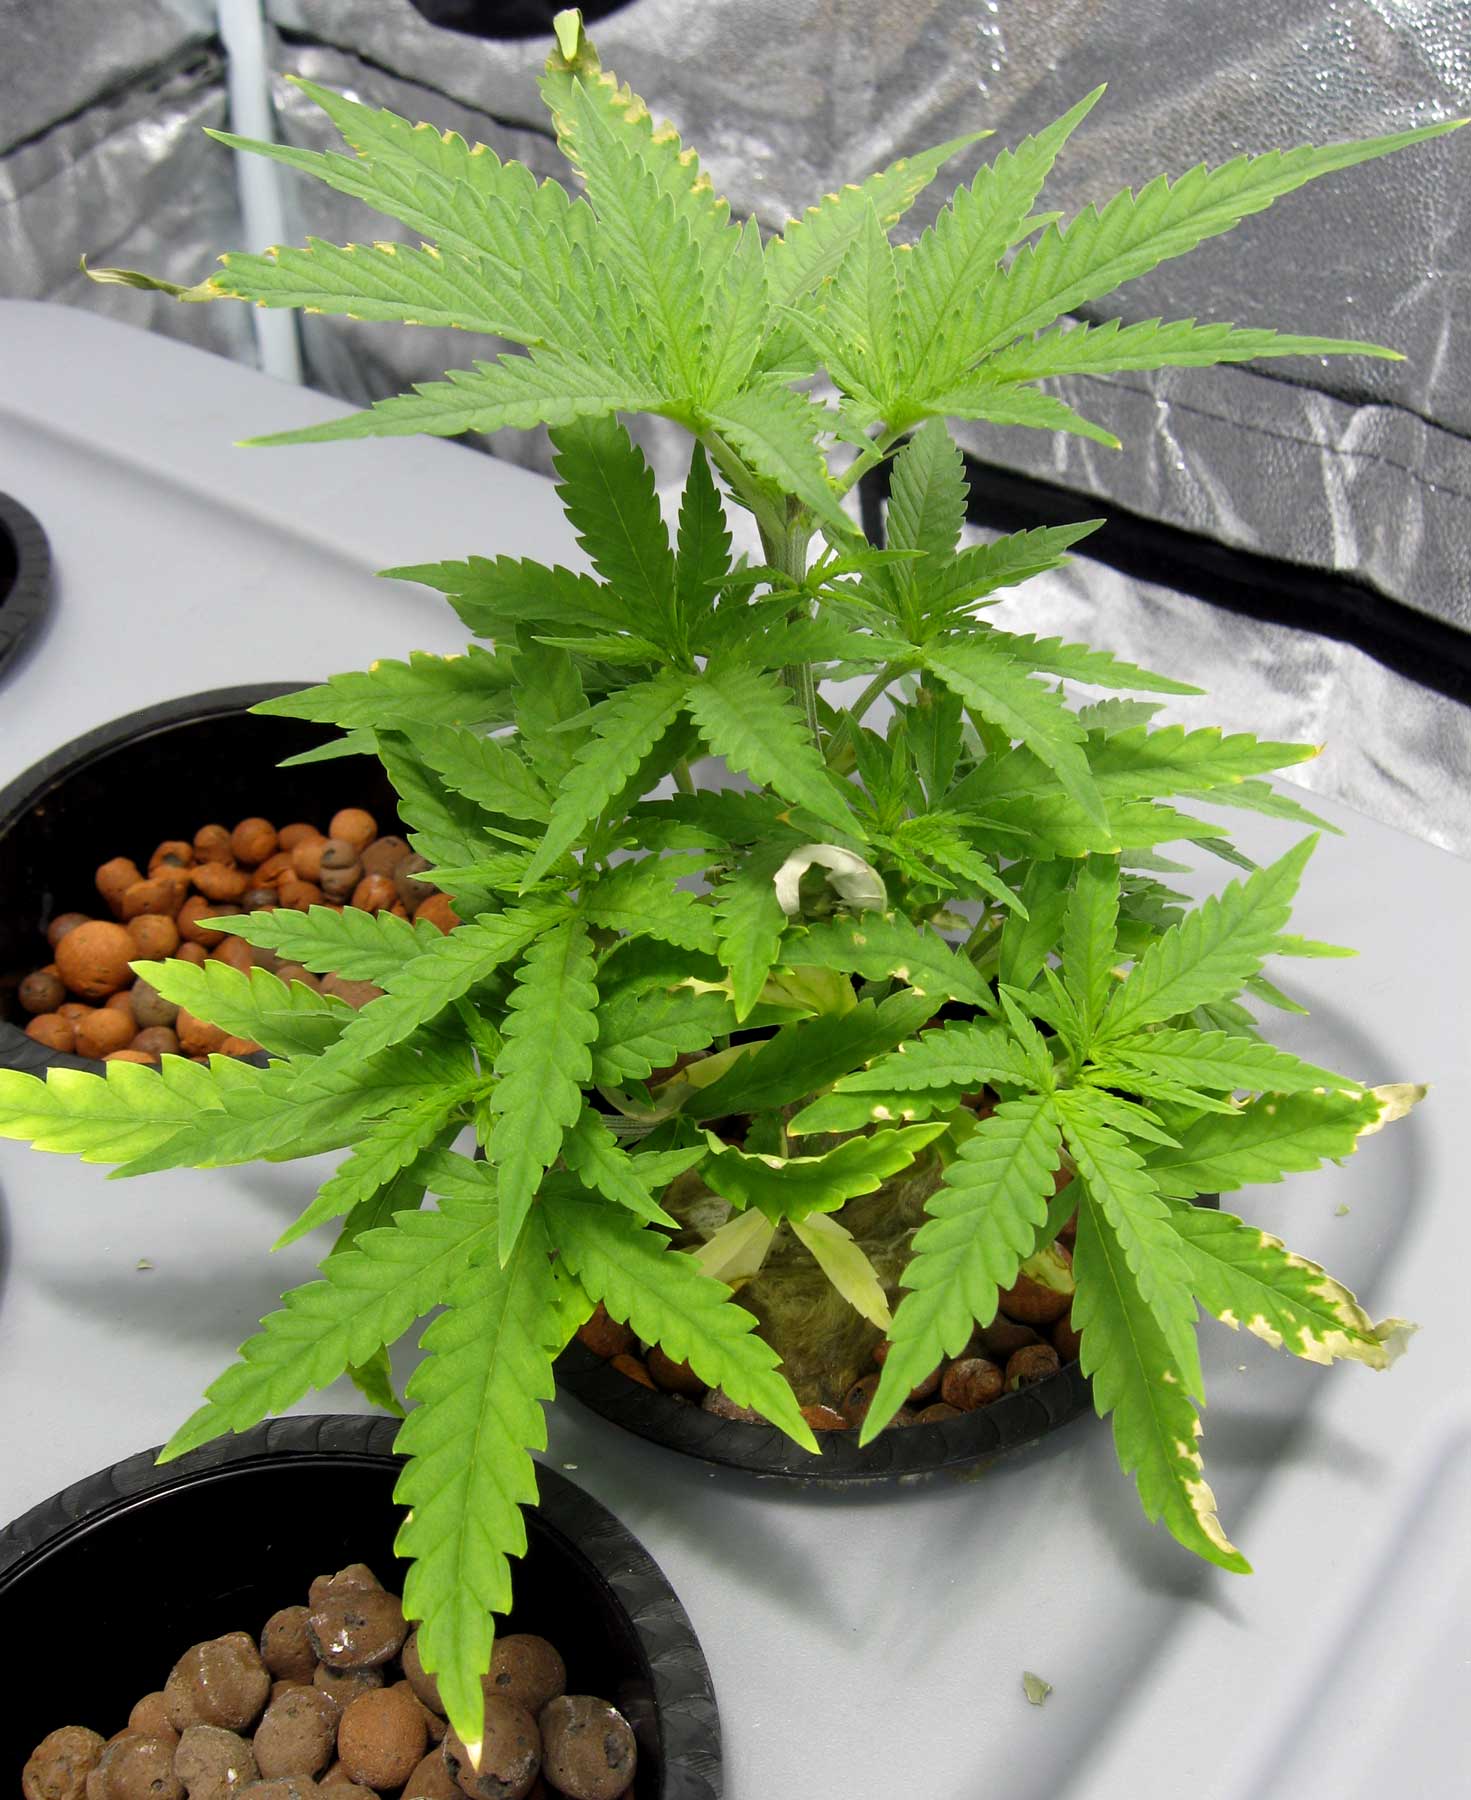
Drooping is often the first sign your plants are suffering from root rot
Plants with root rot may also start getting what looks like various nutrient deficiencies, but the true cause is actually the unhealthy roots
My product of choice for fighting root rot is Hydroguard by Botanicare. Normally I only use nutrients and supplements by General Hydroponics but in my experience, this product has been the best for fighting root rot in DWC / hydro, so I use it specifically. I’m definitely not saying it’s the best root supplement out there, but it’s the best one I’ve ever used and I want to recommend something I know for sure will work. It doesn’t change the pH of the water, and it doesn’t interact with other supplements. I’ve seen it actually fight root rot directly, even when it’s hot, and I never go a grow without it.
I highly recommend Hydroguard as a root supplement for any hydroponic grower struggling with heat or root rot
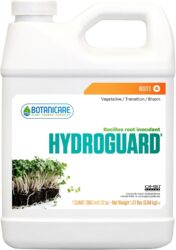
I’ll be honest, I grow hydroponically in San Diego, and my grow room is too hot during the summer. I used to suffer from root rot but as long as I use 1 teaspoon per gallon of this supplement in my reservoir, I see white, healthy roots even in the heat.
I realize this isn’t a direct method to combat heat; rather, it’s a way to help deal with the consequences of too-high heat when it can’t be controlled. It’s best to control the heat in your grow area, but if that’s impossible Hydroguard will help keep your roots healthy in DWC / Hydro! It’s cheap and a little bit goes a long way. A 1-quart bottle will last you more than one grow!
Add CO2 to the Air
Plants can easily survive in temps up to 95°F (35°C) when the air is being supplemented with extra CO2. However, for CO2 to make a difference to your plants, you need relatively strong grow lights (i.e. HPS, LEC, or big LEDs). But for those with strong grow lights, adding extra CO2 can result in faster growth as well as making it so plants can better handle the heat.
Learn how to add CO2 to your grow
Choose Soil or Coco (Hand-Watered Grow) Over DWC/Hydro
Growing cannabis hydroponically can give you some of the fastest growth rates of any style of growing, but as mentioned earlier, hydro does not really play well with hot temperatures because too much heat tends to trigger root problems and slower growth.
We talked about supplements that help prevent root rot for hydroponic plants, but the next step is to cut out the water reservoir altogether and go for a hand-watered grow. That’s because hand-watered plants are inherently much more resistant to high temperatures. Not only are the roots relatively safe from the heat (unlike in hydro) but the growing medium can hold a lot of oxygen no matter what the temperature (a lack of oxygen at the roots causes major problems in hydro).
Plants grown in containers or in the ground tend to be more resistant to heat compared to hydro.
Soil in regular containers is probably the most common way to grow cannabis indoors, and that combo works great.
But when it comes to growing in hot temps, coco coir may be a better choice than soil. In particular, coco coir inherently has properties and hormones that encourage healthy root growth and promote hardiness against heat.
Soil is a good choice, but coco coir is even better when it comes to heat.

Use Smart Pots or Air Pots (instead of hard-sided pots)
Choose a Smart Pot (fabric pot) or Air Pruning Pot (plastic pot covered in holes) to let air in and help cannabis plants with the heat. These pots help increase evaporation from the sides of the root ball, which not only reduces the chance of overwatering but also helps keep roots healthy and heat-resistant by providing plenty of oxygen from the sides.
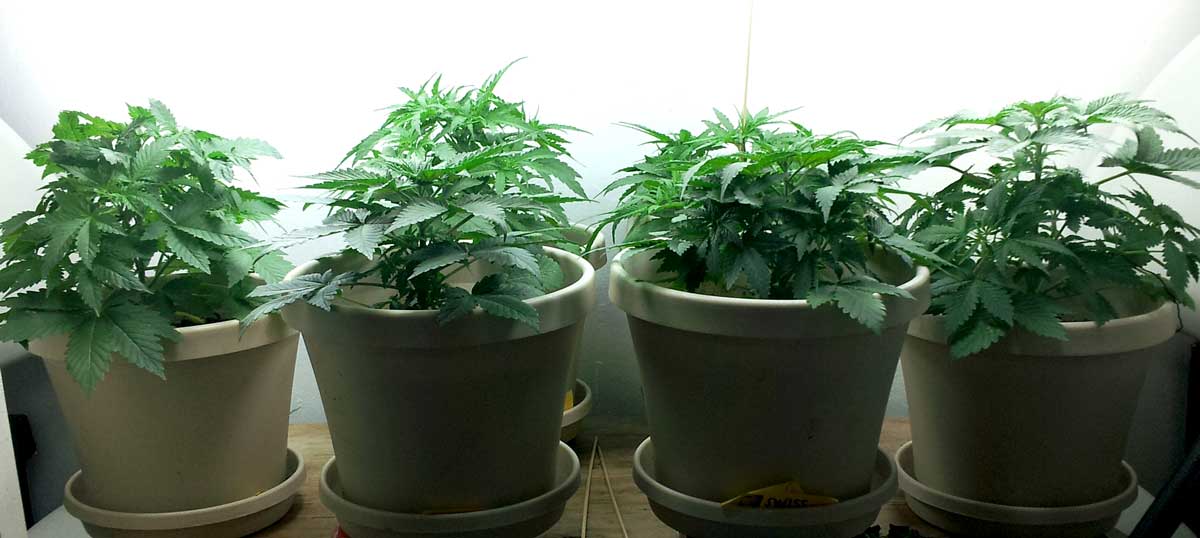
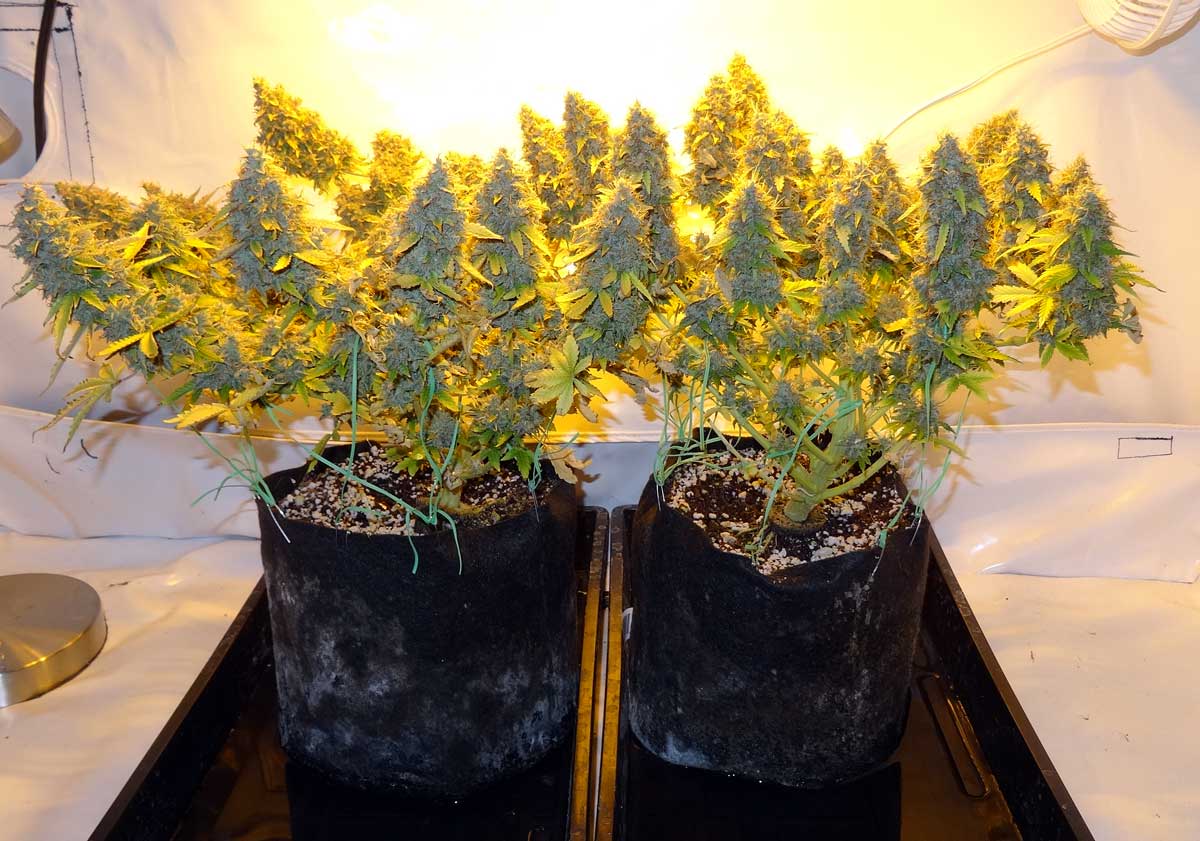
Use Smart Pots (fabric pots) instead of regular containers as further protection against heat. These coco-grown plants were regularly exposed to temps that crept up over 85°F (30°C), and although that wasn’t ideal they made it to harvest just fine.
 Air pruning pots are plastic but have holes in the sides, which accomplishes the same thing as fabric pots (gets more air to the roots) and makes them more heat-resistant.

Growing cannabis with coco coir in fabric pots is one of the best ways to grow if you want your plants to be able to resist the heat.
Keep Roots Cool
Your plant is much more resistant to heat if the roots don’t cook too, whether you’re growing in a pot or in a hydroponic reservoir. If you can find a way to help keep the roots around 70°F (21°C), your plant will suffer less and recover more quickly from a hot spell.
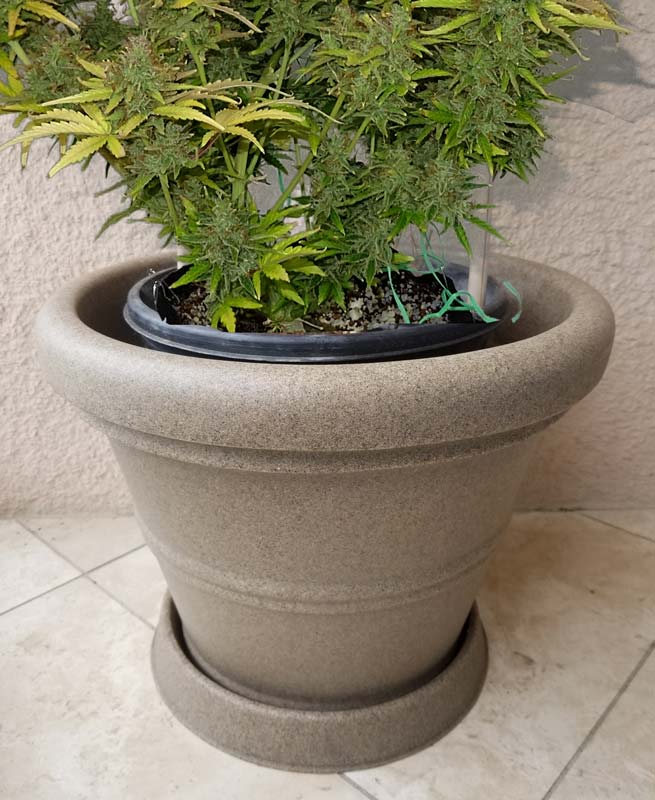
Watering your plant regularly when it’s hot will keep roots from drying out and help them stay cool. If the sides of the pots are getting hot from the grow light, put your potted plant inside a bigger pot (or find some other way to block the pot from direct light. This can help keep roots significantly cooler.
If the sides of pots are getting hot from the light, put the whole plant in a bigger pot to create an air gap and keep the roots out of direct light
Use Fan Placement to Reduce Electricity & Bring Down Temps
Air conditioners can easily control the heat in any room but they use a lot of electricity, which can get expensive really fast! Unfortunately, a lot of growers are using an AC (or just dealing with too much heat) when they could actually reconfigure their fans to be able to maintain the right temps without needing an AC at all.
Proper fan placement can also help save costs because if you use fans more effectively you can use less of them. A lot of fans can use a surprising amount of energy that can really add up over time. That means you don’t want to fill your grow space with tons of fans if you don’t need to.
Being smart about fan placement and investing in electrically efficient fans can save you a lot of money.
Exhaust Fans
The most effective way to control heat is to use an exhaust fan to vent hot air out of the grow space. Make sure your exhaust fan is set up to make sure you have the most cooling power. Here are some tips:
- Grow space is mostly sealed – Your grow space should be mostly sealed for an effective exhaust system, with just ports for air to come in near the bottom of the grow space, and a port for your exhaust fan to blow air out from near the top of the grow space. I highly recommend getting a grow tent for smaller grows to make this super cheap and easy. A grow tent with a strong exhaust fan creates a breezy plant environment that may not even need many other fans. As an added bonus, a grow tent makes it easy to control smells with a carbon filter so no one can smell your plants even in the same room.
- Strong exhaust fan – Your exhaust fan should be strong enough for the size of your space or tent. Avoid cheap ducting fans as they don’t move enough air to cool your grow light. Learn more about choosing the right exhaust fan.
- Vent air from top of grow space – Heat rises to the top of your grow tent/area, so make sure your exhaust fan is located at the top of the tent pointing out.
- Intake holes – You want holes to intake air, about 4x the size of your exhaust hole if possible. When the intake hole is too small it’s hard on your fan, the exhaust won’t be able to vent as much hot air. With grow tents, the intake ports are already built-in so you just leave them open so air can get through.
- Input fresh, cool air – The intake hole should have direct access to cool, fresh air. The inside of the grow space is always going to be at least a few degrees above the temperature of the intake air, so if the intake air isn’t cool the grow space will be even hotter. Cool air stays lower to the ground, so make sure your intake ports are as close to the floor as possible.
Learn more about setting up exhaust system.

Ducting
Keep all ducting as straight and short as possible. You want a short direct line to the window so that hot air is immediately vented outside. Try to avoid using anything in the window that restricts airflow. Though it’s often necessary to use some type of screen to make sure no one can see in, try to do the best you can to obstruct airflow as little as possible. How can I set up an exhaust that looks normal from outside?
Try to keep any ducting as short and straight as possible.

Window Fan
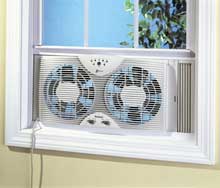
It may seem simple, but a window fan can be surprisingly effective at venting some of the heat if the grow light is raising the overall temperature of your room. In some cases, a window fan can cool your room by several degrees, which can help keep your plants cool. I sometimes call this a “No-Ducting Exhaust” but honestly it’s more like a ‘poor man’s exhaust’ if this is the only thing you’re doing to vent out heat. But that doesn’t mean it doesn’t help,
If grow lights are raising the temperature of your room, a window fan can help vent heat and cool the room down by a few degrees
In order for a window fan to cool a room most effectively, there needs to be some sort of “intake” for cool air to get in. It’s like a bigger version of an exhaust system. A separate open window in the same room is perfect, though an open door can also help, especially if there’s an open window somewhere in the house. However, even in a completely closed room, a window fan can help keep temps down somewhat in the room because it helps vent out heat from the grow light. Although blowing air out is often the most effective, if the air outside is really cool sometimes it helps to blow air in. Experimentation is good.
Clip-On Fans
Small fans help ensure there is a gentle breeze around your plants and buds. This helps plants grow faster, helps buds develop more dense/tight, and reduces the chance of issues like white powdery mildew or bud rot.
Some specialty clip-on-fans are designed specifically to attach to the poles of a grow tent.

Oscillating Fans
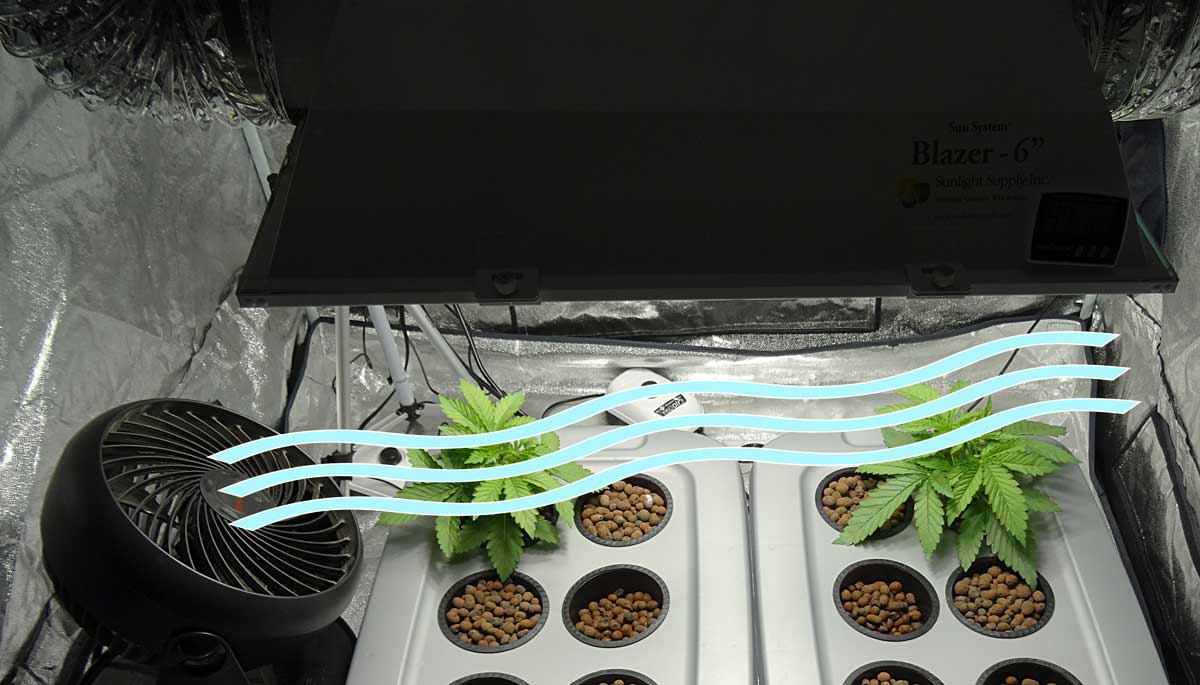
Oscillating fans are perfect for reducing “hot spots” that form in the grow space. Certain grow lights can cause major hot spots. If it’s most hot directly under the light, using fans to blow that heat away from your plants can make a huge difference in how much heat they experience.
In addition to oscillating fans, using a strong-enough exhaust fan with a big intake hole helps keep everything moving so hot spots don’t form. In fact, a smallish grow tent with a good exhaust fan may not even need extra fans because the exhaust fan itself will make the entire tent breezy.
Just be aware that adding oscillating fans doesn’t bring down the overall temperature in the tent. Fans only move air around. So if the entire grow space is already hot, adding more fans isn’t going to help.
Learn more about how to effectively set up oscillating fans in the grow room.
There are several ways you can optimize your grow lights, up to and including upgrading to better ones.
Get the Right Size Grow Light (a smaller grow light doesn’t necessarily mean lower yields!)
Grow lights that are optimized for your size grow space tend to reduce problems with heat. Too much heat hurts yields by making plants grow poorly. On top of that, too much light (light stress) can prevent buds from fattening and make plants more sensitive to heat. That means having the right size light for your space will help prevent the space from overheating. When buying a grow light, many manufacturers list which size space the particular grow light is optimized for (aka 2’x4′ or 4’x4′). Try to match the right size grow light to your space.
In some cases, getting a smaller light can actually increase yields, especially if the heat is out of control with your current light.
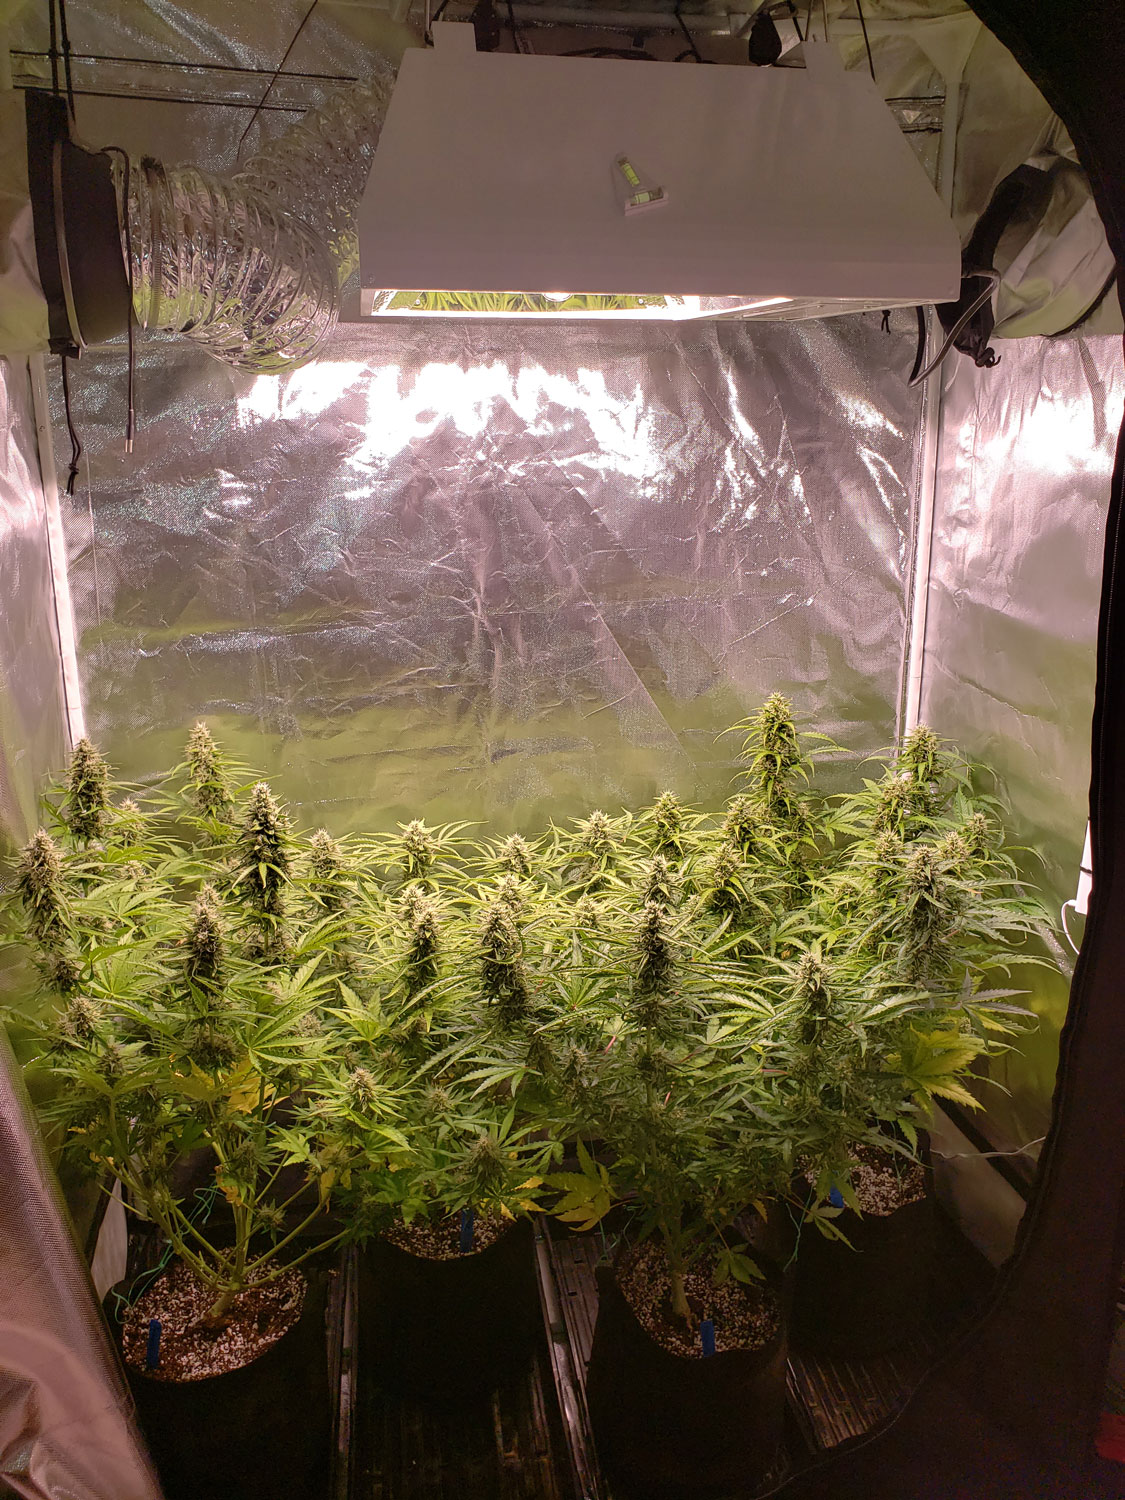
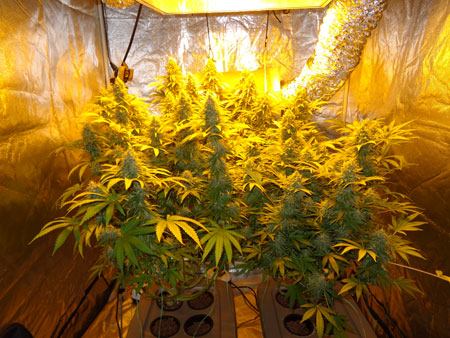
If you’re struggling with heat and plants are constantly heat stressed, consider stepping down the light. These plants grew better after the grower turned down the power.

These plants were also getting way too hot. The grower started getting better yields when they took one of the LED panels out of the space.

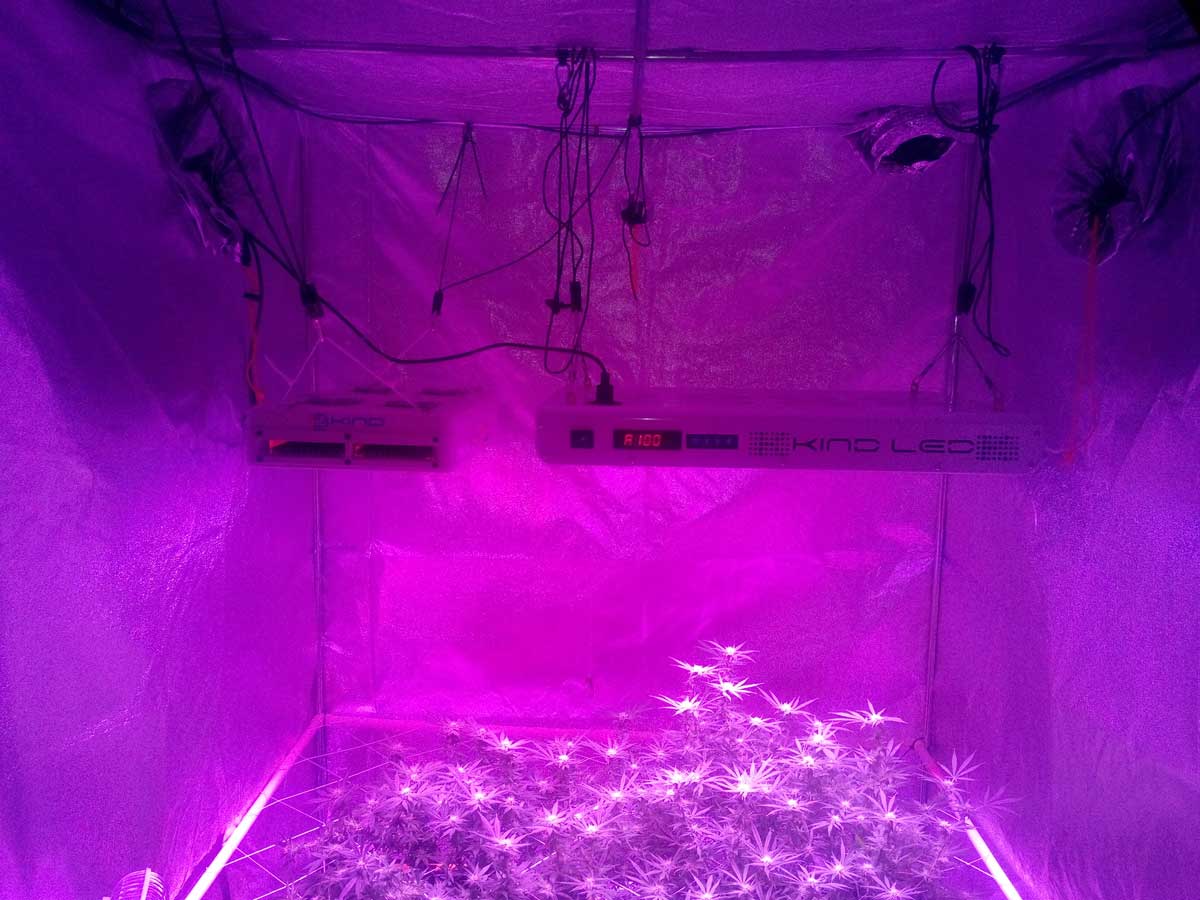
Side note: I’ve found that older and “blurple” colored LED lights tend to put out far more heat than modern LED panels. Buds also don’t fatten as well under them.
Avoid blurple LEDs for growing weed!
Use an LED Grow Light
When it comes to heat control, LEDs are hands-down the best cannabis grow light. As of 2025, multiple newer LED grow lights have proven to be incredible at growing cannabis. These modern LEDs have been developed using real cannabis plants and live up to the LED hype, producing amazing yields and beautiful bud quality.
In my experience, nearly all newer LEDs run cooler per watt than other grow lights like HPS, or CMH/LEC.
On top of the fact that LEDs produce less heat compared to other lights, cannabis plants under LEDs typically can stand higher temperatures. So LEDs give you a light that puts off less heat and plants that can stand more heat. If heat is a concern, you want to go with LEDs.
Note: LEDs perform poorly in the cold. If you deal with cold in the grow space, HPS or CMH/LEC may be a better choice since they produce more heat and plants can stand cooler temperatures under them.
There are a lot of LEDs to choose from and the sheer number of options can be overwhelming. If you’re interested in getting your first LED and aren’t sure which one to get, Spider Farmer brand LEDs are a good mix of quality and price. They get a good rate of growth in the vegetative stage and better yields/bud quality than many LEDs in the same price range. I recommend avoiding generic LEDs (like you would buy from Alibaba) because they usually get hotter than expected for the wattage and often produce poor yields or bud quality.
The Spider Farmer SF-2000 LED grow light uses 200W of electricity and produces relatively little heat.
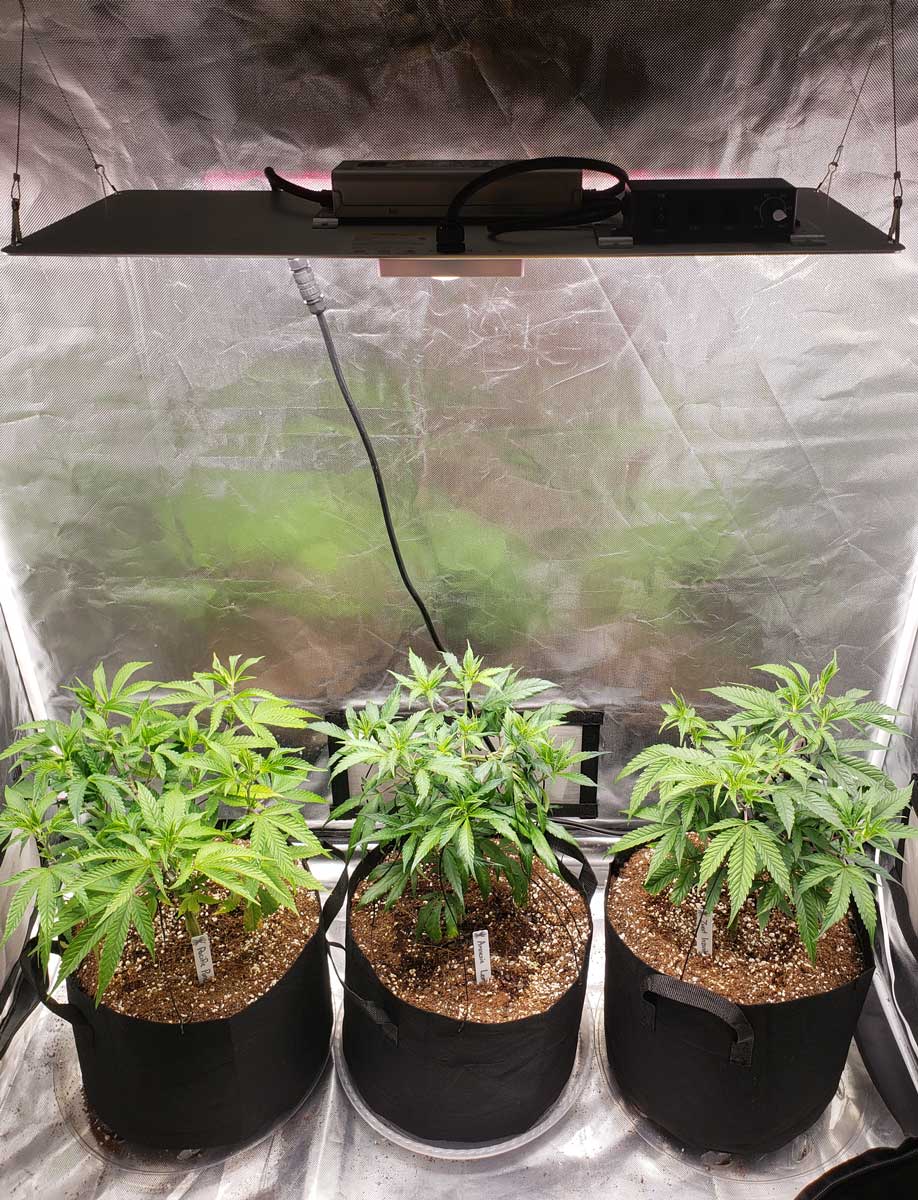
In my most recent grow, the Spider Farmer SF-2000 produced over 10 oz in a 2’x4′ grow tent, or over 1.5 grams/watt. The plants grew quickly and well. I got the buds lab tested and it produced more terpenes and THC than the other LEDs I tested at the same time. A great choice for under $200.
My friend used the Spider Farmer SF-1000 (100W and costs $90) in a 2’x2′ grow tent and produced several ounces. This light can be kept 8″ (20 cm) away or even closer for some plants, which makes it effective for small spaces.
Learn about other popular LED companies for growing cannabis.
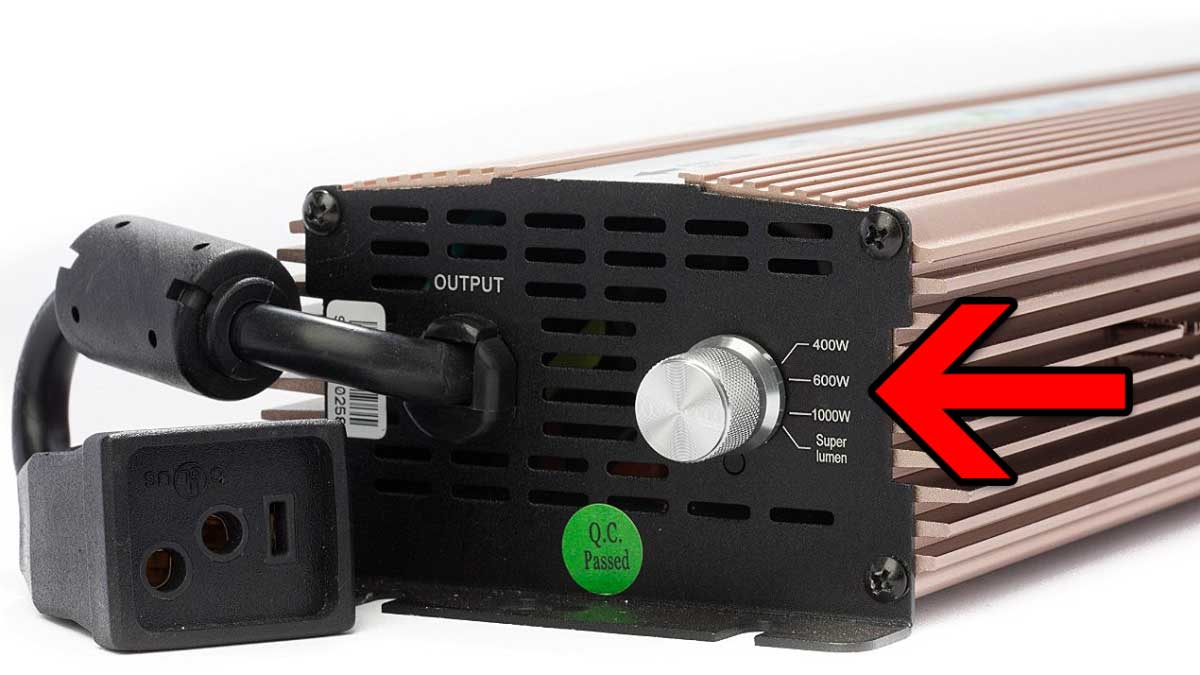
Reduce Power
Many LEDs and other types of grow lights are “dimmable” which means they have different power settings that allow you to reduce the power of your light. For example, you might be able to set your grow light to 75% or 50% power. In these modes, your grow light will use less power and give off less light/heat. If there’s a heat wave coming up, it might be helpful to turn down the power until things cool down.
Raise Grow Lights
Raising your lights tends to help bring down the temperature experienced by the plants, especially with big fluorescent lights, CMH/LEC, and MH/HPS grow lights. Getting a lot of light can make plants more likely to suffer from heat, so another bonus of moving your lights further away can help them be more heat-resistant.
Note: If I need to raise my grow light higher than the normal hanger allows, I use zip ties to attach the grow light to the top of the tent. However, make sure to leave at least a little air gap so you don’t have a hot lamp touching the top surface of the tent directly (this can be a fire hazard).
Raise grow lights (if possible) when the plants are getting too hot to help reduce the heat they experience and especially reduce heat on developing buds. Sometimes a few inches can make a difference.
Learn more about how far away to keep grow lights from your plants.
4.) Change Your Light Schedule
Opt for 18/6 Light Schedule in the Vegetative Stage
Many growers give their plants 24 hours of light a day in the vegetative stage to produce the fastest growth. Yet turning the grow light off for several hours each day helps keep the temperature down, especially if lights go off during the hottest part of the day. The 18/6 light schedule is suitable for all plants in the vegetative stage, and for auto-flowering strains from seed to harvest.
Plug your grow light in an electrical timer to control the light schedule
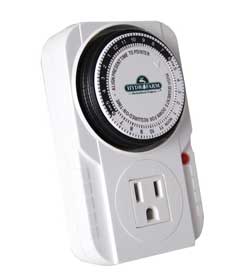
Side Note: Although plants do grow faster if they’re getting 24 hours of light a day, you get diminishing returns after 18 hours of light a day. Cannabis plants benefit from having a night stage, and that helps make up for the lack of extra light. The difference in growth between 18/6 and 24/0 isn’t very noticeable (the increase in growth may not justify the extra electricity and heat).
Learn more about cannabis light schedules here.
Set Your Dark Period for the Hottest Part of the Day
This is a super simple solution to help control the heat for growers who get high temperatures in the middle of the day. User your timer to set your “Off” time to happen during the hottest hours of the day and you’re done. As long as you make sure plants don’t get light during their dark period, they won’t realize their “day” is during your night.
5.) Start with a Heat-Resistant Strain
Some strains are inherently more resistant to heat than others. For example, strains that originated from the equatorial region, including many Sativa and Haze strains, can resist much higher temperatures than strains that originated in colder regions, such as many Indica strains.
- Tall strains with thin leaves tend to be relatively heat-resistant
- Short, bushy strains with fat leaves tend to be more sensitive to heat
- Check the strain description to see if it mentions anything about temperature
Here are some strains that are heat resistant, easy to grow, and produce great effects.
Photoperiod (Traditional) Strains
White Widow
- Legendary strain
- Buds produce smooth relaxing effects that are great for enjoying with friends
- Overall easy-to-grow and resistant to heat and mold
- Has a surprisingly short flowering stage (8-9 weeks) for a Sativa-dominant strain, and doesn’t get too tall
- Great yields even if you mess up a little
- Get White Widow from Seed Supreme (ships from USA)
White Widow is a legend!

Purple Thai
- Thrives in higher heat and humidity than most strains
- Grows tall and stretchy so you need to train the plant to reduce the height (or it may grow into your light)
- Pretty potent at 22% THC but still more of a “head high” (it may even be suitable for day use for high-tolerance people)
- Get Purple Thai from Seed Supreme
Purple Thai laughs in the face of heat!

Afghan
- In addition to doing well in the heat, this strain is overall easy-to-grow and resistant to pests and mold
- Buds produce very heavy effects (a “brain melter”)
- Great yields and bud quality
- Get these Afghan genetics.
This Afghan plant thrived in burning hot temperatures during a heat wave.
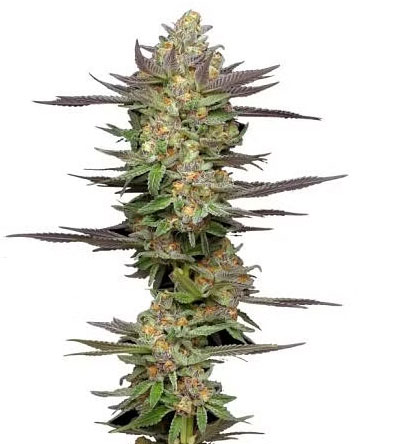
Sour Diesel
- Withstands heat and light better than most strains I’ve grown
- Strong fast plants that tend to be stretchy/tall (not the best choice for small spaces)
- Buds are consistently potent and high quality
- Takes 12 weeks in the flowering stage but rewards with huge yields
- Get these Sour Diesel genetics.
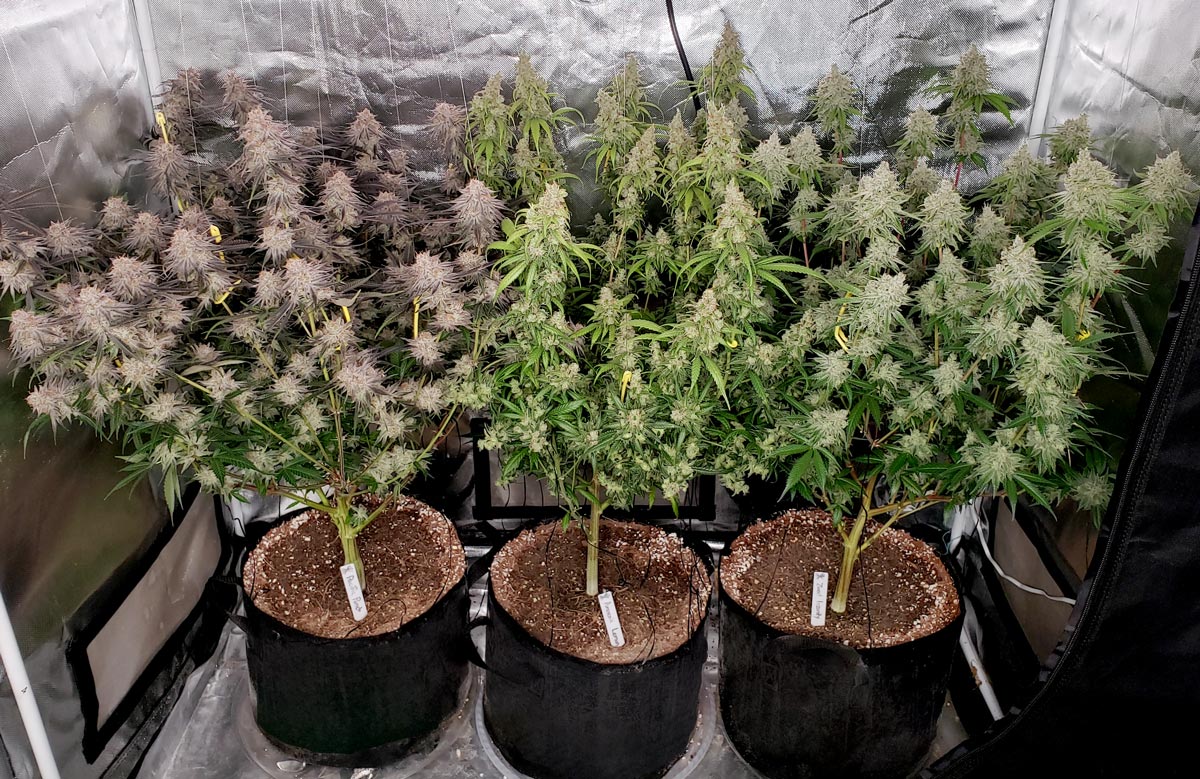
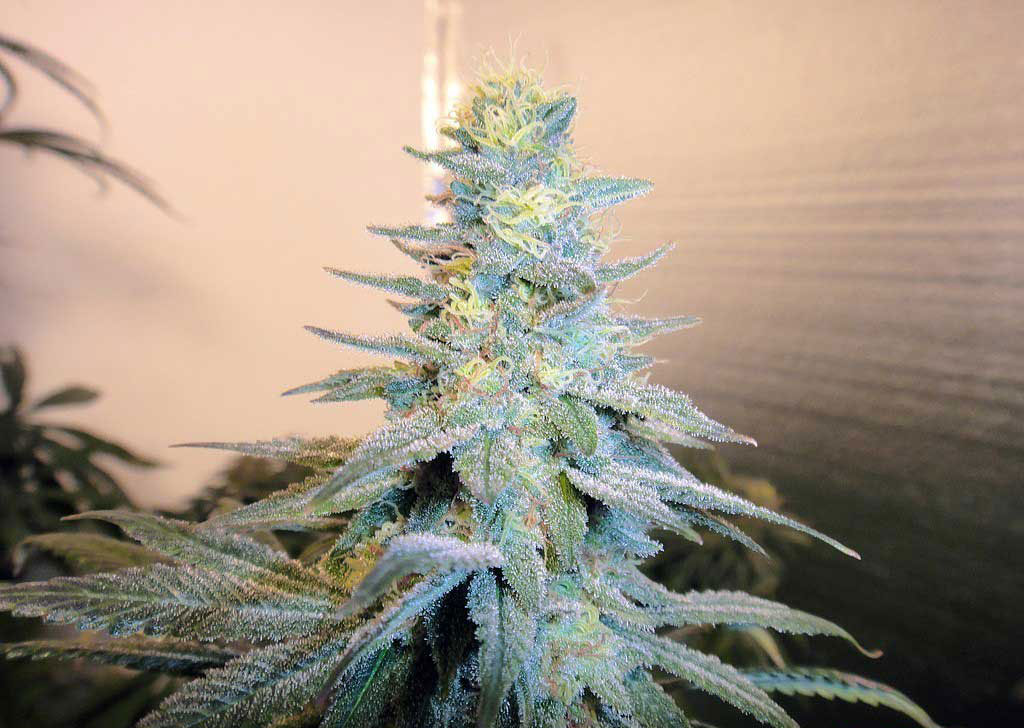
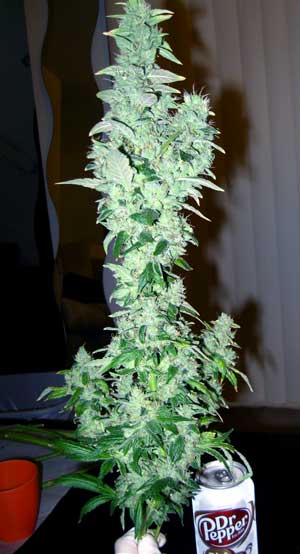
Sour Diesel is the plant on the left. It produced over 9 ounces on one plant.
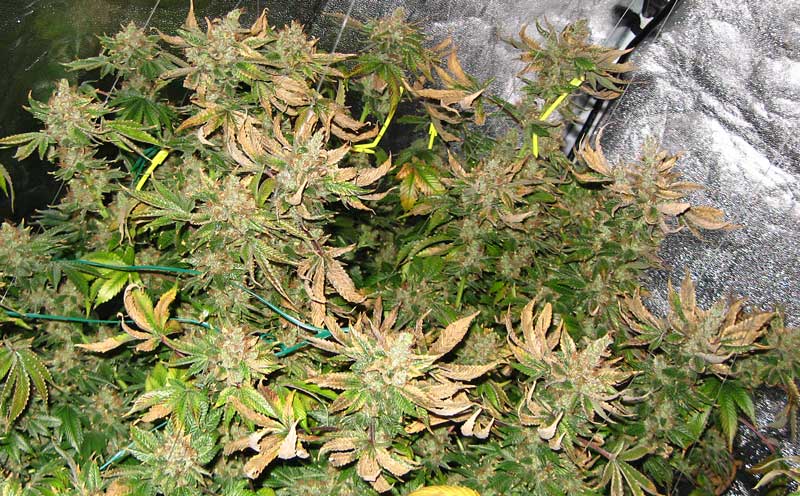
This bud from that Sour Diesel plant grew within 8″ (20cm) of a 600W grow light in the middle of a heatwave. The plant on the right suffered tons of damage despite being further away. On the other hand, the Sour Diesel buds came out huge and potent with a little heat foxtailing on top buds that were closest to the grow light.
Auto-Flowering Strains
The Ruderalis hemp ancestor of all auto-flowering strains originated in the frigid cold climate of northern Siberia. These plant’s developed the auto-flowering trait so they could complete their whole life cycle during 2-month Arctic summer. Unlike photoperiod plants, these plants didn’t have the luxury to wait until the sun told them winter was coming. They had to complete their whole life as fast as possible. As a result of the cold climate of their ancestors, auto-flowering strains tend to be sensitive to heat. However, some breeders have bred out the trait by crossing with heat-tolerant strains. The following is an example of a heat-resistant auto-flowering strain that also produces great buds.
Amnesia Kush Auto
- Gets a bit tall, but usually not too bad since it’s an autoflowering strain
- Excellent “day” buds with a pleasant mental buzz
- Get Amnesia Kush Auto from Seed Supreme (ships from USA)
Get Amnesia Kush Auto for your garden!

Auto Blackberry Kush
- Beginner-friendly
- Resistant to heat as well as plant stress in general
- Incredible fruity smell
- “Body stone” that keeps you glued to the couch
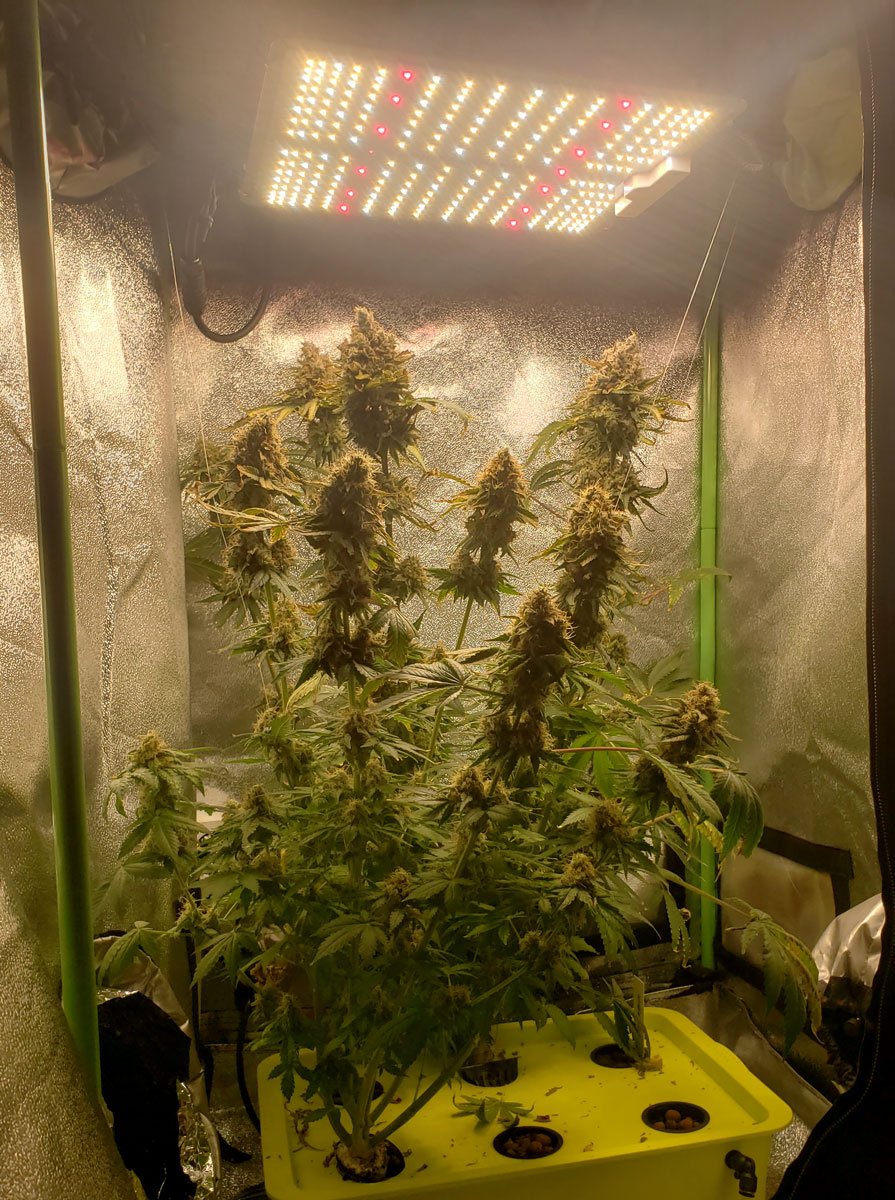
- Get these Auto Blackberry Kush genetics.
An Auto Blackberry Kush plant in a DIY setup

Dos Si Dos Auto
- Easy to grow (can handle some mistakes)
- Smooth, relaxing effects
- Above-average yields
- Buds smell of citrus with hints of cake or cookies
- Get these Dos Si Dos Auto genetics
Dos Si Dos auto by Barney’s Farm is known for its yields, bud quality, and fast growth.
If you have experience with a great heat-resistant cannabis strain, please contact us!
Most importantly, take extra good care of heat-stressed plants – try to baby them as best you can!
Jump to…
Growing Cannabis with Super Soil
How to Use Coco Coir as a Growing Medium
Top-Fed DWC (Bubbleponics) Tutorial
How do I produce top-shelf buds every time?