by Sirius Fourside
Many thanks to Old Hippie, whose tutorial taught me this recipe on how to make cannabis oil caps. You can check out his original article here!
Cannabis has been gaining more and more legal ground with Americans lately. Most US states have legalized “medical marijuana” in some form, twenty-three states have legalized cannabis for possession and cultivation, and many more states are already talking about legalization in future ballots. Canadians love weed just as much; they went even further and made it legal for adults across the entire country! How great is that! Learn more about cannabis legalization here.
Unfortunately, this rising popularity also comes with people getting into the business of providing “medicine” that isn’t quality-checked. We know a cannabis advocate who was hospitalized shortly after using a cannabis extract that still contained poisonous isopropyl alcohol!
Luckily, you can make your own extracts using items that are 100% safe for consumption!
In this article, you learn to make cannabis caps using only cannabis and coconut oil as the ingredients. And not only are cannabis caps safe to consume, but they’re also safe to make! There is no fire or flammables involved; the most dangerous part is baking your cannabis in an oven at 250°F(120°C)! Let’s get started!
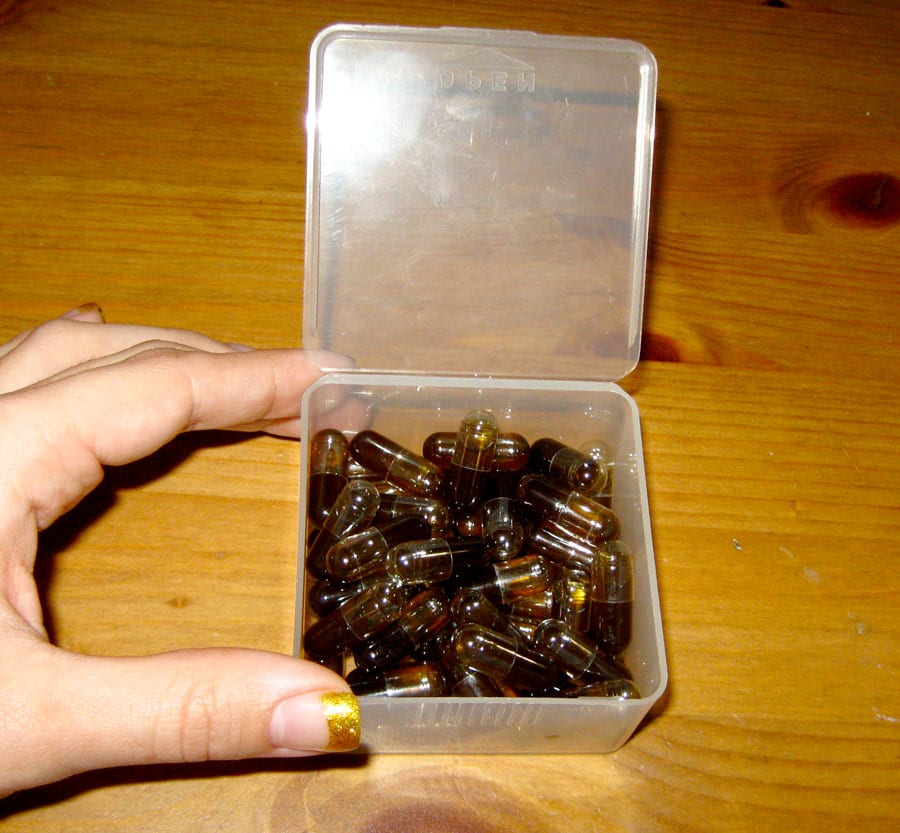
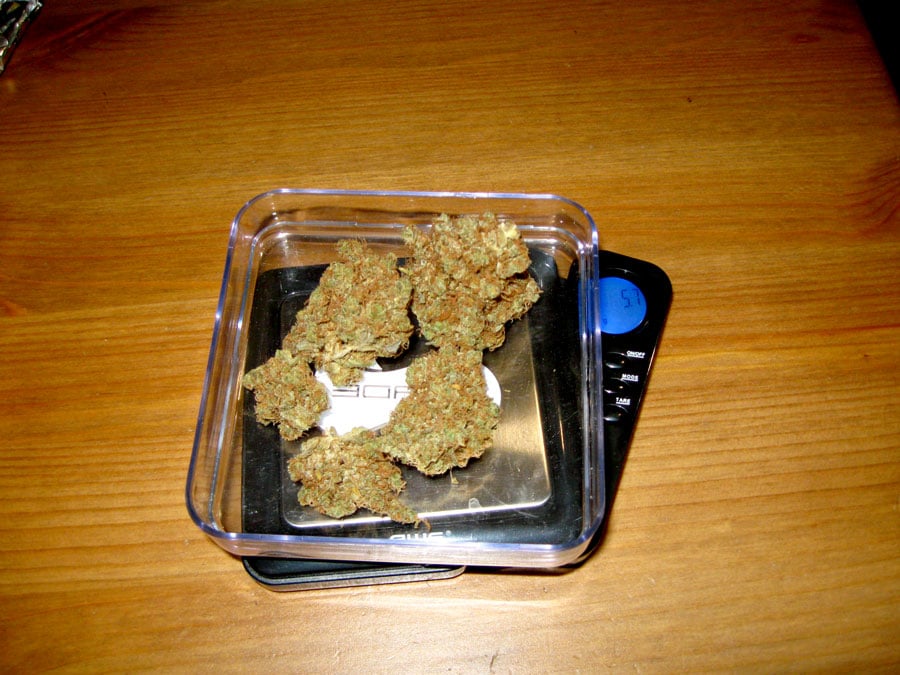
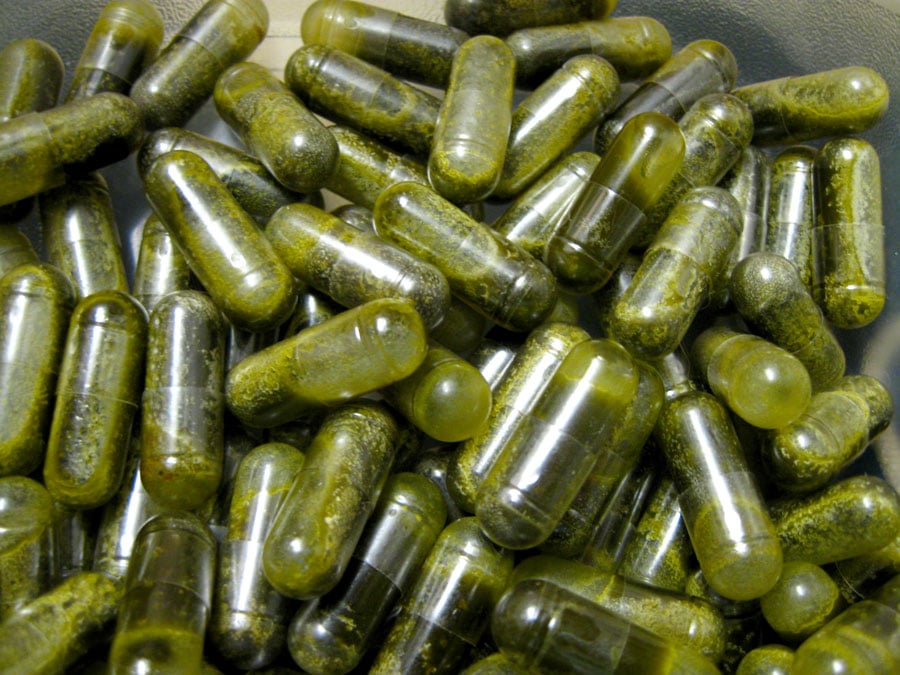
The caps pictured above are super-potent! We used almost an ounce of weed to make these 25 cannabis capsules!
Get All The Stuff You Need to Make Cannabis Caps!
What You’ll Need
Get the tools to make your own cannabis caps! The odds are that you already have some of the items you need to make caps of your very own, and most of the materials last quite a while, so they end up being cheap in the long run.
5.5 grams of cannabis
- Buds or trim can be used; buds produce a stronger effect.
- You can reduce or increase the amount of bud/trim used depending on your preference. The caps produced by the recipe will definitely be potent, but shouldn’t feel too strong.
1/4 Cup (60mL) Extra Virgin Coconut Oil
- Coconut oil is the vehicle that will carry all the good stuff in your weed. It’s healthy, smells nice, has a non-offensive taste, and is easy to work with.
Empty “00” size gelatin capsules
- You can find these at health stores, but it’s much more convenient to get them online.
Cap-M-Quik Capsule filling machine Size “00”
- I’ve also used this cap-filling machine and the experience was about the same.
- You can fill the capsules up by hand, but these handy little machines make the process go a lot quicker!
- The small size of this one is perfect for this recipe. Any crock-pot you use needs a “warm” setting.
A small food processor/food chopper
- This is used to break up your cannabis buds or trim. You can use a regular grinder or your hands to break up the cannabis as a low-budget option.
Potato Ricer (optional)
- At one point, you’ll need to squeeze cannabis oil out of a little bag. A potato ricer presses harder than bare hands and it keeps your hands clean of oil.
- Found in the cooking aisle of grocery stores, or online.
10ml Oral Irrigator (Syringe with Tapered Deep Reach)
- You don’t want to try to pour the cannabis oil into tiny capsules. These (no-needle) syringes are an easy fix to that problem. The tapered reach makes it easy to fill capsules without spills.
Items You Might Already Have
Baking sheet (cookie sheet)
- For baking (decarboxylating) your weed before making it into cannabis oil.
2 small microwave-safe containers
- One container is for holding the tops of empty caps, the other is for holding your cannabis oil.
Aluminum foil
- Use foil to line your baking sheet. This prevents your weed from sticking as much.
A couple of rubber bands
Most items listed above (except for the cannabis) can be purchased on Amazon.com. It’s typically the easiest and most time efficient way to get your supplies if the price is right for you.
Warning: This Can Stink Up Your House
The process of decarboxylating and cooking your cannabis in oil will make something that can only be described as ‘an insanely potent cannabis smell’. One solution (since we don’t share vents/air with neighbors) is to keep the smell bottled up in our house for the entire cooking time while running a fan + carbon scrubber combo. Once the caps are done and the smell isn’t being actively produced any longer, we let the fan and scrubber run for a bit longer and filter the remaining smell before opening any doors or windows. Another option is to put your weed in an oven bag or in a glass mason jar to contain the smell while decarbing the weed. This won’t completely get rid of the smell (it will still smell when the oil is in the crock pot), but since decarbing is the stinkiest part, it does reduce the smell a lot.
Cooking Time: 5 hours
Short Version (full instructions below)
- Break up cannabis.
- Cook it in an oven at 250° F for 30 minutes to decarboxylate cannabis (“release” cannabinoids). It will stink! Don’t skip this step or the caps won’t be as potent.
- Grind up decarboxylated cannabis to a powder.
- Mix ground cannabis with coconut oil in crock-pot.
- Cook on Warm setting for 3 hours.
- Strain oil and put oil in caps with Cap-M-Quik kit (or by hand).
One more thing…
When you finally finish making these amazing canna caps, make sure you dose slowly! They can come on really strong depending on how you make them, so it’s best to slowly test how they affect you. Try taking only 1-2 for the first few hours. If that doesn’t end up being enough, you can try taking more next time, or even make them stronger!
How to Make Cannabis Caps
1.) Preheat your oven to 250° F.
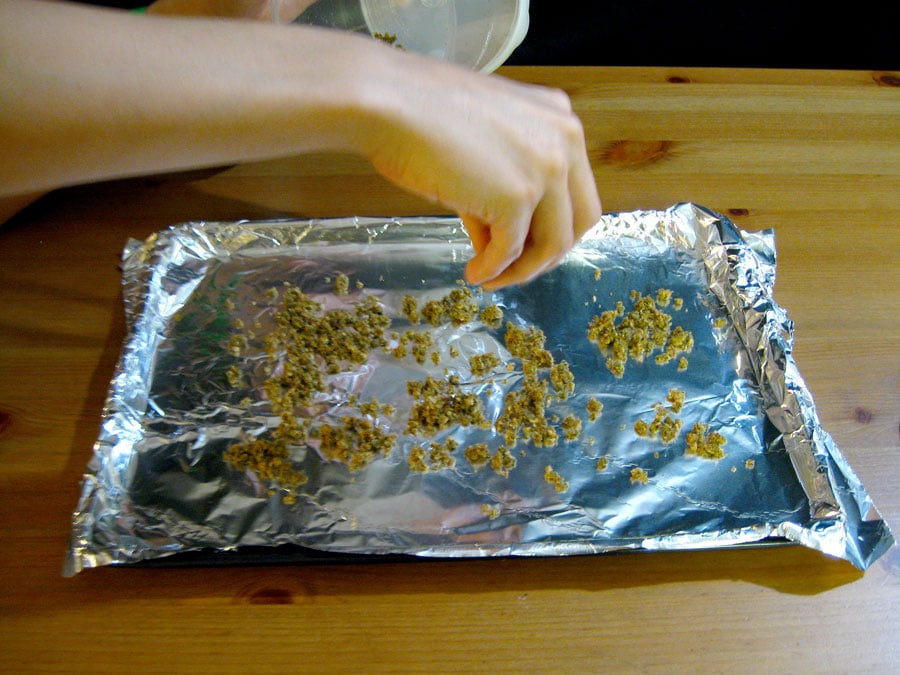
2.) Line the baking sheet with aluminum foil.
This prevents cannabis from becoming stuck to the sheet.

3.) Measure out 5.5g of cannabis.
Bud gives the strongest caps, but dried trim can also be used.
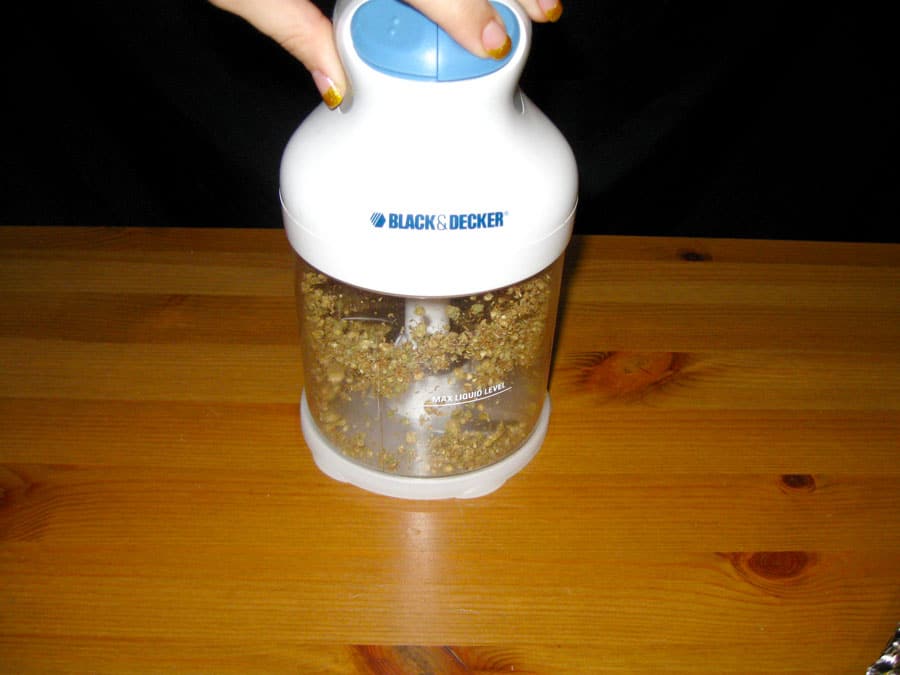
4.) Lightly grind your buds/trim so they cook more evenly.
- Food processor: Low setting for 5 seconds.
- Grinder (or by hand): Grind pieces to pinky-nail size or smaller.
5.) Sprinkle buds onto aluminum foil.
Spread your ground-up buds over the aluminum foil on the baking sheet.
6.) Put in the oven for 30 minutes.
Place the baking sheet in your oven and set a timer for 30 minutes.
- This is where it starts getting really smelly! You can put your weed in an oven bag or in a glass mason jar to contain the smell while cooking.
- Cooking time: 30 minutes
- Learn more about how to decarb weed here.
- While you’re waiting, move on to steps 7 and 8.
7.) Plug in your crock-pot.
It will turn on and immediately start heating, but it takes a while to fully heat up.
8.) Add 60ml (1/4 cup) of virgin coconut oil to the crock-pot.
Measure 60ml (1/4 cup) of virgin coconut oil and add it to the crock-pot. You can leave it heating up while your bud is cooking.
9.) Grind the newly decarbed cannabis to a fine powder.
Remove the dried and decarbed cannabis from the oven and grind it up again to a fine powder.
- Food processor: High setting for 20 seconds.
- Hand Grinder: Grind buds to super small pieces.
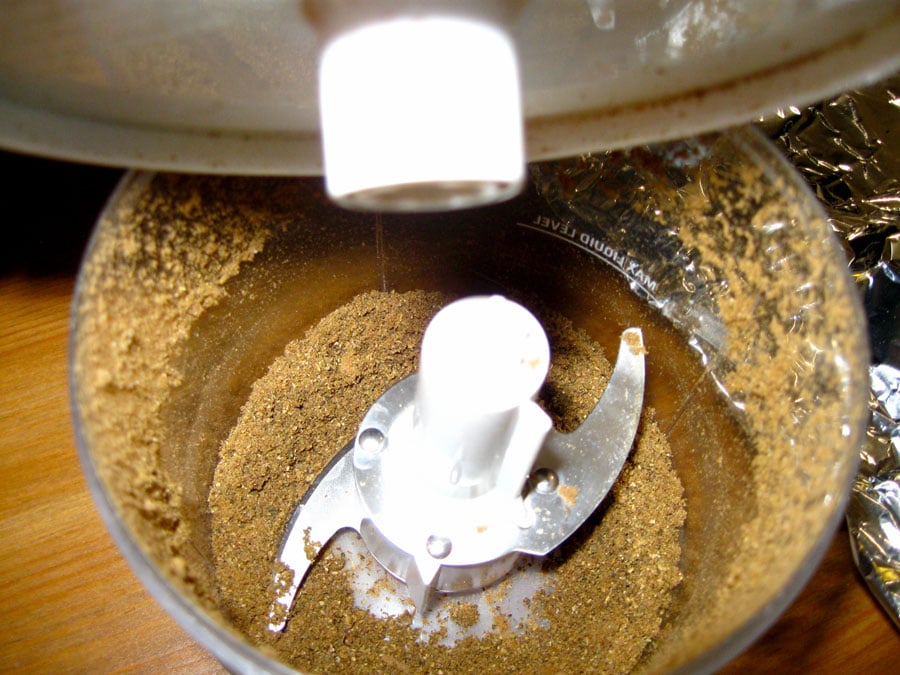
10.) Add the ground-up bud to the crock pot.
With 60ml (1/4 cup) of coconut oil, there should be enough to completely submerge the weed, but just barely. The less oil you use, the more potent your canna caps will be. If you add extra oil, the resulting caps tend to be less potent.
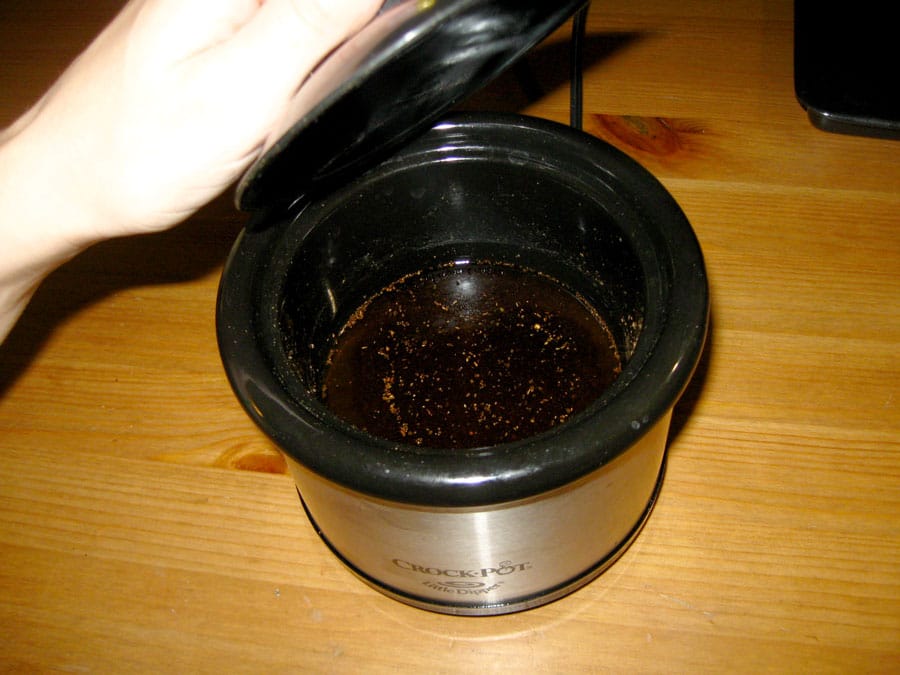
11.) Stir the mixture and allow it to cook for 3 hours.
- I’ve allowed the mixture to cook in the crock-pot overnight for convenience, but I didn’t really notice much difference in potency compared to leaving it for 3 hours. Cooking longer than 3 hours doesn’t seem to help or hurt.
- Stir the mixture about once an hour over the course of the 3 hours; don’t use plastic to stir the mixture!
12.) Set up your Cap-M-Quik machine.
- Set up your Cap-M-Quik (or other capsule filling device) per the directions on the back of the box.
- Most cap-filling machines come with a “tamper” which is used to pack the caps with more material. You won’t need the tamper for this since you’re working with a liquid instead of dry herb.
13.) Put 50 capsules in the Cap-M-Quik machine.
Set up 50 capsules in the Cap-M-Quik per the instructions on the back of the box. The tops of each cap should be held in one of the two containers so they don’t get lost.
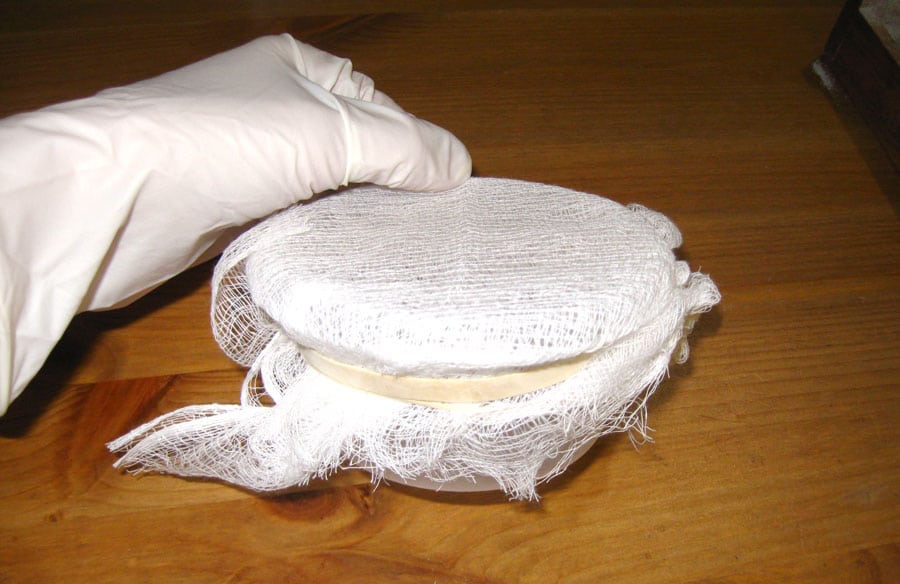
14.) Cut off a square of cheesecloth.
It should be a bit more than twice the width of the microwave-safe container.
15.) Secure your cheesecloth over the container with a rubber band.
Fold the cheesecloth in half (so it’s twice as thick) and place it over the container. Hold the cheesecloth in place with a rubber band. You’ll use this to strain the plant matter out of your oil mixture.
16.) Let it cool for 15 minutes.
Unplug the crock-pot and let it sit for at least 15 minutes so everything can cool a bit.
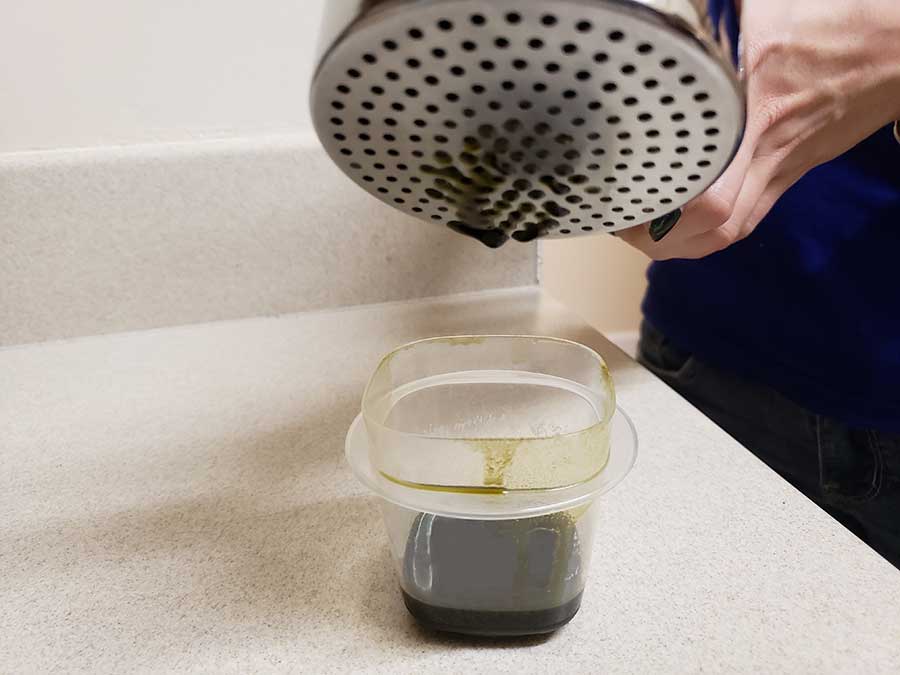
17.) Spoon the contents of the crock pot onto the cheesecloth.
Slowly pour or spoon all the contents of the crock pot onto the cheesecloth. The oil should slowly drip/pour out of the bottom of the cheesecloth into the container.

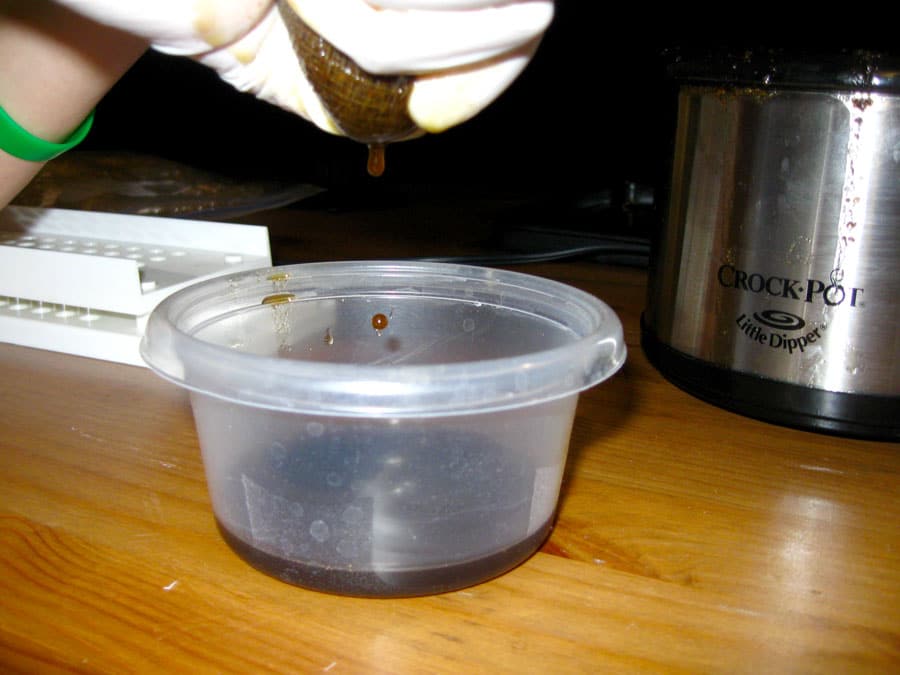
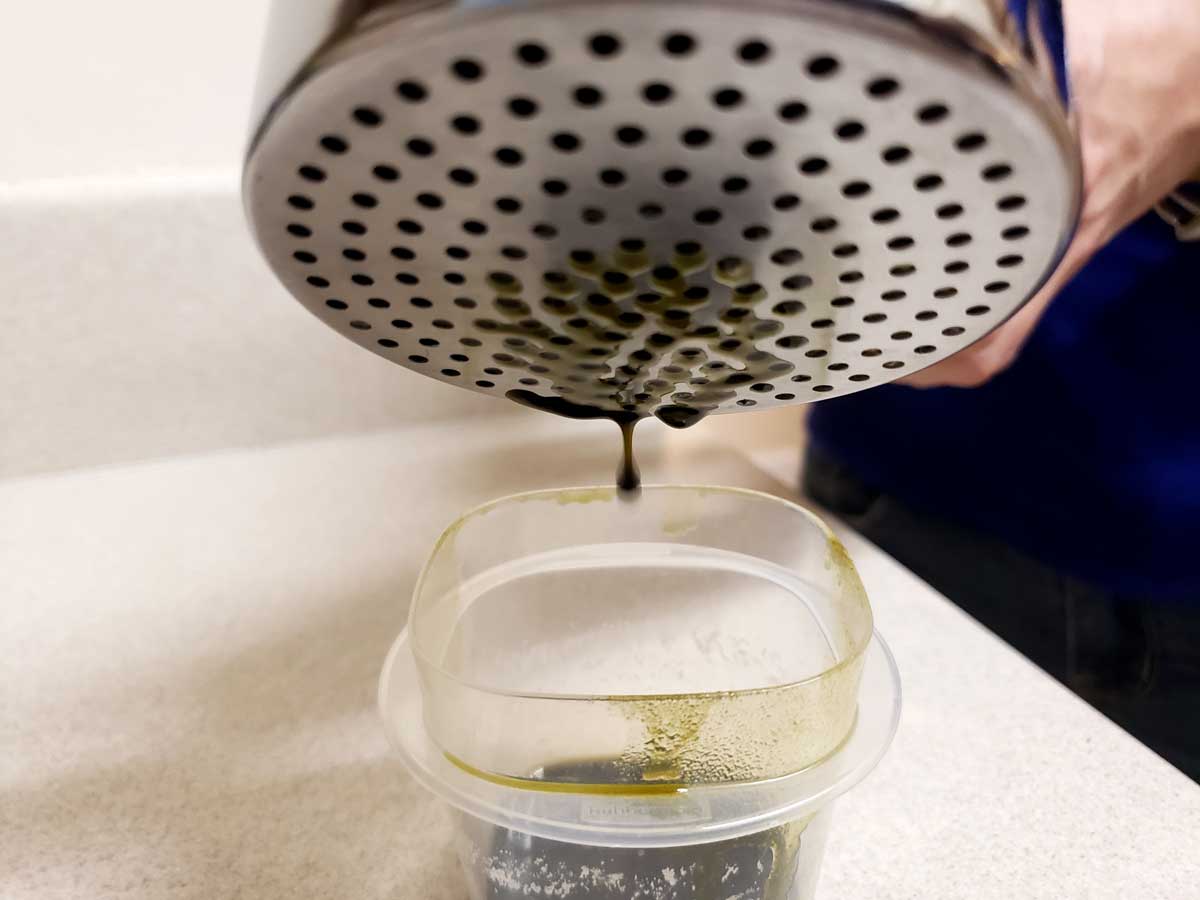
18.) Squeeze the oil into the container.
Untie or cut the rubber band(s) from the container without letting the cheesecloth fall in. Bundle up the bud, and squeeze as much oil as you can from the cheesecloth/bud. Make sure all the oil goes through the cheesecloth so it filters out the bud. Be careful because the oil is probably very hot!
- If you don’t want to squeeze it in your hands (again, it’s hot!), you could place the cheesecloth over a mesh strainer and mash the bud down to get as much oil as you can.
- If you got a potato ricer, this makes it easy to squeeze out all the oil!
- Don’t worry about getting a little bud in the caps, it won’t harm you.
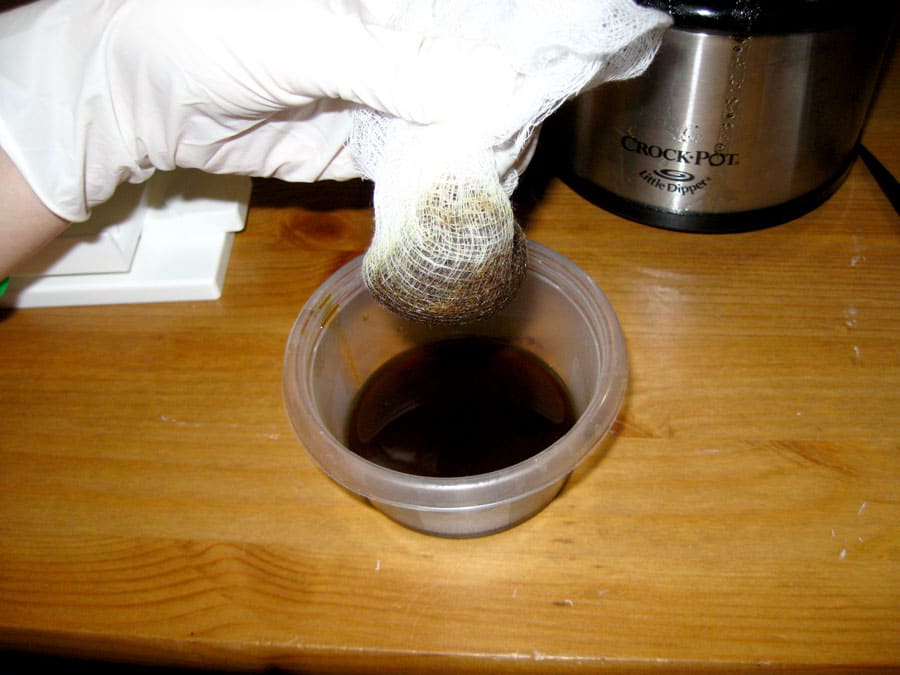
It may be super hot, so be careful if you use your hands! (If it’s too hot, wait 10-20 more minutes)
If you got a potato ricer, use that to squeeze out the extra oil instead!
19.) Throw out the wrung-out bud.
Throw out the wrung-out bud into your garbage disposal if you have one, and securely dispose of the cheesecloth.
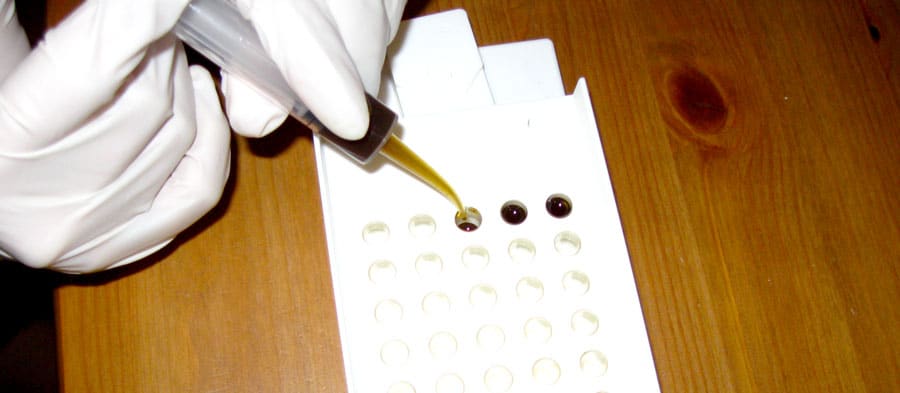
20.) Use the tapered syringe to fill the caps.
Use the tapered syringe to suck up the cannabis-laden coconut oil, and gently fill the caps one at a time.
Be careful not to overfill the caps!
- If the syringe gets blocked up, squirt some oil back into the container to clear the blockage so you don’t unleash a huge gush of oil on your capsules.
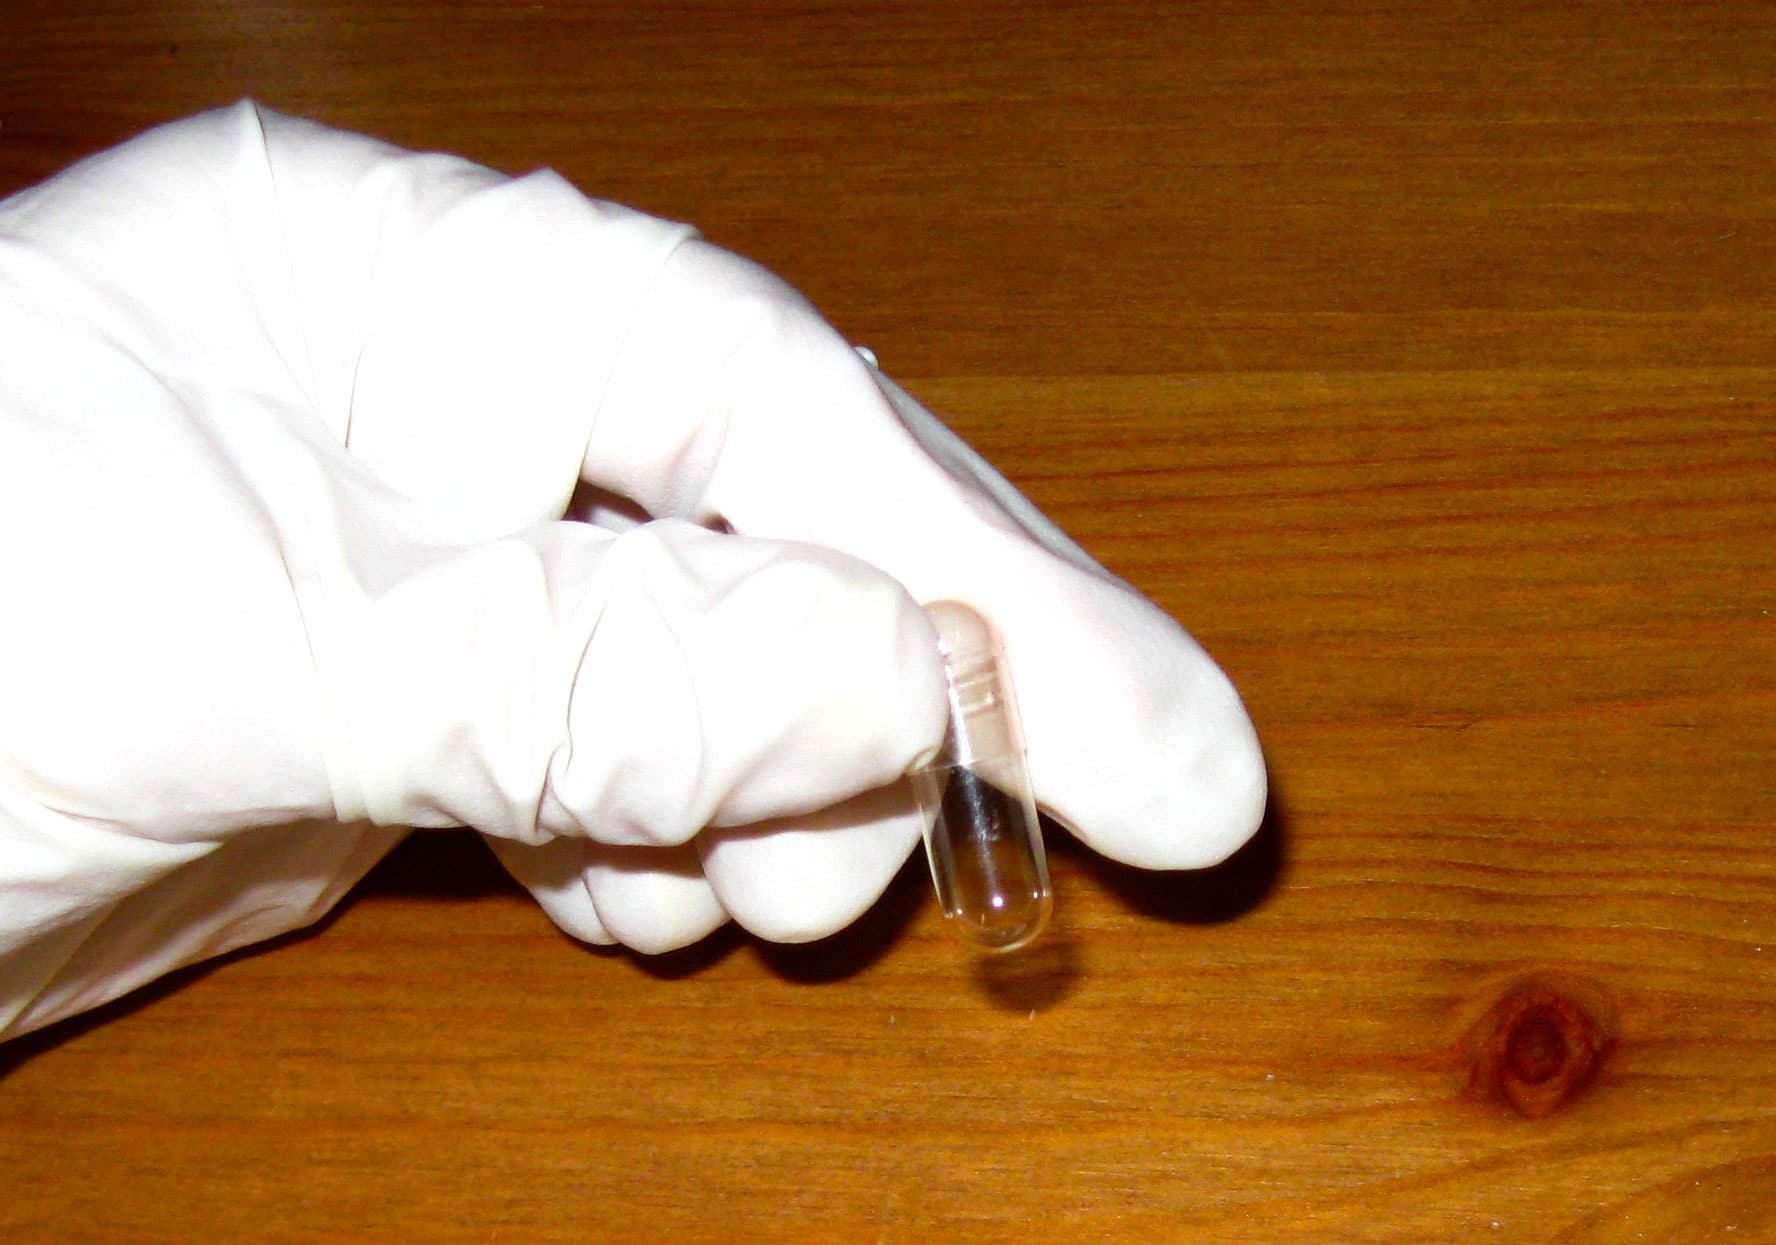
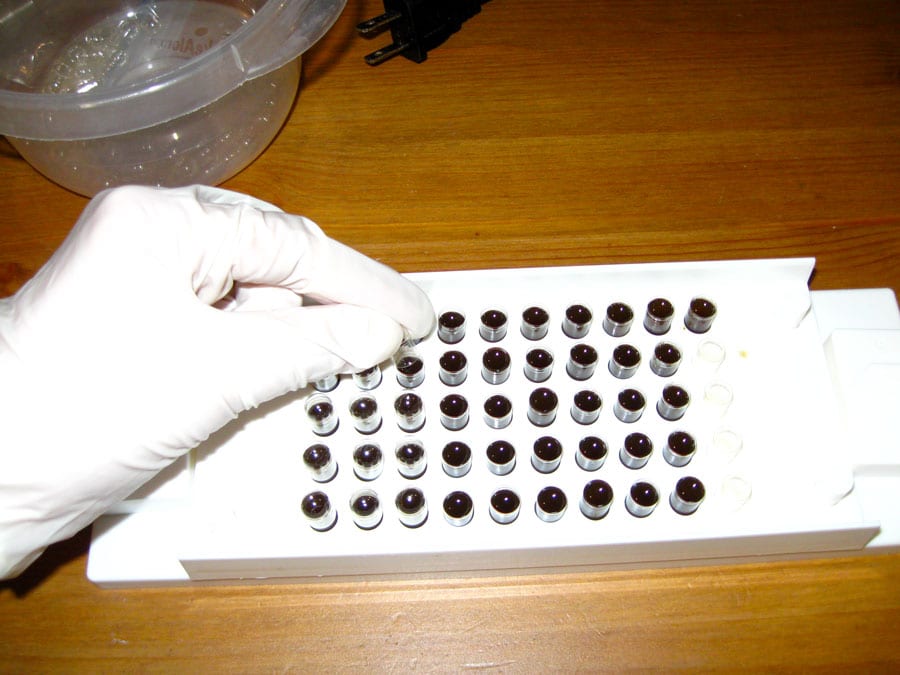
21.) Pop the tops onto each capsule.
Close the capsules (full instructions on the back of the Cap-M-Quik). Basically, you’re just taking the tops of the capsules from before, and putting them on the bottoms you’ve just filled up. When you put the tops on the caps, you should notice a *snap* as it clicks securely in place.
- You may need to press harder than you’d guess to get the caps to *snap*. It’s caused by two ridges connecting to keep the two sides of the cap together.
- If you overfilled any caps, don’t worry. Continue closing the caps, and when you’re done, empty the finished caps onto a paper towel and gently clean any excess oil off your capsules.
22.) Put your canna caps in the fridge for storage.
Place the finished caps into a container and refrigerate until you’re ready to use them. You can eat them straight from the fridge without thawing. The caps will turn a lighter color after they’re cooled, due to the coconut oil solidifying.
- Don’t eat them if they’re still hot! Let them cool fully first.
- You can also keep your caps outside the fridge, but the gelatin on the outside of the capsules may start to melt if it gets really hot in the house (like during a heat wave).
- I’ve used capsules that were in my refrigerator for over a year and they were still just as potent.
There you have it! You should have about 50 (depending on the chef) cannabis pills ready for consumption. Remember that the amounts used in this tutorial are just a guide. You could easily adjust this recipe to make more caps, and to make them much weaker or stronger.
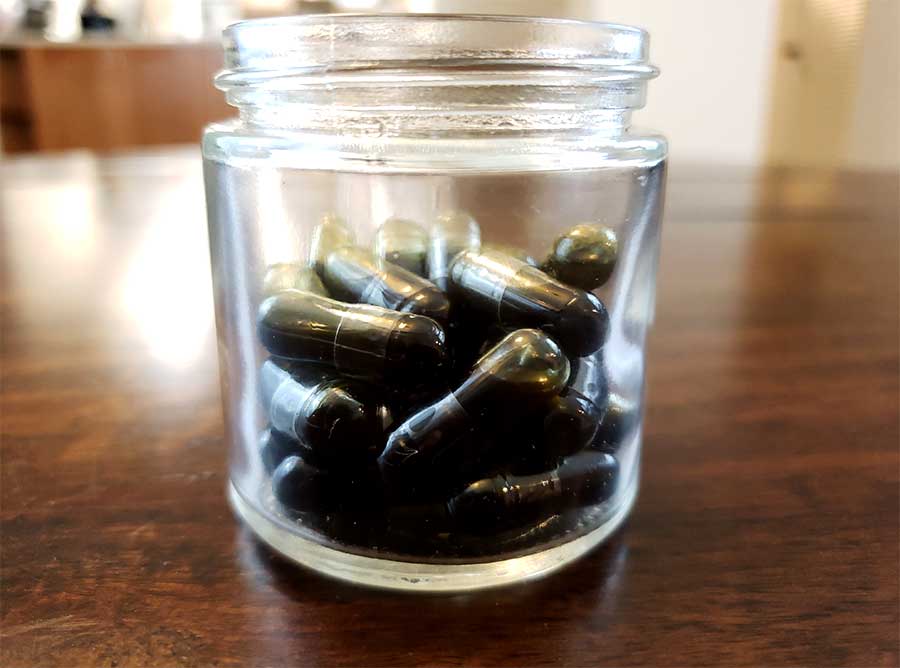
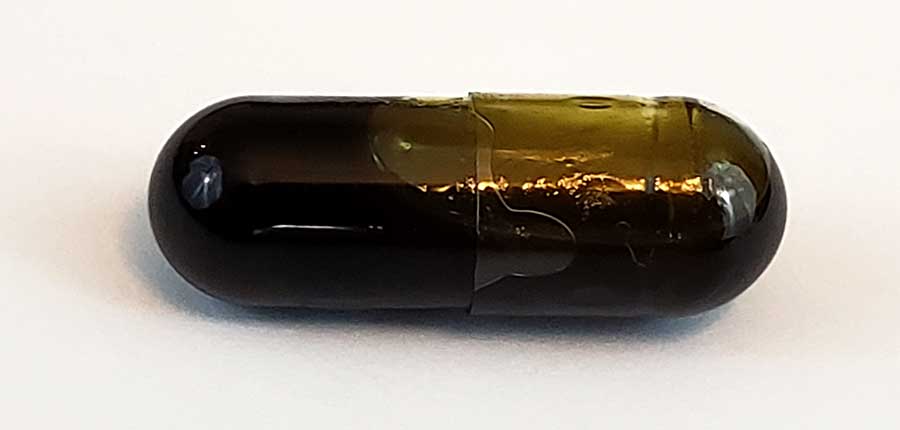
This is what Canna Caps look like after they’ve cooled off…
All that dark stuff is cannabis oil!
Jump to…
How to make cannabis extract oil (a different way to get cannabis oil)
How to Make Dry Ice Hash (quickest and most efficient way to get hash!)
Learn How to Make Great Bubble Hash
See more grow topics on GrowWeedEasy.com!