by Nebula Haze
See Other Examples of Cannabis Growing Setups
Table of Contents
About the Spider Farmer SF-1000 LED Mini Tent Setup
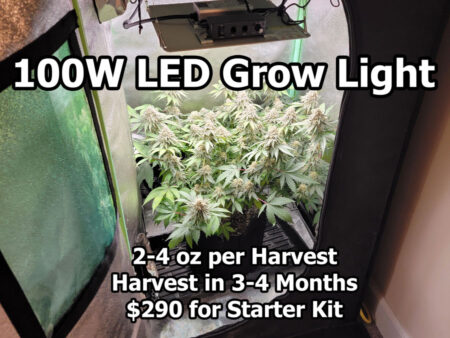
If you want to start growing weed without spending a fortune, this small cannabis grow kit with a 100W LED is great. This cannabis setup is more forgiving than the tiny mini tent setup because it has extra height and yields a bit more. It also gives you more room to expand if you decide to go bigger in the future. This setup has been designed to produce several ounces of high-quality bud in a small 2’x2’x4′ grow tent without any sounds or smells to give it away. It will produce up to 4 oz every 3-4 months.
Total Setup Cost: $290 ($360+ with professional smell filtering)
Check out a grow journal in this setup with the SF-1000 LED grow light.
Follow this tutorial and the $70 Spider Farmer SF-1000 (100W LED) can produce up to 4 oz of weed.

- Yield: 2-4 oz per harvest
- Total time: 3-4 months from seed to weed
- Cost: $70
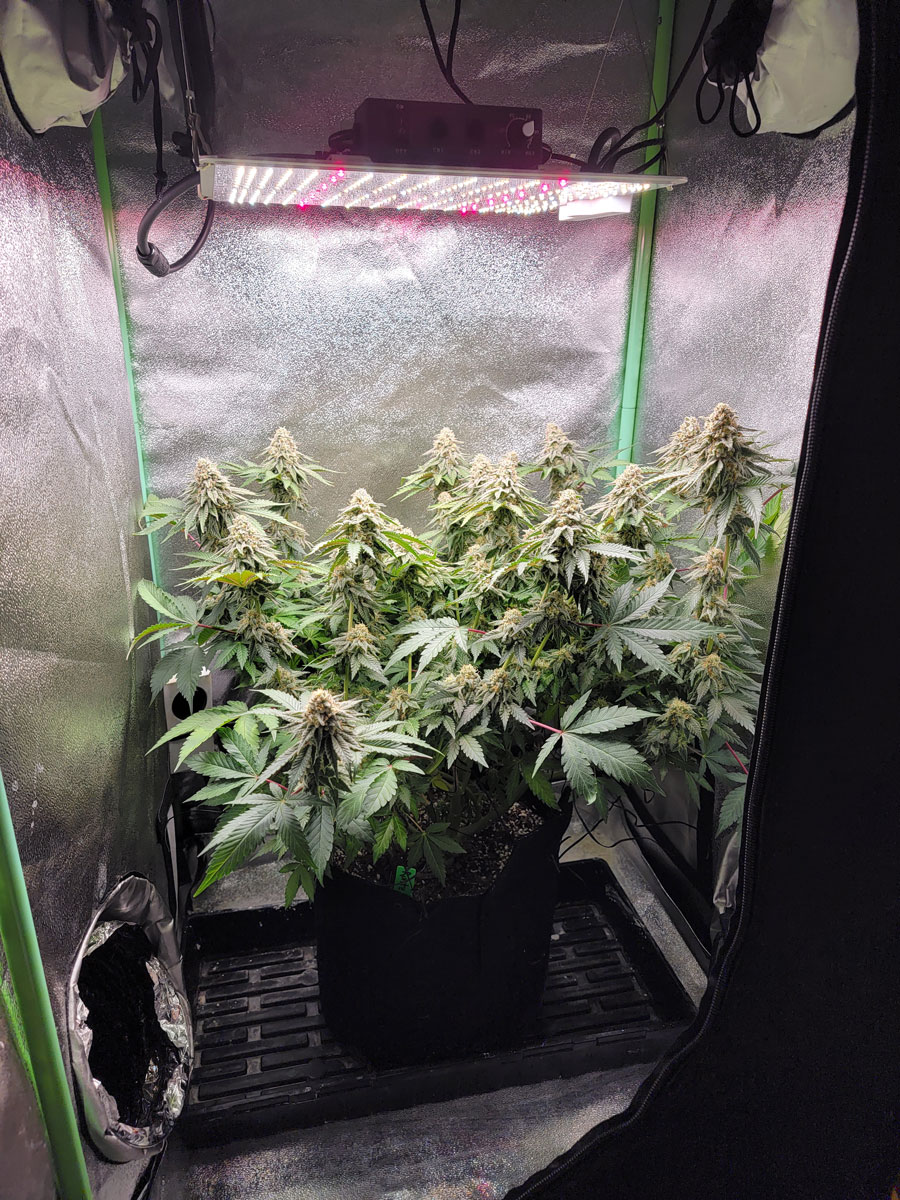
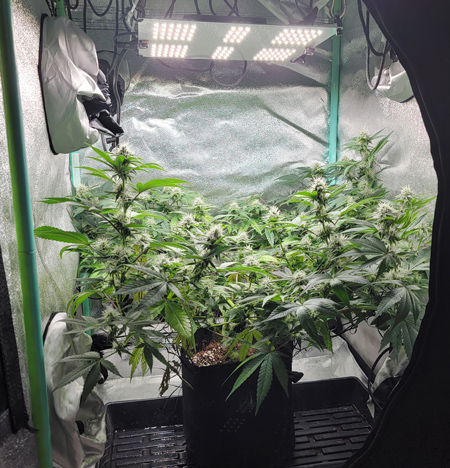
100W Tent Cannabis Grow Examples
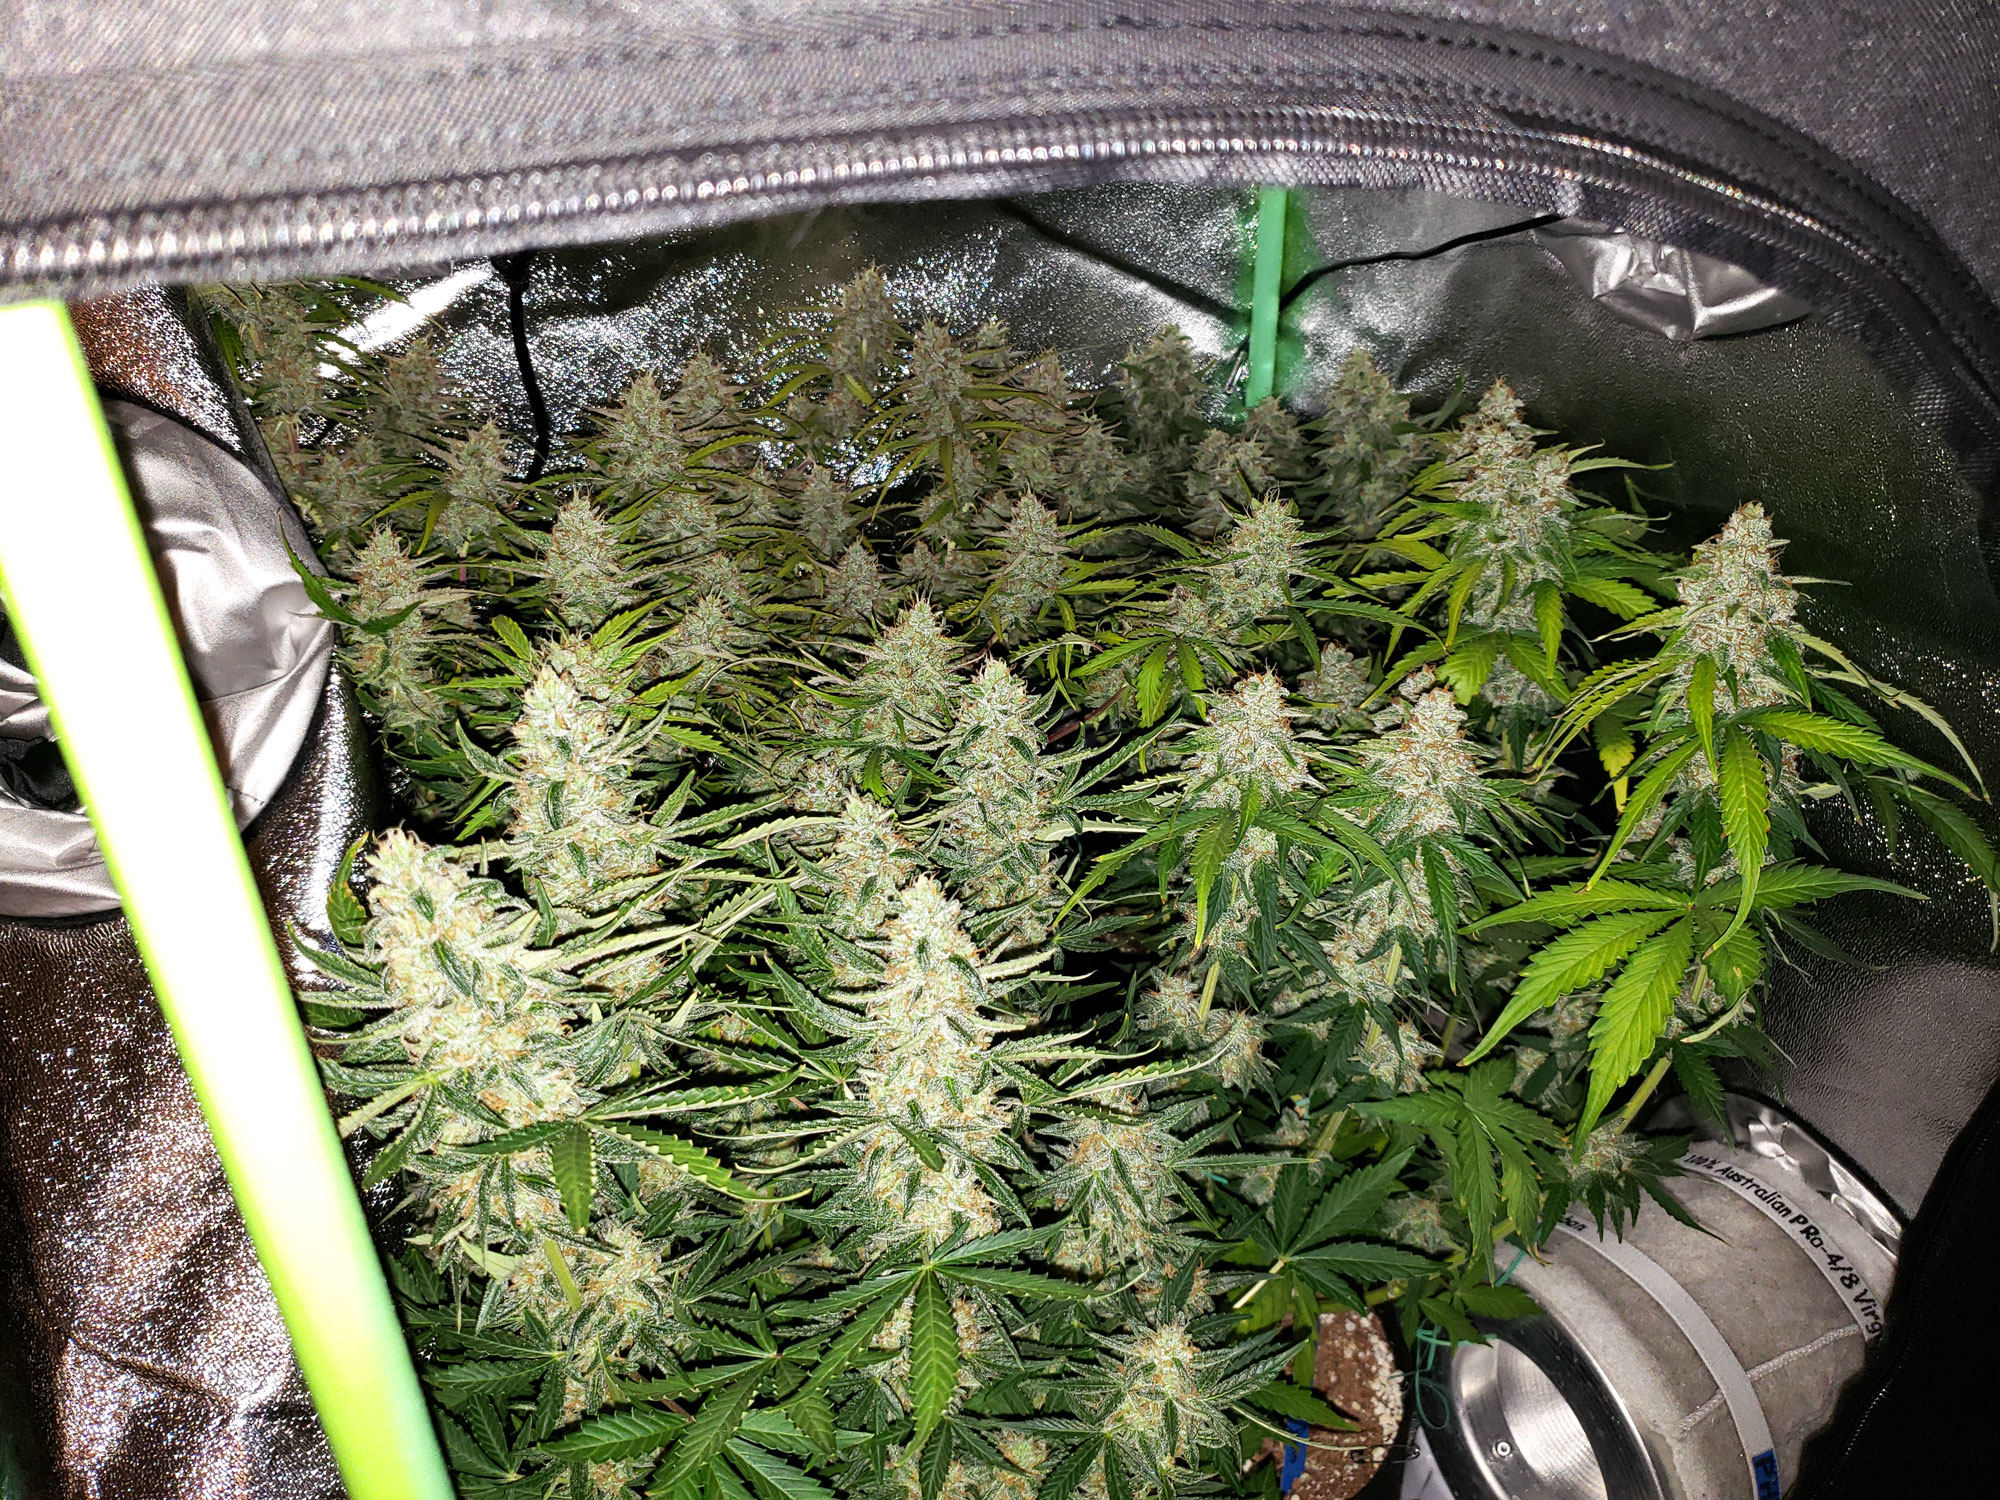
Here are some plants I’ve grown in this grow tent (or check out a full grow journal).
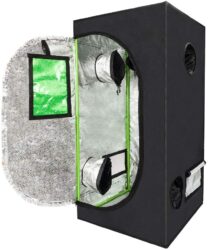
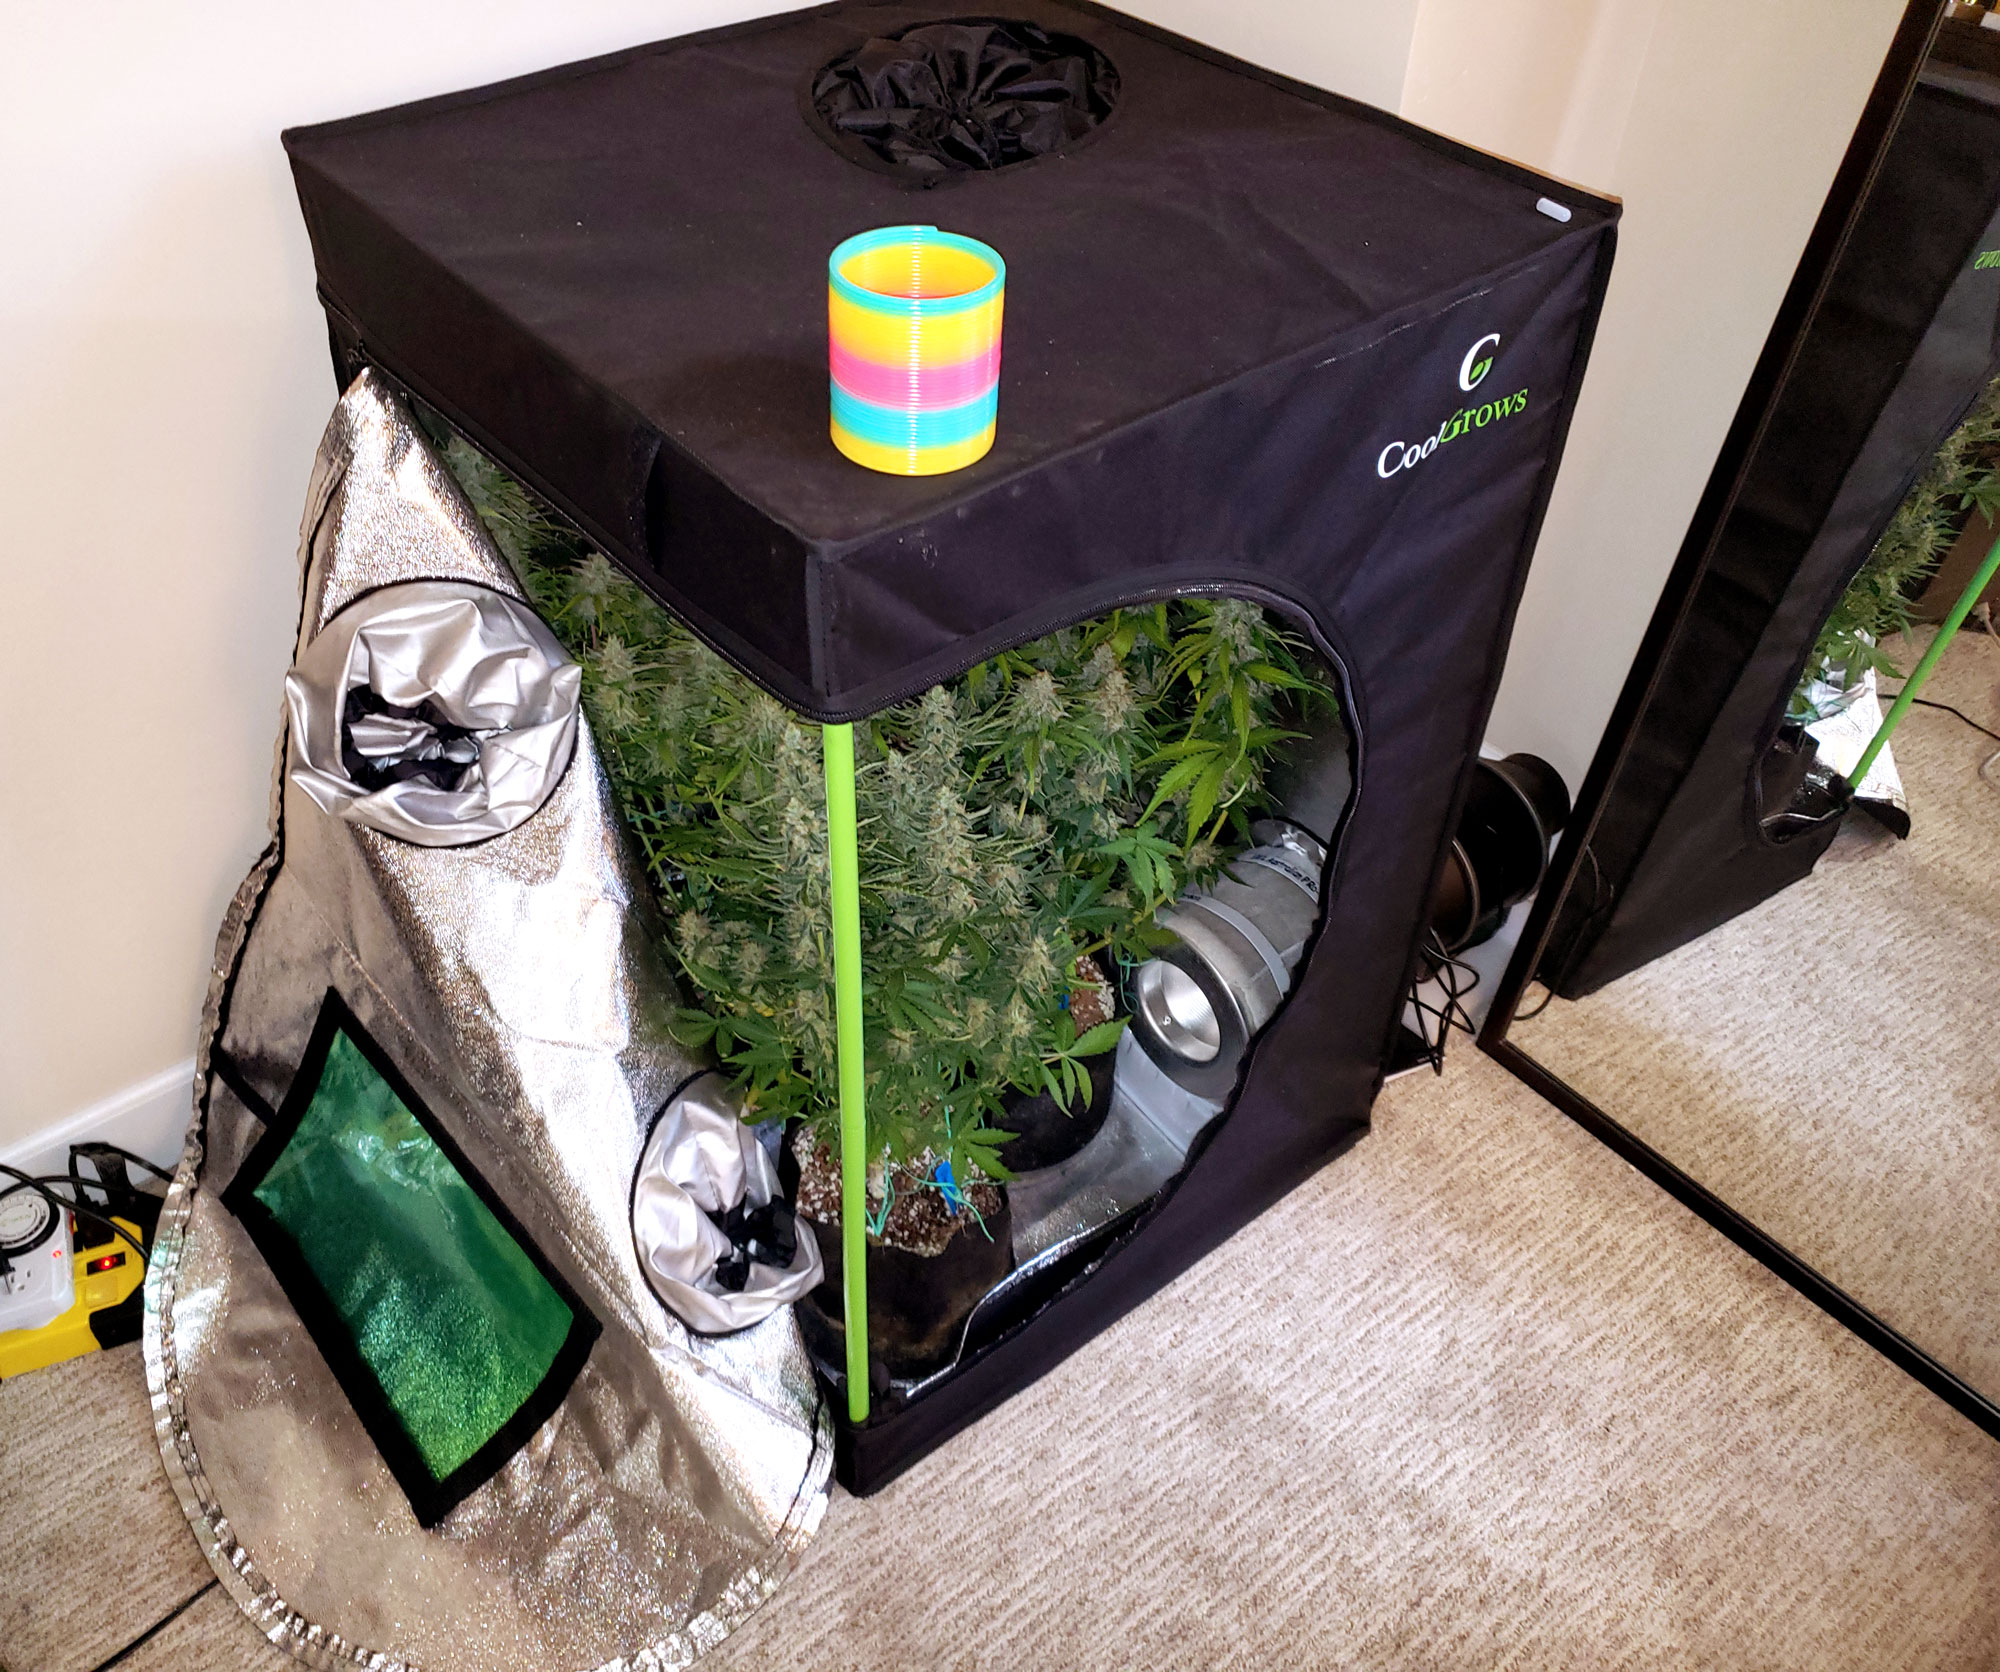
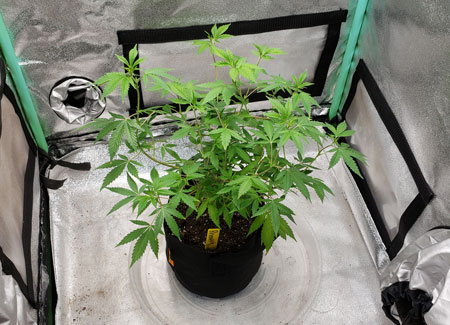
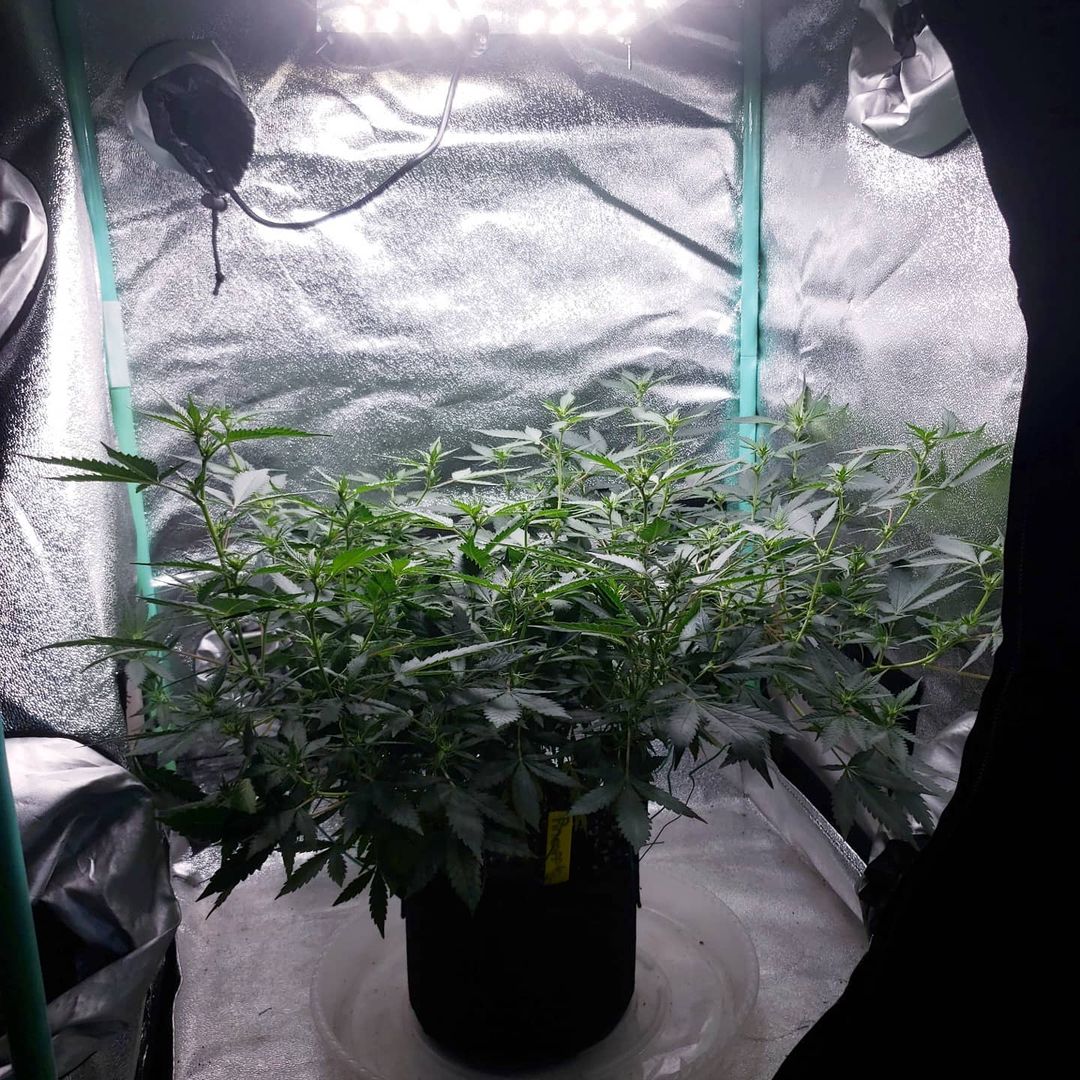
This mini cannabis grow setup uses a 2’x2′ around and 4′ tall grow tent with a 100W Spider Farmer SF-1000 LED grow light.
The 2’x2’x4′ size tent is just tall enough that you can even squeeze a little hydroponic system in there.

I once had autoflowering plants that grew too tall because they took longer than expected to start flowering. However, the SF-1000 light is gentle enough that it won’t burn buds even if they’re close, as long as you make sure to give your plants proper nutrients. The SF-1000 makes this a perfect beginner grow light because it will still produce a lot of great weed even you if you make some mistakes.

Estimated Cost for entire setup: $290-360+
- Ultra budget (no exhaust fan or smell filtering) – $290
- Only the necessary stuff + cheapest exhaust fan + smell filtering: $360
- Get everything including the premium equipment and optional extras: $460
- Estimated Monthly Electricity Cost: $10/month (based on US average of $0.15/kWH)
Total Setup Cost: $290 ($360+ with exhaust fan & smell filtering)
Summary of what you need to get started with this SF-1000 LED Mini Tent grow setup:
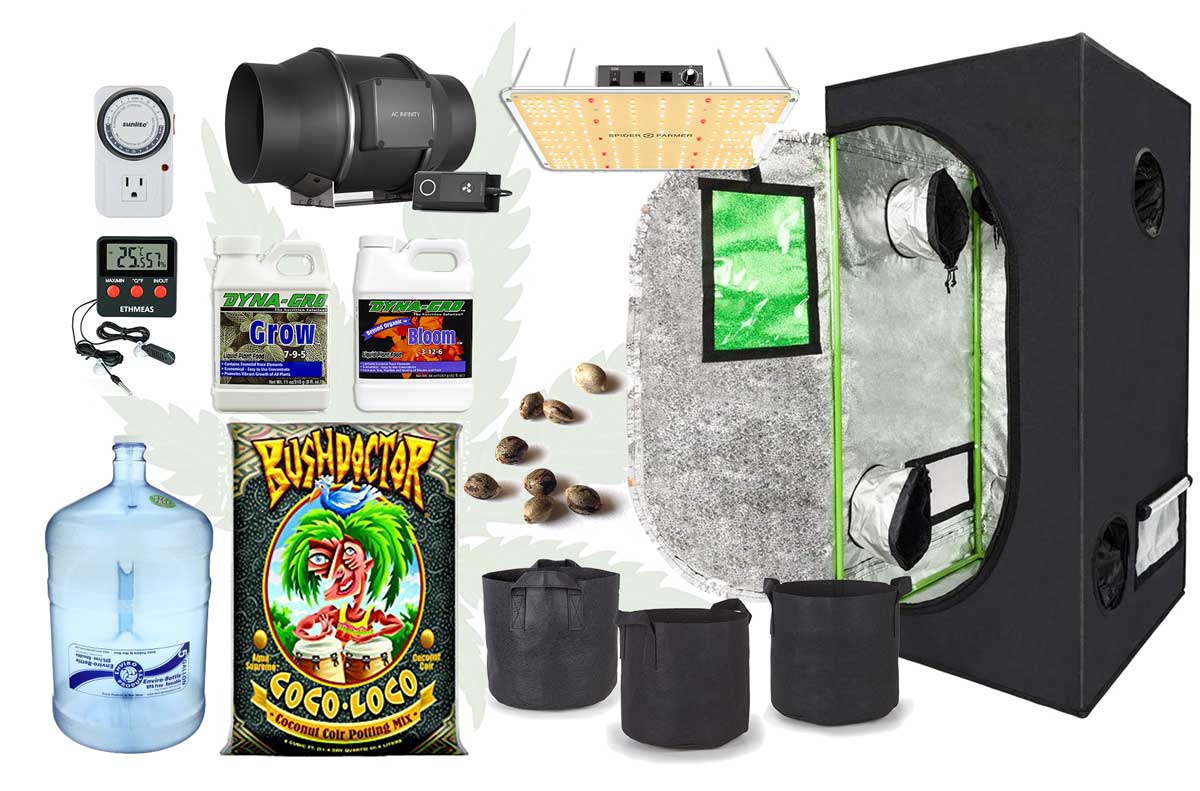
Complete Grow Supply List
This marijuana mini grow tent setup list includes all the supplies you need to get to a bountiful harvest.
Spider Farmer SF-1000 LED Grow Light (100W LED)
- Plants tend to be less sensitive under this grow light than most other LEDs I’ve tried. Some other LEDs are harsher on leaves and more likely to trigger nutrient deficiencies.
- Keep about 10″ away to start. If plants start getting tall/stretchy, move the light closer.
- Performs best if plants are about 8-10″ away, but if plants get too close it still produces great weed (you’re just more likely to see yellow or discolored leaves)
- Simple to use. Works exactly as you’d expect. Dimmable.
Cost: $70
The Spider Farmer SF-1000 (100W LED) can produce several ounces of weed in this setup. Other LEDs would likely work, but I know the SF-1000 works great with cannabis plants in this tent.
Grow Space
- Grow Tent Recommended Sizes
- I like this 2’x2’x4′ grow tent by MELONFARM, though any grow tent of this size will work.
Cost: $45
The above grow tent is higher quality, but even the cheapest grow tent works to grow mini weed plants.
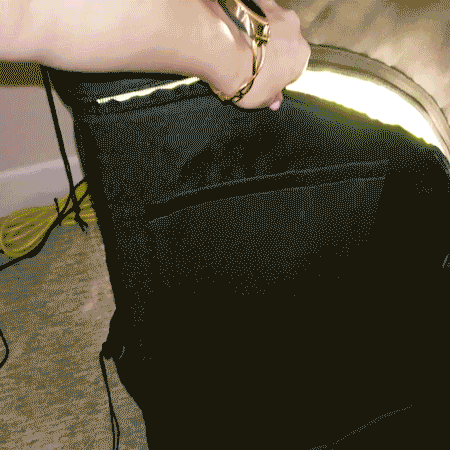
Exhaust Fan & Carbon Filter (Optional Smell Filtering)
This LED grow light does not get very hot. But if you plan on filling your tent with plants like the pictures, you really should get a good exhaust fan to ensure that the humidity from all the plants doesn’t build up too much. An exhaust fan can also be hooked up to a carbon filter in order to filter smells from leaking out of the tent.
Recommended: MELONFARM makes a 6-inch carbon filter with a built-in fan. It isn’t strong enough for a bigger space, but just enough for this size tent. Make sure the fan is pointed OUT and close the tent tightly. It filters the air before it leaves the tent. Combine with a low-odor strain if smell is a big concern.
The main issue is it needs to be inside the tent pointed out. That means you’re losing some room inside an already small grow space. The other problem is it keeps going out of stock, so get it if you want one.
Two-in-one: This $70 quiet MELONFARM filter has a built-in fan.
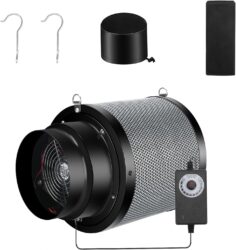
Stealthy and quiet, but takes room inside the grow tent. So there is a tradeoff.

It must be pointed outwards to work, so it has to be inside the top. It’s most effective at the top, but is also 80% as effective if you point it outwards from a bottom port.
A carbon filter can be pointed out from a bottom port like the lower right of this picture. However, venting from the bottom not as effective at smell filtering, and buds get less fresh air.
Choose a port at the top if possible, for the best airflow and smell filtering.
Alternative Fans to Vent Air
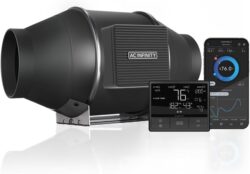
- S4 is the cheaper, simpler version – (21W electricity usage, 26 dB sound level) works well and gives you basic fan speed controls – $90
- Programmable T4 version – (21W electricity usage, 26 dB sound level) has handy extras like a Temperature/Humidity Probe, auto-on and auto-off, ability to program a schedule, a display screen, and ability to check on the temperature and control the fan with your mobile phone – $120. I got both versions and I wish I’d gotten two of this version – the features are worth the extra $30 when you use it all the time.
- Budget choice: Vivosun 4″ Fan – 195 CFM (28W electricity and 42 dB sound level) – effective cheap fan, but runs louder than the AC Infinity fans – $27
Cost: $27-120
The programmable T4 AC Infinity CLOUDLINE fan ($120) runs at a quiet 26 dB sound level and can be controlled from your smartphone. Quietest exhaust fan this effective.
What’s all this about a carbon filter?
- Although a carbon filter is optional, if you don’t hook up a carbon filter to an exhaust fan, your tent may rapidly fill the surrounding area with a pungent weed smell as you get close to harvest. Normally it wouldn’t be such a big deal with such a small tent like this, but you are going to be growing a surprising amount of weed in here. Learn about growing low-odor cannabis strains.
- Recommended: Match the carbon filter to the size of your fan. So the above examples are 4″ fans, so get a 4″ carbon filter so the ports all match up. Here’s a 4-inch MELONFARM Carbon Filter, 4″ x 11″ version that works with the above fans. Note: these are 11″ long, which is likely bigger than you might expect. The main smaller option I’ve seen is to skip getting a separate fan and filter, and get this 10″ long MELONFARM with built-in fan, but the downside is that version must be kept inside the tent, while the others can be configured with everything outside the tent.
- Duct tape – to connect the filter and fan together securely so no air leaks out. Another option is a 4″ duct connector but duct tape works great and many people already have a rolle somewhere.
- (Optional – likely unnecessary) 4″ Ducting and Ducting Clamps – you might need this if you plan on venting the air somewhere, like out a window, but with such a cool-running grow light, that is probably not necessary.
Cost: $32
Plant Pots + Grow Medium
- Growing medium: Coco coir or soil
- Containers: Stick to under 3 gallons in size to help keep plants a bit smaller. I grew with 1-gallon fabric pots, which worked well at keeping plants small, but plants needed to be watered daily towards the end of the grow because the plants drank the water so fast. The plants needed to be watered less often when I used 2-gallon pots, but the plants got a little bigger. 3-gallon pots were the easiest to water, but the plant really wanted to grow big and I had to do a lot of bending to keep the branches from growing into the light.
Recommended:
- One big bag of Coco Loco, a coco-based soil with perlite. This 2 cu ft bag should be enough to fill 14 gallons worth of pots (for example seven 2-gallon pots). You’ll have enough to last a few grows if you’re growing small, but luckily coco-based soils store well so you could use the rest later.
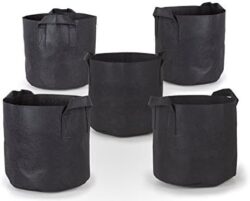
- 2-Gallon fabric pots (here’s an example of a 5-pack) – Any brand of fabric pot works great, in my experience.
Cost: $50
Coco Loco is a coco-based soil that makes thriving cannabis plants

Example a 5-pack of 2-gallon fabric pots for growing cannabis (any brand of fabric pot works great)
Nutrients
Most nutrient systems will come with at least 2 bottles (one bottle for the vegetative stage and one for flowering/bloom stage). Many nutrient lines carry 3 bottles or even more that must be mixed into the water in different ratios over the course of your cannabis plant’s life. Whether it’s on the bottle or online, most nutrient lines come with a schedule on how much nutrients to give your plants. Start the schedule at half-strength in the beginning and only raise to full strength after your plants are healthy and growing fast.
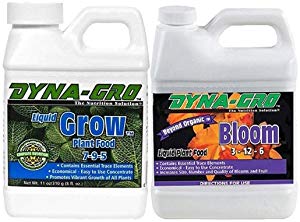
Recommended Base Nutrients: Dyna-Gro Grow + Bloom nutrient combo is excellent, cheap, and easy to use for growing cannabis.
- Grow bottle: Give about 1 tsp per gallon of “Grow” during the vegetative stage.
- Bloom bottle: Give 1 tsp/gallon of “Bloom” during the flowering stage after buds start forming.
Learn about other recommended cannabis nutrients.
Cost: $20+
Dyna-Gro Grow + Bloom is a solid nutrient system for newbies. Cheapest option at $15 to get you from seed to harvest. One bottle for the vegetative stage, one bottle for bloom (after buds start forming). 1 tsp/gallon. Super simple.
Note: A company named Superthrive recently bought Dyna-Gro and jacked up prices. As recently as mid-2025 you could buy this set for $12, but I recently saw the exact same set selling for $35!
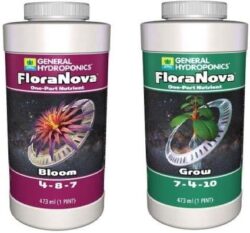
Another company called General Hydroponics offers similar but higher quality nutrients called the FloraNova duo. If the cost is similar, go for FloraNova Duo, as they store longer, and I like that they offer more Potassium, which helps cannabis bloom fast and strong.
Pay a little more for better cannabis nutrients: FloraNova Duo
Other Supplementary Items
- Get your seeds – $10-15/seed on average, but can be more or less depending on the breeder.
- 24-Hour Timer (to put your grow lights on a timer so the plants get a day and night period on a schedule) – $10
- Water containers (I personally use a 3-gallon water jug to mix up nutrients as that’s as much as I can carry without difficulty, but any water container can work). Note: These are much cheaper at Wal-Mart or a water container store ($5-15) than online!
- Thermometer/Humidity Monitor with a probe so you can keep track of the temperature inside the tent (unless you got the really fancy Cloudline exhaust fan with a temperature and humidity probe built-in) – $15
- PH Test Kit – Prevent potential nutrient deficiencies by testing the water pH – $20
- Measuring spoons for measuring out your nutrients (many people already have these) – $10
- (Optional) Zip ties – the hanging apparatus that comes with many grow lights add several inches of height for no real reason. They just aren’t designed for height-limited growing. In a mini tent like this, height is at a premium and a few inches can make a big difference. When you need to get your light all the way to the top of your tent, nothing seems to work better than industrial zip ties. Once you start using zip ties you end up using them for everything. They’re weirdly permanent and strong for something so disposable – $10
Total: $55+
Estimated Cost for entire setup: $290-$460
- Ultra budget (no exhaust fan or smell filtering) – $290
- Only the necessary stuff + cheapest exhaust fan + smell filtering: $360
- Get everything including the premium equipment and optional extras: $460
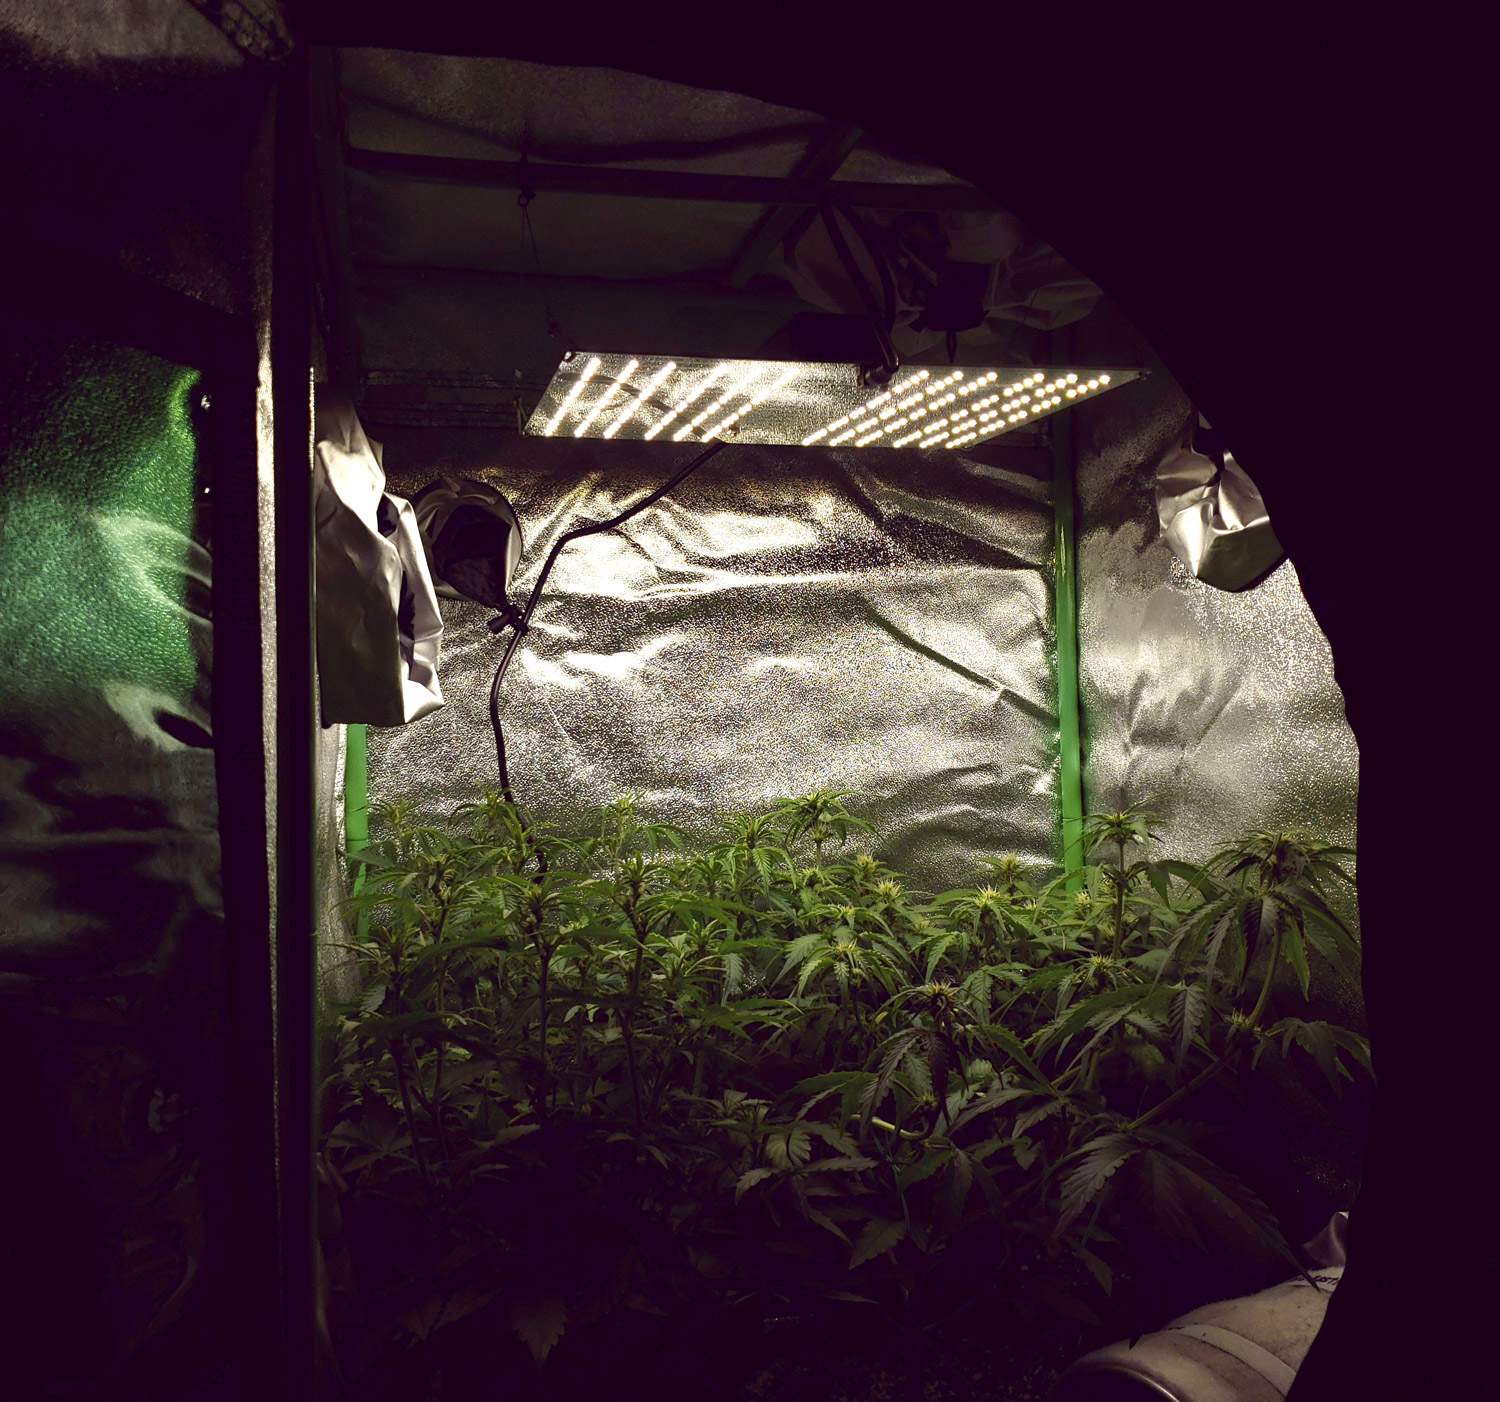
Carbon filter and fan (how to cool tent, remove humidity, and stop smells)
Notice the configuration of the carbon filter and fan. Even though this is a very small carbon filter, just 10″ long, there’s not a lot of extra room at the top of the tent. The configuration below seems to be the only way I can find to fit the carbon filter inside while still allowing the grow light to get to the top of the tent. This is not as effective as exhausting from the top of the tent, but it will work in this small tent.
Your other option is to put both the fan and carbon filter sitting on top of the tent, exiting from the top port. In that case, you’d want the carbon filter to be the last thing before air escapes (carbon filters should always be at the ends of an exhaust system, either inside the tent at the beginning, or at the end on the outside).
You have to get creative to fit a carbon filter in a small cannabis tent like this.
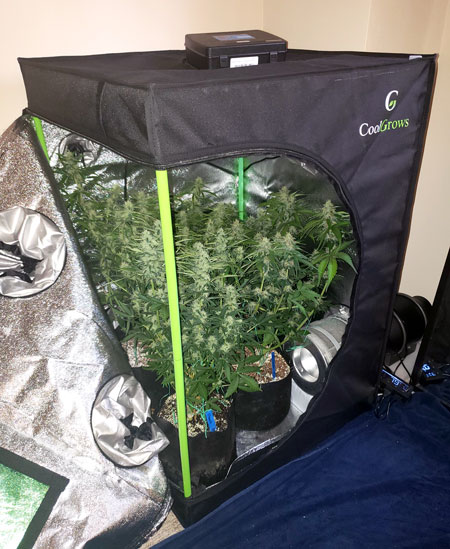
When set up right, you can produce a surprising amount of bud in a tiny space!
But not much room at the top.
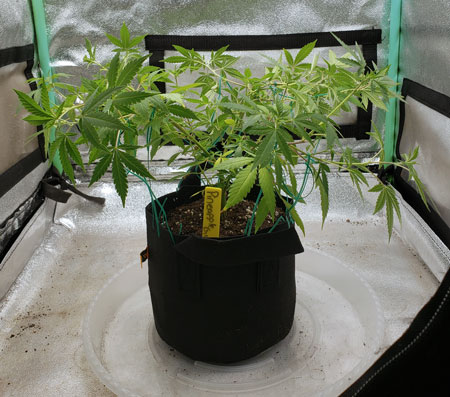
This is when I grew a single Pineapple Chunk plant in this setup. Here’s a step-by-step tutorial on how I trained this cannabis plant to stay so short (scroll to the bottom of the article to see each step with this plant as the main example).
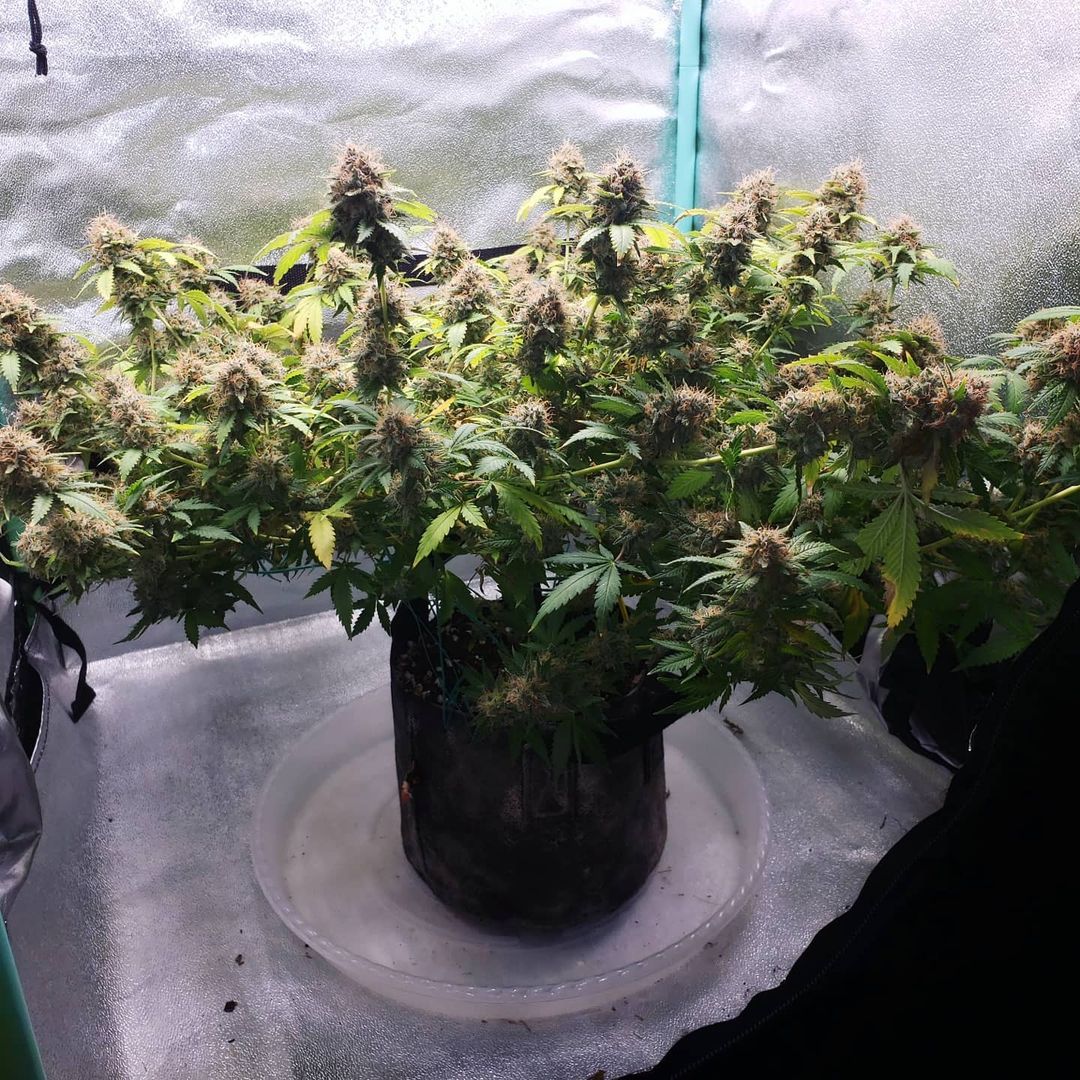
This was a Pineapple Runtz Auto (highly recommended strain for this mini cannabis setup!). Learn how to train auto-flowering cannabis strains to stay short and still get big yields.
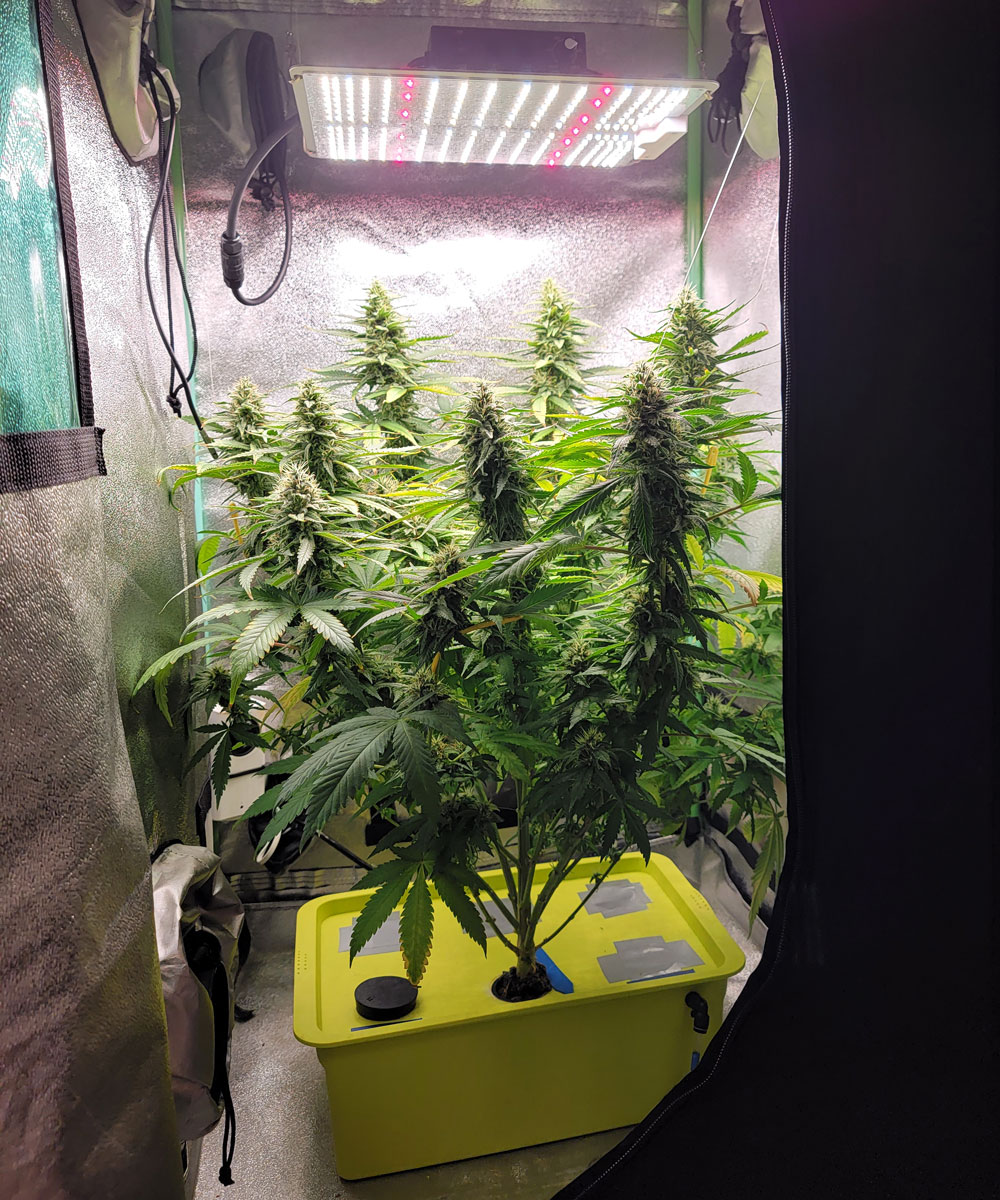
We’ve even grown in the 4′ tall tent with a mini DWC/hydro system! A tight fit but doable.
Another tiny cannabis plant grown in the hydro setup. Contact us if you want to see a tutorial to grow cannabis in mini DWC setups. If there is interest, we will make a full mini-DWC cannabis tutorial.
How to Make Cannabis Plants Stay Small and Still Produce a Lot of Weed
There are lots of great beginner grow tutorials on the site such as the 10-Step Cannabis Grow Guide. However, here’s a super quick overview of everything. Then I’ll explain how to grow cannabis in this mini grow tent setup so it stays the right size and produces as much weed as possible.
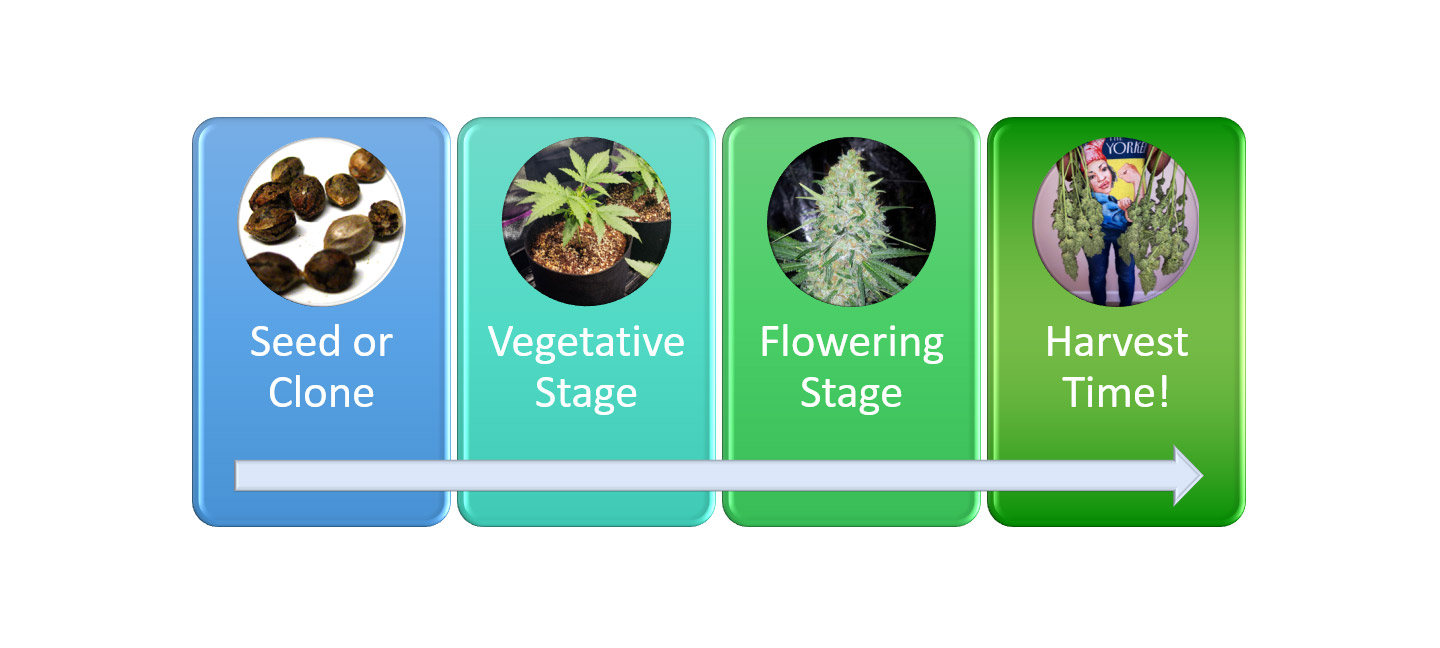
Basic process of growing of an indoor cannabis plant
Germination – there are lots of ways to germinate seeds but the easiest is just to put the seeds directly in the dirt just below the surface (about a knuckle down) and give some water and warmth from the grow light. Seedlings should appear in a few days.
Plants only need a tiny amount of water at first.
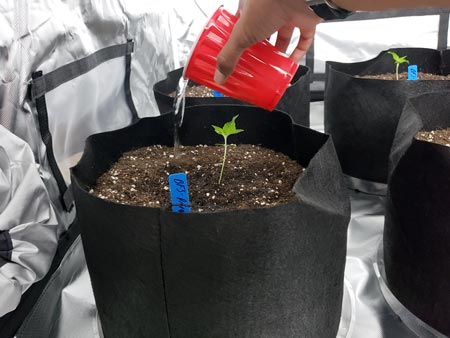
Here’s a day-by-day watering schedule for cannabis seedlings.
Vegetative stage – When cannabis plants are young, they grow branches and leaves but not any buds. Simply give plants water, light, and possibly nutrients. Nutrients are only necessary if you’re not growing in soil (for example in coco or hydroponics) but even in soil, providing nutrients makes plants grow faster. In the flowering stage, the right nutrients make buds get bigger.

Initiate the flowering stage (with a “12/12 light schedule”) when the plant is half the final size – Cannabis buds are actually flowers (isn’t that nice?), and you need to “tell” the plant to start making flowers by tricking it into thinking winter is coming. So once plants have reached about half the final desired size, a grower initiates the flowering stage by putting grow lights on a vacation timer so the light turns off for 12 hours a day. This 12/12 light schedule tricks the plant into “thinking” it’s the end of summer and it starts making flowers/buds. If you’re growing an auto-flowering strain, plants will automatically start flowering when they’re 3-5 weeks old, so you don’t need to think about this step or light schedules. This is a general overview. Read the tutorial below to learn exactly how to make cannabis plants the right size for this specific tent.
Flowering stage – Plants start growing white hairs (“pistils”) at the base of each fan leaf and at the tops of branches. These are are the first signs of buds. Plants will about double in height (more or less depending on strain) after the flowering stage is initiated. Auto flowering strains will double in height from when you see white hairs/pistils. But after about 5-6 weeks, the plant will stop getting any taller and the bunches of white hairs will start fattening into solid buds.
New buds look like white hairs
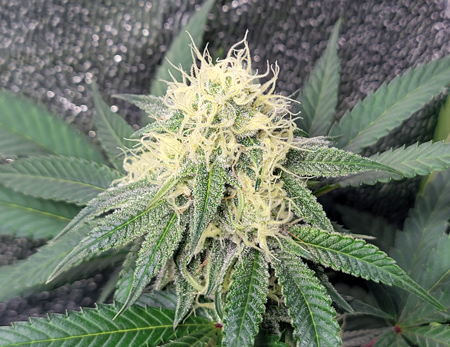
White hairs darken and curl in as buds mature. Buds often start to “sparkle” (depending on strain).
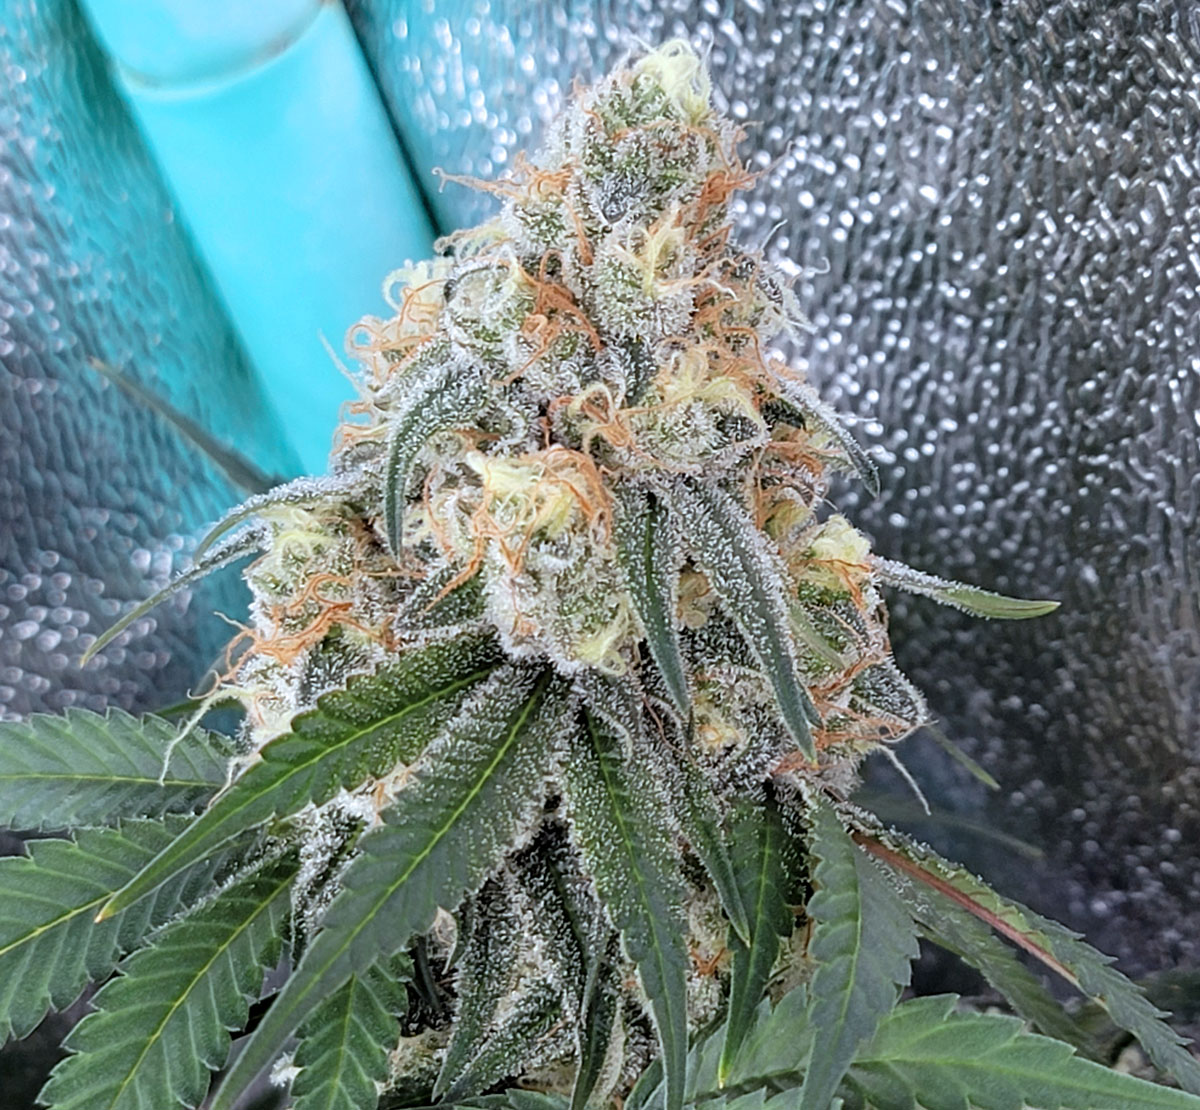
Harvest – The white hairs on all the buds will all darken and curl in when plants are ready to harvest. Check out pictures of ready-to-harvest buds or some people look at the buds under a magnifier to help decide when to harvest. When buds are ready, cut down the branches one by one and hang them upside down in a cool dark place with light ventilation. Often the place you grew the weed is also a great spot for drying it, for example the inside of a grow tent. There are also other ways to dry buds. Once buds are dry, they will easily pop off the branches. At this point the buds can be smoked but if you put them in glass jars the bud quality will continue to improve for several weeks. This process is known as “curing” and helps buds tighten up, smell better, be less harsh, and overall have higher “bag appeal” and be more pleasant to smoke.
Ready to harvest bud. Mature buds are solid with no white hairs. Leaves may turn yellow or purple like autumn leaves (especially directly under the LED grow light).
You can do it!
This infographic I made may be helpful as well (here’s a PDF version)

Now that you know the basics of growing weed, let’s get into the details of how to grow in this mini tent setup.
Bonus Tips for this setup:
- Choose the right strains – Avoid choosing cannabis strains that naturally grow big plants!
- Choose autoflower strains that are ready to harvest 10 weeks from germination or sooner (these strains tend to stay smaller than longer-flowering strains), especially if it’s specifically listed as tending to stay short. Recommendations: Blue Dream Auto, Creme de la Chem Auto (a personal favorite), Strawberry Cheesecake Auto.
- Choose photoperiod strains with a 8 weeks or less flowering period (faster than average). You will initiate flowering when plants are about 3 weeks old for a total of 10 weeks just like with the autos. Make sure to choose a strain that says it’s short or medium size in the description. Even short strains can get tall, but they tend to grow more out than up, especially compared to other strains specifically listed as “tall”. Recommendations: Strawberry Cola Sherbet F1, Bruce Banner Fast, Tropicana Cookies Fast.
- Small pots help keep cannabis plants smaller. Use a 2 or 3-gallon pot (or smaller if you don’t mind watering more often) to help plants stay small enough for this setup. Plants can still get big in small pots, but they will be smaller than the same plant if it’s allowed to grow without any restrictions on its roots.
- Hard-sided pots tend to keep plants smaller, because it further restricts their root size compare to the same size container in hydro or a fabric pot.
- Follow the instructions below to get the most weed from this setup.
Main Idea: Train your cannabis plants to grow flat and wide like a table in the vegetative stage.
Tips
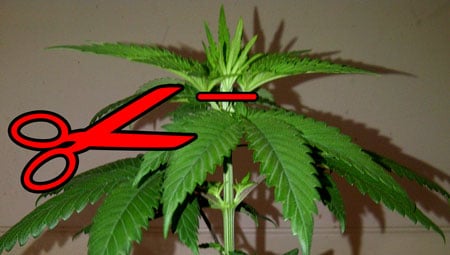
- Cut off the top of young plants – Cut off the top of young plants in the vegetative stage. Cutting off the top of a plant is often called “topping” in the cannabis growing world. Topping splits any stem into two, and a plant with two tops is easier to spread out to create flat plants than a plant with one main top
- Beginner tip: Wait until the seedling has grown 6 sets of leaves. Cut off the top through the main stem above the 5th set of leaves (pictures below). Easy and simple, yet won’t stress plants. After being topped, your plant is easier to spread out and naturally grows more bushy and wide.
- Spread out stems so plant grows flat and wide – As the plant grows, spread out the stems by bending them down and away from the center of the plant. Don’t forget to tie branches down with something like plant twist tie or they’ll spring right back up the next day!
- Tall stems can be “topped” if they can’t be bent over flat – Cut off the ends of (“top”) any stem that’s growing much faster than the rest. Each new pair of stems grows slower than the original one. Topping is a great tool to curb fast-growing stems in the vegetative stage because each new stem grows half as fast.. If you don’t want to cut off the end, you can also bend the whole stem down so it’s not taller anymore. That accomplishes the same thing if you don’t mind tying down the stems.
- Supercrop (if necessary) – Cannabis stems get hard and woody as time goes on. If you find you need to bend a stem that’s already stiff, use the supercropping technique to bend even the toughest stems at any angle. This is a bit advanced because you can accidentally split stems. But don’t worry if you do. Simply tape broken stems back together like a cast and the plant can heal. One of the things I love about cannabis plants is it can recover if you make big mistakes in the vegetative stage.
Here’s an example of training plants to grow wide and flat for more bud sites and bigger yields.
Cut off the top of a young plant right above the 5th set of leaves (“top” the seedling above the 5th node)
When cutting through a stem, be careful not to damage the growing tips at the base of each leaf. These will become your two new stems.
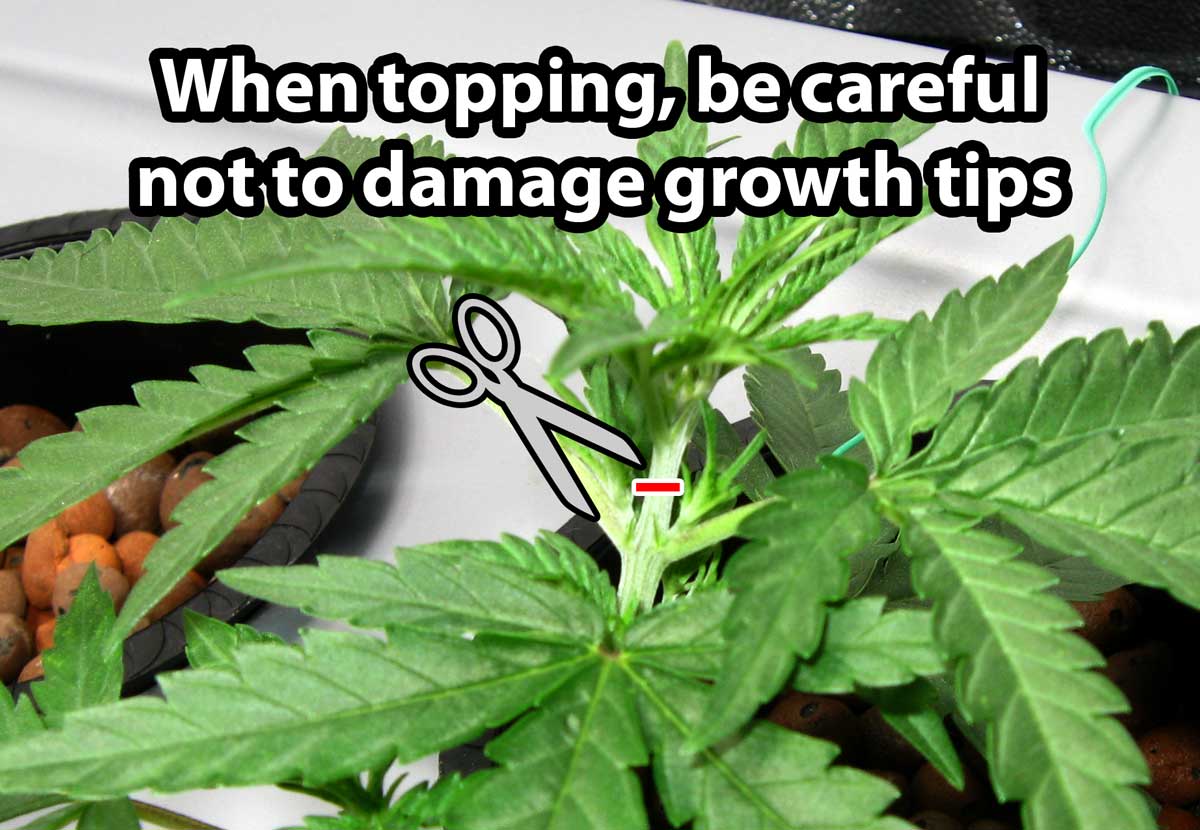
Topping splits the main stem into two. You can see the two new “main stems” on each side of the cut.
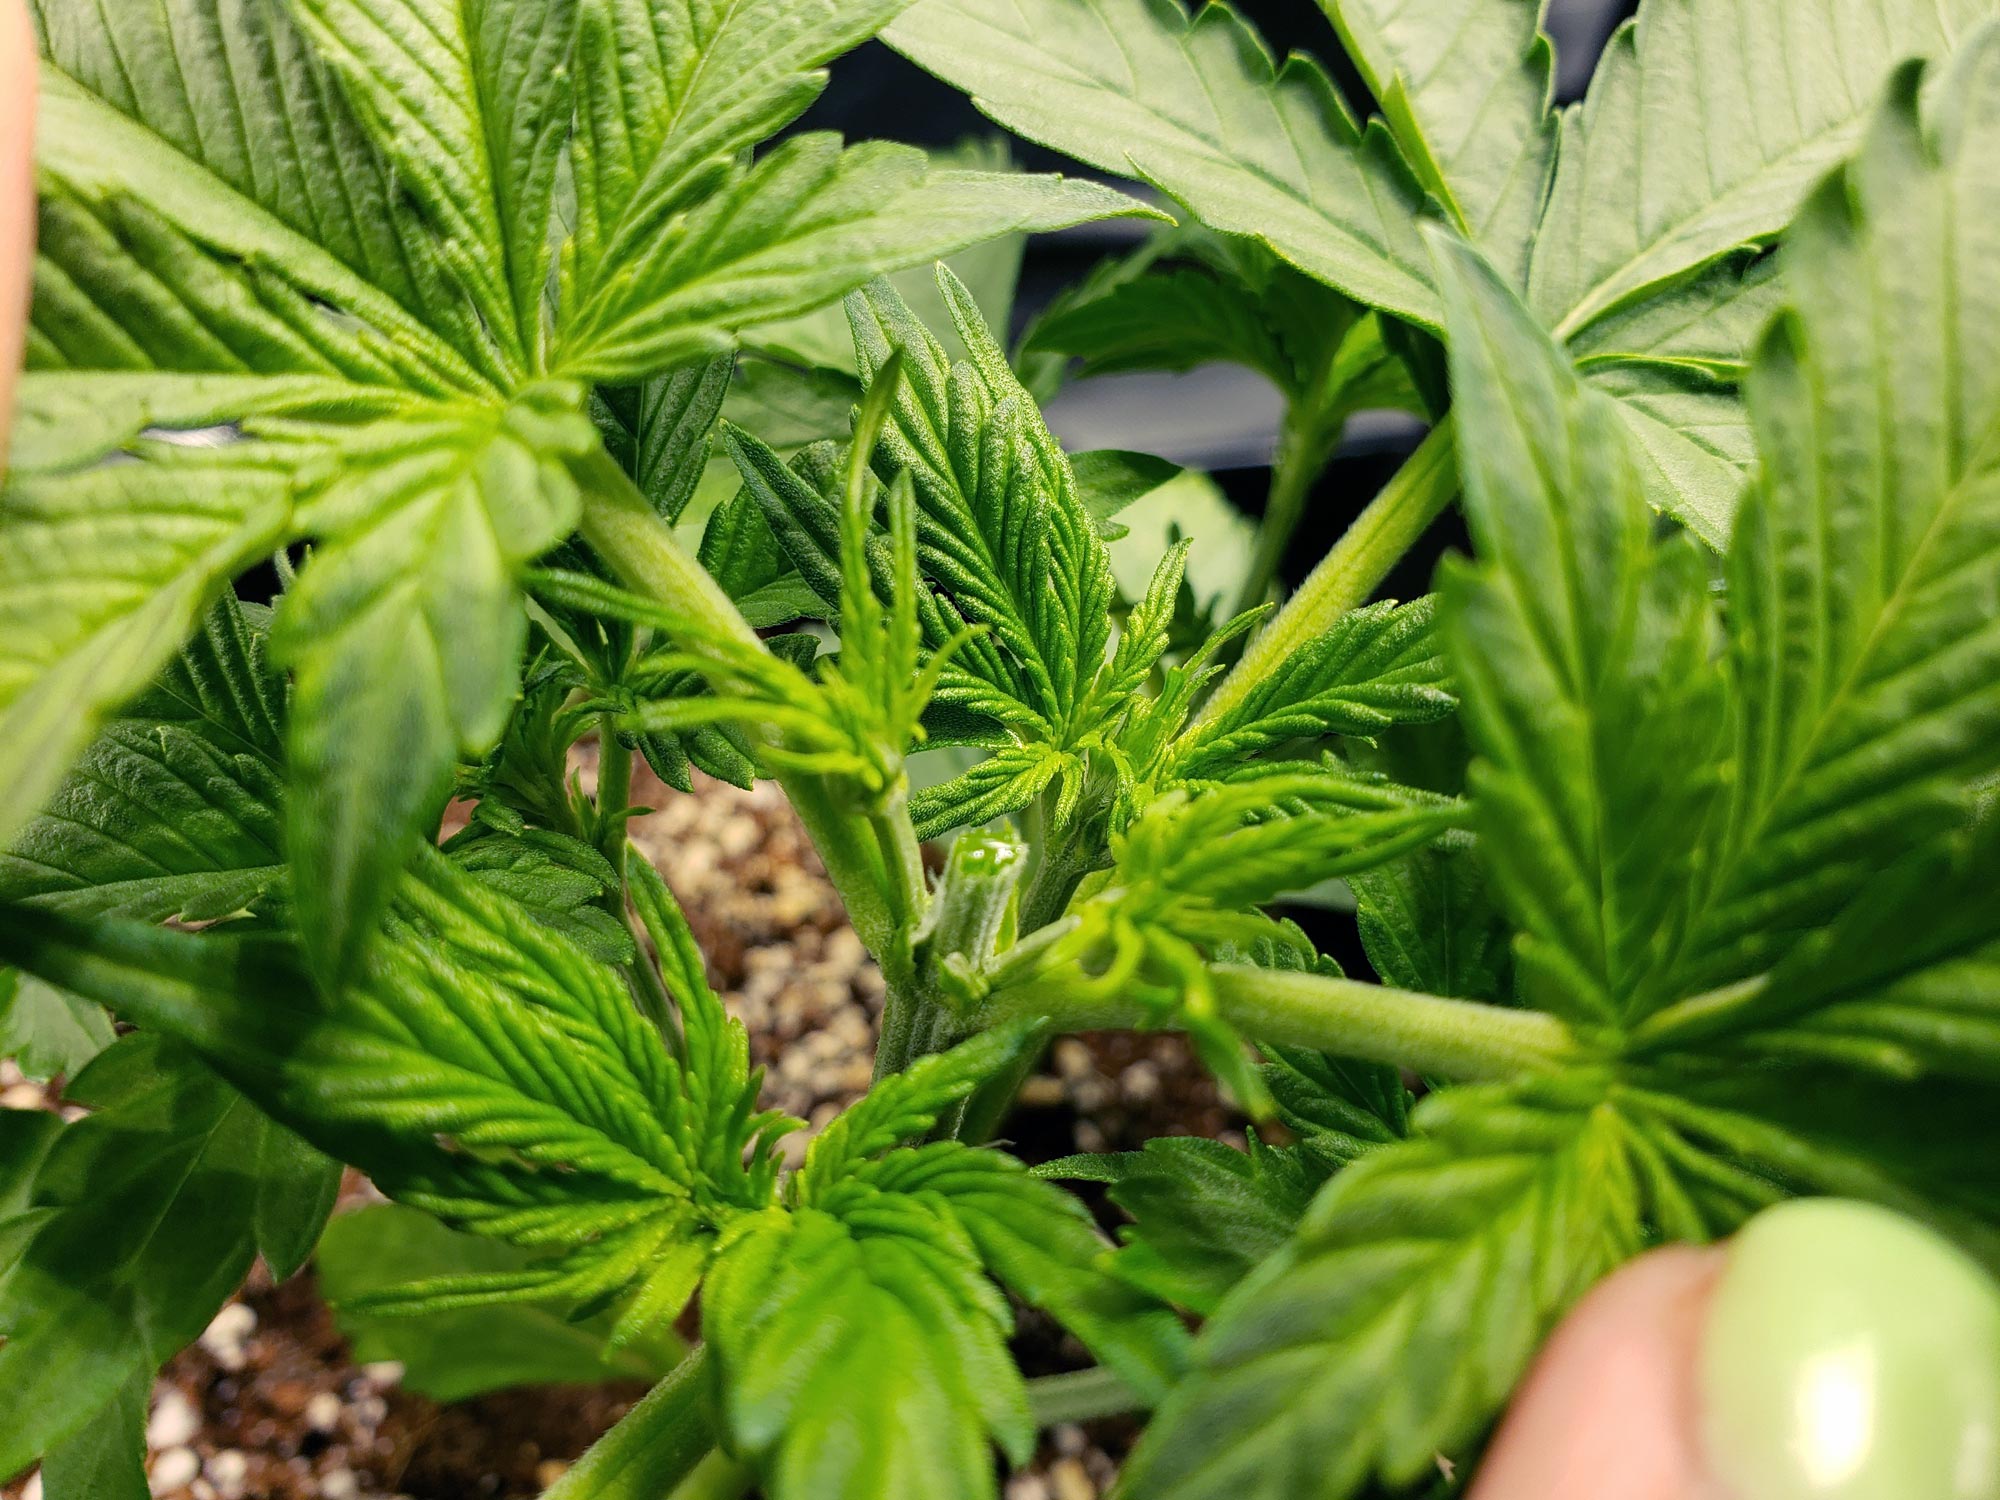
Since you waited until the plant had several sets of leaves before cutting a small piece off the top, it will continue growing as if nothing happened.
As the plant grows, spread out the branches and cut off the top of any stem that’s getting bigger than the others. You don’t want your plant putting too much energy into any one branch.
The plant was transplanted to a mini grow tent under an HLG 65 4000k LED grow light and given a week to adjust to the new environment.
Training time!
Bend over all the stems down and away from the center until it looks flat from the side
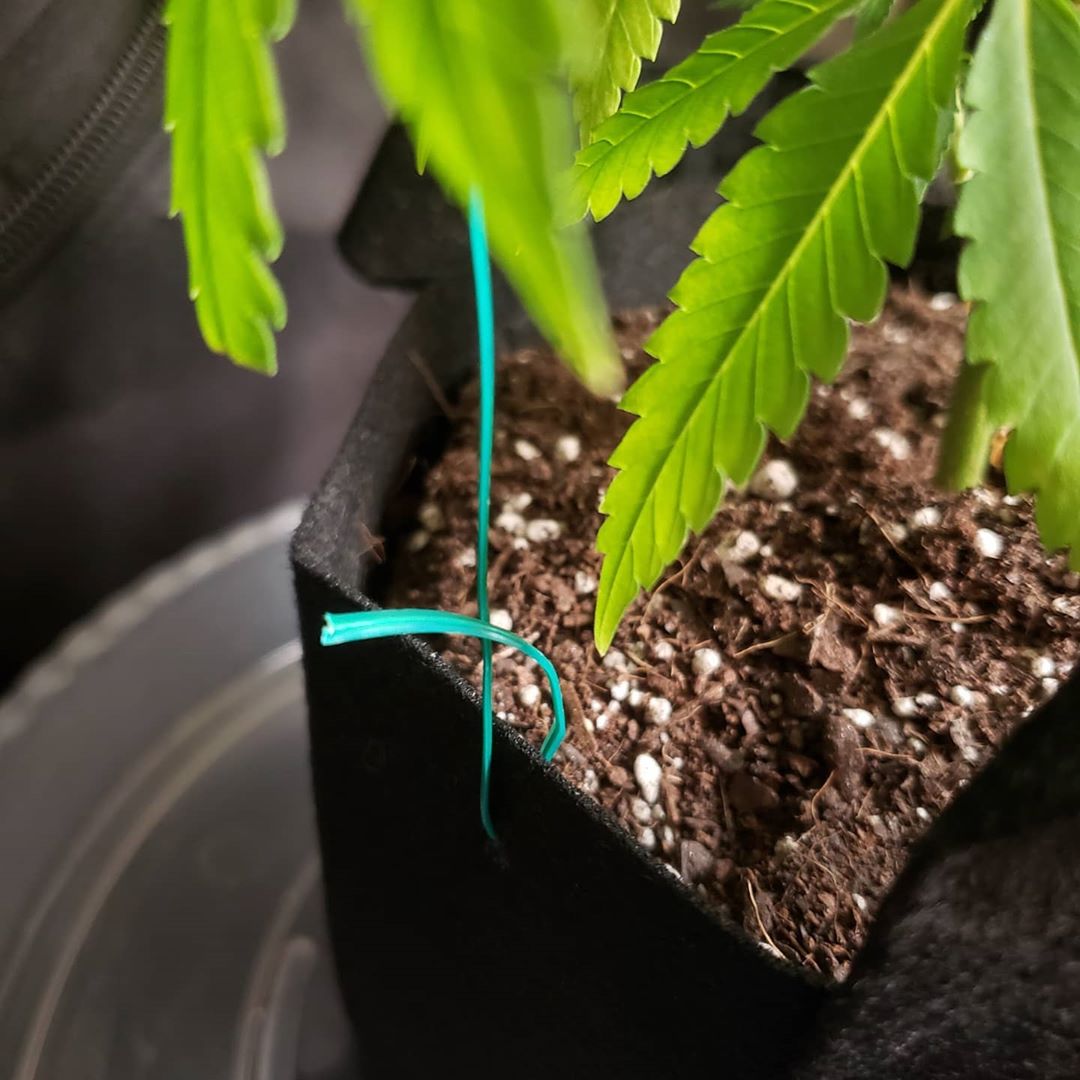
I used plant twist tie to hook on to each branch and tie it down where I wanted. I attached the other end to the fabric pot.
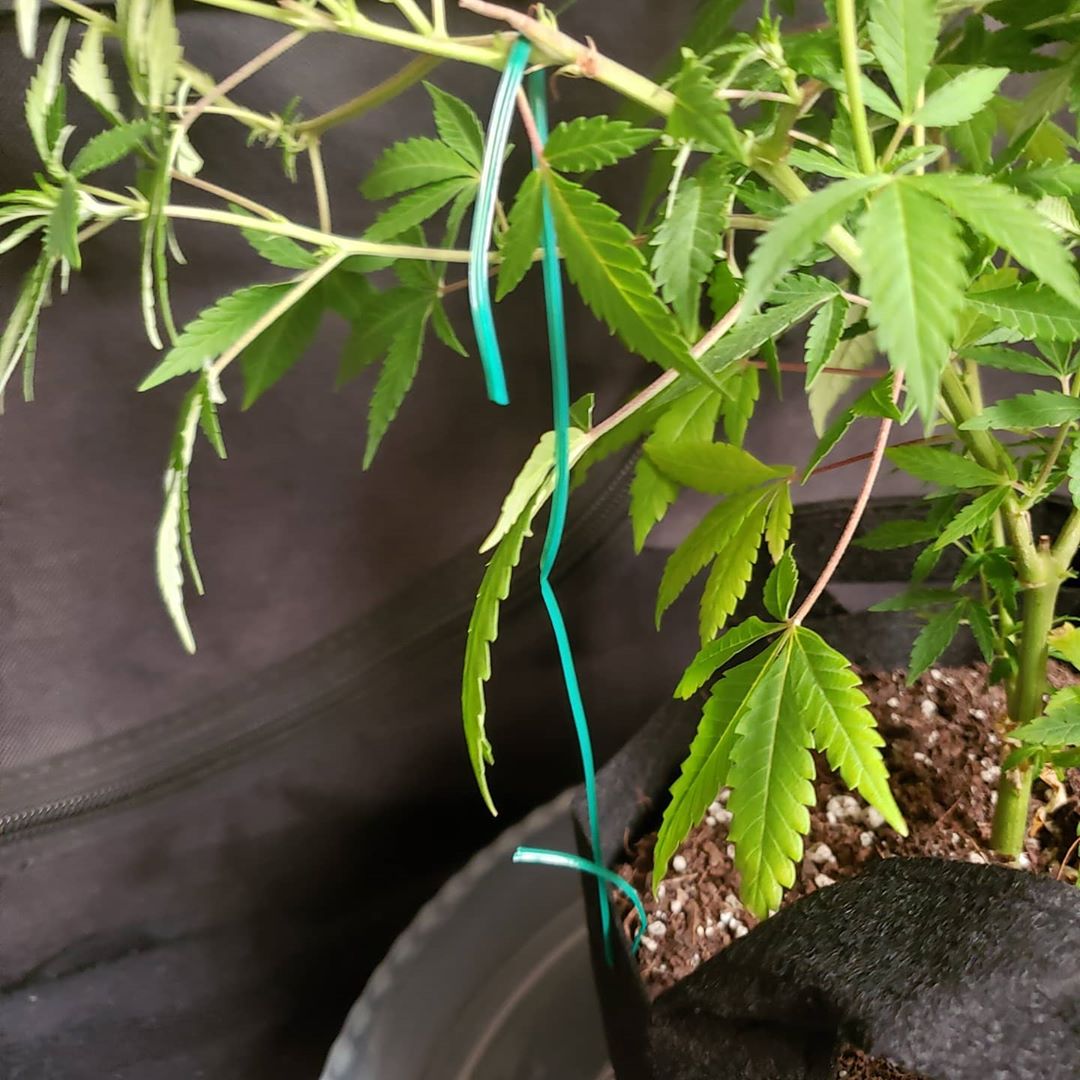
How to attach to the pot? You can use safety pins or binder clips but I think this is easier. Poke holes in the fabric using sharp pointy Fiskars pruning scissors and thread the twist tie through.
Back to training. Here’s a top view. We’re trying to fill the entire tent with this plant.
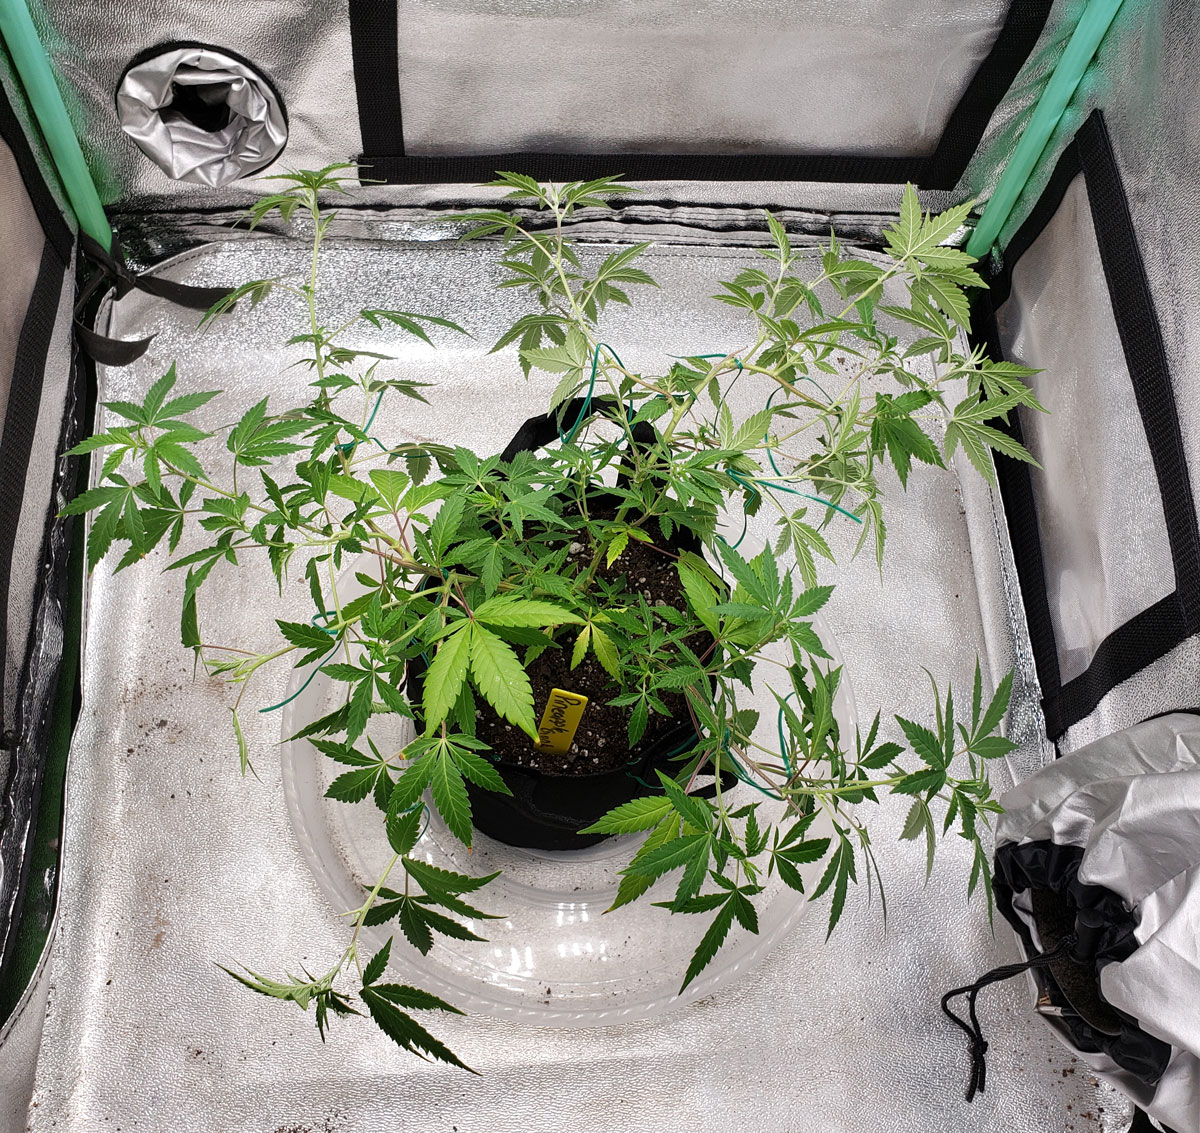
A few days later the plant has filled in nicely. Repeat the steps until you’ve filled your entire grow space.
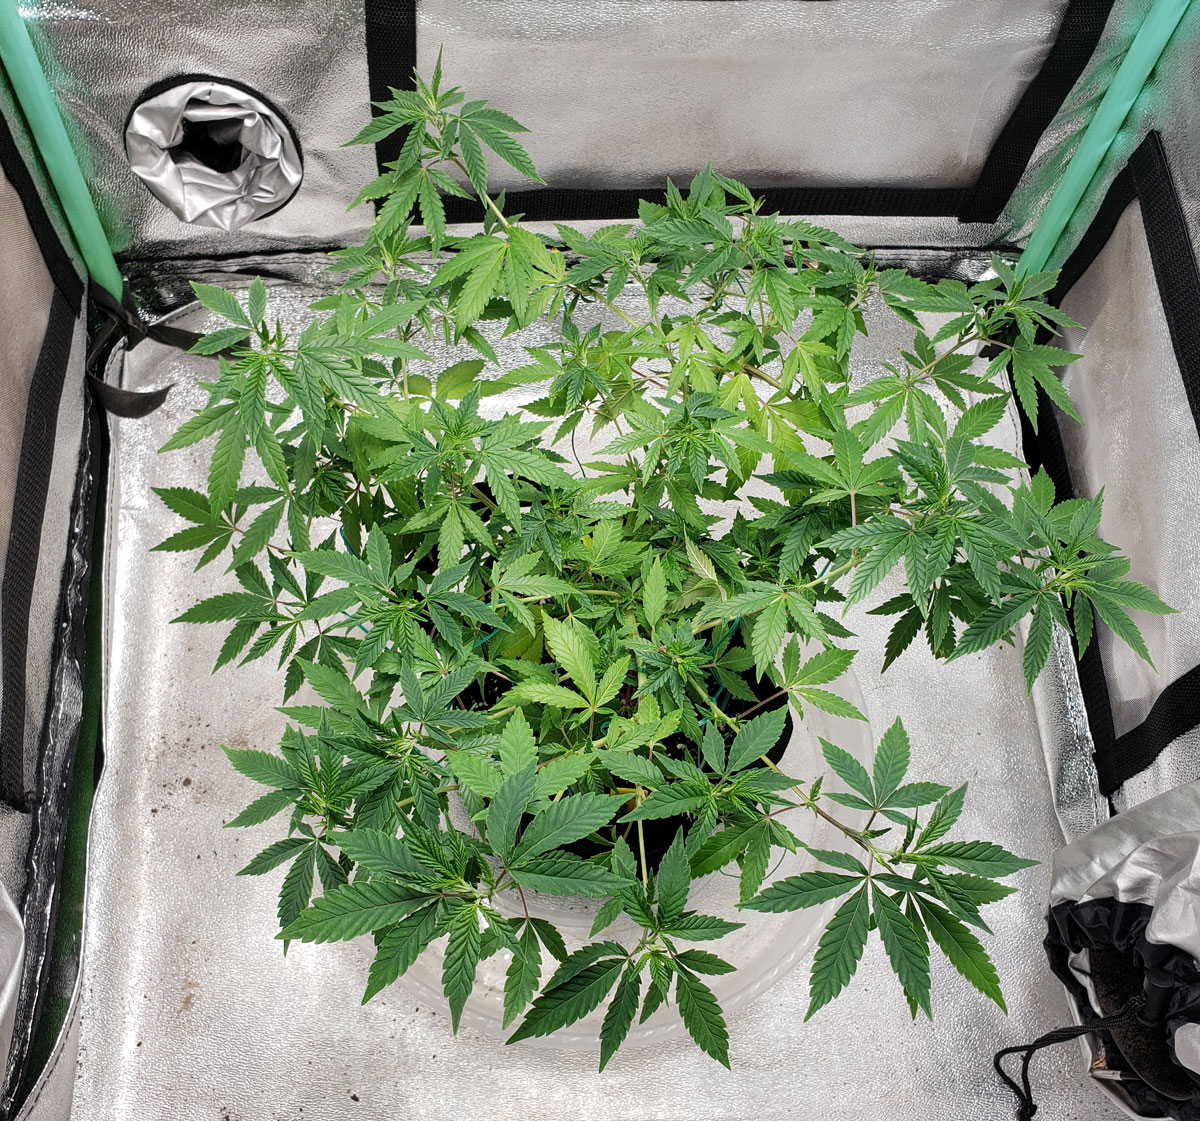
Initiate 12/12 when plants have complete coverage at the height you want. Look at all the bud sites on this 1 plant right as it starts flowering
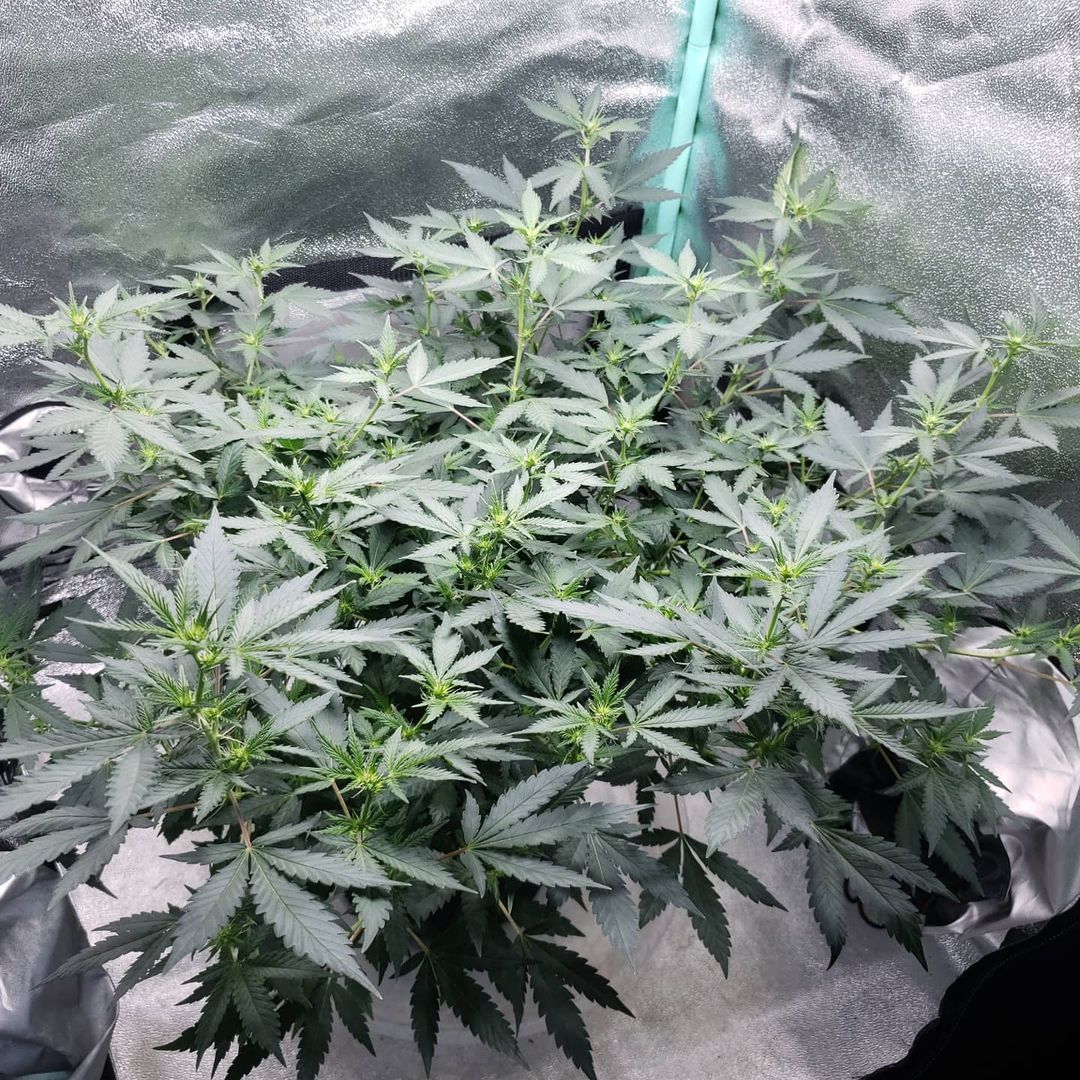
Here’s a side view. At this point, the only thing to do is water the plant and give it nutrients until harvest.
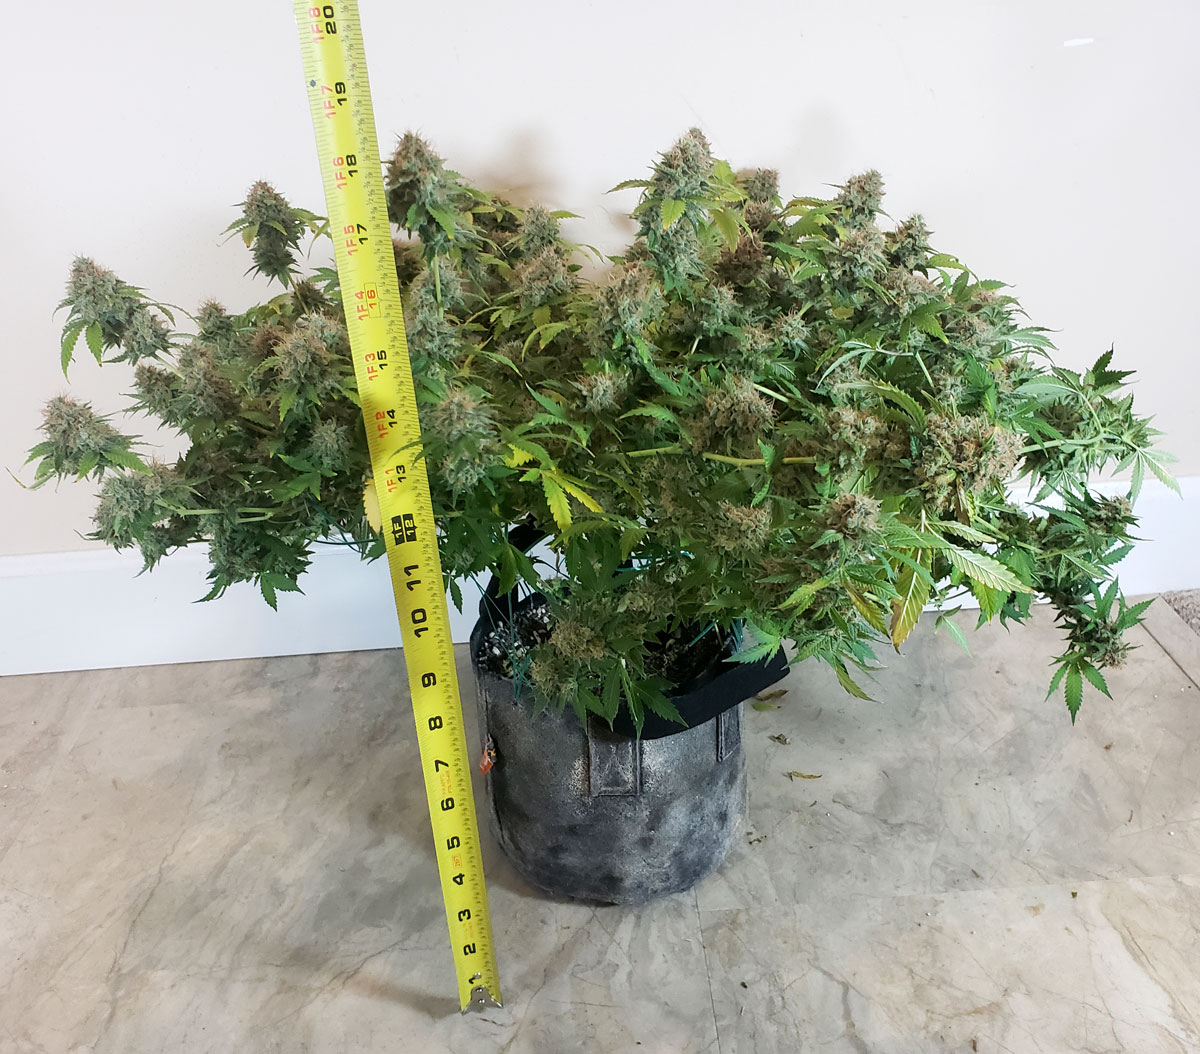
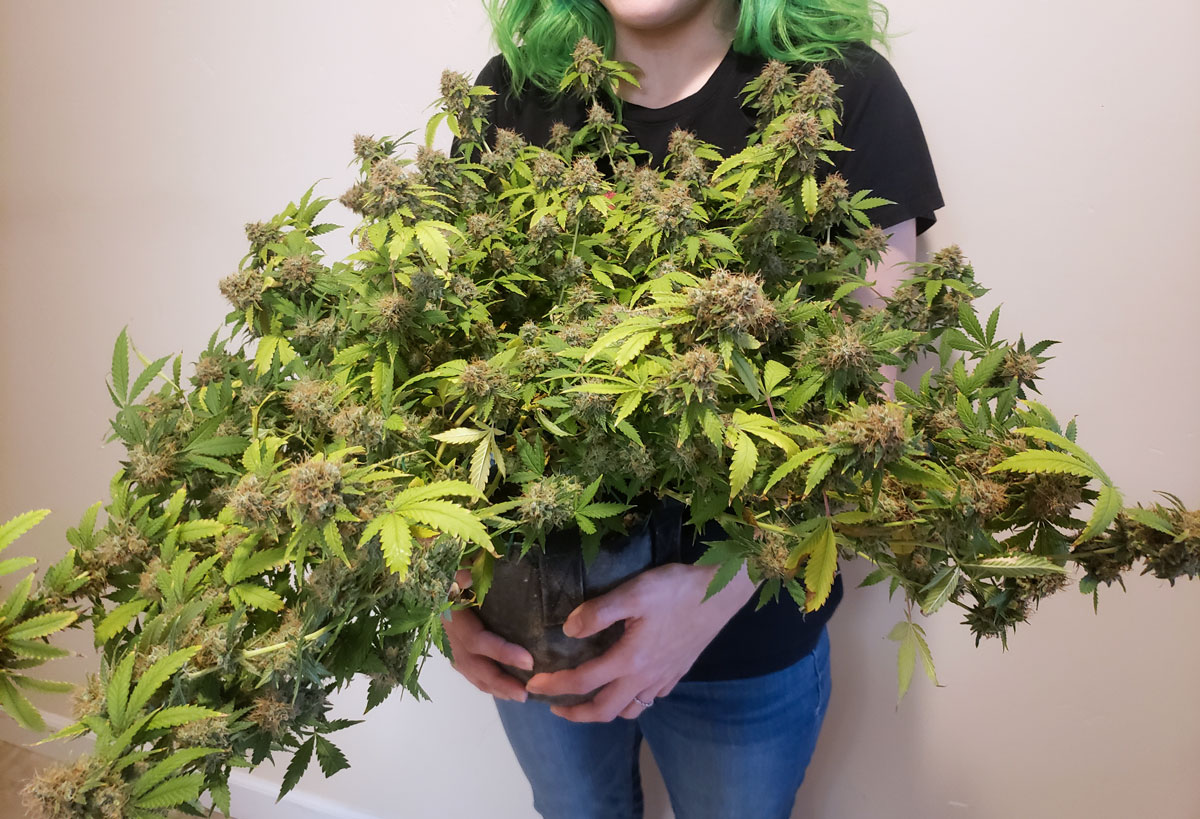
At harvest, this plant was just over 18″ (46 cm) tall, yet yielded several ounces because it was trained to grow wide and flat. Talk about making the most out of one small plant!
Learn more about growing plants to be wide and flat.
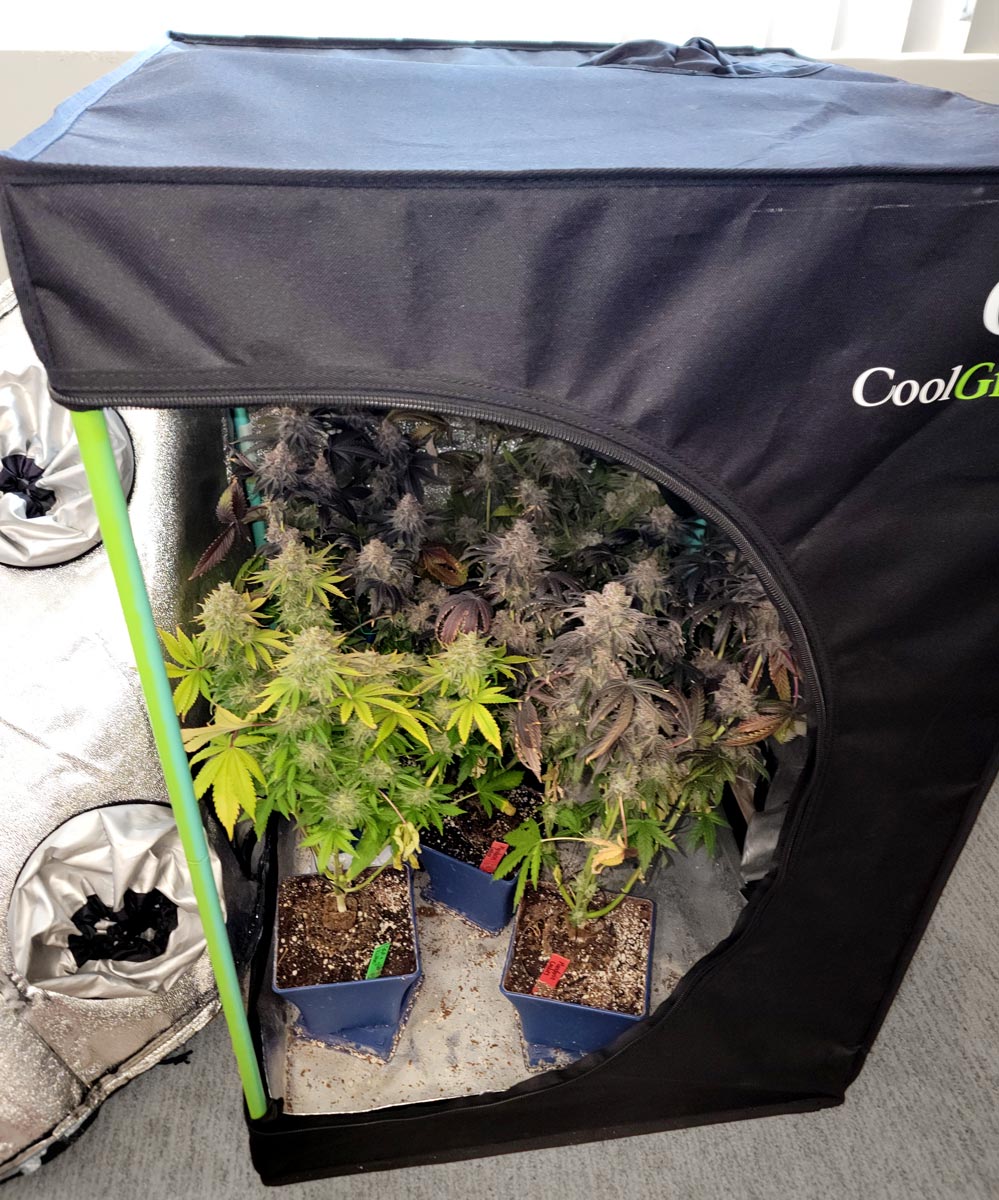
Check out the results from a grow that followed this 4oz mini tent tutorial with many small plants instead of just one. This is actually only a 3′ tall tent, so if you got the taller version (as recommended in this tutorial), you would be able to grow even bigger plants with longer buds.
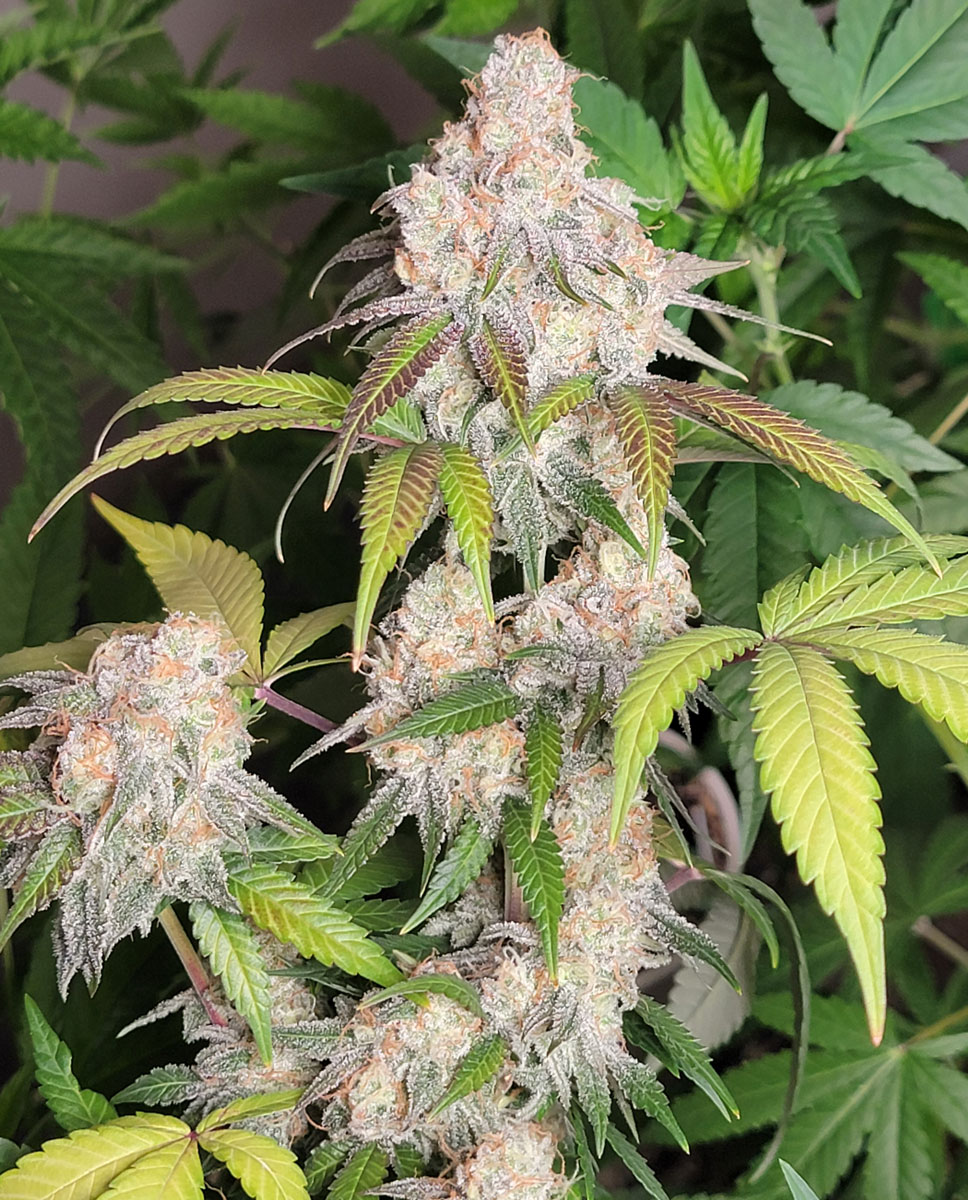
Example of a mini tent harvest
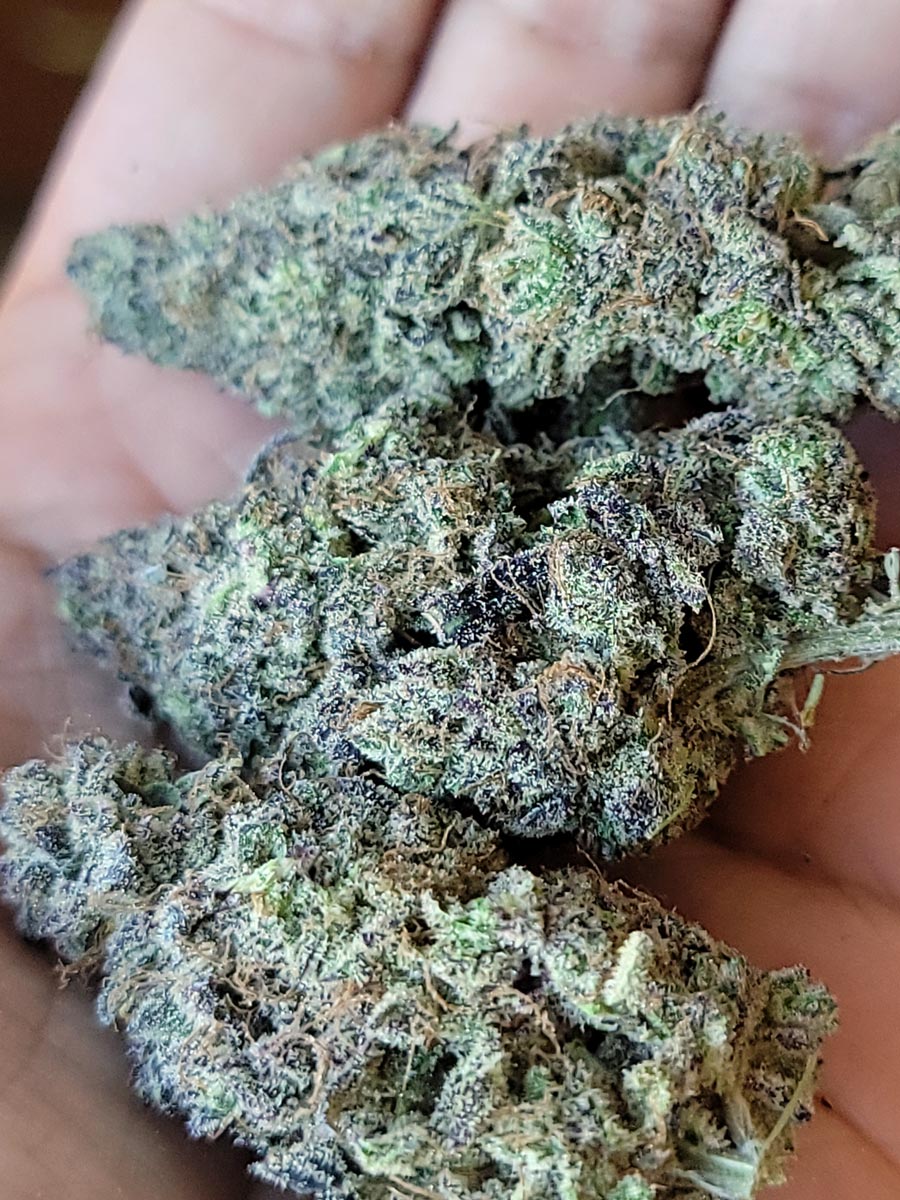
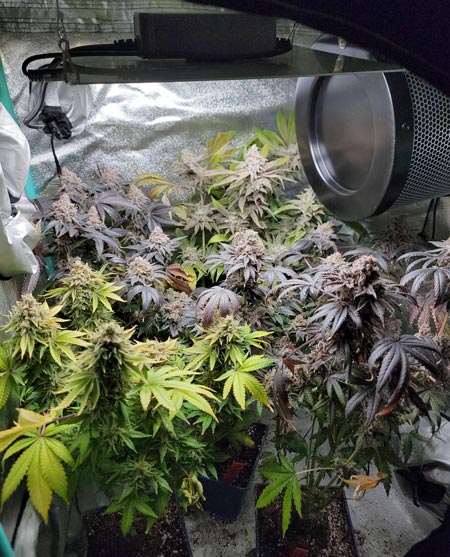
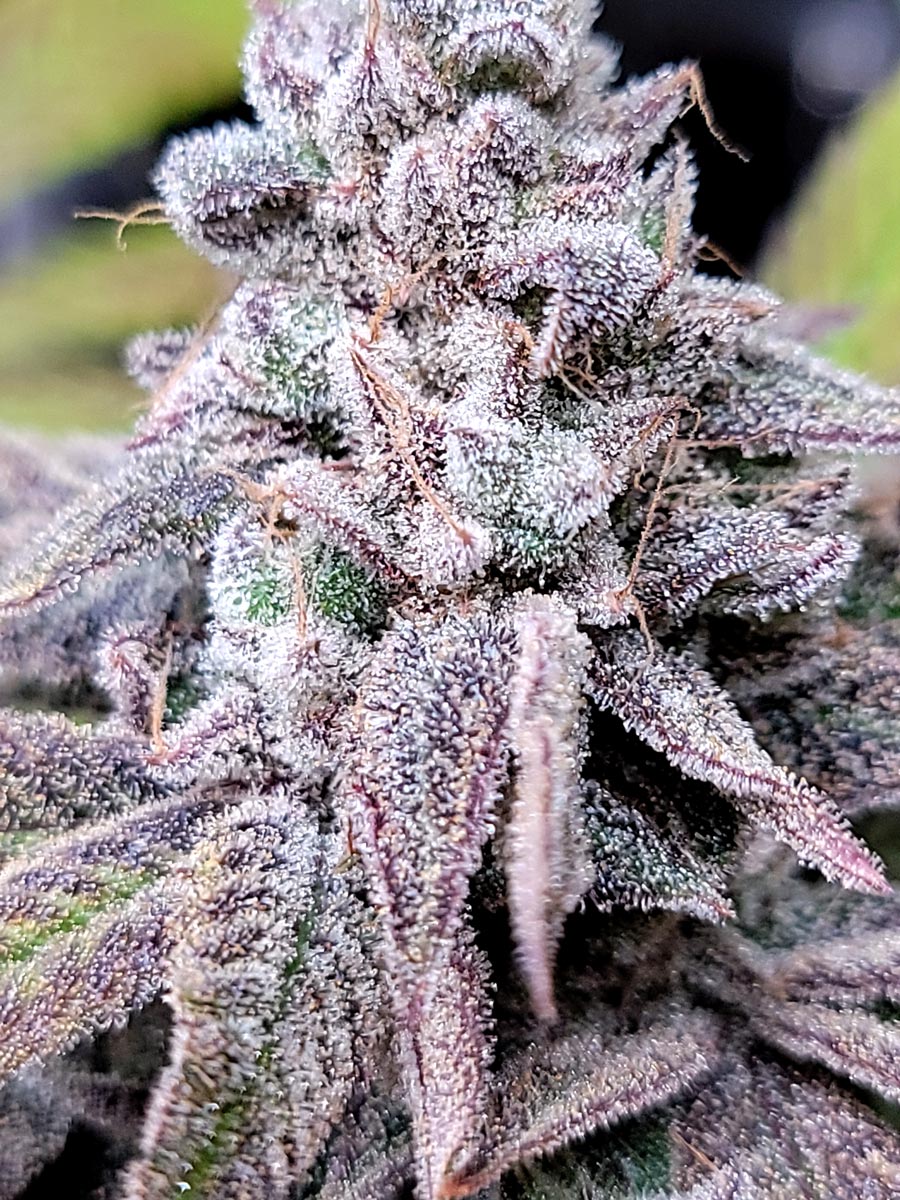
Purple Ghost Candy buds
Mandarin Cookies bud
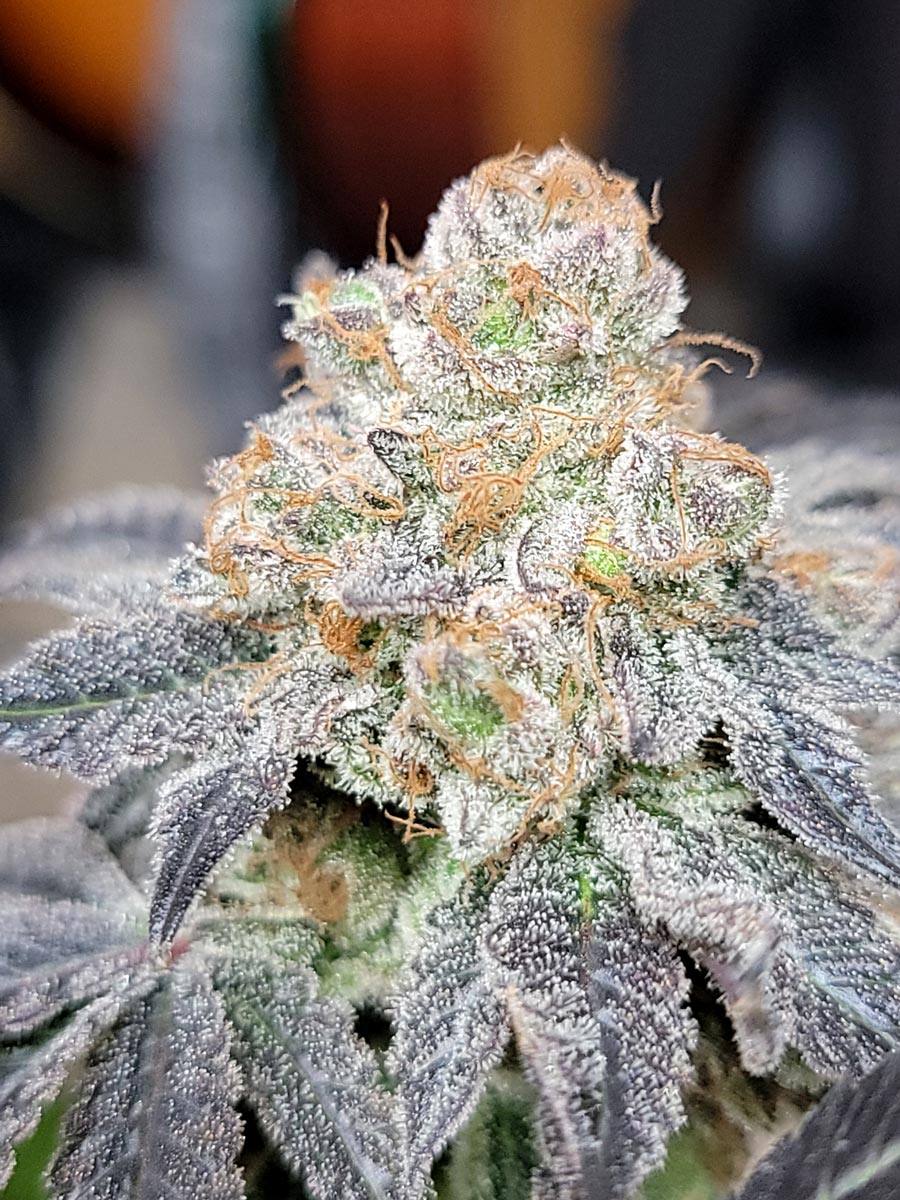
Those Mandarin Cookies buds in hand.