by Nebula Haze
Say “No” to Small, Airy Buds!
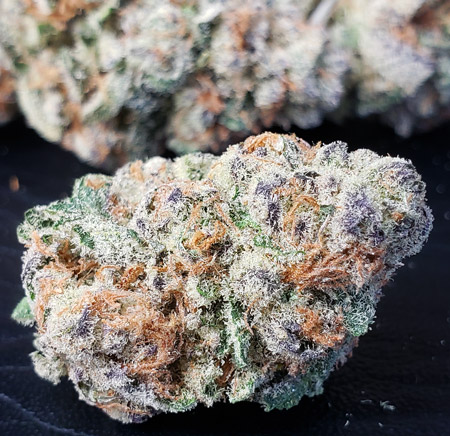
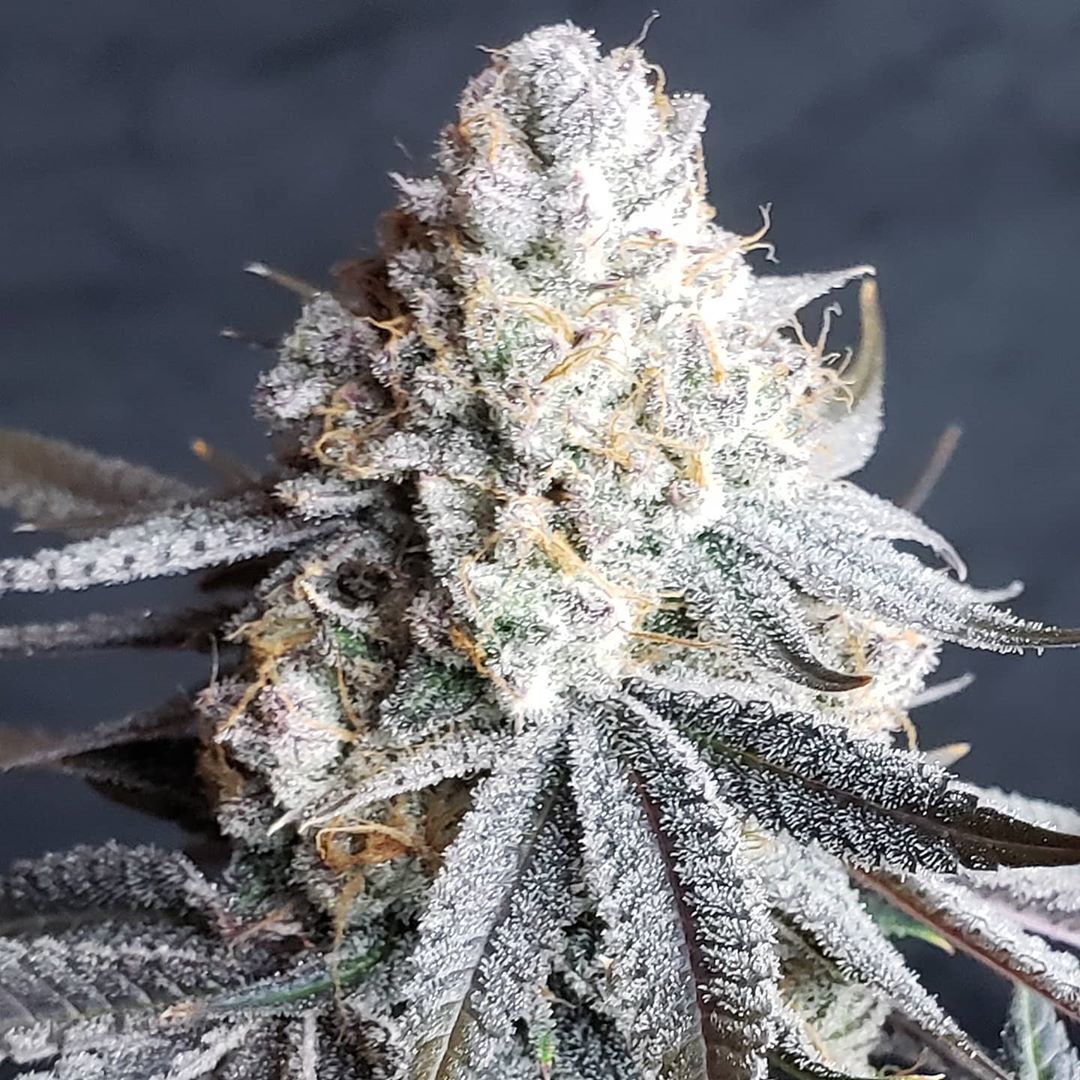
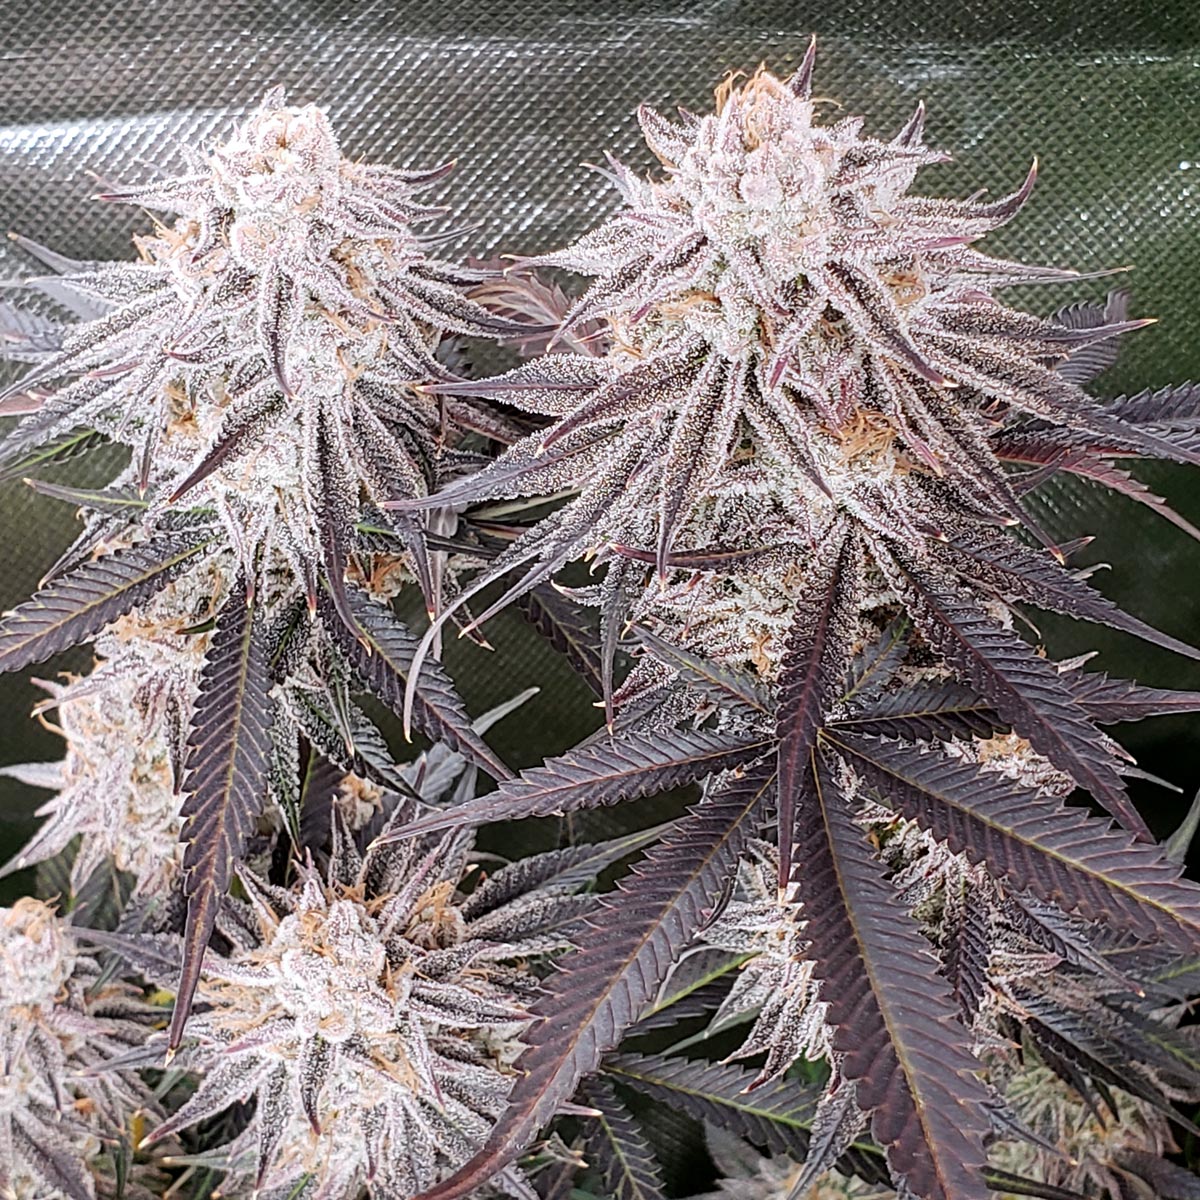
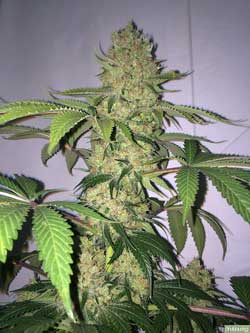
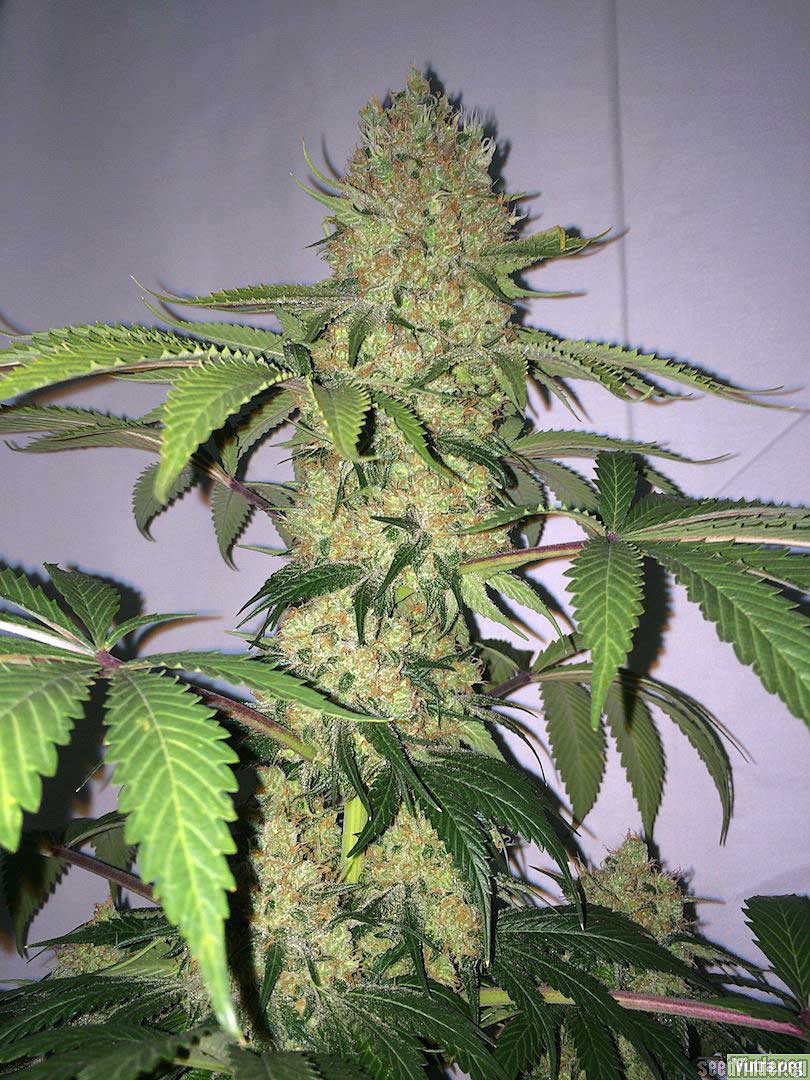
Grow Fat, Dense Cannabis Buds! (like this Purple Ghost Candy)
Top 5 Most Common Reasons for Airy Marijuana Buds
(get a complete breakdown of all the ways to increase bud density in the article below)
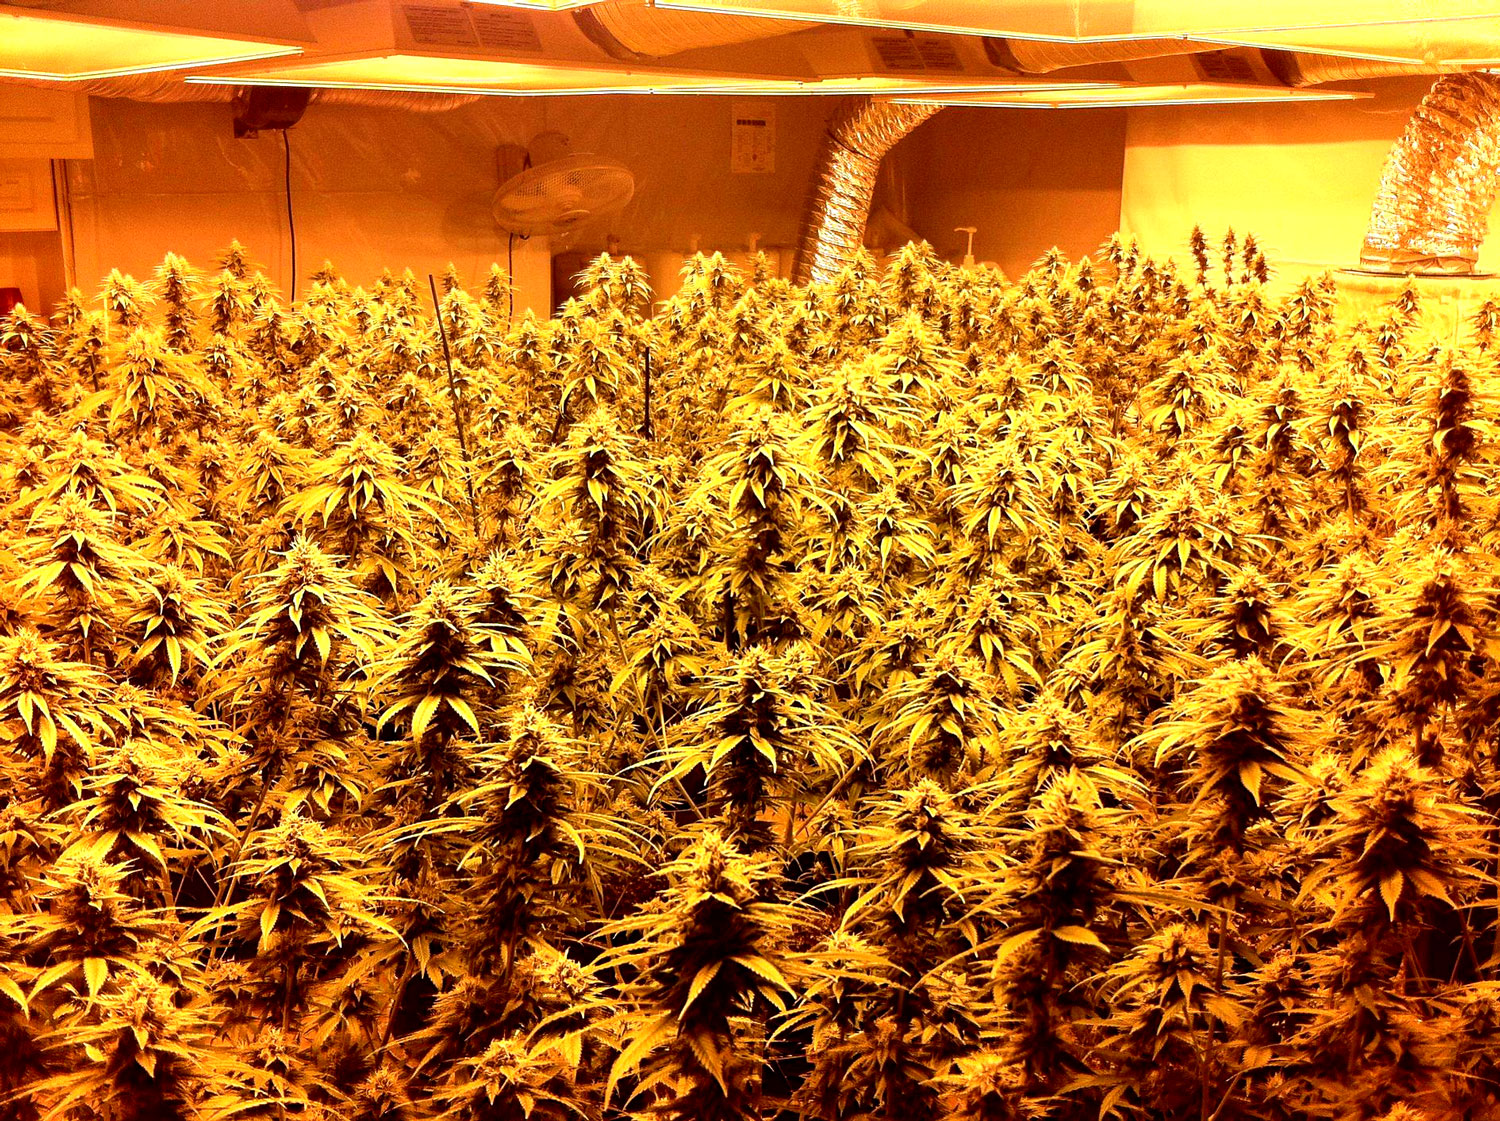
Light – The most common reason buds aren’t dense is the plant didn’t get enough light in the flowering stage. Light is like food for the plant. Although cannabis plants can survive in relatively low light levels, they won’t produce much bud. Up to a point, more light in the flowering stage = bigger buds. On the flip side, too-bright light (less common, but can happen when buds are too close to grow lights) can also cause buds to develop poorly and/or produce airy, hairy fox-tails.
Strain / Genetics – Some strains will only produce airy buds no matter what you do. For example, Sativa plants often grow buds that are less dense, while Indica strains tend to grow more compact buds. Although one isn’t necessarily better than the other, if you want dense buds it’s important to start with genetics that produce dense buds.
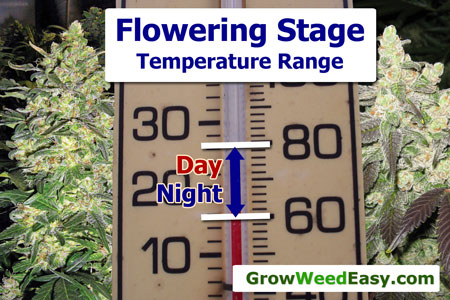
Temperature – Cannabis wants the temperature just right for optimal bud growth. Conveniently, this is about the same temperature as what’s comfortable for humans. Too hot temperatures in the flowering stage (especially above 85°F/30°C) can cause plants to develop loose buds, grow airy foxtails, and experience herming (which makes buds stop fattening and become seedy).
Nutrients – Buds won’t fatten and get dense unless they’re getting the right nutrients at the right time, which means plenty of Phosphorus (P) and Potassium (K) in the flowering stage. Giving too much Nitrogen (found in all-purpose plant food) in the flowering stage can result in smaller, looser buds. Luckily there are many flowering/bloom nutrients that have the perfect nutrient ratios for cannabis bud formation (Example: Dyna-Gro Bloom) so you don’t have to worry about it. Learn more about nutrient ratios. Other nutrient problems and deficiencies can also negatively affect your bud development if left unchecked. However, the most common reason growers see nutrient problems hurt development in the flowering stage is due to deficiencies caused by incorrect pH at the plant roots.
Airflow & Bud Spacing – Poor airflow around buds and lack of strong, direct light will prevent those buds from developing as densely as they could. Buds need a little space to themselves in order to get big and dense, and won’t fatten up if they’re not directly exposed to fresh air and strong light. In the wild, cannabis is a wind-pollinated plant, so it only spends energy growing and fattening buds that are exposed to a breeze and the sun. To make sure the buds are getting a breeze with direct access to strong light, each big cola on your plant should have a few inches of space around it that it’s not sharing with leaves or other buds. It also helps increase bud density if you cut off small or secondary stems before buds start forming (buds tend to get denser when their stem originates from the main base of the plant, which is a key idea behind manifolding).
Never grow loose, airy buds again!
Keep reading to learn how to produce rock hard buds every time
7 Bonus Tactics to Increase Bud Density
In addition to fixing the problems stated above, here’s a complete breakdown of additional tactics to increase bud density (more complete info in the article below or click the links)
Reduce humidity below 55% RH during the last 2-3 weeks before harvest – Lowering the humidity towards the end of the flowering stage triggers a natural plant response that can make cannabis buds more dense as well as increase resin production. This is a good idea even if you’re not worried about density because lower humidity also greatly reduces the chance of losing buds to bud rot.
Density boosting supplements – There are two main classes of bloom-boosters. The first class focuses on enhancing plant processes and uses dozens of various ingredients like amino acids, trace minerals, and natural plant growth regulators (avoid synthetic PGRs). The second class of supplements works by increasing Phosphorus/Potassium levels directly since buds don’t develop properly without them.
Don’t harvest too early – Harvesting too early will prevent your buds from finishing up. They gain a lot of weight and density during the last few weeks before harvest, and you’re hindering all your hard work by not waiting just a little longer.
Dry & cure your buds in jars – In addition to improving taste, smell and potency, drying and curing your buds the right way will cause them to “tighten up” a bit. If you dry your buds improperly or don’t cure them in a sealed container like a glass jar, you’re missing out on almost 50% of what determines your final bud quality.
Don’t overwater your plants – it’s boring but true! Not much to say about this, but don’t overlook this common issue and make sure to water your plants right. If your plant’s leaves are droopy, it means you could be missing out on better growth.
Get a big enough container – If your container is too small your plant just won’t be able to support bigger, denser buds no matter what else you do. Make sure to get the right size container and if possible, get a “smart pot” or “air pot” as they prevent overwatering, increase growth and support larger plants.
- Train plants to create strong main stems – Avoid letting buds form on thin, flexible, or secondary stems. Buds tend to get the most dense when grown on thick stems that have reached the top canopy from the base of the plant. That’s the idea behind training techniques like manifolding. Even if you don’t use any special training techniques, it helps to remove small or stringy branches before buds start forming (especially make to remove stems that haven’t made it to the top of the plant since they will never produce good buds). Ideally, each bud has a nice strong stem and space to itself under the grow light.
Continue reading to learn more in-depth about these tactics and techniques to boost buds density. By the end of today’s tutorial, you will be a density expert.
How to Grow Dense Cannabis Buds Every Time
1.) Provide enough light (but not too much)
Bright but not too bright. When new growers have problems with light, it’s usually that their grow light is under-powered. A sunny window or a tiny LED grow light that uses less than 50W is seriously underpowered even for one plant. Although plants will grow under these types of light in the vegetative stage, they’re not powerful enough to drive dense bud growth in the flowering stage. Which cannabis grow light works best?
Even if the plant is healthy, buds never thicken up properly if they don’t get enough light in the flowering stage
Light is food for the plant, and buds are hungry!
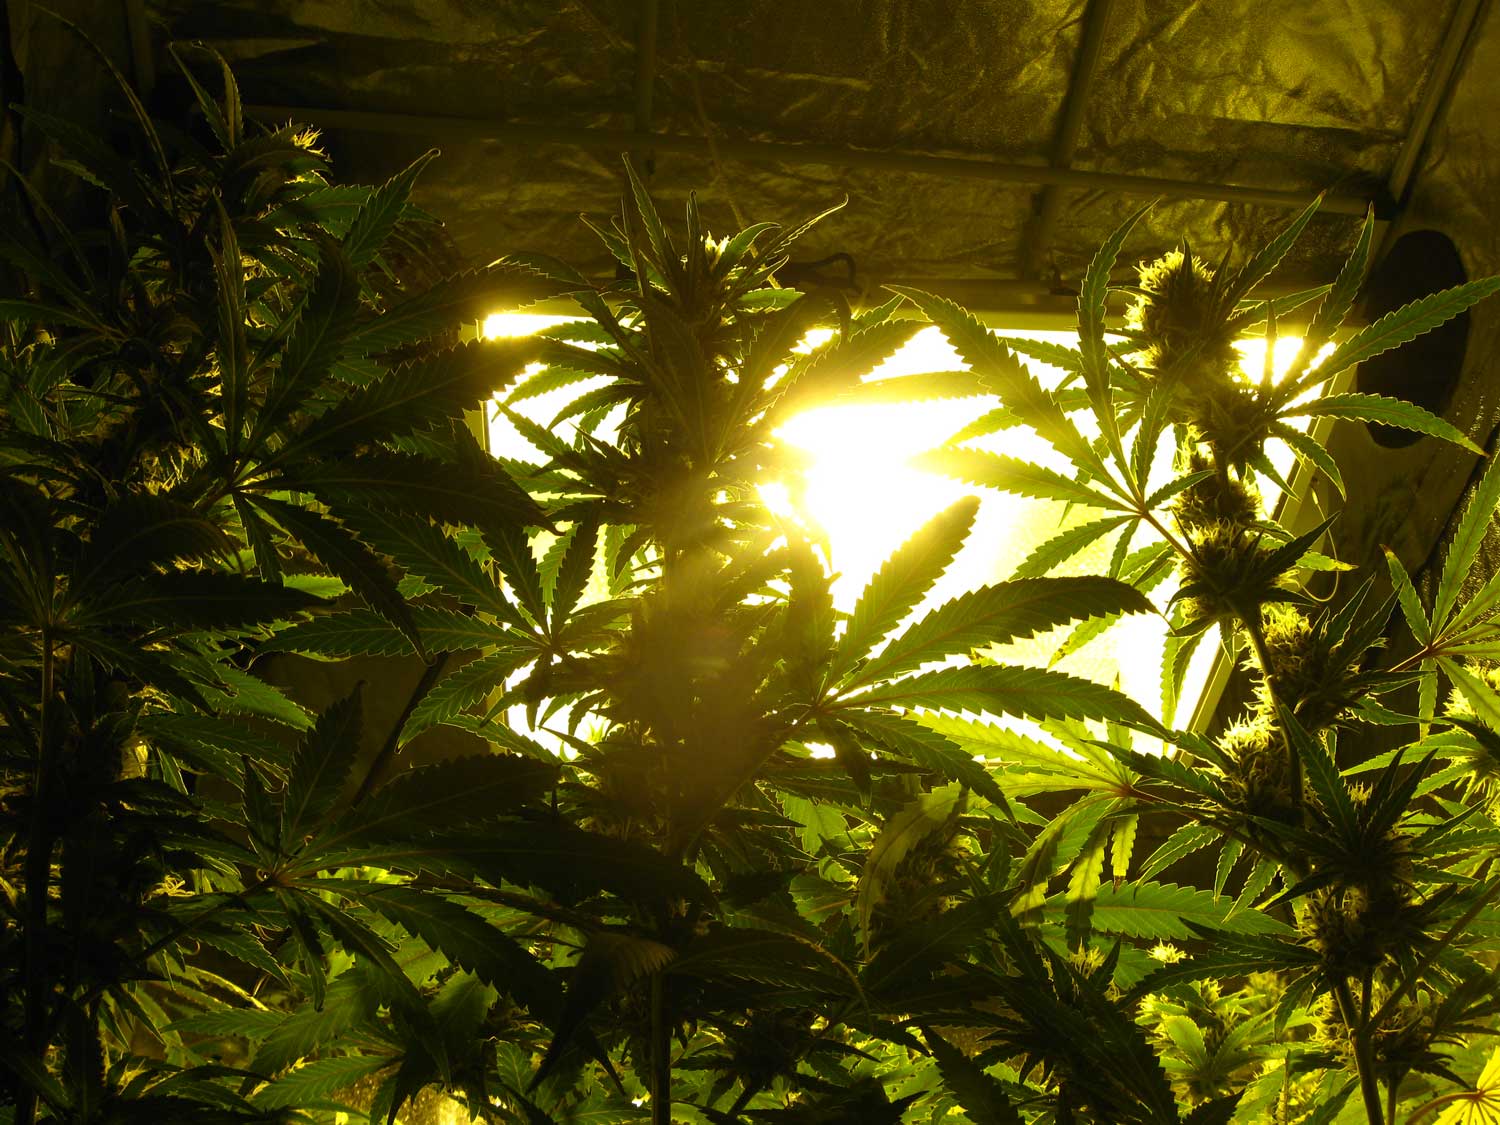
“I’m sooooo hungry. Give me light!” ~ Cannabis bud
The next most common reason growers have trouble with light levels is they keep their grow lights too close or too far away from their plants.
Basically…
- Too far = reduced yields & lower bud density
- Too close = bleaching, burning, herms, foxtails, & poor bud formation
How far away to keep different types of lighting
- LED grow lights – It’s a good idea to look at the product details for your LED to learn how far away it should be from your plant because every model is different. As a general rule of thumb, 150W LEDs and lower can usually be kept less than 12″ (25 cm) away. Bigger 150-300W LED grow lights are usually kept 18-24″ (45-60 cm) from the tops of the plants. For bigger than 300W, LEDs may need to be kept over 24″ (60 cm) away. Regardless of what is listed as the ideal distance, always watch your plants for signs of bud and leaf burn. Some plants are more sensitive than others and may show signs of stress even when the grow light is the recommended distance away.
HIDs (MH, HPS, LEC, CMH) – depends on the type and size of the grow light – learn how far away MH/HPS grow lights should be from your plants. For LEC/CMH, a 315W CMH should be kept 18-24″ from your plants, and 630W CMH should be kept 24-30″ away from the tops of plants.
Fluorescents, T5s, & CFLs – keep as close as possible without hurting your plants with heat. If cool enough, these can be kept just inches away from plants. Make sure all parts of the plants are within a few inches of a fluorescent bulb for the densest buds. However, it’s important to note that fluorescent lights, in general, tend to produce lower density than other types of grow lights.
Outdoor growers should try to ensure that plants get 8+ hours of direct sunlight every day, but you may want to protect plants with a screen on scorching hot days.
If you’re looking to maximize bud density under LED grow lights, you’re aiming to keep lights as close as possible without signs of plant stress. However, LED grow lights can also be kept too close, which burns your buds and may cause bleaching, hermies, loose buds, and/or foxtails. Every LED has an optimal distance. You can usually find the manufacturer’s recommendation in the LED’s product details.
A 200-300W LED grow light performs great about 18″ away from the tops of cannabis plants. I’ve had excellent results at this distance with the 200W Spider Farmer SF2000 and 300W Mars Hydro TSL 2000.
LED burnt buds (from LEDs being too close) often end up growing thin, loose, and leafy
It goes both ways. Buds also don’t fatten properly or get dense if LEDs are kept too far away
MH/HPS lights produce intense light levels and give off a color spectrum that gift you with big yields and very dense buds. MH is used in the vegetative stage, and HPS is used in the flowering stage (typically you can use either bulb in the same fixture, so it’s a matter of switching the bulb). You can also use HPS from seed to harvest but plants tend to grow tall and stretchy in the vegetative stage due to the red/yellow color spectrum of HPS. Here’s a quick guide to how far to keep MH/HPS grow lights away from your cannabis plants:
- 150W – 8-12″ away (start at 10″)
- 250W – 10-14″ away (start at 12″)
- 400W – 13-19″ away (start at 14″)
- 600W- 14-22″ away (start at 16″)
- 1000W – 18-30″ away (start at 20″)
HPS (high-pressure sodium) grow lights are much less popular than they used to be because they have big hot bulbs and are less user-friendly than LEDs. However they are one of the best grow lights for dense buds. HPS consistently produce intense density even with the smallest sizes like 150W and 250W.
CMH lights (also called LEC) are like a combo between MH and HPS and they produce comparable yields and density per watt. However, one advantage of CMH lights is they produce an above-average amount of trichomes compared to other types of grow lights. Learn more about CMH grow lights.
- 315W – 18-24″ away (start at 20″)
- 630W – 24-30″ away (start at 26″)
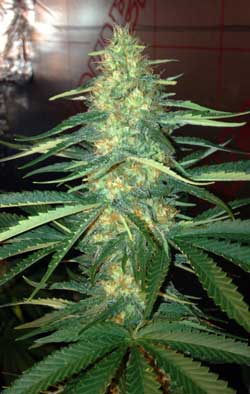
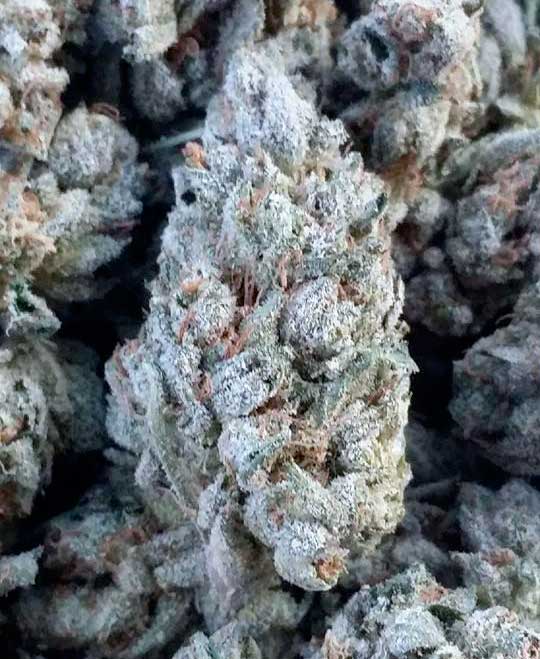
CMH grow lights produce excellent density and make buds sparkle. I grew this bud under this 315 LEC.
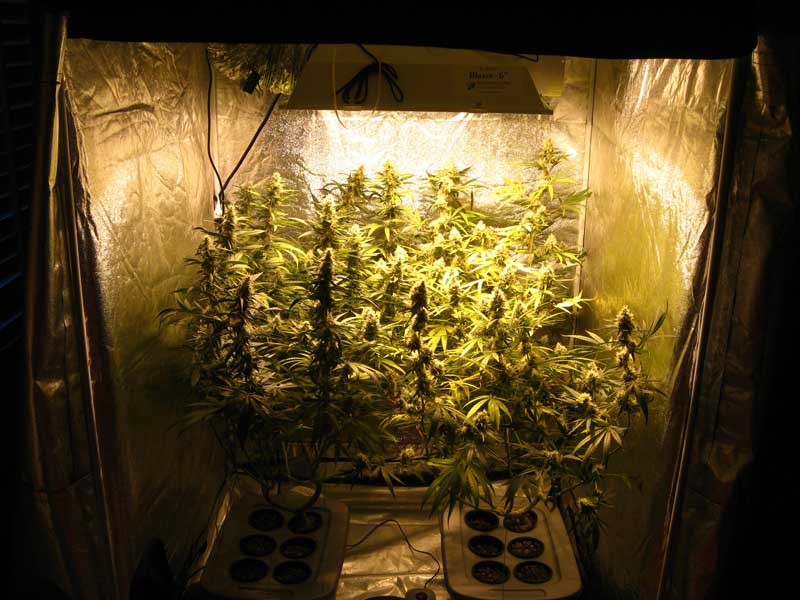
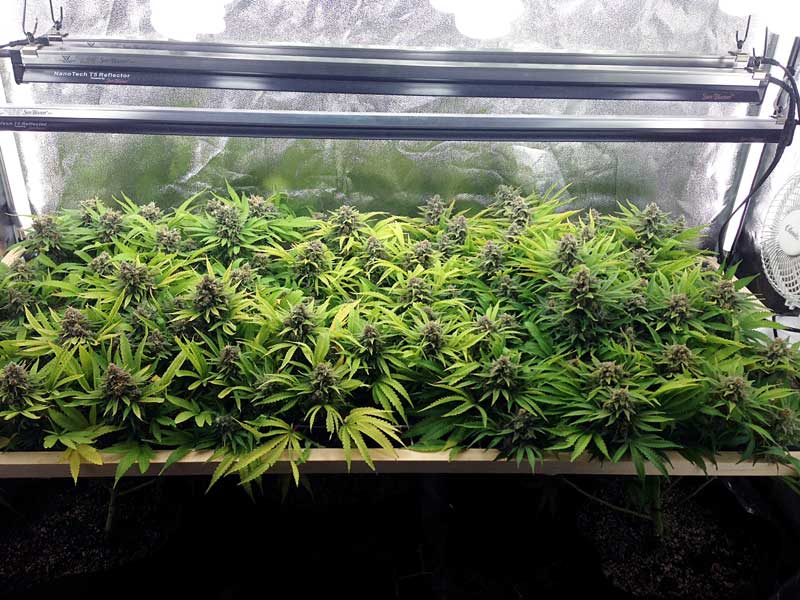
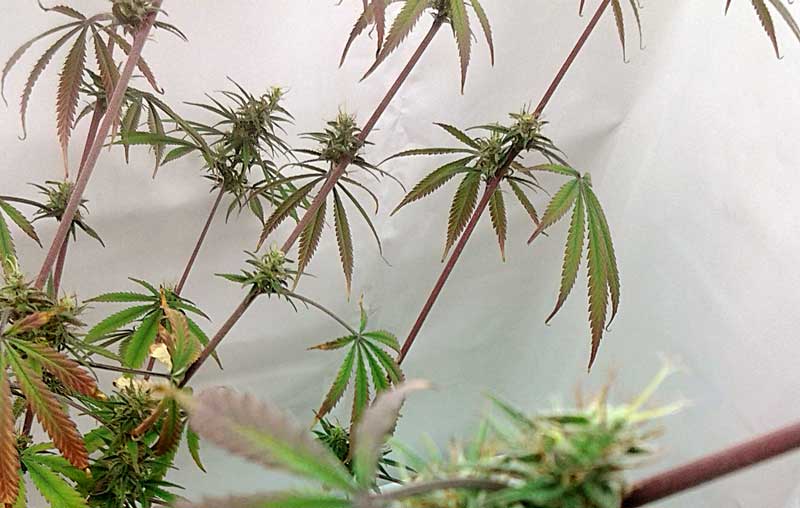
T5s, CFLs, and other fluorescent grow lights should be kept as close to buds as possible as long as heat is under control. If they’re kept more than a few inches away from the buds, like these ones, the buds will never fatten up or become dense
Read the full tutorial on optimal grow light distance from plants
No matter which grow lights you’re using…
- Use reflective walls to get as much light as possible to your plants
- Keep lights close to the top of your canopy without increasing heat to unsuitable levels or light-burning plants. Close but not too close. It’s important to find out how far your grow lights should be for optimum growth.
- Make sure all bud sites are bathed in bright light. Any buds in a shadowy part of the plant won’t become dense.
2.) Grow a strain that tends to produce dense buds
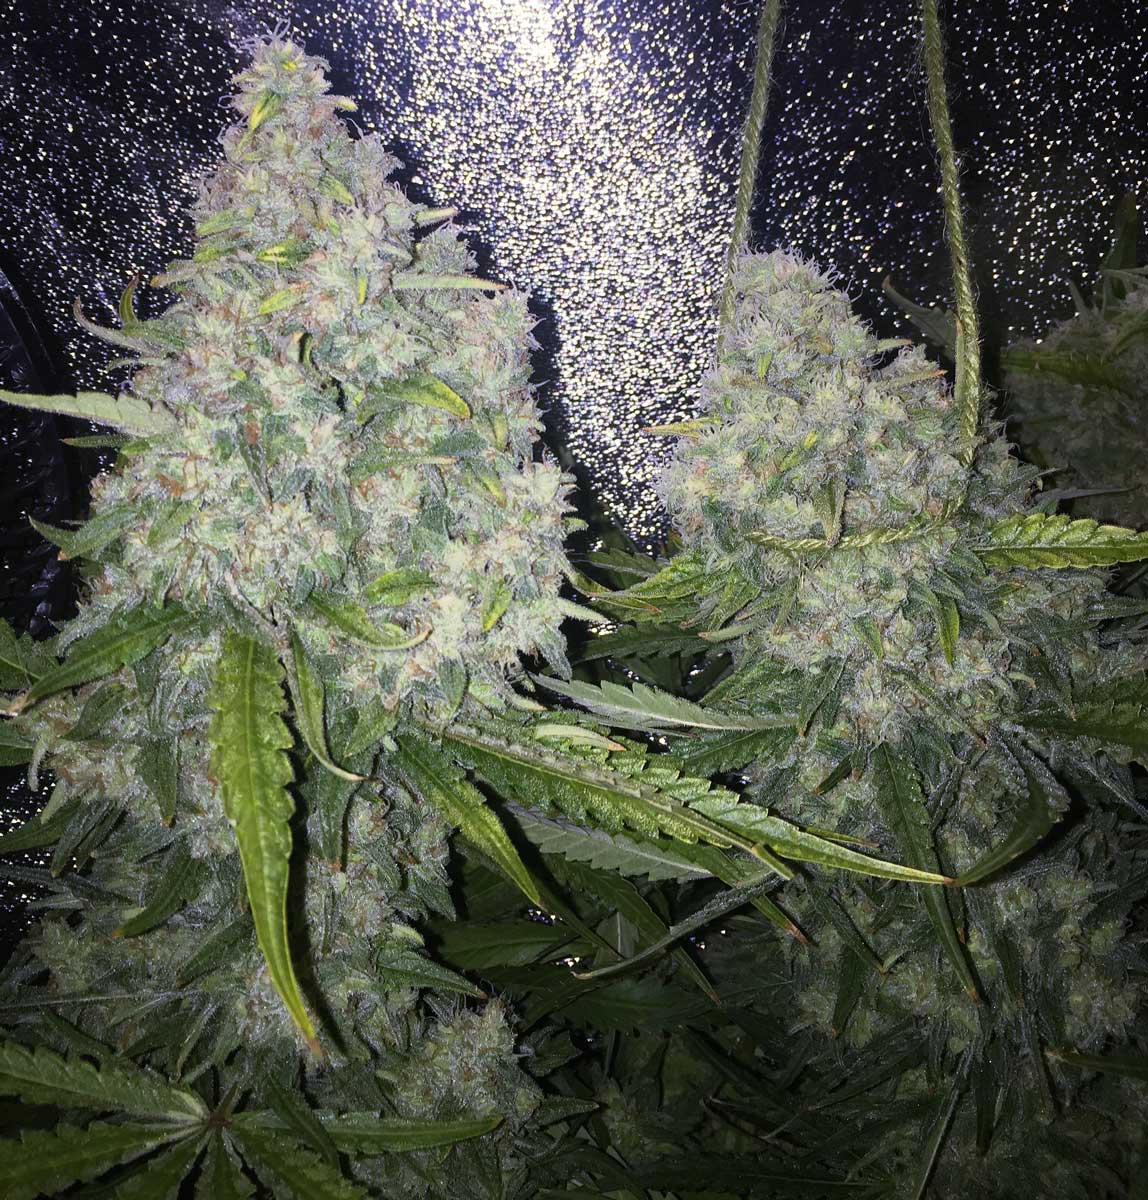
Genetics play a huge role in how your cannabis plants grow, including the appearance, smell, and taste of their buds.
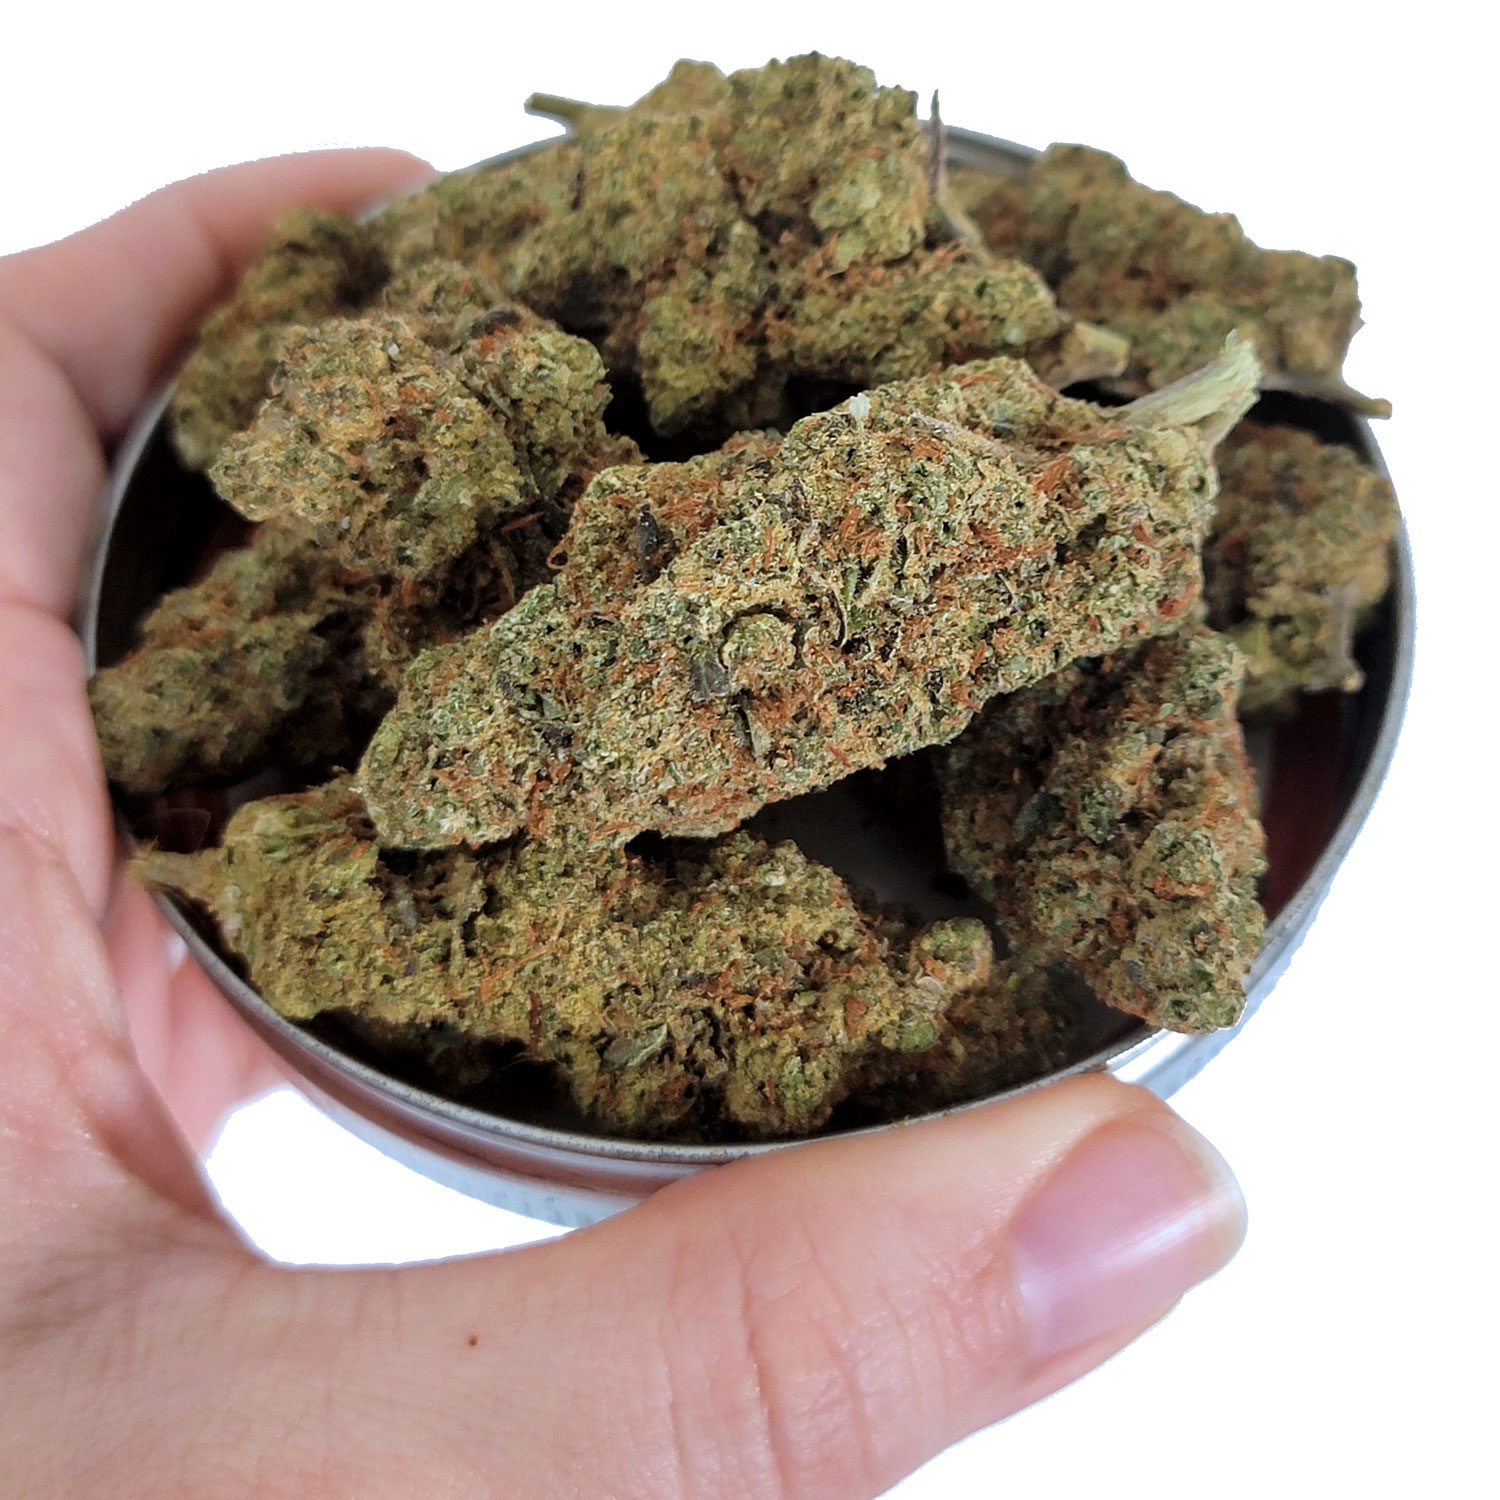
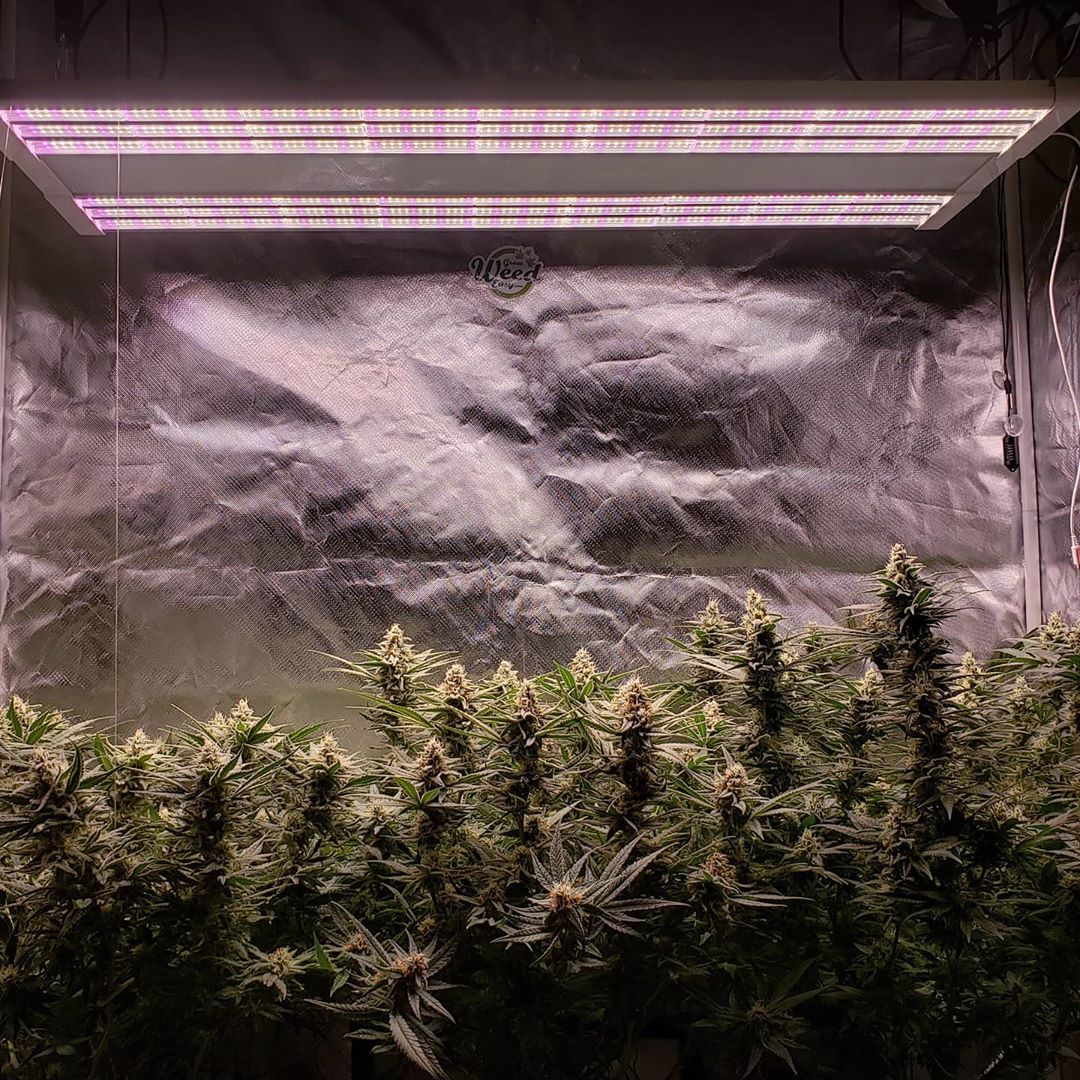
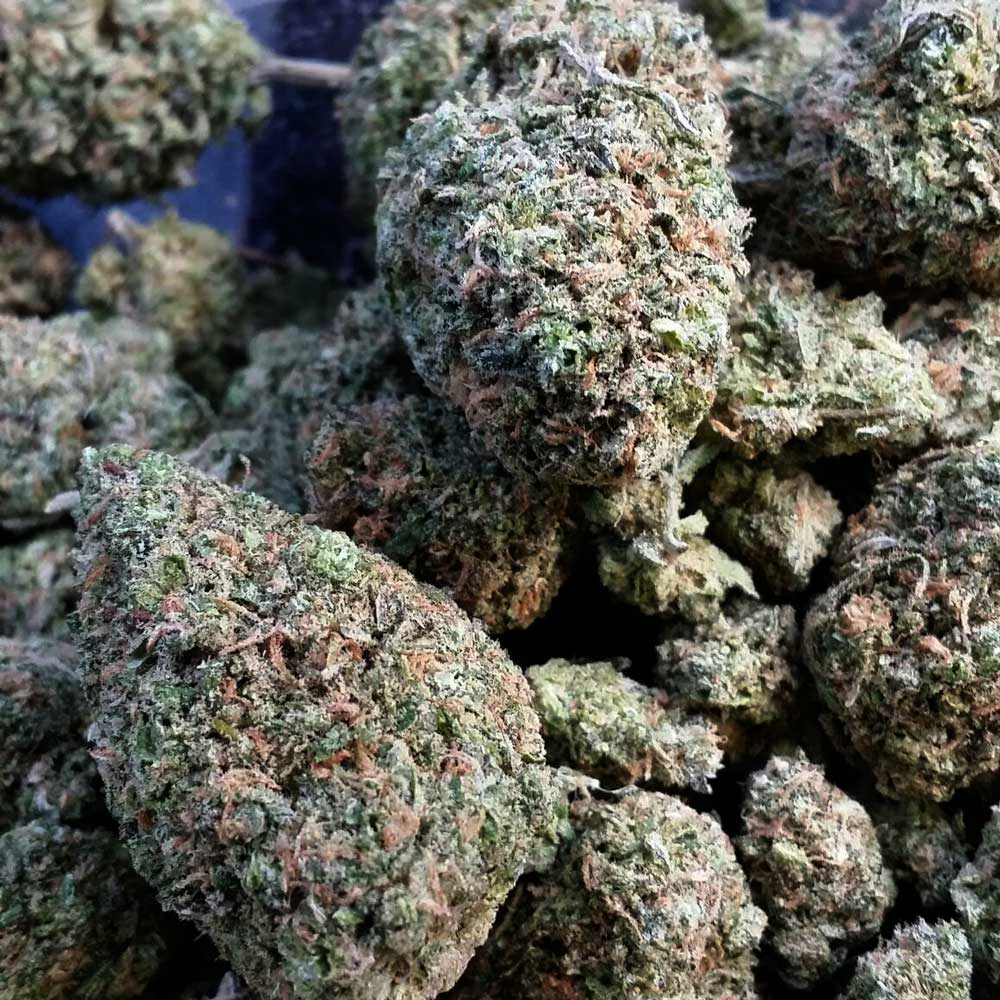
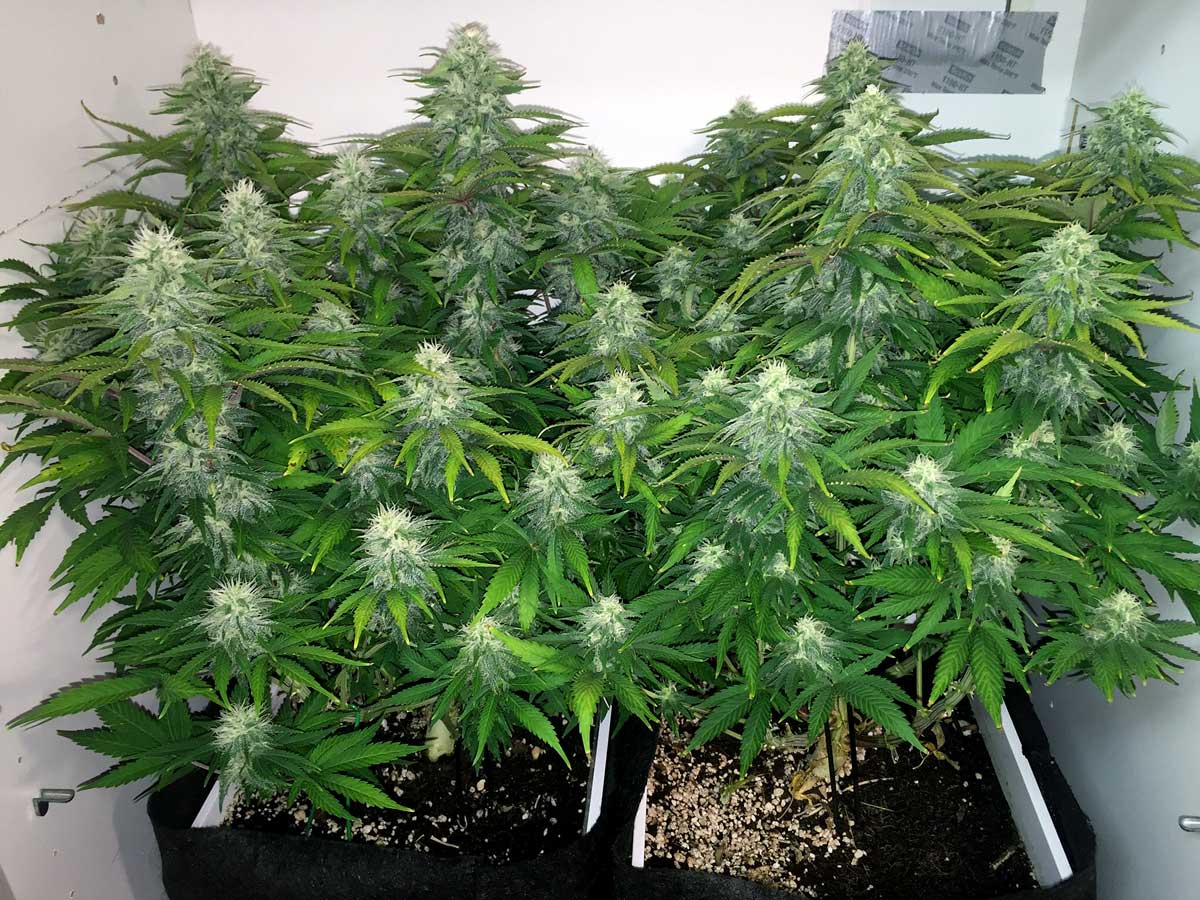
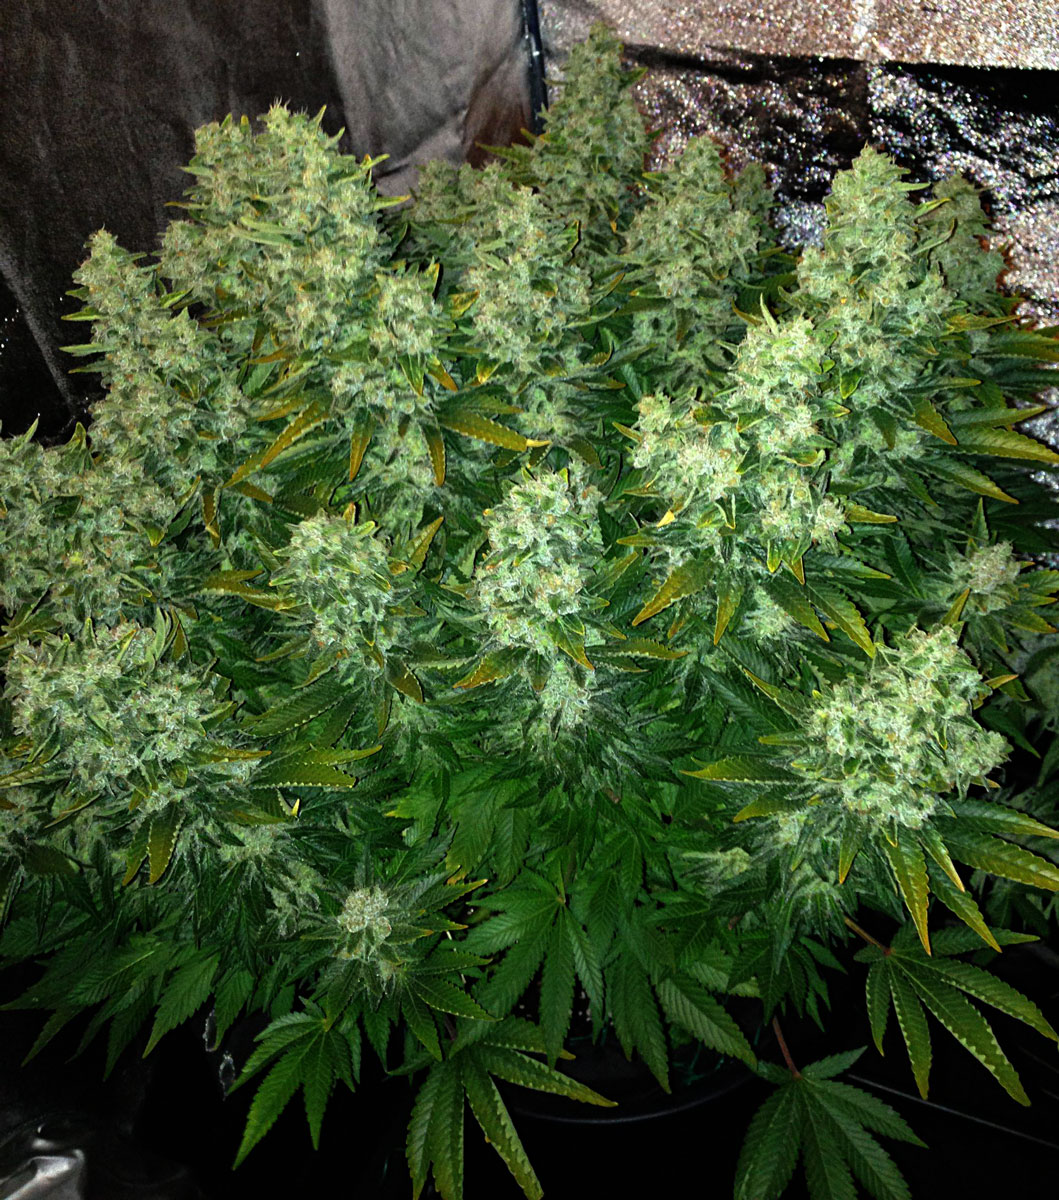
Indica-dominant strains tend to produce more dense buds (though not always of course). The indica-leaning buds pictured here are incredibly dense and were grown under HPS grow lights, but the majority of strains could never achieve this density no matter what you do as a grower. To a certain degree, density is determined by strain.
Some sativa-leaning strains tend to produce less dense buds, but also provide a cerebral “daytime” effect that many growers love. Sativa-dominant strains can still be high-yielding so you may end up with very long buds as opposed to small thick nuggets like with some indica-leaning strains.
Seeing different grows featuring a strain will help give you an idea of what the buds of that particular strain tend to look like.
Important! There are sometimes different versions of strains by different breeders. You can often find several versions of very popular strains, and each version can grow wildly different from each other and which produce different results.
“White Widow” from one breeder may be completely different that “White Widow” by another breeder. So when researching strains, always pay attention to the breeder in addition to the strain name. Learn about how to research and find the right strain.
How to Research a Marijuana Strain
(or read the full tutorial here)
- Make a list of a few possible strains to grow – If you don’t already have an idea about which strain you want to grow, it helps to start by narrowing down your list of possible strains. When I’m researching for a new grow, I usually start with a big seed bank, since they give you lots of helpful information about each strains. These big seed sources usually have a “strain selector” option that lets you put in the specific features you’re looking for and get a list of results. Check out our trusted seed vendor page to get strains by good breeders.
- Search for a grow journal with pictures of your strain during the grow process – Type “STRAIN-NAME grow” into Google.com and look at the regular results plus the Google image results. When looking at image results, it’s important to click through to the page instead of just looking at the image so you can learn more. These steps may give you good leads toward finding a grow journal featuring your strain, but not always. Remember to also pay attention to which breeder the grower got their strain from.
- Search for the strain name on Youtube – you may possibly find people who may have grown the strain and documented their grow with video. Video is a great way to give you an idea of your strain might look like in the flowering stage, and lots of growers post full video grow journals on Youtube. Again, also pay attention to the strain breeder.
- Find the strain breeder on social media – If there’s a particular breeder you’re interested in, see if you can find their social media account. Many breeders upload pictures and information about their strains. Many breeders will also answer questions
- Find the breeder’s website – Similar to social media, many breeders have a website where they have more information about their genetics and where to get them.
- Seedfinder – I like the site http://en.seedfinder.eu/ for strain research. It is one of the best ways to find out the genealogy and ancestry of a strain by a particular breeder. It has growing reviews and pictures for some strains which are really helpful, but that can be hit or miss since many strains are missing any type of grower feedback. Some of the reviews are in German or other languages. You can translate almost any language into English by copying and pasting it here: https://translate.google.com/

Examples of Dense Photoperiod Strains
- Bruce Banner #3
- Cinderella 99
- Grape Ape
- Laughing Buddha
- Lemon Cake
- Kraken
- Platinum Cookies (ultra-potent!)
- Psychotropic Mass
- Purple Bud
- Purple Star Killer
- Wedding Cake
- White Widow (version by 00 Seeds)
- Zkittlez Glue (version by Flavour Chasers)
Examples of Dense Autoflowering Strains
- Berry Ryder Auto
- Big Bomb Auto
- Big Stilton Auto
- Gorilla Glue Auto
- Lemon Auto
- Monster Mass Auto
- Pineapple Express Auto
One last thing to keep in mind… Looks and density are important to many growers, and bud appearance is part of the whole experience when using cannabis.
I love dense buds as much as the next grower (how do growers maximize trichome production?)
…But when it comes down to choosing the strain, I recommend seeking strains that produce the effects you like as opposed to thinking only about density or looks. Some strains may not produce buds that look as dense as what you see in magazines and online but will give you exactly the effects you are looking for.
These Sour OG buds weren’t the most dense, but the bud effects were out of this world
3.) Keep the temperature under 85°F (30°C)
While it isn’t always possible to control temperature, there’s a lot you can do (especially indoors) to keep temps at the optimum levels for bud development. Choosing a suitable strain for your growing environment will also make a big difference.
Cannabis plants like temps around 65-80°F (18-26°C) in the flowering stage for best development. Temps over 85°F (30°C) usually makes buds grow parts that are noticeably more airy than the same plant grown under proper temps.
- Indica-leaning strains are better at handling cold
- Sativa or equatorial strains are better at handling heat
Too much heat triggers heat burn, airy buds, fox-tailing and also reduces potency and smell, especially for indica-leaning strains which are less resistant to heat. High temps can also lead to seedy buds if your plant herms as a result of the stress.
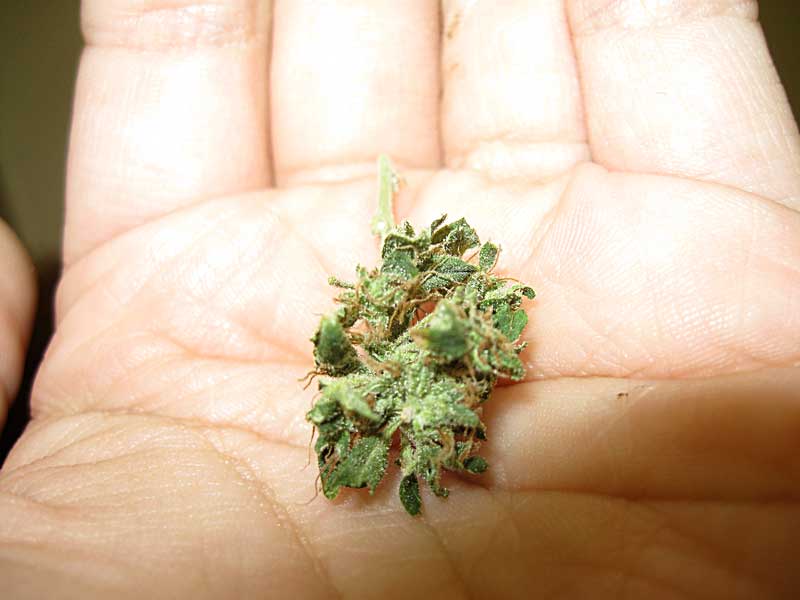
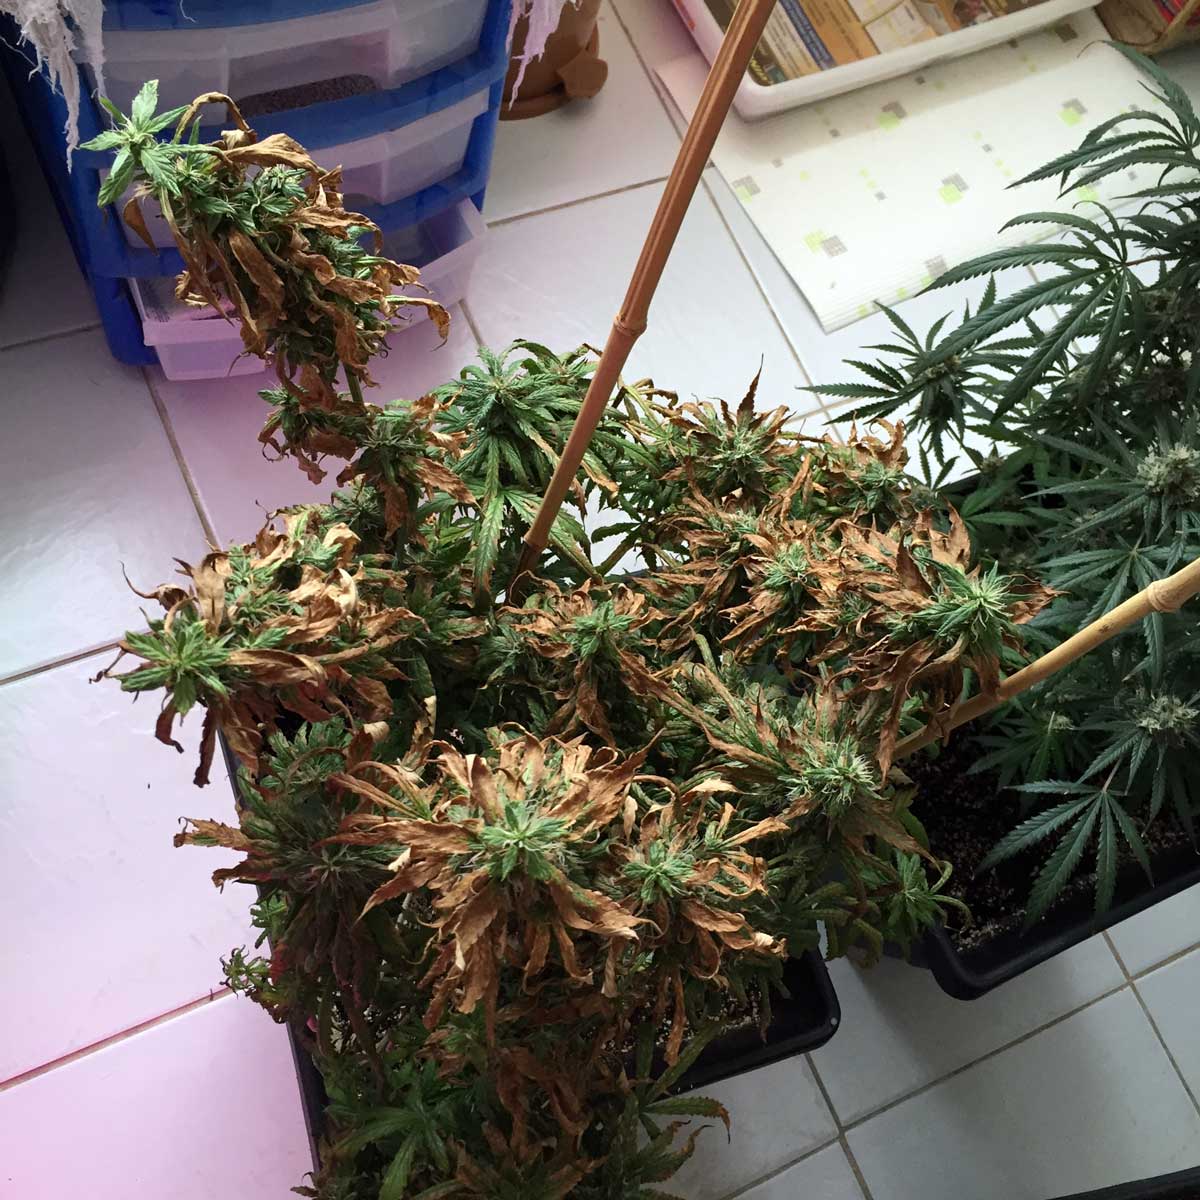
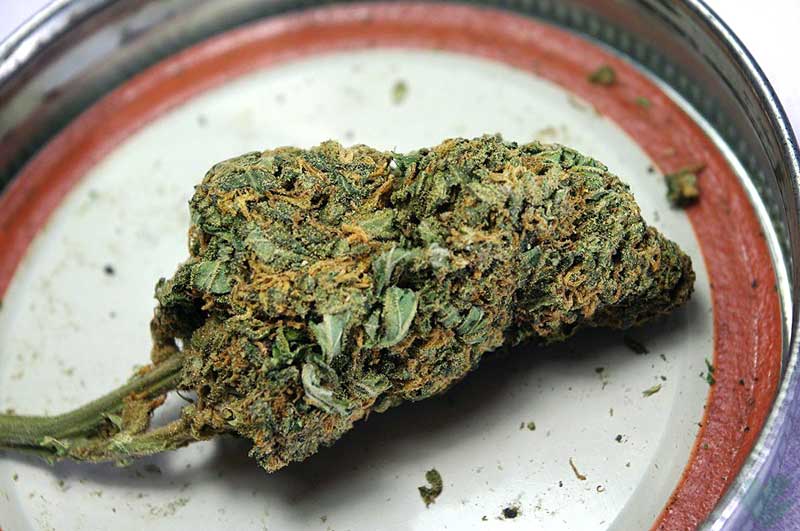
This bud was exposed to high temps and never really grew more than a few calyxes and lots of sugar leaves
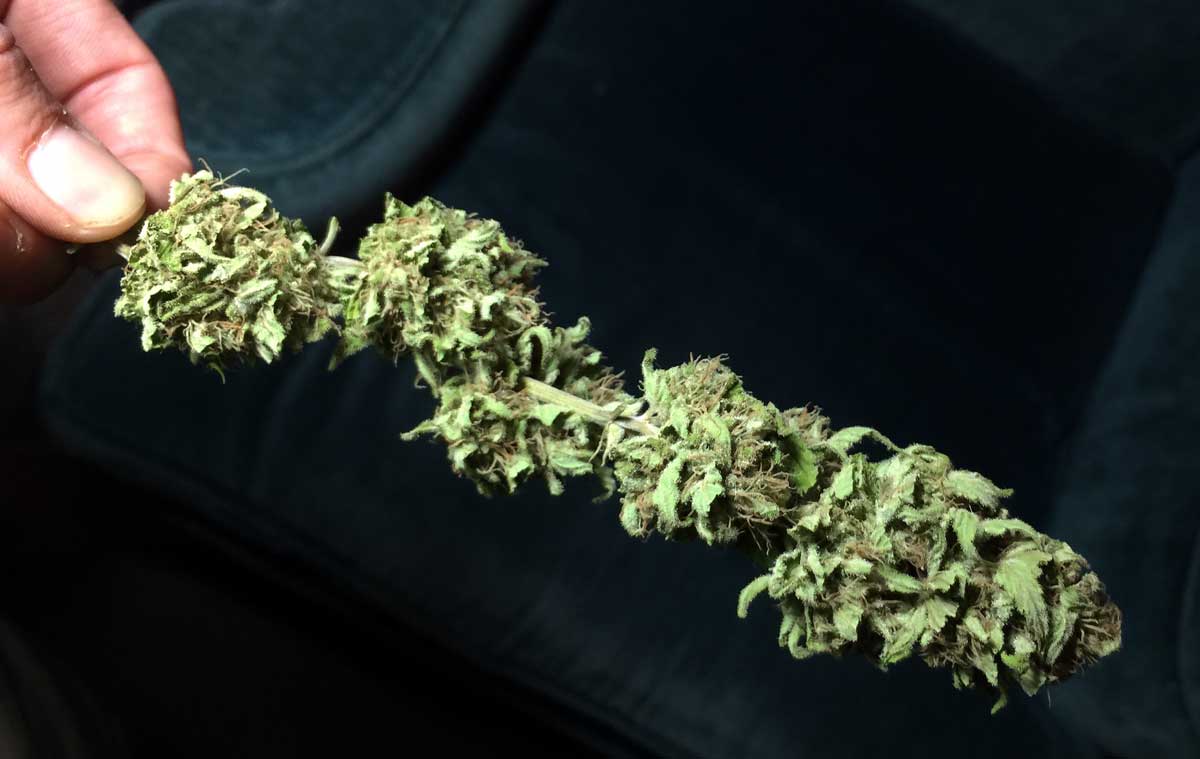
Fox-tailing caused by heat – the entire bud is larfy and airy
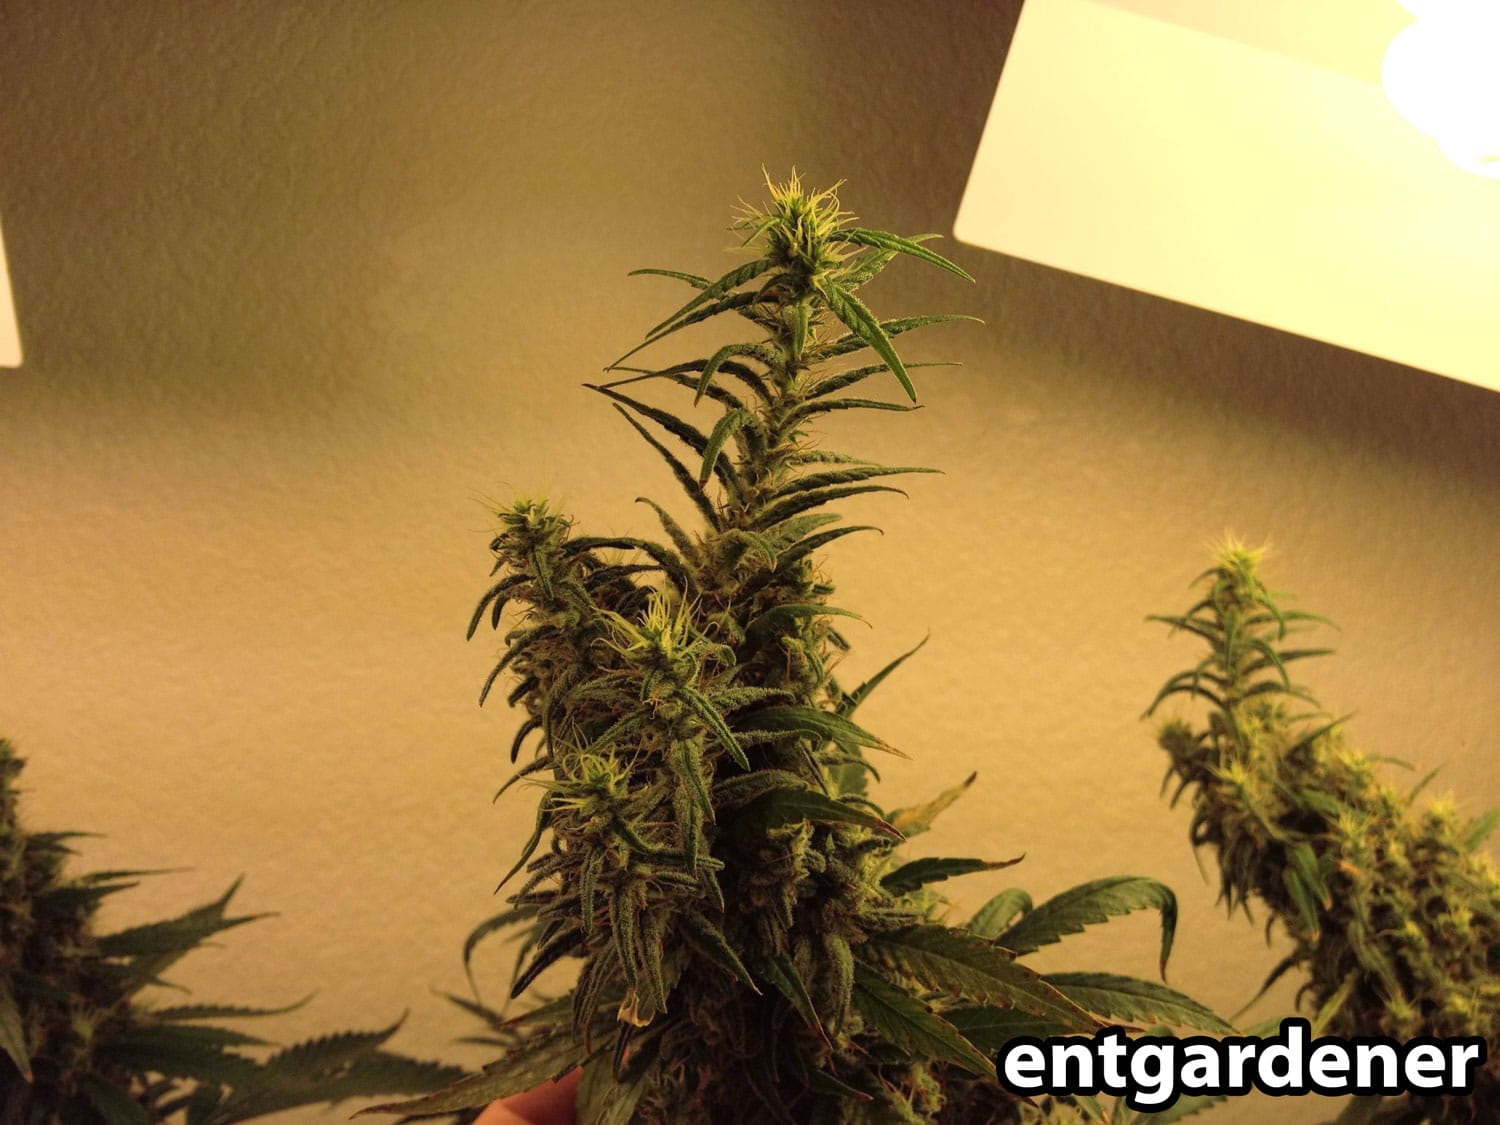
Too much heat causes thin buds and strange growth patterns
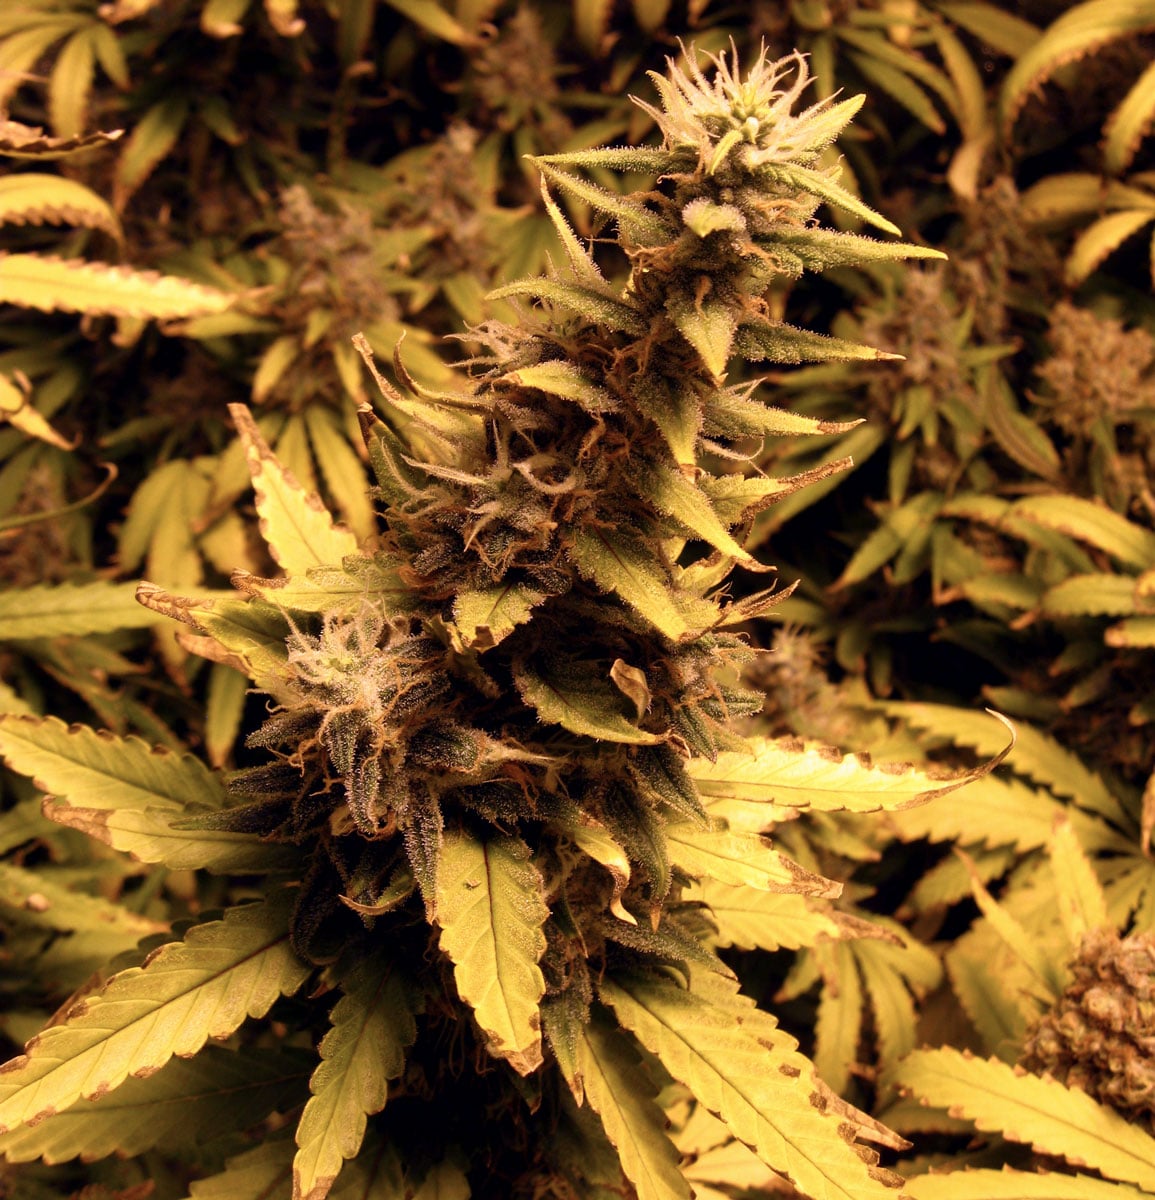
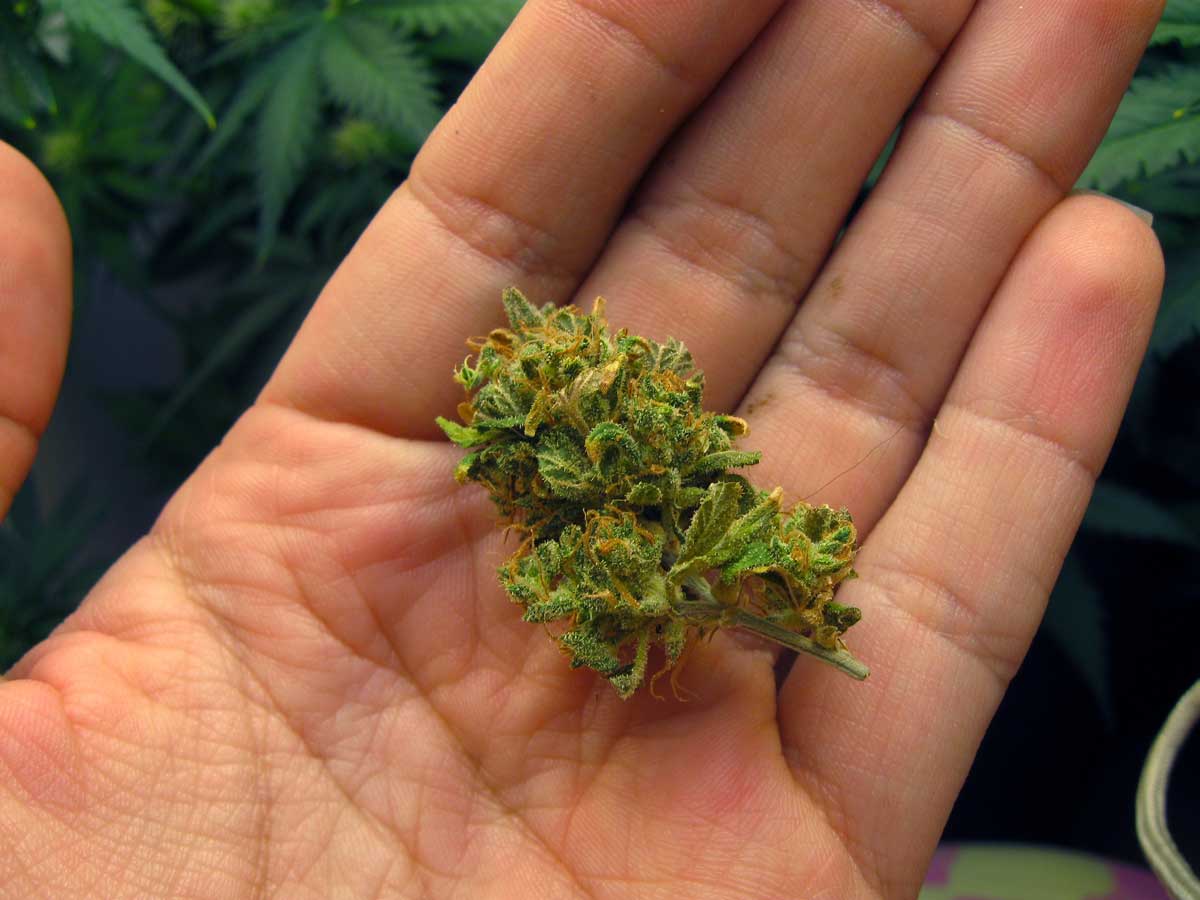
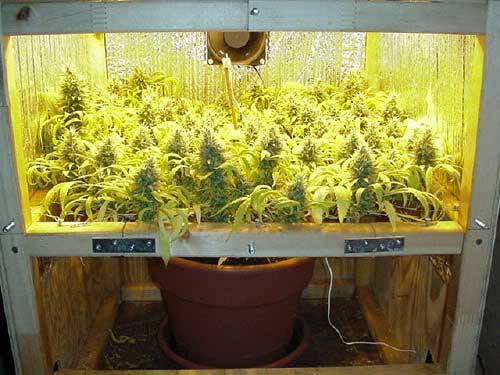
Too-cold temps (especially during first 6 weeks of flowering) are less common but can also cause airy buds that don’t ever fatten up and grow dense.
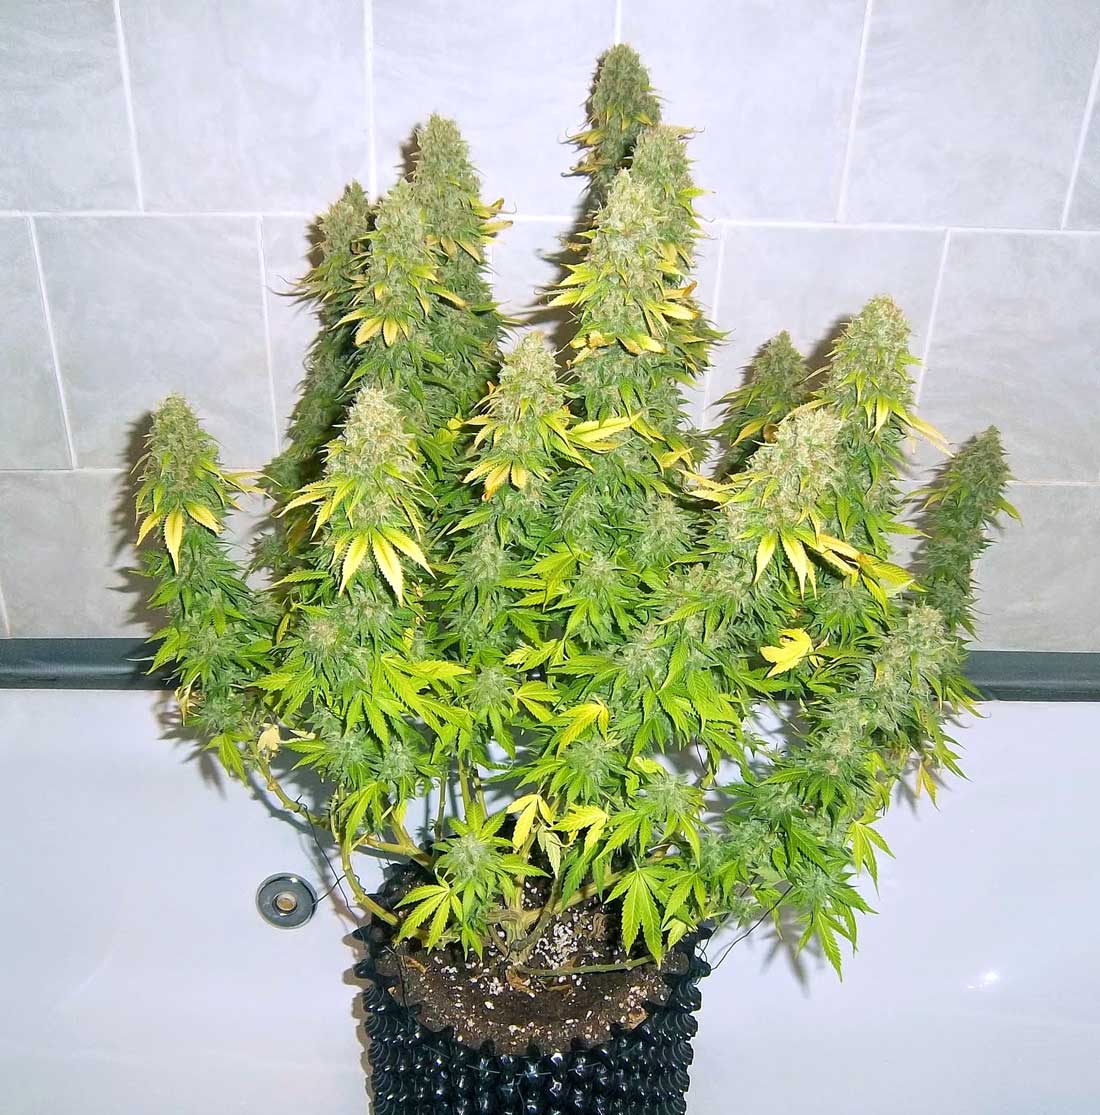
Cold temps can also keep buds from developing, like this plant grown in a cold basement
Cold temperatures can also cause leaves and stems to turn purple. Purple leaves can be problematic since green leaves make more energy from light. That’s why it’s a good idea to avoid letting leaves turn purple too early in the flowering process.
Cool temperatures tend to bring out purple, but this reduces yields if it happens early in the flowering stage so keep plants warm until close to harvest
Although indica-leaning strains tend to be more cold-resistant and sativa-leaning strains tend to be more heat-resistant, almost all strains available today are some sort of hybrid. Instead of relying just on a strain’s classification as Indica or Sativa, it’s important to learn about the particular strain and how it reacts to heat and cold. Even more importantly, watch your plant for signs of stress!
4.) Nutrients – Use the right N-P-K ratios for the flowering stage! (but don’t go overboard)
Give your plants the right ratios of cannabis nutrients during the flowering stage (while avoiding nutrient burn). Not only does this help you avoid nutrient deficiencies, but it also gives your plant the building blocks needed to make buds.
Don’t forget about pH! It can be tempting to ignore this part, but pH is also incredibly important when it comes to nutrient absorption. Managing pH properly is one of the best ways to make sure that plant has easy access to nutrients at the roots.
The N-P-K values are listed on the back of most nutrient bottles
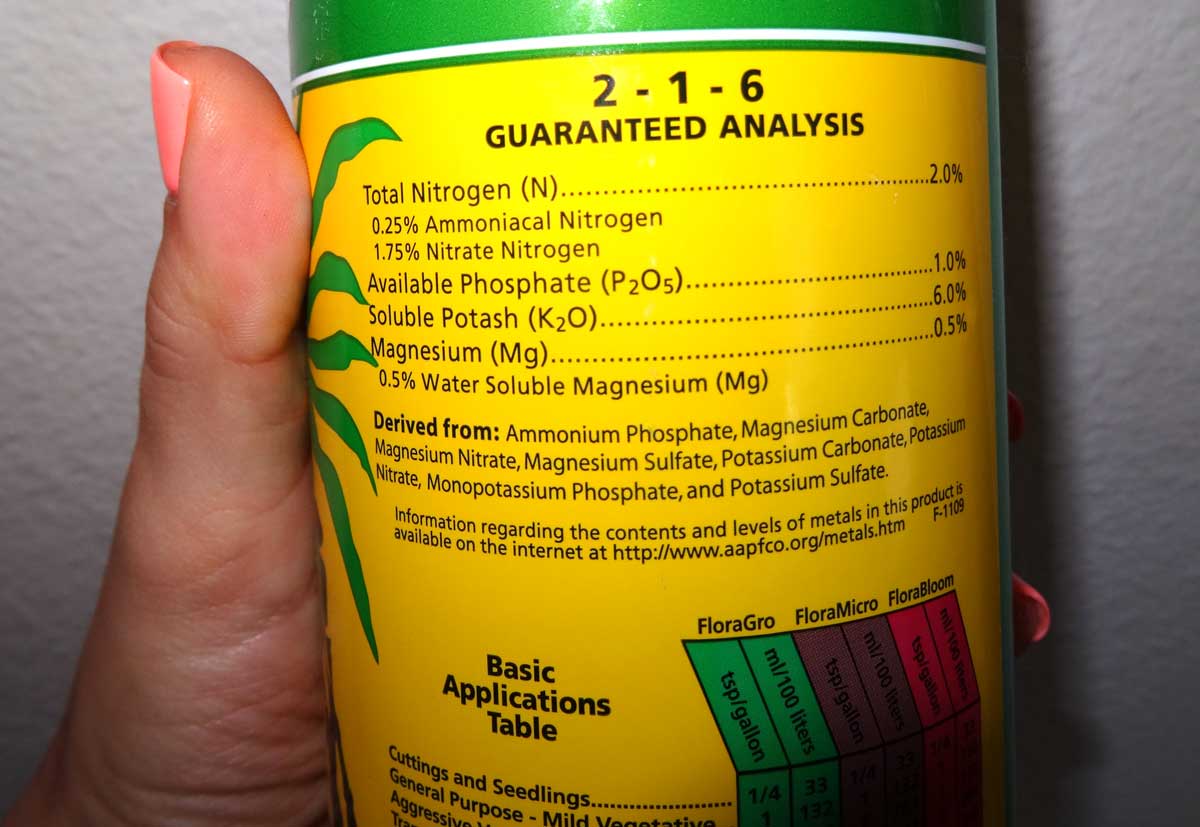
What nutrients does a cannabis plant need in order to make dense buds? In the budding stage, make sure to provide a little Nitrogen, a lot of Potassium, and a good source of Phosphorus.
Best for cannabis flowering stage (“Bloom Nutrients”):
- A little Nitrogen (N)
- A good source of Phosphorus (P) – definitely more than Nitrogen, and possibly more than Potassium as well
- A lot of Potassium (K) – about double the amount of Nitrogen or more
Giving relatively low levels of Nitrogen during the flowering stage helps buds fatten up
It’s important to avoid giving too much N while plants are budding, as too much Nitrogen prevents proper bud formation and results in lower yields and airy buds. This means you should not use your vegetative or all-purpose nutrients (which are high in N) during the flowering stage.
Nutrient bottles list their nutrient levels with 3 numbers. These numbers stand for N-P-K levels. In the flowering stage, avoid giving plants too much Nitrogen (N) but make sure plants get a good source of Phosphorus (P) and Potassium (K).
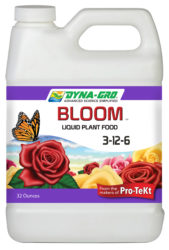
Dyna-Gro “Bloom” plant food, shown below, is an example of a flowering formula that has good ratios of N-P-K for the cannabis flowering stage. Any quality cannabis nutrients designed for the flowering are formulated to give your plants exactly what’s needed to produce buds.
Dyna-Grow Bloom is a 1-part nutrient for the cannabis flowering stage. Give 1.5 tsp/gallon for the first 2-3 weeks after plants start flowering, then 1 tsp/gallon after that until the flush before harvest (many growers give plants plain water for a few waterings before harvest day, known as “flushing” your plants).
You can take out pretty much all of the guesswork out of nutrient ratios by using a cannabis-friendly “bloom” nutrient formula during the flowering stage.
Examples of cannabis-friendly “Bloom” NPK ratios (low N, higher P & K):
- 3-12-6
- 4-8-7
- 1-4-5
- 2-3-5
Note: There is no “perfect” NPK ratio because the nutrients are made with different chemical forms of N, P, & K. Not all forms are equally available to the plants, and certain combinations affect the absorption of nutrients. As an example, some sources of Phosphorus are more easily absorbed by the plant. Nutrients with those forms of Phosphorus tend to have lower ratios of P than other nutrients even though the plant is “getting” the same amount of Phosphorus. That’s why it’s best to research and use a nutrient brand that’s been proven for growing cannabis as opposed to just going purely by the NPK. A lot of factors go into what makes nutrients for cannabis, and the raw numbers don’t always give you the full story.
Note 2: Avoid nutrients that are labeled “Grow,” “Vegetative” or “All-Purpose” in the flowering stage! In an emergency, if you can’t find specific Bloom nutrients, get cactus nutrients as they use a similar nutrient ratio as flowering cannabis plants.
For those not using nutrients, starting with amended and composted super soil is the best way make sure plants get access to the nutrients they need at the right time. As a bonus, when starting with properly composted soil, it’s the one time you don’t need to worry about pH. For growers who would like to supplement their organic grow with a boost of nutrients in the flowering stage, Flower Girl is an excellent organic amendment that works well with cannabis.
Learn more about cannabis nutrients
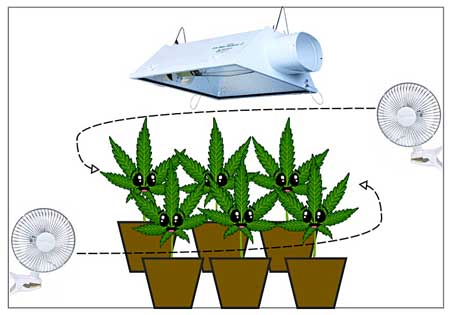
5.) Expose all buds to both high levels of light and a gentle breeze – each cola needs space to increase density to maximum levels!
The most dense and weighty buds on the plant have a few inches of space to themselves and are exposed to both bright light and airflow.
Buds hidden in the plant by leaves (without access to much airflow or light) stay airy and tend to never fatten up or become dense. In fact, buds sitting in stagnant, non-moving air may stop developing completely. This is why you often see small buds on very leafy plants.
Let me show you how much a difference it makes to expose buds to bright light and air. This example used defoliation. Defoliation means removing leaves, and is an advanced technique that is not recommended for beginners. Defoliation should only be used on very leafy, healthy plants that are under bright lights.
For those worried about taking off too much, similar results can be obtained much more safely simply by tucking leaves to expose bud sites.
Here’s a leafy, healthy plant which is being grown under bright grow lights – notice how many bud sites are hidden in the middle of the plant. You cant even see them all!

Here’s the plant immediately after tucking and removing leaves – notice that the buds are now much more exposed to air

Less than 2 weeks later (and after another defoliation session)

The biggest colas (“cola” is Spanish for “tail” and is a common slange term used to describe big long cannabis buds) are the ones that get exposed to the most light and air. This likely is because cannabis plants are wind-pollinated in nature. Buds that aren’t exposed to air can never be pollinated in the wild, so the plants may “give up” on them. Yet when buds are exposed to light and air, the plant “knows” they can possibly be pollinated by the wind and so the plant puts energy toward fattening them up. Hidden buds don’t fatten up, so give your buds room and expose them to a gentle breeze!
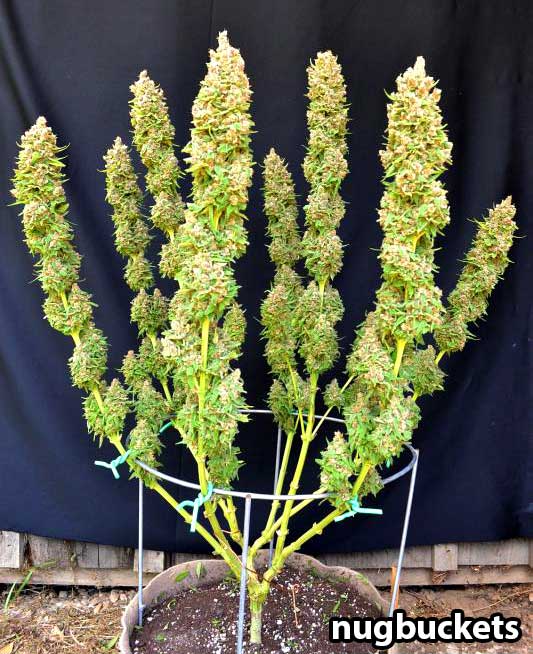
For the most dense buds, make sure each cola has a few inches of space to itself while developing
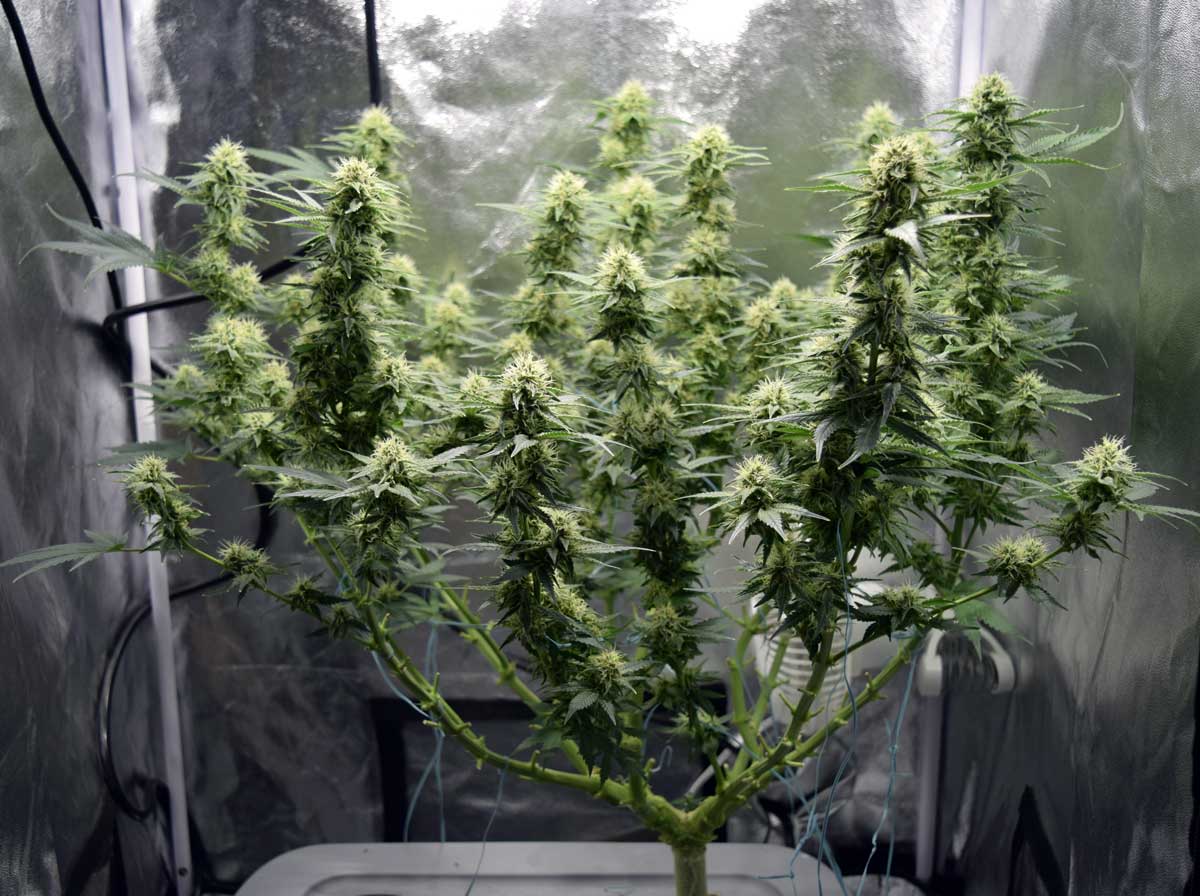
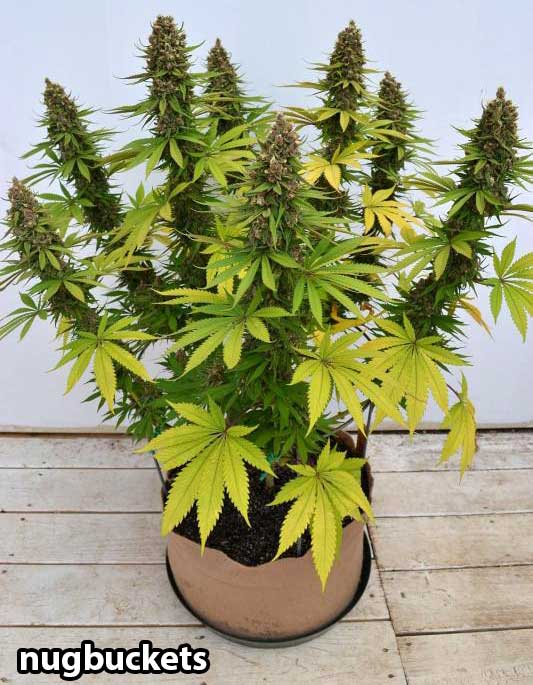
One easy way to accomplish this growth pattern is to use the manifolding technique while the plant is still young. This spreads the plant out while producing many well-spaced colas.
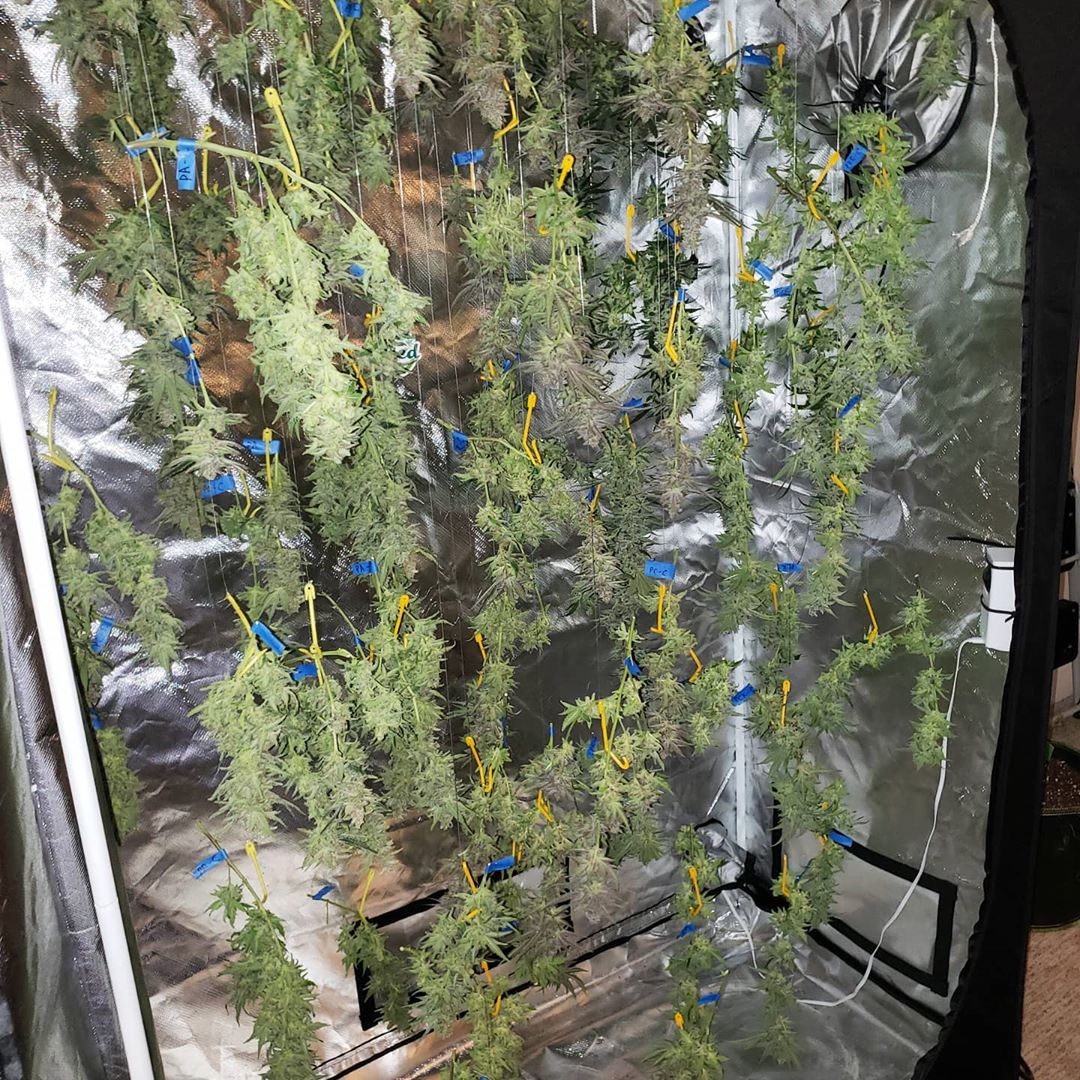
6.) Lower humidity below 55% RH during last 2-3 weeks before harvest
Keep humidity under 55% in the flowering stage (and as low as 45% in the last 2-3 weeks before harvest) to trigger your plant’s natural response to go into bud production overdrive. Very low relative humidity in late flower may enhance density levels, promote resin production, produce more of a smell/taste, and possibly even increase potency. Lower humidity will also prevent bud rot from forming in the middle of dense buds.
Indoor growers have a lot of options for controlling humidity in the grow space.
Outdoors, it’s best to find a strain that is suitable to growing in your climate, and give plants cover when you know there’s going to be bad weather coming soon. Protect buds from getting too wet in rainy weather, and if at all possible try to plant them in a place where they will get some amount of wind.
Lower humidity during the last few weeks before harvest can boost resin production and bud density

7.) Use Density Boosting Supplements
Before thinking about supplements, make sure you’re first providing the right base nutrients. Without proper base nutrients, your plant simply won’t grow or produce buds no matter what supplements you provide. So get your base nutrients first. But once you know you’re giving your plants the essentials, what do you add next?
Some cannabis supplements claim to increase yields and bud density, and many of these supplements contain a source of sugar. They also often contain ingredients such as amino acids, humic acids, vitamins, trace minerals, and other additives which may be helpful to bud formation. There is another common “formula” for bloom boosters that adds a lot of extra Phosphorus and Potassium.
The jury is still out and which is the most effective supplement, but many growers are happy with bloom-promoting supplements that include sources of…
- carbohydrates/sugar
- amino acids
- humic acids
- vitamins
- trace minerals
I personally don’t use this type of supplement (following the other tips on this density tutorial will produce very dense buds without any supplements) so I can’t recommend a particular one, but some of the most popular cannabis supplements based on this type of formula include…
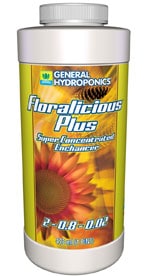
- Floralicious Plus (by General Hydroponics)
- Liquid Karma (by Botanicare)
The supplements listed above use ingredients that add only tiny amounts of base nutrients (NPK). They use other ingredients to help the plant use its resources better, or in the case of sugar, to directly plump up buds. But that’s not the ony kind of density-boosting supplement.
Give 1/2 tsp per gallon of Blackstrap Molasses when watering (for soil or coco coir) for the last 2-3 weeks before harvest to possibly increase density as well as improve taste/smell of buds

As a cheap alternative to expensive bloom boosting supplements, some growers water plants with a small amount of blackstrap molasses for the last few weeks or so before to help buds get bigger/more dense (it’s just the regular stuff you find in your kitchen or at the grocery store). It adds sugar as well as amino acids and various trace minerals. As a bonus, molasses can also improve the taste/smell of your buds. However, anything organic like molasses is not suitable for a hydroponic reservoir! Only for soil and coco growers 🙂
Density-Boosting Supplements with Extra P & K
- Phosphorus (P) increases number of flowers
- Potassium (K) increases weight/density of flowers
Many popular density/yield increasing supplements contain extra Phosphorus (P) and Potassium (K), sometimes with a small amount of Sulfur (S), and possibly other ingredients like amino acids, trace minerals and/or sugar.
However, it’s very important to use these types of supplements sparingly as your regular base Bloom nutrients will already contain quite a bit of P and K. Although you want to make sure your plant can get as much P and K as it can use while making buds, you don’t want to give too much or you’re just going to burn your plants and/or cause a nutrient deficiency (too much of one nutrient can cause deficiencies in others).
Popular supplements to Increase Yields/Density with extra P & K (most PK supplements also contain some unlisted ingredients)
- Liquid Koolbloom (by General Hydroponics)
- Hydroplex (by Botanicare)
- Cha Ching (by Fox Farm)
- Beastie Bloomz (by Fox Farms)

8.) Don’t harvest too early!
When you harvest at the right time, you’re giving your buds the time they need to develop to their fullest. Harvesting too early will lower your yields and you’ll usually end up with more airy and less developed buds. Even worse, harvesting too early causes reduced potency and some people may get headaches from early-harvested buds.
Don’t harvest while pistils are still white and sticking out

Wait until buds are mature and have thickened up!
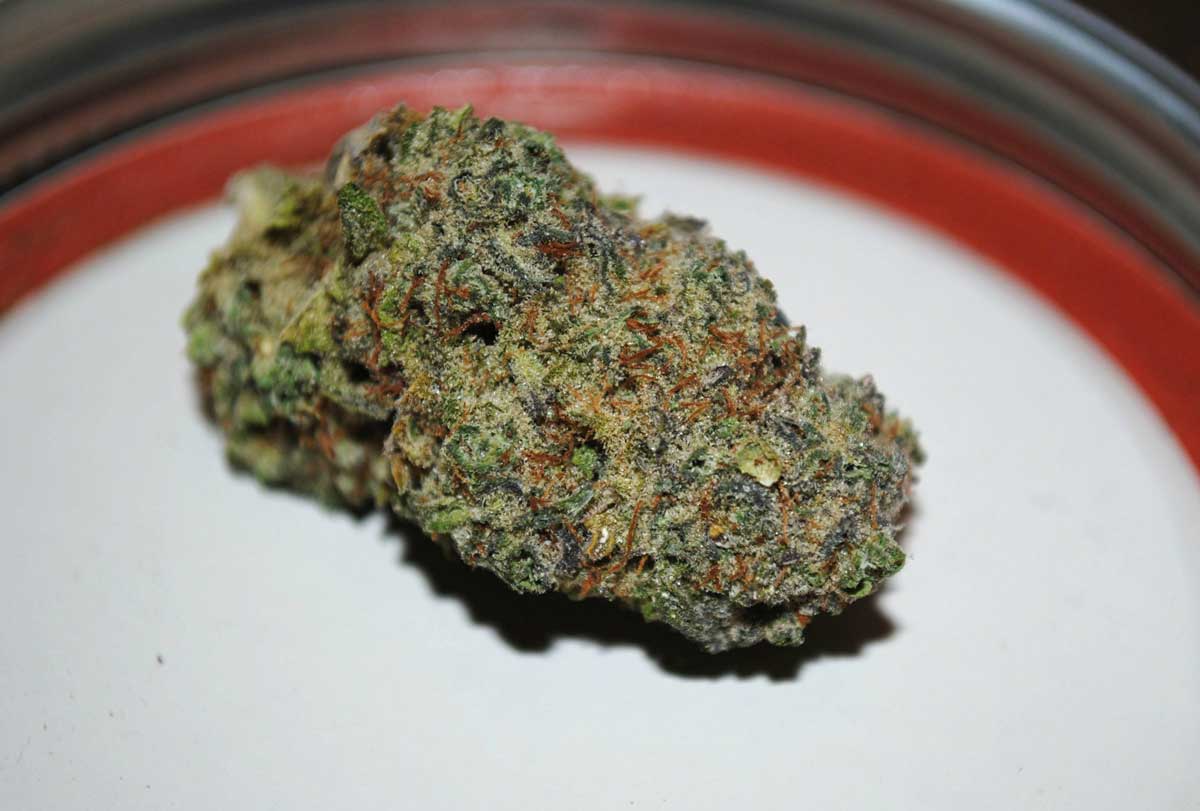
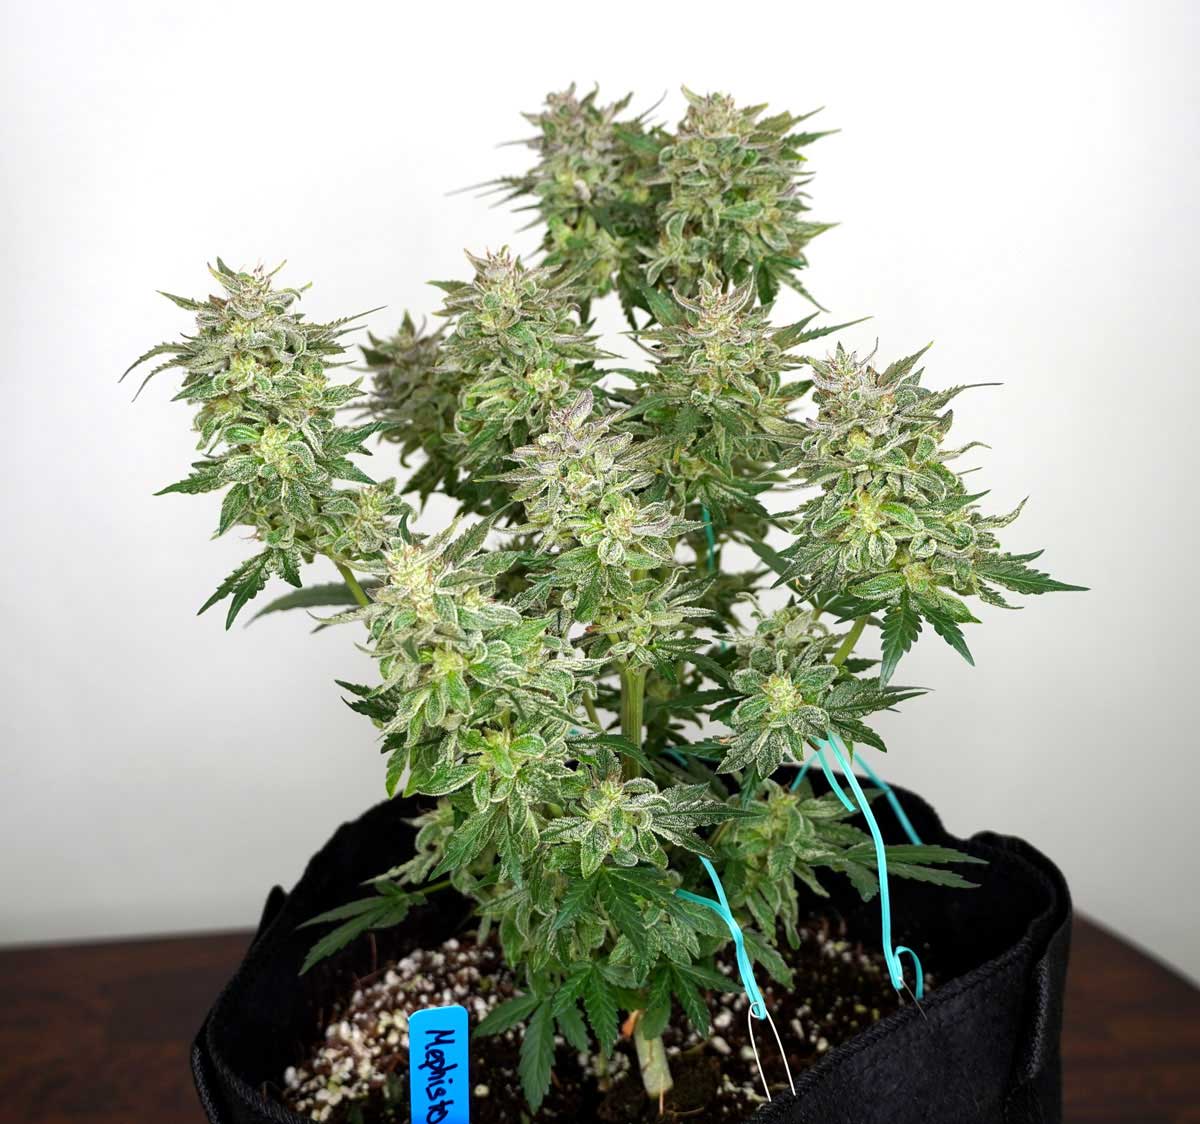
These buds were harvested at the right time, giving them the chance to thicken and tighten up as much as possible.

9.) Dry & Cure Your Buds
Proper drying and curing after harvest can help buds become slightly more dense, while also adding to better taste, smell, potency and bag appeal.
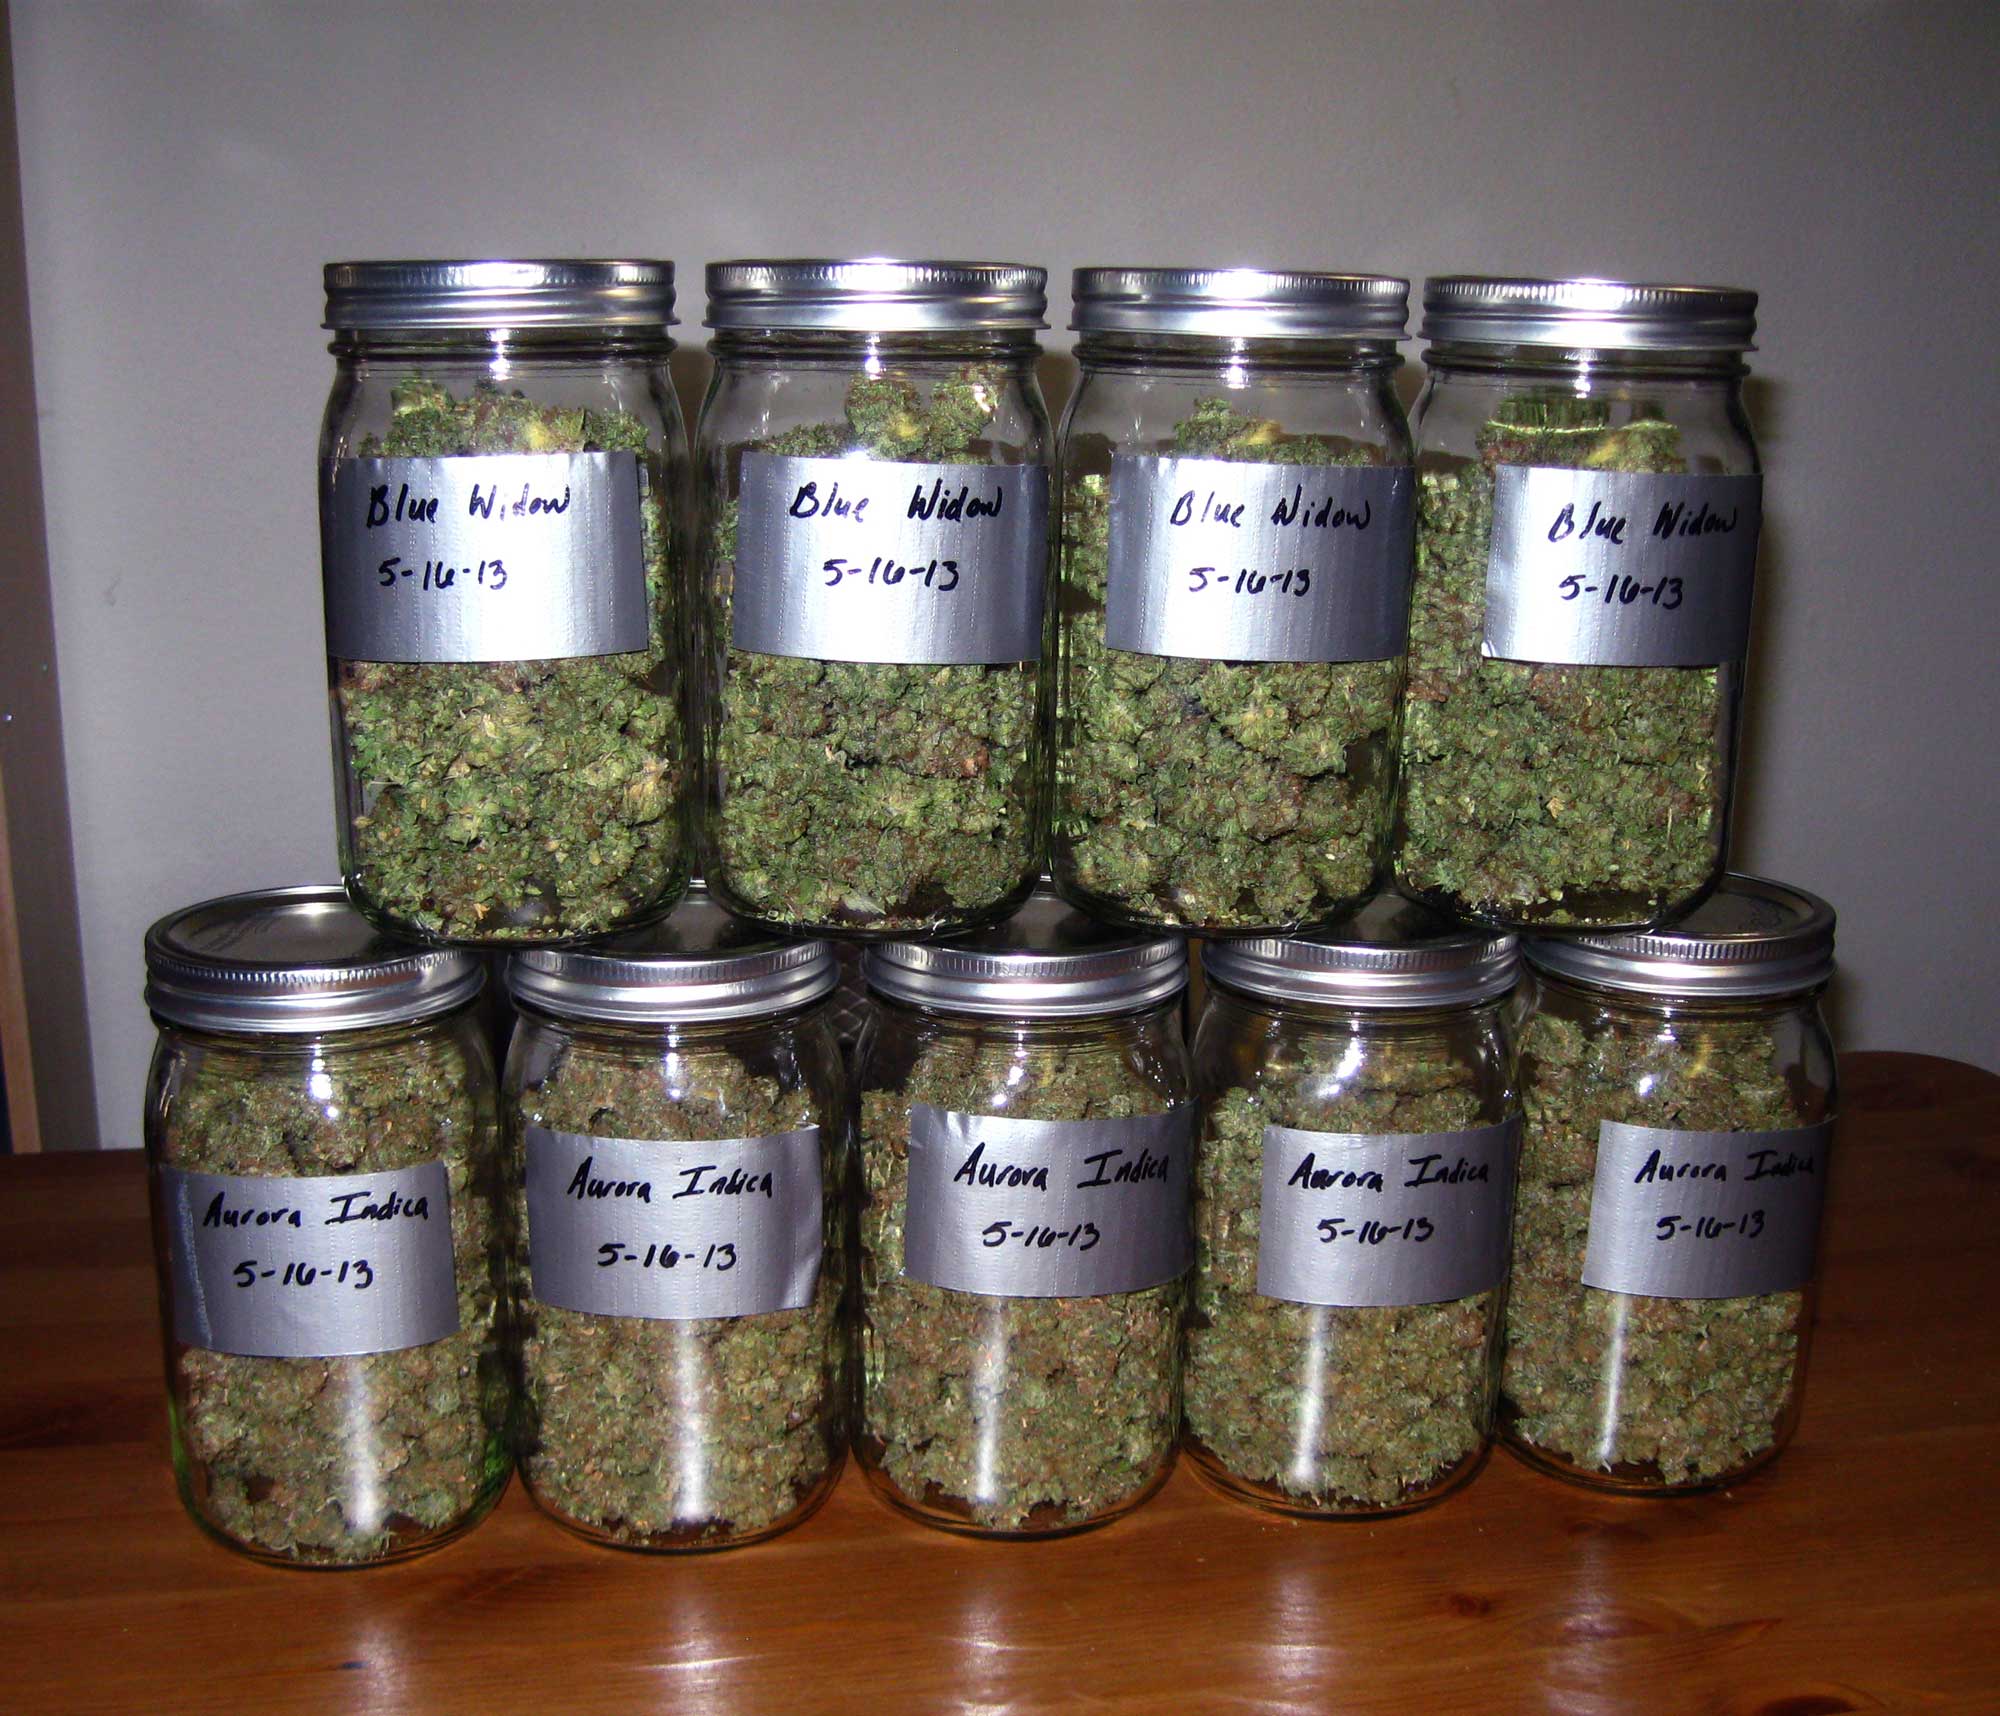
A proper dry/cure can help “tighten up” buds
Learn how to dry and cure your buds the right way
10.) Don’t overwater your plants – it’s boring but true!
This may seem like a boring one, but just a few simple precautions can make your plant grow faster and produce bigger yields. If you want to get the most dense bud possibles, you want to cover all your bases.

So if your plant looks droopy all the time, chances are it’s hurting your yields even if otherwise your plant looks healthy.
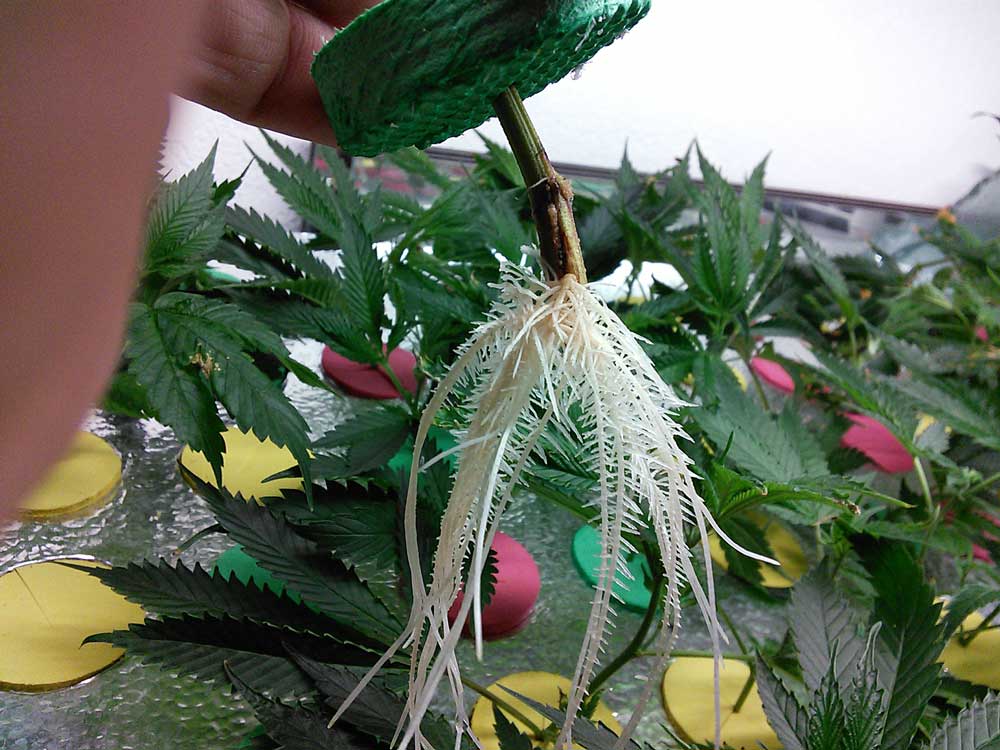
Roots “breathe” oxygen, so good root health involves giving just the right amount of water while maximizing the amount of oxygen available to the roots with air pockets. When the roots aren’t getting enough oxygen, the plant can’t properly get water or use nutrients. As a result of unhappy roots, leaves may show signs of drooping or nutrient deficiencies, and buds stop developing.
So it’s important to water plants properly and take good care of roots for dense buds!
11.) Get a Big Enough Container & use a “Smart Pot” or “Air Pot” If Possible
The type and size of the containers you use for growing cannabis determine how big your plant can get and ultimately how much bud it can support. Smaller containers can only support smaller plants, and small plants can only grow relatively small buds. So when growng cannabis, it’s important to get a container that’s big enough to support the size plant you want.
Some types of containers such as smart pots (and air pots) actually make your plant grow faster. A smart pot is a fabric pot that lets plant roots get air from the sides, causing faster growth, while an air pot is a plastic pot with holes in the side. They also prevent plants from becoming root-bound from a too-small container. The main downside is the grow medium dries out faster (since it’s also getting air from the sides), which means you need to water plants more often. Learn more about smart pots & air pots.
Get “smart pots” or “air pots” (containers that let air in from the side) to prevent plants from becoming rootbound. This helps plants get bigger than they would in a regular plant container. These types of pots also cause plants to grow faster.
In the end, density is definitely not the only thing to consider when deciding the quality of buds. There can be times when buds are too dense (which increases the chances of mold and bud rot) and there are also several strains that produce less dense buds which have amazing effects. In my opinion, an ounce is an ounce is an ounce. If you harvest an ounce of airy buds with great effects, to me that’s just as good as an ounce of dense buds with great effects, so enjoy what you grow while striving for better!
Review: How to Grow Dense Buds!
1.) Provide the right amount of light
Not enough light is the most common reason buds don’t develop as dense as they could. On the flip side, too-bright light (or buds being too close to grow lights) can also cause buds to develop poorly and/or produce airy fox-tails.
2.) Start with a strain that tends to grow dense buds
Start with the right strain to grow buds the way you want. Some strains won’t grow tight, dense buds no matter what you do.
Indica-leaning strains tend to have more dense buds, but it’s a good idea to always research a strain before growing it.
Learn where to get good strains
One strain that reliably produces dense buds and good yields is Moby Dick. This hybrid strain is popular because although the buds have strong, psychoactive Sativa-like effects, the plant grows dense buds and has a relatively short flowering period just like an Indica.
More Examples of Dense Photoperiod Strains
- Bruce Banner #3
- Cinderella 99
- Grape Ape
- Laughing Buddha
- Lemon Cake
- Kraken
- Platinum Cookies (ultra-potent!)
- Psychotropic Mass
- Purple Bud
- Purple Star Killer
- Wedding Cake
- White Widow (version by 00 Seeds)
- Zkittlez Glue (version by Flavour Chasers)
Examples of Dense Autoflowering Strains
- Berry Ryder Auto
- Big Bomb Auto
- Big Stilton Auto
- Gorilla Glue Auto
- Lemon Auto
- Monster Mass Auto
- Pineapple Express Auto
3.) Control temperature
Cannabis wants the temperature just right for optimal bud growth. Too-hot or too-cold temps can cause buds to grow airy.
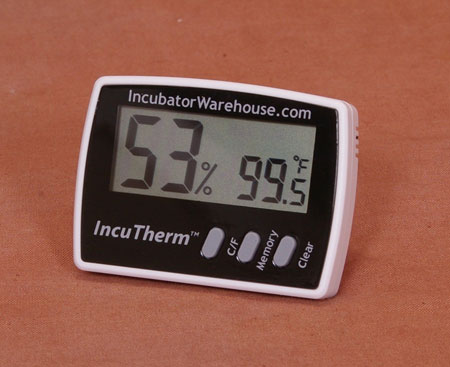
Start with a thermometer that also measures humidity)
Cannabis like temps around 65-80°F (18-26°C) in the flowering stage for best development.
- Indica-leaning strains are better and handling cold
- Sativa or equatorial strains are better at handling heat
Learn how to control temperature in the grow room
4.) Cannabis Nutrients
Buds won’t fatten and get dense if the base nutrients aren’t right. Nutrient problems can be caused by incorrect pH, not giving enough nutrients, giving too much nutrients, or by giving the plant the wrong kind of nutrients in the flowering stage.
Learn everything you need to know about cannabis nutrients
5.) Expose all buds to both light and a gentle breeze
Poor airflow around buds will prevent those buds from developing as dense as they could. In the wild cannabis is a wind-pollinated plant, and it only spends energy growing and fattening buds that are exposed to fresh air with a gentle breeze.
So make sure your buds are getting exposed to airflow. A small circulating fan works great to add more air movement to the grow space.
Air circulation & exhaust tutorial
6.) Take care of roots
Under-watering, overwatering, and/or root problems (such as root rot or a too-small container) will hurt yields and prevent buds from getting as dense as they could be since the plant isn’t able to run at peak efficiency.
Roots “breathe” oxygen, so good root health involves giving just the right amount of water while maximizing the amount of oxygen available to the roots with air pockets.
So it’s important to water plants properly and take good care of roots for dense buds. Your plants will thank you for it.
There are also a few popular root supplements to help care for your root health:
- Botanicare Hydroguard <– Highly recommended, especially for hydroponics to prevent root rot. I use this with every hydroponic grow from seed to harvest.
- Seaweed Kelp Supplement <– Helps roots resist and recover from heat damage. This is not to be used as nutrients – it’s just a supplement that’s great for root health.
- Great White <– Popular multi-purpose root health supplement for growing cannabis
7.) Keep Humidity Under 55% RH for Last 2-3 Weeks Before Harvest
Indoor growers have a lot of options for controlling humidity in the grow space.
Outdoors, it’s best to find a strain that is suitable to growing in your climate, and give plants cover when you know there’s going to be bad weather coming soon. Protect outdoor plants from wind in dry weather. Protect buds from getting too wet in rainy weather.
8.) Density-Boosting Cannabis Supplements
These supplements focus on enhances plant processes. I personally don’t use these types of supplements so I can’t recommend a particular one, but many growers swear by them. Some popular supplements of this type include…
All-around supplements that help plants grow better in general
- Floralicious Plus (by General Hydroponics)
- Liquid Karma (by Botanicare)
Popular supplements to Increase Yields/Density with extra P & K (most PK supplements also contain some unlisted ingredients)
- Liquid Koolbloom (by General Hydroponics)
- Hydroplex (by Botanicare)
- Cha Ching (by Fox Farm)
- Beastie Bloomz (by Fox Farms)
9.) Don’t Harvest Early
When you harvest at the right time, you’re giving your buds the time they need to develop to their fullest. Harvesting too early will lower your yields and you’ll usually end up with more airy and less developed buds.
Harvest at the right time, every time!
An important tool for harvesting at the right time is a magnifier to look closely at buds, like a jeweler’s loupe or (even better) a digital magnifier that displays the trichomes on a screen.
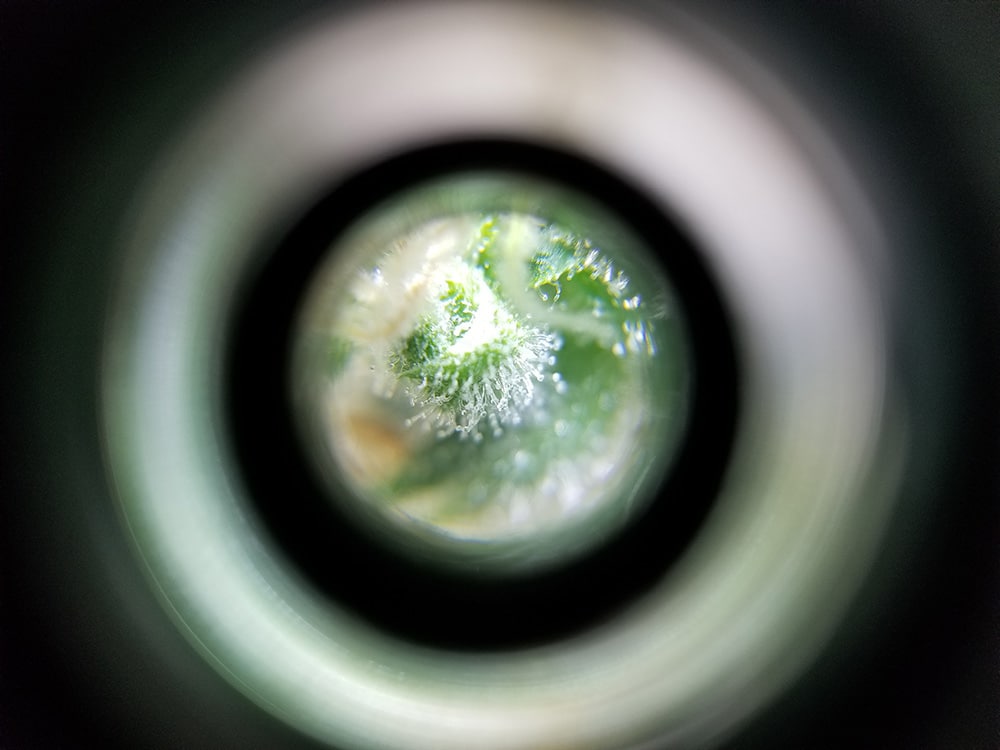
I look at trichomes on buds using a USB microscope attached to my phone. So far this seems to be the easiest accurate way to look at trichomes (and you can make the picture big so you’re not squinting through a tiny jeweler’s loupe 🙂
Learn how to look at trichomes under a magnifier
10.) Drying & Curing
Proper drying and curing after harvest can help buds become slightly more dense, while also adding to better taste, smell, potency and bag appeal.

Read the full drying & curing tutorial
11.) Get a Big Enough Container
If your container is too small, your plant won’t be able to support big, dense buds. By choosing the right container size, you’ll help maximize your plant’s potential!
What size container should I use?
Jump to…
Learn more on how to grow top-shelf buds
Plant training – topping & more!
How long does it take to grow weed?