by Nebula Haze
Table of Contents
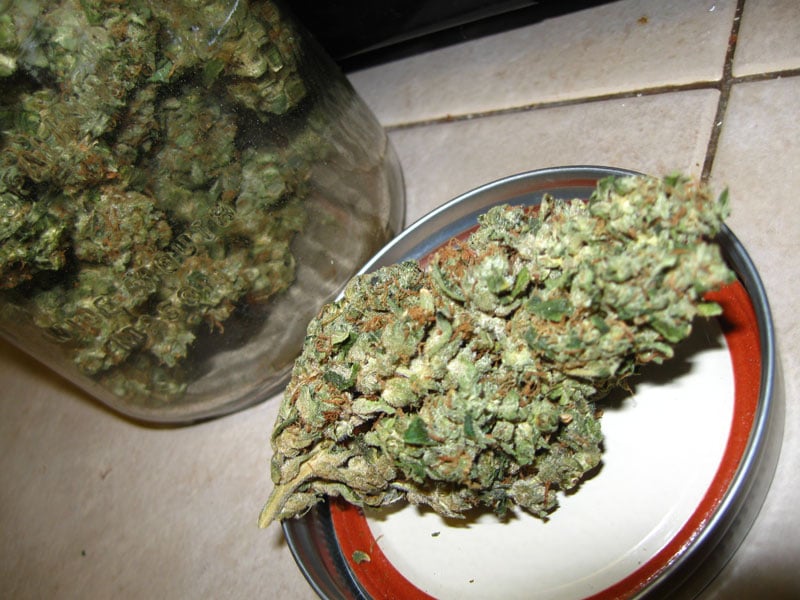
Picture Proof: Defoliation Works!
Vegetative Stage: How to Defoliate Cannabis
Flowering Stage: How to Defoliate Cannabis
Why Cannabis Defoliation?
Cannabis “defoliation” is the process of removing leaves from your cannabis plants. Some growers call this “lollipopping” when applied to the bottom of the plant.
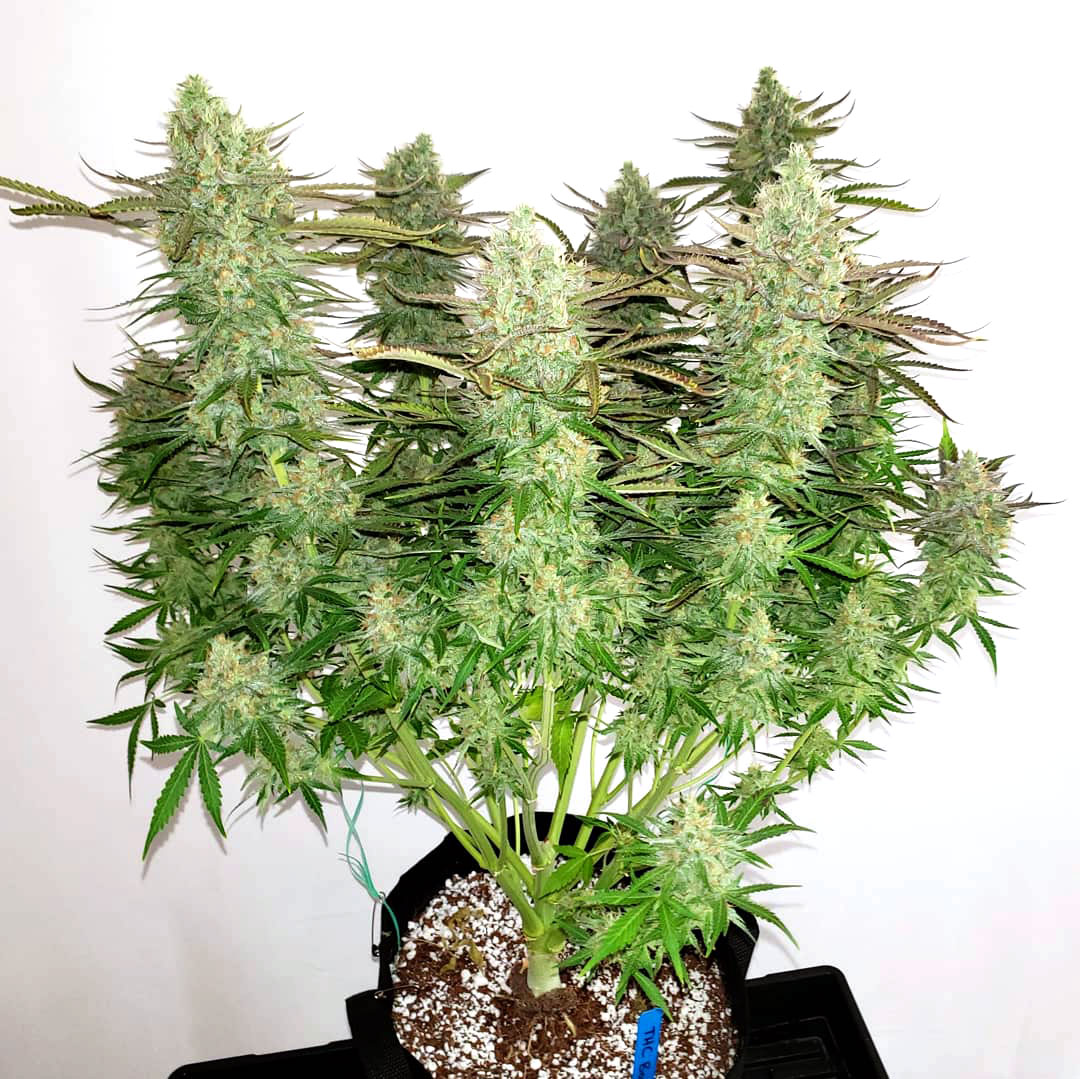
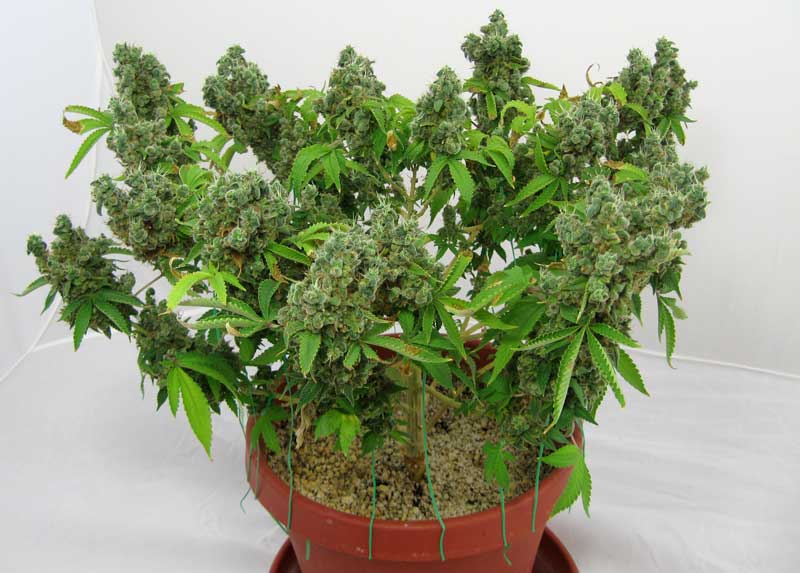
Here’s an example of a defoliated cannabis plant.
Many growers believe defoliation can be used as a tool to increase cannabis yields indoors, but there are also a lot of cannabis growers who say that plucking leaves off cannabis plants (defoliation) is not beneficial for your cannabis yields in any way. Today, I’m going to provide evidence that defoliation does indeed work and I believe the pictures I’m going to show you in this article will speak for themselves!
Defoliation means strategically removing leaves to “hack” the plant’s natural processes so you get bigger yields.
Over the years I’ve heard many naysayers swear defoliation can’t work:
“My friend is a grower and he says defoliation doesn’t work”
“I read in a book that defoliation is a terrible idea”
“I tried it and it hurt my yields!”
“The plant NEEDS those leaves or it wouldn’t grow them”
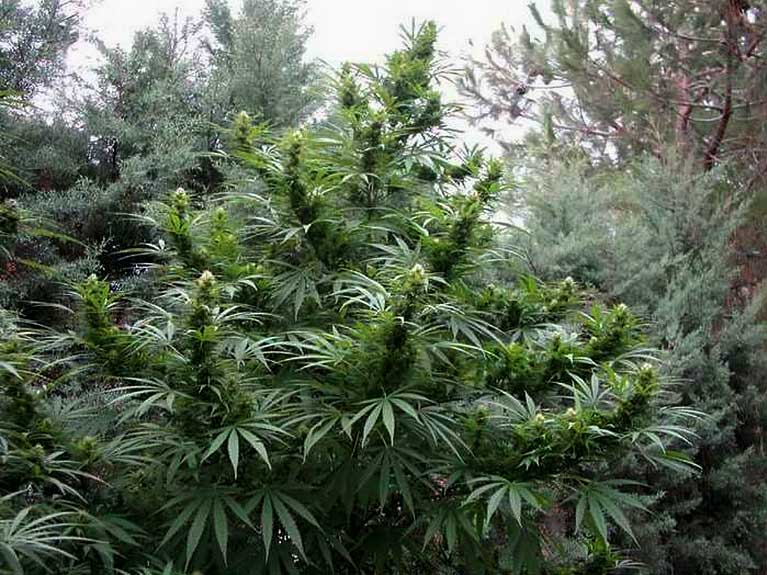
There is some truth to what they’re saying. Defoliation isn’t for everyone in all setups. It should only be used in specific situations. If you do defoliation the wrong way it will hurt your plant and reduce your yields. As one example, defoliation doesn’t appear to be effective at significantly increasing yields for outdoor plants. But for indoor growers, cannabis defoliation done right results in larger yields.
Unfortunately, I’ve also seen growers try to defoliate their cannabis plants the wrong way, most especially by pulling leaves from plants that are slow-growing and/or sickly. Defoliation will not make up for other problems like too-hot conditions, not enough light (or conversely too much light) or nutrient deficiencies. If you try to defoliate plants that are not in top condition, you’re asking for trouble because defoliation will only stress your sick plants further.
The truth is, when growers defoliate their plants the wrong way, they’ll end up with slow growth and reduced yields, and I believe that is where a lot of the criticism of defoliation is coming from.
But the fact that defoliation doesn’t work for all growers in all setups doesn’t mean that it doesn’t increase yields when done the right way!
Today I’d like to show you what successful cannabis defoliation looks like, and how to use it to increase your yields indoors. You’ll see examples and lots of picture-proof! If you still don’t believe properly-done defoliation works to increase yields after reading this article, I still encourage you to give it a try if you can afford to do so. You don’t need to do any defoliation on your plants… just don’t complain when the defoliators get better yields 😉
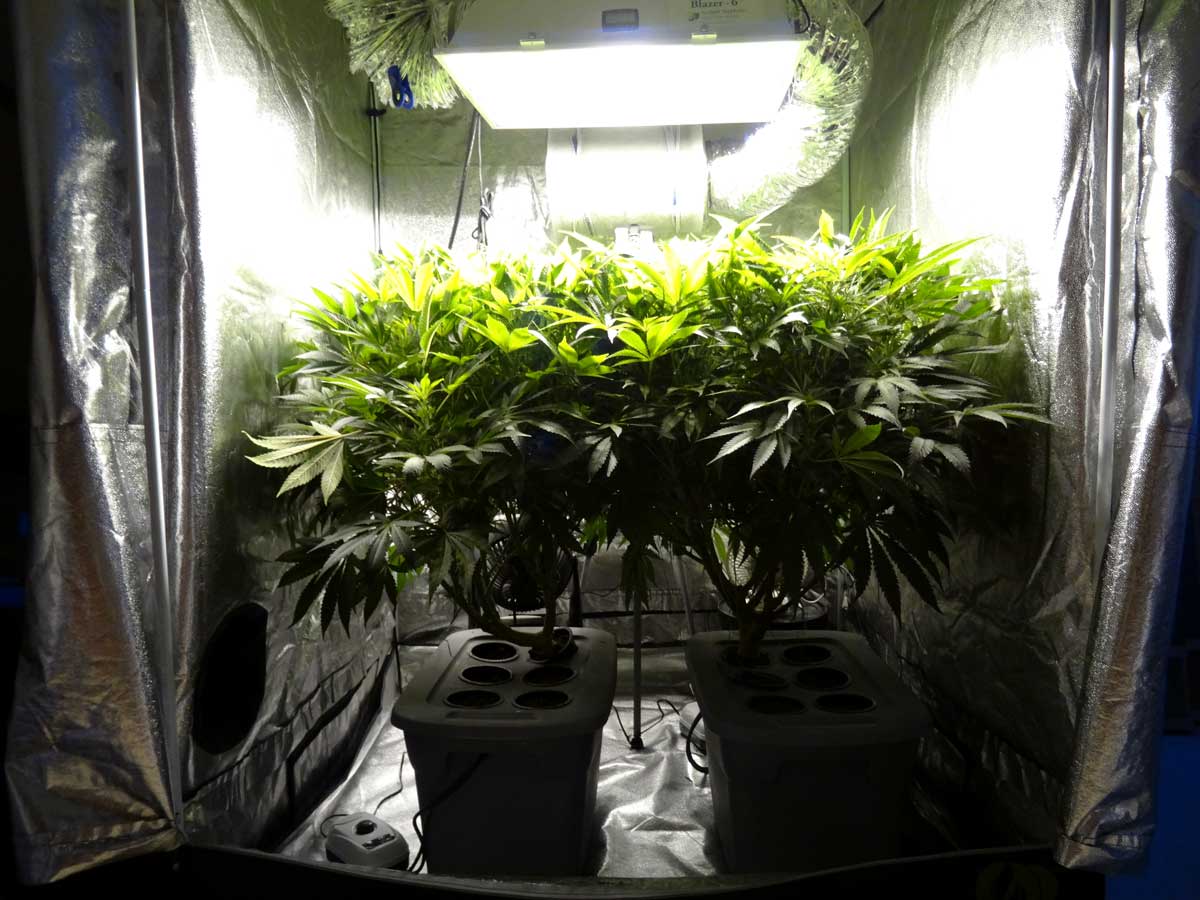
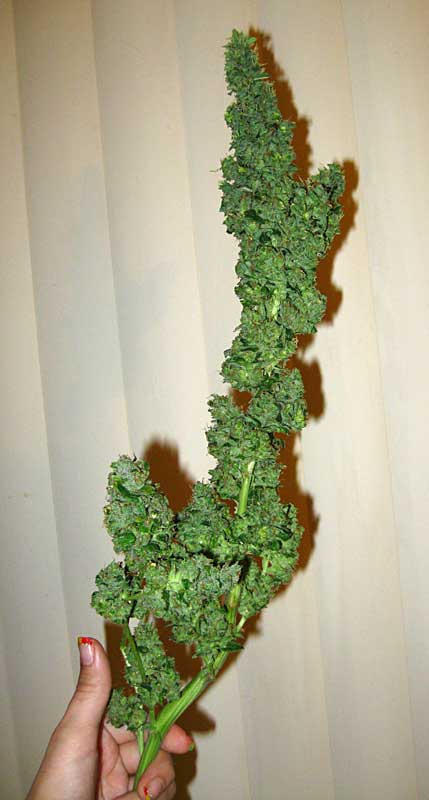
Defoliation Example (under 250W grow light)
Growing wide and flat is the key to producing the best yields indoors under grow lights! I used the manifold technique on this plant.
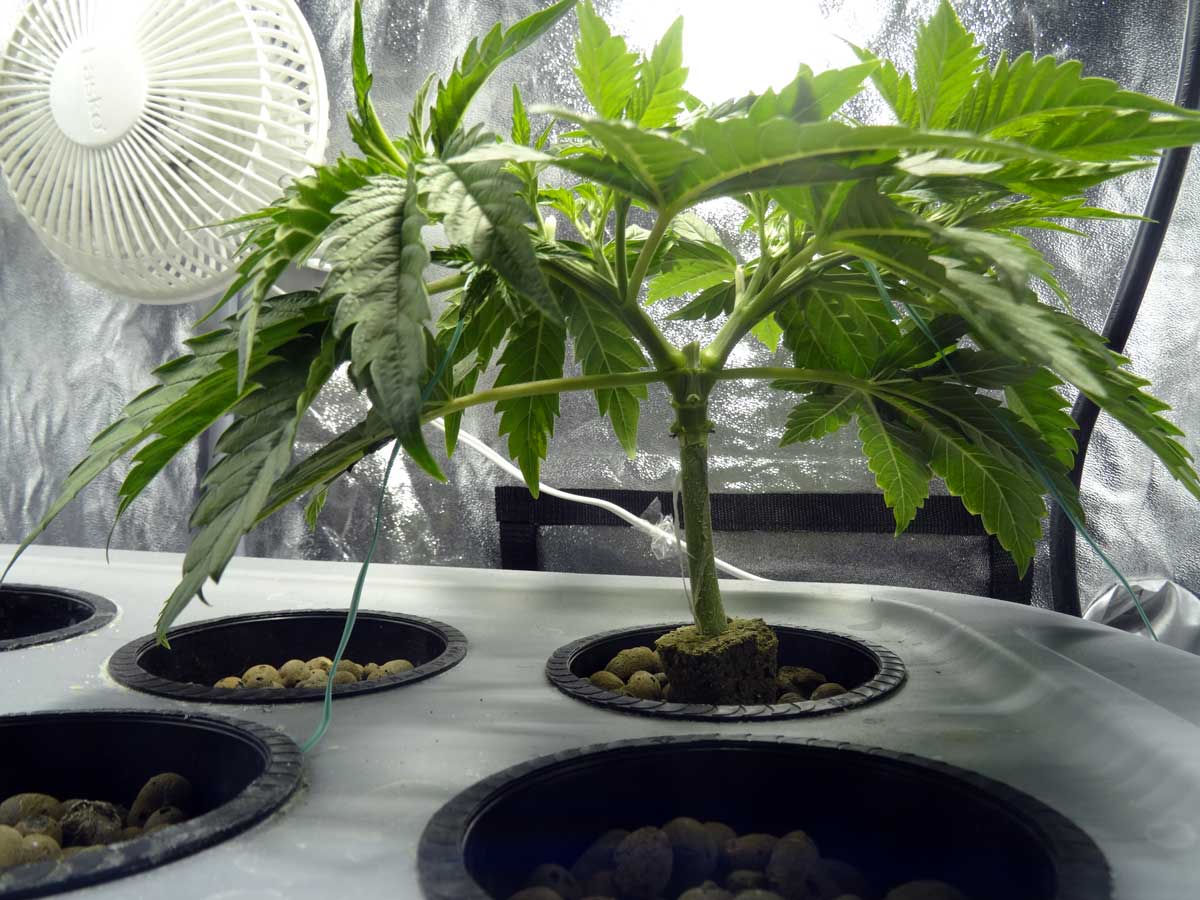
Just before switch to 12/12 – Before Defoliation
Just before switch to 12/12 – After defoliation
I started by removing the biggest fan leaves, especially any that were hand-sized and bigger. Some growers like to defoliate the bottom 20% of the plant at this stage. Make sure not to disturb bud sites, and always leave enough leaf cover that you still can’t really see through the plant very well. The plant needs a table of leaves to power the growth and stretch the way we want in the next few weeks! I think it’s common to go overboard at this stage, so I recommend taking a few less leaves than you think. It’s easy to get lost in the zone and realize you’ve completely plucked your plant bald! Just remember, you can’t put leaves back but you can always take more later 🙂
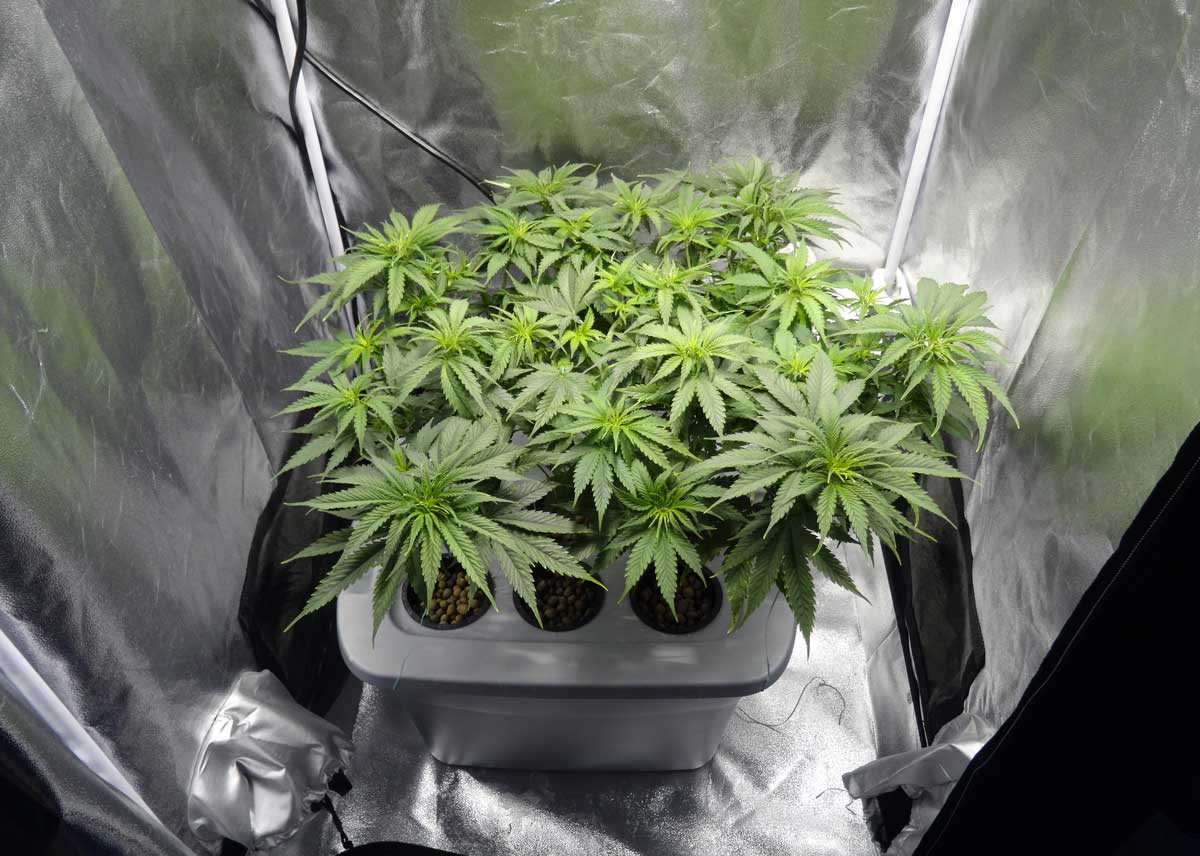
3 weeks after switch to 12/12 – Before Second Defoliation
It has started growing buds, and completely re-leafed itself in that time!
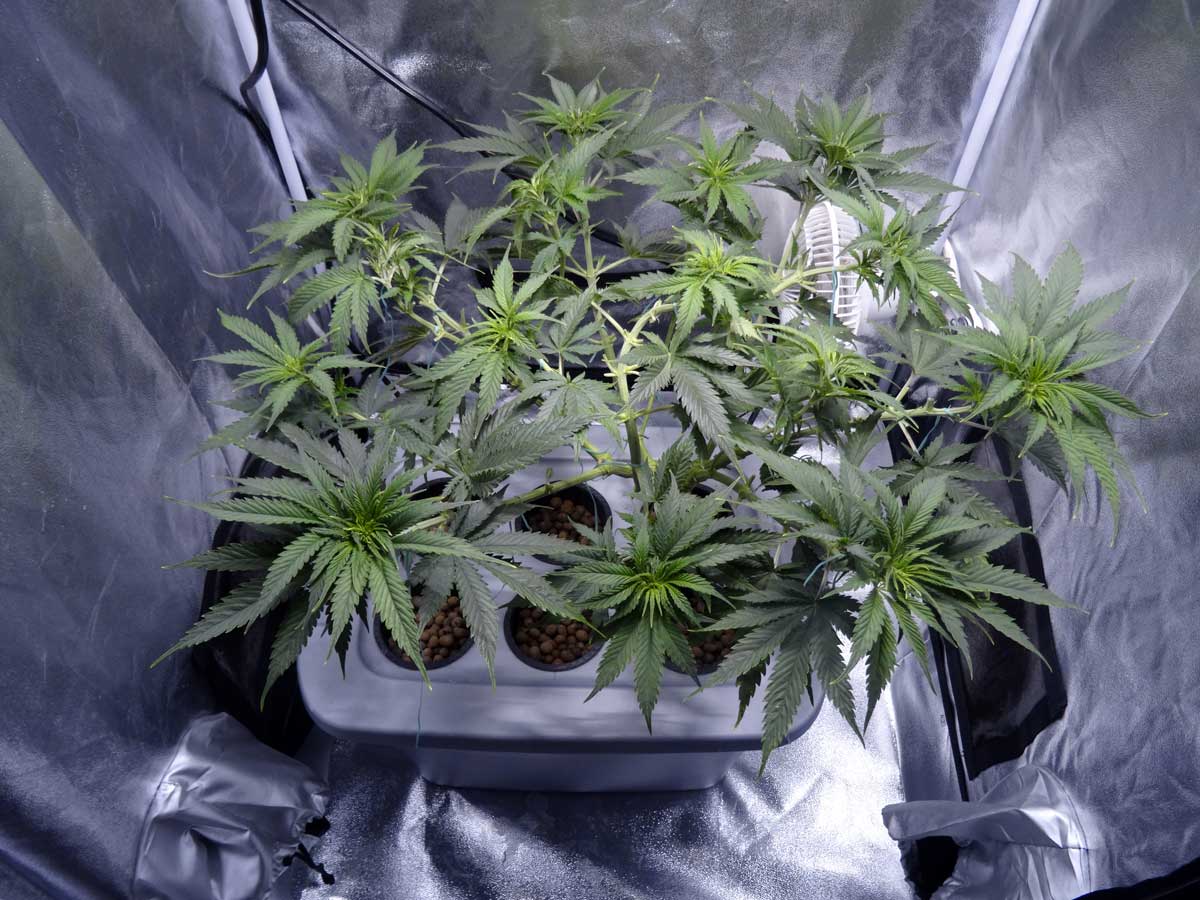
3 weeks after switch to 12/12 – After Second Defoliation
At this point I only took the biggest fan leaves, making sure not to disturb the growing buds. Again, you still shouldn’t be able to see through the plant very well after you’re done, your plants need leaves to fatten those buds! Nothing else was done after this point, and buds were allowed to fatten unhindered. I just gave them nutrients and water from here until harvest!
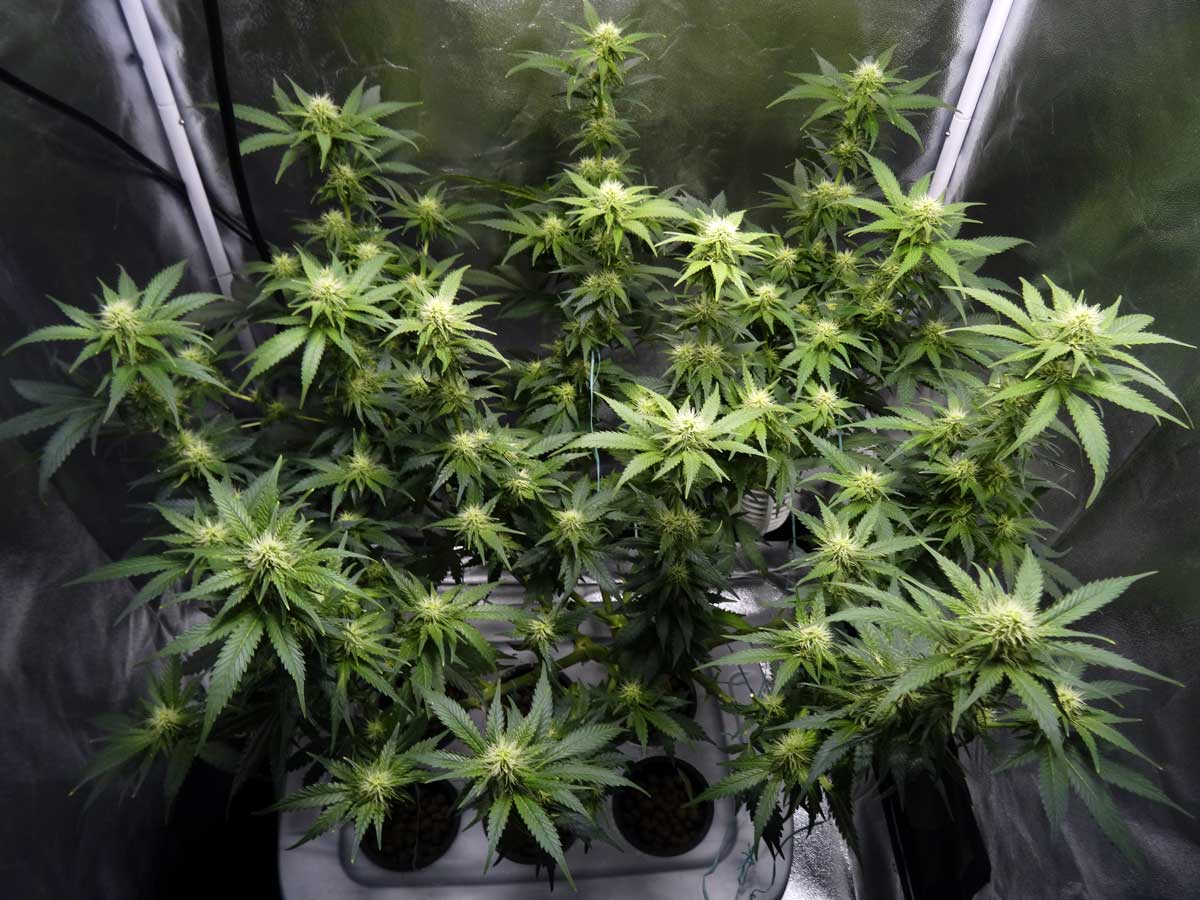
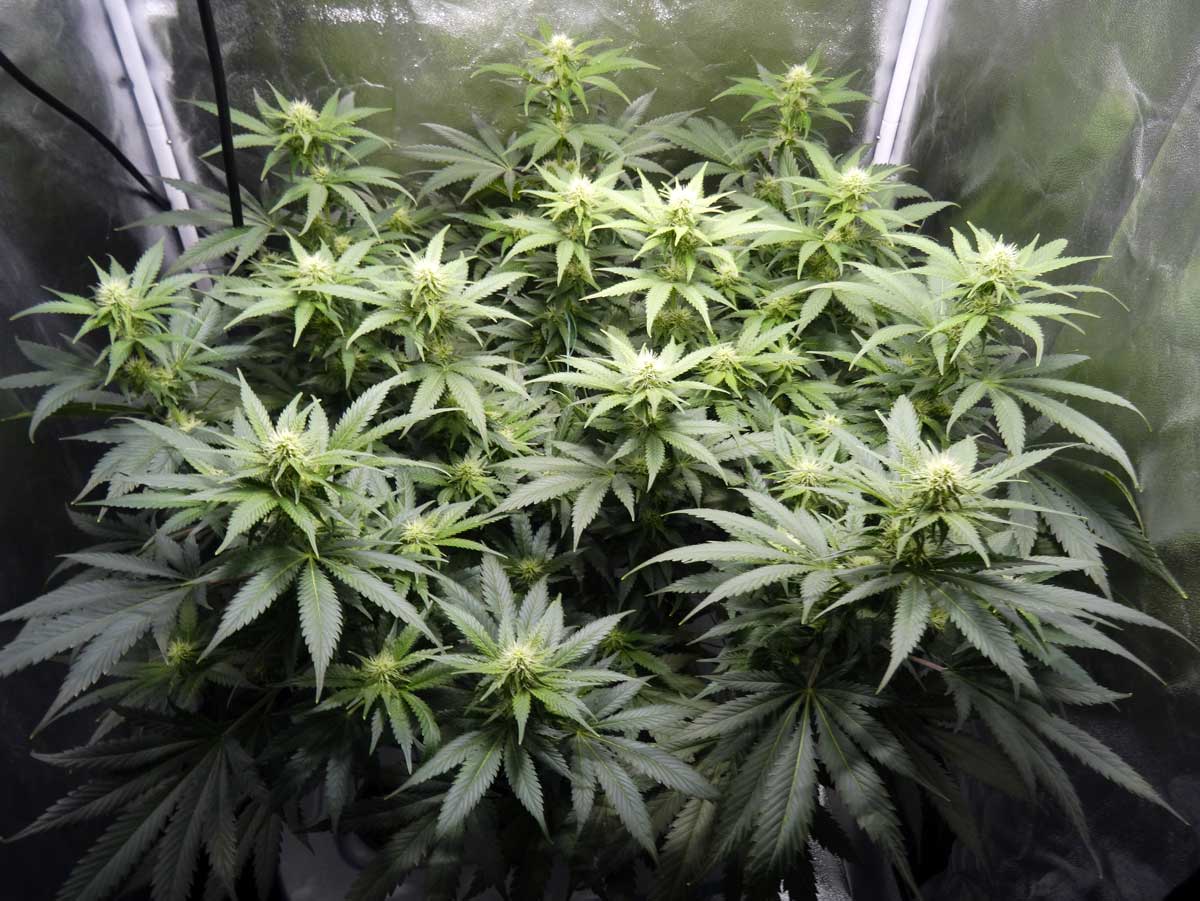
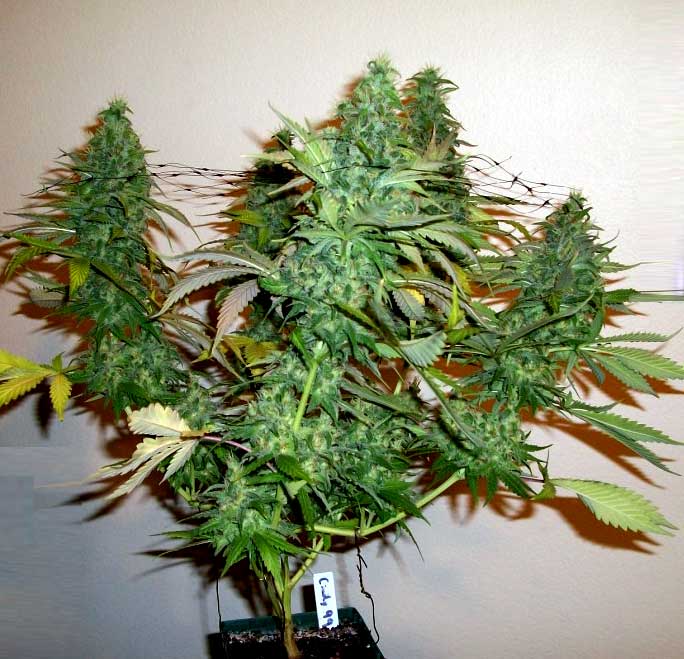
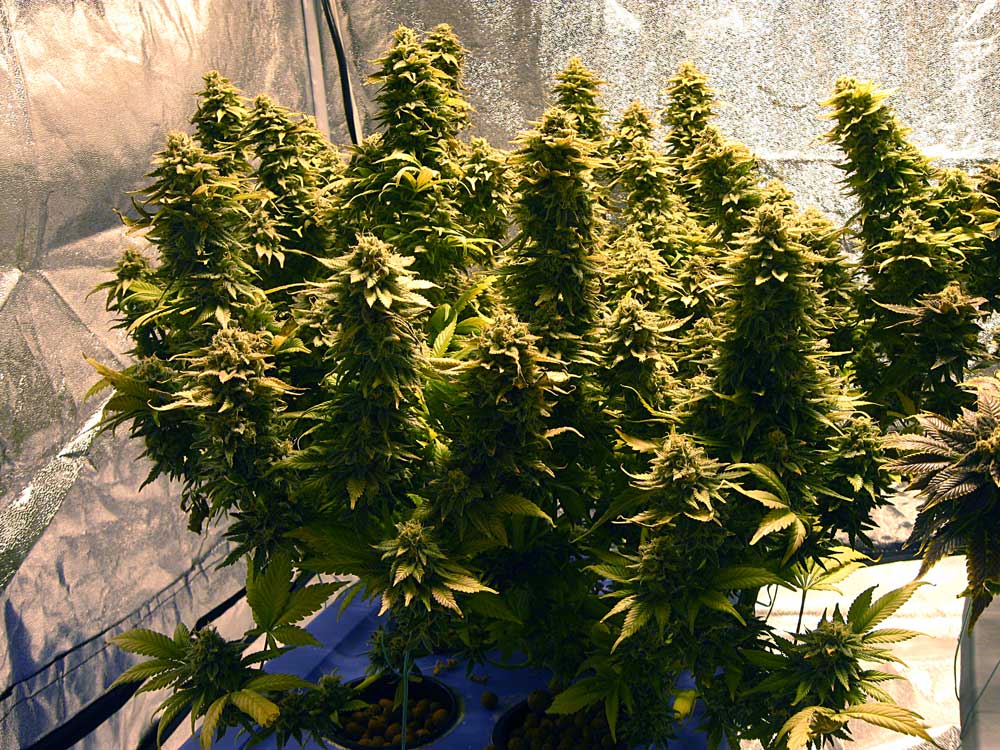
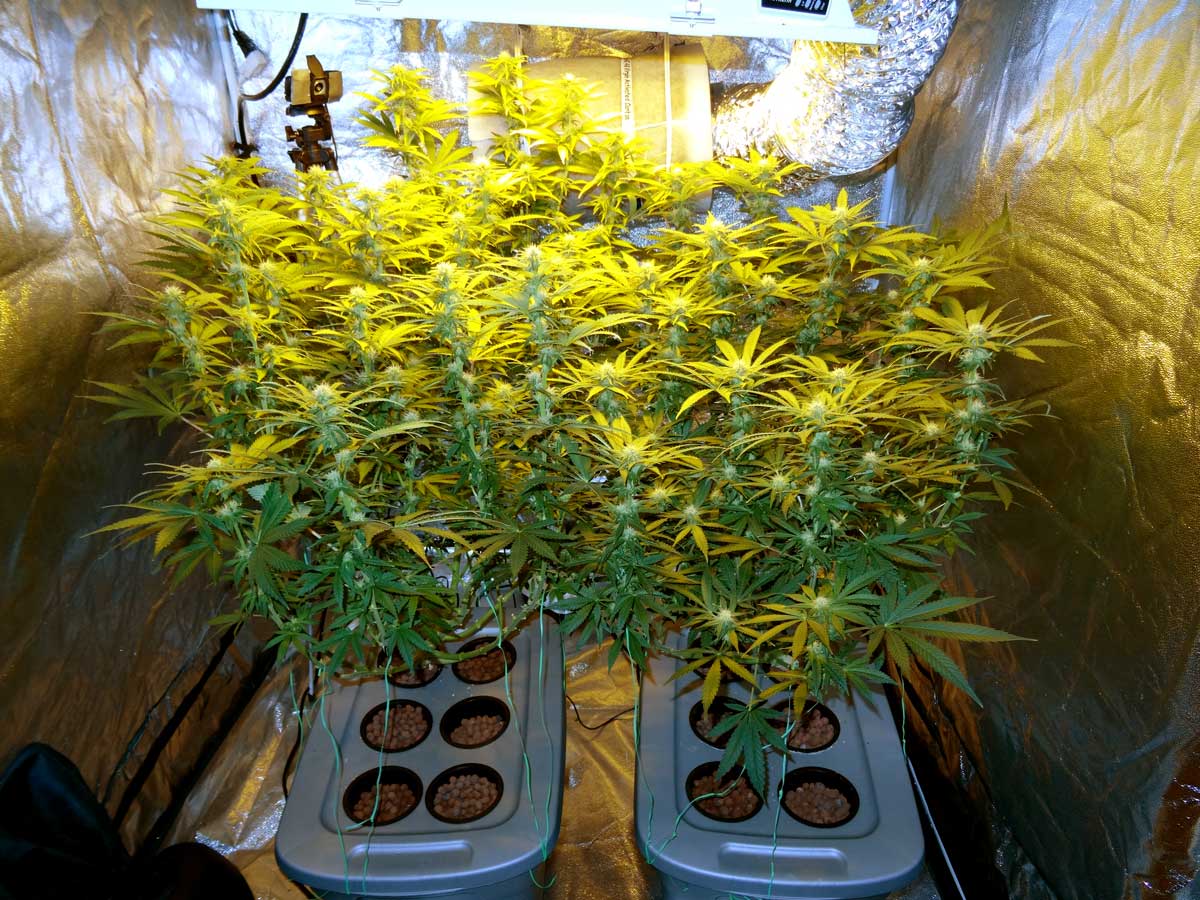
39 days into flowering (2.5 weeks later)
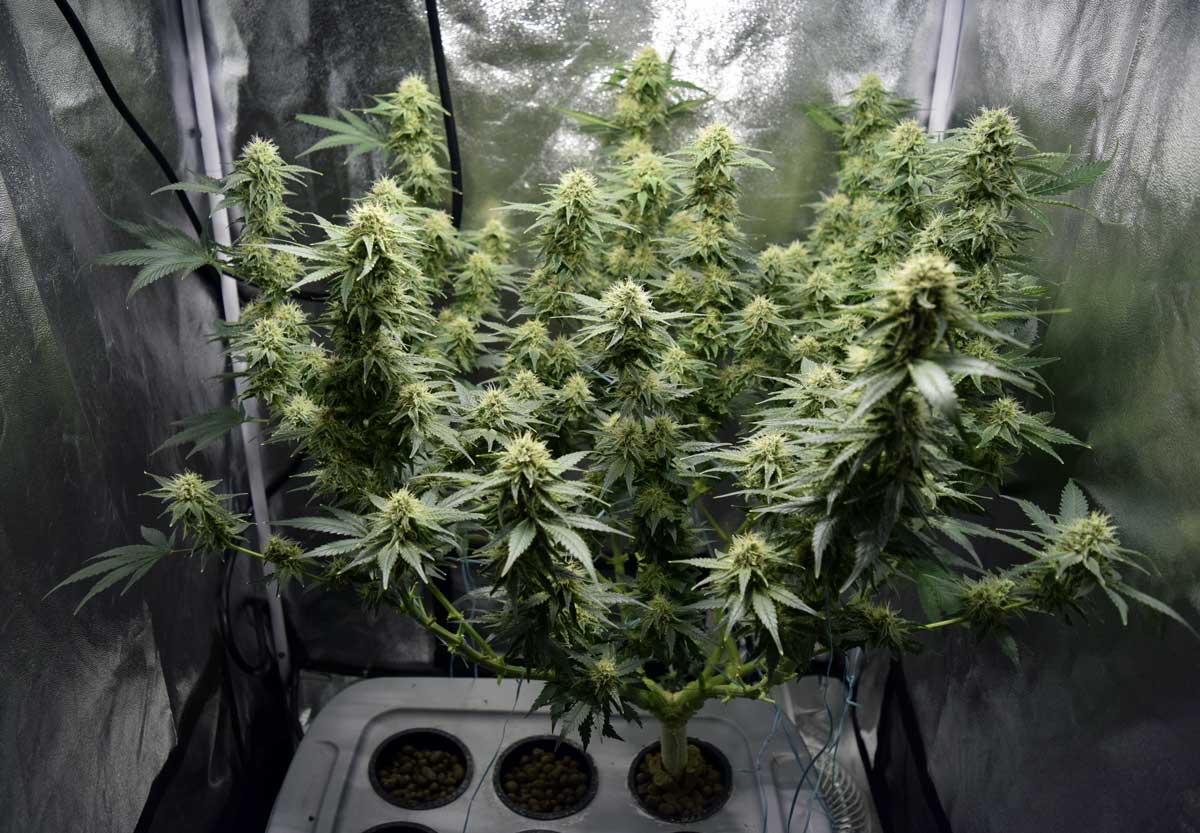
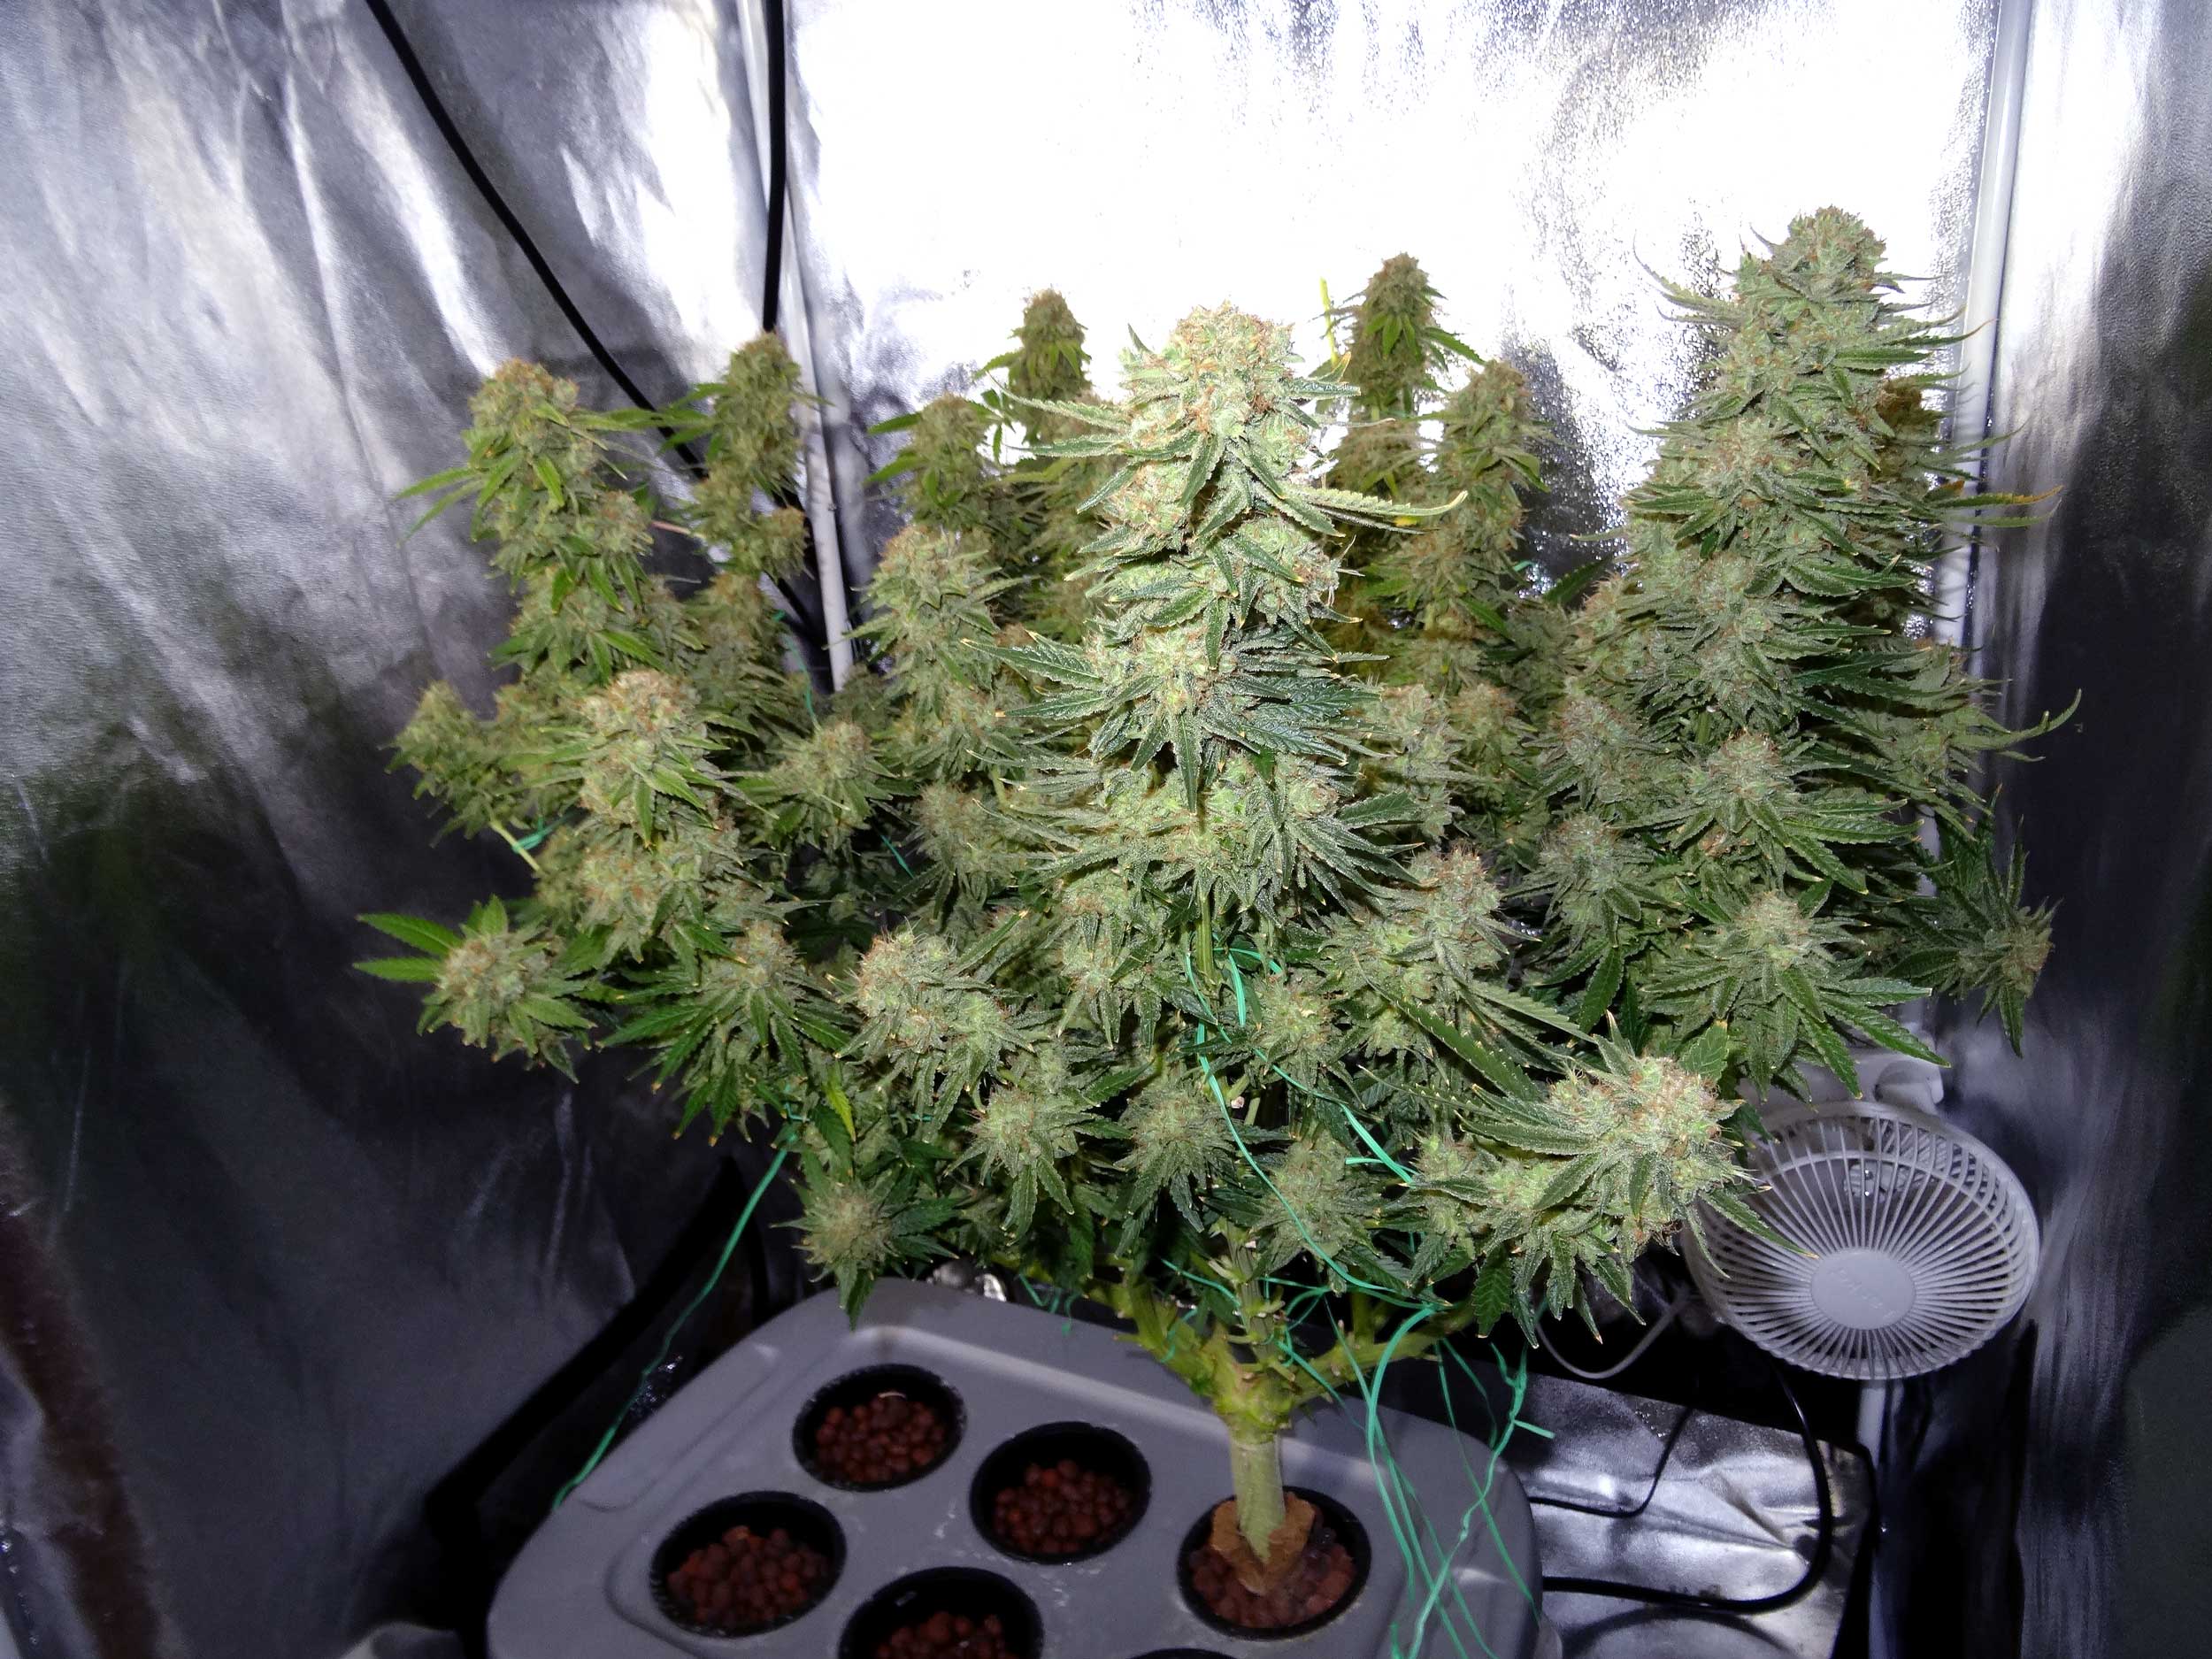
72 days into flowering – Just before harvest
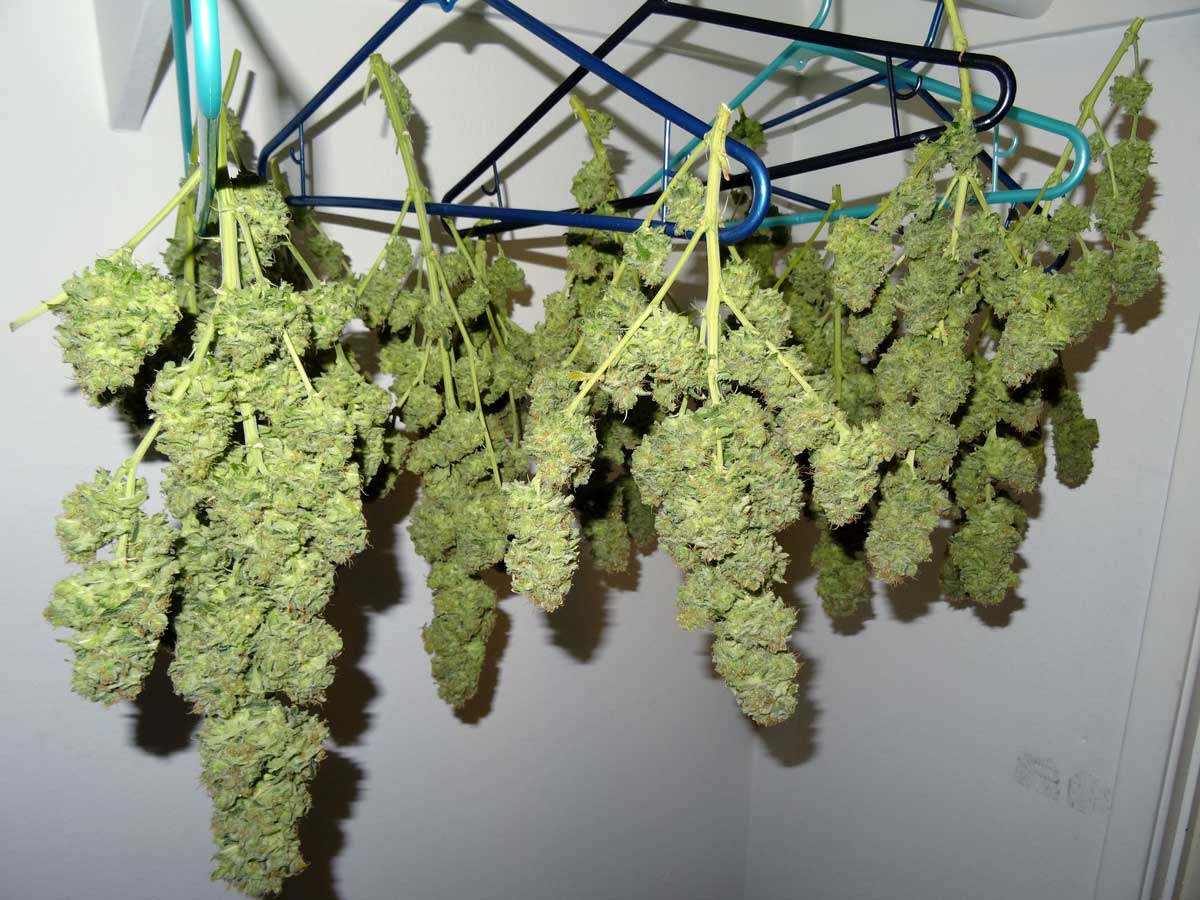
Drying buds upside down.
How can this be? Why would the plant make leaves if it doesn’t need them?
Outdoors, cannabis plants need extra leaves to store nutrients and create an extra wall of defense in case the plant gets attacked by pests or otherwise loses all its leaves. But indoors there should be no pests, and you are there to give your plants the exact nutrients it wants at the exact right time. This makes holding onto leaves a lot less useful for the plant, especially some plants which get extremely bushy without defoliation.
“In the wild a fan leaf is a pretty necessary thing. Not only is it a solar panel but it is also a holding center for the plants nutrients. Indoor grows, where you control a constant supply of food to your plants, makes the fan leaf less necessary. Yes, they are a solar panel but they are also a huge blocker of light to your offshoots which need daily development to achieve greatness.”
– AK GreenLover
Cannabis isn’t the only plant that benefits from defoliation
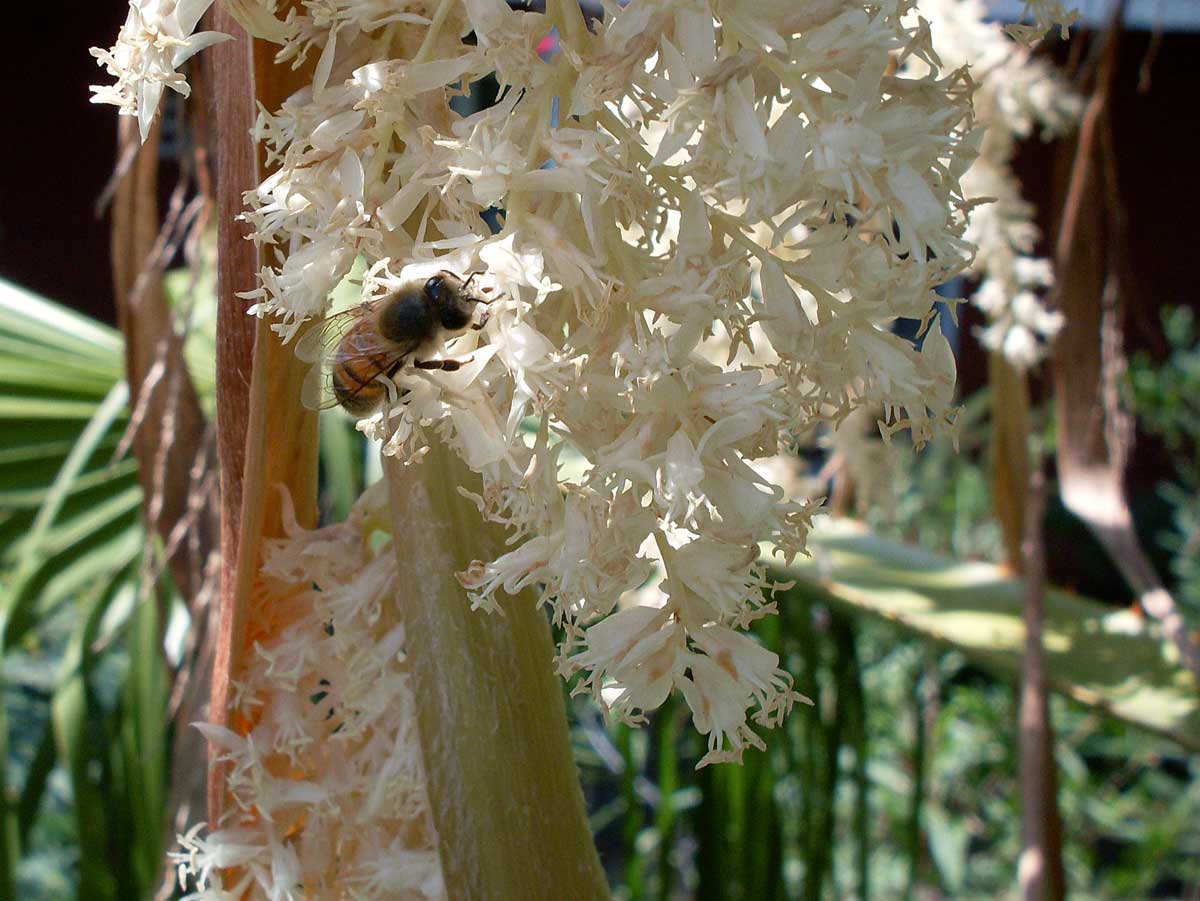
To those naysayers who claim defoliation can NEVER work, I think it’s important to point out that cannabis isn’t the only plant that rewards growers with bigger yields and higher quality from defoliation. Some commercial crops, such as cotton, need to be defoliated during their grow to produce the best yields and quality of cotton. In fact, even after 40 years of intense study on cotton defoliation, there is still controversy and ongoing research by commercial crop producers to further pinpoint the exact time and way to defoliate cotton plants in the field to produce the best results. In a study with subterranean clovers, defoliation in early to mid flowering dramatically increased the number and size of flowers, but continuing defoliation until later in the flowering stage dramatically reduced flower yields. Cowpeas and some palms are other plants that produce better yields in response to thoughtful defoliation, but again yields are lower when too many leaves are taken, or if they’re taken at the wrong time.
Some palms produce more flowers in response to being defoliated
I think these examples demonstrate the main thing you need to remember: Defoliation is definitely not some magical way to increase cannabis yields; it’s a technique like any other and it can be done in both good and bad ways.
Let’s learn how to do defoliation the right way for cannabis plants!
Note: Cannabis defoliation works best when it’s combined with other cannabis plant training methods such as topping or LST.
Cannabis Defoliation in the Vegetative Stage
Some growers say cannabis defoliation in the vegetative stage can only hurt your plant. They believe removing leaves only prevents the plant from growing. In our experience, we believe defoliation gives growers better control over plant structure, while also stressing the plant in just the right way to cause it to explode in growth… but only in the places you want!
Now I would never recommend that someone take defoliation to an extreme unless they were a very advanced grower who can understand their plant…but I do believe the following extreme example shows that defoliation doesn’t necessarily hurt or stop your well-established, hardy indoor cannabis plant.
In the following example, the left plant was only defoliated slightly while the right plant was heavily defoliated! Defoliating this much is NOT recommended for most growers and could seriously hurt your plants in the wrong conditions!
The right plant was heavily defoliated – don’t do this if you have never defoliated before! If you do decide to “skin” your plant this way, I highly recommend leaving all the bud sites and only removing leaves. I’ve found having more bud sites (without leaves) doesn’t seem to take away from your top buds, but taking too many buds sites WILL hurt your yields. As a result, growers usually get better yields if they leaves all their bud sites alone, and stick purely to removing leaves.
Here’s a closeup of that defoliated plant. The grower wanted 8 main colas, with no other larfy bud from below. So they removed all growth except the growth at the end of the desired colas. However, in my experience, this grower would have produced even higher yields if they’d left all the bud sites and only removed leaves. The top buds would have been the same side, but you’d still get a few chunky buds from the bottom, too, getting more out of your grow space.
Now here’s those two plants 12 days later. The defoliated plant has completely overtaken the other plant, but with a better plant structure to take advantage of indoor grow lights.This grower did this in a very controlled environment, but you can start to see how it works. Like I said, that plant got good yields, but I think it would have gotten more with more lower bud sites.
The defoliated plant does not have growth tips from underneath trying to make bud (which would never amount to anything anyway). The only growth tips left are the ones that the grower wants to become main colas. This type of structure sets the perfect stage for flowering, where the main colas stretch up and become a row of buds in your canopy.
Picture Proof – Cannabis Defoliation in the Flowering Stage
How can taking away leaves help your plants in the flowering stage? Don’t they need as much energy as possible to make buds?
Yes and no.
Yes, your plant does want to make the most energy for its buds in the flowering. But, making sure all the bud sites are exposed to direct light (and air) is actually one of the best ways to do that. For whatever reason, just like several other types of plant, partial (and thoughtful) defoliation increases the final size and mass of flowers.
I’ll show you a quick cannabis defoliation sequence, and there are lots more pictures below
Defoliation: Before – notice how leafy the plant is; no light can get down past the top canopy. Way-too-bushy plants like this are prime candidates for defoliation in the flowering stage.
Before plucking

Immediately After Plucking

4 days later, look at the incredible bud growth!

Now that you’ve seen how powerful cannabis defoliation can be in the flowering stage, let me give you a little background information, plus even more picture proof!
In the wild, plants are powered by the sun. The sun has deep penetration (enough to travel 93 million miles and still power your plants) and moves throughout the sky, getting light and energy to all the buds. This may be partially why defoliation doesn’t seem as effective on outdoor plants.
But in an indoor grow environment, your grow lights just don’t have that power.
The only way to get light directly to your buds is by removing physical obstacles so the buds aren’t left in the shade.
Outdoors cannabis plants get light from all angles (since the sun moves through the sky). When all the buds of an outdoor plant get direct exposure to light, they don’t grow larfy buds at the bottom like indoor plants do. But if part of an outdoor plant is in the shade, those buds won’t develop.
But why doesn’t the plant just use the energy from the top leaves and send it to the buds below? Because the plant sends energy to the nearest budsite, instead of taking that energy and having to move it to all the way to another place on the plant. If you look at any indoor-grown plant, it’s obvious that the buds that don’t get light never fatten up.
The less light received by a bud, the smaller it usually is at harvest. With indoor grow lights, the light is usually only coming from above and has much less penetration, and so buds lower on the plant (and any buds in the middle that don’t receive light) stay small and airy.
Buds that don’t get light stay smaller, so with indoor plants the lower buds stay smaller.
It’s even worse if the plant is very leafy like the one below. Notice how tiny the lower and middle buds are. You can also see a few tiny buds peaking through their leaf cover at the very bottom middle. These “buds” are little more than a few hairs.
This is the type of bud that grows at the bottom and middle of the plant grown indoors without access to light. These buds are often called “popcorn buds” or “larfy buds” and they don’t really have any use beside being thrown in with the trim.
So for the best results, indoor growers must try to keep all the buds near the grow lights, so they all develop and get as big as possible.
That’s why many indoor growers try to grow flat plants (shaped like a table) with lots of bud sites at the top – you get bigger yields when many buds get great access to light. In fact there are many plant training techniques besides defoliation for indoor cannabis growers, and the goal of nearly all plant training techniques is to create a flat even canopy directly under the grow lights. Defoliation is just one of the most advanced technique that builds on all the others.
Let’s show you some examples of what defoliated buds look like in the flowering stage. I hope these pictures and videos show what I cannot express in words!
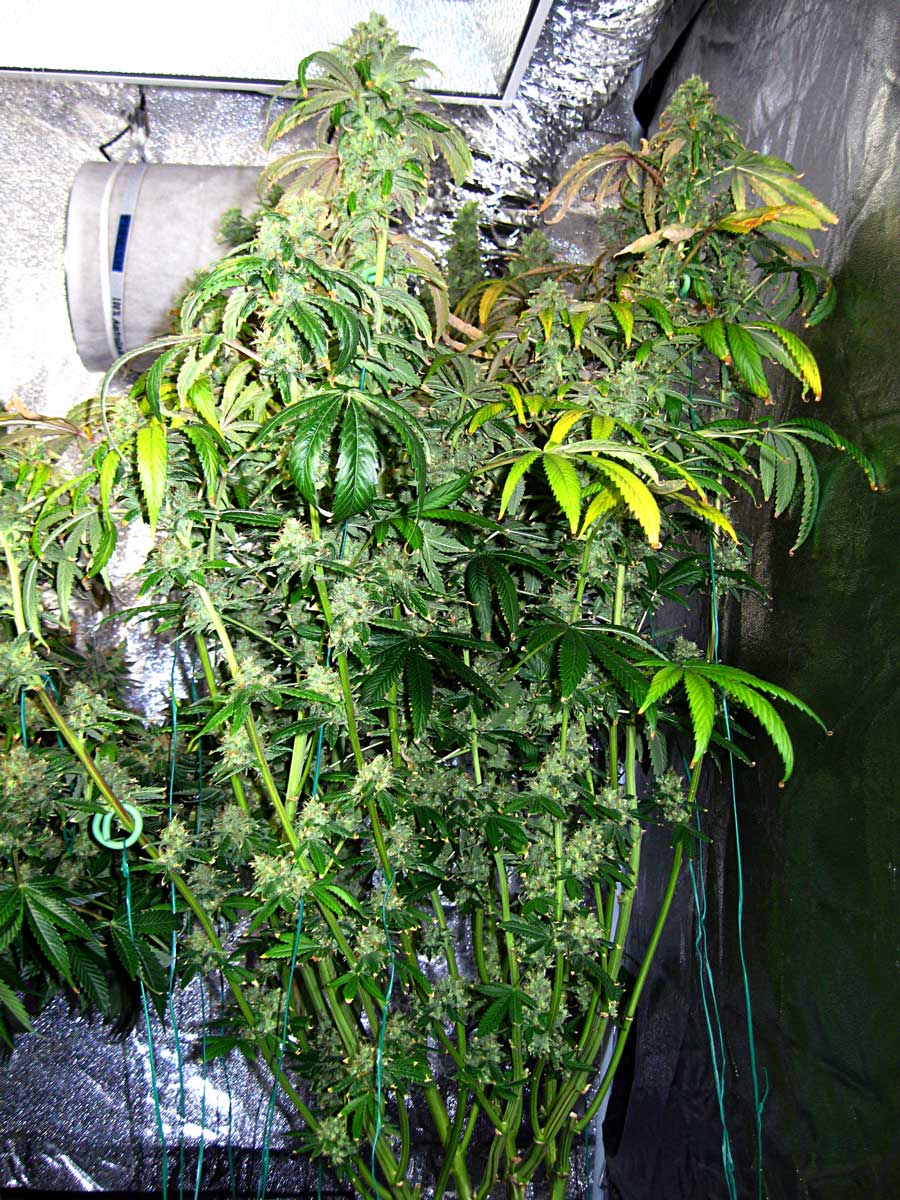
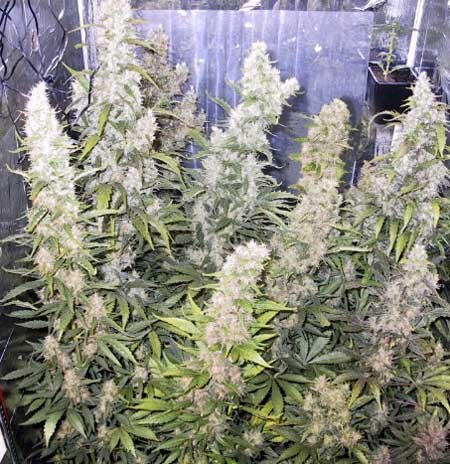
This plant was grown in coco coir after being defoliated throughout its life. Despite the tiny low-wattage lights, this plant ended up rewarding the grower with solid yields.
Getting more light to more of your buds is the whole purpose of the ScrOG technique (using a screen so you end up with just tops under the grow lights). ScrOG relies on removing unwanted leaves and underbrush in order to focus all energy on the top buds.

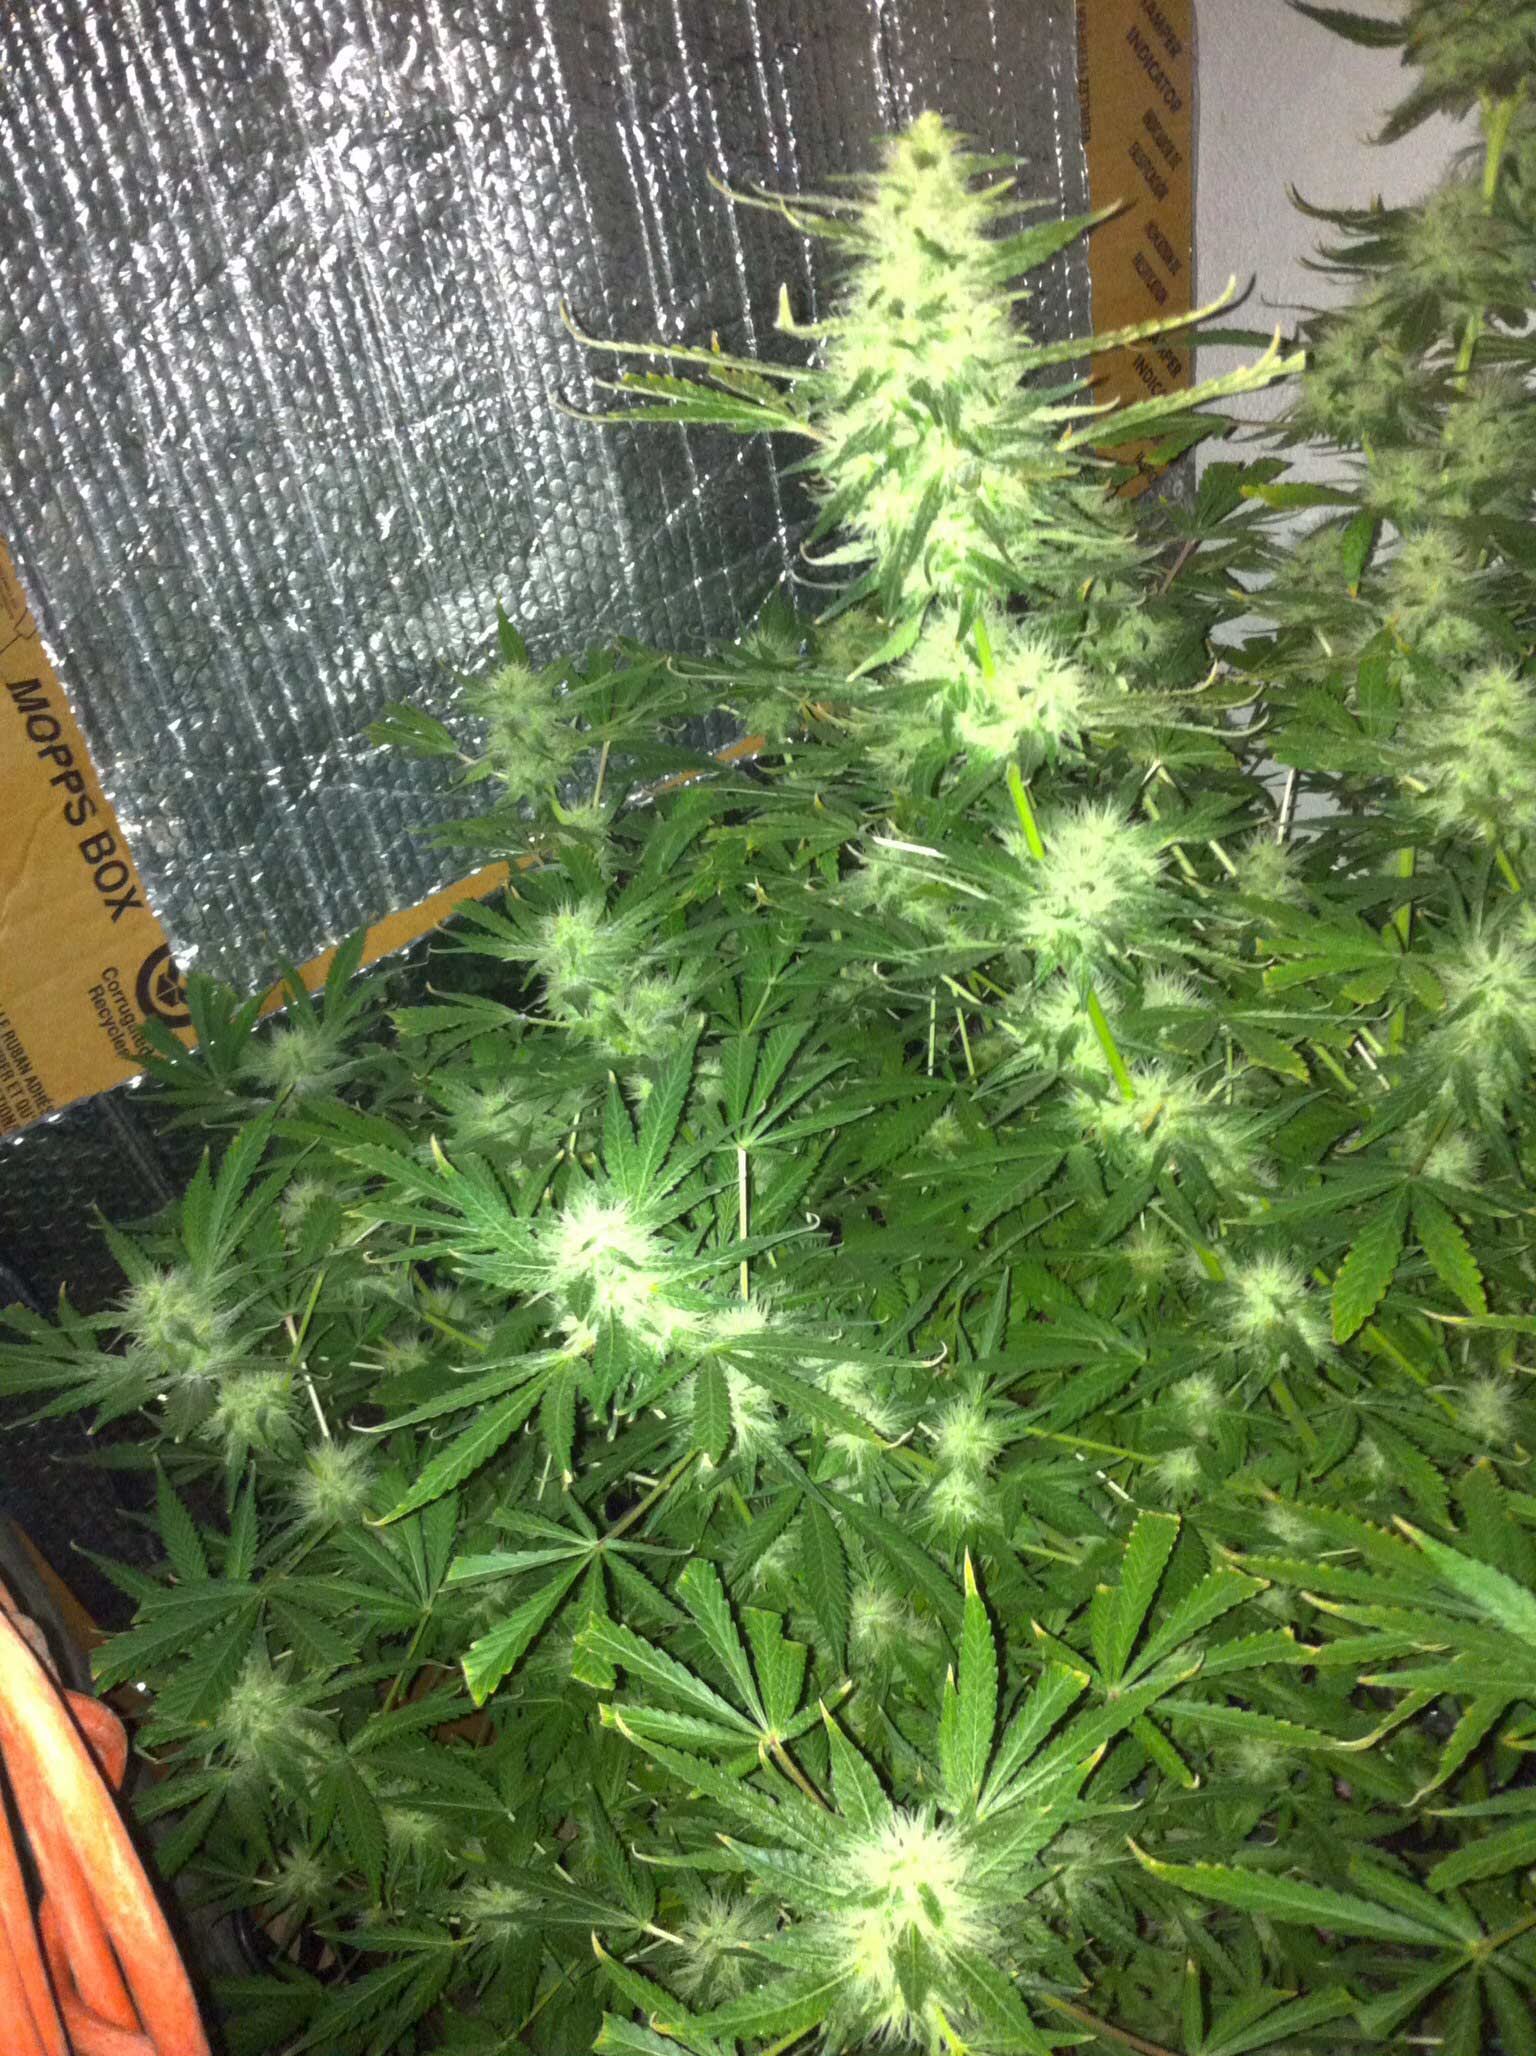
As you can see, this plant was defoliated just enough to expose all the buds, and no more. This is the ideal way to defoliate for beginners, since there’s less room for error.
This plant was under 2 feet tall at harvest, but still pulled in 6 ounces of premium bud after grower exposed buds with defoliation throughout the flowering stage.
I think it’s difficult to find examples of indoor cannabis plants that grow huge buds like these without some sort of defoliation or a massive amount of light. Whether it happens naturally or manually, I believe this type of indoor result is difficult to achieve without exposing the buds to direct light from the grow lights in the flowering stage, but I would love to be proven wrong!
Send us pics of your defoliated cannabis plants!
Vegetative Stage – How to Defoliate
Why defoliate in the Vegetative Stage?
Prevent Mold – With a leafy plant, the inside can get very humid and even produce water droplets on the leaves. Defoliation can help prevent mold from growing on a leafy plant.
Faster growth in the parts of the plant you want – you’re getting rid of unwanted parts of the plant, and the rest of the plant will start growing faster in response (since it doesn’t have to spread its energy, it can focus just on growing the parts of the plant you want).
- Better structure to take advantage of grow lights – Defoliation can help you create a better structure to start flowering by allowing you to create several main colas (prime bud sites), and get rid of colas that are unlikely to produce any significant amount of bud.
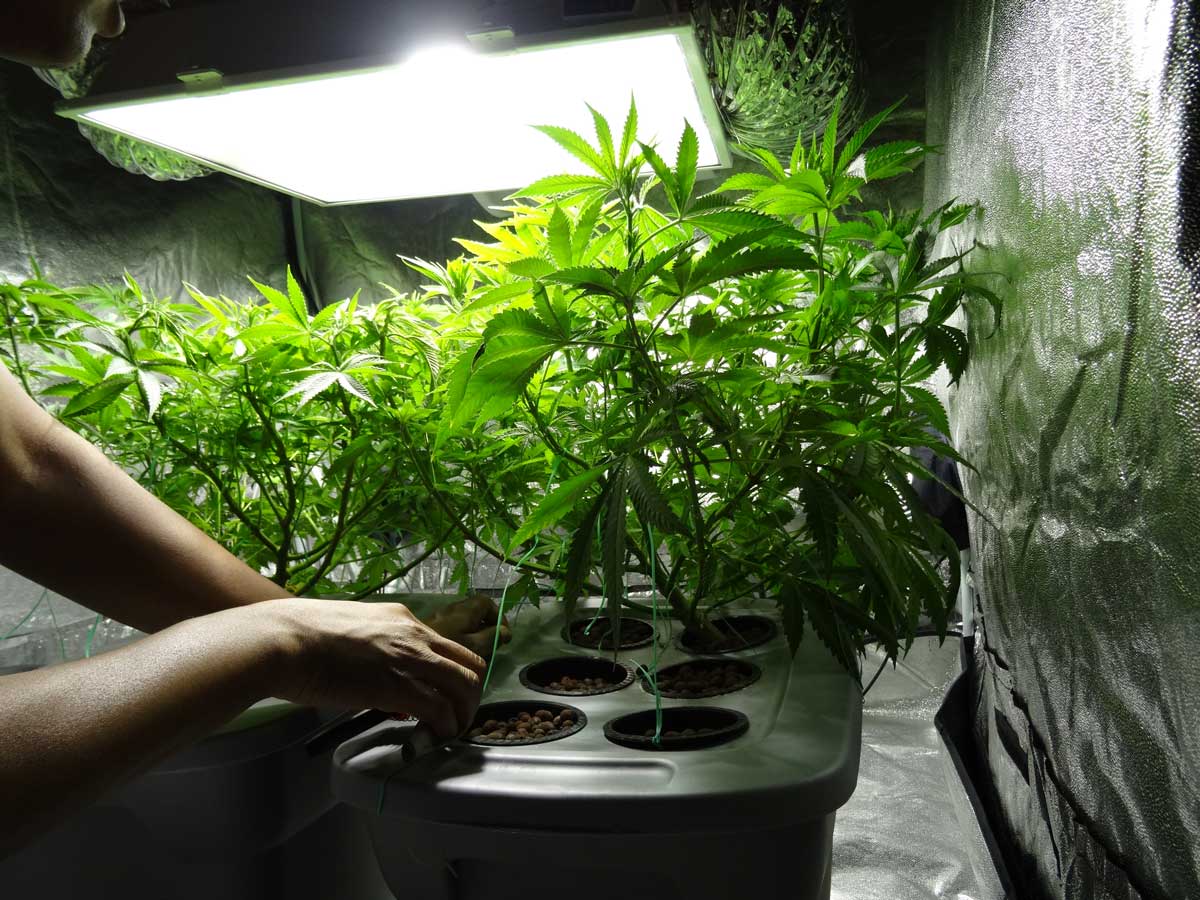
Training is easier – Removing leaves can make it easier to train plant with LST (Low Stress Training), and defoliation is absolutely necessary for advanced growing techniques like ScrOG and manifolding.
When to defoliate in Veg (checklist)
- Plant has several nodes (is no longer a seedling or young plant)
Plant is healthy and fast growing
Hardy strain
Plant is so leafy that leaves are laying on top of each other, especially if it’s leafy in the middle of the plant
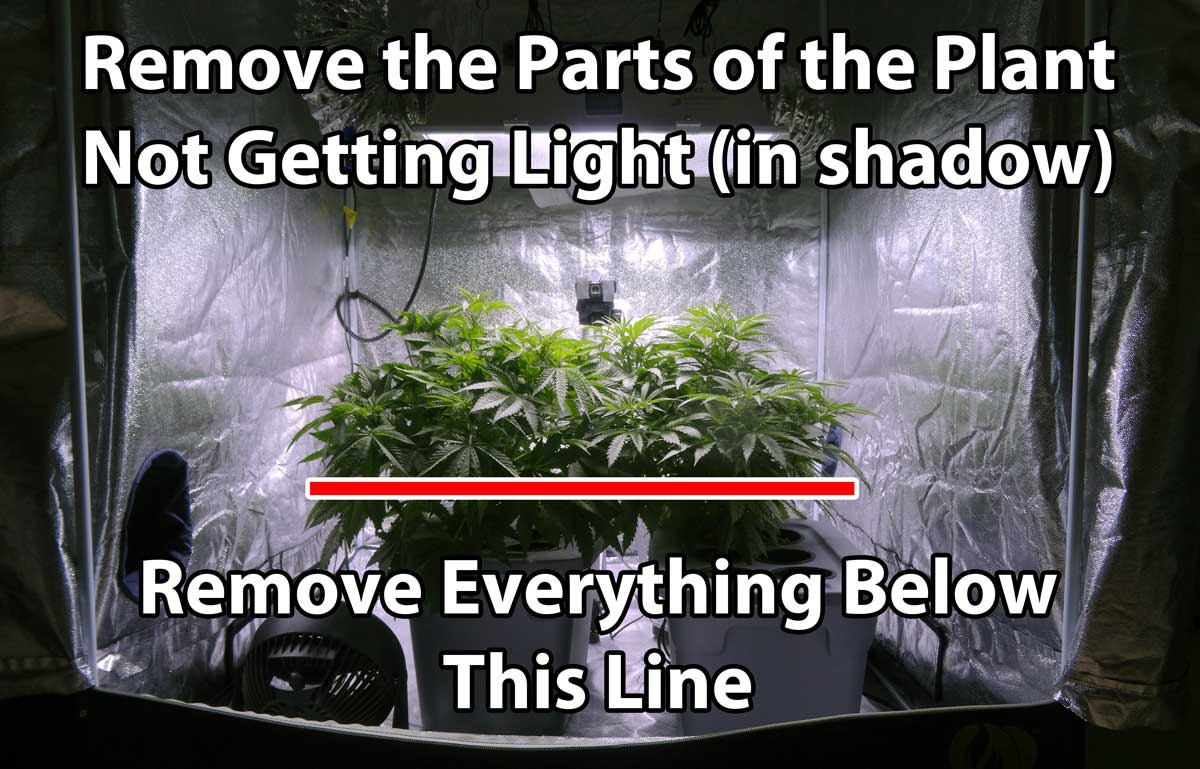
Leaves are preventing light and air circulation from getting to the inside of the plant (see picture below for an example of a great candidate for defoliation)
These vegetative plants are so bushy the bottom of the plants are in complete shadow. These plants should be defoliated for the best growth and to prevent possible mold or other problems from occurring in the middle of the plant
When NOT to Defoliate in Vegetative Stage
- Plant is unhealthy or slow growing
Strain is known to be finicky and tough to grow
Plant is not very leafy
First-time or new grower
You can see through this plant and light easily reaches the bottom. That lets you know this cannabis plant doesn’t need to be defoliated.

Which Leaves to Defoliate in Vegetative Stage
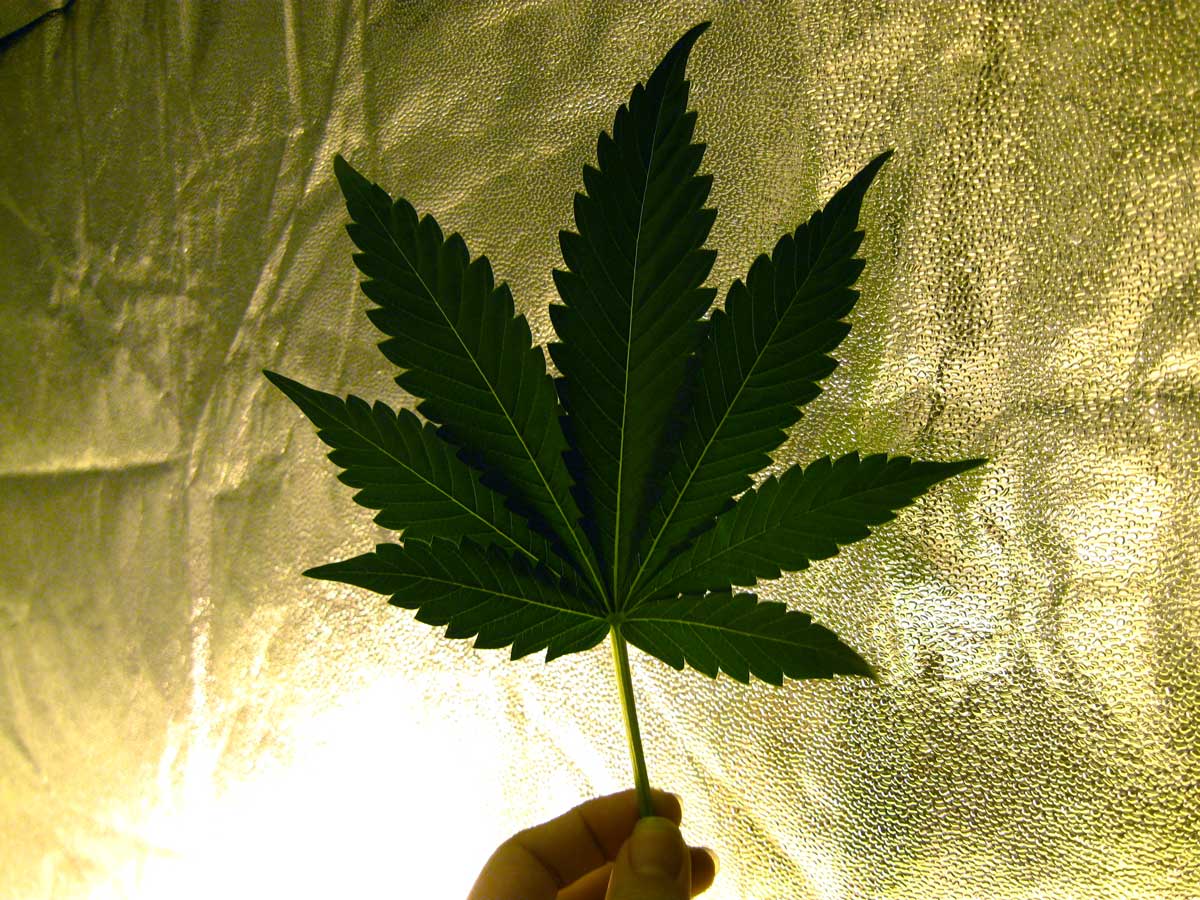
When defoliating in the vegetative stage, you should start by taking off troublesome fan leaves (big leaves with many “fingers”). You’re looking to remove leaves that are laying on top of each other (which can create wet spots, leading to mold). When possible, try to take leaves lower down on the plant, and in the middle of the plant.
Try to stick to removing fan leaves that are on the larger side
Try to avoid plucking the outer and uppermost leaves – they already should be getting plenty of light and don’t need to be removed. You want a plant with leaves around the outside, and fewer leaves in the middle or bottom getting bunched up and touching each other.
When defoliating, take 20% of the leaves at most in one session. If you’re inexperienced with defoliation, it’s recommended you take far less, and do your defoliation over a couple of weeks. Leave at least a week between defoliation sessions. Taking too many leaves in a short period of time can seriously stunt your cannabis plants.
While defoliating, you should work on creating the right structure for your plant. Indoor growers generally want many colas (bud sites) to increase yields, and defoliation can help you create a desirable structure.
How to create more colas in the vegetative stage during defoliation
Indoor cannabis growers usually want many colas on their plants to get the most bud out of their grow lights. But in order to achieve the biggest main colas, the competition on the plant needs to be weeded out. That means you need to remove the growth tips/leaves that make up unwanted colas.
Note: Removing growth tips is not technically defoliation since you’re removing tips in addition to leaves, but this technique works so well with defoliation (and does involve removing leaves) that I think it’s important to include this here.
A nice general rule for indoor growers is to try to create 4-8 main colas right under the light. For smaller plants you may want fewer main colas, for bigger plants you may want to create more colas.
In order to create main colas that get fat and dense, you want to remove smaller bud sites so they don’t steal the energy from your main buds. To do this, you should remove undeveloped colas/growth tips that are not going to help you.
This starts by looking at your plant and studying its structure to see which colas seem to have the most dominant branching. You’re looking for colas with a thick connection at the base with lots of nodes at the top of the stem – these nodes are where buds form, so you want your main colas to have a lot of them right under the light.
Buds only form at the nodes on a stem (where fan leaves come out), so if you have a lot of space between nodes, you’ll end up with less bud. This is why it’s important to get rid of these slim, gangly stems and choose to promote main colas that have closely spaced nodes.
The growth tips you choose to leave alone will become your main colas/bud sites. Once you’ve figured out which main colas you want, it’s time to start de-leafing!
If your plant starts getting so bushy that no light is making it down to the floor through the plant, it’s time to “clean” the bottom of the plant. First start by removing any tiny growth tips on the lower part of stems that will never be able to reach the light anyway. These will only create wispy buds at best, and you don’t want these tiny buds to steal from your main buds.
Remove small growth tips from the bottom of the plant that are in shadow
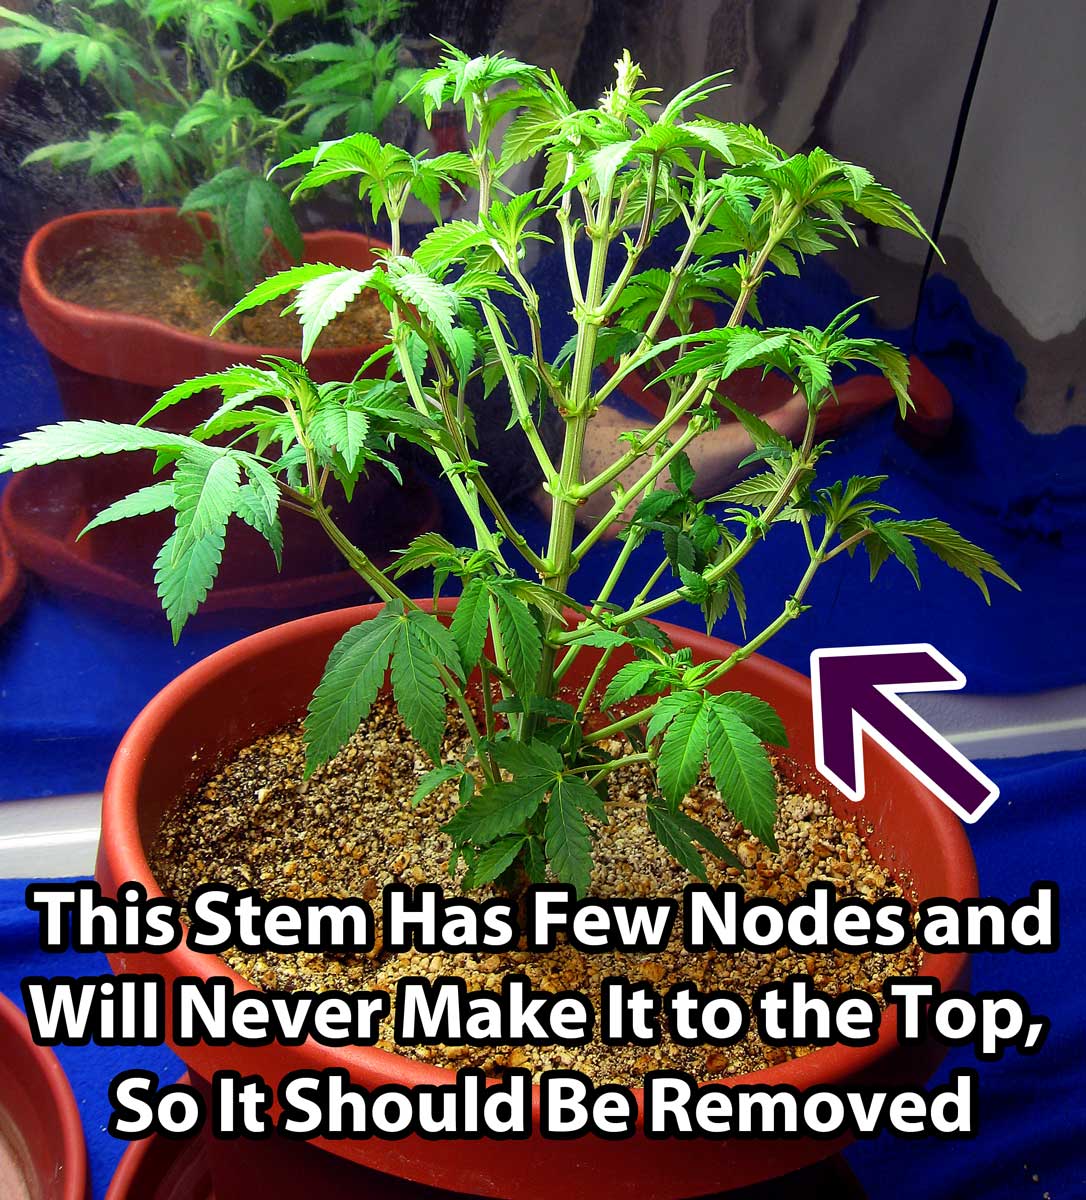
Next, remove long stringy stems with big spaces between nodes – these will never become good colas since they can only make buds at the few nodes it has, and generally should be removed.
Remove stems with few nodes, especially if the stem hasn’t made it to the top of the plant where the light is
This plant was over-defoliated (grower took too many leaves) but I wanted to show it to you because it really shows the structure of the plant underneath.
Now take a look at your plant and study its structure. Determine which stems you want to save to become your main colas. You want at least 4 main colas when growing indoors. Check to see if you need to remove any parts of the plant that may be in competition for light and space with those colas.
What happens after defoliation in the vegetative stage
If you follow all the instructions above, the remaining parts of your plants will grow faster and immediately start “re-leafing” themselves on the colas you have left behind. This faster growth lets you start flowering sooner, and with a better structure to take advantage of your grow lights. The side growth will increase so the plant starts growing more wide and less tall than before, while the bottom growth won’t steal energy from the top buds.
“I stripped many of the fan leaves, not knowing there was a name for it. My girls were at day 20 of growth and fan leaves were huge, so I got rid of them.The plants almost seemed to gather themselves in a tight ball for a few days and then just exploded with sideways growth. A week later not much vertical growth, all sideways.”
– Tose
Flowering Stage – How to Defoliate
Cannabis plants seem to spend the most energy on buds which are exposed to light, and those are the buds that grow the biggest and the most dense. I believe that’s why buds hidden from view and in the middle or bottom of the plant never seem to fatten up – they don’t get enough exposure to light and air.
Why Defoliate in the Flowering Stage?
Helps prevent mold and bud rot on indoor plants by reducing humidity inside the plants, on the leaves and in your grow tent
Bigger yields – buds that are exposed to light and air fatten quickly and produce bigger yields than buds hidden from the light and air.
Who Should Defoliate in the Flowering Stage?
Growing indoors with bright grow lights
Your plants are healthy and fast growing
Your plants have been hardy their whole lives, without problems
Your plants are so leafy that leaves are laying on top of each other, OR
Some buds are hidden from the light by large fan leaves (example below)
Who Should NOT Defoliate in the Flowering Stage?
- Your plants are unhealthy or slow growing
Your plants have given you problems during your grow (they may be too sensitive to respond well to defoliation)
Your plants are not leafy – if you can see through the plant to the other side, and/or if light is making it to the floor under your plants, then you probably don’t need to defoliate
Buds are already exposed to light and air (buds are not hidden by fan leaves)
Don’t defoliate this plant!

When to defoliate in the flowering stage
There are a few schools of thought as to when to defoliate in the flowering stage. I’ll share some common ones:
- Nebula’s defoliation tutorial – Defoliate the plant right before switching to the flowering stage, then defoliate once again at week 3 of the flowering stage. This is what I do with photoperiod plants and I’ve gotten good results with it. I suggest you start with this if you’re not sure what to do.
- Week 3 & 6 defoliation – I’ve heard some grower like to move everything down 3 weeks, and avoid defoliation right at the beginning of the flowering stage. In this case the first defoliation would happen at the end of week 3 of the flowering stage, then a second defoliation end of week 6. I’ve never tried this method, and I typically avoid defoliating that late in flower but some growers swear by it. Let us know if you’ve tried this method and share your results!
- Many growers don’t have a specific schedule, and instead defoliate throughout the flowering stage by pulling leaves whenever the plant seems leafy, or if they notice leaves laying on top of each other or covering bud sites. Basically they go more “by feel” as far as when the plant looks like it needs to be plucked.
Which leaves to defoliate in the flowering stage
Your main goal with defoliation in the flowering stage is to expose all your main buds to light and air. Exposed buds simply grow faster and fatten up faster than buds that have been hidden by leaves.
Try to focus on removing the bigger fan leaves
As in veg, you should still be removing any leaves that are laying on top of each other, and focus on removing those lower leaves (only bigger fan leaves) on the plant if possible. This defoliation will decrease the chances of mold and help release energy to be put into the colas.
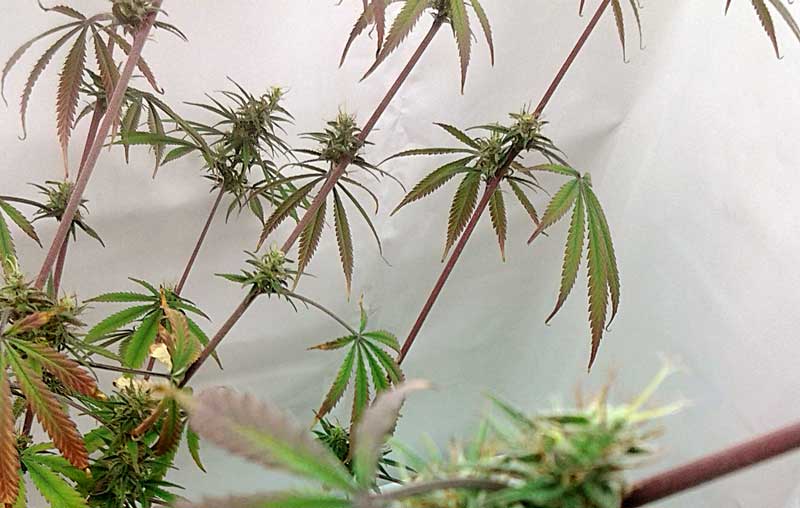
You especially want to remove any big fan leaves near the top that are hiding buds from the light. If a fan leaf is yellow, it doesn’t really have anything left to offer the plant, so it’s also important to take these fan leaves at the top of the plant if they’re blocking any buds.
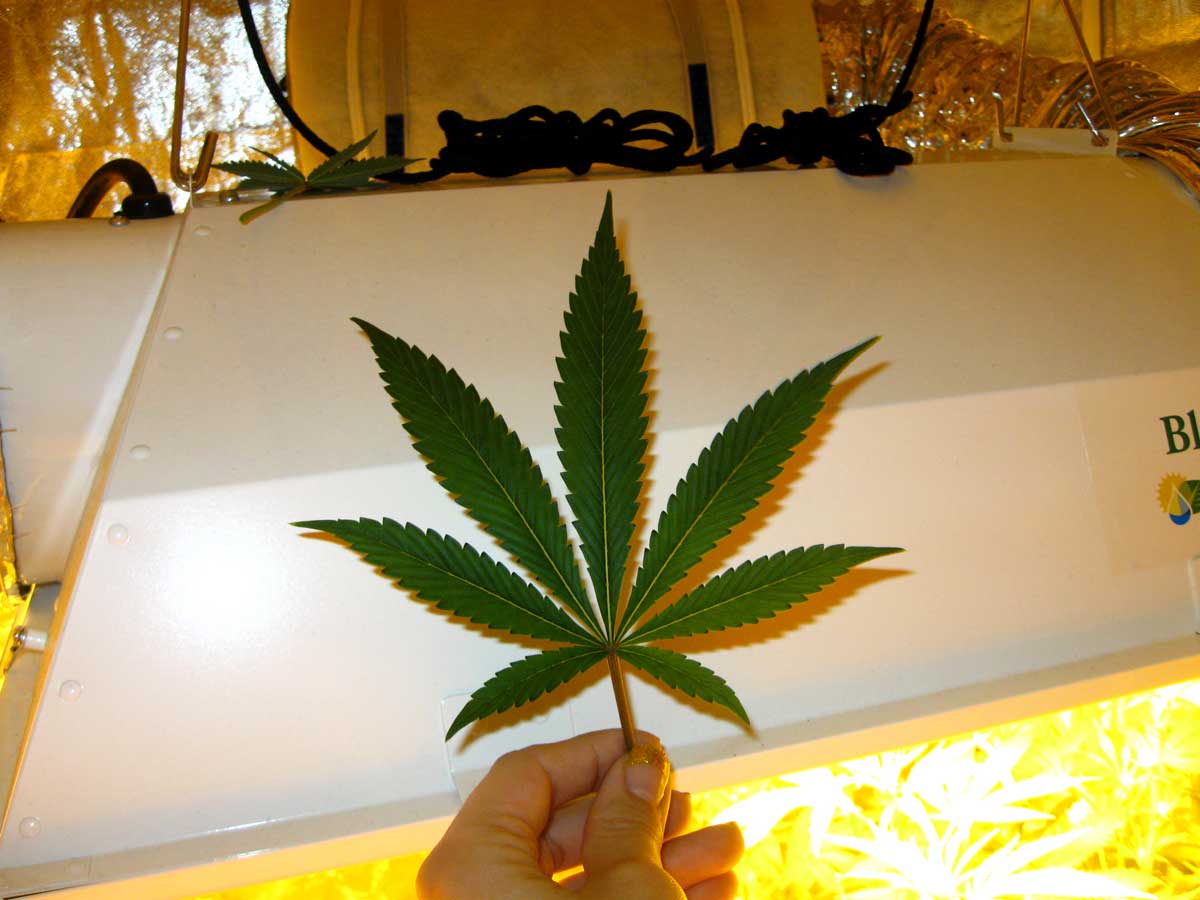
The defoliating tool 🙂
As always, never take so many leaves that you can fully see through the plant. Plants later in the flowering stage don’t really grow more leaves, so all the leaves you take are gone forever and the plant won’t replace them! Taking too many leaves in the flowering stage, especially during the last few weeks, can seriously hurt your yields, and no one wants that!
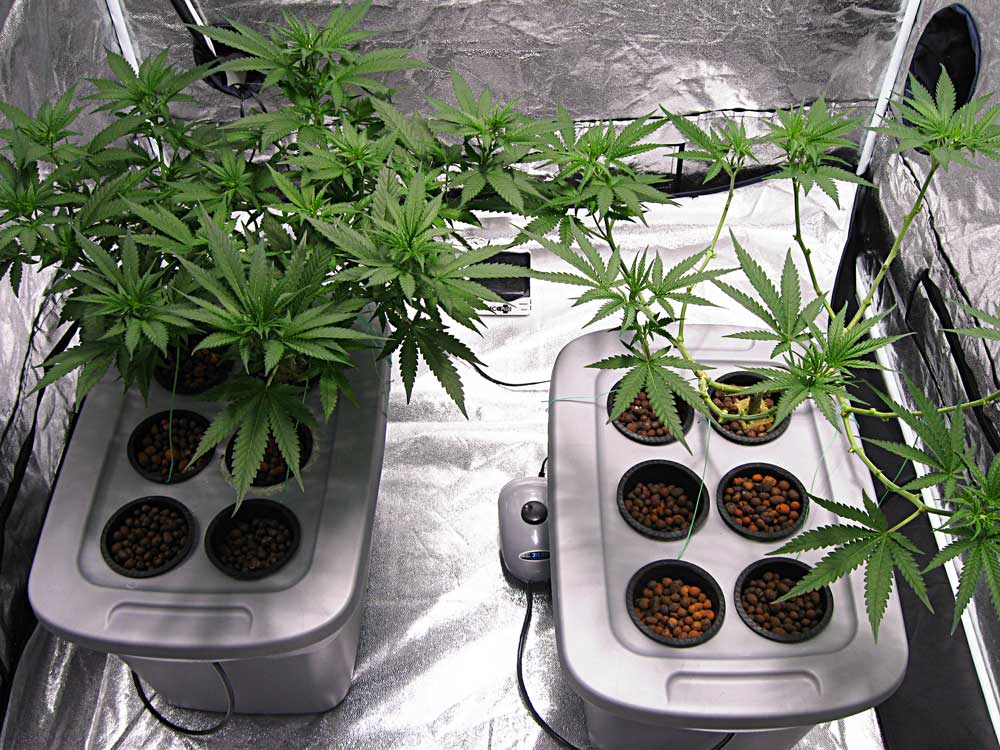
Defoliation Example in the Flowering Stage
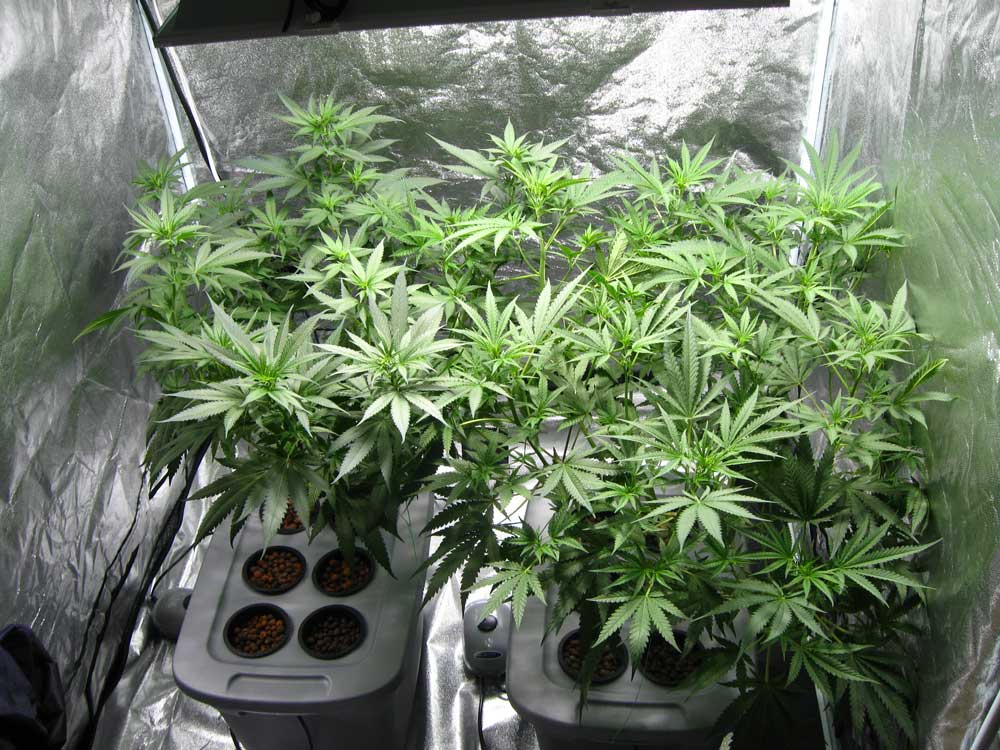
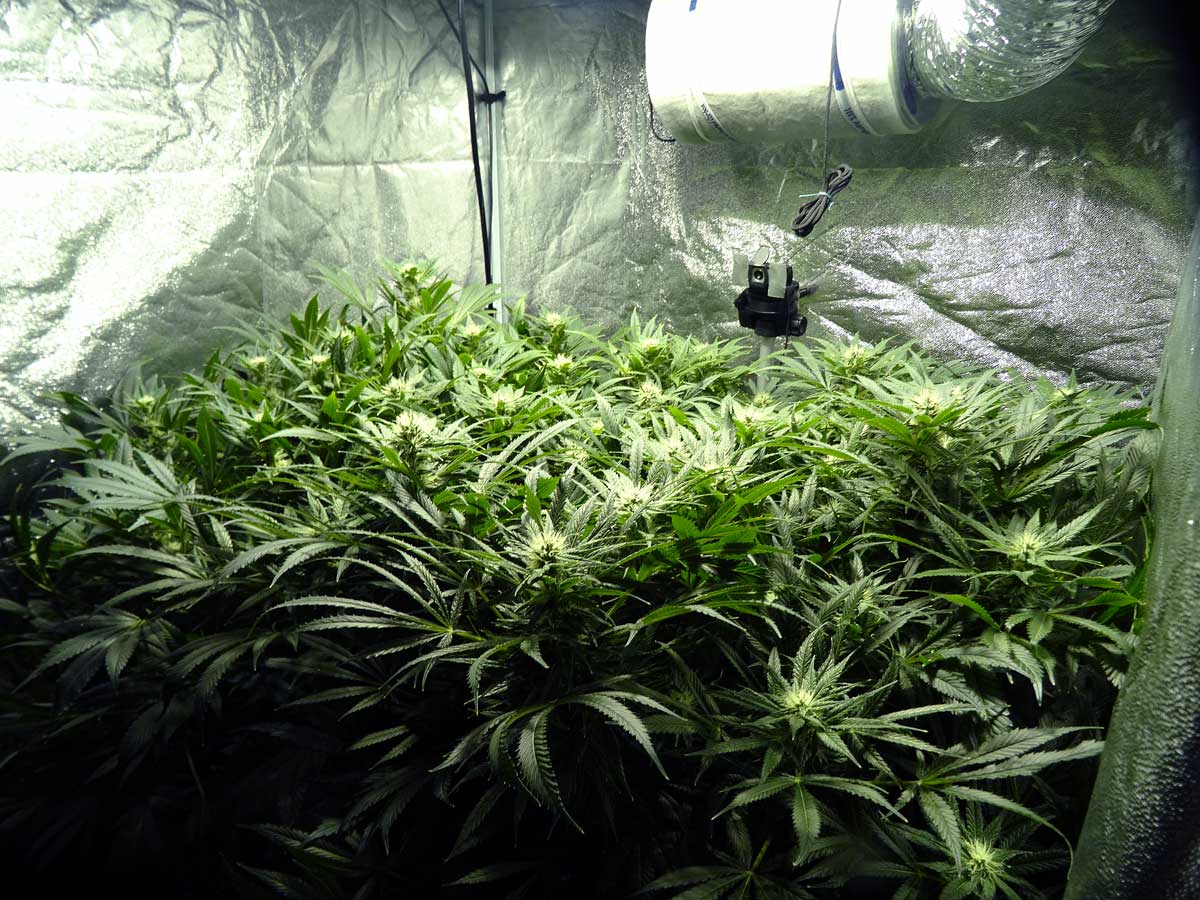
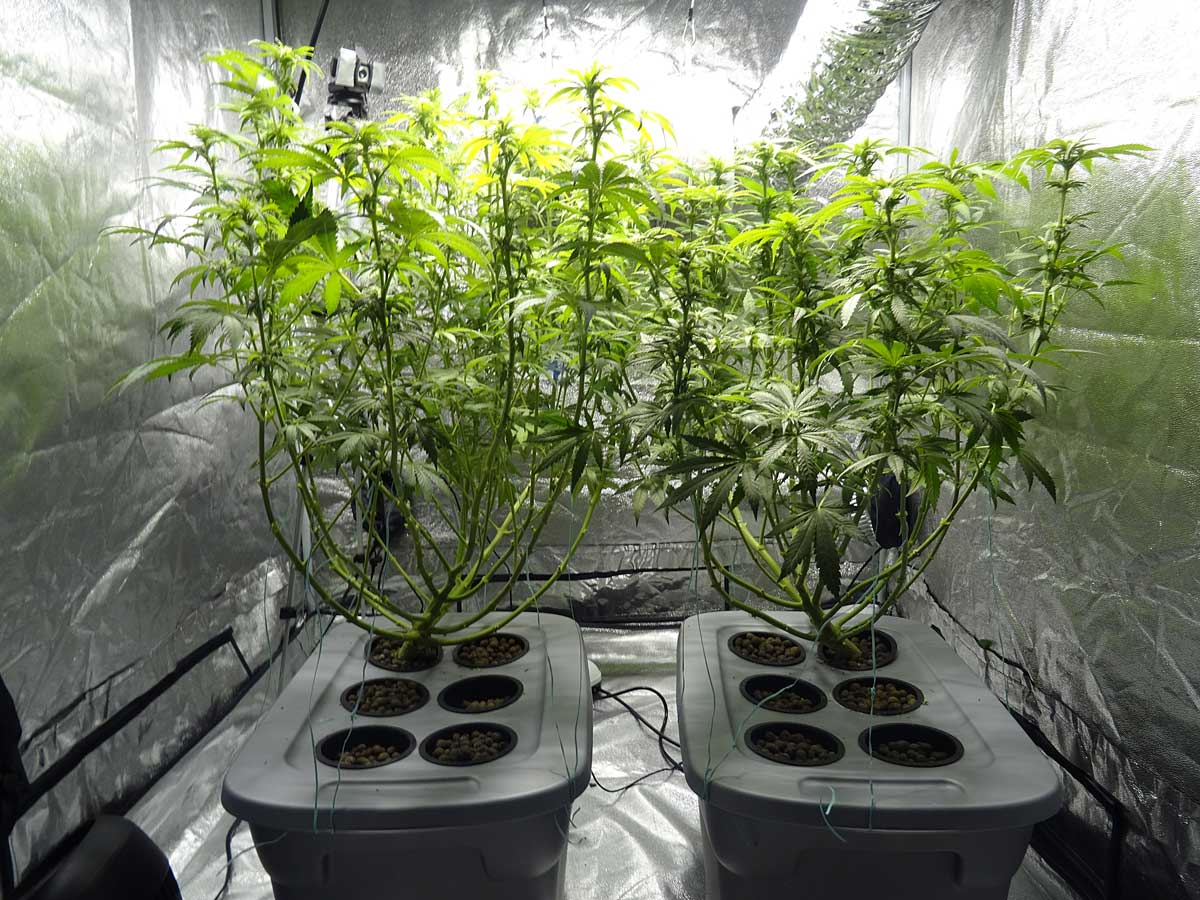
Before – notice how leafy these plants are; no light can get down past the top canopy and the floor is in shadow. Way-too-bushy plants like this are perfect for defoliation in the flowering stage. You may notice this one was defoliated less than some of the other exampless. If your plant is really bushy but you’re worried about taking too many leaves, you can take just a few leaves and it can still help!

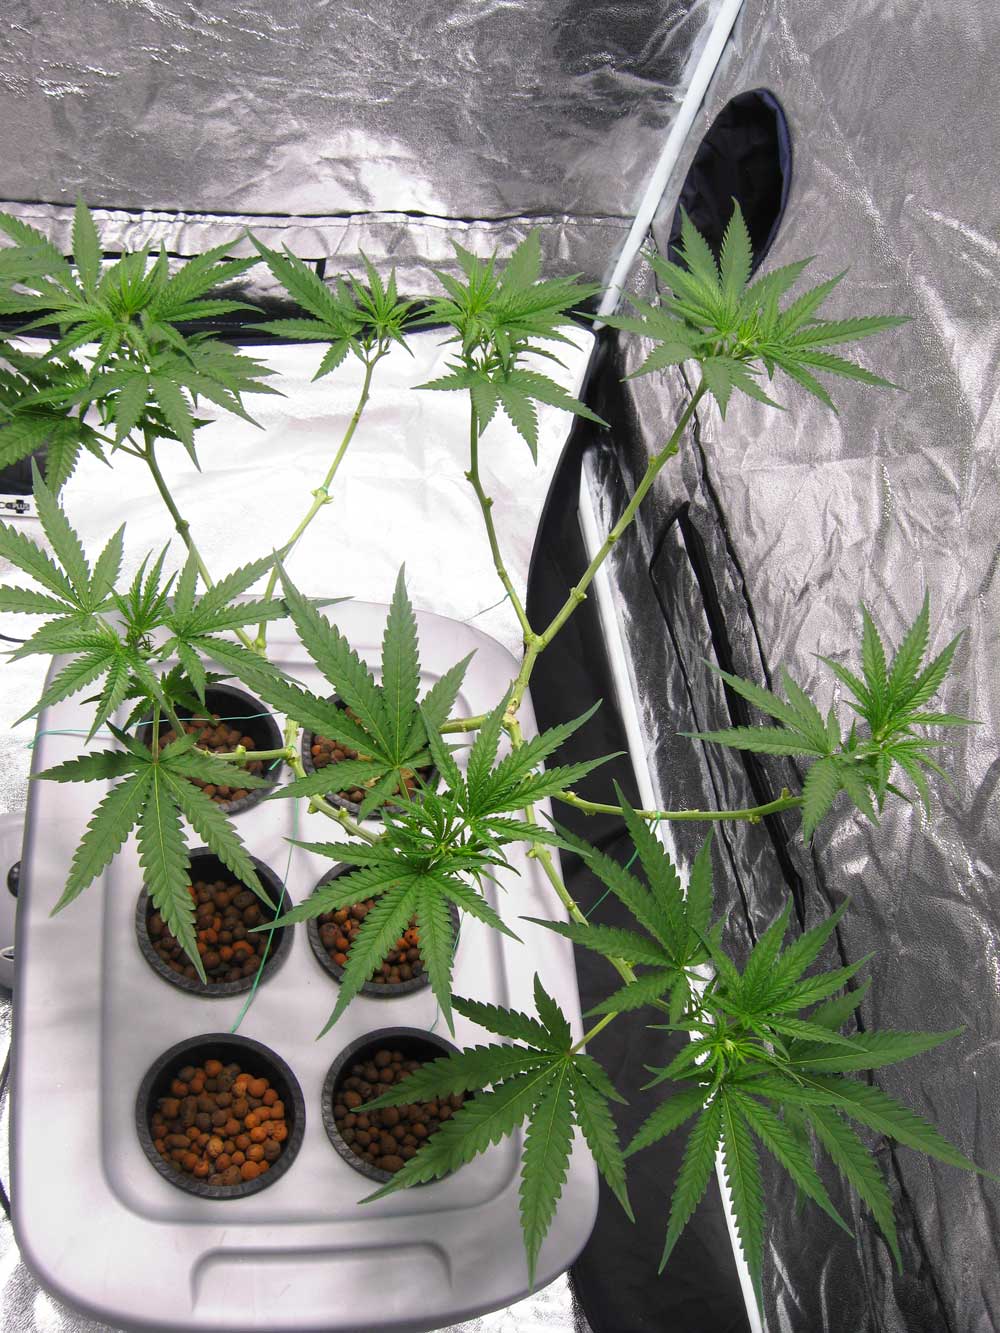
A view from above
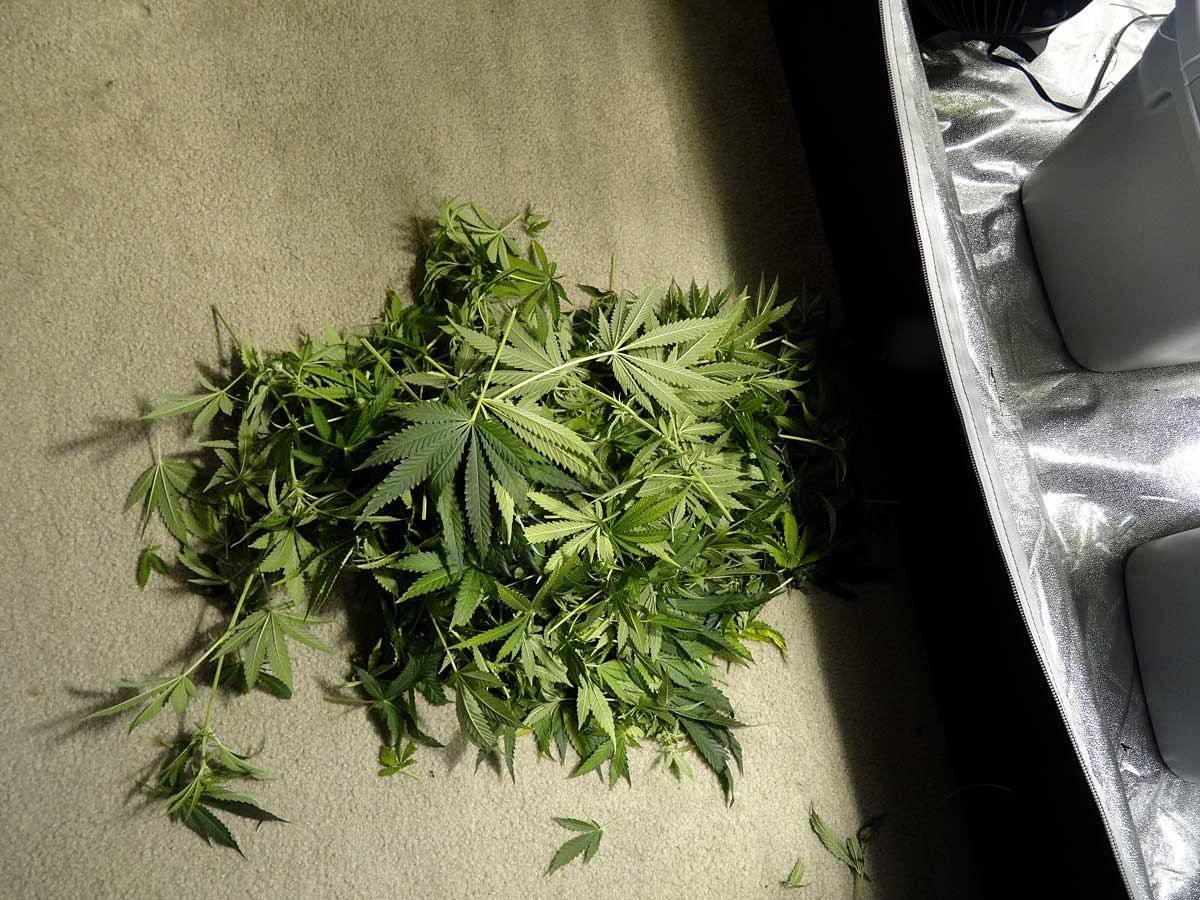
Here’s the same two plants about an hour later, after a defoliation session. Bigger fan leaves were the target, and small fan leaves were left alone. Notice how all the bud sites are now exposed and the light can get to buds deep down in the plant. Several small stems and leaves around the bottom of the plant were also removed, since the tiny lowest buds on spindly stems will likely never amount to anything. But there’s still enough leaves left that you can’t easily see through the plant.
Quick video: immediately after defoliation
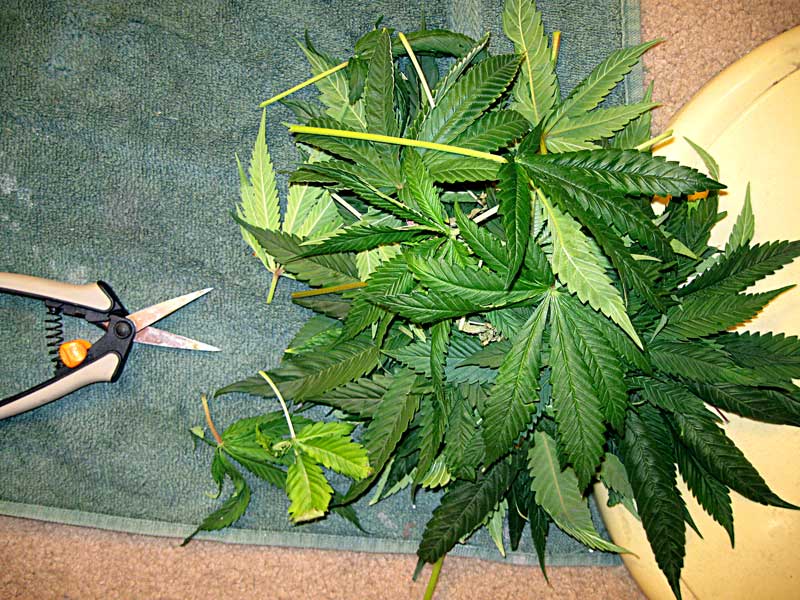
Here’s the resulting pile of leaves and stems. Some of the stems with growth tips had little buds forming, but we had to remove them because they were thin and too far from the light to ever fatten up properly. We want to allow the plant to focus only on buds that are in the right conditions to get big.
What happens after defoliation in the flowering stage
If you follow all the instructions above, your newly exposed buds will explode with growth and start fattening up noticeably. You should easily be able to see the difference after a week. If you’re not sure if defoliation is right for you, try defoliating just half your plant so you can really see the difference 🙂
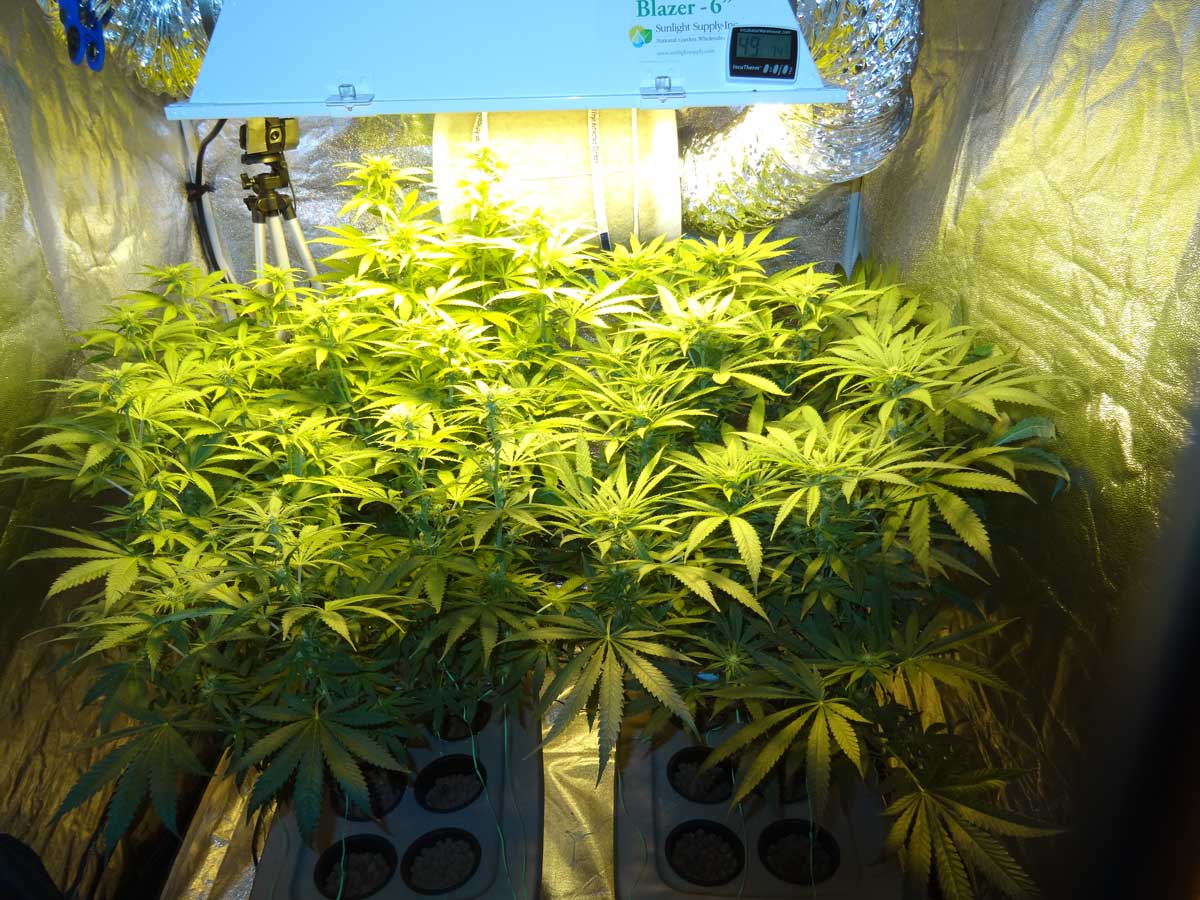
Here are those same plants only 6 days later
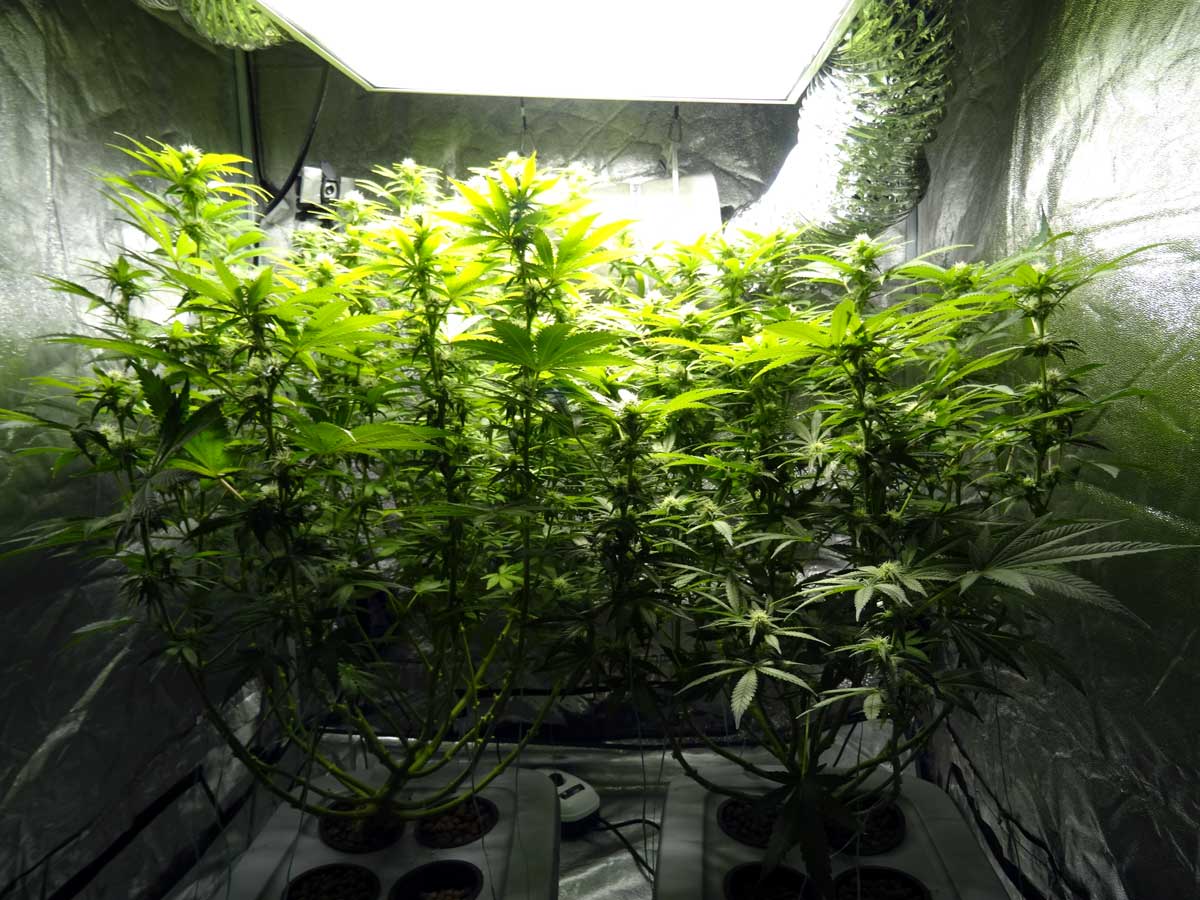
And a view from above
Watch a time-lapse video showing the first 7 days after defoliation for the above plants
“I have been trying defoliation for a month or so of flowering. It works. It always made sense to me but I was too apprehensive to try removing plant parts. After I worked at a commercial nursery growing everything from Catnip to Brugmansia I learned plants can take a beating and defoliation is where it’s at!!!”
– DrRosko