by Sirius Fourside
We all know how important light is to cannabis plants!
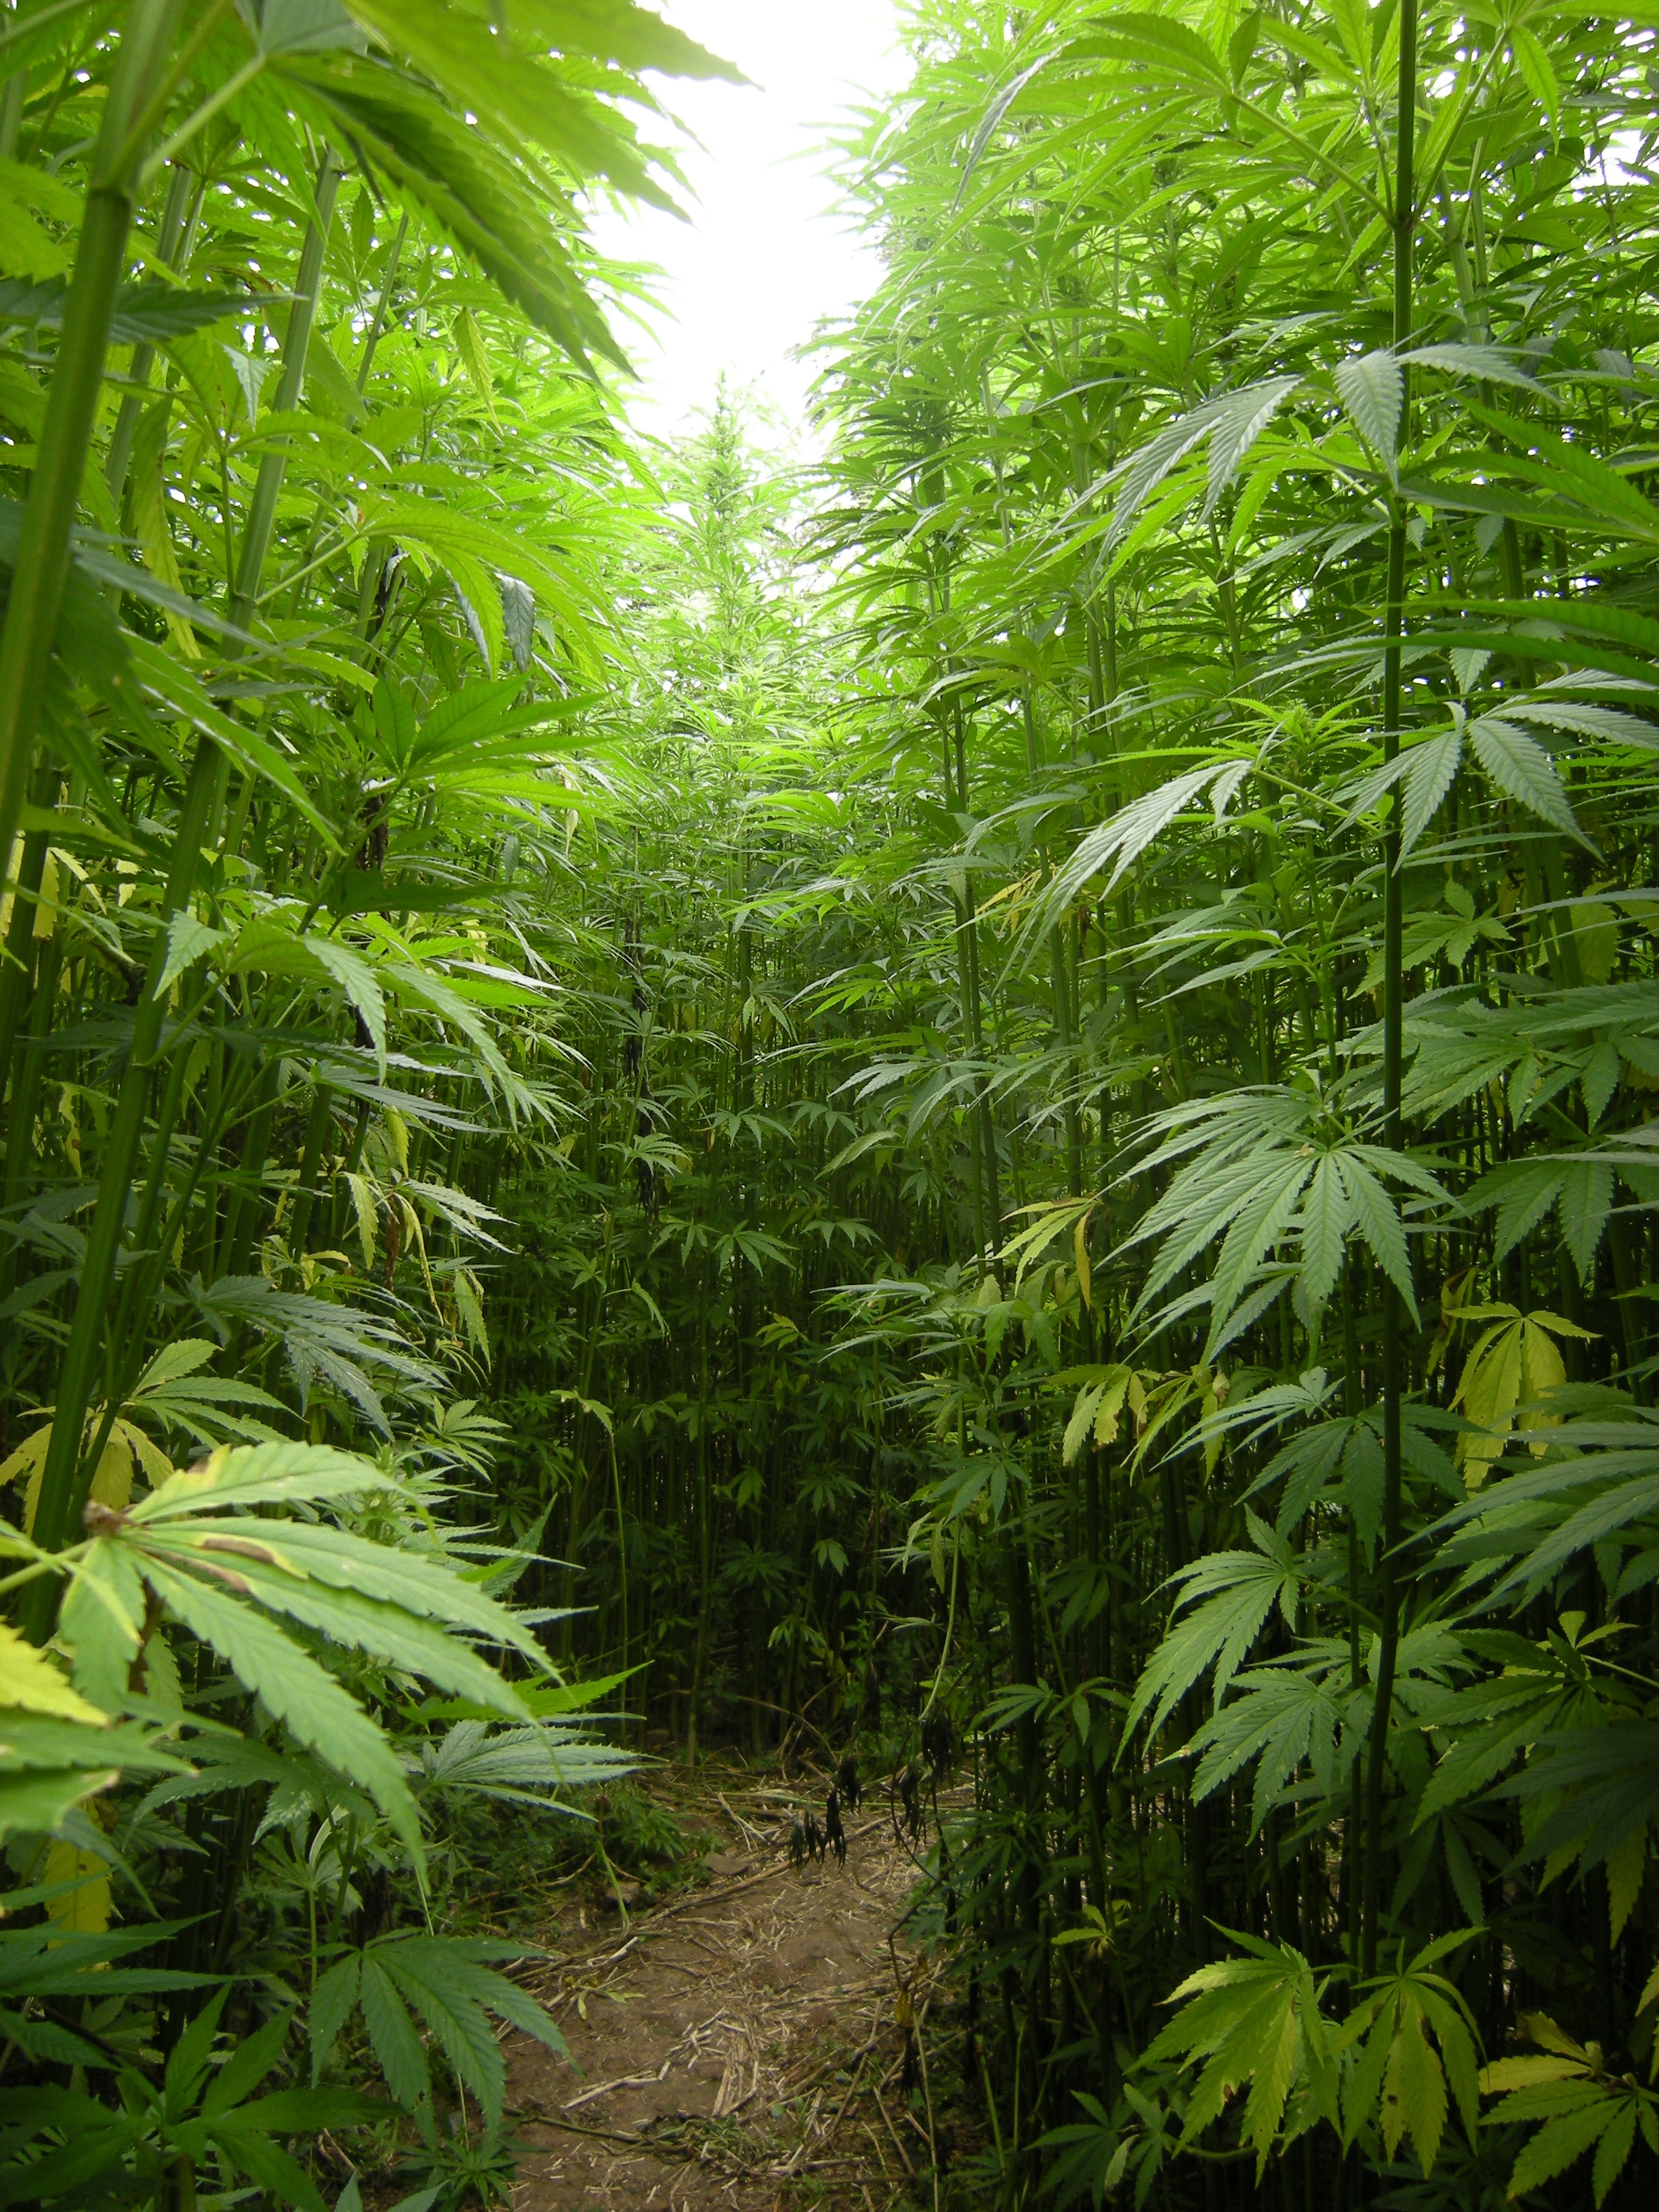
In the wild, growing cannabis plants generally like bright, direct sunlight. Outdoor cannabis plants given lots of light can grow to the size of trees!
That’s why indoor growers have been trying for years to make a system that mimics the sun or even improves on it if possible.
The sun’s awesome penetration is still unmatched, however we can mimic its power at close range. In fact, grow lights can outdo the sun in terms of light levels received by the plant because we can position them only inches away!
When we set up grow lights, we position our lights several inches or even farther away from the top our plants, depending on the type of grow light, because we don’t want our plants to get too much heat. But is that the only reason why? If we could reduce the heat in the area, couldn’t we give our plants more light by moving the grow lights even closer? If more light equates to more bud, I could be harvesting more using the same amount of electricity…right?
For my last grow, I decided to try keeping my lights as close as possible without obvious heat/light burning the plants to see if they would capitalize on the abundance of light. My Liberty Haze and Critical Kush became the unfortunate guinea pigs in our test to see what happens if a plant gets too much light!
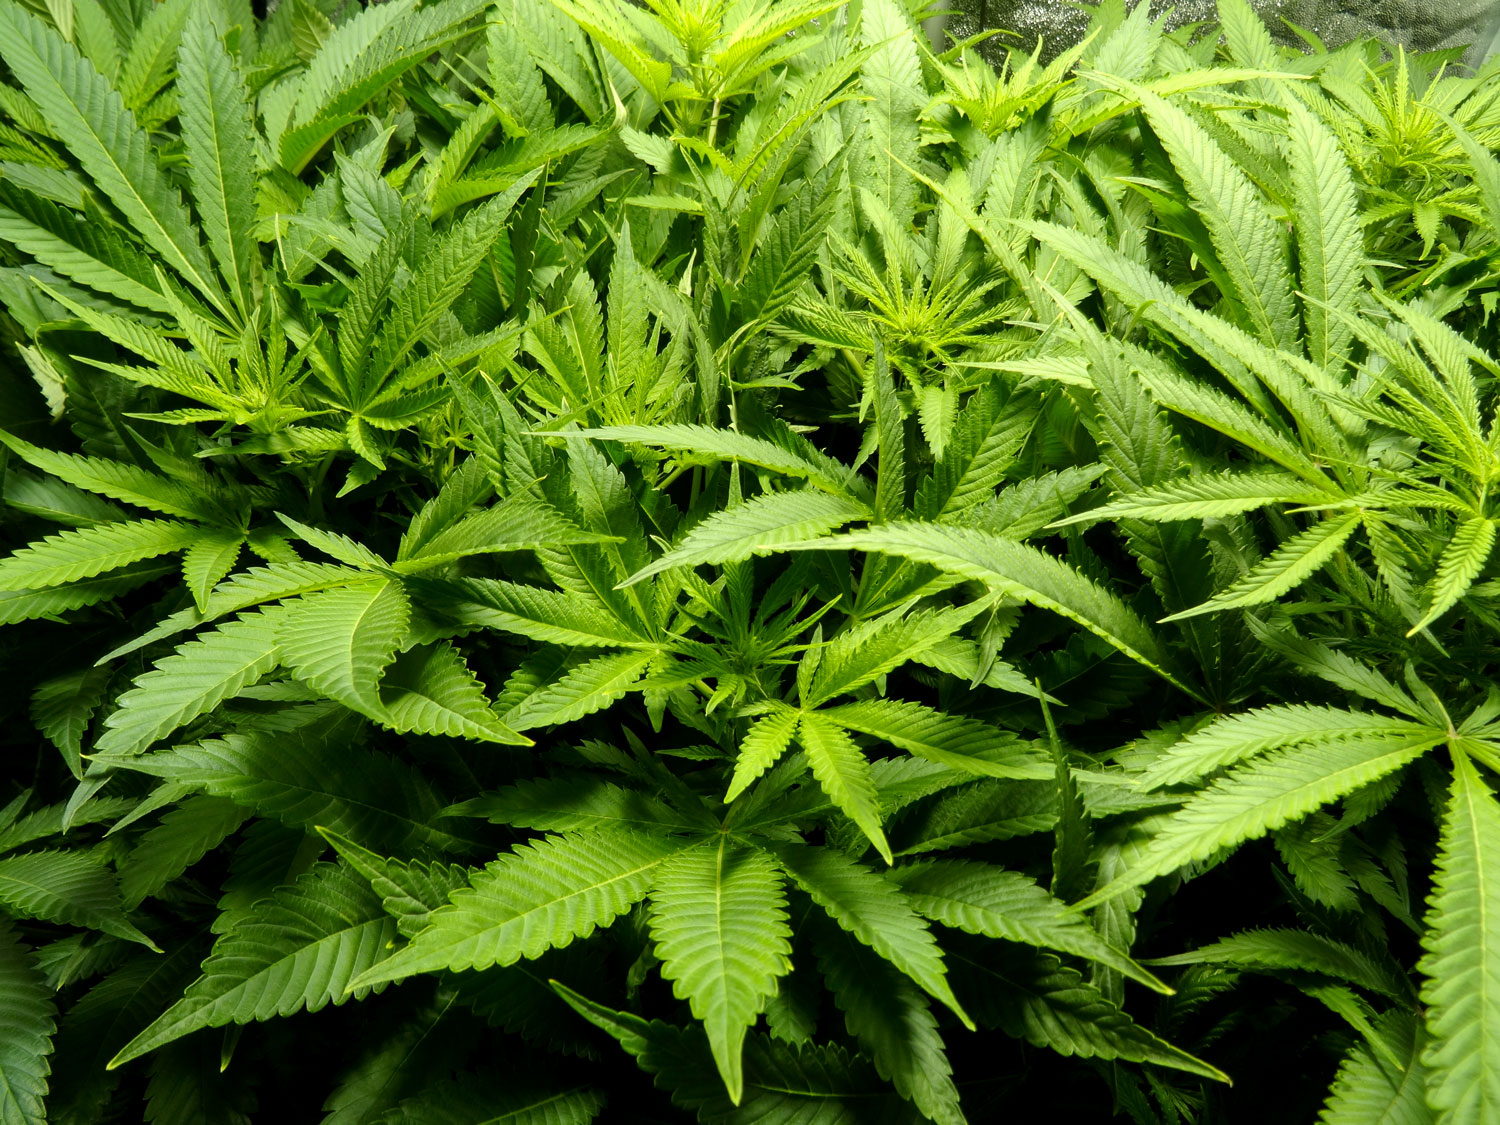
A plant is getting high light levels when you see all the leaves upturned towards the light. But how much light is too much light?
A Natural Amount of Light
 First, it’s good to know how much light a cannabis plant could possibly get if it was being grown outdoors.
A plant being grown outdoors in a location with relatively low levels of sunlight could get as low as 32,000 lux (lux is a measurement of light) on a bright sunny day in direct sunlight. Light levels can fall down to 10,000 lux (or even less) on an overcast day. On the flip side, a desert in the height of summer can see light levels as high as 100,000 lux on a sunny day. Cannabis can usually survive at either end of these ranges as long as the temperature, soil, etc. are acceptable.
That being said, there is definitely a desirable range when it comes to the amount of light a cannabis plant receives. Although that range varies depending on the type of plant (Indica vs. Sativa) and strain, most plant’s ideal light levels fall into the range below:
Vegetative: 35,000 – 70,000 lux
Flowering: 55,000 – 85,000 lux
Note: Lux is the measure of how much light is being received at a specific point in space. You can measure the amount of lux at different places in your grow tent using a lux meter. Using a lux meter gives you the power to accurately position your lights so you get the biggest yields out of them.
When a cannabis plant is having its other needs fulfilled, being in the desirable light range means that it grows at a pace that isn’t slowed down by any factor besides its genes. A plant in light levels below this range will produce spindly stems and buds and just plain take too long to develop. Conversely, a cannabis plant getting higher levels of light than this range will usually experience nutrient problems, heat burn, light burn, or a combination of all three! Let’s take a look at what too-high levels of light can do to your cannabis plant.
Our Too-High Amount of Light
In this last grow while the plants were flowering, I lowered the temperature in my grow tent with an AC so I could get my lights closer. I also used a fan to blow air right under the light to further reduce the amount of heat on the plants. Generally a 600W HPS grow light should be kept ~16″ away from the tops of the plants in order to give the same brightness level as direct sunlight. What distance should my MH/HPS light be from my plants?
I ended up keeping my 600W light only 8 inches above my plants, but the heat was reduced enough that I could stick my hand right over the plants without my hand getting uncomfortably warm. I thought that the plants would be able to use all that extra light because they didn’t need to worry about heat.
When we measured the amount of light the plants were getting with a lux meter, we got readings between 105,000 and 110,000 lux! This means that these cannabis plants were getting more light than they would on a sunny desert day, but with temperatures in the 70s. We thought this would make the plant grow even faster and better than in the wild. However, even with the heat controlled, not only did we not get faster growth or bigger yields (the opposite actually), problems showed up…
Tip Burn, Nutrient Deficiencies & Dying Leaves
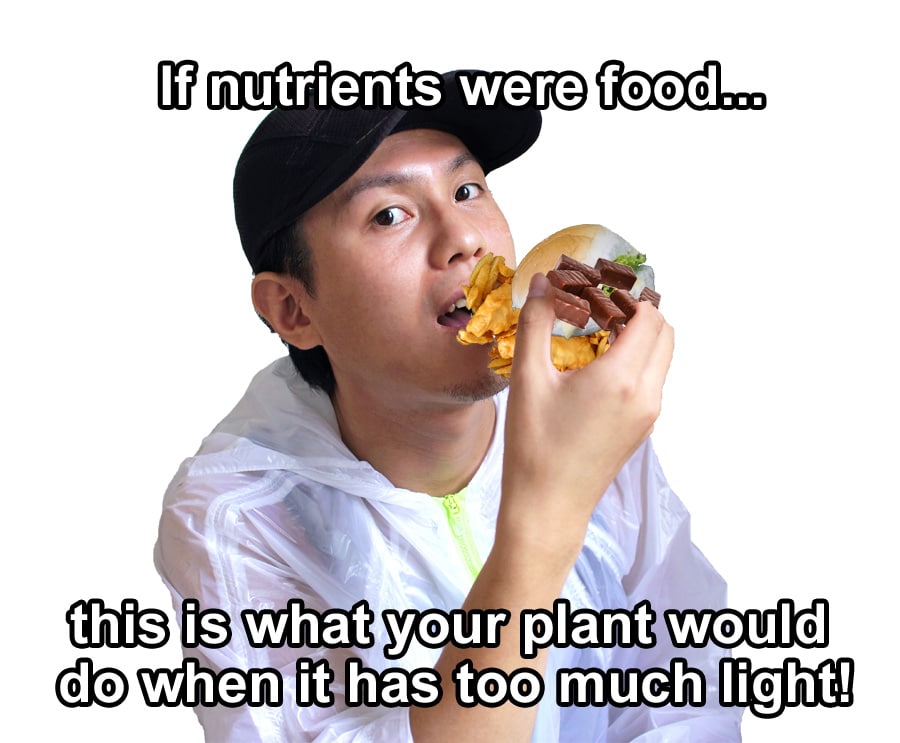
As your plant gets higher levels of light, it increases how much nutrients are being taken in by the roots. This is most true for growers using powder or liquid nutrients.
This is because cannabis plants drink more water when it’s sunny out. And taking in more water at the roots also causes the plant to take in more nutrients. In other words…
Cannabis plants take in more water and nutrients in bright light
Why? Photosynthesis (the process of making energy from light) causes the plant to lose extra water out of the leaves. As a plant evaporates water from the leaves, it creates negative pressure which sucks up water from the roots like a straw. This capillary action is how plants get water from the roots to the leaves. Though plants can also absorb nutrients through their leaves, cannabis plants generally get the majority of their nutrients during the process of taking water in through the roots.
So how much the plant drinks has a big effect on how much nutrients are being taken in.
Did you know? In addition to light levels, several other environmental factors can cause plants to drink more, including high temperature, low humidity, and a higher amount of air blowing over the leaves.
So if a plant is drinking more, it’s also taking in higher levels of nutrients from the roots, even if it doesn’t need them…
Unfortunately, cannabis plants don’t seem to uptake nutrients a la carte. Rather, they generally uptake all the available nutrients in the water and get whatever is on the menu. Cannabis plants aren’t really able to distinguish properly if there’s too much or the wrong type of nutrients, they just take whatever nutrients show up. This is most true when growers are using powder or liquid nutrients, since these provide nutrients in the most chemically available forms, so they are extremely easy to uptake.
So as plants are using more light, they take in more nutrients than they otherwise would, which can lead to a buildup of nutrients in the plant, causing…
Nutrient Burn
If a plant gets too much nutrients at once, it “doesn’t know what to do with it all” and this causes problems in the plant. Generally the most common symptom is nutrient burn where the tips and edges of leaves get a brown, burnt appearance.
Though a plant can handle a small excess of nutrients, they won’t be able to handle a huge extra load of minerals being piped in through the roots, especially if it happens all at once. An excess of a certain nutrient can show itself in many ways (like with Nitrogen Toxicity where leaves turn dark green), but when mineral levels get too high for the plant to process any more, you get this:
These nutrient burn symptoms are actually caused by the grow light being too close
So you realize your plants are getting nutrient burn, and your thought may be to simply lower the nutrient levels. That should work, right?
Nutrient Deficiencies Galore!
Wait a minute…how can the plant be taking in higher levels of nutrients and have nutrient deficiencies?
When the whole plant is being overworked, it starts showing signs of what appear to be nutrient deficiencies. So you might think that it just needs higher levels of nutrient, right?
Unfortunately adding more nutrients at this point can do more hard then good, often leading to even worse nutrient burn. Because the true problem is the light being too close, upping the nutrients isn’t going to help, even though it may look like the plant is suffering from nutrient deficiencies.
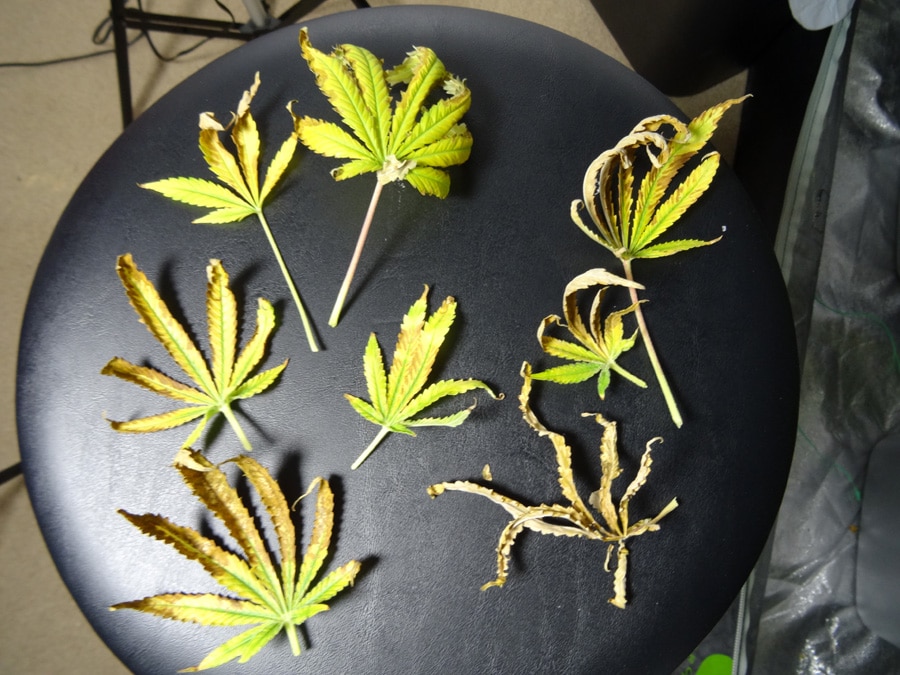
These overworked leaves began dying early! They showed signs of both nutrient burn, and nutrient deficiencies at the same time, though the true problem was the distance of the grow light. Giving the plant more nutrients at this point would only make things worse.
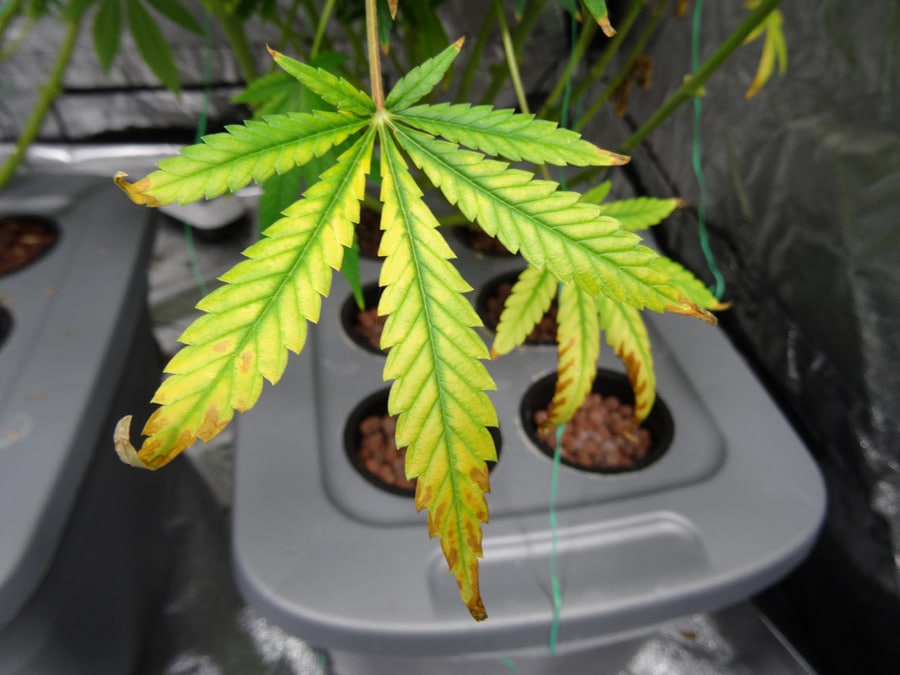
The leaves below show different stages of a mix of what appears to be nutrient deficiencies from an “over-lighted” plant. Changing the nutrients won’t help in this case, but if you fix the conditions by moving the light further away, these symptoms will stop spreading to new leaves. Unfortunately the damage done to the current leaves is permanent.
Top Leaves (or Buds) Getting Bleached
This is closely related to the problem of the plant showing nutrient deficiencies when lights are too bright. Leaf bleaching often looks a lot like a nutrient deficiency.
The fact is, leaves just start breaking down when they’ve been getting too much light for too long. They can show a few different symptoms that can look like different deficiencies, but noticing where the deficiencies/bleaching are happening will help alert you to the true solution.
So when you see the top leaves closest to the light are getting lighter than the rest of the plant, especially if they seem to be yellowing fast while the rest of the plant stays green, that’s a big warning flag that the light is too close.
In cases where too-high intensity light levels are being used, leaves can’t keep up with removing the waste products from photosynthesis. As the leaves gets more and more damaged, they begin to look bleached and stop being effective for anything.
This bleaching reaction seems to be most prominent when buds are fattening fast in addition to high light levels – the leaves just get tired out. They need to “retire” early after a hard life.
Here’s a pic of my Liberty Haze (left) and Critical Kush (right).
Notice how the leaves closest to the light have turned completely yellow, yet the Critical Kush plant that is lower down and further away has leaves that are still green and healthy
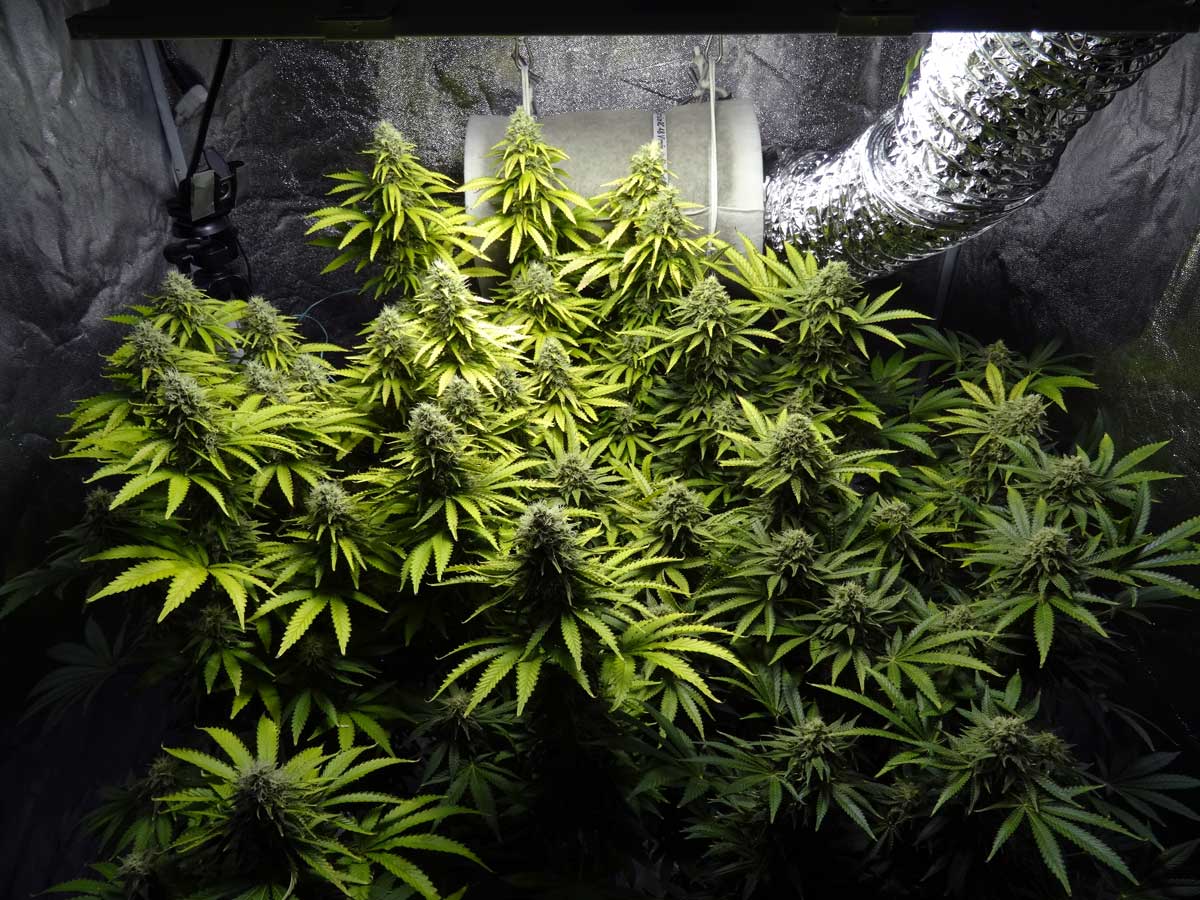
Without green leaves to support growth, the buds on the left pretty much stopped growing. Non-green leaves can’t do photosythesis any more, so unfortunately buds stop fattening when all the leaves turn yellow.
In order to geth the best yields, it’s important to try to keep a healthy amount of green leaves for most of the flowering stage.
This leaf bleaching was caused by the grow light being kept too close to the top of the canopy. When leaves turn yellow and die too early like this, it reduces your yields because these damaged leaves can no longer make energy and buds stop fattening up.
When you see bleaching directly under the grow light (while the rest of the plant is green and healthy), it is a clear sign that this particular part of the plant is having a hard time keeping up with processing the light energy it’s receiving, and the light should be moved further away. If the light can’t be moved away, that part of the plant should be gently bent and tied down further away from the light, as best you can. Learn how to use low stress training to control too-tall plants.
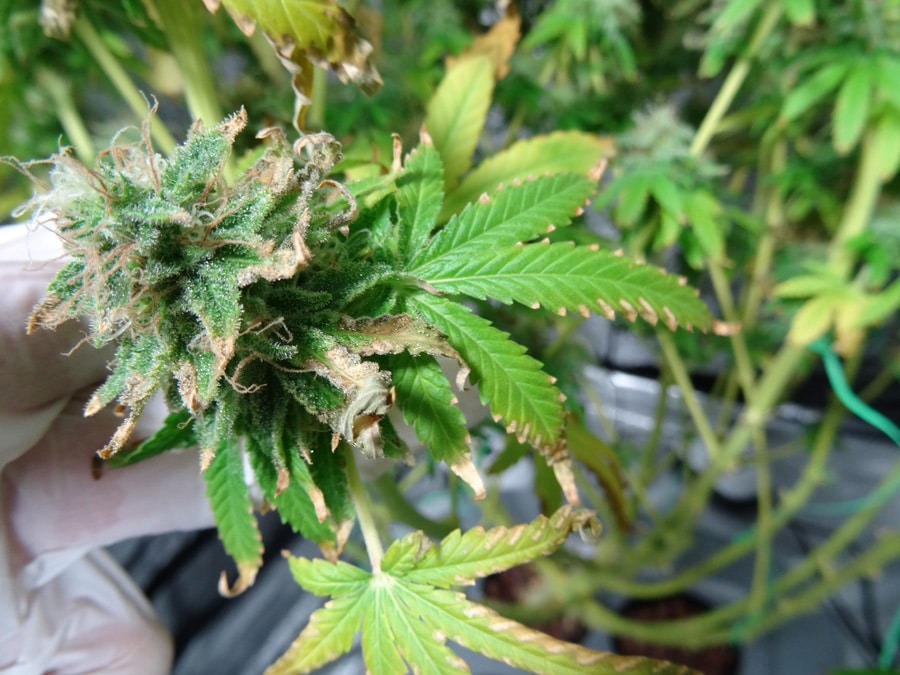
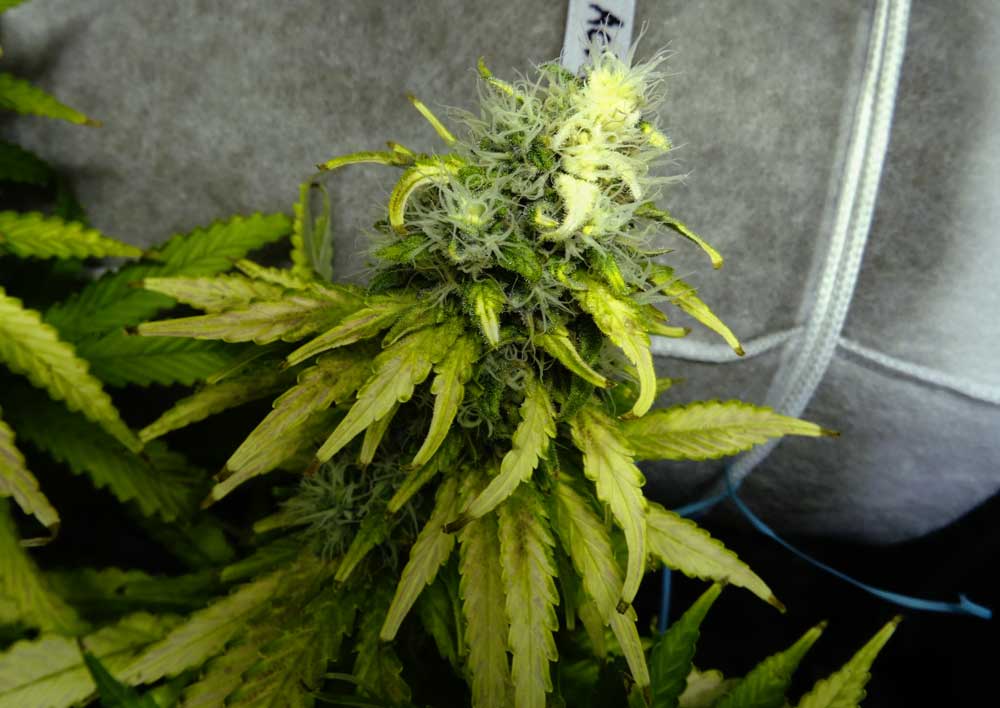
And it’s not just leaves, buds can also get bleached or light-burned, lowering their potency and reducing their smell!
This picture shows a bud too close to the light where the top has been bleached white (notice that all the surrounding leaves have also been bleached and look unhealthy, too)
Some plants/strains are more sensitive to light, while others can take incredibly bright light levels like a champ. For example Indica strains tend to be less resistant, while Sativa strains (which hail from the equator) seem to be better able to deal with a lot of light. You can have two plants in the same tent that are reacting differently to the same amount of light. It’s important to watch your plants closely during the flowering stage to see how they’re reacting to the grow lights!
Now that you understand why keeping your grow lights the right distance away is important, let’s look at some ways to prevent your grow lights from being too close to your plants!
Solution – Find the “Sweet Spot” for Your Grow Lights
The main idea is you want to keep your grow lights as close as possible (to maximize the amount of light to the plant) while keeping them far enough away they won’t cause damage.
I will list some of the tools and techniques you have available to you so you can find the “sweet spot” for your own grow lights.
The Hand Test
Ok, you know that you don’t want to give your plants too much light. So what can you do to check?
One way is to use the “hand test” to check if a grow light is too close to your plants.
Although not the most accurate method, the hand test is still a technique to get a very loose measure of the heat and energy a plant is receiving from your grow light.
With the hand test, you place your hand where the plant is for 30 seconds – if it’s uncomfortably warm for you it means you need to move your lights further away.
Pros
- Easy & Free
- Great Estimate for CFLs and T5 grow lights
- Relatively Good Estimate for MH/HPS Lights
Cons
- Not effective for LED grow lights (which often burn if kept too close, even at cool temps)
- Not effective if grow space is cool, since the low temperature can mask the high levels of energy from the grow lights
As we’ve learned in this article, this technique should only be used as a general guide, because a cool grow area will prevent your hand from being able to tell if there’s too much light.
Manufacturer’s Specifications
When it comes to choosing the correct distance for your grow lights, a great way to find out is to ask the person who made your grow lights.
For LED grow lights, this is pretty much the only good option you have besides trial and error, or talking to other growers who have the same LED grow light model. The hand test does not work for LEDs because they run very cool, yet still put off a lot of light, often focused downward with lenses to make the beams of light even more powerful.
Each model of LED is different, and needs to be kept different distances from your plants. Unfortunately there’s no “standard” yet for LED grow lights since they use various ways to focus light downward, and these have a huge effect on how much light is experienced by the plant.
Pros
- Free
- This is the only real way to know where to start when it comes to how far to place LED grow lights from your plants since there is no standard for LEDs and all models are different
- Some grow lights have been standardized to the point you don’t even need to talk to the manufacturer, for example MH/HPS grow lights follow a pretty standard formula when it comes to placing the light
Cons
- Definitely not a perfect solution but this method is a great starting guide
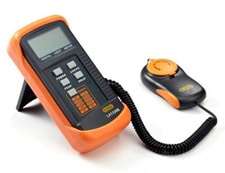
Return of the Lux Meter
For growers who aren’t using LED grow lights, you may appreciate a tool known as a “lux meter.” These inexpensive devices measure the level of light in a specific spot, and can be used to help you know whether your plants are getting too much or too little light.
Unfortunately, lux meters aren’t an effective way to estimate light levels for LED grow lights 🙁
When used right, a lux meter can help you maximize your yields from both big and small grow lights, and they’re excellent for growers who are worried about giving their plants too much light. A lux meter will help make sure you’re giving your plants exactly the amount of light they want.
Pros
- Inexpensive
- One of the more accurate ways to measure light levels without paying a lot of money
- Lets you easily measure light levels at different points in the tent
- Can be used to measure if there’s too much light, and also if there isn’t enough
Cons
- Not effective for LED grow lights
Learn how to use a lux meter for your cannabis grow!
Watch Plant’s Reaction
So now that you know about light levels, you have a few tools to help make sure you’re avoiding light problems. The hand test is a good start, the manufacturer’s specs are great for LED grow lights, and a lux meter is great for everything else.
But the most important thing to look out for is your plant’s reaction. A plant will tell you it’s getting too much light by displaying nutrient problems and bleaching. If a plant is not getting enough light, it will grow tall and spindly.
Pros
- Free
- Hands-down most effective way to place your grow lights at the right distance
Cons
- Takes time to watch your plants closely, at least until you get experience with your grow light
Used together, these tools ensure you are giving your plants just the right amount of light. Just like humans, plants need a happy medium with everything, even if it’s good for them. Now I know that for sure!