by Nebula Haze
Table of Contents
10 Photography Tips & Tricks to Take Beautiful Cannabis Pictures
- Clear the Background
- Frame the Picture
- Keep Camera as Still as Possible
- Use Flash When Taking Bud Pics
- Take Pics from Different Angles
- Use Lighting to Prevent Blur and Make Trichomes Pop
- How to Take Clear Close-Up Pictures
- Camera Settings that Improve Pictures
- How to Take True-Color Pics Under LEDs or HPS
- Fix Levels with Picture Editing Software
Get Ideas for Cool Pictures to Take
I love taking pictures of my cannabis plants.
Yet sometimes the pictures don’t turn out the way I want. I’ve learned many tricks over the years, and today I would like to share with you what I’ve learned so you can take great cannabis pics so you could proudly show off your garden online.
Learn how to capture the natural beauty of cannabis in digital form
 These tips and tricks produce pictures as captivating as your buds

One thing I’ve really learned from growing marijuana is that sometimes it’s the little things we miss that can make a huge difference in our workload, save us time, or give us effortlessly better results.
Today, I would like to share some of the little things that have made a big difference to me as far as taking pictures. These tips, techniques, and tutorials will serve you well if you enjoy taking plant pictures, and I believe this info should be known by all growers!
10 Tips, Tricks & Tactics For Taking Awesome Pictures Of Your Plants
(in no particular order)
1.) Clear The Background
Take a second to clean your grow room and the area around the plant. You will dramatically increase the quality of your photos when it’s just the plant in the photo. Taking 5 minutes to pick up any stray items or leaves will make a huge difference in your final result.
Try to take pictures of plants against a plain background whenever possible. A white wall works great, but any plain-colored background will help people see your plant in full effect.
If you want stellar pictures, it’s worth the 10 minutes to clean the area and think about presenting a clear picture of only what you want to show.
What am I even supposed to be looking at here?
(pic from when I first started growing)
I guess I was just really excited there were live marijuana plants in my closet 🙂
Cannabis pictures look better with a clean, clear background
Before taking the shot, take a moment to run your eyes around the borders of the frame just to double-check that you’re not accidentally capturing something you don’t want in the photo. Make sure you have a clear shot of the subject you’re trying to take. It should be completely exposed. For example, avoid the inclusion of random pieces of leaves from the sides covering up anything you want to see.
This shot would have been better if the grower had taken the time to move the leaf on the left side out of the way so you can see the entire bud
A clean black background is nice
2.) Frame the Picture
Another idea is to look for anything that might make a good frame for the picture. For example, backing up until you can see the edges of your grow tent, or looking at the subject through a doorway, etc.
It’s nice to have some sort of visual container (or “frame”) to help people know where to look in the photo and make it more visually interesting
Consider backing up until you see the edges of your grow tent.
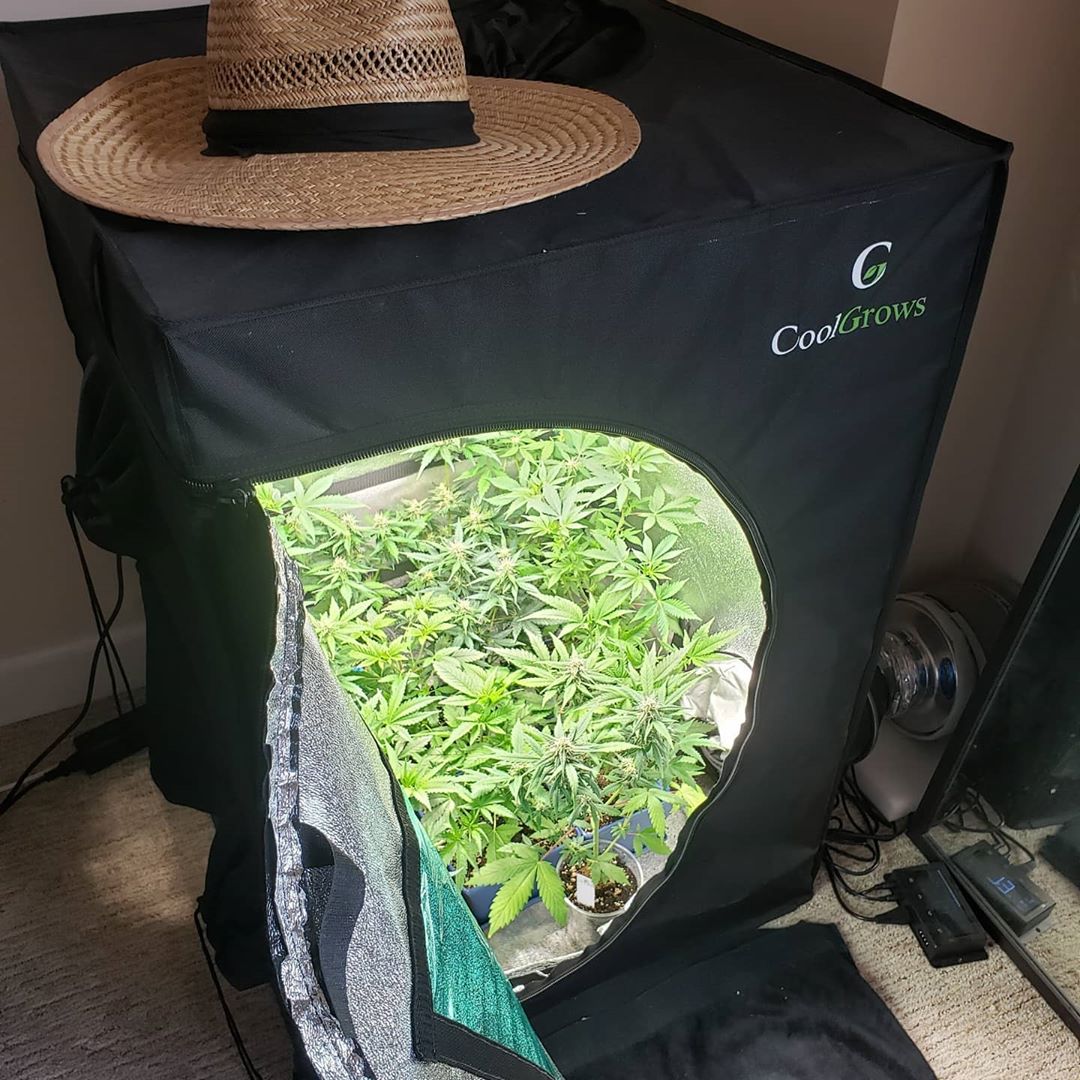
The sun shade at the top of this picture helps make you feel like you’re there with the plants
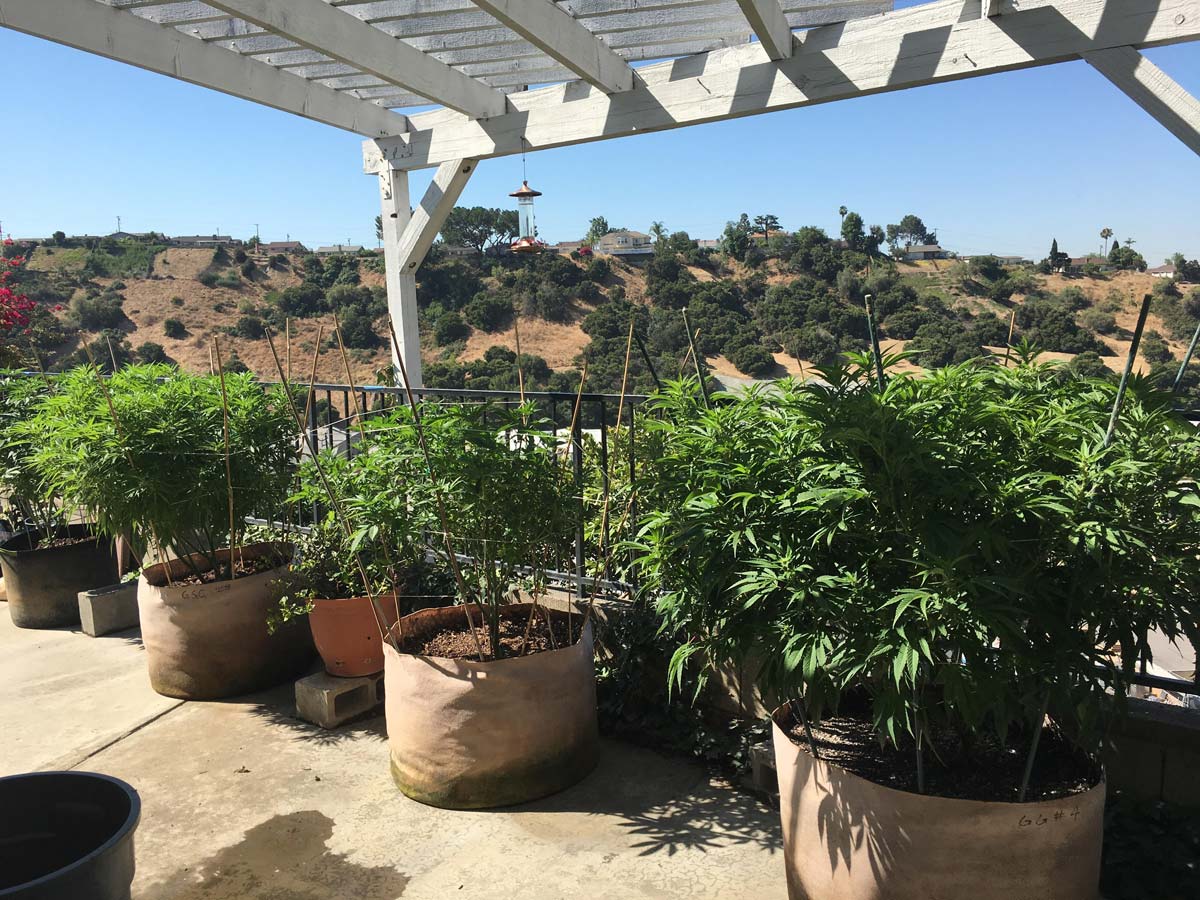
Any kind of visual border can help make the picture more interesting
Try taking a few pictures the way you normally would, then go back and look at them. Nearly all cameras these days have a screen and a way to quickly look at pictures you’ve taken. Once you’ve looked at the initial pictures, go back and take more pictures. This second set of pictures often results in higher-quality images than your first attempt. This will also help improve your photography skills so your initial pictures come out better each time.
3.) Keep Camera As Still As Possible
If you can rest your camera on something, it will help your camera be able to focus on those ultra-clear, gorgeous pics.
You must hold the camera completely still to get the best pictures, especially when zooming in

A tripod, or anything that’s not moving, can be used. I’ve placed the camera on a table, books, and many other stationary objects. Try to rest your camera on something the next time you’re taking pictures, and see what a huge difference it makes!
You can stabilize your camera on things like…
- a tripod
- a table
- a stack of books or boxes
- a friend
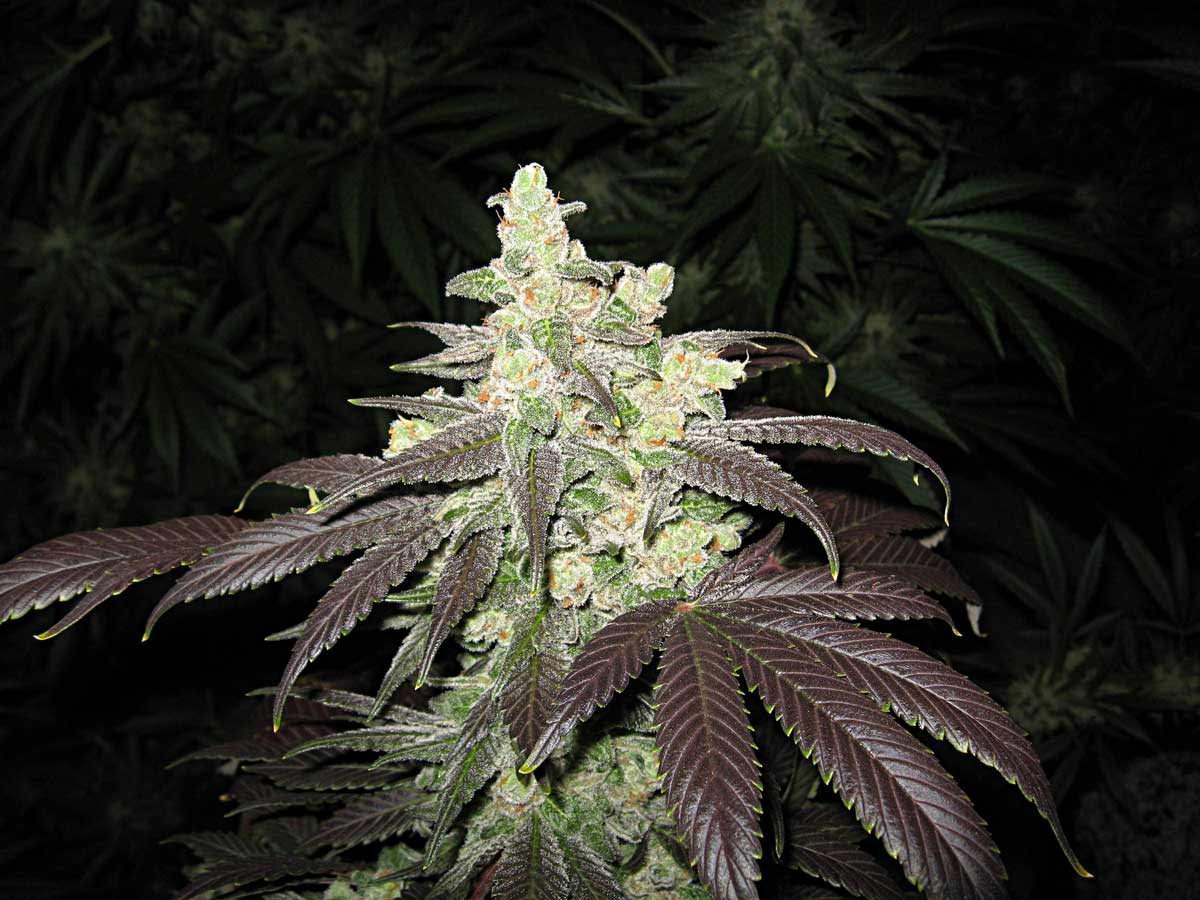
4.) Try Using a Flash When Taking Pics of Your Buds
Many times (though not always), you’ll get the most impressive pictures of your buds and colas when you use a flash.
In the flowering stage, taking pictures of your plants in the dark with a flash is one of the best ways to get “glamour shots” of your buds. Something about taking a pic in the dark with a flash really causes buds to look gorgeous in pictures.
If everything seems too bright from the flash, try muting the flash with white paper. Just tape the paper over the flash. This can help disperse the light from the flash, so you get more realistic pictures. Also try moving the camera further away to help disperse the light. You may need to zoom back in with the camera to get the picture as close as you want.
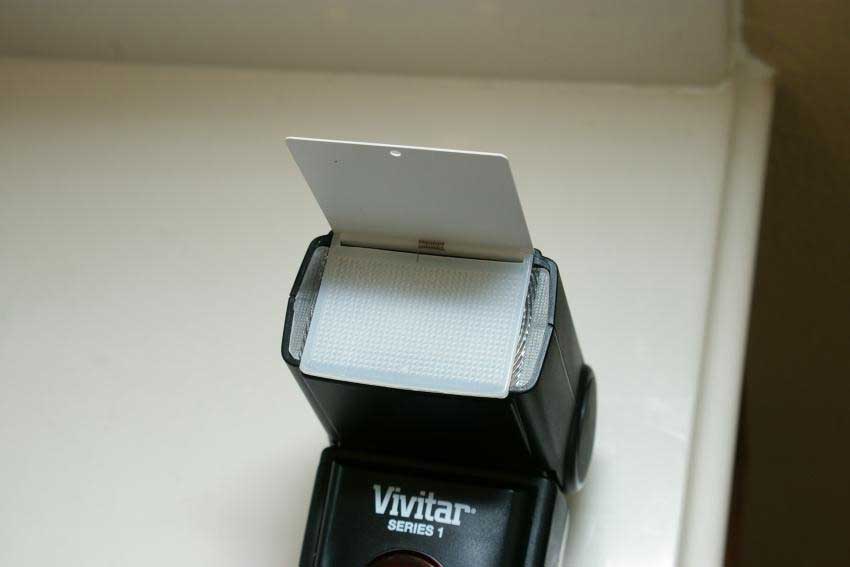
If you have the kind of flash that attaches to a DSLR camera, here’s a good way to mute the flash: Fold an index card in half, then stick it above the flash lens so the card is perpendicular to the flash. Then point the face of the index card towards what you’re taking a picture of. This causes a bounce flash which can produce stellar results.
It looks like this.
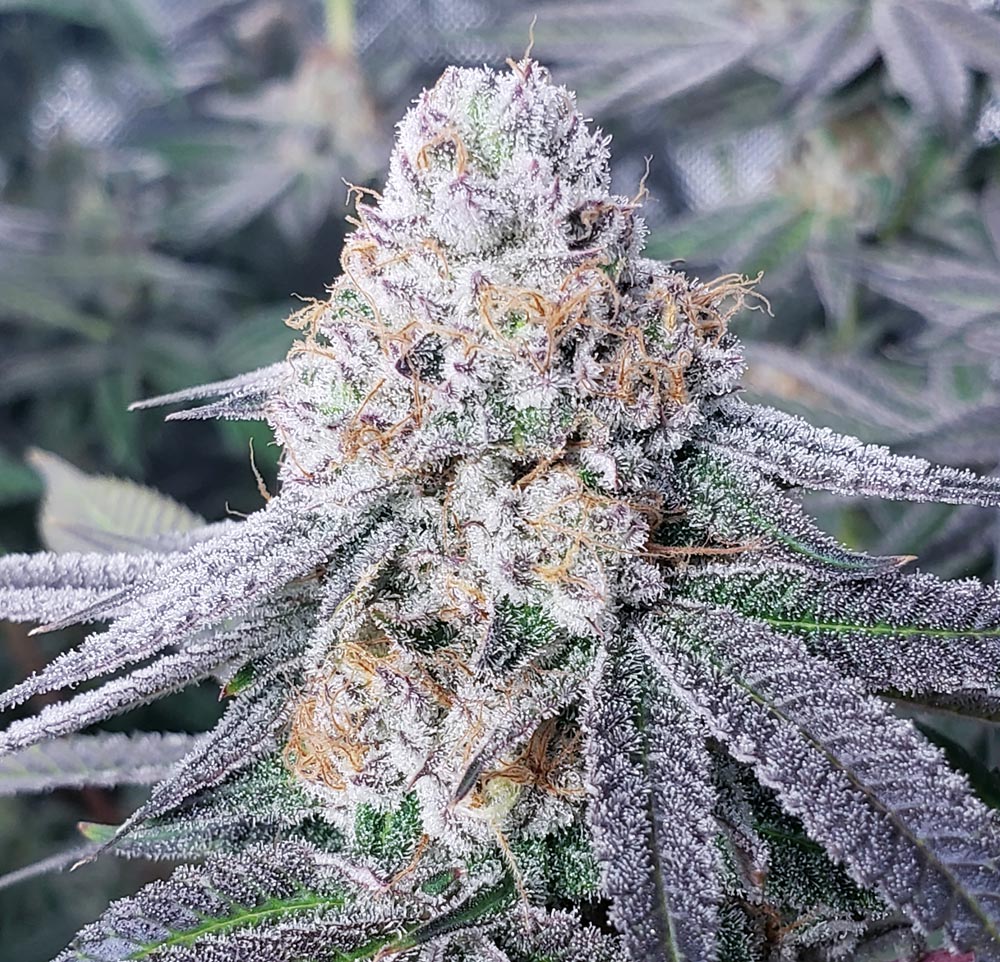
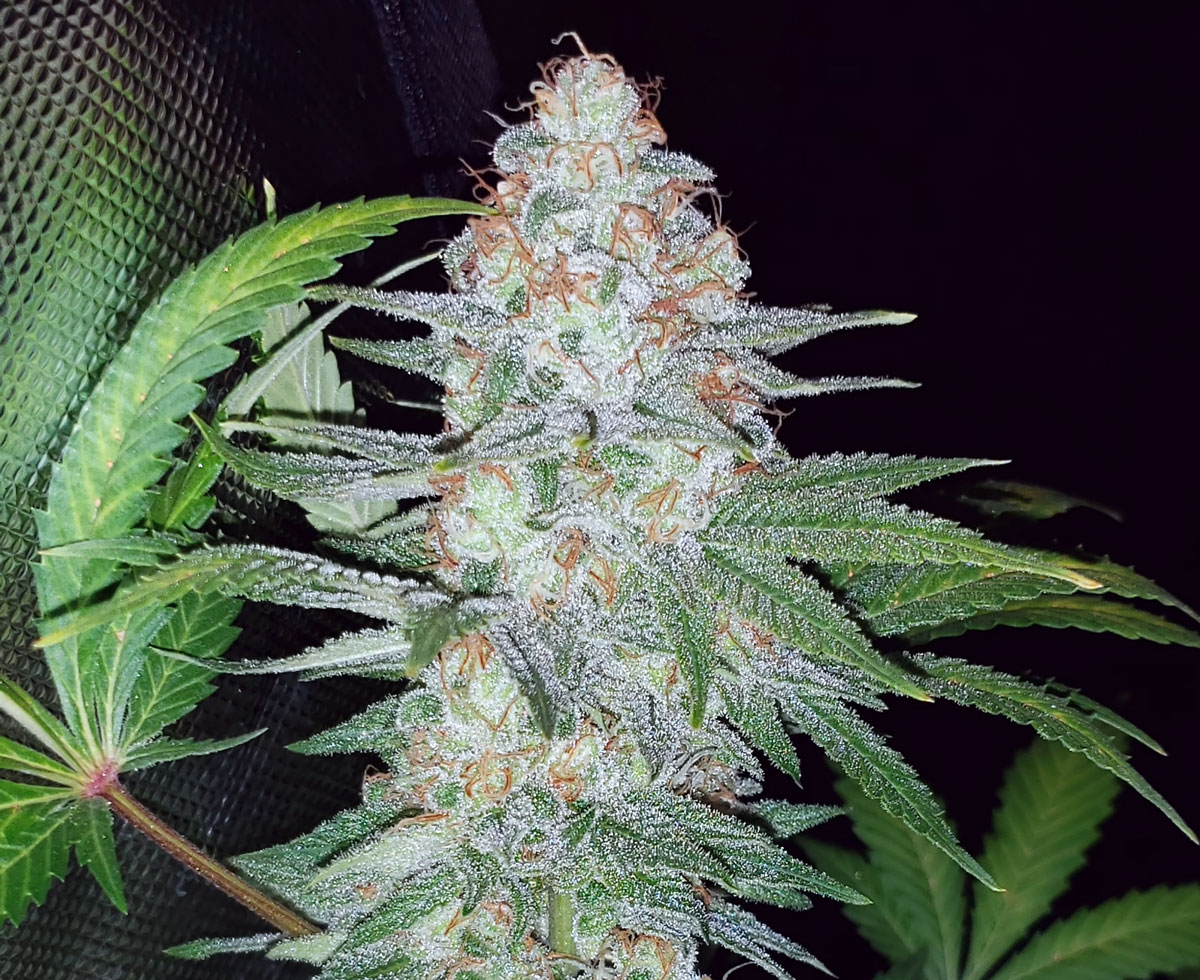
When taking pictures of plants in the flowering stage, one of the best ways to show of your garden is to take a picture with a flash when the lights are off. The flash reflects against all the glittery trichomes on your colas and really shows off how big your colas actually are (which can be difficult to capture with pics in a natural light setting).
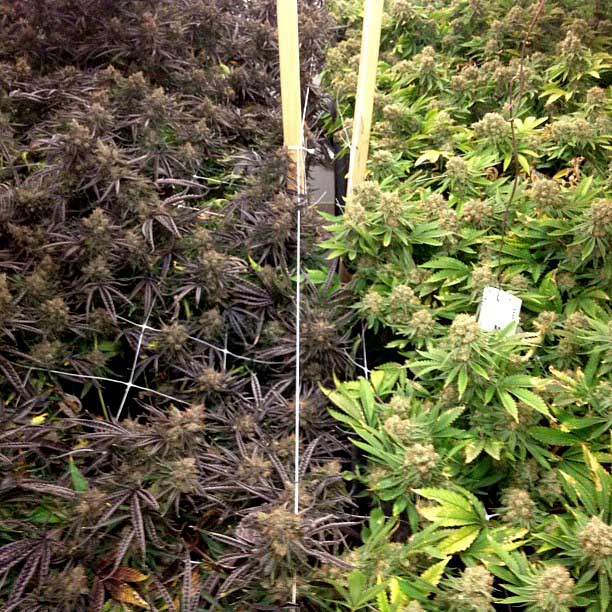
5.) Take Pics From a Few Different Angles
This technique is really simple but powerful, and it’s amazing how much of a difference it can make if you take pics from a few different angles!
Due to variations in temperature, light levels, proximity to other plants and more, different parts of your plant will look different. For example, it’s common with “purple” or “blue” strains to see just the buds actually touching the light change color. It’s sort of like fruit. And these variations can make your plant look very different at different angles!
Example: The following two pictures are the same plant!
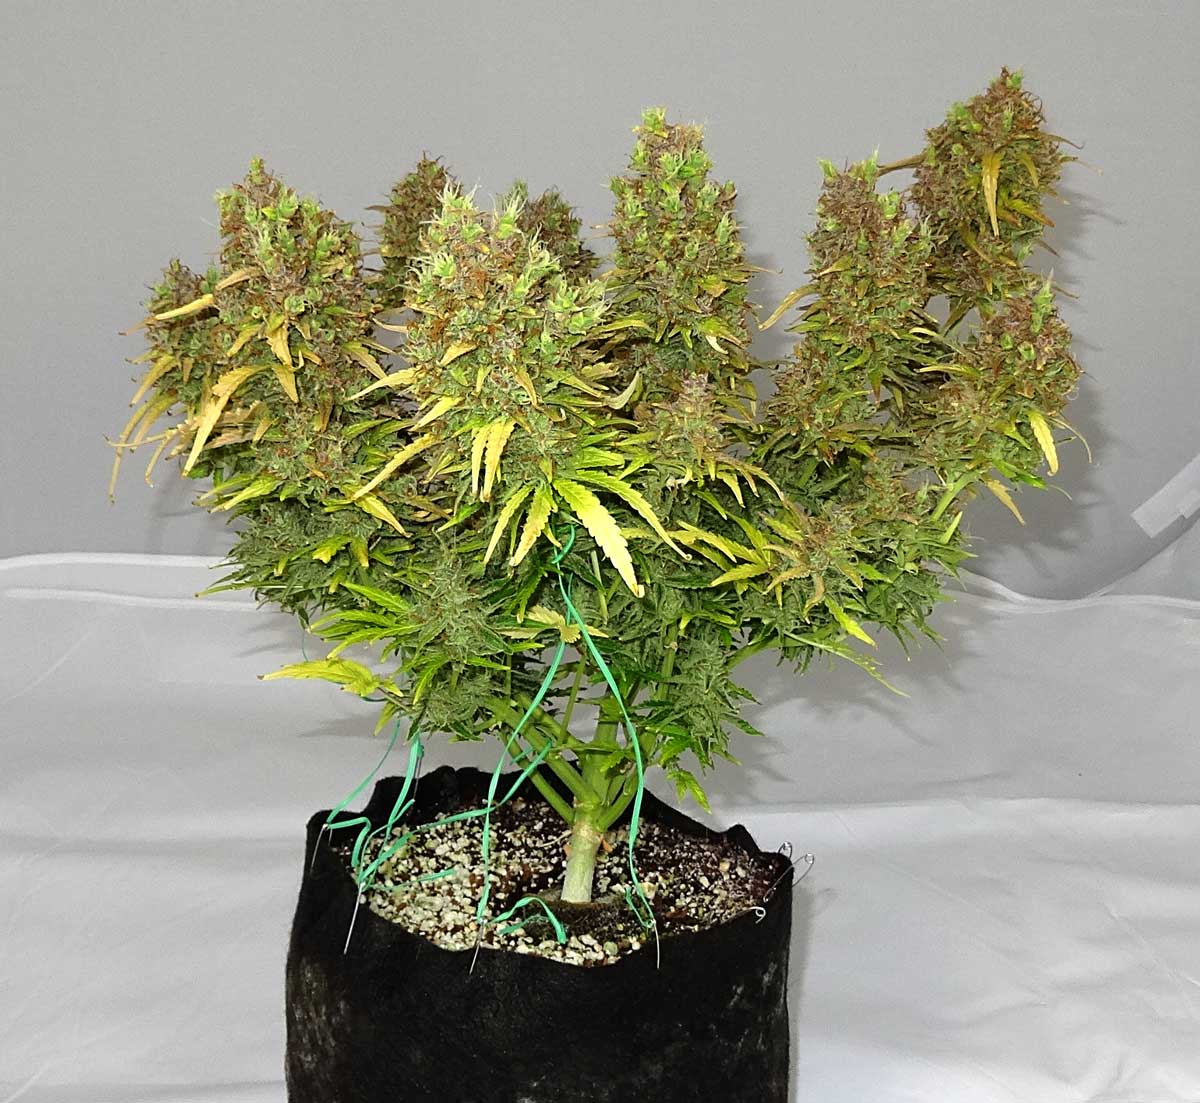
This is the same plant, but the opposite side
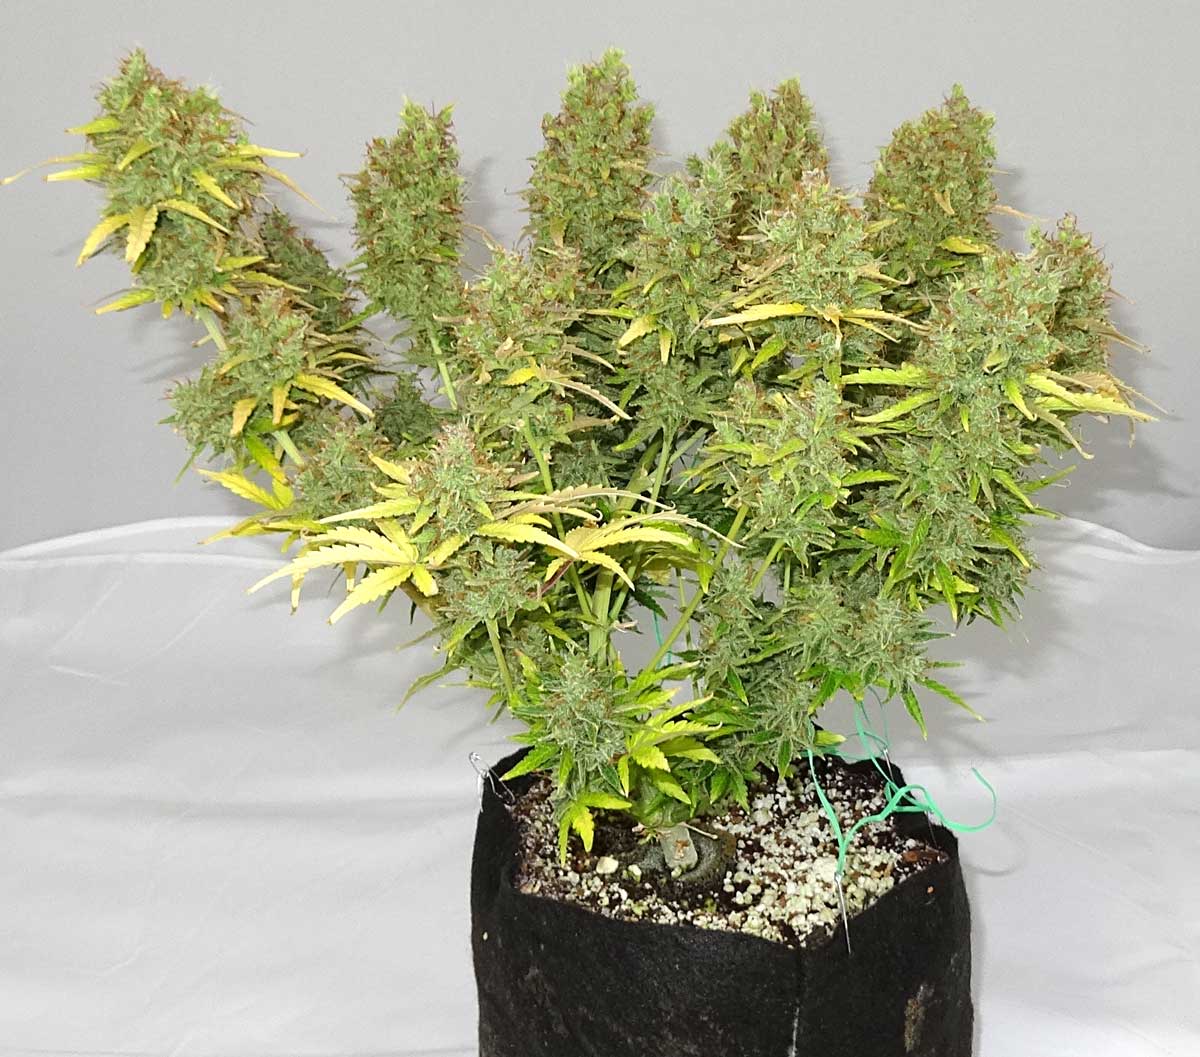
I’m not saying one side is necessarily “better” than the other, but they definitely look different from each other! Taking pictures of your plant at different angles helps you take pictures that show people the plant as you see it!
It’s also a great idea to take multiple pictures of the same shot. Your camera will auto-focus on some part of the picture, but sometimes it chooses the wrong thing to focus on. Taking several pictures of the same shot to help increase the chance you get one where the camera is perfectly focused on what you want. This also helps compensate for any shakiness.
Sometimes when you take a picture, the camera focuses on the wrong thing. This camera focused on the back leaves instead of the bud in the middle
By taking multiple pictures, you increase the chance your camera focuses on the part you want. This time the camera actually focused on the right thing
Something counter-intuitive about cameras is that sometimes you actually get better closeup pictures by moving your camera further away. So while you’re taking multiple pictures, try moving your camera both closer and further to see how that affects the clarity. Sometimes you’ll get a better picture by moving the camera further and zooming in, or zooming in while moving the camera away. Experiment with your particular camera for the best results.
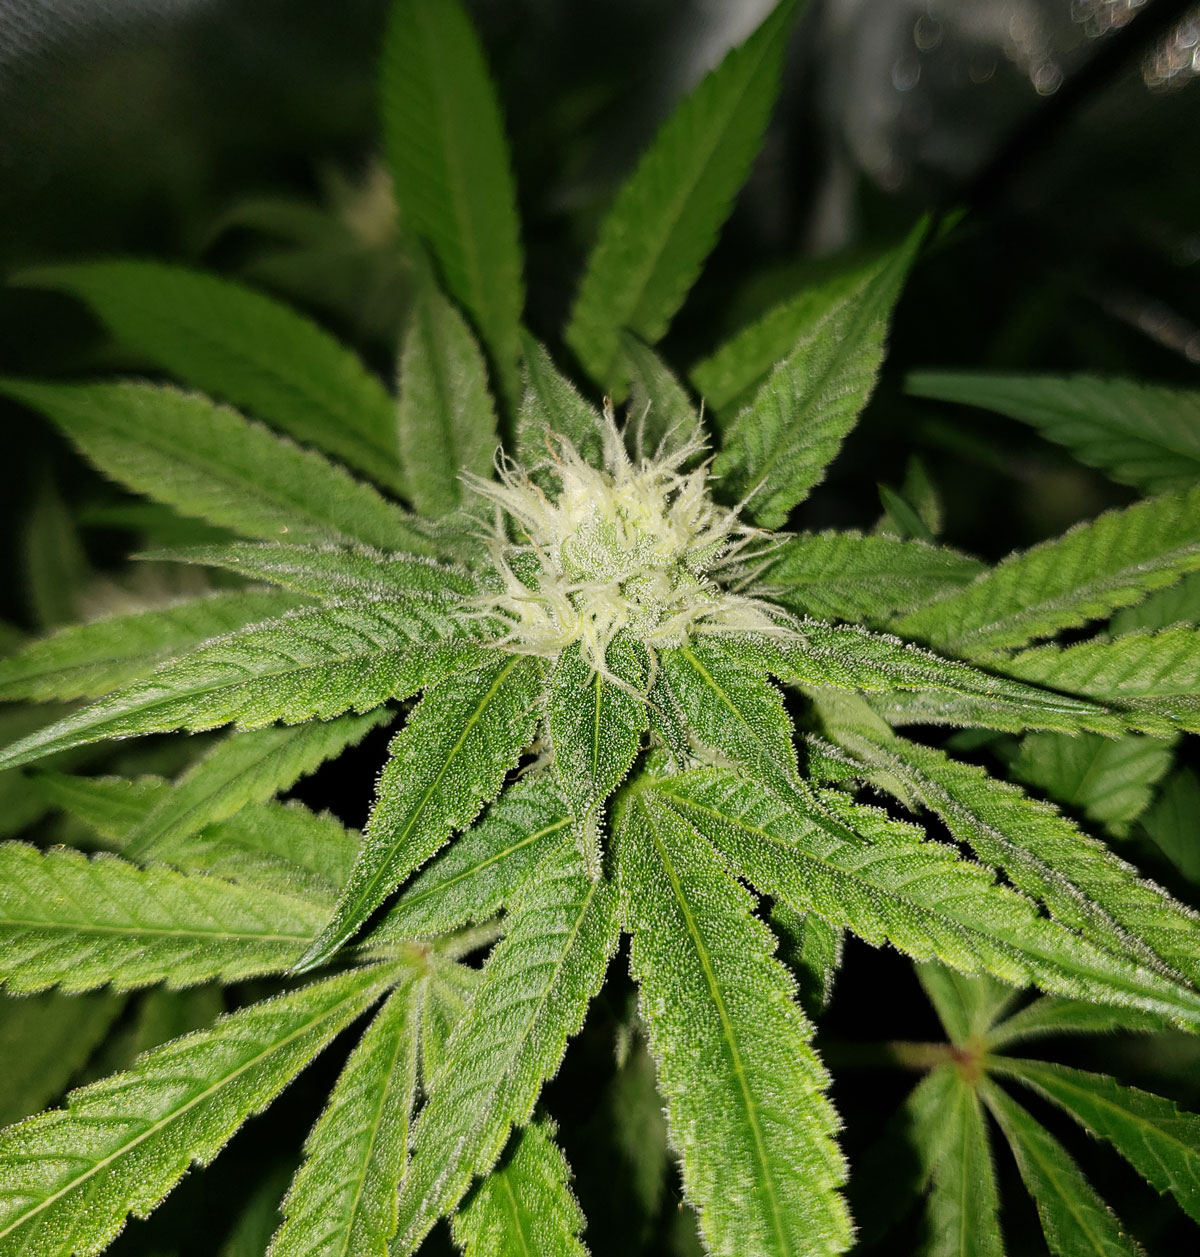
6.) Use Lighting to Prevent Blur and Make Trichomes Pop
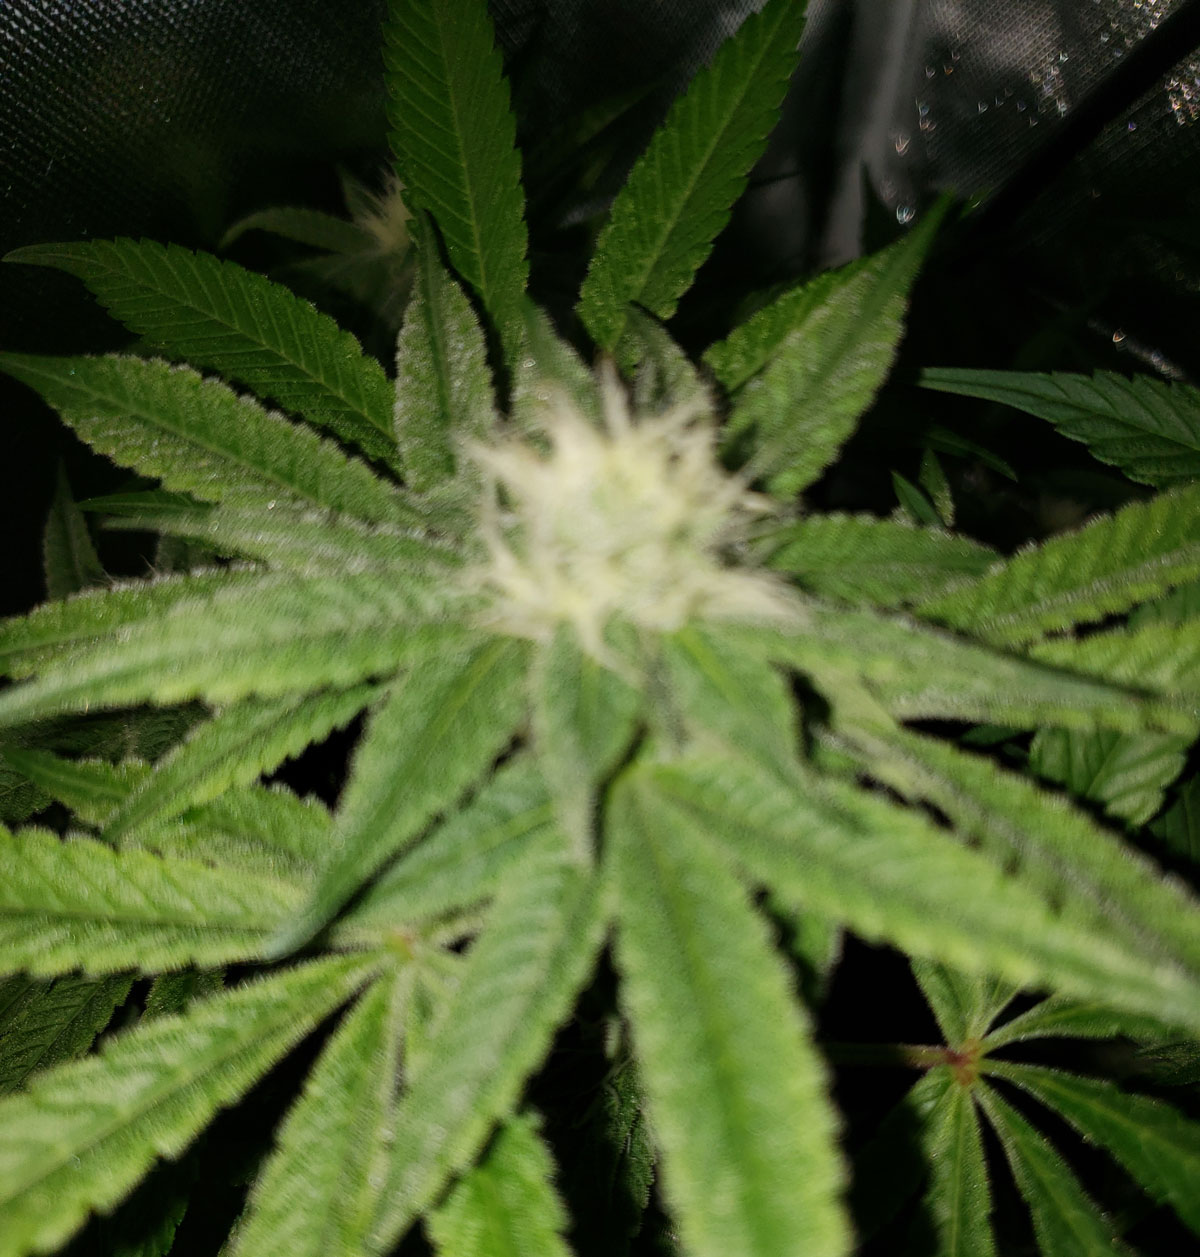
If you’ve followed all the tips so far, including keeping your camera ultra-still, and pictures are still coming out blurry, then this tip is for you.
Blurry pics like this are often the result of poor lighting. Make sure the entire area is bathed in light while you keep the camera as still as possible. If your grow light does not make white light, turn it off and use natural light instead (tips below on how to take great pictures under non-white grow lights).
This picture was taken on a Galaxy S9 phone under a ring light. The even spread of light helps make trichomes pop!
Ideas for adding light:
- Open all the windows and take pictures during the brightest time of day
- Shoot pictures outside when it’s bright and sunny
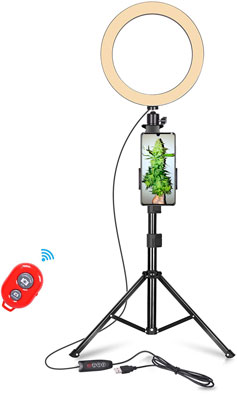
- Recommended: Get a ring light, selfie light, or other spotlight meant for photography. A ring light is normally used to help faces look better on video, but work surprisingly well for cannabis plants and especially cannabis buds
Turn off your grow light and use a ring light on the “white light” setting to capture marijuana plants in their full glory
7.) How to Take Clear Close-Up Pictures
Many cameras can zoom in quite a bit, even smart phones. This is the most popular way to take closeup pictures.
Here are some other ideas:
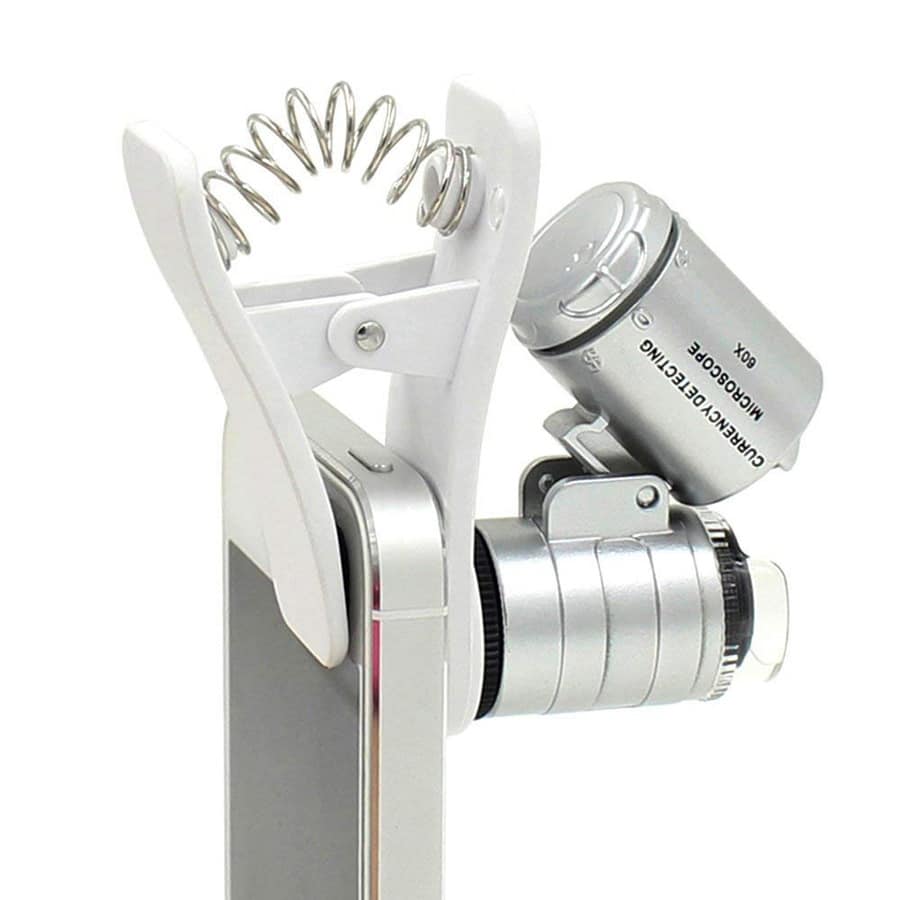
A.) Modify Your Smart Phone
You can mod your smart phone to take better closeup pictures.
Example pictures:
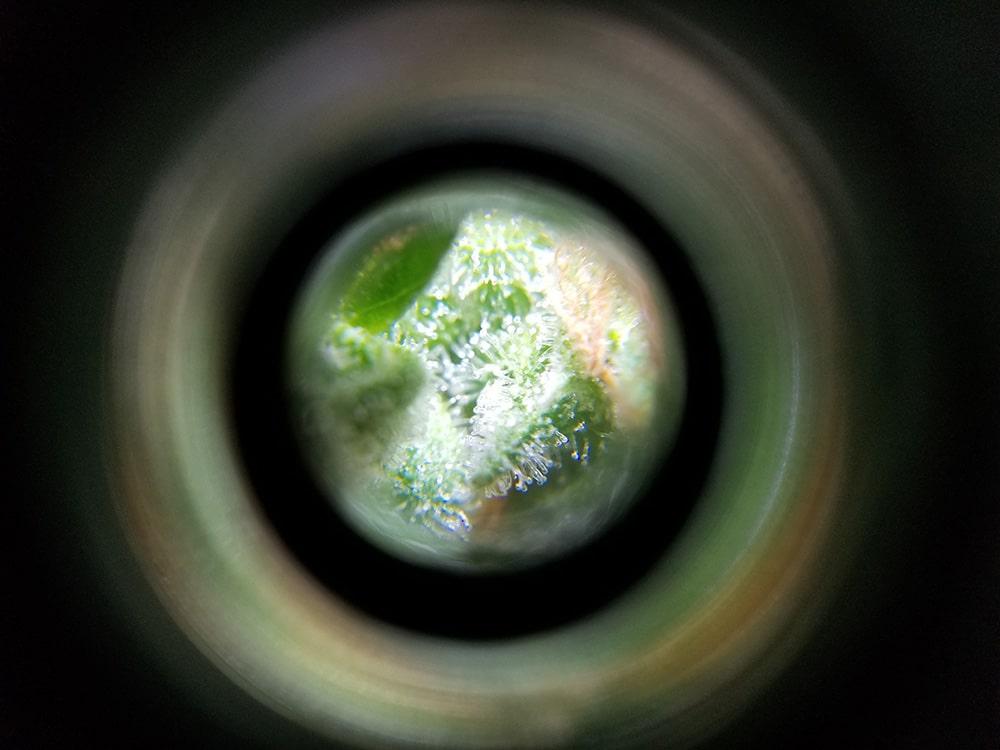
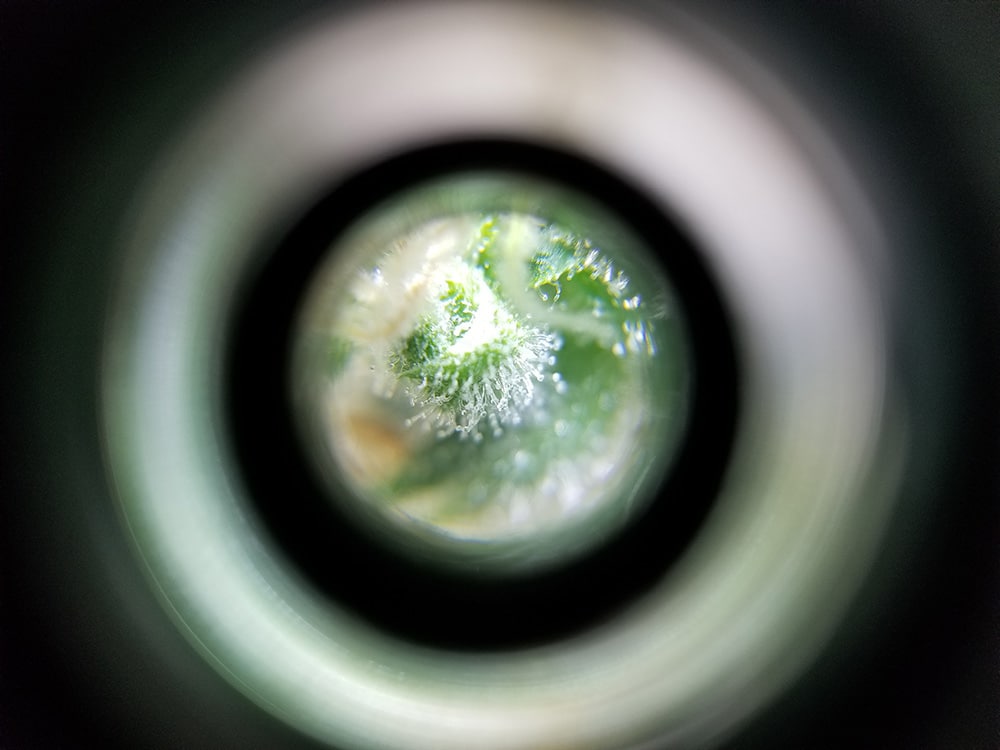
Click images for larger versions
These microscope phone attachments are relatively cheap and can be used to take better pictures and easily focus on the piece of plant you want. Pro-tip: these are great for video if you don’t have a USB camera available.
Note: If you get a microscope meant to clip on to your phone, make sure you get one that fits as each phone is a little different. If the clip isn’t the right size for your phone, the camera won’t be able to focus on your beautiful trichomes. I use this pocket microscope since it fits my Galaxy phone.
Clip-on microscopes are nice, but make sure to find one that fits your particular phone!

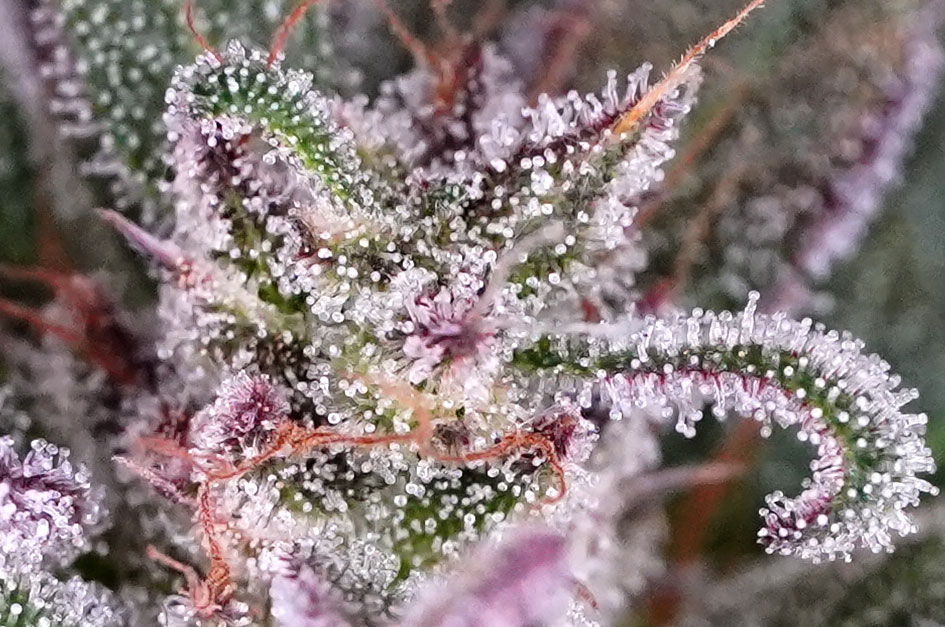
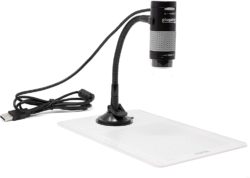
B.) Digital USB Microscope
Take pictures using a digital microscope (this kind of microscope connected directly to your computer and shows you the images on your screen, allowing you to take screenshots or video).
This type of magnifier is, in my opinion, one of the best ways to see your trichomes so you know when your plant is ready to harvest. They take pretty amazing closeup pics and videos.
Here’s are examples of media I took with a USB magnifier
They also take videos. I turned this one into a gif for your enjoyment 🙂
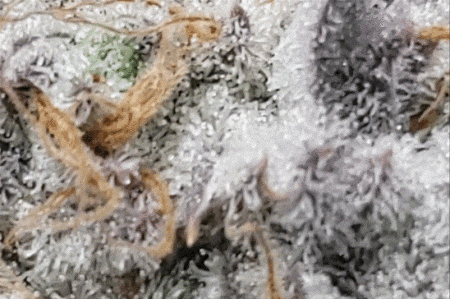
Note: USB microscopes typically have to be connected to a laptop or computer. However, many newer Android smartphones have OTG capability, which means that they can connect to USB devices. The combination of a smartphone with a USB microscope is tough to compete with since images come in so clearly without a steep learning curve. Make sure your phone can support OTG before getting a USB microscope and don’t forget to get an OTG USB convertor. Unfortunately, some Android phones, iPhones, and iPads don’t support OTG. In that case, a computer or laptop still does the trick!
I took the above picture and video using the Pluggable USB Microscope hooked up to an Android phone with an OTG USB convertor (that fits my phone) and an app called USB camera
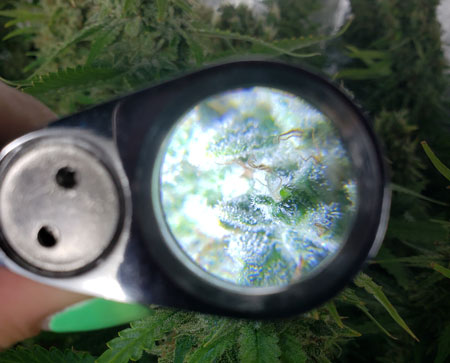
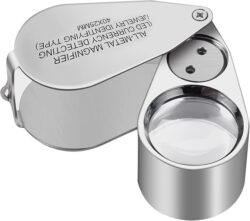
C.) Jeweler’s Loupe or Other Magnifier
You can take a picture of a plant through a jeweler’s loupe or other magnifiers to get closeup pics. Sometimes you can even attach a magnifier directly to your camera or phone camera with a rubber band.
For closeup pictures, you always get the best results with bright, even lighting.
Seeing your buds up close helps you choose the perfect harvest time to harvest. Learn how to pick the perfect harvest time with your close-up pics.
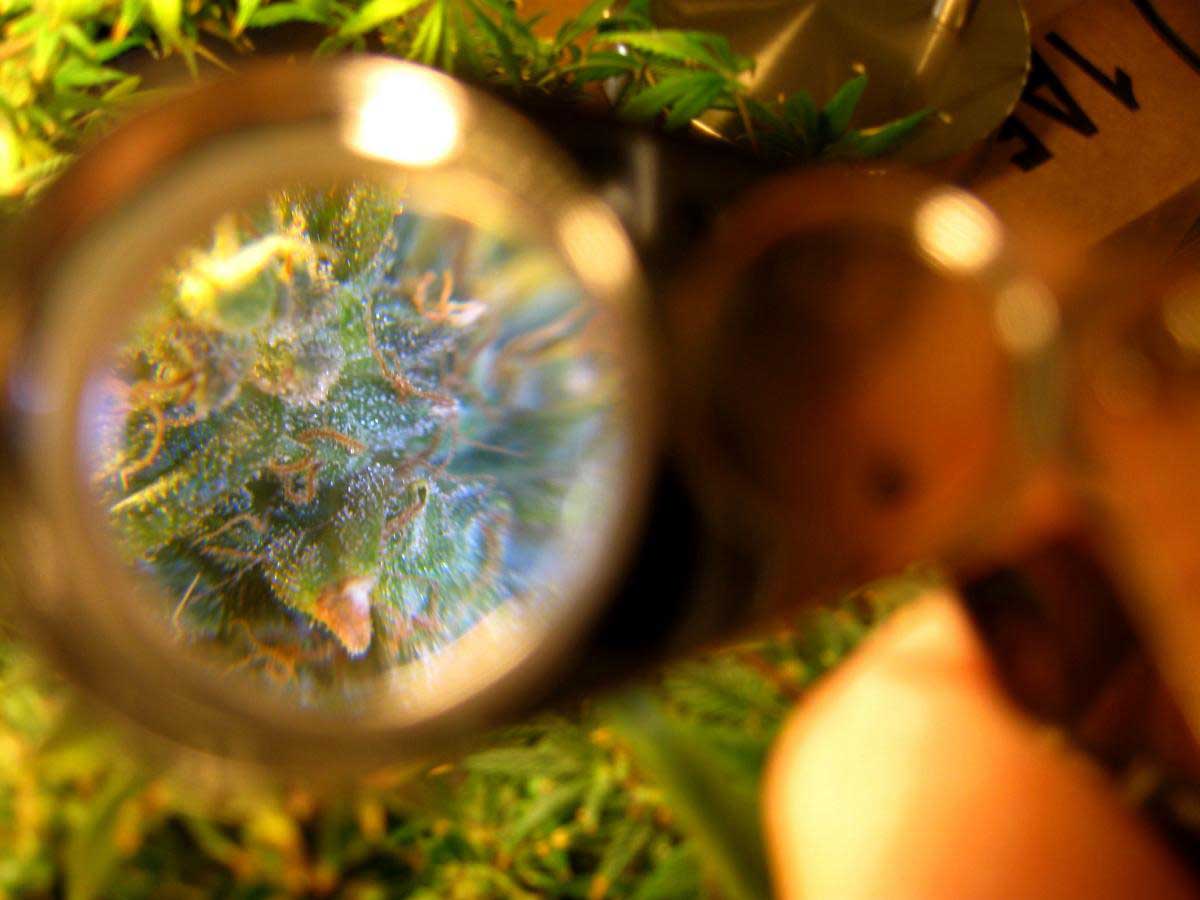
Jeweler’s loupes are surprisingly cheap and nearly any loupe you can find online will suffice. That being said, I have tried several and this is the one I liked the best.
Recommended loupe: 40X Jewelers Loupe
D.) Use the “Macro” Focus Setting
Does your camera have the “Macro” focus setting or mode? Coincidentally (we’re taking pictures of flowers after all!) a flower is the universal symbol/icon for macro mode. It can appear in a couple of different places on your camera, as demonstrated by the picture below.
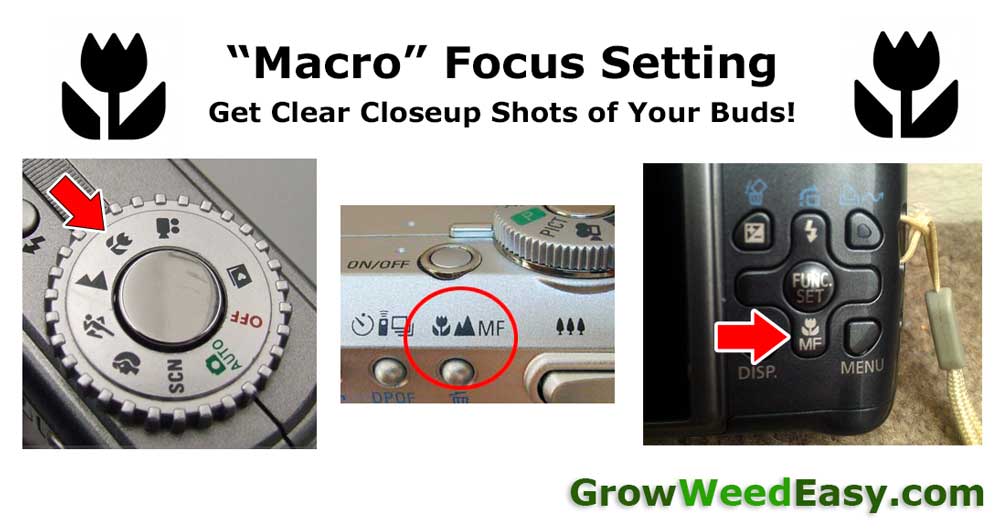
Some camera phones have a “Macro” mode in their advanced settings.
- Get more ideas in our article about the best ways to look at trichomes.
8.) Play With These Settings On Your Camera
I just mentioned Macro mode, but there are several other camera settings. Sometimes playing with these settings on your phone or camera can make a huge difference in how your pictures come out:
- Image Size
- Mode
- White Balance <– Reduce yellow/red/purple in pictures under HPS or LEDs
- Exposure
- Zoom
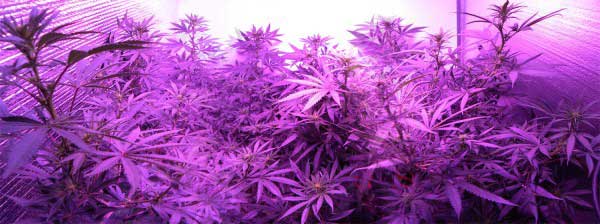
9.) For Taking Pics Under Unnatural Color Lights…
When using an HPS grow light or many LED grow lights, plant pictures often come out looking yellow, orange, pinkish, or purple. With older HPS you may even see strange black lines appearing in the pics. This makes it almost impossible to see what your plants really look like.
Luckily, there are several simple steps you can take to make sure your pictures don’t look like this one below!
You don’t want this!
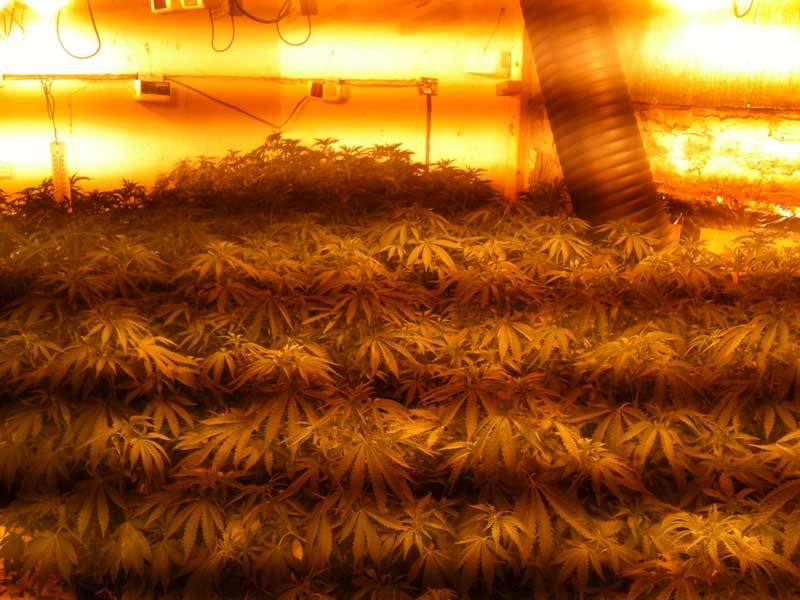
It’s cool to see plants under unusual spectrums of light, but sometimes you want plants to look natural
Each type of grow light is a little different, so check out our complete tutorials.
- Learn how to take great HPS pictures so you get natural colors and no black bands.
- Learn how to take great LED pictures in true color.
10.) Whites Appear Gray or Yellow? Colors Faded? Fix “Levels”
This is especially common with camera phone pictures and pictures from cheap or old cameras. This still happens with even the best cameras when the lighting levels aren’t right, or when the color of the light isn’t white.
Luckily, you can fix this by adjusting the “levels” after the fact in a picture editing program like Photoshop.
Let’s start with a bluish picture of cannabis plants under an MH grow light

Now I’m going to fix the levels in Photoshop under Images > Adjustments > Levels by using their 3 “dropper” tools on the right side of the “Levels” screen. The goal is to try to match the black dropper to black, gray to gray, and white to white. It doesn’t fix every picture, but will improve many. Using the droppers in a different order will make a difference. Play around to find out what works best for your picture.
Click on the dropper tool, then click on that color in your picture
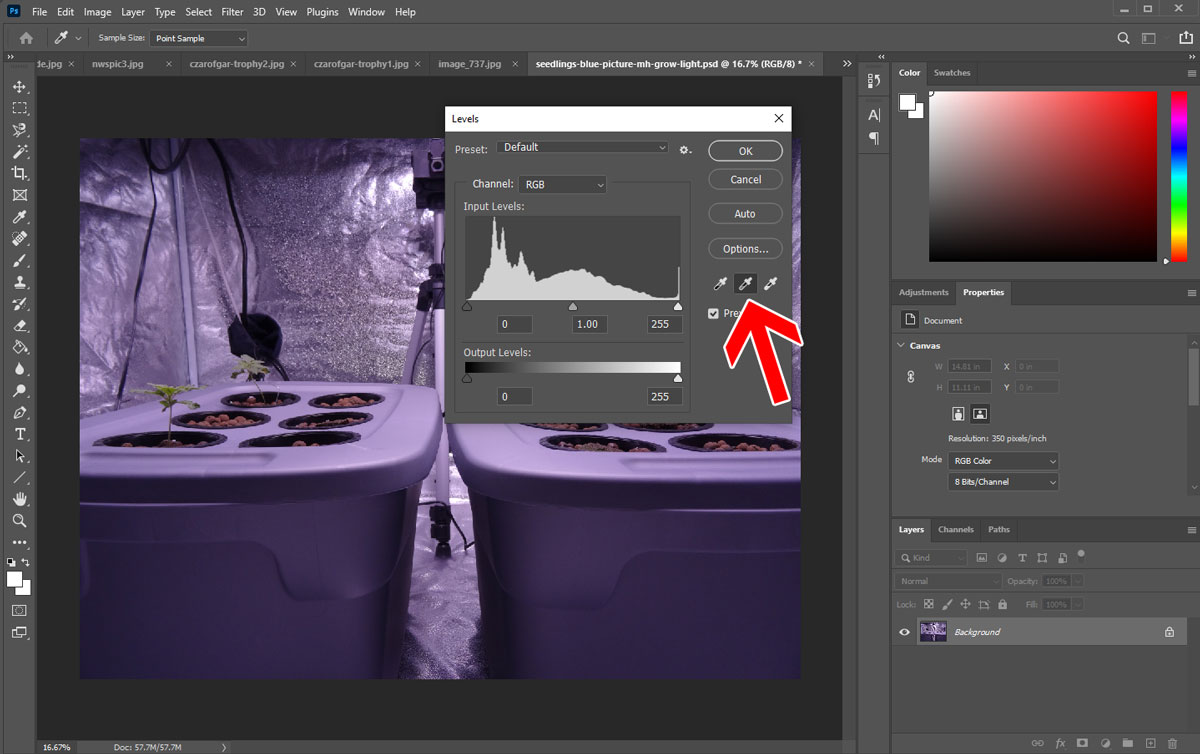
I used the gray dropper to click on the gray tub and it made the picture look a lot more natural. Here’s that picture after fixing levels.

Notice the bluish cast to the pictures is greatly reduced and the color appears more natural.
You can make this easier by setting up a little before you start shooting pics. If you place something in the scene that is known to be black, gray or white, you can use that as a reference when correcting levels. For example, if you have a white piece of paper in the picture, you can use that as the correct “white.” In the above pic the tub on the right is gray, so I know I can use at as my “gray” reference. The net pots are black in real life, so I use them as my new “black.”
Basically, in the Levels screen…
- match black dropper to what should be black
- gray dropper to what should be gray
- white dropper to what should be white
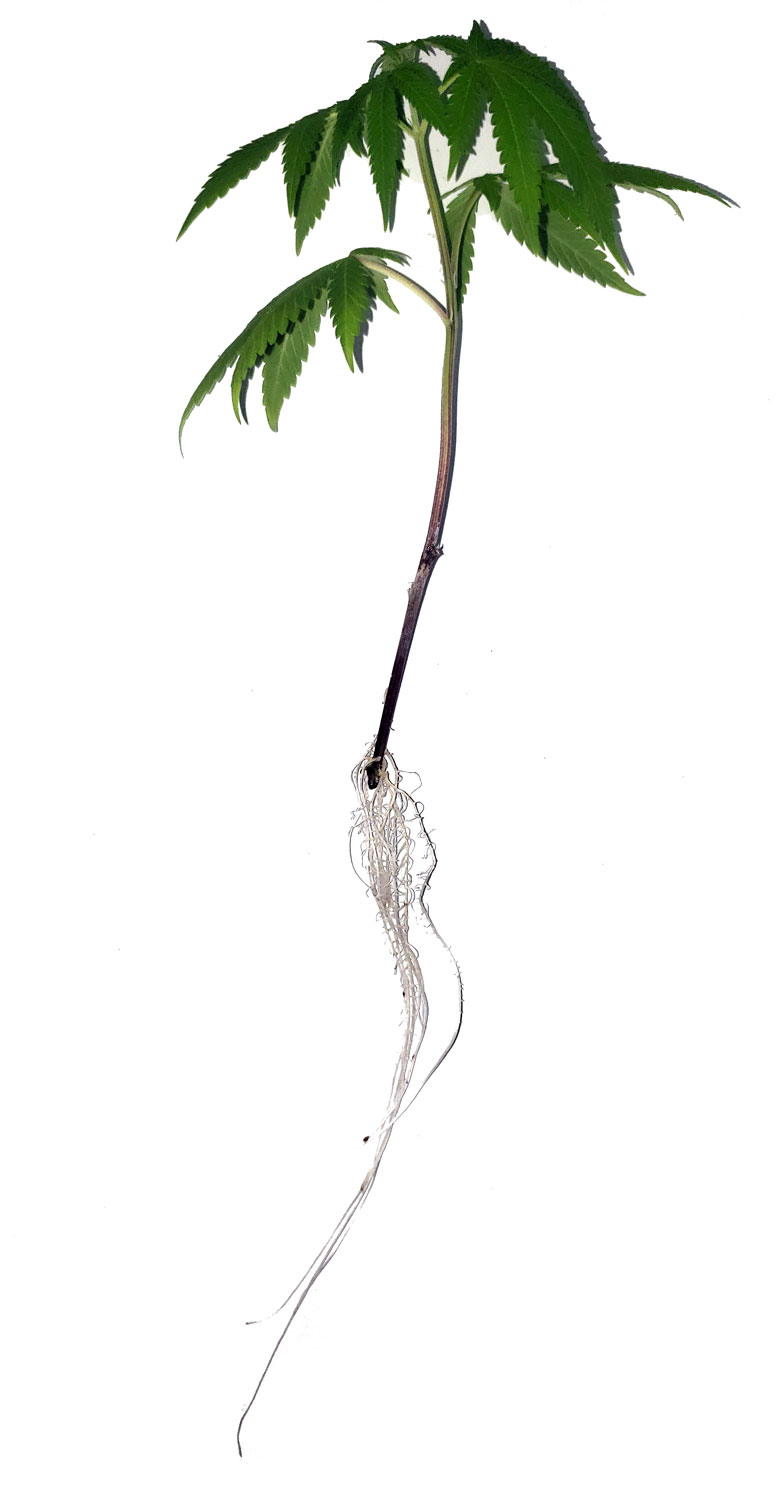
Take a picture with a completely white background so you can use the white dropper to full effect.
I took a picture of this rooted clone on my washing machine, which is white, but the picture came out dark and the white looks gray.
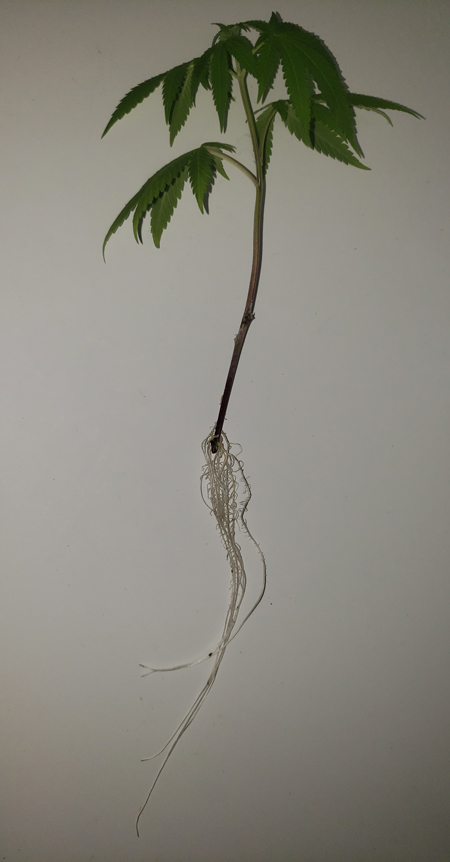
I clicked on the background with the white dropper, which made the background really white and fixed the dark grayish cast on the leaves. A bright white background makes a picture pop!
This beautiful bee picture looks washed out
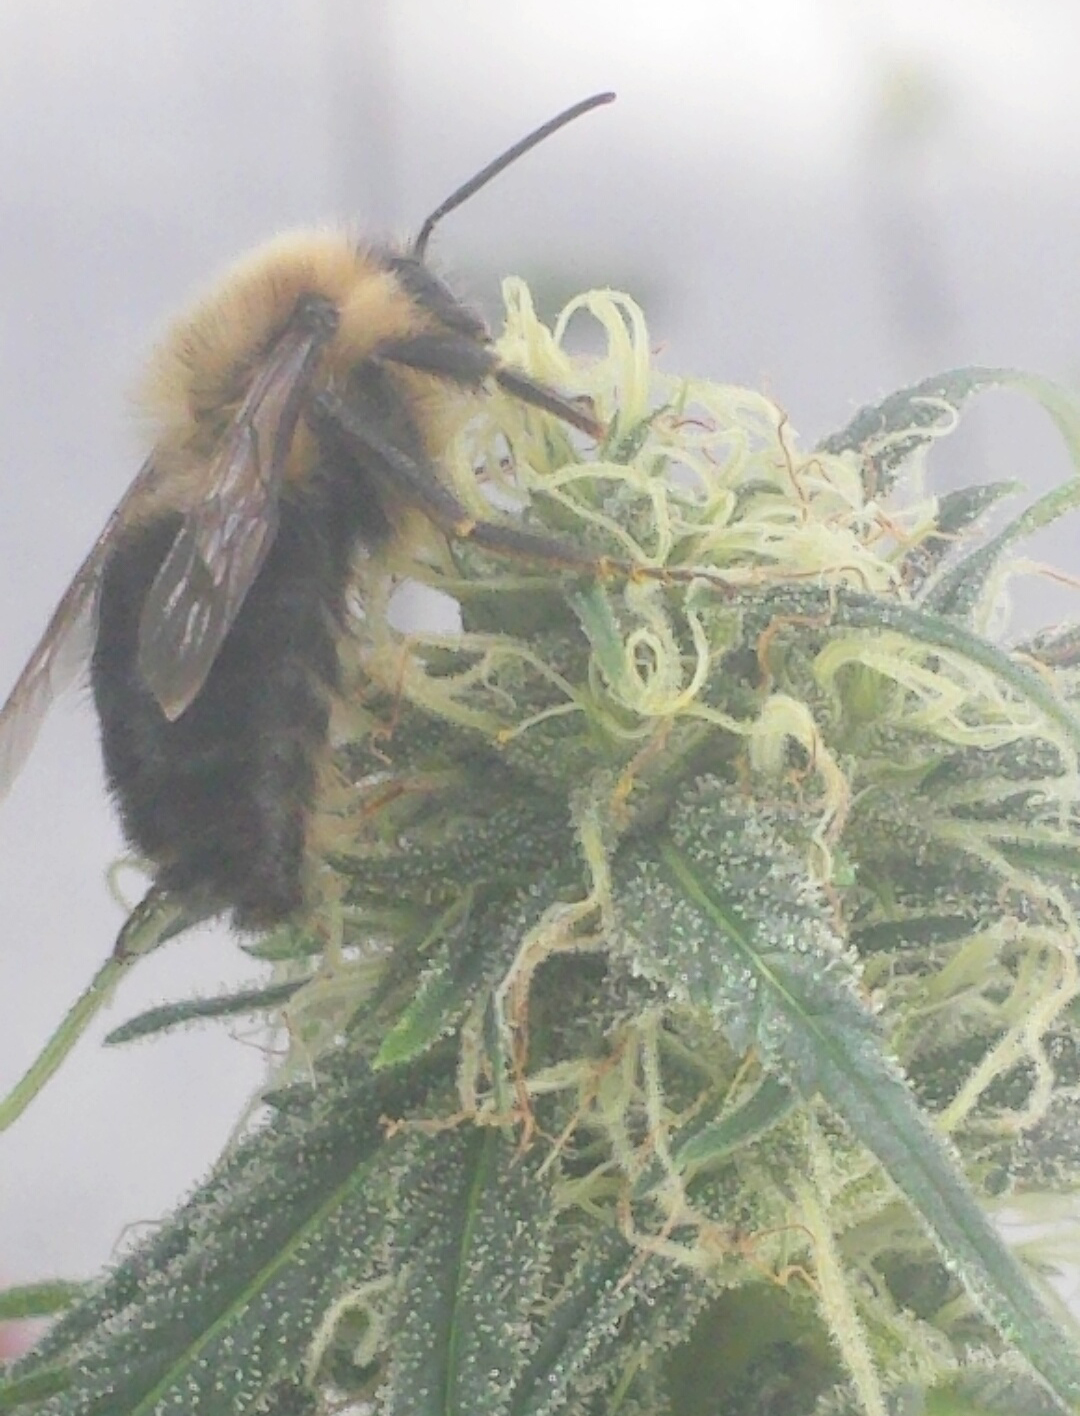
After clicking on the darkest part of his butt with the black dropper, the picture was transformed
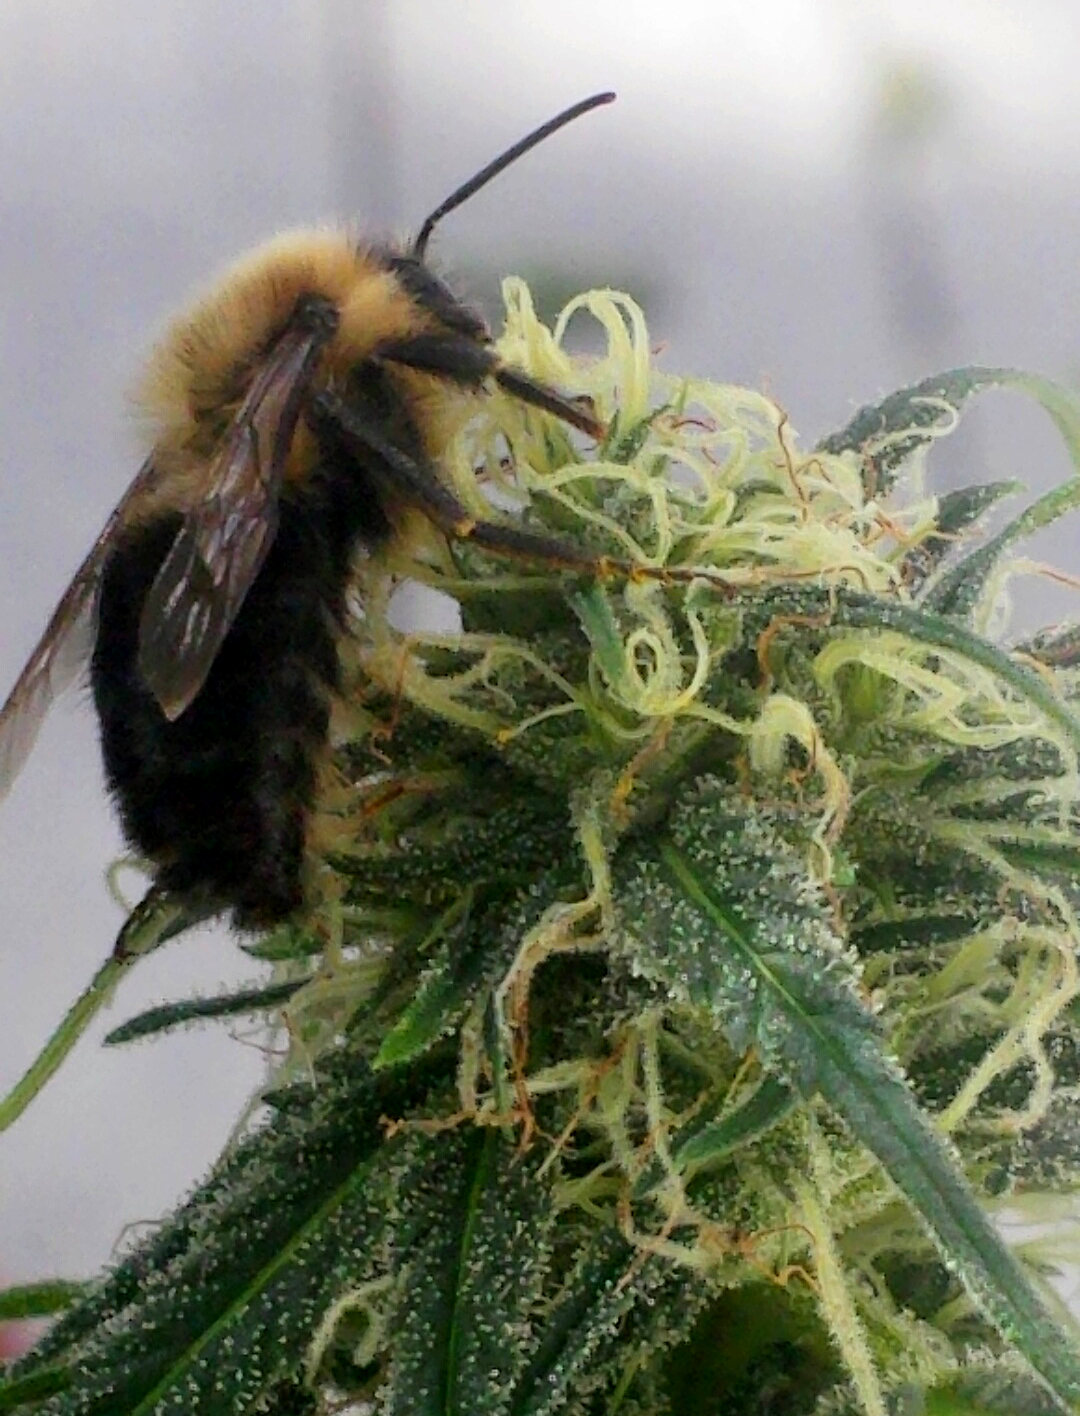
If it doesn’t look good, click undo and try again on other parts of the picture. A lot of pics can be fixed up this way!
What Should You Take Pictures Of?
What are some common pictures that people like to see?
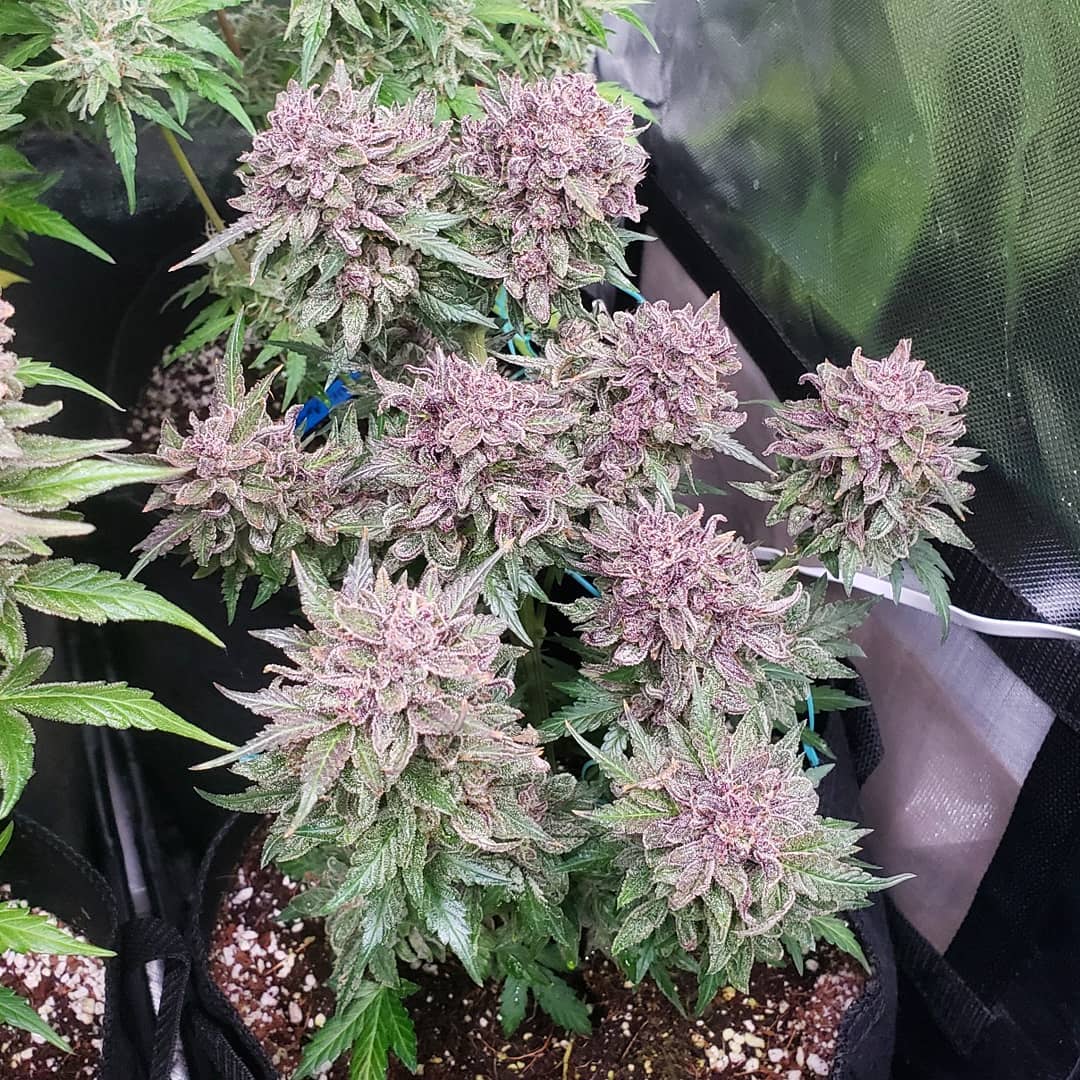
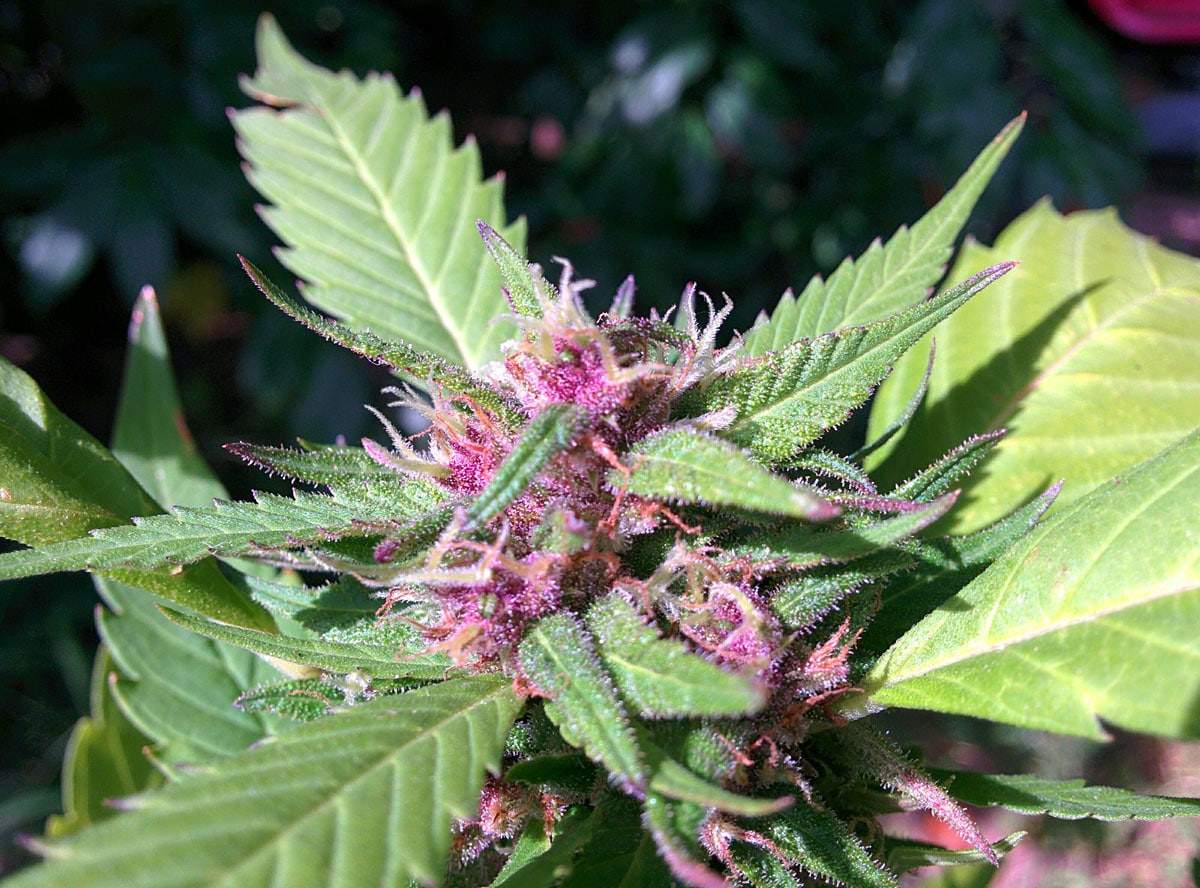
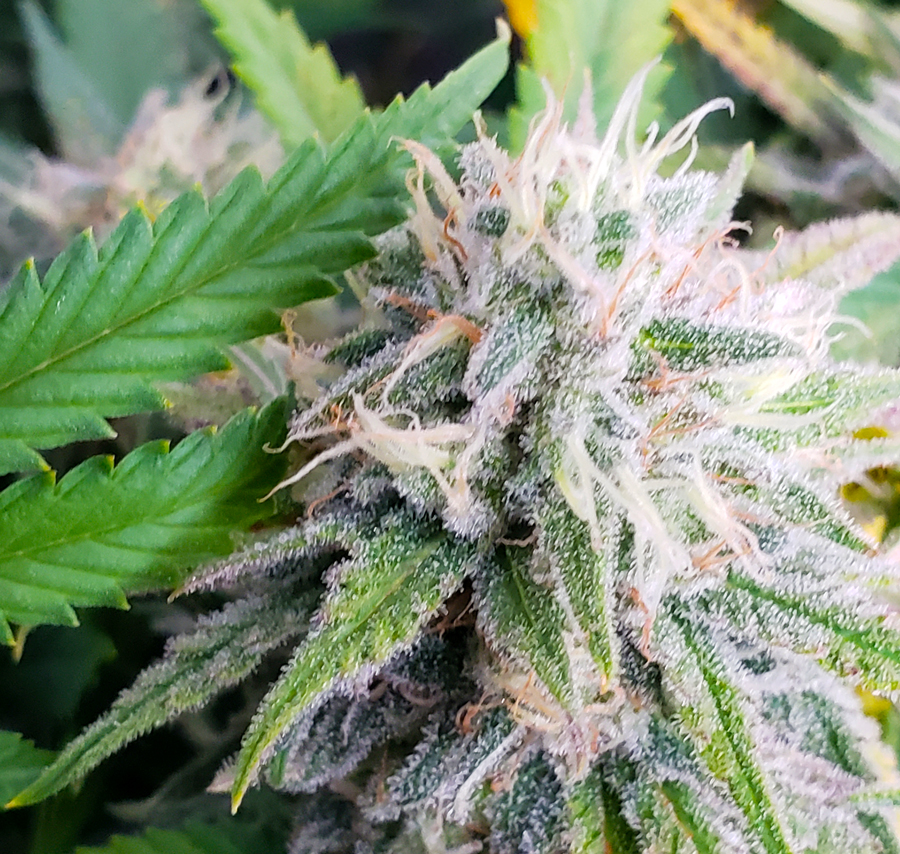
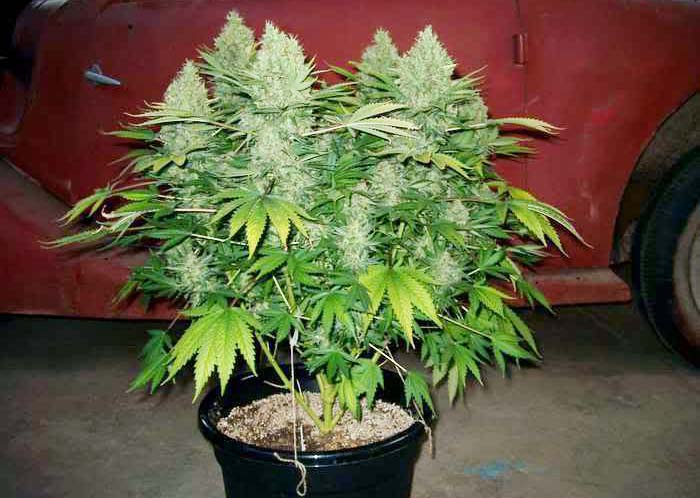
1.) Bud Closeups
Everyone loves seeing bud closeups. You’ll look back on them fondly, and the growing community literally can’t get enough of them 🙂
However, there’s a tendency for grower to take pics of only their buds. Which makes sense, that’s the part of the plant we’re most interested in! But while buds pics are awesome, sometimes there’s a lot of other interesting stuff going on that doesn’t make it into bud pics! Here’s a few ideas…
2.) Plant Problems or Weird Symptoms
Don’t “forget” to take pictures of problems!
Even though it may feel embarrassing to have plant problems, it’s helpful to remember that every single grower has them.
Everyone hates running into plant problems and the tendency is to try to pretend like they don’t exist. However, these pictures are really helpful and interesting to refer back to (after some time has passed). This calcium deficiency was caused by low pH in the grow medium.
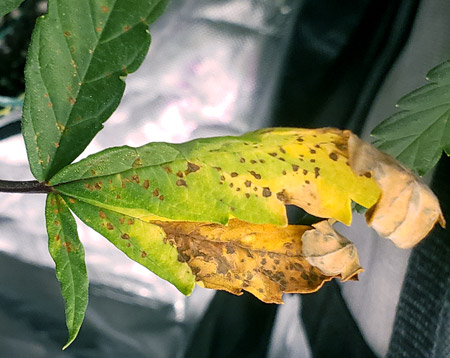
Plant problem pictures are worth their weight in gold to other growers, and chances are they will help you down the road, too. Every time I’ve taken pictures of plant problems, I’ve always ended up referring to them later, and there has been several times when I wish I’d taken more!
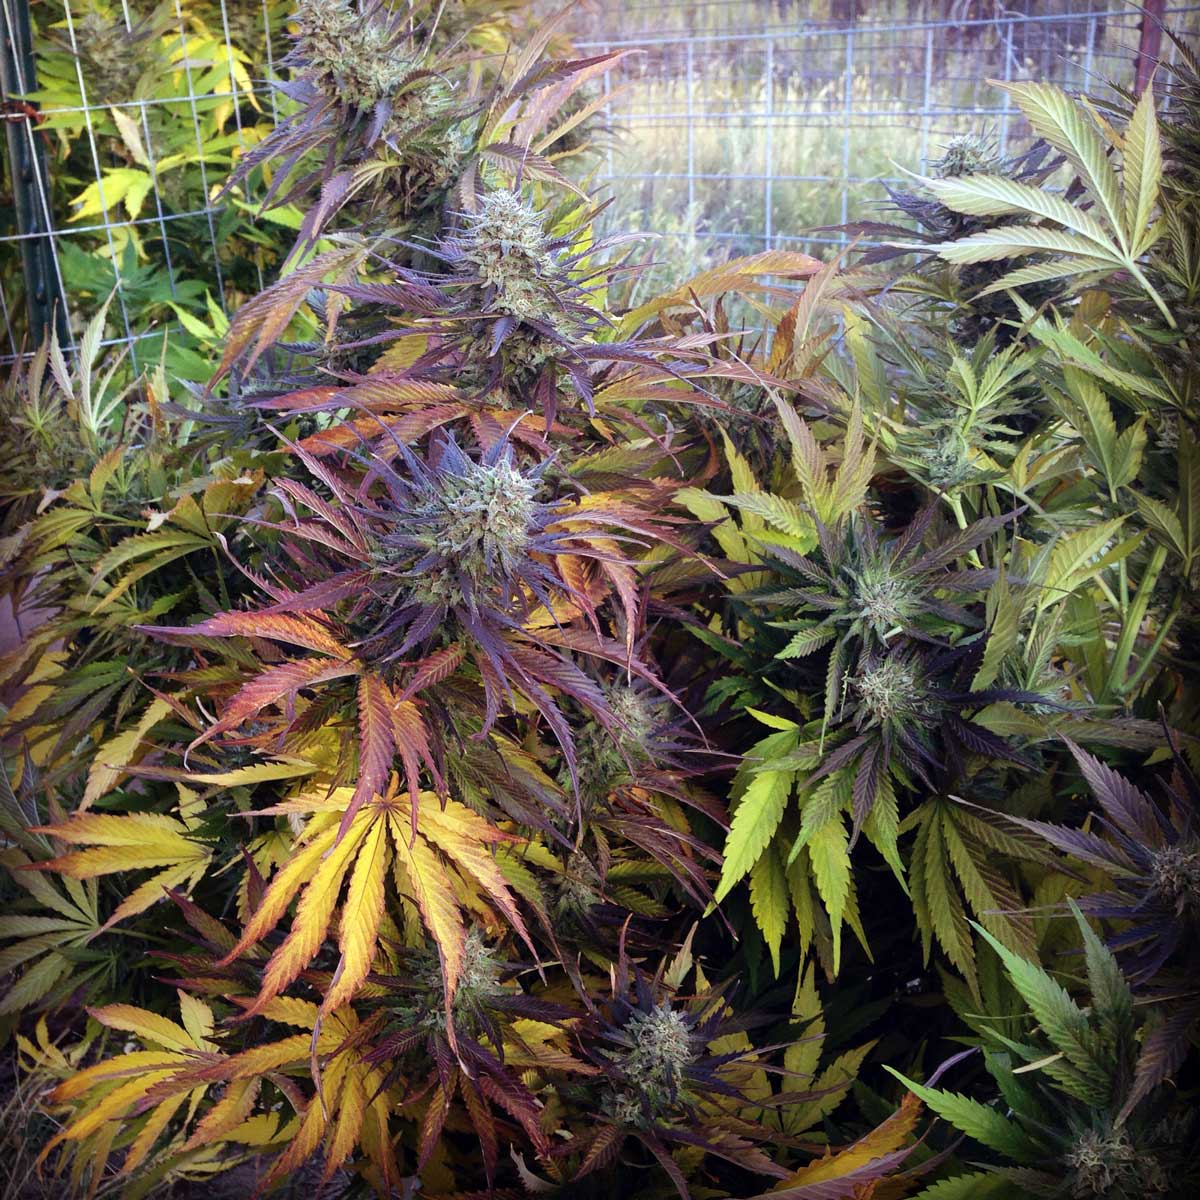
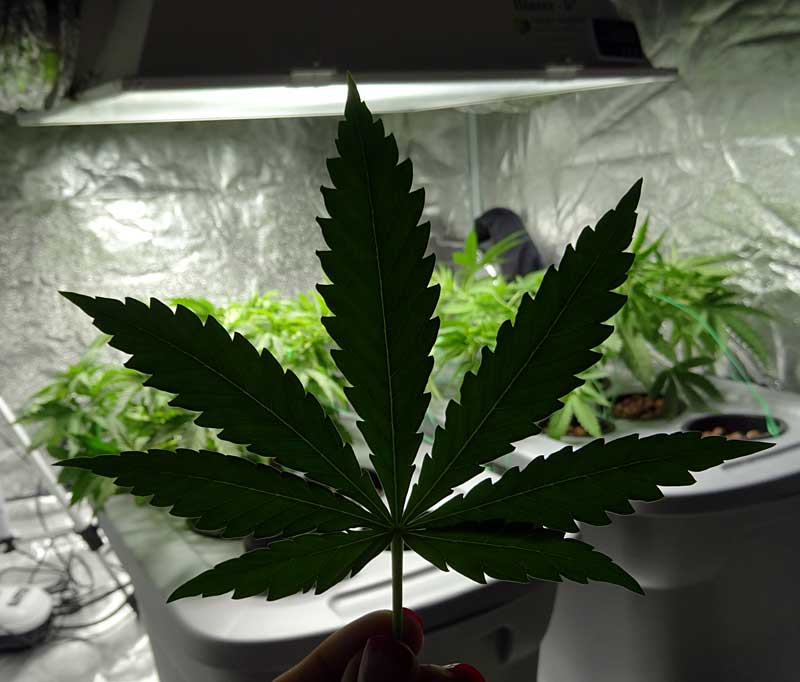
3.) The Whole Plant
Take pictures of different parts of the plant, and take at least a few pictures of the whole plant without cutting off the top or bottom. Even if you’re not happy with all parts of the plant, it’s very helpful to you later to be able to look back and see the entire plant structure. This will help you improve your LST skills down the road.
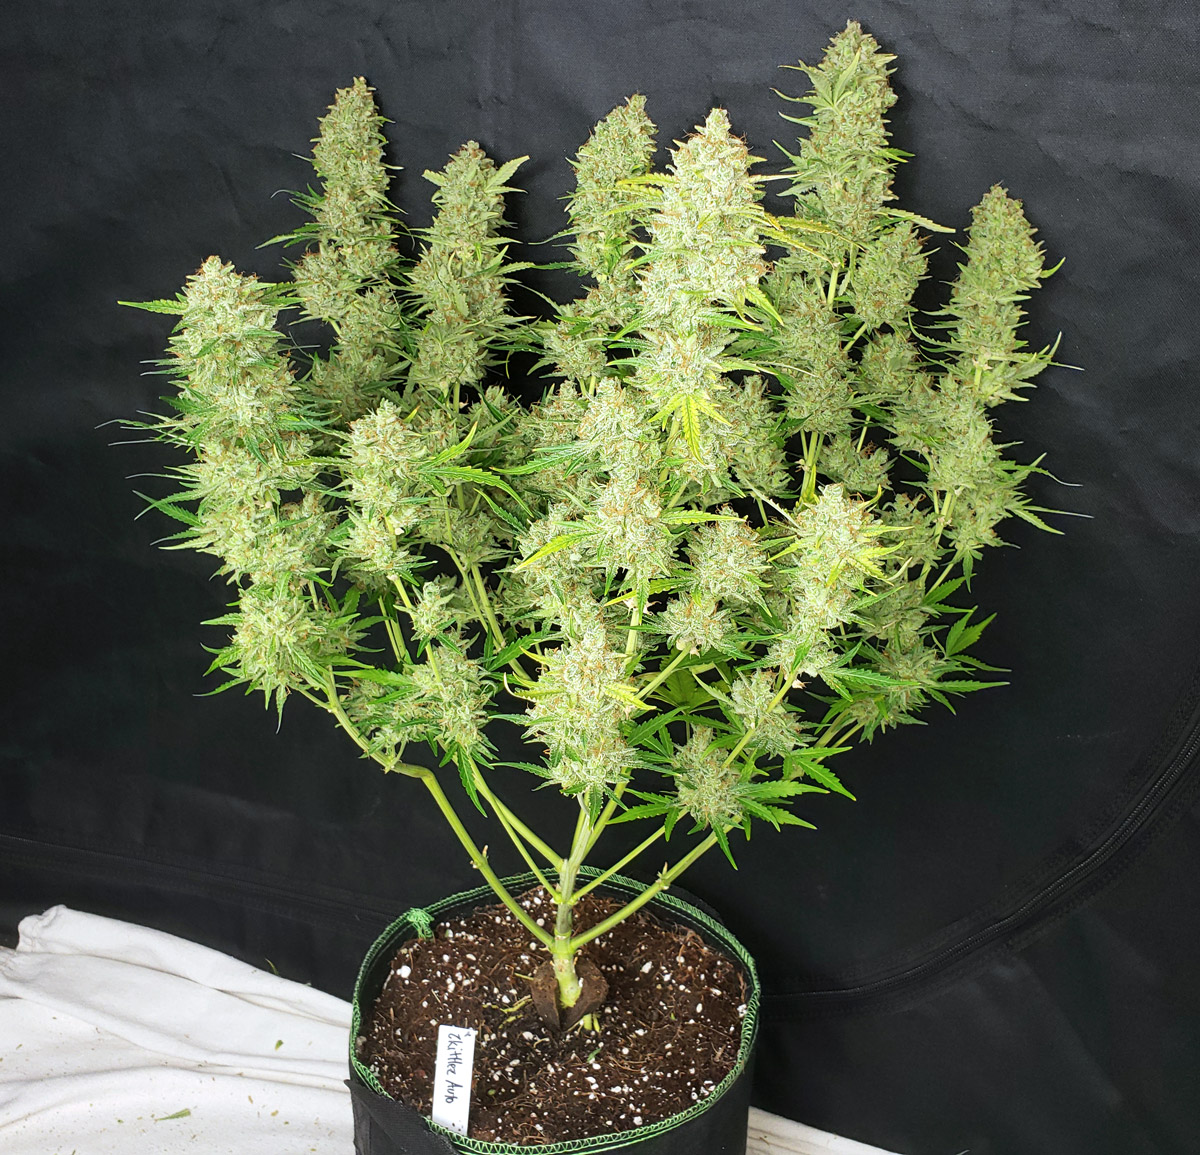
Try to get pictures of the plant from both the side and the top looking down. Some growers also like to take pics from the bottom of the plant looking up towards the light, so you see the canopy of leaves above you.
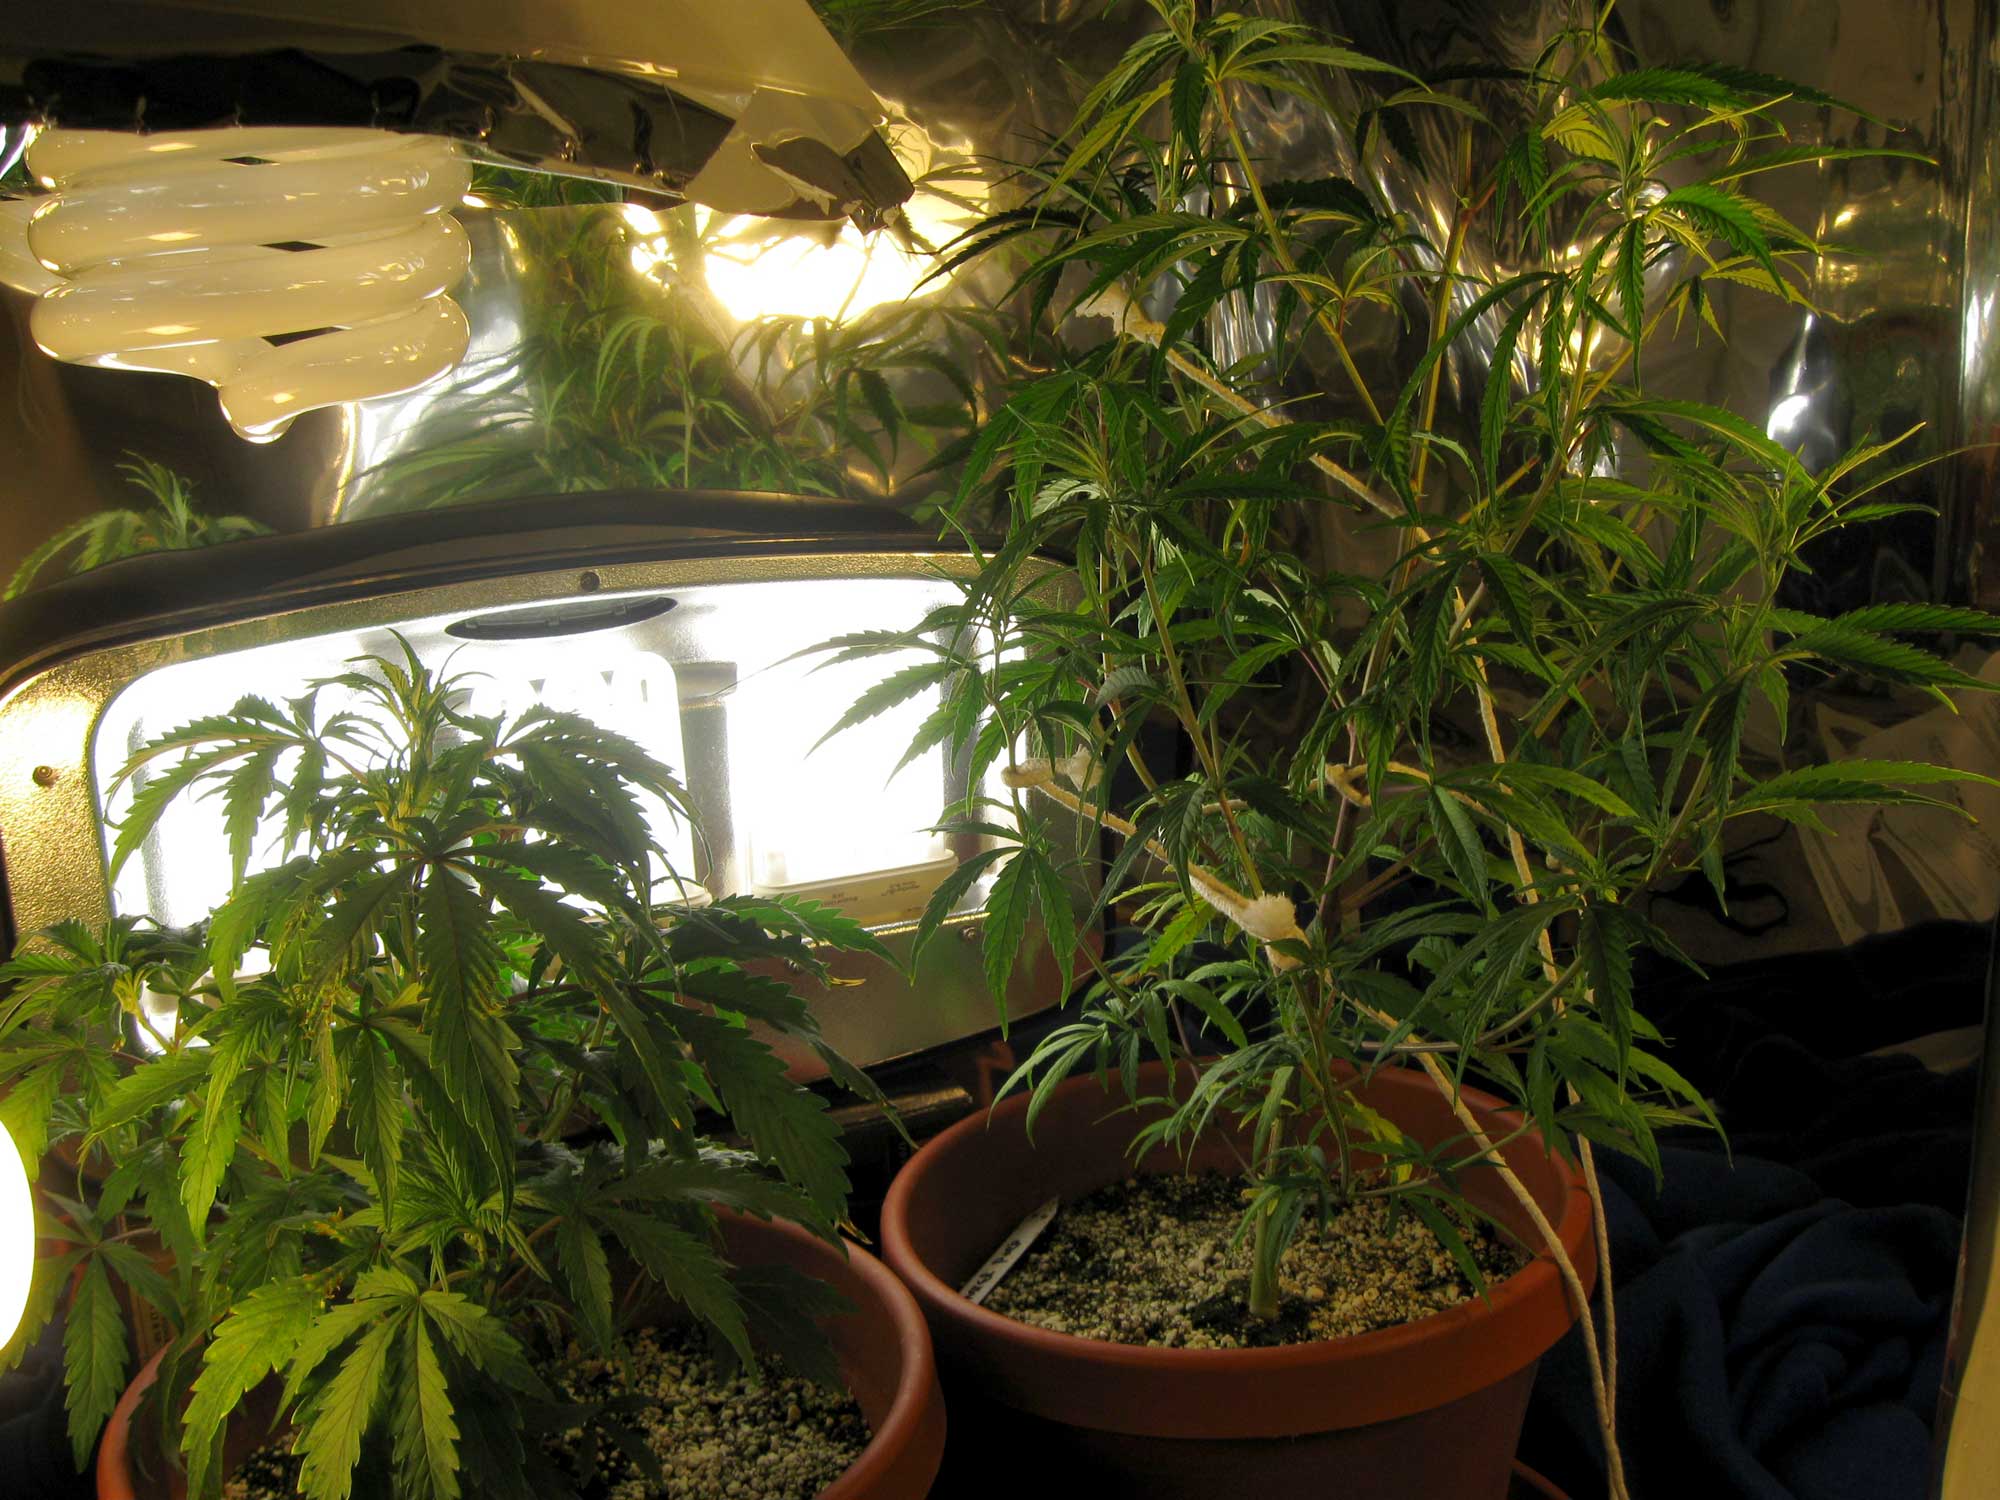
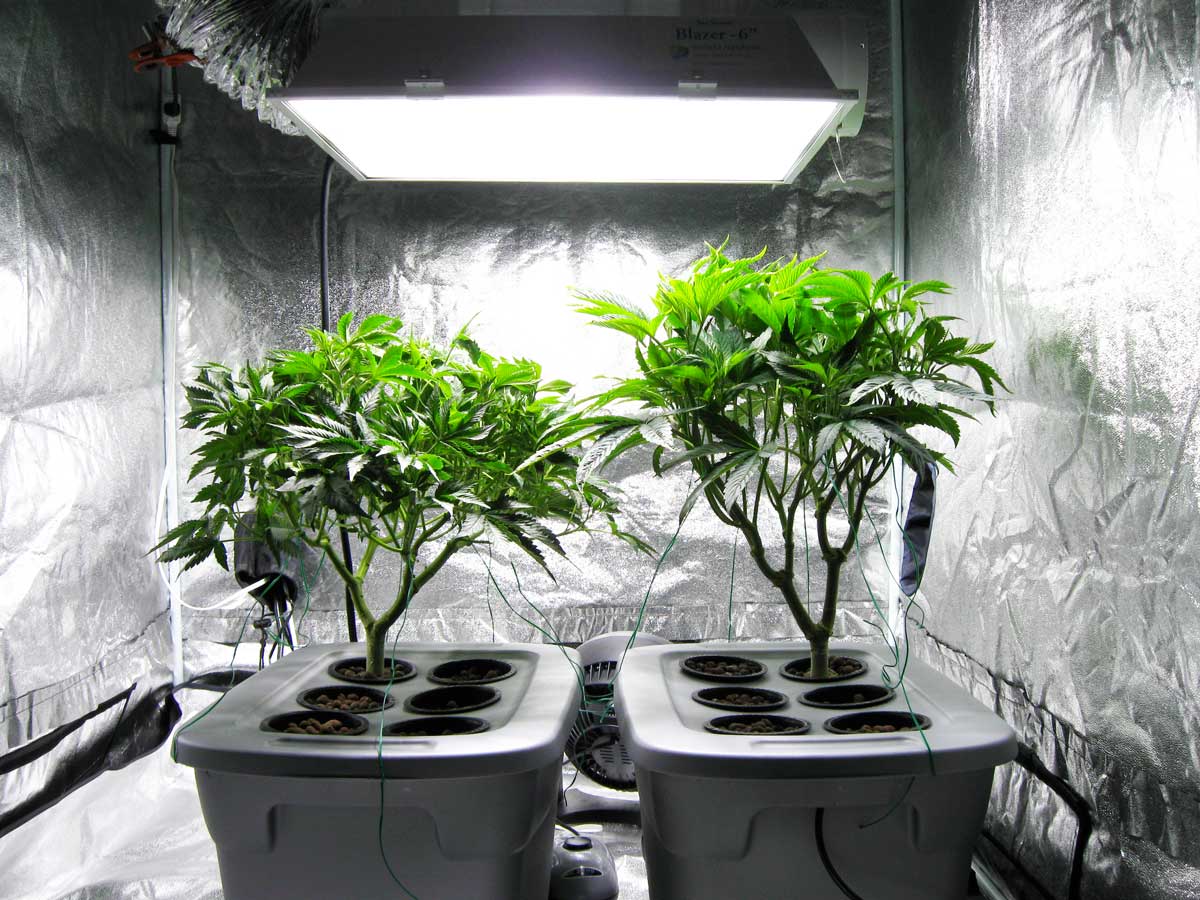
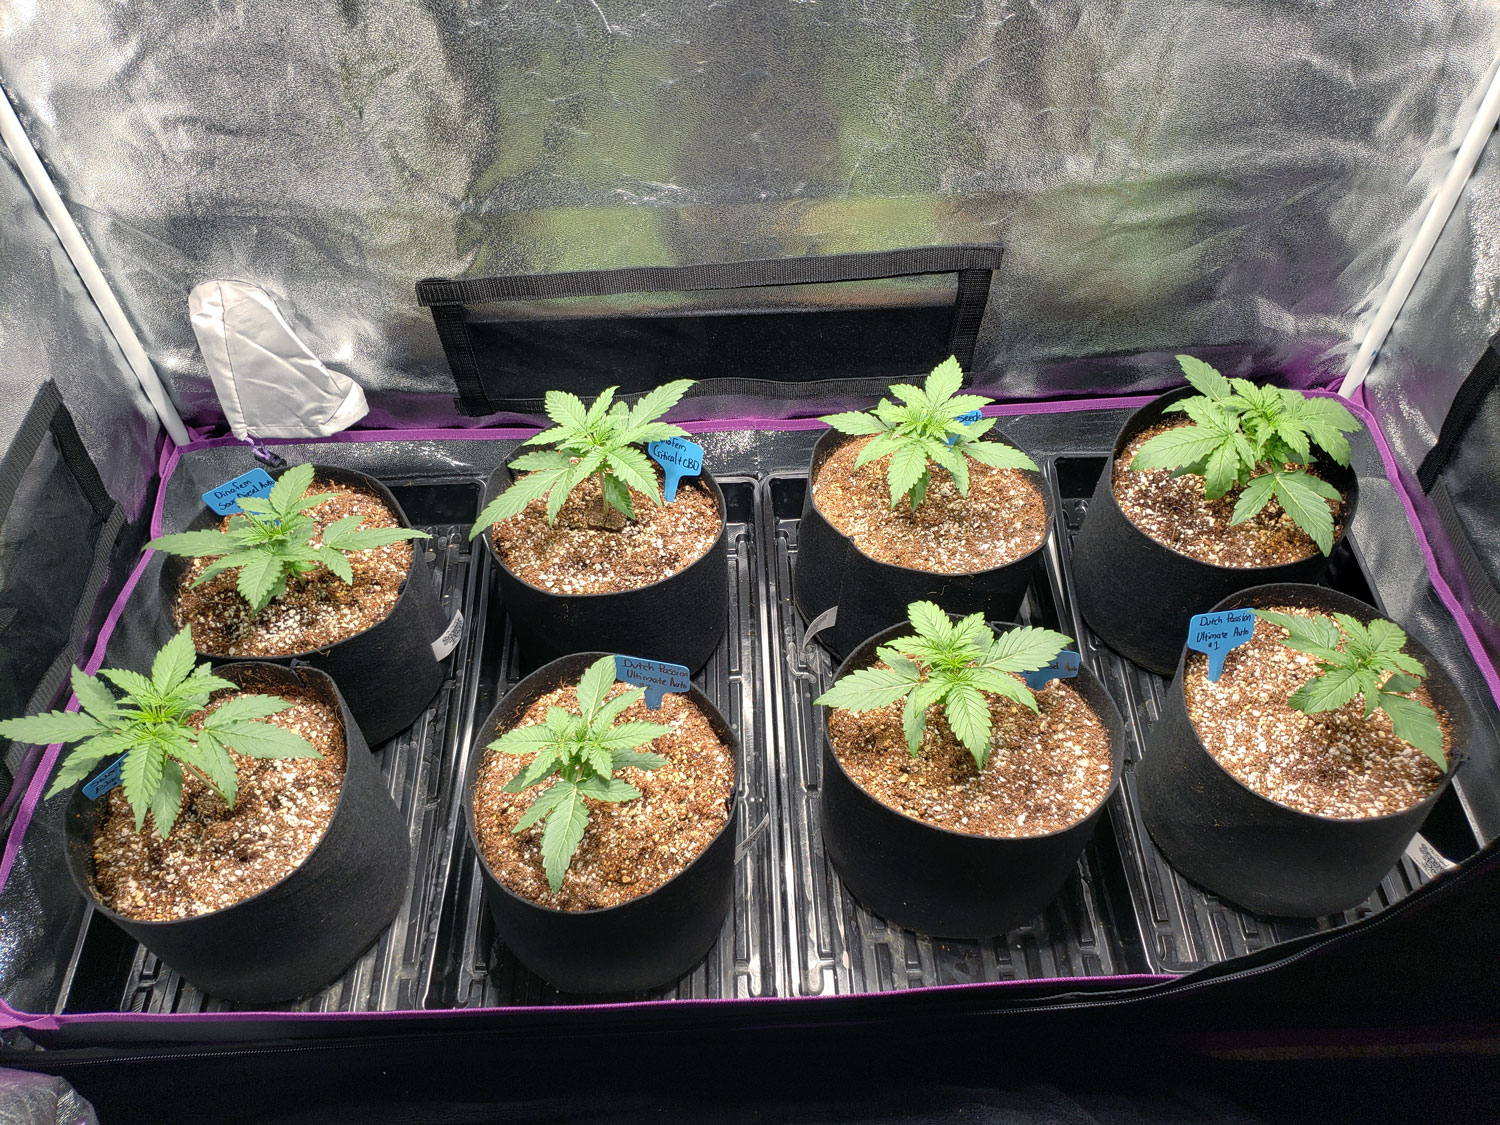
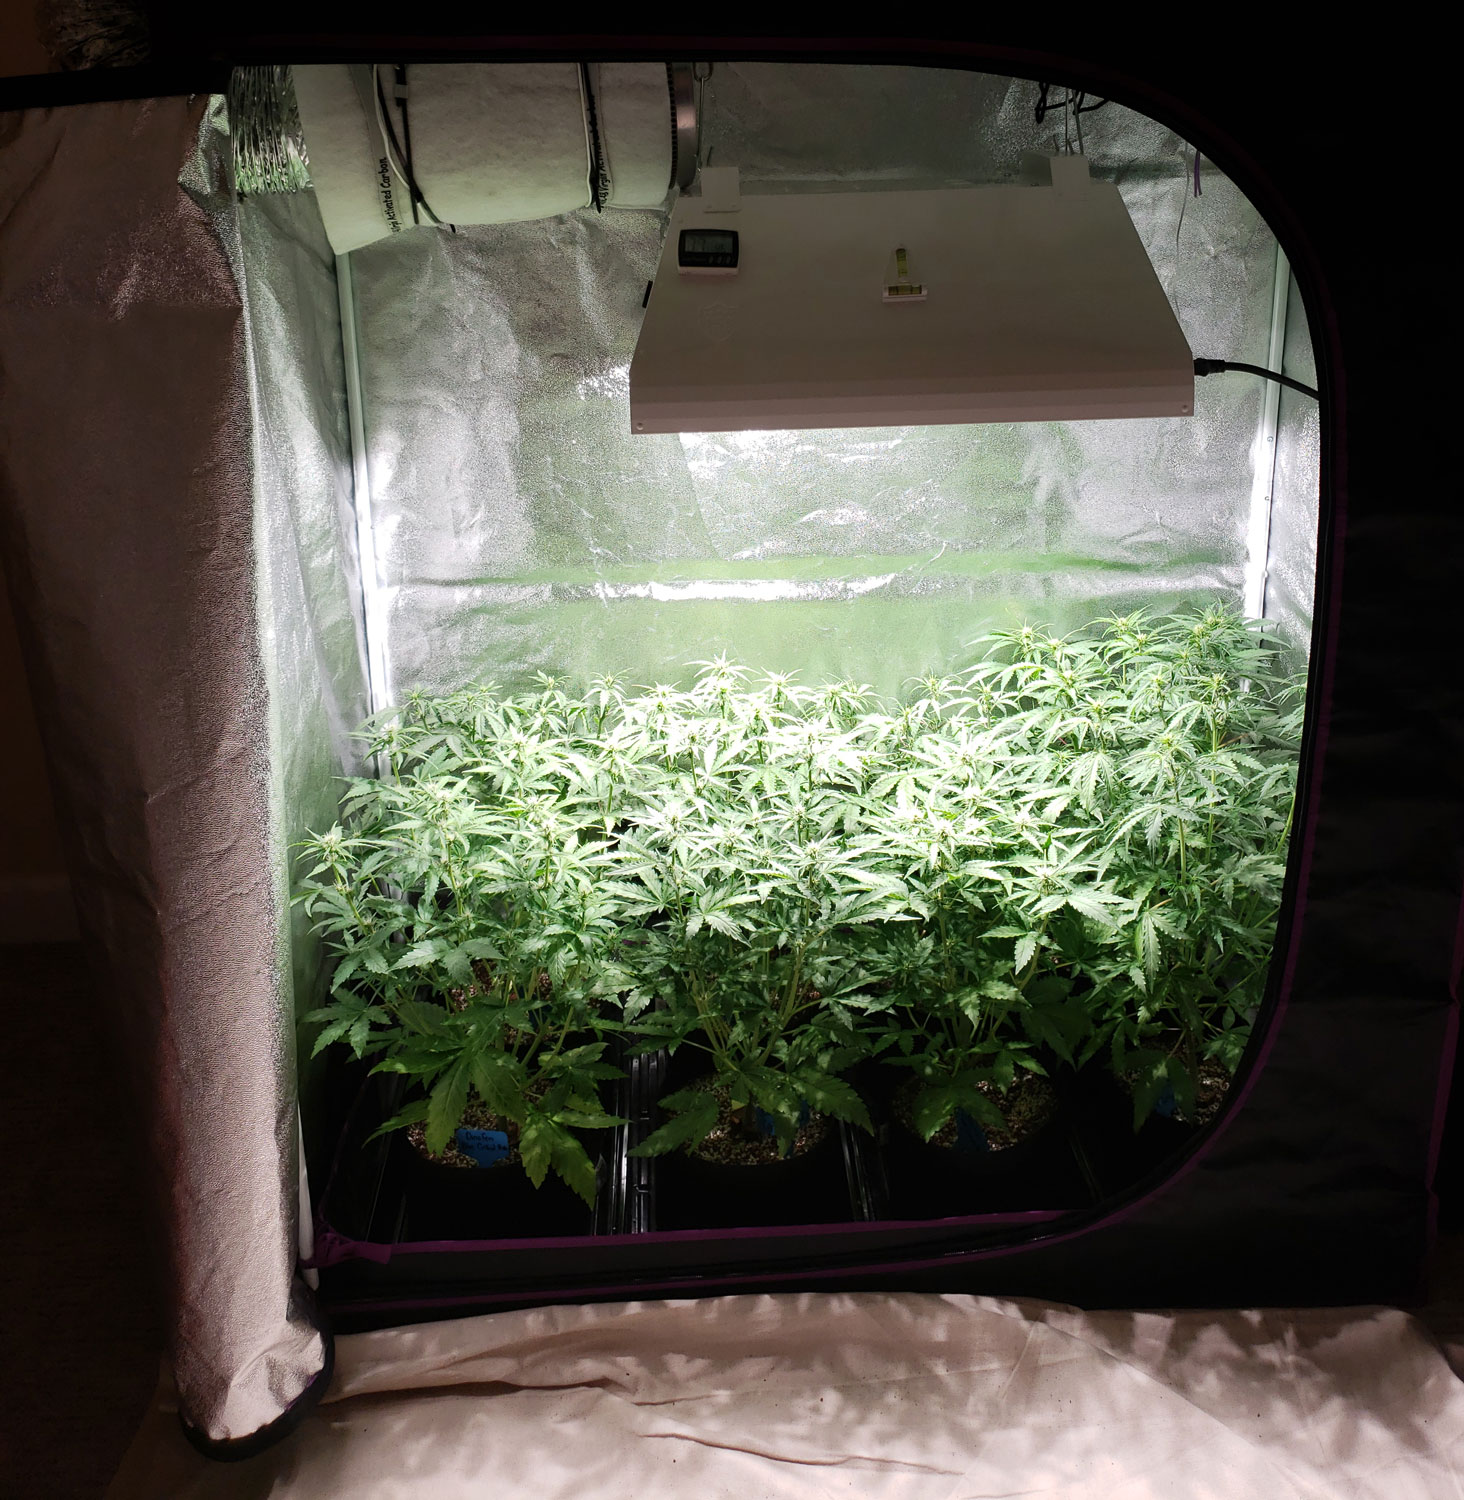
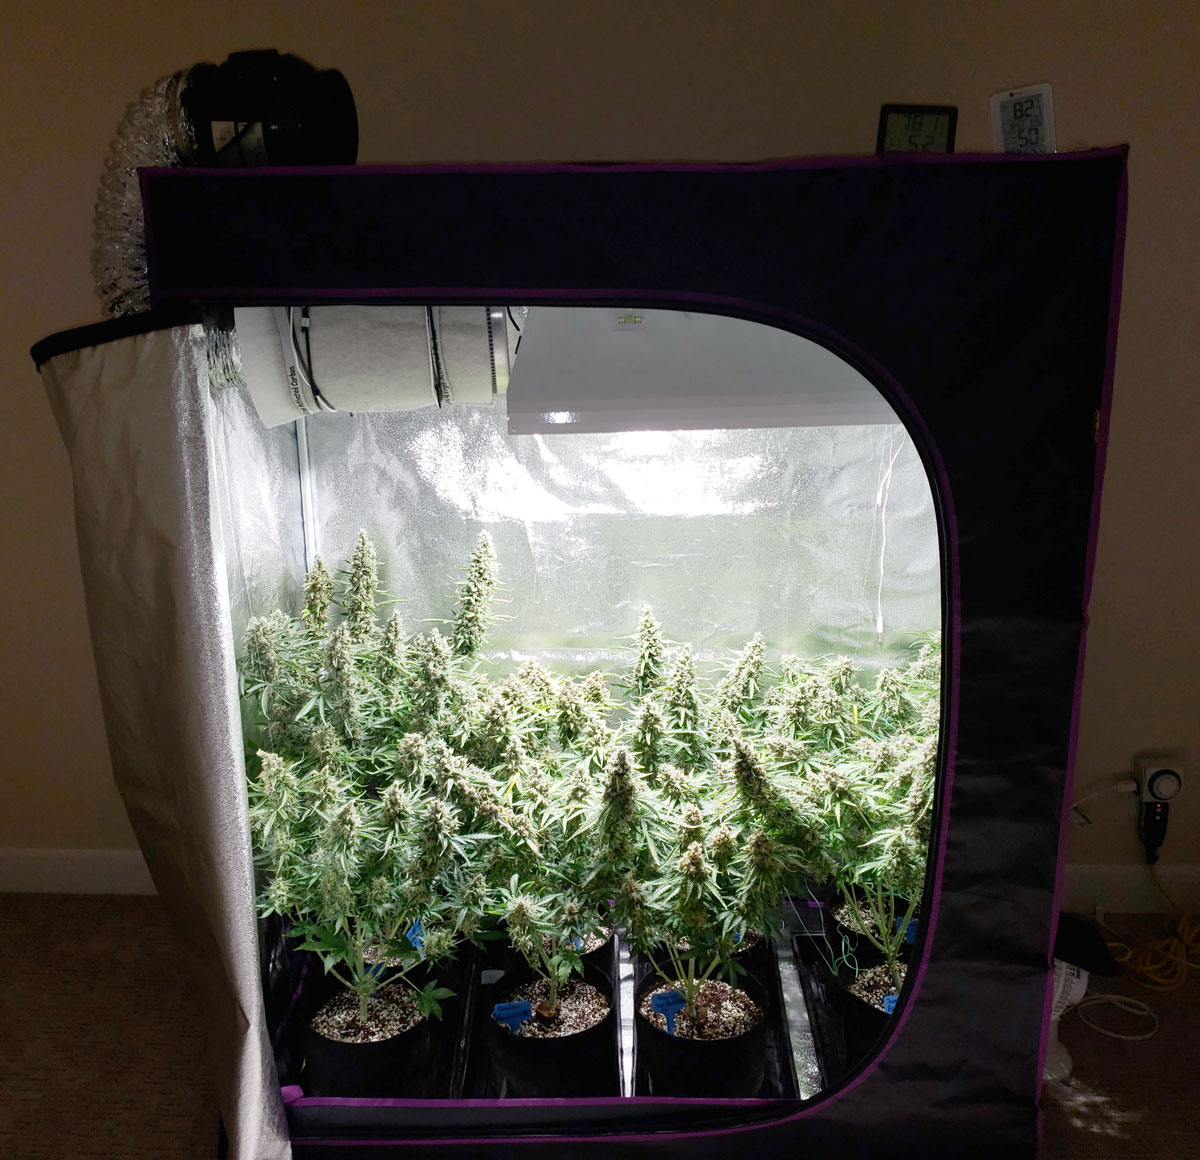
4.) Pictures of the Entire Setup
It’s great to take nice pictures of your plant, but it’s also helpful to step back a little bit and take pictures of the whole setup, including your plant, but also your grow area, etc. This gives you and others a more “whole picture” look of the plant. These pictures are really cool to see later, because you’ll get to see how your setup changes over time!

5.) The Story of Your Plant’s Life
It sounds silly, but it’s nice to take pictures of your marijuana plant at different stages of its life. I like to try to specifically take a few pictures of my plants at the same angle throughout their life. That way you get a direct comparison to see how they change they grow. Everyone loves seeing a “picture album” of a cannabis plant from seed to harvest!
Young plants
Getting older
At harvest!
6.) Artistic Pics
Look at pictures of cannabis online and see what you like and don’t like. What are your favorite pictures? Experiments with different angles, using props, focusing on different subjects, etc. Discover your artistic style!
Looking up through cannabis leaves can look cool whether plants are inside or outdoors

If you like taking pics of your plants, we’d love to see them!
Submit your favorite pics: https://www.growweedeasy.com/submit-trophy-pics
Wanna Take Pictures But Don’t Have Plants?
View GrowWeedEasy.com’s list of trusted seed vendors here to get your seeds today! https://www.growweedeasy.com/seeds
Our list only contains seed banks who have proven themselves over the years with high quality seeds, discrete shipping, and great delivery rates.
Trophy Pics!
From the grower: “The setup consists of three grow rooms, one veg room, and one curing room. Strains pictured are God’s Gift, Fire Alien Urkle, and Raskal’s OG. (10.9% CBD!!) We currently run and have run a variety of others including Kraken, Fruity Pebble OG, White Dawg, White Fire, Tre Dawg, Star Dawg, and Ewok.”
From the grower: “There are many more photos to be found on our Instagram page, as well as set up and growing tips. Check it out at @firebros206″
Good Dog!

Jump to…
Advanced Only! Controversial Defoliation Technique Increases Yields
How Tall Will My Plants Grow? How Long Does It Take?
LBH’s Famous 4-way LST Tutorial