by Nebula Haze
Finished! Go to the end to see the results.
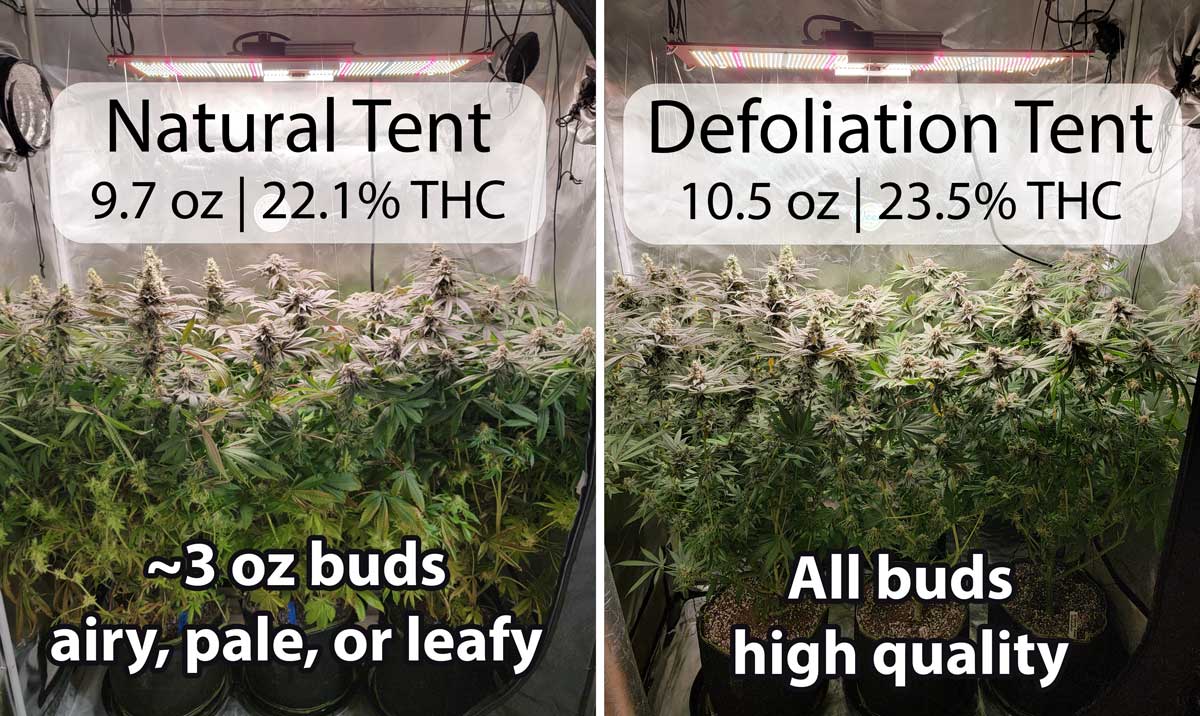
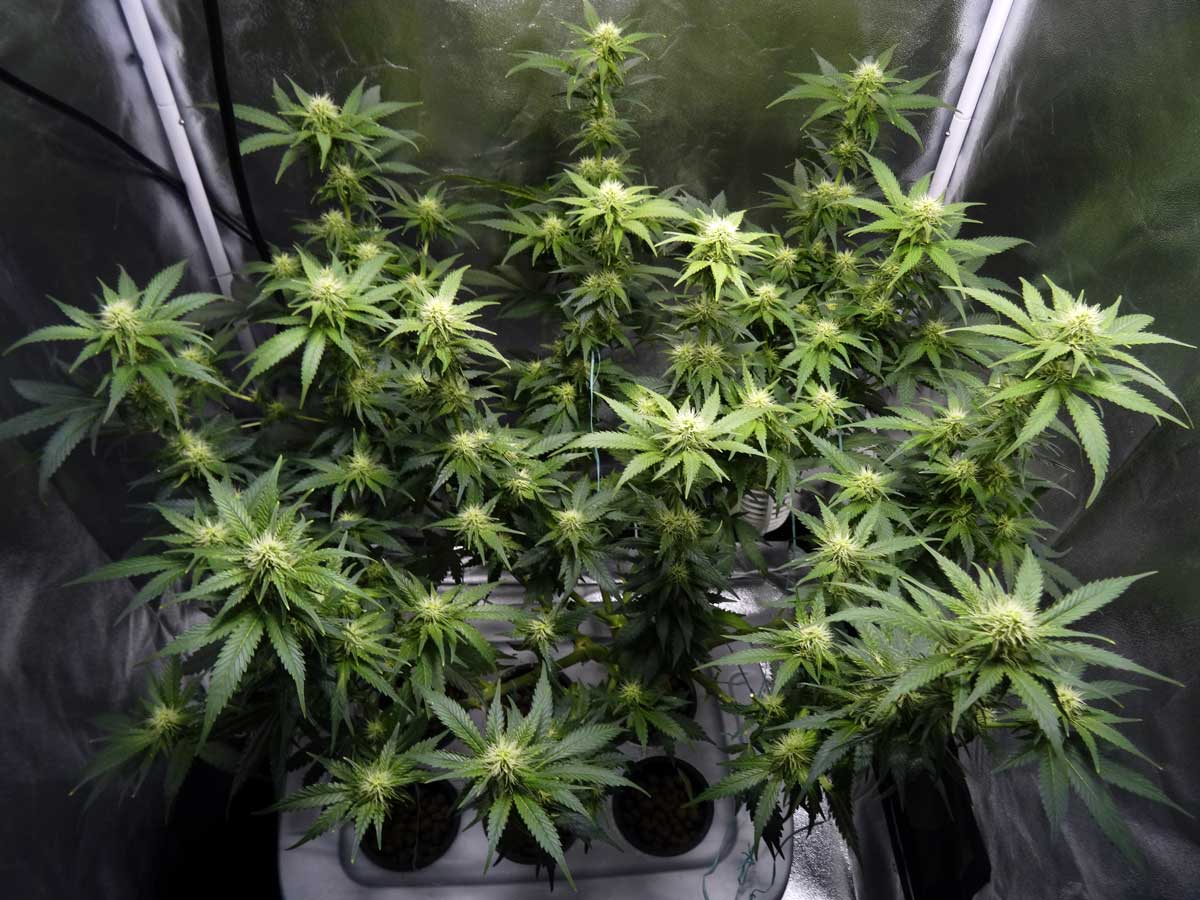
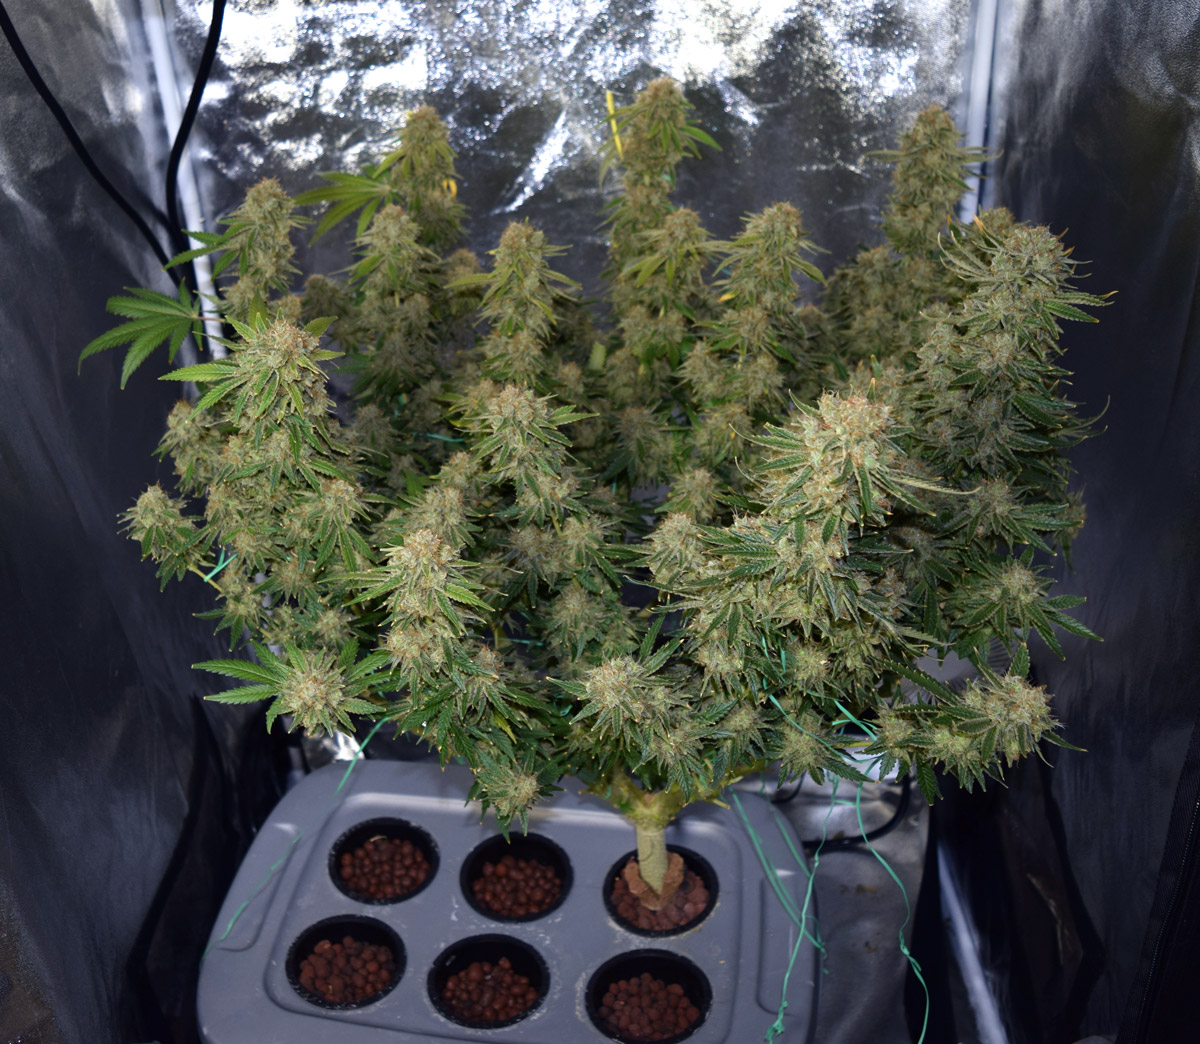
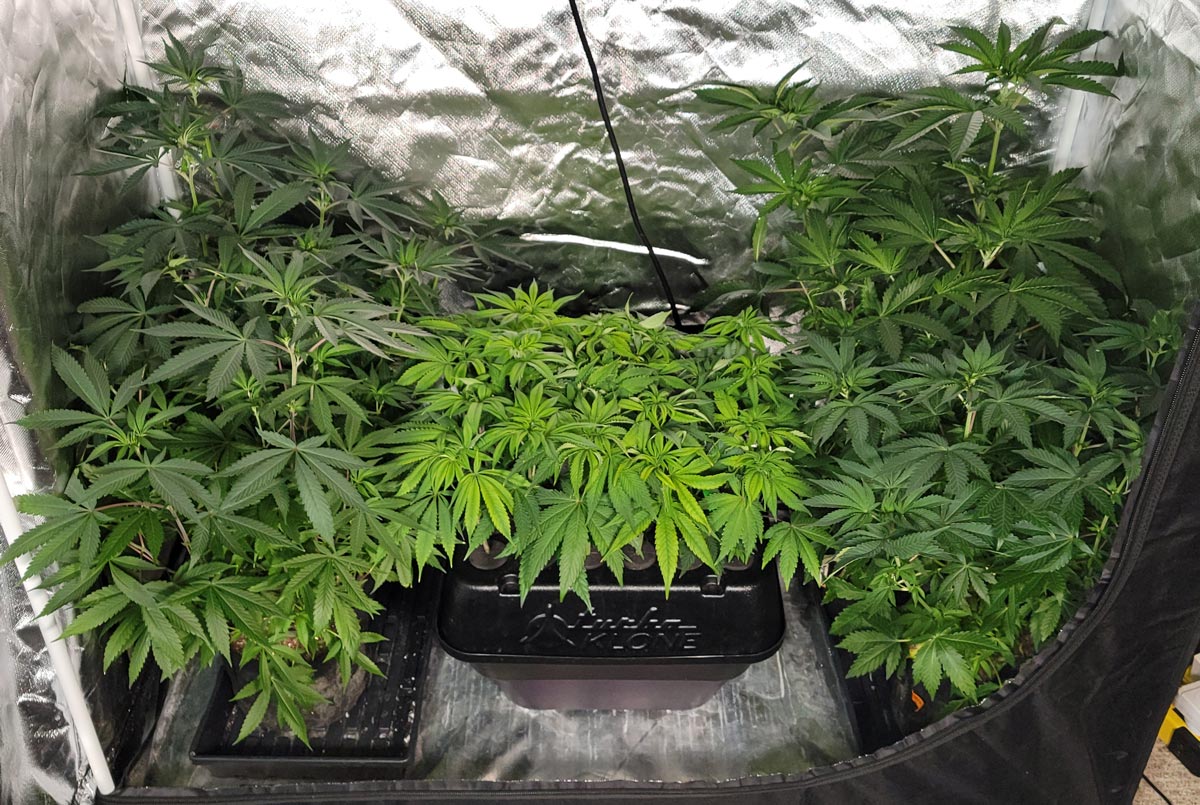
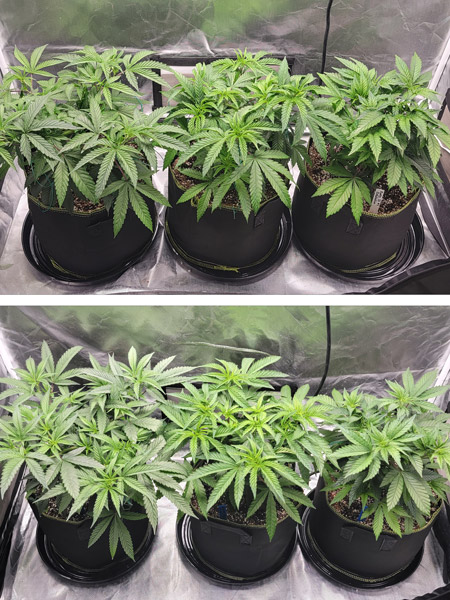
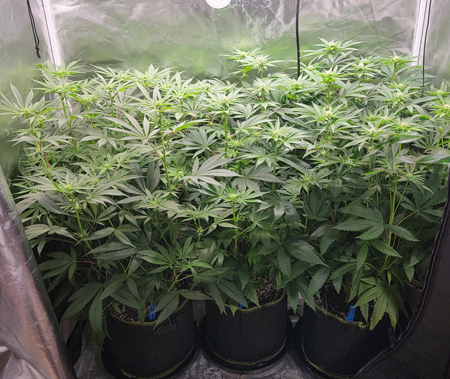
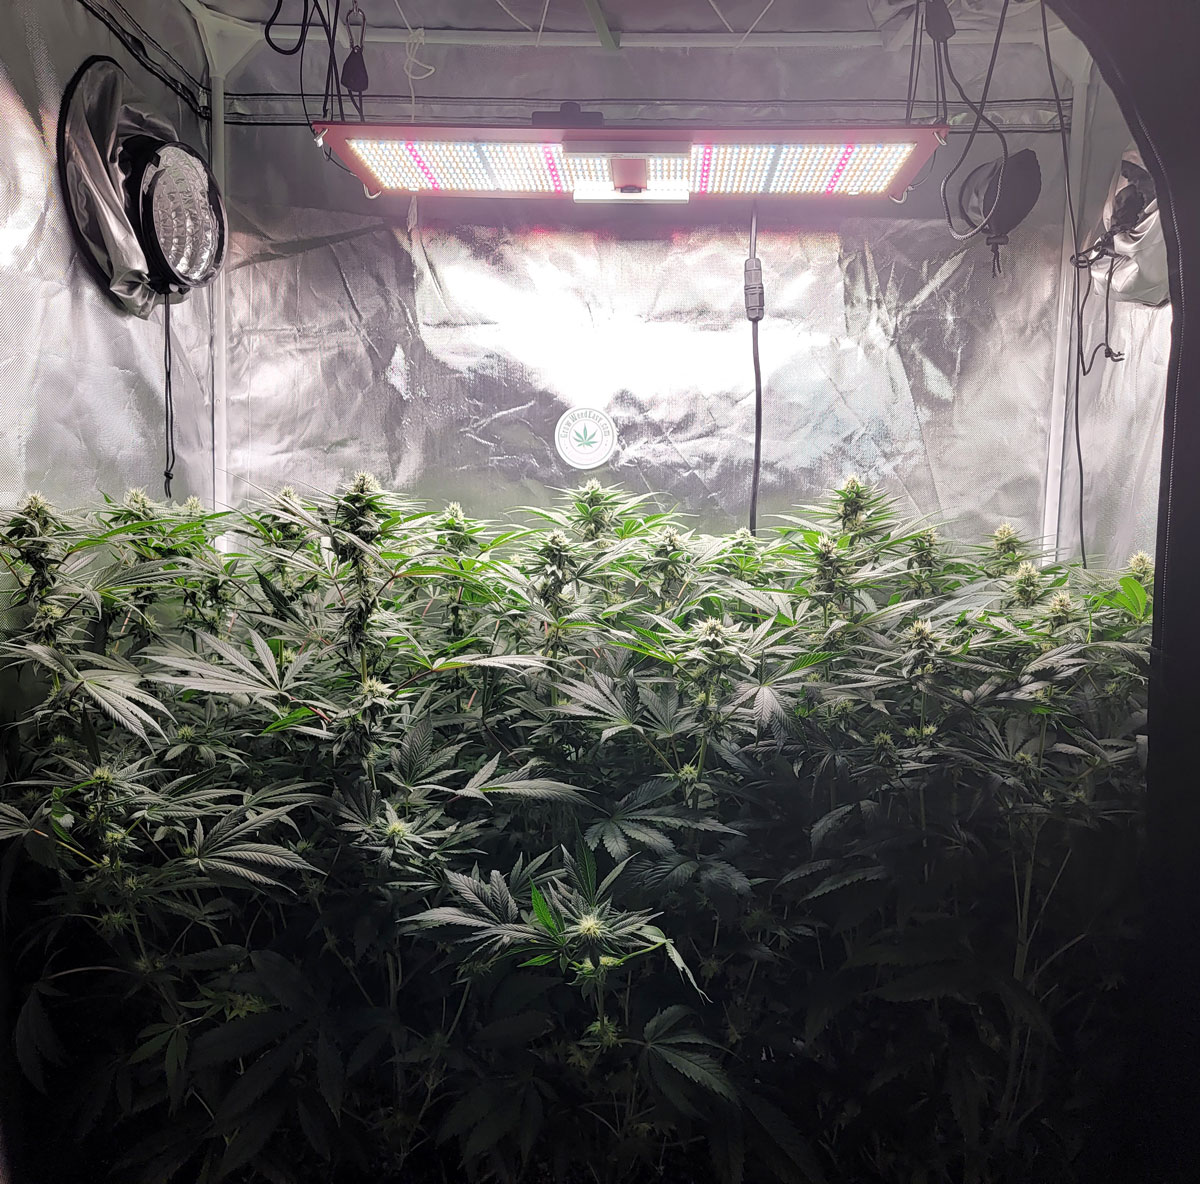
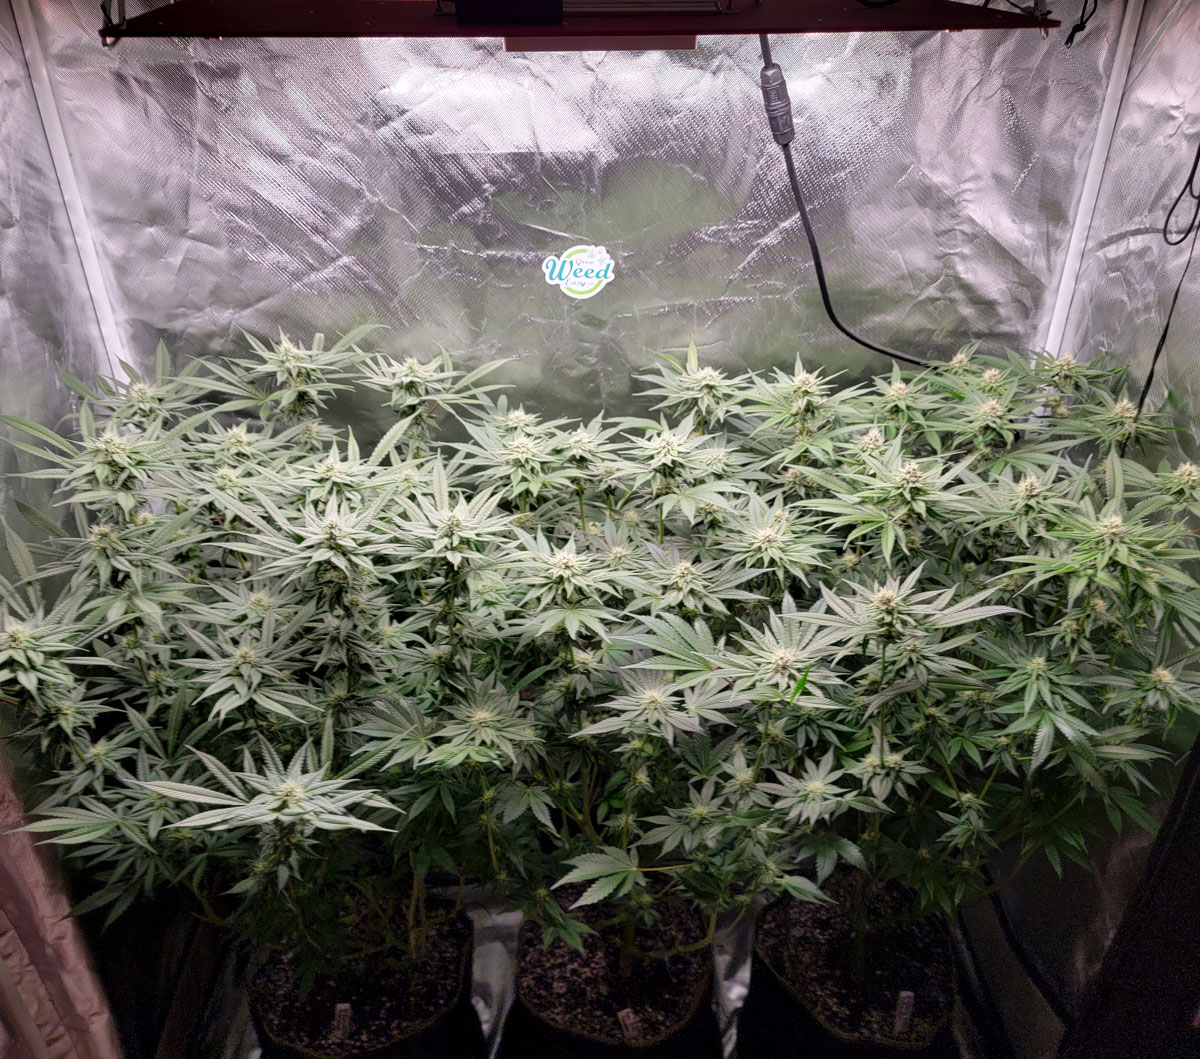
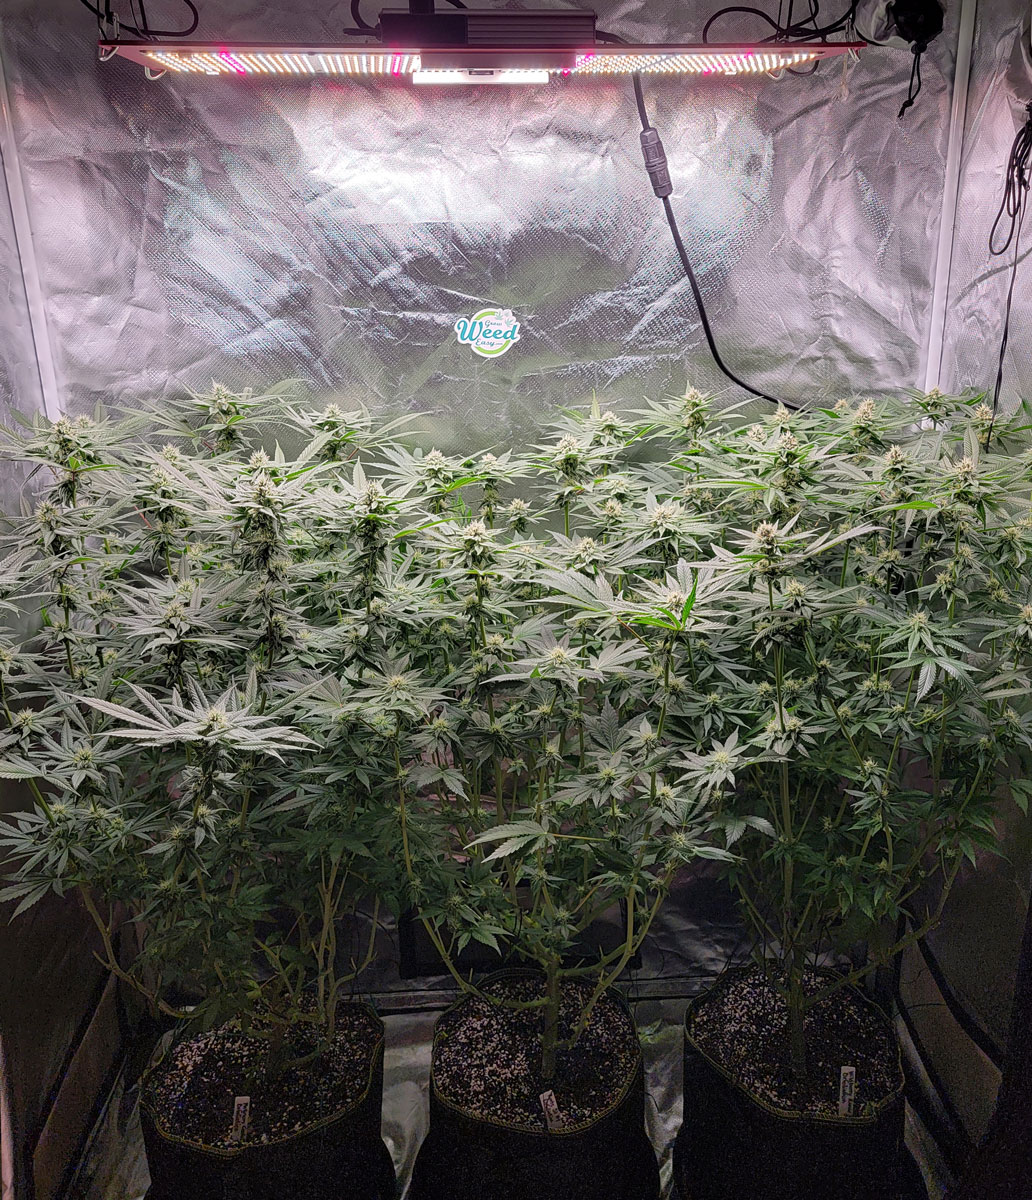
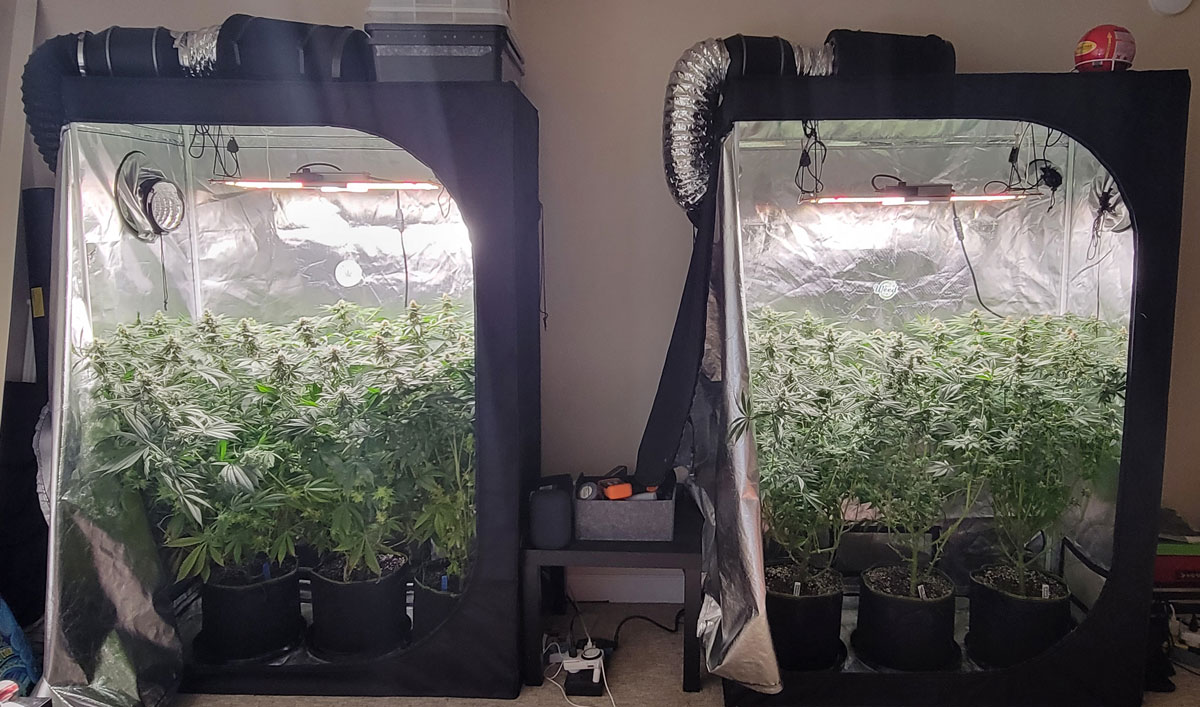
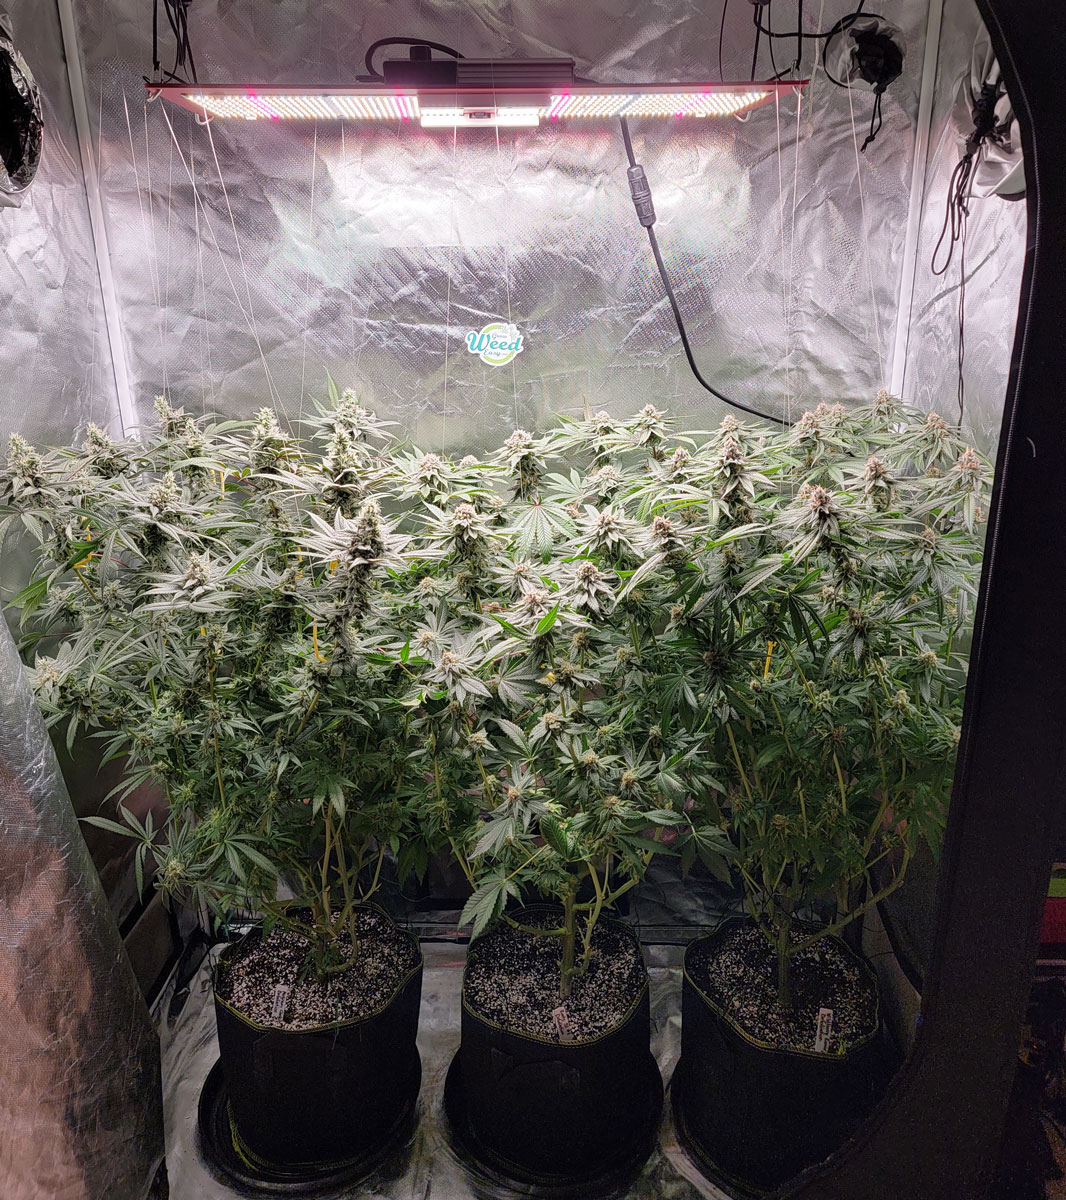
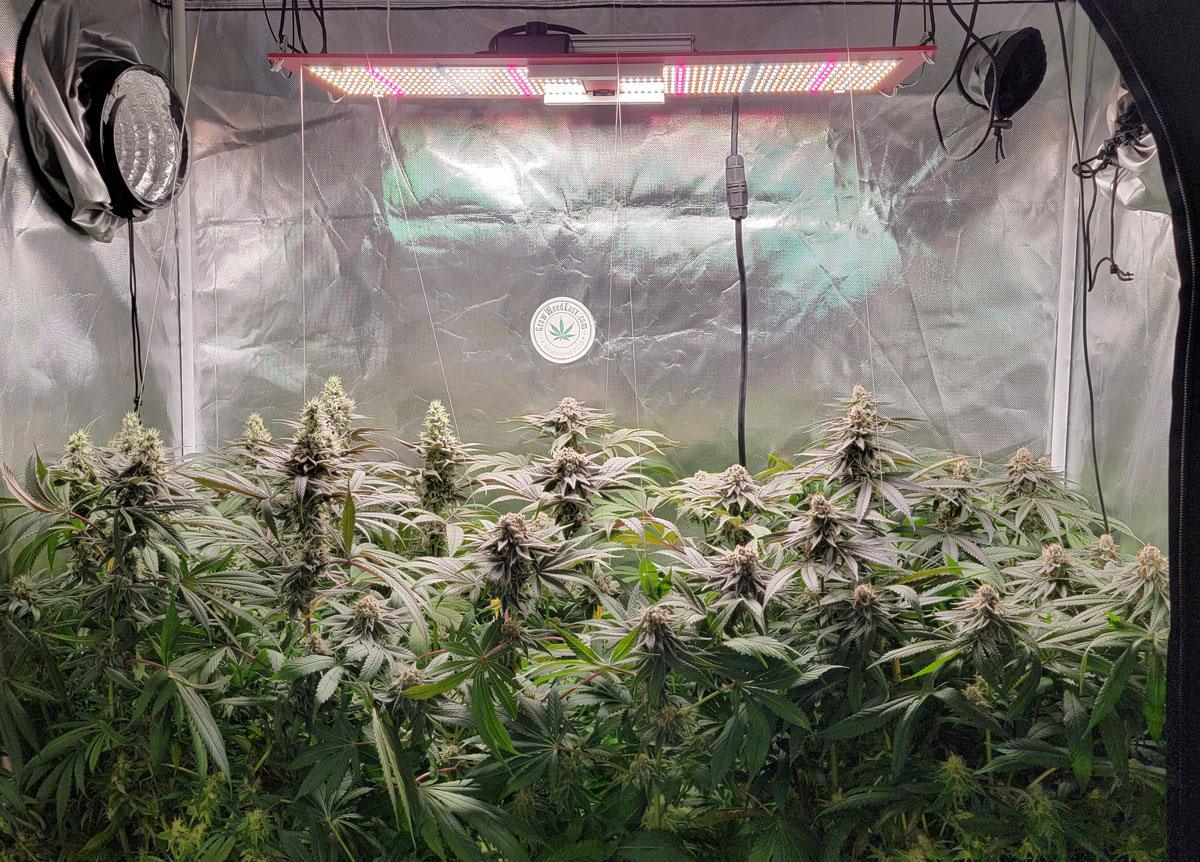
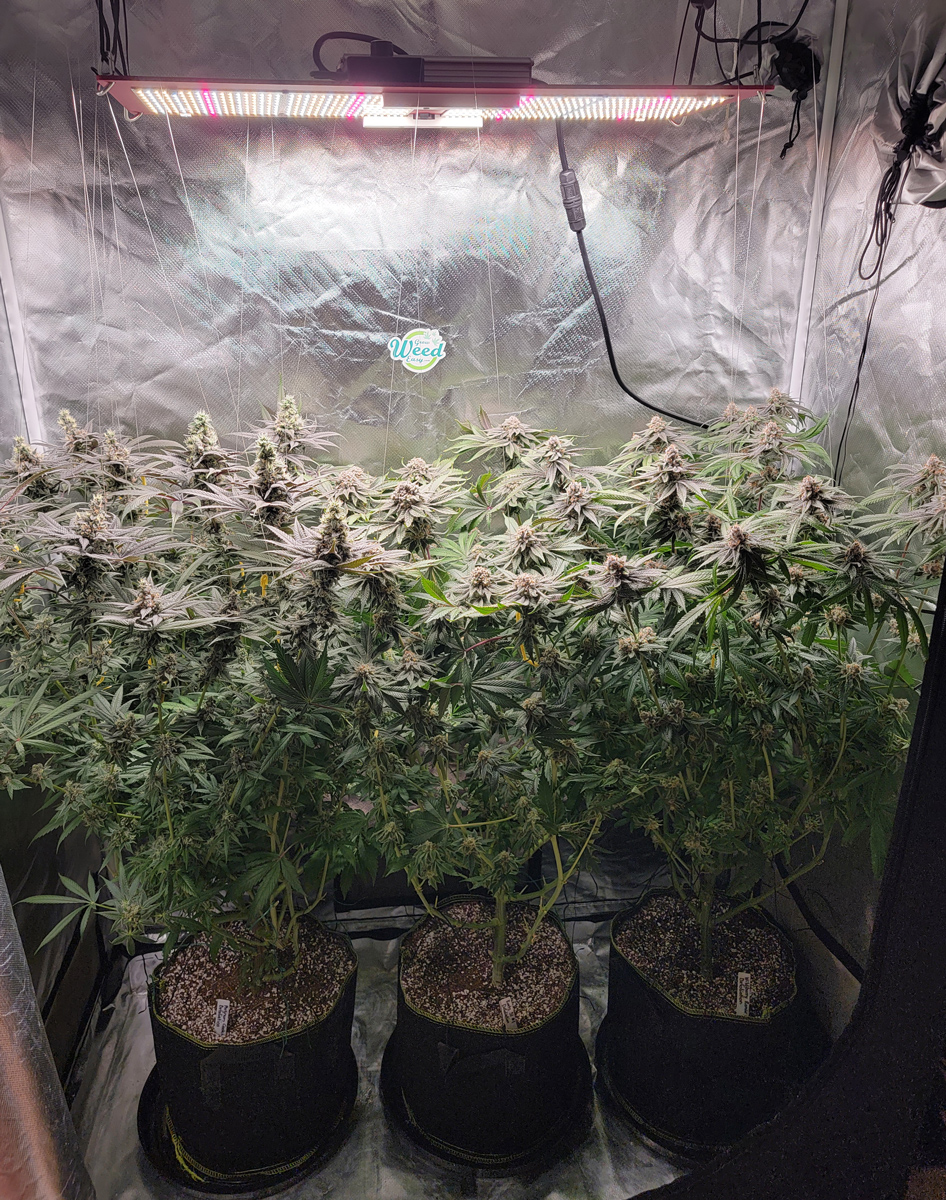
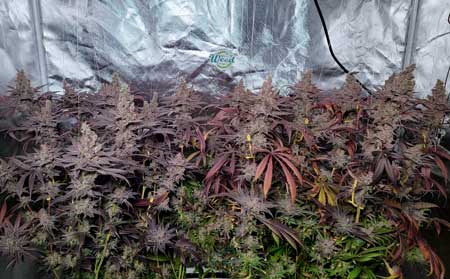
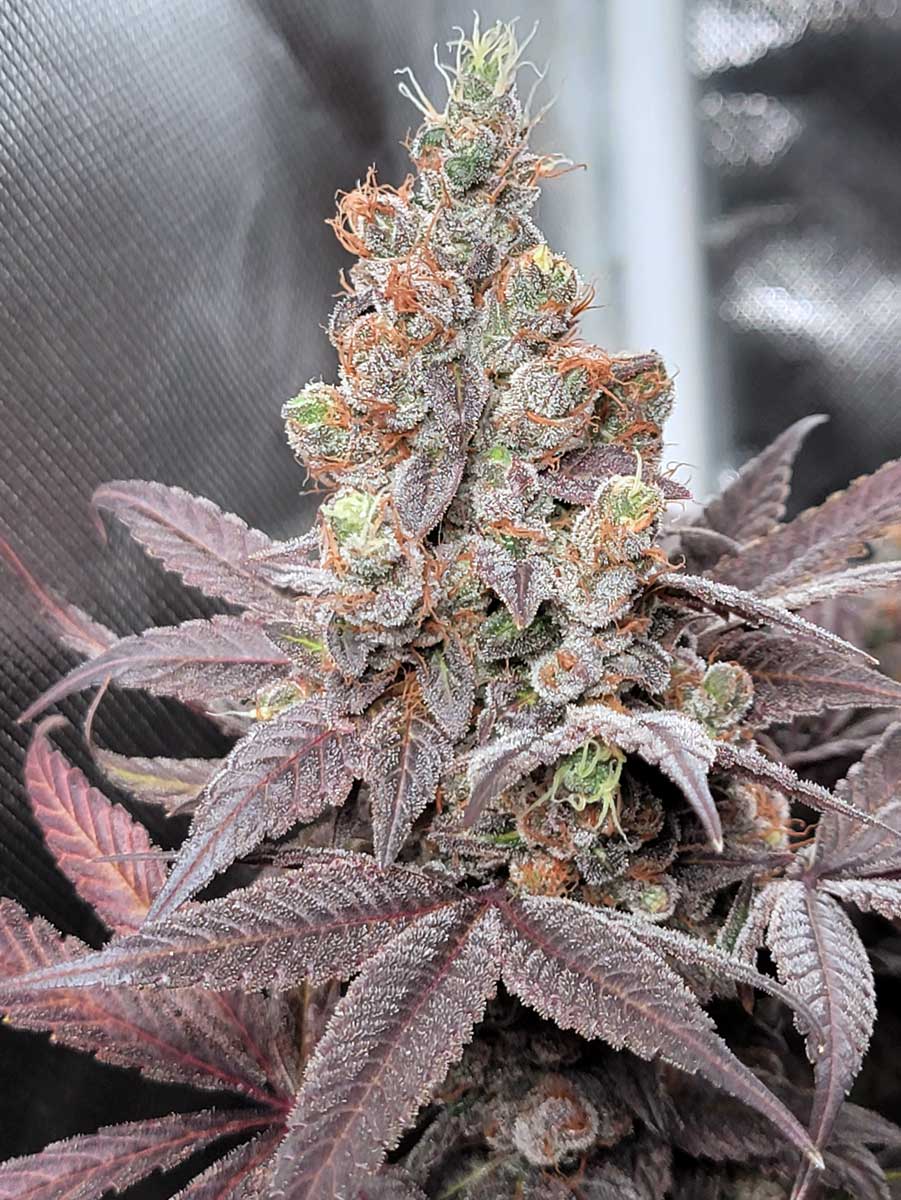
Here’s a quick preview: Non-defoliated (natural) tent (week 7 of flowering stage)
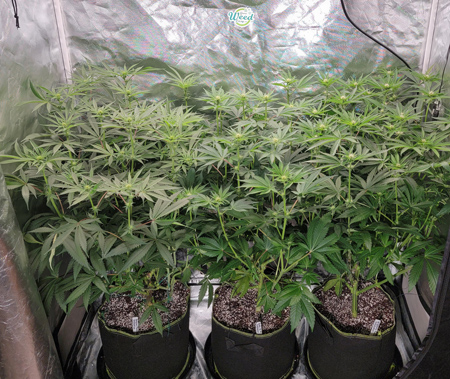
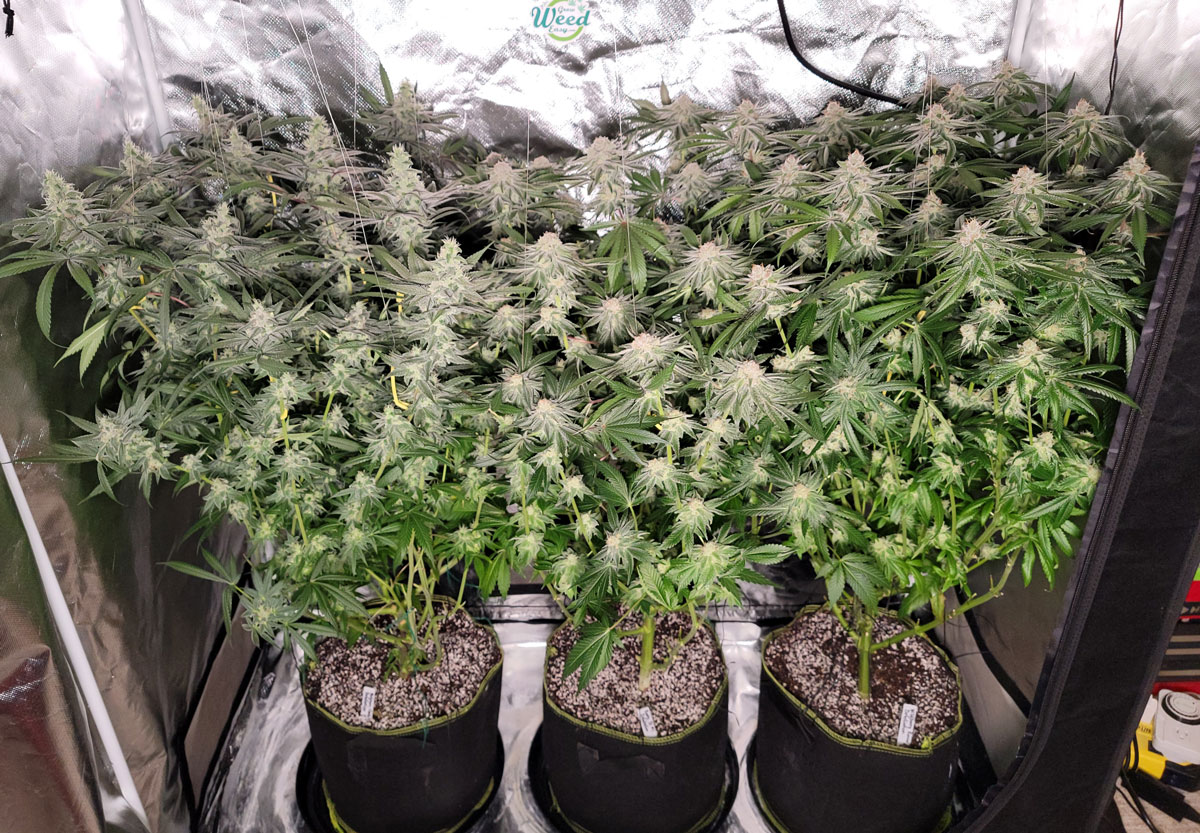
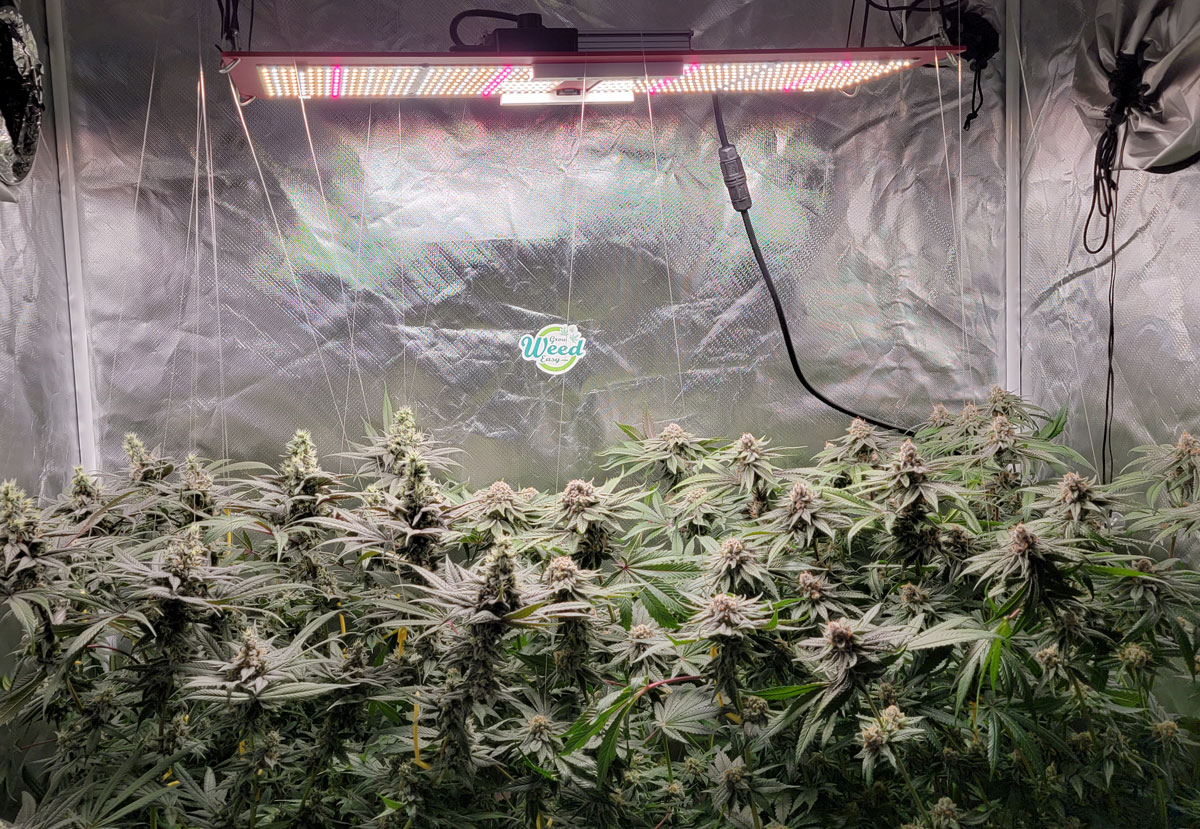
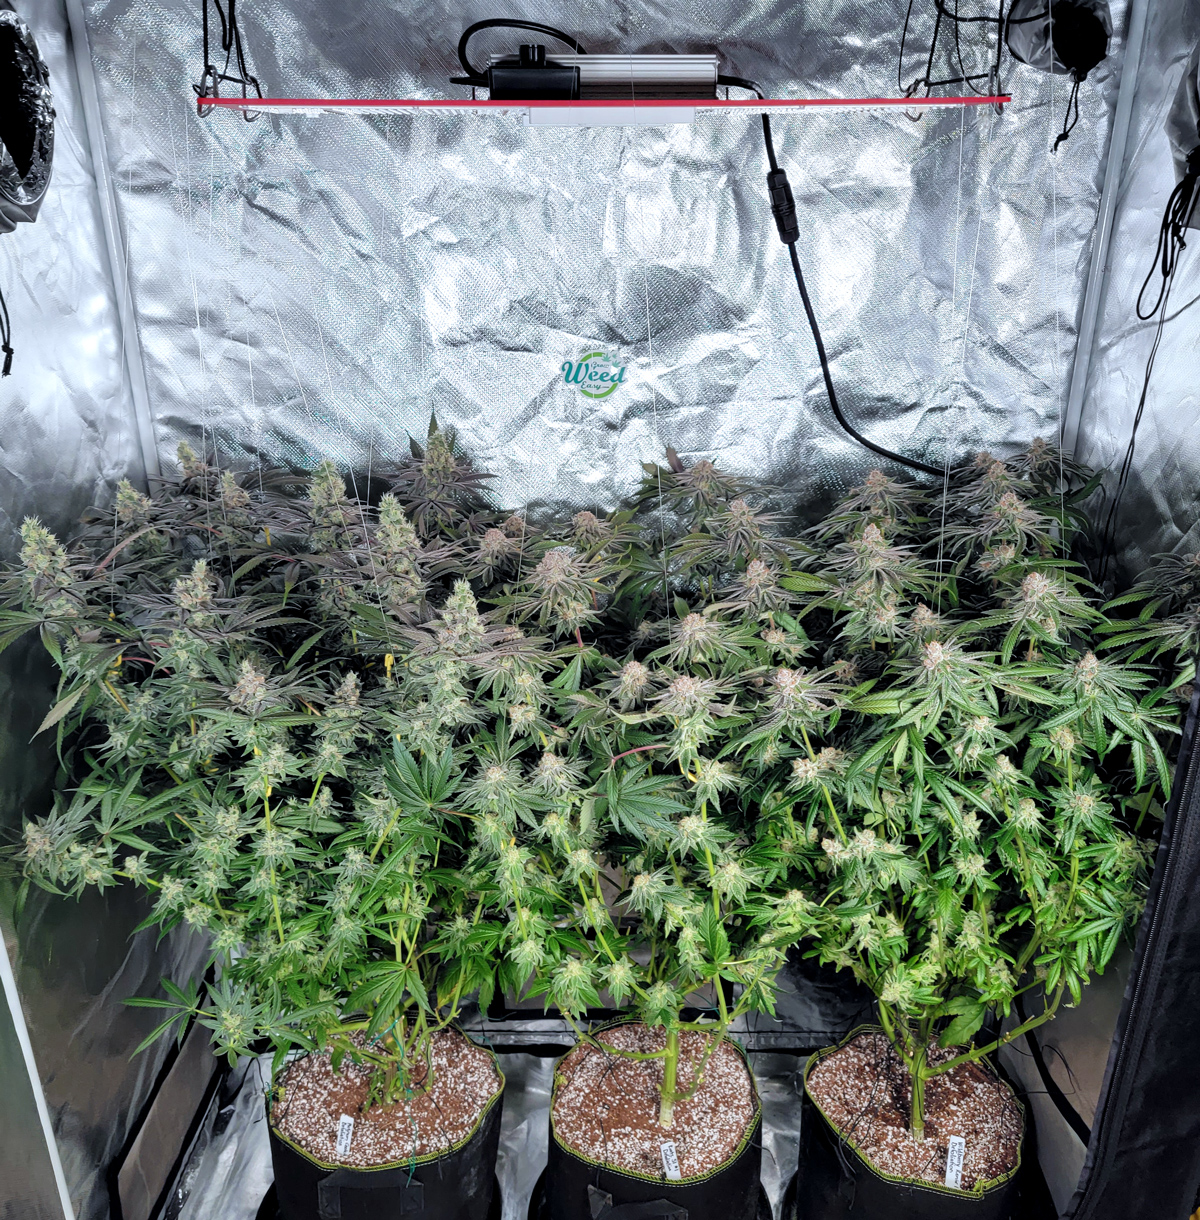
Defoliated tent (week 7 of flowering stage)
About my side-by-side cannabis defoliation experiment
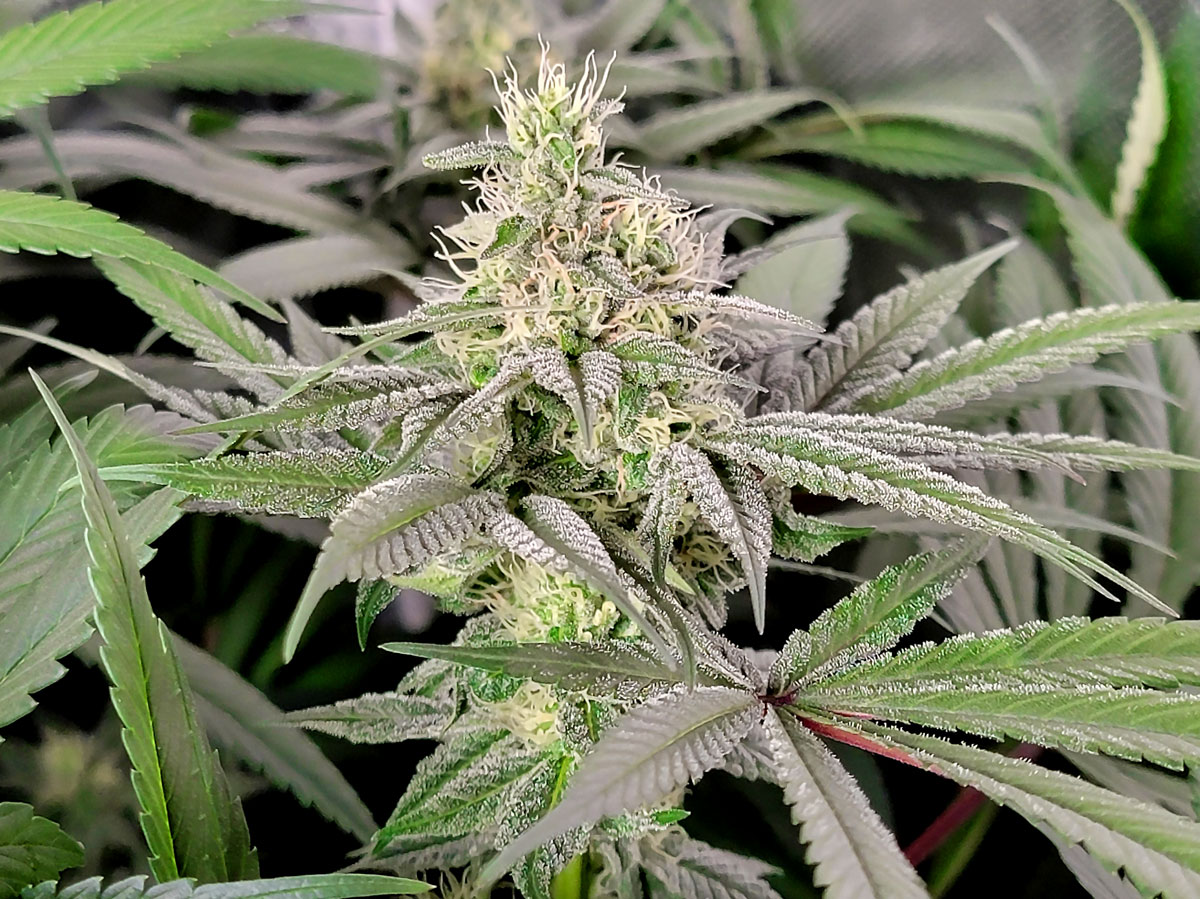
This experiment aims to test whether flowering stage defoliation increases or decreases cannabis yields overall. Here’s a past example of cannabis flowering stage defoliation.
This White Rhino cannabis plant was heavily defoliated in the flowering stage. Here’s what it looked like before the defoliation in week 3 of flowering.
Here’s that White Rhino plant after being defoliated. I removed a huge amount of leaves.
This is how that White Rhino plant looked at harvest.
Would it have produced more or less yields if I’d left it alone? The buds turned out fat but perhaps they would have been taller/longer if I hadn’t defoliated. It’s really hard to say how the defoliation affected the plant when you don’t have anything to compare it to.
This side-by-side experiment seeks to find the answer. I’ll be growing two sets of clones in identical setups. They will be trained and treated the same so they should look identical going into the flowering stage. Then I’ll defoliate the plants in one tent like the White Rhino pictured above. I’ll leave the leaves of the clones in the other tent untouched. Everything else will be the same.
Let’s find out how defoliation changes the way plants and buds grow in the flowering stage!
My Hypothesis:
Defoliating cannabis plants in the flowering stage causes buds to grow more dense. I hypothesize this defoliation will increase yields overall on those plants though I feel less sure about that than the density.
Proposed Experiment:
Two identical grow tents. There will be 4 strains with one clone of each strain in each tent. Both plants will be treated exactly the same during the vegetative stage in order to make plants that are essentially identical as they enter the flowering stage. In the flowering stage, one tent will receive a defoliation treatment while the other will not.
Here is the plan I plan to follow for this experiment.
1.) Make two identical clones of each strain and put one in each tent. One plant will be the “defoliation tent” and the other will be the “non-defoliated tent”
I will make several clones from each of the 4 mother plants, and then choose the two clones from each set that are the closest to being identical
2.) Train plants to grow wide to cover full tent from front to back.
3.) When plants are about 12″ (30 cm) tall, initiate the flowering stage by giving plants a 12/12 light schedule
4.) Defoliation vs non-defoliation procedure
Non-defoliated tent will be left alone after 12/12 is initiated. It will received water and nutrients but otherwise be allowed to grow naturally without any input from me. The only exception is if any stem starts getting much taller than the others I will bend it over and tie it down.
Defoliation tent will receive the following schedule:
- Week 0 (the day I switch to 12/12): Lollipop & defoliate plants.
- Lollipop = remove all leaves at the bottom part of the plant which don’t get light.
- Make sure there are 8 main branches for each plant (cut away the smallest ones)
- Defoliate =
- Remove all fan leaves bigger than a hand.
- Remove leaves with stems longer than 3 cm except for the top 3 sets of fan leaves on each of the main branches.
- Only remove leave from the top 3 sets of leaves of main branches if the fan leaves are oversized (longer than 5″)
- Week 3 – Defoliate plant one more time. Remove all fan leaves with stems longer than 3 cm.
- From then on, only remove leaves if they’re covering a bud site (and I can’t tuck the leaf away) or if the plant starts getting so bushy through the middle and bottom that light isn’t making it to the floor
5.) Harvest once buds are ready!
At this point we’ll get to see the results of the experiment. How will the defoliation schedule affect plant growth?
Setup & Supplies (one set for each tent)
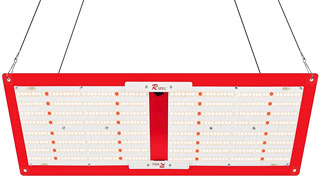
Grow Light
Grow Space (tent with exhaust fan)
- Grow tent – 2’x4’x6′ grow tent
- 6″ exhaust fan – AC Infinity Cloudline T6 – Exhaust fans are used to remove heat from the grow space and bring in fresh air for the plants. The HLG 300 LED makes some heat and it’s good to have an exhaust fan so plants get plenty of CO2 in the air. You also need an exhaust fan if you want to stop smells because a carbon filter doesn’t work without a strong exhaust fan. The AC Infinity is quiet but expensive; the Vivosun 6″ 390 CFM exhaust fan is a cheaper alternative that’s both stronger and louder. Learn how to vent heat with an exhaust fan.
- (optional) 6″ carbon filter connected to the exhaust fan with 6″ ducting – Carbon filters are used to stop smells from leaving the grow space. Learn about carbon filters.
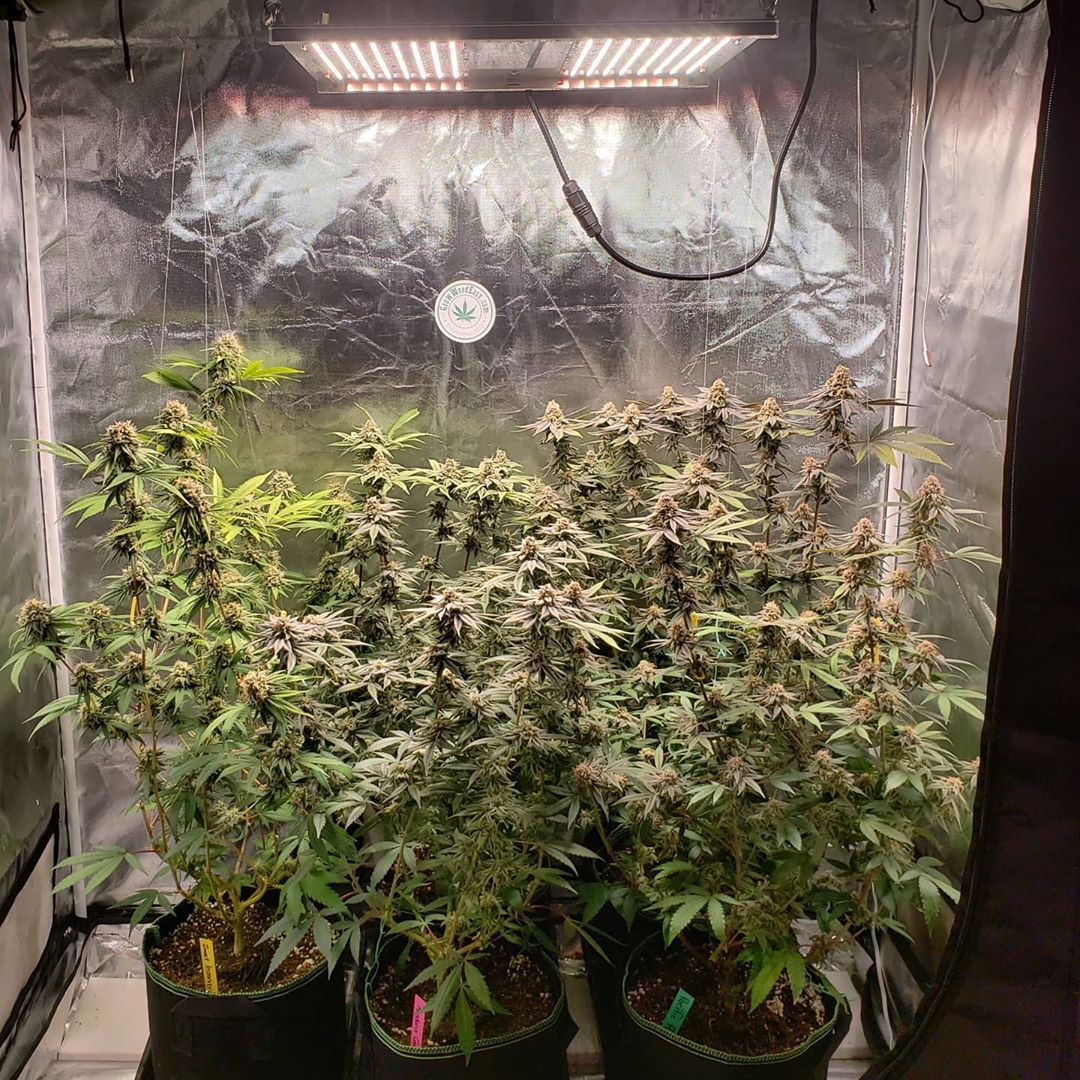
This grow journal features the HLG 300 R-Spec LED grow light. I used a past version of this grow light and had great results so I’m excited to try the newest version.
Here are my results with the old HLG 300 R-Spec in this same setup. Although the yields weren’t the best (so far the Mars Hydro TSL2000 300W LED grow light has produced the best yields-per-watt for me with a 300W LED), the HLG 300 produced the highest THC levels I’ve ever grown, with buds exceeding 25% THC, and buds were beautiful and sparkly with a great smell and high bag appeal. Based on the bud quality I figured it was worth trying the HLG again, and I’ve heard this newer version produces excellent yields.
Plant Containers
- 4-gallon fabric pots – 4 gallons is an unusual size for plant pots (normally there are only 3-gallon and 5-gallon sizes) but I picked these particular ones because they were the biggest size I could fit in my convenient 1020 trays.
- 1020 Heavy Duty plant trays to catch runoff water. Plants saucers are a cheaper alternative but I like putting a little piece of plastic underneath these trays in the back, which causes a slight incline, and as a result all runoff water pools forward to the front for easy collection with a wet vacuum or large blunt syringe.
Grow Medium
Nutrients: Fox Farm Cultivation Nation 3-part nutrients + Cal-Mag Supplement
Nutrient Schedule
- Vegetative stage
- 1/2 tsp per gallon of Micro, Grow, and Bloom
- 1 tsp/gallon Calimagic
- Flowering Stage (after 12/12 light schedule)
- First 4 weeks after plants start flowering: 1/2 tsp per gallon of Micro, Grow, and Bloom + 1 tsp/gallon CaliMagic (same as the vegetative stage)
- Until 2 weeks before harvest: 1/2 tsp per gallon of Micro, 1 tsp/gallon Bloom, 1/2 tsp/gallon CaliMagic
- From then until harvest: 2 tsp/gallon Bloom
- Give plain water for 1-2 waterings before harvest
Note: I kept my pH between 6-6.5 throughout the grow (I’ve found this range seems to get the best results in coco under LED grow lights).
Strains
- Platinum Cookies
- Wildberry Remix
- Runtz S1
Grow Journal
Let’s get started!
Take clones for the experiment – March 13
 Cannabis babies on the way!
In the picture above you can see a bunch of clones in the middle, with mom plants (well what remains of them after I took all the cuttings) on the right and left side.
The roots should take 7-14 days to form. I’ll give you an update on what their “feet” look like next week. Probably a few will have roots but they’ll need another week before they’re ready to plant.
Then onto the defoliation side-by-side experiment!
Clones have roots! – March 21
Look what I spotted today! It’s been 8 days since I took these clones and roots finally started popping out.
Here’s a closeup of some of the most developed (Platinum Cookies clones)
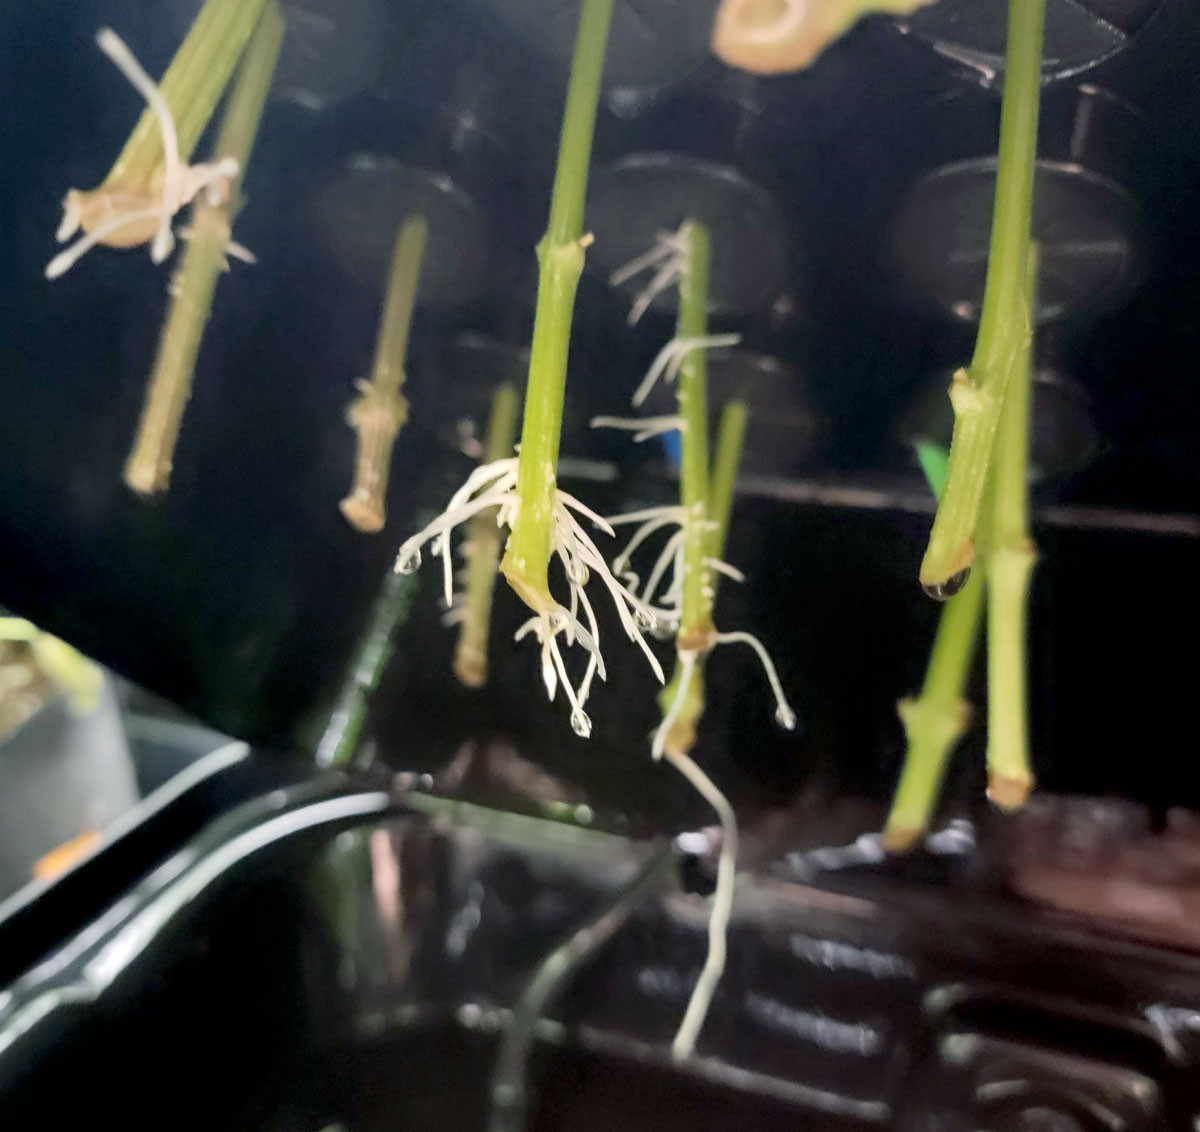
I’m going to give them a few more days in the cloner to make more roots then move them into coco. After they adjust to their new homes and start growing I’ll pick the two most similar clones between each strain and put one in each tent.
Then the real experiment begins!
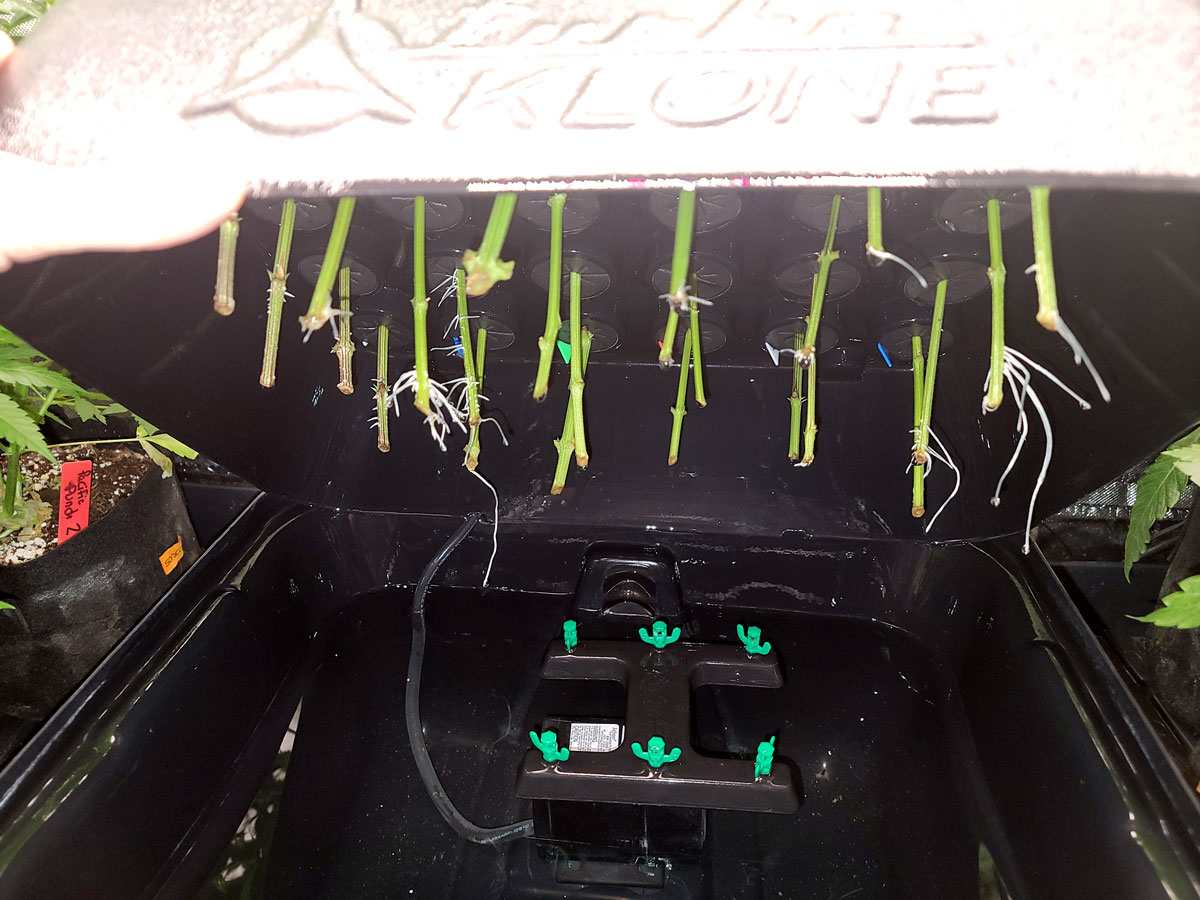
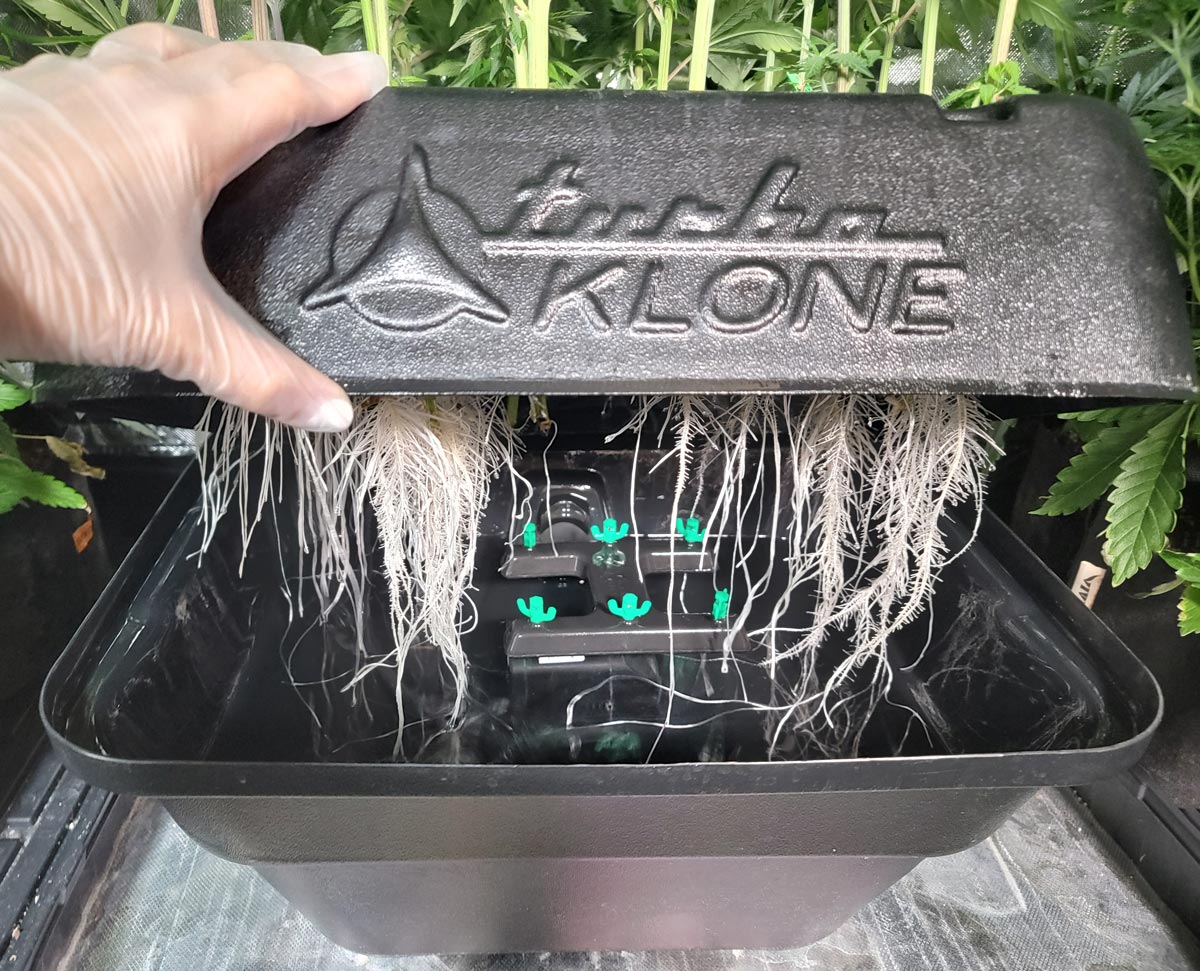
Clones roots are out of control – March 29
I left the clones in there a few more days than I meant to and next thing I knew they looked like this in the aerocloner.
Luckily that means they’re going to be exploding in growth. When cannabis clones have big roots they tend to take off the moment they start getting nutrients and full light.
Here’s what they looked like on top (aerocloner is in middle with mom plants on the sides). The clones are a little pale because they’ve gone without any nutrients since they were cut, which is totally normal and should disappear within the first week after being planted.
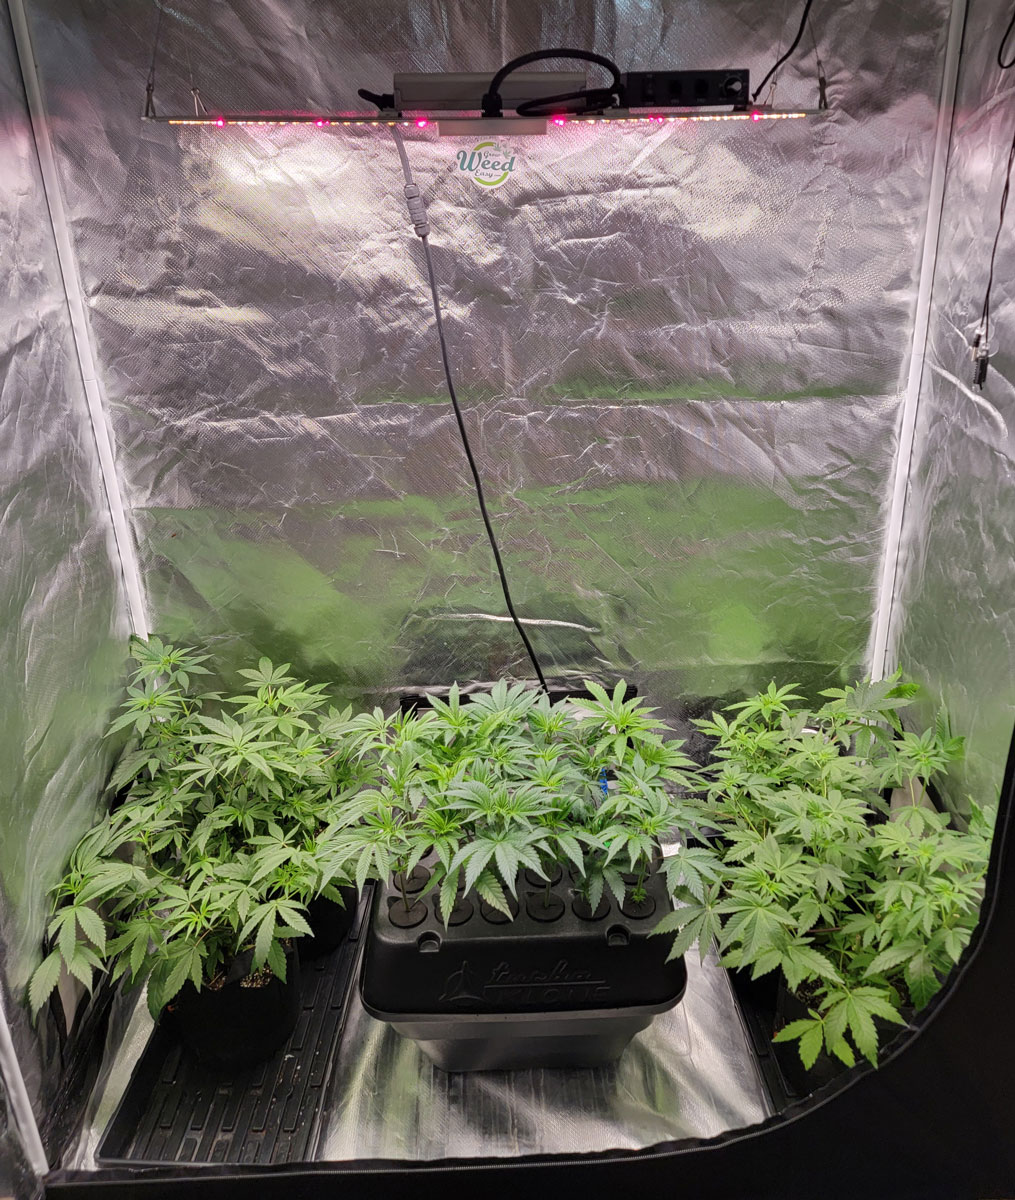
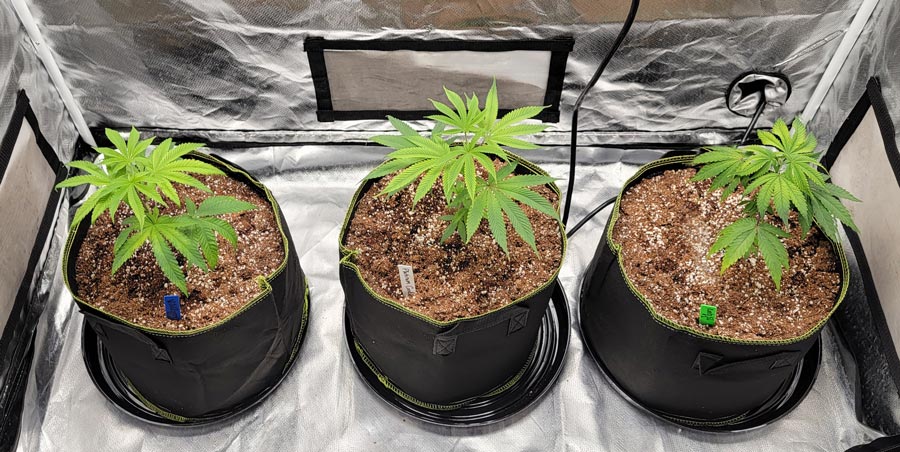
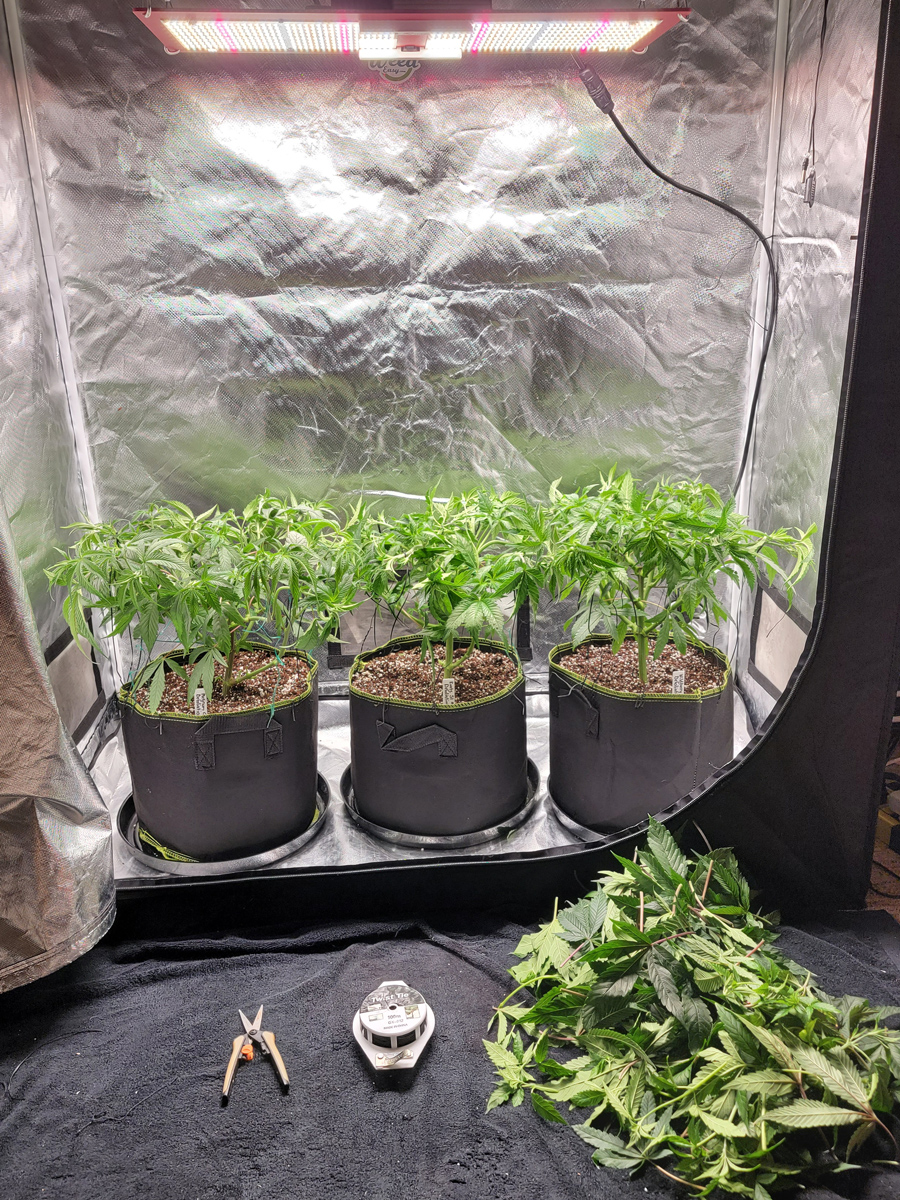
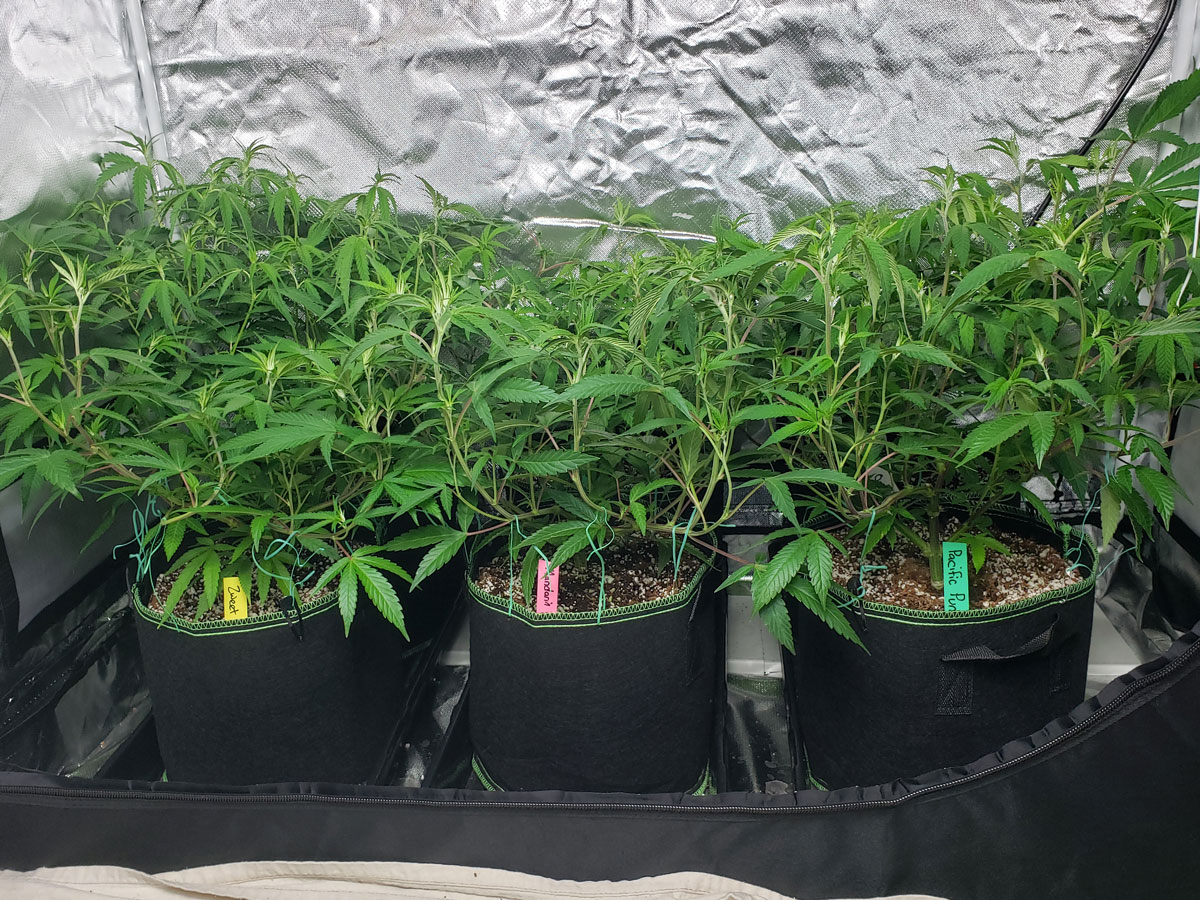
Now to move the best-matched clones into their final homes. I tried to pick two clones from each strain that seemed to have similar overall plant structure and root development. Then they were moved into their final homes: 5-gallon fabric pots filled with Cultivation Nation 70/30 Coco Perlite potting mix.
I think I did a pretty good job matching them in each tent, don’t you think? From left to right are Wildberry Remix, Platinum Cookies, and Runtz.
This tent will be the “defoliation” tent.
![]()
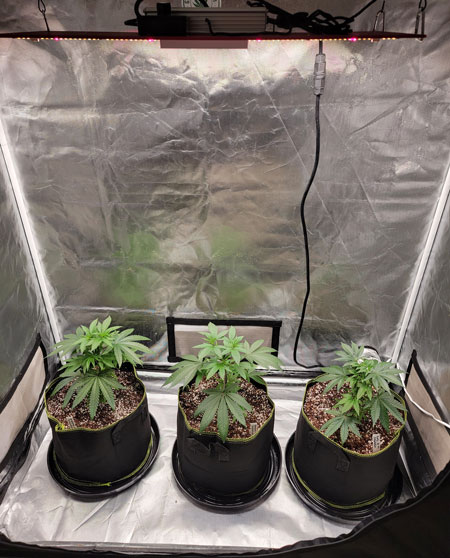
This tent will be the “natural” tent (receive no defoliation in the flowering stage).
![]()
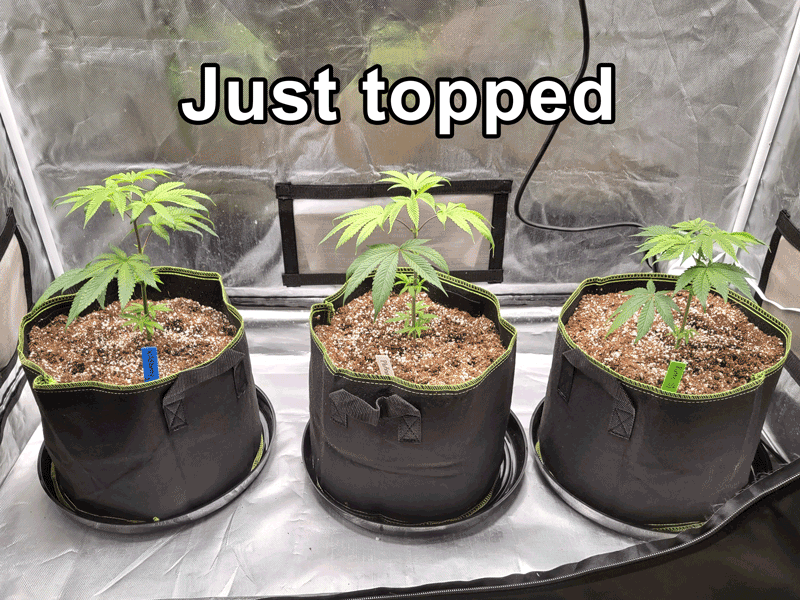
Clones were topped – April 2
Today the plants went through an important day… topping! This means to cut off the top of each plant. This causes them to split their main stem into two and bush out. I’ll be training these plants to grow wide and flat over the next few weeks but once the flowering stage starts, I will leave one tent alone until harvest, while the other tent will be defoliated twice on a schedule of Week 0 (right after switching to 12/12) and then again on Week 3 after 12/12.
I removed the top off each plant (“topped” the plants).

I left 5 sets of leaves on each clone.
“Defoliation” tent after plants are topped

“Natural” tent (receive no defoliation in the flowering stage) after plants were topped
As you can see, the tents are still pretty well matched, which I’m happy about. I think these will be little bushes by next week’s update! Once they reach about 12″ tall and are spread out to fill most of the tent, I’ll be initiating the flowering stage by giving them a 12/12 light schedule. Maybe 2 weeks from now?
And that’s when the tents start diverging… The defoliation debate has raged on for over a decade and I’m so interested to get some objective data points.
Clones are looking green and healthy – April 9
It’s been about a week since the last update and the plants are growing green and healthy. The clones were a bit yellow when they came out of the aerocloner but now they have a nice green color. They finally caught their stride and now they’re growing fast enough to see significant new growth from day to day.
“Defoliation” tent – Although the tents have received identical treatment so far, that changes soon. This tent will receive defoliation the day I switch the grow light to 12/12 to initiate the flowering stage, and defoliated again 3 weeks later. I changed all the strain labels in this tent to be white so it’s easier to tell the difference between the tents.
“Natural” tent – This will receive no defoliation. Once I initiate 12/12, I will not touch these plants again and let them grow naturally until harvest. I made all the strain labels in this tent blue.

They look healthy but they’ve been growing pretty slowly in the vegetative stage so far. Here’s a gif showing one of the tents just after the plants were topped vs one week later (today).
I remember noticing slower vegetative growth the last time I grew with an HLG 300 R-spec LED light, too. It’s not too surprising since “R-spec” or “red spectrum” grow lights are specifically designed for optimal performance in the cannabis flowering stage while buds are forming. They can be used in the vegetative stage too, but in my experience, the Spider Farmer SF-2000 and Mars Hydro TSL 2000 LED lights both produced faster vegetative growth.
- Example for reference with a different LED: Cannabis plants after being topped and about a week later (check out the full grow journal here). Look at all that vegetative growth in just 7 days. It feels like more growth than the HLG 300 R-spec produced over the last week.
But a little extra time in the vegetative stage doesn’t bother me as long as the buds turn out amazing. Part of why I decided to use these HLG lights is because the older 2019 version of the HLG R-spec produced some of my favorite buds I’ve ever grown (check out the grow journal which features a side-by-side between the HLG 300 R-Spec and a 315 LEC grow light). I’m excited to see how this model performs after buds start forming.
The plants have started picking up in growth over the last few days so I think they’ll look totally different the next time you see them. I’m hoping by next week they’ll be spread out enough to fill the tent and we’ll flip to 12/12 soon after that.
Almost time to start flowering! – April 16
One week later and the plants have finally hit their stride. I can see brand new leaves appearing every day.
“Defoliation tent” on top with “Natural tent” on bottom (both tents have received identical treatment so far but that will be changing next week)
I thought you might think this is interesting. I just wrote an article about the best cannabis grow lights for a hot grow room, and one of the main takeaway points is to use LED grow lights. And one reason is that LEDs do not raise the temperature of a leaf nearly as much as other types of grow lights. As a result, LED plants actually do pretty poorly in the cold but thrive in the heat.
I wanted to show that to you with numbers.
Note: A temperature gun ($35) is a fun and handy tool. You point it at something and pull the trigger to get the temperature of that surface.
The air of the grow tent is about 77°F. When I use my temperature gun to measure the temperature of the side of the grow tent next to plants, the surface temperature is about the same as the air temperature.

However, if I point the temperature gun directly at a leaf, the surface temperature of the leaf is several degrees colder than the temperature of the air or the sides of the grow tent.
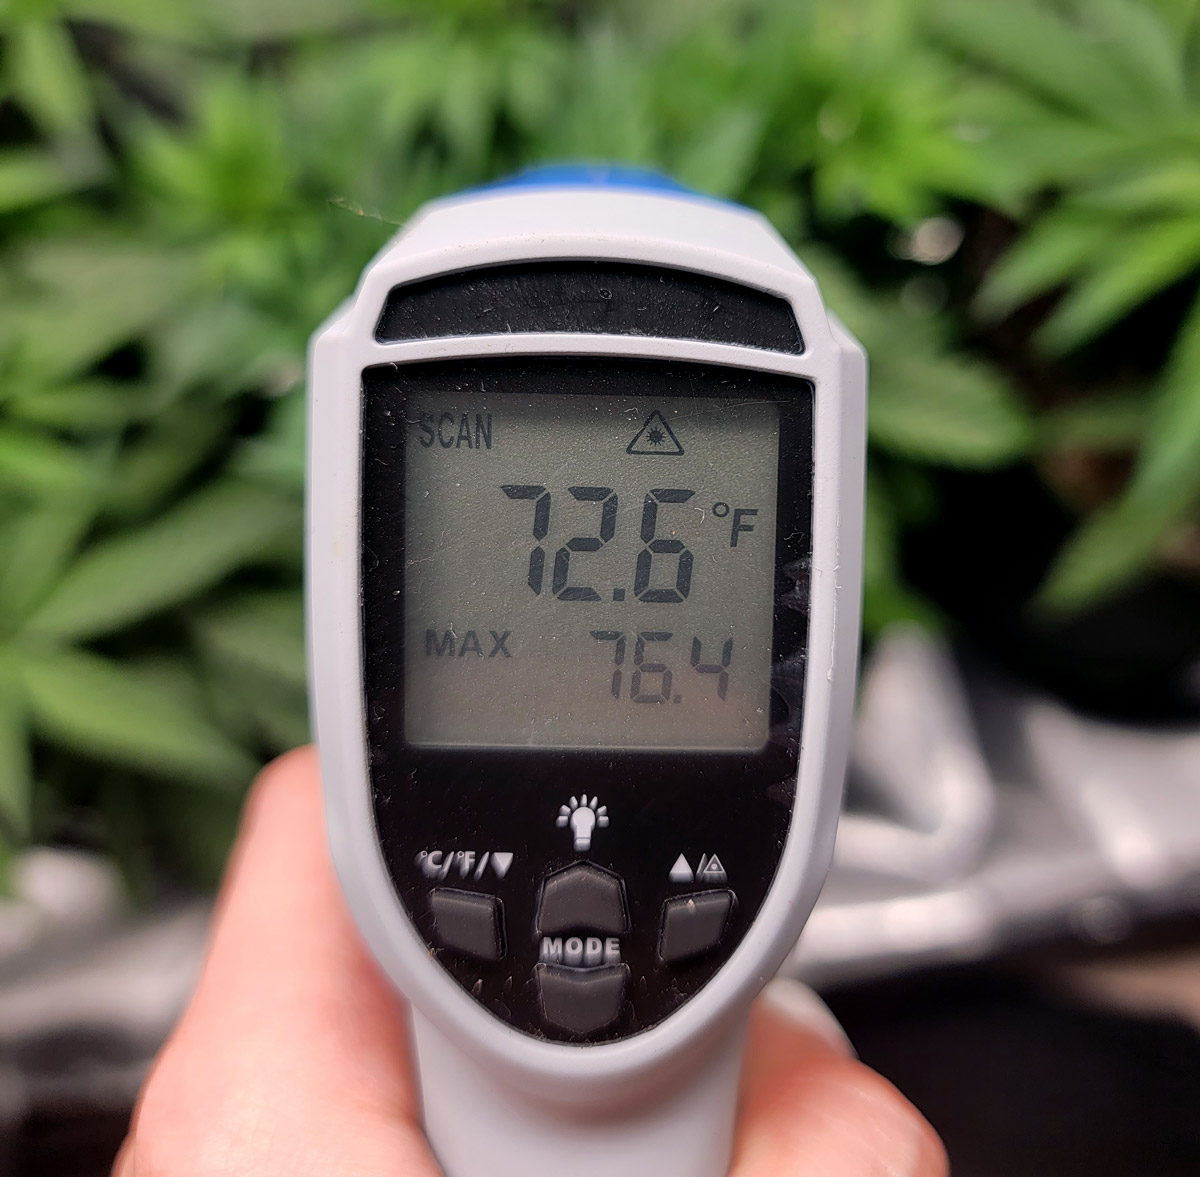
In the past, when I’ve run this same test on plants under HPS and LECs (bulb lights), the leaves that get direct light from the bulb have a much higher surface temperature than the air. That’s because bulb lights give off infrared light that raises the temperature of a leaf in addition to providing light. LEDs give off less infrared light and therefore do not raise the internal temperature of a leaf nearly as much. As a result, you can have a much hotter grow space with LEDs and the plants stay cool on the inside. This makes LEDs perfect for any grower dealing with heat.
I suspect that next week the plants will have completely filled the grow space and I will have already initiated 12/12 and done the first defoliation.
Stay tuned!
Initiated 12/12 and first defoliation! – April 20
Just a few days later and the plants look ready. Today is 4/20 so it seemed an appropriate day to switch to 12/12 🙂
The “natural tent” (blue tags) just before the switch to 12/12. These plants pretty much won’t get touched between now and harvest.
The “defoliation tent” (white tags) just before the plants all got their first defoliation today
And today was the big day for the defoliation tent. It got its first major plucking. Here’s what the tent looked like immediately after being defoliated and lollipopped. Look how many leaves and small stems were removed!
The defoliation tent will receive one more plucking session in 3 weeks (around May 10 or so), and then both tents will be allowed to finish growing on their own to harvest.
Here are both the tents the next day so you can see the plants side by side. We won’t really be able to tell for another couple of days or weeks how their growth patterns will diverge from now on.

Quick recap of the experiment (this info is also at the top of this page):
Non-defoliated tent will be left alone after 12/12 is initiated. It will receive water and nutrients but otherwise be allowed to grow naturally with all its leaves. The only further input is if any stem starts getting much taller than the others I will bend it over and tie it down, and I will also “tuck” any leaves that are covering a direct bud site, when possible.
Defoliation tent will receive the following schedule:
- Week 0 (today – the day I switch to 12/12): Lollipop & defoliate plants.
- Lollipop = remove all leaves at the bottom part of the plant which don’t get light.
- Make sure there are 8 main branches for each plant (cut away the smallest ones)
- Defoliate =
- Remove all fan leaves bigger than a hand.
- Remove leaves with stems longer than 3 cm except for the top 3 sets of fan leaves on each of the main branches.
- Only remove leave from the top 3 sets of leaves of main branches if the fan leaves are oversized (longer than 5″)
- Week 3 – Defoliate plant one more time. Remove all fan leaves with stems longer than 3 cm.
- From then on, only remove leaves if they’re covering a bud site (and I can’t tuck the leaf away) or if the plant starts getting so bushy through the middle and bottom that light isn’t making it to the floor
Typically I take a more holistic approach to defoliation where I remove leaves regularly throughout the plant’s flowering stage, but I wanted to use a specific schedule for the purposes of this experiment to allow anyone to follow the results for themselves. When I first learned the flowering defoliation technique I was taught to defoliate on day 0 and week 3 after 12/12, so that’s what I’m doing here.
What will we see next week? Will the defoliated plants be taller because they’re focused on just the top branches? Will the “natural” plants be taller because they didn’t have to deal with the stress and loss of nutrients/solar panels from defoliation? I’m actually not sure what to expect. It’s pretty cool!
Plants look the same again – April 29
It’s been a little over a week since the last update and the tents look almost exactly the same as each other again from afar. The only visual difference is that there are fewer leaves at the bottom of the defoliated plants. Other than that they seem to have just as many leaves as the other tent.
Here they are last week and this week next to each other so you can see for yourself.
Plants on right were defoliated a little over a week ago, but they look almost the same as the other tent now.
At 9 days after initiating 12/12, the plants are only just starting to put out significant pistils (white hairs) to show buds are forming. This seems a little slower than normal. When I’ve grown the Runtz clones in the past under different LEDs, the plants started flowering within a week of receiving 12/12. I suspect the red spectrum of this HLG 300 R-Spec LED may have something to do with it.
Does R-Spec delay the flowering stage?
I’ve noticed that all these plants under the HLG 300 R-spec LED light seem to be flowering slower than when I flowered the same clones under a Spider Farmer LED grow light. The slow start made me think about the times I’ve grown plants from seed to harvest under an HPS grow light. Just like these R-spec lights, an HPS is heavy on the red spectrum. In the past, I noticed plants grown under the red spectrum of HPS in the vegetative stage tend to start flowering a little slower than the same strains grown under LECs or non-red-spectrum LEDs.
Red spectrum is well-proven to increase cannabis yields in the flowering stage. It makes me wonder if something about the red spectrum slows down the beginning of flowering, which possibly helps the plant develop long productive buds by extending the flowering stretch. Something to keep an eye on. I have more clones of the Runtz and Platinum Cookies plants that I might try flowering under some blue spectrum HLG LEDs to see if they seem to flower faster under the blue HLGs than the red. I smell a possible future experiment 🙂
Hopefully, by next week I’ll have some significant buds to show you. And seeing the bud progress will help us tell if they are flowering on the same schedule as each other.
Developing beautifully – May 6
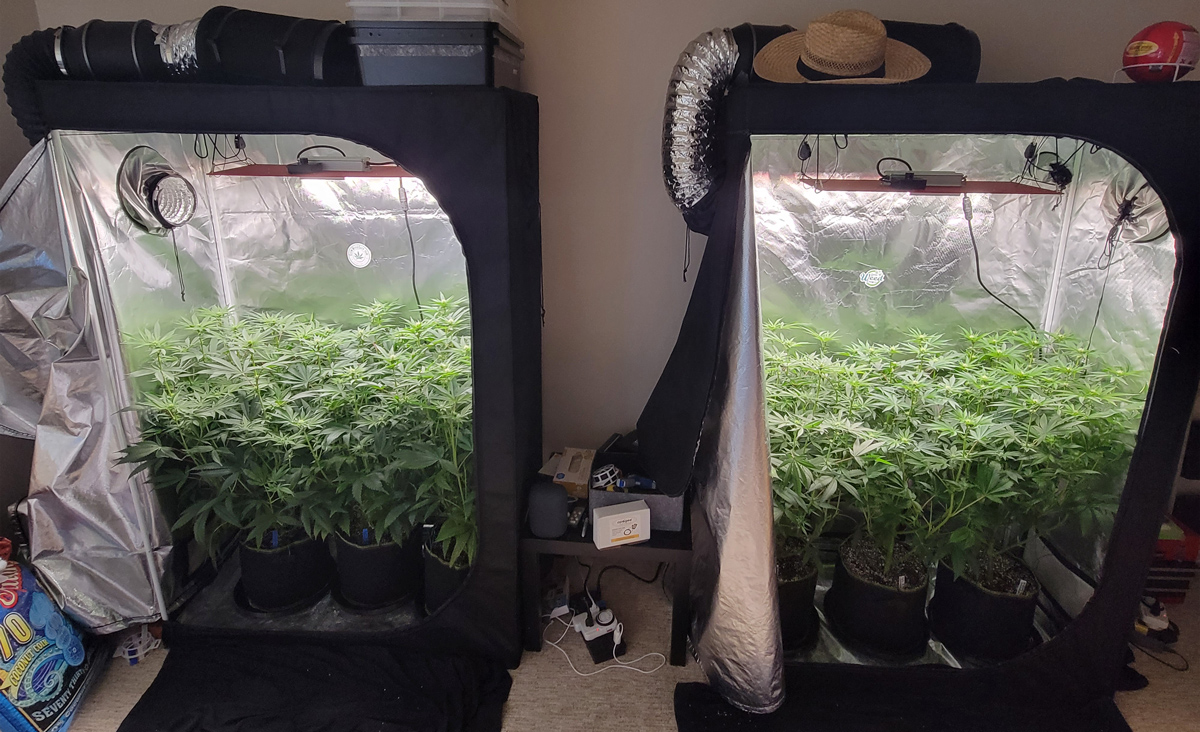
Not much to report this week. Plants have been developing about the same. It’s truly difficult to see the difference between the tents except that I labeled them.
Natural tent on left, defoliated tent on right
Closeup of the non-defoliated tent
Closeup of the defoliated tent.
May 10 (just a few days) marks 3 weeks from 12/12 and is when I’ll be giving the “defoliation tent” another haircut. Then both tents will be left alone until harvest.
Buds are about the size of my thumbs and I noticed that the Wildberry plants are starting to produce bits of purple on their buds, which is pretty neat. I’ll make sure to take closeup pictures of all the buds when I defoliate in a few days.
Defoliation Part 2 – May 10
As you know by now, these plants were grown identically, but when I initiated 12/12, I defoliated one of the tents and left the other alone. The plan was to defoliate the “defoliation tent” again 3 weeks later.
Get a quick refresher on flowering stage defoliation
Well, today is week 3 from when I initiated 12/12 on April 20, so it’s time for the second defoliation.
Today is Defoliation day: Part 2

Natural tent
Defoliated tent (before today’s 2nd defoliation)
Here they are after the defoliation tent was plucked 🙂

Wow, look at the difference in how much light is reaching through the plant. On the natural plants, you can’t even see the floor of the tent because it’s in shadow. In the defoliated tent, there is light getting to every single leaf and bud site. But how much of a difference will it make, if any?
After this point, I am just watering the plants and leaving them alone. Let’s see what they do!
—
Side discussion about these HLG 300 R-Spec LED grow lights so far
So far I’m not a fan of the plant structure growing under the HLG R-spec LEDs. As with most grow lights that have a strong red spectrum like HPS or 3000k LEC bulbs, it tends to cause plants to stretch tall and grow less squat overall. I would have much preferred these plants to stay shorter as that tends to maximize yields. I looked back at pictures from when I tried the older version of the HLG R-spec in 2020, and I saw that they grew the same way. It seems to be a reaction to the extra-red spectrum.
Old version HLG 300 R-Spec lights pictures (from 2020)
These plants were grown exactly the same as today’s journal, only under the previous 2020 version of the HLG 300 R-Spec. Here are the plants 2 days after initiating 12/12. I’d say they looked relatively similar to the plants from today’s journal at the same age.
And here those plants were at harvest. Their overall tall stretchy structure reminds me a lot of the plants from this current grow under the newer version of the HLG 300 R-Spec. I didn’t like the yields at the time. And just like now, I didn’t like the plant structure either.
You may wonder why I decided to try the HLG 300 again even though I didn’t like how plants grew. It’s because it ended up producing incredible bud quality.
Even though the buds were on the smaller side, they all looked like this.

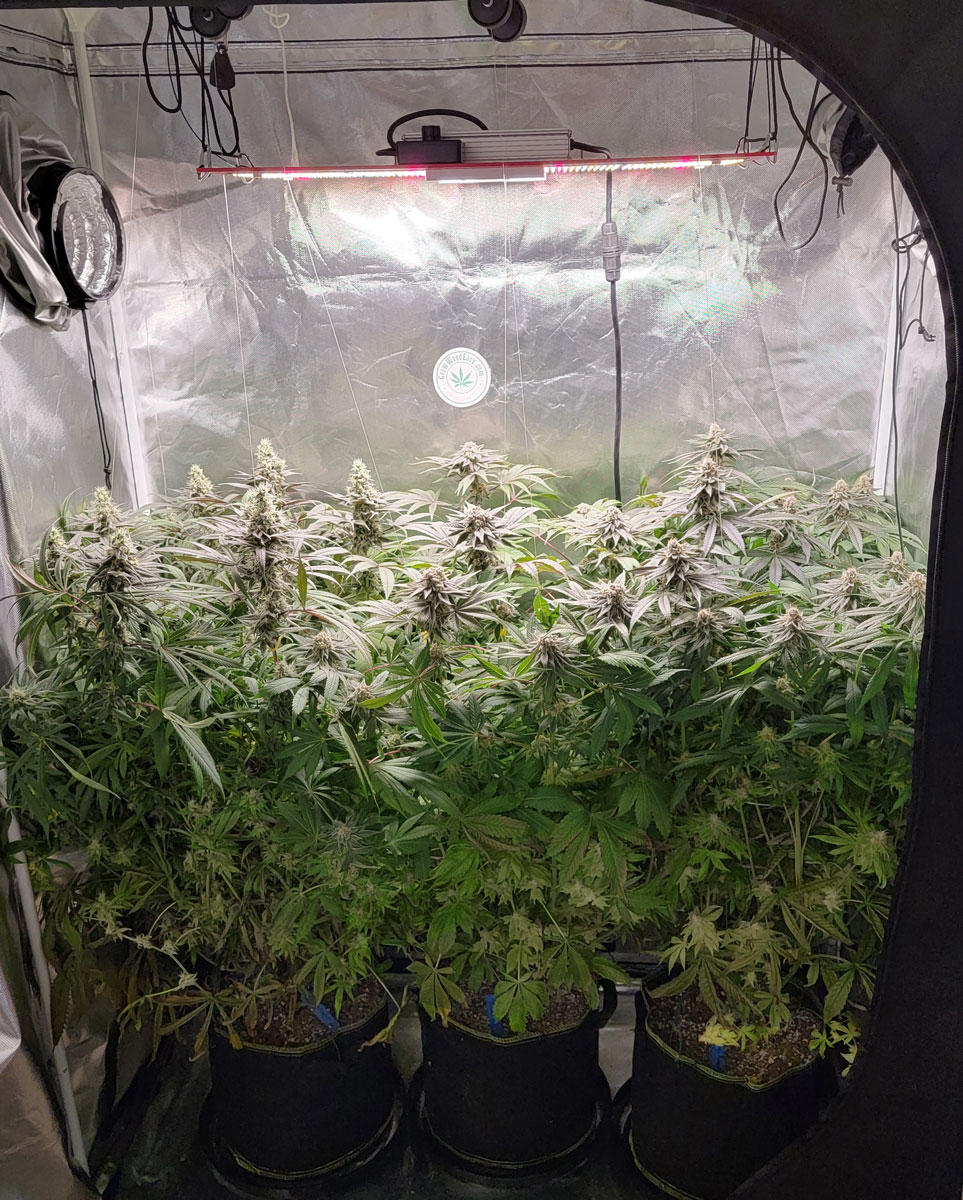
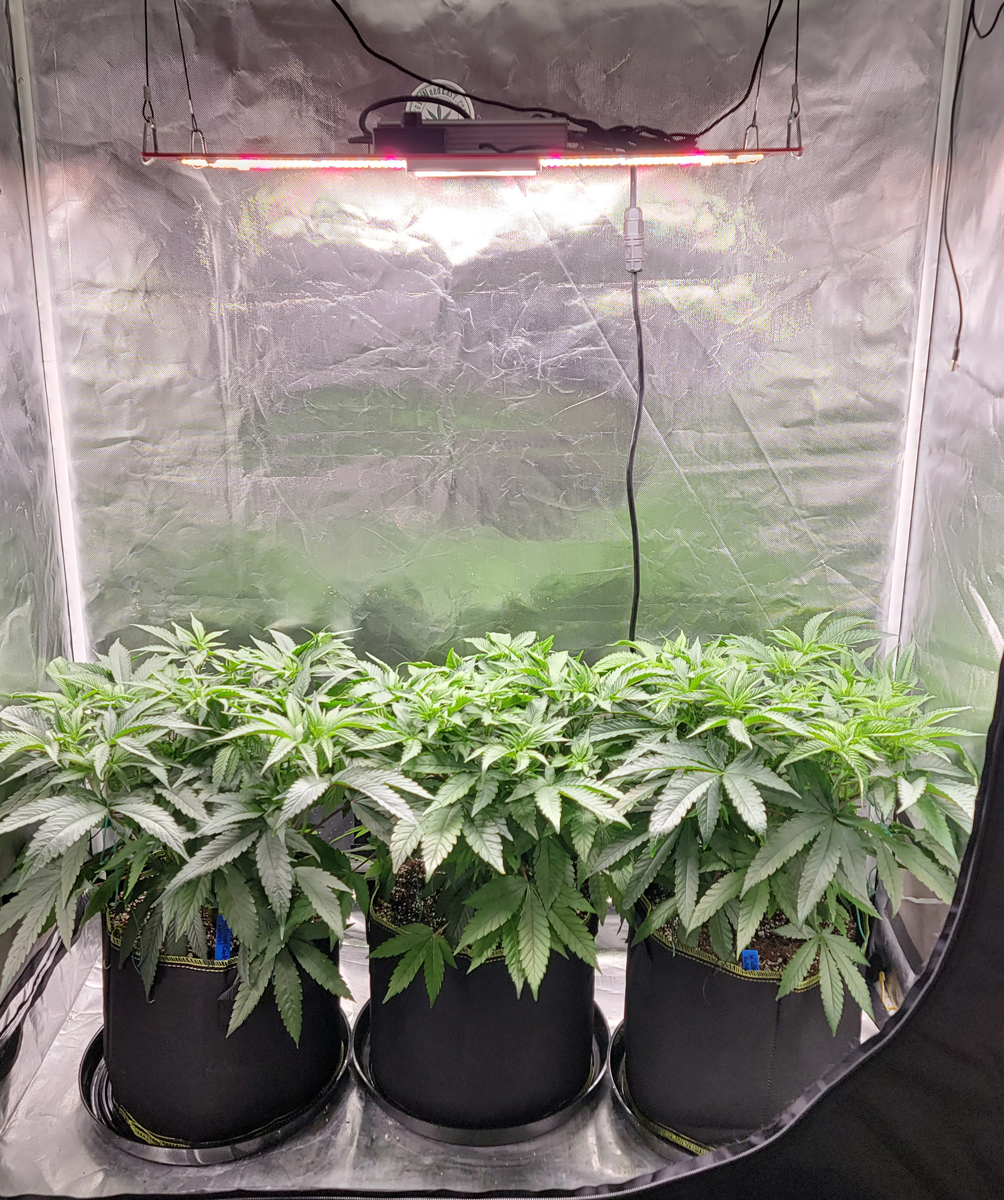
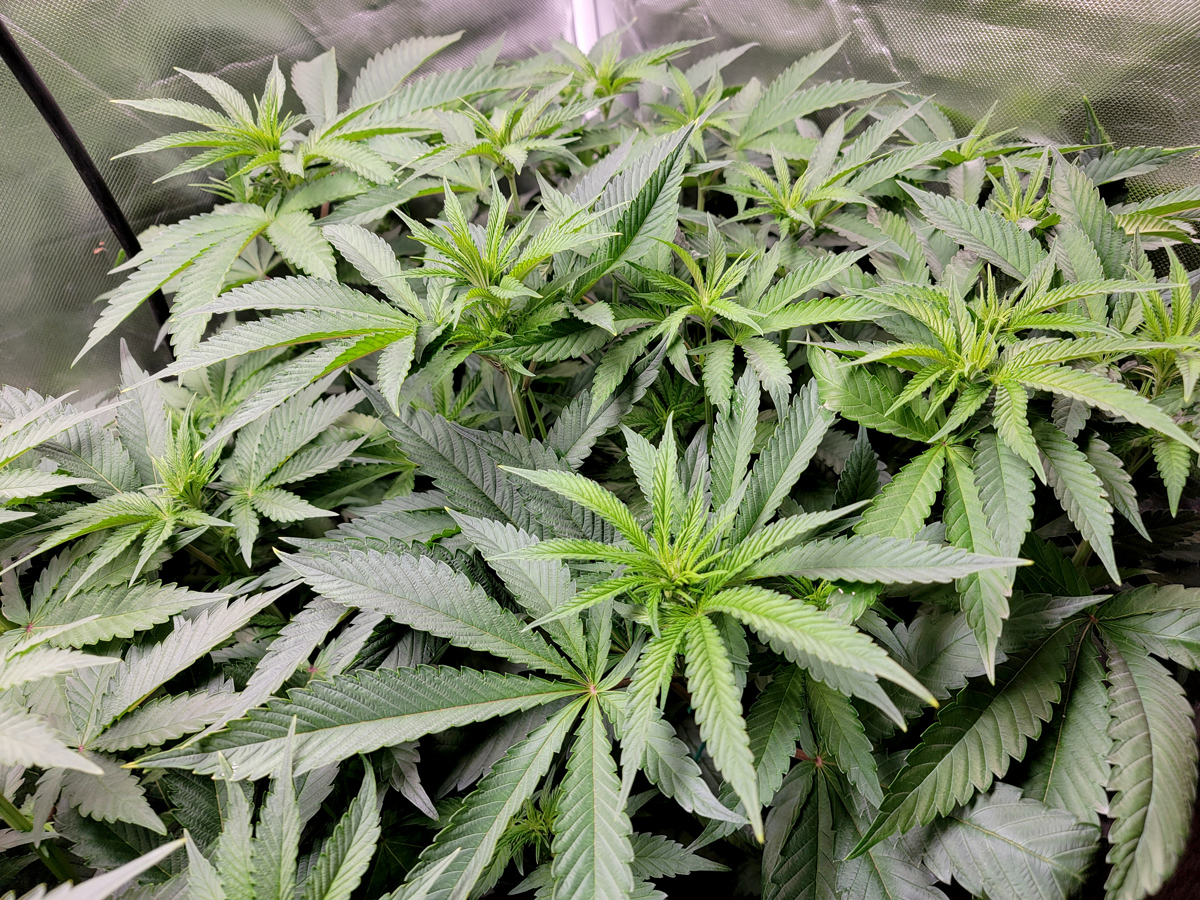
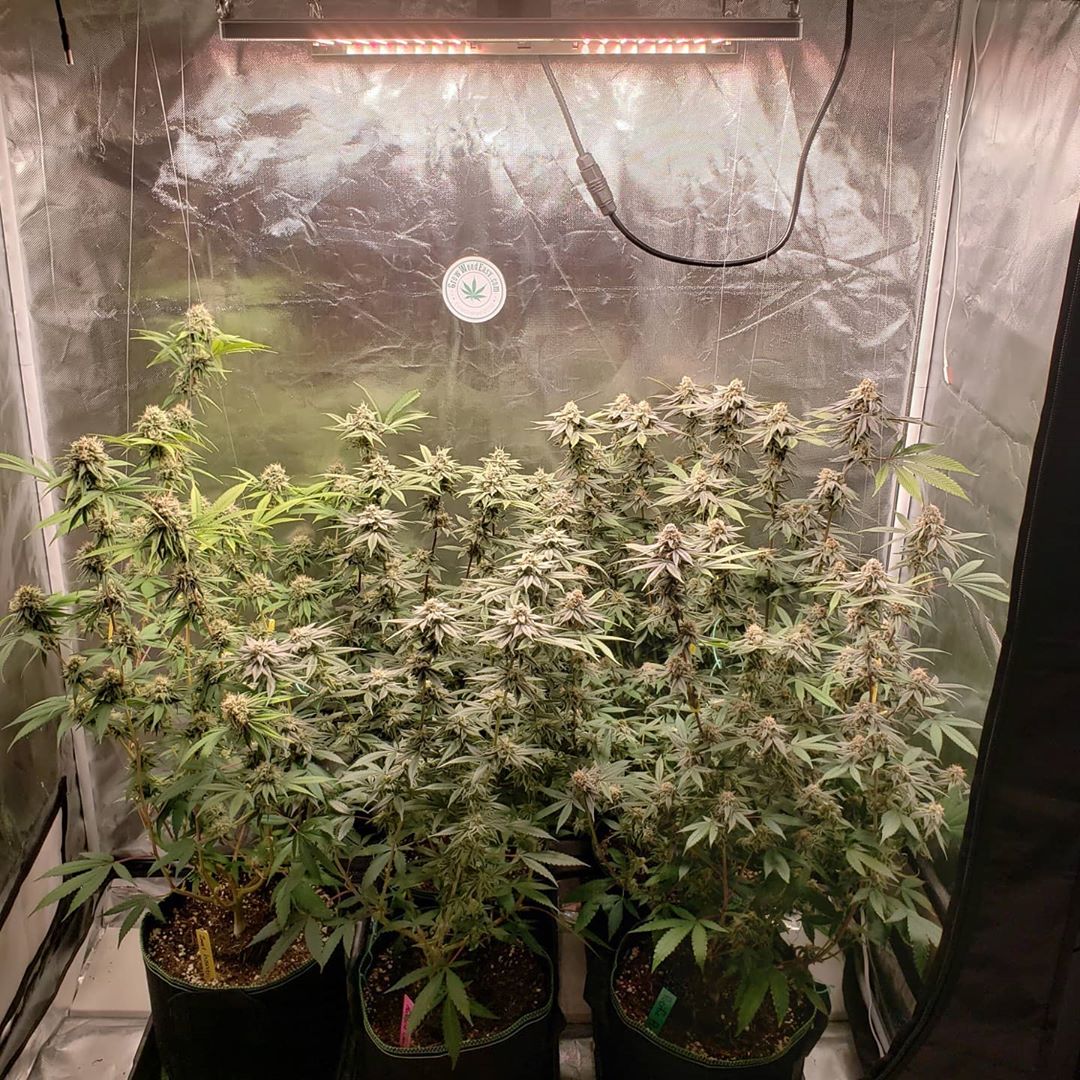
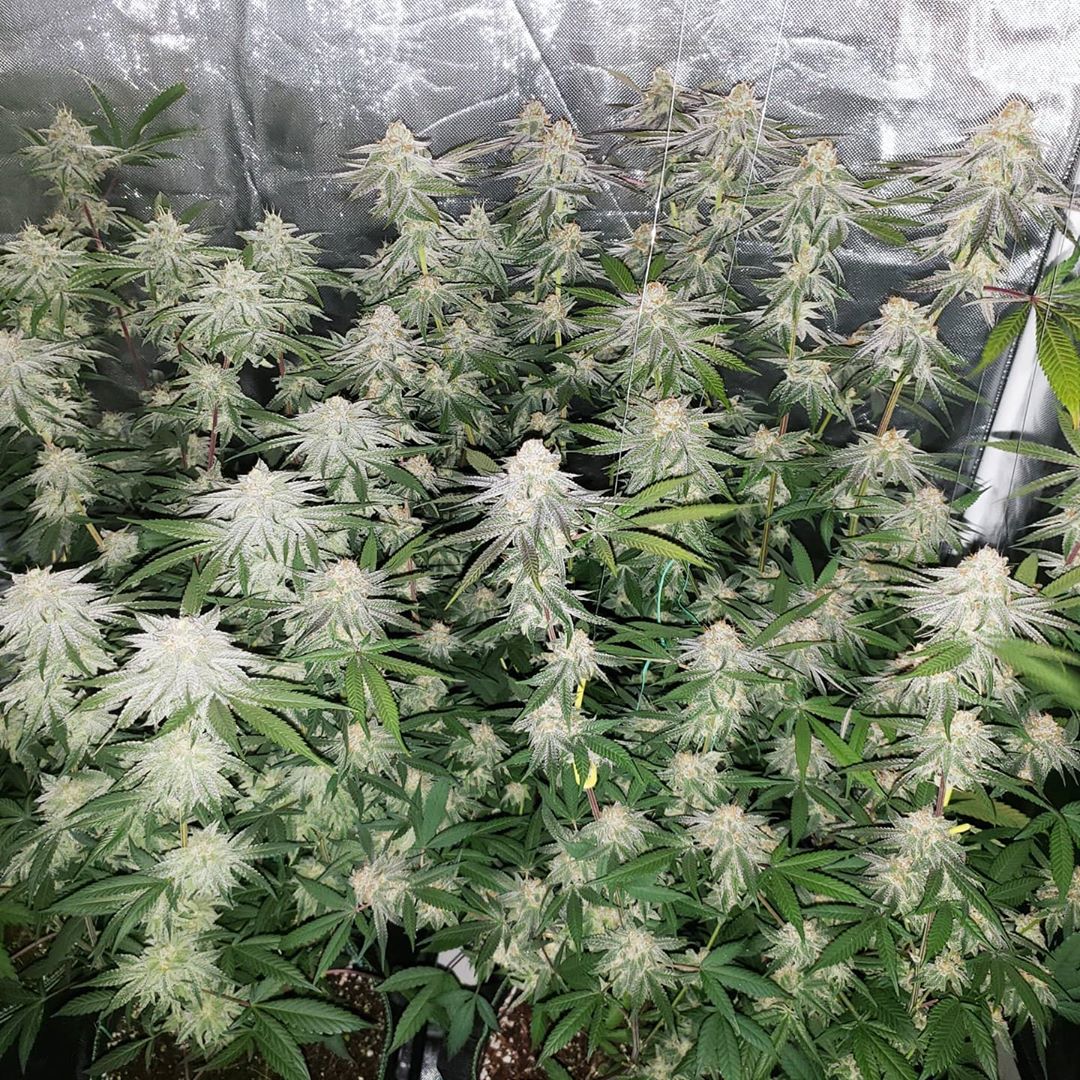
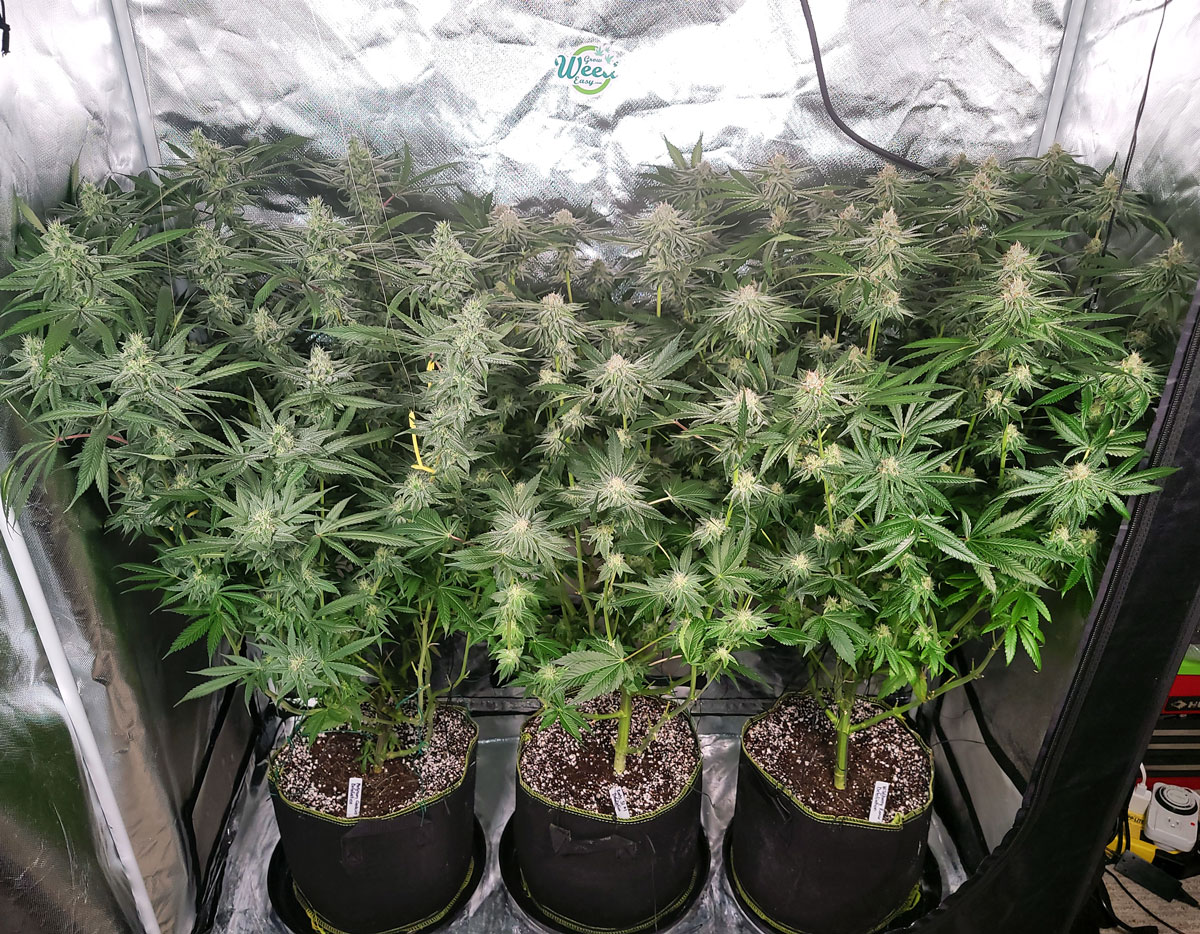
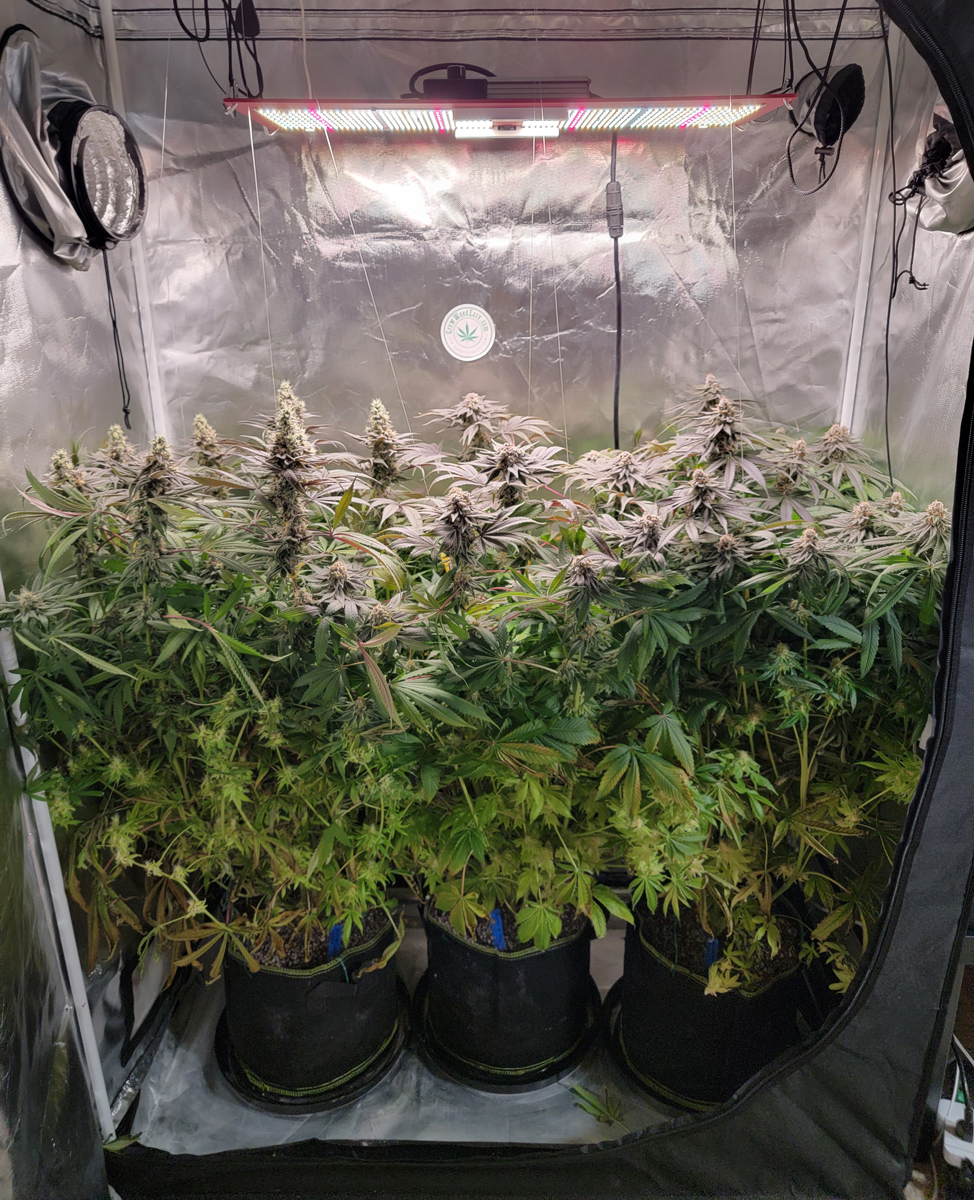
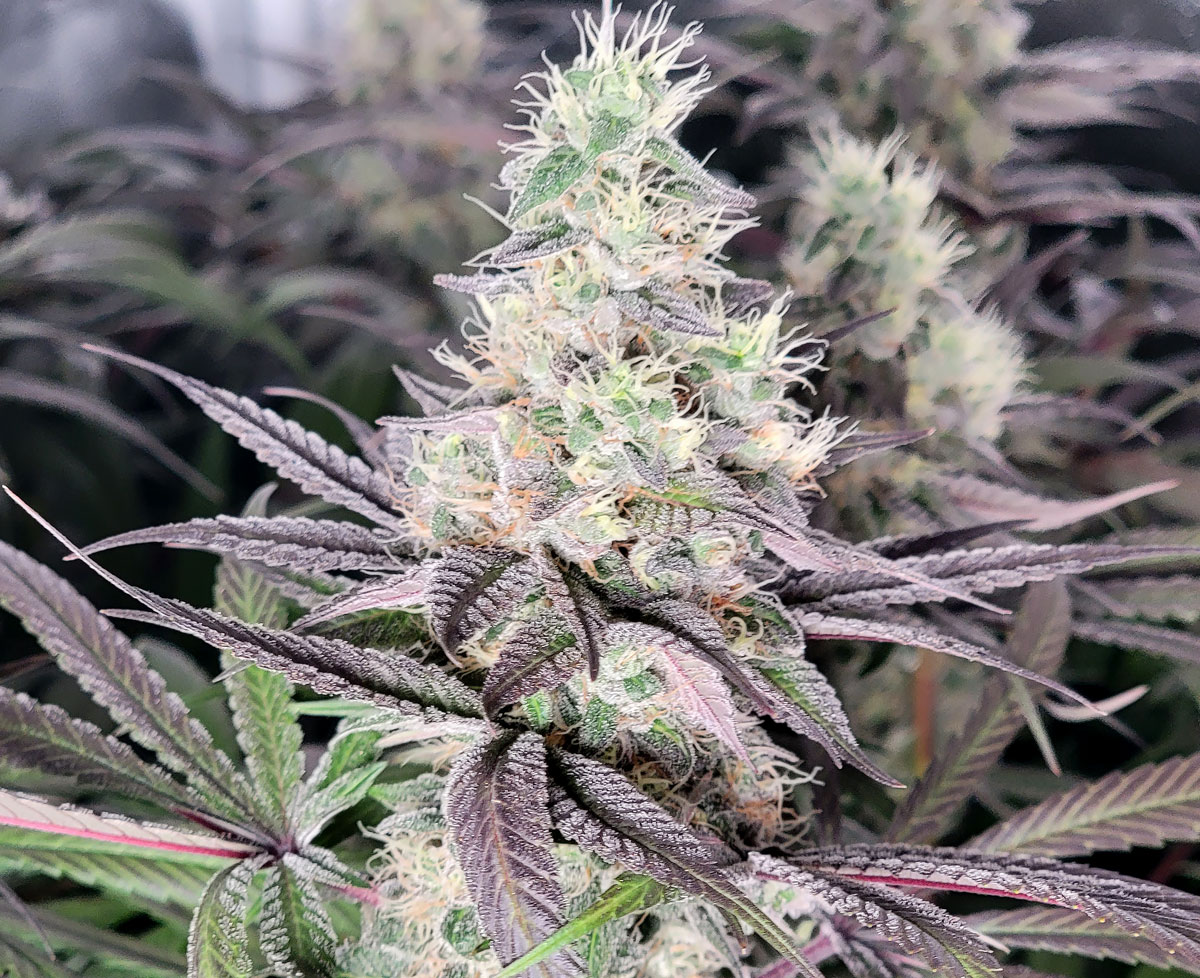
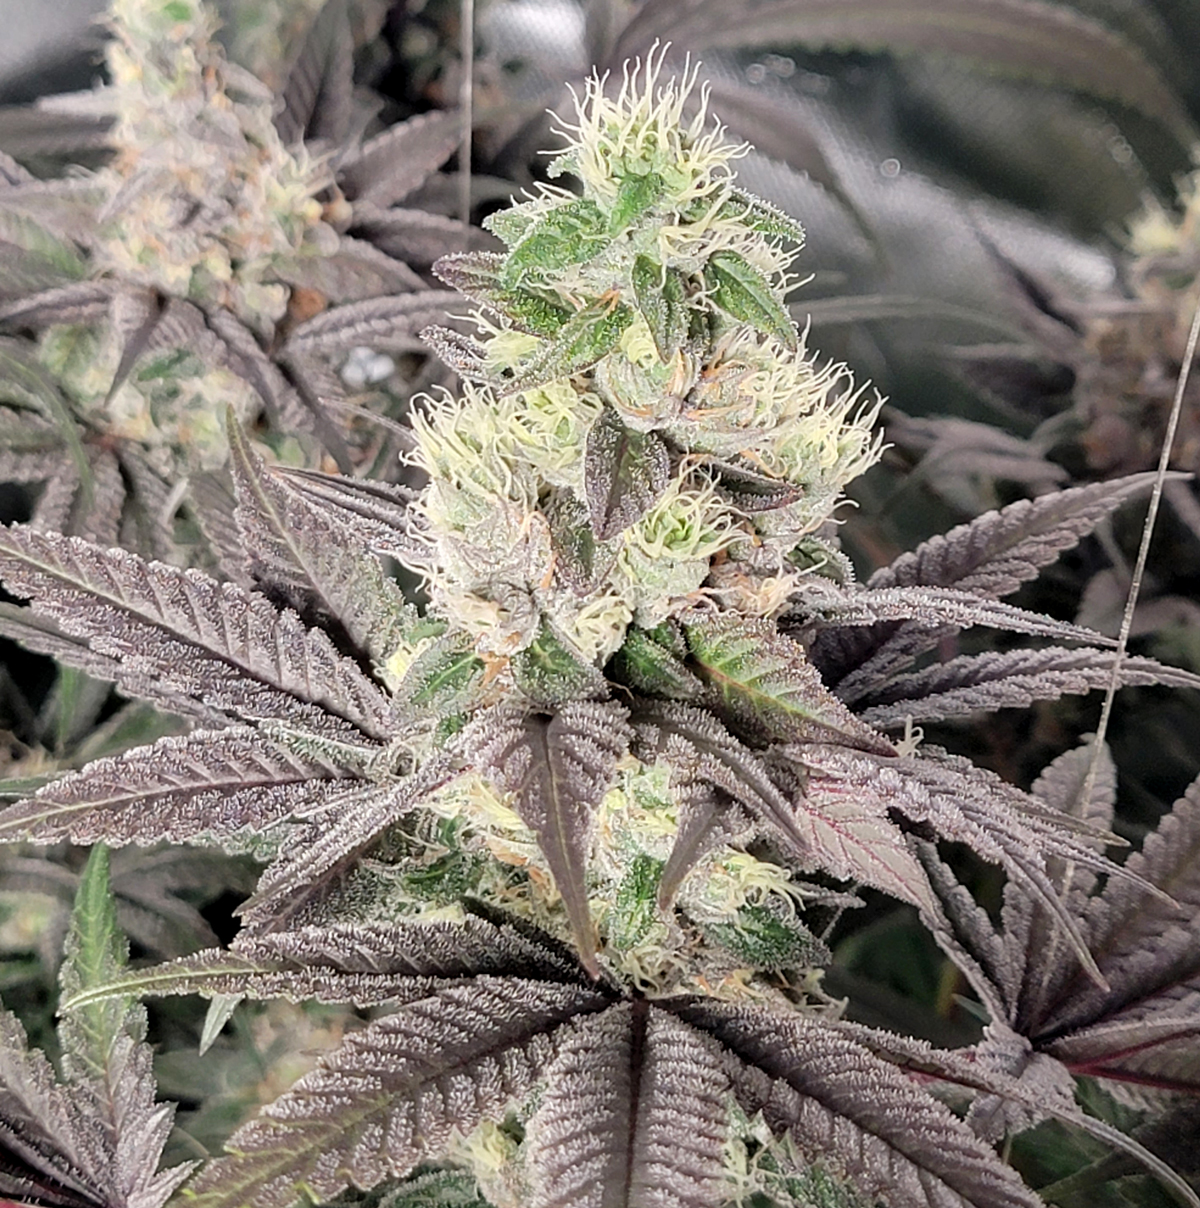
Buds are fattening – May 20
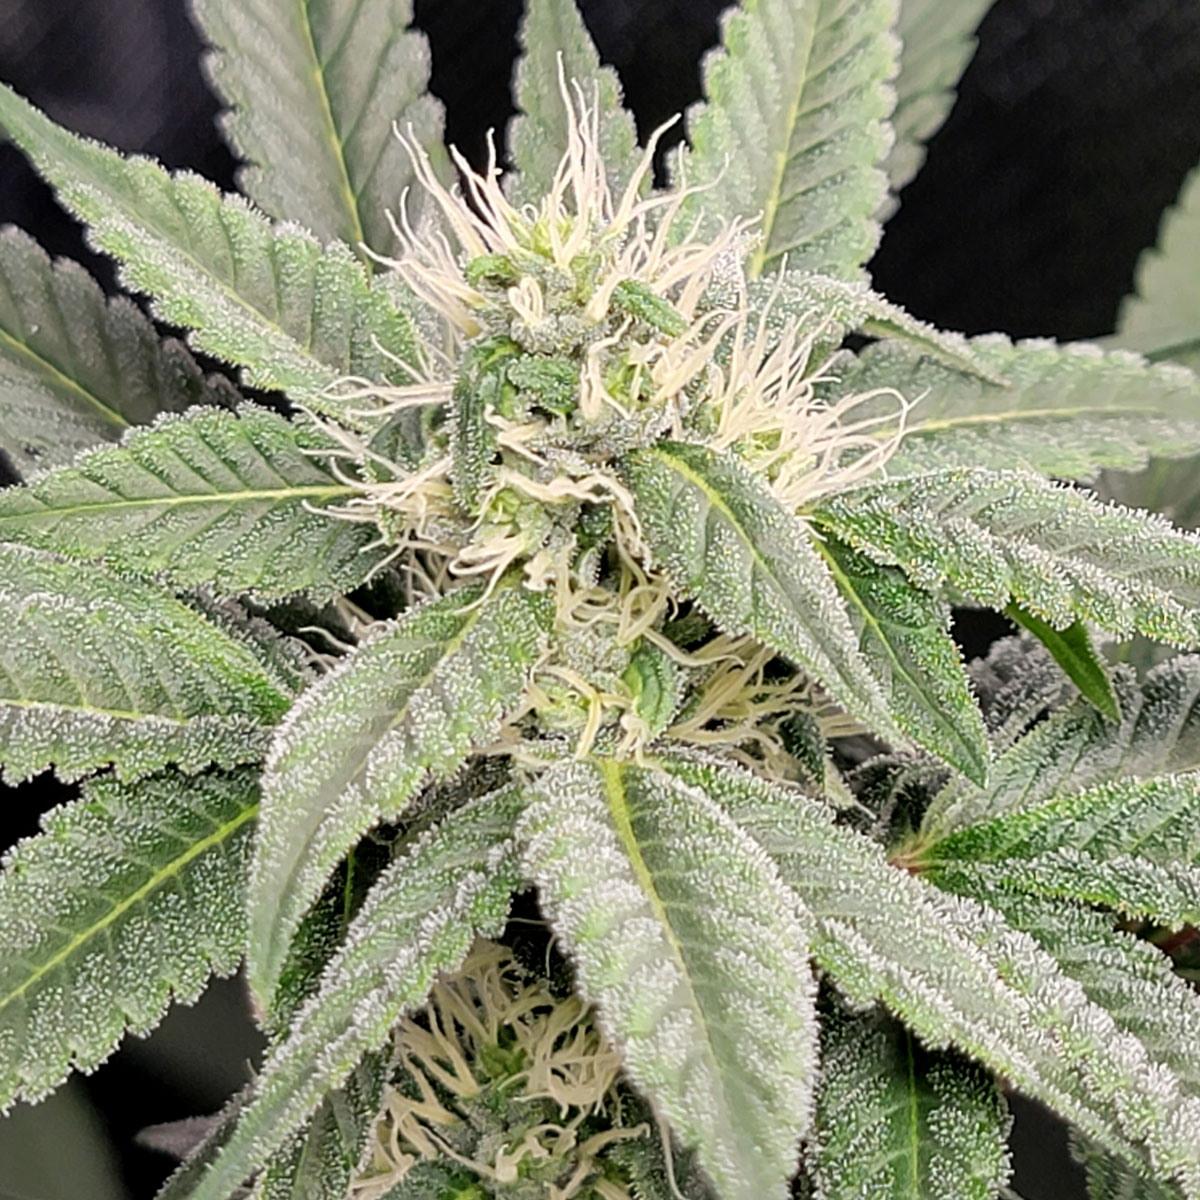
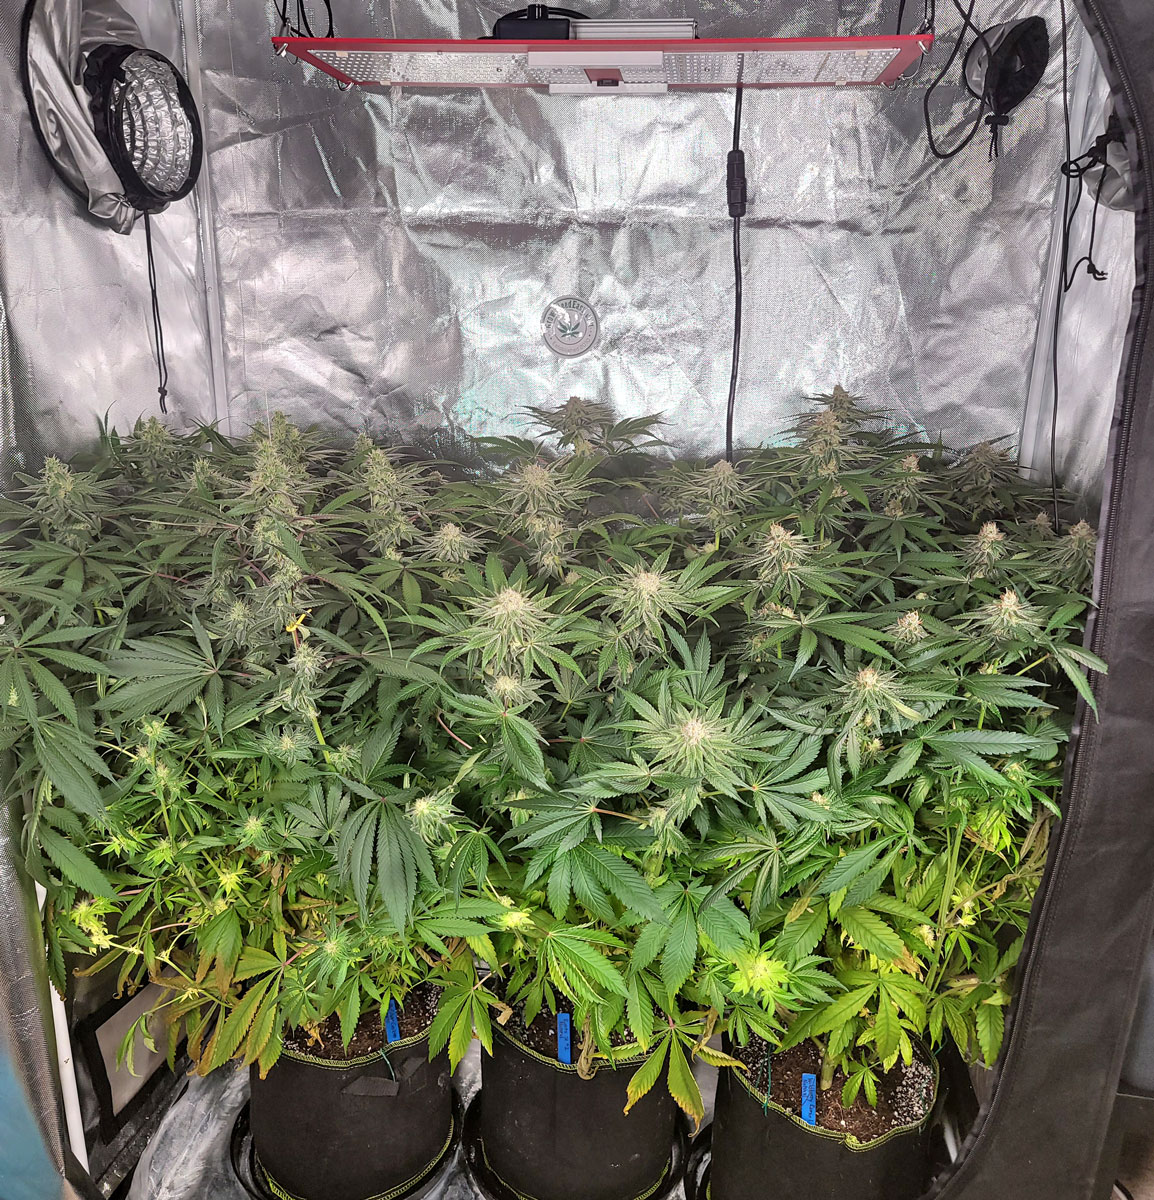
The plants have stopped growing upward as much and are drinking less, while buds are visibly fattening. The hairs are still mostly white still. It’s been a month since I initiated 12/12 and I expect about one more month before they’re ready to harvest. I included pictures of all the buds. They are getting sparkly, and so far they look identical in each tent.
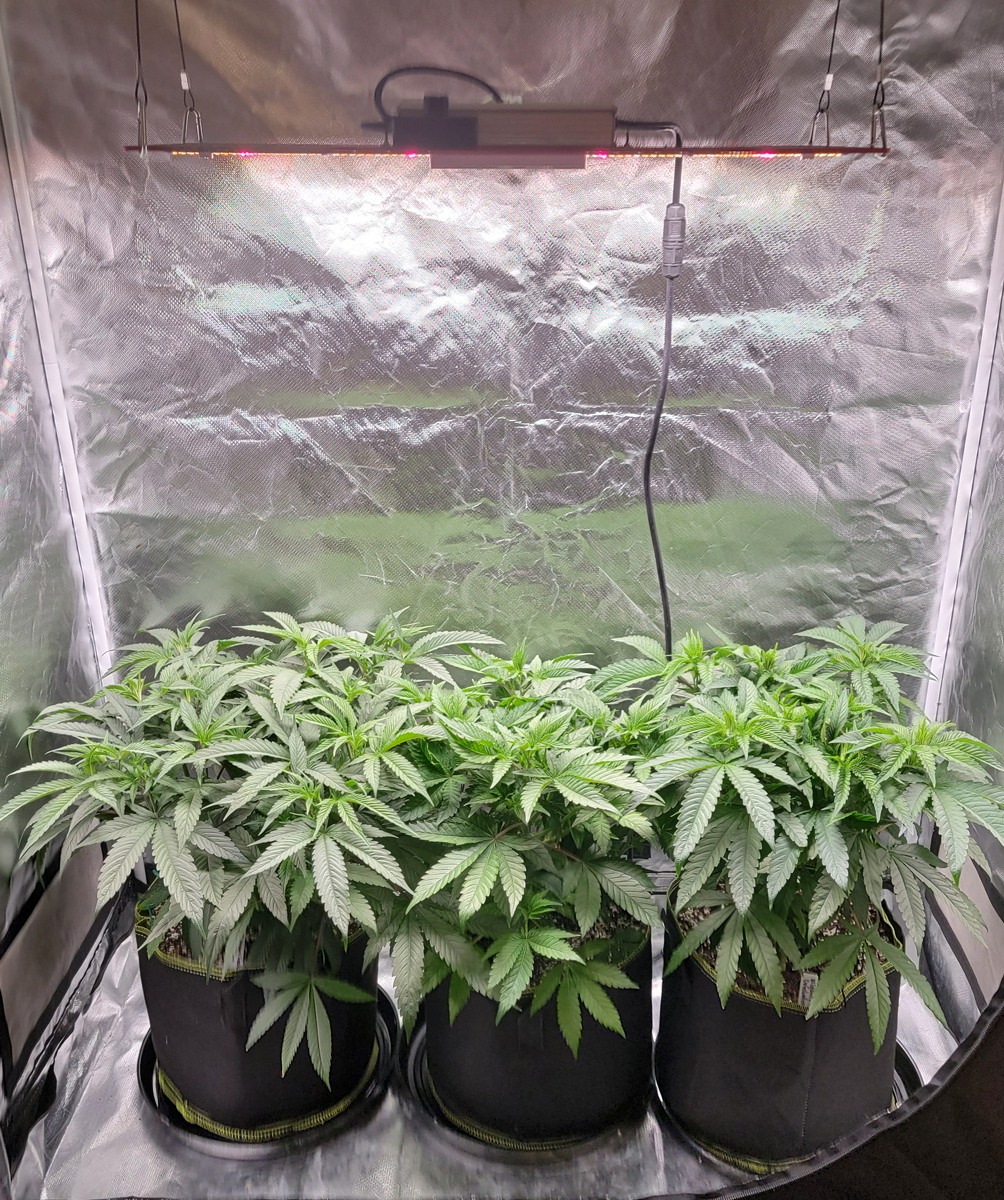
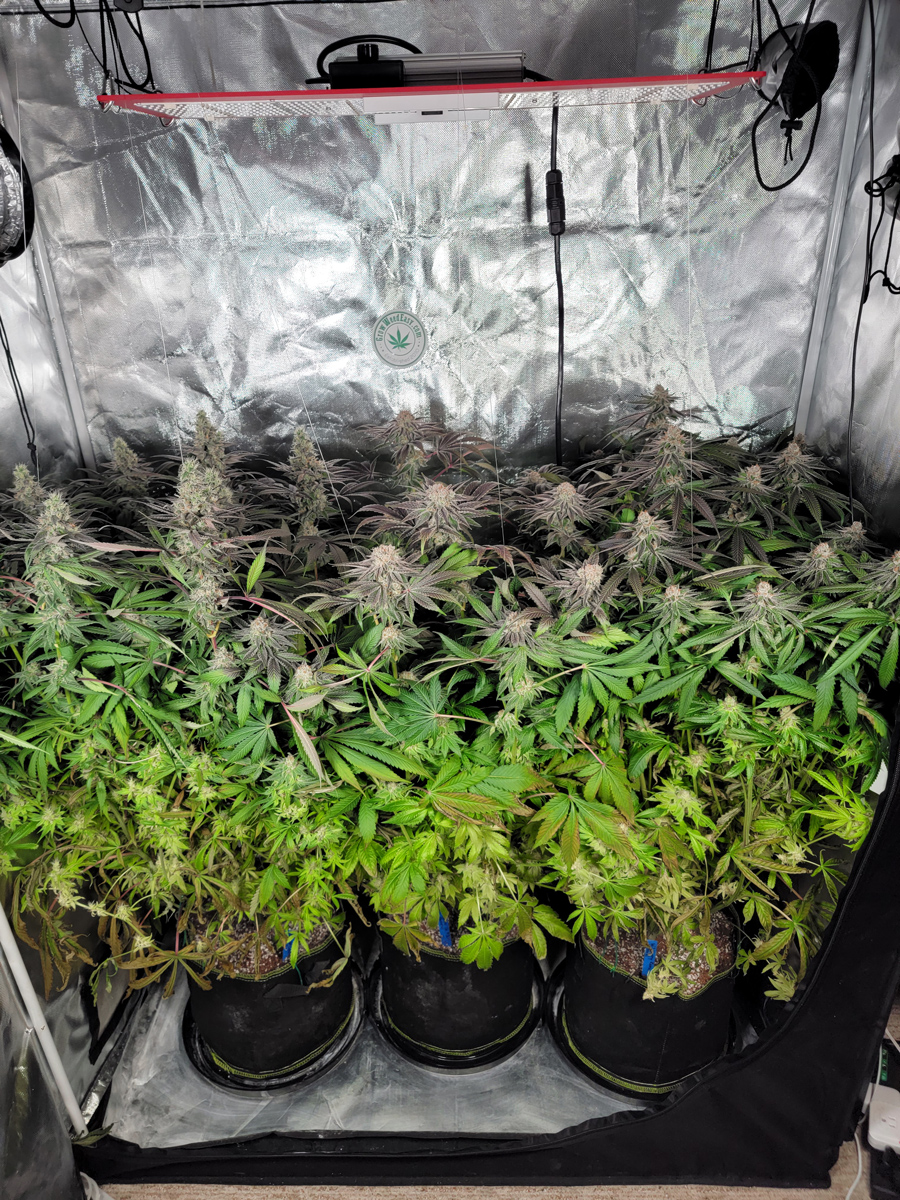
Non-defoliation tent
Looking bushy!
Side view – so little light getting through the plant
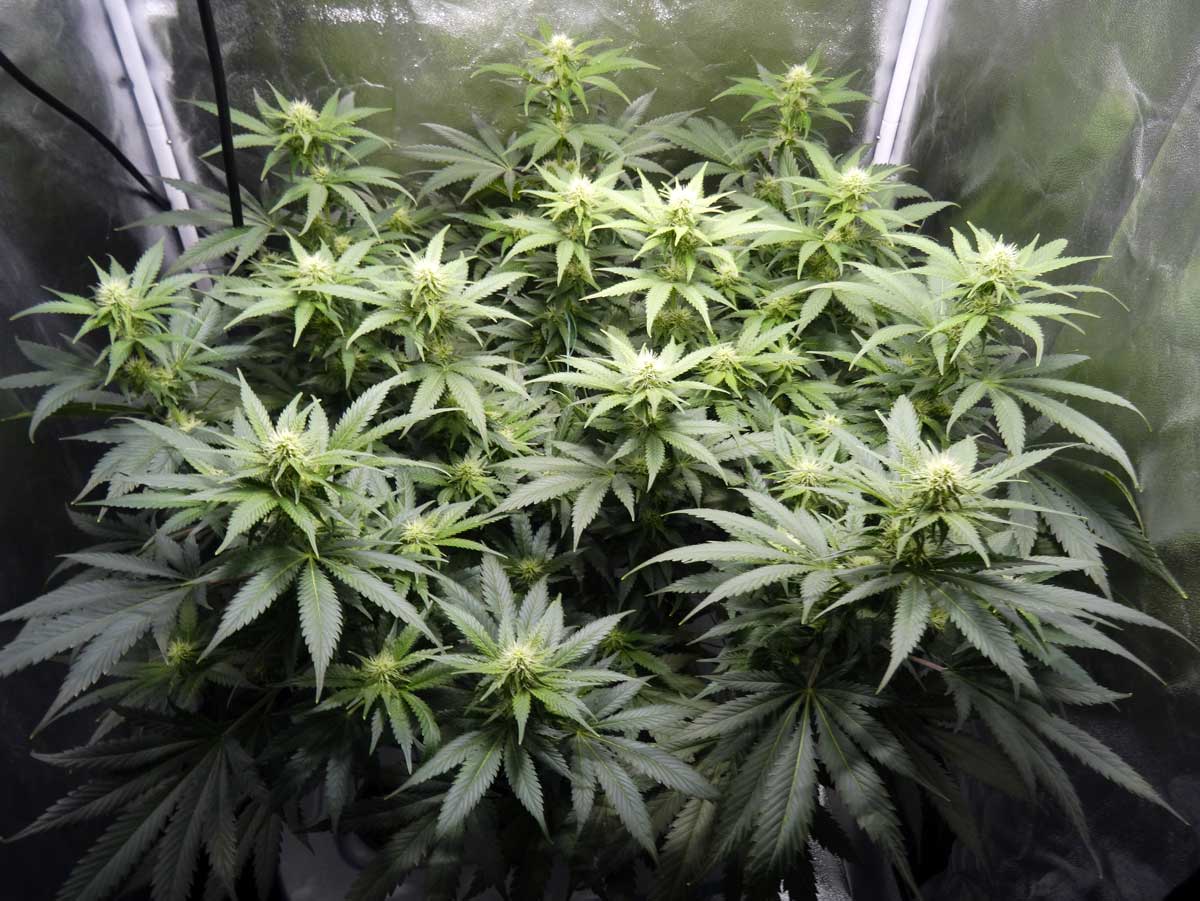
Platinum Cookies bud closeup (left plant)
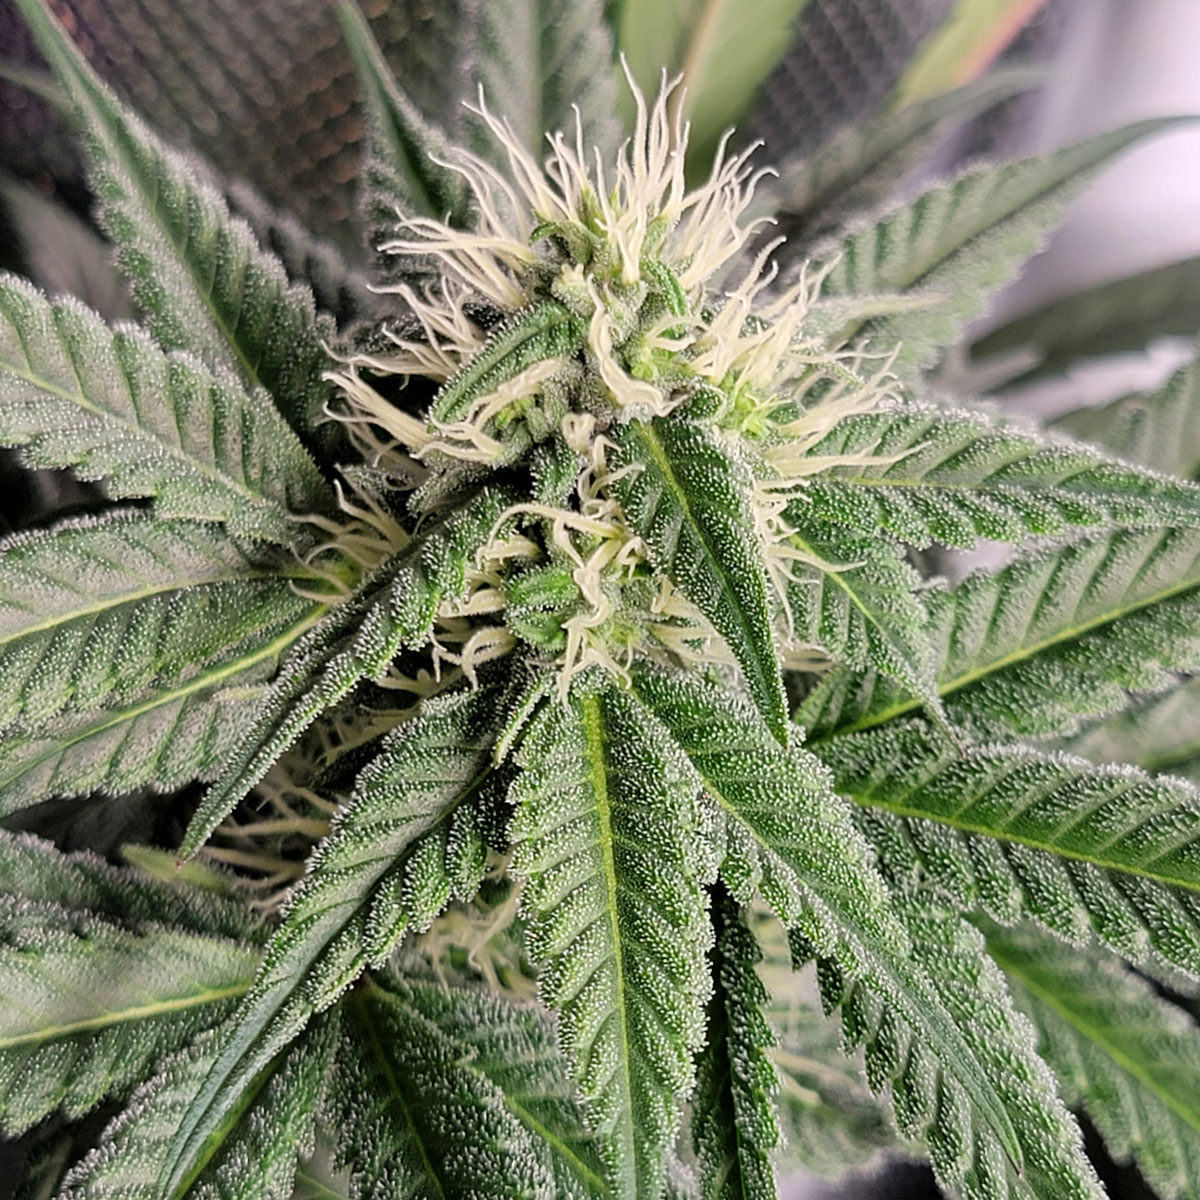
Runtz bud closeup (middle plant)
Wildberry bud closeup (right plant)
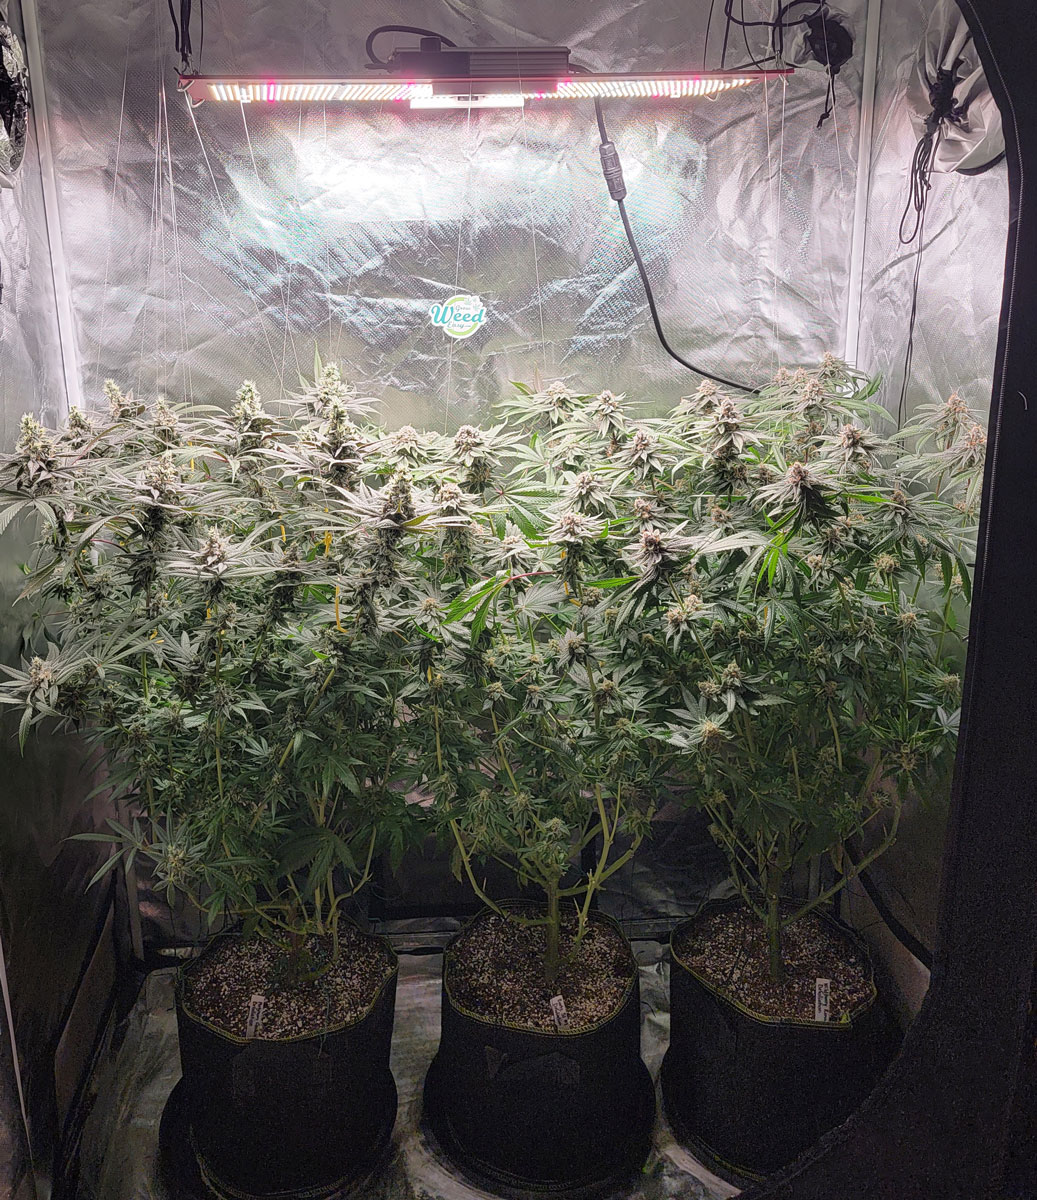
Defoliation tent
From the top
Side view – much more light getting through the plants
Platinum Cookies bud closeup (left plant)
Runtz bud closeup (middle plant)
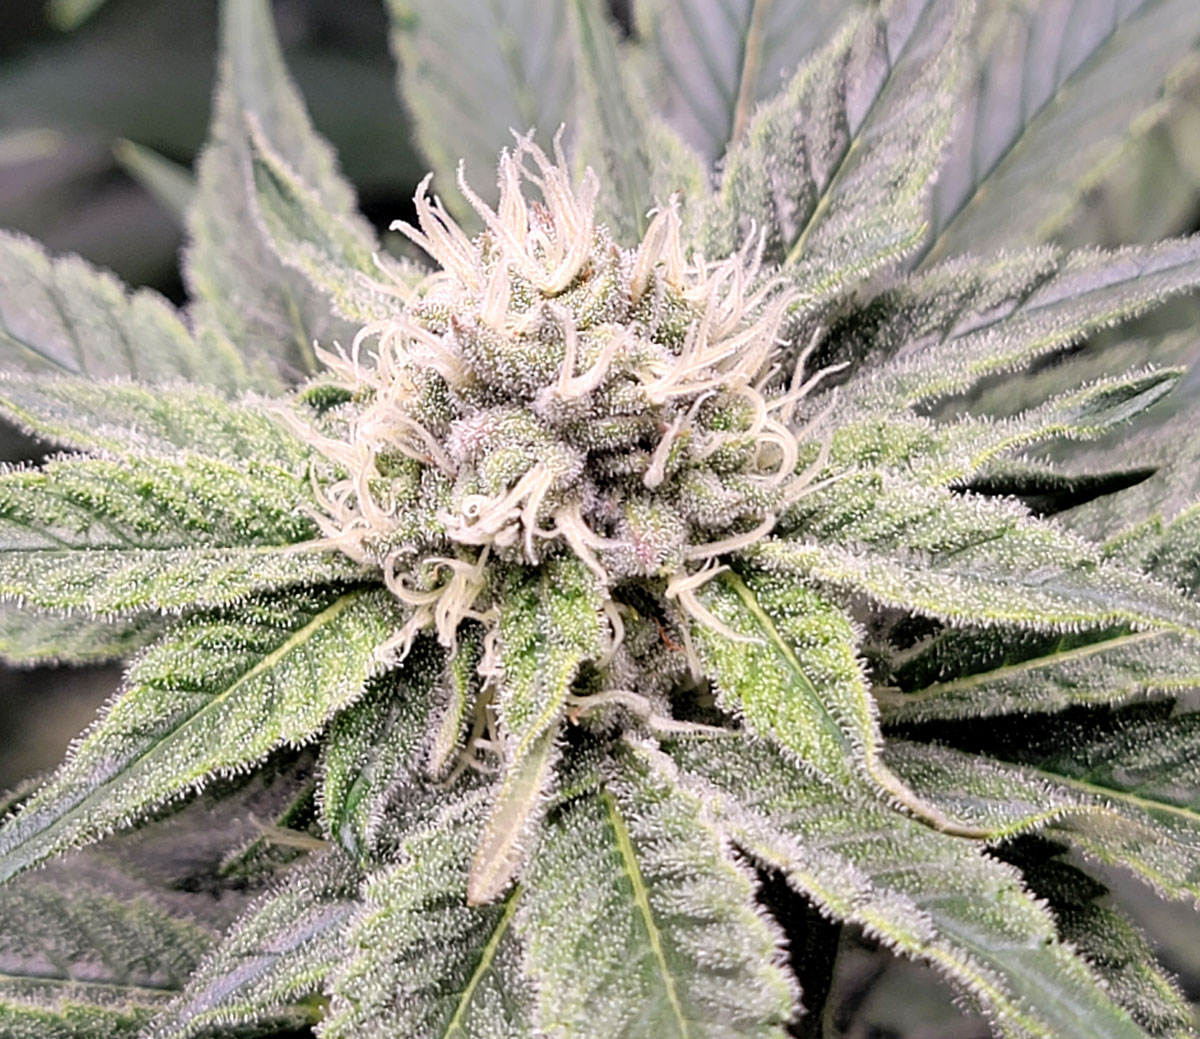
Wildberry bud closeup (right plant)

Comparing the HLG 300 to Spider Farmer LED
For this entry, I wanted to talk a bit about how buds are developing between the HLG vs a Spider Farmer LED grow light.
I happen to be growing a clone of the Runtz plant under a Spider Farmer SF-1000 LED grow light. The buds have developed differently under the two lights and I thought you might be interested to see the differences.
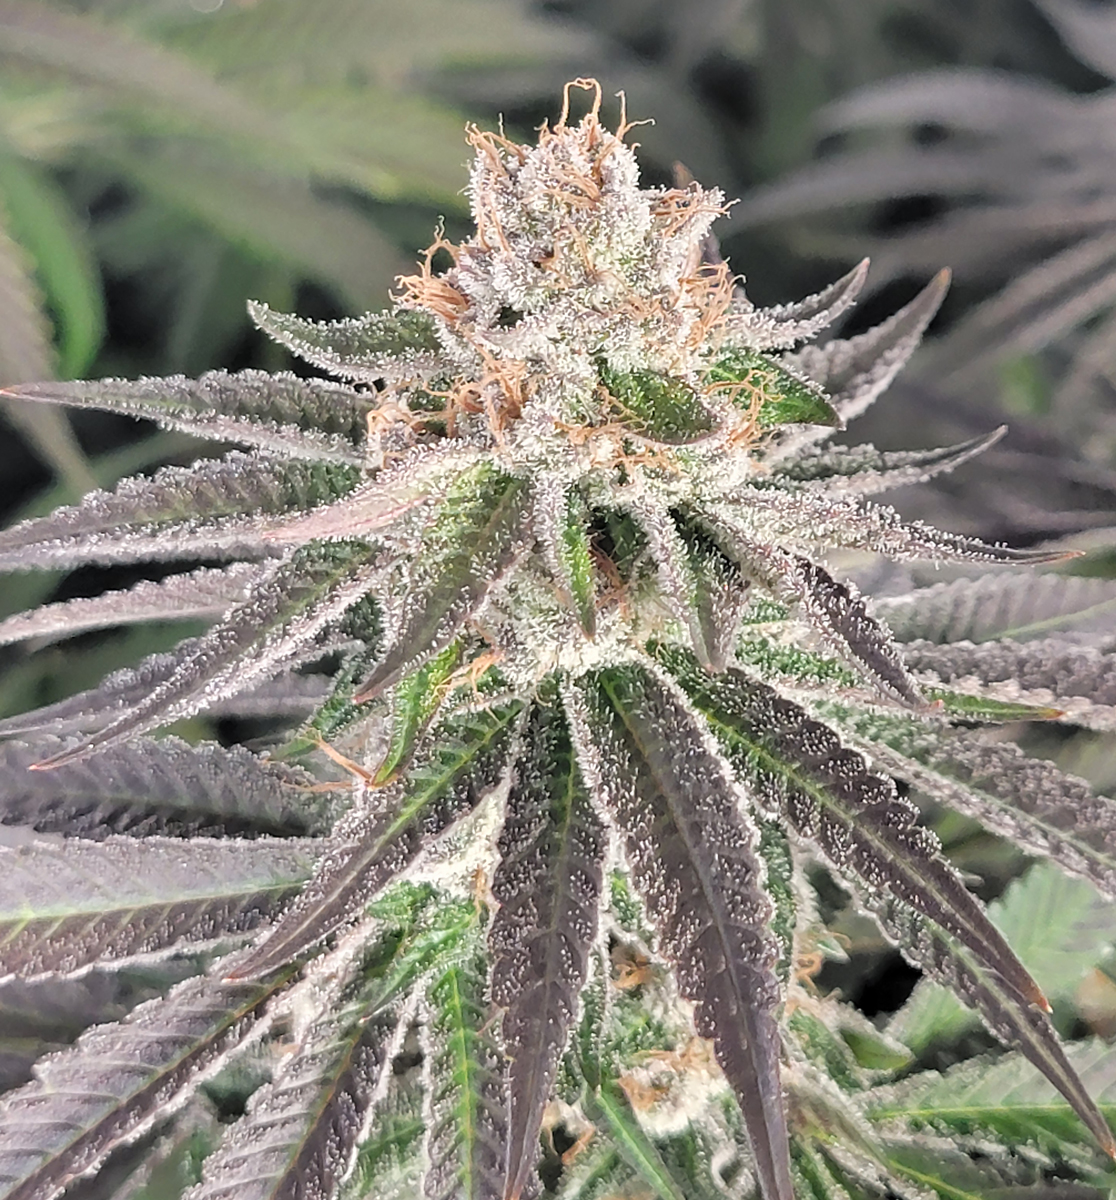
HLG 300L R-Spec LED: Runtz bud at 30 days after 12/12 (this is one of the pictures from above I just reposted it here for easier comparison). Lots of purple already. Short white hairs. Super dense bud structure. Tons of trichomes everywhere including all the leaves.
Spider Farmer SF-1000 LED: Runtz bud at the same age. Stayed mostly green with only hints of purple, hairs were longer, looser bud structure. Still a lot of trichomes, but not as many.

I’m going to get all the buds tested at the lab so I’ll be able to see if these buds test differently or just appear a little different. But this is exactly why I decided to try the HLG 300 grow lights again even though their plant structure is just so-so. They seem to grow truly unique buds with a dense bud structure and covered in trichomes. I remember the last buds I grew with the older version of the HLG 300 LEDs were the favorite I’ve ever grown when it came to enjoying them after harvest. I’m excited to be able to compare the buds of clones grown under the HLG vs Spider Farmer LEDs!
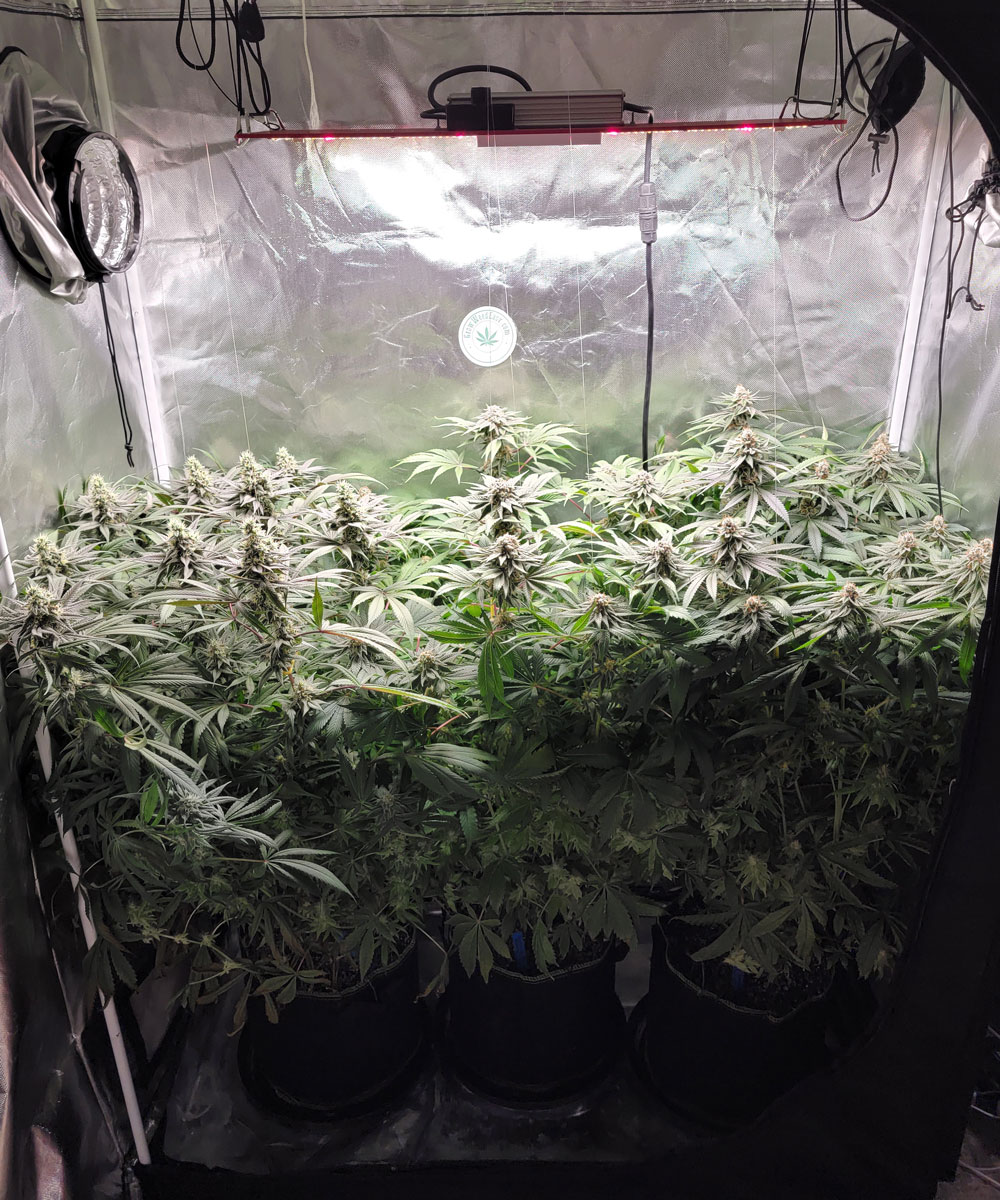
Buds are starting to fall over – May 28
These are the last pictures of the plants “naked” because immediately after taking these pictures some of the buds started falling over because they’re getting so weighty. Now they’re being held up by plant yo-yos, so you’ll probably see more of those in pictures next week.
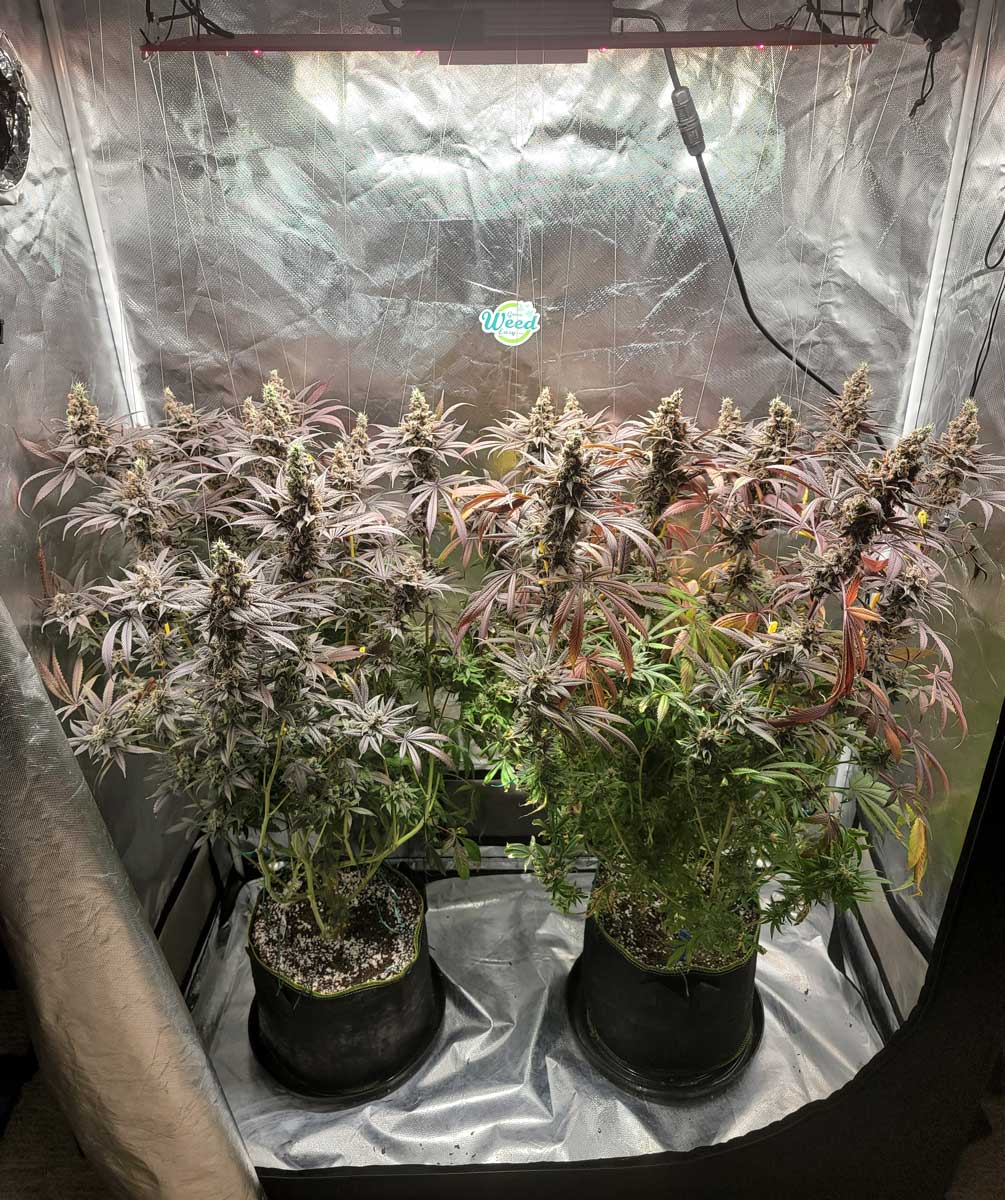
“Natural tent” on left, “Defoliation tent” on right – Day 38 since initiating 12/12
Here they are in regular light to help you see the plants better. If you see strings hanging from the ceiling and yellow plastic pieces, they’re the plant yo-yos holding up the buds.
If you see these in the buds, they’re plant yo-yos to hold up the buds that started falling over

Now on to the tents!
Natural tent – notice how it’s “abandoning” the entire bottom part of each plant. This seems to happen to leaves and bud sites that don’t get any light.
Pretty crazy to see the plants in the natural tent. All 3 plants have abandoned all the lower growth. It’s turning yellow and the bud sites located down there have kind of shriveled and aren’t developing. I have observed this in the past when parts of the plant don’t get any light at all. I don’t believe it’s a nutrient deficiency because the buds and leaves that get light look flawless. The only leaves that are showing signs of trouble are the ones that are completely in the dark all day. It makes sense if you think about it. Cannabis is a wind-pollinated plant in the wild, and buds that don’t get access to air or light probably won’t spread or receive pollen from the wind.
Here’s a closeup of some of those bottom parts of the plant. It’s mostly just the bud sites that have gotten pale, but the plant also seems to be giving up on some of the bottom leaves.
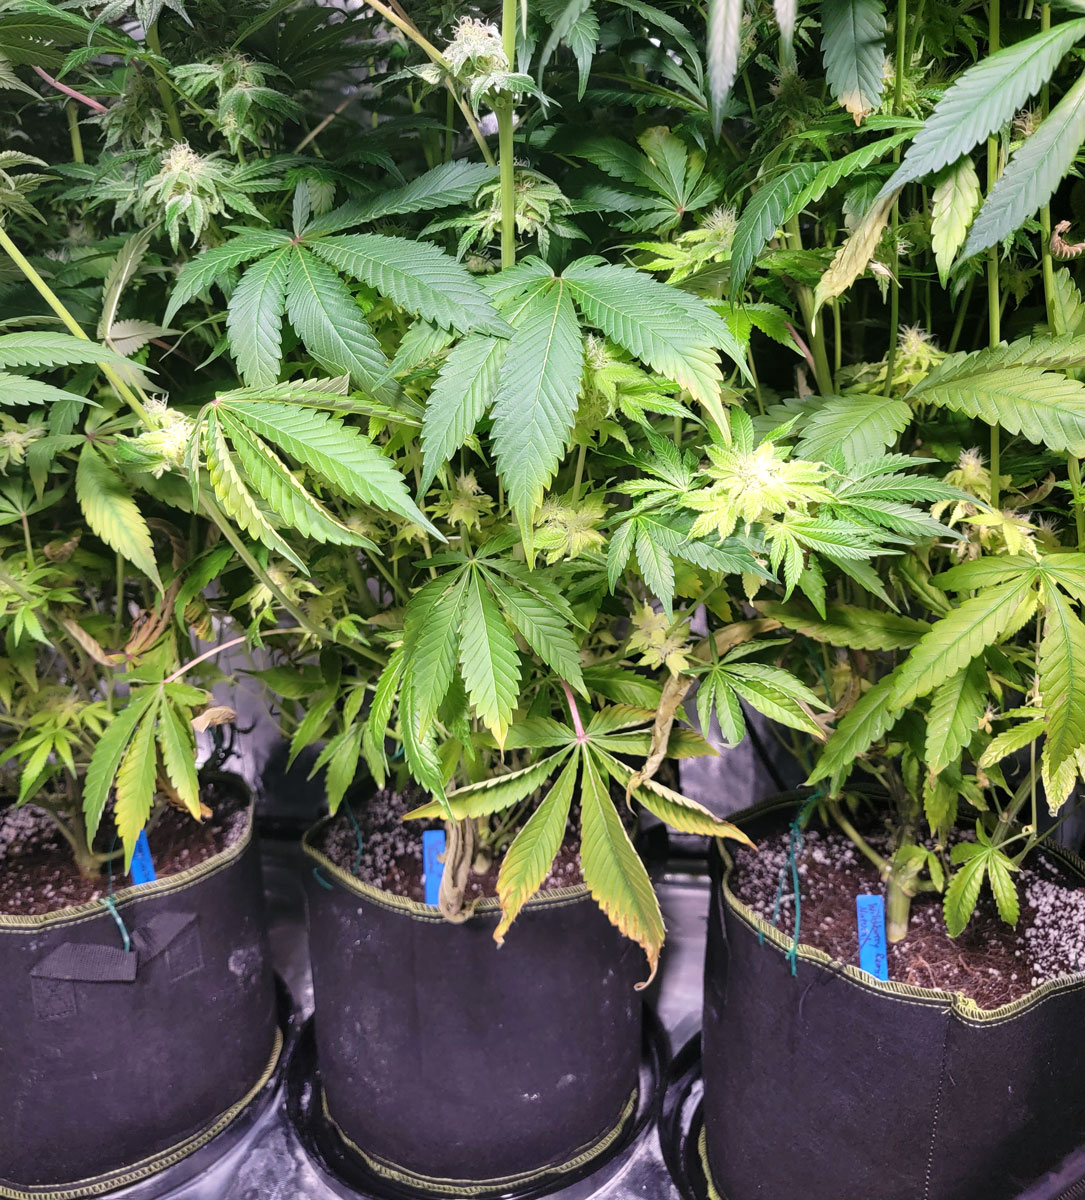
The abandoned buds all look like this. They still have trichomes (glitter) and pistils (hairs) like a regular bud, but the leaves attached to the buds turn a pale yellow and the buds don’t fatten.
Click for a closeup of this “abandoned” bud site on the Platinum Cookies plant
Here’s a bud from the top of the same Platinum Cookies plant, which doesn’t have any sign of a nutrient deficiency. All the buds that are getting light appear pristine.
Pretty neat! It’s like a cannabis plant will lollipop itself to an extent.
On the other hand, in the defoliation tent, all the leaves are getting light and all appear a normal green
As far as I can tell, the top buds in each tent look exactly the same so it’s difficult to tell which plant will yield more. It should start getting more obvious soon.
See you next week!
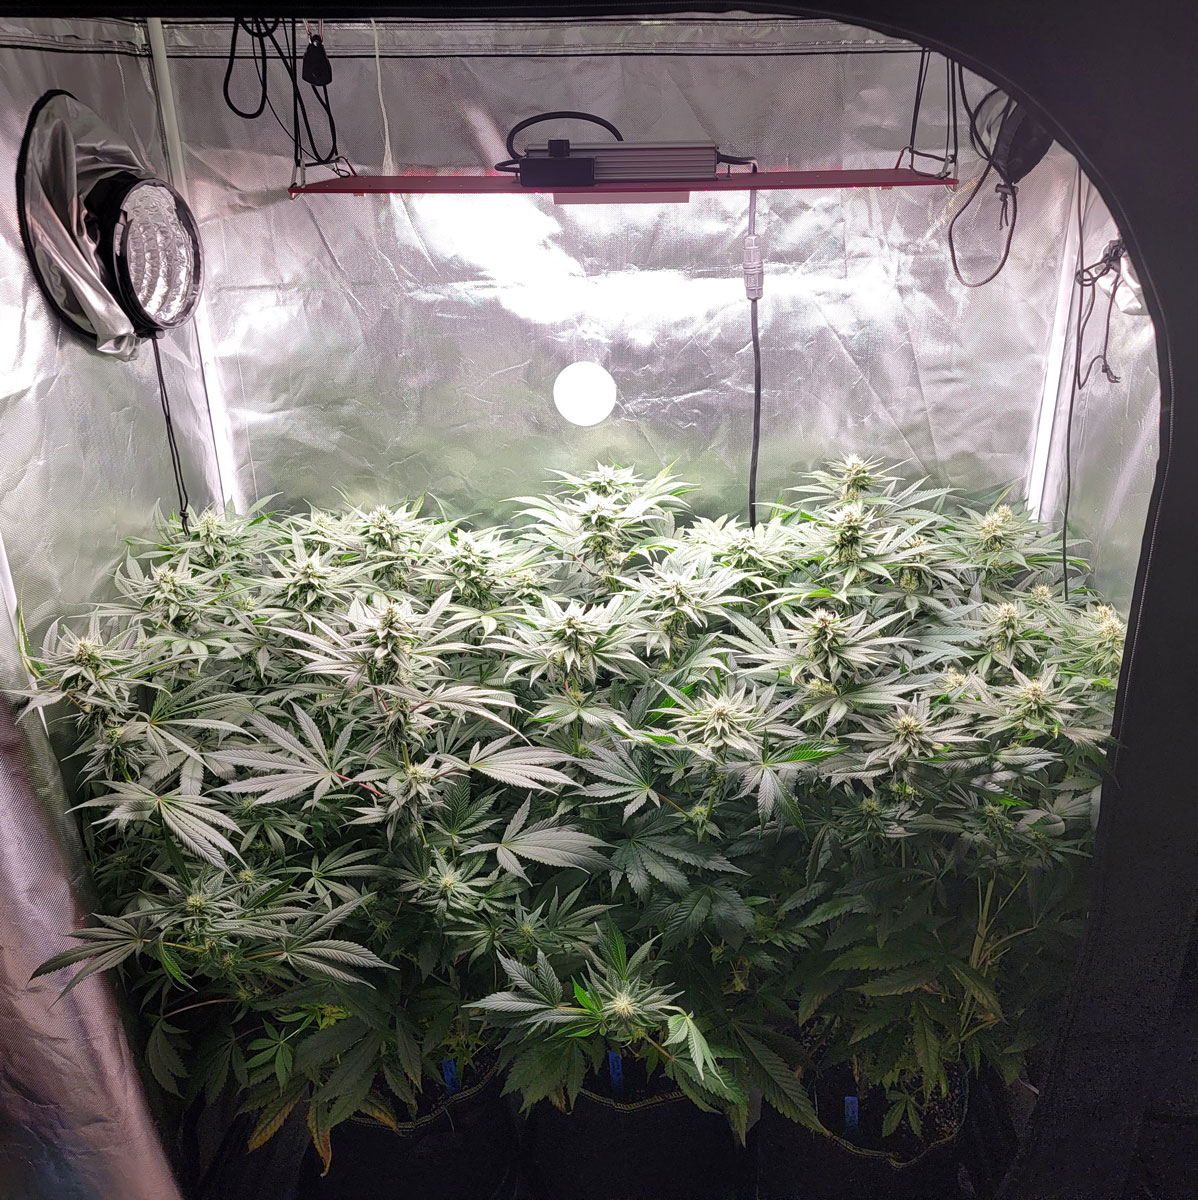
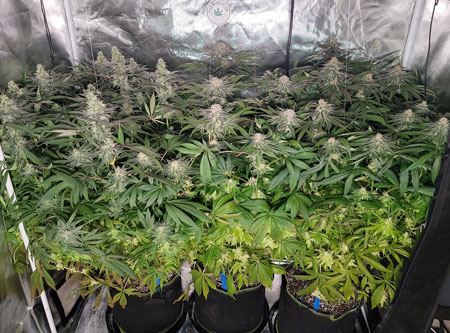
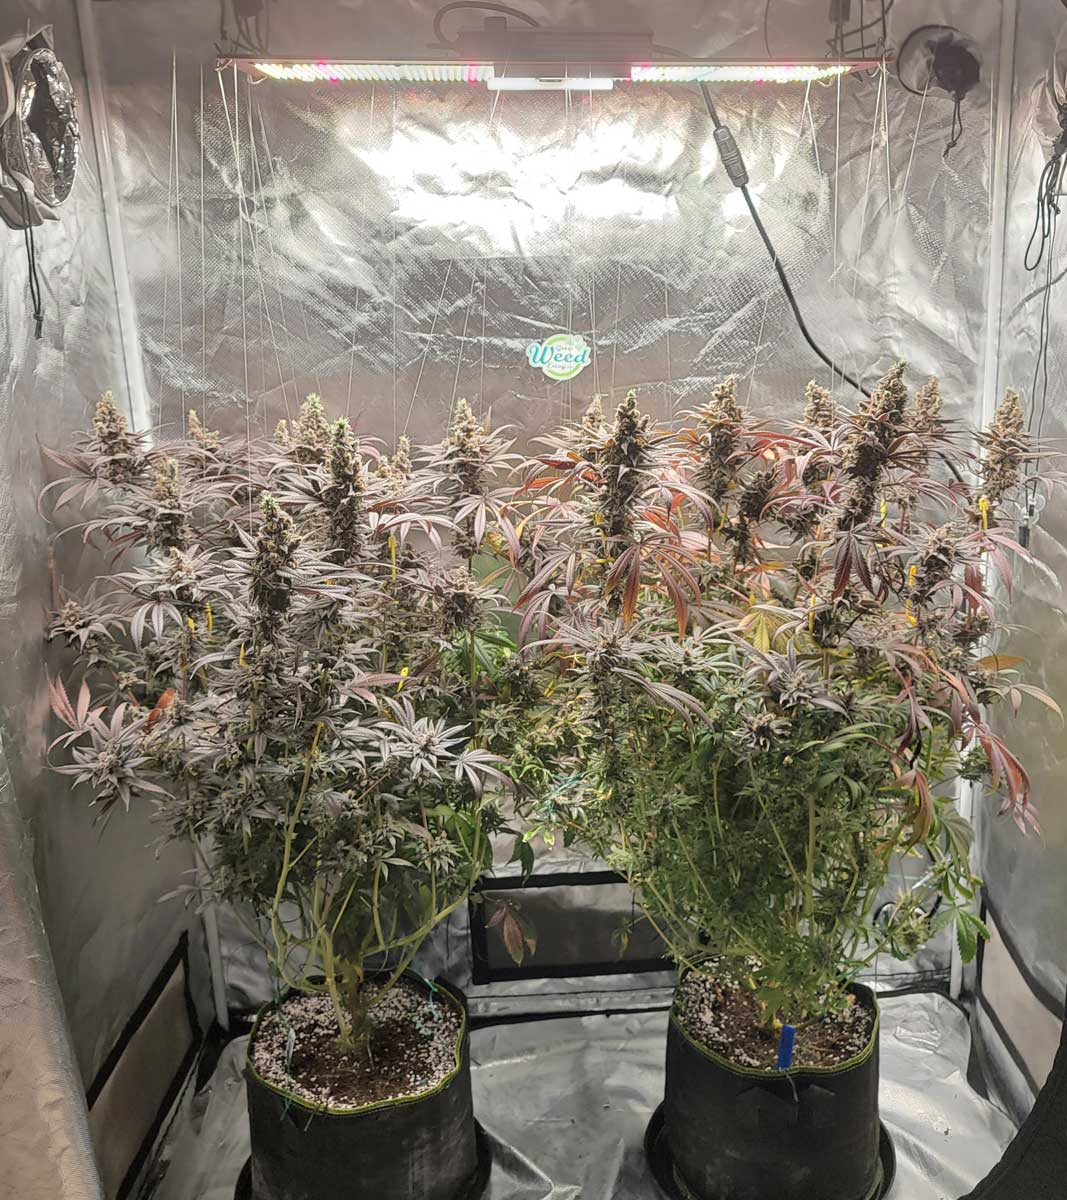
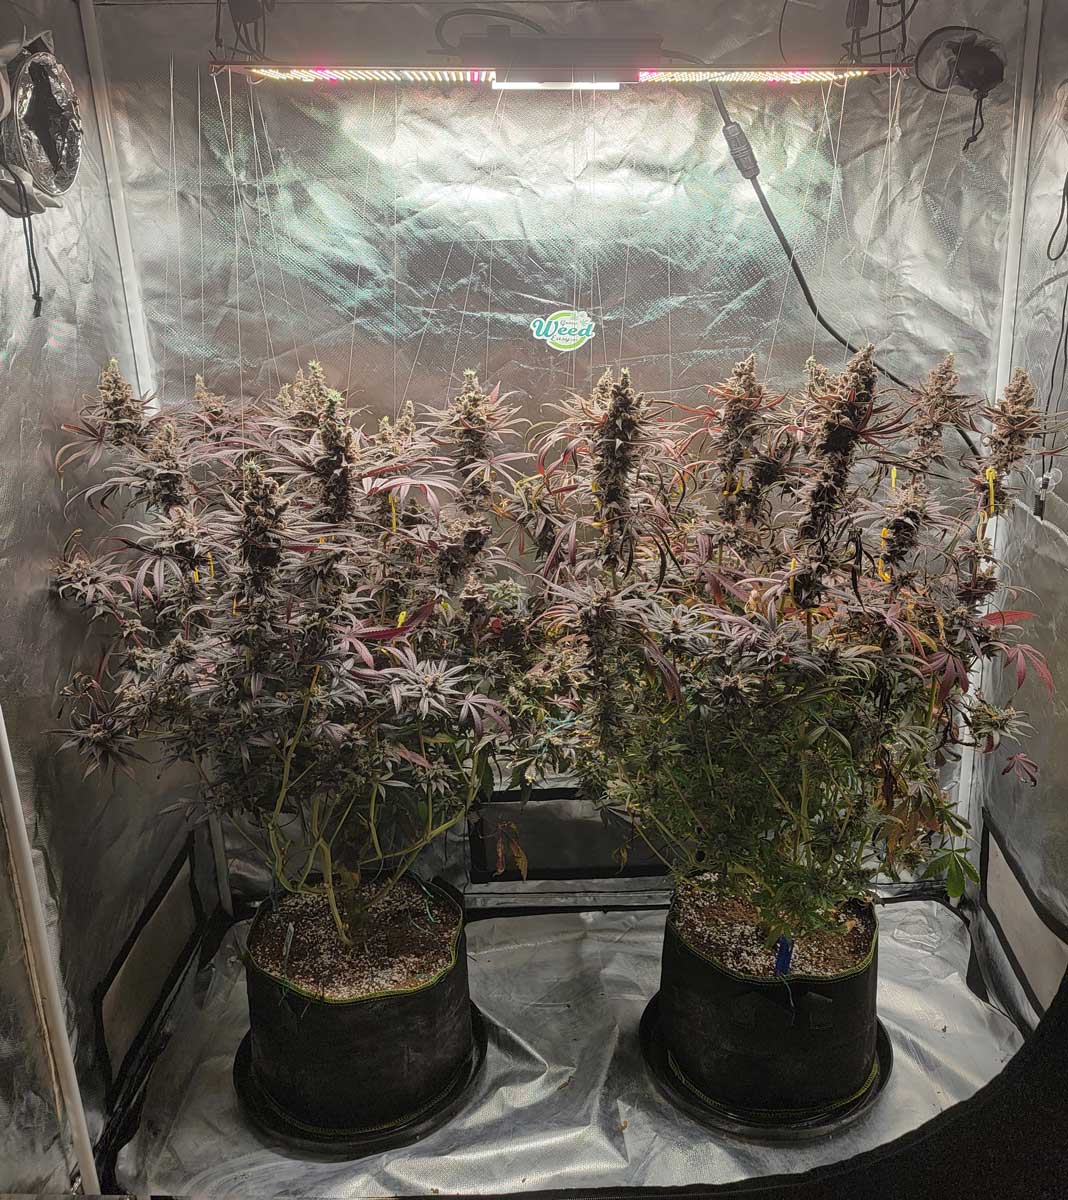
Buds continue to mature – June 3
But are significantly fatter compared to last week! It’s been 48 days since I initiated 12/12 and I expect they will be ready to harvest by day 70 (though the Platinum Cookies plant on the left in each tent may take longer by the looks of their buds).
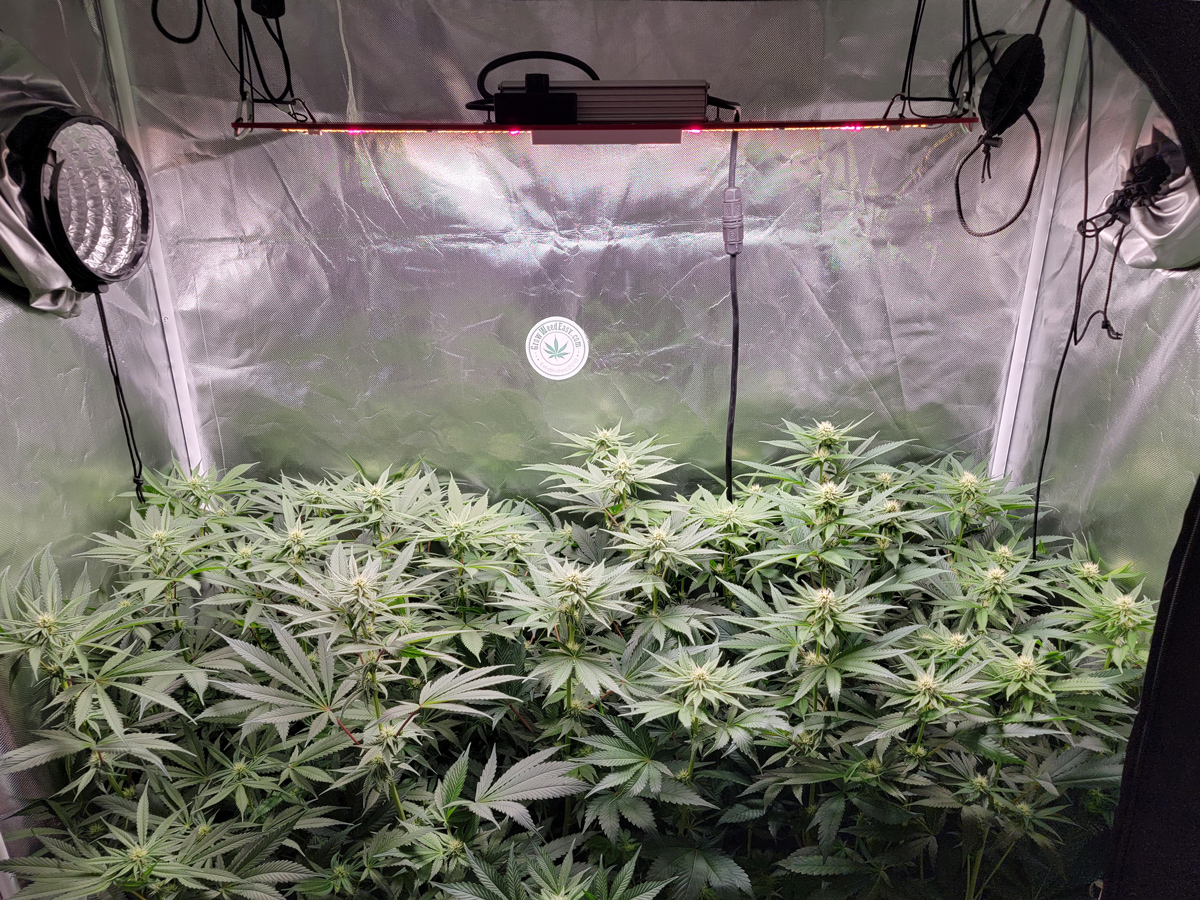
Natural tent with LEDs on
Natural tent in regular light with a flash to help see the buds. I haven’t removed any leaves so you can see exactly what the plant is doing with those lower leaves that don’t receive light.
I’ve noticed the buds on top of the natural tent seem bigger/wider than the buds in other tent, but are shorter (go less far down into the plant). I wonder what that will end up meaning at harvest when it comes to yields.
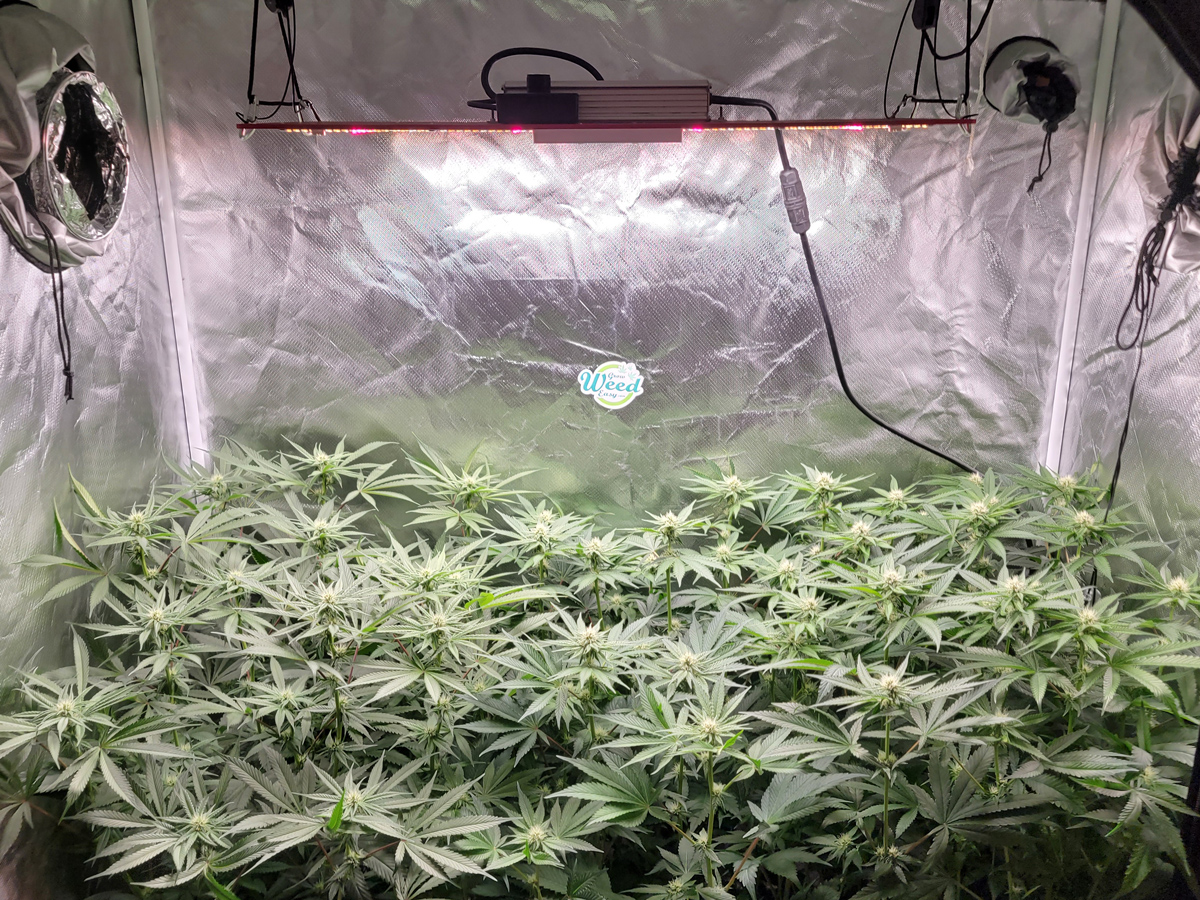
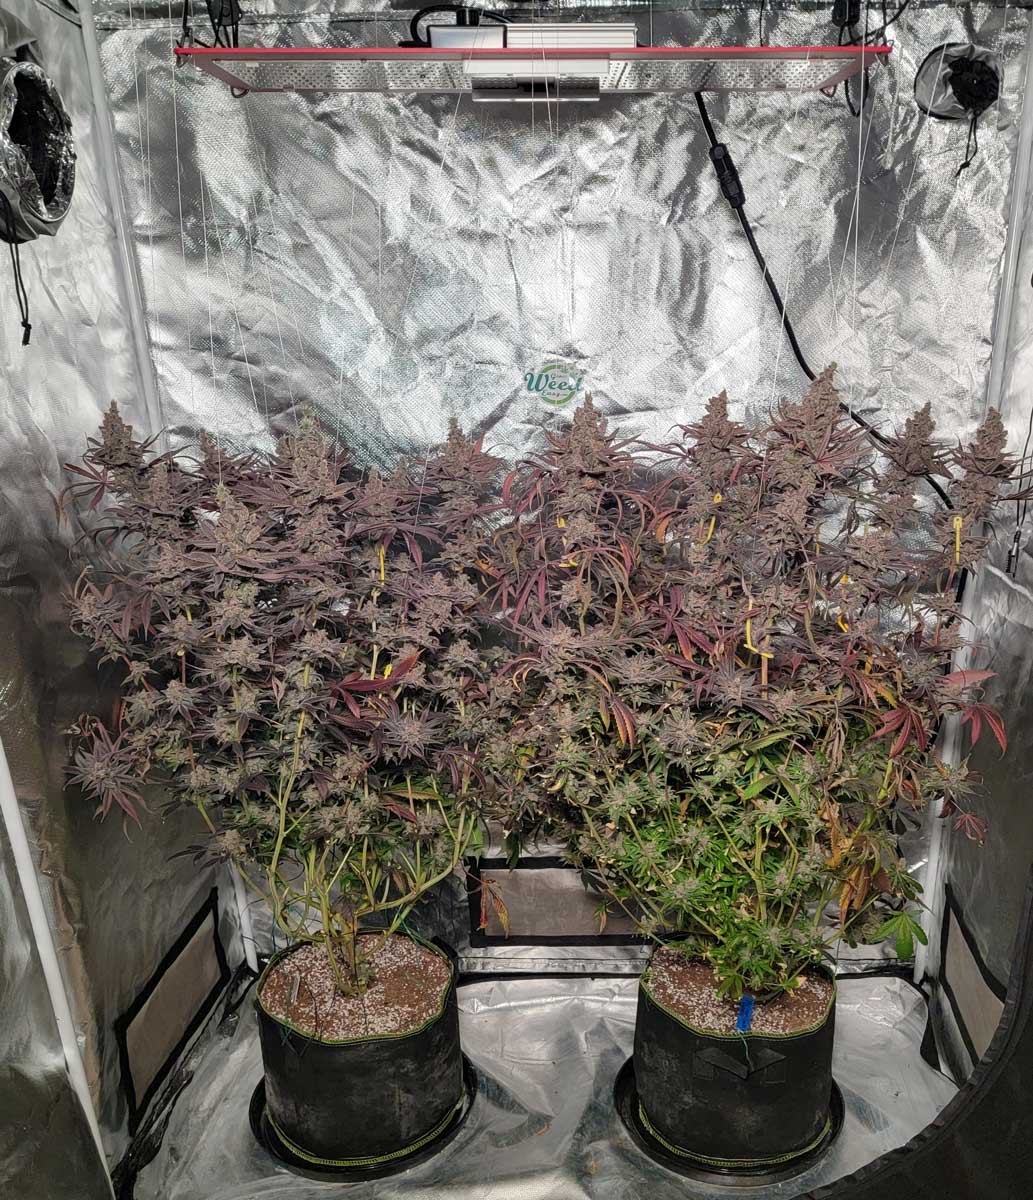
Defoliation tent with LEDs on
Defoliation tent in regular light with a flash to see the bud structure
I should have a harvest date estimate soon. See you next week!
4 of the 6 plants are ready to harvest! – June 8
Big things happening this week!
All strains were described as needing 8-10 weeks of flowering so I figured they’d all be ready to harvest around the same time… However, the two right plants in each tent (Runtz and Wildberry) appear like they will be ready to harvest in just a few days, or before the end of week 8. On the other hand, the Platinum Cookies plant doesn’t look anywhere close to harvest. It’s still 99% white hairs. It looks like it’s got a month or more before buds will be mature, probably closer to 11-12 weeks. I have not grown these strains before, so it’s hard to judge whether this is something the strains would have done anyway, or if this is somehow the plants interacting with the R-spec light in some way. In any case, here’s the plan!
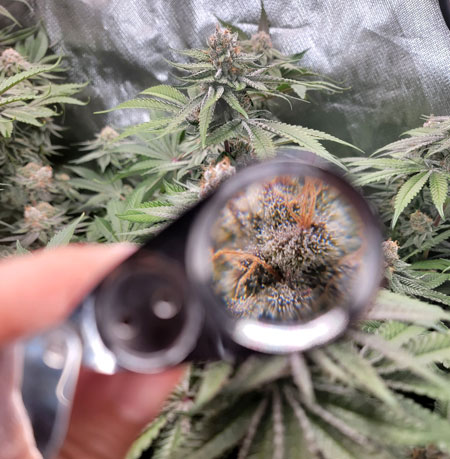
The Runtz and Wildberry plants appear to have hit the harvest window when you look at the glittery trichomes under a magnifier like this handy jeweler’s loupe.
My plan this week is:
- harvest the Runtz and Wildberry plants in each tent, leaving just the two Platinum Cookies plants
- move the two Platinum Cookies plants into the same tent so I can dry the harvested plants in the other tent
- harvest the two Platinum Cookies plants when they’re ready in a few weeks
A cool side bonus is you’ll get a chance to see a defoliated and non-defoliated plant developing right next to each other. Thanks to Sirius for suggesting this as a solution to some of the plants maturing early.
Natural tent with lights on
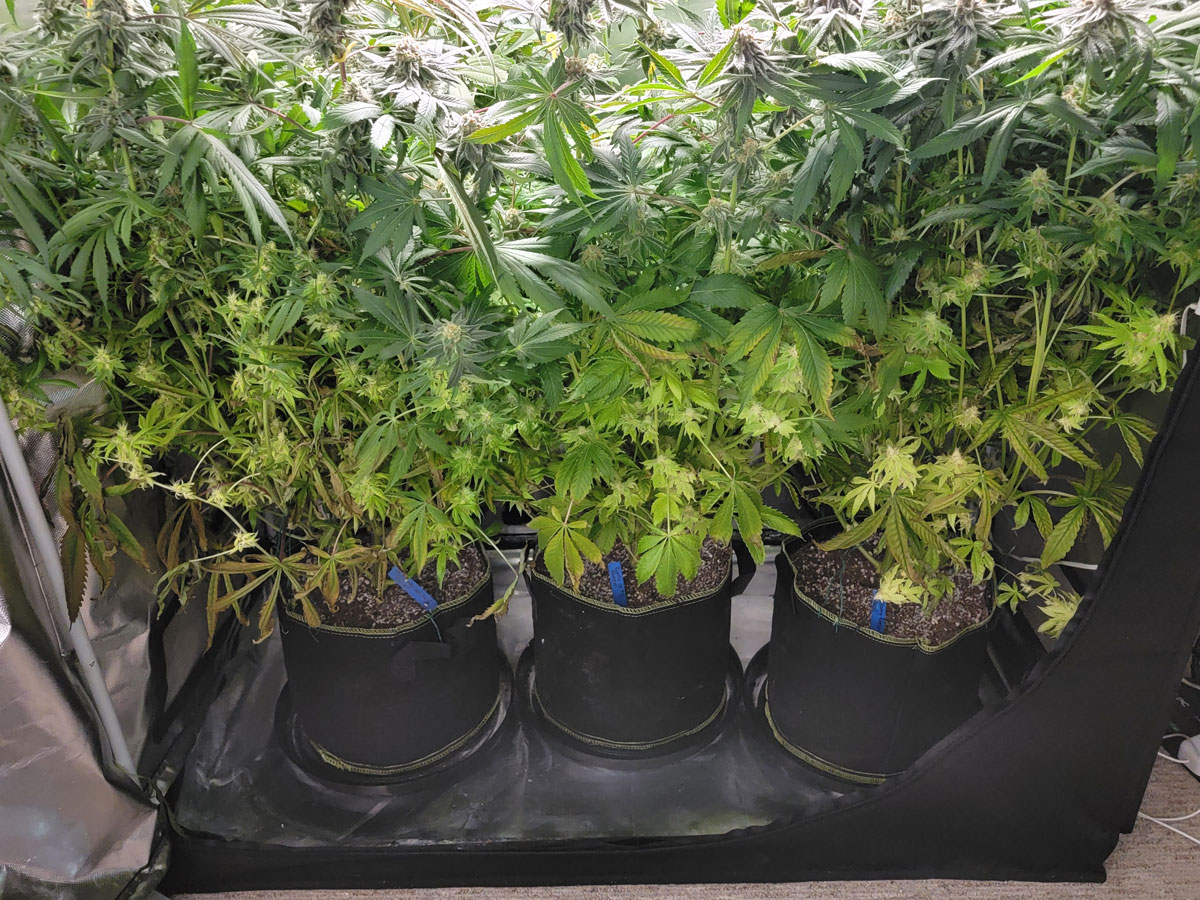
Here’s a closeup of all that dying bottom growth that is living in shadow. It’s so crazy to see a cannabis plant cannibalize the lower parts of itself like this. I normally always remove dying leaves and try to thin out the middle of bushy plants but I wanted to document this incredible process without touching anything just to help understand how the plant responds to long-term darkness.
Now onto the other tent…
Defoliated tent
One difference I’ve noticed is that the top buds in the non-defoliated tent seem to be fatter overall than the tops of the buds in the defoliated tent. However, the buds in the defoliated tent go way further down into the plant. It makes me wonder which tent will end up yielding more in the end, and which will end up with better quality buds overall.
Natural tent (top buds appear shorter but fatter)
Defoliated tent (top buds appear longer but thinner)
I start getting really excited when we get this close to the end of an experiment. I have learned a lot from this grow already, and I can’t wait to share everything I’ve learned with you after I get all the results (yields, cannabinoids, terpenes, density, smoke tests, etc.).
Stay tuned for the next update! I expect there to be 4 fewer plants when you see pictures next week! I’ll make sure to take pictures of all the buds just before harvest so you can see exactly what they looked like.
And then there were two – June 12
This week, four of the six plants were harvested and are drying. Let’s check out today in pictures!
Natural tent
Defoliated tent
Before we look at the harvest pictures, let’s look at some of the buds!
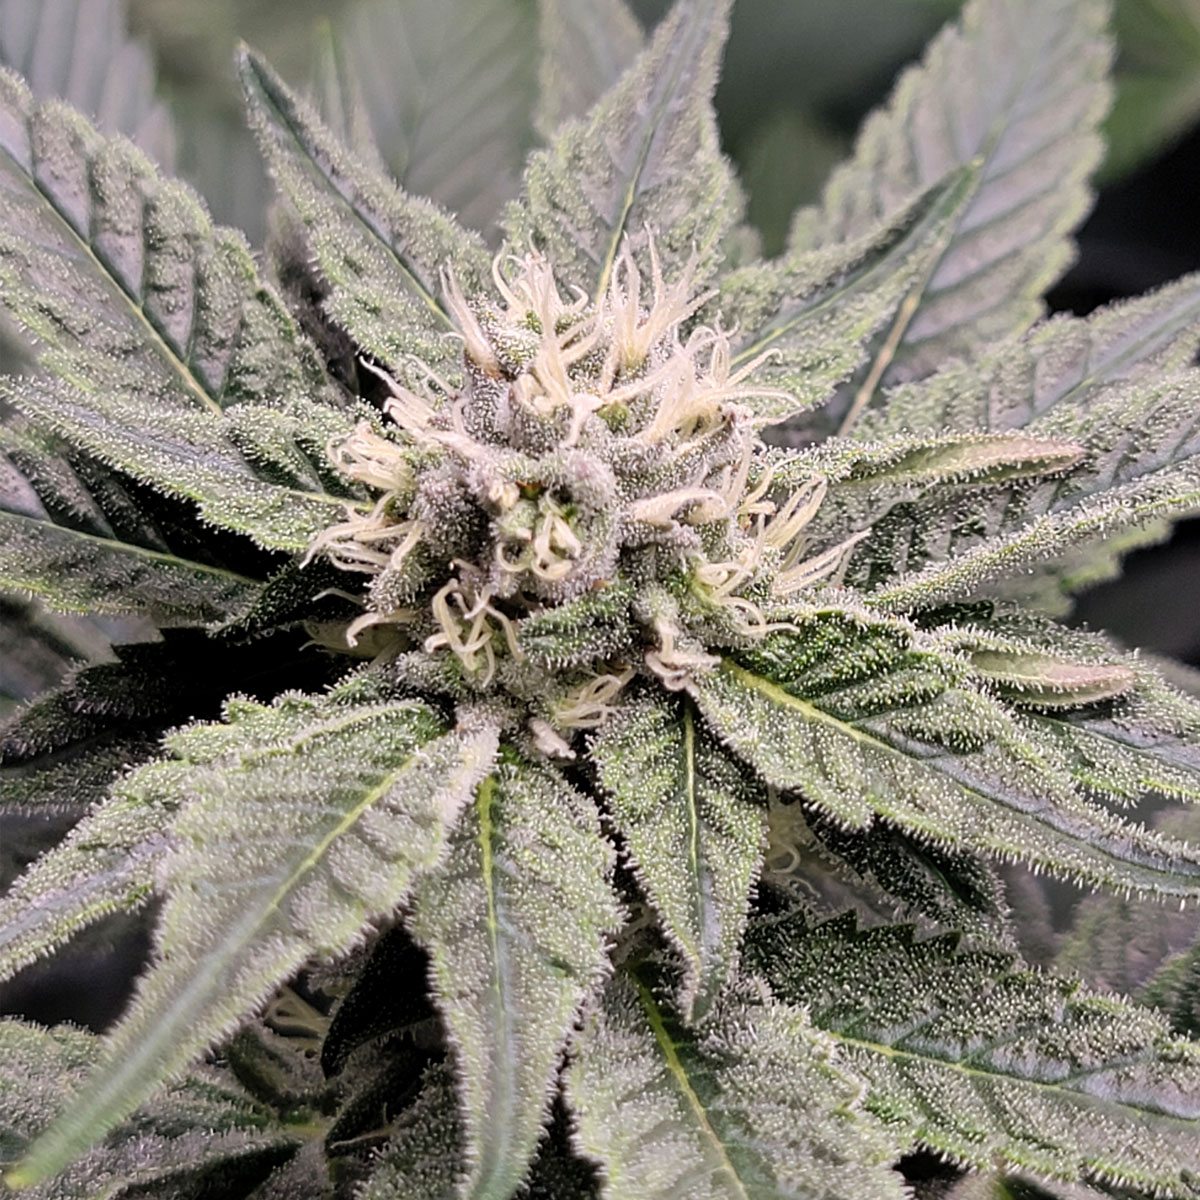
Wildberry (natural tent)
Wildberry (defoliation tent)
Runtz (natural tent)
Runtz (defoliation tent)
Platinum Cookies (natural tent)
Platinum Cookies (defoliation tent)
Here’s a snapshot of the defoliation tent as we were mostly through the harvest.
Just one plant left from each tent

I moved the remaining Platinum Cookies plants together. I think it’s pretty easy to see which is which. It’s neat to see them next to each other like this.
Two Platinum Cookies plants. Left plant is defoliated, right plant was untouched after it started flowering.
I’m using the other tent to dry all the buds

Can’t wait to see how the Platinum Cookies plants look next week. I set the light 18″ away and I’m going to let these beauties take their sweet time until they’re ready to harvest. I can tell both of these plants are going to produce a TON of weed.
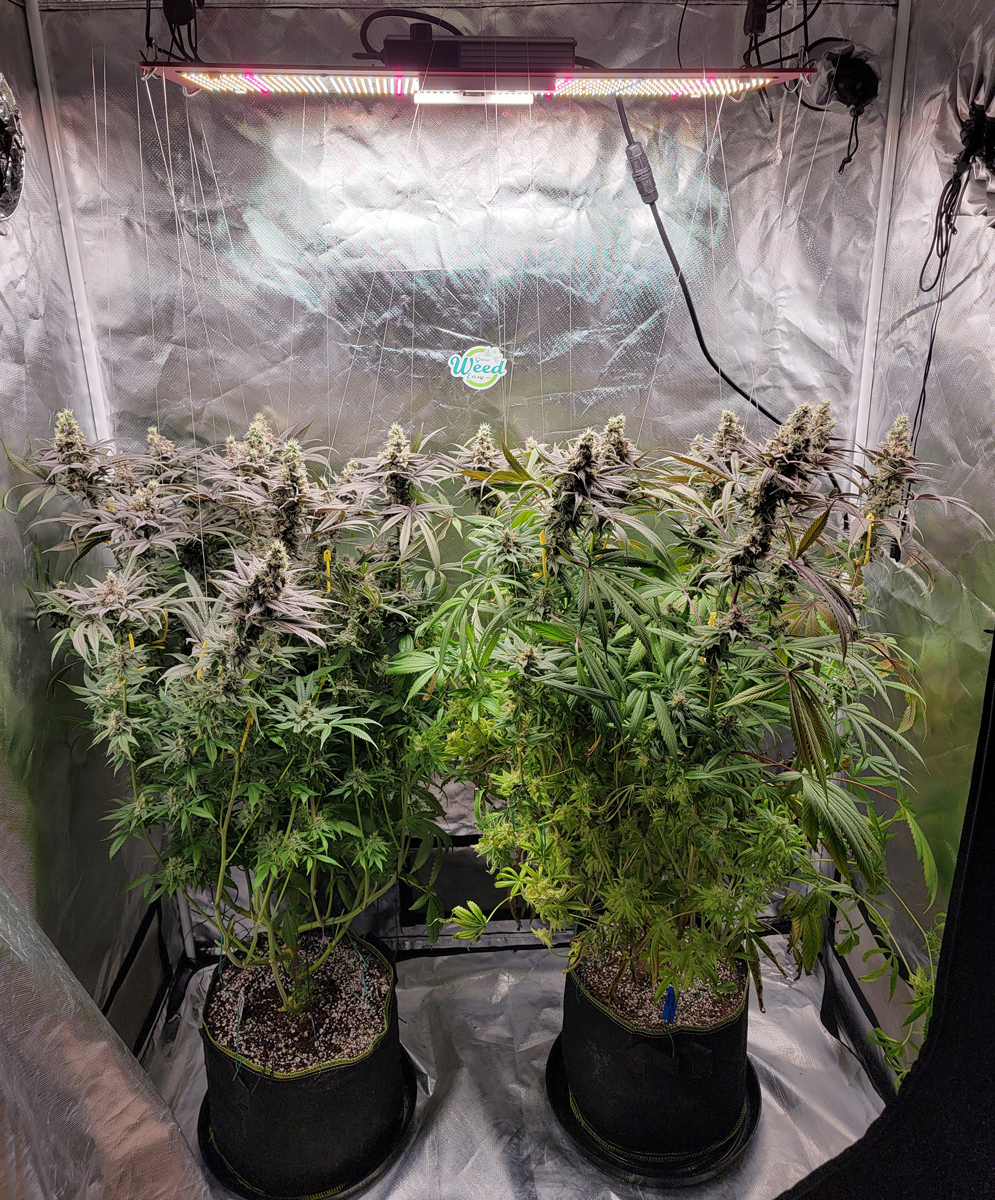
Two plants developing – June 25
The two remaining plants are chugging along and looking much closer to harvest, but there’s still a while left to go. Maybe 2-3 weeks? It’s hard to say because I haven’t grown this strain before.
 Here they are with the lights off.

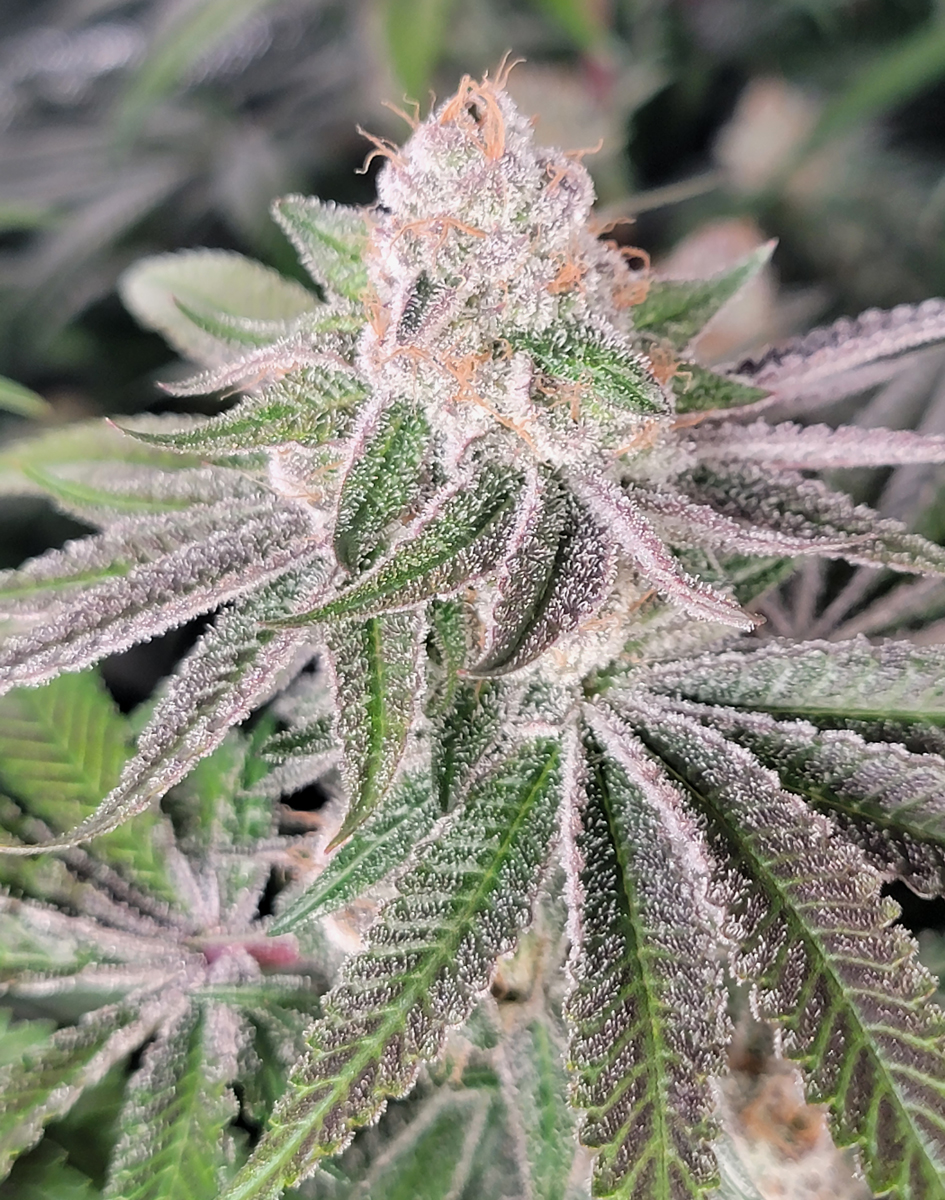
I’ve noticed that all the top leaves are turning purple, which is pretty common under LED grow lights, though a few leaves on the bottom/middle of the plant that was never defoliated (bushy right plant) are turning yellow instead of purple. Seeing purple or yellow leaves is pretty common by the time you hit almost 10 weeks in the flowering stage especially under LED grow lights. I haven’t seen any signs of stress on the buds so I think this is a part of the natural maturation process as opposed to the sign of a deficiency.
The buds look incredible!
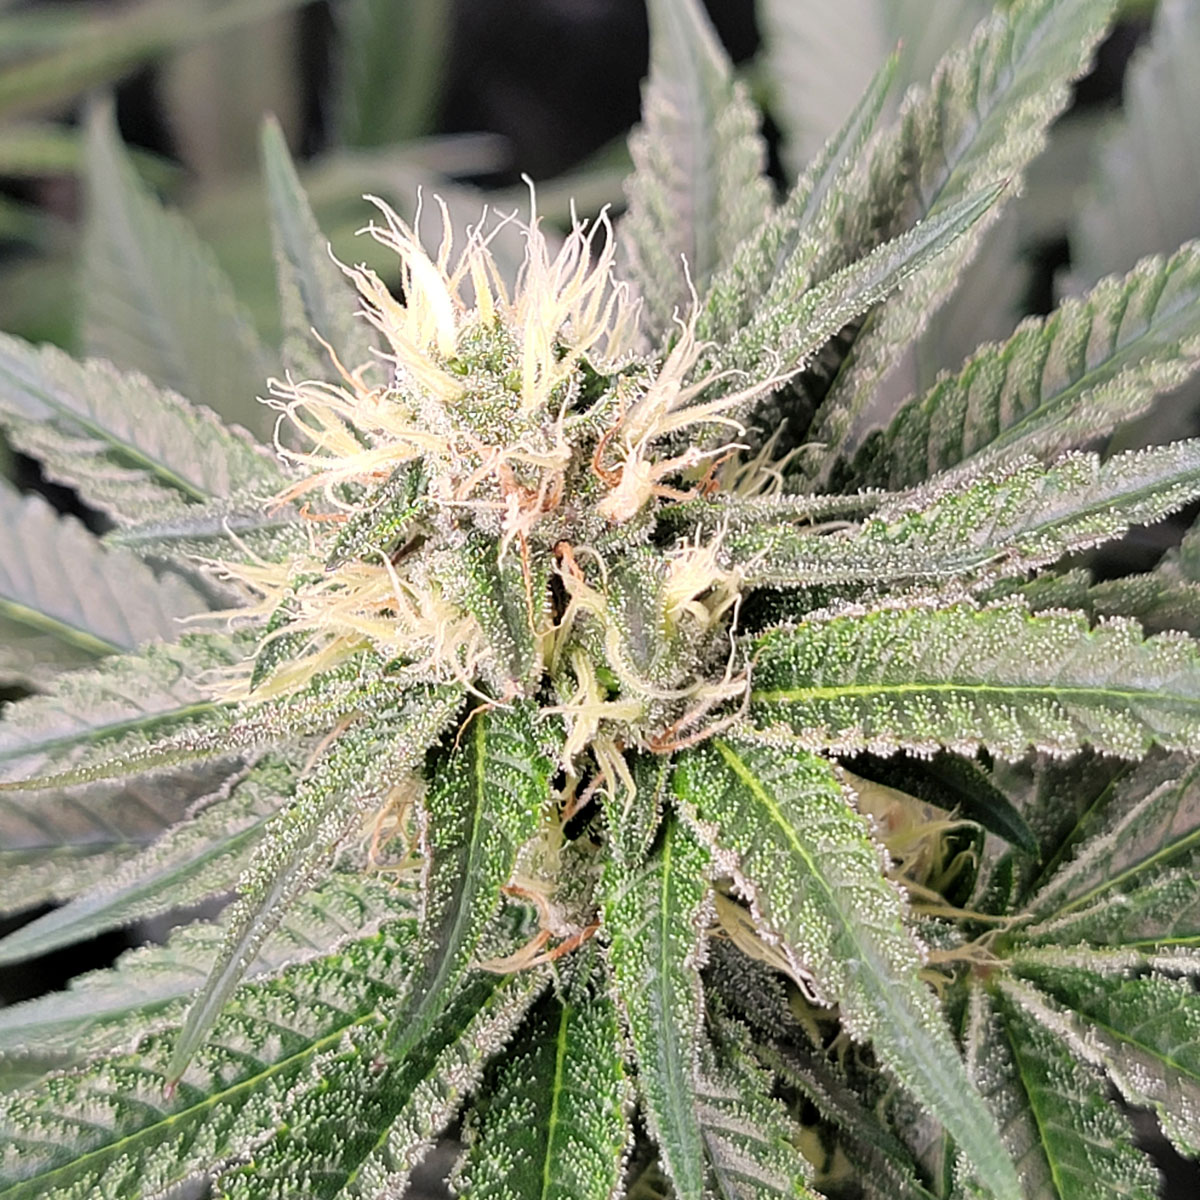
Bud closeup on the natural plant
Bud closeup from the defoliated plant
Not much else to report. I’m just waiting on these two. 🙂
See you next week!
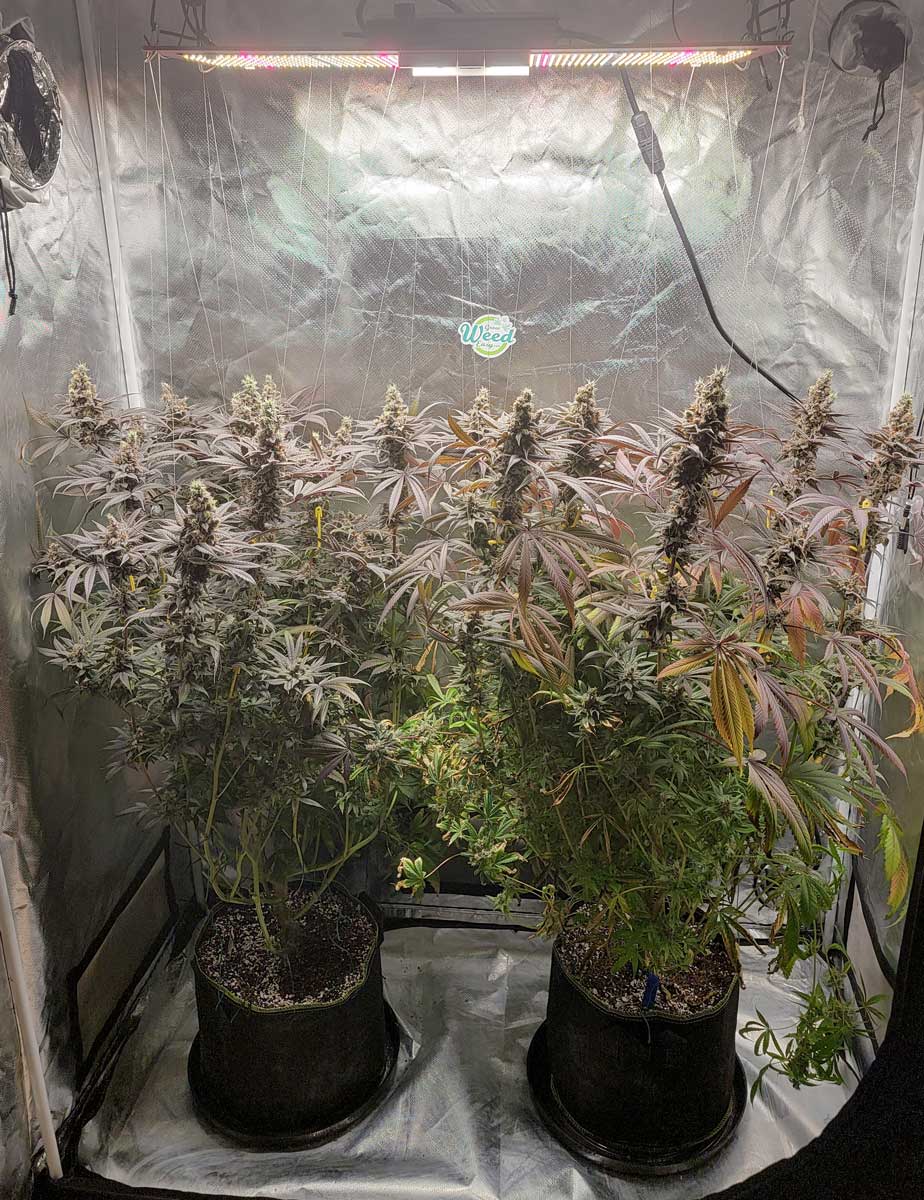
Odds and ends – July 2
The buds on the two plants are really thickening up!
Here they are in natural light

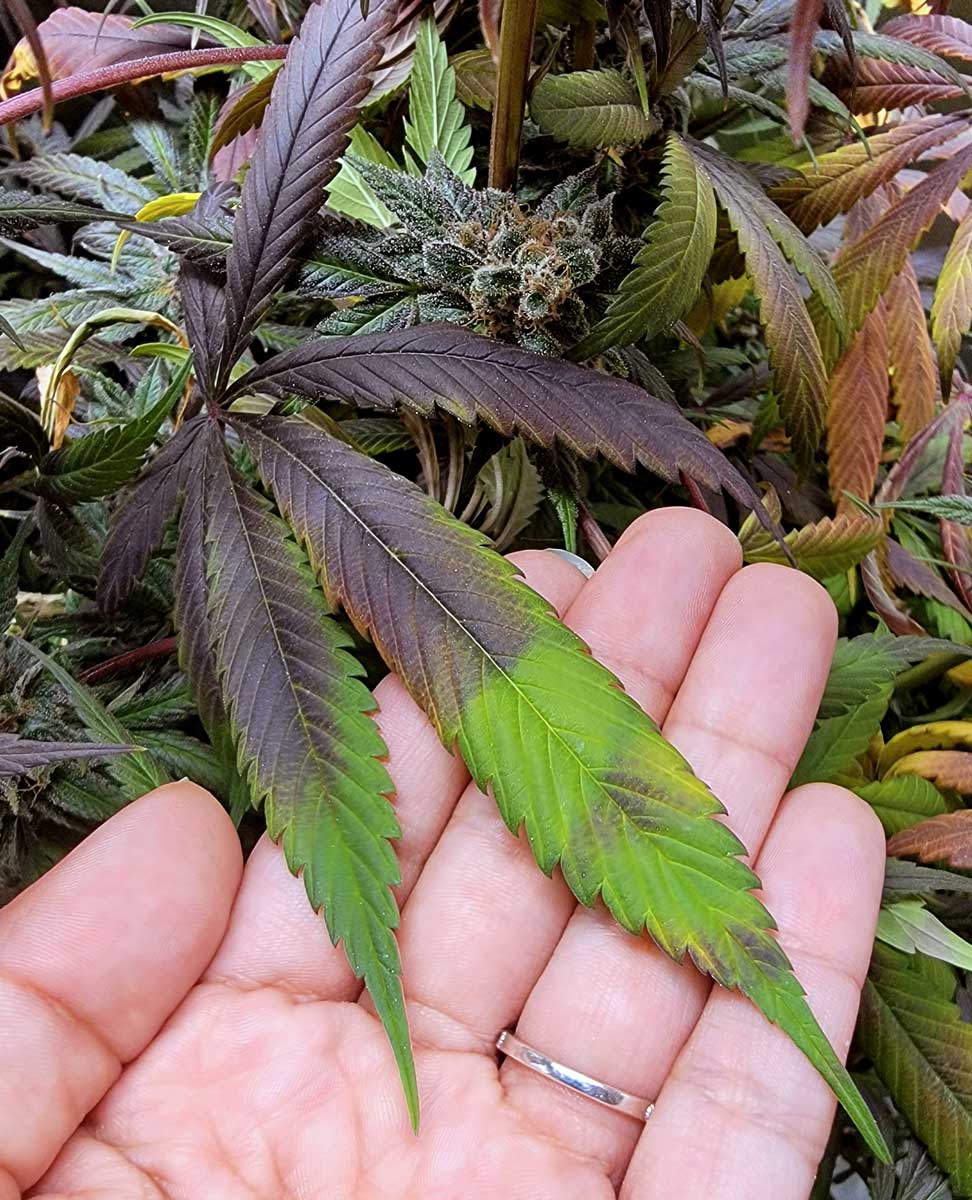
As you can see from the pictures above, all the leaves close to the light have turned purple, which is really common under LED grow lights. I found one leaf that was half-covered by another leaf, and I feel like that really shows how much a difference the light makes!
The parts of the leaf that were hidden by another leaf stayed green.
We’re at the home stretch!
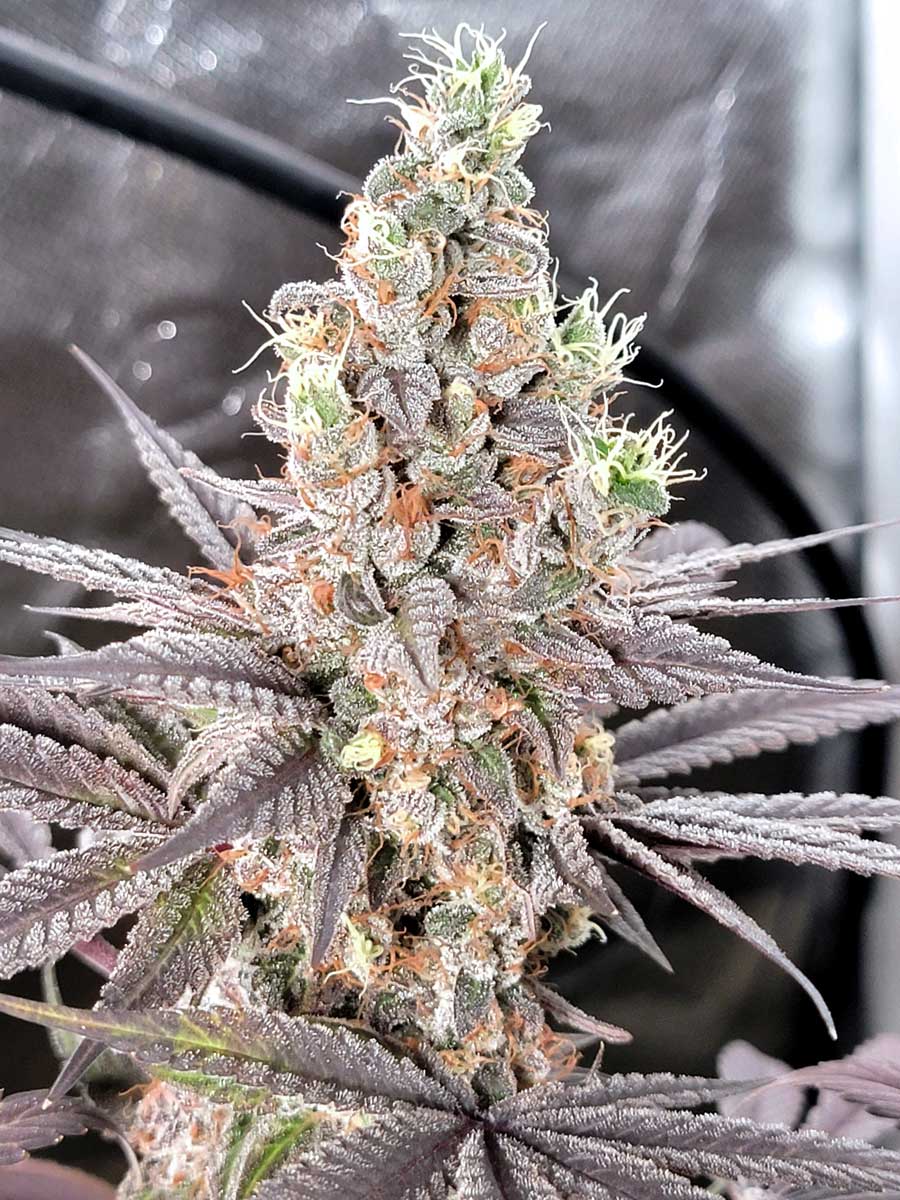
Almost there? – July 6
The buds look like they’re almost ready to harvest!
Here are those main buds in natural light.
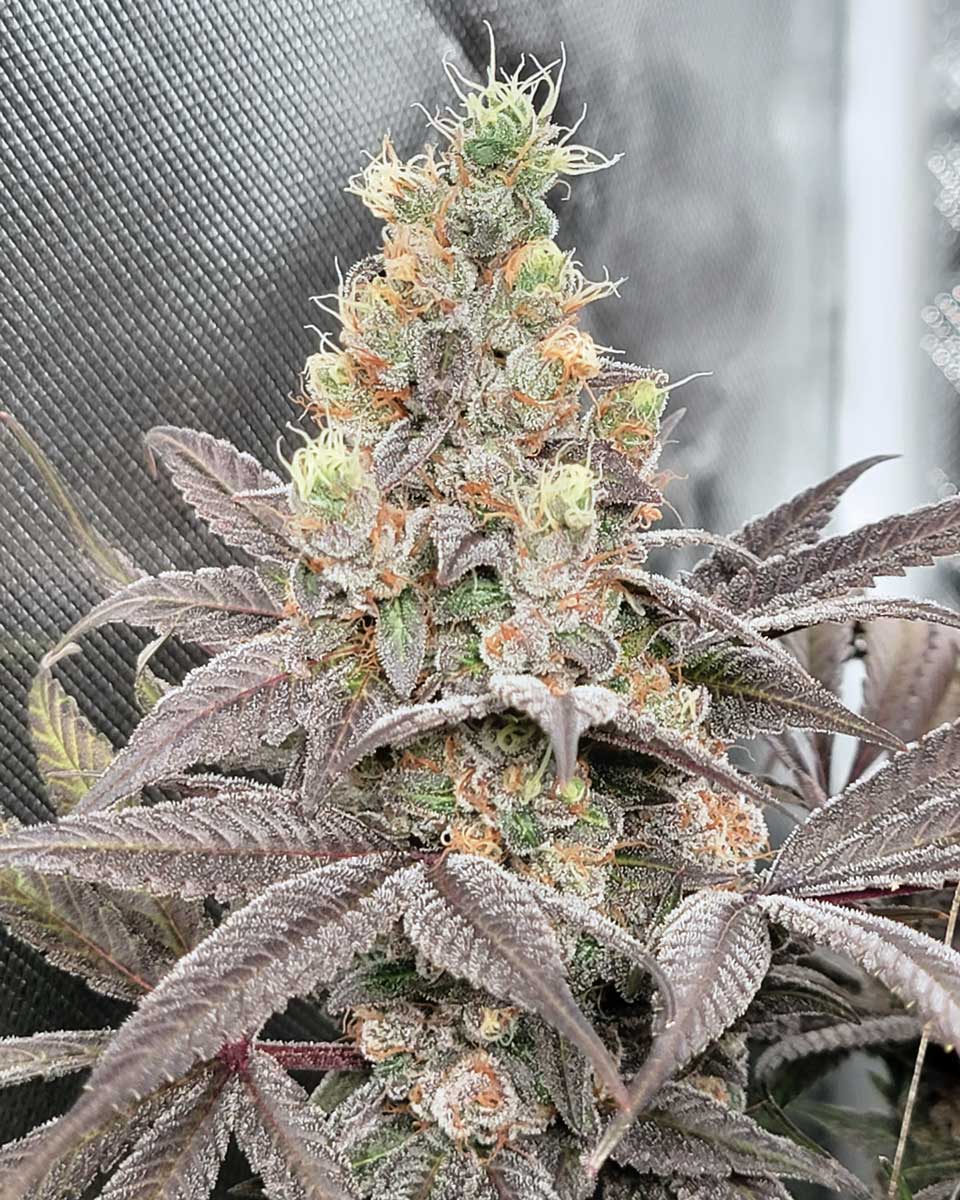
 So. Much. Purple.
Can’t wait to see if they’re ready to harvest next week!
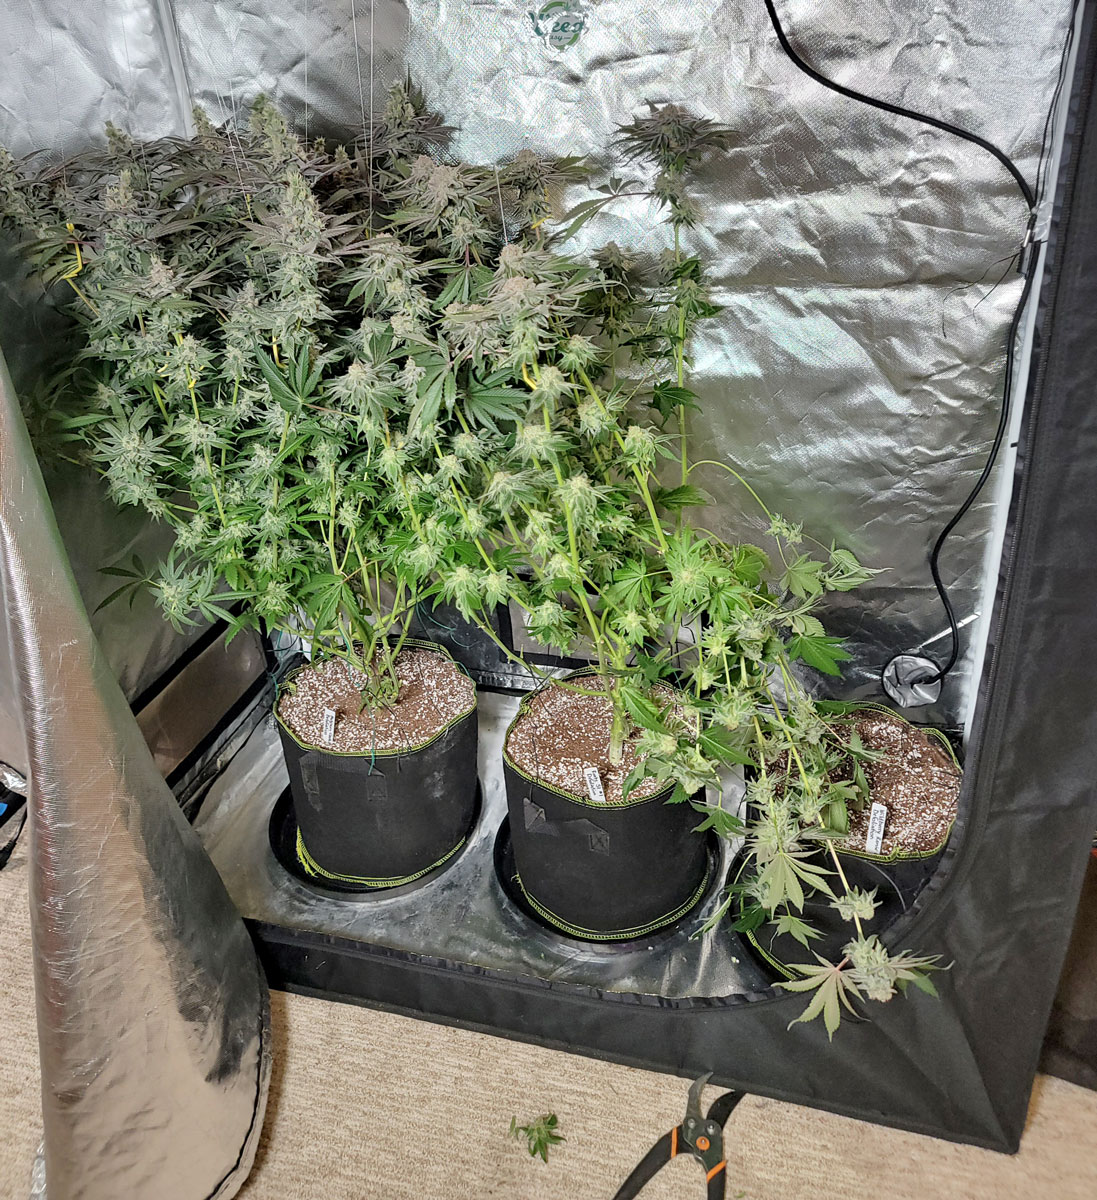
Harvest day! – July 14
Harvest day!!!!
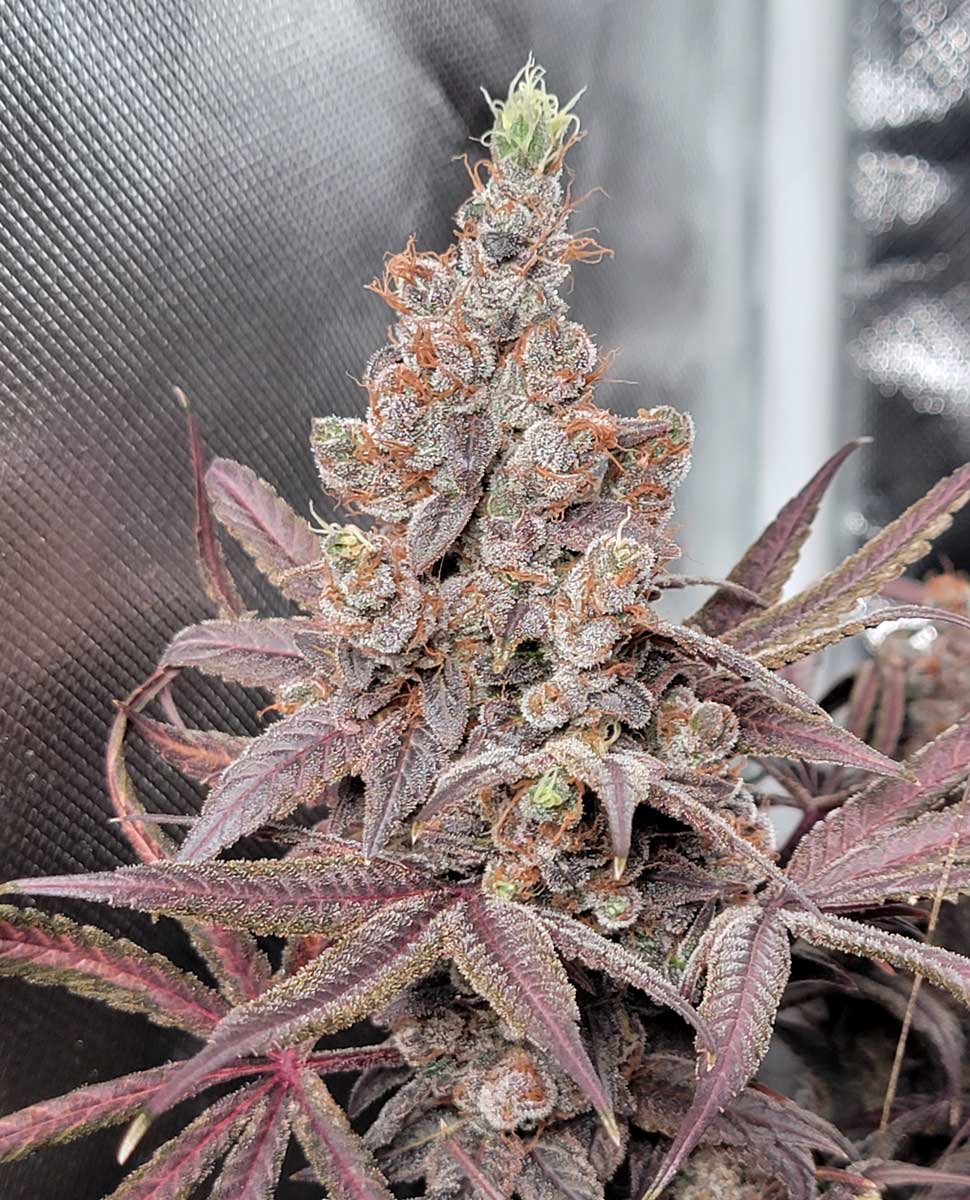
Platinum Cookies plants just before harvest (left was defoliated, right was left to grow naturally)
In natural light
I have no idea which is going to end up yielding more. Normally I have a feeling from looking at the plants, but I truly don’t know in this case.
Non-defoliated plant
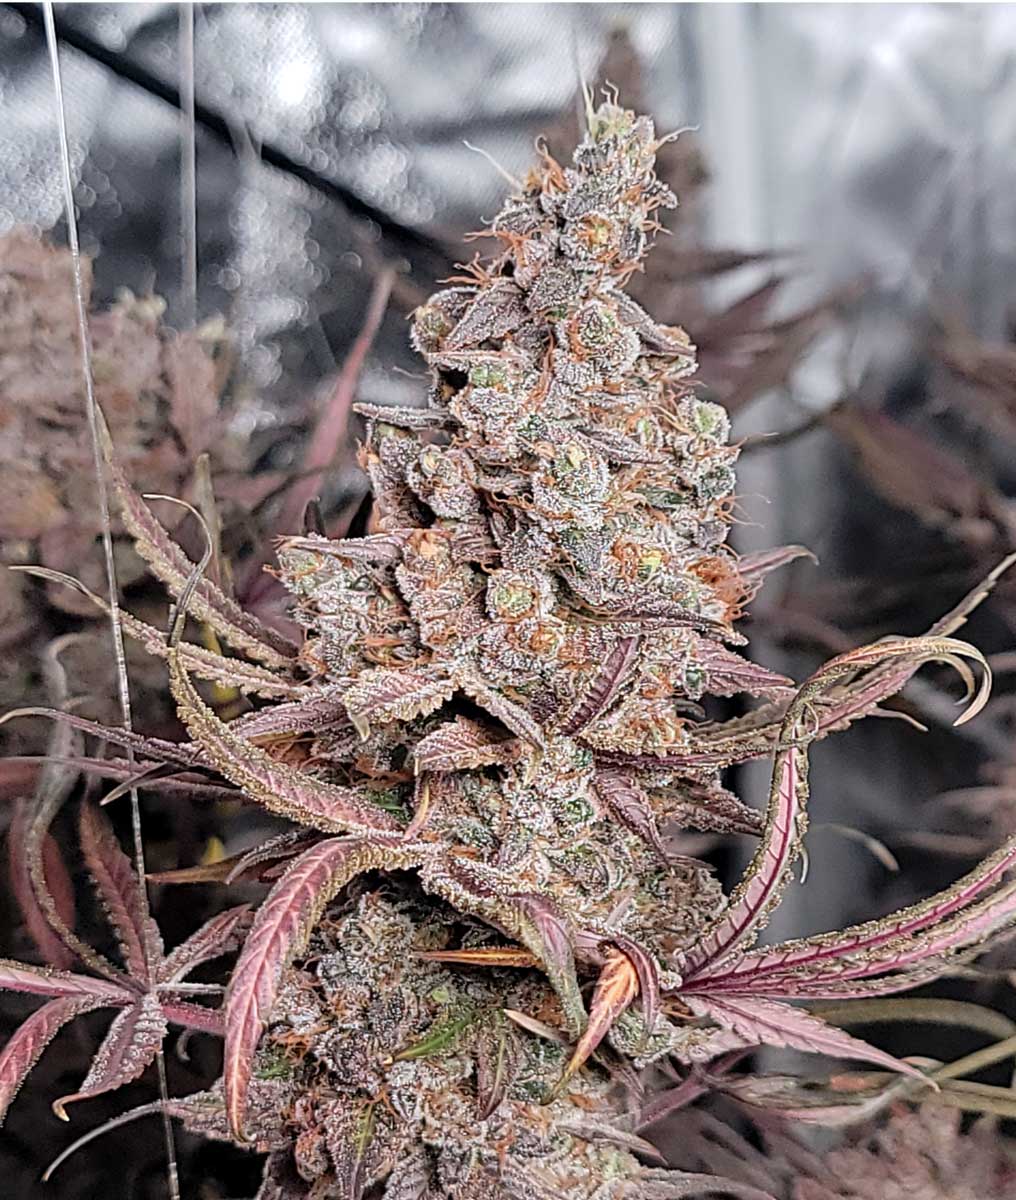
Defoliated plant’s buds look almost exactly the same
Buds hanging to dry (wow, just two plants!)
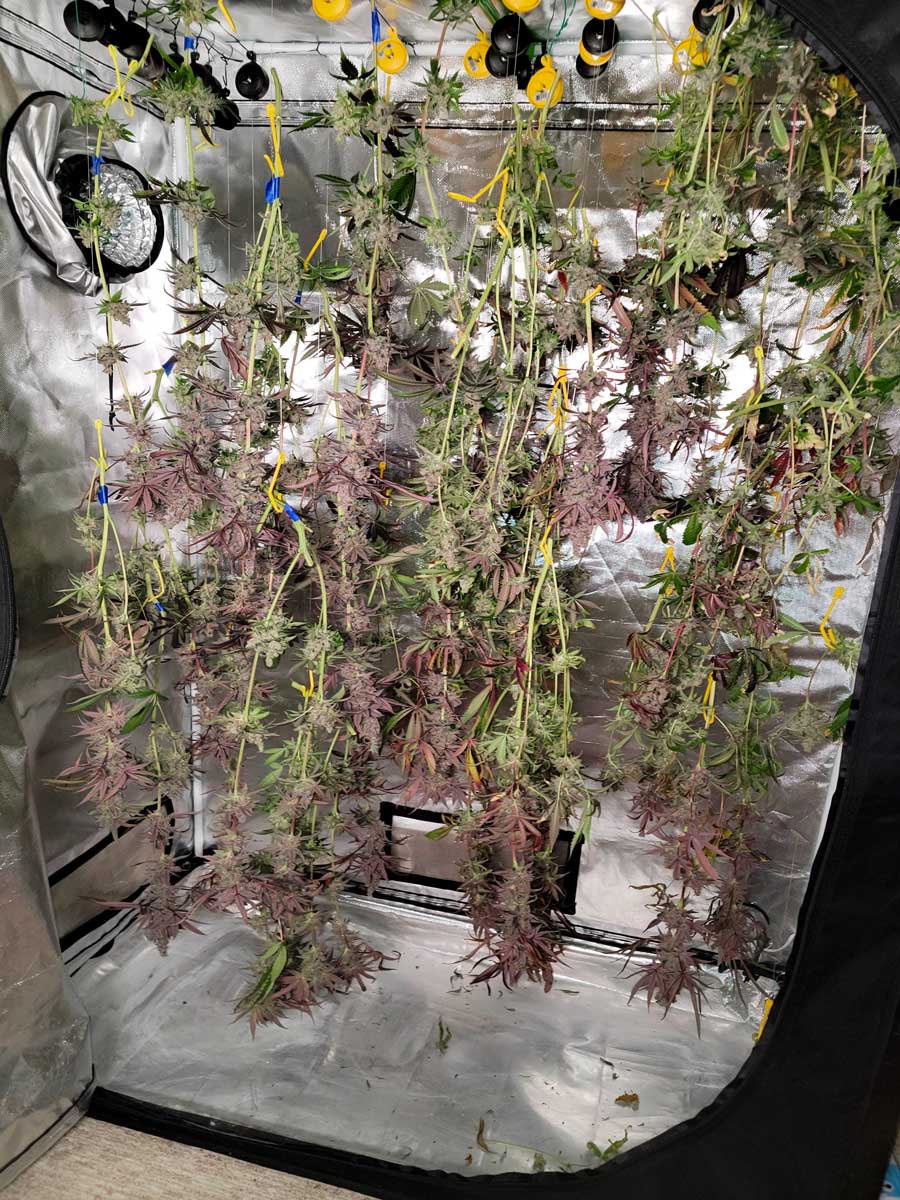
Check back to learn the final weights! And then it’ll be time for the lab tests, which may be my favorite part of any side-by-side experiment.
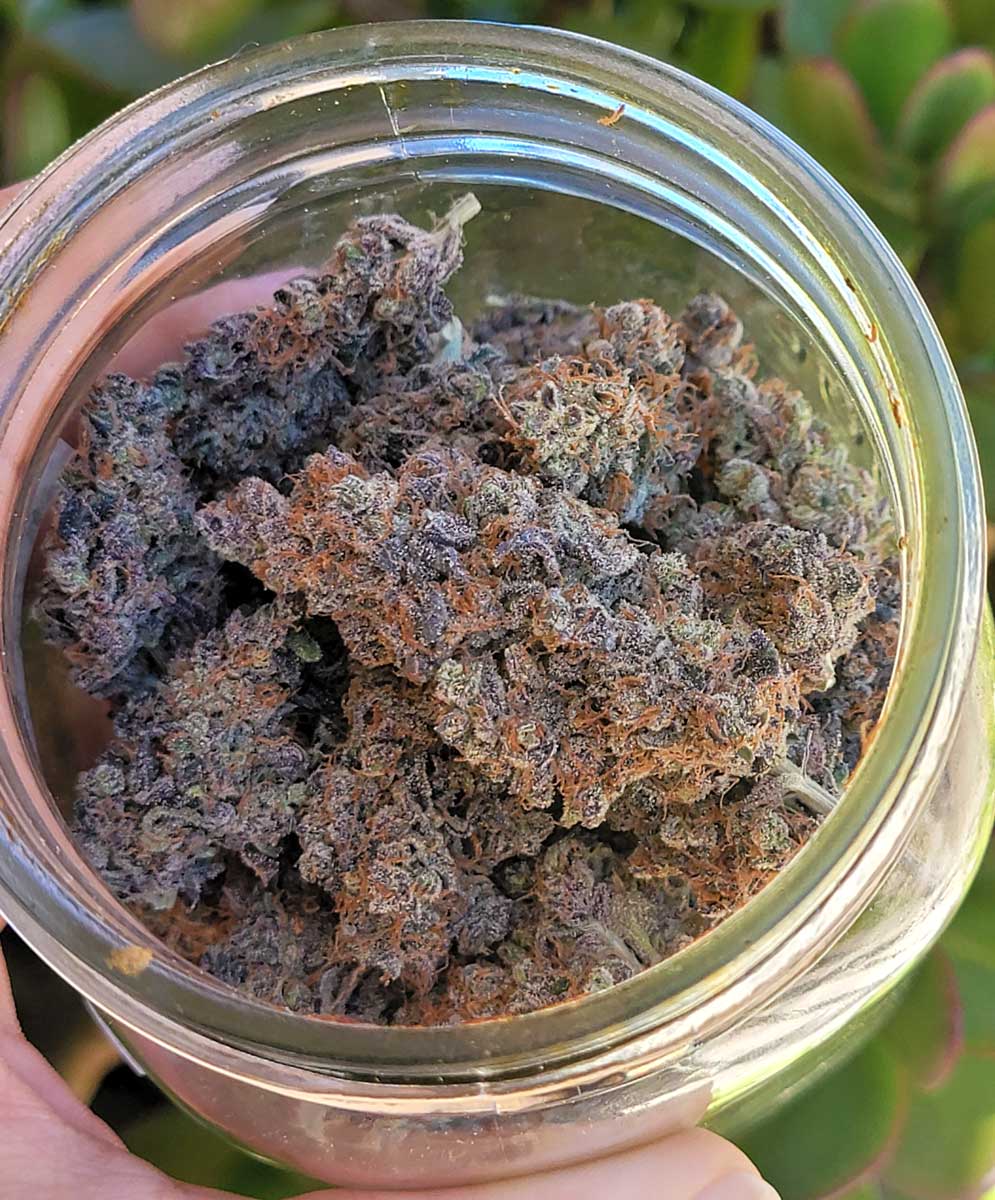
July 23 – Buds sent to the lab!
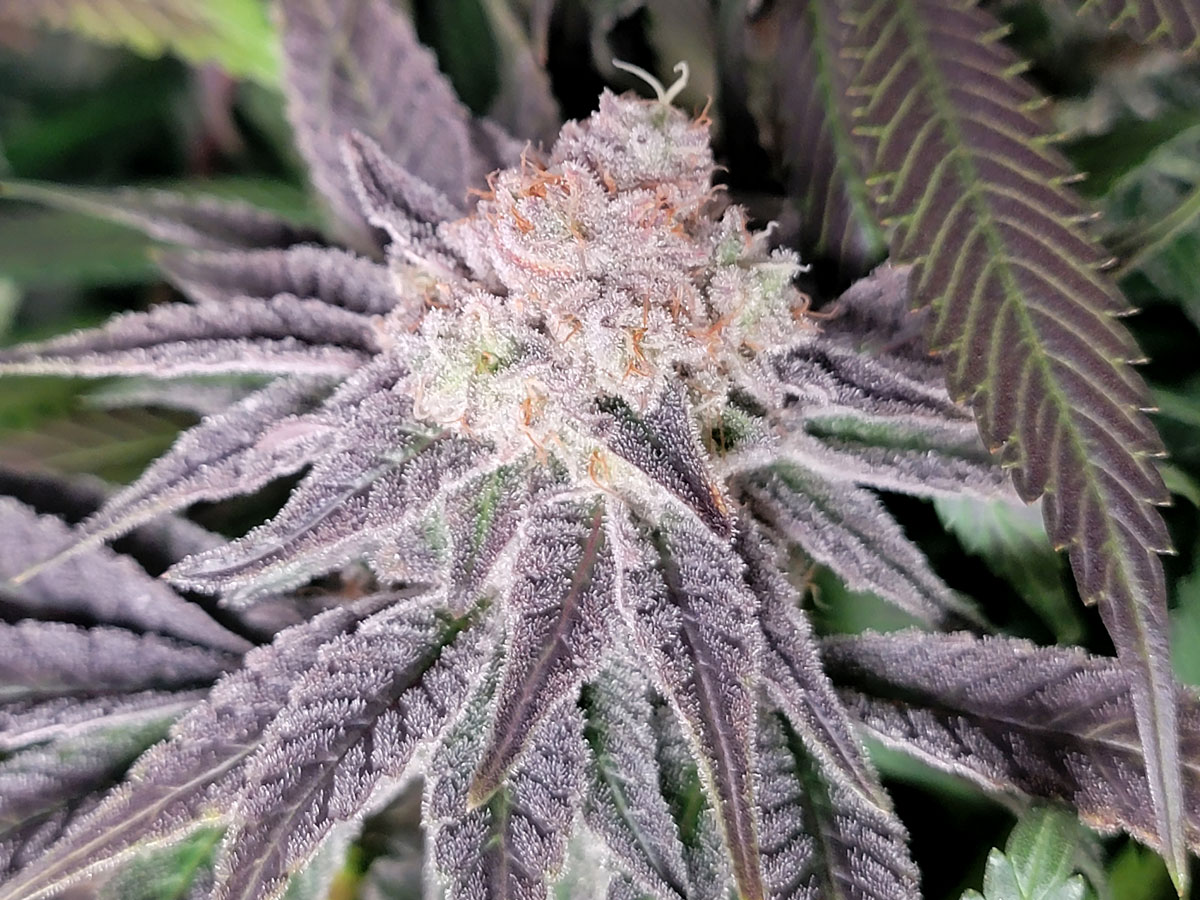
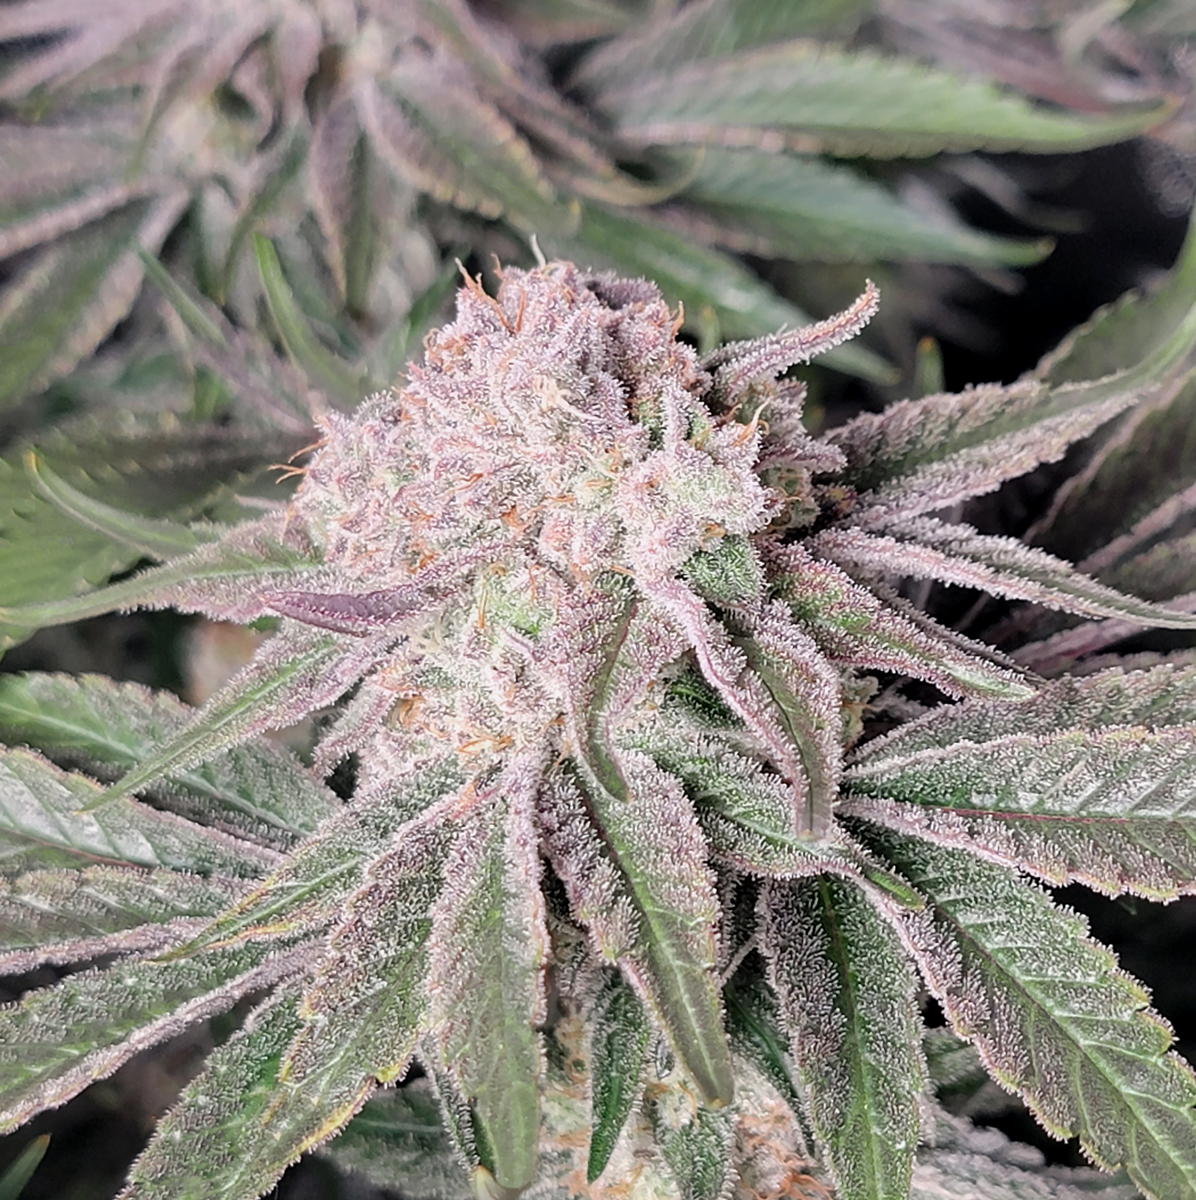
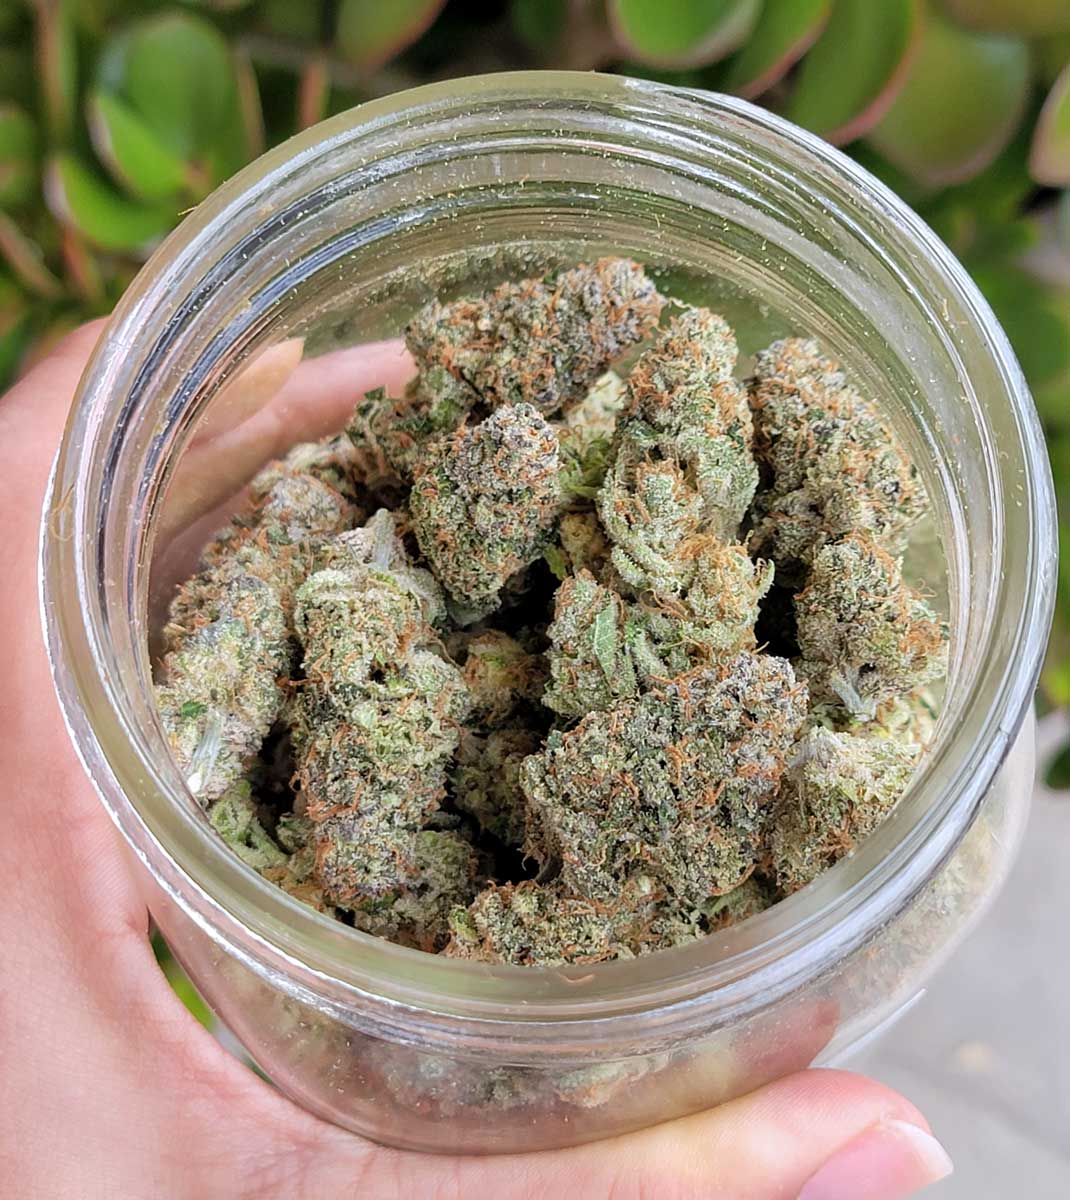
Here’s a preview of some of the buds after they were dried and jarred. I’ve sent samples to the lab and should have the final results of the whole grow journal (weights, THC, terpenes, smoke test, and more!) for you next week. Visually, the buds all look the same. But lets see what the lab as to say.
Wildberry
Runtz
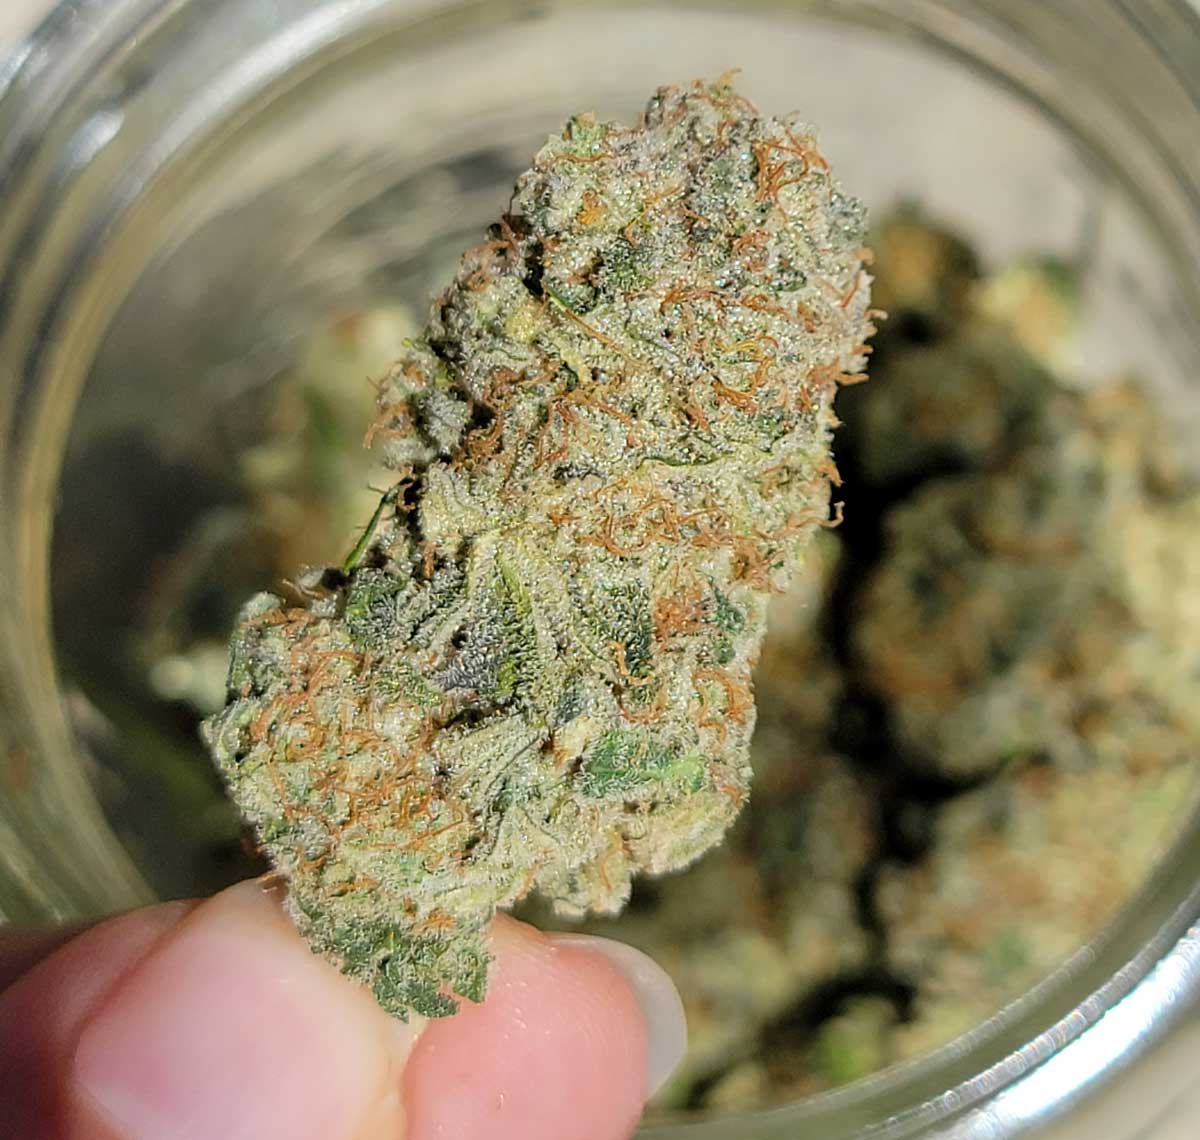
Platinum Cookies
August 6
Lab results are in!
Natural tent
- Yields: 274.43 g (9.68 oz) – about 0.9 gram/watt
- Premium buds from top of plant: 188.14 g (6.64 oz)
- Bleached buds from the bottom of plant: 86.29 g (3.04 oz)
- Terpenes: 12.91 mg/g average
- 22.09% THC (Average)
Defoliation tent
- Yields: 298.68 g (10.54 oz) – about 1 gram/watt
- Average Terpenes: 12.74 mg/g
- 23.45% THC (Average)