by Nebula Haze
Brown spots on cannabis leaves… the bane of home growers! Brown or bronze markings on leaves are extremely common cannabis growing symptoms. Luckily, it is usually simple and easy to fix once you determine the root cause.
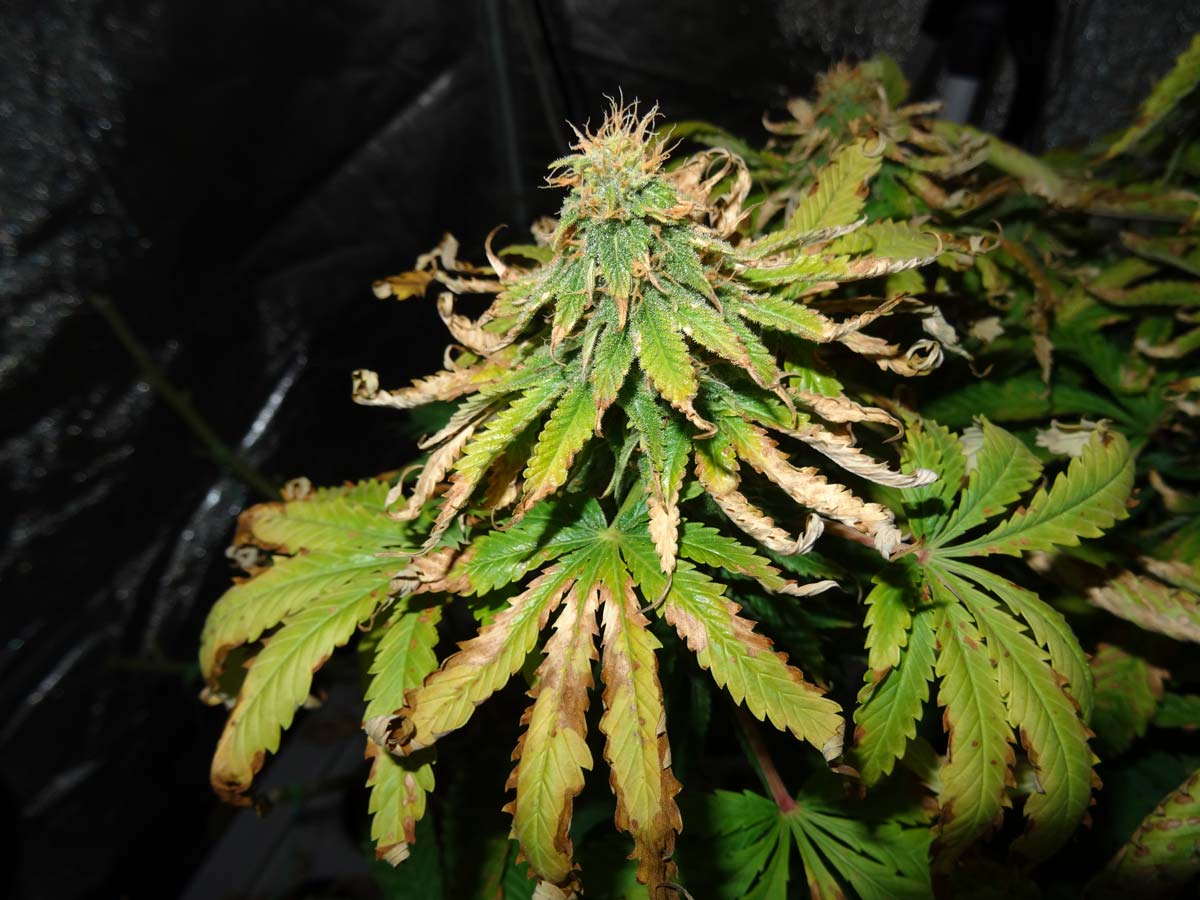
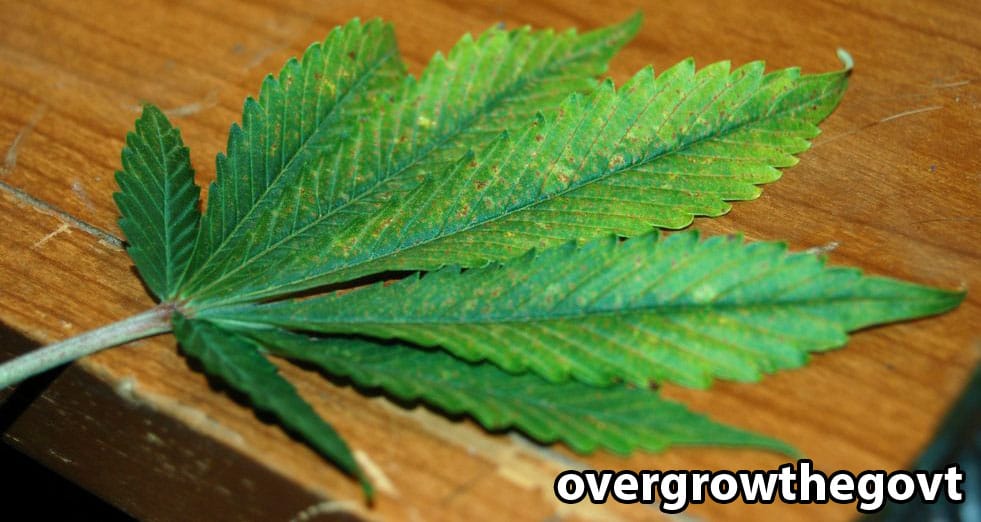
Diagnosing brown leaves can be difficult because many cannabis plant problems can cause similar symptoms. Get the lowdown today. Note: these brown markings were caused by too much heat and light.
If you’ve been frustrated by this problem, you’re not alone. The first major cannabis growing problem I ever struggled with was scorched brown spots on leaves. I experienced Issue #2 on this list for almost a year before I figured out the remarkably easy solution. Since I started growing in 2008, I’ve experienced just about every problem on this list and slowly figured out the solutions. Now my plants consistently grow and healthy, and I want to make that true for your plants, too.
I haven’t seen someone put all the most common triggers and solutions to brown spots on cannabis leaves in a tutorial before, so I’ve compiled this list for you. I hope this list of problems and solutions with pictures helps you as much as it would have helped me when I started growing 🙂
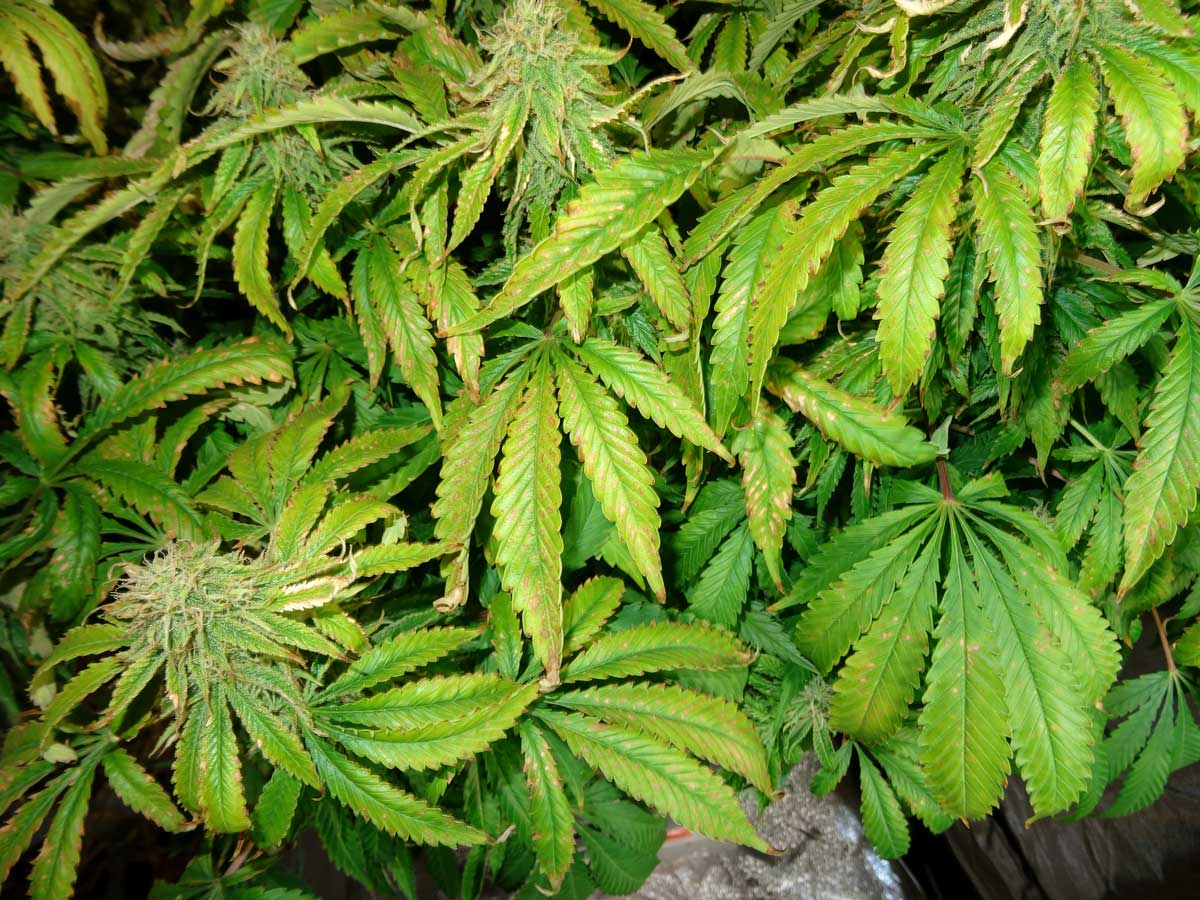
1.) Low PH (especially under 6 pH)
Regardless of whether you’re growing in soil, coco, or hydro, the Number 1 reason growers see brown marks is the pH is too low at the roots (typically under 6 pH).
The following symptoms were all caused by low pH at the roots
Some growers will naturally have low pH (acidic) water, which can cause these symptoms if you don’t use a PH Up solution to correct the issue.
Certain nutrients or soils can reduce the pH, so it’s always good to test the pH even if you’re starting with great water.

These symptoms are common when using a lot of PH Down solution (for example to correct very high-pH tap water) because it can build up in your grow medium over time. This can even happen if using “natural” PH Down like citric crystals.
Test the pH of your runoff water to find out if this is happening. If the water coming out the bottom of the pot tests at a much lower pH than the water you put it, that’s a sign that there is low pH at the roots.
Learn how to test and adjust the pH. This is a great habit to get into as it not only prevents nutrient problems but the right pH may even increase plant growth and yields.
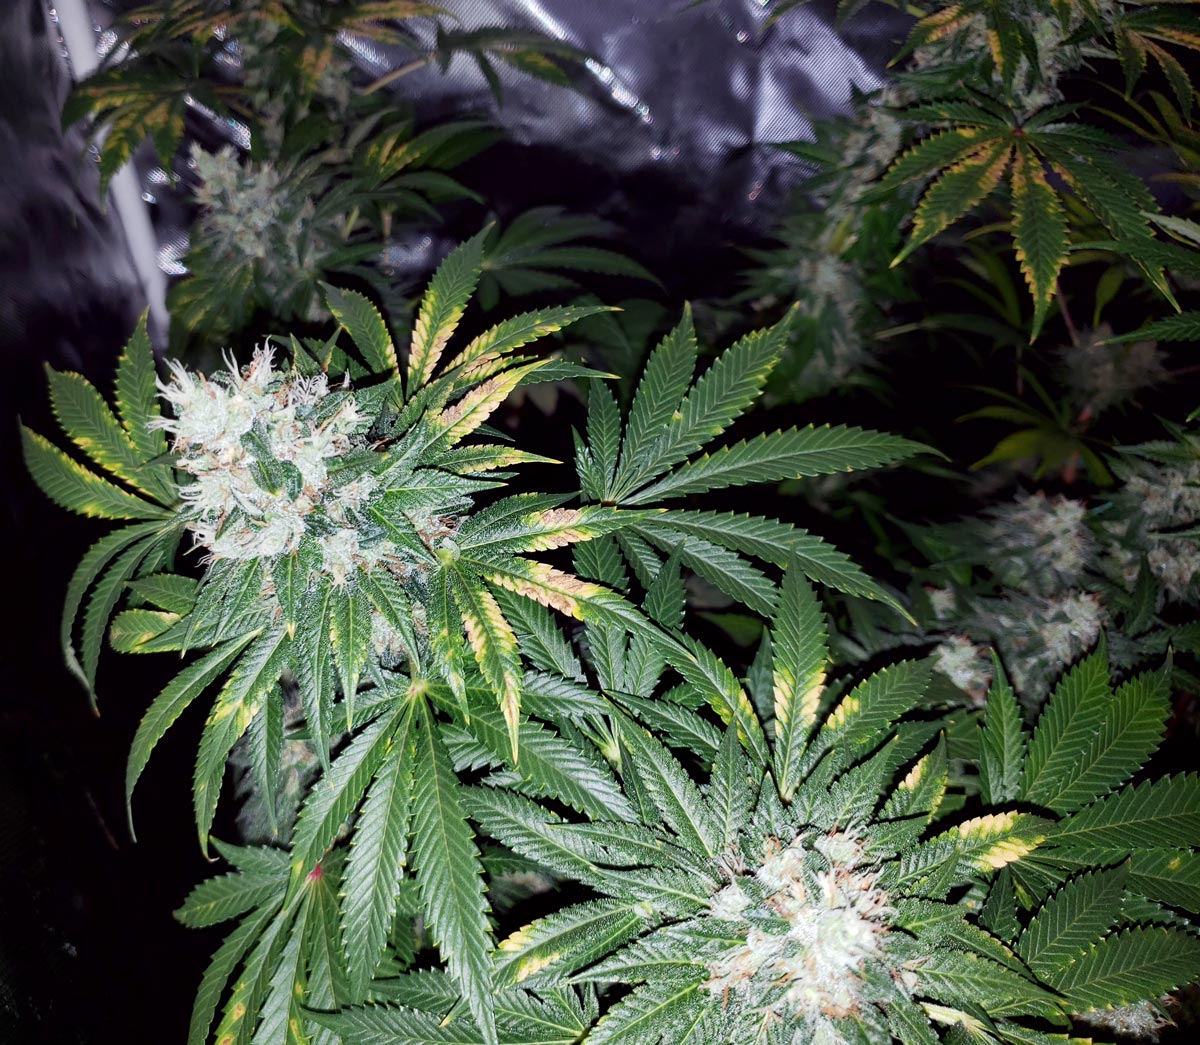
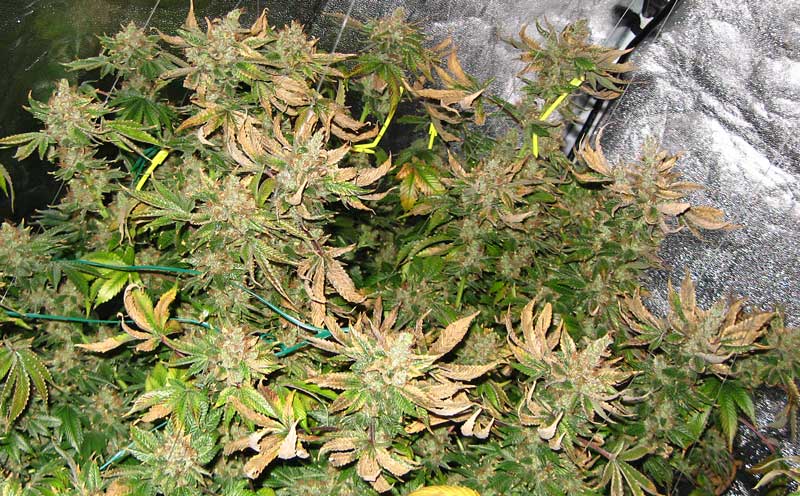
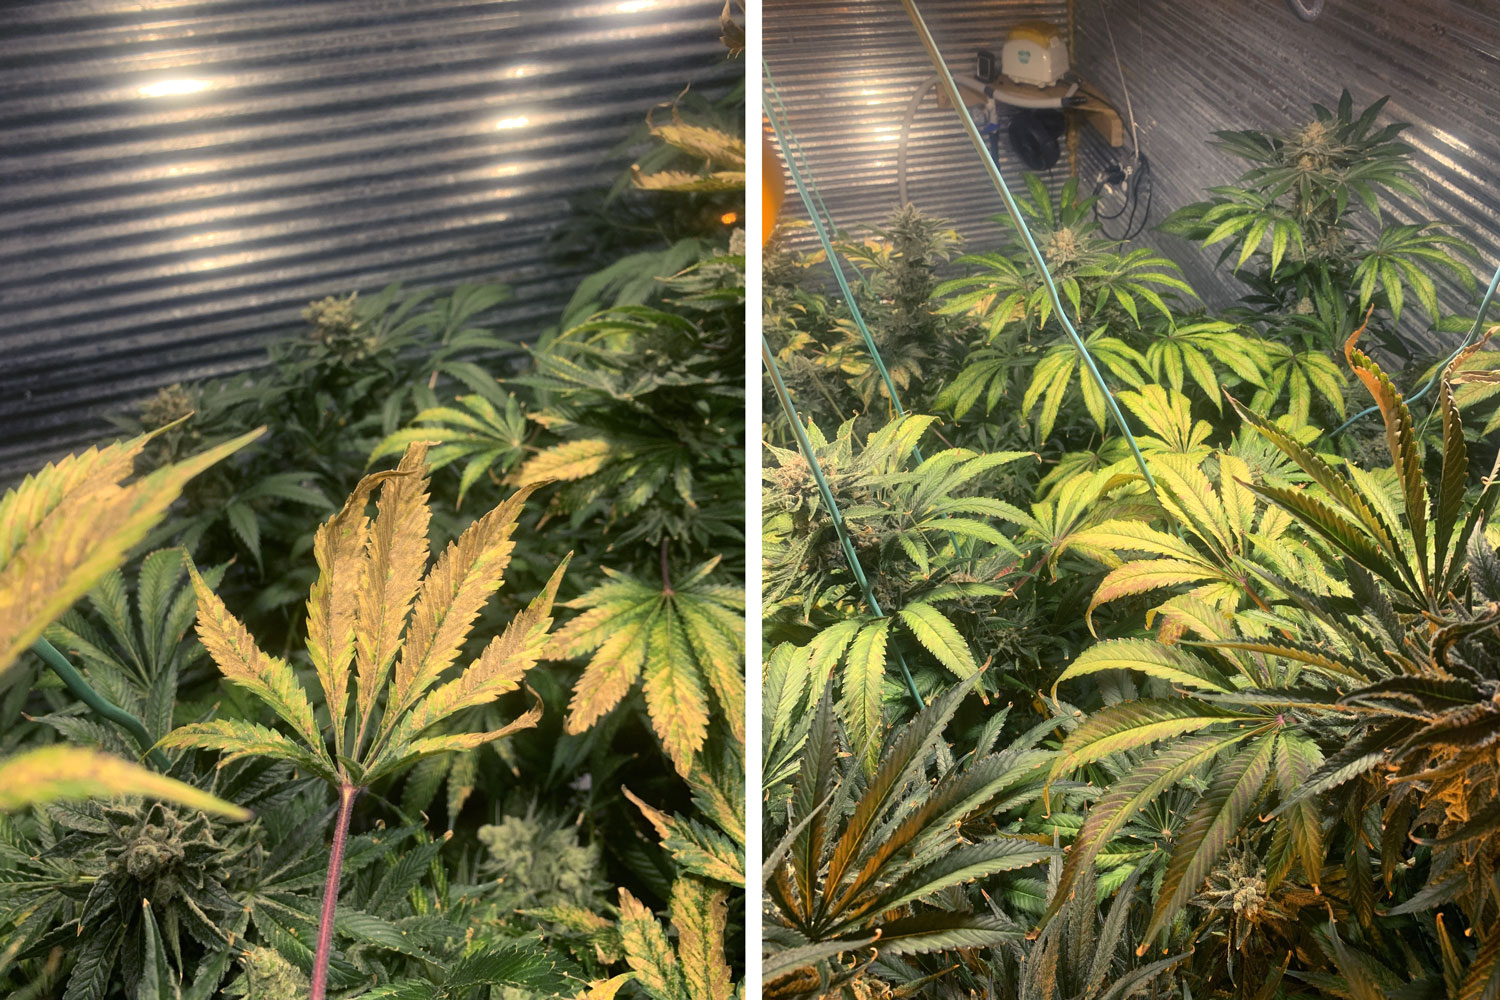
2.) Light burn
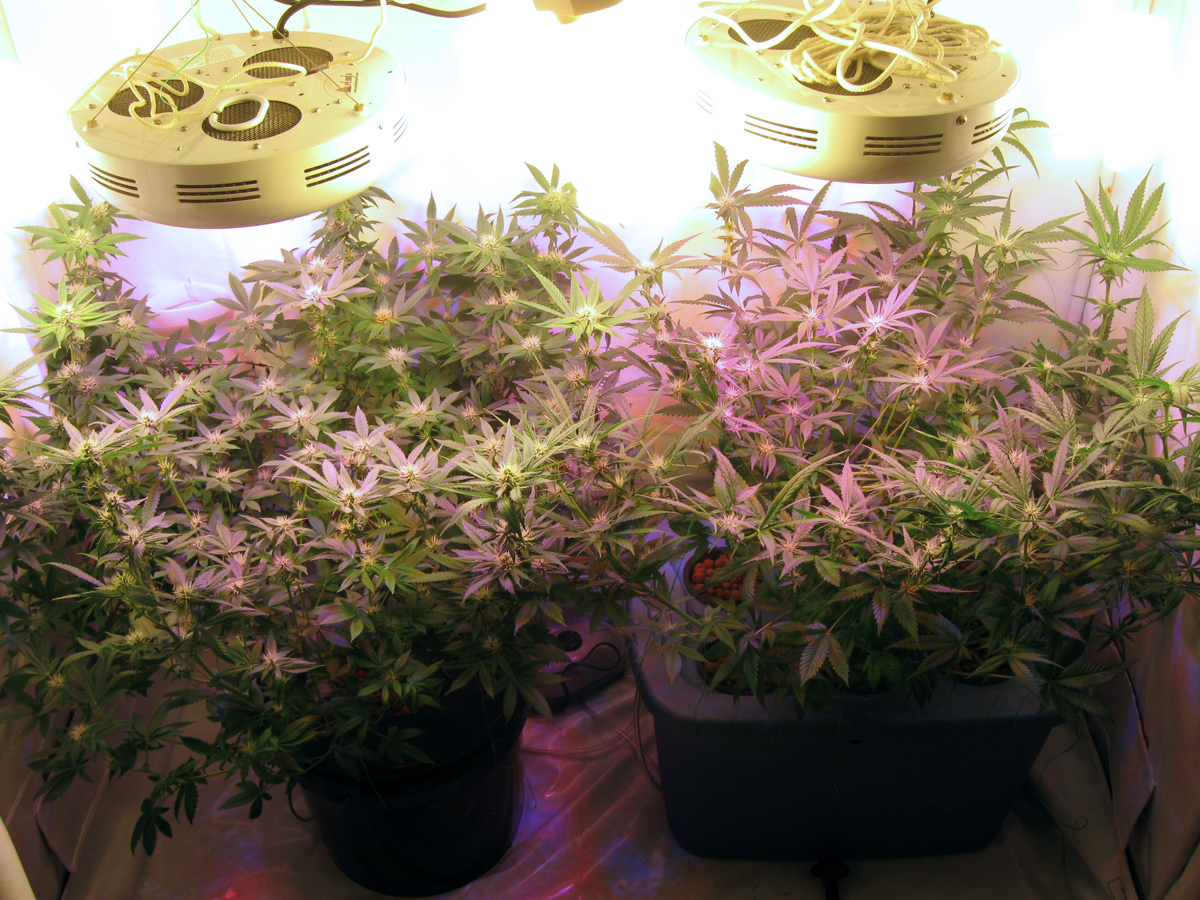
These plants were doing great… right up until we added the two “UFO” style LED grow lights pictured at the top. Our goal was to increase yields by adding more light in the flowering stage. The manufacturer of these LEDs said you could keep them just inches from the plants.
These cannabis plants were doing great until we added two new LED grow panels on top of the fluorescent lights we were using
We started noticing brown and yellow leaves near the top of the plants.
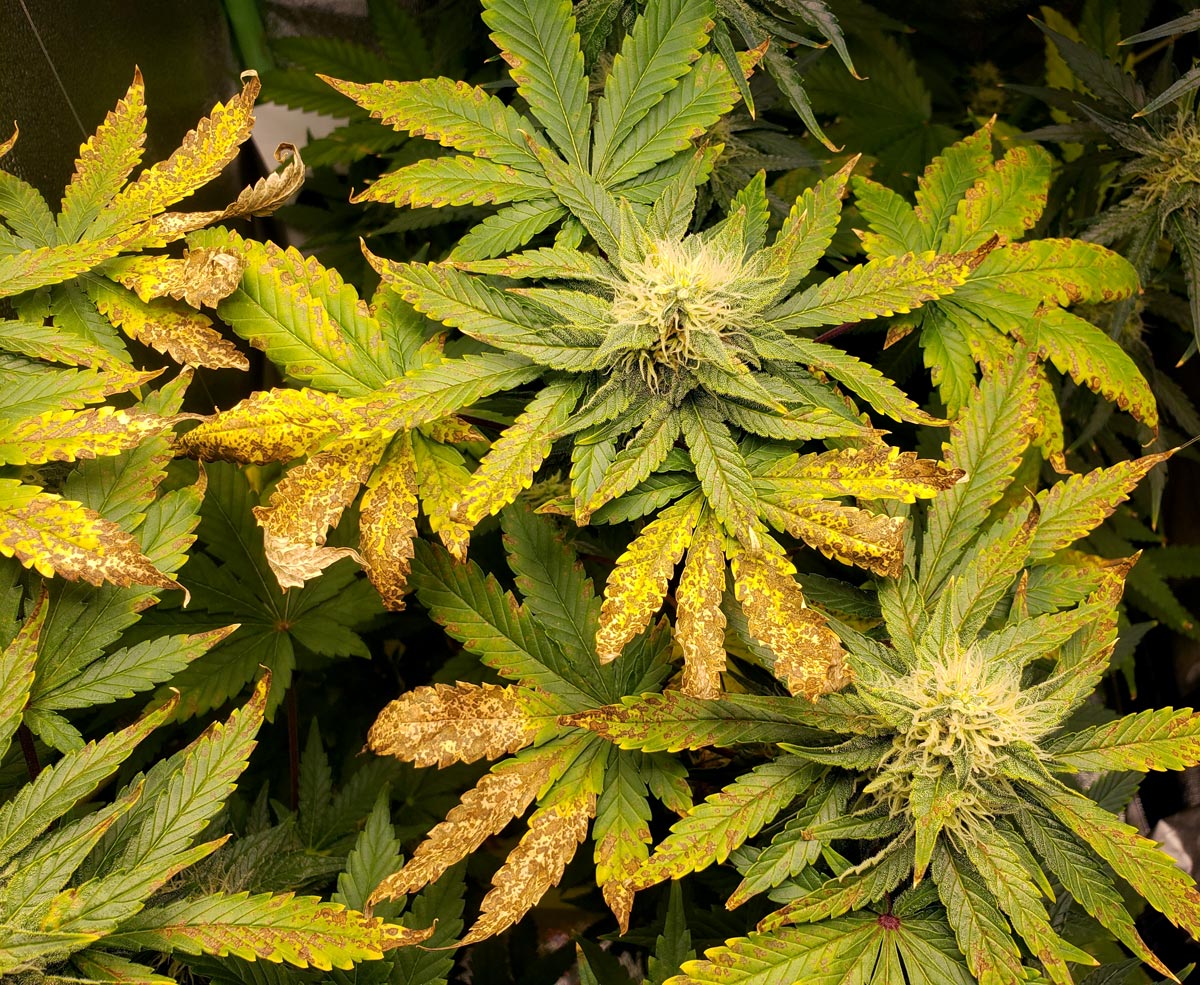
A few weeks later, the plants looked like this.
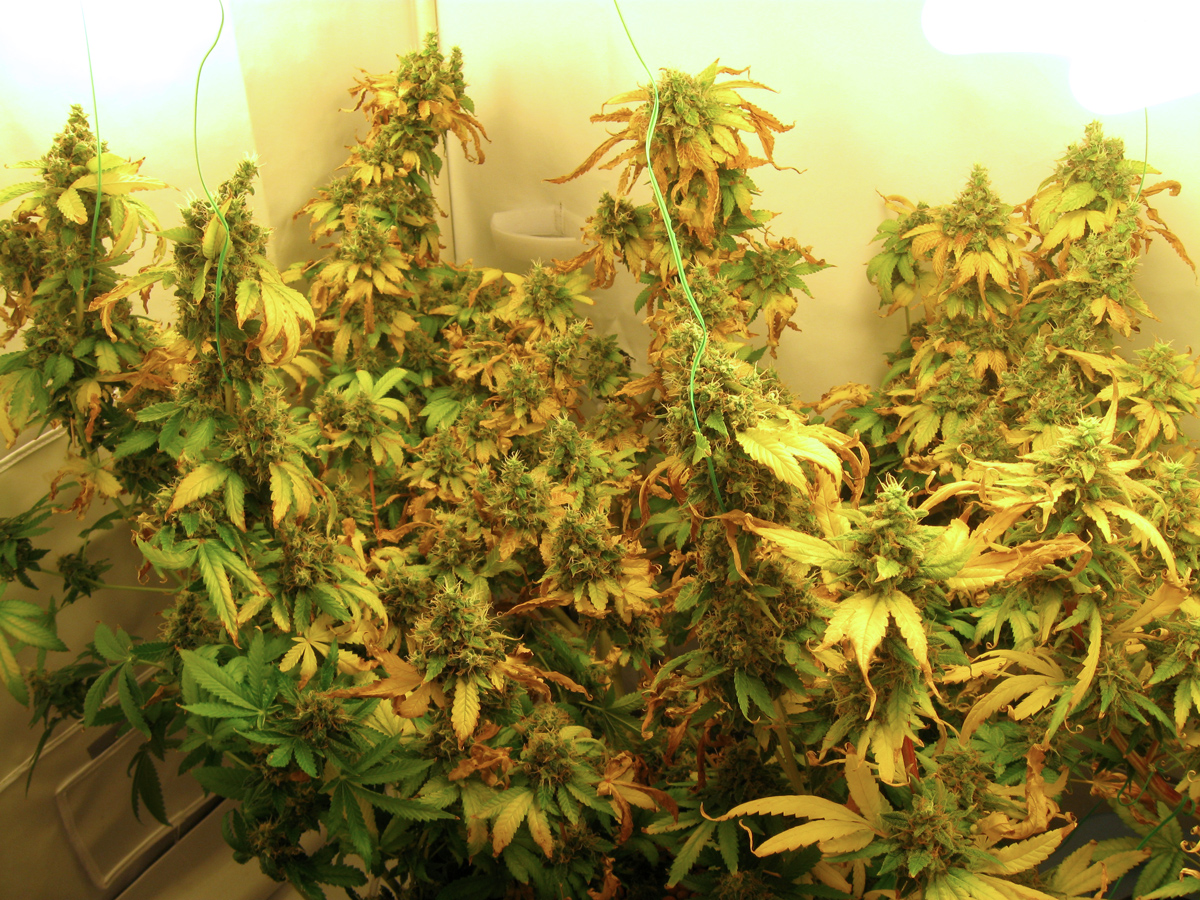
We had no idea why. We thought it must be a nutrient deficiency.

It seems obvious to me now that the problem was light burn from the grow lights being too close, especially considering that the yellow and brown marks appeared right after I added the two new LED grow lights. Unfortunately, I didn’t make that connection at first. This inexplicable problem plagued me for another grow. I almost wanted to give up growing because I couldn’t figure out what was causing the discoloration. Then I noticed the parts of the plant furthest from the LEDs were staying green. Ah ha! The intense light from the LED panels were causing the problem.
All I needed to do was move the lights further away.
Here’s another example of light burn. Notice how the symptoms appear most towards the top of the plant, but not necessarily on the topmost leaves
Light burn is most common with LED grow lights because they can be kept close without producing much heat. However, you can experience light burn under any powerful grow light
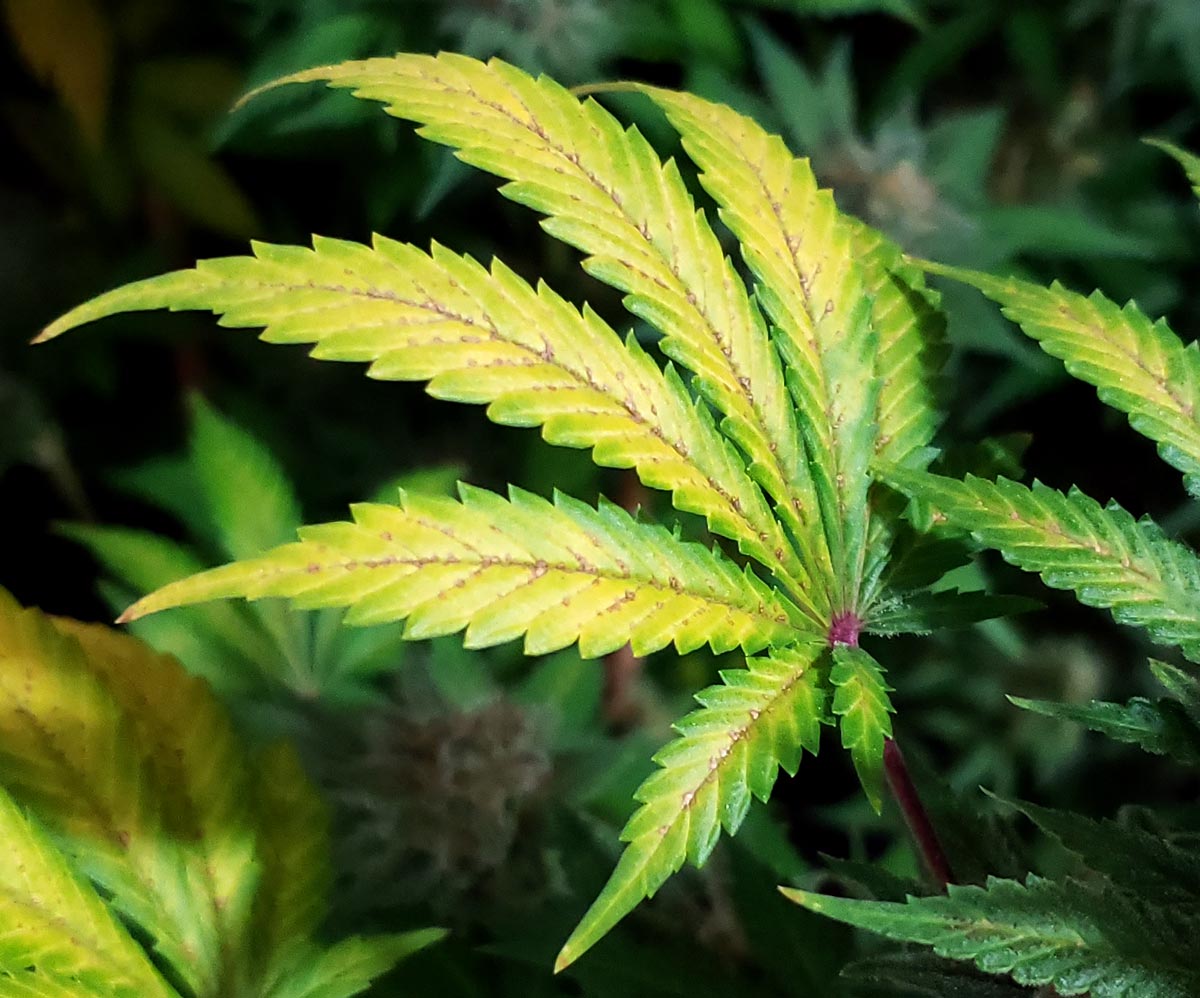
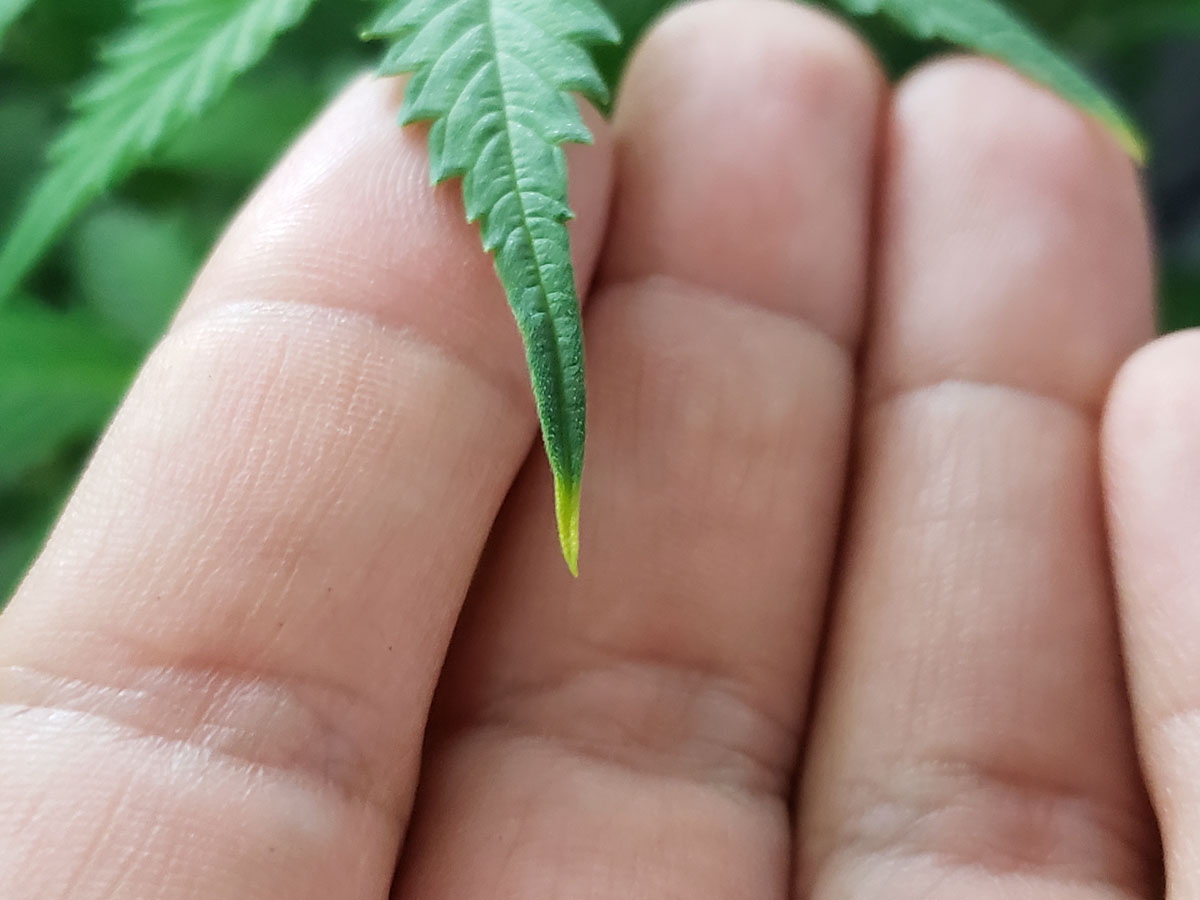
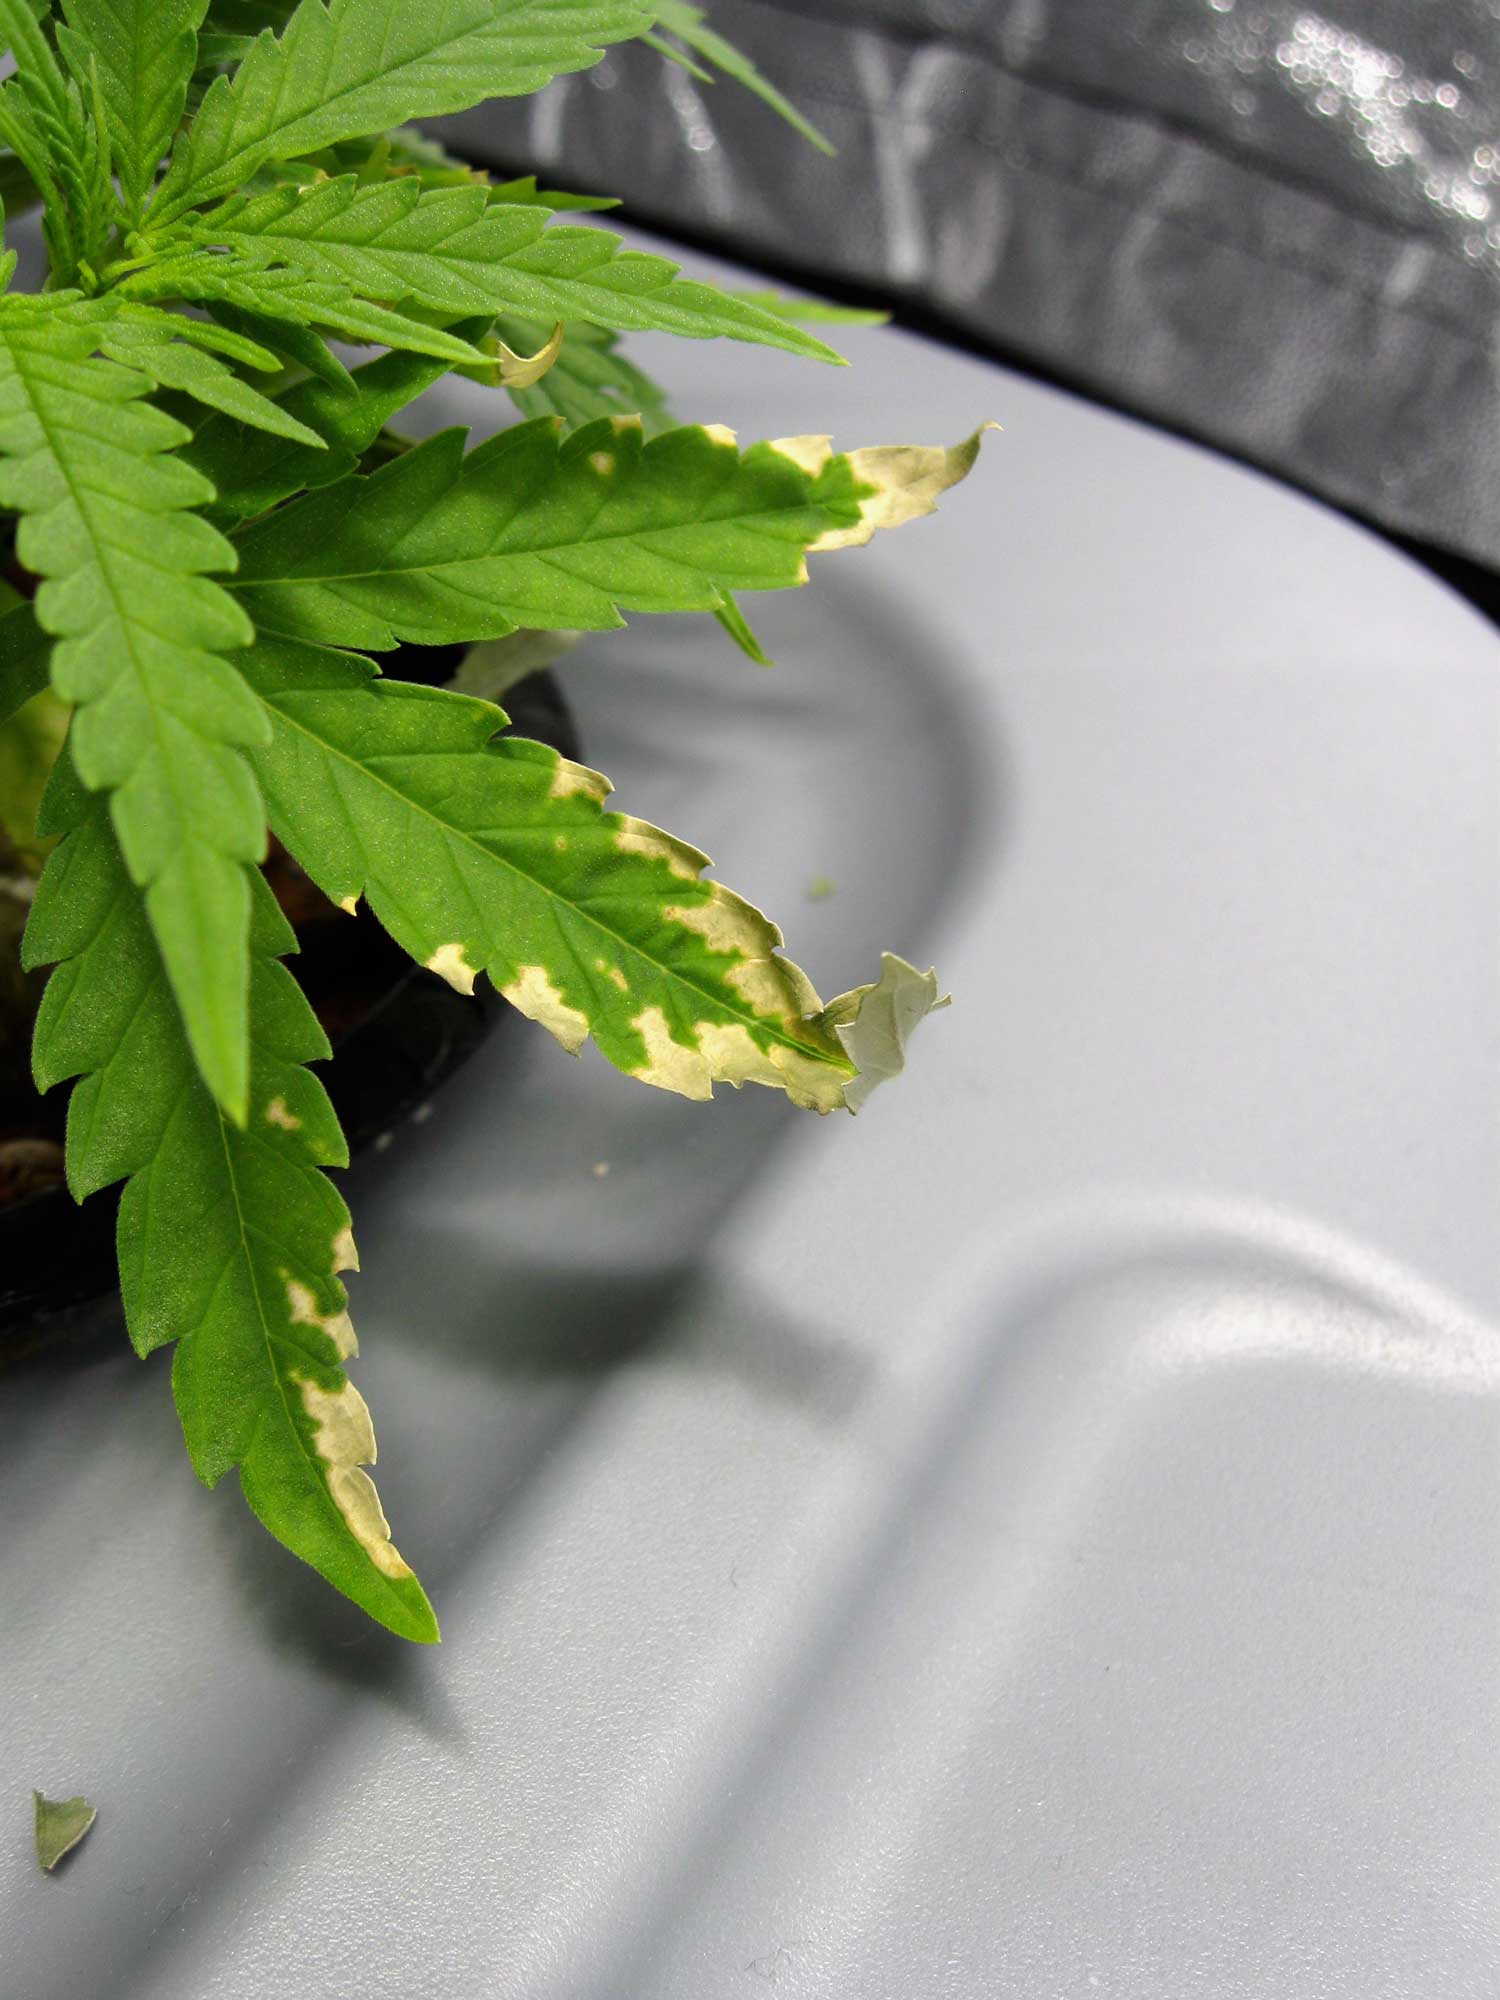
While we’re talking about light stress, I just want to mention that yellow leaf tips are another common symptom of too much light (especially with certain grow lights)

Yellow leaf tips can be a sign the grow light is too close. If you see this combined with brown markings, try moving your grow light a bit further away to see if the symptoms stop spreading.
Luckily, the hardest part of light burn is just recognizing it for what it is. Once you make the connection, just moving your grow light up a few inches is the easy solution. I hope that you get to learn from my mistakes and don’t get stuck wondering for months what is causing your symptoms.
Tips for light burn
- Light requirements change over time – Plants often get more resistant to intense light over time (think about a seedling in the scorching sun vs a big plant). If you need to move your grow light up because of light burn on leaves, you can often gradually lower the grow light again as the plant adjusts.
- Other possible problems – Calcium deficiencies and low pH at the rooms also cause symptoms that look like light burn because these issues make leaves more sensitive to light. It’s always a good idea to consider whether these are contributing or may actually be the real problem.
- Zip ties – This is the perfect solution when you need to move your grow light further from plants. Often the built-in hangers that can with your grow light add a lot of unnecessary height. In that case, zip ties let you securely attach your grow light closer to the top of the tent. Just make sure to always leave at least a little bit of an air gap so the burning hot lamp isn’t touching the top of your tent (a potential fire hazard).
3.) Heat & Air Circulation Problems
If your plant goes through a major heating event, it’s not uncommon to see a bunch of brown marks in response to heat stress.
Learn how to help your indoor or outdoor plants during a heat wave.
Similarly, other environmental stresses like too much wind/breeze can sometimes cause brown spots. This is most common when you have a fan blowing directly on plant leaves, causing them to wave around.
Too much fan or breeze on part of a plant can cause “wind burn”, which can cause various leaf symptoms (curling, deficiencies, underdevelopment, etc.). Occasionally, the symptoms include brown spots. Notice how the spots look similar to the spots from heat stress.
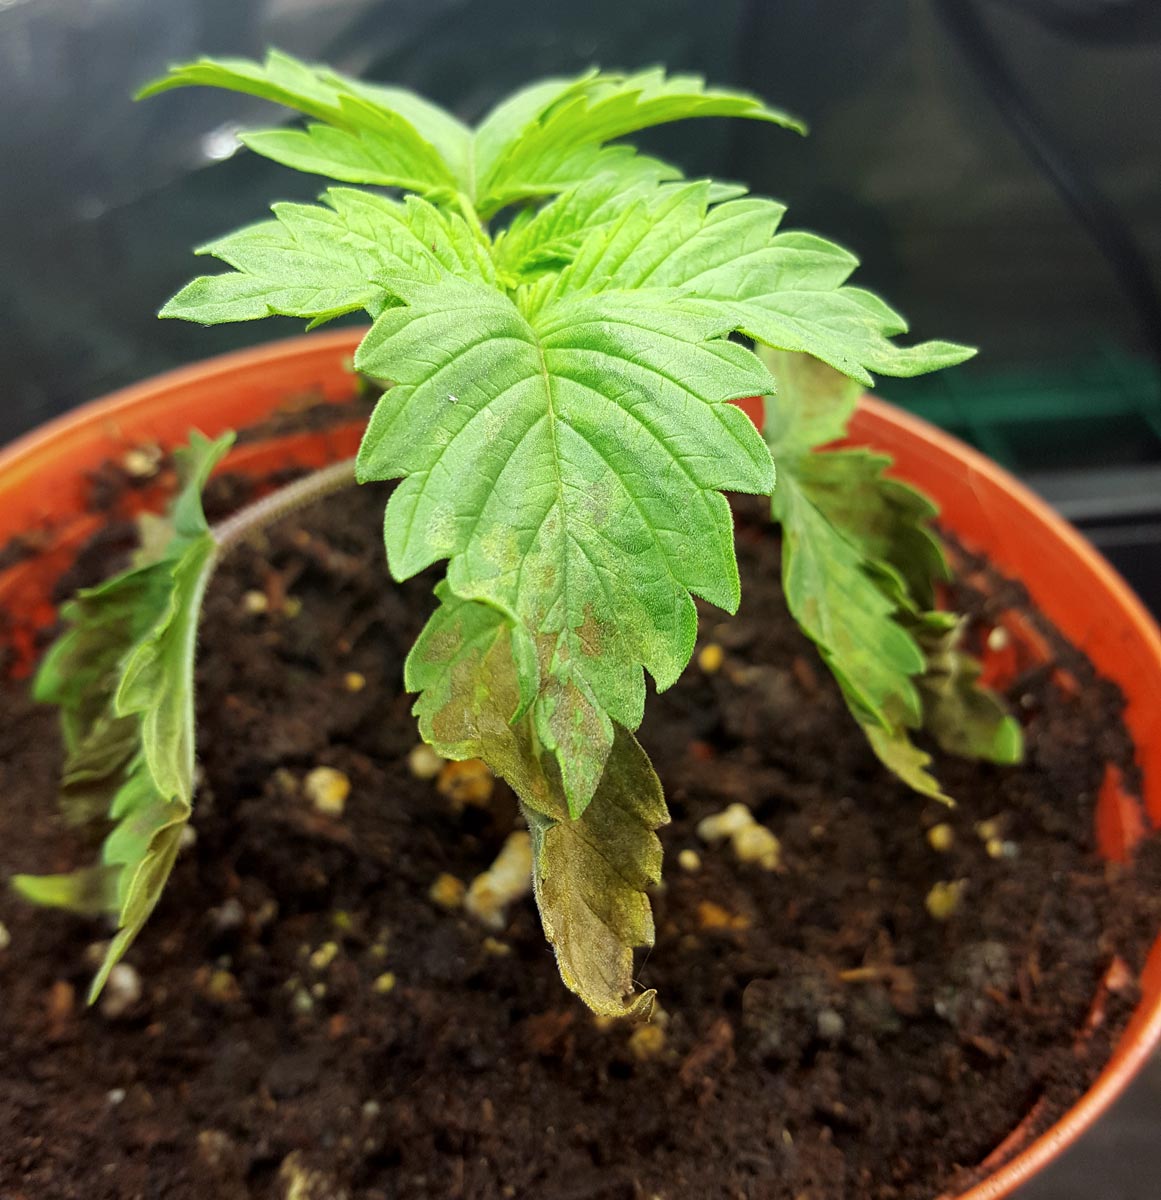
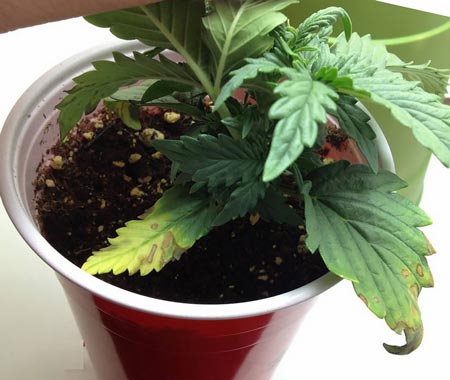
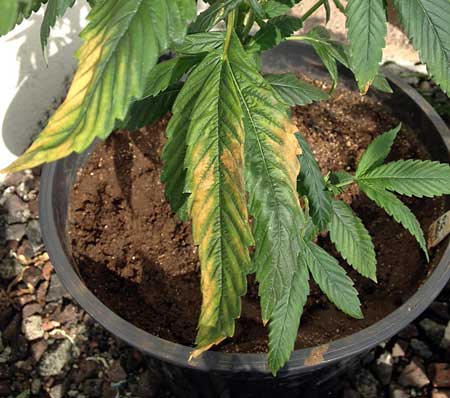
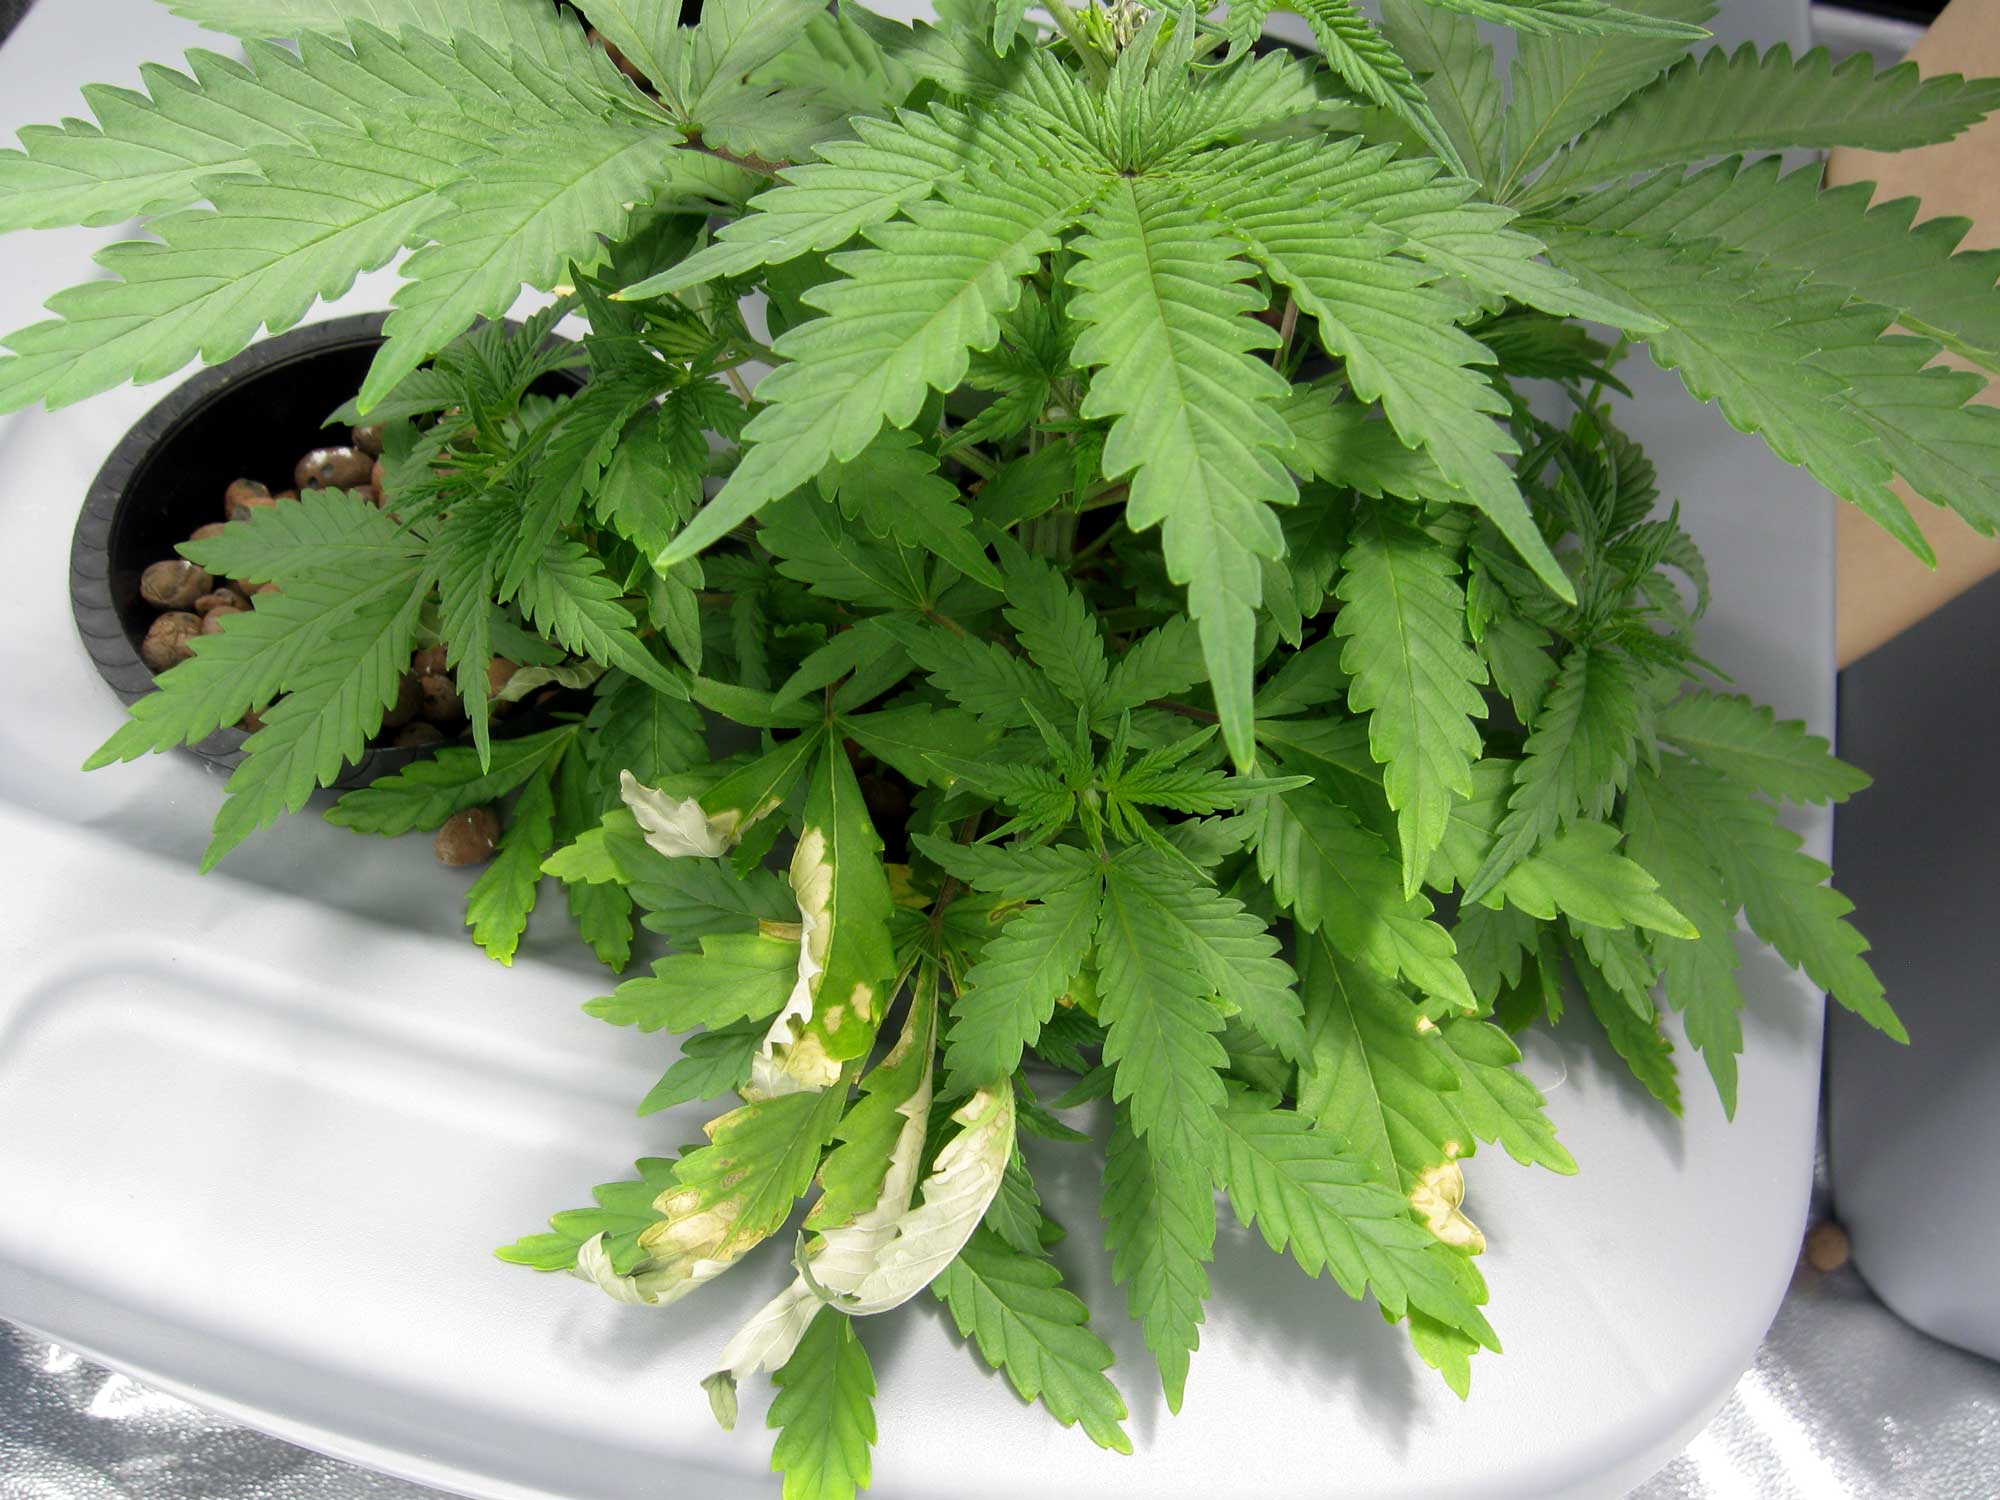
4.) Watering problems – overwatering or underwatering
Watering problems can cause all kinds of unexpected symptoms, especially in younger plants. Overwatering is most common with beginners, but underwatering can cause similar symptoms.
Notice how the top of the grow medium has a green hue. This is the result of algae growing on the surface. Whenever you see that, you know the plant is getting too much water.
These brown lower leaves look like a nutrient deficiency but the real cause is overwatering.
This plant was overwatered then went through a cold (nearly freezing) night. The next morning these spots had appeared on many of the leaves.
“Wet feet” causes symptoms that are commonly mistaken for a nutrient deficiency
When plants are drooping in addition to the leaf markings, it’s usually some sort of watering issue.

Learn how to water seedlings in a big pot (it’s much easier to overwater plants if they’re growing in a too-big container, but there are strategies to get around that).
Overwatering vs Underwatering: See the Difference in Pictures
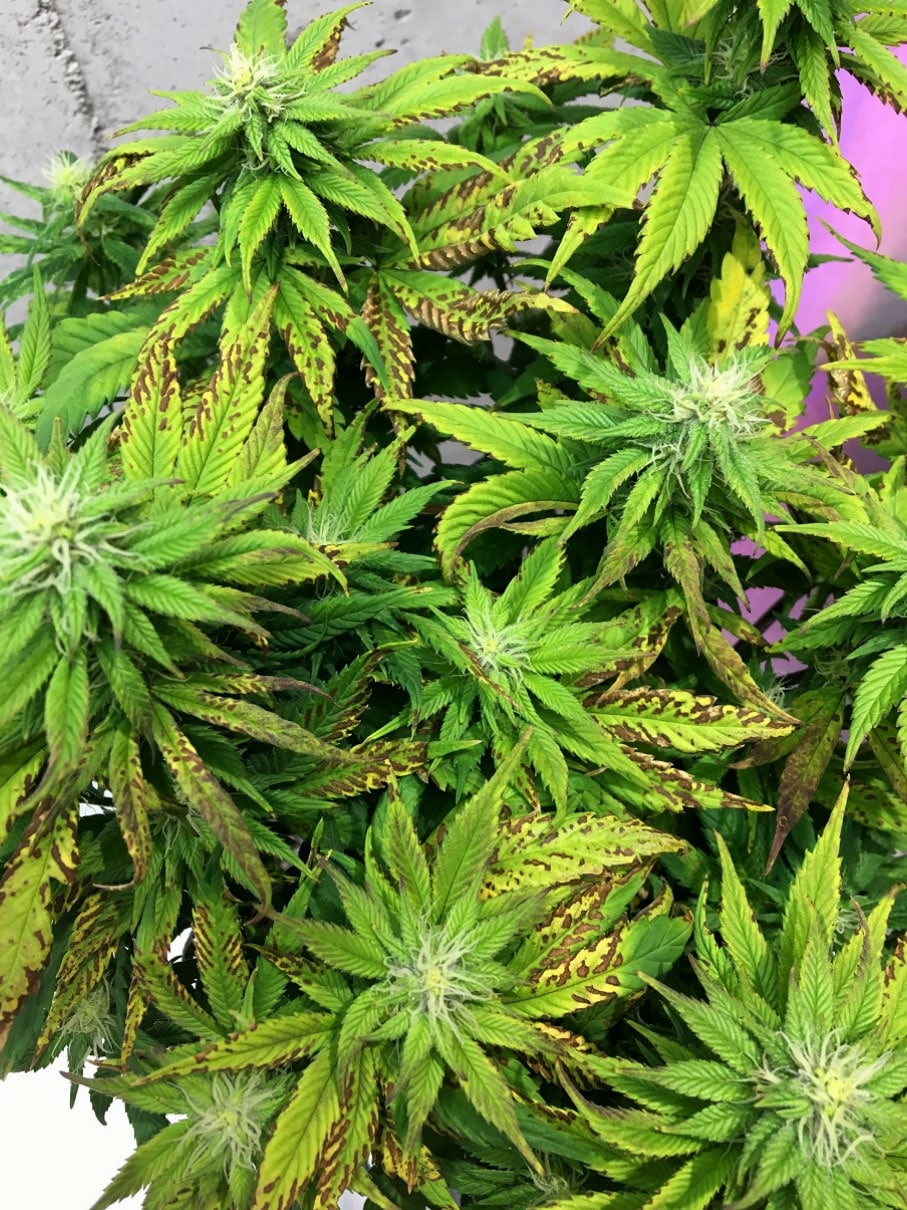
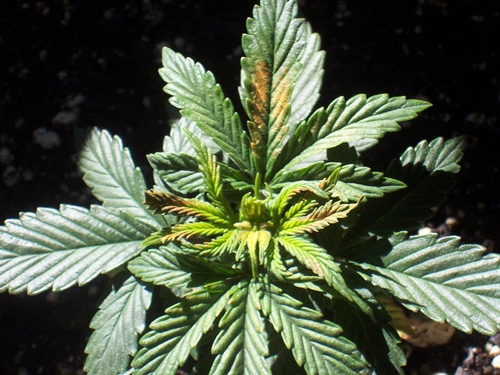
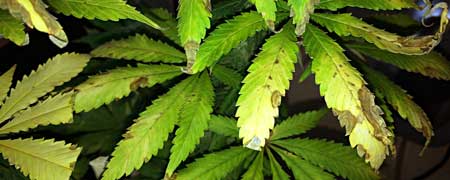
5.) Calcium deficiency
A calcium deficiency is typically the result of one of 3 things:
- Low pH at the roots – We talked about this earlier, but pH is always the first thing to consider when you see any nutrient deficiency
- Too-pure water that doesn’t contain minerals – For example RO/Reverse Osmosis water, filtered water, “soft” tap water, etc. Typically most tap water contains enough minerals to give your plant the calcium it needs when combined with nutrients.
- Not using nutrients – If you’re growing in soil and not adding nutrients to the water, your plant is far more likely to run into deficiencies. Especially in the nutrient-hungry flowering stage, which happens after the plant has used up a lot of the nutrients in the soil.
Other possible causes
- LED grow lights – Plant leaves work hard under LEDs, which is how they get great yields, but it also makes plants more prone to deficiencies. Luckily if you take good care of plants and use good LED grow lights, you don’t need to worry about nutrient deficiencies.
- Coco coir (maybe) – Since I started growing I’ve heard that cannabis plants are more likely to experience calcium deficiencies in coco coir compared to growing in soil or hydro. Because of that, I’ll mention it here, but I’ve grown extensively in all 3 mediums and personally haven’t noticed that myself. Whenever I’ve had calcium deficiencies in coco, it can be traced back to one of the above factors.
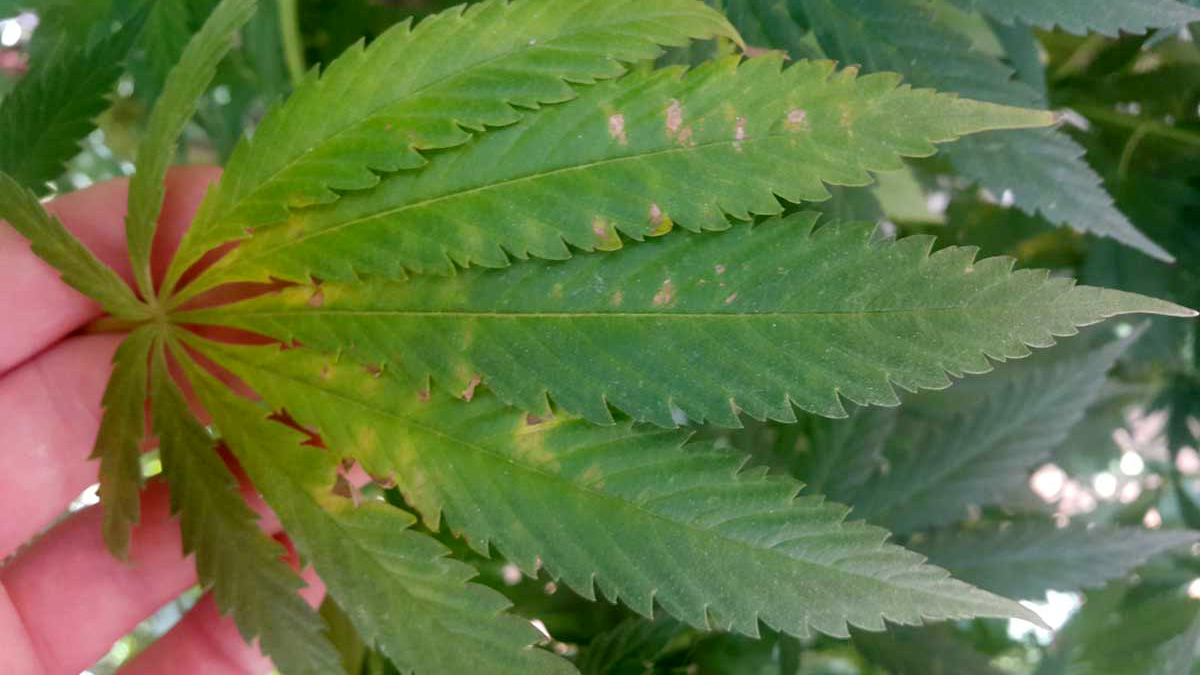
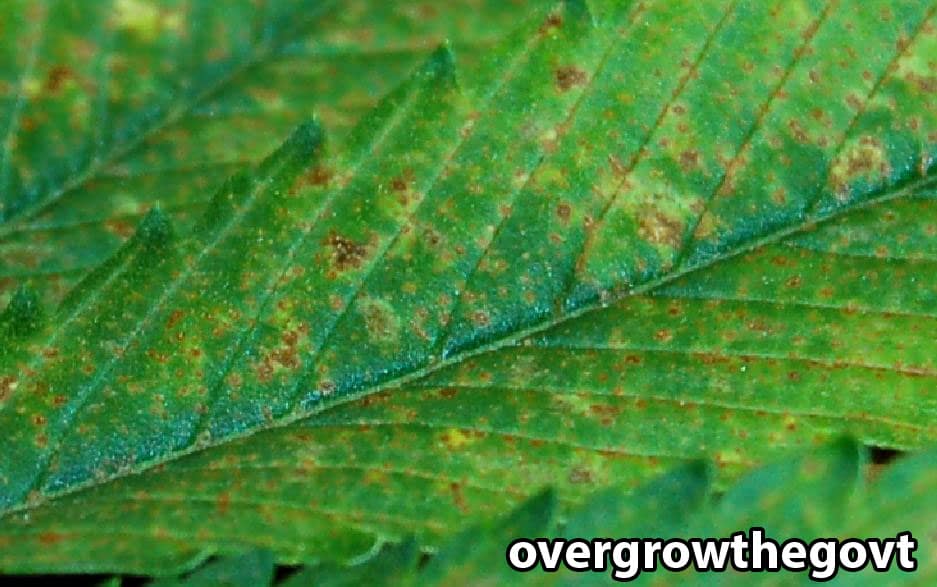
A calcium deficiency can appear like a ton of brown spots overnight on just the top leaves.

Sometimes a calcium deficiency is mistaken for bugs because the brown spots look a bit like bite markings. A key clue is that the spots affect some leaves but not others, with most of the “bad” leaves in direct light. Another big clue is you won’t be able to find any bugs anywhere.
A calcium deficiency is sometimes mistaken for a pest, but the symptoms only affect some leaves and you won’t be able to find any bugs.
With a calcium deficiency, some leaves will be greatly affected while others won’t show any symptoms. This is different from a pest infestation tends to affect more of the plant at once.
Notice how some leaves are covered in spots while others are completely green right next to them. This is a key sign that you’re dealing with a deficiency as opposed to bugs.
5b.) Other Nutrient Deficiencies
The following pictures show various nutrient deficiencies that are less common than calcium but can also cause brown markings. Ultimately, all these are caused by either incorrect pH or not giving extra nutrients when your plants need them.
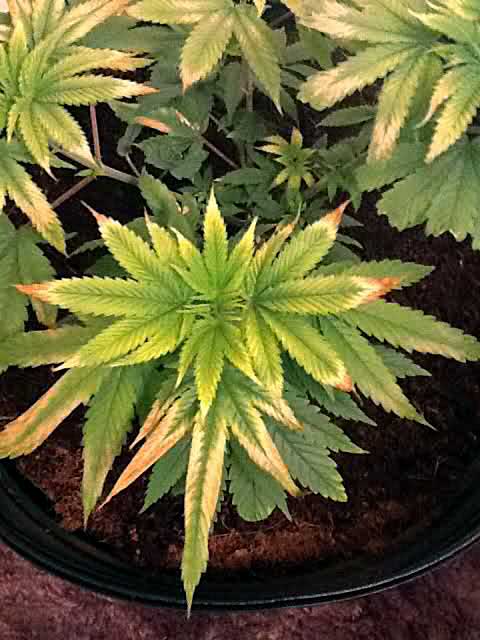
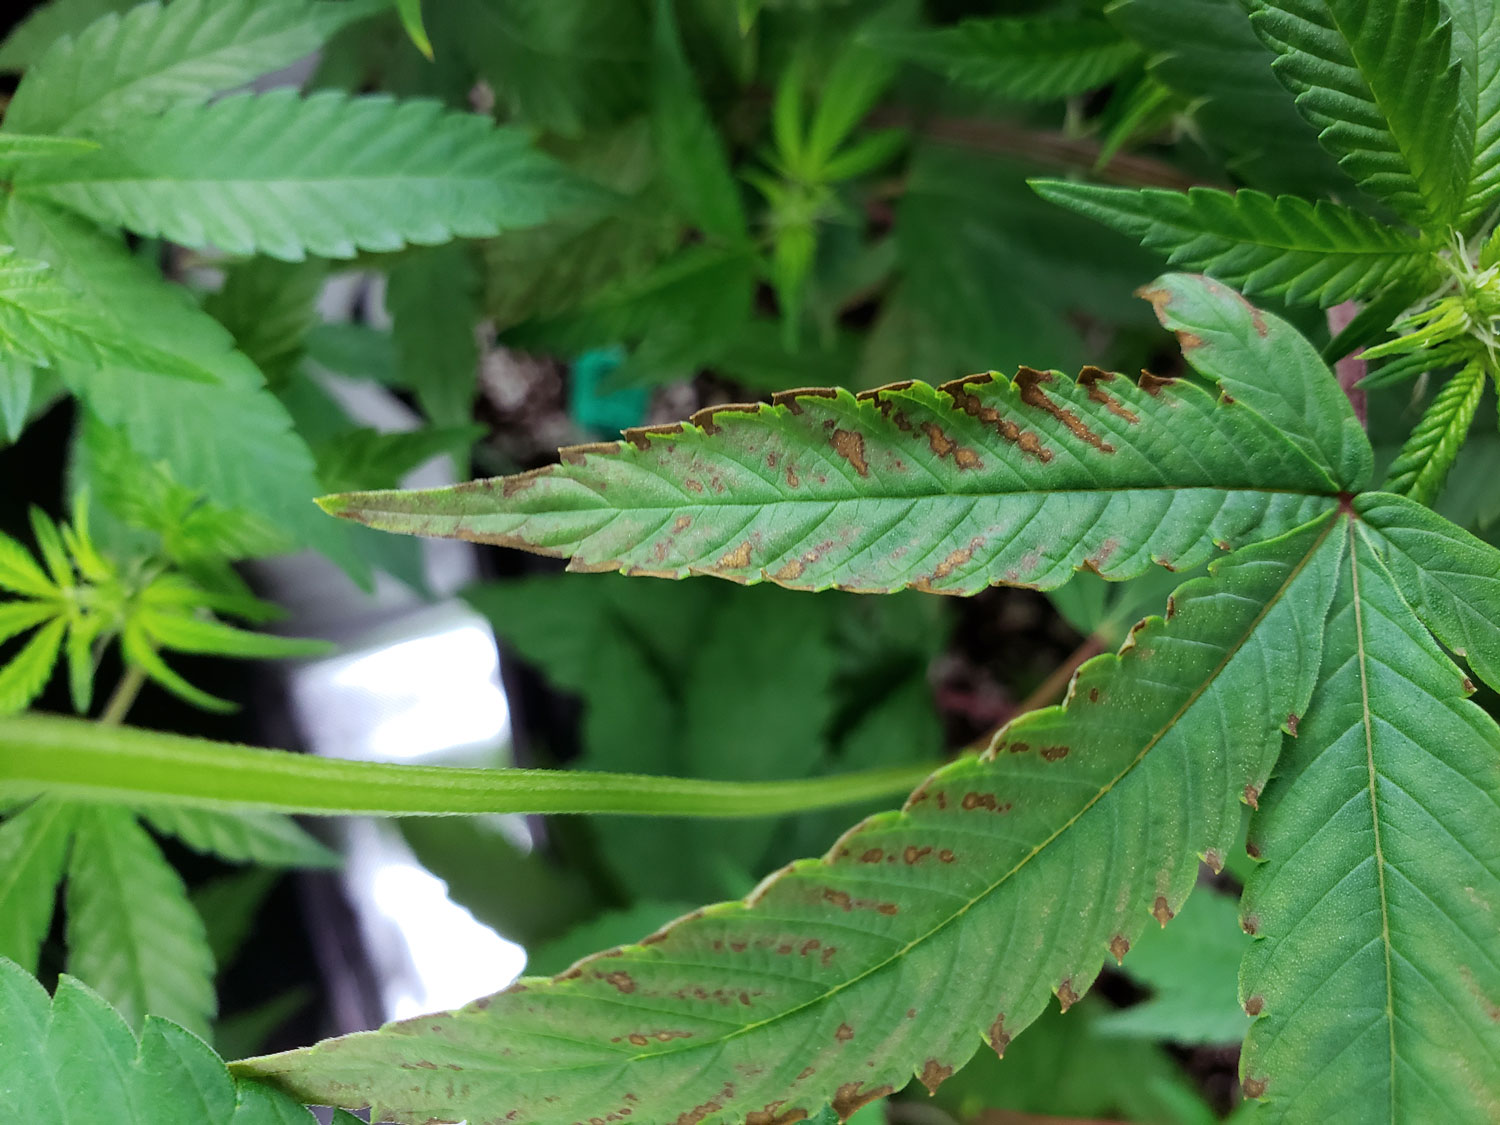
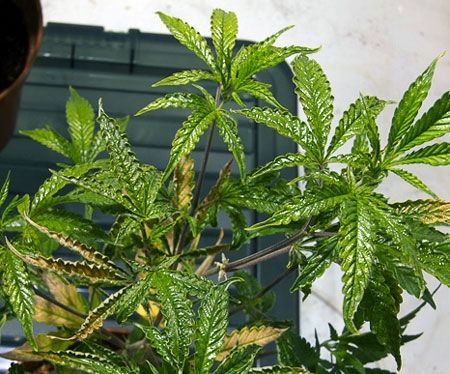
Potassium deficiency – caused by incorrect pH
More examples of potassium deficiencies from incorrect pH
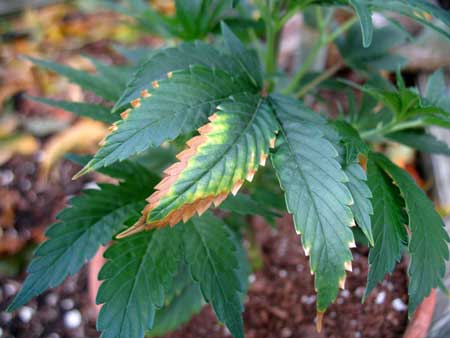
A potassium deficiency sometimes makes brown tips that look a bit like nutrient burn before it progresses further. However, these symptoms were caused by pH.

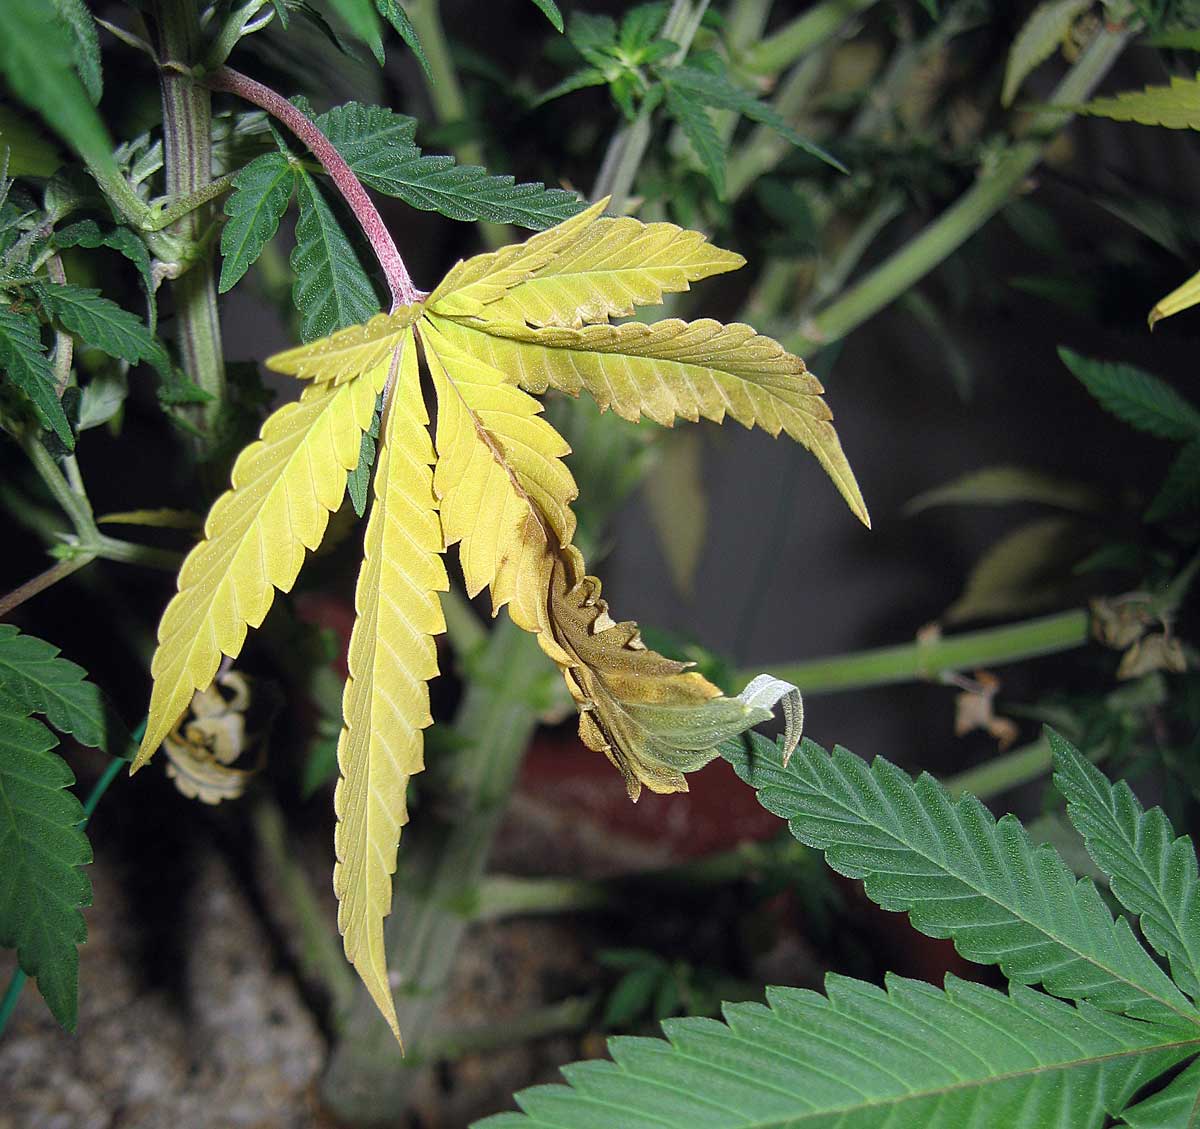
Plants need nitrogen to make green leaves. Cannabis is actually pretty good at absorbing nitrogen at all pH ranges, so when you see this deficiency it almost always means your plant needs higher levels of nitrogen overall.
A nitrogen deficiency causes lower leaves to start yellowing and eventually turn brown as they dry up. Finally, the leaves fall off on their own. This series of symptoms (lower leaves turn yellow, dry up, and fall off on their own) usually means your plant wants higher levels of nutrients overall.
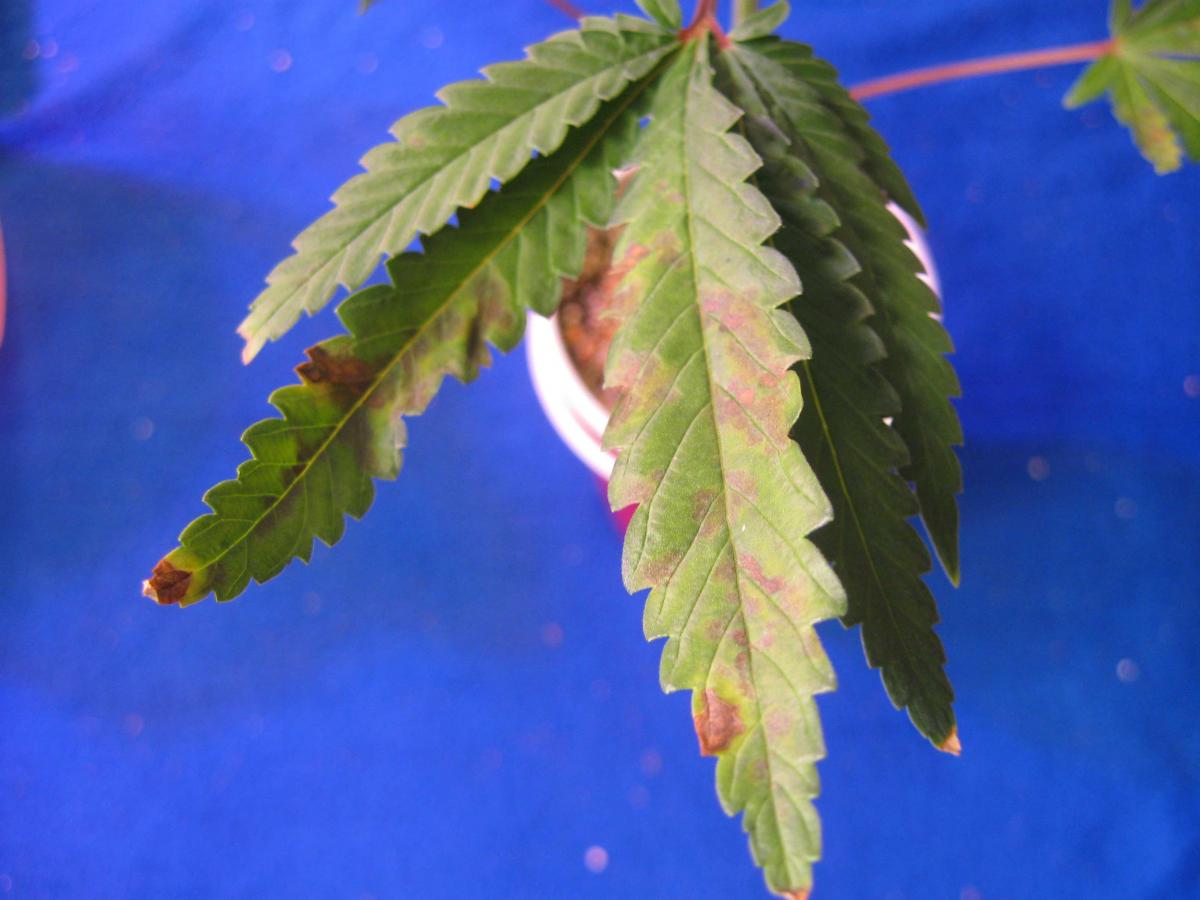
This relatively rare boron deficiency was caused by incorrect ph at the roots.
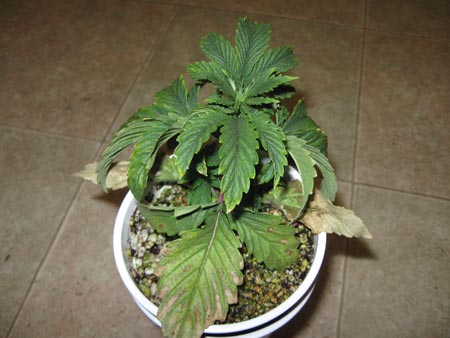
6.) Root Problems
Root problems, like overwatering, can cause a surprising number of odd symptoms.
This phosphorus deficiency was caused by heat and root problems
Root rot is a common problem when growing in a hydroponic setup
Root rot often causes a ton of symptoms, including brown or scorched leaves

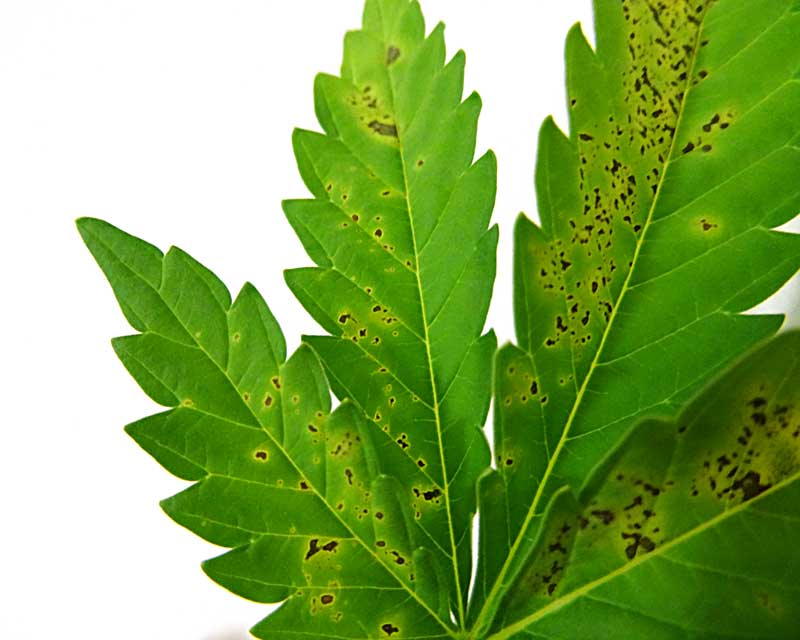
7.) Bugs or pests
There are a few bugs or pests that can cause brown leaf markings, so I’ve posted pictures here to try to help you get a quick visual match.
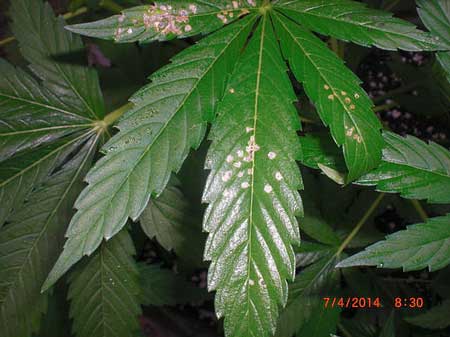
Thrips – learn how to identify and get rid of thrips.
The spots from thrips often appear pale or yellow at first, but may darken over time and appear brown.
Fourlined Plant Bug– learn how to identify and get rid of fourlined plant bugs.
Four-lined plant bug leave signature brown marks on cannabis leaves
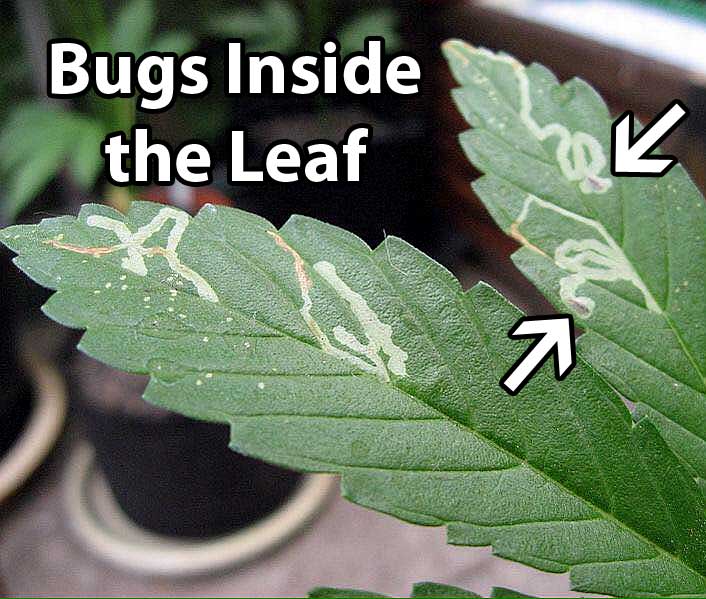
Leaf miners – learn how to identify and get rid of leaf miners.
Leaf miners leave long squiggly lines on leaves that turn brown over time.
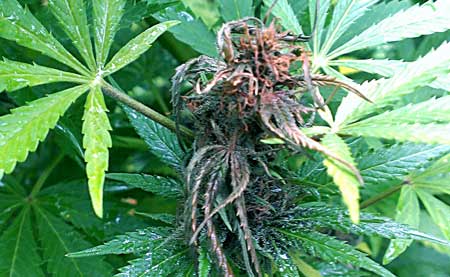
Bud Rot – Learn how to identify and get rid of bud rot.
But rot is what happens when mold or fungus starts growing inside your buds. It will cause the bud and surrounding leaves to turn brown and die.
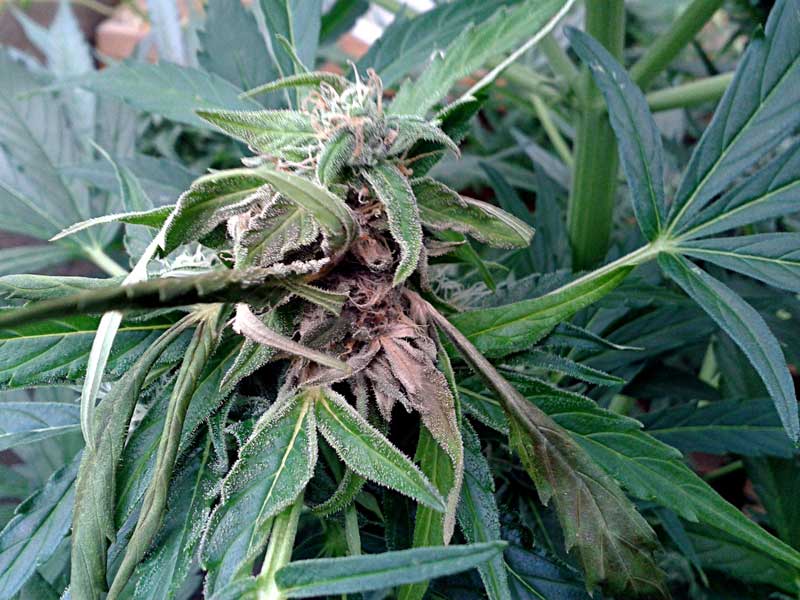
The first sign of bud rot is often random leaves turning brown or dying on bud sites
Broad Mites – Learn how to identify and get rid of broad mites.
Broad mites are so small you will likely never see them, but new leaves will be blistered, twisted, and glossy, often turning yellow or brown over time.
Fungus Gnats – learn how to identify and get rid of fungus gnats.
Fungus gnats look like tiny dark flies and appear when plant soil is staying too wet for too long (over watered)
Although a few fugnus gnats won’t affect plants much, leaves start showing symptoms when a gnat infestation gets out of control. This is due to plant stress at the roots, as opposed to the bugs affecting the leaves directly.
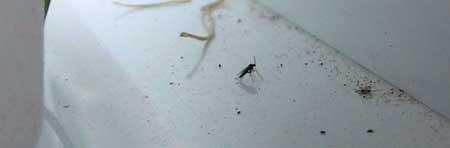
Plant hoppers – learn how to identify and get rid of planthoppers.
Like fungus gnats, planthoppers won’t usually create brown leaves unless you have a lot of bugs. For example, this out-of-control planthopper infestation started seriously stressing out these plants and causing brown leaves.
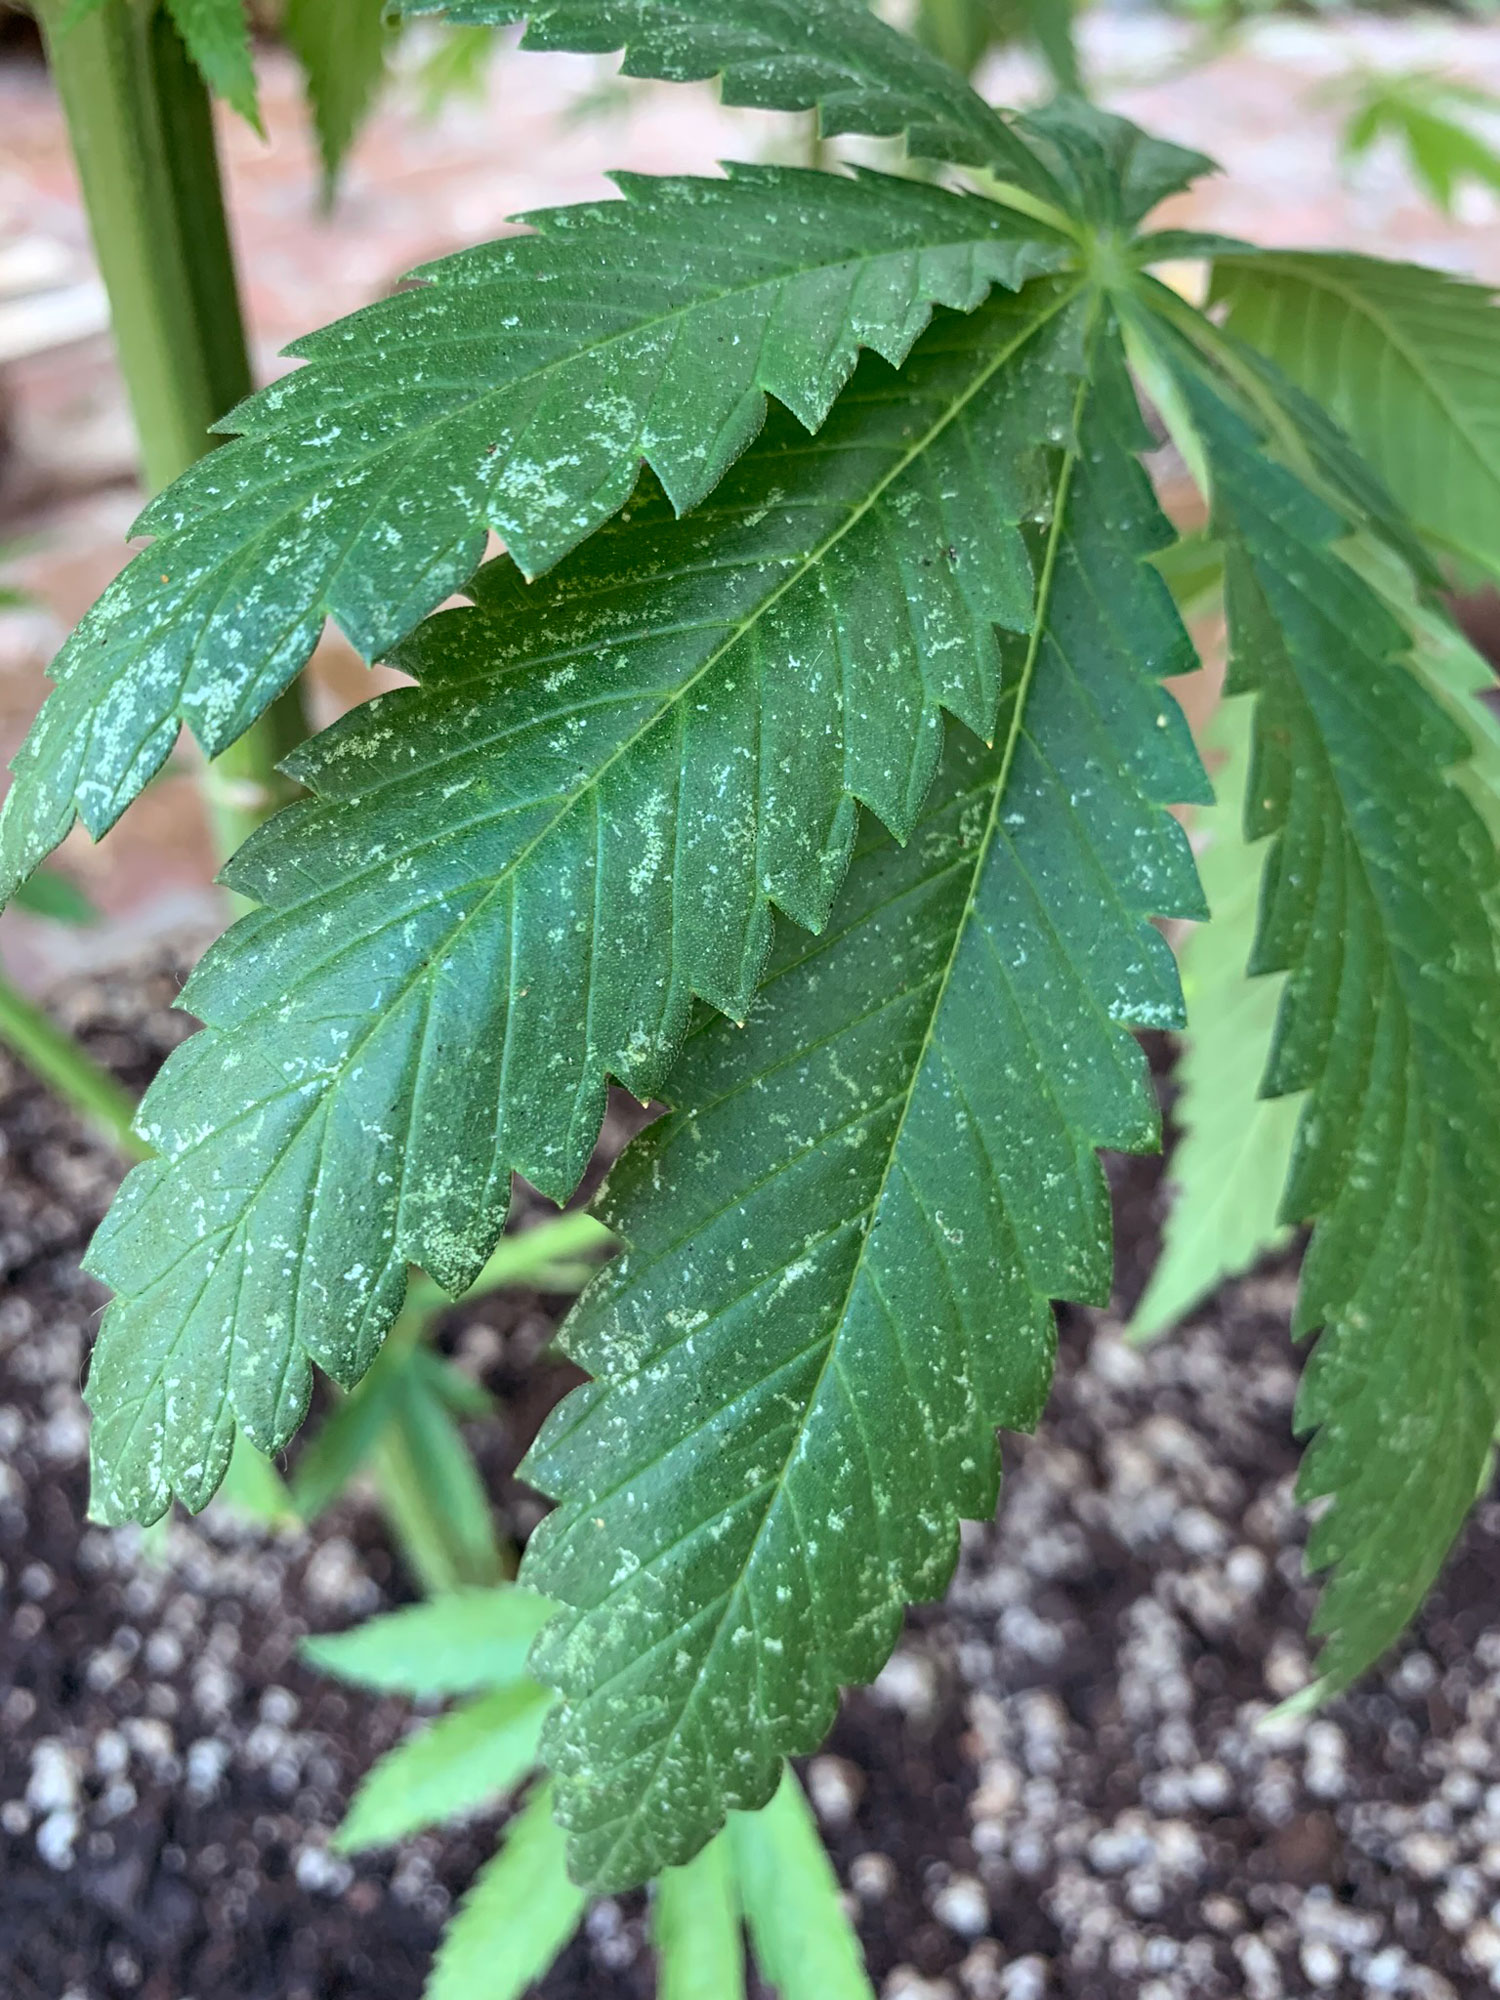
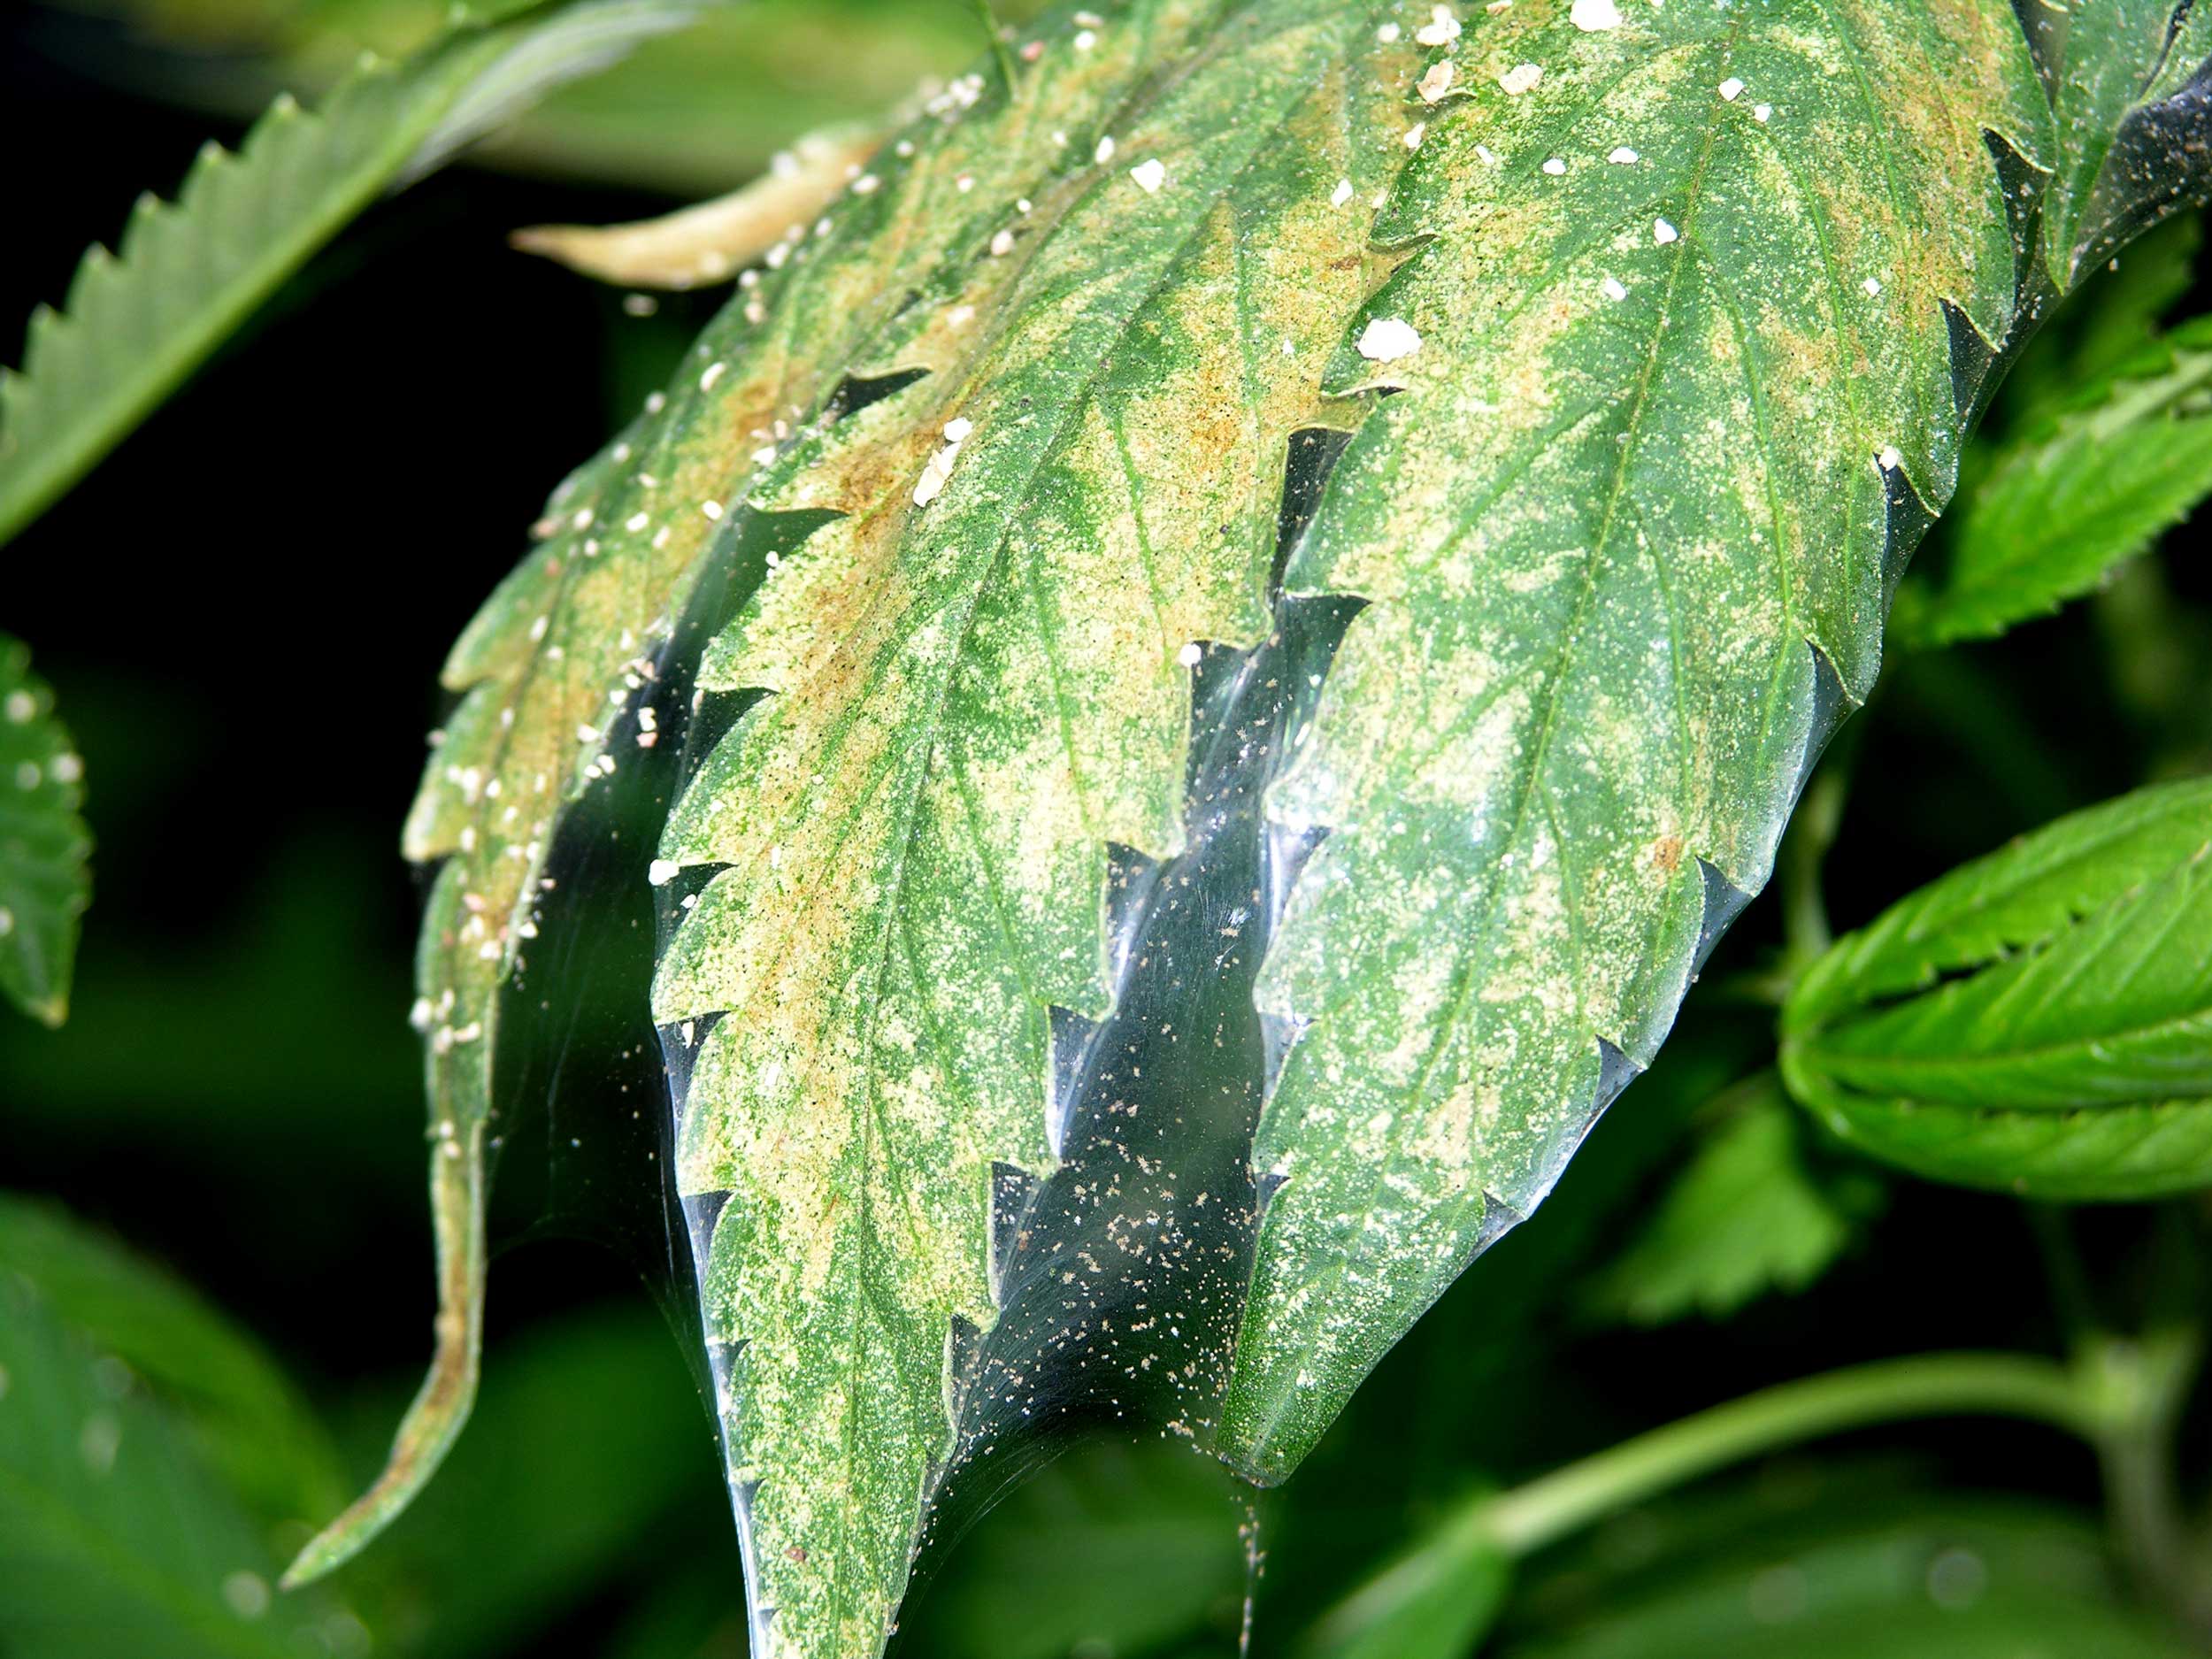
Spider mites – learn how to identify and get rid of spider mites.
Spider mites leave tell-tale white spots on the leaves.
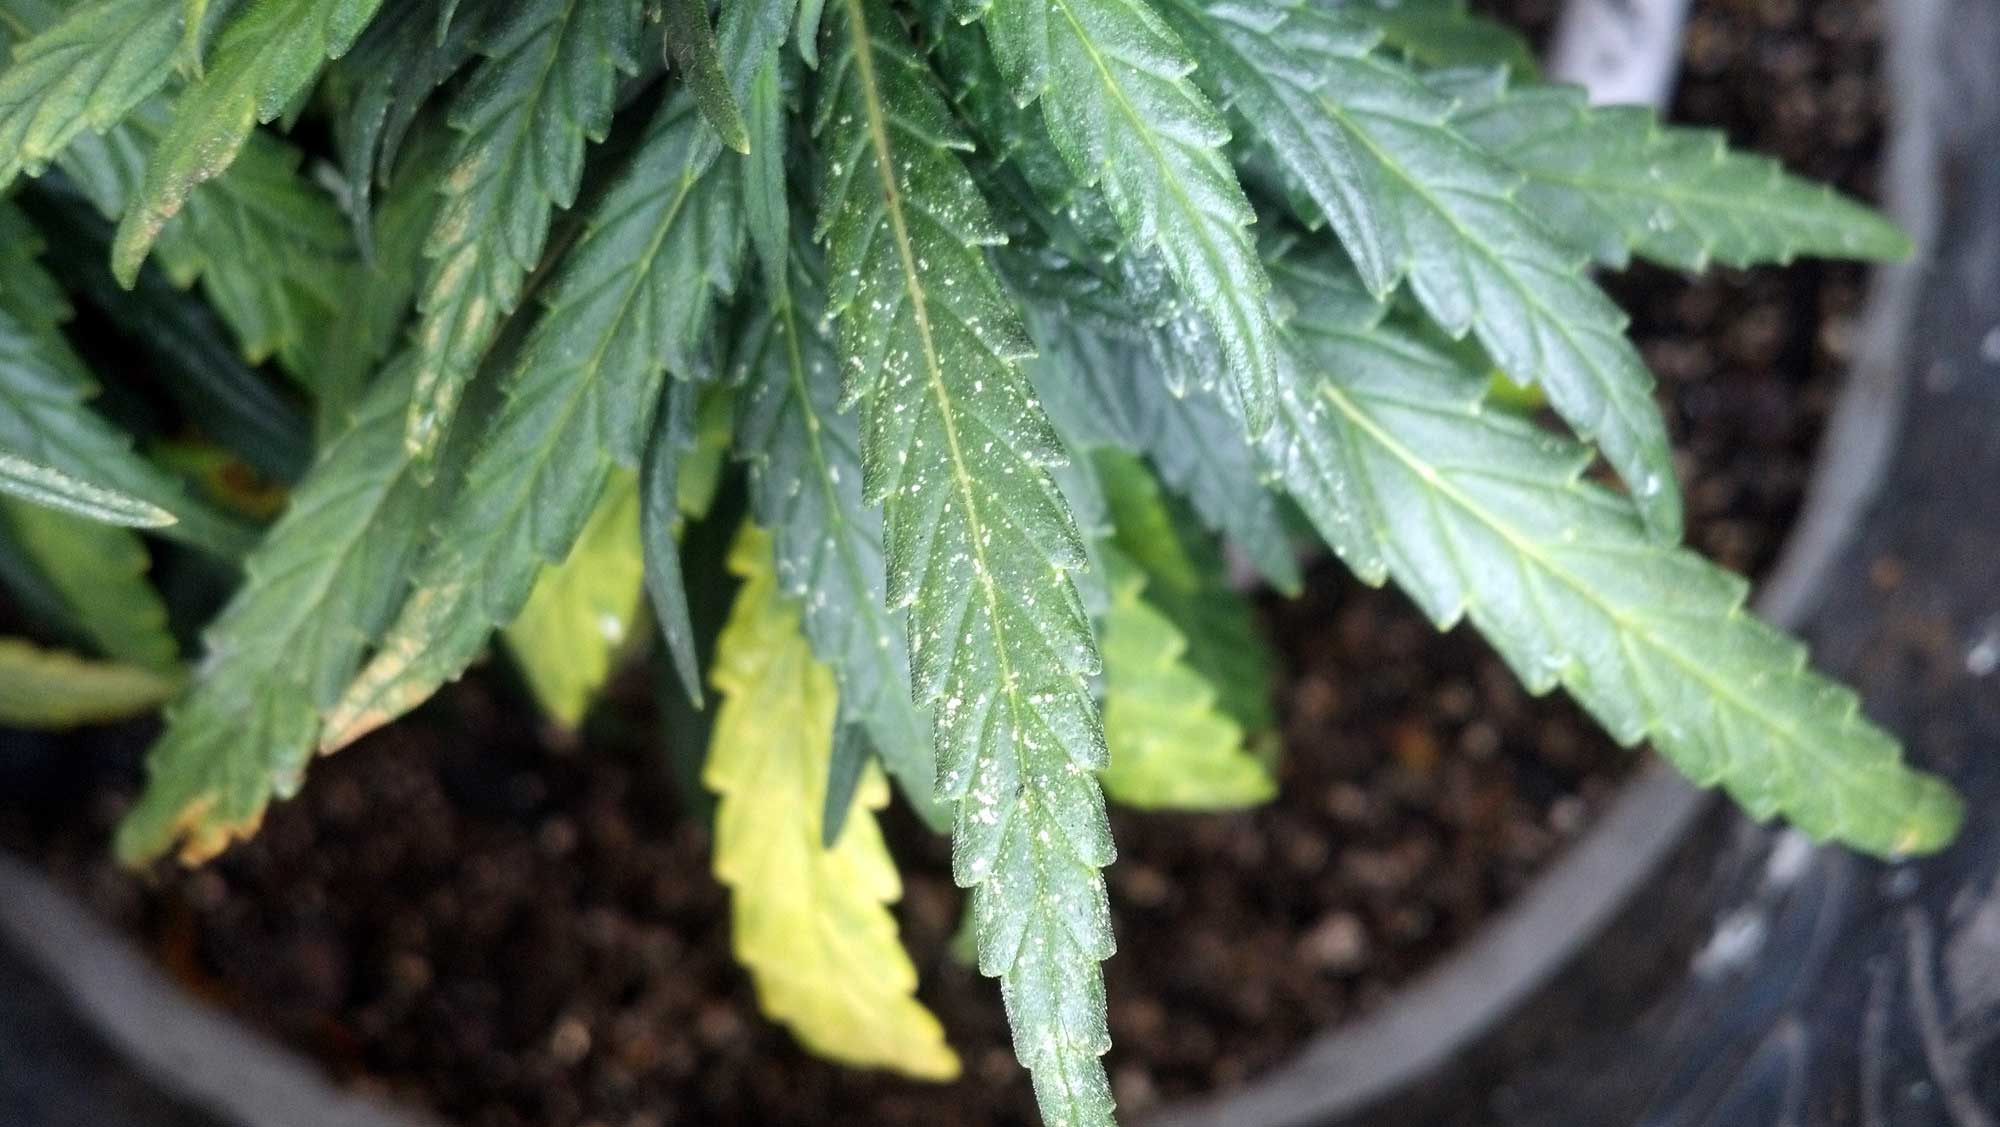
However, if spider mites get numerous and start making visible webbing, leaves often turn brown or bronze
Check out this page with pictures of more common cannabis bugs and pests.
Conclusion: 3 Most Important Factors to Prevent Brown Leaves
If you’ve read through this whole article, you’ll probably start to realize that these problems are often related, with stress increasing the chance of problems, and pH/nutrient/bug issues being a common underlying culprit of brown or bronze marks on leaves.
Here are the 3 main factors to pay attention to, and you’ll never see brown scorch marks again:
1.) Good growing environment
- Create a plant paradise with plenty of fresh air
- Avoid excessive heat and keep the temperature under 80°F (27°C) if possible
- Maintain grow lights the recommended distance away (move grow light further if you notice symptoms on the top leaves, then move it closer once symptoms stop spreading)
- Ensure there is air movement throughout the grow space
2.) Nutrients and PH
- Avoid low pH – Cannabis roots don’t like overly acidic conditions. Test and adjust the pH to make sure it stays over 6 pH if you’re noticing brown markings. Low ph at the roots is the most common reason for a nutrient deficiency that causes brown scorch marks.
- Use a cannabis-friendly nutrient system, especially if you’re noticing continuing nutrient deficiencies after adjusting the pH, or if you’re using RO/filtered water
3.) Basic plant care
- Water plants regularly but never let roots soak in water for too long. Learn how to water perfectly every time.
- Watch out for any signs of plant ill health (spots on leaves, bugs, droopiness, etc.)
- Always take a few seconds to let your eyes gaze over your plants and their leaves. Sometimes you’ll notice something odd. The sooner you notice problems, the faster and easier they are to fix!
- Check out our free cannabis plant doctor tool to diagnose your sick plants
Now you can grow happy healthy plants and focus on increasing bud quality and yields.