by Sirius Fourside
Any grower who wants to cultivate their own high-grade homegrown cannabis has to pass a few milestones before that becomes a possibility. One of those milestones is being able to test the pH (the ‘p’ is always lowercase) of the water you’re giving your plants. If you grow in soil, DWC, aquaponics, coco coir…it doesn’t matter! Cannabis plants want properly pH’d water despite how trivial (or annoying) the task may seem to us humans!
Learn how to adjust the pH of your water
Strips that measure the pH will get the job done, though pH drops are a far better choice. However, today we’re going to talk about another option: the pH pen. We’ll show you how to use them, then the ones we use, and we’ll even go over the types of growers the pH pen is actually good for (spoiler: not everyone needs one!).
Note: Don’t accidentally get a “TDS Pen” if you want a PH Pen! They often look similar but they do not measure the same thing!
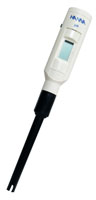
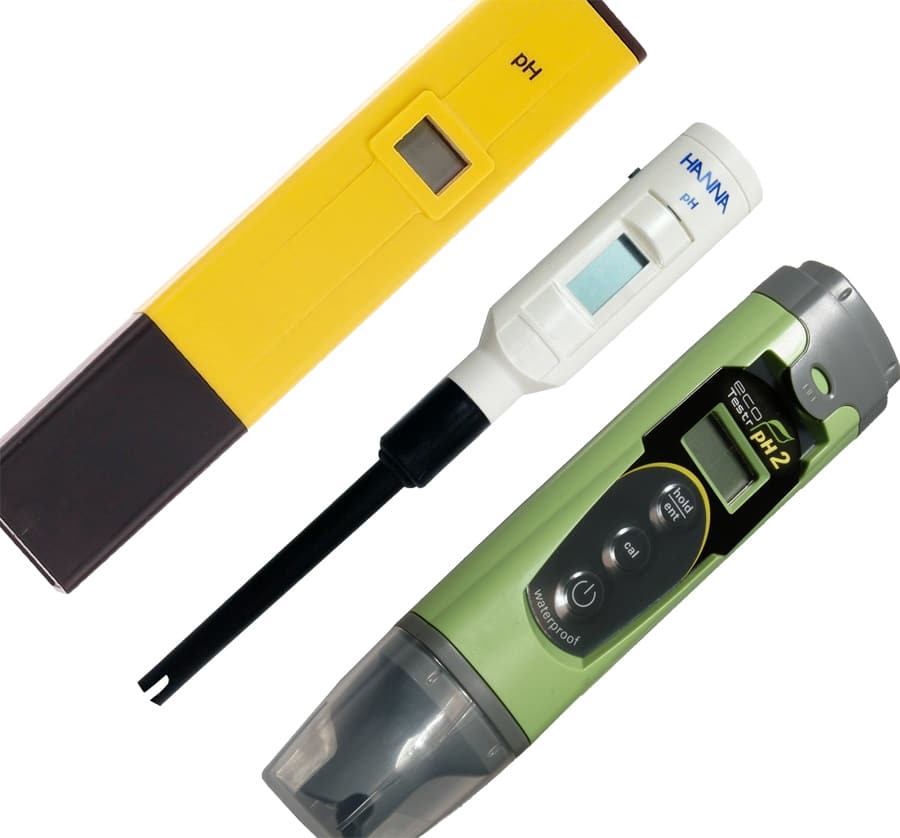
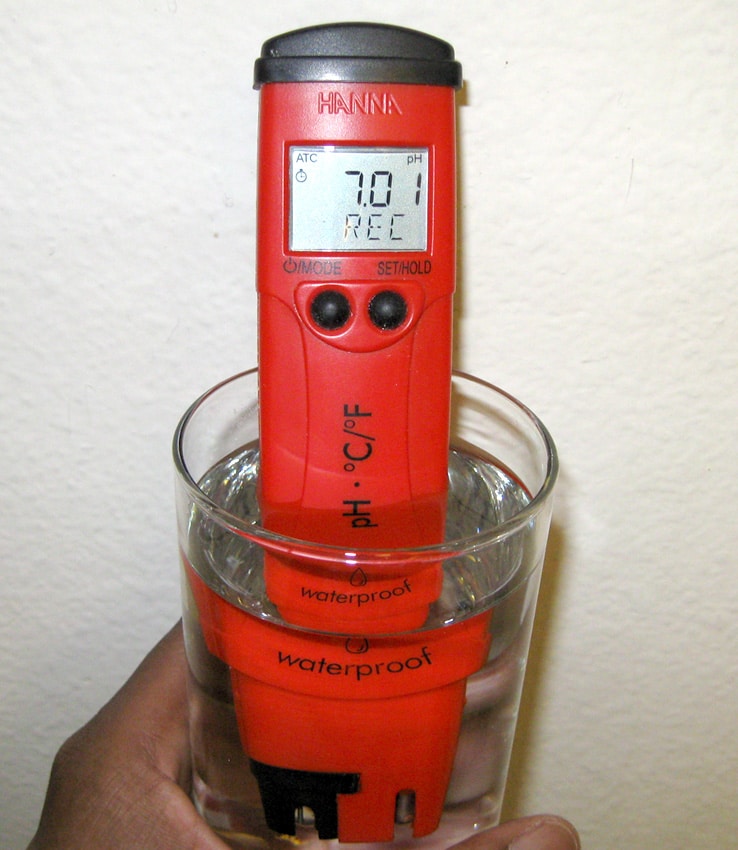
This is a pH Pen!
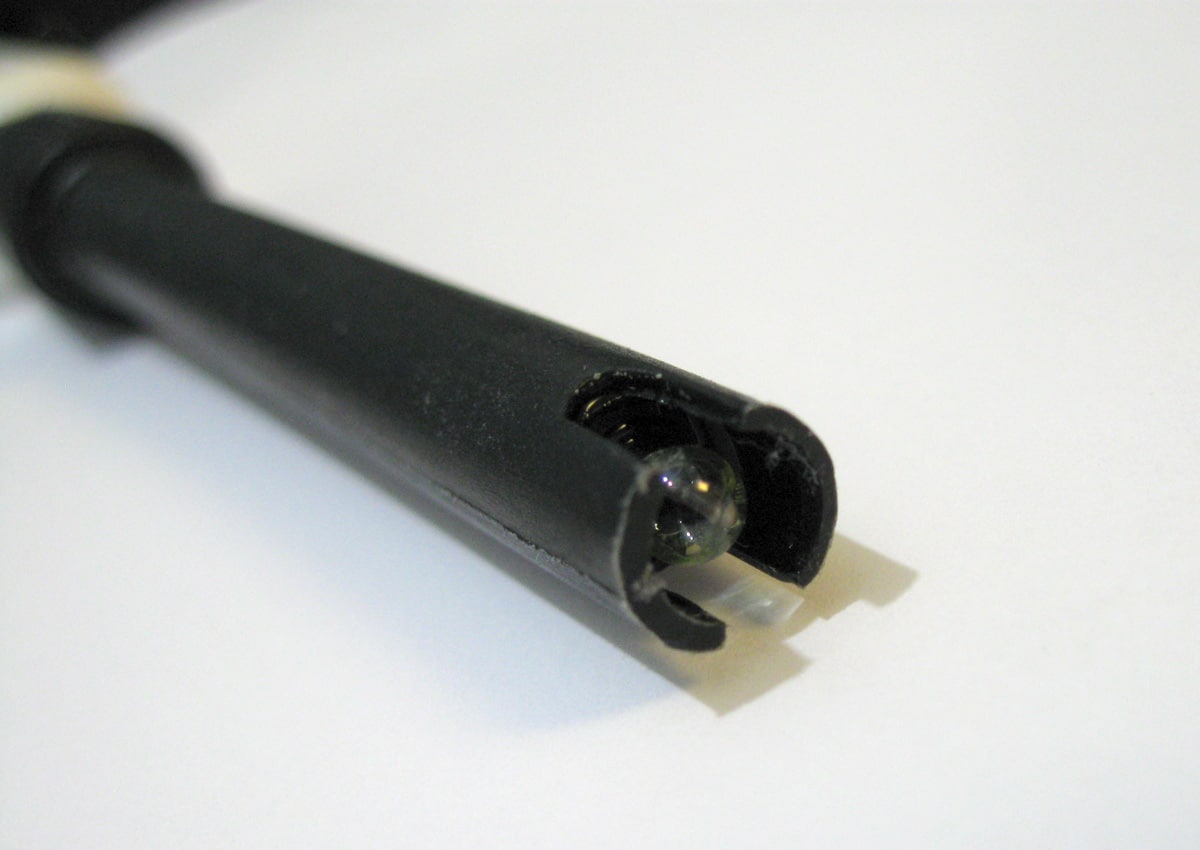
Besides being called ‘pH pens’, they’re also called pH meters or pH testers. They don’t all necessarily look like these ones, but this gives you a general idea. You have a ‘business end’ with an ‘electrode’ on the end that’s replaceable on many models. The electrode looks like a small glass ball on the very end; it can’t stay dry for long! The other end is the part the user holds, and it contains the screen, buttons, and pretty much everything else that makes the pen work.
pH pens do the exact same job as pH strips or drops, but they’re much more precise. Instead of getting a broad pH range from your tester, a mid-level pH pen can give you a measurement down to 2 decimal places with +/- .1 accuracy. In this case, that would mean that you could measure the pH of some water and get a reading of 5.85 and know that at worst the pH is really 5.75 or 5.95. Luckily, when you’re growing cannabis precision at that level isn’t entirely necessary though it’s nice to have if you want it.
PH pens tend to run on (multiple) watch batteries; luckily their batteries are pretty cheap if you look in the right places and they tend to last for a long time. As long as you make sure to turn off the device as soon as you’re done using it, the batteries can last for years.
Additionally, all pH pens need to be calibrated to ensure that they’re taking accurate measurements. For an accurate pH pen, you’ll need two calibration solutions, a storage solution, and a cleaning solution. The number and cost of the solutions tend to scare away some growers, but they can all last for a very long time when used sparingly. That being said, any grower looking into getting a pH pen should be aware that these extra solutions substantially raise the price of starting out with pH pens. If you get a cheaper pen (like my favorite model), the solutions can cost as much as or more than the pen itself!

pH Pen vs. TDS Meter vs. PPM Meter vs. EC Meter
We get questions from growers who aren’t sure what the differences are between a pH pen and the other tester pens available. Here’s a quick run-down of what these pens really are:
- pH Pen – Measures the pH (acidity or alkalinity) of a liquid
- TDS meter – Same thing as a ppm meter. Measures Total Dissolved Solids, or how much stuff is in a liquid. TDS meters measure in ppm (parts per million).
- PPM Meter – A ppm meter is another name for a TDS meter.
- EC meter – Measures Electrical Conductivity of a liquid. EC meters are to TDS/PPM meters what the imperial system is to the metric system; ppm is much more widely used in the cannabis world.
In short: pH pens check how acidic or basic your water is. TDS/PPM meters check how much stuff is in your water. EC meters also check how much stuff is in water, but is not as frequently used in the growing world.
Who Should Use a pH Pen
A pH pen can be an awesome tool for many growers; I use mine almost exclusively now instead of drops. However, not all types of grows need the kind of precision a pH tester offers. Here are some things to consider before getting a pH pen for your next grow.
Soil grow
For a soil grow, especially if you’re using amended soil, a pH pen probably won’t do you much good as you hopefully have a system of microorganisms already taking care of the job.
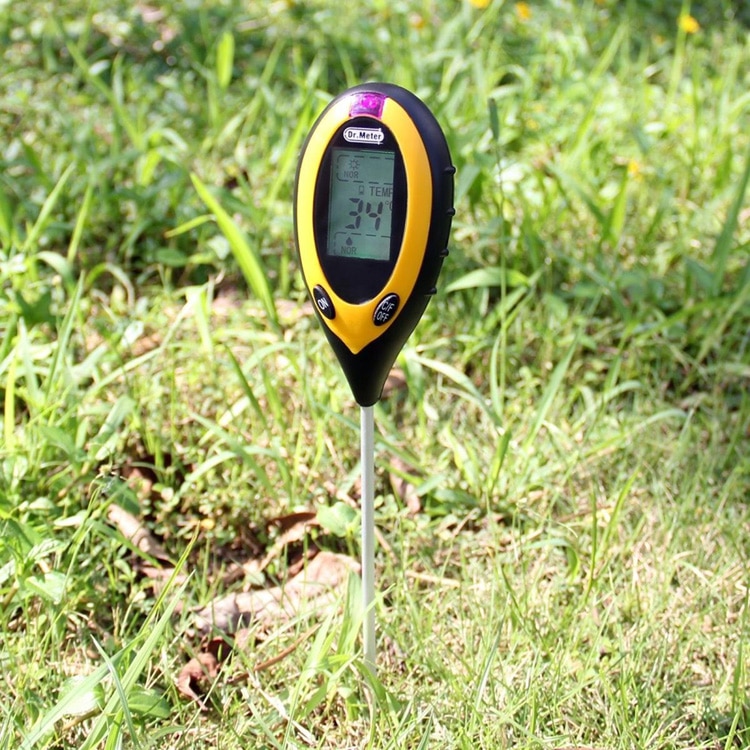
If you’re using soil as a medium and feeding nutrients throughout the grow, you might need to check the pH a bit more. Luckily for you, there are meters that check the pH of the soil while sitting in it. This is a pretty convenient way to check the pH of your soil, and many of these devices will simultaneously check your soil for moisture content as well the temperature. That being said, growers report that these are hit or miss.
Coco coir/peat/perlite/vermiculite combos
A pH pen is by no means necessary for growers using this type of medium. In fact, we would suggest that first-time growers using this type of medium hold off on using a pH pen for at least one grow. Using strips or drops the first time around gives more room for variation and is good for learning how plants react. pH pens are good for growers in this medium if they’re trying to fine-tune their grow or root out a pesky problem that might be pH based.
DWC/Top-fed DWC/Any water-based hydroponics
A pH pen is a great tool to have for hydro growers! Again, it’s by no means necessary, but in mediums where the roots are resting in water, knowing an exact pH can be extremely helpful. This is due in part to the fact that water can change pH much quicker than soil or coco coir. A pH pen will allow a hydro grower to check for trends in pH changes so that they can anticipate problems and react before anything bad happens.
How to Use a pH Pen
Alright, so if you’re sitting there and you already have a pH pen, or you want to see how they work…it’s pretty simple! There are three main parts of using a pH tester. Fortunately the first part only needs to be done every once in a while – once every week is more than enough for a working pH pen.
Calibration
Calibrating your pH pen to make sure it stays accurate is by far the most off-putting part of owning a pH tester of any type. If you can get past this small task, you’re set!
To ensure your pH pen is giving accurate readings, you need to have it test something with a known pH. Generally, you’ll test a liquid at 4.01(or 4.0) and 7.01(or 7.0); some will recommend you also test at 10.01, but that step isn’t needed.
If you test a liquid and the reading is off, you’ll need to adjust your pH meter to match the liquid it’s testing. Some pH pens will have to be manually adjusted, such as with a dial you have to turn, or buttons to press. Other testers can automatically calibrate themselves once in the appropriate mode, but you generally will pay noticeably more for this feature.
Manual Calibration
- First, check the manual that came with your pH pen for specific instructions.
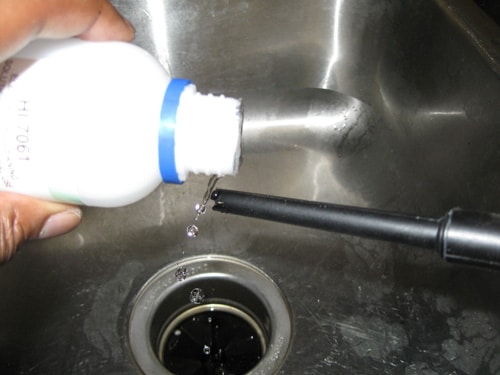
- Pour some 4.01 testing solution into a clean container. This is so the rest of the 4.01 solution doesn’t get contaminated.
- Turn on your pH pen and place the electrode into the 4.01 solution you poured out. If the reading is anything than 4.01, turn the appropriate dial (or press the appropriate button) until the screen reads 4.01.
- Gently clean the electrode with a paper towel and repeat steps 2 and 3 with the 7.01 testing solution.
- You’re done! Do this again in a week to ensure accurate readings. If it feels stable after many tests, you can calibrate less often. It’s also a good idea to do it sooner if you feel the readings you’re getting don’t seem right. Trust your gut!
Automatic Calibration
- This will usually take a sequence of button presses, so you’ll want to consult the manual for your pH pen for this.
- When you do automatic calibration, the pen will have you dip the electrode in 4.01 and 7.01 pH fluids. Make sure to pour each of those fluids into separate clean containers so the rest of the two solutions remain usable.
Measuring pH
This is the easy part where the pH pen finally gets to pull its weight. Just turn on the pen and dip the electrode into the liquid you want to test. Keep in mind that not all pH testers are waterproof, so don’t completely submerge any of them unless it specifically says it’s waterproof.
- Take the protective cap off your pH pen, and turn it on.
- Place the electrode into the liquid you want to test and leave it until the reading stays within a .02 range. Some pH meters may never stay still on a single number, but as long as the number isn’t in an upward or downward trend, you can stop measuring.
- This process can be sped up by lightly swirling the electrode through the water. You don’t want to move it fast enough to make any splashing at all.
- Make sure you only feed your plants water in the correct range
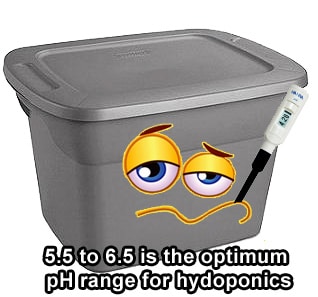
- Hydro: pH of 5.5 to 6.5
- Soil: pH of 6.0 to 7.0
Cleaning and Storage
Once you’re done with your pH pen, there’s one main rule to remember: never put your pH pen away with the electrode dry! Seriously…
Don’t put your pH pen away with the electrode dry. Dryness breaks electrodes!
- Use a small amount of cleaning solution to rinse off the electrode. If cleaning solution is unavailable, use distilled water instead.
- Pour a small amount of storage solution into the protective cap for your pH pen. Make sure there enough to cover the electrode when the pen is placed in.
- Place the pH pen in its protective cap so it stays nice and moist. Don’t forget to turn it off to save the batteries!
That’s pretty much everything you need to confidently handle pH pens, or at least learn if they seem like they’re worth the trouble for you.
If you’re looking to get a pH pen and aren’t sure which one to get, these are the two we use:
Vantakool Digital PH Meter – Dirt cheap but gets the job done. Comes with powder packets that can be used to calibrate the pen.

Apera PH60F – Costs a bit more, but is higher quality, waterproof and comes with everything you need including a battery and calibration fluid.

Atlas calibration solution; you can’t really go wrong with a good company! If your pH pen doesn’t come with calibration fluid, you can buy your own for cheap!
PH pens have electrodes that need to be kept clean and moist. Distilled water can be used for cleaning and storage, but specially made cleaning and storage solution do an even better job and last a long time if used sparingly. If you only plan to get one, get the storage solution, which can also be used to help gently clean the electrodes.
Jump to…
How to pH Cannabis & Stop Deficiencies
PPM: What It Is and How To Track It
7 Steps to Fix 99% of Growing Problems
How Sirius Grows – 600w MH/HPS & Top-Fed DWC