by Nebula Haze & Sirius Fourside
Quick Grow Snapshot
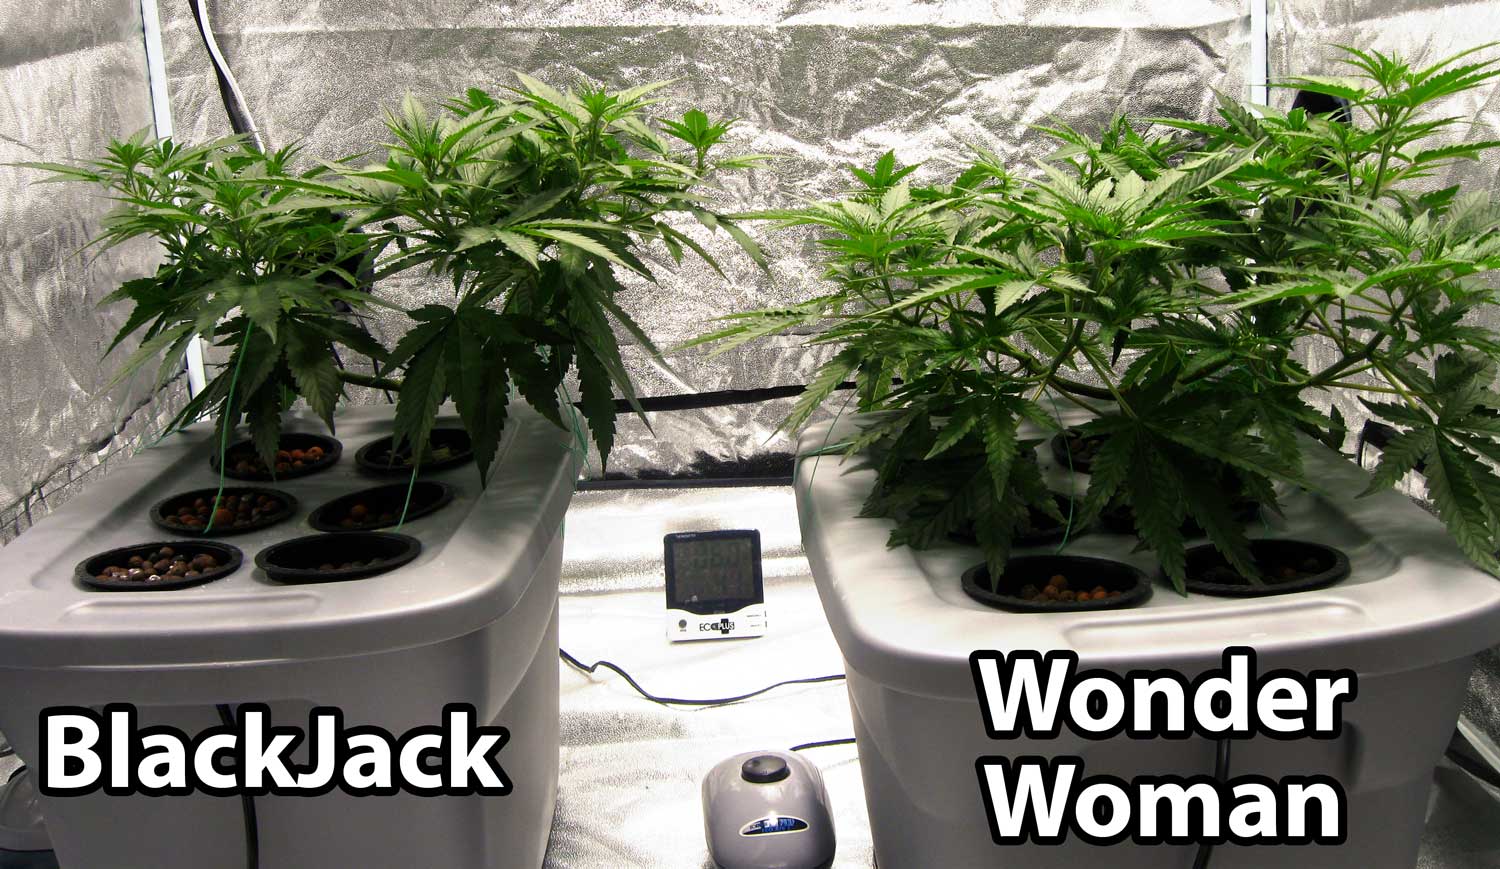
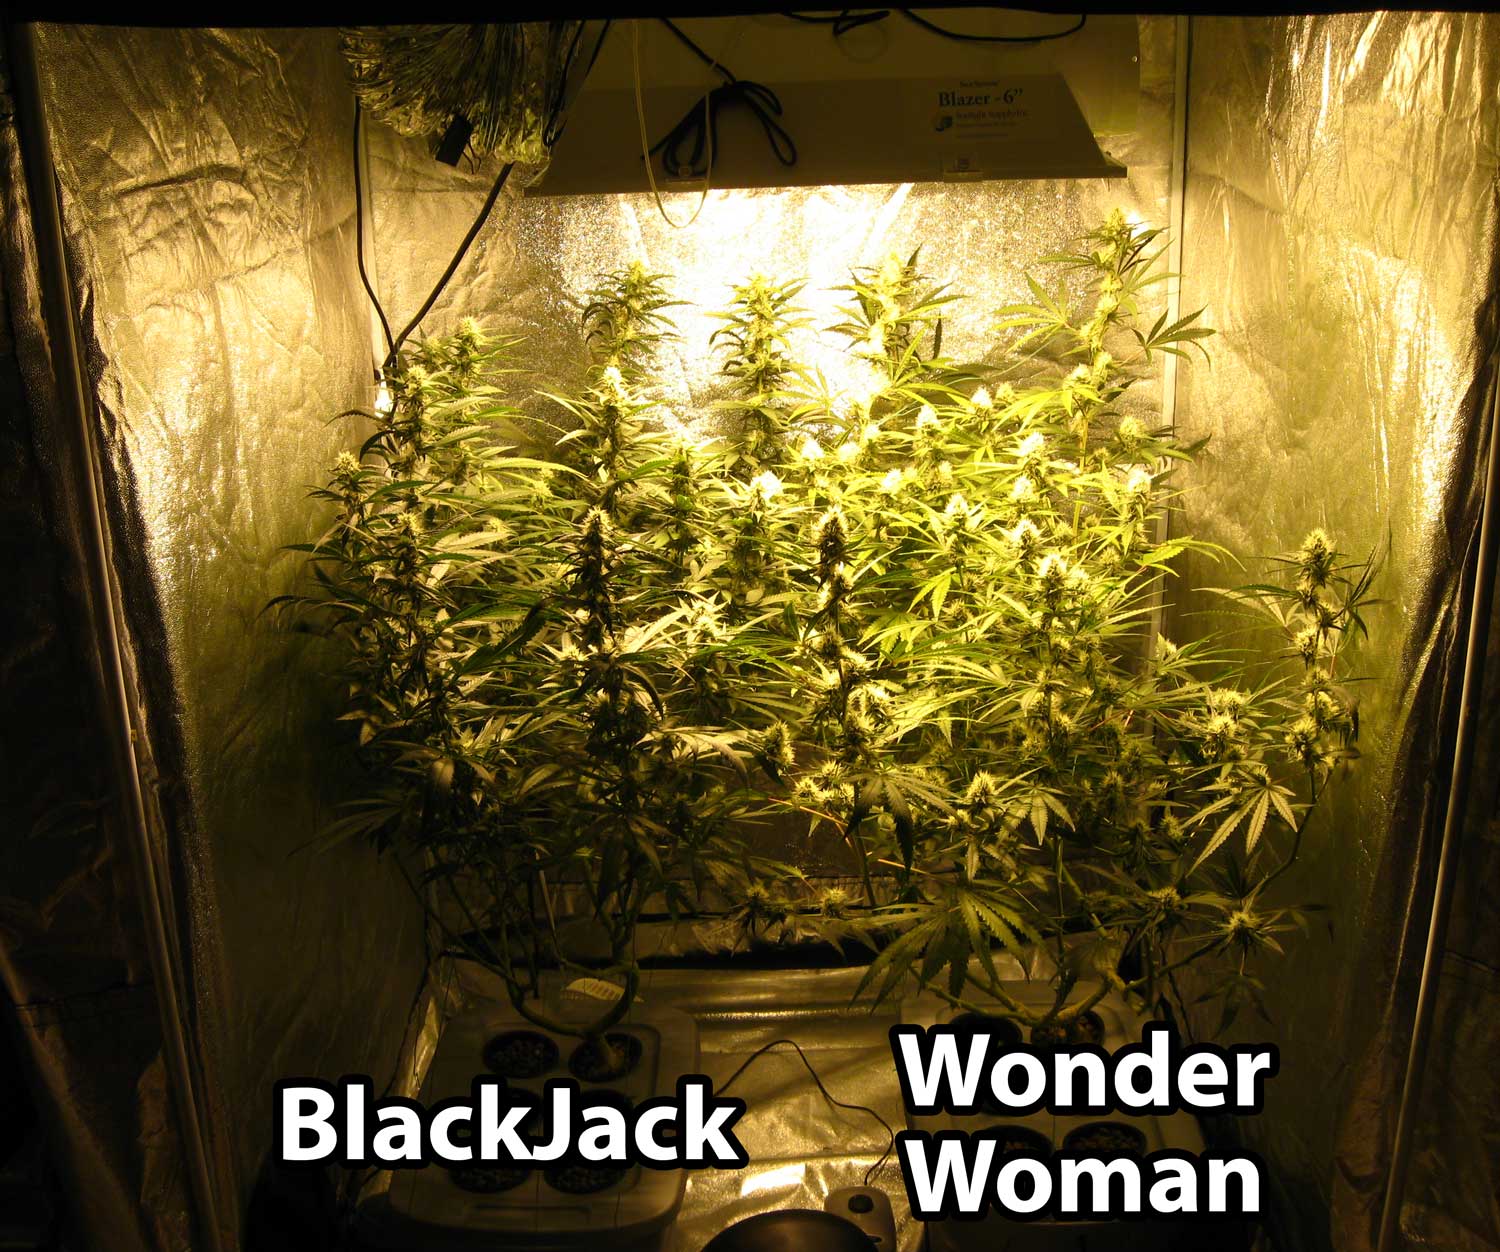
- Strains: Blackjack & Wonder Woman
- Grow medium: Hydroponics / top-fed DWC (deep water culture)
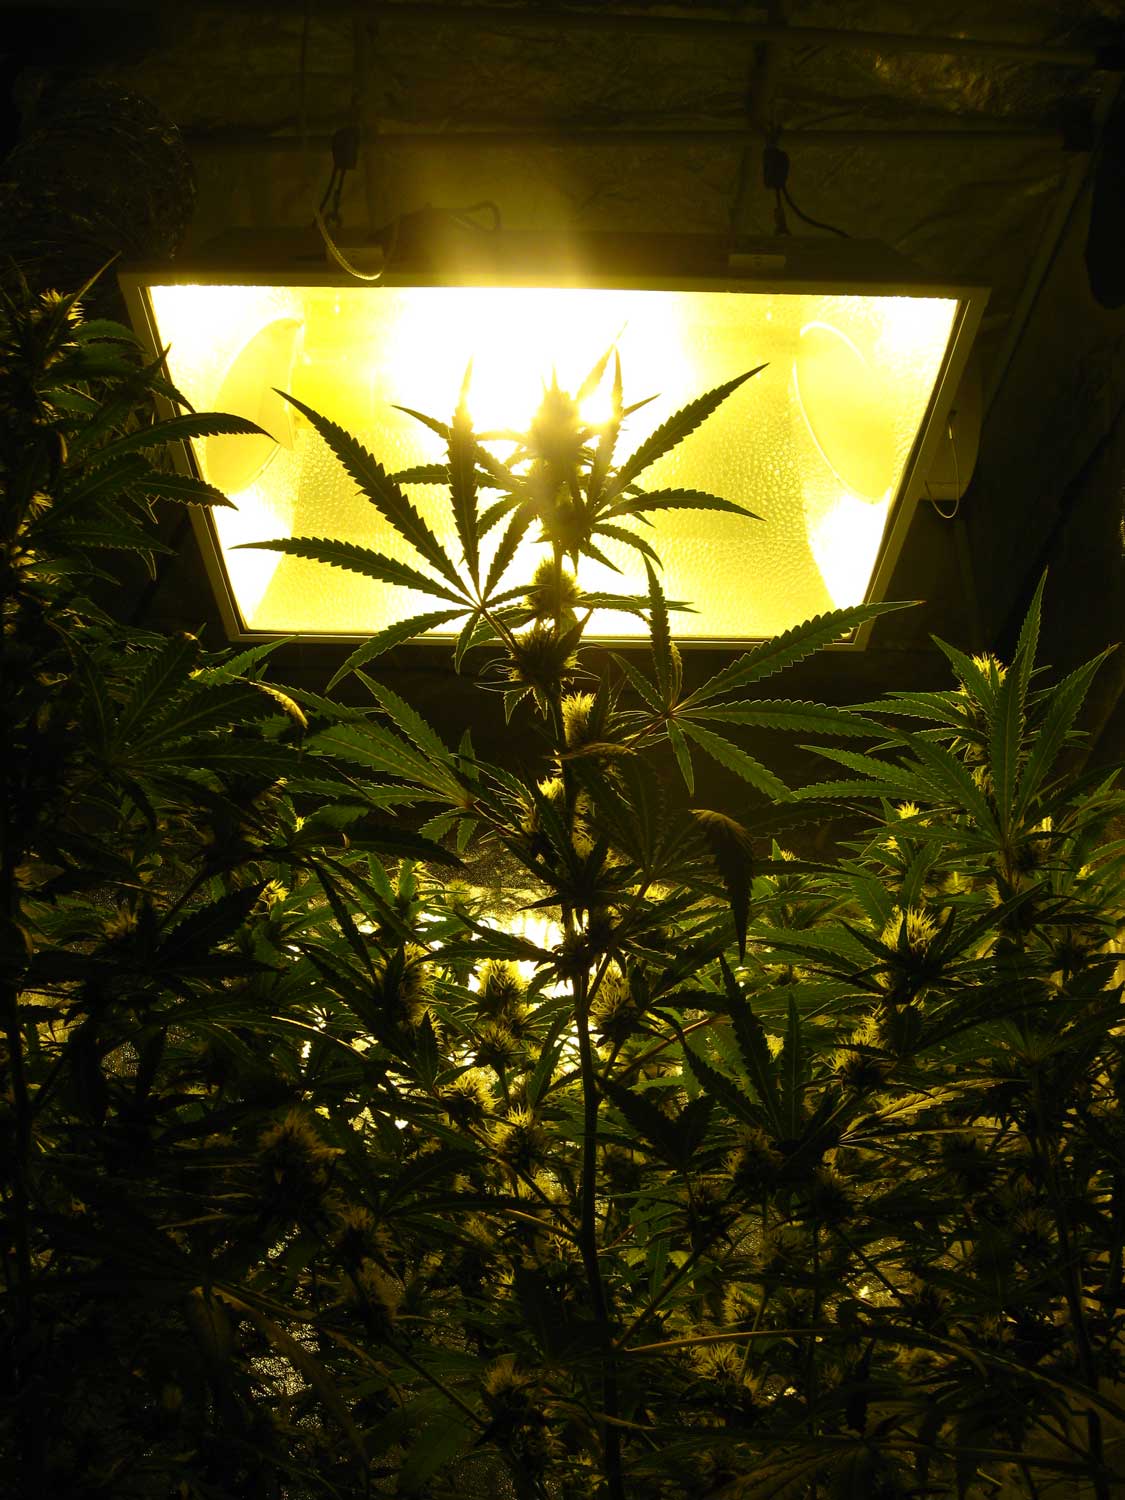
- Grow Light: 600W HID
- Metal Halide (MH) bulb in vegetative stage
- High Pressure Sodium (HPS) bulb in flowering stage
- Nutrients or Additives: General Hydroponics Flora Trio & Hydroguard (formally Aquashield)
View the complete grow setup here
June 16: Seeds sprouted
August 22: Switched to 12-12 flowering light schedule
November 19: Harvest!
Vegetative Stage: 67 days (2 months, 6 days)
Flowering Stage: 89 days (2 months, 28 days)
Total Time – Seed to Harvest:
156 days (5 months, 3 days)
Final Yield
23.09 oz
View full grow journal below!
We started with 2 feminized BlackJack and 2 feminized Wonder Woman seeds.
Because these seeds were feminized, we knew that all the seeds would grow into bud-producing female plants, so we didn’t have to worry about sexing these seeds as they grow older. Learn about buying cannabis seeds online (including feminized seeds), right here.
Here’s a quick diagram to show how growing in a top-fed DWC hydropnic system works:

Learn more about growing cannabis with bubbleponics
Seeds were sprouted June 16 via the paper towel method and were transferred to rockwool cubes and placed in DWC system on June 17. All 4 seedlings were initially placed in one tub together for easy care. Later all chosen plants can be moved to their own tub.
June 17 – Sprouted seeds placed in system
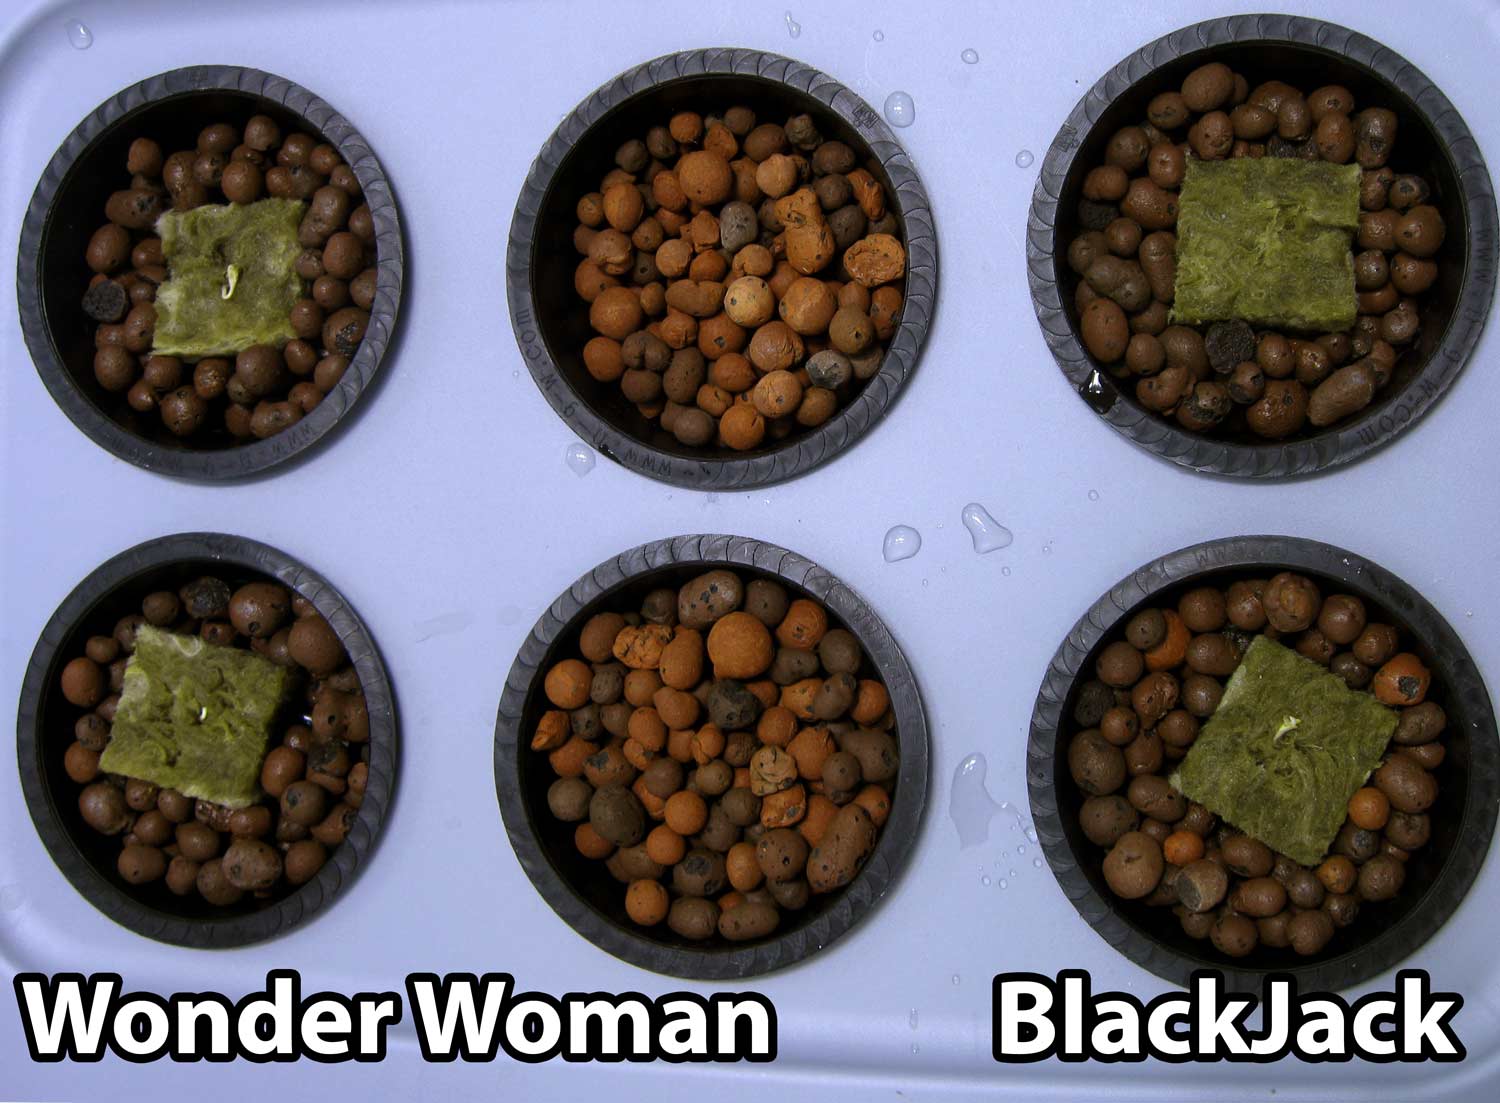
We initially started plants on 24 hour light schedule (24 hours of light a day), but kept the new seedlings several feet under the powerful Metal Halide bulb (which was also turned down to 60% power). The reservoir was filled with plain pH’ed tap water until the plants grew their second set of “real” (serrated) cannabis leaves.
Becasue of the top-fed aspect to our DWC system, we didn’t need to worry about watering the seedlings. We simply needed to sit back and wait for the sprouts to appear above ground, and for the roots to follow the top-drip down into the water reservoir below.
Here they are a few days later on June 29. By this point, we had turned the Metal Halide light onto 100% power, and had moved the light a little closer. This is also when we began adding nutrients to the water, at about 1/4 strength compared to the directions provided by General Hydroponics for a recirculating hydroponic system.
June 29 – Given their first nutrients!
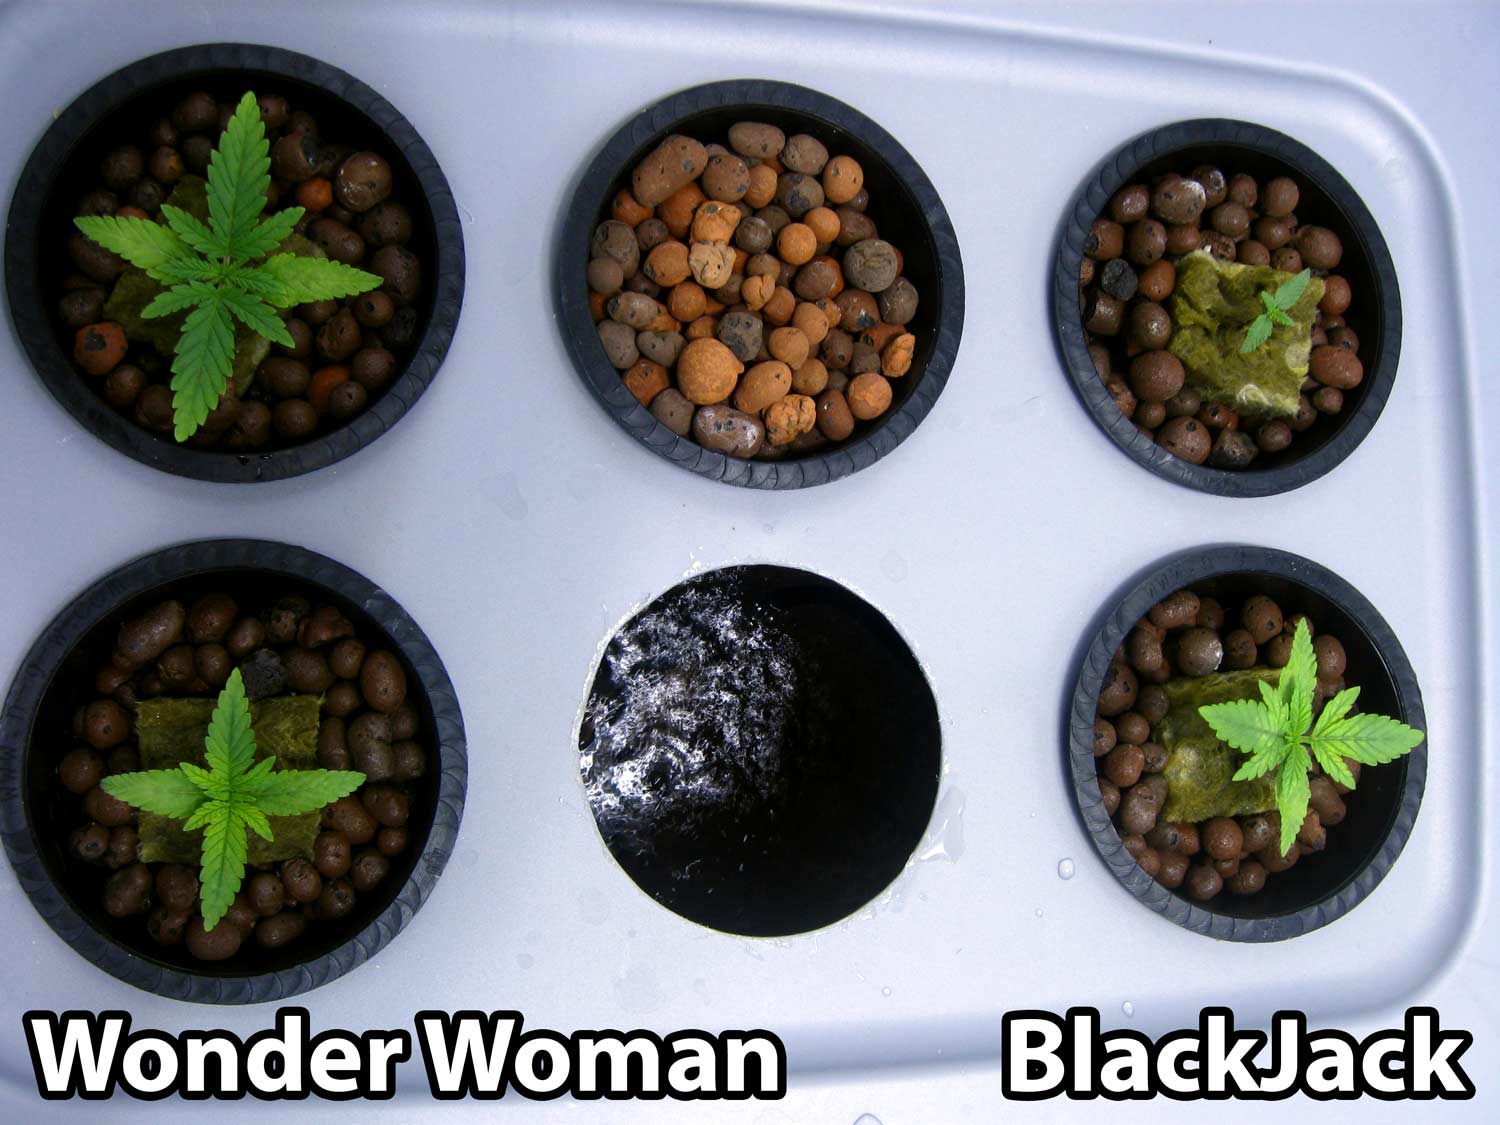
One of the net pots is removed, so you can see the water reservoir below.
You can see that the top right BlackJack seedling is struggling behind the other three seedlings. Luckily, we planted 2 seeds from each strain so that we would be able to throw away the two least-healthy seedlings. Some seedlings just come out of the gate faster than the others, and we look for the ones that seem to be growing fast & healthy, and which have healthy roots.
July 11
We selected the most healthy and vigorous seedling from each strain to become the main plants for our grow.
July 13 – Chose best plant from each strain
We moved our 2 winners into their own separate tubs.
July 15 – Moved to separate tubs
July 18 – Started plant training (main-lining)
Learn all about the main-lining technique here:
https://www.growweedeasy.com/main-lining-technique-nugbuckets
We began main-lining them, which involves using cutting and training techniques to create a manifold at the roots with 8 main colas.
This was our first time main-lining a cannabis plant!
We began by topping down to the 3rd node (set of leaves), then cleaning off all other vegetation that wasn’t on the 3rd node.
At this point, the young vegetating plants were over a month old. Normally it is considered best to start main-lining plants when they have about 6 nodes in total.
When we main-lined our plant, they had more nodes, and were a bit older than they needed to be. While this didn’t affect our results with main-lining, it did unnecessarily add a few extra weeks onto our vegetative stage time.
While we were pleased with our results (as you will see), we believe we should have begun main-lining earlier, and we believe doing so would have cut off a couple extra weeks from our veg time.
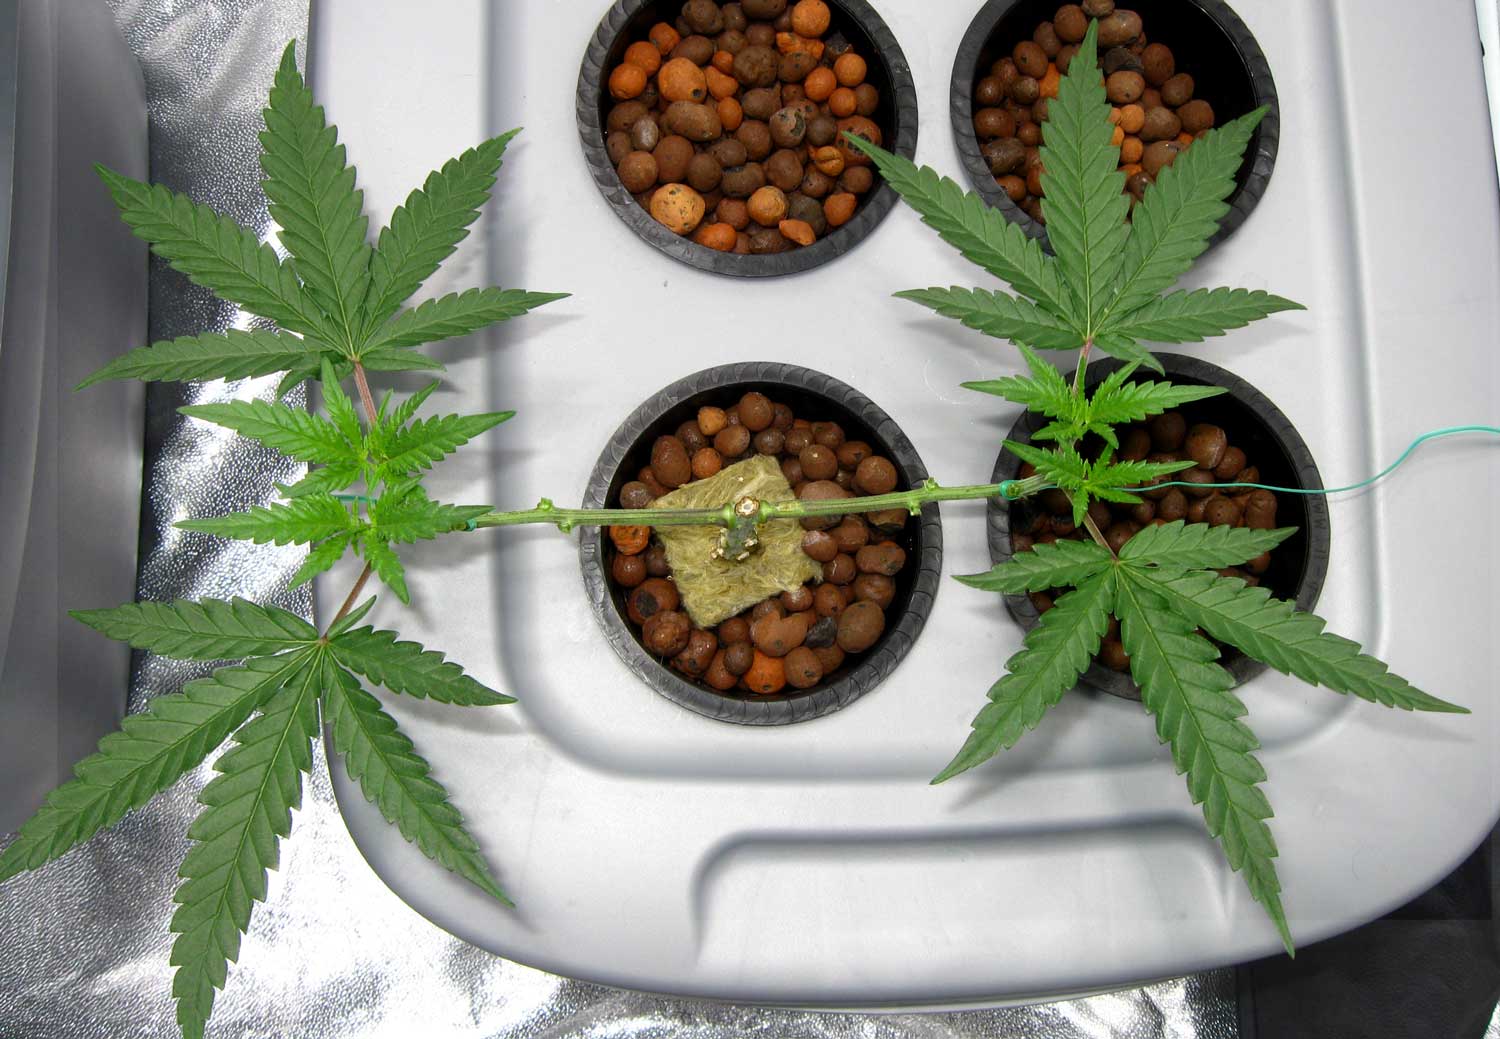
July 24 – immediate after second cut
The next step to main-lining is to main-lining is to again top the plants. Now that the plant has been topped twice, she has 4 main colas.
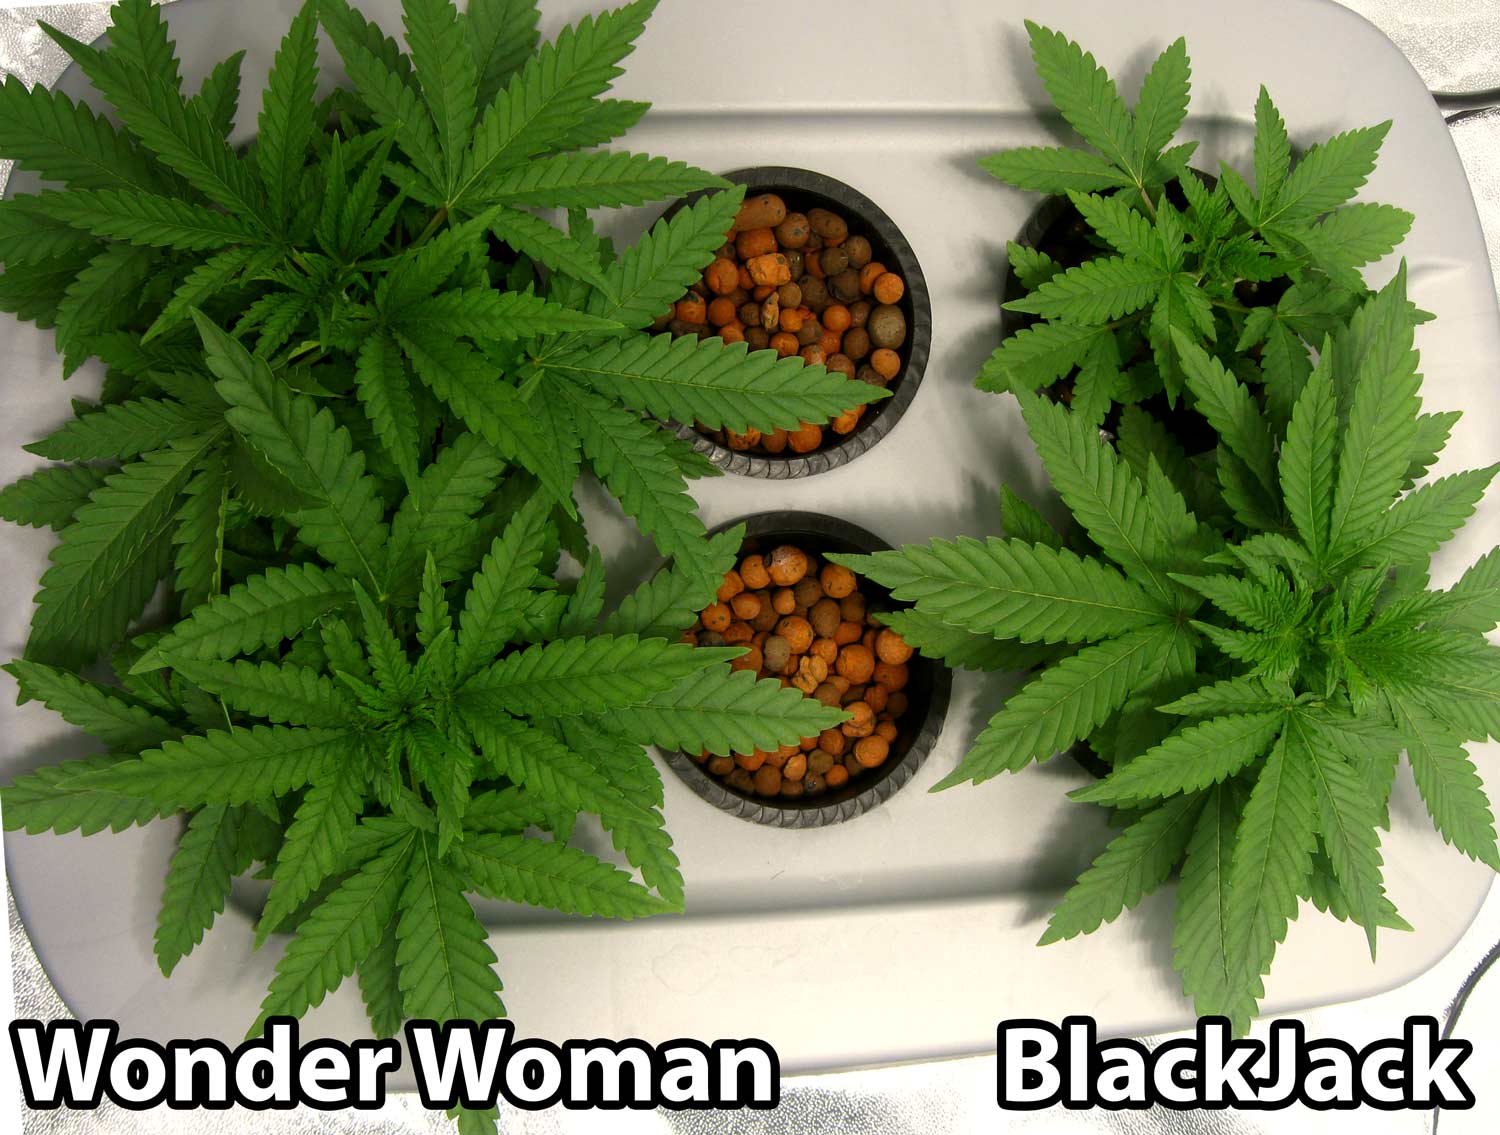
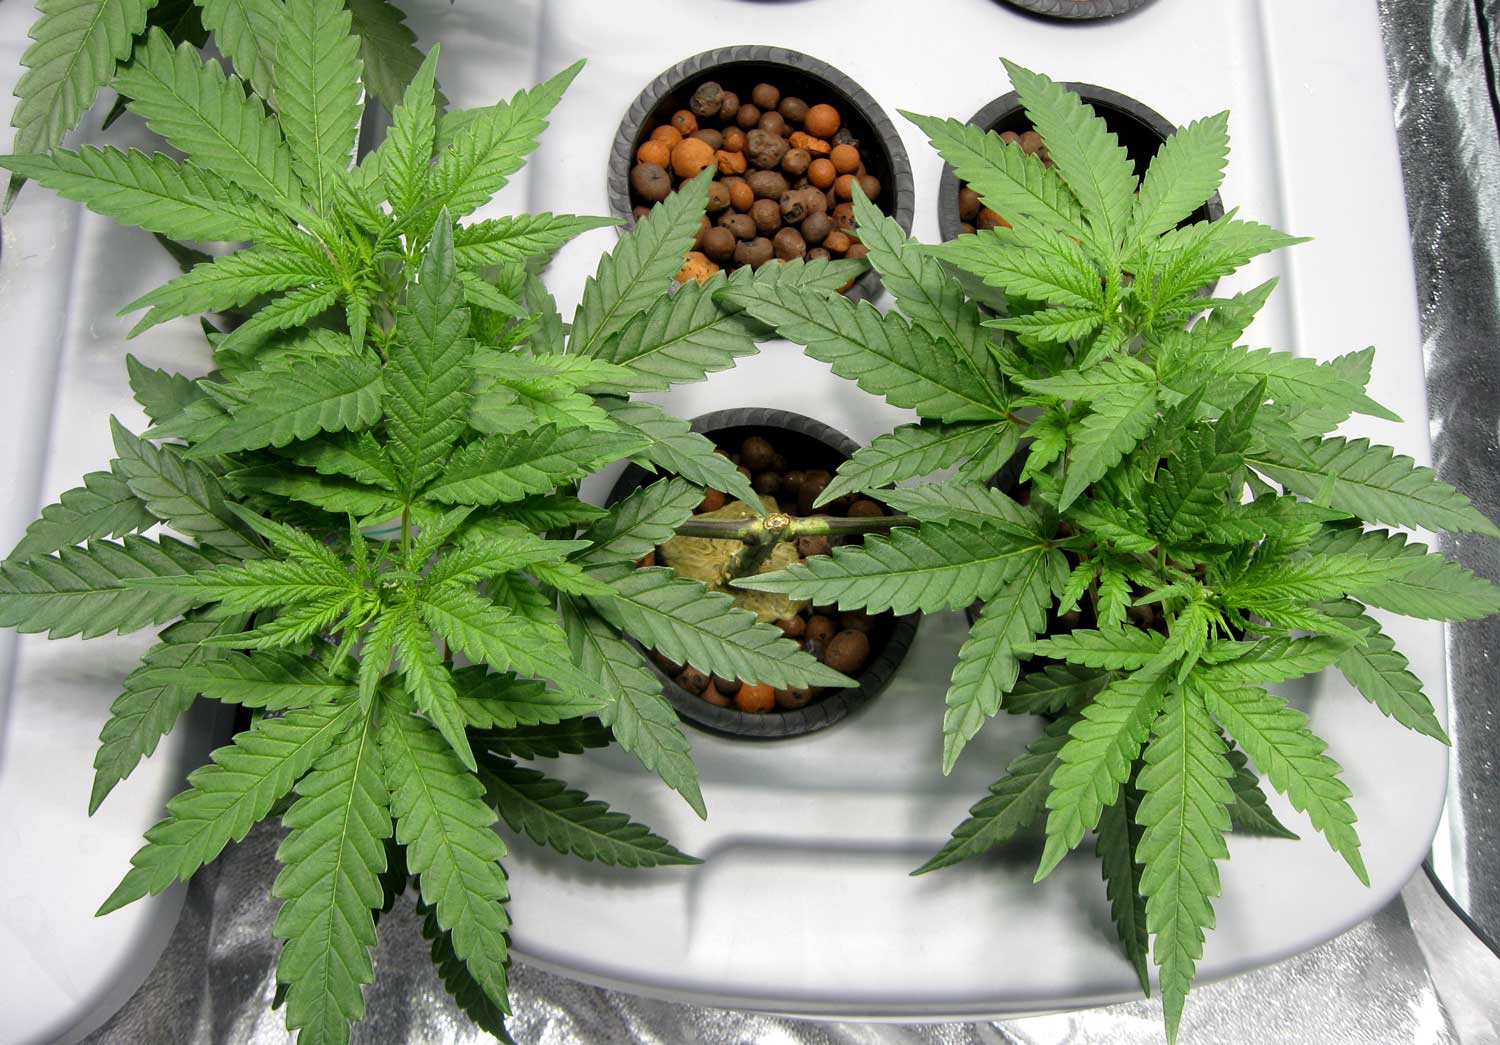
A day later, here’s a view from above the Wonder Woman (click for closeup)
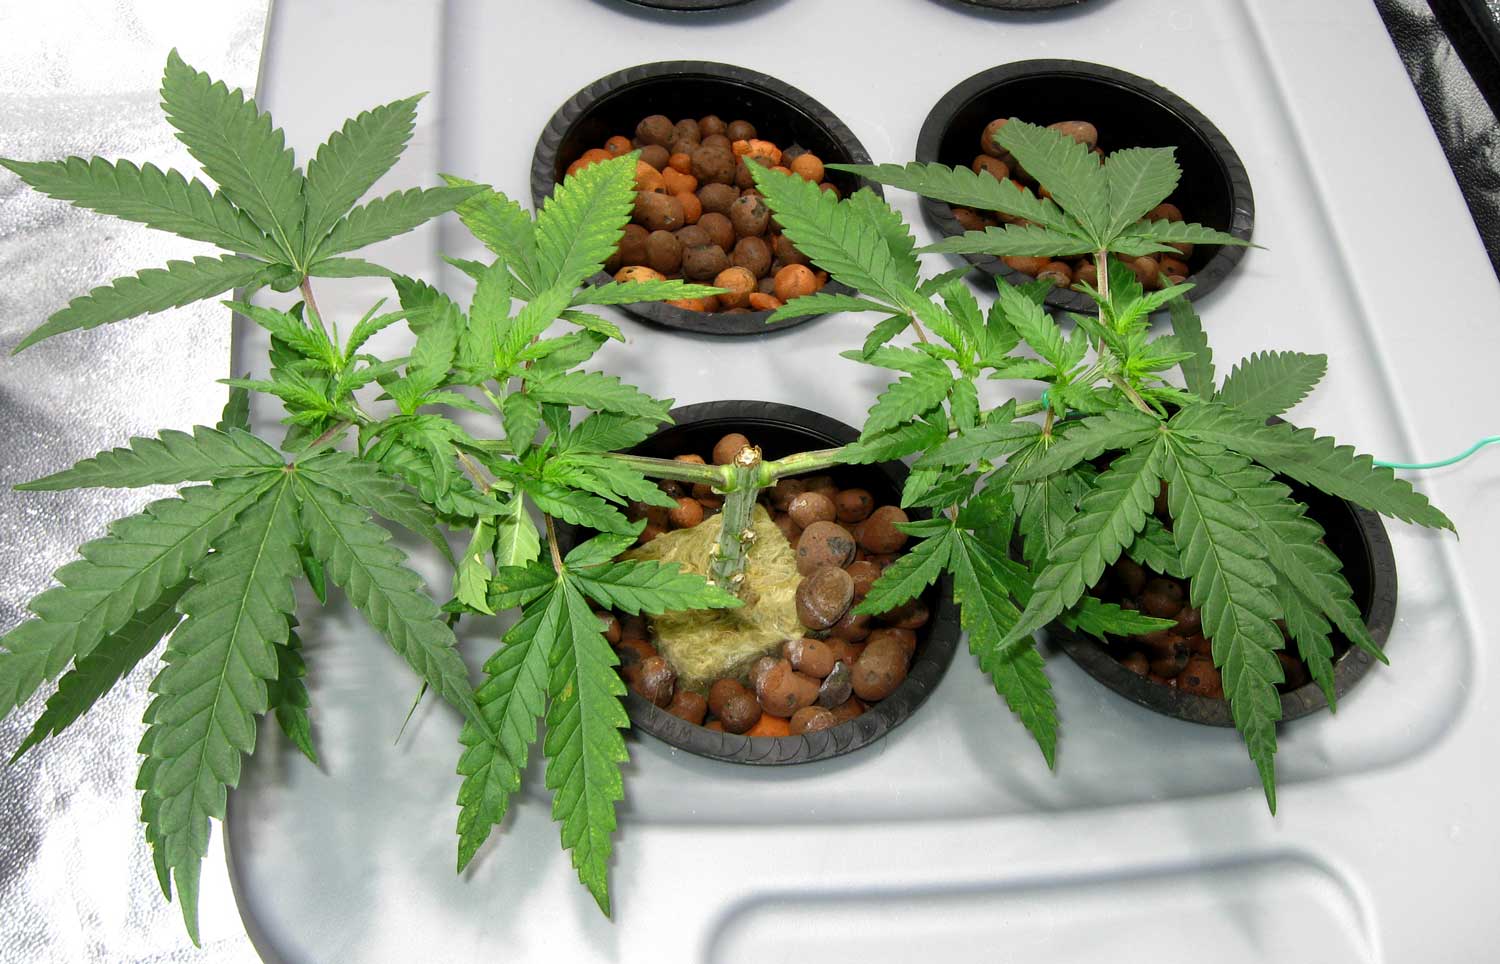
July 26 – Removed other growth tips, leaving just 4 mains
At this point we only have 4 growth tips on the plant. We want 8, so we will repeat this process one more time.
During this point, we had a heat wave. And we believe that the plants seemed to be growing a bit more slowly than usual.
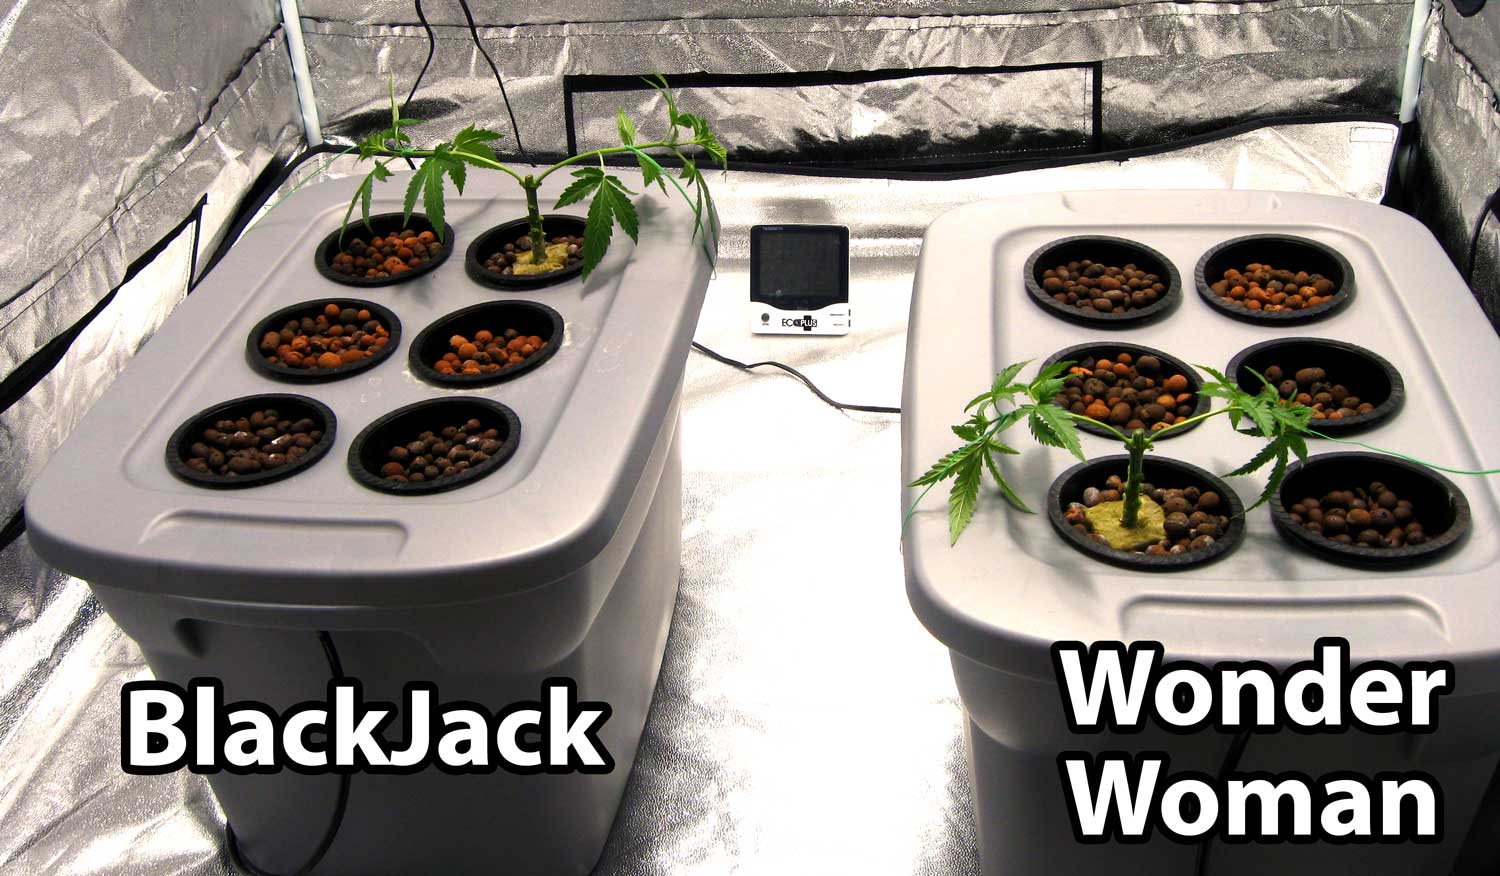
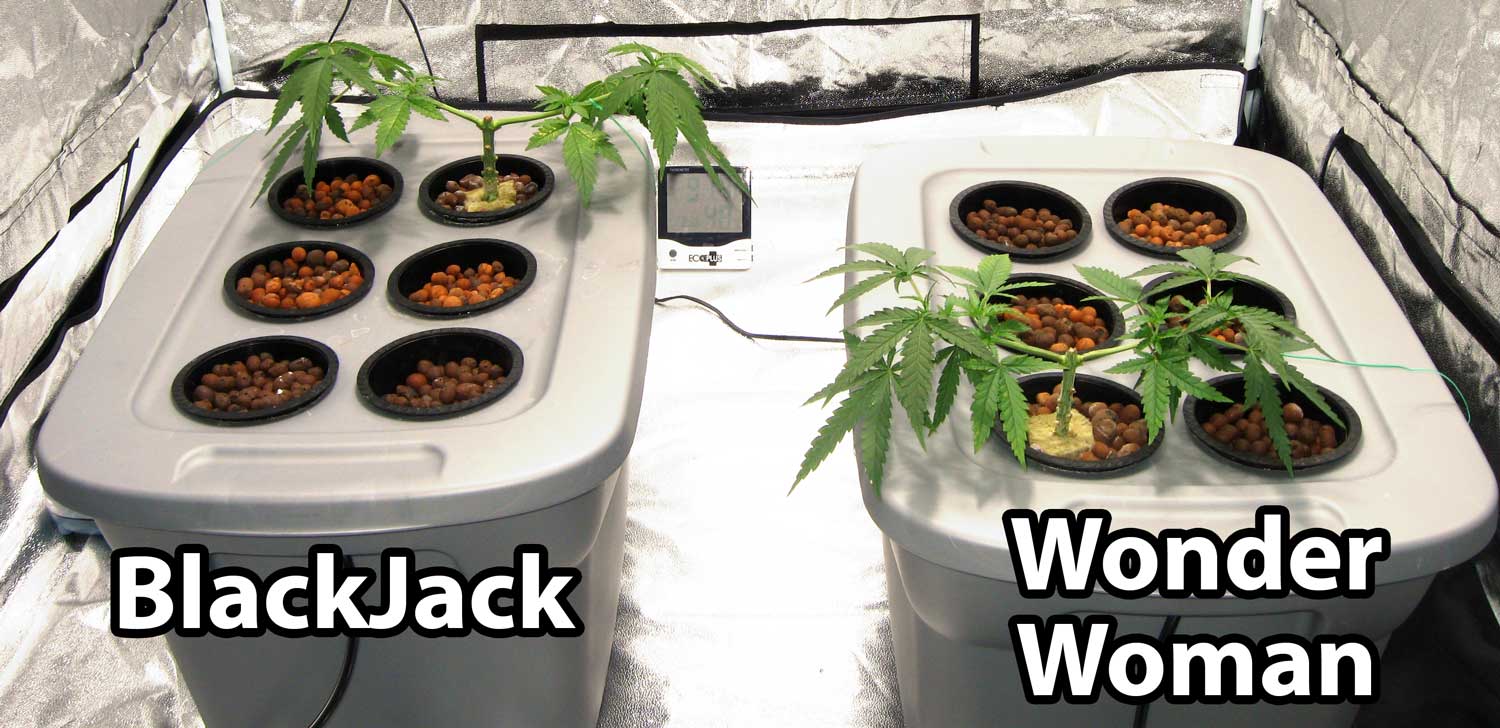
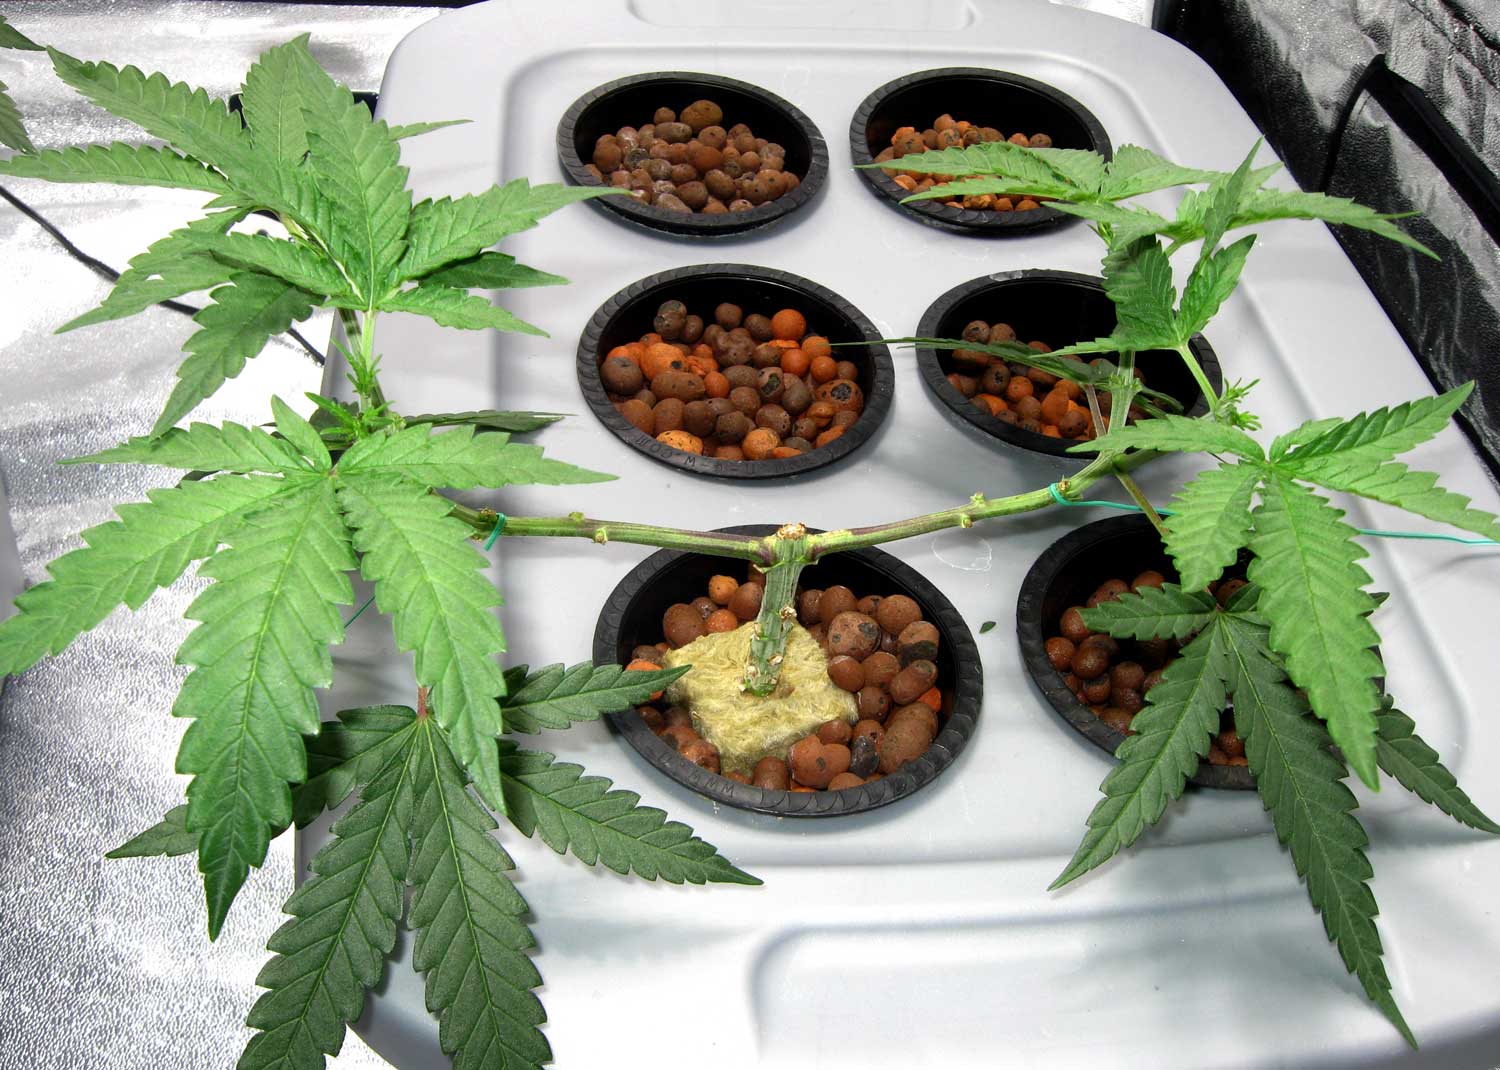
August 1 – Topped again for 8 mains
After the two plants had grown a bit bushy again, with a few more growth tips, we topped both plants again for total of 8 mains. This is basically the end of our main-lining and plant training.
Before
After
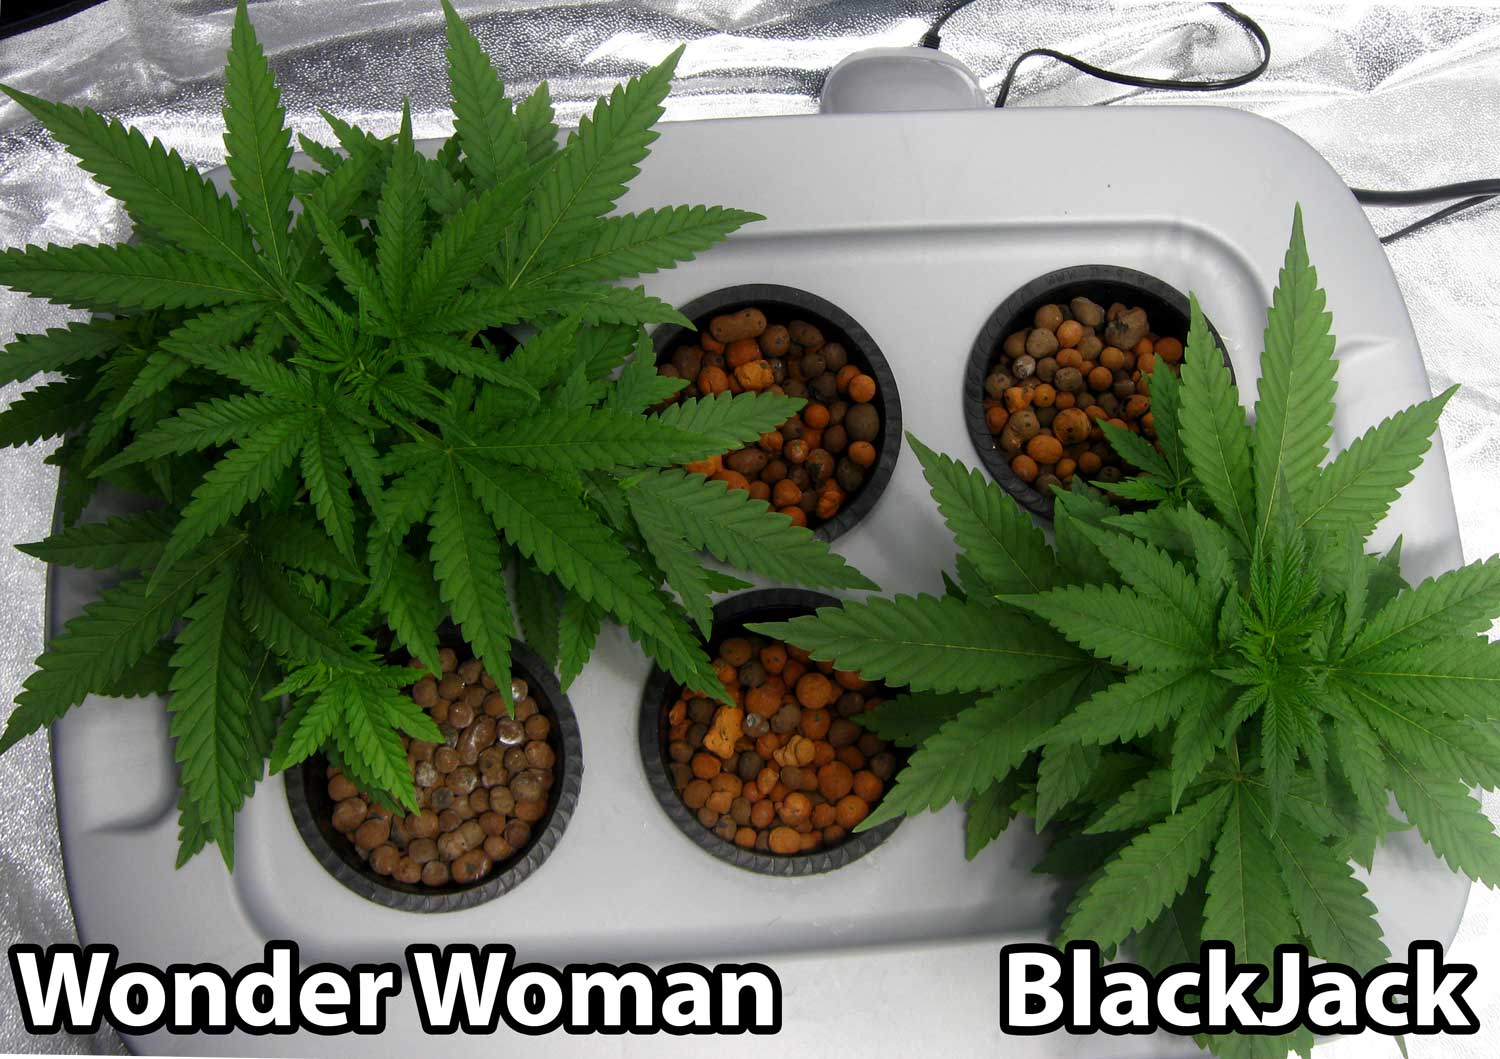
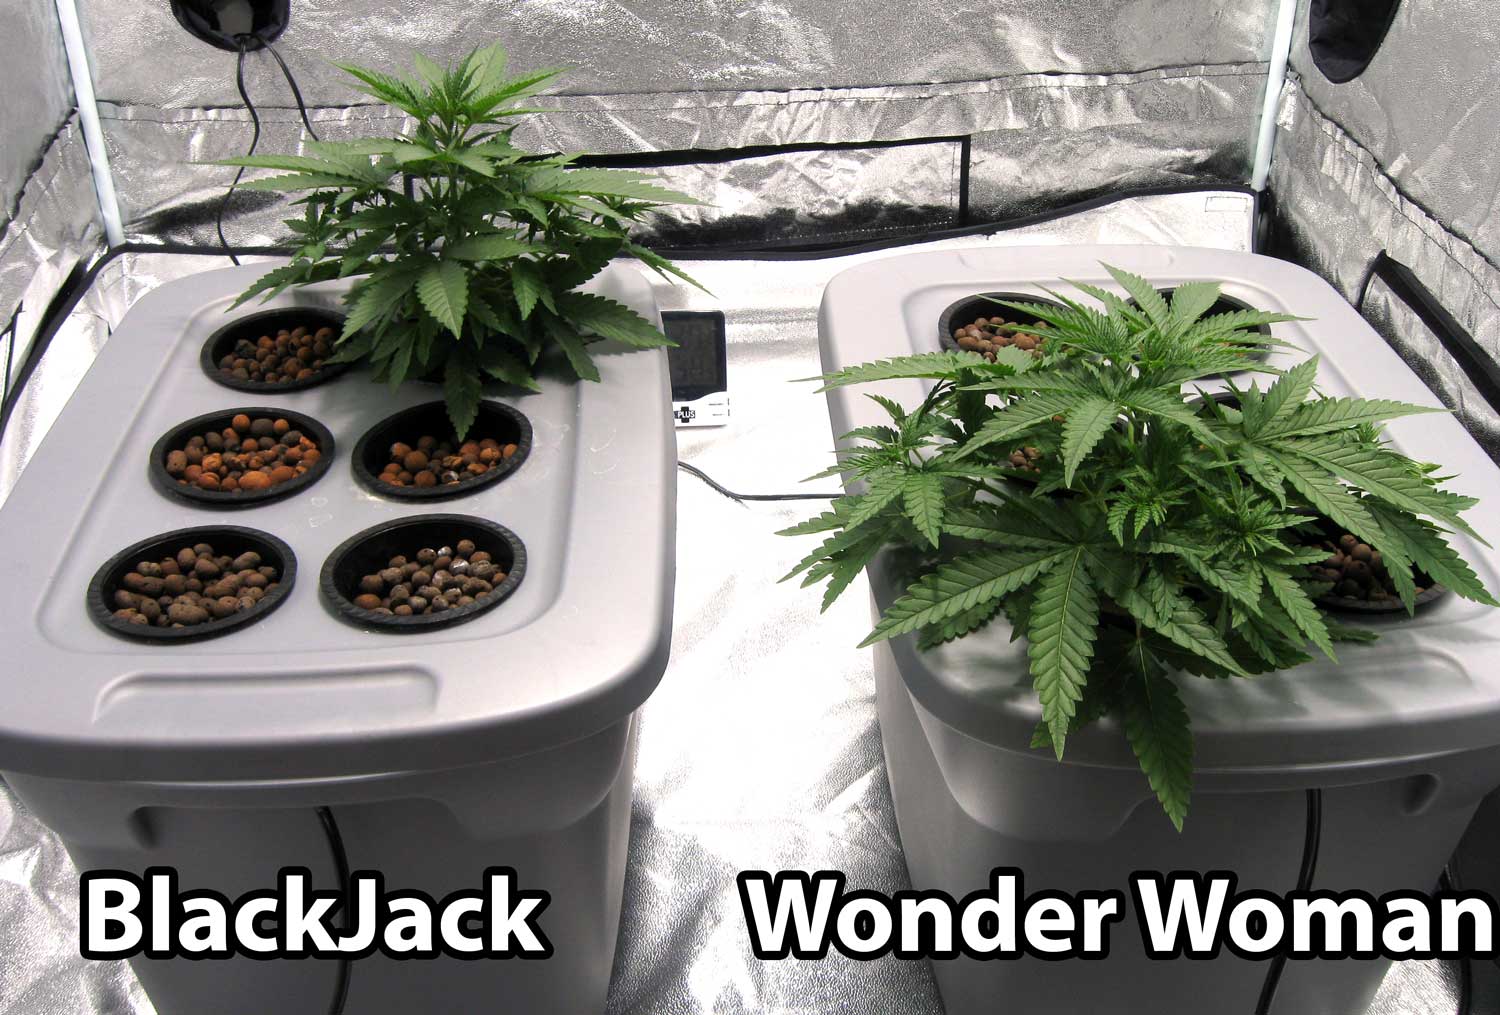
Here they are!

Now that we have main-lined the plants to produce 8 main colas, we must give them a little bit more time to gain some size before we signal them to start budding by changing the timers to a 12-12 flowering light schedule.
By allowing plants to get a bit bigger in the vegetative stage, we prepare the perfect structure to produce a lot of buds and get the most from the grow light in the flowering stage.
The only “training” we are doing at this point is tying down any branches down and away from the center of the plant. This helps the plant spread out in a desirable shape with a flat canopy.
Other than that, we are just giving the plants nutrient water and allowing them to naturally grow into a beautiful main-lined shape.
August 13 – Plants are starting to get bushy again
Flowering Stage
August 22 – Switched to the Flowering Stage
Flowering time! This is when plants start making buds!
We changed the timer to be on a 12-12 “flowering” schedule to initiate flowering. The process of giving a photoperiod cannabis plant 12 hours of light and 12 hours of uninterrupted darkness each day caused the cannabis plants to “get the message” that winter was coming and it was time to start flowering..
Growers artificially create a 12-12 light environment for cannabis plants grown indoors to signal the plant to start flowering (making buds).
We switched to the 12-12 flowering light schedule on August 22, so plants were vegged for just under 9 weeks.
While it is generally recommended to switch to an HPS bulb during the flowering stage, we kept the Metal Halide in for a little bit extra time as the blue light from the Metal Halide tends to reduce “stretching.” The yellow light from an HPS is great for flowering/budding, but does tend to cause the plant to grow taller or “stretch” more.
Whenever a cannabis plant is switched to flowering, it will tend to grow a lot of height all at once, known as the “flowering stretch.” By keeping the Metal Halide bulb in for a bit longer, we hoped to reduce the stretch a bit, since we were very happy with the structure of the plant.
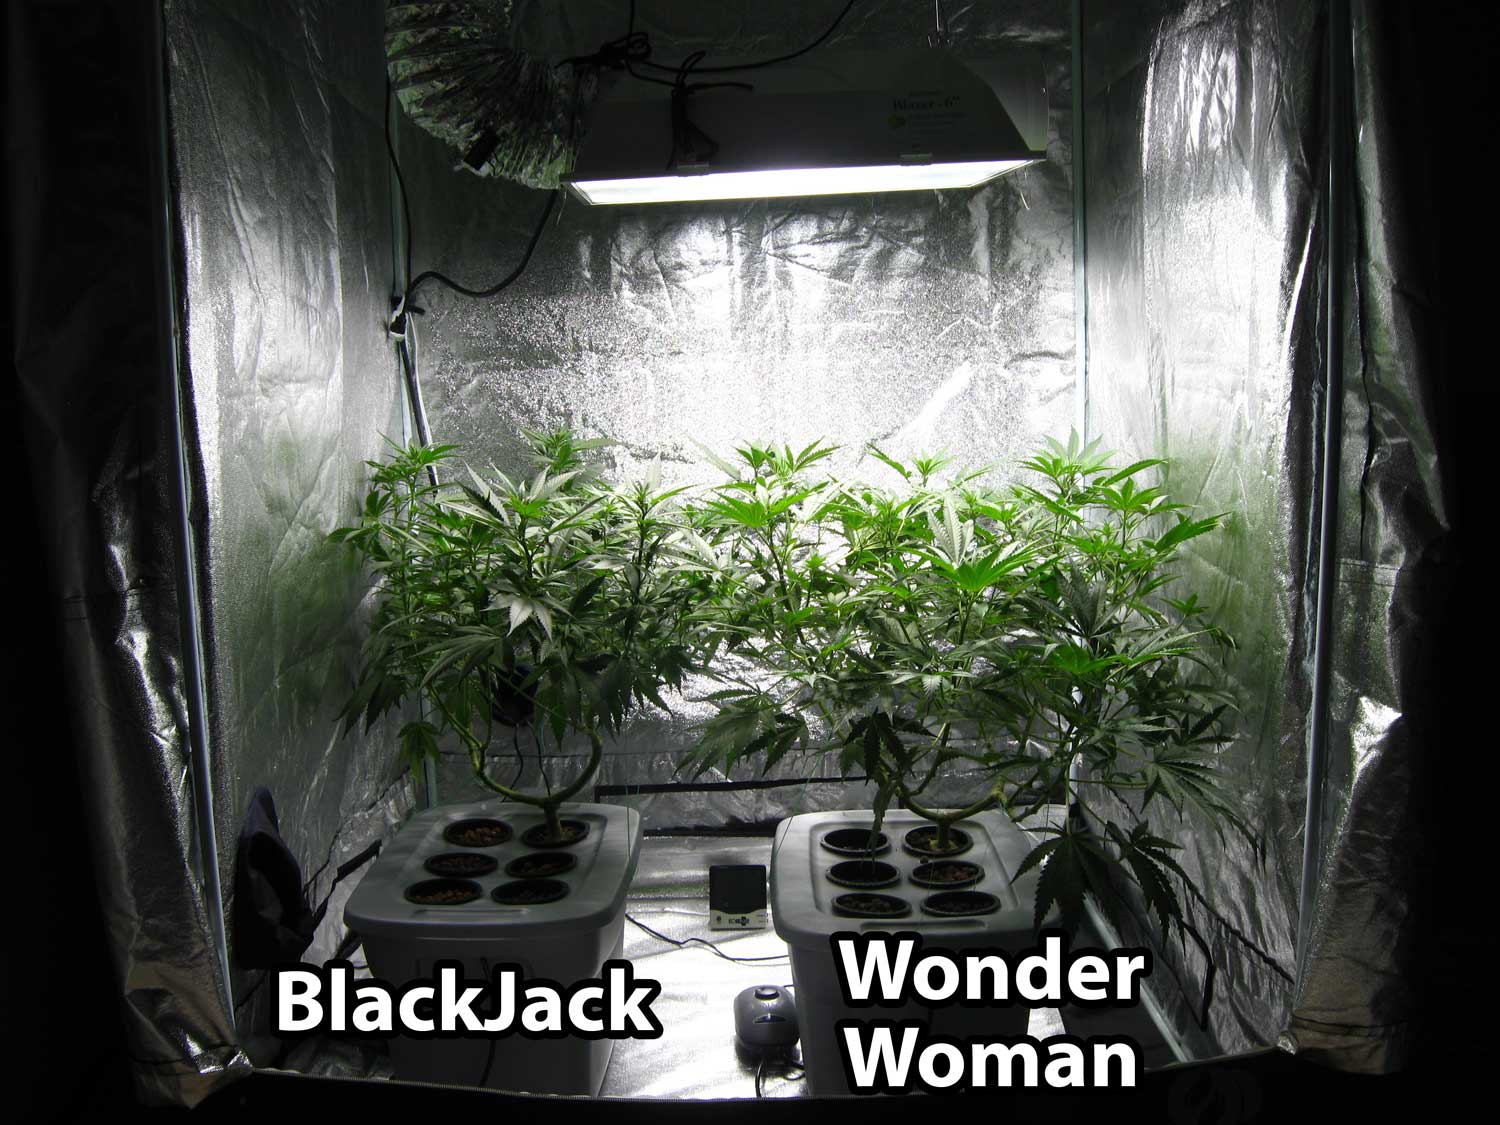
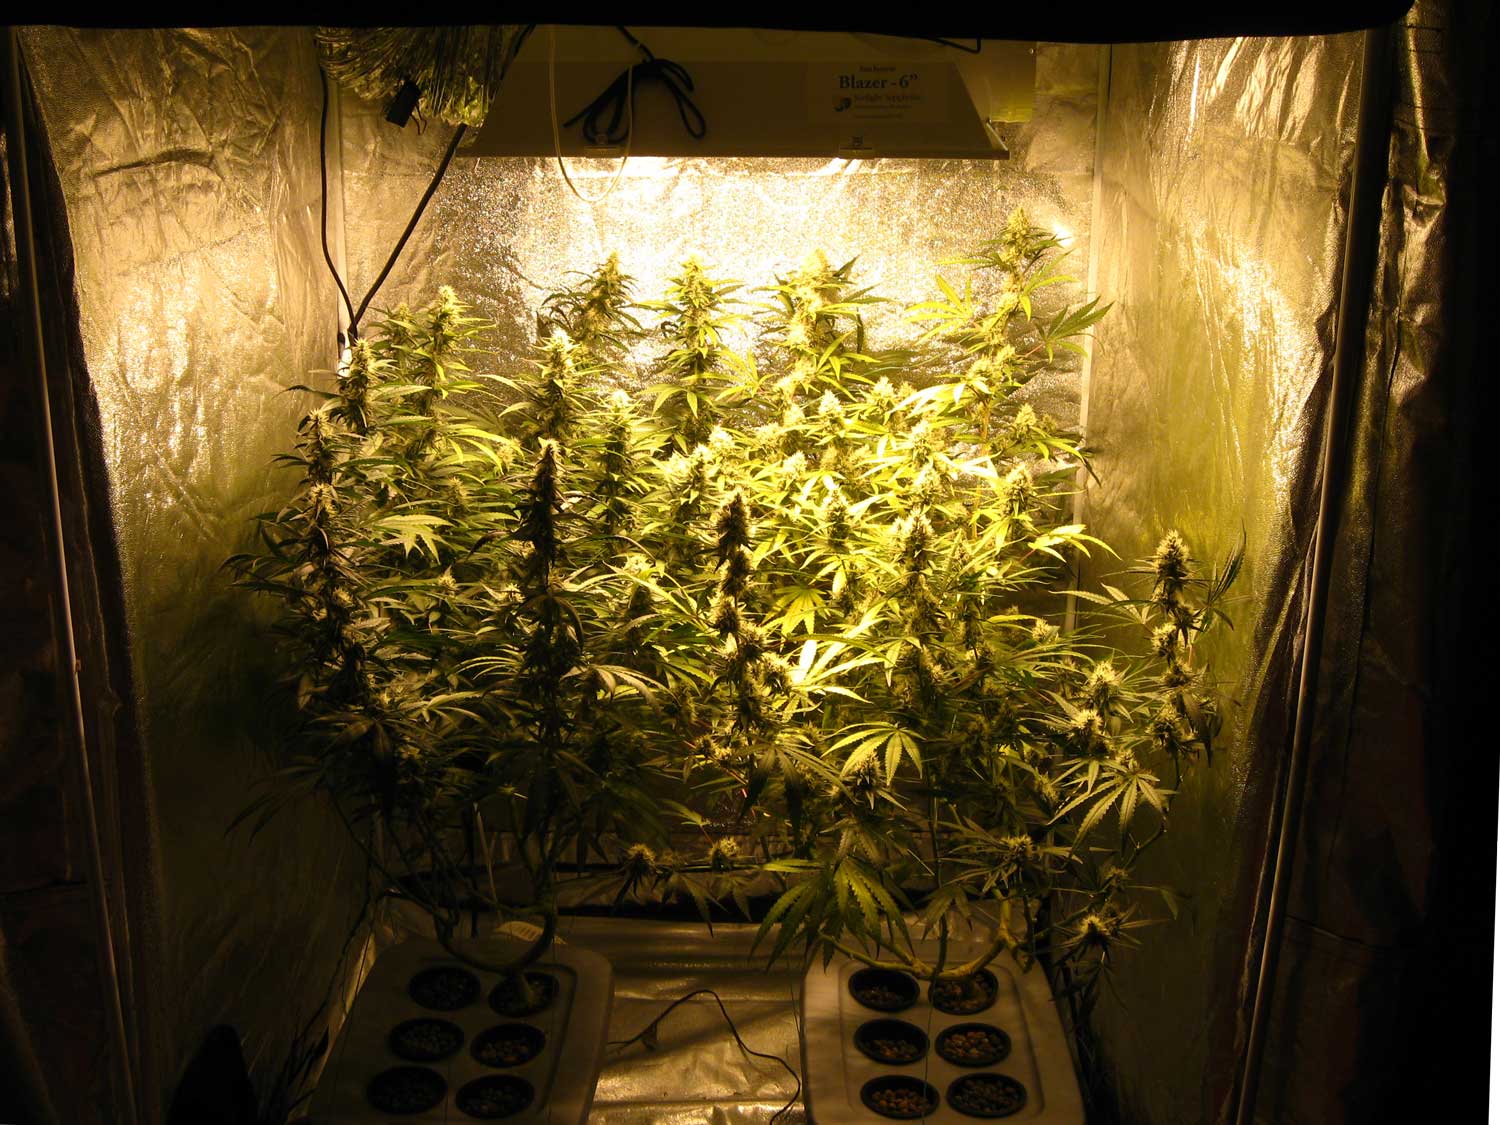
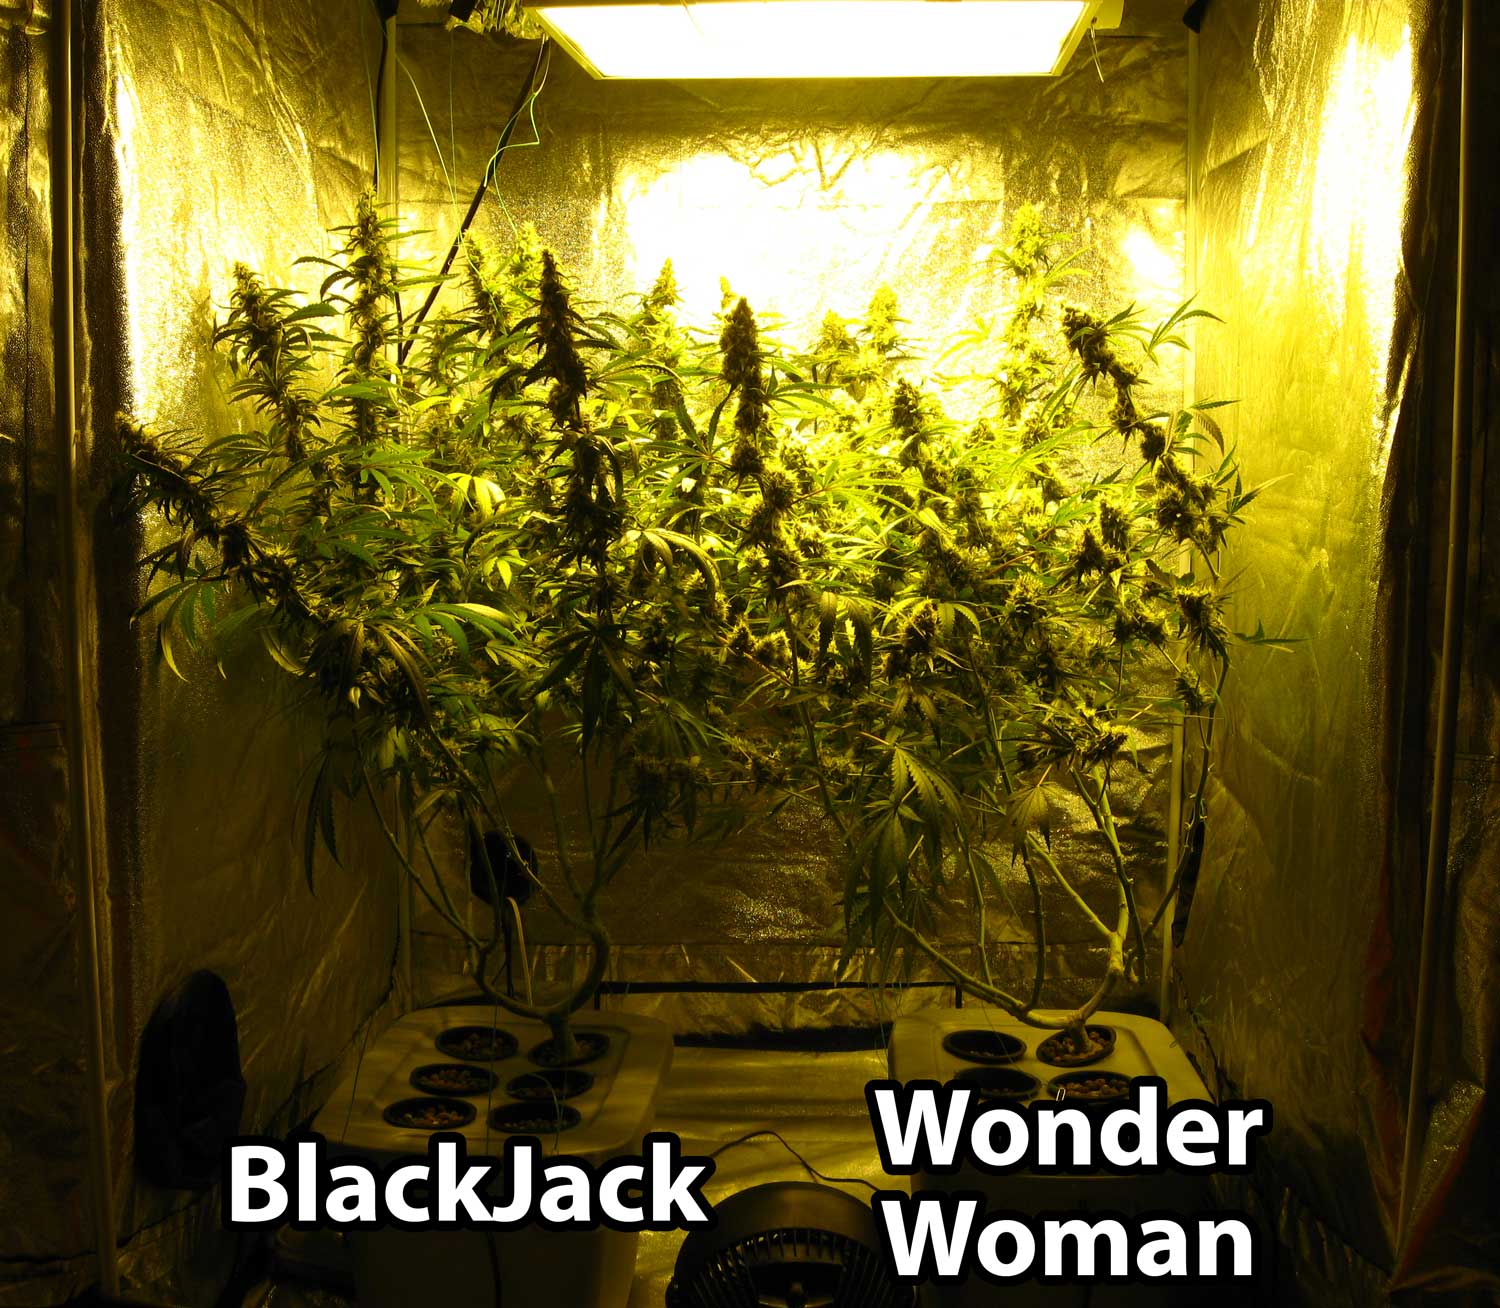
August 25 – A view of the two plants
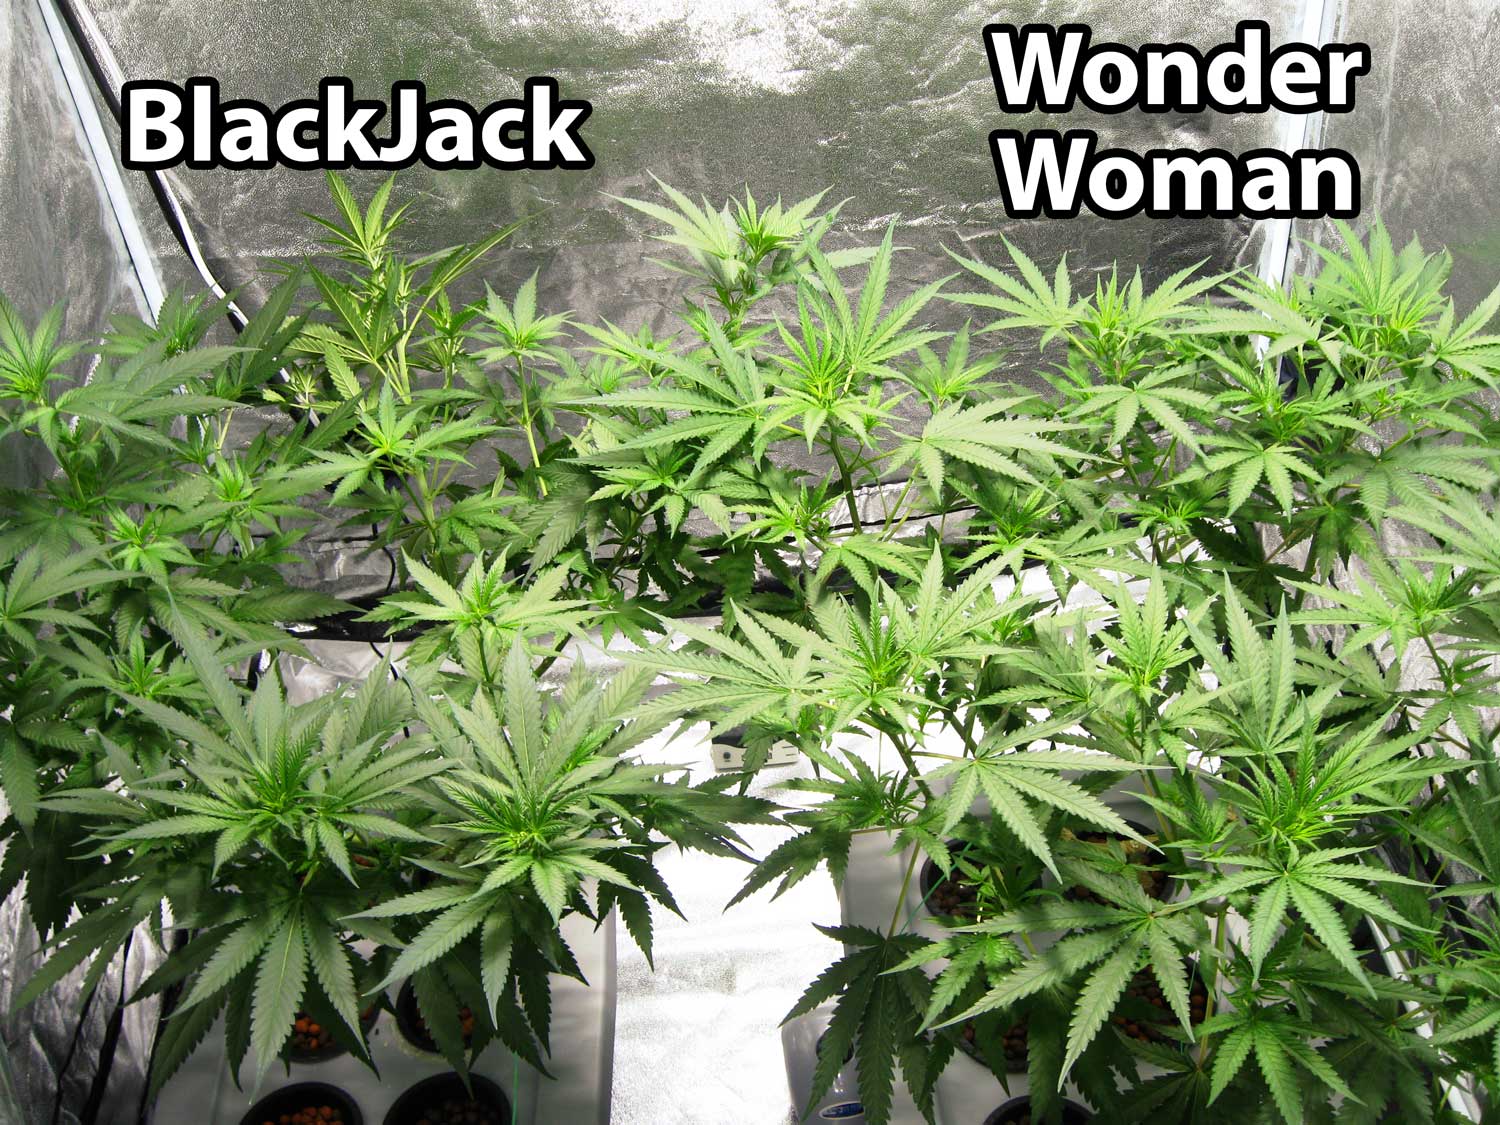
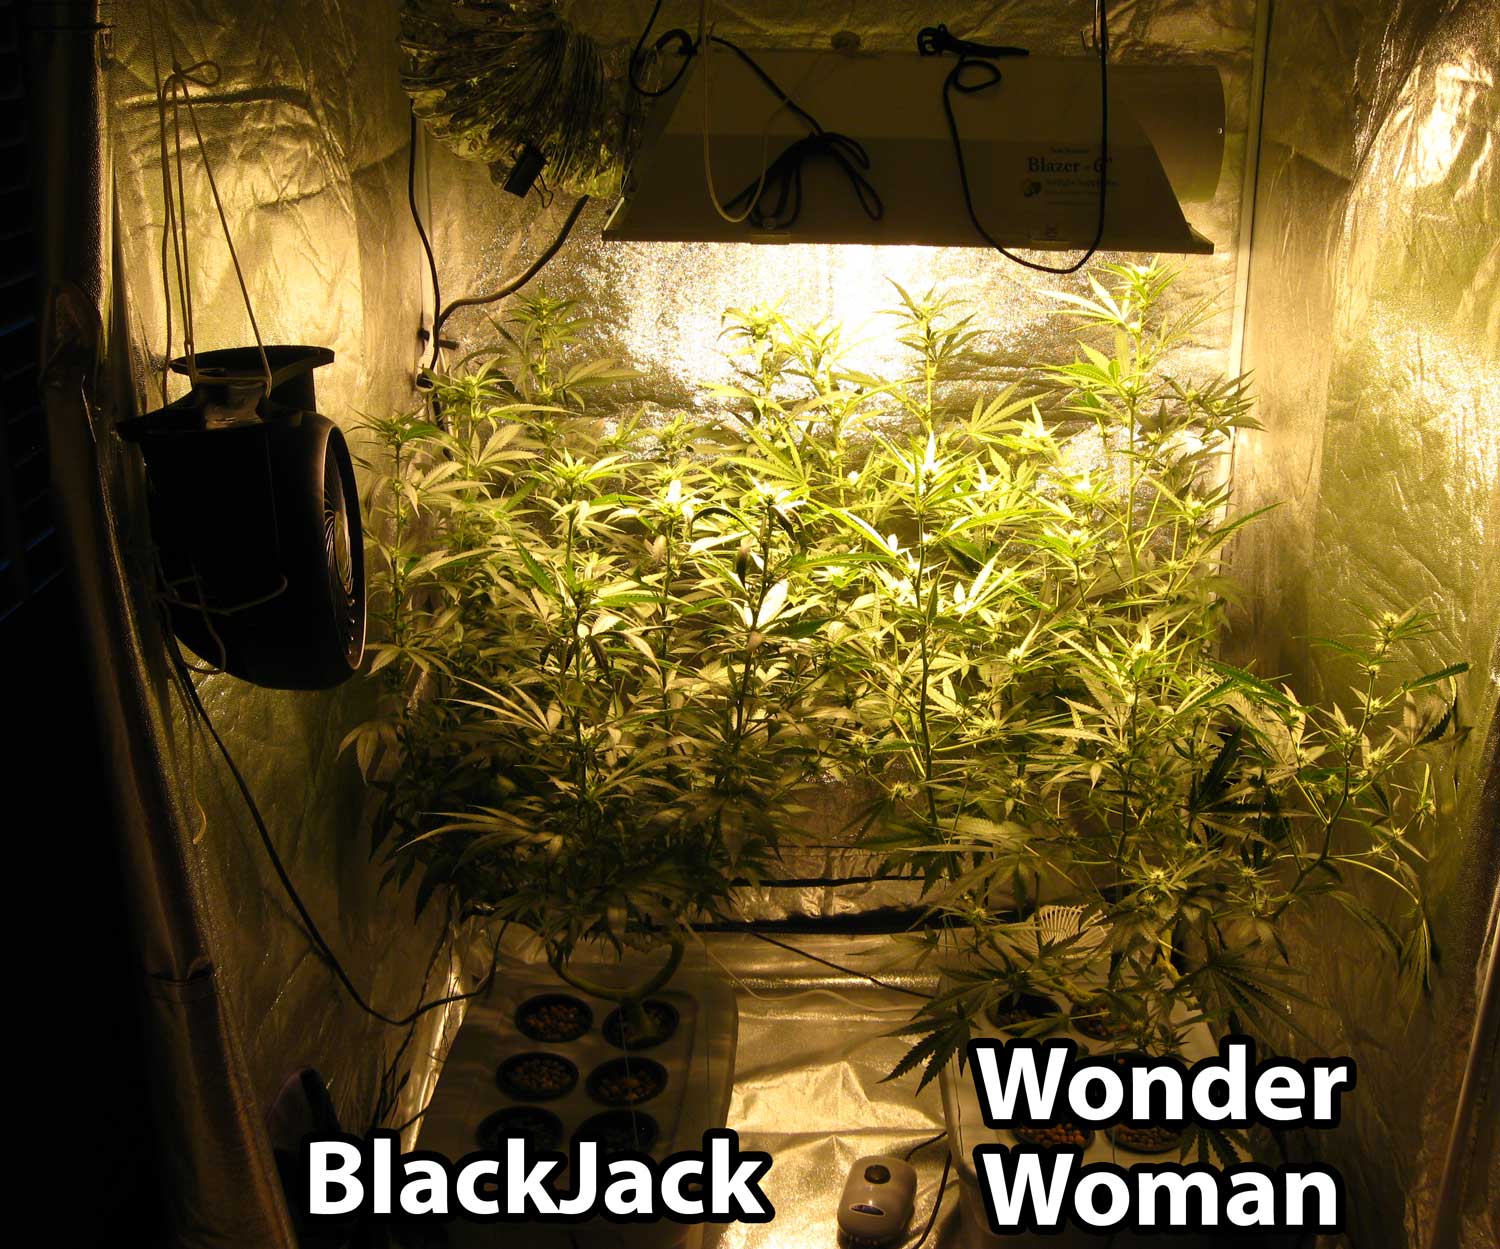
August 28 – The grow tent is starting to get filled up
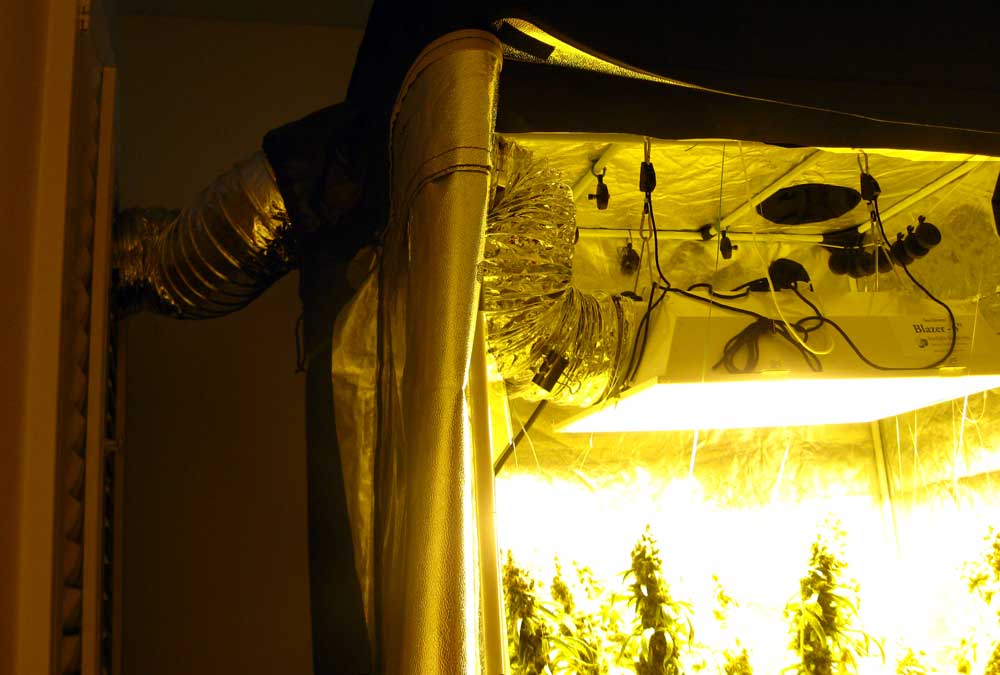
August 29 – We switched to an HPS bulb to help promote flowering
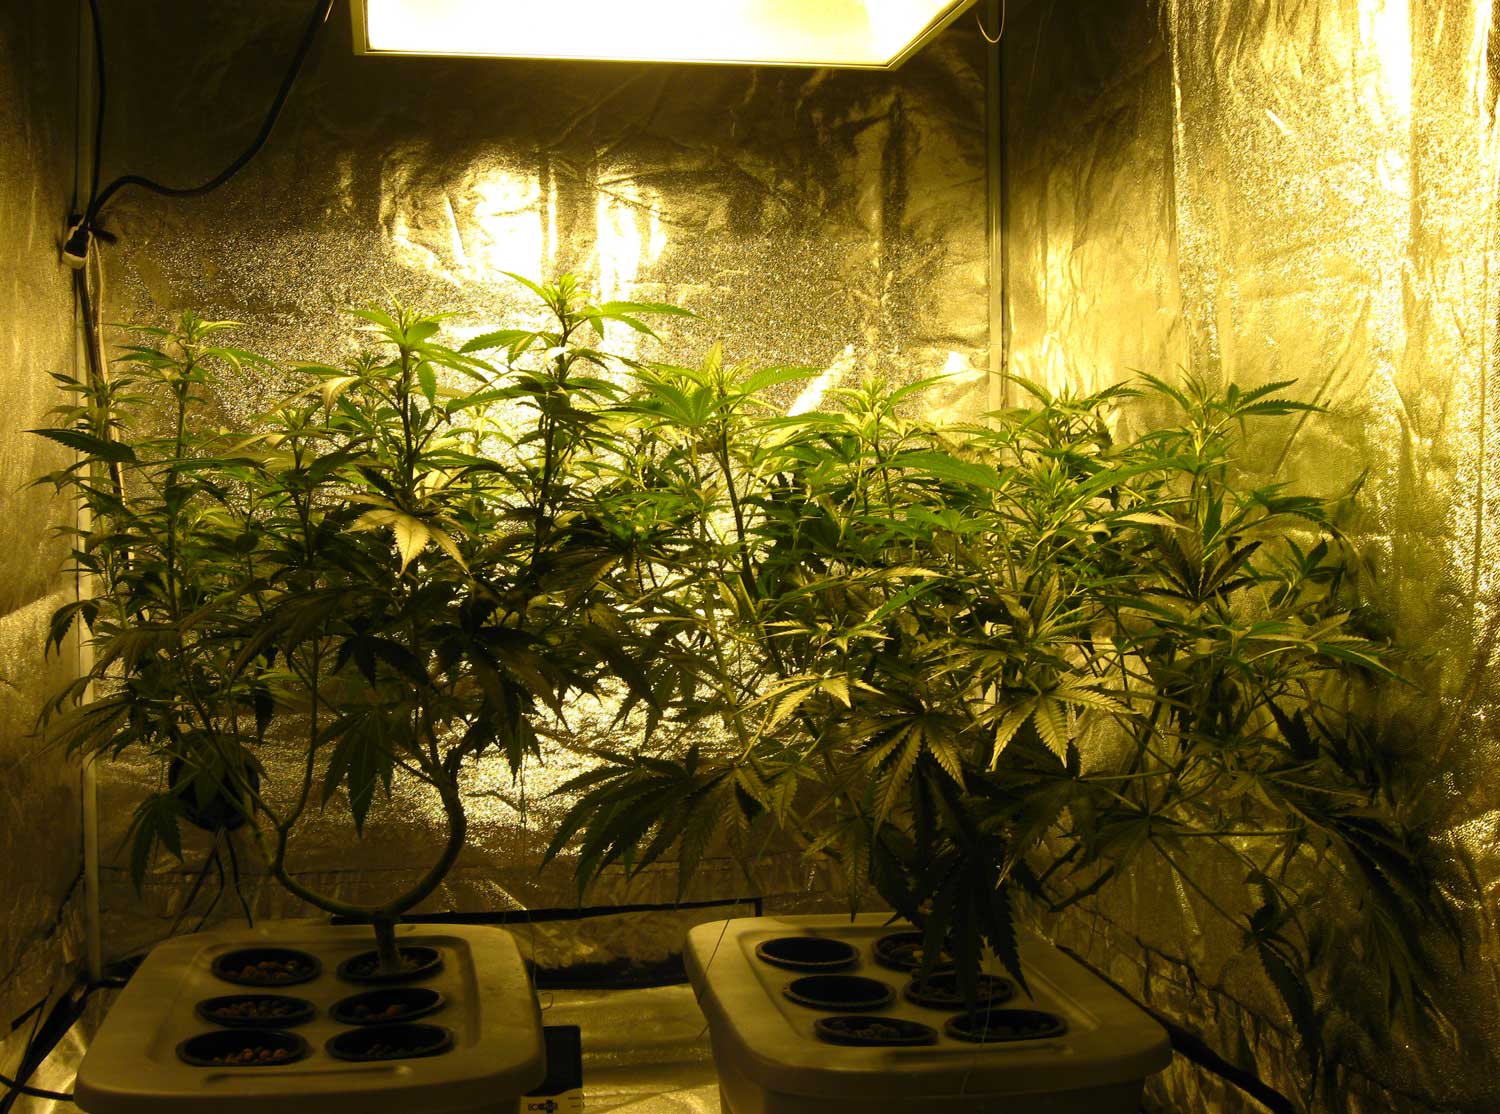
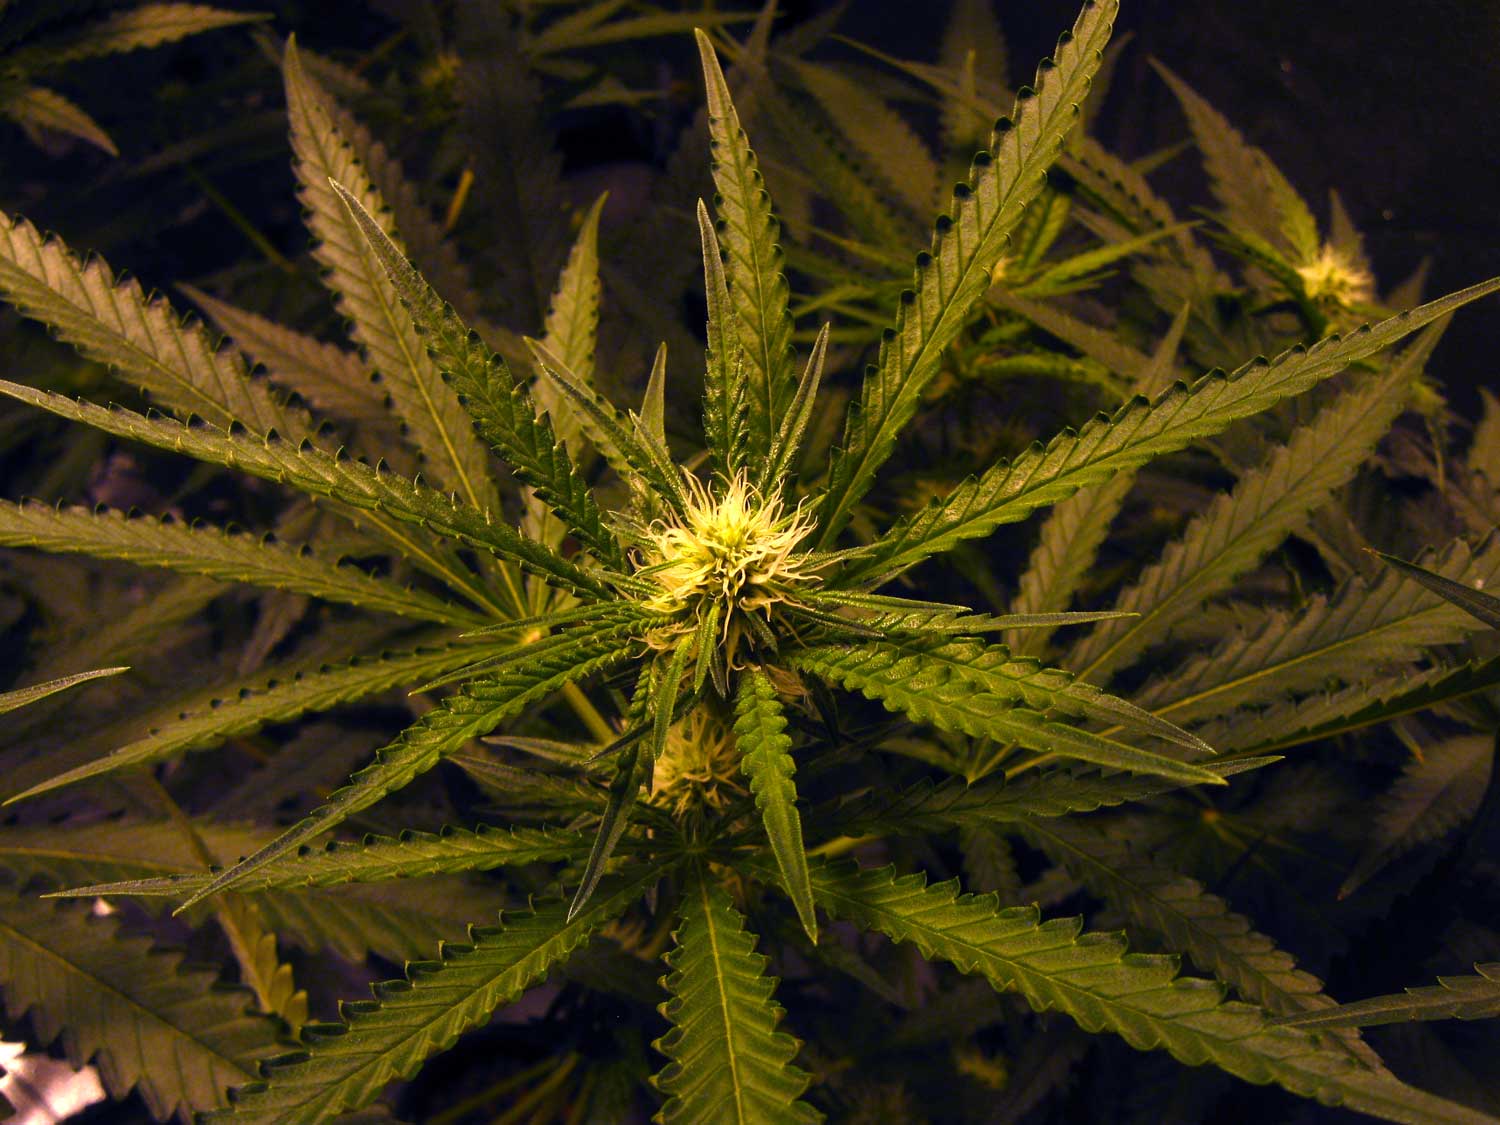
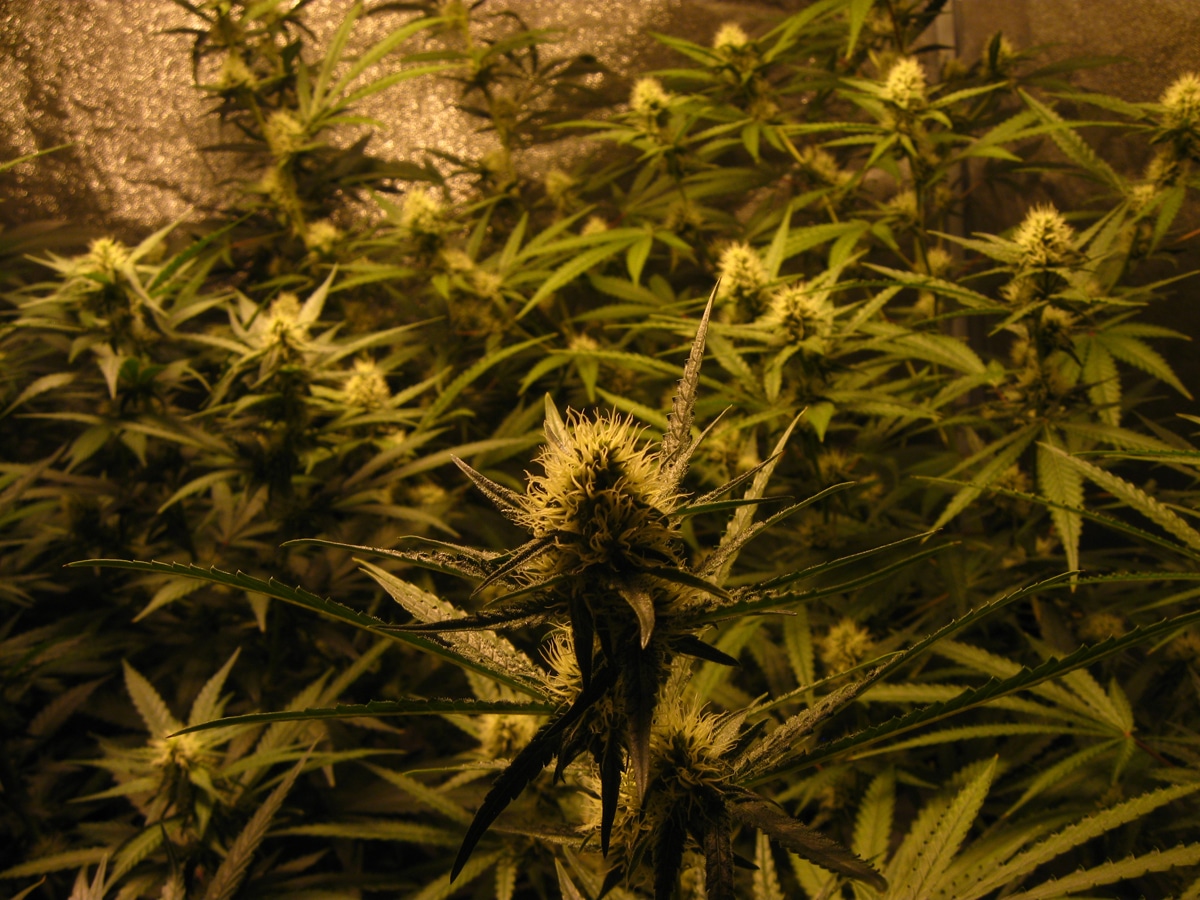
You will notice that the HPS bulb produces a much more yellow light spectrum. This yellowish/pink light spectrum helps promote budding in cannabis plants. At this point, we still have not seen signs of flowers/buds (which show up as wispy white hairs on the joints of the stems for female plants).
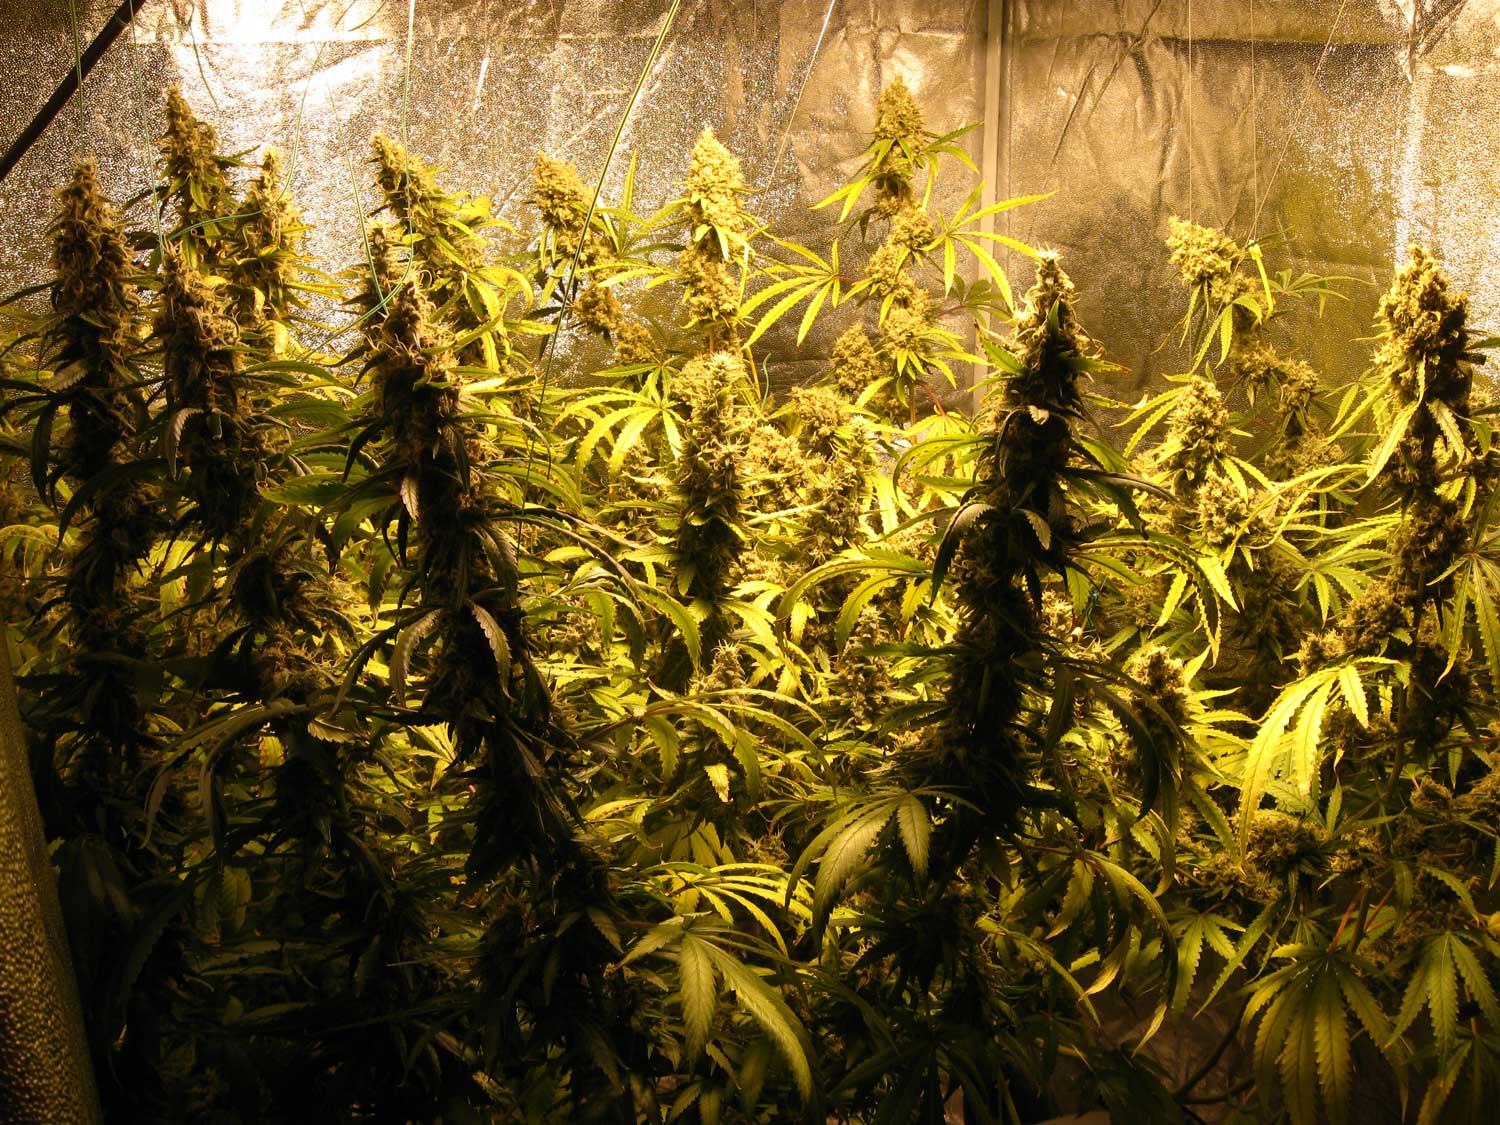
September 7 – Flowering stretch! Look how much they’ve grown in just 9 days

As you will soon see, pretty much all the extra growth that was added during the flowering stretch will turn into long thick colas covered in buds.
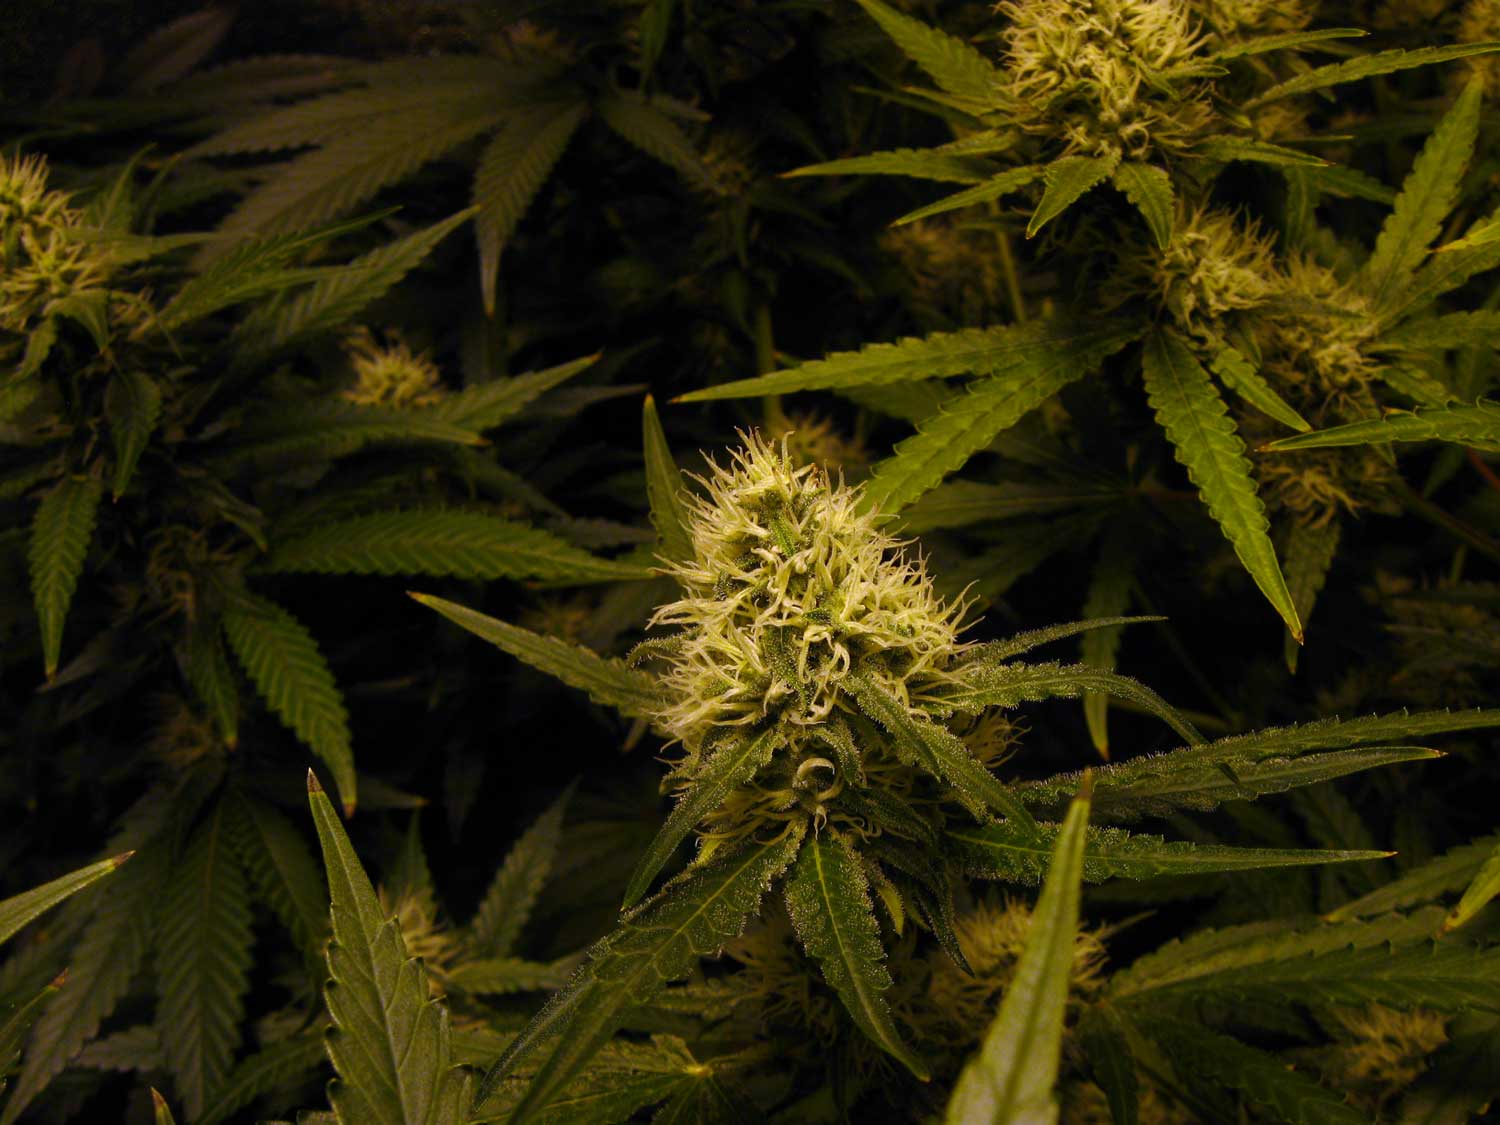
Here are those first buds beginning to form
The manifolds we created in the vegetative stage have grown strong and thick, providing a steady supply of nutrients to the plants from the roots:
September 11 – Buds are popping up everywhere
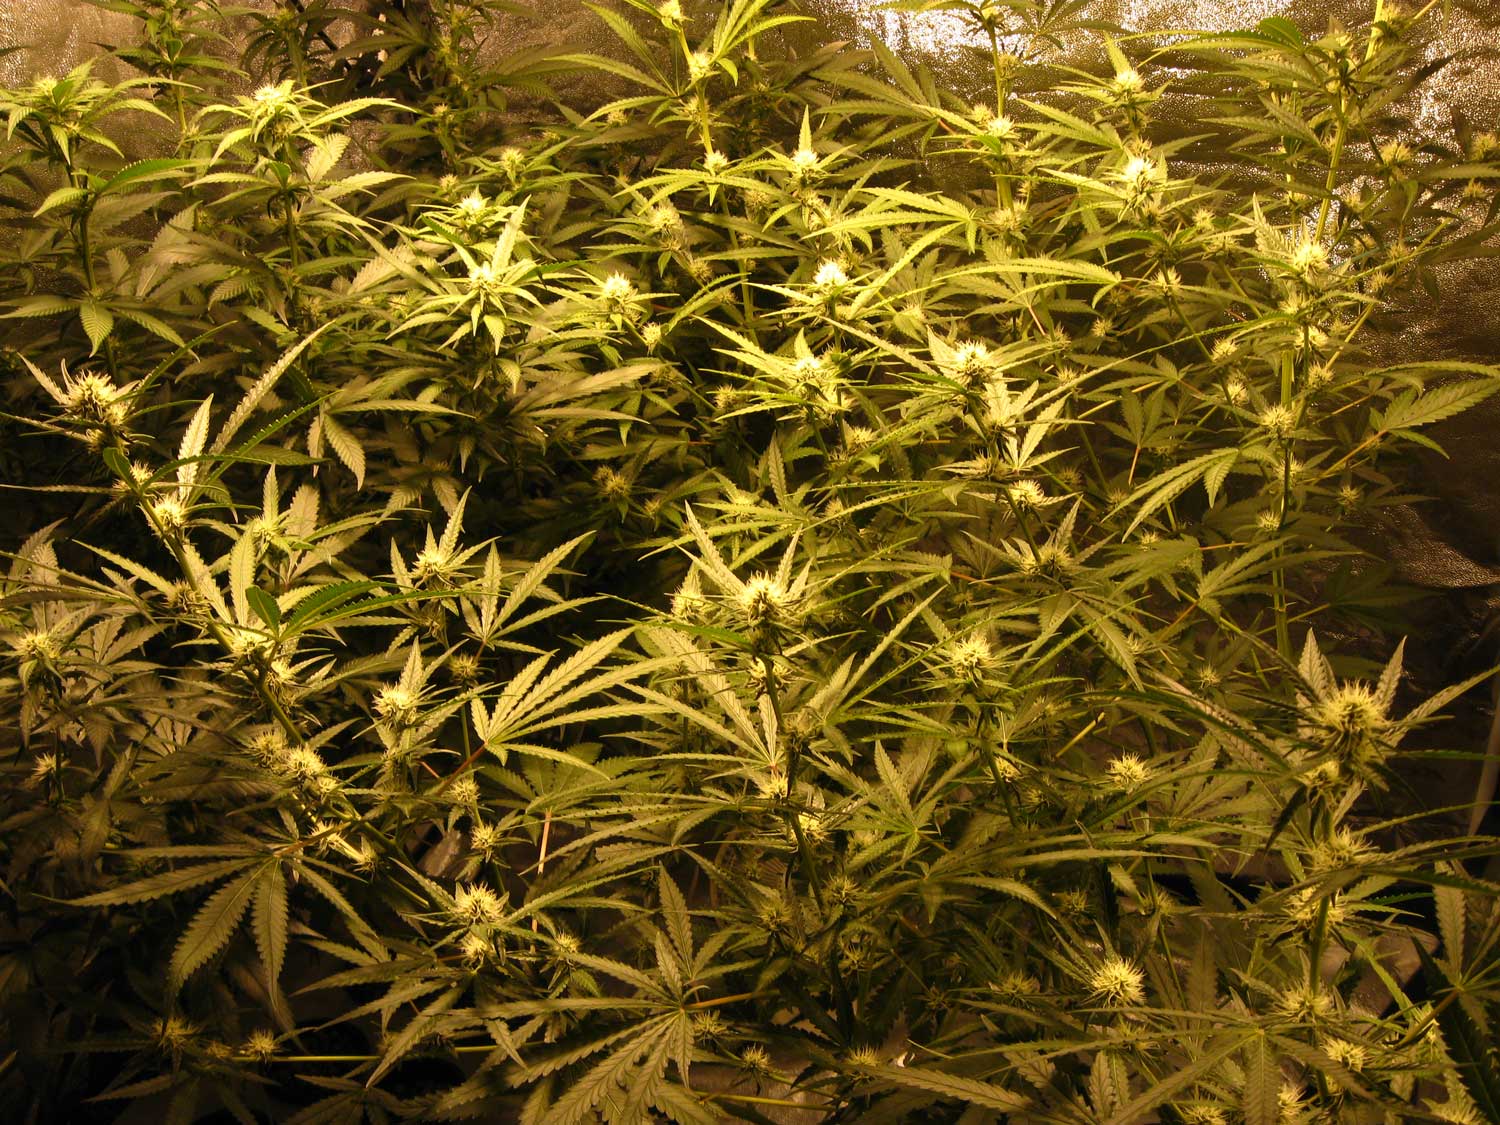
September 19
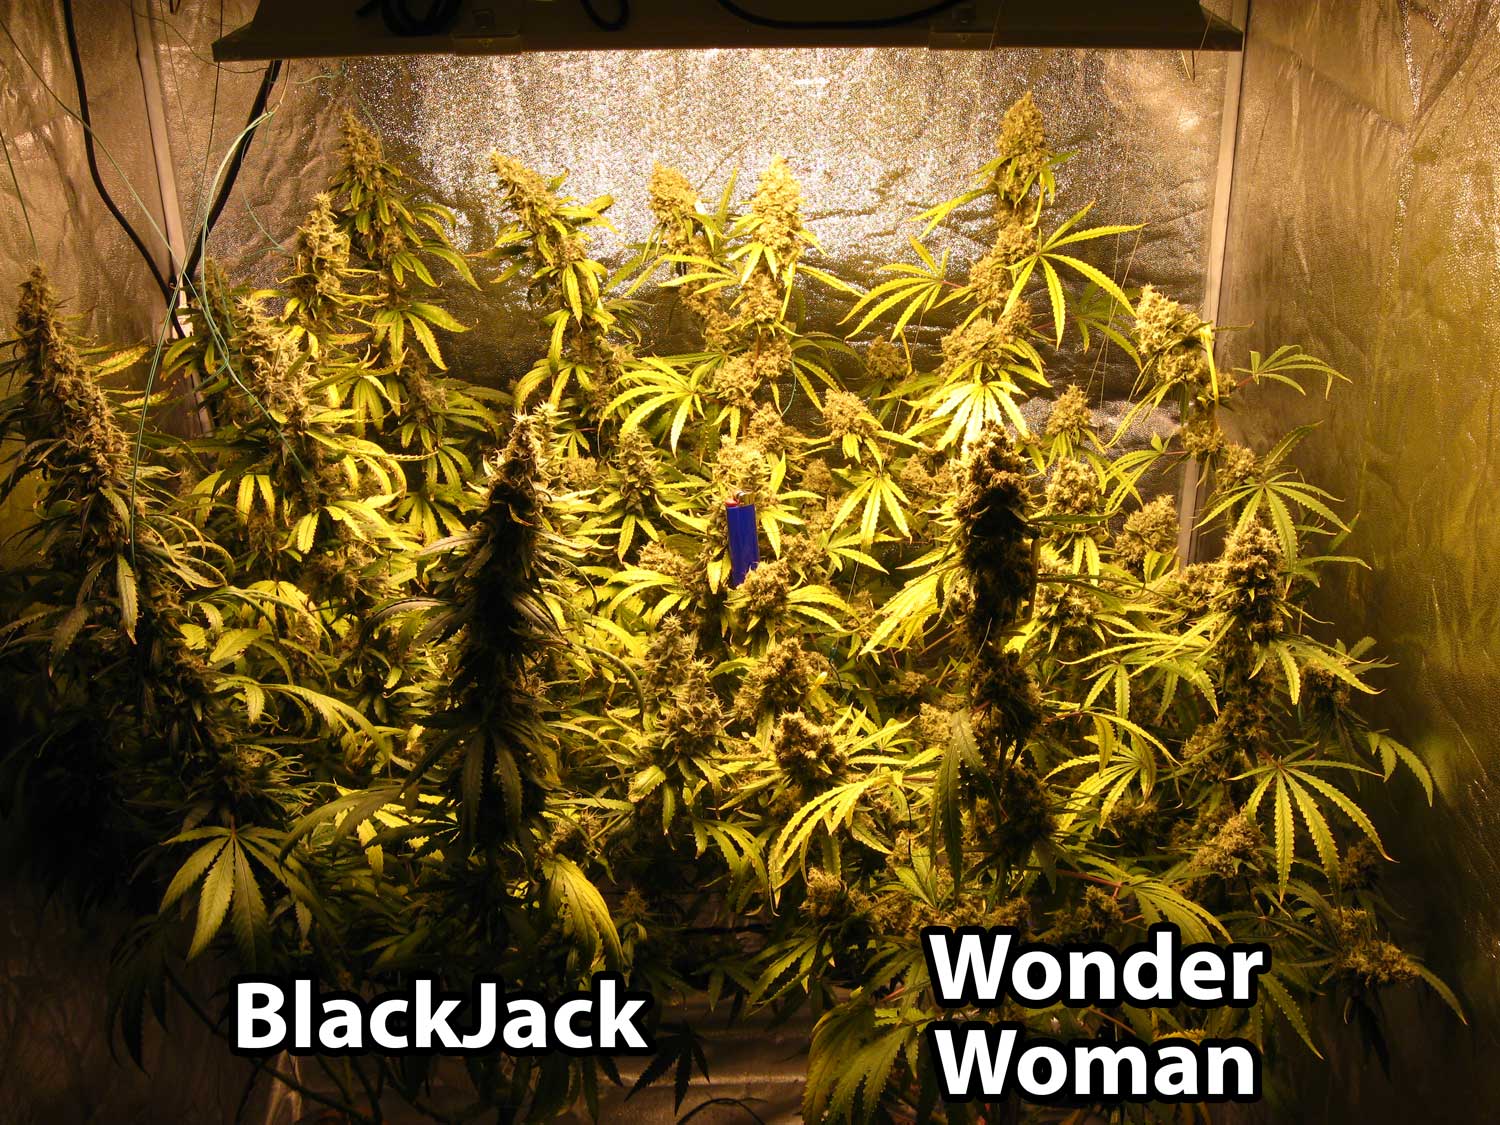
September 20 – The Wonder Woman is fattening up faster than the BlackJack
BlackJack Bud

Wonder Woman Bud
September 28
September 30 – Comparison of the colas
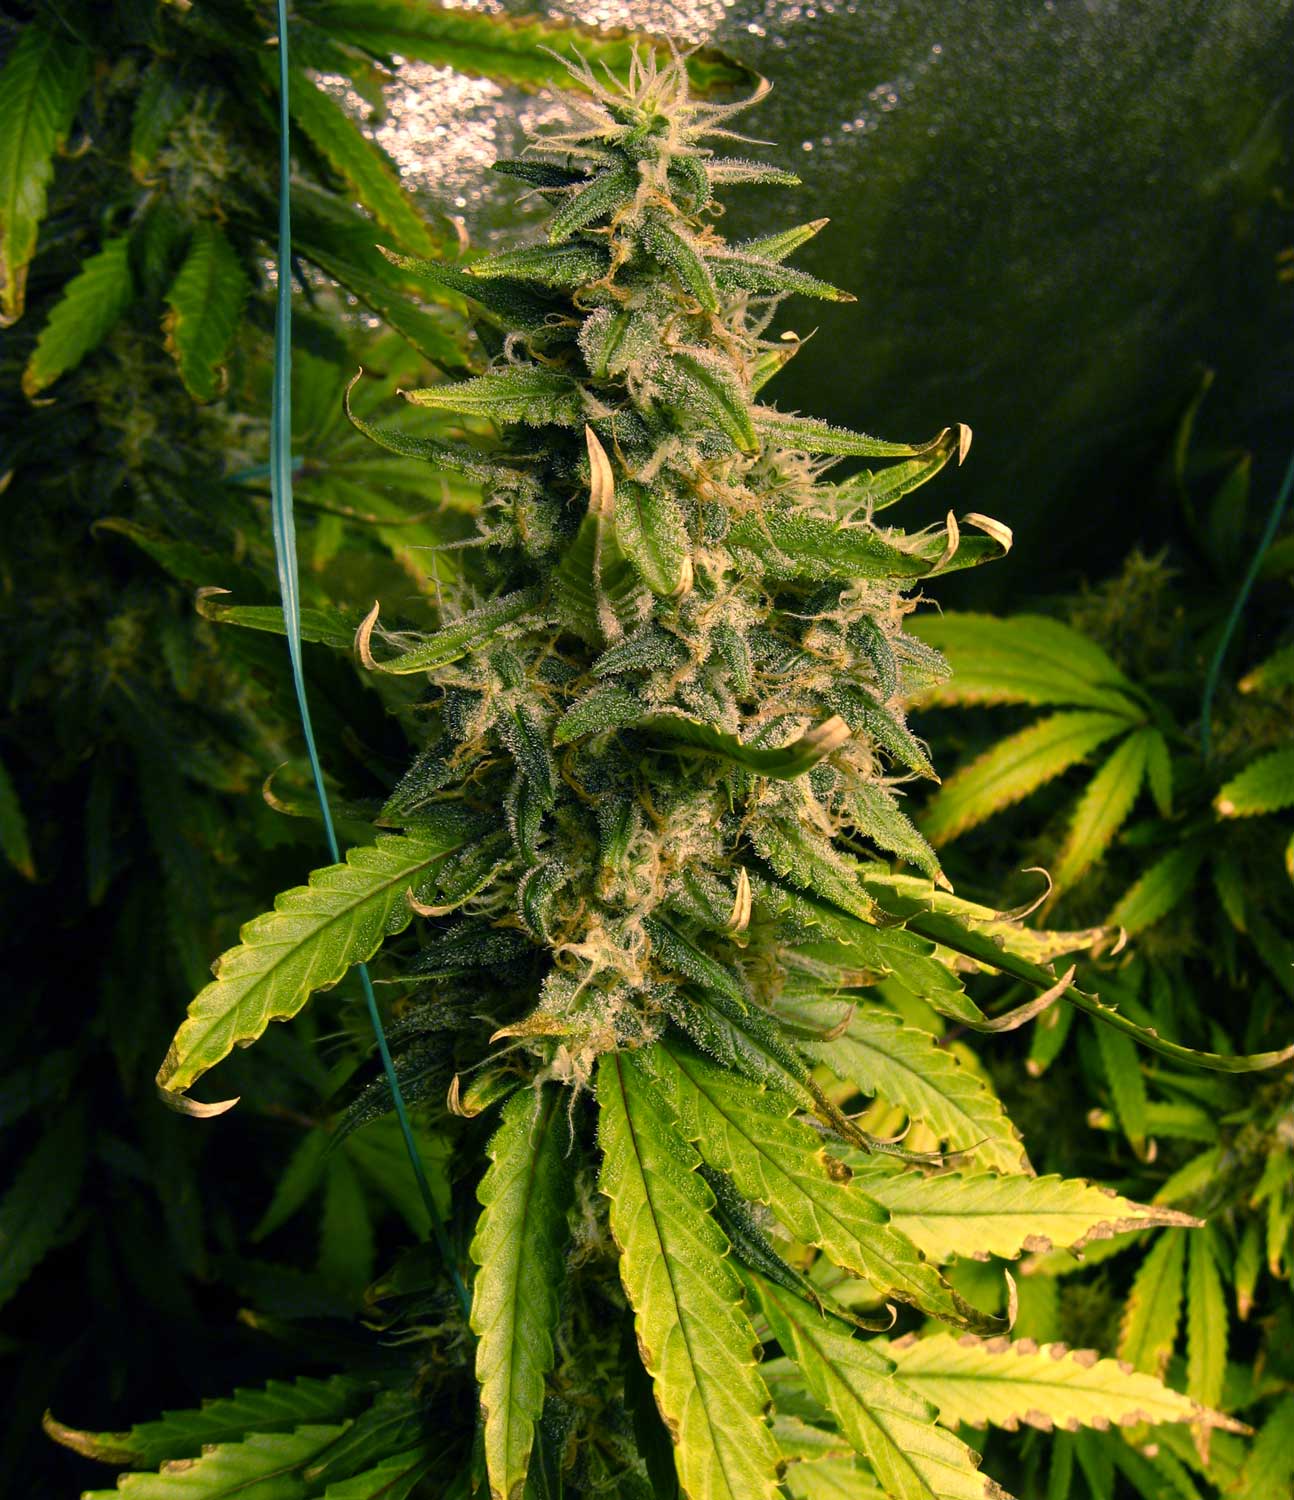
The BlackJack colas are growing long, thin and spear-shaped, absolutely covered in trichomes
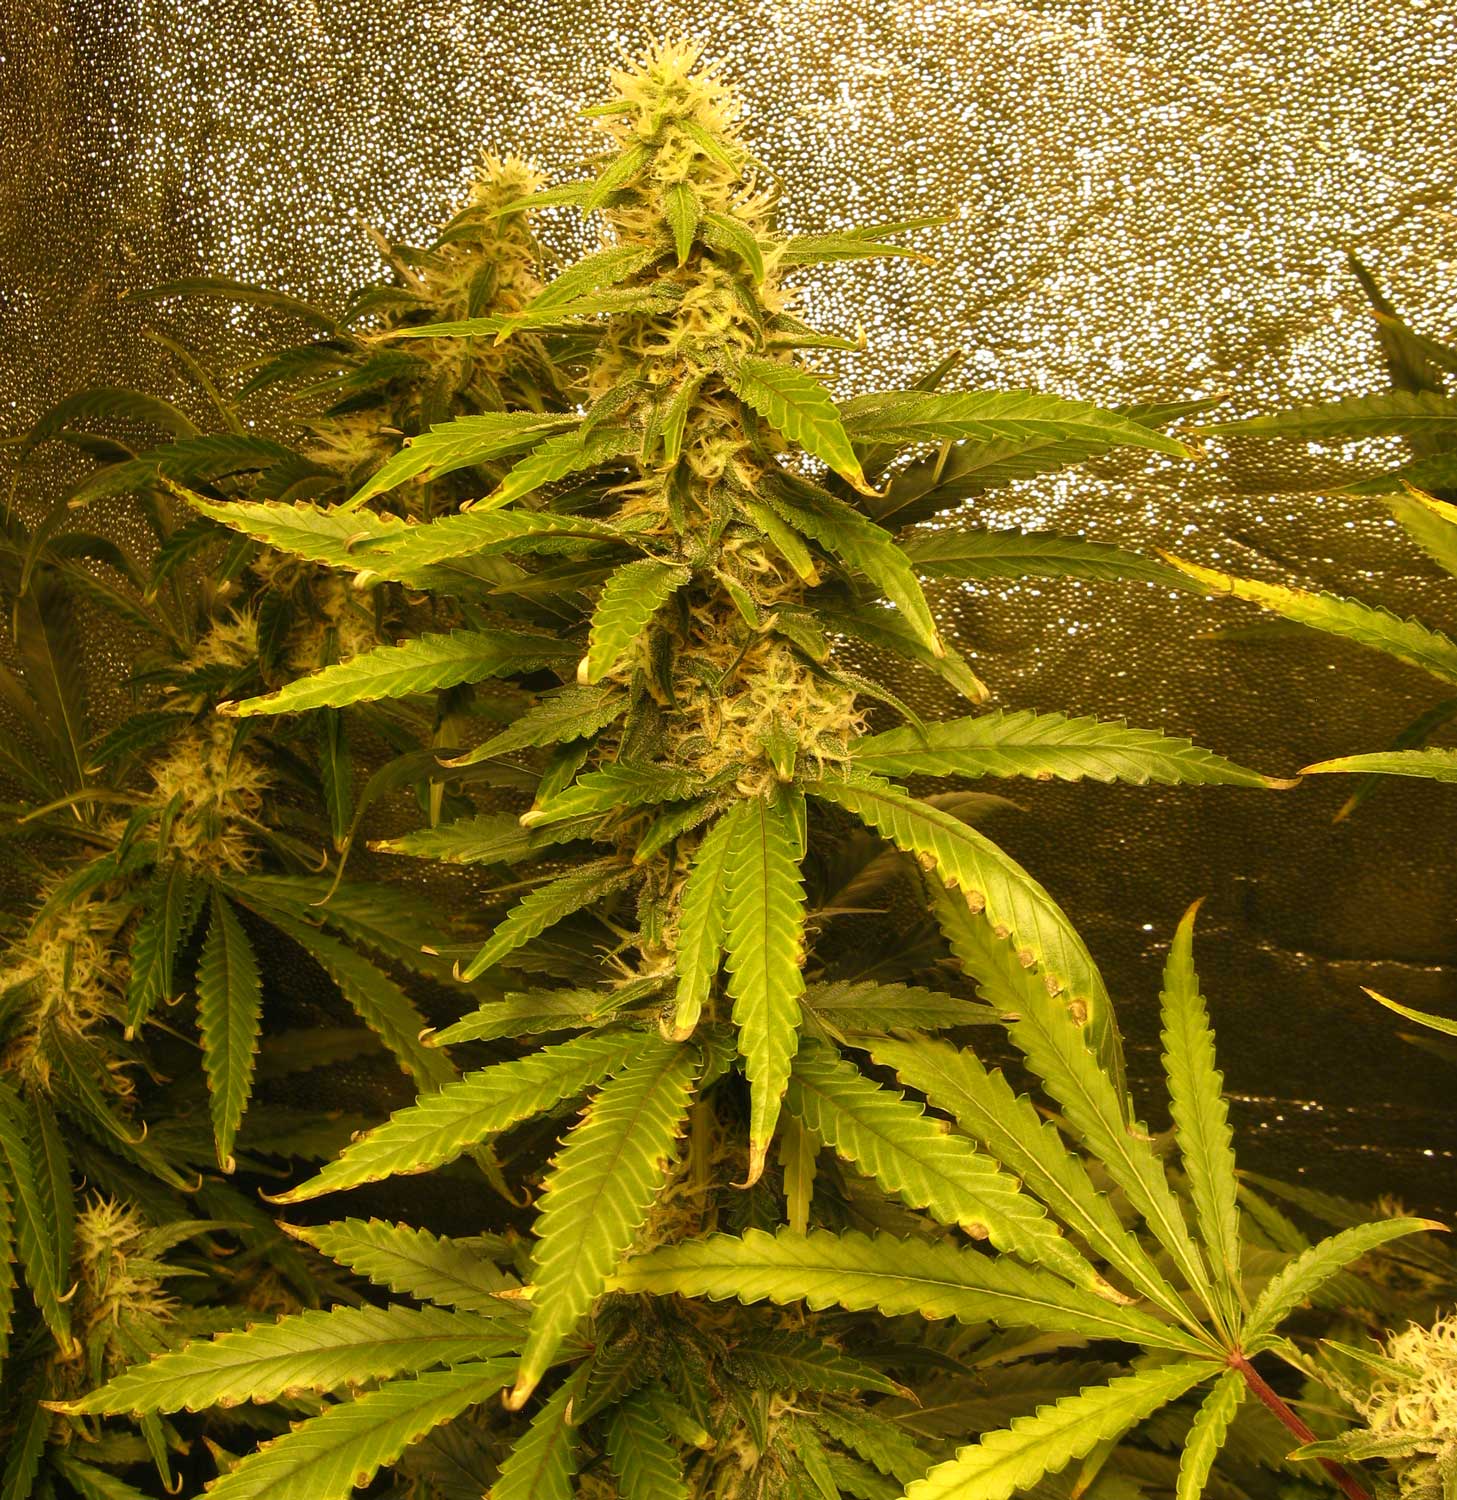
Throughout the flowering stage, the BlackJack has proven to be extremely sensitive to nutrients, and has shown signs of nutrient burn (burnt leaf tips) even at 1/4 strength levels of the General Hydroponic nutrients.
It’s important to note that the heat may be partially a cause of this. Plants drink a lot more water when the temperature is higher, and this may contribute to nutrient overload (nutrient burn) when it’s hot. This is why DWC growers may notice that plants seem to prefer lower levels of nutrients in the summer when they’re drinking a lot of water.
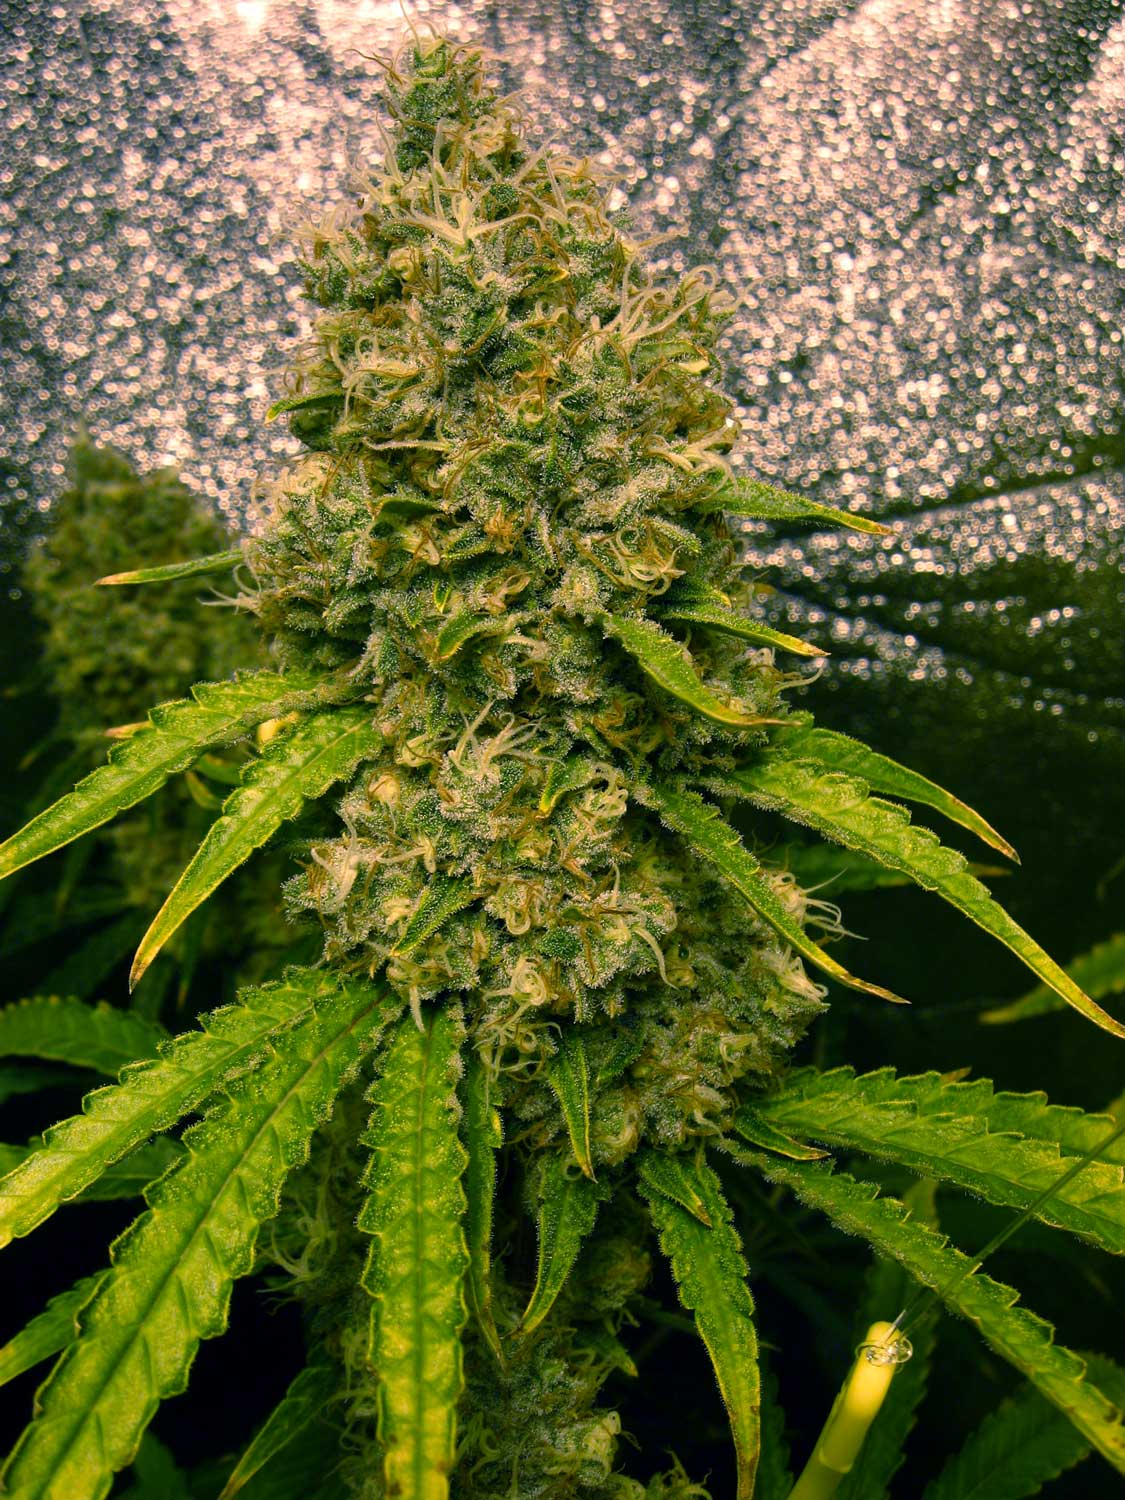
The Wonder Woman colas are growing extremely thick and rounded
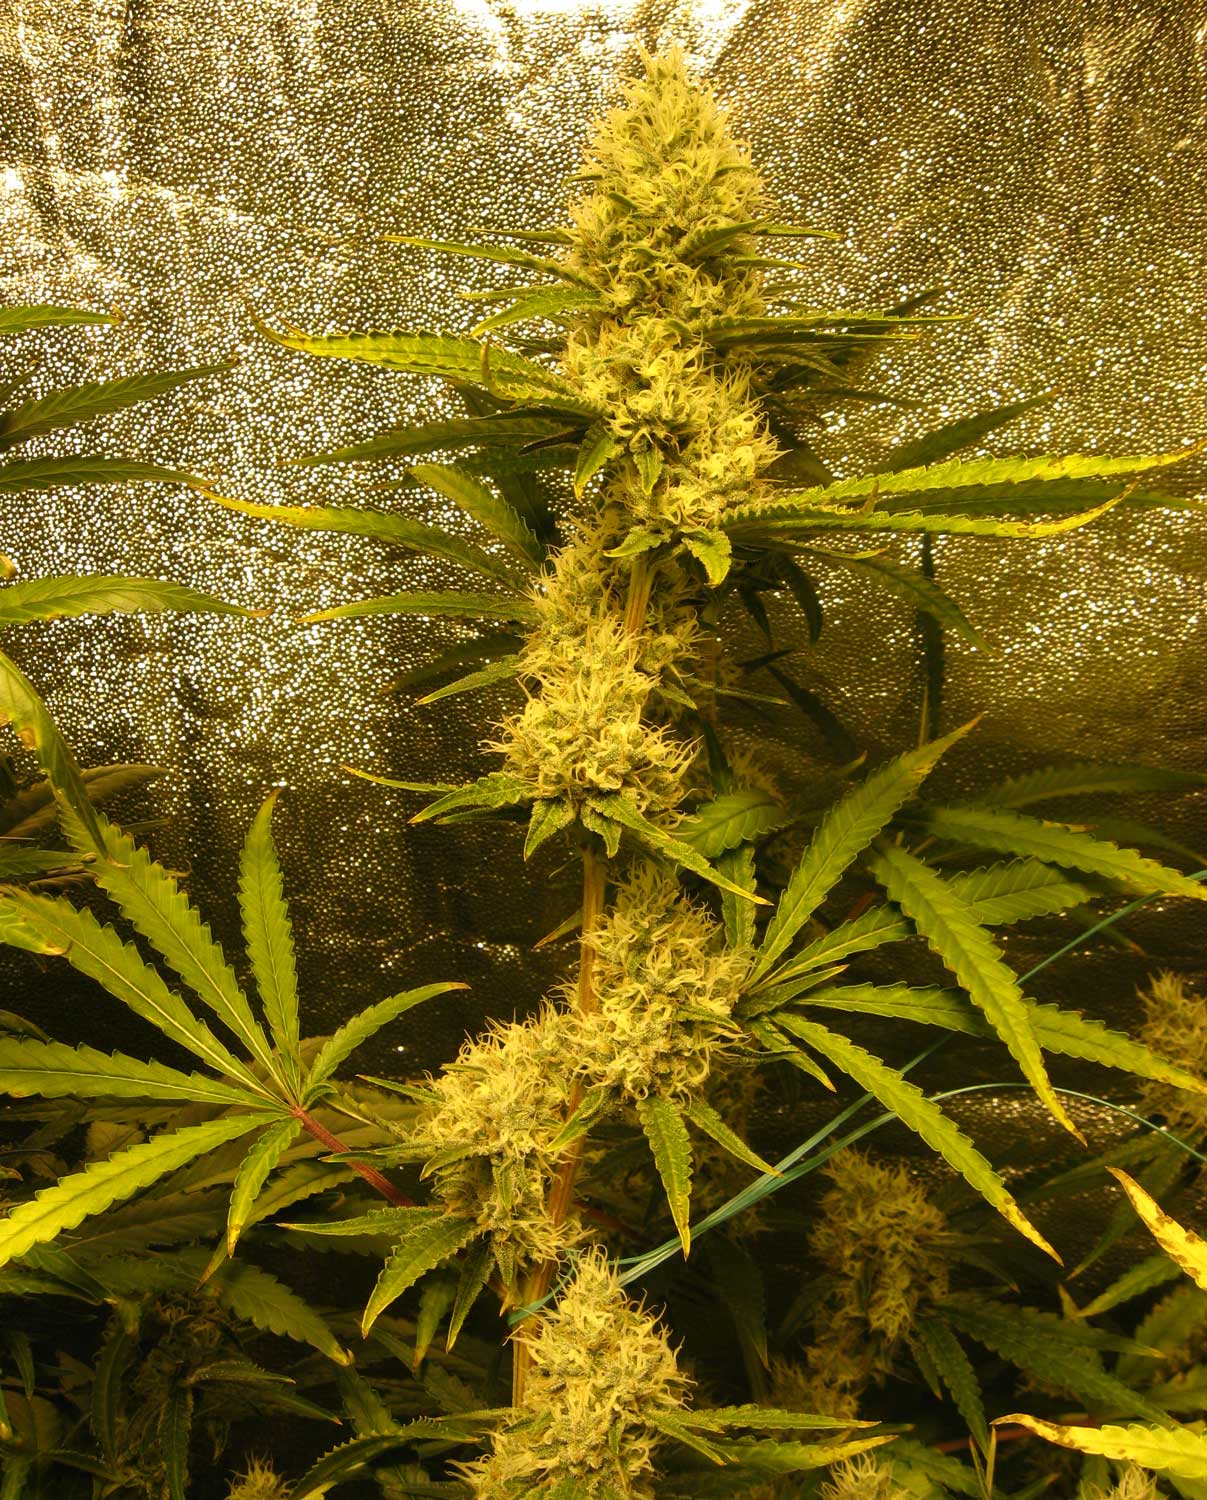
In contrast to the BlackJack, the Wonder Woman seems to continue demanding more and more nutrients throughout the flowering stage. We struggled with her showing yellowing leaves (not getting enough nutrients) even while the BlackJack was showing signs of nute burn at the same nutrient strength.
We upped the nutrient strength for the Wonder Woman to nearly twice as much nutrients as the BlackJack from this point on.
I also must admit I was a bit disappointed at how the BlackJack plant was growing at first in the flowering stage (she was a dream in veg during the plant training). But at this point in the flowering stage, she didn’t impress me at all.
All the buds were thin and spear-shaped, while the Wonder Woman was growing these huge top-heavy buds. However, the BlackJack colas were incredibly long and continued to steadily fatten up throughout the flowering stage.
Despite the lack of bud growth so far, the smell from the BlackJack is already amazing, very spicy like a Haze strain, though this smell will get pretty overwhelming in the grow tent by the time harvest approaches. The Wonder Woman produced fat indica looking buds with a throw-back skunky smell that didn’t appear until later in flowering, and not as intense of a smell as the BlackJack.
Things were going great, then…
Another problem…
About 6 weeks after changing to the 12-12 flowering light schedule, we ran into another problem, only this problem actually made us happy 🙂
The plant colas were getting extremely heavy, and stems felt ridiculously weak in comparison. By week 6, the colas were falling all over each other and we were worried about mold (from fat buds touching each other), and also about making sure we were maximizing light to the leaves and colas.
October 9 – Buds start falling over
Plant Support Spools: We got a very helpful tool made exactly for this scenario, known as “plant support spools” from our local hydro store (examples: Sun Spool, Support Spool, Yoyo plant hanger, etc) in order to hold up the colas.
These worked fabulously, and allowed us to hang each cola directly from the top of the grow tent, opening up the plant to both reduce the chance of mold while allowing a great deal more leaf surface area to capture energy from the grow lights above.
Take a look!
October 11 – Tied plants up with plant support spools
Close-up of a support spool below
(hooks the heavy cola directly to the ceiling of the grow tent with string)

October 18 – Buds are continuing the develop
A BlackJack cola
A Wonder Woman cola
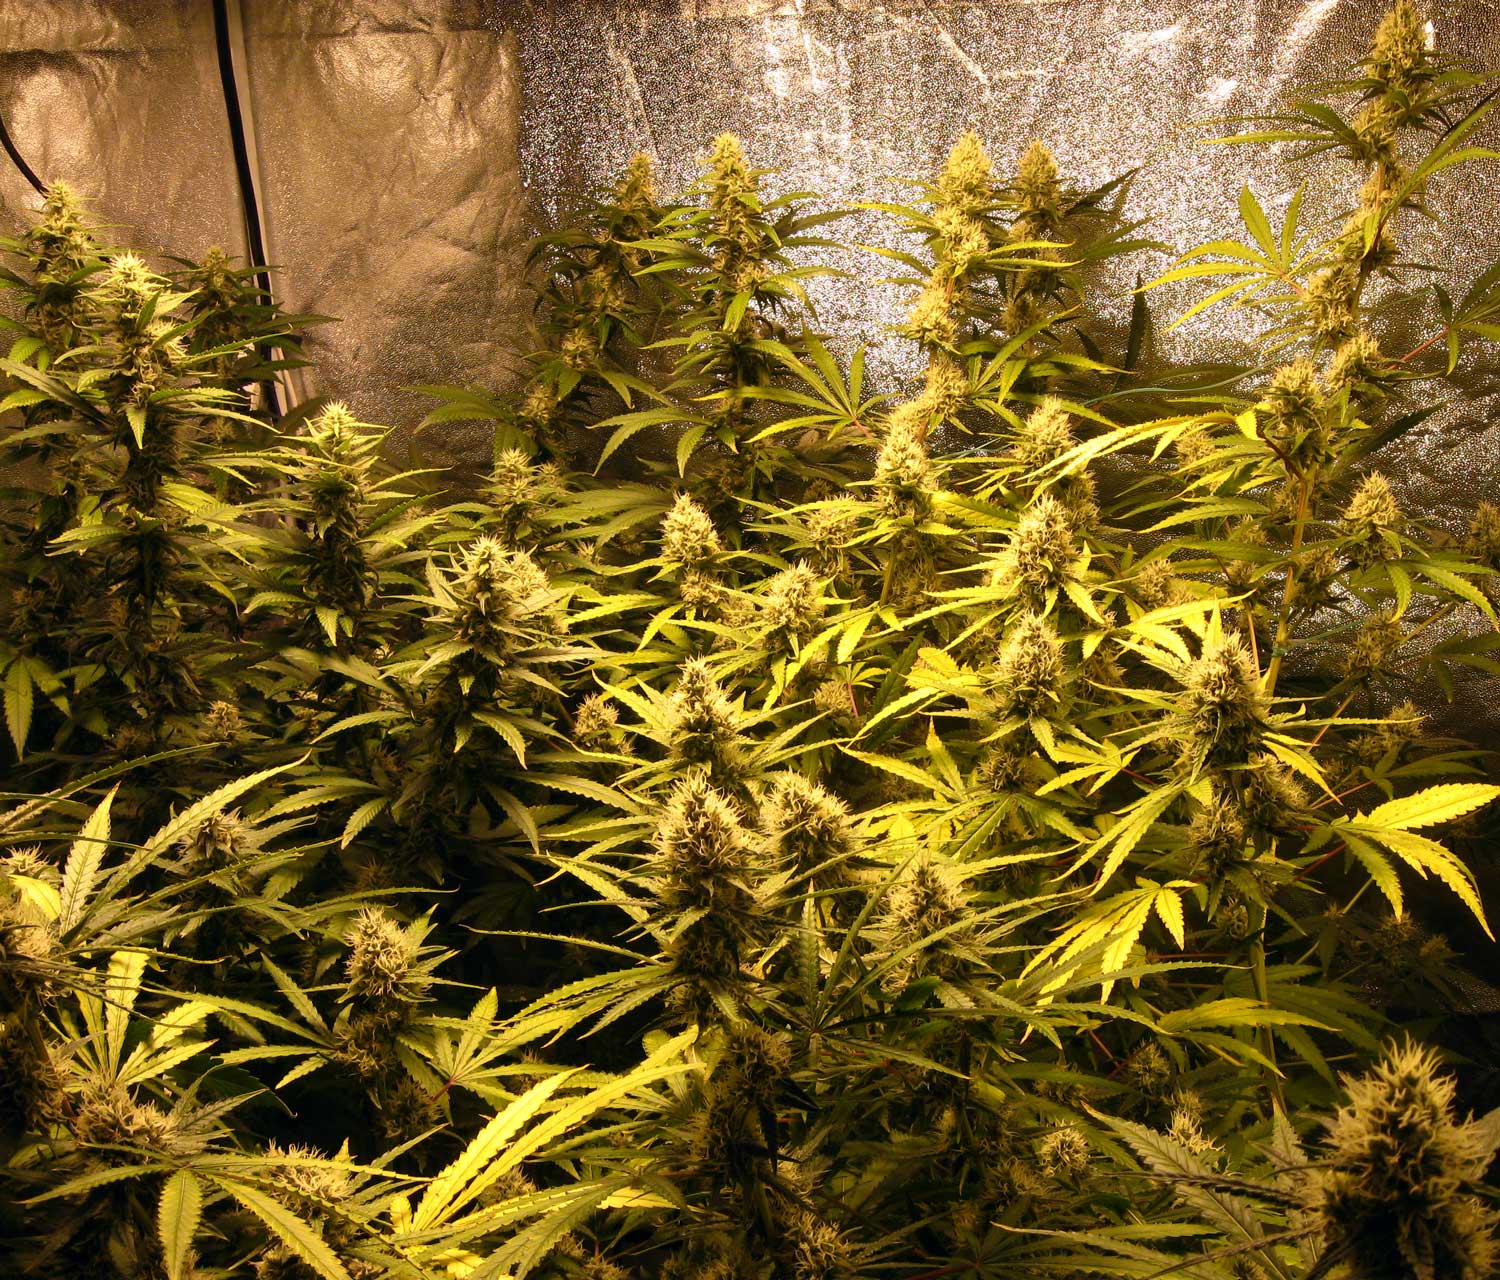
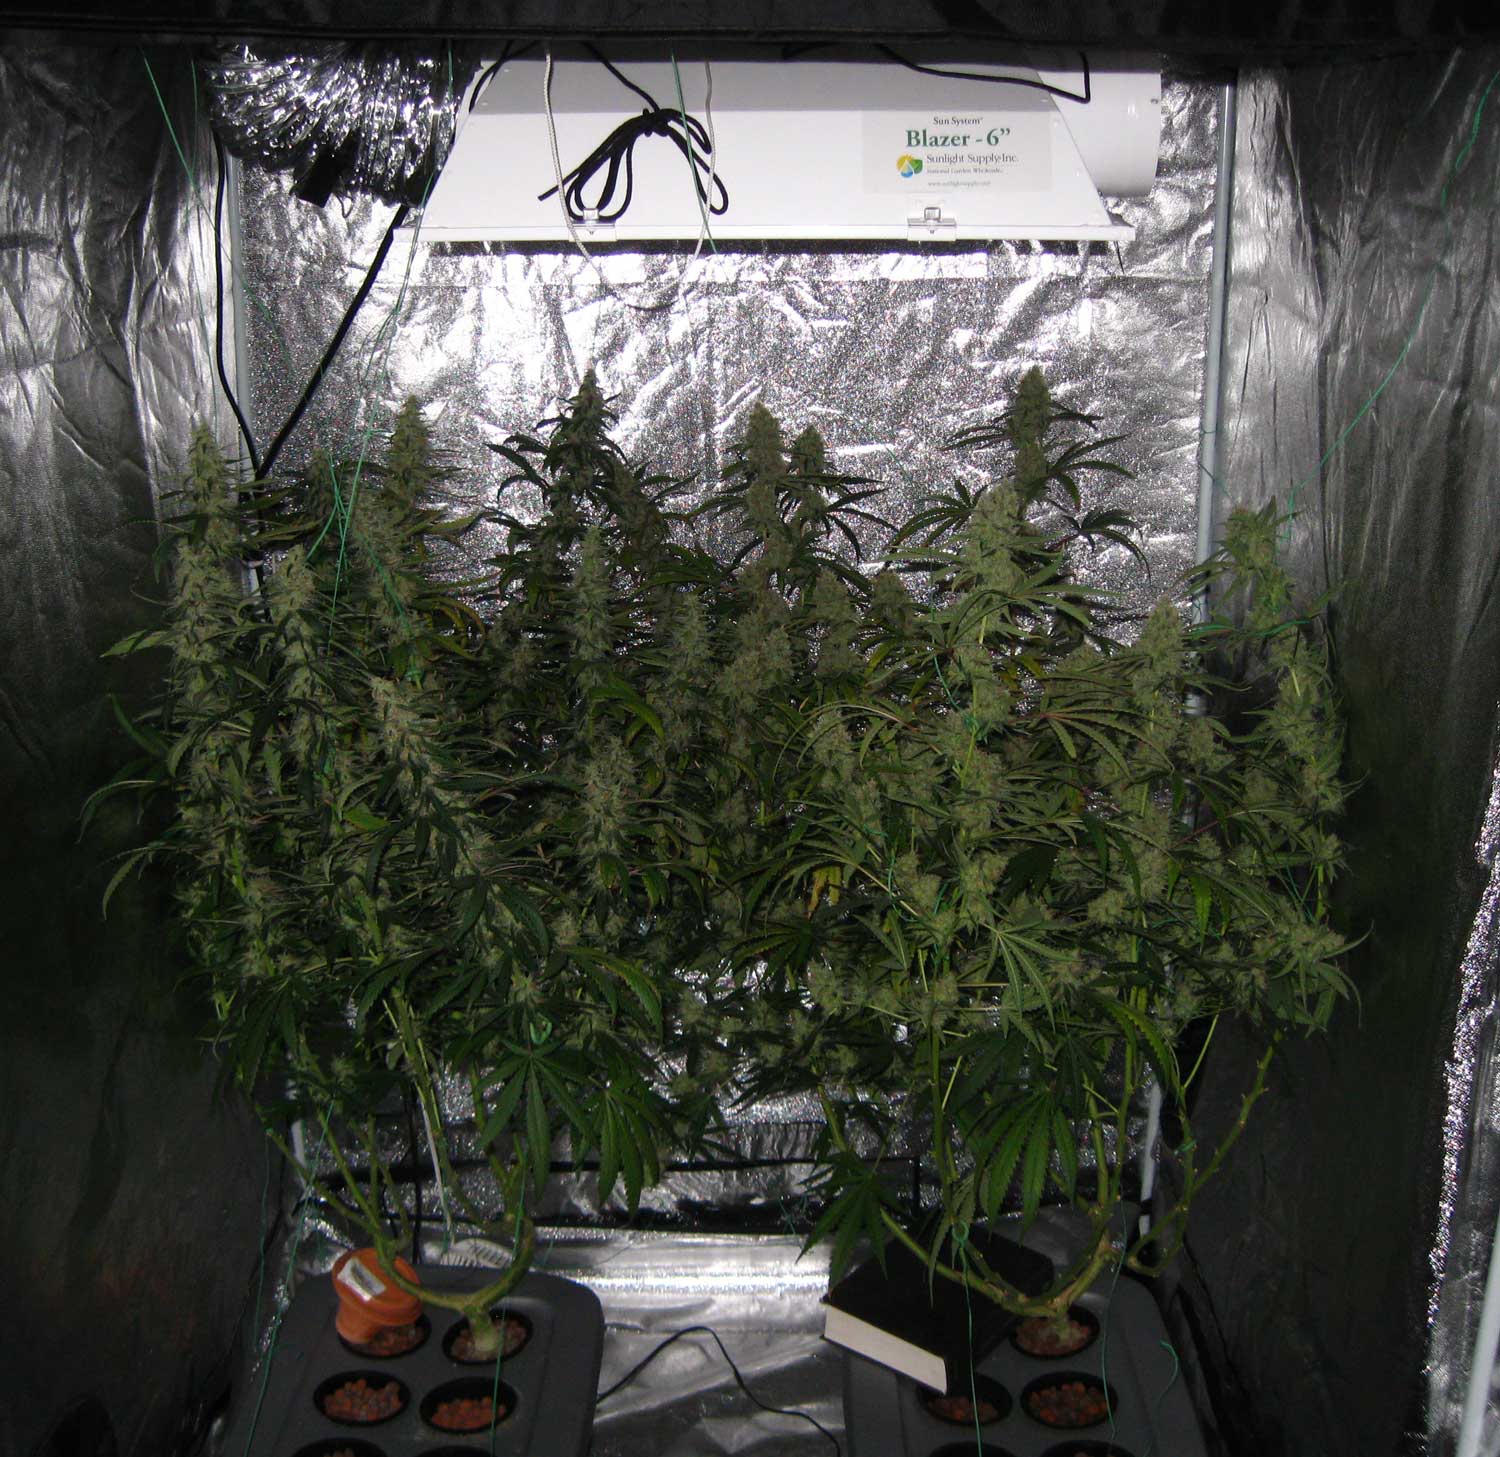
October 24 – Everything is still fattening up nicely
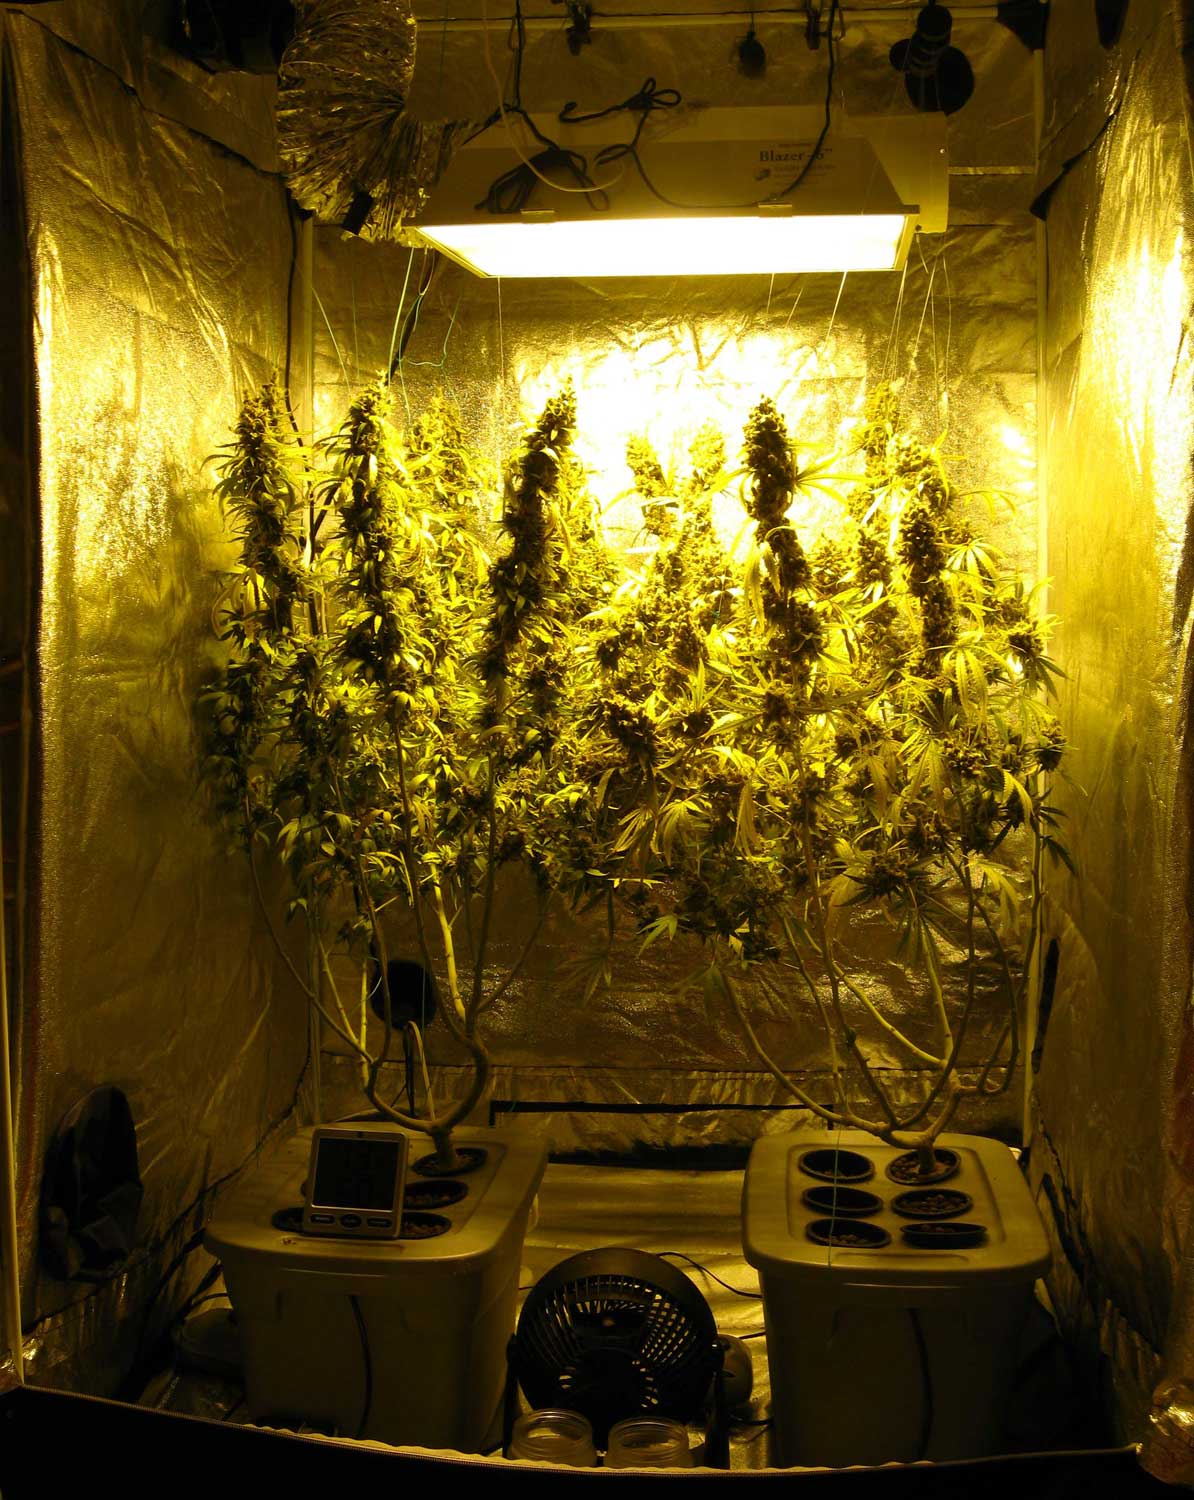
A view of the grow tent, with a blue lighter in the middle for size comparison
From this point, the buds are continuing to fatten, but we are most concerned with the color of the “trichomes” (glittery stuff that covers the buds).
Here is what the trichomes look at this point – still mostly clear
(which means it’s too early to harvest)
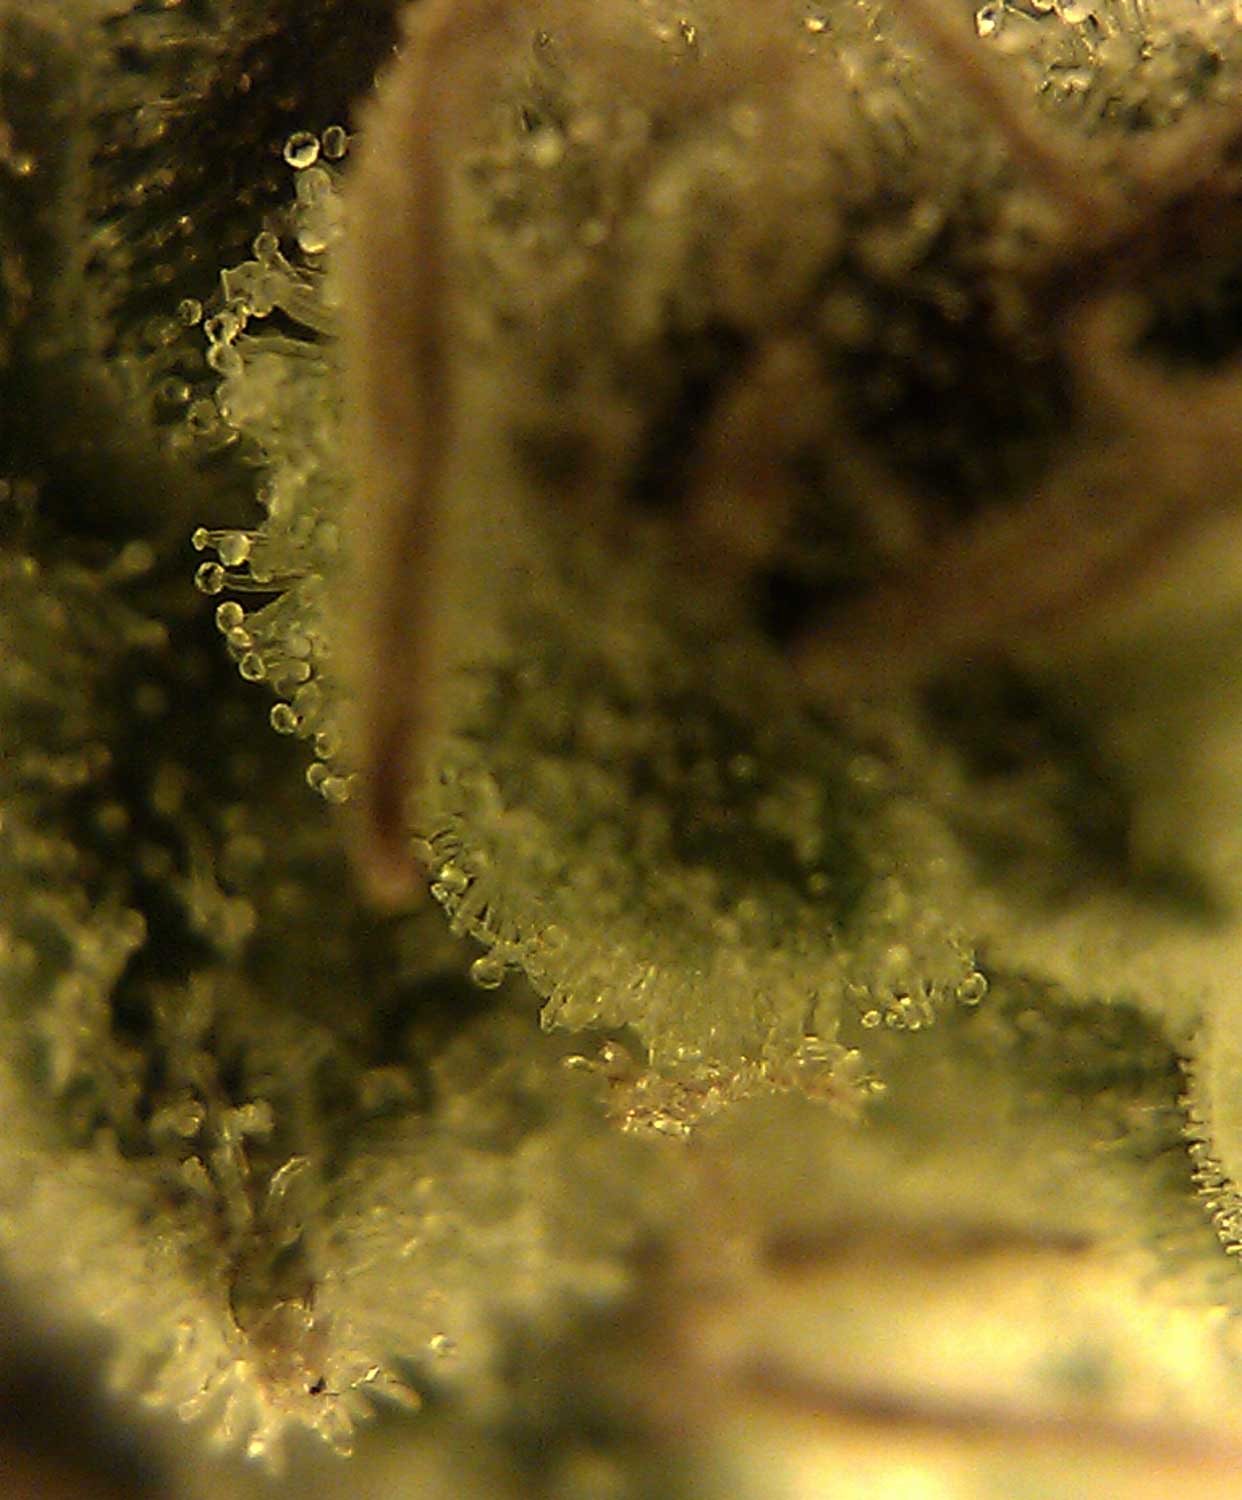
When looking at these trichomes under a microscope, we can see them turn from clear to milky-white as the cannabis grows in potency.
When the THC begins to degrade, the milky-white trichomes will begin to turn a golden color (often referred to as “amber”). For a more “stony” effect from the buds (and less of the racing thoughts or paranoia which is slightly more common with early-harvested buds), we opt to harvest our buds after at least a few trichomes have begun to turn amber.
Learn more about when to harvest: https://www.growweedeasy.com/harvest
November 17 – Getting close to harvest…

The BlackJack is listed as having a 9-11 week flowering time, while the Wonder Woman is 8-10 weeks. These times are generally considered to start when the plant first starts showing signs of flowers/buds, which usually happens about 2 weeks after switching to a 12-12 flowering light schedule for female cannabis plants. In my experience, and from what I’ve heard from other growers, both these strains tend to do better when left a bit longer than the breeder’s estimate.
Yet no matter what is stated by the breeder of a strain, I highly recommend using a magnifer to look at the trichomes of a cannabis plant. Each plant is a bit different, and the trichomes are the best way to know the exact right time to harvest.
Learn how to determine exactly when to harvest your cannabis so your buds have the greatest potency and medical effects:
https://www.growweedeasy.com/harvest
On November 17, we saw what we were looking for plants finally appeared ready to harvest!
Here’s a look at the trichomes…
We took these videos using the Carson zOrb hooked up to a laptop
At this point, we began flushing the plants (feeding them pure pH’ed water until harvest):
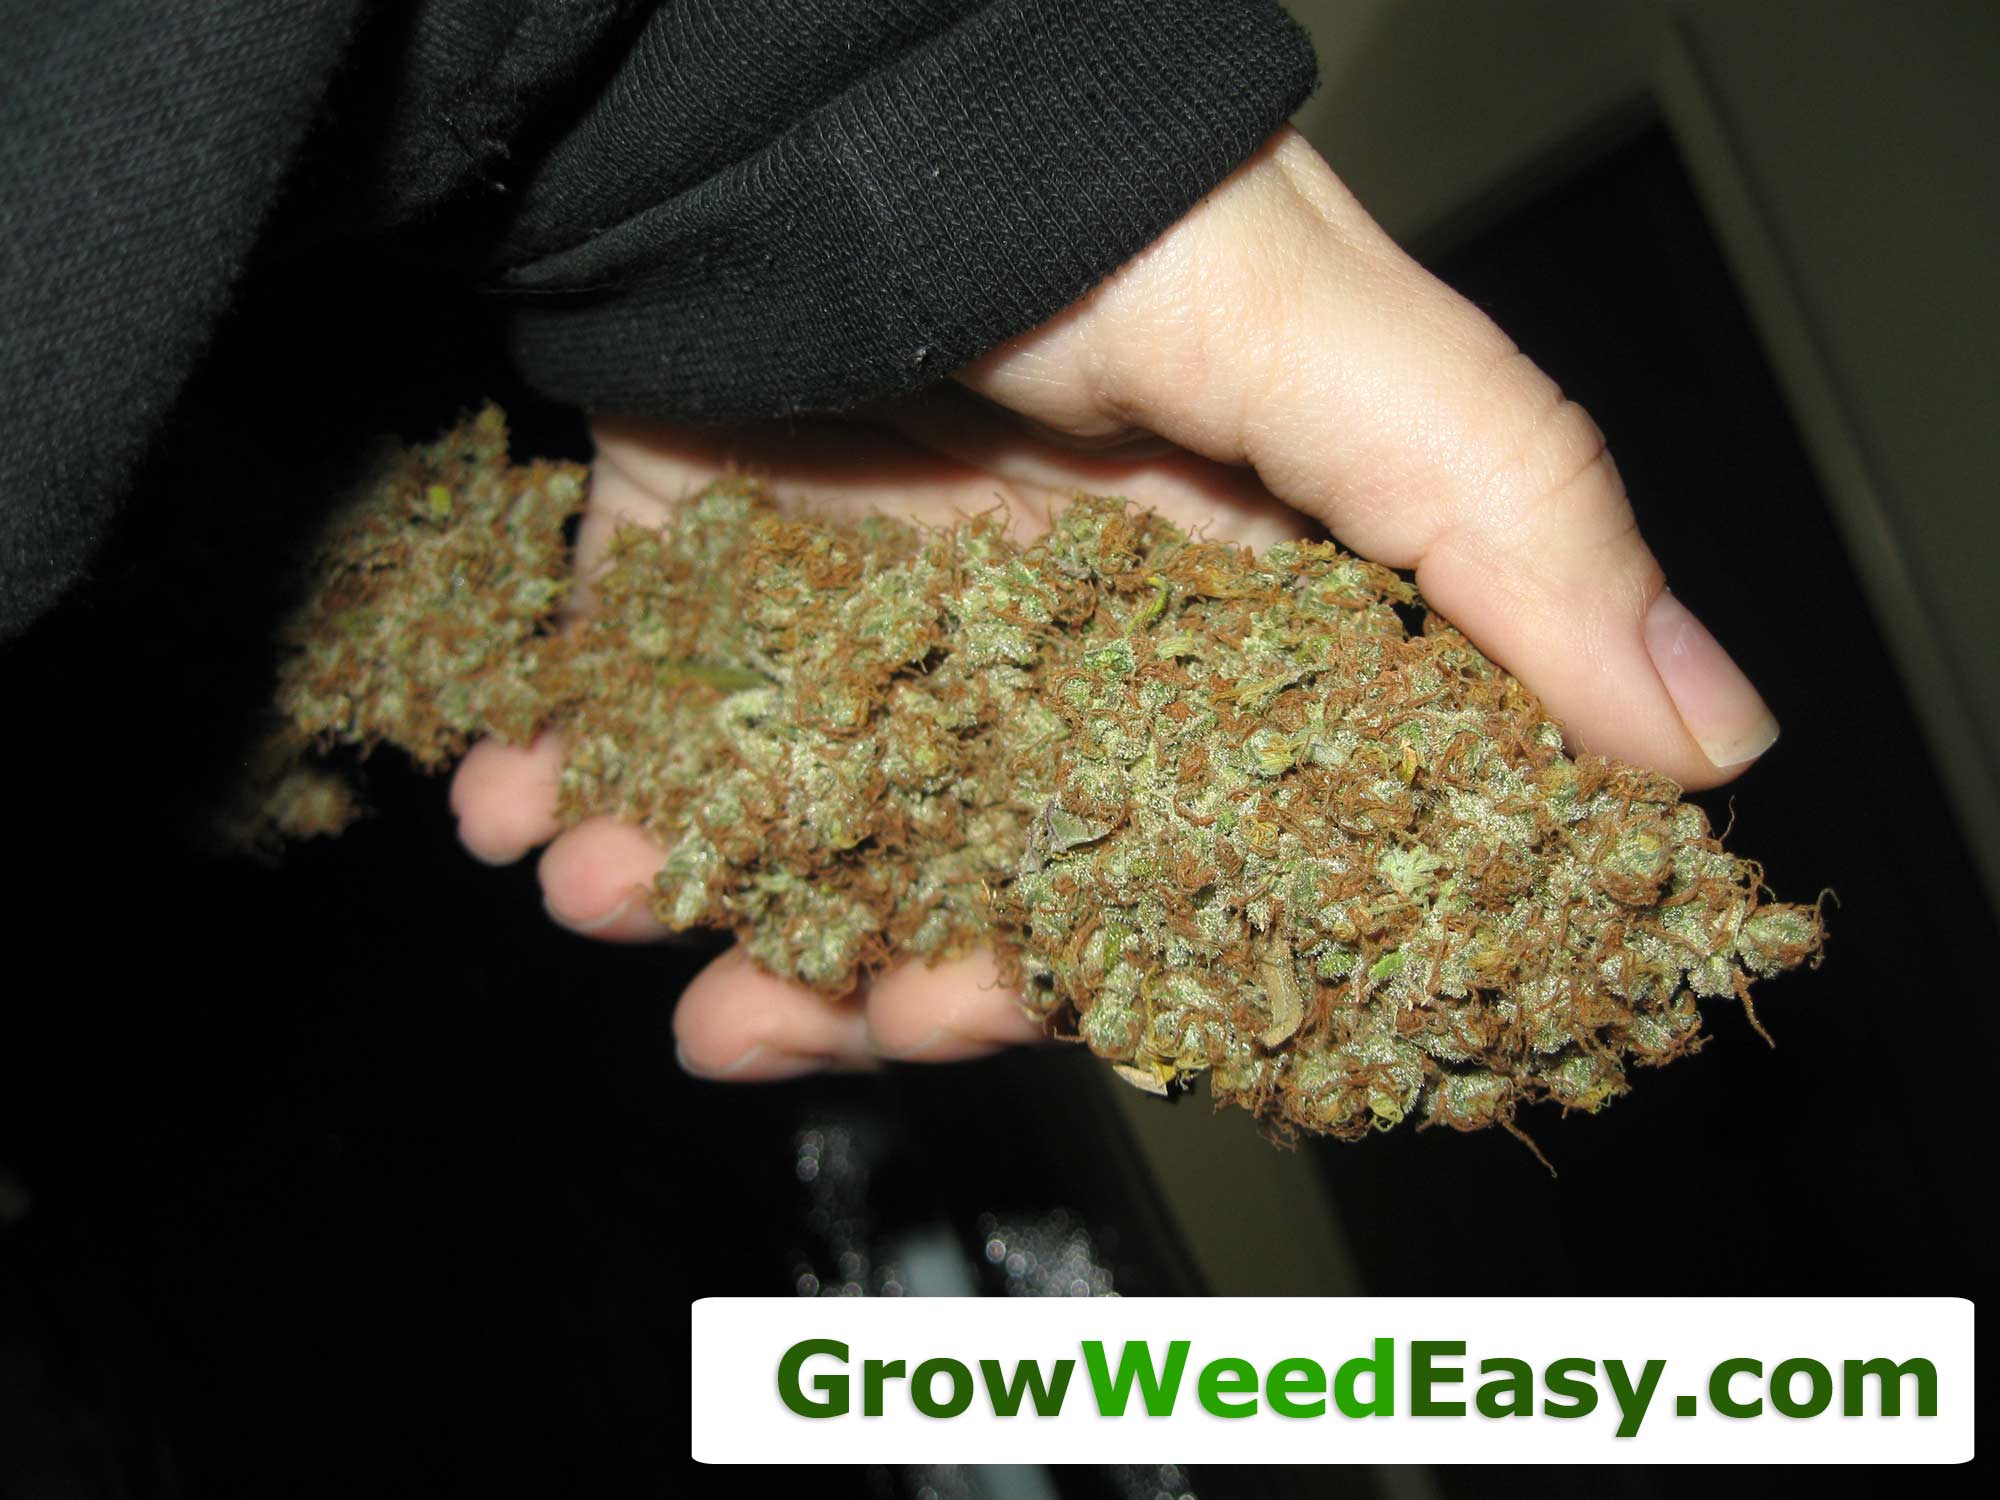
Before we harvested the plant, we were hoping to pull a pound from the tent this grow, and we were feeling very hopeful as the buds were long, dense, and covered in resin.
November 19 – Harvest!
Buds were harvested on November 19, trimmed (and it was a very easy trim job due to the fact that pretty much all the buds came from huge colas with no larfy smaller buds, due to the main-lining we’d completed in the vegetative stage).
A big cola from the Wonder Woman plant
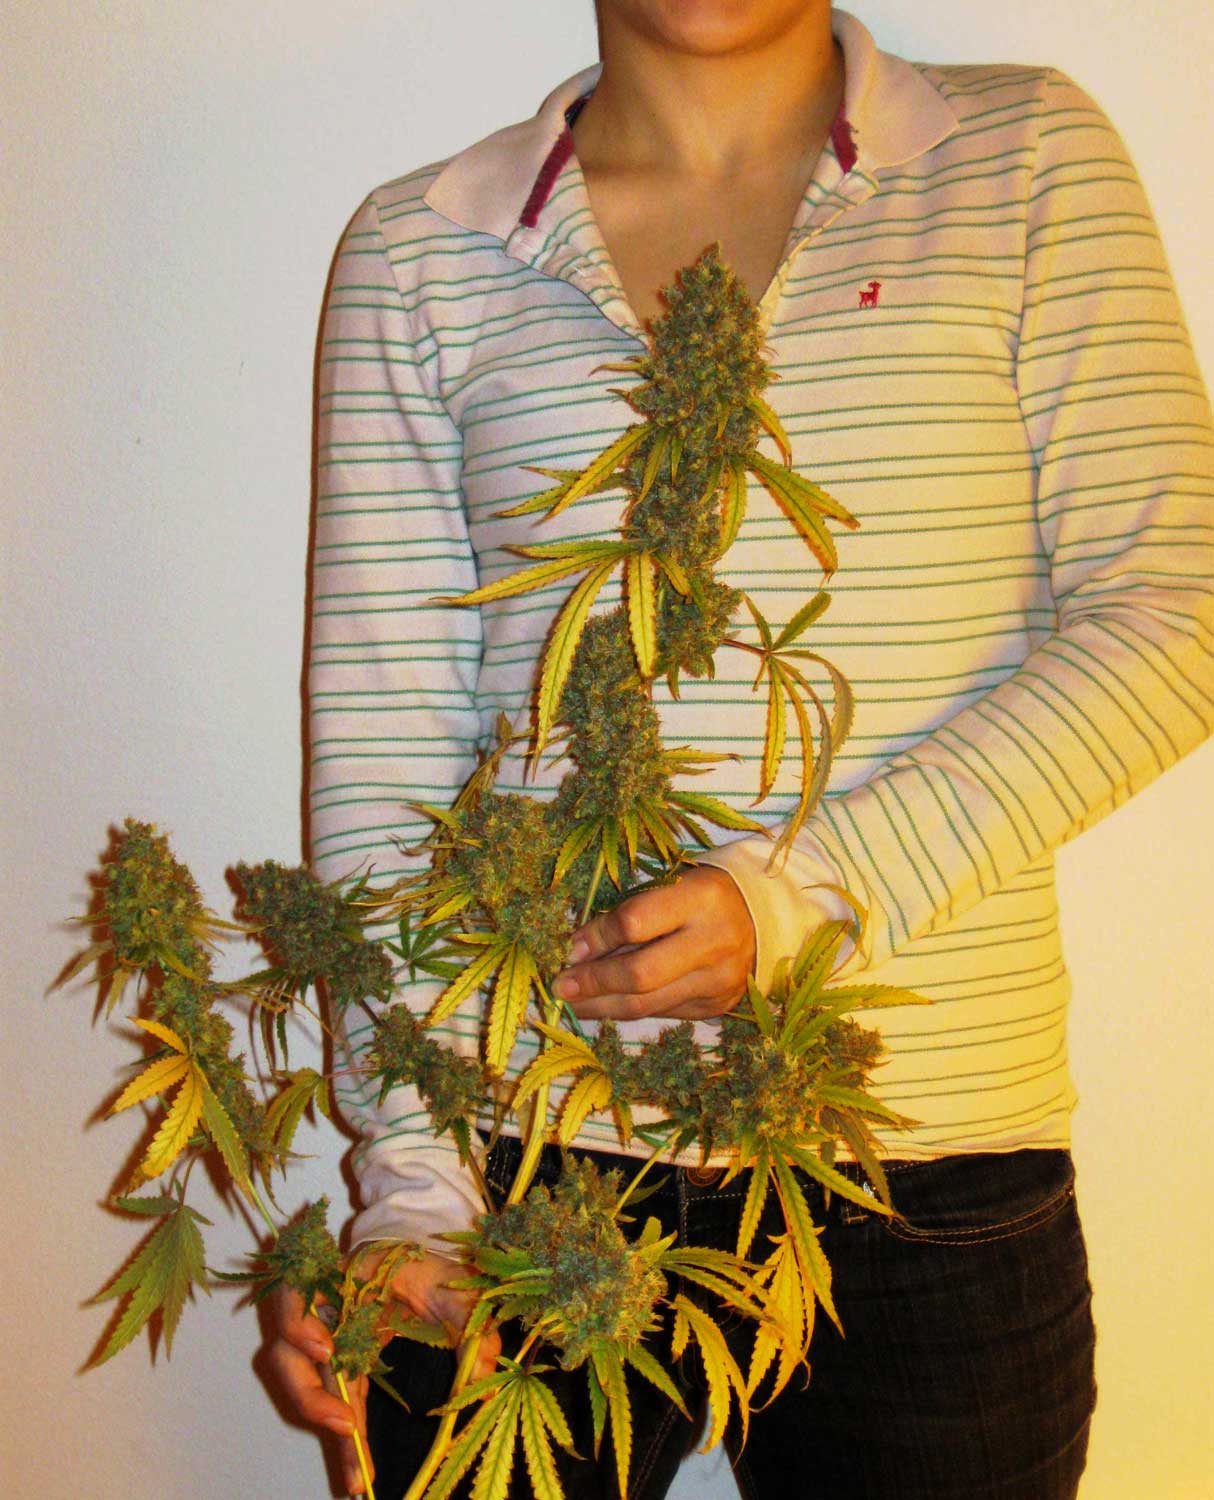

The BlackJack buds weren’t as thick, but still long, dense and covered in trichomes
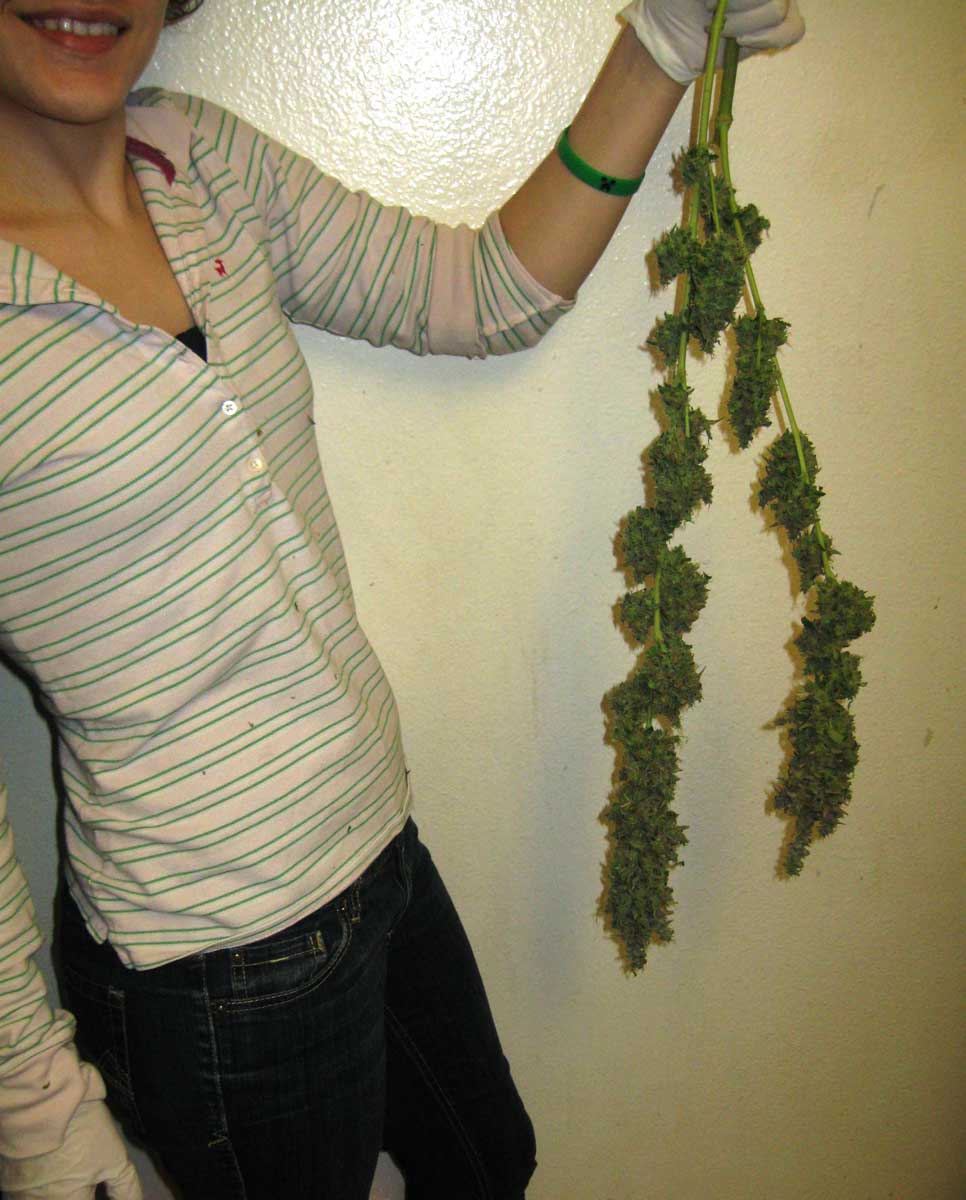
The buds were hung upside down to dry in our grow tent
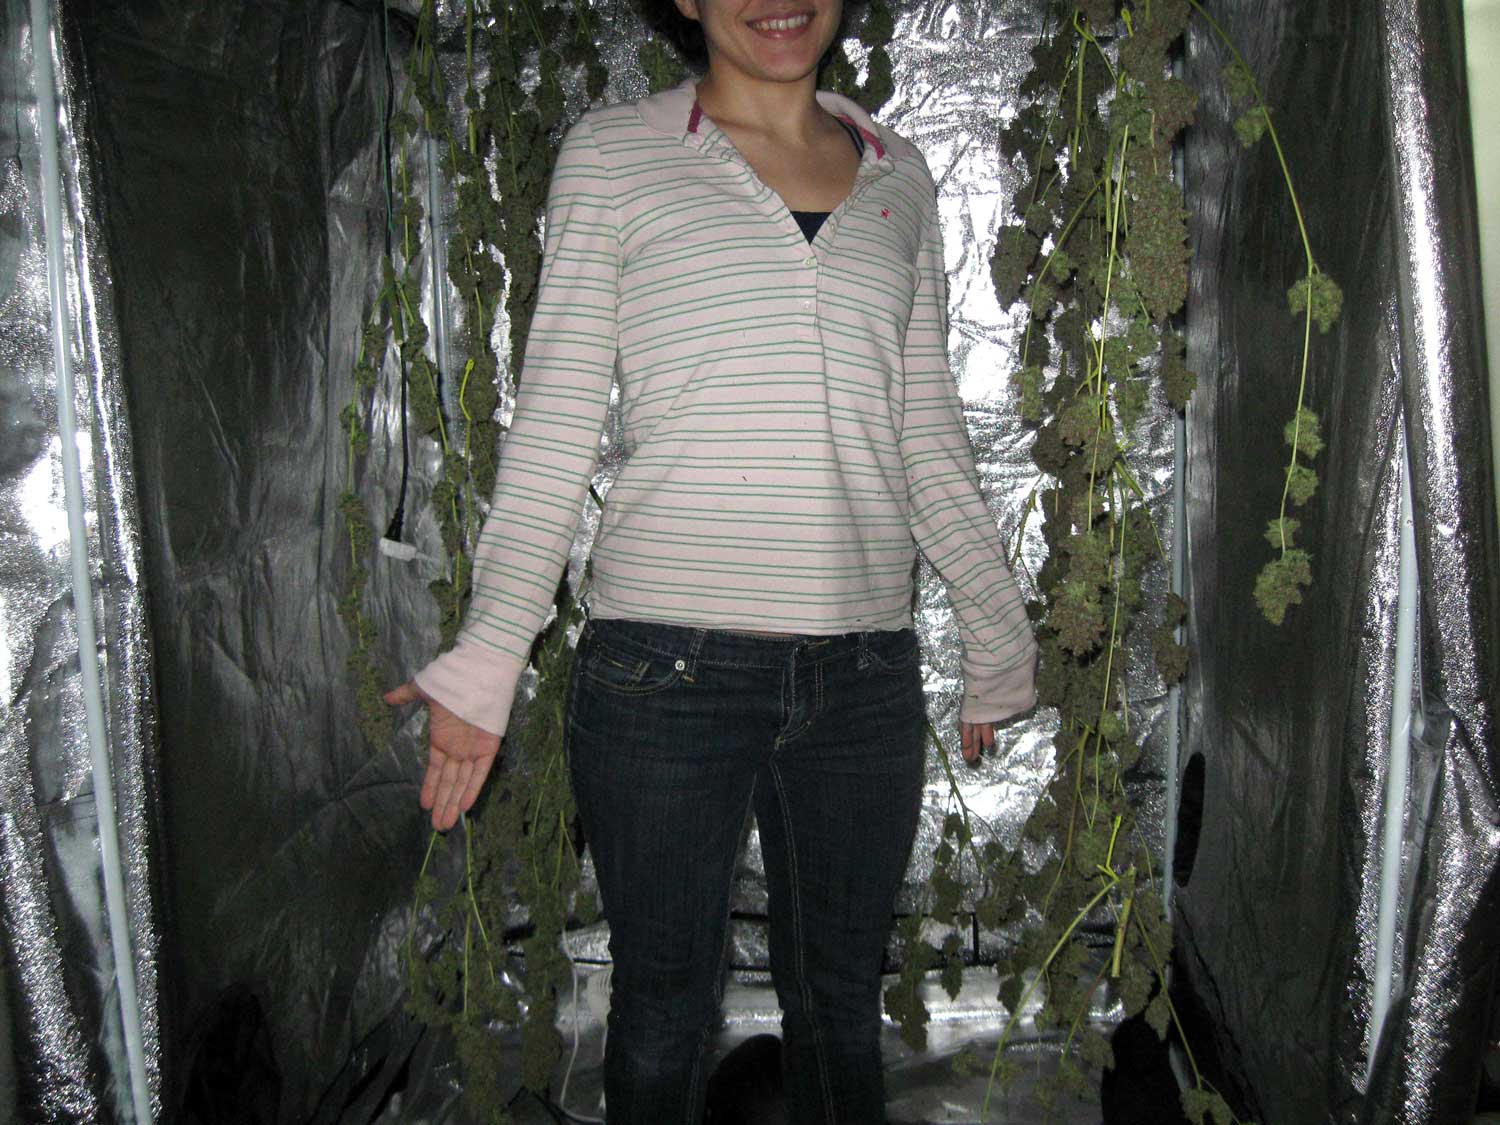
Buds dried for about 6 days until smaller stems started snapping, and buds were cut off the branches everything was jarred up. We made medical cannabis oil capsules out of the trim.
Final dry yield was 23.09 ounces for 2 plants
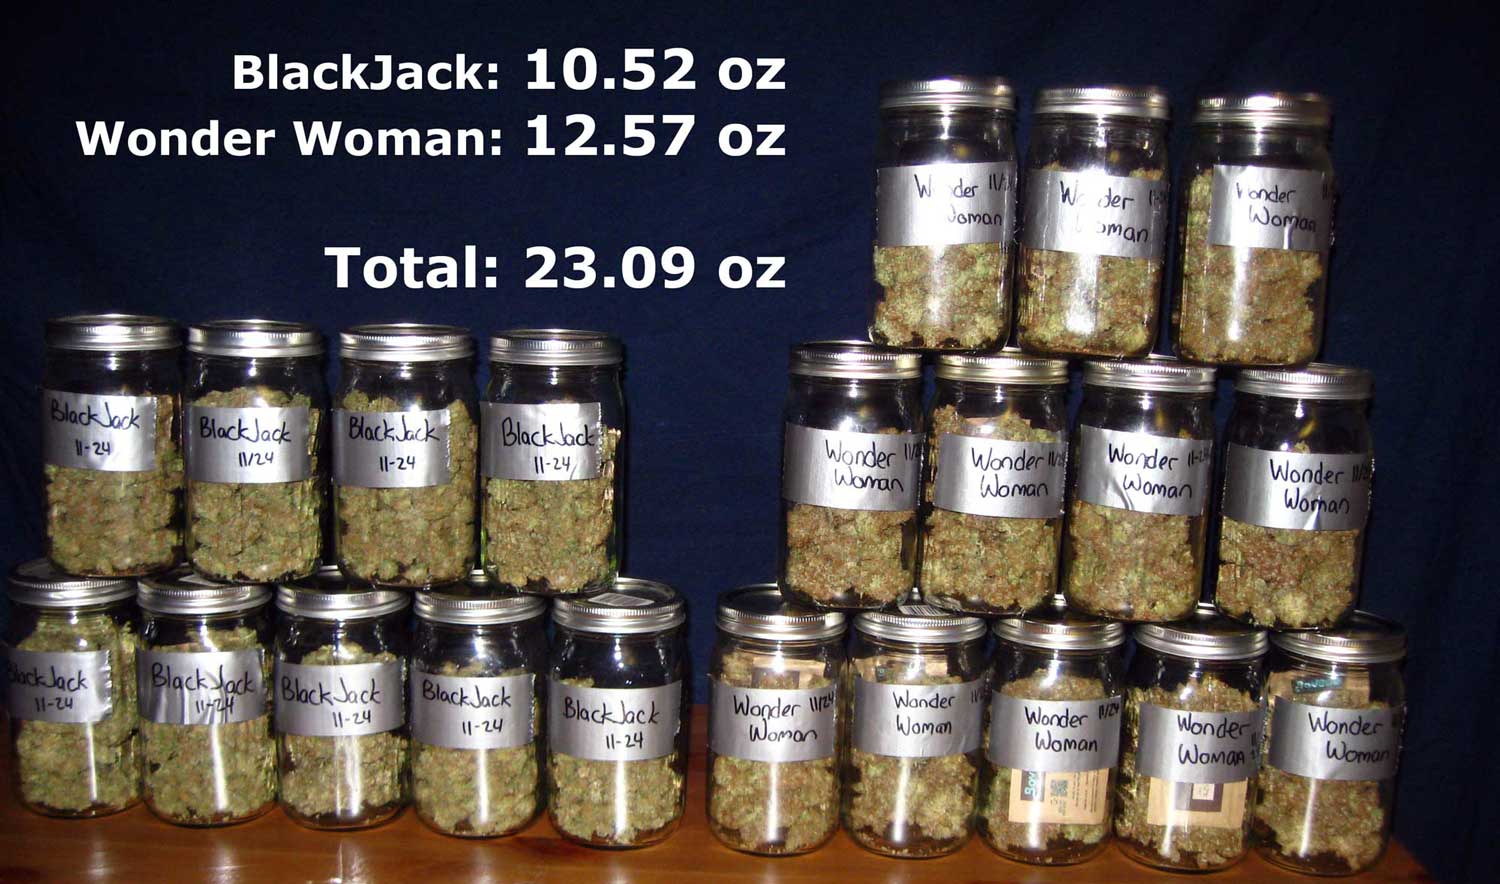
We weighed everything out on our digital scale after buds were dried and trimmed, before placing in jars. We were expecting about a pound (16 oz), so we were both pleasantly surprised by the final yields!
Learn how to grow your own cannabis plants exactly like this below!
Is It Time to Grow Your Own?
Here’s a list of everything used in this grow journal:
(get more info about this setup from the grower right here)
Cannabis Strains From This Journal
- Wonder Woman – Creates many, MANY top-heavy bud sites. High yield. Very potent.
- BlackJack – Covered in trichomes (great for extracts or hash). Pungent spicy smell similar to a Haze. Highly requested medical strain.
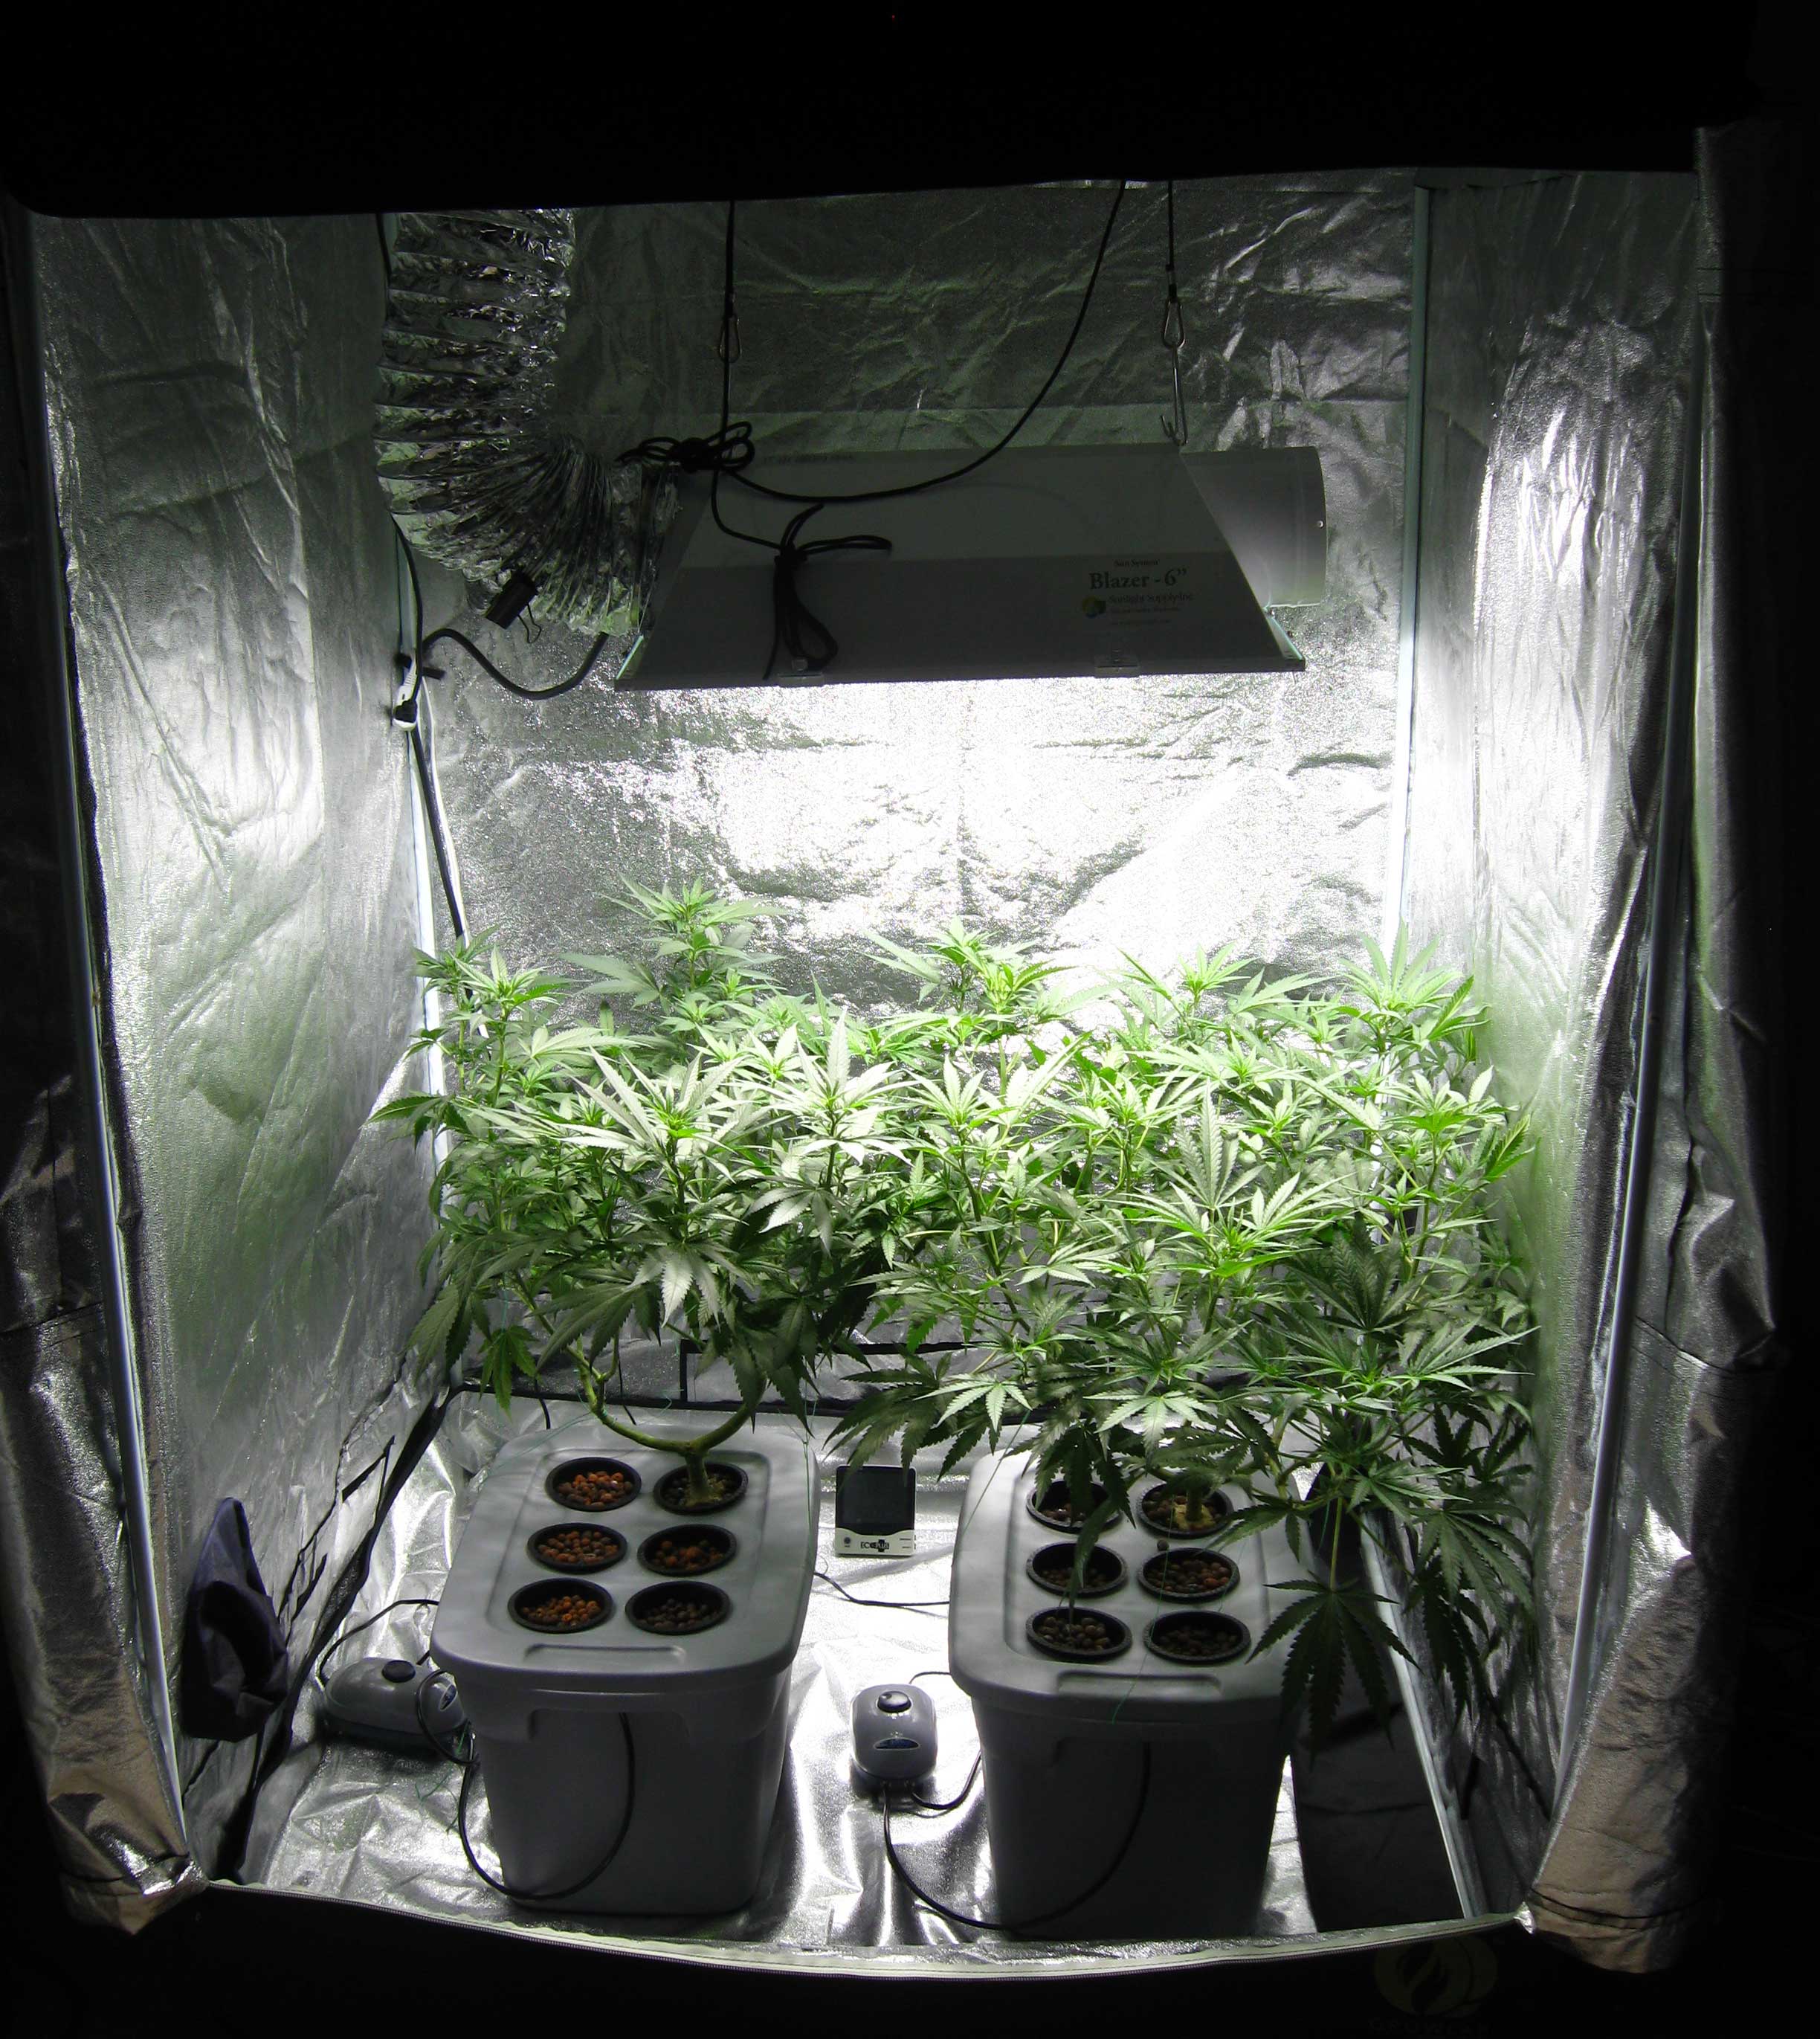
Growing Environment
 Grow Tent:
GrowLab GL120 ( 3’11” x 3’11” x 6’7″)
The grow tent is set up near a window in so we could exhaust the heat from the lights.
Grow Lights & Exhaust
Ballast (for 600W bulbs):
GGL 600W Dimmable ballast
- MH bulb: SunMaster 600 Watt Cool Deluxe
- HPS bulb: Digimax Digital Lamp 600 Watt
Hood/Reflector: Sun Systems Blazer 6” Reflector
Exhaust Fan:
Can-Fan Max 6” with speed control
6″ Ducting
Learn how to hook everything up (grow lights & exhaust)
Growing Medium
Hydroponics: Deep water culture (DWC) hydroponic system with top-feed, also known as “Bubbleponics”
Learn how to grow this way: Top-Fed DWC “Bubbleponics” tutorial
 Nutrients: General Hydroponics Flora Trio
Additives: Aquashield
pH Tester: General Hydroponics pH Test kit
Tip: Quickly Change Your Reservoir with a Water Transfer Pump!
It makes me so sad to see people struggling to change the water in their hydroponics reservoir. A water transfer pump will make your life so much easier. The inexpensive Sierra Tools water transfer pump does the job better than any other water transfer pump we’ve tried in its price range. This will allow you to easily remove reservoir water and add new water to your reservoir without disturbing the plants. Note: You need 2 x D batteries for this pump to work. We use rechargeable Eneloop batteries.
 Smell Control
We used a couple quarts of Ona Gel to control odors for this small medical grow. We weren’t worried about the smell of the air coming out of our exhaust, just of the smell in our living areas (when guests come over). Many growers use a carbon filter as part of their exhaust system, which is much more effective (when set up properly) and will remove just about all scent from the air both in the grow room and outside where the air is being vented out.
Learn how to control odors in the grow room
Harvest, Trimming, Drying & Curing
Magnifier – Jeweler’s Loupe or a Digital Magnifier (we use the Carson zOrb hooked up to a laptop)
Shears for trimming: Fiskars Microtip Snips
Several Quart Mason Jars for Curing
Rubber Gloves (otherwise your hands will be covered in resin)
Learn how to professionally dry and cure your buds every time
Other Gardening Tools
Gently Tie Down plants:
Any gardening ties will do – We use Study Twists & Soft Wire Tie
Hold Up Heavy Buds:
Plant support spools (Sun Spool, Support Spool, Yoyo plant hanger, etc)
Small Fan For Inside the Tent:
The exhaust fan does the heavy lifting as far as air exchange, but a small desk fan inside the tent can help keep air moving below and within the plant canopy.
Humidity & Temperature Monitor:
This Ambient Weather WS-07 Wireless Thermo-Hygrometer lets you check the readings from another room (don’t forget to get 6 AAA batteries

Read frequently asked questions below!
How big is your tent? How do you keep the temperature down?
I am currently using the GrowLab GL120, which is 3’11” x 3’11” x 6’7″ (a tiny bit smaller than 4’x 4′ x 7′). I don’t fill the complete tent so I could probably get away with something that was 3′ x 3′ x 6′, but I like having the extra space to work with the plants.
I use ducting and an exhaust fan to pull hot air out of tent and through a nearby window. The exhaust fan I use is the Can-Fan Max 6” with speed control. It has 3 speeds and is about as loud as a regular powerful room fan when it is set on high. It works pretty well even though I have no AC. Even in the midst of summer, I was able to keep temps under control as long as the lights were kept off during the hottest 6 hours of the day. Now that summer is over, I don’t have any problem with heat.
For complete details, here is a complete explanation of all the parts included in this setup.
Is DWC hydroponics a good choice for a new grower?
DWC is very rewarding once you get a handle of it. It really makes you feel like a mad scientist when you’re mixing up the reservoir.
Some people start with hydroponics and do very well. Other people prefer to start with something that seems more familiar like a hand-watered grow. While grower Sirius started directly with top-fed DWC as his first type of grow, Nebula started growing cannabis in pots of coco coir using CFLs.
If you do decide to try growing cannabis in DWC, definitely don’t beat yourself up if you run into problems your first DWC grow. The cool thing about DWC is if you keep an eye on the plant, you can usually recover from most problems if you react quickly.
I recommend keeping it simple for your first DWC grow. I believe a lot of growers try to add a whole bunch of different nutrients and supplements all at once to make things better, but it can sometimes cause unexpected reactions. I’d stick to a single nutrient line without too many bells & whistles.
For DWC, I like the General Hydroponics Flora nutrient trio (just follow their included schedule for “recirculating hydro systems,” at reduced strength) and Botanicare Aquashield for root health. Those were the only nutrients/supplements we used for this whole grow. I wouldn’t add anything else unless you notice a problem (except maybe Cal-Mag if you know you have soft water or are using distilled/RO/filtered water).
DWC has great advantages(faster vegetative growth being the biggest one compared to soil), but a lot of growers find it tough to get dialed in. You must commit to maintaining your reservoir, which takes at least 20 minutes a week. It’s also important to watch over the plants closely (we check in daily) because if things go bad in DWC, they go bad fast. On the flip side, you also have total control to fix problems almost instantly too, since you can always completely change the reservoir and the roots have a completely new environment.
We have been growing in DWC for a few years, but on a smaller scale (LEDs, CFLs). This is our 3rd full run in this tent with a 600W HID. Last yield was less than a pound, so we are pretty happy with this harvest.
We added a few weeks into our vegetative stage due to a heat wave. We were growing two long-flowering strains and we harvested when the trichomes were pretty much all cloudy with a few ambers here and there.
We went a big longer than the breeder’s recommendations (which estimated 9-11 weeks for these strains). In my experience, if you wait to harvest until all the trichomes turn cloudy with a few amber, it often takes a few weeks longer than the breeder’s rec. Many growers harvest earlier and are happy with the results, but a few ambers is our preference.
No matter what the breeder says, I recommend that growers always go by the trichomes. Every plant is different. I believe most plants have at least a 2 week harvest window when they are good to harvest, and it’s up to each grower to determine what works best, especially for small medical grows like this one.
Learn when to harvest your cannabis:
https://www.growweedeasy.com/harvest
How do you clean your reservoir? I’m using the 10 gallon totes like yours and they are a pain to clean or change the water!
As far as changing the reservoir, we use a cheap water transfer pump to easily pump water in and out of the reservoir. This cheap battery operated Sierra Tools water transfer pump does the job better than any other water transfer pump we’ve tried its price range. This will allow you to easily remove reservoir water and add new water to your reservoir without disturbing the plants. You need 2 x D batteries for this pump to work, just for your information.
Between harvests, I generally clean the reservoir with bleach water or just regular hot soapy water. I throw away the net pots and buy new ones. I also replace all the tubing (I bought a big spool of tubing a while back) instead of trying to clean them out. Lastly, I check all the airstones, pumps and individual parts to make sure everything still works properly and get the system going for a couple days before I germinate any new seeds.
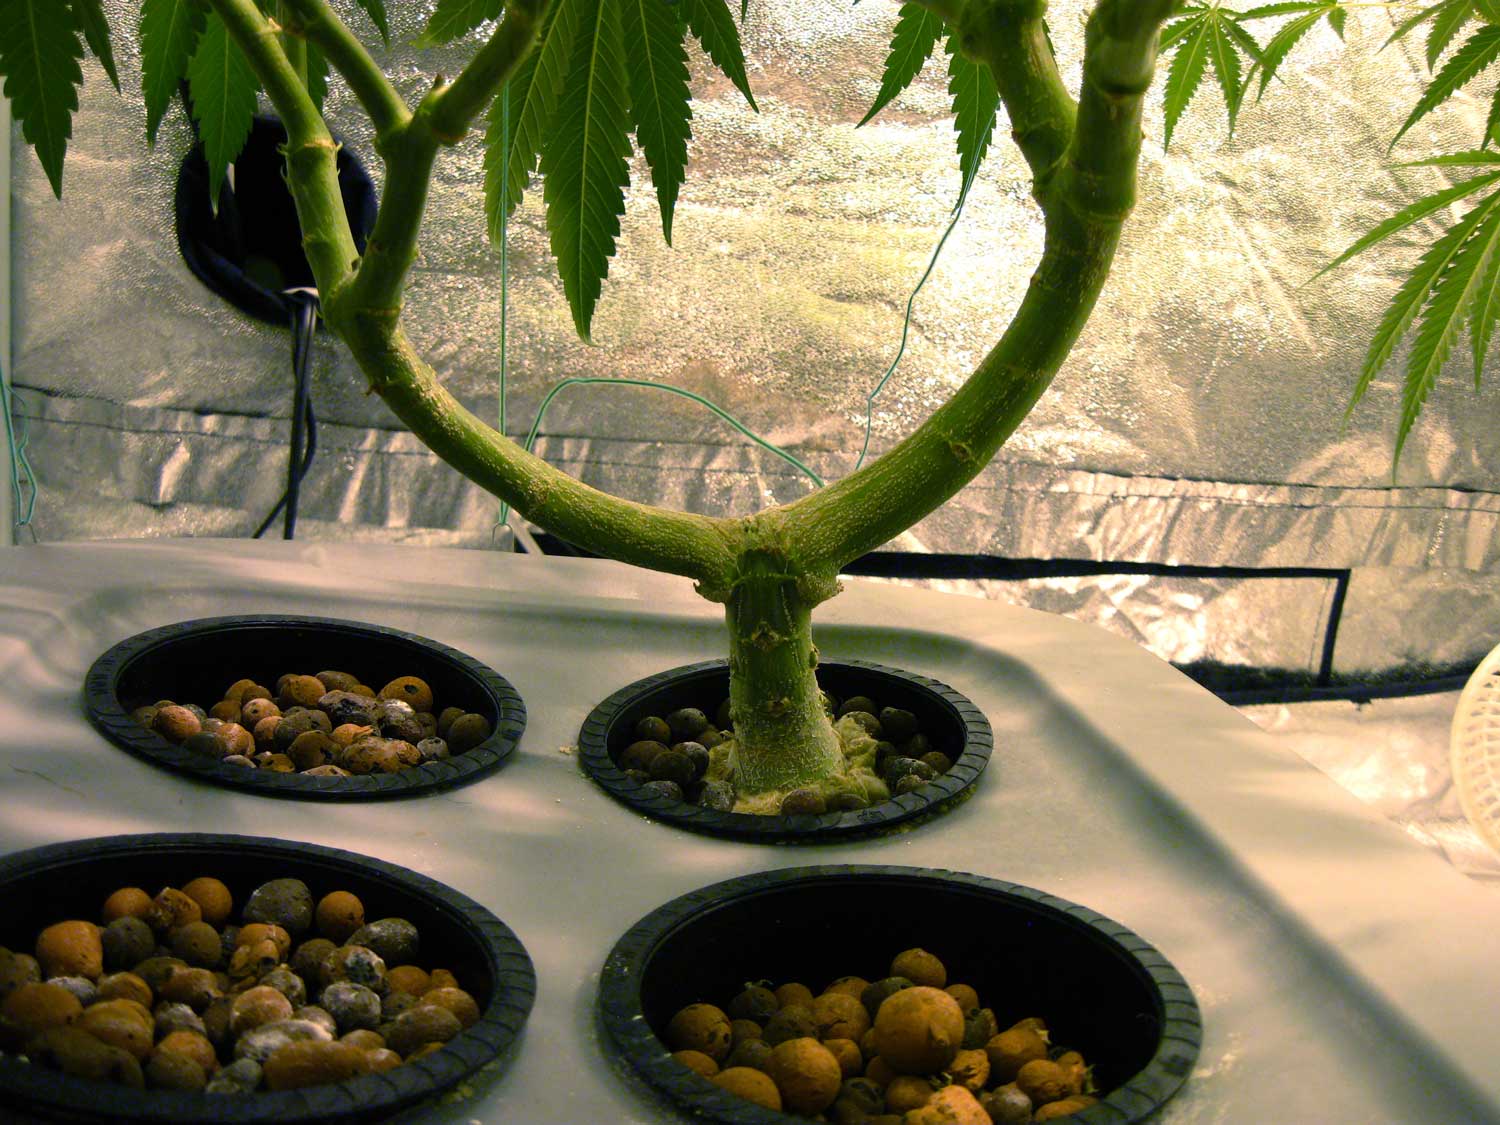
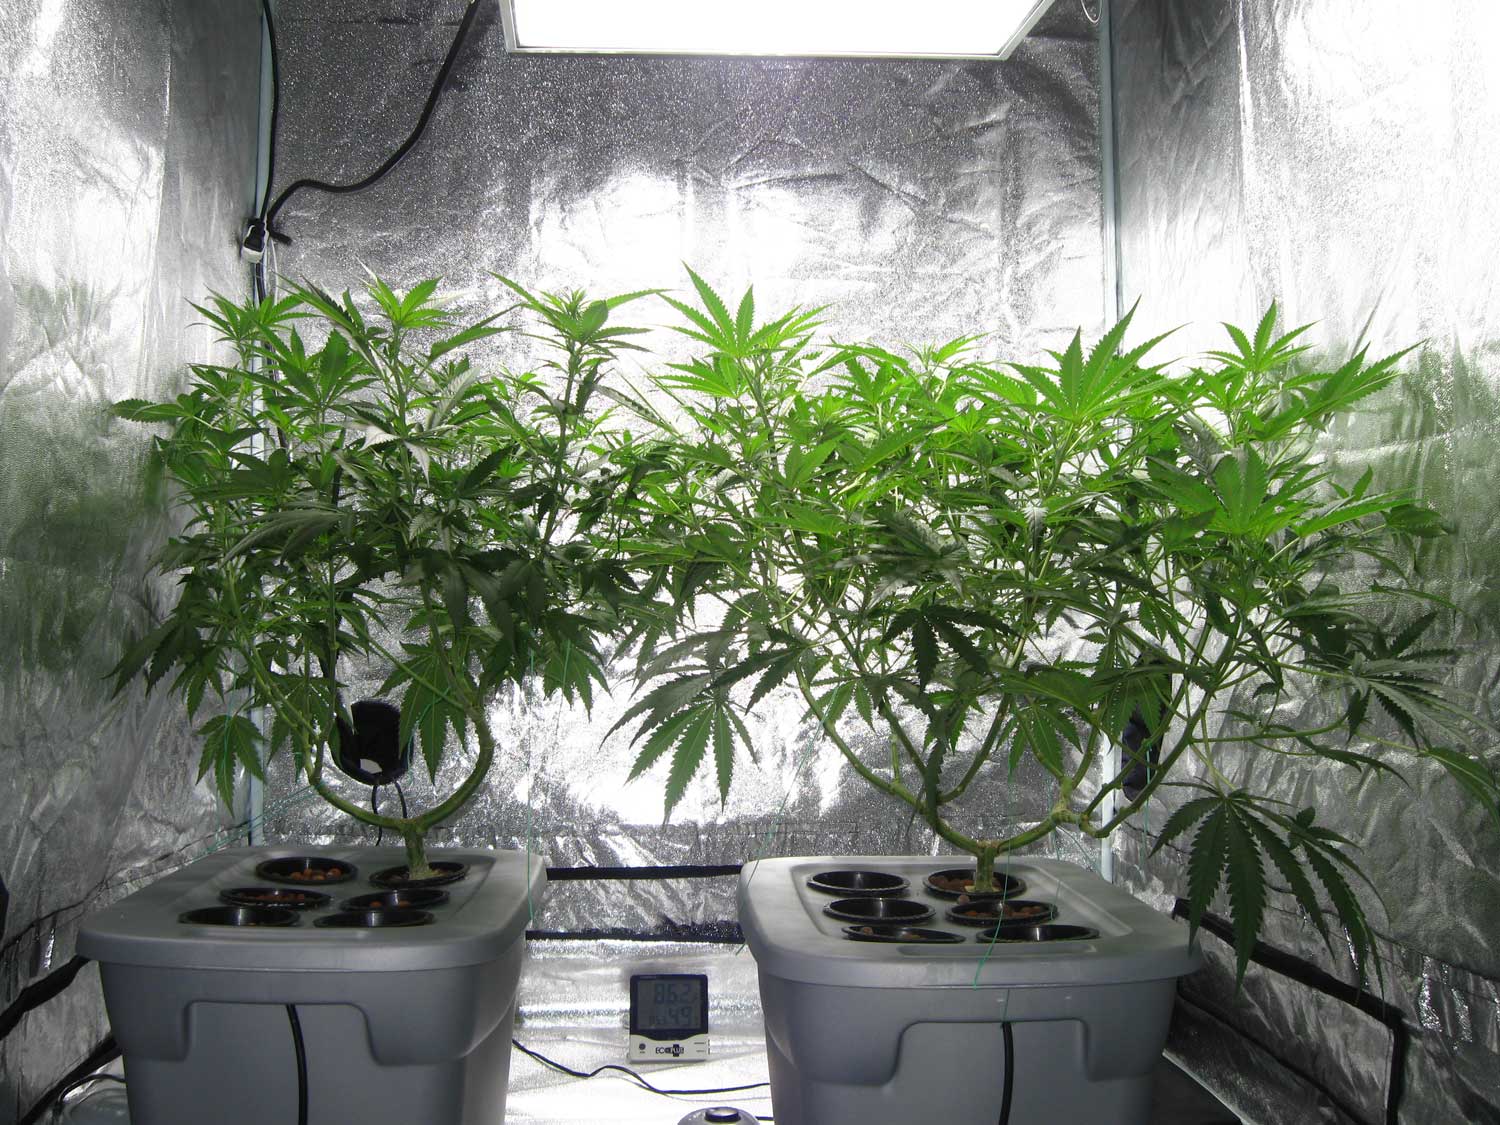
I can’t believe you got plants that big with those little pots!
Those little pots are called ‘net pots’. They are used to hold the seedling plant roots until they grow down into the water reservoir below. The roots are actually sitting in the grey 10 gallon bins which are full of nutrient water. It’s known as a DWC (deep water culture) hydroponics setup.
What are the other empty pots for? Dead plants or future grows? Also, are you growing in clay balls or what is the medium?
This setup allows you to start 6 plants at a time. I use them to plant more than one seed at a time and pick the best one to grow. I also use the other holes to access the reservoir, for example to check levels, add/drain water, etc. Those clay balls are known as hydroton, but they actually don’t make hydroton anymore. I just have a huge bag of it from years ago. There’s replacements out there that are just as good.
What’s the advantage of hydroton vs coir or soil?
Each growth method has their own advantages and disadvatages.
- Organic Super Soil – A hand-watered grow like a plant in a pot of organic super soil could arguably be one of the easiest ways to grow, since you basically just need to water the plants. A big advantage of making your own organic super soil is that these growers often don’t need to worry about nutrients or pH throughout their grow. They make the soil right for a plant like cannabis (usually involving a period of composting or letting the soil cook, to achieve the right levels of microbes which basically break down nutrients from the soil and feed them to the roots), then just water the plant, and let her do her thing. A lot of organic soil growers claim that their buds have a better taste than buds grown other ways, and that organic growing is more natural. Unfortunately, this is subjective, so the benefits are mostly up to the growers taste. The biggest time-sink in this type of grow would likely be the process of mixing up and cooking the soil.
- Regular Soil – In a regular soil grow (like if you just buy soil from the store), growers don’t have to worry about mixing their own soil or composting, but they do have to worry about factors like providing nutrients to the plant (as it will naturally use up all the nutrients in the soil). They also have to worry about monitoring the pH of the roots, because they don’t have the teaming army of microbes to do it for them. Remember, if the pH at the roots is too high or too low, the plant doesn’t have access to the nutrients and will show deficiencies even if the nutrients are there in the soil. This method takes a little more work while the plant is growing since you have to feed some amount of nutrients and monitor pH, but is much easier and quicker to get started than mixing and composting your own soil which makes it attractive for a lot of new growers. Also, many people have already grown at least some kind of plant in soil before, so it’s a lot more intuitive for some people than hydroponics.
- Hydroponics – Hydroponic means that the plants are getting their nutrients directly from the water as opposed to the soil. That means you can grow a plant in a soilless medium like coco coir, and it is still considered hydroponic because there are no nutrients in coco coir (coco coir is just an inert medium to hold the roots). When you’re getting into hydroponic setups like coco coir or DWC, you are entirely responsible for 100% of the nutrients the plant gets. You are also entirely responsible for maintaining the pH. Basically you are doing the “job” that the microbes were doing in the organic super soil setup. Hydroponics can be intimidating because most people do not have experience providing nutrients and managing pH this way. However, just like mixing your own super soil, you can easily follow an exact recipe that has been proven by other growers and get great results on your first time. One of the biggest advantages of hydroponics over soil is that the plants grow much faster vegetatively, and also tend to get higher yields. This is partially because you are basically “chewing up the food” before you give it to the plants. You make it easier for the plant to get the exact nutrients needed, and the plant will grow faster/produce more. Some growers believe that hydroponic bud does not taste as good as organically grown buds. I do not find this to be the case (many people ask if I grow organic when they taste my DWC-grown buds, and I don’t use organic nutrients). I believe the biggest factor is causing an unpleasant “nutrient taste” is from feeding too high levels of nutrients during the late flowering stage, and also from poor drying/curing practices. This is an ongoing debate and I definitely don’t claim to know the answer.
Sirius: Personally, I find hydroponic cannabis to be far more potent on a regular basis. This is reflected by the fact that many medical dispesaries tend to sell organic cannabis at a lower cost, even for the same strains. If we’re speaking purely about things that can actually be measured, hydroponic growing outperforms organic growing in every way except ease after the initial setup. That being said, the debate is still ongoing!
I know that was a lot of info, but I hope it helps you and other growers make the choice.
To summarize:
- Organic super soil – quite a bit of prep work before you grow, ultra easy-to-maintain during the grow, possibly more flavorful buds.
- Regular soil – easy to get started, slightly more work during the grow.
- Coco coir & other soilless mediums – easy to get started, perhaps a little more work than regular soil during the grow – faster growth.
- DWC (or other hydroponic setups where the roots are fully immersed in water) – Most effort to maintain, fastest growth, biggest yields.
What nute strength were you giving them? (ppm/were you following the Generaly Hydropnoics schdule for Flora trio amounts)
We started by giving them the recirculating nutrient schedule from General Hydroponics at about 1/4 to 1/2 strength.
The Blackjack wanted much less nutrients than the Wonder Woman, and I gave her plain water sometimes while the Wonder Woman took the 1/2 strength dose and wanted more. It was hot this summer, and they were drinking a lot, so they needed lower concentrations than what would likely be appropriate for the cooler months.
What are you going to try next?
The next grow will be the same setup with a few adjustments:
- Strains: Most likely Sour Diesel & Headband
- We are considering adding a Silicon supplement in addition to the GH trio & Aquashield
- Topping the plant earlier to begin main-lining – exactly when the plant hits 6 nodes
Jump to….
I want to make a grow setup just like this!
How to grow with bubbleponics (top-fed DWC)
How to set up your MH/HPS grow lights
Where can I safely buy medical cannabis strains?