by Nebula Haze
Times have changed! If CFLs are your only option, they do grow good weed. However, just about every cannabis grower would be better off with an LED grow light than CFLs as your grow light. They’re cheaper than CFLs per watt, and get better yields!
Explore Curated Cannabis Grow Setups:
Get LED grow lights if you can! LEDs are better than CFLs for growing cannabis even for tiny grows.
I’ll let this article remain here for posterity, and also for anyone who lives in a place where CFLs are their only option for a cannabis grow light.
Table of Contents
This easy indoor hydroponic cannabis grow guide uses common CFL bulbs as grow lights and forgiving coco coir as a growing medium. It’s designed for the beginner as a cheap and easy way to introduce yourself to growing marijuana.
Growing weed doesn’t have to be hard!
 Startup Cost: Around $300 to get started
(materials listed here)
Maintenance Cost: $50/month
Yields to Expect: 1-3 ounces/plant (if you follow the directions in this tutorial)
Time to Harvest: An average CFL cannabis grow takes about 12 weeks from seed to harvest. Some strains (like auto-flowering cannabis strains) can be ready as soon as 8 weeks from seed. With other strains, you may need 14 weeks or more to get to harvest (learn how to get to harvest sooner). Strain choice is very important when it comes to timelines! Learn how to find the right strain.
Recommended For: People who want a super-cheap, super-easy grow style.
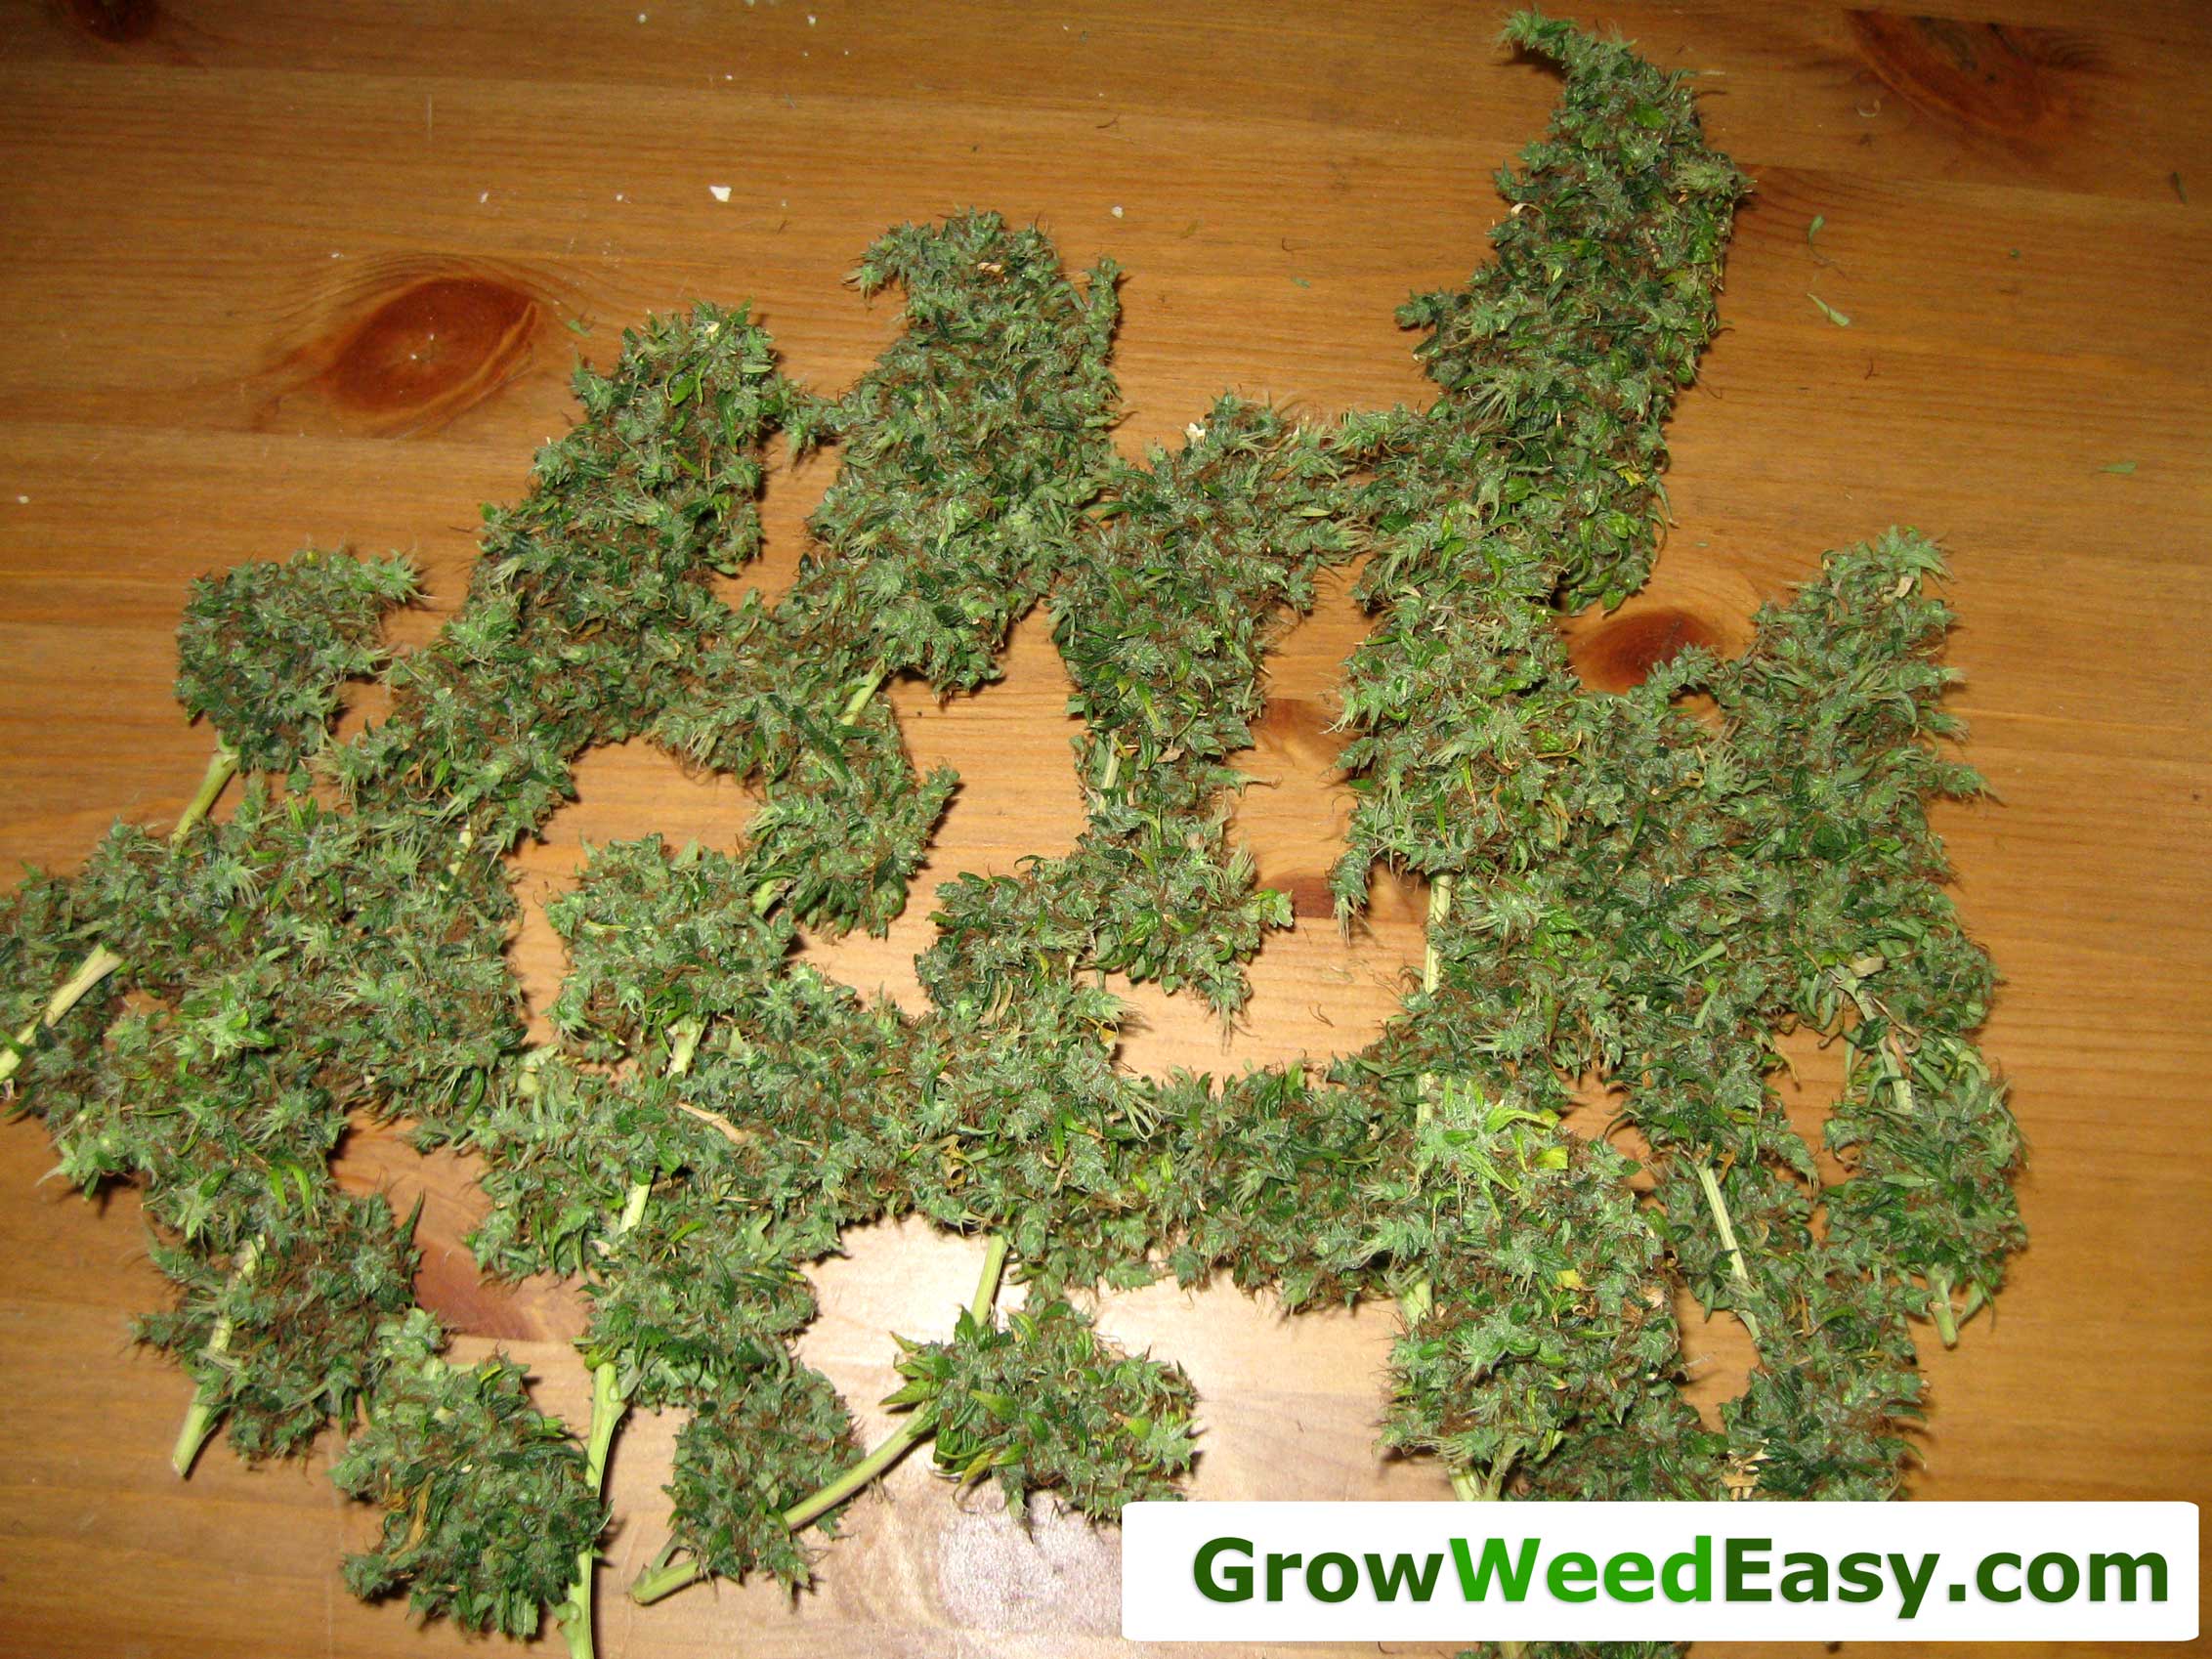
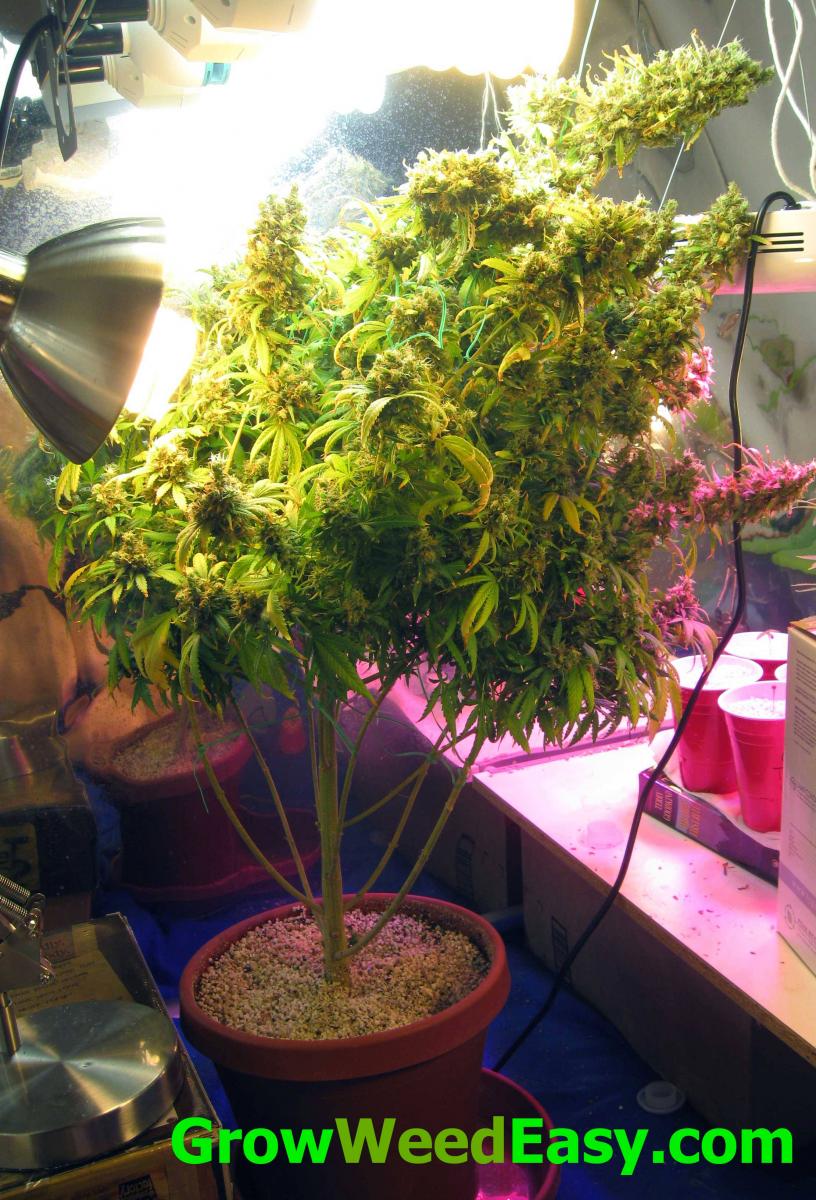
Don’t be fooled just because it’s easy. Even though I was a complete beginner when I started, I ended up getting 6.2 ounces of dried buds off my very first cannabis plant from my very first grow, which I grew using this system! (Pics below). That is an unusually lot of cannabis for a CFL grow, and took using a LOT of bulbs, but if you read through this whole tutorial you’ll learn step-by-step how you can do it, too.
It helps to use a high-yielding strain (Northern Lights is great because it’s high-yielding, tends to grows short, and is low odor).
I also train my cannabis plants to take advantage of the great light that CFLs produce within 2-8″ of the bulb.
These results are not typical for your first try unless you’ve put in a lot of extra research and really watch and tend to your plants throughout your grow. Which brings me to my next point.
This method is not for everyone!
That’s because growing weed with CFLs isn’t the highest yielding method. It doesn’t get the most yields for the electricity, it’s not suitable for a large grow, and it’s not going to work if you aren’t willing to watch over your plants closely throughout the grow.
But it’s super cheap, super easy, and if you just need a few ounces of bud every few months, it may be the perfect “low-maintenance” way for you to grow weed!
I think it would be safe to assume that even a beginner can expect to get 1-3 ounces of dried buds per plant if you just follow these instructions. Even if you mess up (and you will), you’ll still get at least that if you can get your plants to harvest.
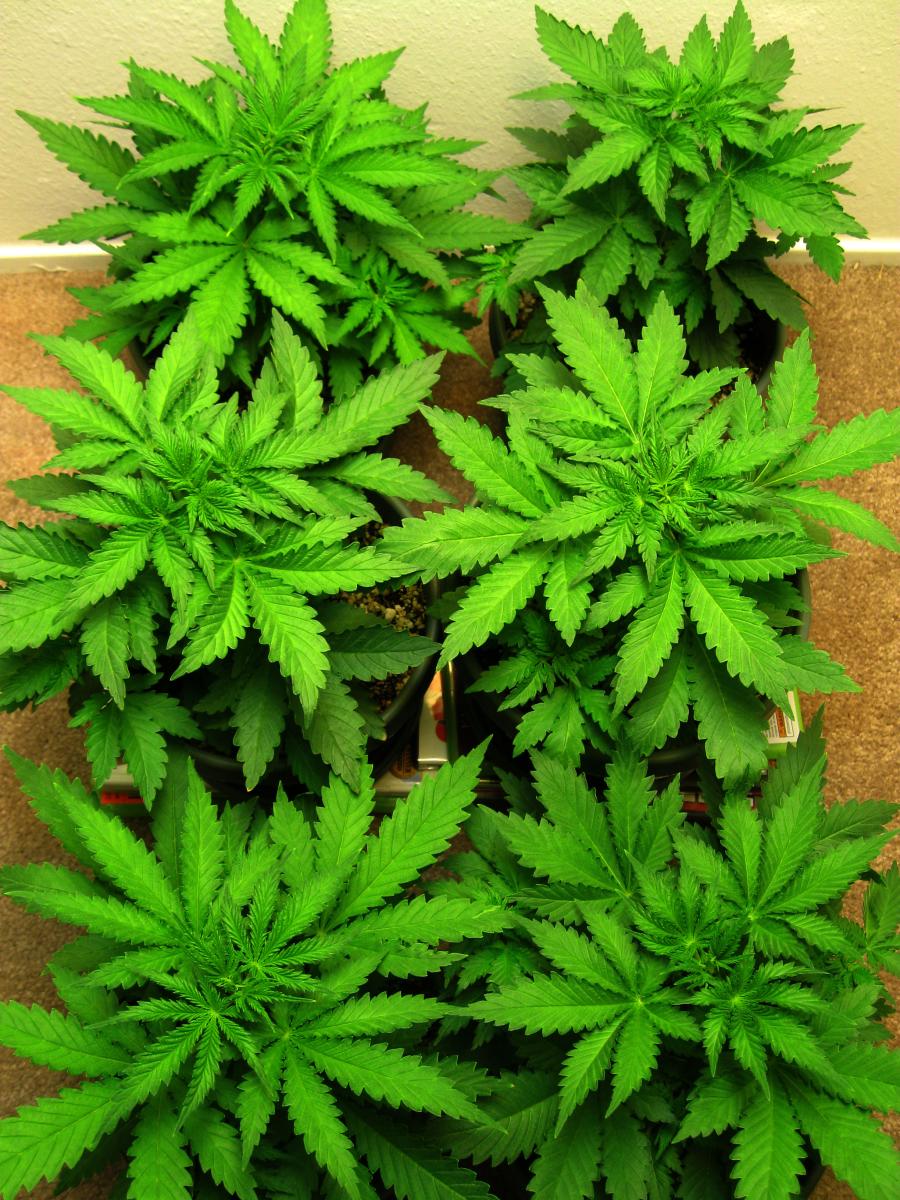
Here’s a pic of my very first grow using this method!
You will be growing your marijuana plants indoors in a soil-less medium called Coconut Coir (often called coco coir, or even just coir). Coco coir is a natural fiber made from the husk of coconuts that naturally stimulates the roots of plants and is forgiving when growing marijuana.
For feeding (water plus nutrients), you will hand-water them whenever your plants get dry and you will provide them with all the nutrients they need right in their water.
 For lights, all you need are some cheap CFLs (Compact Fluorescent Lights) like the ones you get from your local hardware store.
These common bulbs are much more efficient than old-fashioned light bulbs (which can’t be used to grow plants) and CFLs don’t use much electricity or produce as much heat compared to some other grow lights.
For a stealth marijuana grow inside a tiny space, nothing can beat CFLs as marijuana grow lights.
Because CFLs have a short light range (8-12 inch max), this tutorial works best for growing plants that are kept shorter than 3-4 feet. You want to focus on training your plants to grow wide instead of tall.
That means you will choose either…
- A compact grow when you keep your marijuana plants small and harvest often (great choice for beginners who want a quick harvest) OR
- A controlled grow where you allow your plants to get bigger / wider, but you maximize the CFL light range by training your marijuana plants to grow short and bushy. This is a great choice for growers who don’t mind waiting a few more weeks in order to get a bigger harvest.
You can still get at least a couple of ounces off each plant, even when plants are kept short and you will be able to harvest your crop in only 3-4 months.
This system reduces many of the problems associated with an indoor soil grow, and is also much easier than almost any other hydroponic style grow.
It is a great way to learn about how marijuana plants grow and after doing one harvest yourself, I guarantee that you will start getting millions of ideas on how you want to do your next grow.
Pros of Growing Marijuana with CFL Grow Lights and Coco Coir
- Cheap and easy to start
- Cheap and easy to maintain even for a complete beginner
- Forgiving way to learn how to grow weed
- Perfect for growing 1-2 plants
- Get 1-3 ounces/plant (harvest yields depend on the strain, how big you grow your plant ,and the light intensity you provide to the buds during the flowering stage)
- High quality bud since the plant is fed hydroponically
- Suitable method for a very small grow space
- Can be used with any strain of marijuana, whether starting with seeds or clones
- If you ever upgrade down the road, you’ll still be able to use all this equipment for seedlings and vegetating marijuana plants; this setup is easily turned into a dedicated vegetative chamber
Cons of Growing Marijuana with CFL Grow Lights and Coco Coir
- CFL grow lights are not cost effective when growing more than 1-2 flowering marijuana plants at a time, if you’re growing more than a handful of plants, you’ll probably want to invest in a LED Grow Light or LEC grow light to supplement your light intensity. Learn about the various marijuana grow lights you can add if you want to really ramp up your yields (instead of just trying to add more CFLs).
- Hand-watering plants is simple, but can be a pain if you have a lot of plants OR very small pots (which need to be watered more often)
- You have to adjust your CFL bulbs 1-2 times a week, as your plants will be rapidly growing into them
- For best results and to be able to harvest several ounces/plant with this method, you will need invest your time to learn how to keep your marijuana plants short with basic marijuana growth control techniques
This is really a perfect way to grow your first harvest if you “just want to get your feet wet” because it’s low cost and so forgiving it’s hard to mess up. Plus, you will really learn an incredible amount about cannabis growing by using this method.
I used this technique for my first grow, and even though I made a lot of mistakes, my plants produced great buds.
 .
.
- Marijuana Seeds or Clones
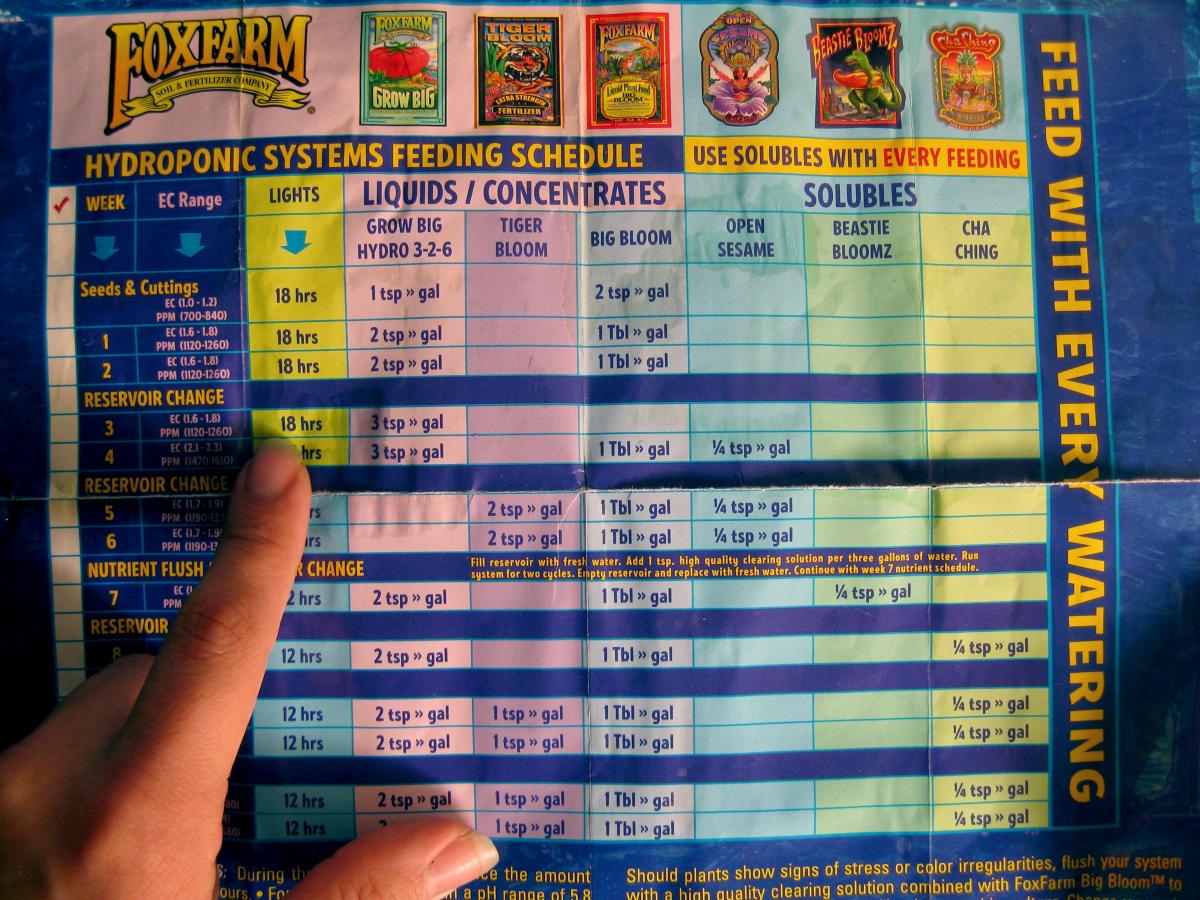
- High-quality hydroponic nutrients which are designed for growing marijuana hydroponically. Any quality cannabis nutrients made for hydroponics will work well as long as you also use a Cal-Mag supplement. I personally use the General Hydroponics Flora trio plus Calimagic (a Cal-Mag supplement) for growing in coco coir. This is a tried and tested nutrient system for any type of hydroponic growing. You can actually follow the nutrient schedule on the bottle because it’s formulated for plants like cannabis, just start at half-strength. Here is the exact nutrient schedule I’m using right now from them (pdf). I also recommend Fox Farms Hydroponic Liquid Nutrient trio since that’s what I exclusively used with good results on my first grow. Learn more about different cannabis nutrients.
- Pots to plant your marijuana in. Learn all about cannabis growing containers. Since you want to keep plants relatively small when growing cannabis with CFLs, you’ll generally want smaller containers (1-3 gallons each) for your plants. If you do get bigger containers (5+ gallons), you should still start your plants in smaller containers until they outgrow the current one and need a larger pot.
- Coco Coir Potting Mix. You can buy done-for-you Coco Coir potting mixes online or at hydroponic garden stores, which can be used immediately just like regular soil. But the cheapest and most widely available type of coco coir for growing comes in brick form. Here’s a tutorial showing you how to hydrate coco coir bricks into a nice fluffy soilless coco mix that your plants will love.
- CFLs (Compact Florescent Lights). You want at least two 40W ‘daylight’ CFLs to start (note: a 40W CFL is the same as a 150W incandescent equivalent, don’t let them trick you). You’ll be adding more CFLs as your plant grows and needs more light. You should plan on getting around three more 42W ‘soft white’ CFLs for the flowering stage. CFLs are found everywhere, in stores and online. For growing cannabis, I like bulbs close to the 40W range because they are a small, manageable size but still produce a lot of light. By the time your cannabis is flowering (making buds), basically the more light the better. When it comes to CFLs, you pretty much can’t give your plant too much light. It’s optimal to use ‘daylight’ (6500k) colored bulbs for the vegetative stage and ‘soft white’ (2700k) colored bulbs for flowering, because this more closely matches what the sun is doing in summer and fall, but you can use any color spectrum CFL during any stage of life and your cannabis will grow well. The total amount of CFL wattage you give your plants is much more important than the color spectrum of the bulb. Learn more about how many CFLs to use for the yields you want.
- Enough light sockets for all your lightbulbs – they’re about $5 apiece at my hardware store, and a few bucks more online. Sometimes they also come with some sort of clip you can use to clip your lights anywhere. A 4-way splitter is a great way to get more sockets in a small amount of space for less money.
- A timer to make your lights go on and off when you want. You can get a cheap mechanical one or spend more for a nice digital one, and they’re found in hardware stores or online. The timer I use cost less than $10 and has served me well for years. You don’t necessarily need a timer to start growing, but you will need one by the time you start flowering your plant (about a month in).
- pH Control Kit: This contains pH Up and pH Down (to adjust pH of your water) and a simple strip test. Another option for testing pH is a fancy (and more expensive) digital pH tester though my plants did just fine with the strip test that comes in the much cheaper pH Control Kit. All hydroponic stores and some gardening stores with sell pH Control Kids. You will want to adjust your water so it’s around 5.5-6.0 pH when you water your plants. How do I check and adjust the pH of my water?
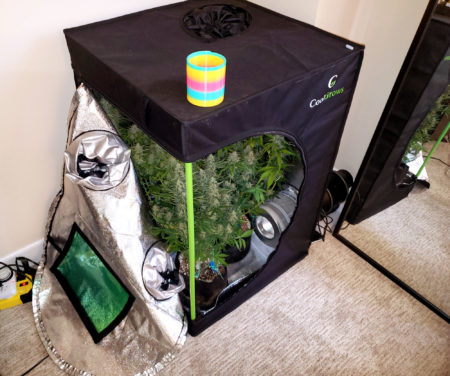
- (Optional) Grow Tent: If you don’t have a good growing space, you can easily buy one that’s perfect for growing cannabis! A 2’x2’x4′ Grow Tent is great for small spaces. If you have more space, a larger model such as a 2’x4’x5′ Grow Tent will give you a lot more flexibility as far as accessing your plants and being able to arrange your lights. You can also use a 2x4x5 with bigger grow lights such as a 250W HPS or even a 400W HPS, so you’ll have the ability to upgrade your grow down the road. I always recommend getting the biggest grow tent size you can fit, as you’ll always wish you had more room! Learn more about using grow tents for growing weed.
Estimated Total Cost for Growing One Plant
- Seeds or Clones – Free – $10+/plant (learn how to get marijuana seeds in the US)
- Nutrients – General Hydroponics Flora trio plus Calimagic (a Cal-Mag supplement) – $55
- Coco Coir – $20 for a done-for-you bag of coco mix, or about the same for a coco coir brick + perlite. (learn how to rehydrate a coco brick)
- Container – 2 or 3-gallon pot – $1 – $8
- CFLs
- Two 40W ‘daylight’ CFLs for the vegetative stage – $20
- Three 42W ‘soft white’ CFLs for the flowering stage – $35
- Light sockets – you need a light socket for each of your CFLs. They usually cost less than $10 each, and you can get cheap 4-way splitters to be able to use less sockets/cords for even cheaper. For five sockets (to account for your five CFLs), it will run less than $50.
- Light Timer – An average timer costs about $10 though some digital ones can cost $30 or more
- pH Kit – A complete pH kit costs $10 – $30
Total Startup Cost for One Plant: $201 – $258
Each additional plant needs an additional container, coco and 5 more CFLs and light sockets, for an additional setup cost of about $100/plant.
Important! If you plan to grow more than 2-3 plants, I highly recommend upgrading to a small LEC, LED or HPS grow light as you will get a better “bang for your buck” than with CFLs as far as yields for electricity. An LEC, LED or HPS will yield 2-4 times as much bud as you would get with CFLs for the same amount of electricity. CFLs are much better suited for just one or two plants, or for growers who want to “dip a toe” in growing without investing too much.
So, you can see that it doesn’t cost that much to get started growing cannabis with CFLs! After you get going you can expect to spend about $30/month in electricity, supplies, etc. considering an electricity price of $0.12/kWh (average cost of electricity in the US). So, if you harvest in 3.5 months, which is the average time, you’ll have spent about a total of $300 – $360 for your entire first grow, including setup, electricity, nutrients and maintenance. After that you can expect to pay about $100/grow since you won’t have to invest in most of the setup costs again.
Spend about $300 and Harvest 2+ Ounces From One Plant!
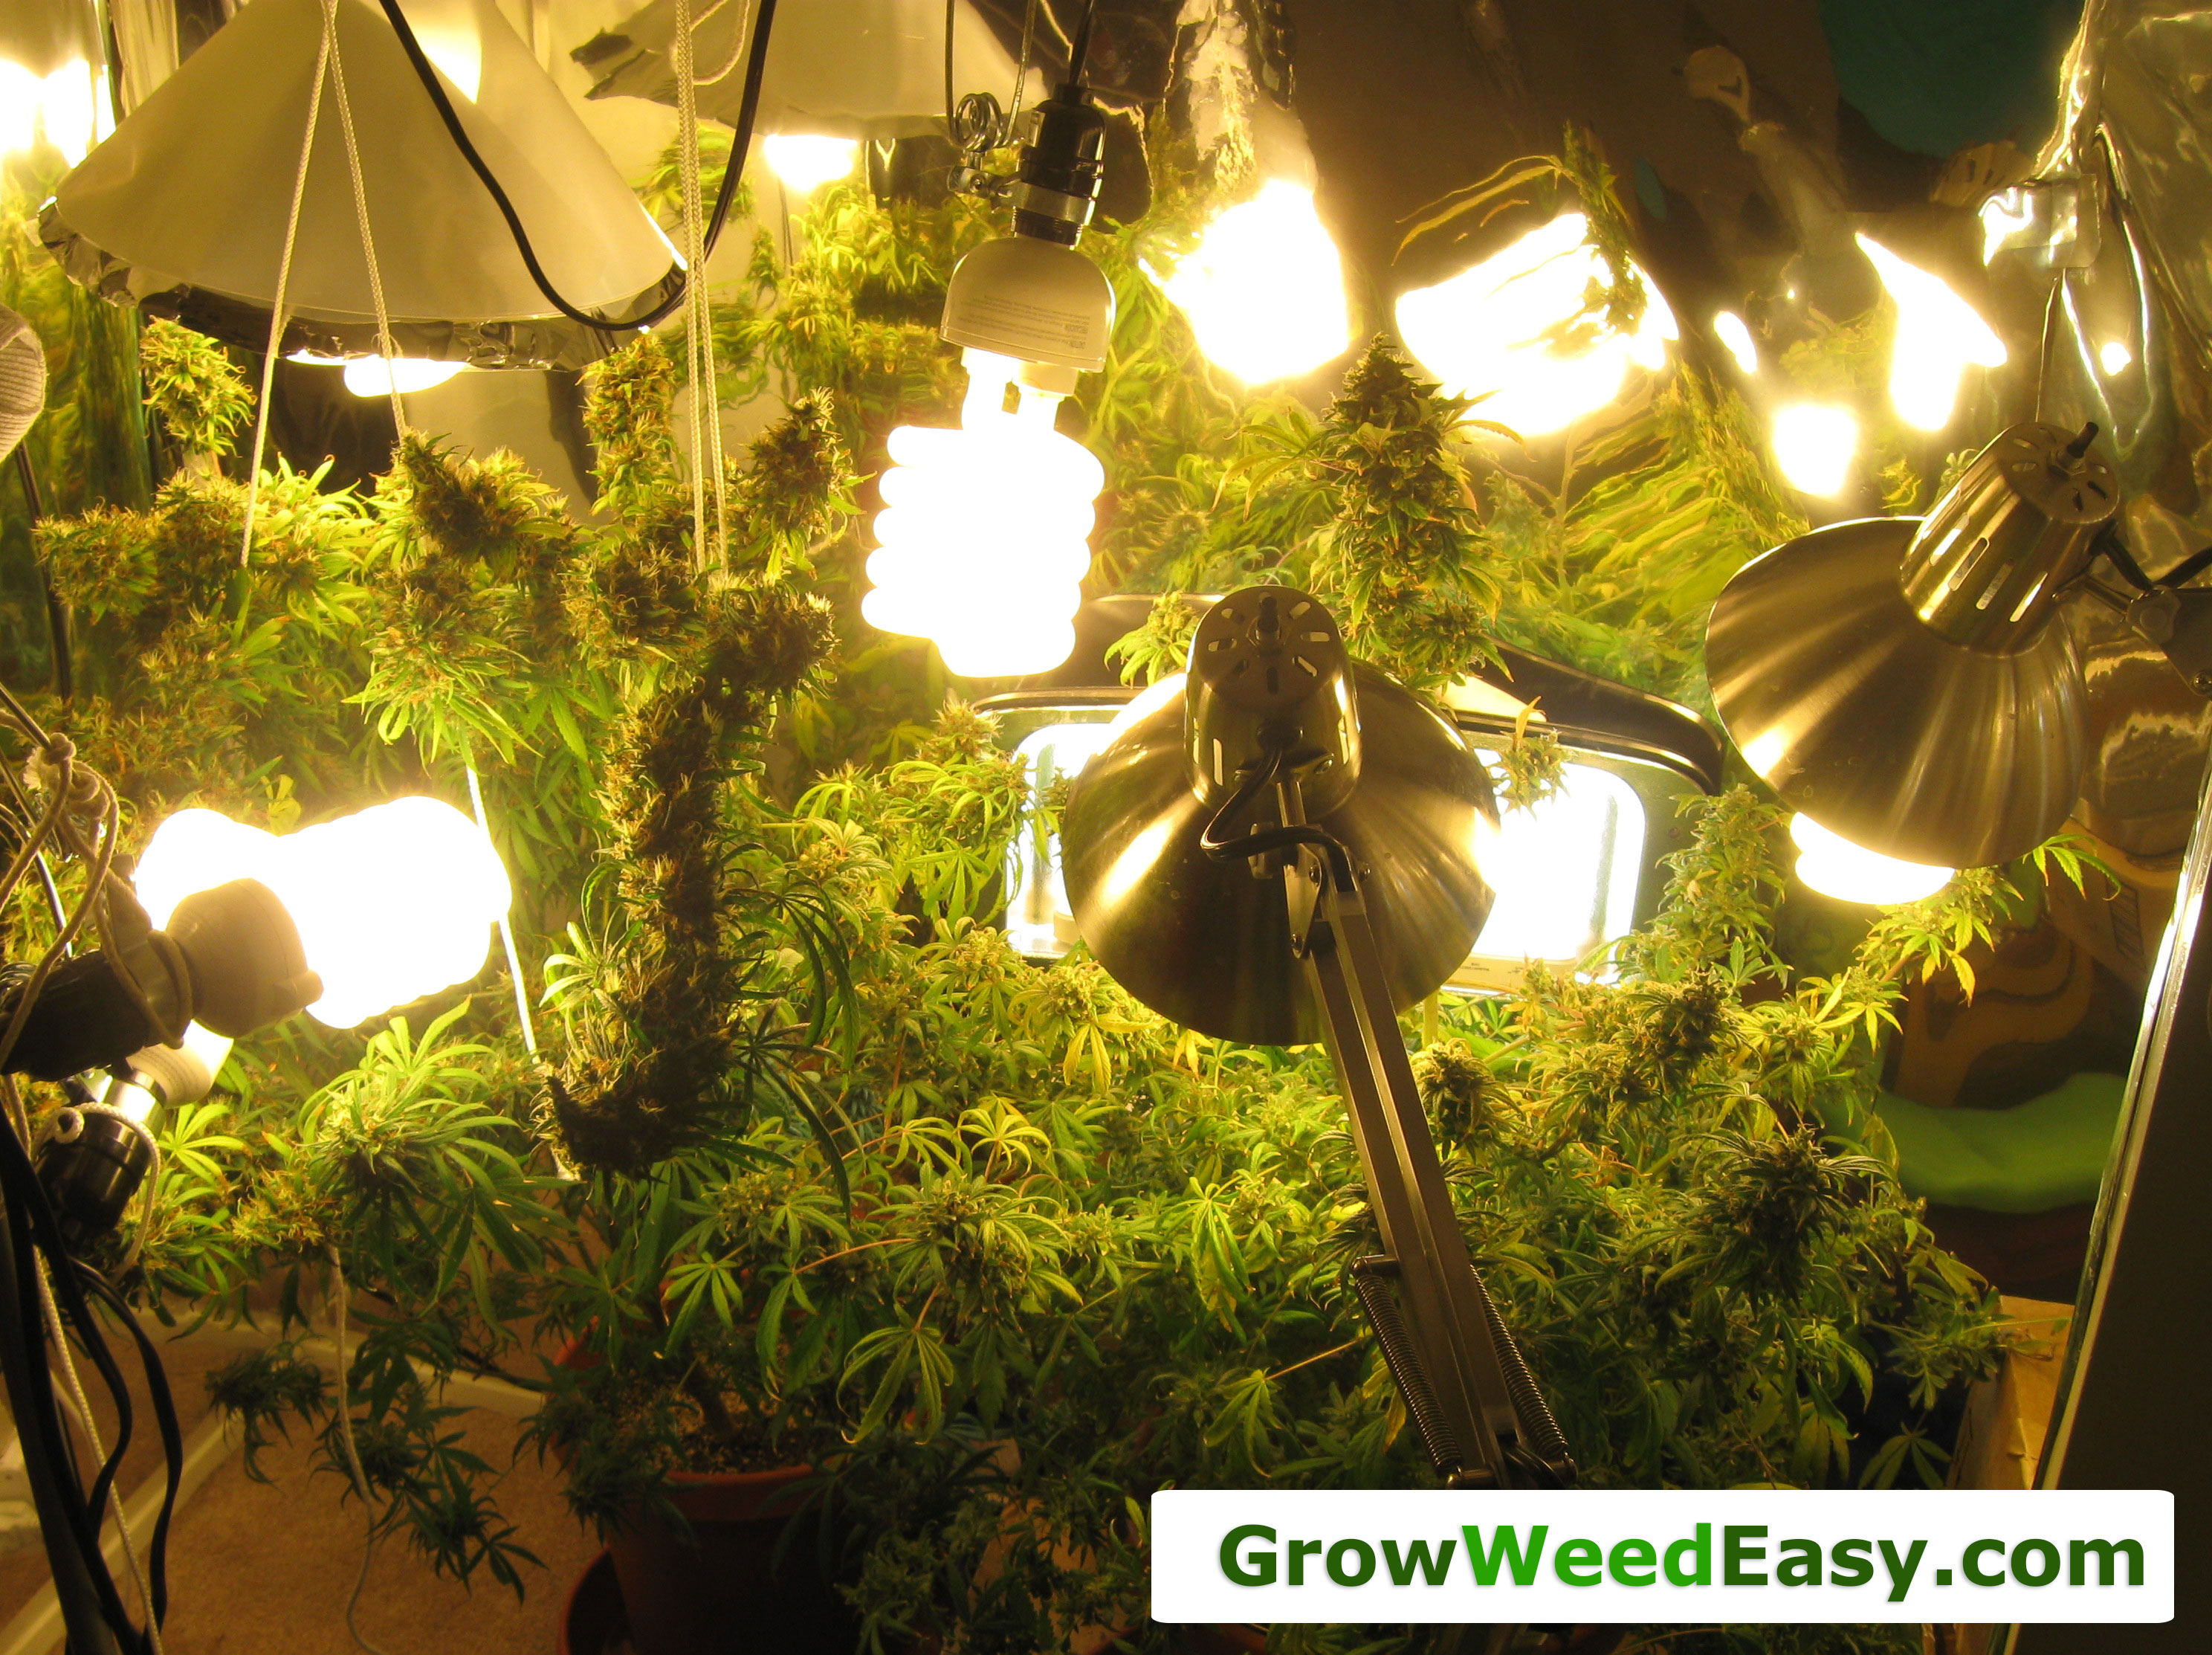
2 ounces (~60 grams) per plant of bud retail value: You may get even more but a reasonable estimate for someone who follows the directions is to harvest at least two ounces of dried bud from each plant. At $10-$20/gram (prices around here), two ounces of cannabis is equal to $566 – $1133 which is worth much more than the money you need to put in to get started. And the amount you spend will go down each grow, while your yields will likely go up. Plus, you don’t have to go anywhere to get your buds! I got a total 6.2 ounces of dried buds off my first cannabis plant I grew using this system (pictured below in flowering section) but to get those kinds of results you need to train your plant and invest in more CFLs as the plant get bigger to make sure there aren’t any shadowy areas.
After your first grow, you will only need to get more plants, more coco coir, and more nutrients which will significantly bring down the start-up costs for subsequent grows.
Remember, you can start out with fewer lights and light sockets (start with 2 per plant), and will only need to get more as your plants get bigger. The great thing about all of the items needed for this technique is they can all be used in future grows, even if you decide not to continue with this method. For example, even if you end up getting more powerful grow lights eventually, you will always be able to use the CFLs for starting out new plants, or for adding additional side lighting.
You need about 80w of CFLs per plant to start; I prefer to start with two 40W per plant
This is what I use for each plant:
- Two 40W ‘daylight’ CFLs to start
- When the plant starts budding, I recommend adding at least an additional three 42W ‘soft white’ CFLs for the flowering stage. You can add even more if you have the space. More light = more bud when it comes to CFLs in the flowering stage.
These lights are easily found at the store or online. You can get lower or higher wattage bulbs, but I like bulbs close to the 40w range because they produce a lot of light, but are still a small, manageable size.
You’ll likely need to add CFLs a little as a time while your plant grows, but by the time the plants are flowering, you definitely want more light than your original two bulbs to get your plants to produce lots of bud. Light is what gives your plant energy, and the more energy it gets, the bigger buds it will grow.
More Light = More Bud
(up to a point)
It’s optimal to use ‘daylight’ (6500k) colored bulbs for the vegetative stage and ‘soft white’ (2500k) colored bulbs for flowering, but you can use any color CFL during either stage and your plant will grow well. The color spectrum of the bulb is not nearly as important as the total wattage.
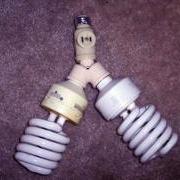
Instead of just plain sockets, you may decide to get some heavy duty clamp light sockets which you can use to power your light bulbs. These light sockets have a reflector built in and are able to clamp to most anything.
When looking for clamp light sockets, avoid anything that’s made of plastic (it’s cheap and will break) and try to find something with at least a 9-foot-long cord. You might be surprised at how annoying it is to try to find a way to make a 6-foot cord work.
To maximize the light your plants are getting, you can use a 2-way or 4-way splitter plus a light socket extender to fit more bulbs per each clamp light socket (without the extender, they might not fit inside the reflector).
Setting up more than one bulb per socket can often be cheaper than buying an individual light socket for each light, especially if you buy online. It also is really convenient for arranging around your plant.

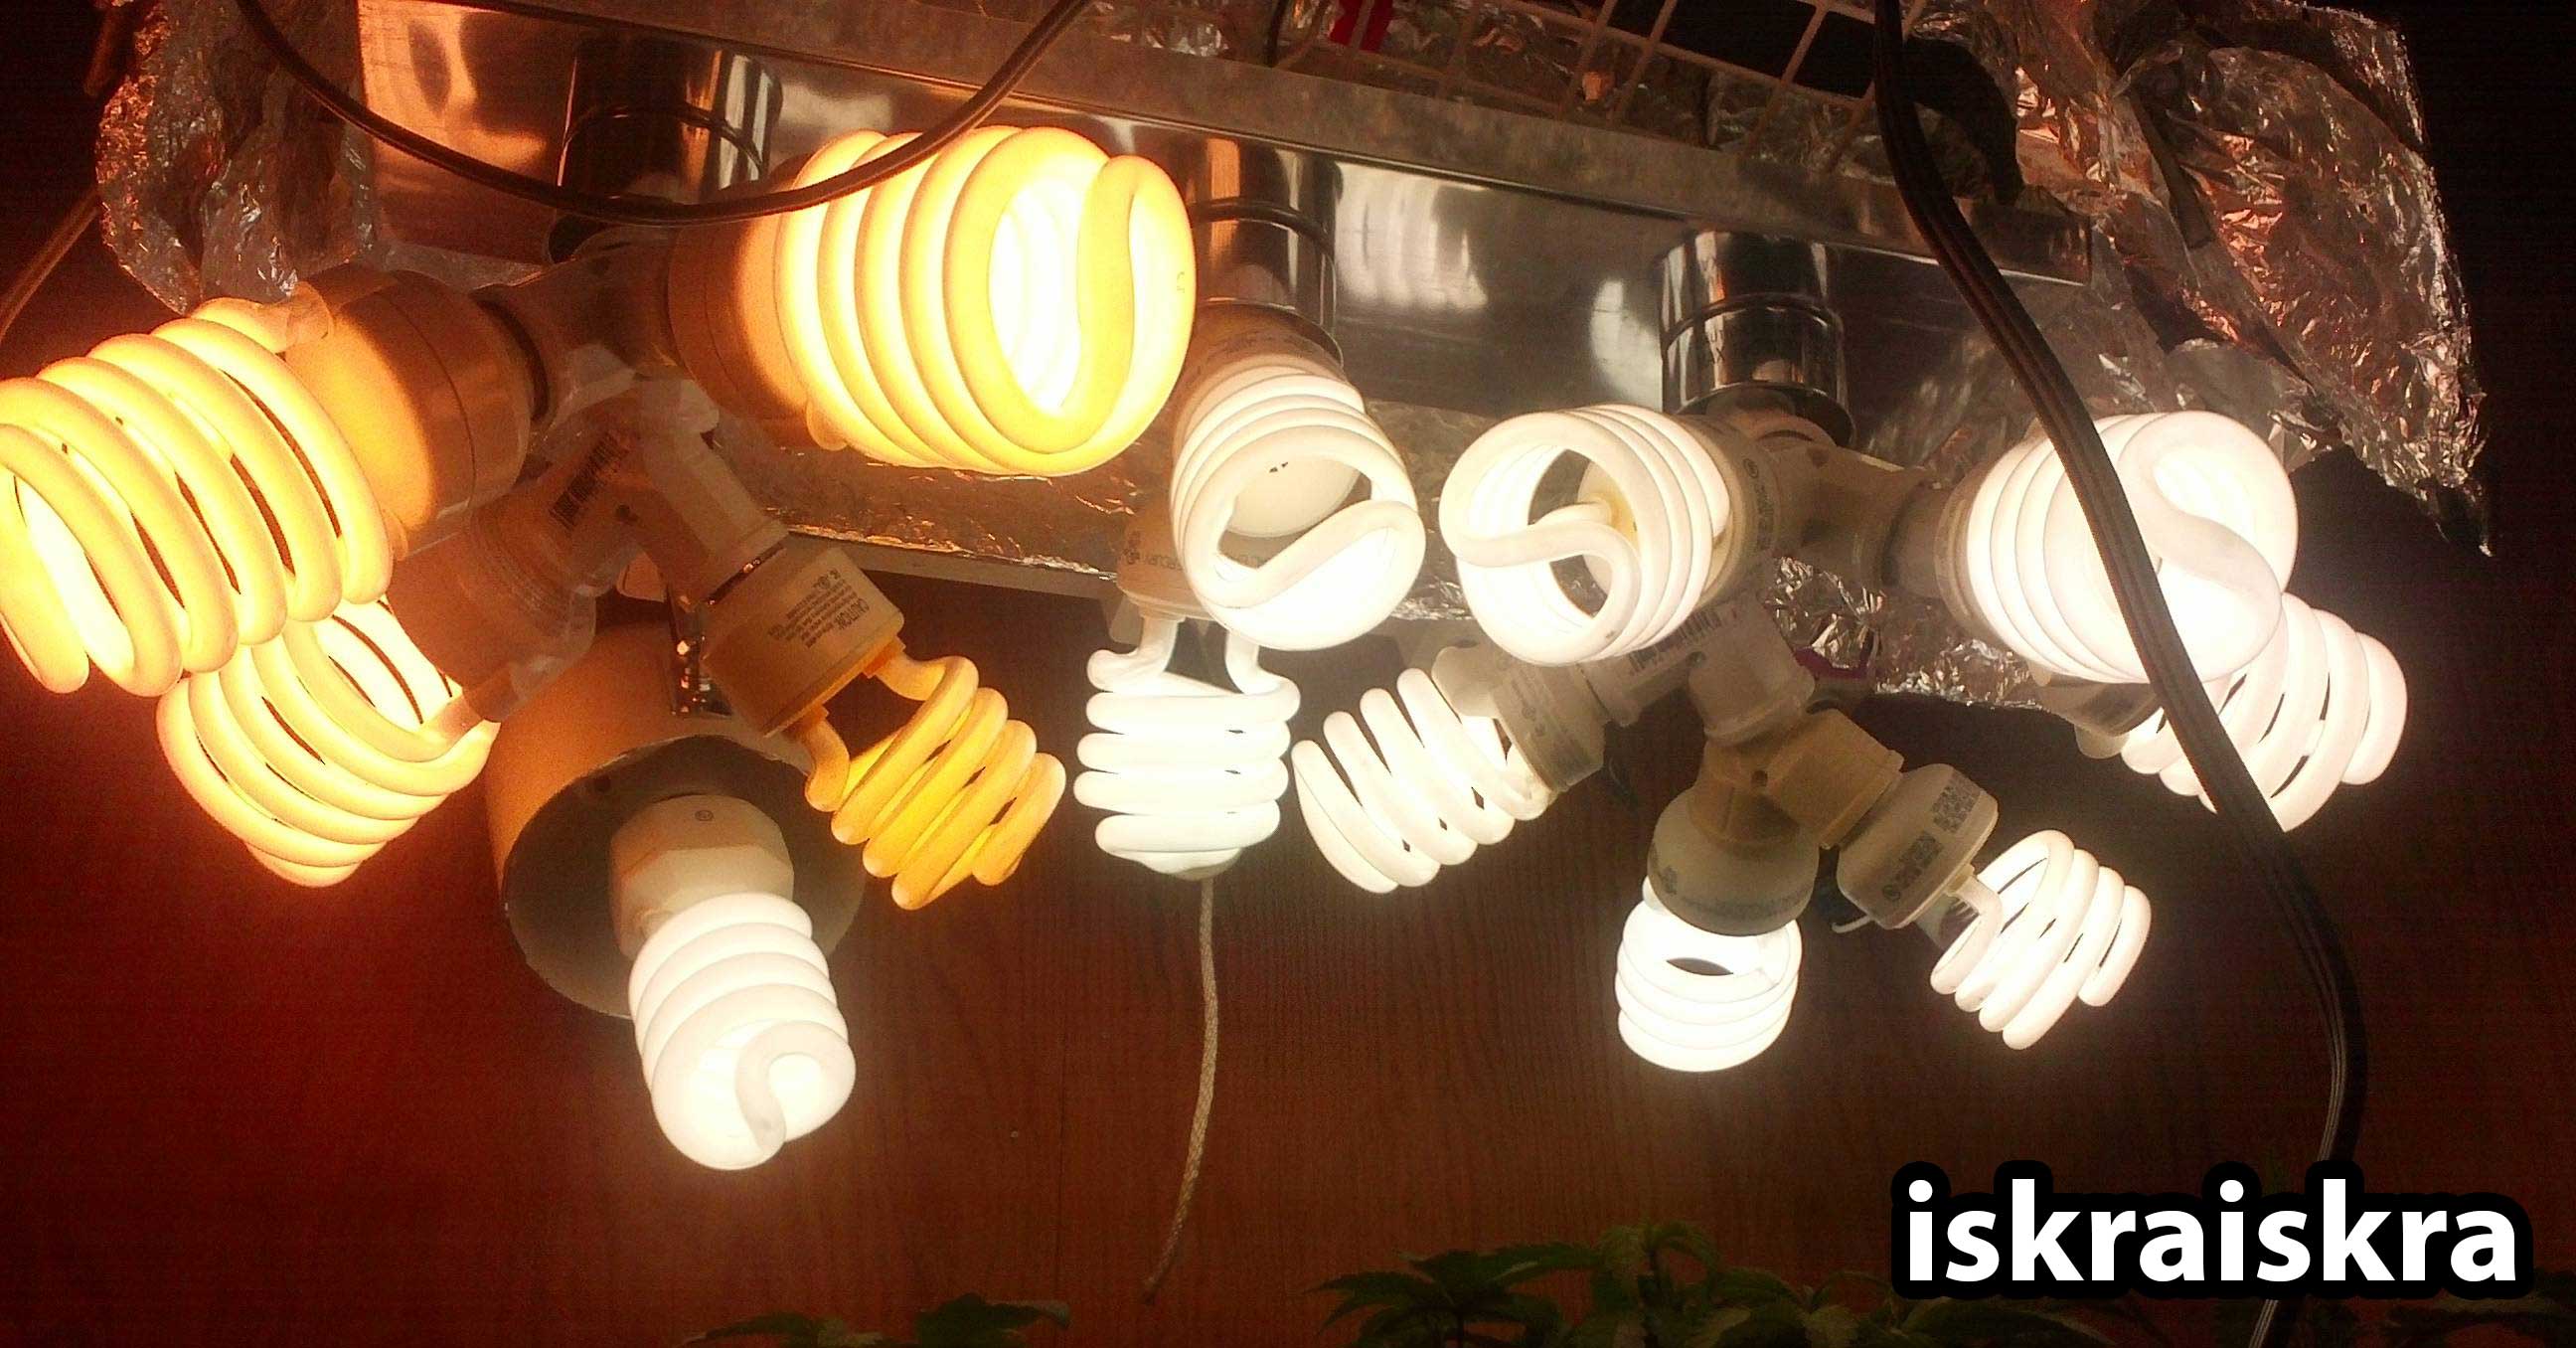
An incredible CFL grow light setup by grower iskraiskra
 Optionally fill the first couple inches of your pots with perlite for extra drainage, and then fill the rest of the pot with coco coir.
Note: Perlite can often be found in garden stores or the garden section of places like Home Depot and Lowes. I normally advise against all things Miracle-Gro, but their 8-quart bag of perlite is okay for this tutorial if you can’t find anything else. But remember, never use Miracle-Gro time release soil or their standard nutrient formula! But their perlite is okay.
Read the full tutorial on how I make my coco coir mix
Water your pot with coco coir thoroughly until water drains out the bottom before adding your seeds or clones.
Set up your lights so that they can start around the height of your pots and eventually be raised to the final height of your plant (2-3 feet depending on your marijuana strain and how long you let your plants stay in the vegetative stage).
Once you have everything set up as described, simply add your marijuana seeds or clones and set up your lights so that they’re about 4 inches away to start.
You will want to start feeding your plants with nutrients at quarter strength for the first week, then work your way up to full strength slowly.
I recommend following the instructions exactly as provided by the nutrients.
For example, if you are using Fox Farms Hydroponic Liquid Nutrient trio, just follow the feeding chart that comes with the bottles and water your plant with nutrients every other watering.
When not using nutrients, make sure you still pH your plain water before your feed your marijuana!
This is important! Water your marijuana plants until you get at least 20% extra runoff water out the bottom.
Then don’t water your marijuana plants again until the top of the coco coir starts feeling dry.
This will start out with you watering the plants every couple of days, and may end up with you watering them once a day towards the end of the marijuana flowering cycle.
This bears repeating, you want to ensure that you have about 20-30% extra run-off water come out the bottom of the container every time you water your plants.
The reason for this is that coco coir tends to form natural salts if it the fertilizers just sit in there and never get washed out. Making sure you keep adding water until you get run-off is also a great way to make sure that your plants are draining properly.
As I said before, make sure to feed your marijuana plant with plain, pH’ed water every other watering.
This will greatly help reduce the amount of salt buildup and prevent nutrition problems from occurring. If your marijuana shows signs of drooping, chances are you are over or under-watering.
In order to prevent over or under-watering, make sure you water thoroughly every time, and wait to water again until the top inch of coco coir feels dry.
 After your plants have grown accustomed to their new environment (after a couple of days for transplanted clones, or when your seeds grow their second set of leaves) then you will want to move your CFLs so that they are about an inch away from the plant.
CFLs lose a lot of light the further away they are and their light is almost useless once the plant is 6-8 inches away.
Your biggest task when growing your marijuana will be adjusting the lights.
The CFL bulbs should always be as close as possible to the plants, yet they need to be far enough away that your marijuana doesn’t grow into the lights and burn its leaves.
If you check on your plants constantly, you can keep the lights closer. If you’re going to be away for a while, you should move the bulbs away to give your marijuana some growing room.
Personally, for me, adjusting the lights was one of the most fun parts of growing marijuana using this method because it gave me something to do while I was hanging out in my grow room.
As a beginner, I always wanted to keep checking in on my marijuana plants all the time, and adjusting the lights gave me something I could do to satisfy that urge. You may also want to rotate your plants every day in order to provide the evenest amount of light from all sides.
Your marijuana can’t get really get too much light from CFLs and the only thing you need to worry about with the CFLs is burning your plants if they get too close.
Basically, if you put your hand where your plants are closest to the light, and the light feels too hot to be comfortable, then the light is too close. If your hand just feels warm, but not hot, then your plants are at the perfect distance. I generally kept my CFL bulbs 2-4″ from the leaves during the whole grow.
If you notice that your plant is growing with a lot of space between nodes or otherwise seems like it’s ‘stretching’ upwards, that means that it probably needs more light. Try adding an extra CFL or two or move them closer. If you notice your plant is having any other issues or something doesn’t seem right, check out the Plant Problems and Symptoms Guide.
 When your cannabis plants are about half their final desired height, you will change them over to the flowering stage so they start growing buds.
By half the final desired height, I mean, if you wanted your plant to achieve a final height of 2 feet, then you would switch your marijuana to flowering when they’re about 1 foot tall, or half of 2 feet.
If you wanted your marijuana to grow to be 5 feet tall, then switch them to flowering when they’re at a height of 2.5 feet.
The reason for this is that marijuana will generally double in height after being switched over to the flowering stage.
To initiate the flowering stage, you will switch your light schedule so that your lights are on for 12 hours a day, and off for 12 hours a day.
During the ‘off’ period, your marijuana should be in total darkness.
This light schedule will trick your marijuana into thinking that the days are getting shorter and fall is coming.
The 12-12 light schedule will cause your plants to begin the flowering stage and start focusing on making buds instead of just growing.
If you don’t change your schedule to 12-12, chances are your marijuana will just keep growing forever and never make buds.
After switching to 12-12, you should start noticing your plant making its first sex organs after a week or two. Females will grow white hairs and males will start growing grape-like balls.
In order to maximize the amount of bud you get, you will want to make sure you remove any males so they don’t impregnate you females. If they stay together than your females will get pollinated by the males and will end up making lots of seeds instead of buds.
Unless you have a reason to keep males (for example breeding), you probably want to just kill any male plants because they won’t make any usable bud anyway.
When growing with CFLs, it becomes harder and harder to fully illuminate the plants as they get bigger and grow more branches. You will maximize the total amount of buds you get by keeping the plant smaller (and therefore easy to bathe in light), and then harvesting more often since your plants will be ready to harvest much sooner.
As the plants get taller and start blooming, you may need to get a couple more CFLs to light them from the sides. Basically if you see any dark or shadowy areas that are more than 6 inches from a CFL, then you should get another CFL to plug in that ‘hole.’
Towards the end of the flowering cycle, as your marijuana approaches harvest time, you may notice that some of the oldest leaves start turning yellow and falling off. This is totally normal and is a sign that your plant is taking nitrogen out of the leaves and putting them into the buds/flowers.
You will want to stop feeding your marijuana any nutrients for the last two weeks before harvest to ensure the best tasting bud. Simply feed them plenty of water without nutrients for these last two weeks, but make sure you’re still adjusting the pH so they absorb any leftover nutrients in the coco coir.
I usually stop feeding my cannabis nutrients and start feeding them water when about 75% of all the pistils (hairs) have turned dark and started curling in towards the buds.
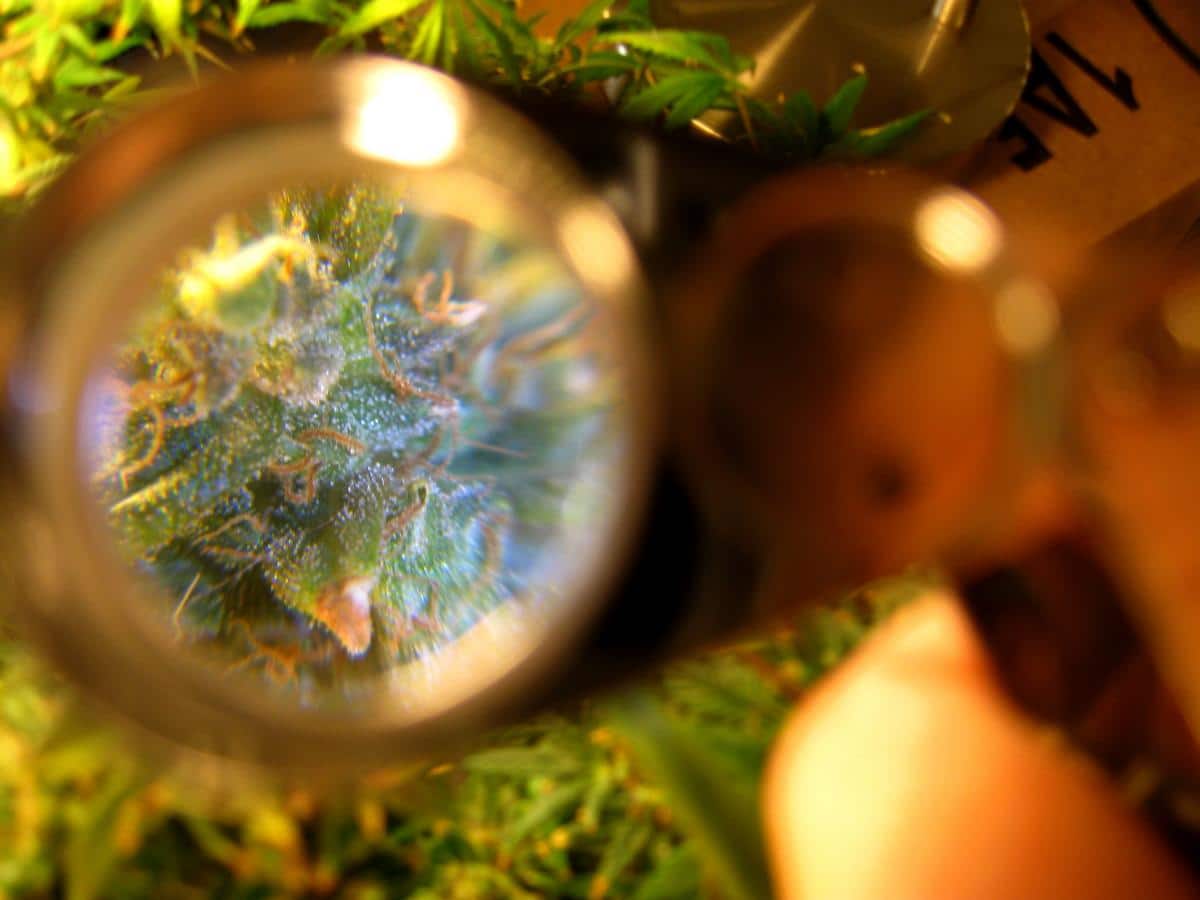
 Please view the Harvest tutorial for more information about when and how to harvest your plant. This guide will tell you exactly what to look for as far as determining if your cannabis is ready for harvest.
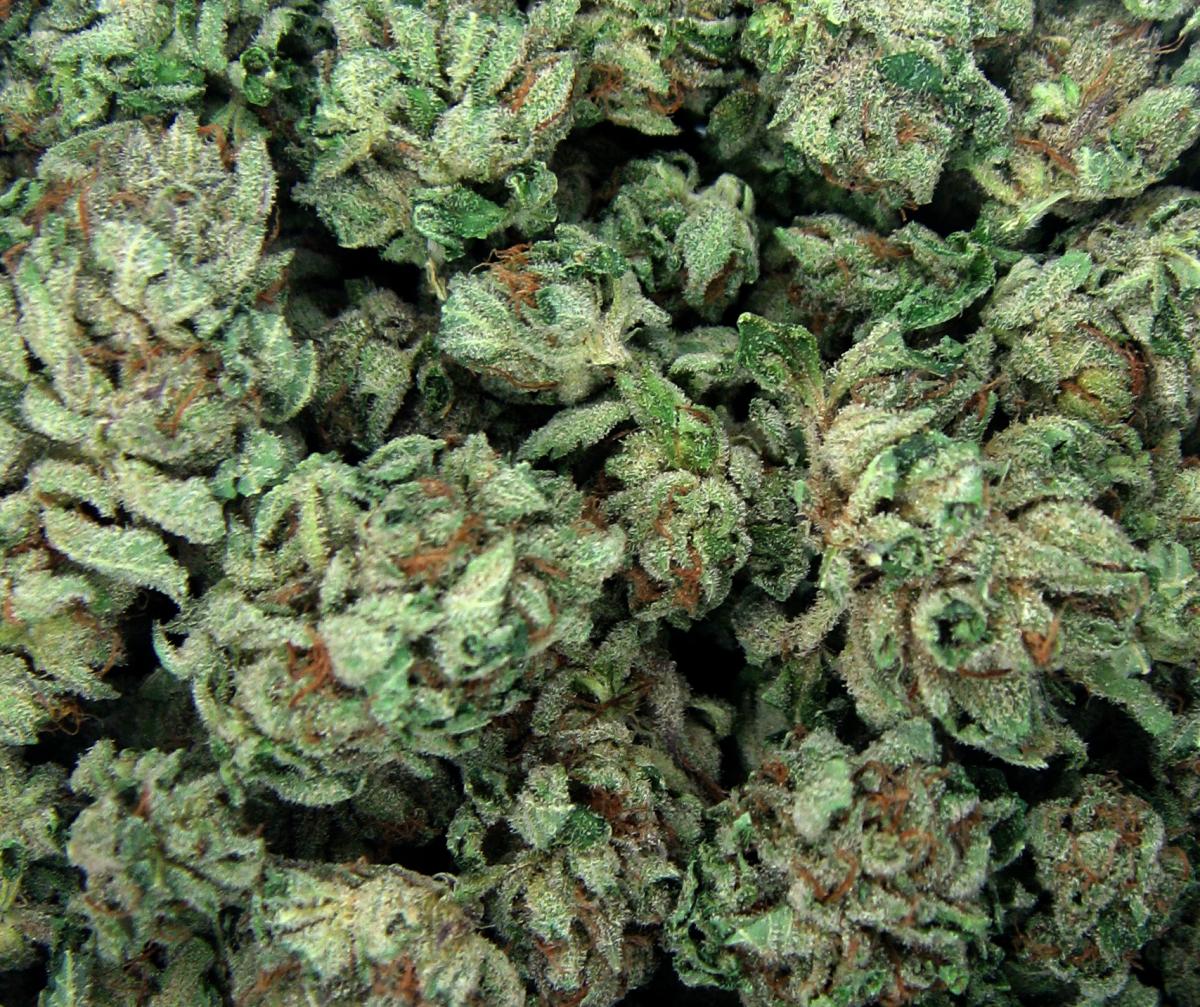
Basically, you’re waiting for your cannabis flowers (which are initially covered in straight white hairs) to darken and curl in. When the buds are ready to harvest, nearly all the white hairs/pistils will have turned orange and curly.
Final Thoughts
When using this method, I’ve found my cannabis to be really resistant to issues or problems, especially considering this method was the one I used for my very first harvest and I had no idea what I was doing when I started.
Over the course of my first grow I made several mistakes, including dropping a light on one of my plants and accidentally burning some of the leaves on the lights. Every time something happened to a plant, it seemed to take it in stride and just keep growing.
Despite all my mistakes, I still got 6.2 ounces of dried buds off my first plant grown with this grow method!
 I really like this technique for a beginning cannabis grower because it’s a really good way to get a feel for how plants grow and how the cannabis plant grows in particular.
It can be hard to decide what you want to do for you first grow, and this is a really cheap yet effective way to get started with growing and get good results.
After having one successful grow under your belt, I guarantee that the whole process will start making more sense.
Even if you end up eventually moving on to other types of growing systems, you will be able to use many of the materials from this system with your future grow.
If you end up using this technique or have any other thoughts or comments I’d love to hear from you!
Jump to….
Coco Coir as a Cannabis Grow Medium: Full Guide
Growing Weed with CFLs Starter Shopping List
Grow 4-7+ oz in Coco Coir with a 250W HPS – Step-By-Step Beginner Tutorial