by Nebula Haze
Many cannabis growers have written in and asked what it takes to grow magic mushrooms (Psilocybe cubensis species like Golden Teachers, APE, Penis Envy, etc., aka “cubes”) or other types of edible mushrooms (lions mane, oyster mushrooms, etc.). Where to get the best magic mushroom genetics? I know there are many great companies, but I personally use Inoculate the World (ITW).
This setup has worked the best for me so far.
Life Cycle of a Mushroom (from the perspective of an indoor grower)
The mushroom growing process is similar to growing cannabis in the way that it is essentially like Germinate > Vegetative Stage > Flowering Stage > Harvest. Or, more accurately with mushrooms, Germinate > Colonization Stage > Fruiting Stage > Harvest.
- Germinate Spores – Mushrooms start from spores. You can get them from Inoculate the World. This step is analogous to germinating your cannabis seeds. Typically, beginner mushroom growers germinate spores by inoculating grain (injecting the spores onto sterilized grain like rice, rye, oats, popcorn, etc.). From that point, the spores meet each other and start growing white mycelium (this is the “body” of the mushroom organism that normally lives underground). In some cases, you can buy “liquid culture” or “agar plates” that contain already-germinated spores, or living mycelium. Starting with mycelium (a “live culture”) results in faster initial growth than starting from spores. Starting with a live culture can shave off 2-3 weeks from your total colonization time. Starting with a live culture is like starting with cannabis clones instead of cannabis seeds. And just like with clones, when you start with a live culture, you get more predictable and consistent results because there is less natural variation. However, unlike cannabis clones, live cultures are easy to ship through the mail. Therefore, when possible, I highly recommend starting with a live culture (specifically liquid culture in a syringe) vs ungerminated mushroom spores. However, spores may be easier to get, depending on where you live.
- First Stage of Life – Colonization Stage (colonize grains). This is analogous to the cannabis vegetative stage. Essentially you’re growing the underground mushroom organism (called “mycelium) which is the “body” that will power the growth of your mushrooms. It is like the “vegetative” part of the mushroom organism. During this phase, the white mycelium will completely cover all the grain until the grain is enveloped within the mushroom organism. In a way, the grain is like the “grow light” for your mushrooms as it gives them the energy to grow. Now you’re ready for the next stage of life.
- Second Stage of Life – Fruiting Stage (making mushrooms). Mushrooms are essentially the flowers of the mushroom organism that lives underground, which makes the fruiting stage analogous to the cannabis flowering stage. A mushroom grower initiates the fruiting stage by mixing the colonized grain with a substrate in a humid container that provides gentle air circulation and some light. You’re essentially recreating the environment of a clear day after some rainy weather. Think about when you tend to see mushrooms outdoors. For those unfamiliar with wild mushrooms, in nature, mushrooms often appear after a period of rain. It is humid, wet conditions, combined with gentle airflow, that cause Psilocybe cubensis mushrooms to grow. Luckily, from the perspective of an indoor grower, if you set your fruiting chamber up properly, you don’t need to open it or do anything until your first harvest. No need for special light schedules or anything like that. That being said, if something is going wrong in your fruiting chamber, for example, it’s starting to dry out or seems overly wet, you may need to open the tub and fix the fruiting environment.
- Harvest – Harvest time! One cool thing about mushrooms is they are ready to eat as soon as they’re dry, vs cannabis buds which need to be dried slowly over several days, then jarred and cured for 2+ weeks before being ready to smoke. As another bonus to growing mushrooms, you can typically get multiple “flushes” or harvests after the first one. That is because, typically, the mushroom organism doesn’t eat all the grain in just the first harvest. So after the first harvest, you can put the entire mushroom garden back into the fruiting stage and get a second “flush” of mushrooms. In some cases, you can get 3-4 flushes or more. This is highly dependent on the mushroom species and how you care for your garden, but it’s pretty nice to keep getting bonus mushrooms with essentially no extra work.
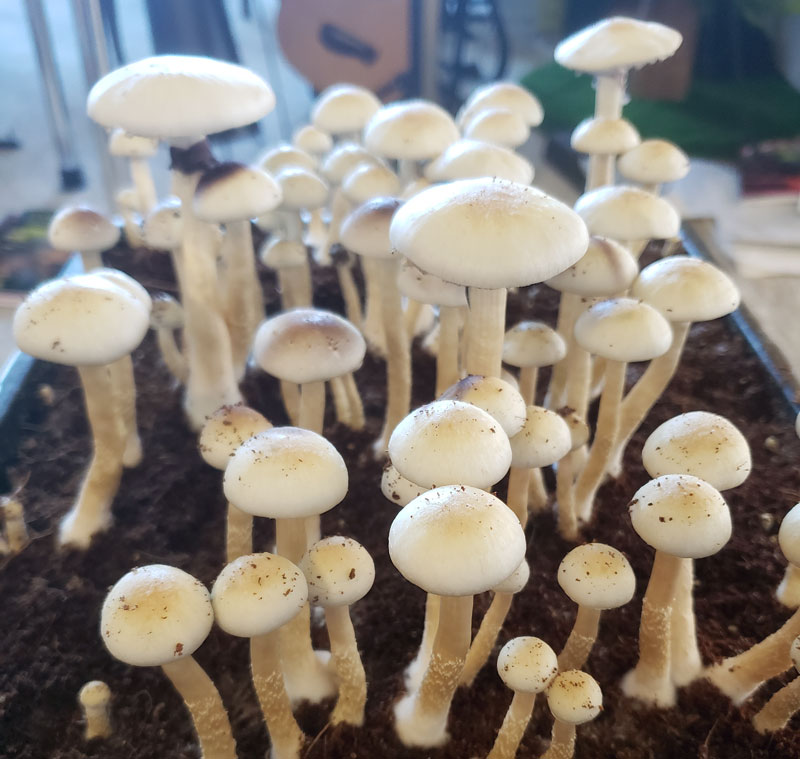
Mushrooms come in all kinds of shapes and sizes, like these White Teachers (pale or “leucistic” version of the more popular Golden Teachers strain).
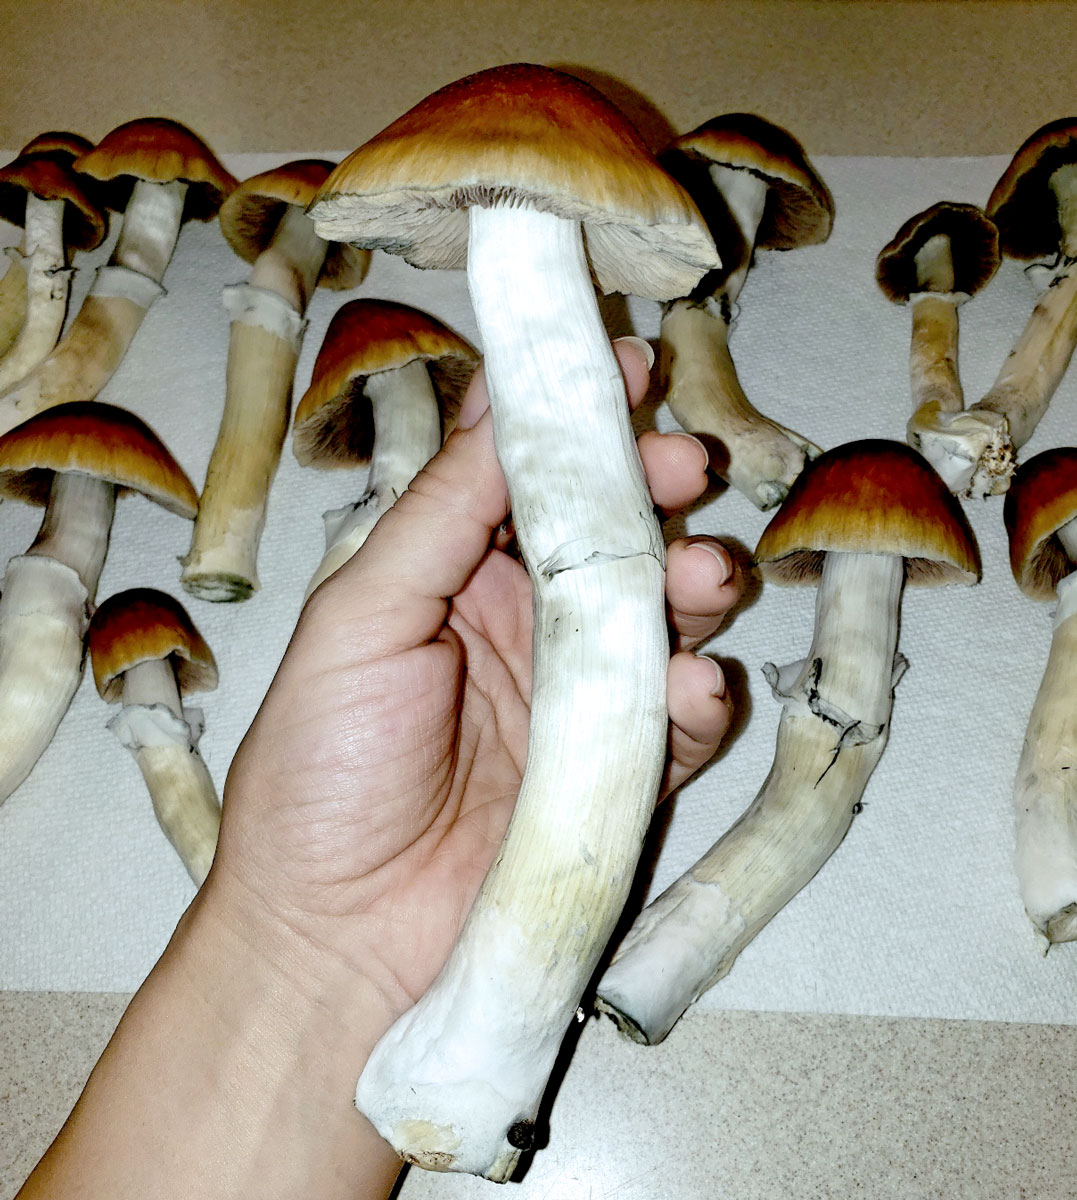
The popular strain “Penis Envy” (or “PE” in polite company) tends to produce really huge mushrooms. This variety needs a bigger fruiting chamber and a lot more water than strains that tend to grow smaller, thinner mushrooms.
First stage of life – Colonization Stage
Essentially, you’re growing the “body” of the mushroom organism on grains. Sometimes the mycelium looks a bit like white chocolate, though with some strains, the mycelium is more fuzzy and looks a bit like mold (healthy fluffy mycelium is often mistaken for mold!). Keep the grains in a dark safe place at a comfortable room temperature during this phase, for example in a cupboard, or just on a counter with a towel over it to keep it dark. It should get a little bit of air.
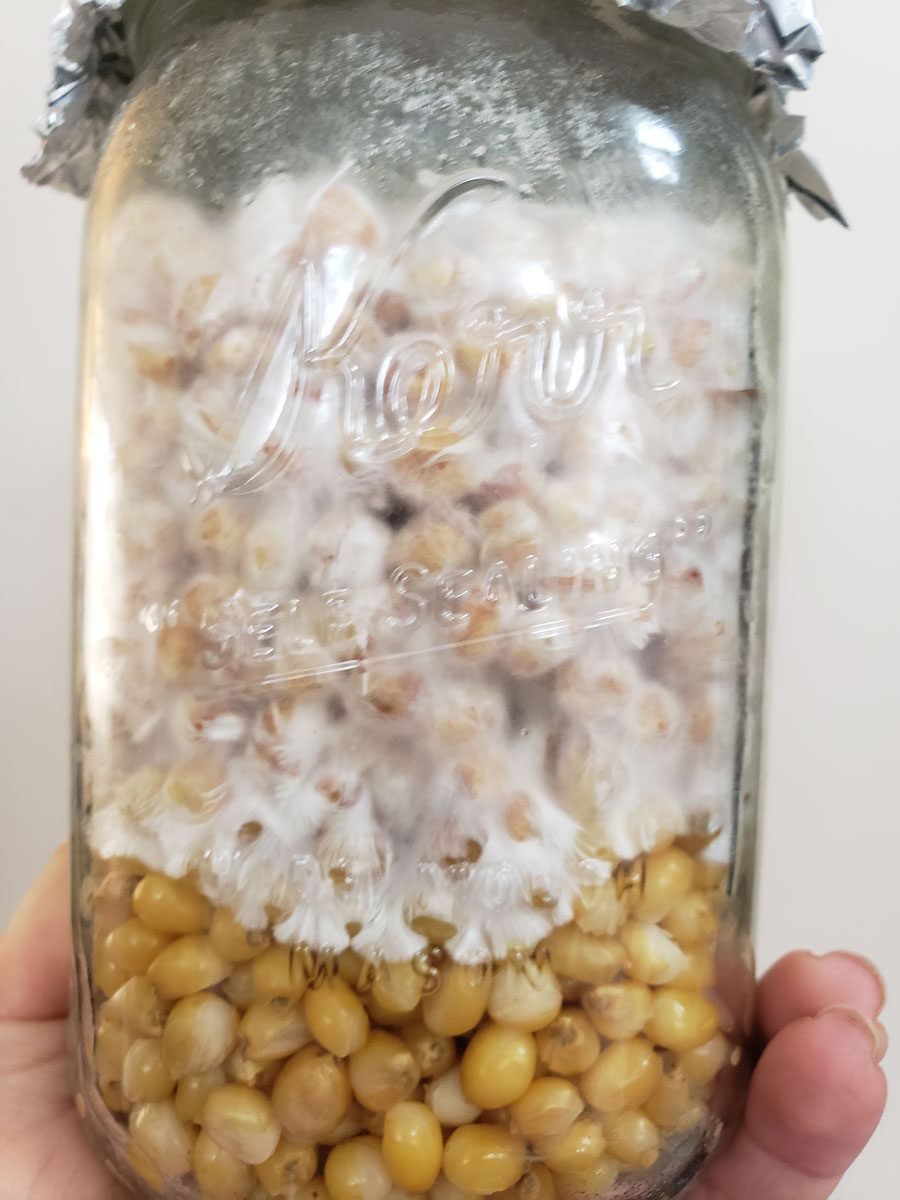
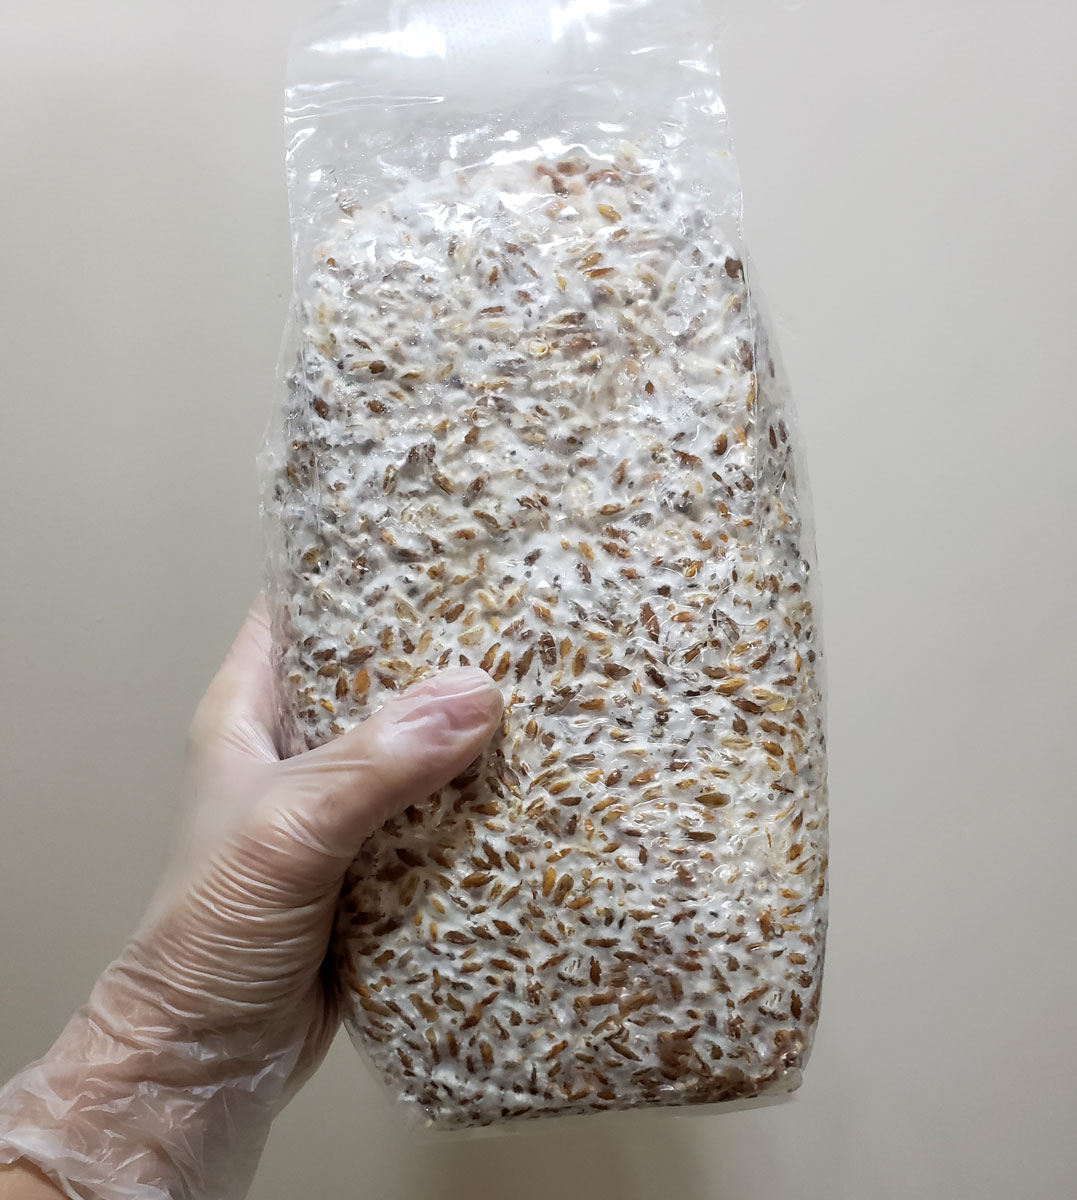
I injected genetics into this jar of sterilized popcorn, and the mycelium has colonized 70% of it so far. Once the grain is completely white, that means it’s fully colonized, and you’re ready for the next step. Popcorn is one of the easiest grains to make at home that colonize well with magic mushrooms. All the white stuff is mushroom mycelium.
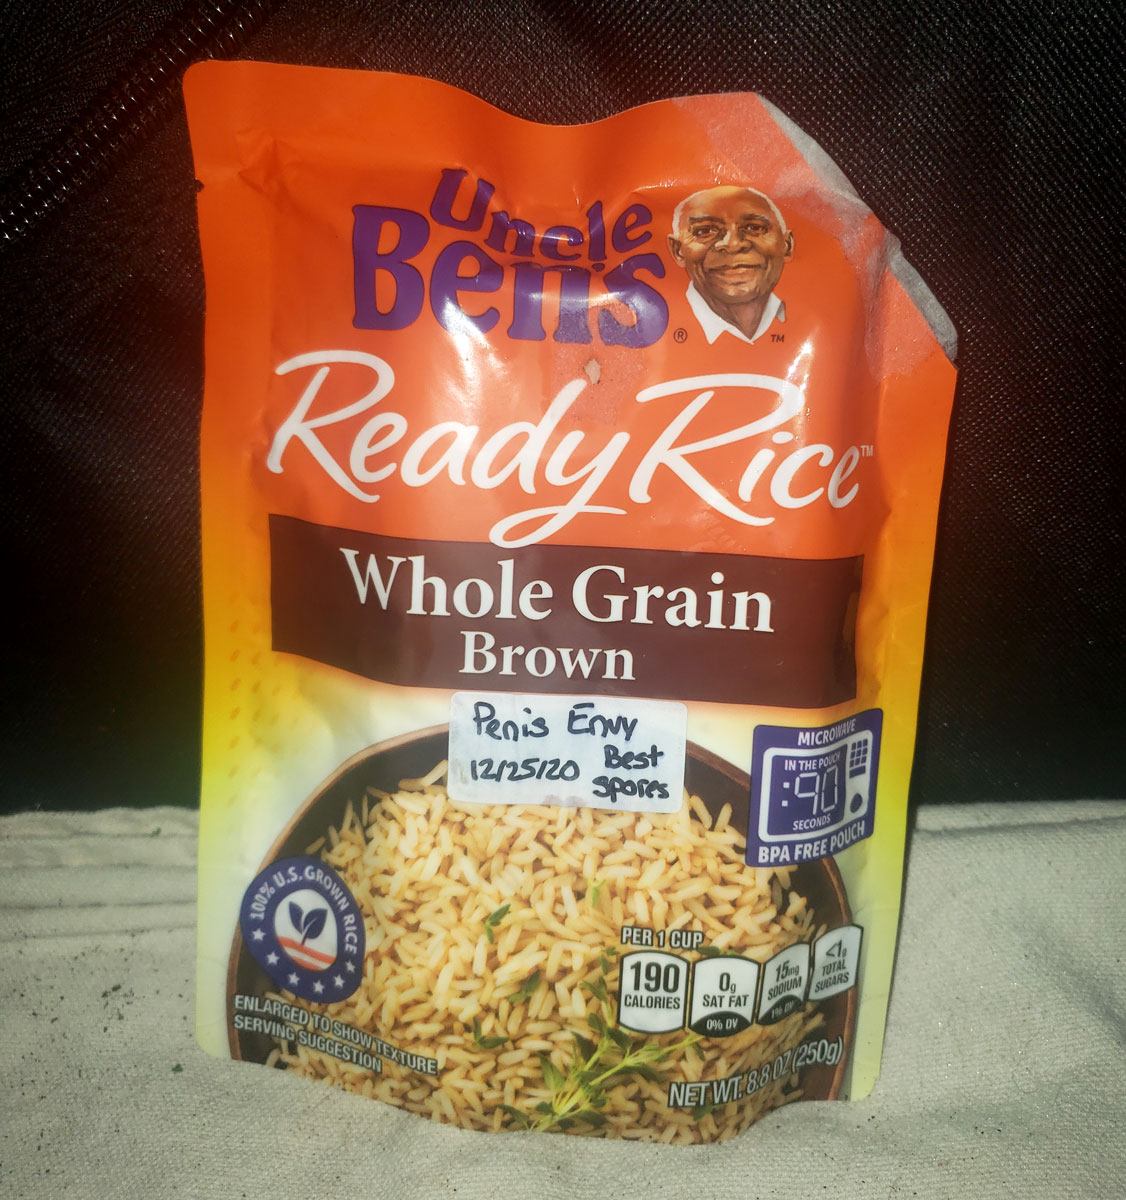
It’s popular to inject genetics into pre-sterilized bags of rice, like Uncle Bens Ready Rice bags. These have been professionally sterilized in retort packaging at high temperatures so that the fully cooked rice inside does not spoil on the shelf. Some ingenious mushroom grower realized these sterile bags of rice are a great place for mushroom mycelium to grow. Using Uncle Bens Ready rice is not the cheapest way to obtain sterilized grain for growing mushrooms, but it’s easier than sterilizing grains at home and can be bought at the grocery store. For many growers, Ready Rice is a convenient entry-level way to skip the step of sterilizing grain and still use local purchases to start growing mushrooms.
I like to make grains at home in a pressure cooker or buy them from Etsy. After you innoculate your grains, basically, the only thing you do is wait until the grains are all white.
This grain is fully colonized and ready to go. This took about 4 weeks to colonize fully. This phase takes about 3-6 weeks on average, depending on your genetics, the size of your grain bags, and the quality of your grains.
Now you’re ready for the next phase of your mushroom journey.
Second Stage of Life – Fruiting Stage
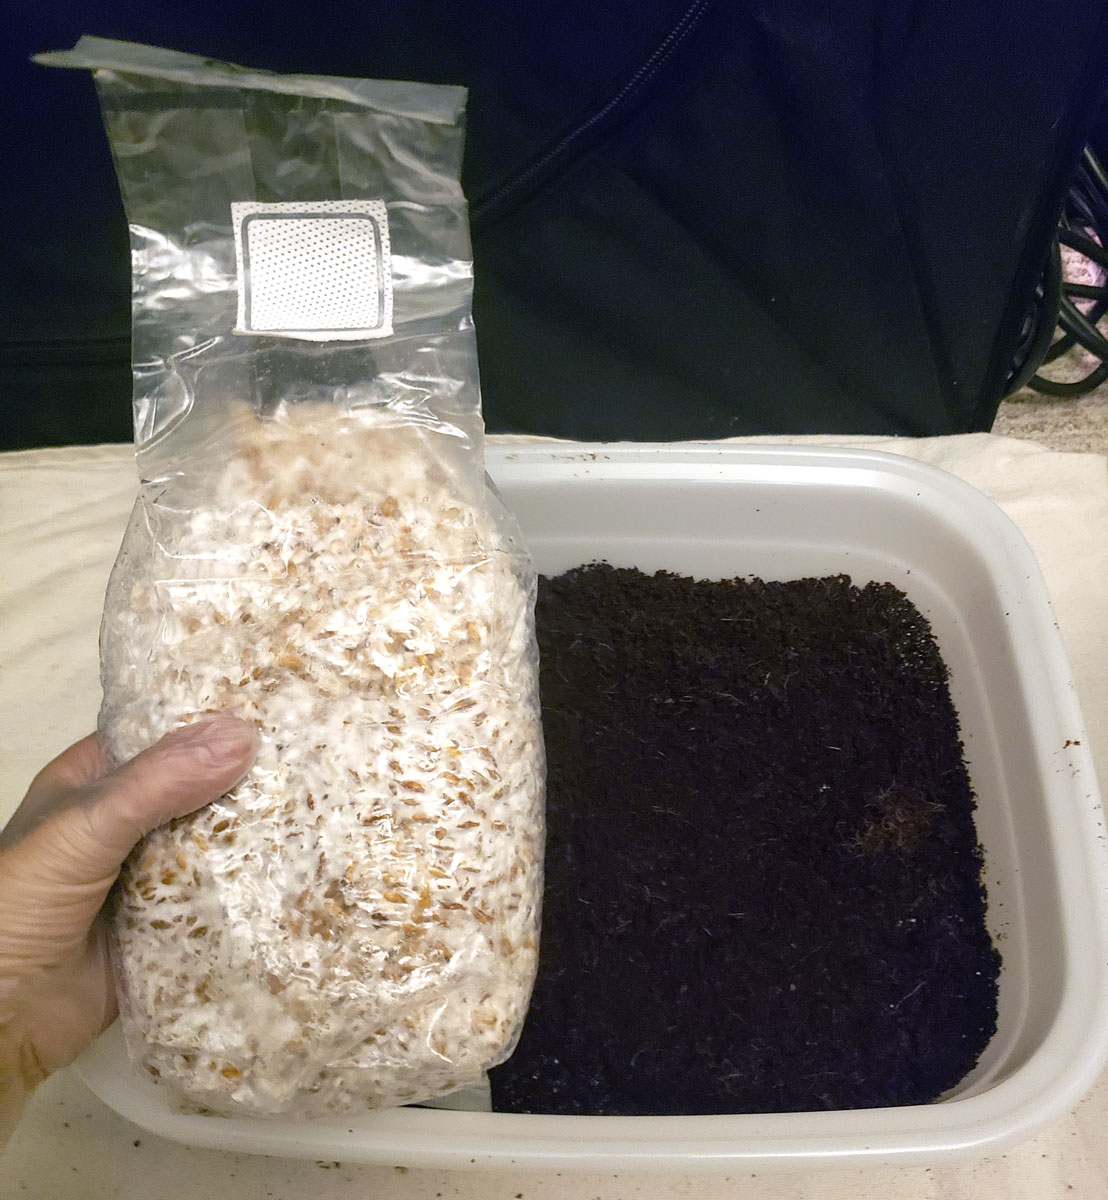
This is when you get the mushrooms to start forming. Essentially, this happens once the colonized mycelium starts getting airflow. If you want, you can open up the jar and let the mushrooms grow out the top. However, this tends to be really low yielding. You want to spread everything out so there is a big surface area for mushrooms to grow. Typically, a mushroom grower accomplishes this by mixing the colonized grain with a substrate like coco, and put it in a fruiting chamber that will stay humid but still allow airflow.
Some growers make mushrooms directly off of the grain, without mixing it with anything, but there is not much surface area and relatively little water contained inside so this produces really low yields with only a few mushrooms.
You will greatly increase your yields by breaking up your grains, mixing it with a substrate. A substrate acts like soil for the mushroom mycelium. It provides a way to spread out, and also contains the water that mushrooms need to grow. When mushrooms don’t have enough water, they can’t grow, and your substrate is going to give them water “on tap”.
Break up the colonized grain and mix it with a moist pasteurized substrate. This spreads the colonized grain out with plenty of water and surface area to grow your mushrooms.
The absolute simplest fruiting chamber is a plant seedling tray, or a pre-made fruiting chamber. There are many many different ways to construct a fruiting chamber. But the main idea is…
Imagine a dewy morning after a rain. The mushrooms grow hidden among the grass. That’s your goal environment.
- Gentle airflow around the mushrooms
- Very humid near the surface
- Access to clean air with oxygen
- Ambient light (light from the top helps mushrooms grow straight up)
- Substrate stays moist (mushrooms are mostly made of water)
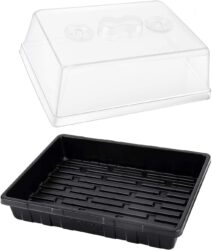
Example: Seedling Tray as a Fruiting Chamber
A seedling tray can work as a fruiting chamber, though you’ll need to alter it for the best results. They do not provide enough oxygen unless you add more holes on the sides to let air in and get a little more airflow and movement.
I used this seedling tray “straight out of the box” as a fruiting chamber. I did not alter it. It did okay, but you can see that the mushrooms clustered in one corner. I later realized that this corner was lifted up due to the plastic being deformed, which was letting in extra air from that point. Once the mushrooms got tall enough, they started lifting that side even more, and the mushrooms seemed to thrive from the extra oxygen. I believe the access to more oxygen is why all the mushrooms grew on that corner (but not on the other side which was more sealed).
The mushrooms clustered near a corner that was lifted up and letting in more air.
This helped me realize that the seedling tray wasn’t naturally providing enough oxygen for healthy mushroom growth. In future grows with a seedling tray, I added additional holes to the sides of the humidity dome (and covered them with filters) to let in more air but not contamination. That helped make it so the tub would get more even rows of mushrooms and fewer clusters.
This is the seedling tray I used.
Another limitation to this seedling tray is that the tray itself only has enough room for about 2″ thick of substrate at the bottom. This isn’t too big a deal if you’re growing small mushrooms, but with big mushrooms like Penis Envy that drink a lot of water to grow, the thinner substrate can quickly run out of water before the mushrooms are done growing. That means you may need to add extra water partway through, which isn’t ideal as it can increase the chance of contamination.
Summary: Gets the job done, but not ideal.
Example: Fruiting directly in mushroom bags
Growing in bags works the same as any other fruiting chamber. Here’s a quick overview.
- Mix the colonized grain and substrate in the bag
- Seal up so only a little air gets inside and put in the dark
- Wait until the substrate looks mostly white on top
- Put in a place with gentle light and open up the bag more so air can get inside (I keep the bag still sealed, but poke a bunch of holes in the sides.
- Wait for mushrooms
This method is easy, though the lack of seal against the outside air might make it more prone to contamination (I got lucky and didn’t deal with contamination even when I poked holes directly in the sides). The biggest downside is that these tend to get low yields even if the bag is absolutely stuffed with mushrooms. You need to use a ton of bags to get good mushroom yields, as each bag doesn’t have much surface area for mushrooms to grow.
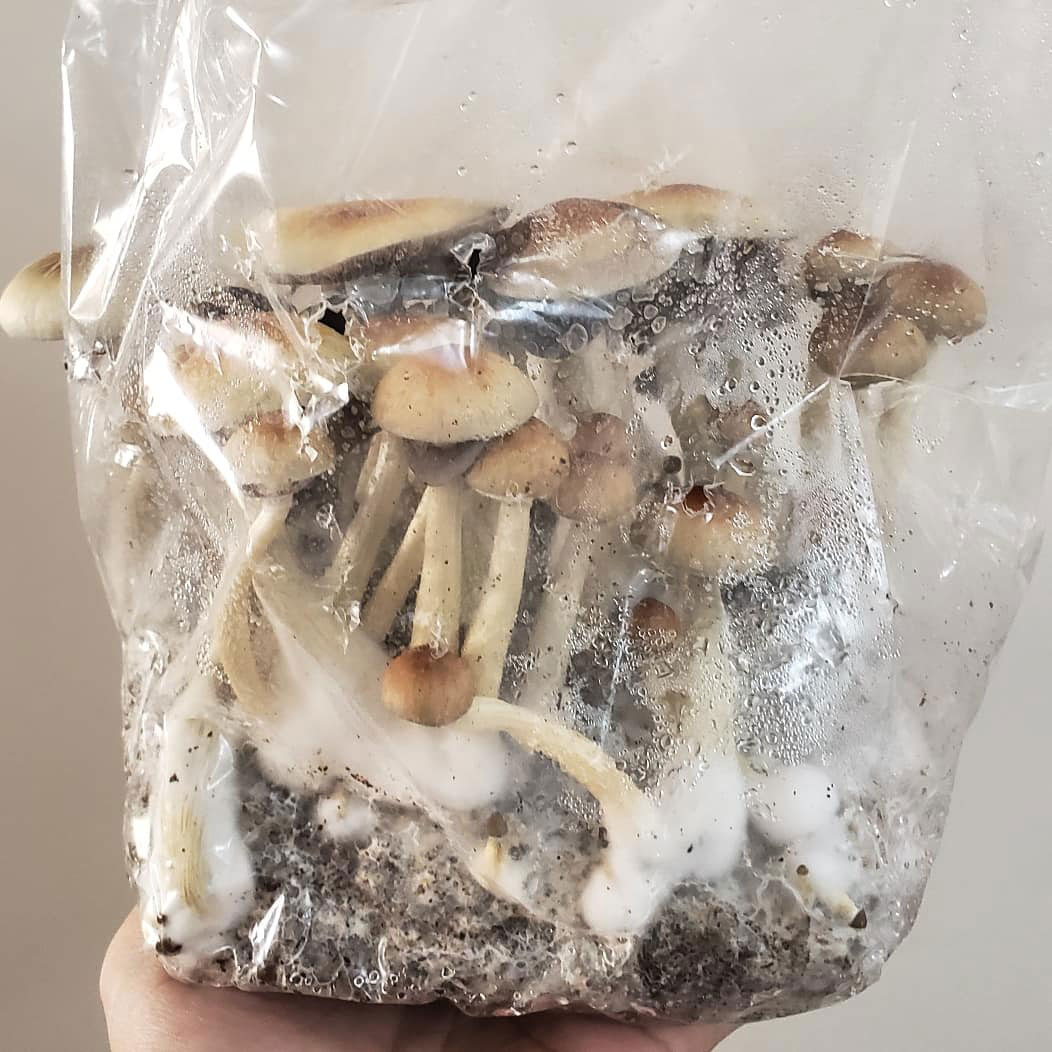
Summary: Easy and simple, but small yields unless you grow a lot of bags at once.
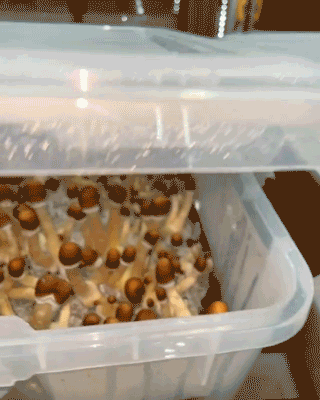
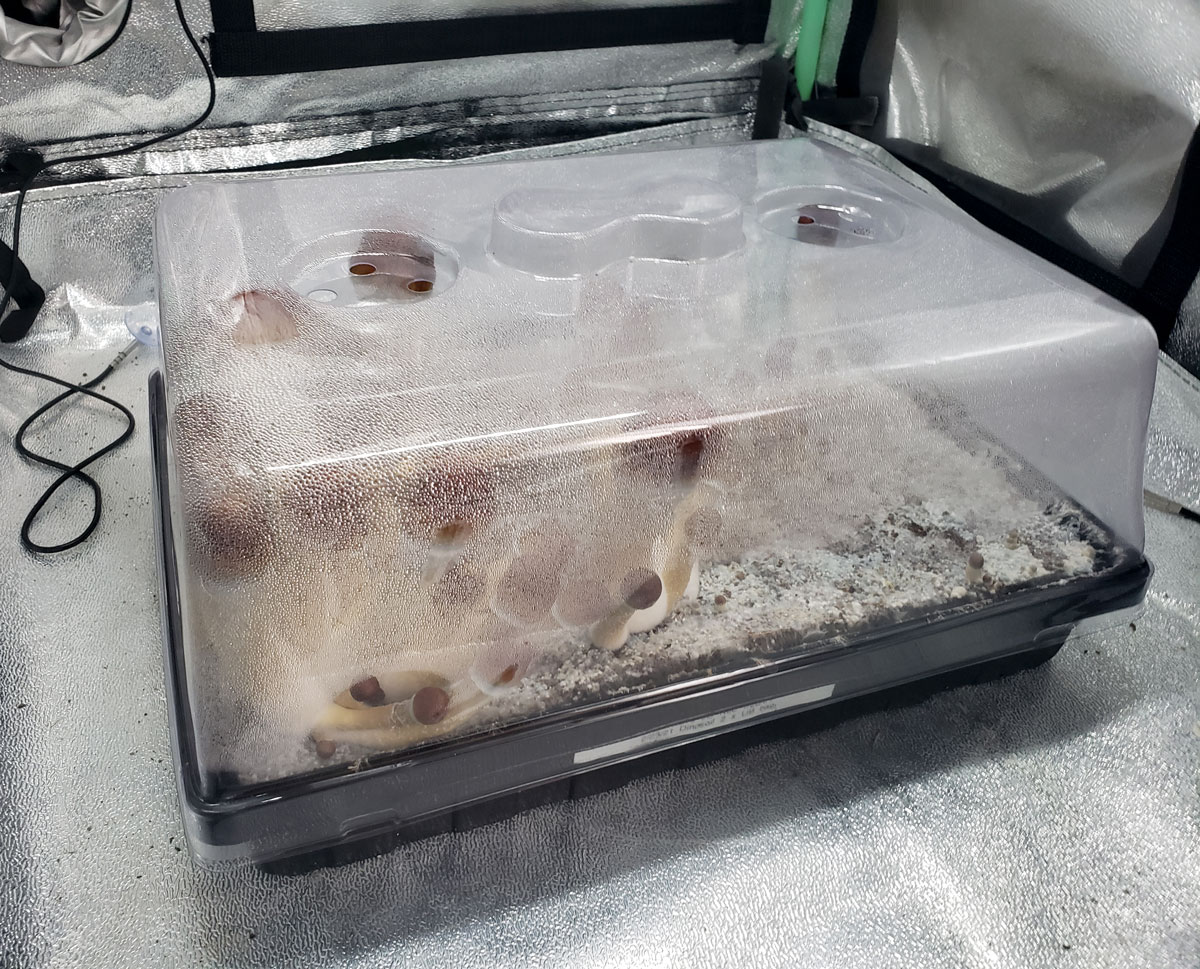
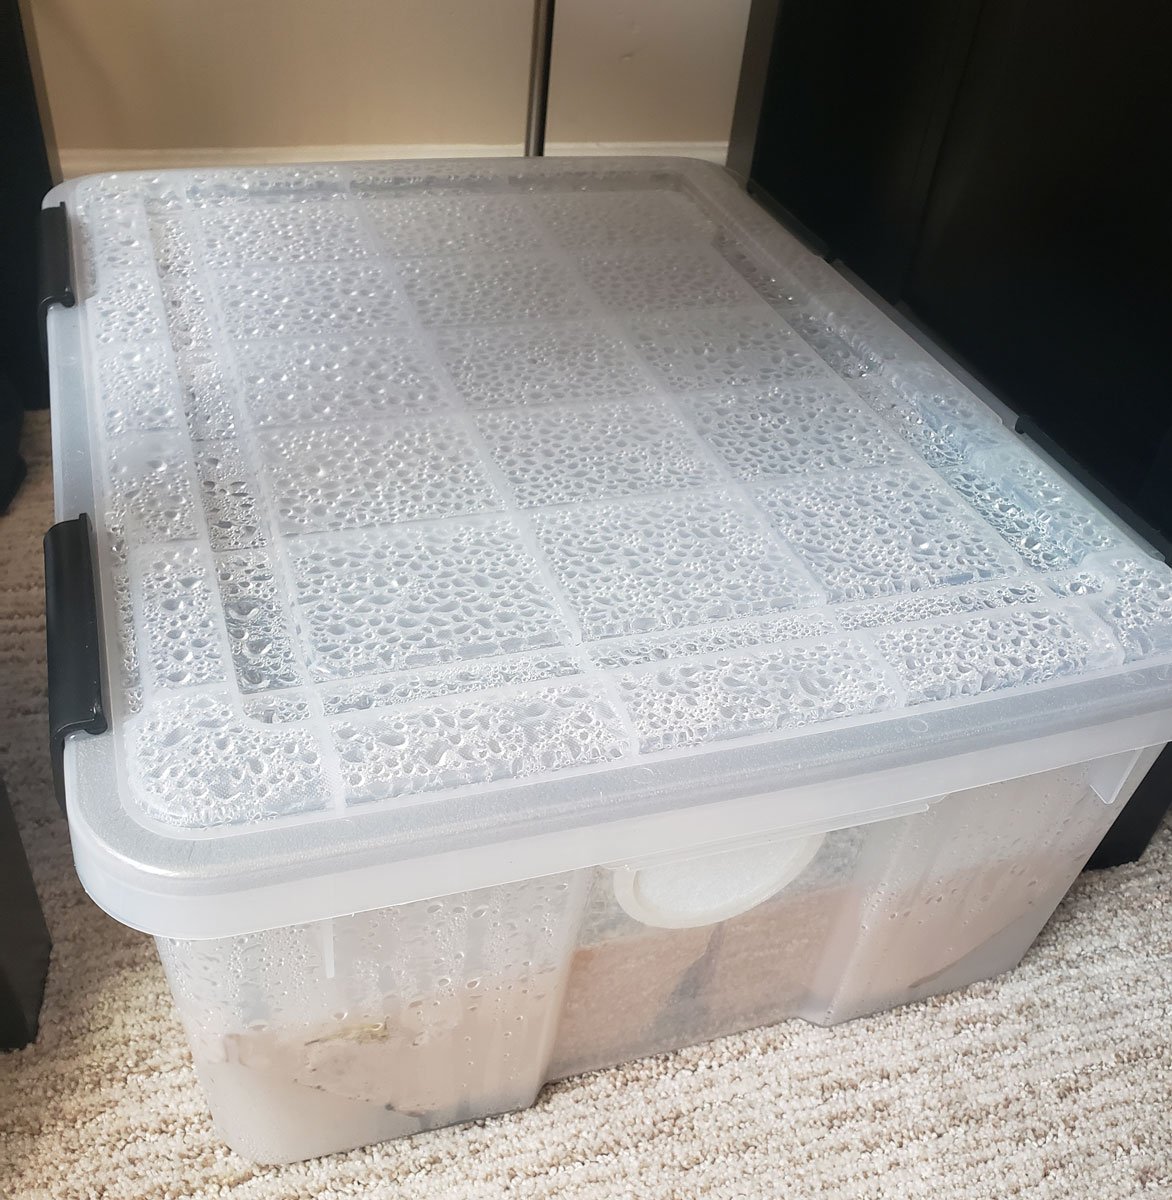
Example: Monotub (Using a Storage Container) as a Fruiting Chamber
I’ve had the best results using a short Sterilite-style storage container and using a black liner with multiple filter holes. This type of fruiting chamber is often called a “monotub” in the mushroom-growing world.
You can make a monotub out of almost anything. I’ve made a ton of them, and most will work. However, I’ve found I get the best results with shorter vs taller tubs, as the short tubs seem to help maintain a more consistent environment than a tall tub which holds a ton of extra air even when it’s sealed up, which tends to dry out the substrate and mushrooms.
Personally, I have found you will get the best results finding someone who’s already designed a successful tub, and copying them exactly (same tub, size holes, filter, methods, etc.). This works better than trying to design your own monotub from scratch because you know for sure that the design will work well.
The only downside to using a monotub is you typically have to use a holesaw or other tool to safely make the holes. Someday, I’d love to see people selling these premade. Especially the particular design described here.
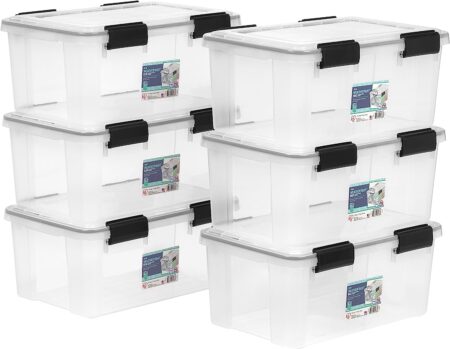
This storage chamber has gotten the best results with growing mushrooms so far: IRIS USA 19 Quart WEATHERPRO Plastic Storage Box. I cut one big 2 7/8″ hole on each side with a holesaw, and covered them with either a layer of Nexcare cloth tape or filter discs. GET AT LEAST TWO OF THESE CONTAINERS! Even if you only plan on growing one set of mushrooms at a time. Why? These are relatively short. That is great for maintaining the proper humidity and environment, which is part of why this particular container is great at growing lots of rows of mushrooms. However, if your mushrooms get too big, for example, the Penis Envy strain, they will run into the top and you don’t want that. You want mushrooms to be able to grow tall and straight to the maximum size with airflow around the caps as they grow. If that happens, you want a second container you can use as a nice tall top to stack on the other.
Get at least two IRIS USA 19 Quart WEATHERPRO Plastic Storage Boxes so you can stack one on the other if your mushrooms get too tall. Cut a 2 7/8″ hole on each side with a holesaw and stick on 3″ filters (or use Nexcare cloth tape) from the outside to filter the air that gets inside. Line the bottom with a cut-up black trashbag and you’re good to go with a professional monotub!
Summary: A little extra work since you must make it at home, but one of the best fruiting chambers to grow mushrooms. A well-designed monotub is self-contained and can produce a lot of mushrooms per harvest.
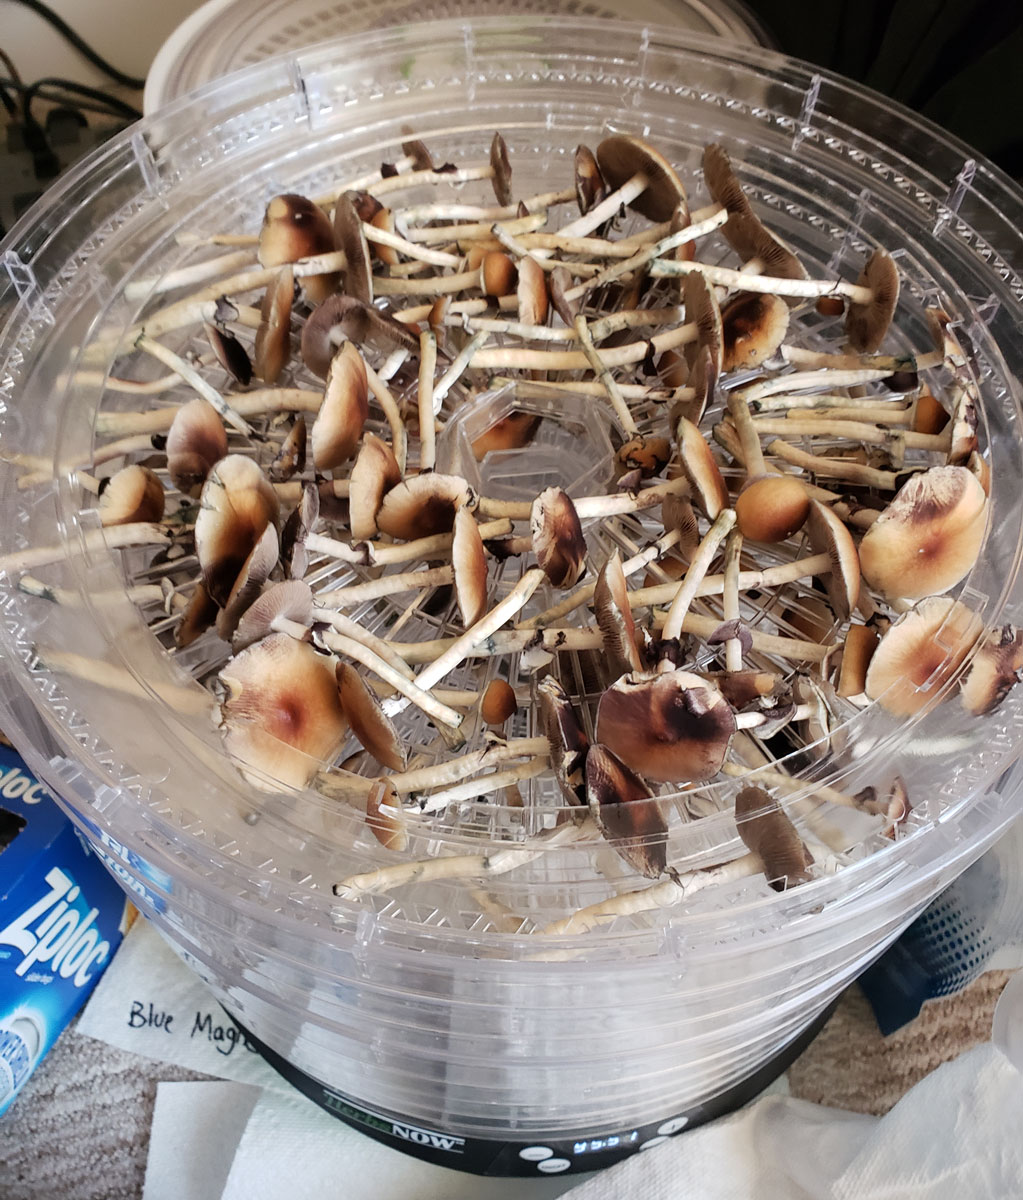
Harvest the Mushrooms
Mushrooms should be harvested right as they open up and release their spores, or a little before. Once the mushrooms are harvested, most growers dry them before consumption.
What about growing mushrooms is easier than growing cannabis?
When growing mushrooms, good preparation prevents most work. This is different from growing weed. With cannabis plants, you can create an absolutely perfect growing environment, but it’s still going to need almost daily care because you have to check on plants daily, water them regularly, train plants to grow short and flat, adjust the grow lights, etc. However, with mushrooms, you can smartly design your system so it needs almost no work to maintain. As a bonus, harvest comes much faster than growing weed.
- Takes less time each day. A mushroom grow involves a few key times that need your help, for example, buying/making sterilized grain, injecting grain with genetics, setting up your fruiting chamber, and harvest. However, between these times, pretty much your only job is to leave your mushrooms alone and let them do their thing. Unlike growing cannabis, you don’t need to water your plants or make nutrients. You don’t need to train them to grow in a specific way. If you set things up right from the beginning, you mostly wait and then harvest. However, if you encounter problems, you may need to start interacting more often to get your mushroom grow back on track.
- Faster harvest. Expect your first grow to take about 10 weeks from start to finish, though there are steps you can take to shave off the time even further. That’s a similar timeline to growing an autoflowering cannabis strain but unlike weed, you can harvest mushrooms in the morning, immediately dry them, and eat them that night. That means that you get usable mushrooms in hand and ready to use weeks sooner than even a short cannabis grow.
- No electricity, no heat. Mushrooms don’t turn light into energy via photosynthesis and don’t need a grow light. Instead, they eat grain. They can even grow in the dark. That means that you typically don’t need to spend money on electricity, and you won’t need to deal with venting the heat from grow lights. Along the same lines, you don’t need to worry about light schedules, light leaks, timers, etc.
- Easy to grow multiple strains and harvest often. With cannabis, you often get a whole setup that goes together. For example, you’ll buy a grow tent with a matching grow light. When growing plants, you typically must keep all the vegetative plants together in their own grow space and flowering plants together in their own grow space. However, with mushrooms, you don’t need any one place to keep them. You can create new mushrooms at any time, and since everything is kept in individual jars, bags, or tubs, you can easily start a new mushroom grow at any time. You can have multiple grows going at once at different stages of growth. I love how when I started growing mushrooms, I was able to germinate new mushroom strains constantly and had mushrooms at every stage of growth at all times. As a result, I could harvest tons of mushrooms every week. If I messed up and had to throw away a batch, I had so many more in progress. This really took the sting off of any challenges and meant I could still get to a quick first harvest without having to start over from the beginning.
Most of the mushroom growing process is looking at grain or your tub, waiting. The mushrooms mostly take care of themselves.
What about growing magic mushrooms is harder than growing cannabis?
Growing mushrooms is easy. They love to grow. A mushroom grower’s main “job” is the fight against contamination. It is important not to cut corners regarding sterilization because once your mushrooms are contaminated, you must toss everything immediately to prevent the contamination from spreading. Contamination reminds me of growing a hermie or male cannabis plant, which you need to remove from the grow space to prevent pollination and seedy buds.
- Contamination. With cannabis plants, you typically don’t deal with much “contamination” besides bugs, white powdery mildew, or bud rot. These are straightforward to prevent in a cannabis garden by keeping out bugs and maintaining the proper humidity to stop mold/bud rot/mildew. These problems can often be treated and the plant saved. However, when it comes to mushroom, the hardest part, by far, is the prevention of contamination. Why is that? Mushrooms are a type of fungus. Mold and mildew are also fungal organisms. Why does that matter? Magic mushrooms like the exact same conditions as other types of fungus. A lot of bacteria also likes the same conditions. When you’re creating the perfect home for a mushroom to grow, you’re also making the perfect home for all kinds of non-mushroom organisms to grow. As a mushroom farmer, the main way to prevent this is with sterilization and careful practices to prevent bad stuff from getting to your mushrooms. Essentially, you need to maintain a sterile environment. You also want healthy mycelium, which is more resistant to contamination. However, the good news is that mushroom growers have discovered the proper techniques needed to grow mushrooms without contamination. As long as you follow good directions closely, you can prevent bad stuff from growing until it’s time to harvest the mushrooms.
- Seriously, preventing contamination is the only hard part. Seriously, the only hard part of growing mushrooms is preventing contamination. Mastering that skill turns the mushroom growing process easy and straightforward. There are lots of home hacks that let you prevent contamination in a home environment. For those who get serious about growing mushrooms, you can buy specialized equipment (like a “flow hood”) that makes it even easier.
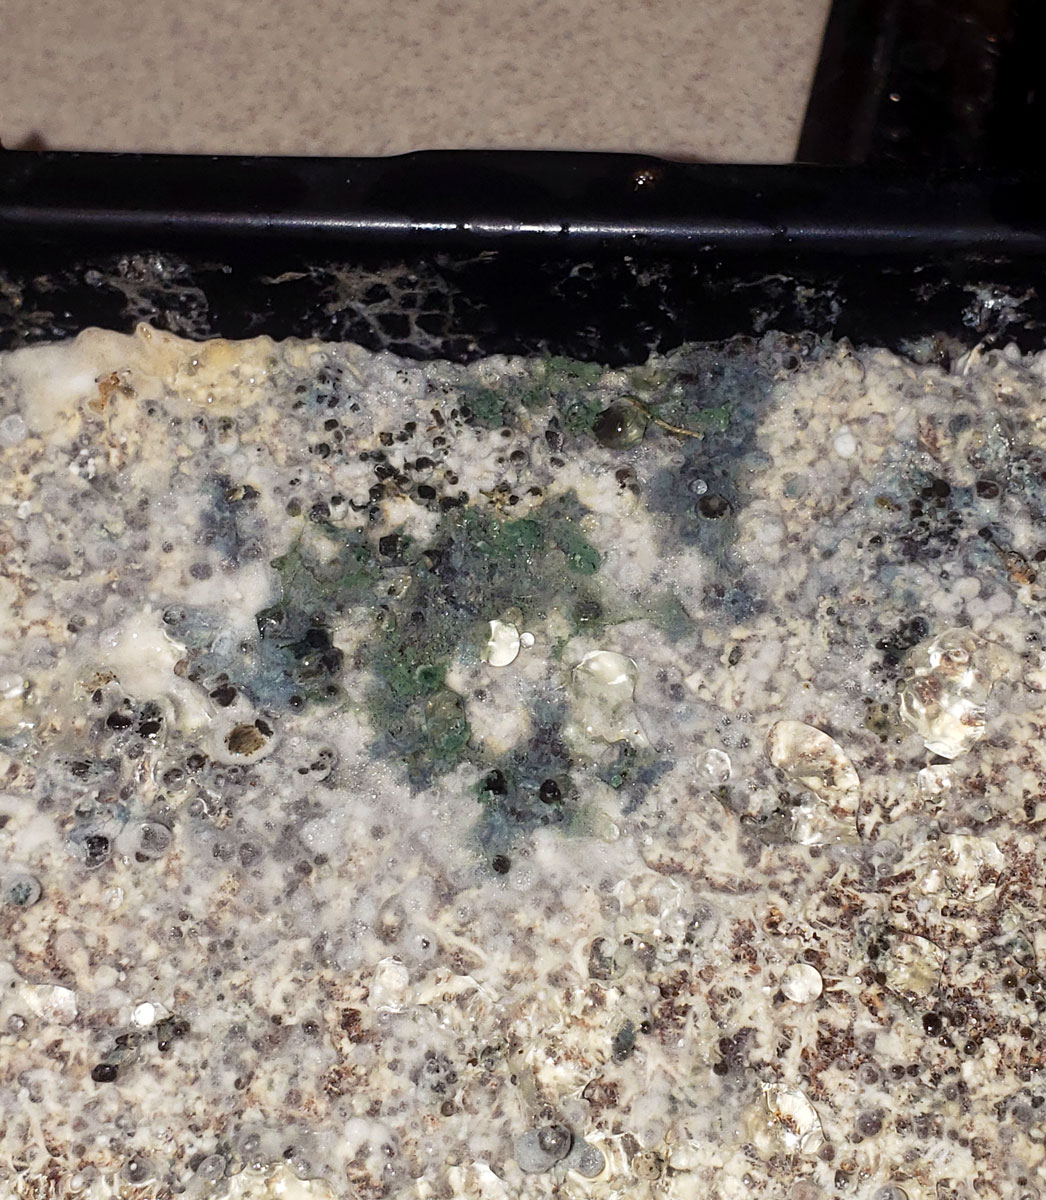
Healthy mushroom mycelium is white. Contamination is often colorful 🙁
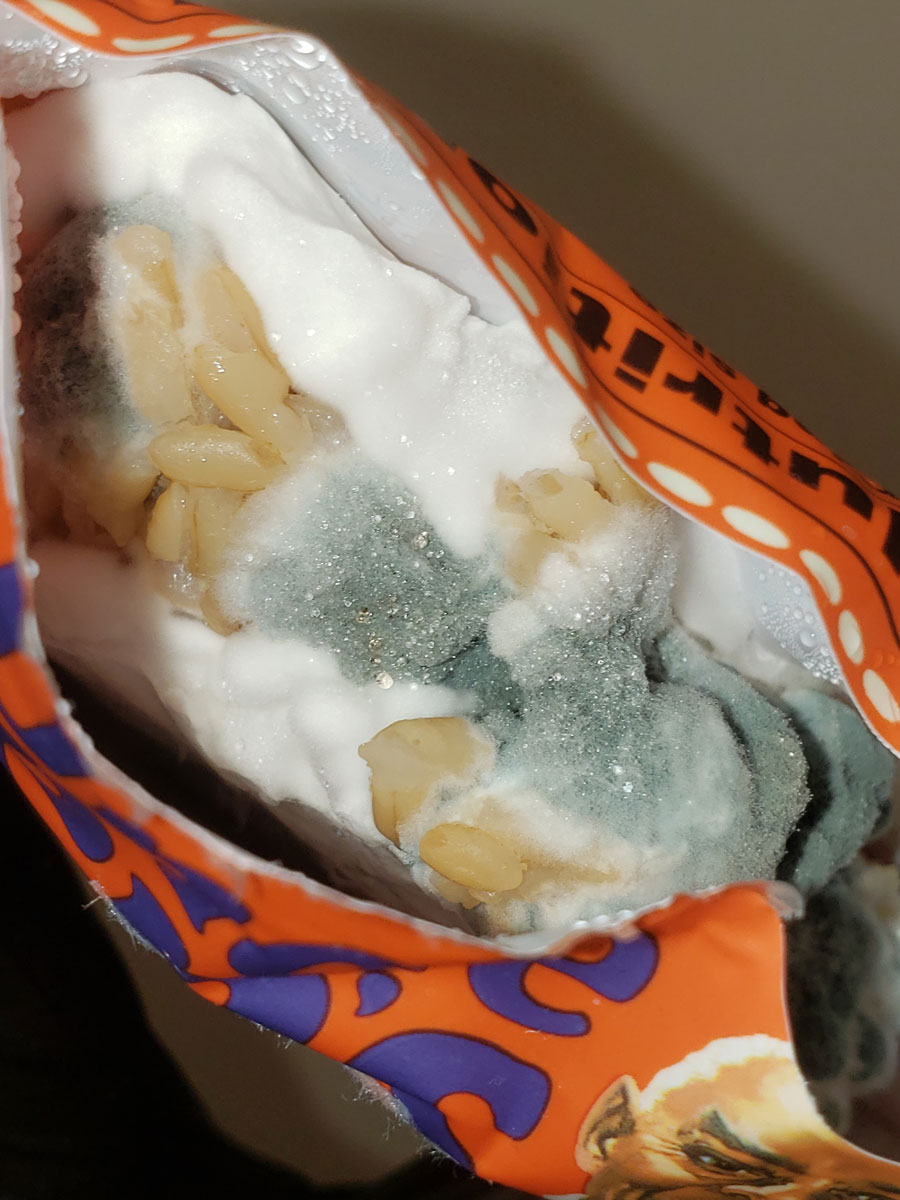
Green mold is one of the most common and hated types of mushroom contamination. It appears on grain as the result of poor sterilization. In a fruiting chamber, it often appears when the substrate has uneven moisture or the fruiting chamber has poor environmental conditions that let the green mold outcompete your healthy mushroom mycelium. Green mold makes spores (the spores are what’s green) that can harm humans. When you see green mold, it means the infection is well progressed, and any growing mushrooms usually stop growing (abort) and die. If you see green mold, you must safely and carefully get it out of the house to prevent it from releasing spores that could harm you or infect your other mushrooms.
Indoor Mushroom Growing Timeline – Expect 10 weeks to First Harvest (7-12+ weeks)
Get genetics & supplies – Days to weeks
- Some sources of genetics can take weeks to arrive, but some sources of genetics show up within a week. Very similar to buying cannabis seeds online.
Colonization of grain – 3-6 weeks. Some methods are faster than others.
- Starting with live culture is faster than starting with spores (like starting with clones vs seeds)
- Some strains of mushrooms are naturally faster to colonize than others (just like some strains of cannabis grow tall and fast)
- If you want a big harvest, it will take longer to colonize all that grain unless you use many small bags/jars of grain (like if you want to grow big plants takes longer than growing many small plants).
Make mushrooms – 2-4 weeks
- Colonize substrate in the fruiting chamber: 1-2 weeks
- Fruiting stage: 1-2 weeks on average before mushrooms appear once you initiate the fruiting stage
Additional harvests (“flushes”)
- 1-2 weeks for each additional flush until the cake is spent (mycelium ate all the grain) or cake gets contaminated
Conclusion: Do you want more mushroom-growing tutorials?
I hope today’s article helped you understand the mushroom-growing process and how it’s different from growing weed.
Do you want to see more guides like this about how to grow mushrooms? If you liked today’s article and want to see more mushroom-growing tutorials, contact us and let us know!
What do you want to see?
Potential ideas to cover (let us know what you want to see first!)
Magic Mushroom Genetics
- Best sources to buy magic mushroom genetics
- How to save genetics after your first grow (general principles)
- How to take a spore print
- How to clone a great mushroom
- How to stabilize and breed a mushroom strain
- Agar Plates
- Liquid Culture
Inoculation
- Complete guide to inoculating grain with mushroom genetics
- Inoculating grain: Agar plates vs spores vs liquid culture
- Grain-to-grain transfer
Colonization Stage
- How to make sterilized grain at home
- Popcorn
- Rye berries
- Oats
- Rice
- Millet
- The fastest way to colonize grains
- Optimal colonization environment
- Troubleshooting and tips for Grain Colonization
Fruiting Stage
- How to make a mushroom fruiting chamber
- Modified seedling tray
- Mushroom bags
- Martha tent
- Growing in tupperware or cardboard containers
- All-in-one mushroom grow bags
- Make a monotub (recommended!)
- Reviews of pre-made monotubs
- How to care for mushrooms in the fruiting stage
- What are mushrooms pins?
- How to get a good “pinset”? (lots of even rows of mushrooms throughout the fruiting chamber, without bare patches that don’t have mushrooms)
- How to avoid “side pins” and “bottom” pins. These annoying mushrooms grow on the sides or under your substrate. Side pins are still good mushrooms, but they’re all dirty from the substrate instead of clean and pristine like mushrooms that grow straight from the top. Luckily a few simple tricks will prevent them! (Quick summary: use a liner, don’t let the substrate dry out, don’t less the surface dry out, maintain high humidity near the surface, proper fruiting environment).
- Surface Microclimate: Why is it important?
- Visual guide: What to expect during the fruiting stage
- How to rehydrate a dry substrate?
- Should I use a liner? (yes, it will help prevent side pins, among other benefits)
- Common Fruiting Stage Problems and Solutions
Harvest
- Best harvest methods
- How to get multiple harvests (“flushes”)
- How to dry mushrooms
- How to prepare magic mushrooms to eat
- Eat dried mushrooms directly
- Grind up dried mushrooms and put in caps
- Mix dried mushrooms with chocolate
- Lemon tek (mix with lemon juice)
- Alcohol lemon tek (a two-step extraction method that uses both high proof alcohol and lemon juice)
- Alcohol extraction (best method for long-term storage)
- Blue juice (Ice water extraction)
Using Magic Mushrooms
- Dosing mushrooms: How much do I eat?
- Microdosing magic mushrooms: What is it like?
- Tripping on magic mushrooms: What is it like?
- “Ego death” and extreme psychedelic mushroom experiences
- Do you need a babysitter for your trip?
- Ideas for the most enjoyable experience
Complete mushroom contamination guide
- Green mold / Trichoderma
- Bacterial contamination
- Sour rot (wet spots)
- Orange/red/pink bread mold
- Cobweb mold
- Black bread mold (“pinhead mold” because it may look like abunch of black spots)
- Other contamination
Sterilization: Deep Dive
- How to make a sterile inoculation environment
- How to set up your fruiting chamber so it doesn’t get contaminated
- Special equipment: Glove box vs Still Air Box vs Flow Hood
- Sterilization vs Pasteurization
Let us know if you want to see any of these (or other) mushroom-growing tutorials. Don’t forget to tell me which one you want me to write first.