by Sirius Fourside
Table of Contents
- What is Decarboxylation? (and how does it increase potency?)
- Should you grind the weed?
- How to Decarboxylate Your Weed
Before making edibles, decarb (cook) cannabis in the oven for 30 minutes at 250°F (120°C) to increase potency.
Note: This university-level book teaches the chemistry of extractions (cannabis, herbs, mushrooms, roots, seeds, etc.)
What Is Decarboxylation?
Decarboxylation is a chemical reaction that makes cannabis edibles feel more potent. The sciency-sounding word describes the process of turning THCA, which isn’t that psychoactive, into the THC we all know and love. Since cannabis typically contains THCA instead of THC before it’s heated or smoked, decarboxylation is essential when processing cannabis for eating. The regular cooking process typically isn’t enough to decarb cannabis fully, and it doesn’t happen naturally in your stomach.
That’s why in most recipes for cannabis edibles or tinctures, decarboxylation (or the informal verb, “decarbing”) is the first step you take.
Don’t worry, it’s simple. Decarbing simply means subjecting your weed to high temperatures (~250°F or 120°C) over about 30 minutes before using it in your recipe.
These cannabis buds are about to get decarbed.
When you smoke or vaporize cannabis, the heat of the fire/vaporizer makes the decarboxylation process happen. The heat turns the THCA in your cannabis to THC, you inhale that THC and feel its effects.
When you decarb, it forces the same transformation to happen, yet leaves all that good stuff on the bud so you can eat it or cook it into something like butter or oil.
Did you know? Heat isn’t the only way decarboxylation happens. Even if you never heat your cannabis, the process of decarbing also occurs naturally over time at regular temperatures. So older cannabis is often already decarboxylated.
Why Is Decarbing Important?
Why decarb? Because decarbing is what makes edibles work! Decarboxylation could be seen as the most important step in making edibles since it’s the process that makes your weed actually feel like weed when you eat it.
It may seem counterintuitive to “cook” your weed by itself. Wouldn’t that burn off all the good stuff and make it less potent? No, it won’t reduce the potency as long as you follow the instructions in this tutorial.
In fact, it’s the opposite. If your buds are not decarbed before being eaten, you won’t feel the psychoactive effects of your weed. You could eat a whole ounce of raw bud and only be left with a breath that smells like a dispensary!
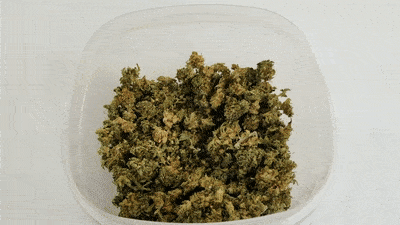
Break cannabis buds up to prepare them for decarboxylation.
Small Pieces of Weed vs. Grinding Your Weed
There’s a bit of debate about how to prepare your bud before decarboxylation. But in our opinion, as long as you break it up a little bit there isn’t a whole lot of difference.
Small Pieces
Breaking your weed into smaller pieces means it all gets baked a lot more evenly than if you had used whole nugs. The downside to breaking your weed up by hand as opposed to grinding is that it’s slightly more time consuming since grinding can be done with machines like a food processor.
Don’t get scared off though, it’s easy to do. If you have enough finger mobility to break up broccoli florets with your hands, you can break up your bud. It only takes a few minutes and it’s free!
I used my fingers to break this weed up into small pieces before decarboxylation.
Grinding
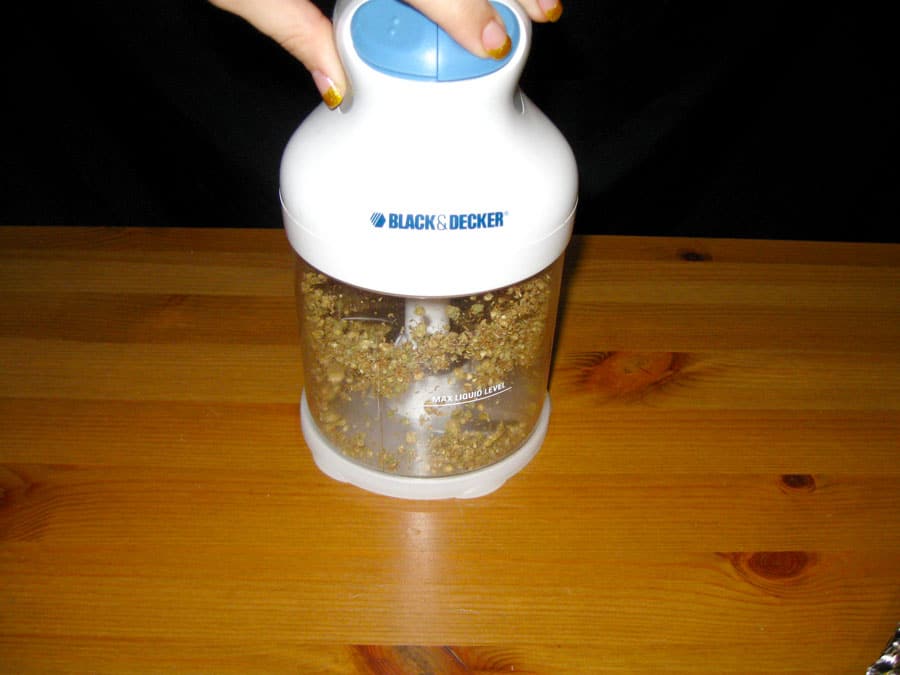
A huge benefit to grinding up your weed instead of breaking it up with your hands is that you can use a machine like a food processor to do all the work for you. You just put some bud in, hold a button for a few seconds and dump out the finished product!
This is the method I typically use because it’s a bit easier to do than breaking up nugs. It’s hard to mess up because you can’t really grind your bud too small/fine. I’ve made edibles with weed ground so fine it ends up as a powder. Some growers claim that grinding the weed can cause it to lose potency, but I never noticed that in my experiments.
You can use a food processor to save time compared to breaking weed up by hand.
I had this older model food processor for almost 6 years. I miss ya, pal.
However, there is a downside to grinding: it’s easier to lose material the finer your weed gets. You can lose some herb to the sides of the grinder, some in transferring containers or some in the container you use for decarbing. If you’re concerned with saving every last bit of bud, you might want to break buds up by hand. That being said, you can save the vast majority of your ground-up material by just making sure to be a little careful about collecting and moving your weed.
Extra Note: Some devices that help make edibles (like the Magical Butter Machine) suggest that you don’t grind up your weed before using it in their recipes. So, if you’re thinking about using a Magical Butter Machine, break your buds up by hand. If you’re going to make edibles without a machine, grinding is a solid solution.
How to Decarb Your Weed: Overview of Methods
Alright, let’s get into details. We’ll go through the popular methods of decarbing, how to do them, what supplies you’ll need, and grade them based on convenience and how much smell they make.
Natural Decarb (Time Method)
Did you know time turns THCA to THC? Weed that sits around long enough decarbs on its own. Just wait for a long, long time. In all honesty, this method is so time-consuming and inconsistent that it isn’t really a viable technique for making edibles. That being said, sometimes it works out. Nebula and I grow a lot of weed, and once we had a particularly high-yielding harvest sitting in jars in our cupboard for over a year as we slowly went through it. After a year, the weed was still fantastic to smoke, but had clearly gone through changes as it had turned into a rich golden-brown color.
We could’ve added it directly to food and felt psychoactive effects without decarbing. But if we had used that weed for edibles, we still would have decarbed it separately just to ensure all the THCA had turned to THC.
Convenience: 1/10
Smell Containment: 10/10
Supplies:
- Weed
- Time
Steps:
- Wait a long time, or use a different method if you want your edibles in less than 12+ months.
There are better ways to decarb than just waiting!

Baking Sheet
This is the most common method growers use to decarb their weed because many people already have all the materials they need to do it without needing to make a trip to the store.
It’s also worth noting that this is by far the smelliest method for decarbing. If you’re going to use this method, just know that your home is going to be flooded by an unignorable, pungent, unmistakably weedy smell. Running a fan with an attached carbon filter helps a lot, but it’s still going to get funky.
Convenience: 7/10
Smell Containment: 1/10 (smelliest method)
Supplies:
- Oven
- Baking Sheet
- Foil or Parchment paper (no wax paper)
- Weed
Steps:
- Preheat oven to 250°F
- Line baking sheet with foil or parchment paper
- Place your broken-up or ground cannabis on the baking sheet
- Bake cannabis for 30 minutes
- The cannabis should change to a brownish color
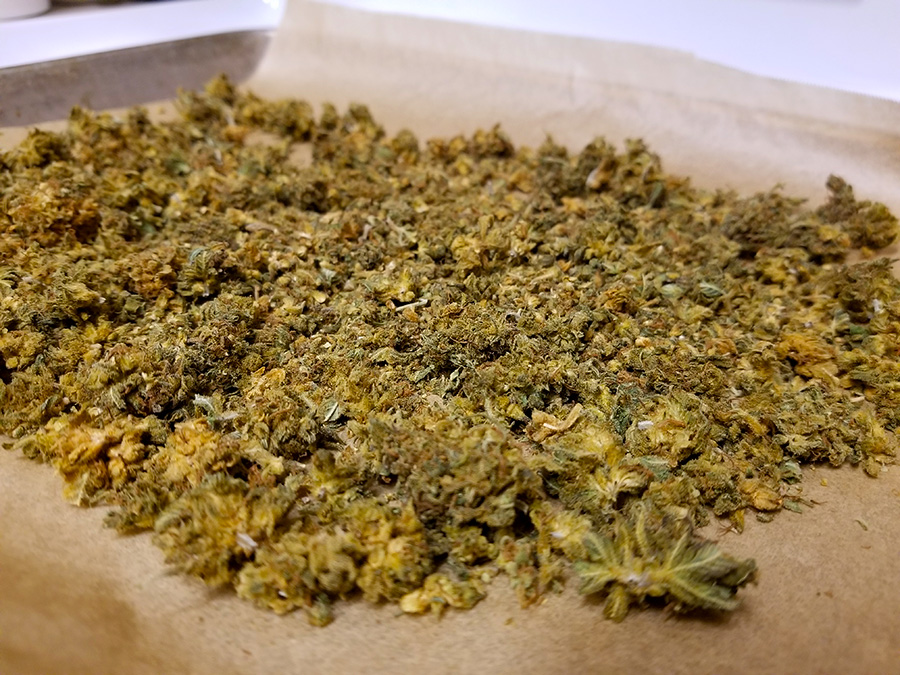
This is an ounce of cannabis before being decarbed on a baking sheet…
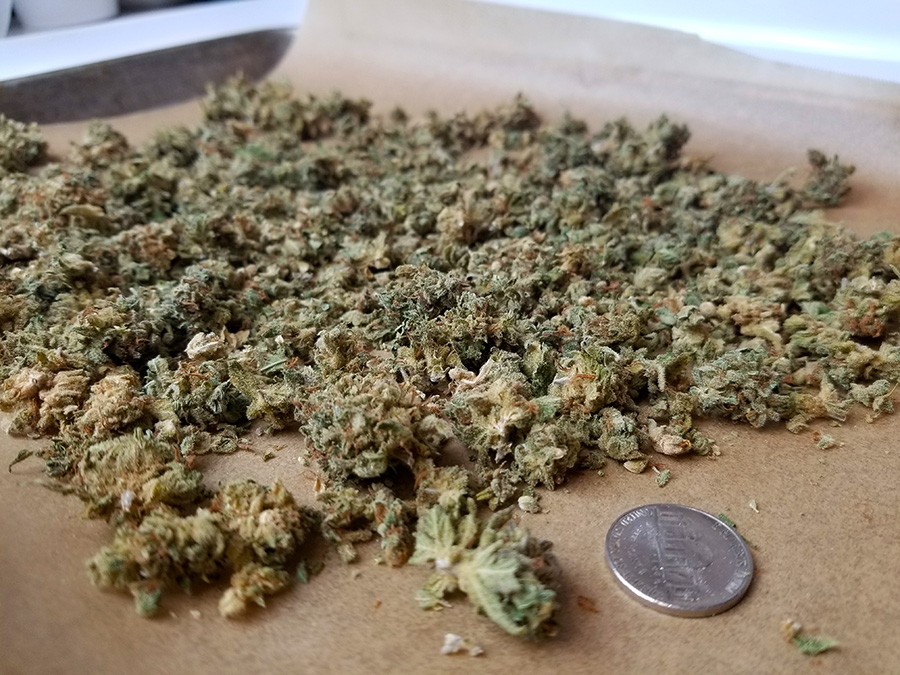
…and this is the same ounce of weed after being decarbed on a baking sheet at 250°F for 30 minutes.
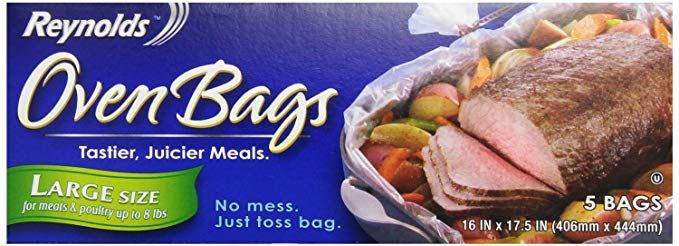
Oven Bags
The oven bag (or turkey bag) method works just like the baking sheet but with a bit less work. You don’t need to line a baking sheet this way, and collecting the finished material is a piece of cake. Also, the bag doesn’t get extremely hot to the touch, so in that way, it’s safer than using something like a glass mason jar. There’s also much less smell than if you just bake the cannabis on a baking sheet.
The downside is that this method takes having something that probably isn’t in your house right now.
Convenience: 8/10
Smell Containment: 6/10
Supplies:
- Oven
- Baking Sheet
- Oven bags (sometimes called turkey bags)
- Weed
Steps:
- Preheat oven to 250°F
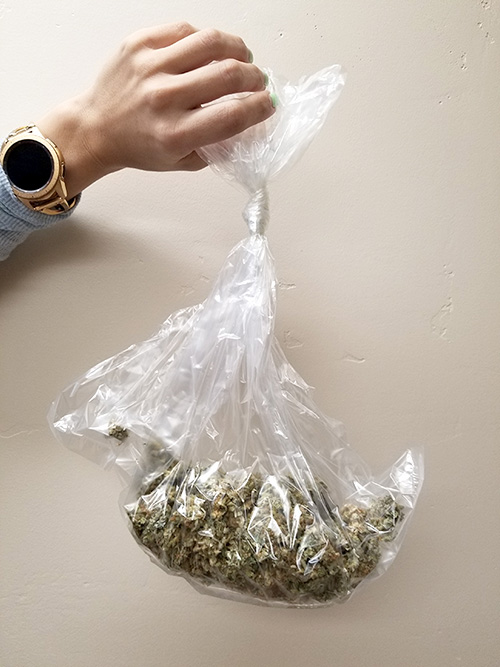
- Place your broken-up or ground cannabis in the oven bag
- Tie a tight knot in the oven bag
- This keeps the weed and smell inside the bag
- Place the bag on a baking sheet (no foil/parchment needed)
- Bake for 30 minutes
- The cannabis should change to a brownish color
Place your broken-up cannabis in the oven bag, tie a tight knot, and bake for 30 minutes at 250°F on a baking sheet.
Mason Jars
Glass mason jars are great, aren’t they?
They’re great for curing cannabis, they can be vacuum sealed, they’re an amazing tool for decarboxylation, and you probably already have at least one in your house if you grow cannabis. Additionally, they’re pretty darn good at keeping the weed smell contained; even better than oven bags and WAY better than just baking the weed on a baking sheet.
Convenience: 8/10
Smell Containment: 8/10 (screw the lid on tight to keep the smell in)

Supplies:
- Oven
- Wide-mouth Glass Mason Jars
- Weed
Steps:
- Preheat oven to 250°F
- Place your broken-up or ground cannabis in the mason jar
- Screw the top on tight. Real tight!
- A tighter seal means less weed smell will escape the jar
- Carefully place the mason jar on your oven rack. The jar should not be touching the heating element or sides of your oven.
- Bake for 30 minutes until cannabis changes to a brownish color.
- Important: The glass will be very hot when it comes out of the oven! Make sure to use oven mitts when you touch the jar and give it time to cool before opening.
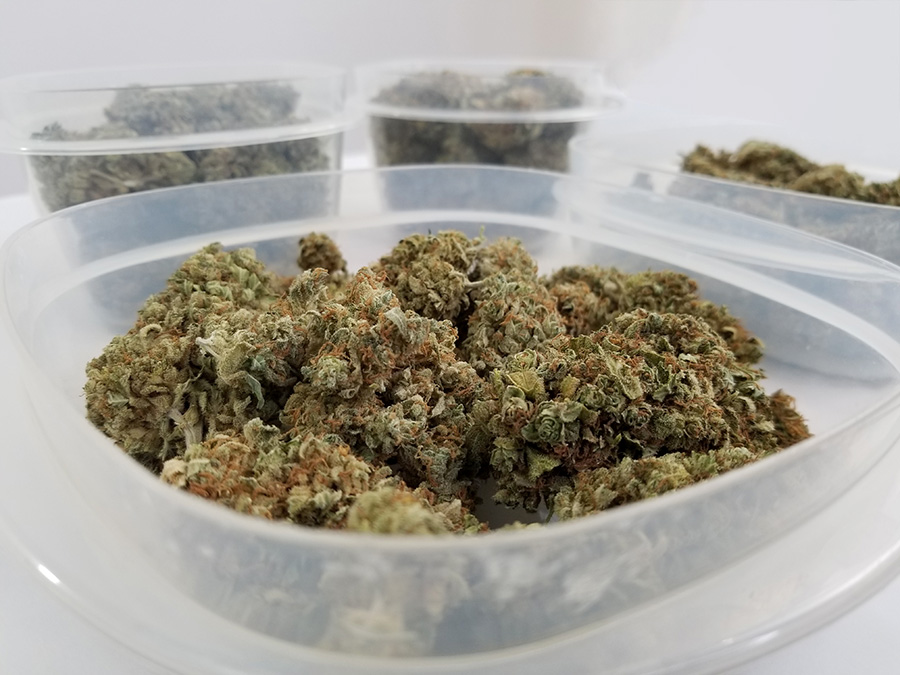
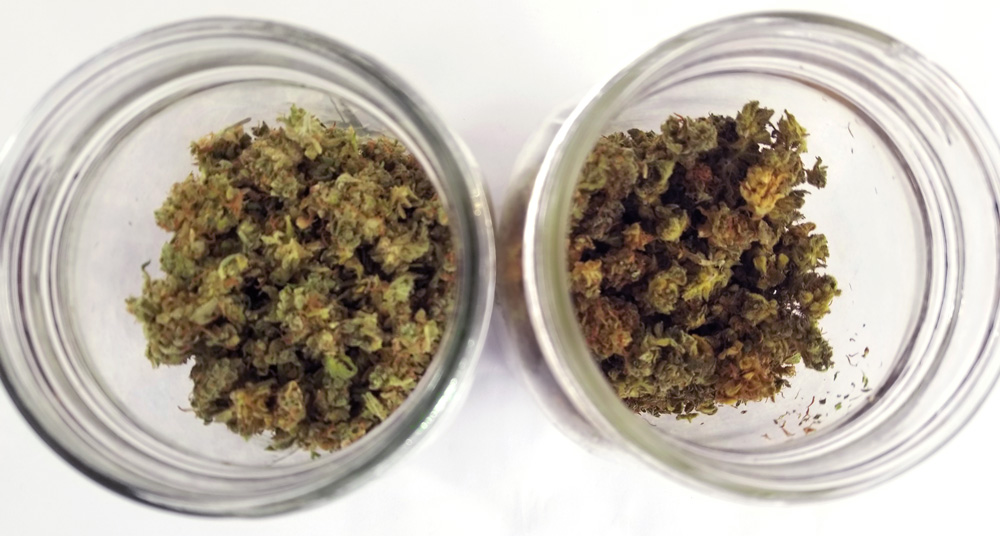
The left is untreated weed and the right shows weed that has been decarbed in a mason jar at 250°F for 30 minutes
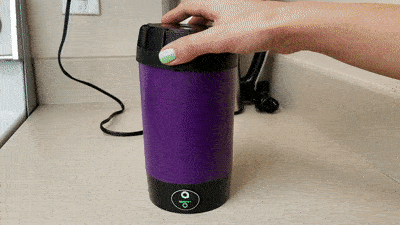
Ardent FX Mini (previously called the Ardent Nova)
I didn’t even realize this was a thing until a reader wrote to me about it. The Ardent FX Mini (previously called the “Ardent Nova”) is a machine with a singular purpose: decarbing weed. It’s a set-and-forget style system, meaning you can load it with up to 1 ounce of weed, start it, and walk away. While you’re gone, the Ardent FX Mini will slowly and thoroughly decarb your weed and stop applying heat as soon as it senses the job is done. No need for an oven because it plugs directly into the wall. Plus it makes almost no smell whatsoever; I had to put my nose right up to it to smell anything.

Click Here to Get Your Own Ardent FX Mini on Amazon.com
Downsides to the Ardent FX Mini machine? It takes longer to decarb your buds than the oven-based methods (up to 2 hours instead of the normal 30 minutes), you can only do an ounce of bud at a time (maximum), and it’s expensive ($170).
However, after trying out the Ardent FX Mini, I was converted. I live in a condo in a populous city, so my neighbors are pretty close to me. The total lack of smell was enough to make me a fan of the Ardent FX Mini all by itself, but being able to start the process and go run errands without worry sealed the deal.
Convenience: 9/10 (would be a 10 if not for the price)
Smell Containment: 10/10
Supplies:
- Ardent FX Mini Decarboxylator
- Weed (1oz maximum at a time)
Steps:
First, consult the instructions that come with the device. Here are the general steps:
- Plug in your Ardent FX Mini
- The light on the front will turn green
- Take off the top and purple seal underneath
- Take out the metal container and load it up with weed, up to an ounce at a time
- Put the metal container back in, put the seal on top (it fits loosely), and replace the lid
- Press the button on the front of the Ardent Nova
- The light on the front will turn red
- Come back in roughly 2 hours (or whenever you feel like, it stops automatically)
- The light will turn green again when it’s done
- It takes about 2 hours to decarb a full ounce
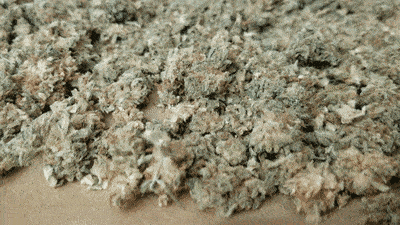
After decarbing weed in the Ardent FX Mini, this is what the buds looked like inside
There you have it! You now have a handful of effective methods to decarb your weed and get ready to make butter, oil, gummies, tinctures, infused food, etc. I ended up decarbing more than 6oz of weed while writing this, so I’ll be making lots of cannabis goodies over the next few weeks!
If you’re not sure what to do with your newly decarbed cannabis, “magic” butter is one of the best options in my opinion. Cannabutter is super versatile and can be used in hundreds of dishes that use butter or just as a topping on a “regular” dish (like a baked potato).