by Nebula Haze
Table of Contents
Week 1, 2, 3, 4, 5, 6, 7, 8, 9, 10, 11, 12, 13
Pros & Cons: My Thoughts on Auto-Flowering Strains
Reflection: How I Could Have Improved Grow
More Info on Training Auto-Flowering Strains
(Click Here to See a Photoperiod Grow Journal in This Same Setup)
Time Needed For This Auto-Flowering Cannabis Grow:
Seed to Harvest in 13 Weeks!
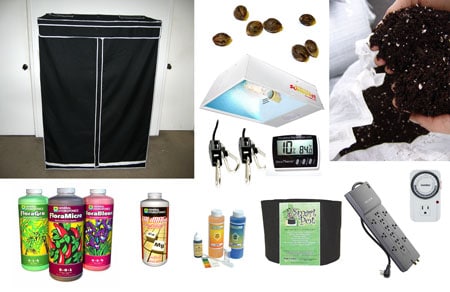
Supplies – Get Everything You Need to Copy This Grow!
Total Grow Time:
13 Weeks From Seed to Harvest (~3 Months)
Auto-Flowering Cannabis Strains
Dinafem Critical Jack (Recommended replacement: Critical Purple Auto)
Dinafem Sour Diesel (Recommended replacement: AK-47 Auto)
Sweet Seeds Jack 47 (Recommended replacement: Black Jack Auto)
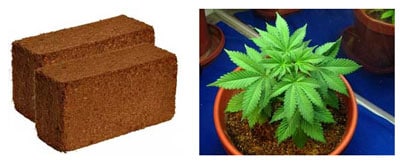
Growing medium
Coco Coir + Perlite – this article shows how I mixed these together with water to become the growing growing medium.
4 x 2-gallon Smart Pots – I should have gotten bigger containers, maybe 3 or 5-gallon. I had to water these ones all the time and if the pots had been bigger, it would have been a lot easier to care fore them because they’d need to be watered less often..
Rapid Rooters – to start seeds (these can be kept in the fridge between grows)
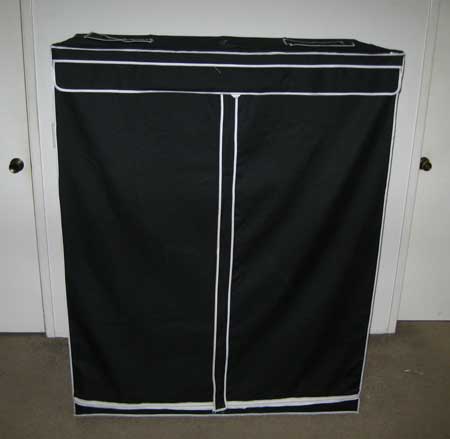
Setup
Sunburst 250W MH/HPS with Built-in Ballast
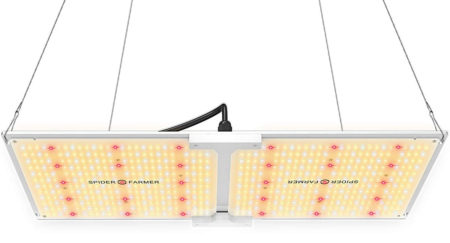
Note: This particular grow light model is no longer available. However, the SF-2000 LED grow light is an ideal replacement that gets similar yields even though it uses less electricity. Honestly, I loved the 250W HPS from this journal, but these new LEDs are better all around. Check out a grow journal featuring the SF-2000 where it smashed the results of another popular LED I tested it against.
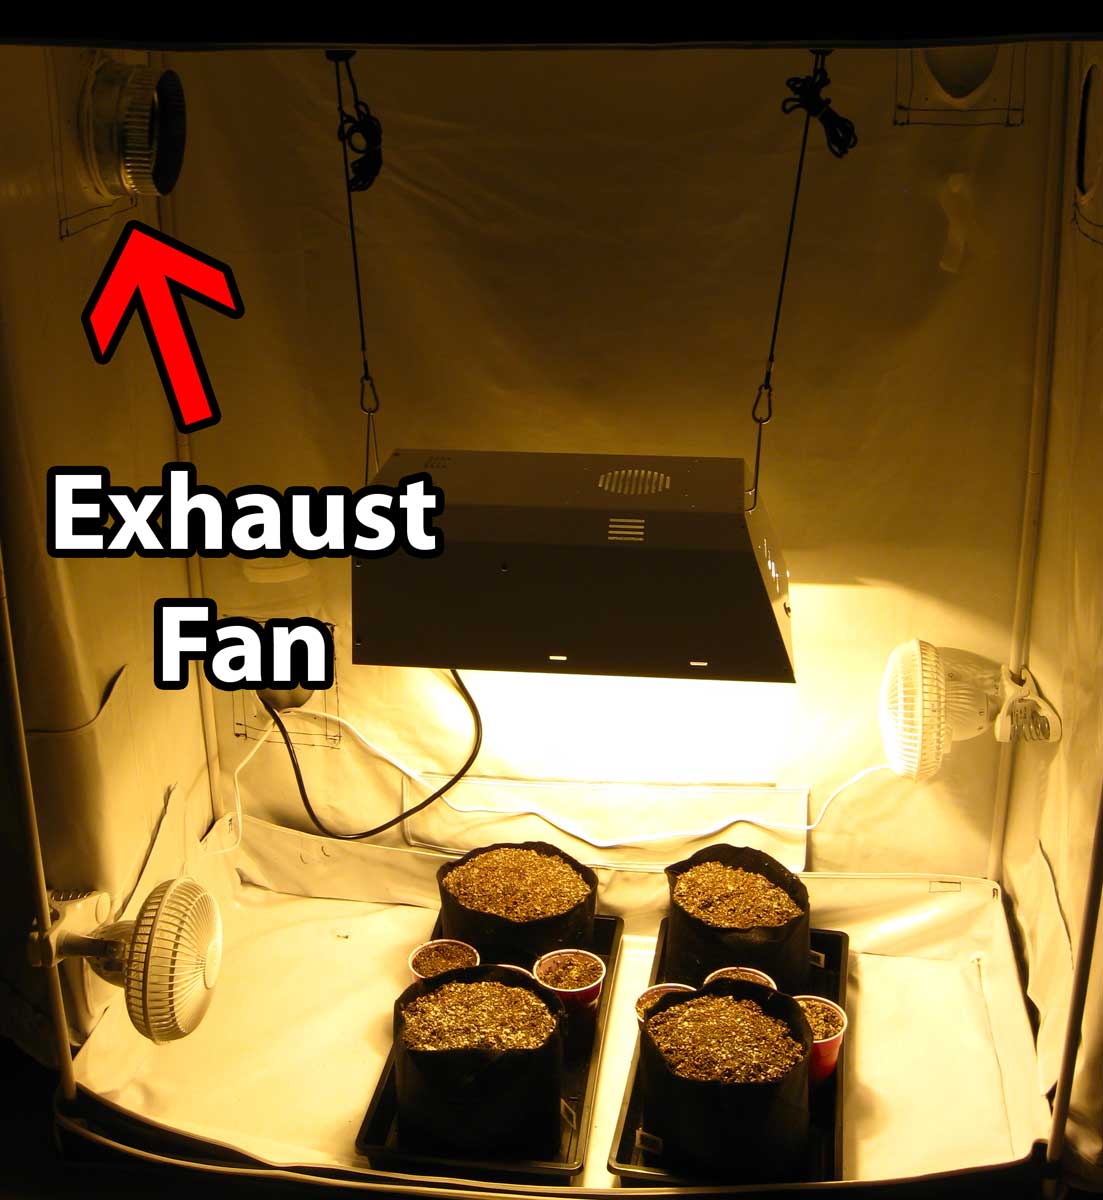
Air Circulation: Two small clip-on fans circulating air around and over plants
Exhaust: Cheap booster ducting fan pointed out from the top inside vent. This is not a powerful fan, but with a small light like this, it’s enough to vent out all the heat and make sure your plants get access to plenty of fresh air. In addition to the ducting fan, if the room started getting hot, I used a window fan pointing out to vent that heat outside. For me, the temperature in the tent stayed around 78-83°F. That’s a little hot, but okay.
Nutrients
CaliMagic (Cal-Mag supplement, essential when growing in coco coir)
Here’s the nutrient schedule I used (PDF) (it’s basically the regular GH schedule for the Flora trio, but I cut the dosages in half and converted everything to imperial measurements (tsp, etc). You can use this schedule exactly as is for growing cannabis in coco coir.


Other Random Tools
Rope Ratchets to hang light
Measuring spoons (I got this particular set because it goes down to 1/32 tsp)
Dropper/Pippette (for pH testing)
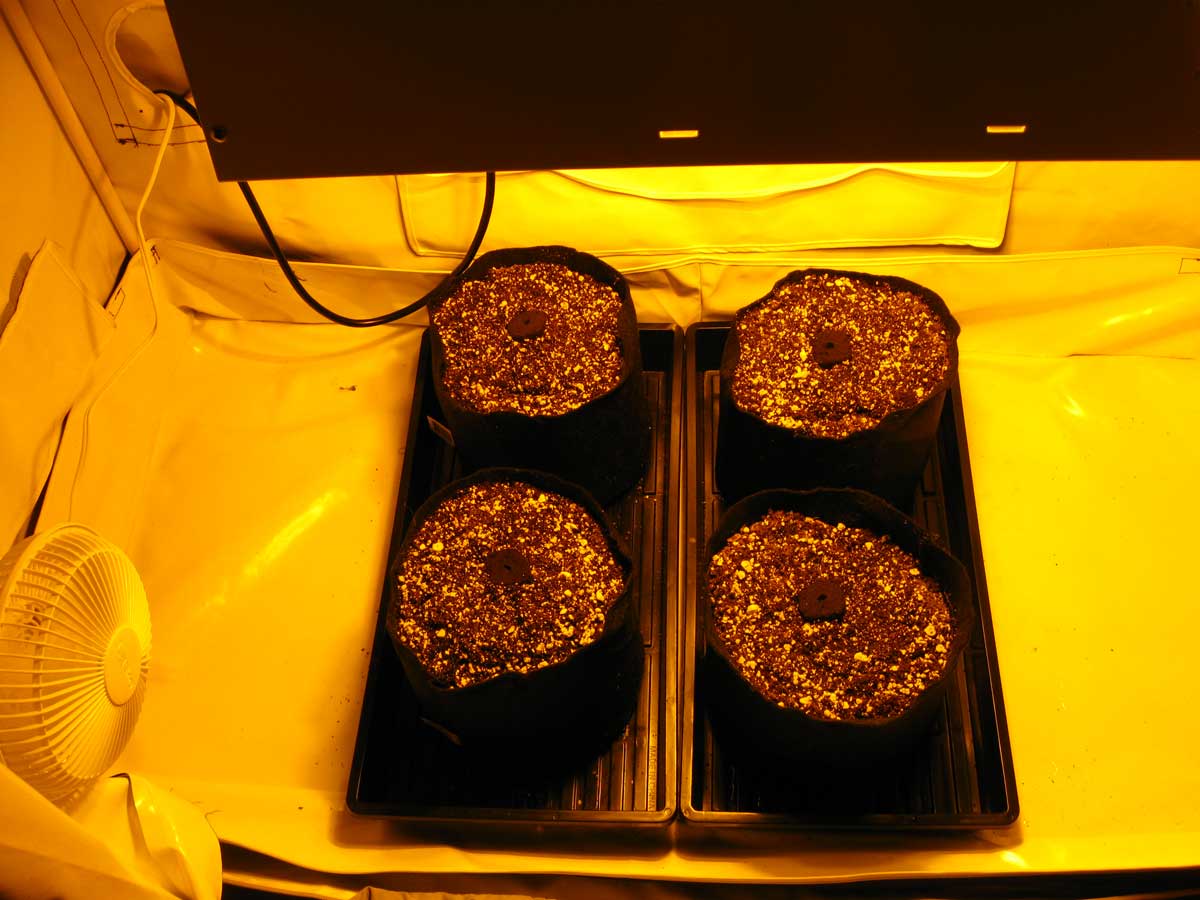
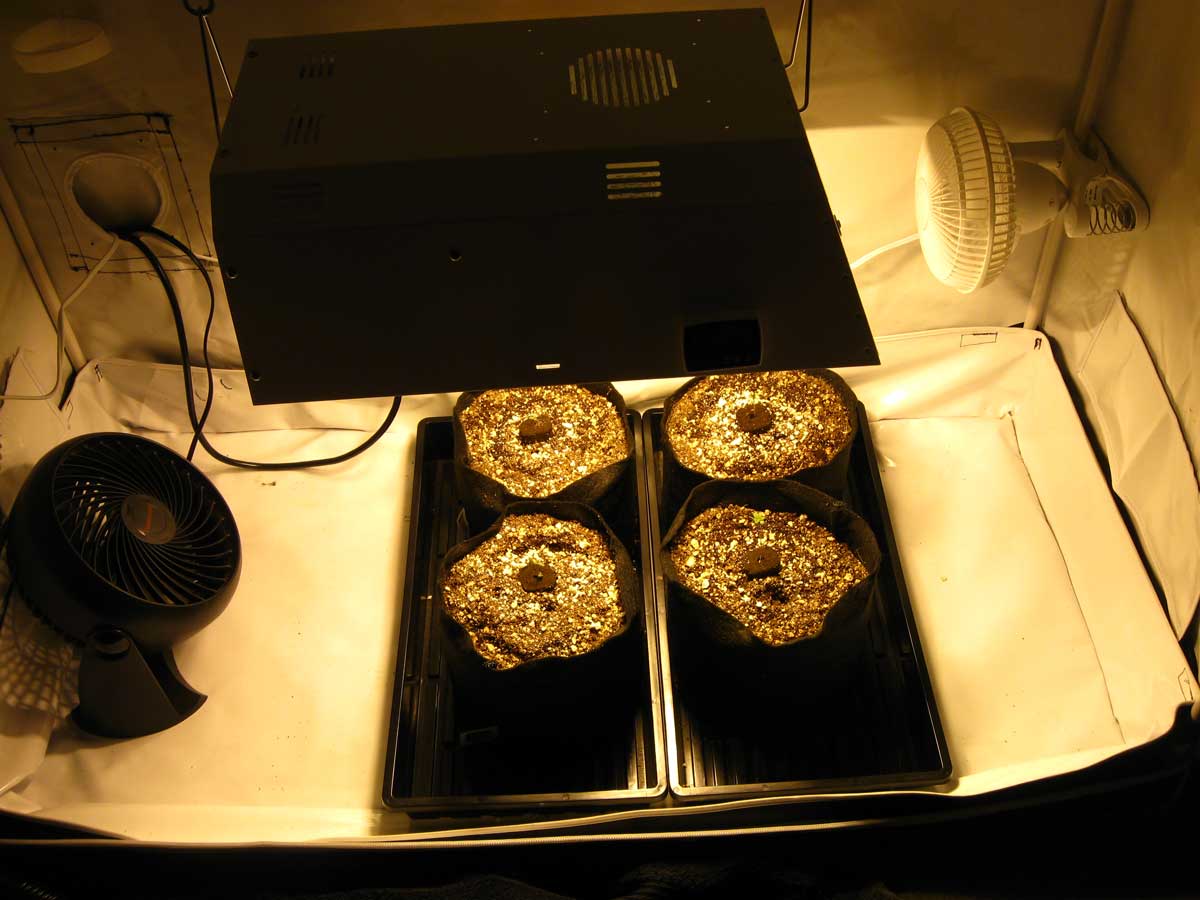
October 13 – 19
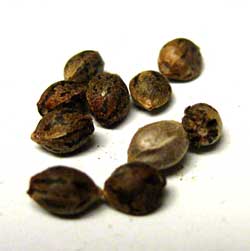
Baby Sprouts!
I noticed that the seedling in the lower right corner, the Jack 47, had two taproots coming from the same seed
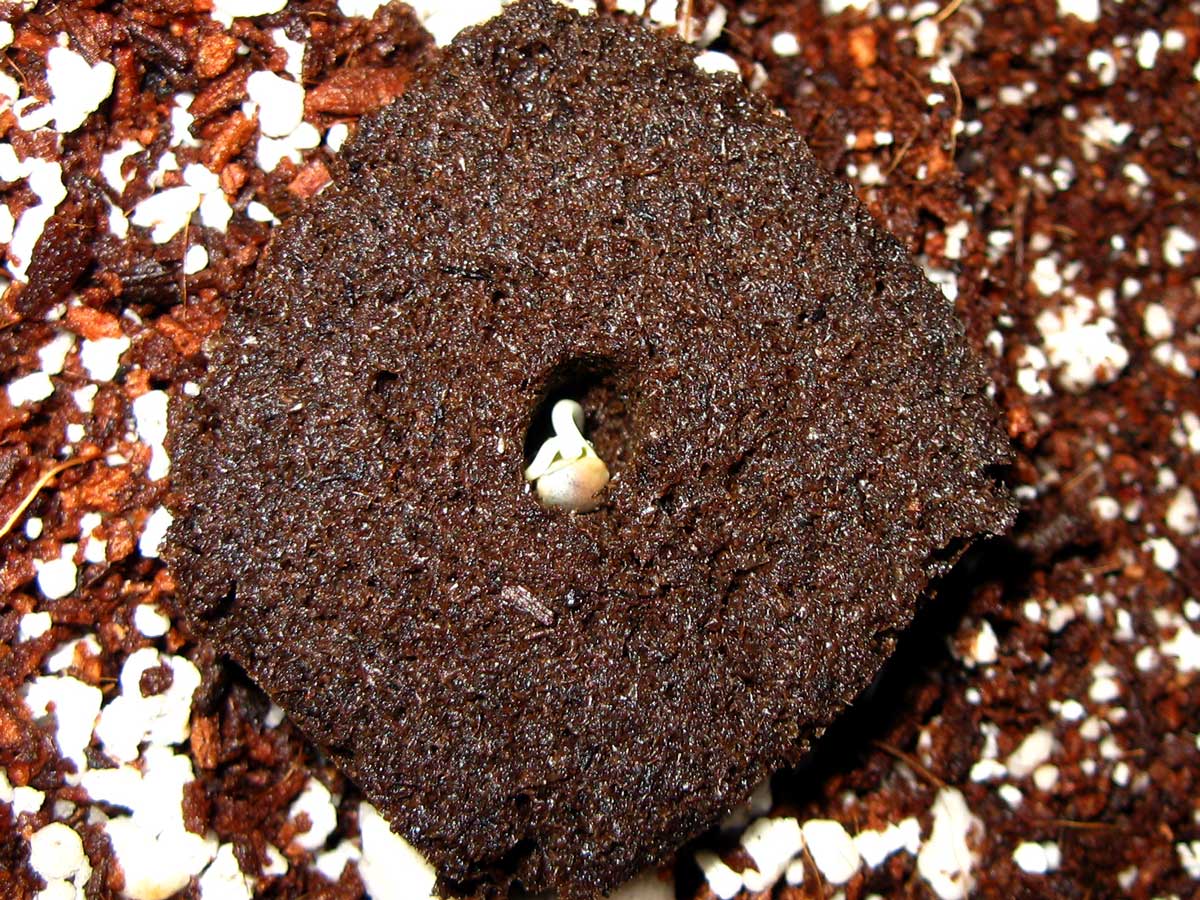
When the leaves appeared, there were two different distinct sprouts – “twins.” I’ve heard of this happening before, but it was kind of neat to see it in person.
You can see a tiny set of leaves behind the main sprout
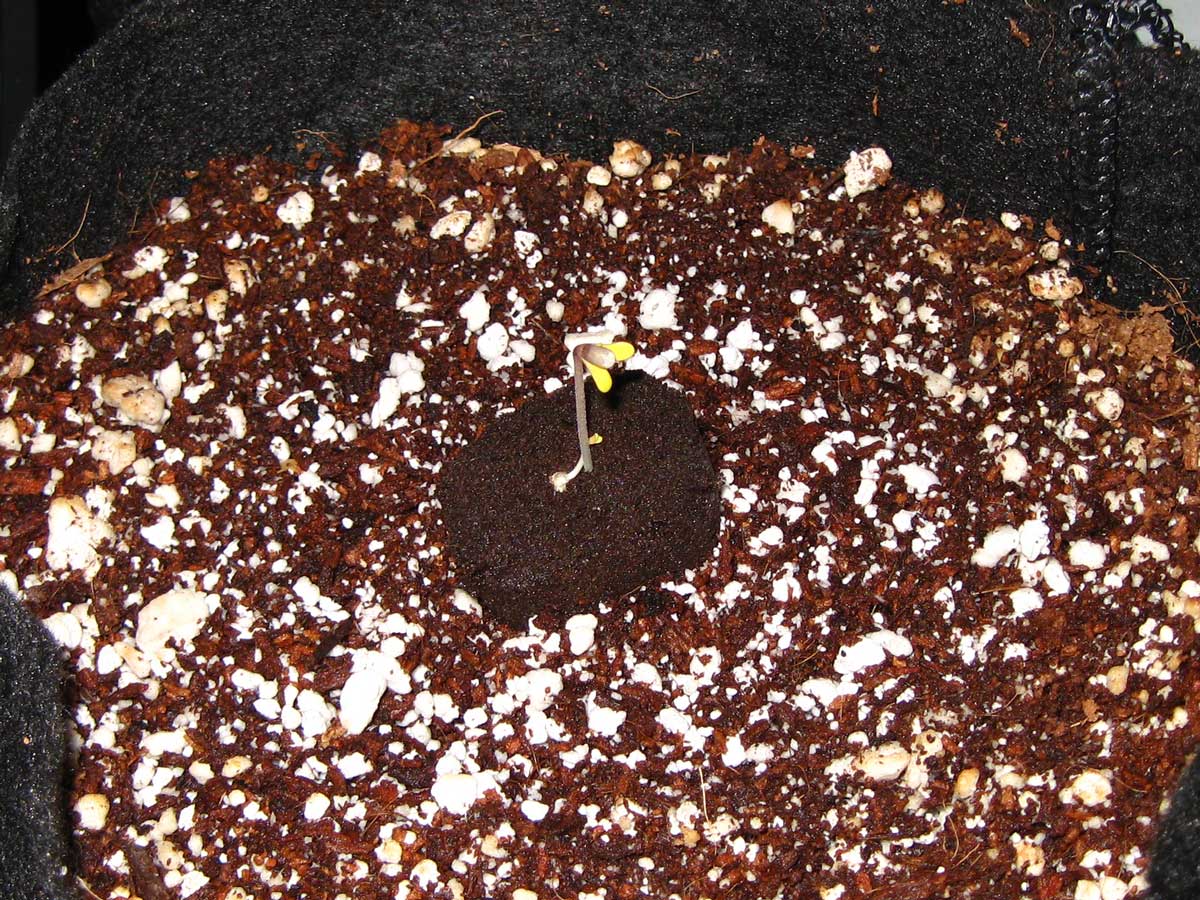
At this point, I didn’t realize the main sprout was a tri-leaf plant. As you can see if you look above, there are three cotyledons (round leaves) on the tall seedling, while the tiny seedling only has two.
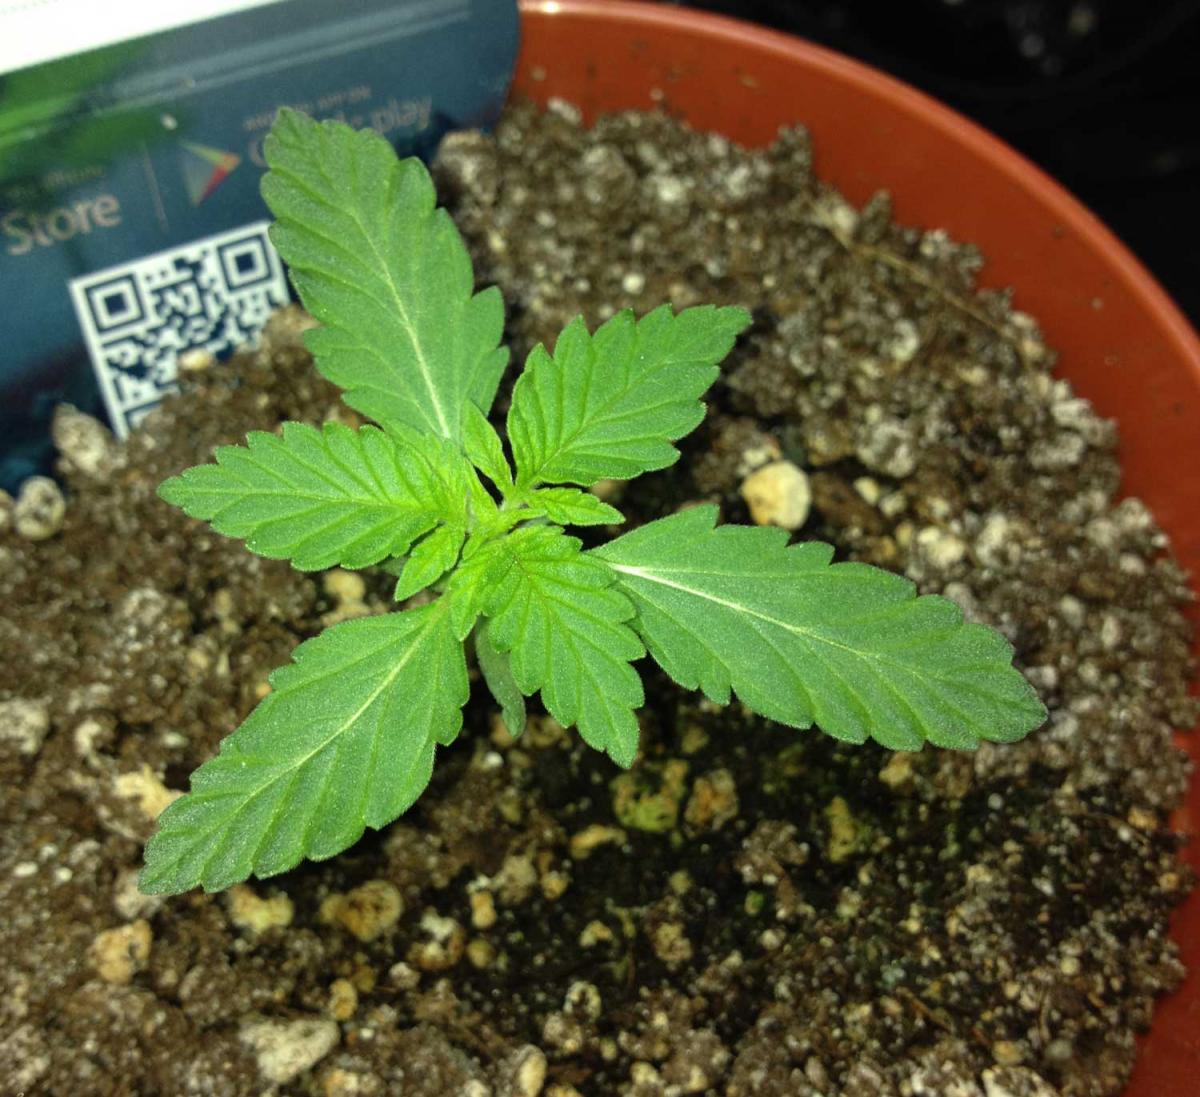
I decided to kill the smaller sprout, though later I come to regret that as I end up running into all sorts of problems with the tri-leaf plant. From what I understand, tri-leaf plants are caused by polyploidy, which happens when their is abnormal cell division. This weirdness may also have been what caused there to be twins in this seed. In any case, I eventually have to throw away the tri-leaf plant. I wonder if things would have gone better if I killed the tri-leaf and nurtured the two-leaf Jack 47 plant.
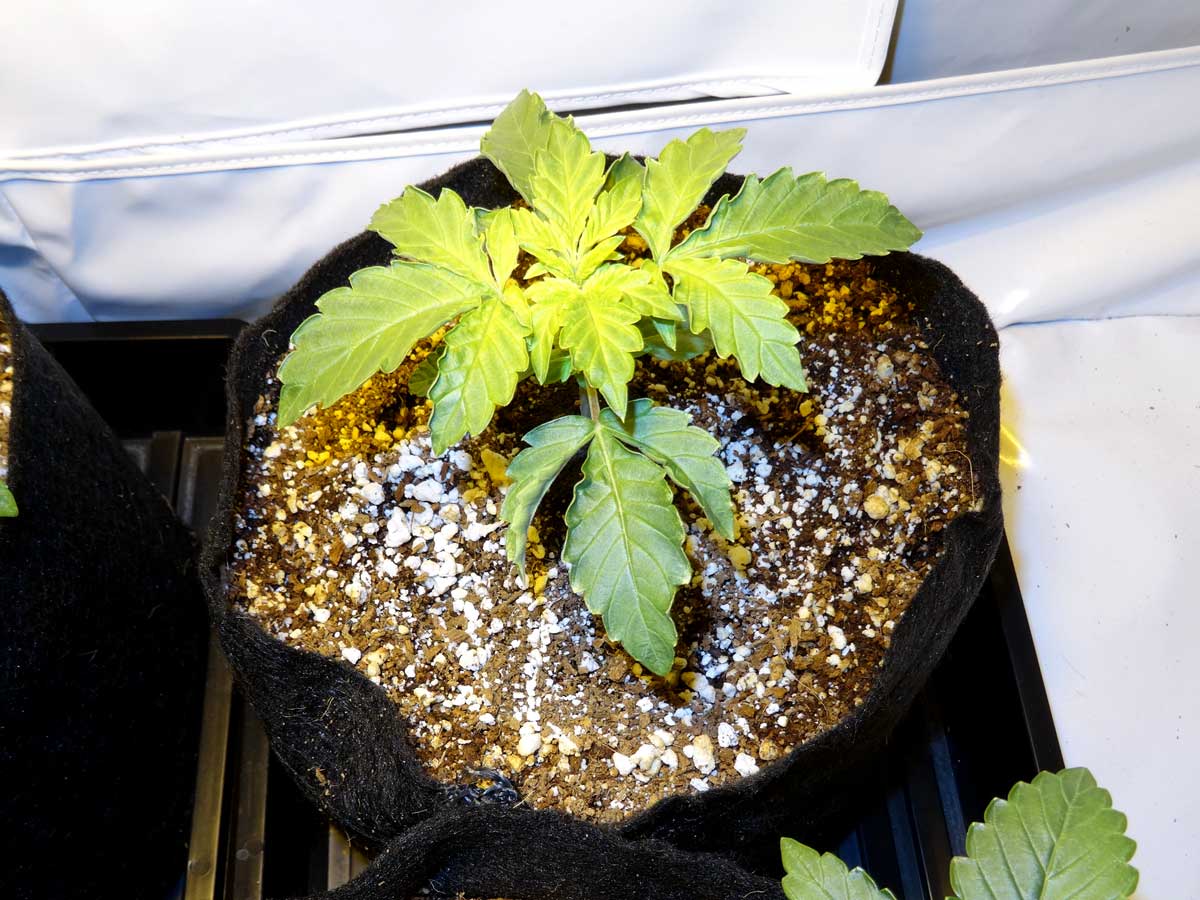
Here’s the Jack 47 tri-leaf at the end of week 1 – it has three leaves at every node instead of just two. It’s beautiful isn’t it? At this point I’m hoping that extra leaves at each node will end up with more bud.
October 20 – 26
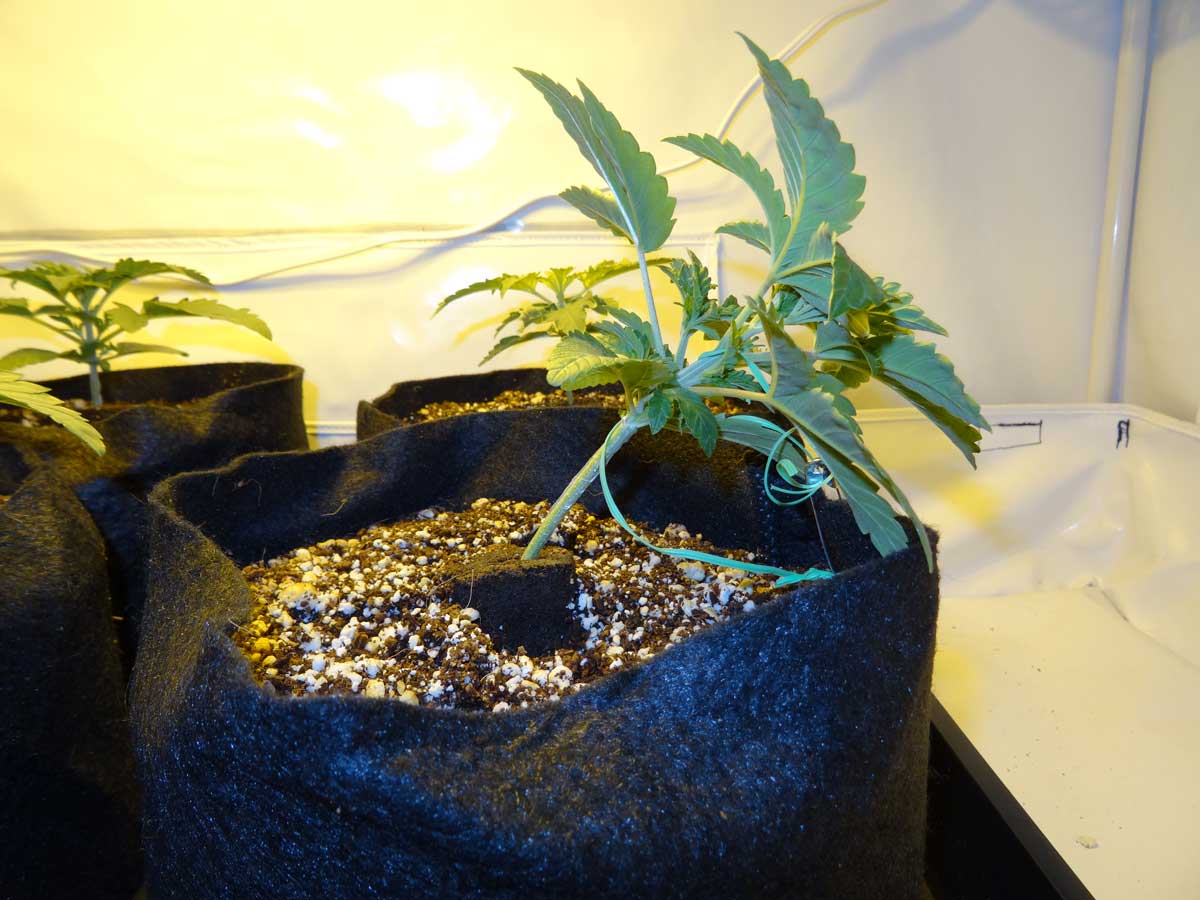
Started some light LST (low stress training) to pull the main stems down and away from the center.
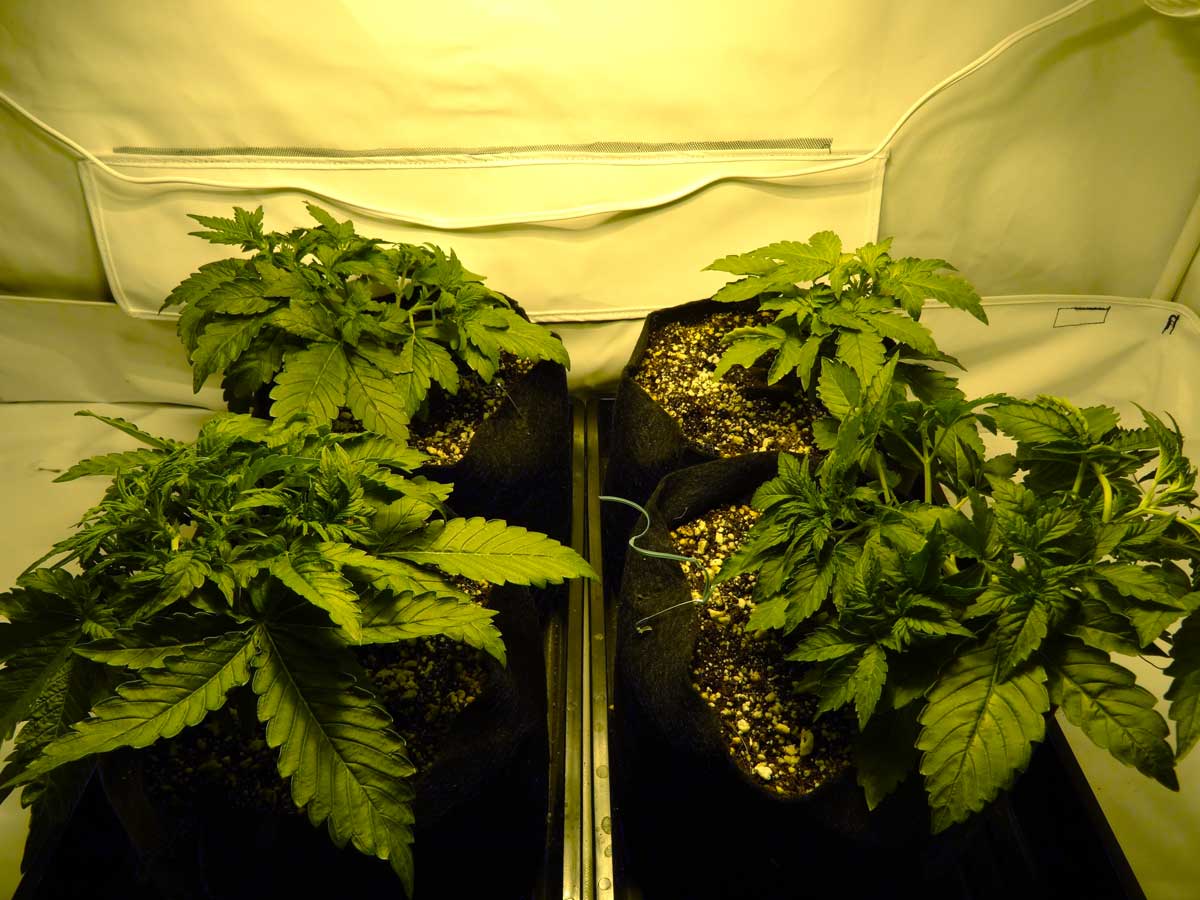
Here they are at start of Week 2
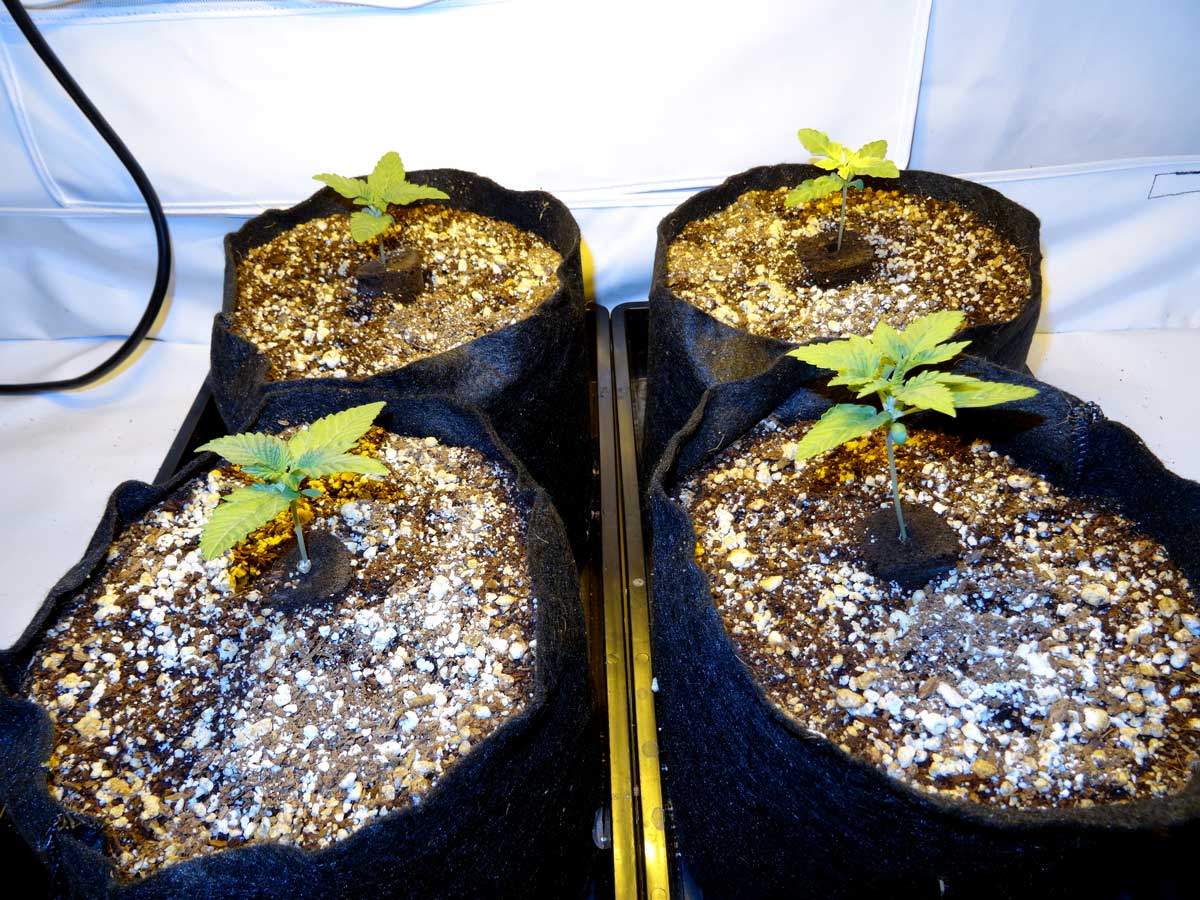
I do some LST, starting with the Jack 47 in the front right
End of Week 2
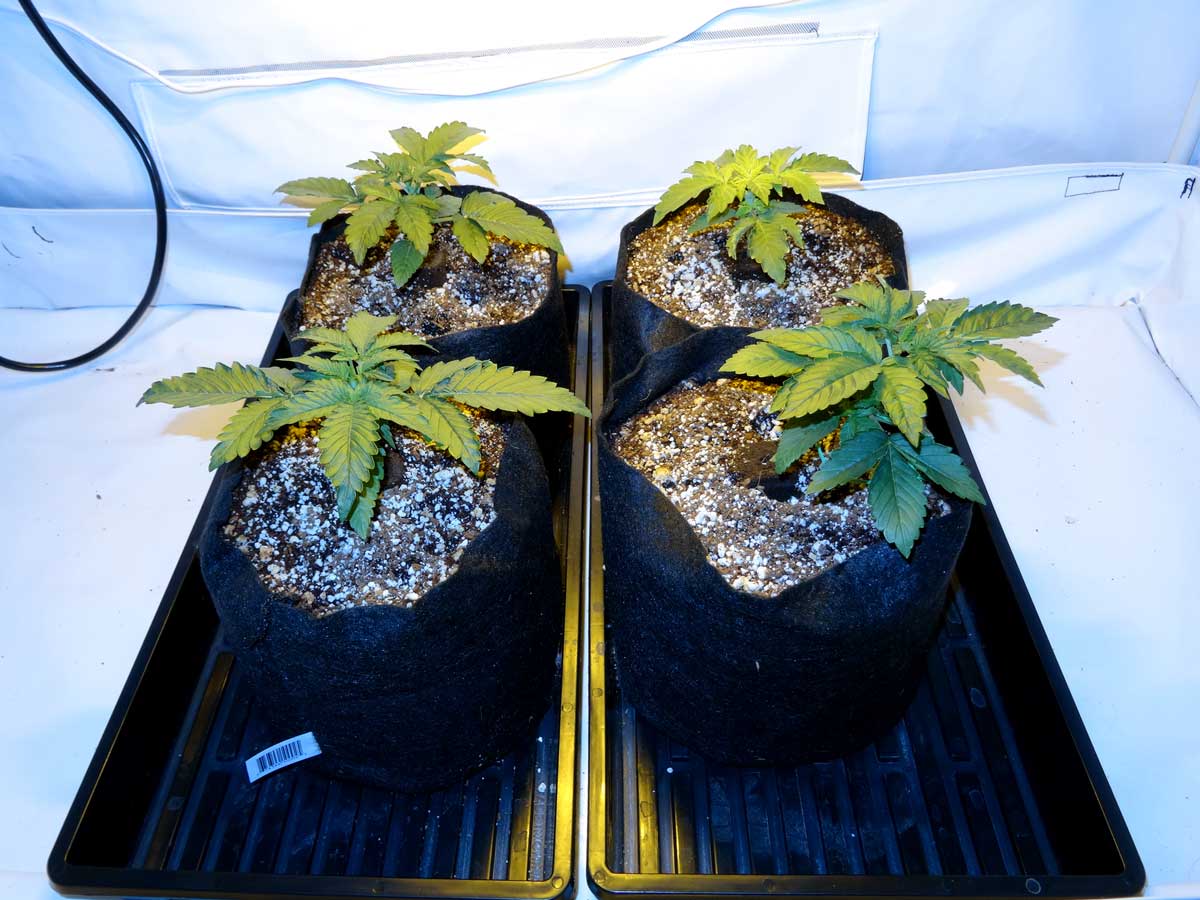
All the plants seem to be growing well except the Sour Diesel. It has been suffering from what looks like an iron deficiency ever since it first sprouted.
Here’s a closeup
The leaves come out yellow, then slowly turn green. I think it may be an iron deficiency.
I thought it would grow out of it, but by the end of week 2 I decided to check the pH of the runoff (which I should have been doing the whole time) and saw that the Sour Diesel’s runoff was way too high.
I started giving nutrients at a 5-5.5 pH every time I watered the Sour Diesel plant until the runoff started coming out around 6. I think it took a week or two. I also started giving more CaliMagic, now at 1/2 tsp/gallon every watering. As you’ll see the yellowing eventually clear itself up after a while with the Sour Diesel.
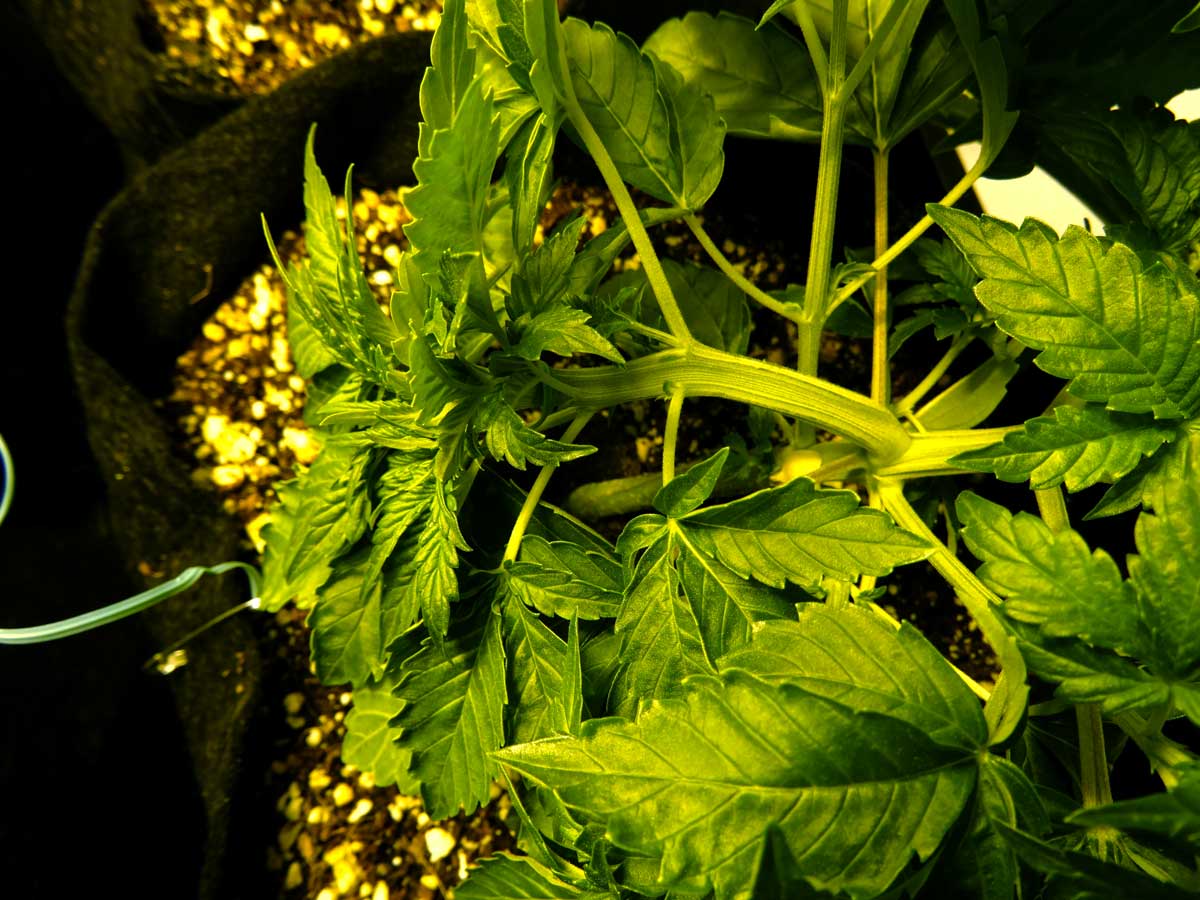
The Jack 47 does something weird in week 2. One of the growth tips kind of splits off where a growth node will be, kinda like the plant topped itself on just one of the three sides. So it had three growth tips per node, and one kind of splits off. On the right is a normal cola, now with just 2 leaves per node. On the left side of the split, the stem grows very strange, a whirl of leaves with no apparent growth tips.
Left – strange whirled cola. Right – now is a normal cola with 2 leaves per node.
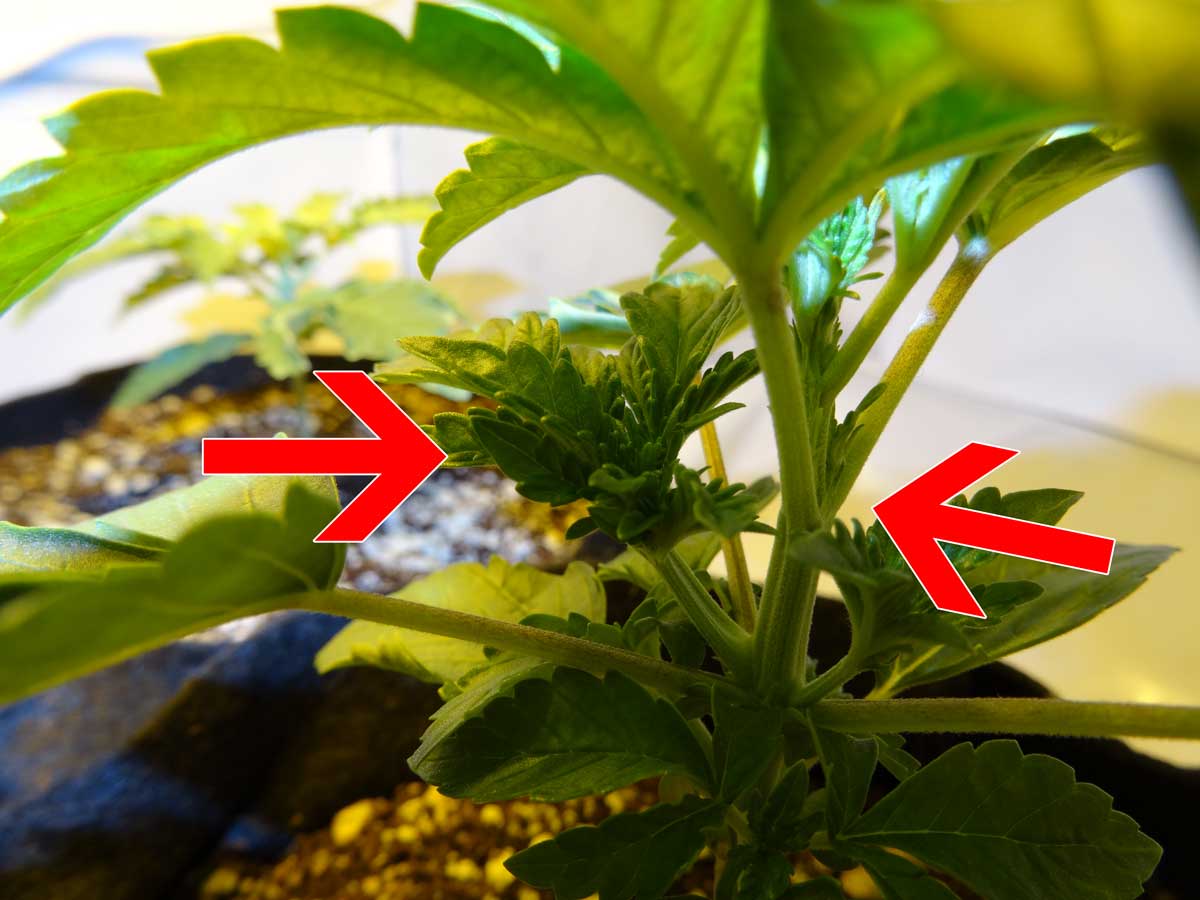
I don’t know it yet, but this whirled cola is going to become a useless, leafy mass. I should have cut it off at this point. Though that probably wouldn’t have changed the fate of this plant….
October 27 – November 2
Pistils appear on the Blue AutoMazar and Critical Jack at the end of week 3, both showing pistils on the same day.
I did more LST on all the plants this week, though the Sour Diesel is just pulled over a bit since it’s smaller than the others.
Low Stress Training – I’m trying to pull the main colas down and away from the light
Here’s what the plants look like after being LST’ed
About plant training
When I started LST’ing the main stems down and away from the center of the light, my idea was I wanted to break the apical dominance (the tendency of the plant to grow just one main cola) by depriving the main colas of light. My hope was that if the main cola didn’t have enough light, this would cause the lower branches to become main colas.
My idea was to do this instead of Topping or FIMing (pinching/cutting off the tip) the plant, which is how I would normally start a plant training regiment, but I didn’t want to cut these plants since they were my first autos and everyone tells you not to cut autos.
Well, as you’ll see in a little bit, this strategy of bending away from the light to break apical dominance did not work for any of the plants. These autos appear to have an incredibly strong apical dominance. Even when the main colas were deprived of light, the plant still focused on them instead of the side buds. So in the end I actually bent the main colas back under the light. You’ll see the crazy bending I did when you see the plants’ “skeletons” after harvest.
Next time I grow autos, I definitely plan to FIM them. Despite what everyone says, I think the plants would have recovered quickly and it would have broken the apical dominance while giving me a better platform to LST.
November 3 – 9
Pistils appeared on the Sour Diesel at the beginning of this week. At this point all plants have pistils except the Jack 47.
We had a crazy heat wave this week, and I kept accidentally overwatering the plants to make sure they didn’t dry out, and to help them cope with the dry heat. They are looking a little droopy but still growing fast.
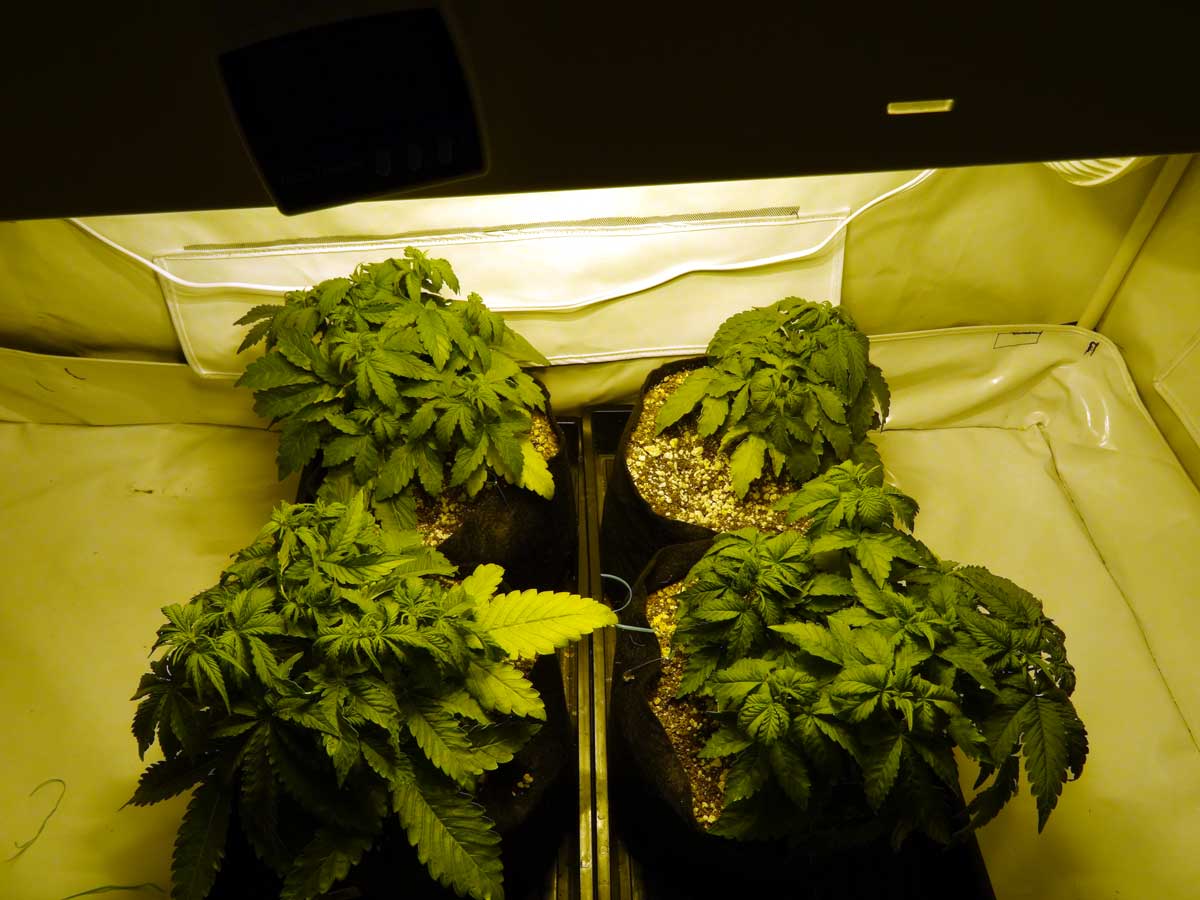
Here they are at end of Week 4 – still droopy but growing fast! Some of the plants are starting to stretch and I’ve bent the plants down wider to keep things flat.
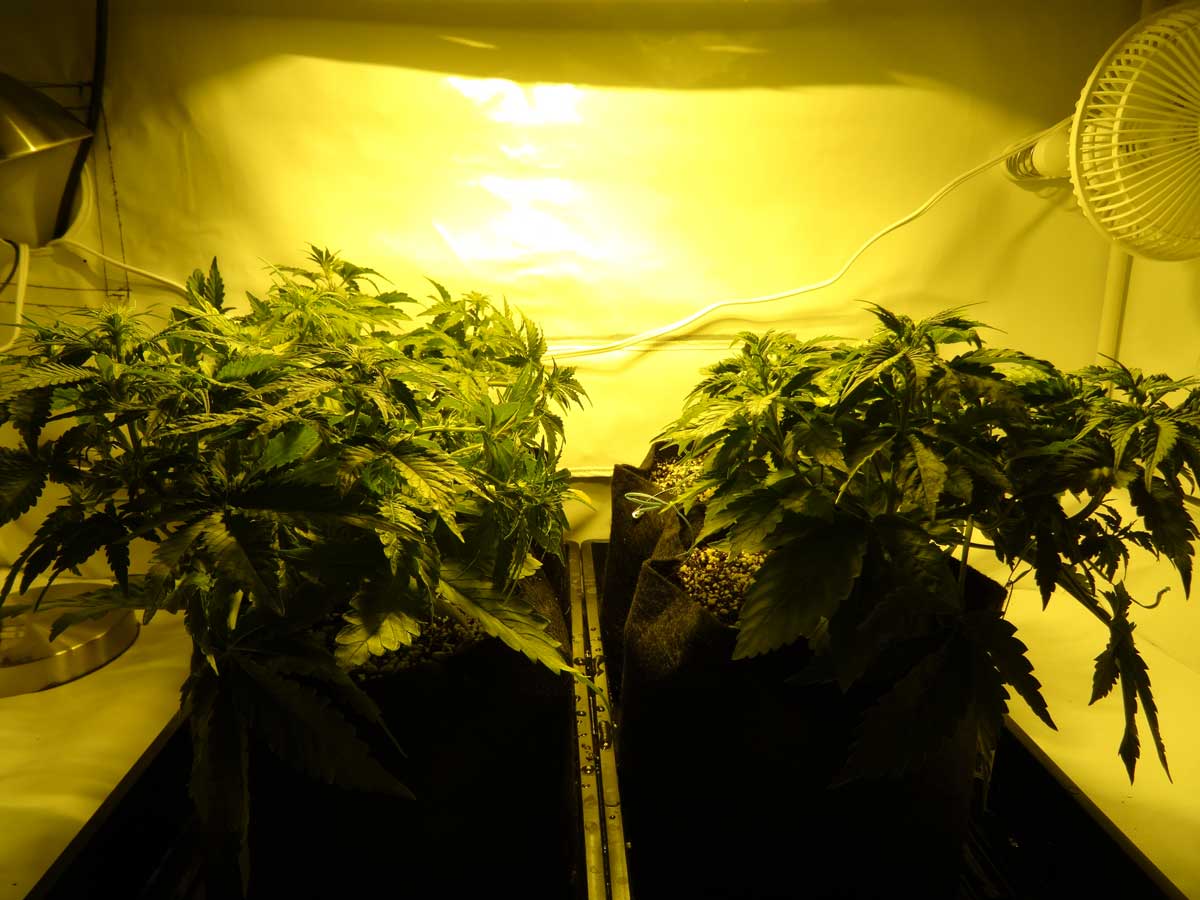
For the next few weeks, I will be bending down any growth tips that grow taller than the others. The goal is to keep the whole canopy the same height, so all plants get the same amount of light from the 250W HPS.
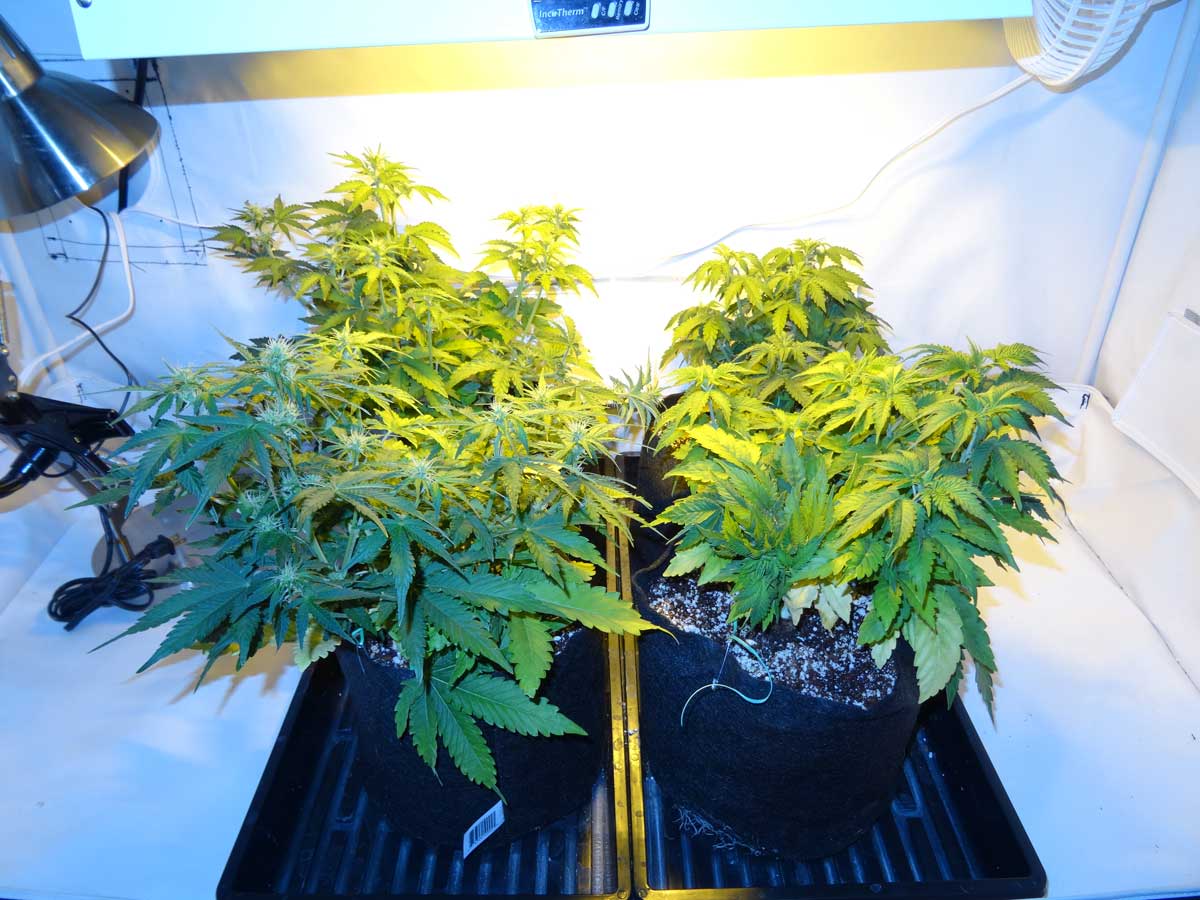
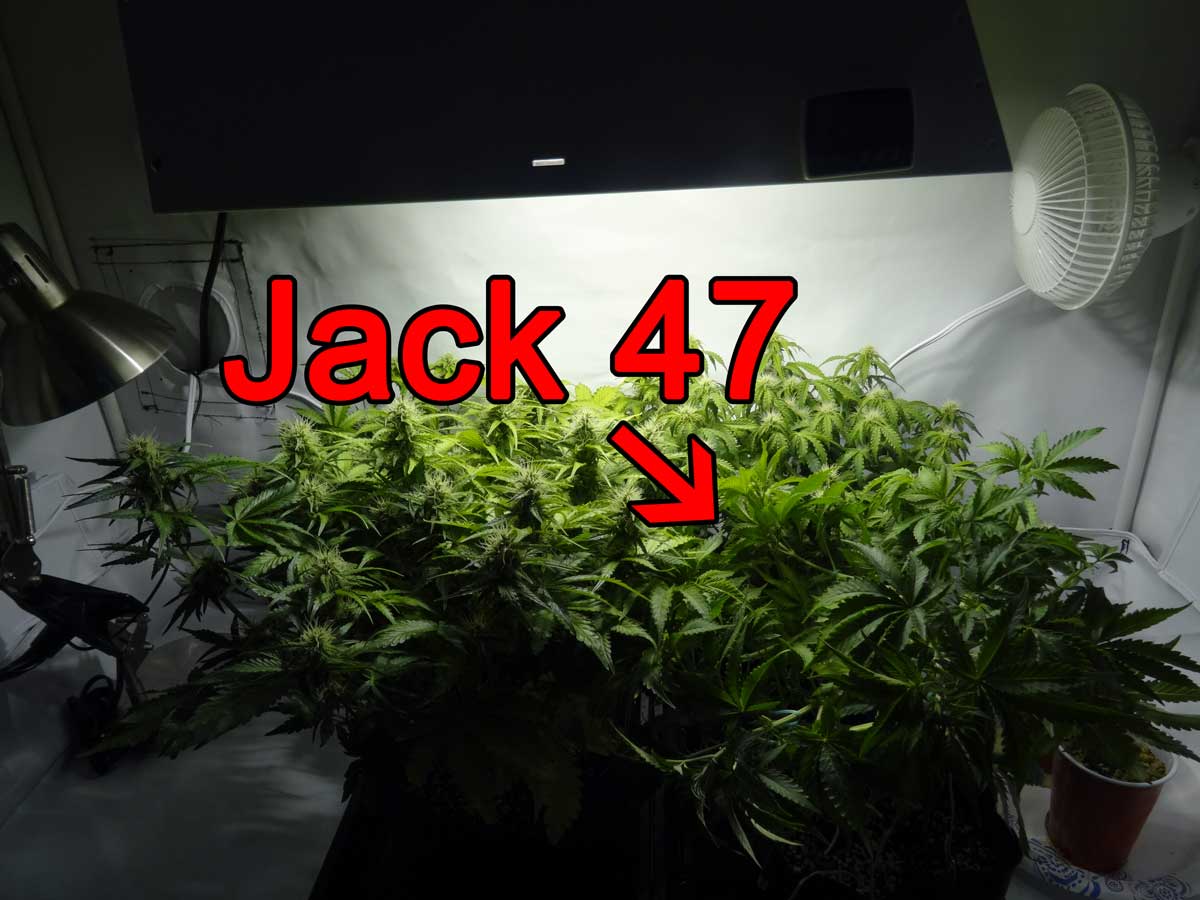
November 10 – 16
Jack 47 shows a few pistils. At this point I’m hoping it’s just going to flower a little later than the others, but considering how weird this plant has been so far with the twin seedlings, the tri-leaf and the splitting of the main cola, I’m not holding my breath.
I installed a webcam last week, and I’m using this lamp (with a heavy base) to hold it up. There’s no light bulb, I’m just using the frame to hold up the webcam.
They’re really starting to stretch now! The two on the left (Blue AutoMazar and Critical Jack) have really taken off and started producing buds. The Sour Diesel is catching up, and the Jack 47 in the front right hasn’t grown any buds yet.
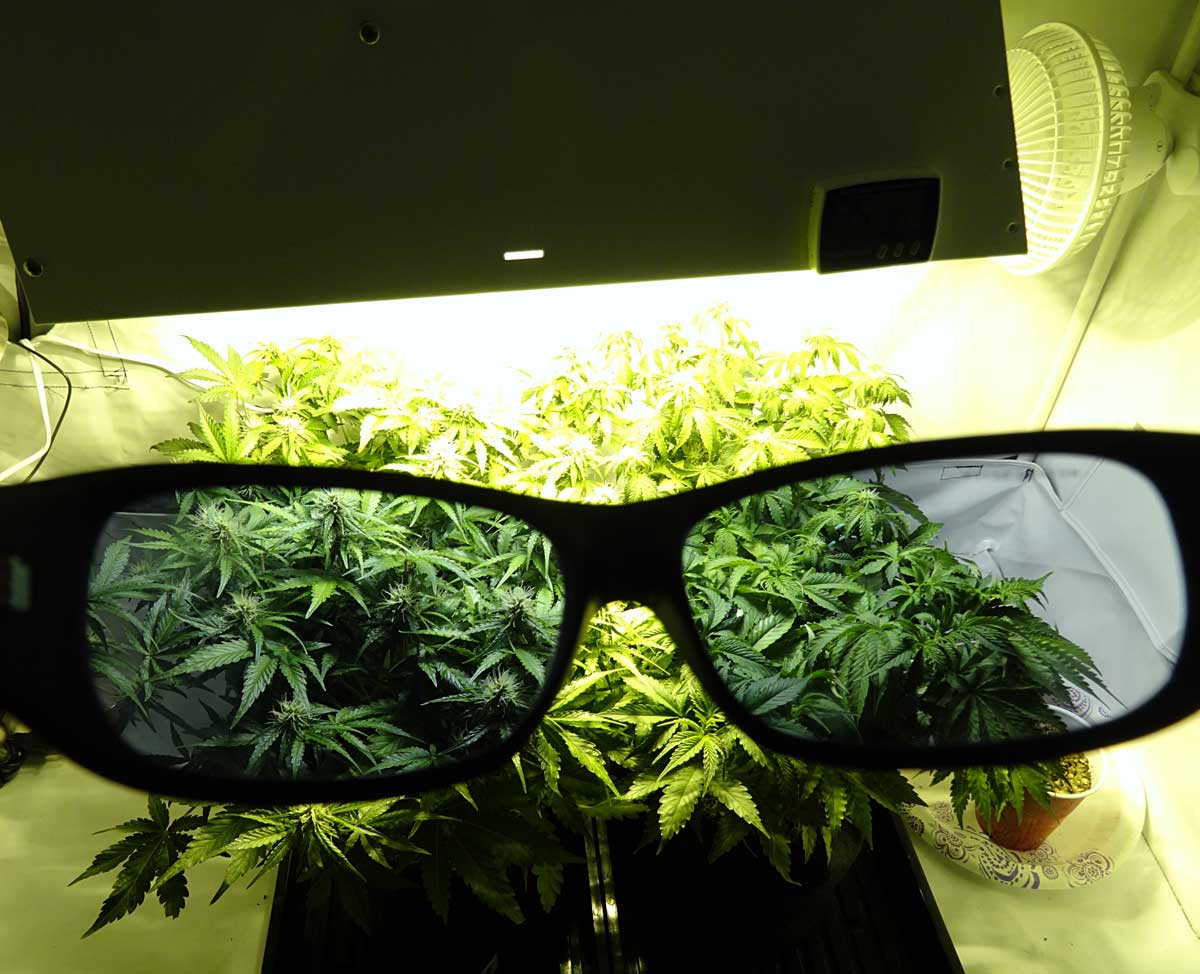
At the end of this week, I got some Method 7 glasses, which let me see my plants in full color under the HPS grow light, and it can also be used to take better-color pictures. So from now on, be prepared for better pics! 🙂
I got a pair of Method 7 glasses made for HPS and show your plants in true color under HPS grow lights. The Method 7 company also have an LED version for you LED growers out there!
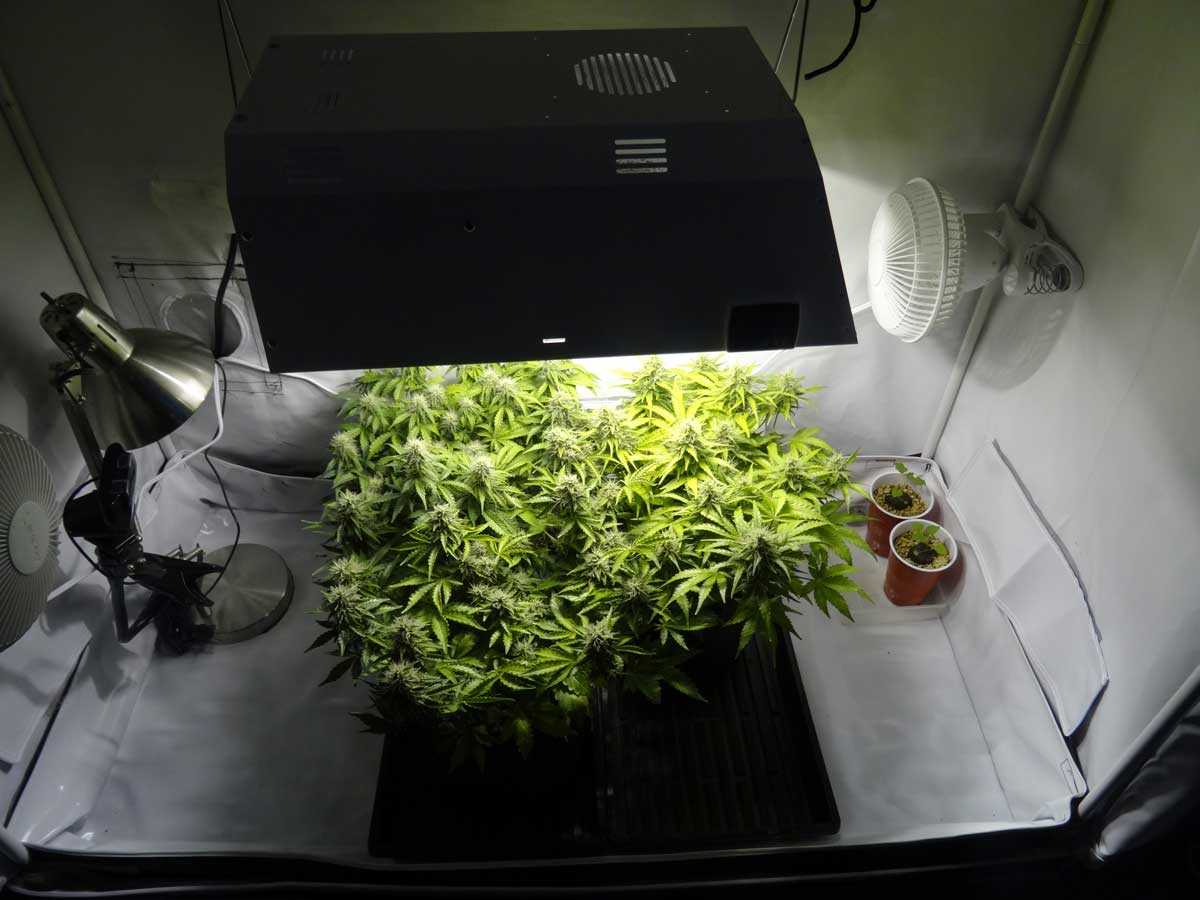
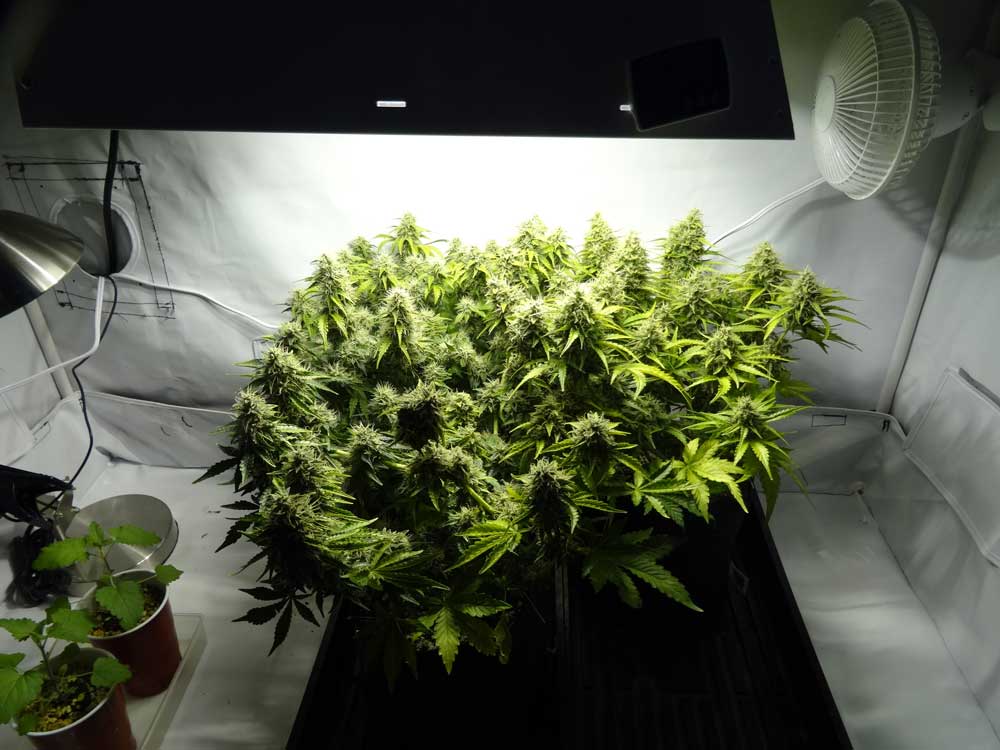
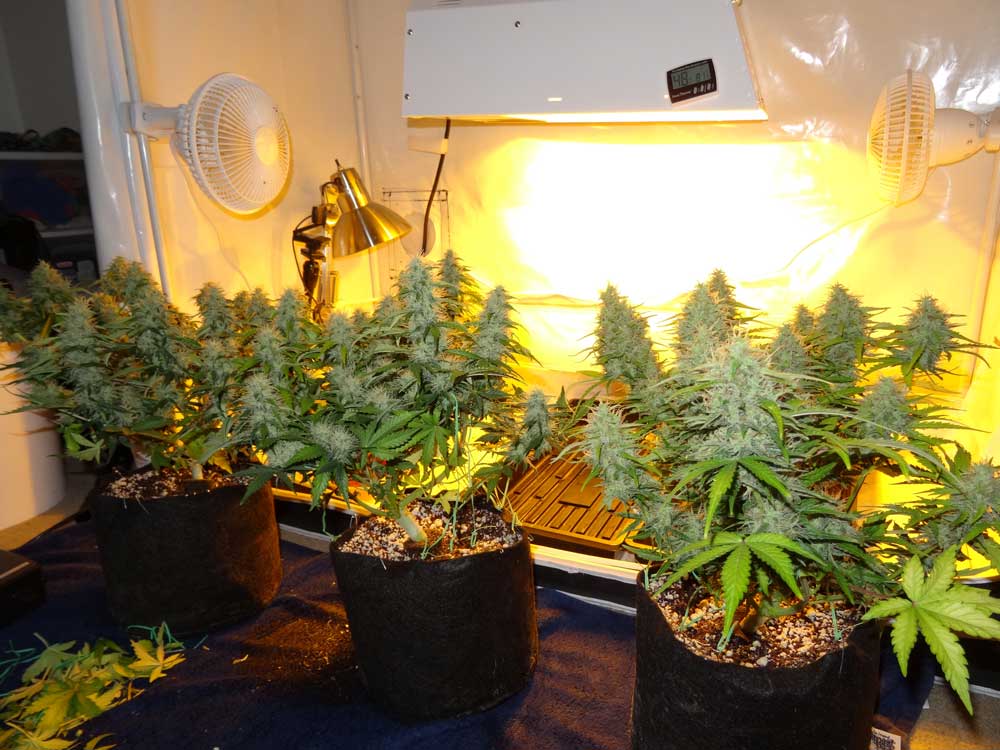
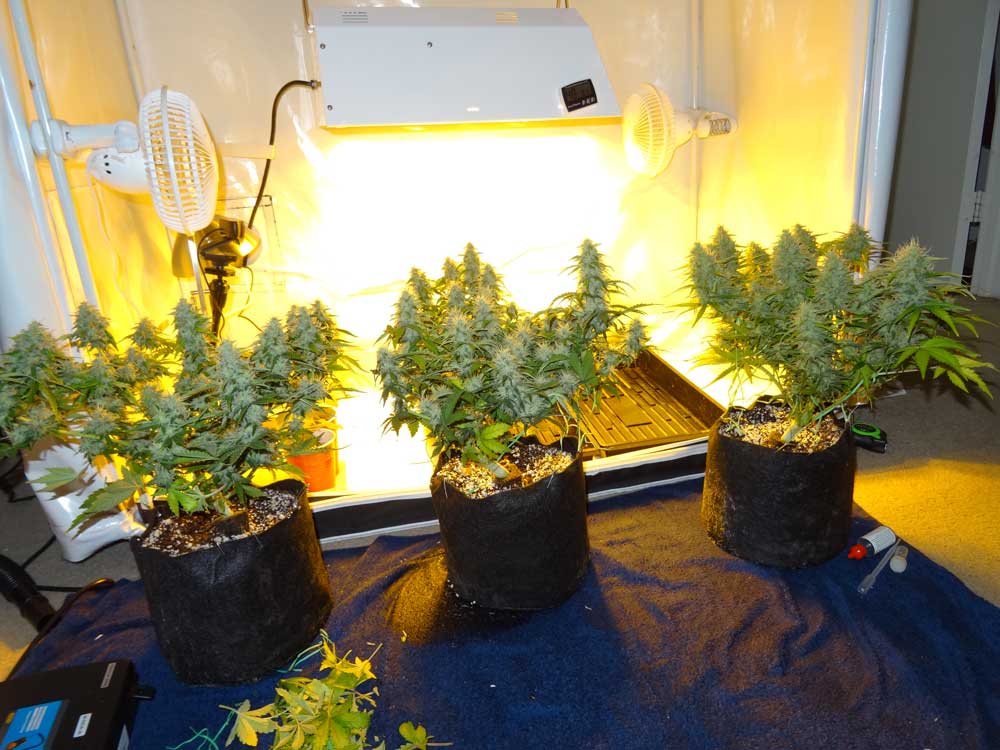
November 17 – 23
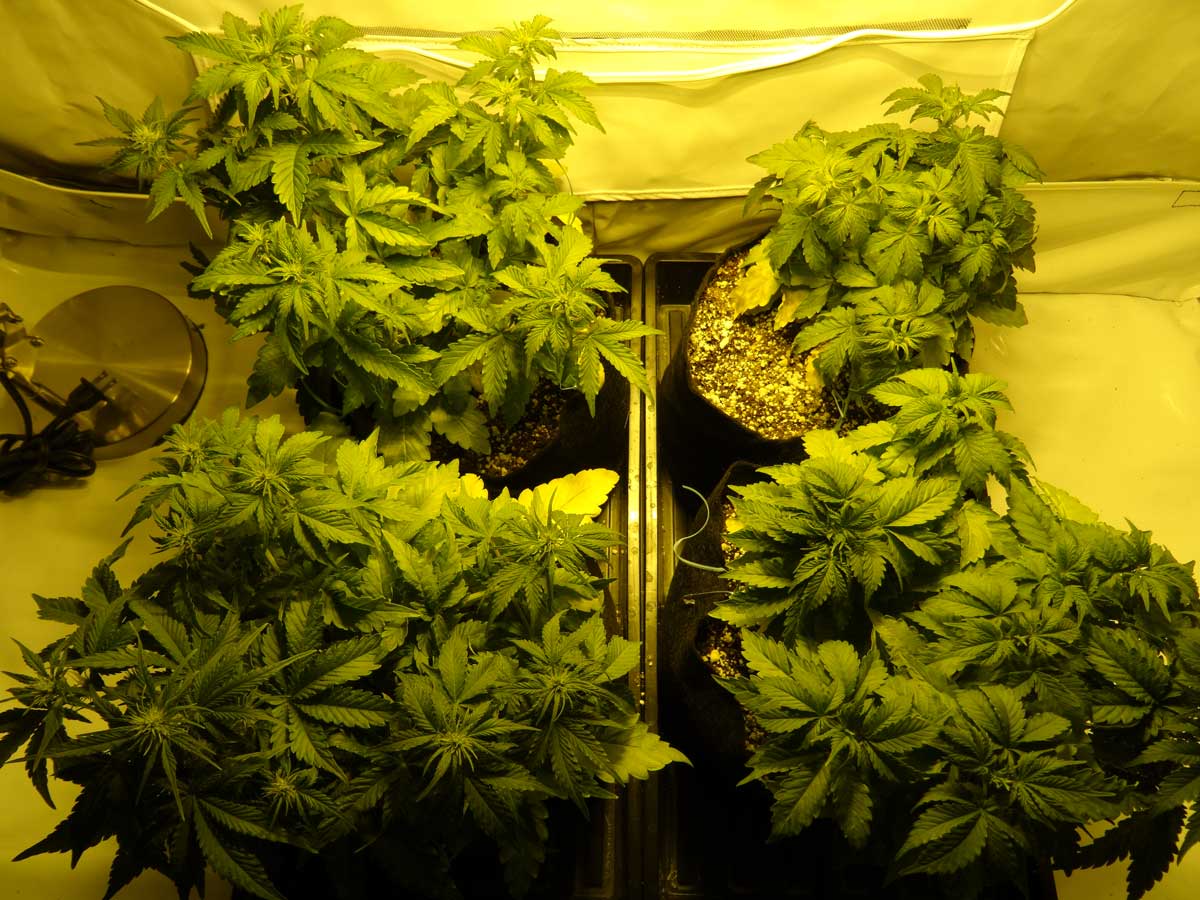
Here are the plants at the beginning of Week 6
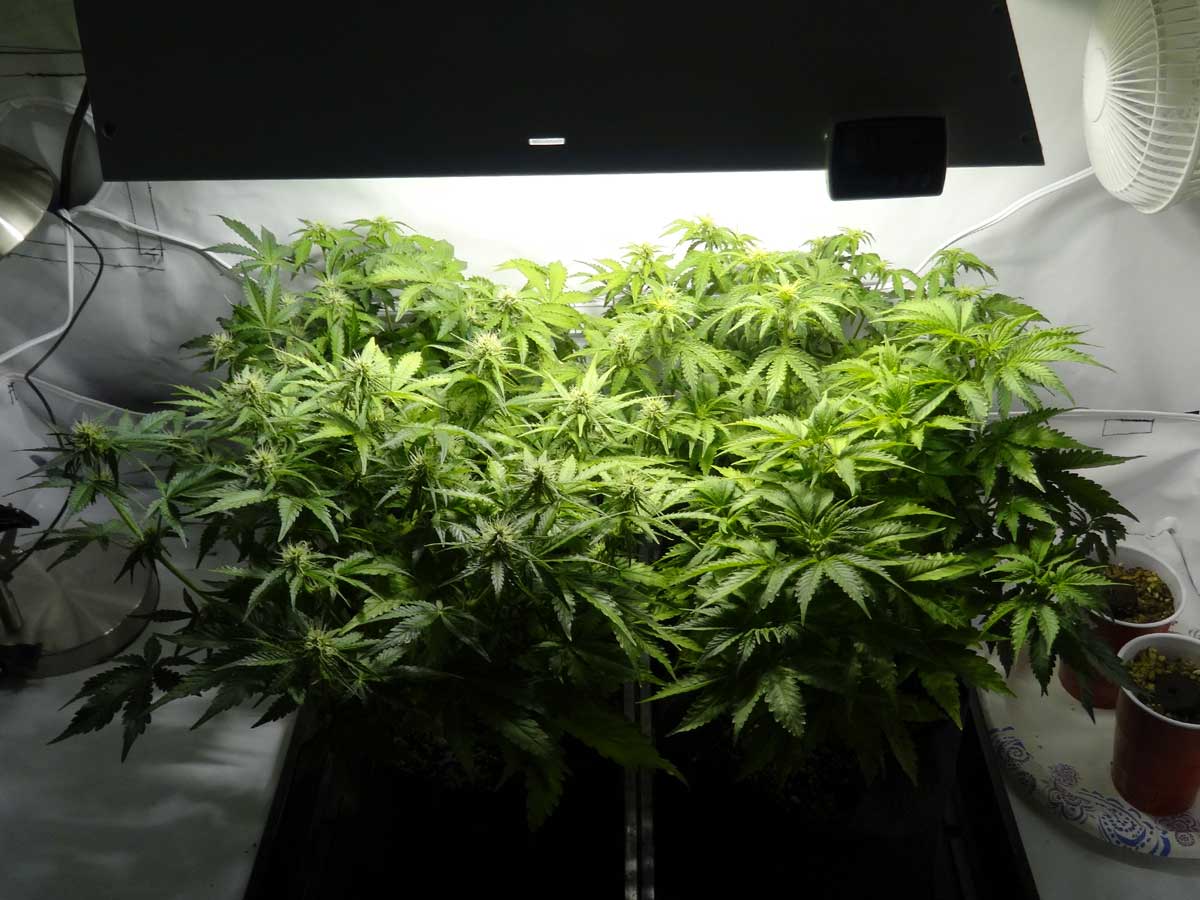
A view from the side
Everyone is now in full swing making buds except for the Jack 47 plant in the front right, which still only has a handful of pistils.
The Sour Diesel plant is still suffering from yellow new growth, like it has from the beginning. But it is now growing vigorously and I had to do some LST to keep the height down. The buds are also beginning to form. We’ll see what happens next with this plant!
The Sour D still has yellow new/inner growth, but seems to be growing well now
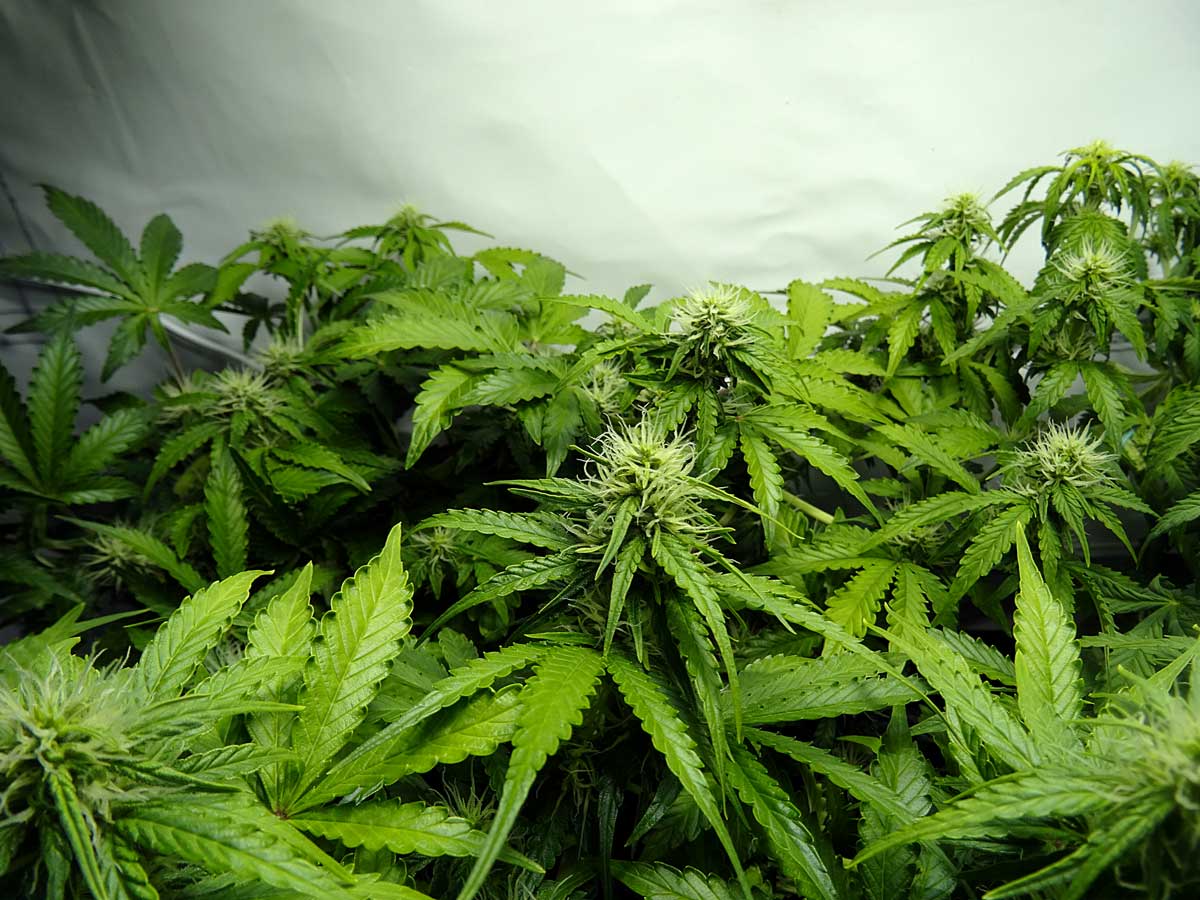
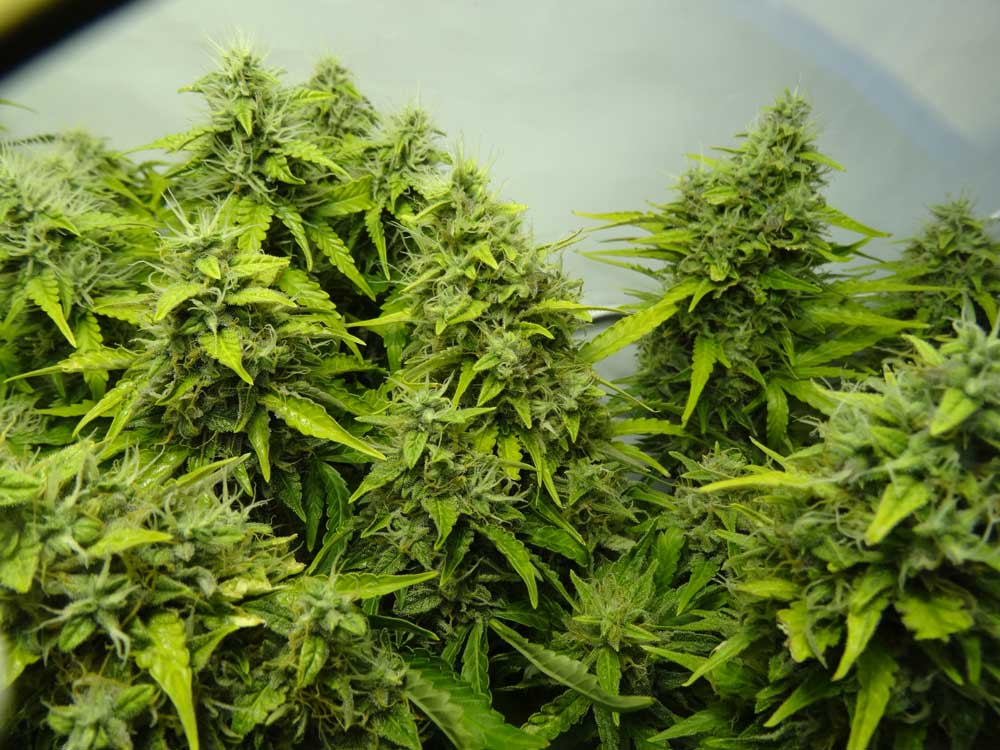
I did some LST and light defoliation on the other plants
The buds are starting to look pretty!
November 24 – 30
Tossed the Jack 47. It wasn’t making buds yet, and still just had a few hairs/pistils around the joints. It has been a thorn in my side the entire grow. At this point, I decided it was just a waste of space. Even if it started flowering immediately, it would still be 4 weeks behind the others, and honestly I was a little annoyed with the plant. I felt a sense of relief when I threw it away.
December 1 – 7
The two new plants in solo cups (on the right) are catnip plants I started growing for my cat 🙂

December 8 – 14
Busy week!
First off, I started using the Lux Meter we had laying around, and I found out I could move my plants a few inches to get more light to them. I explain it all here:
Learn more about using Lux Meters for growing cannabis
It’s SMELLY in the grow room this week. I’ve just invested in some ONA blocks for the living spaces in the home to keep any guests from being assaulted by the smell of cannabis when they come through the door. ONA products are extremely good at getting rid of odors and replacing them with a clean ONA scent.
The only thing to keep in mind about ONA products is they can’t share air with your flowering plants. For example if you put an ONA product in your tent with your flowering plants, all your buds with smell/taste like perfume after harvest, because the ONA is removing their natural smell and replacing with ONA smell. The perfume smell never goes away – it’s permanent, even after months and months. I learned this one from experience a few years ago, so don’t make the same mistake I did!

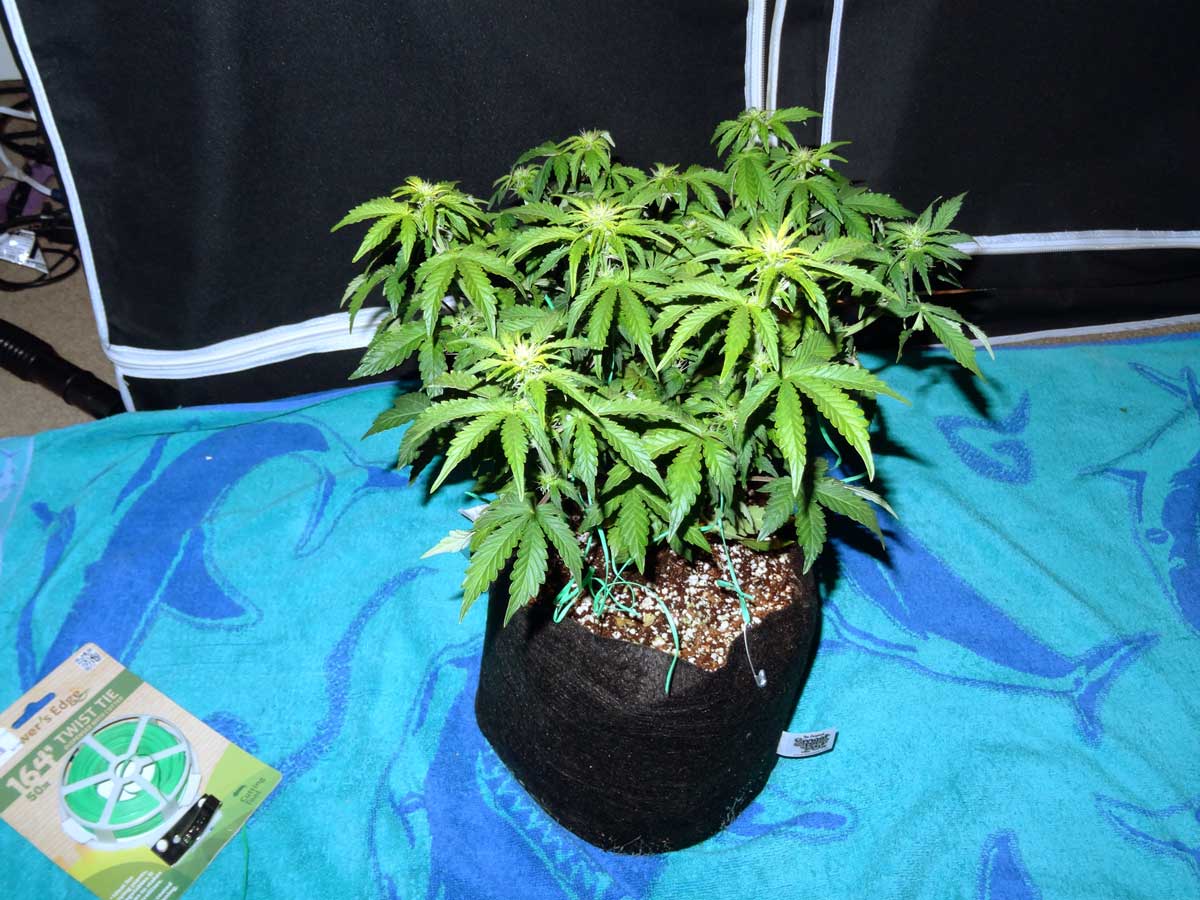
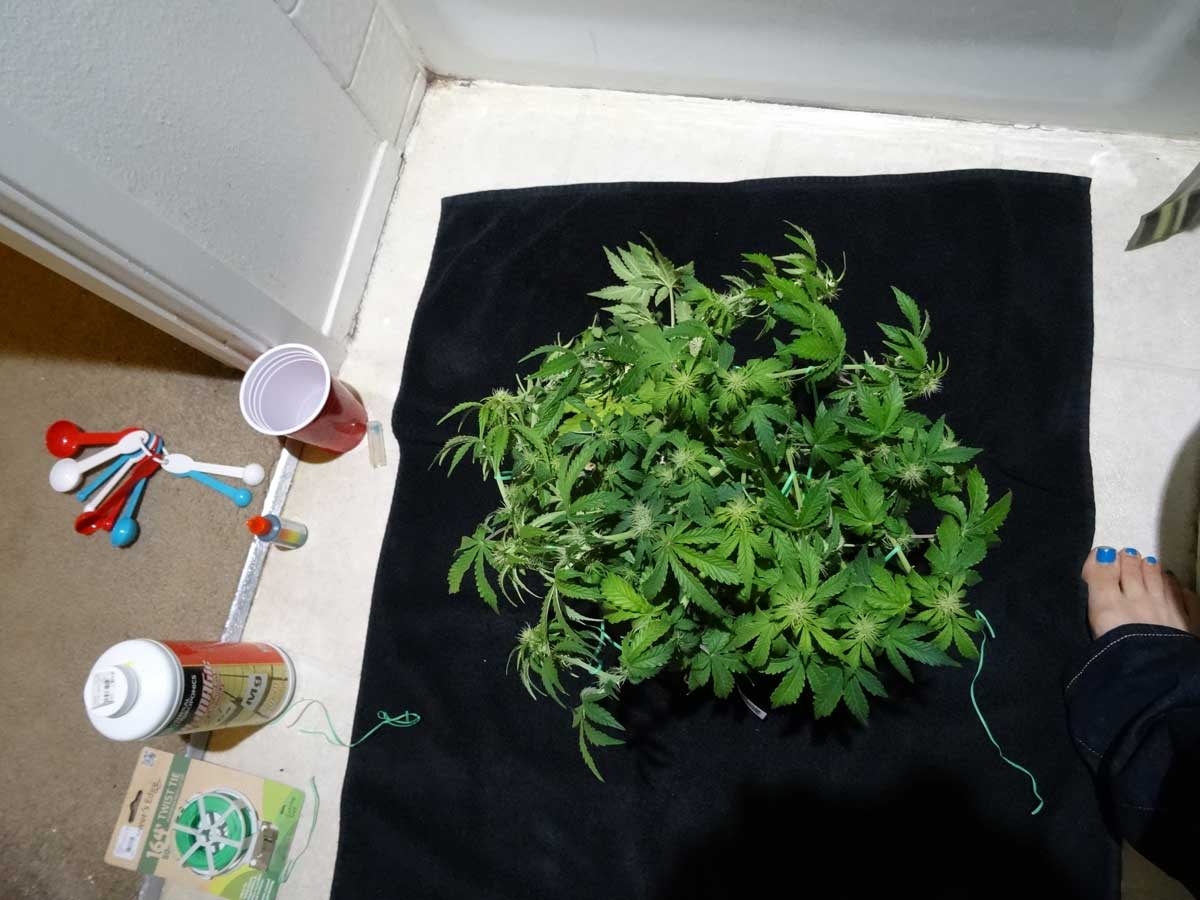
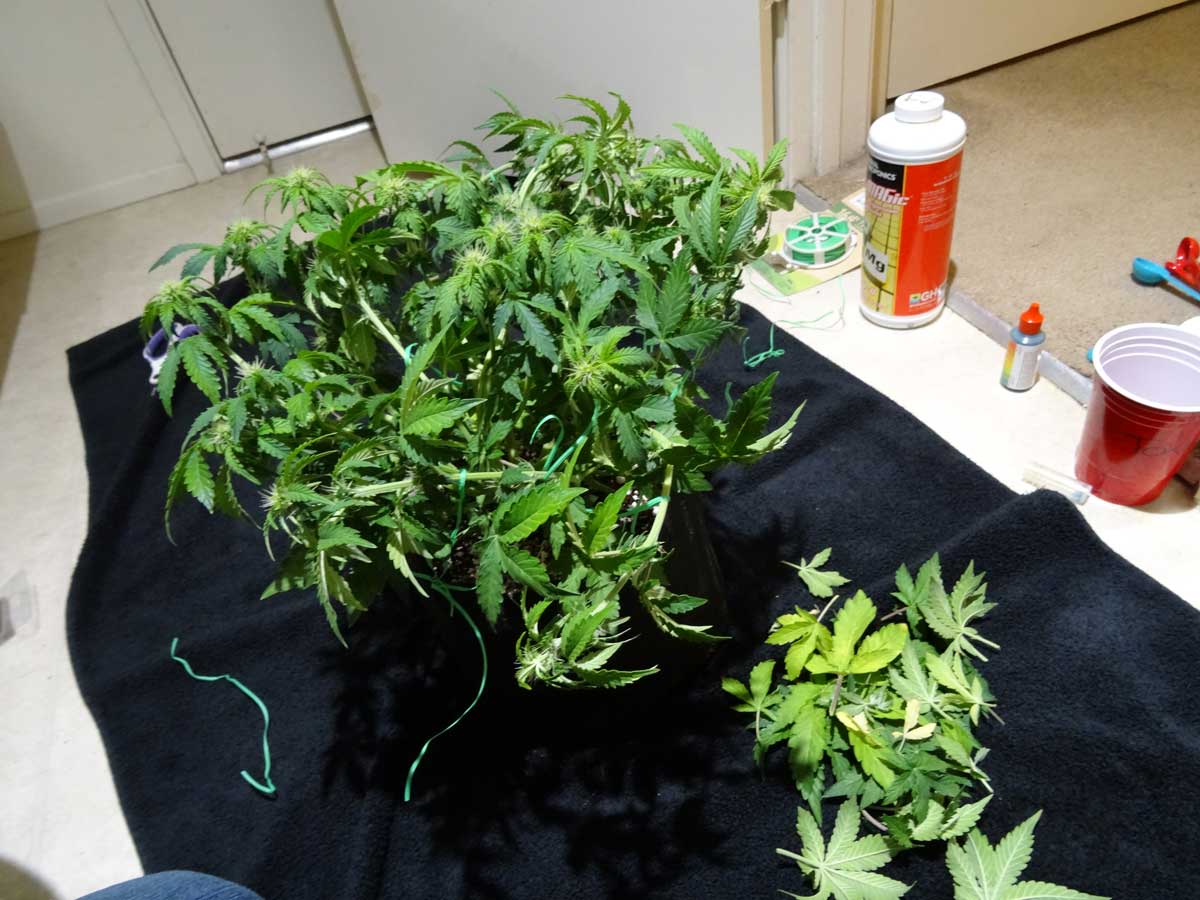
From left to right: Dinafem Critical Jack, Dinafem Sour Diesel, Dutch Passion Blue AutoMazar
I normally don’t take them out of the tent, but I wanted to do some leaf checking
December 15 – 21
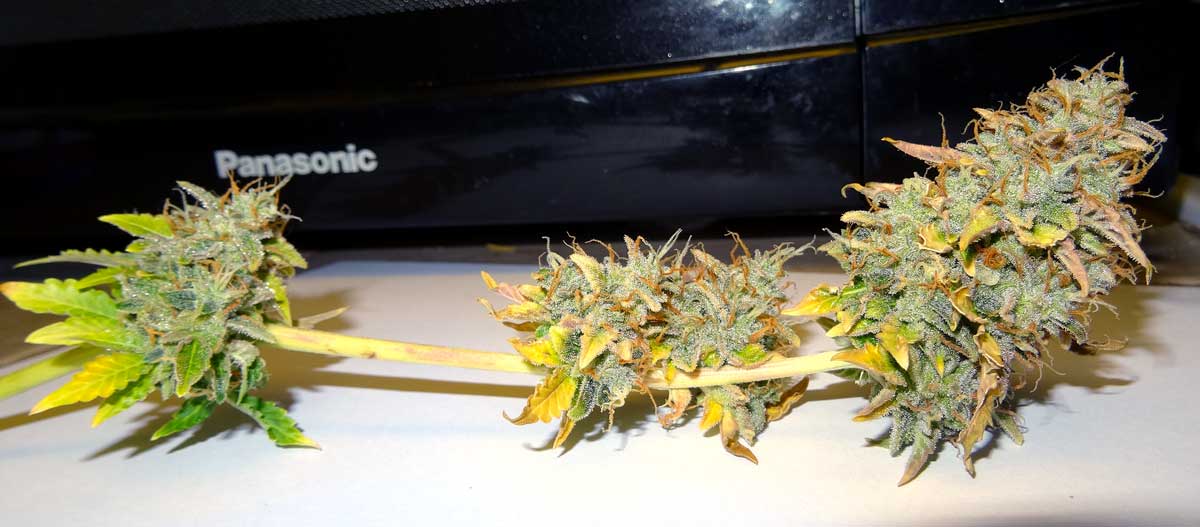
At this point I still have 3+ weeks to go before harvest, but when I was taking pictures of the plants, I noticed that just one bud from the Critical Jack plant looked like it was ready for harvest already. All the leaves had turned completely yellow and everything was starting to curl in.
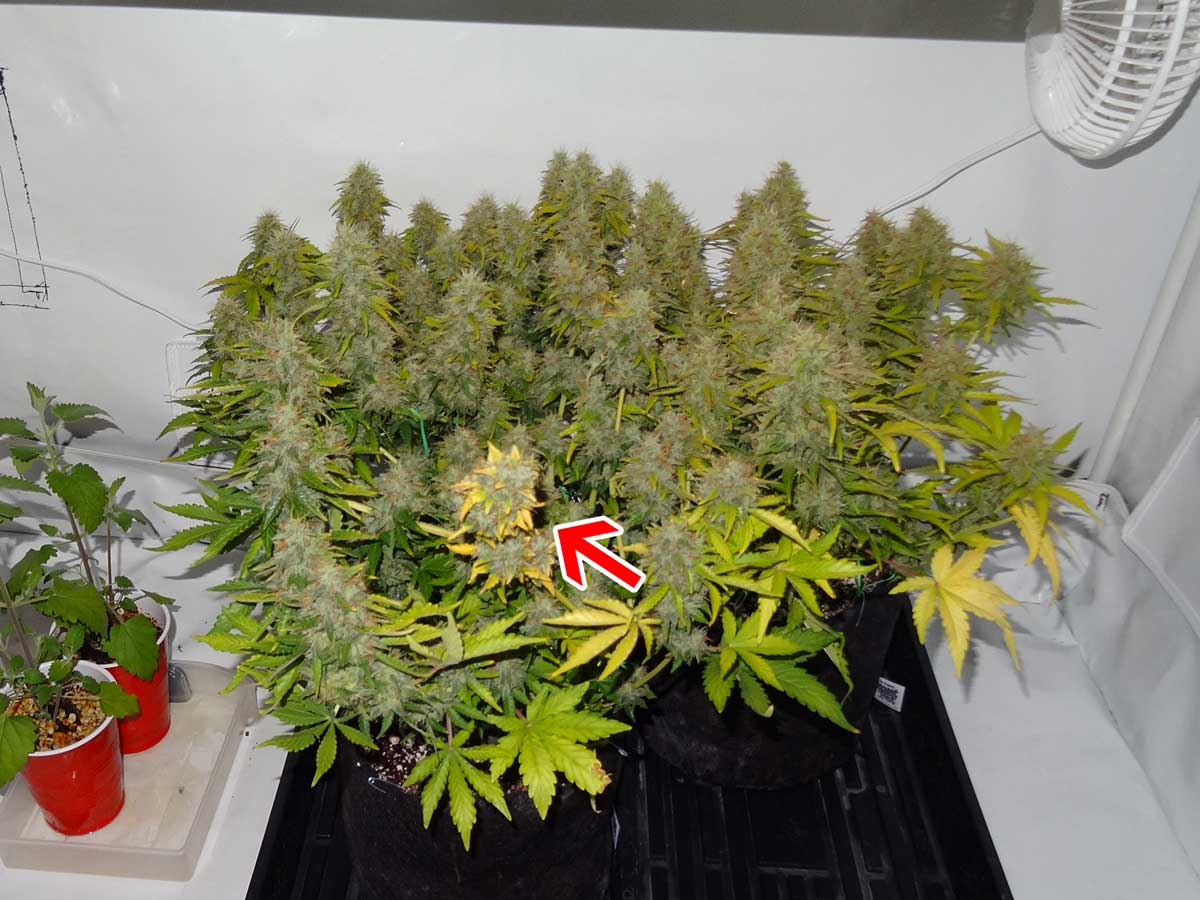
On closer inspection, I realized that I must have accidentally broken the stem at the base of this bud at some point, and so the bud was basically just drying out on the plant.
There was nothing I could do except harvest it, which means I’ll get to sample some of the Critical Jack buds early 🙂
Here’s the stem after I cut it off the plant, and it smells!
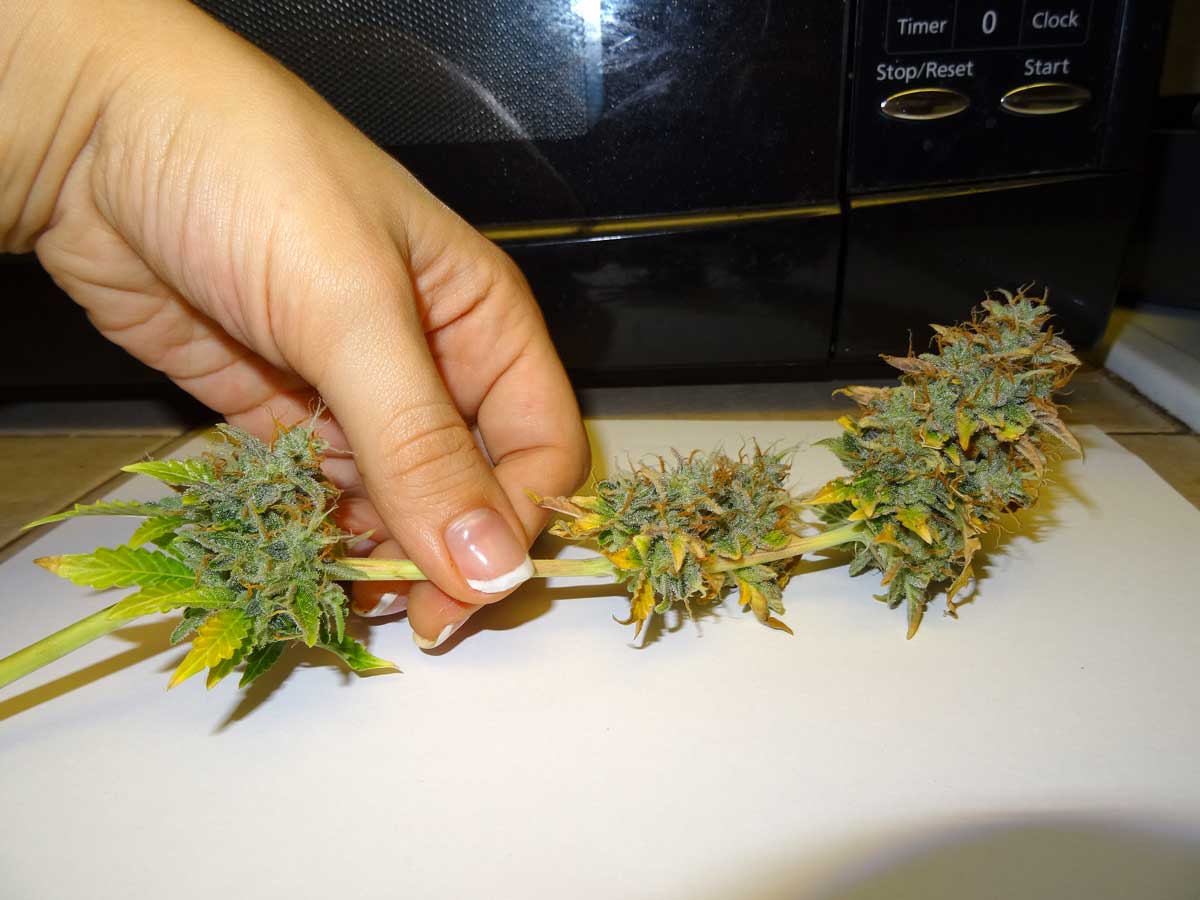
In fact the whole grow space is INCREDIBLY stinky with this grow, worse than any other grow I’ve been through. I wasn’t sure which plant was the culprit, but after bringing this one small stem downstairs, it stunk up the whole floor. Now I’m pretty sure it’s this Critical Jack that is making the entire grow space reek of fuel.
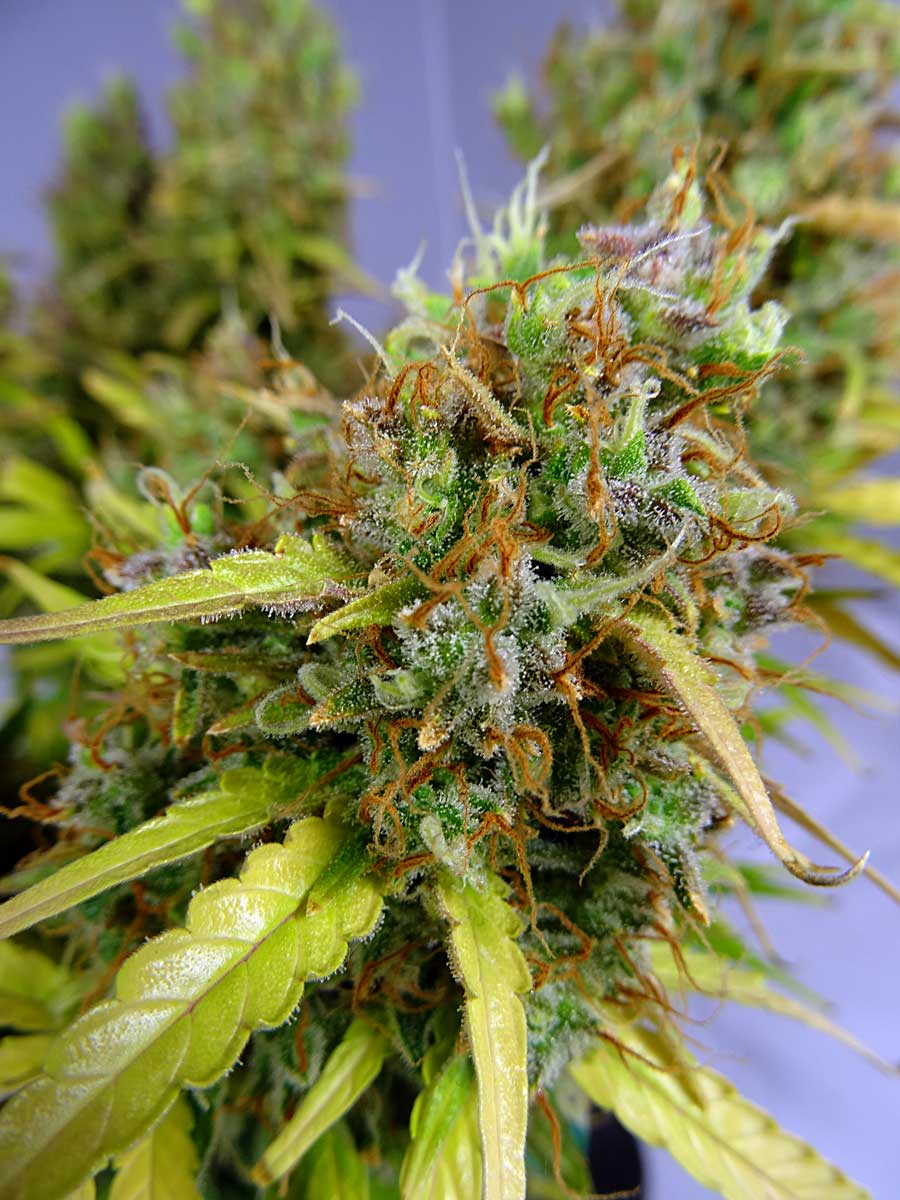
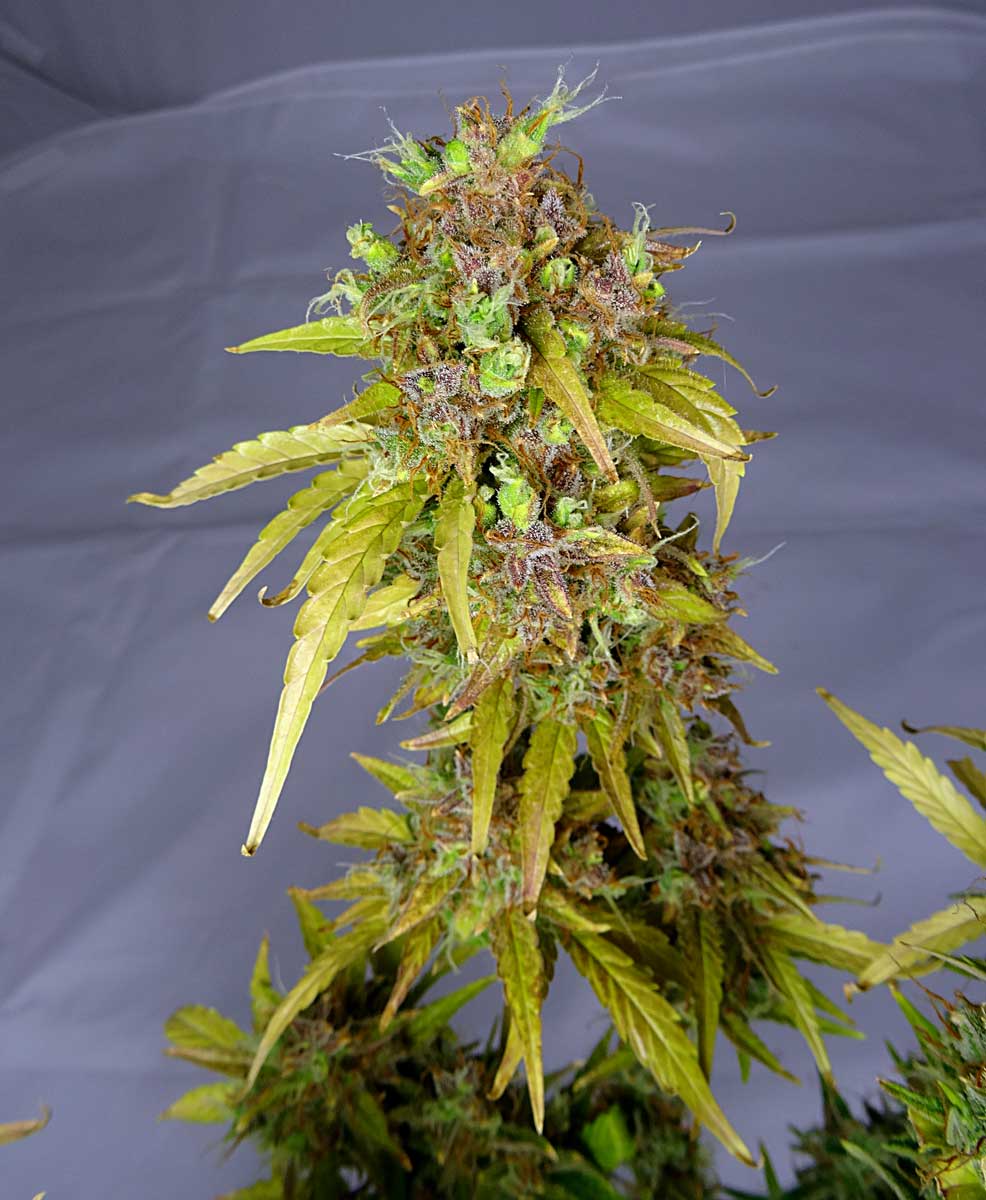
Here’s a closeup
I trimmed the buds and prepared them for drying & curing.

Here’s another closeup. Make sure you click on the pic so you can see the full-size and zoom in! I took a macro shot so you can see all the trichomes.
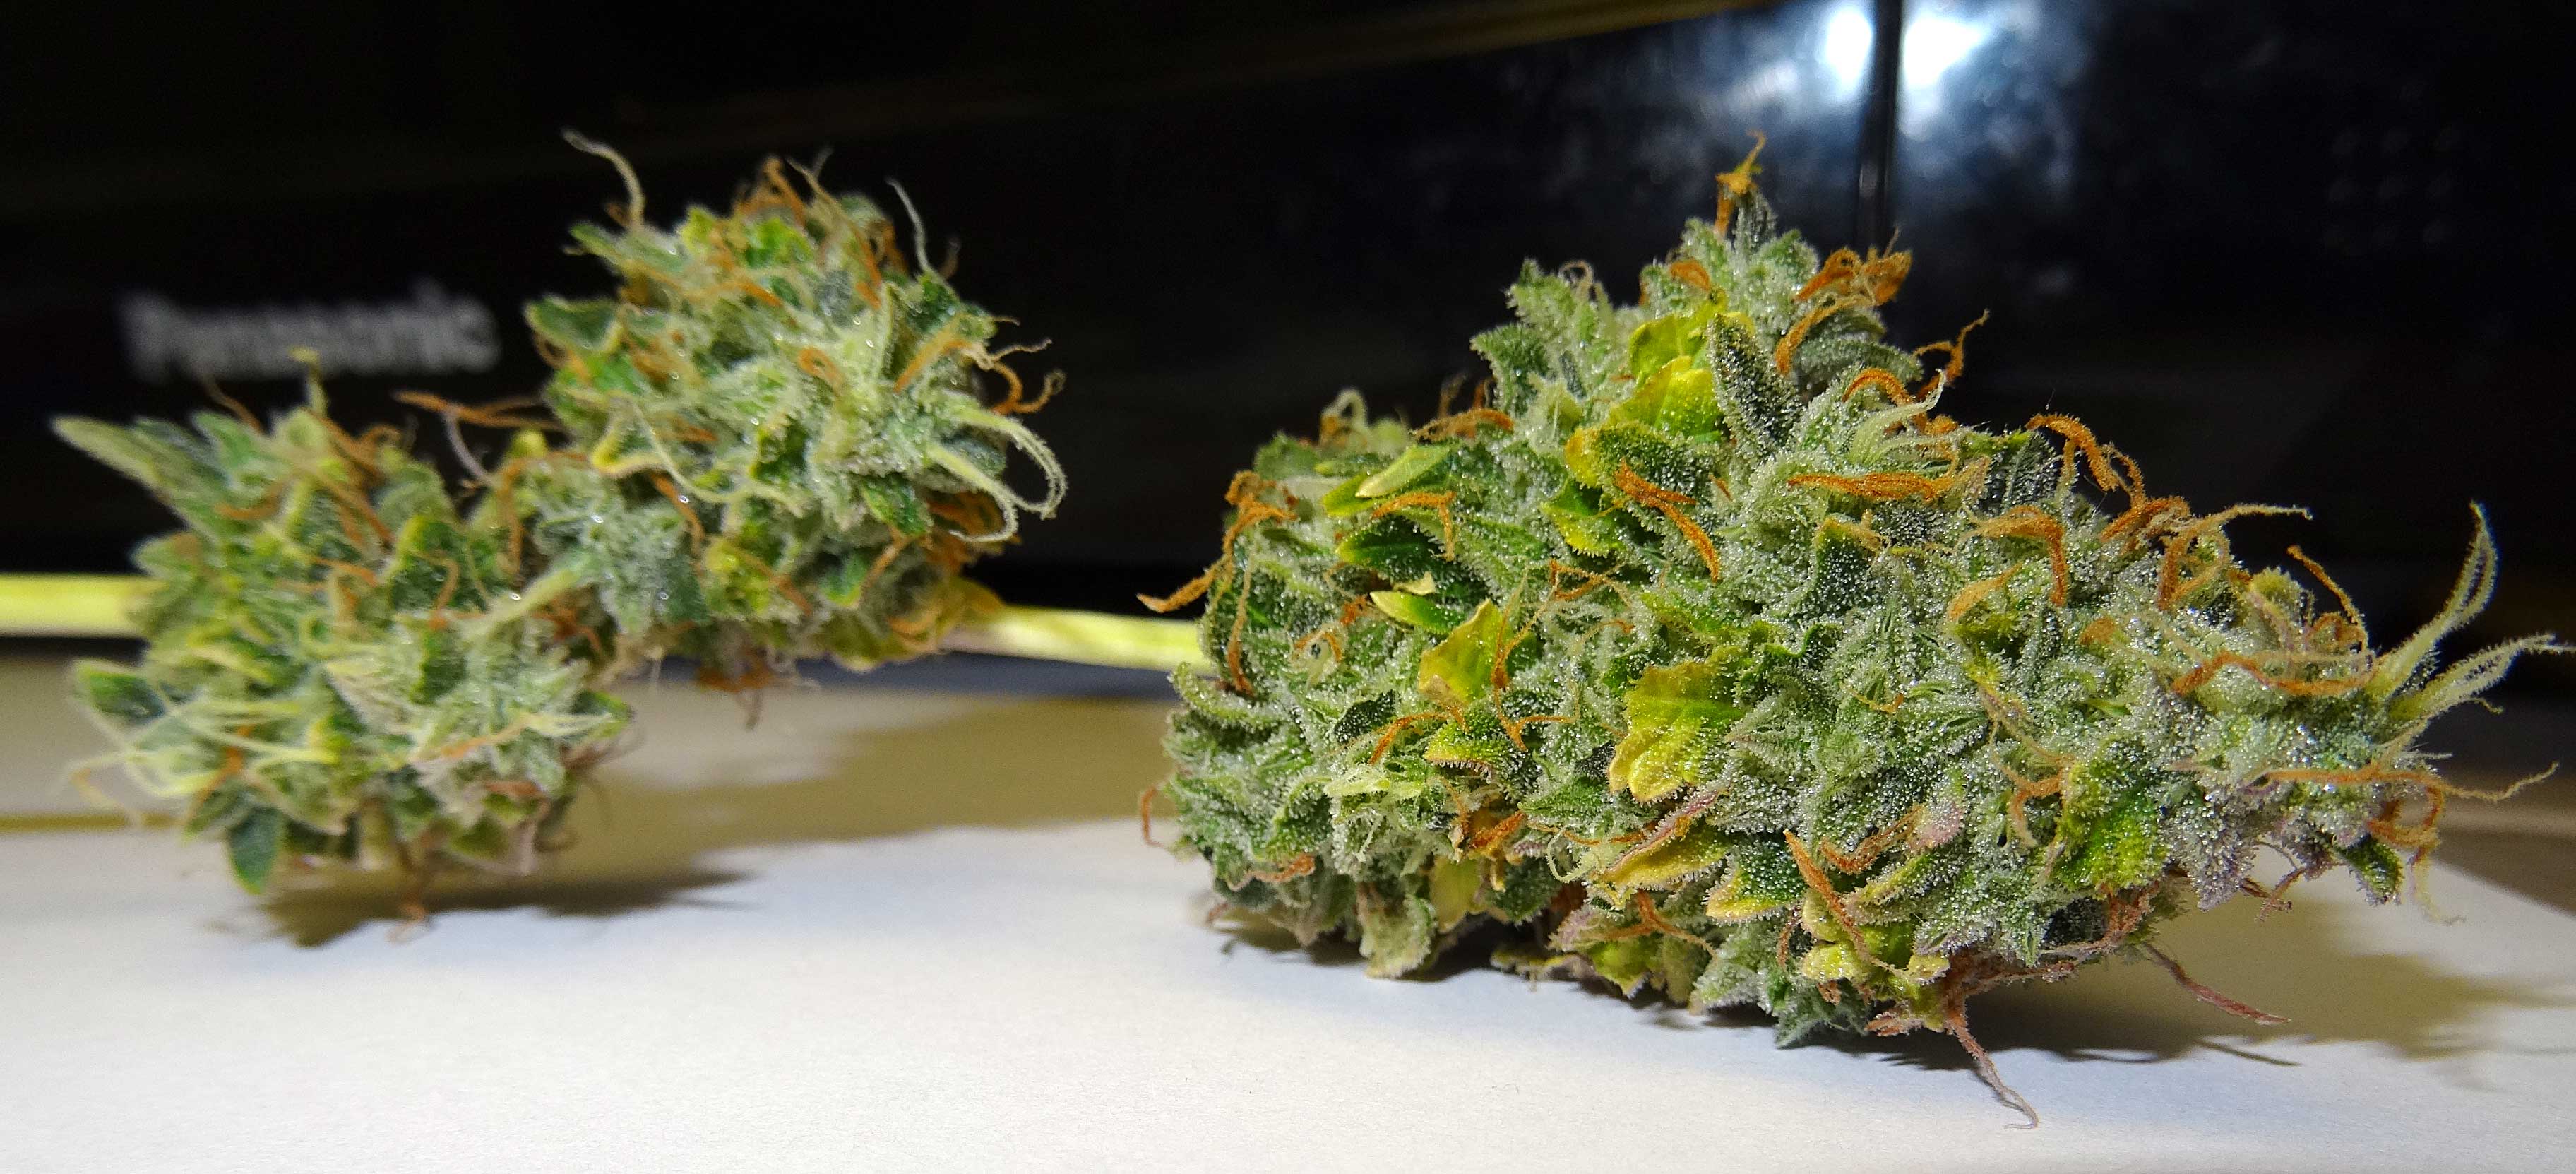
I will be drying this out, doing a 2-week cure, then “testing” it for potency 🙂
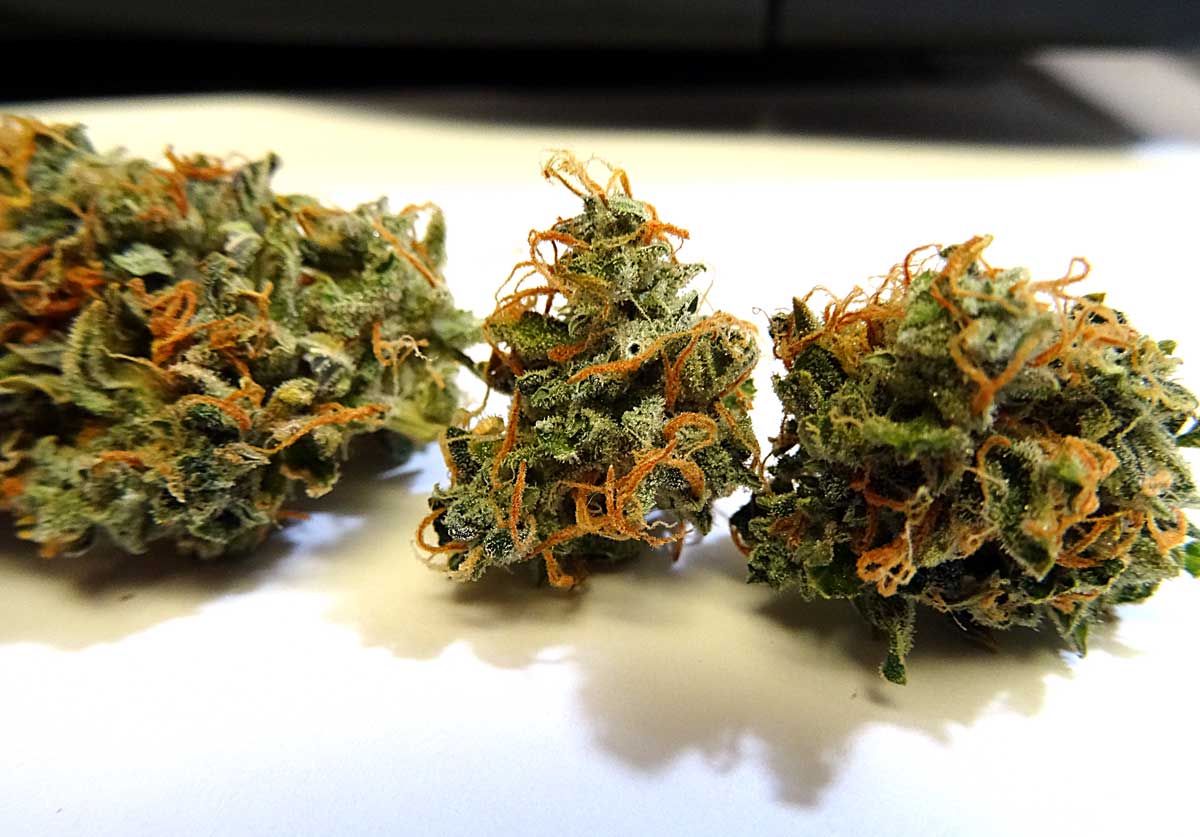
December 22 – 28
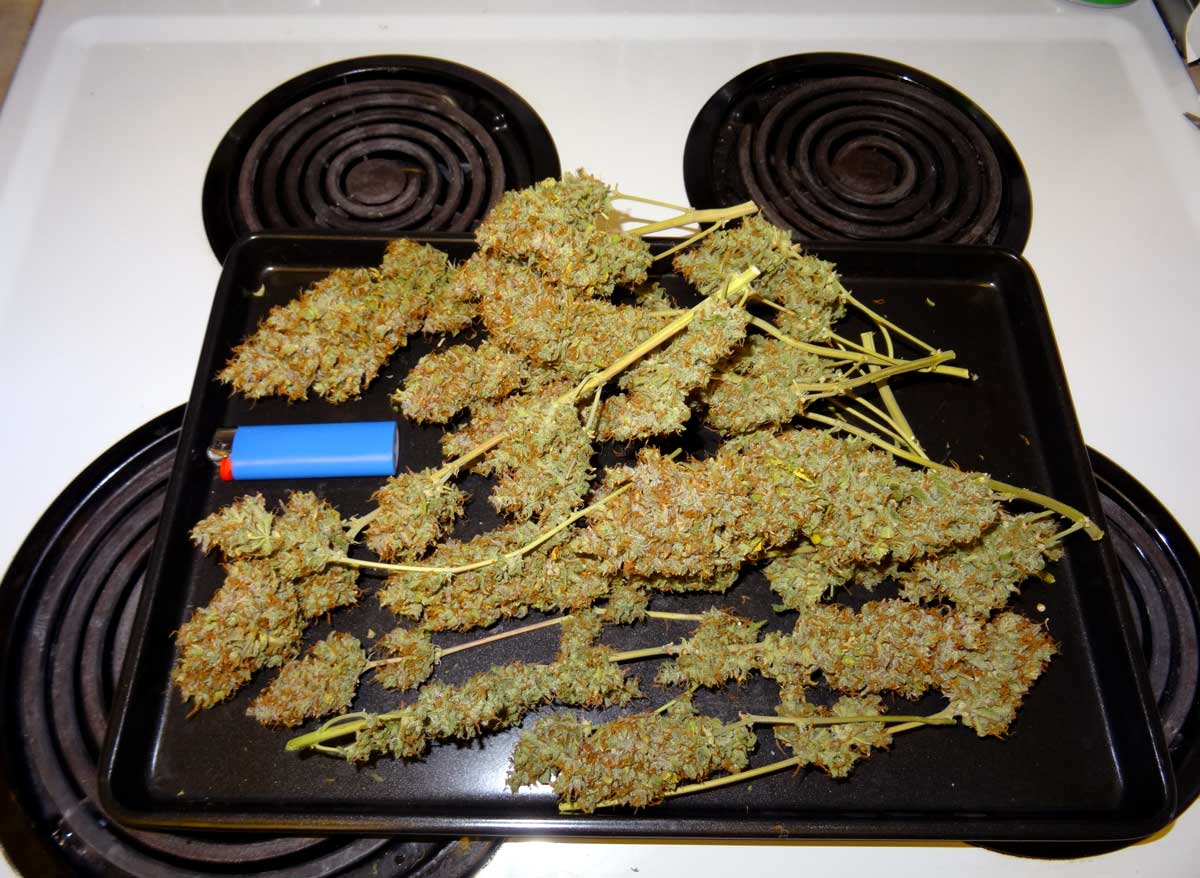
Finished drying the extra nugs from last week. I dried it for several days on the stem, and I think I may have overdried them a little bit, but c’est la vie. It’s important that there’s a little moisture for the curing process to happen properly, so I’m hoping there’s still some moisture in the middle of the buds that will work its way to the outside during the cure.
Click pic for closeup!

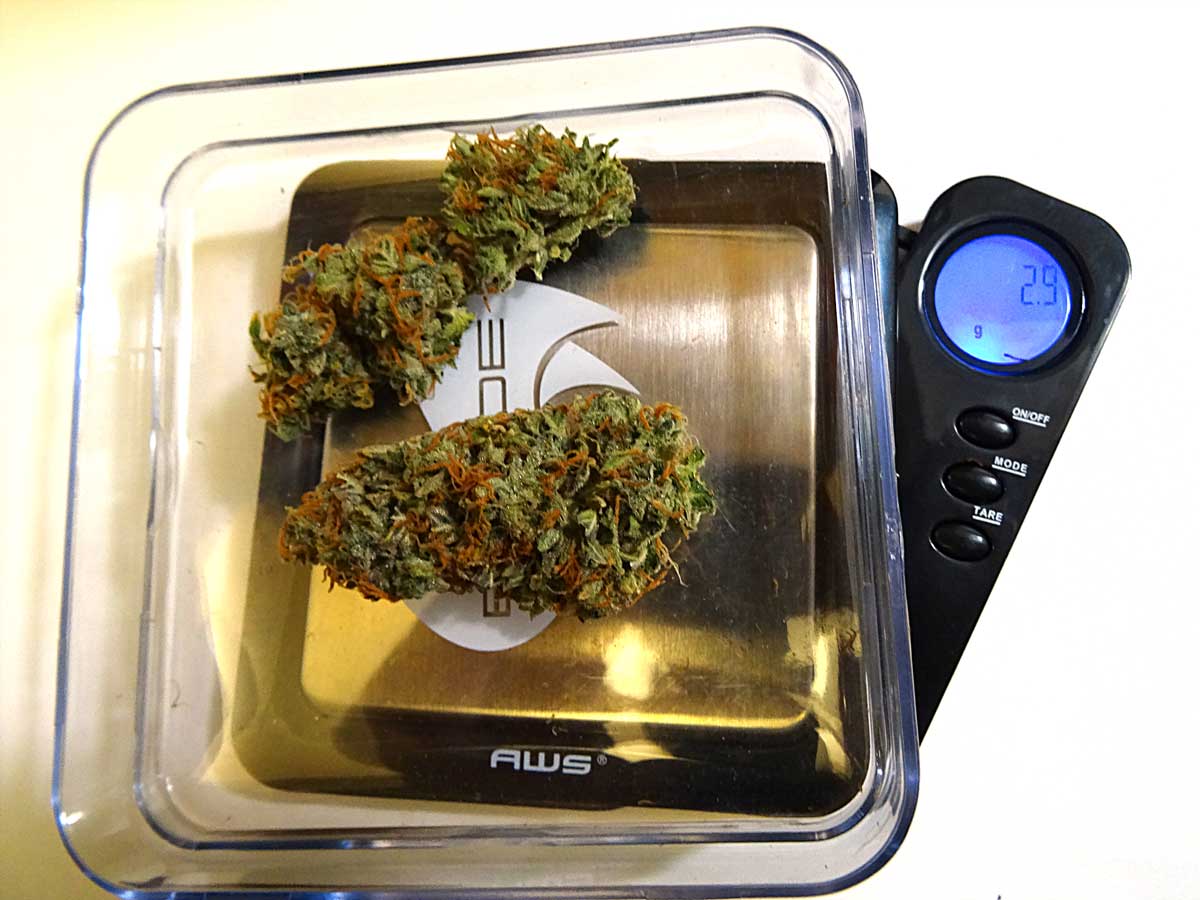
I weighed the buds, and together they came out to 2.9 grams.
In the tent it’s mostly just watering and waiting. Unless I run into some sort of problem, there’s not much left for me to do until harvest.
December 29 – January 4
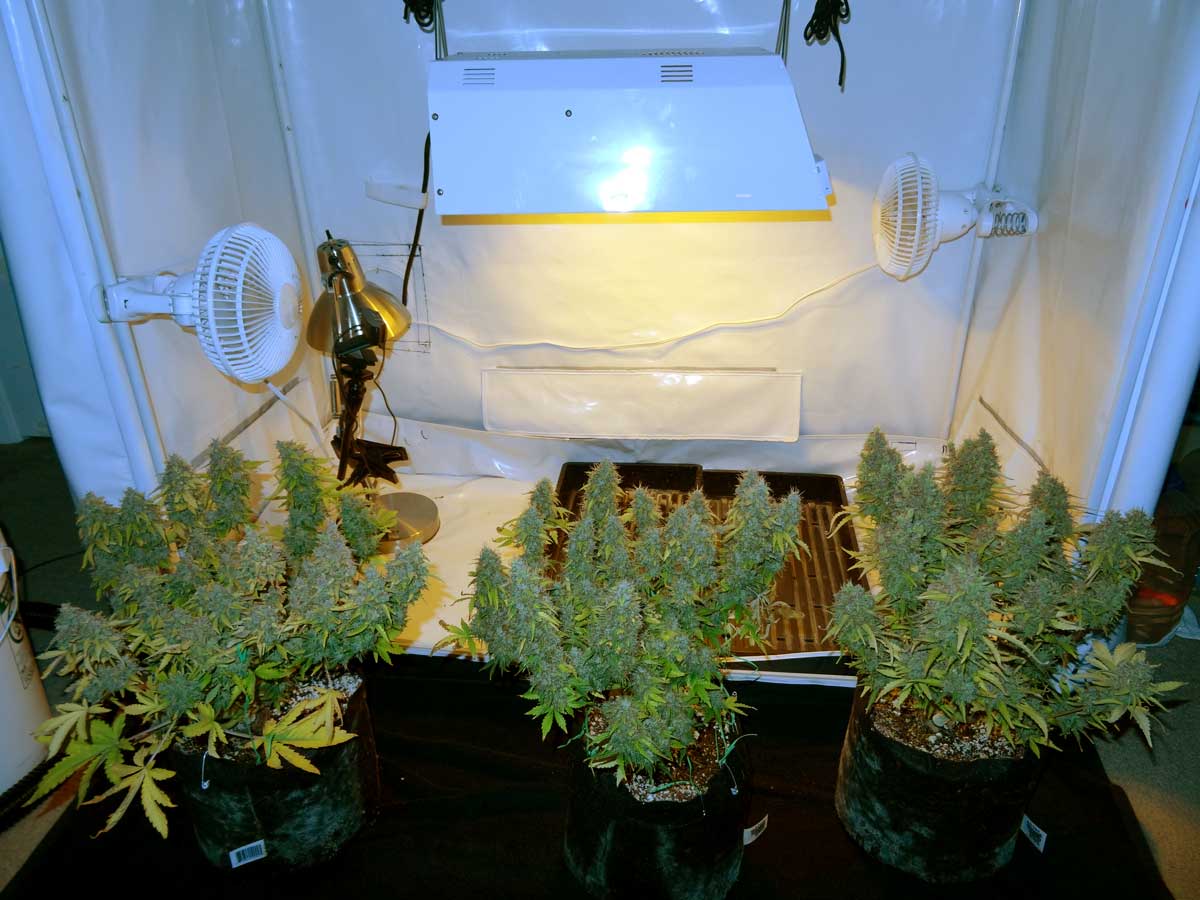
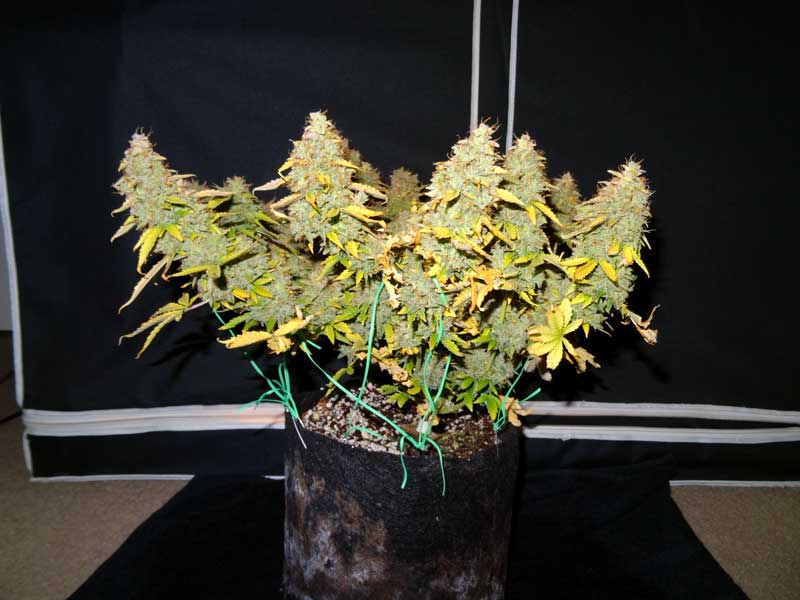
As we get close to the end, each plant is about 1’x1′, and about 18″ tall when you include the 2-gallon pots.
All 3 of the plants are about the same width and length because I trained them to grow in that shape with LST/bending. They could have been a different shape/width/length if I’d trained them to be.
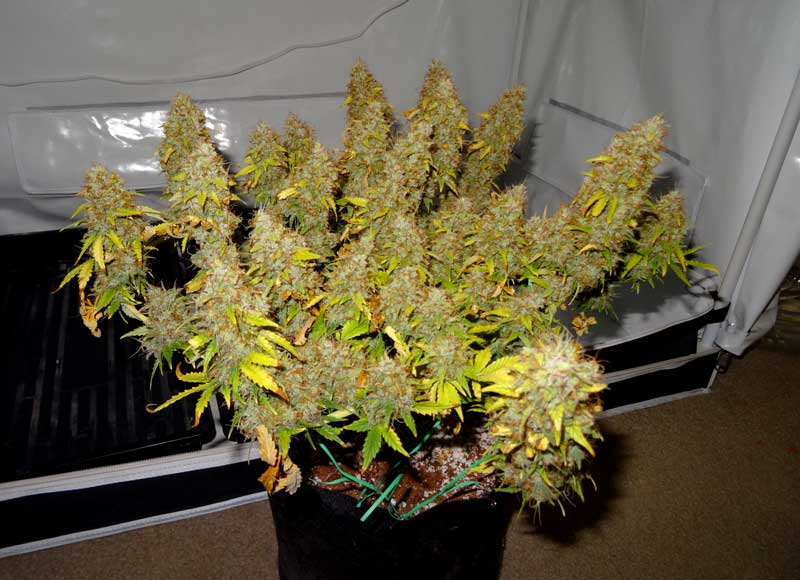
Blue AutoMazar Harvest
1/3 plants harvested! I harvested Blue AutoMazar on Dec 31.
This plant was 79 days old from seed (2 months 18 days). It really makes me appreciate how quick-to-harvest these auto-flowering strains can be. I planted the seed in mid-October and was able to harvest the first plant before the New Year 🙂
I also made a video of the trichomes from the day before harvest if you’d like to check it out:
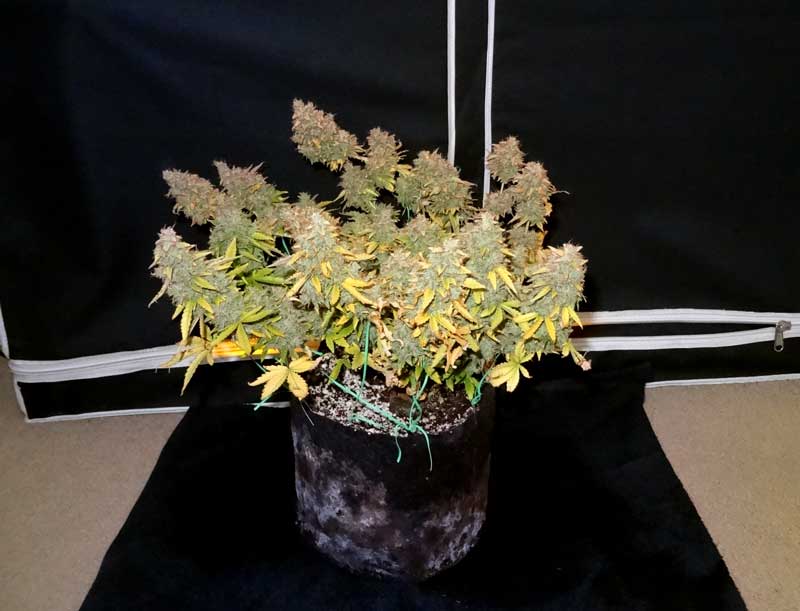
Blue AutoMazar is on the right. The other two plants will be harvested in a few weeks.
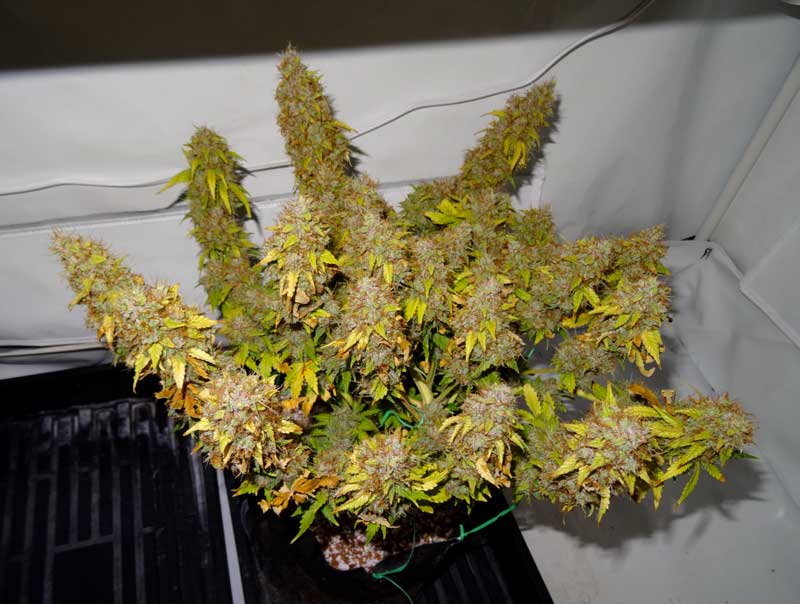
A view from above
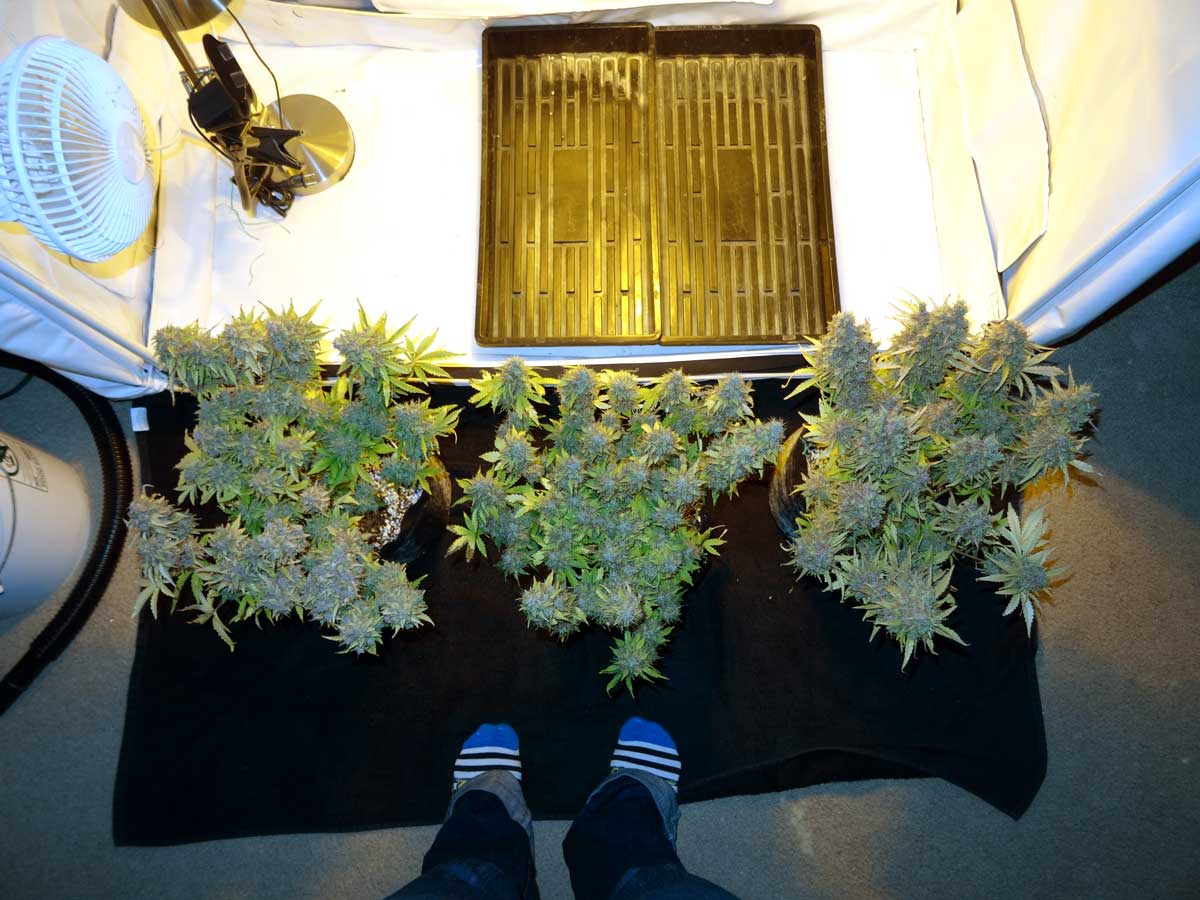
All the buds that were facing the 250W HPS light turned purple, but the rest were mostly green. This pic shows the side that was facing the HPS.
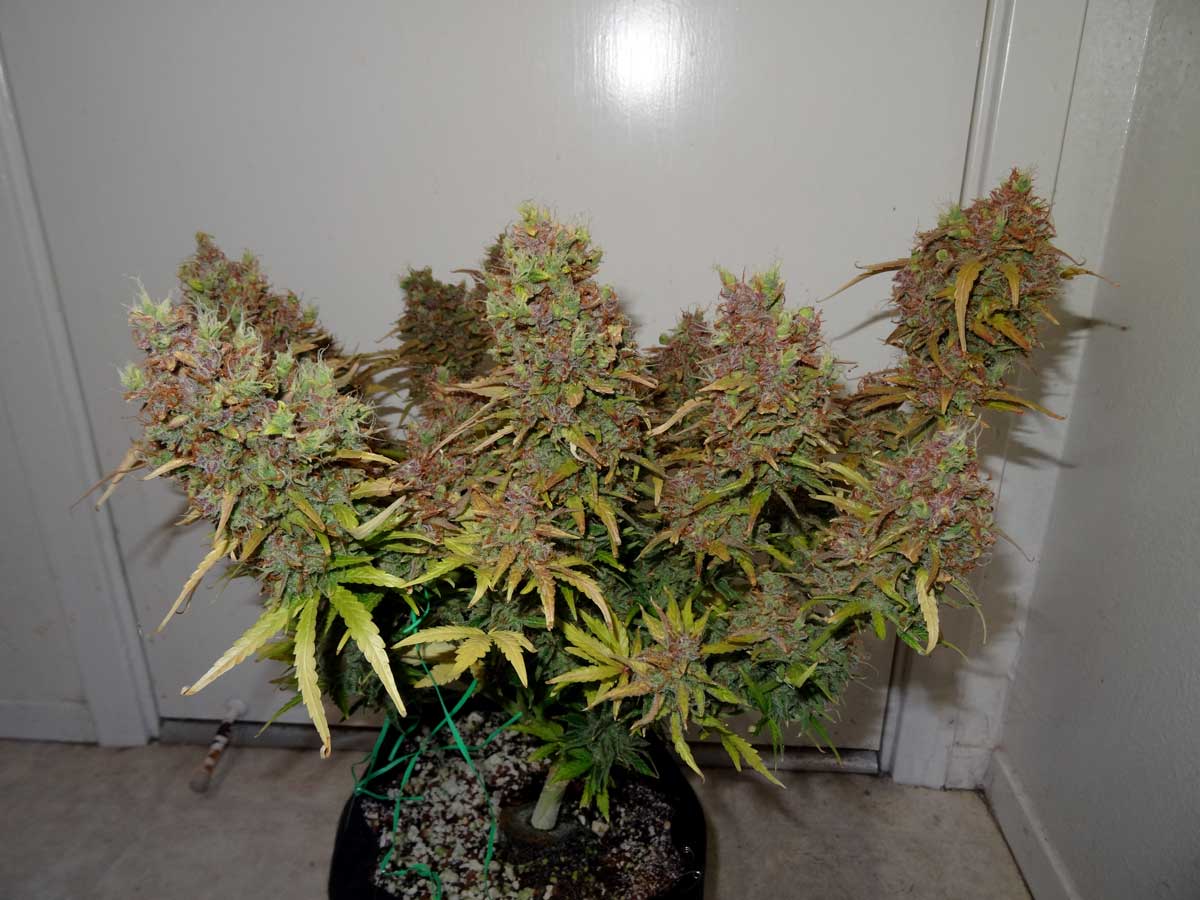
The buds displayed a lot of different colors; some were mostly green, some were mostly purple.

This cola is particularly purple compared to the others
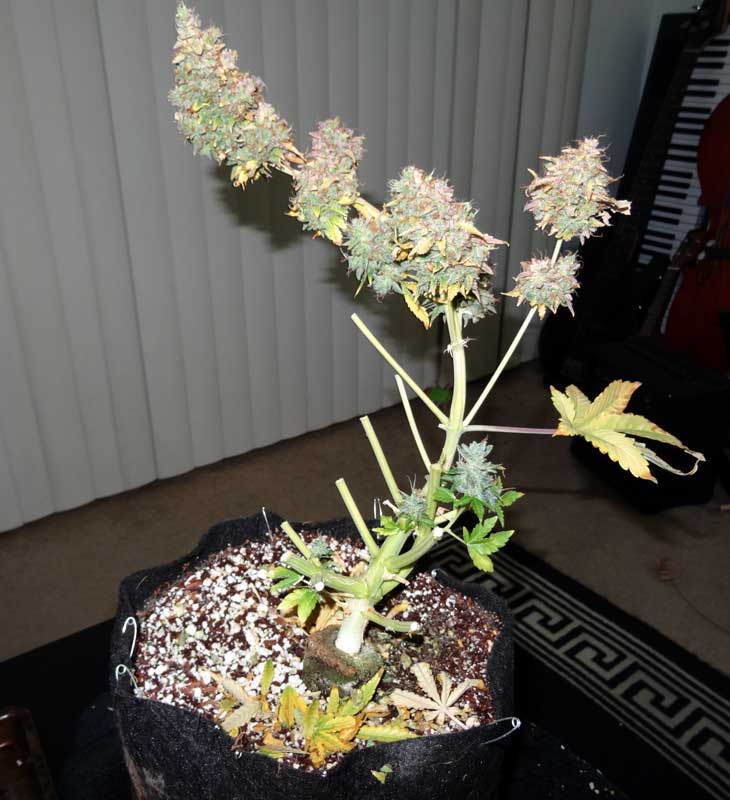
This shows the “structure” of the plant. I used LST (bending) to train the plant to be short to take the most advantage of the 250W HPS grow light.
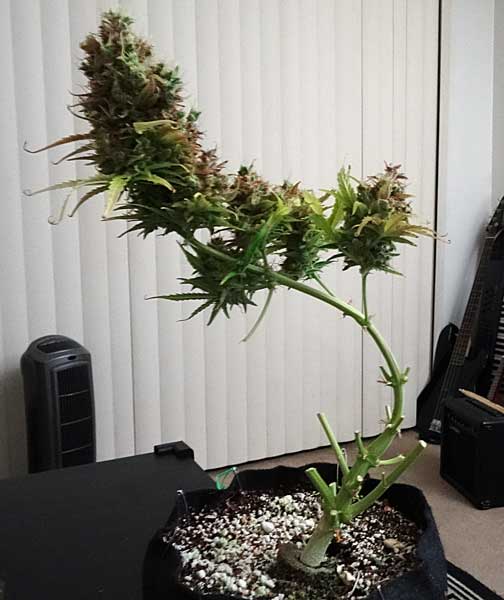
Yay! Harvest day is the best 🙂
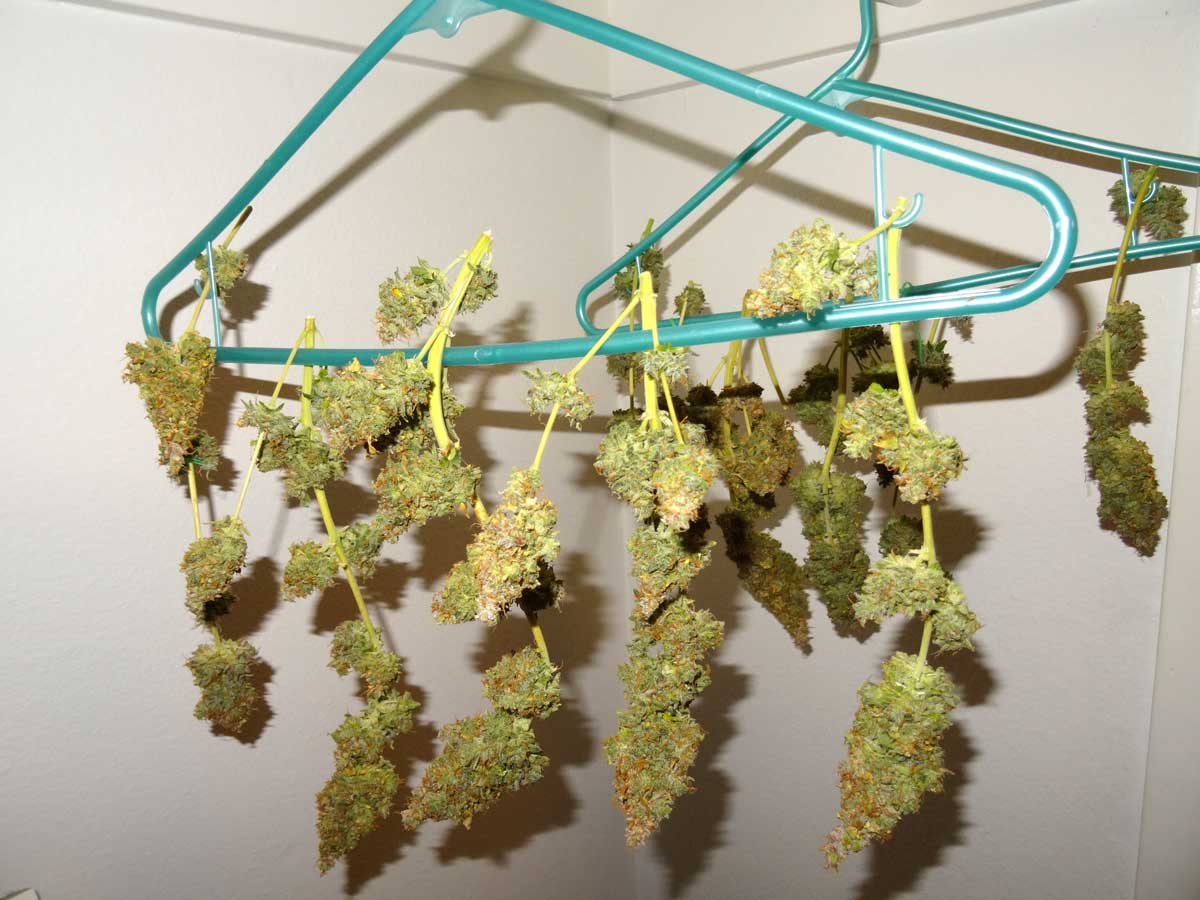
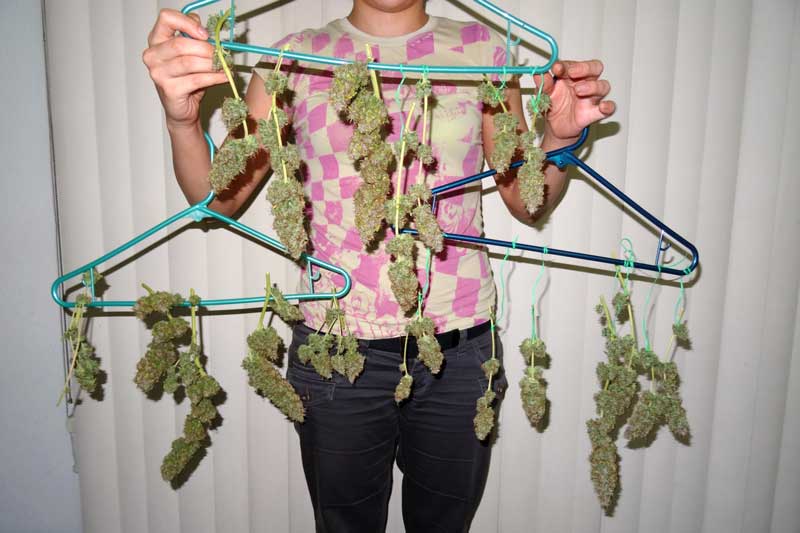
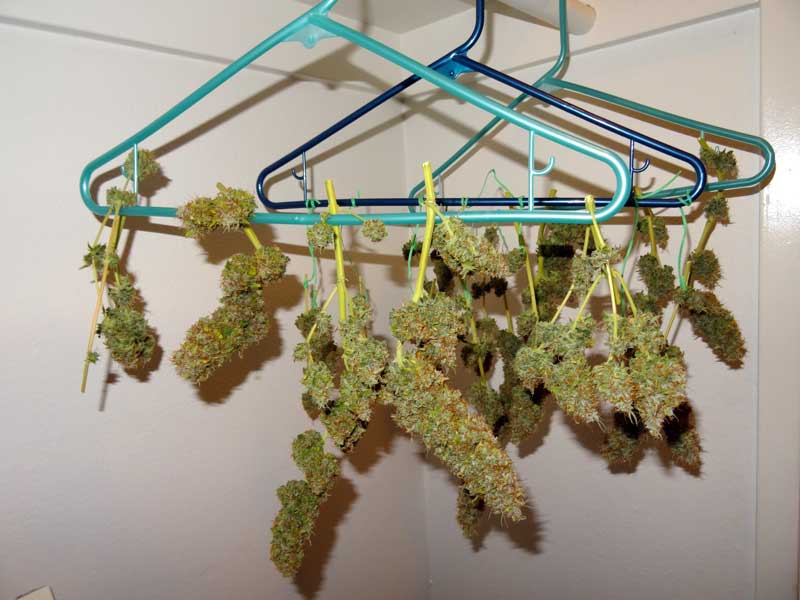
Hanging to dry in my closet

January 5 – 11
Critical Jack Harvest
Harvested Critical Jack on Jan 5, at 85 days old, or 2 months, 24 days from seed
A side view
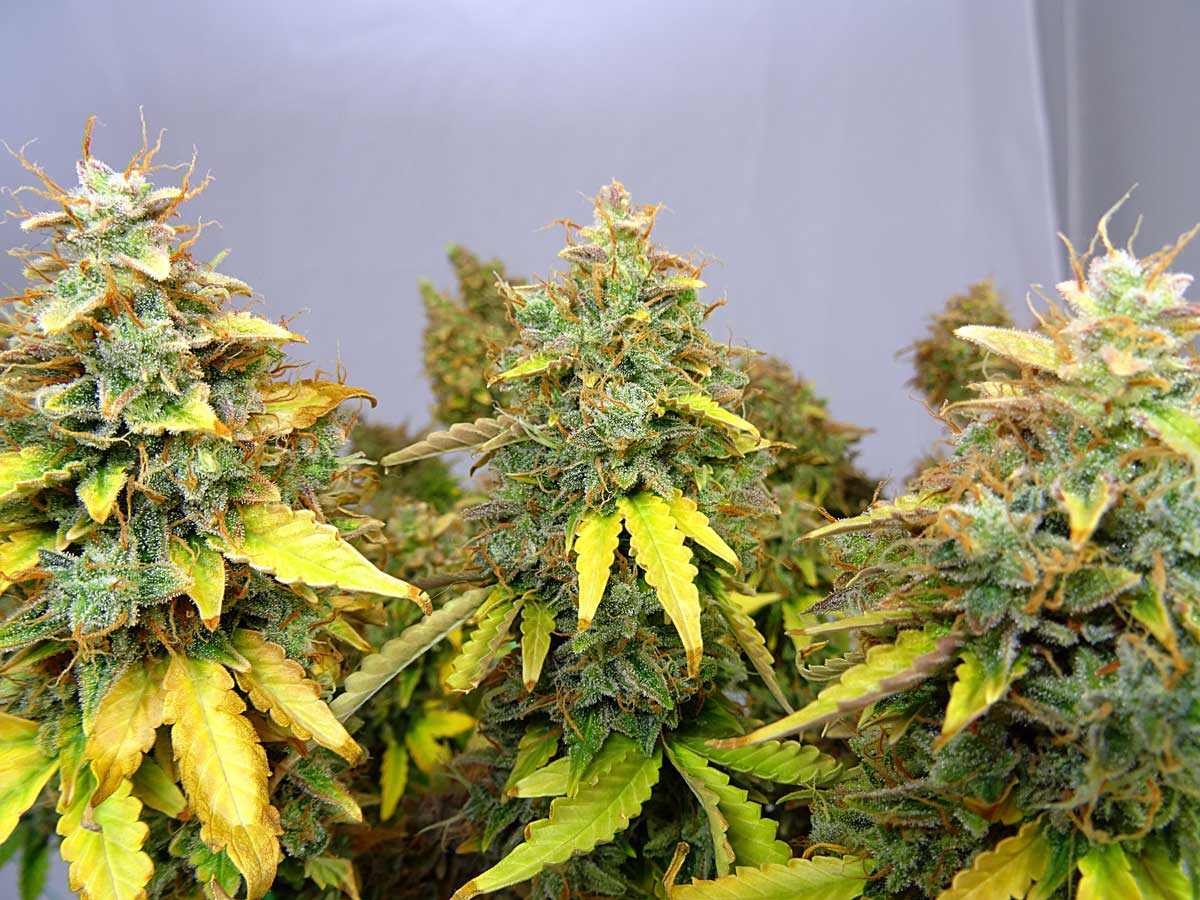
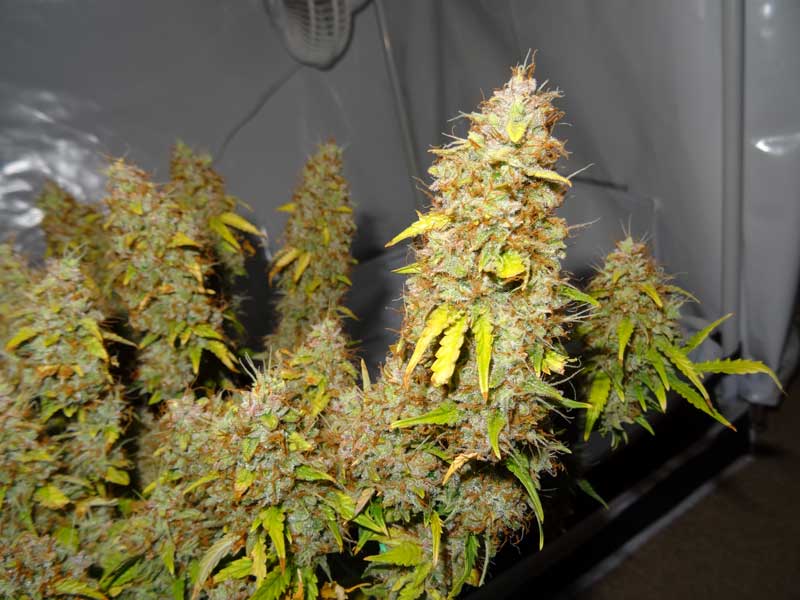
Some closeups of the Critical Jack buds just before harvest
The structure of the plant “under the hood”
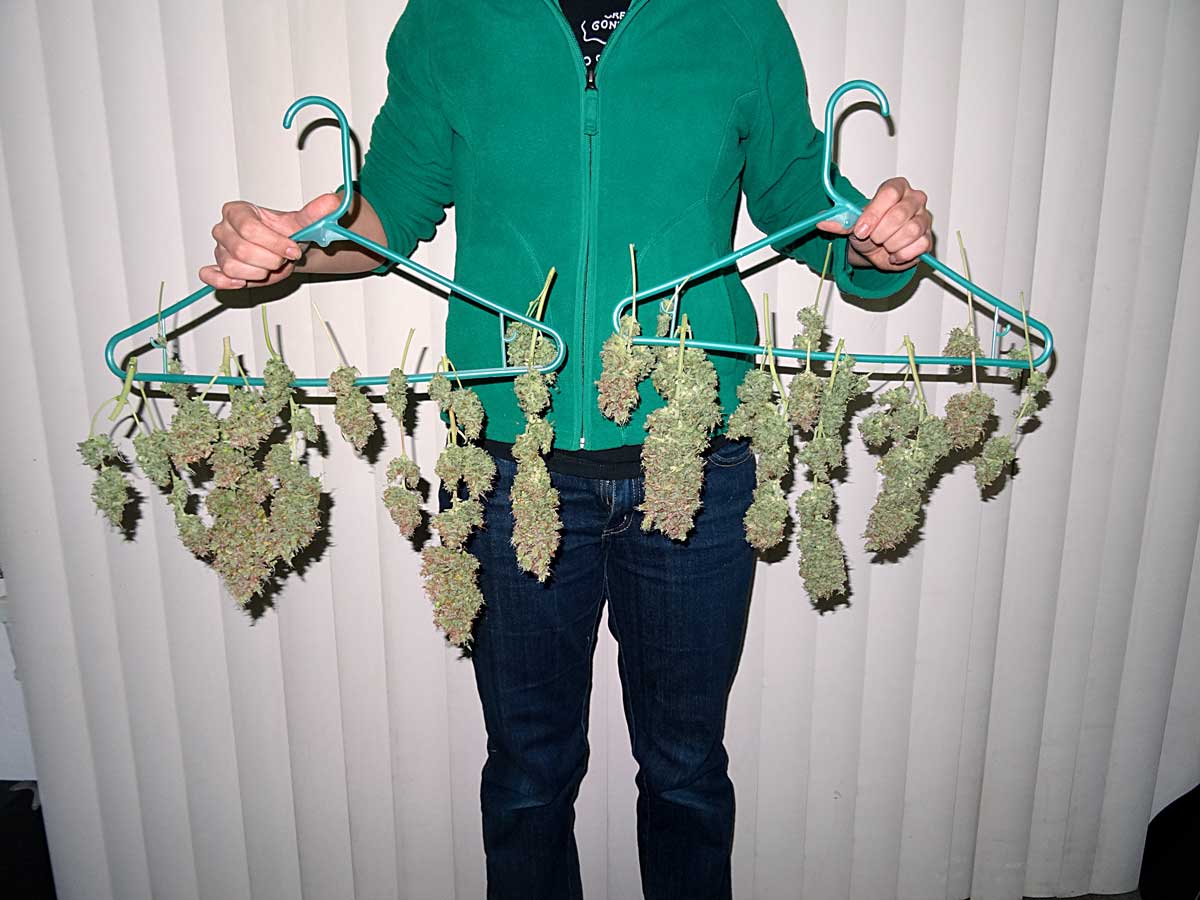
Holding up the full harvest from the Critical Jack plant

Hanging to dry
Sour Diesel Harvest
Harvested Sour Diesel on Jan 9, at 88 days old, or 2 months, 27 days from seed
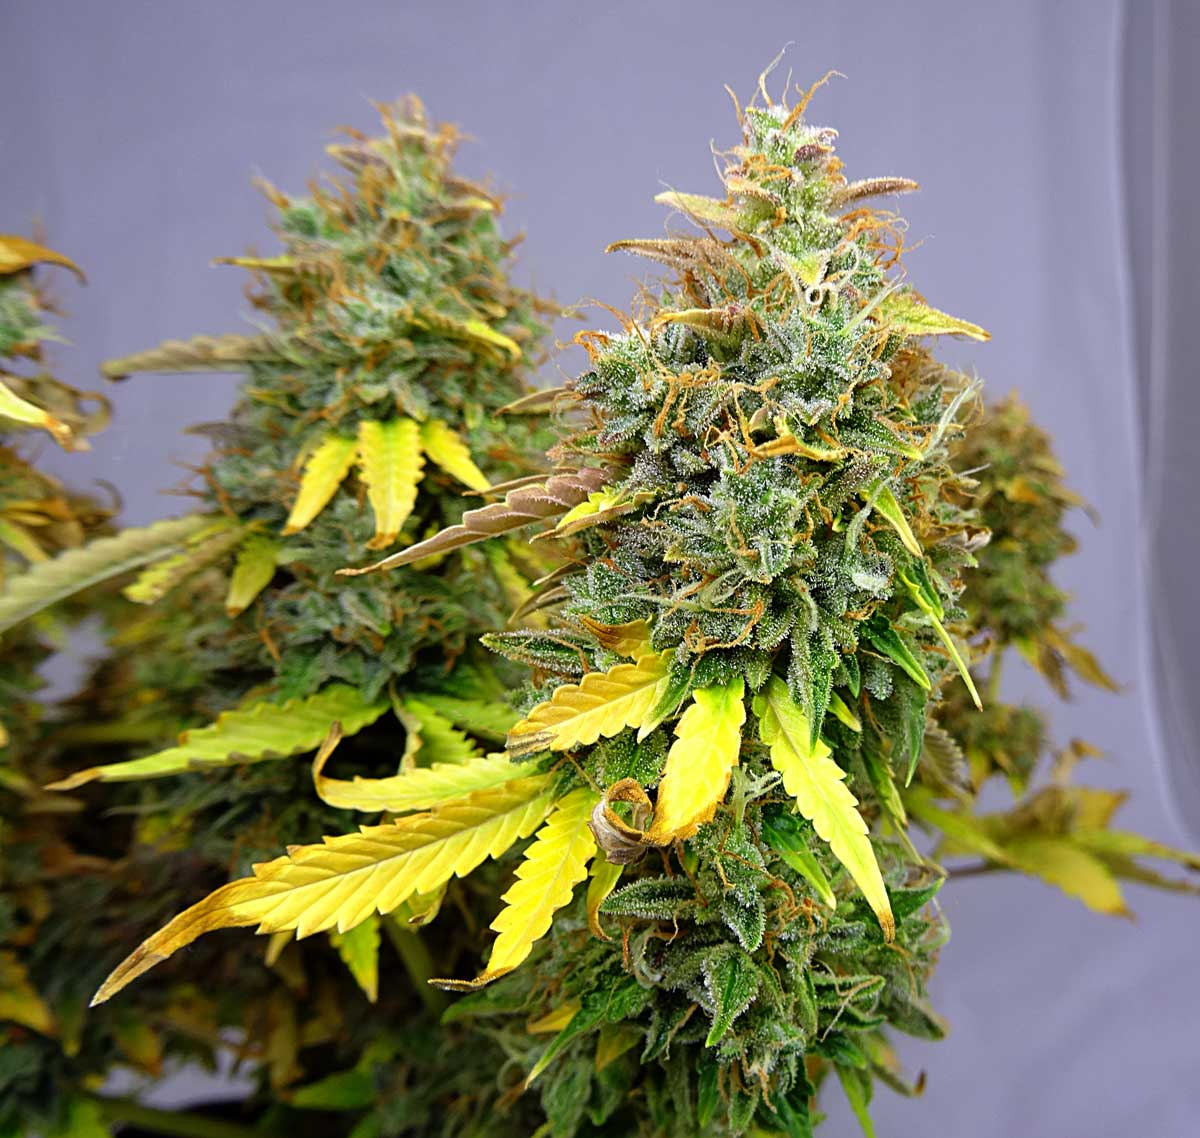
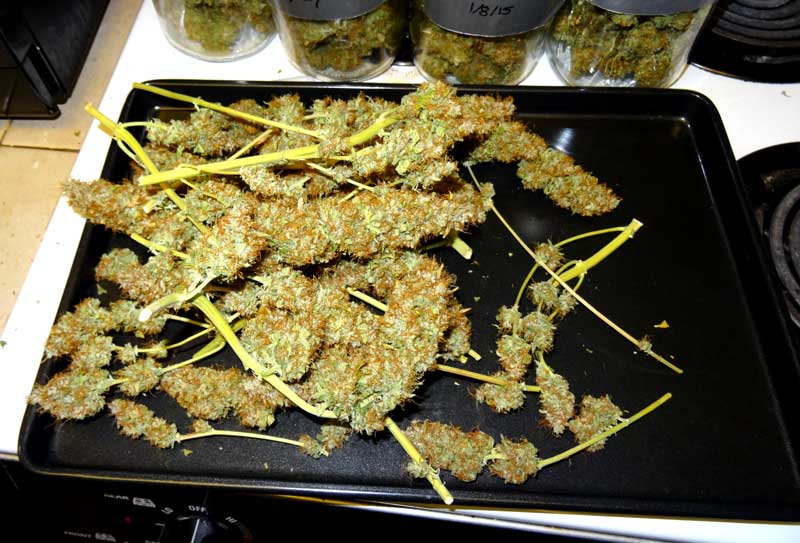
Look at the LST on some of the colas – even after being bent over, the stems still formed lots of chunky buds
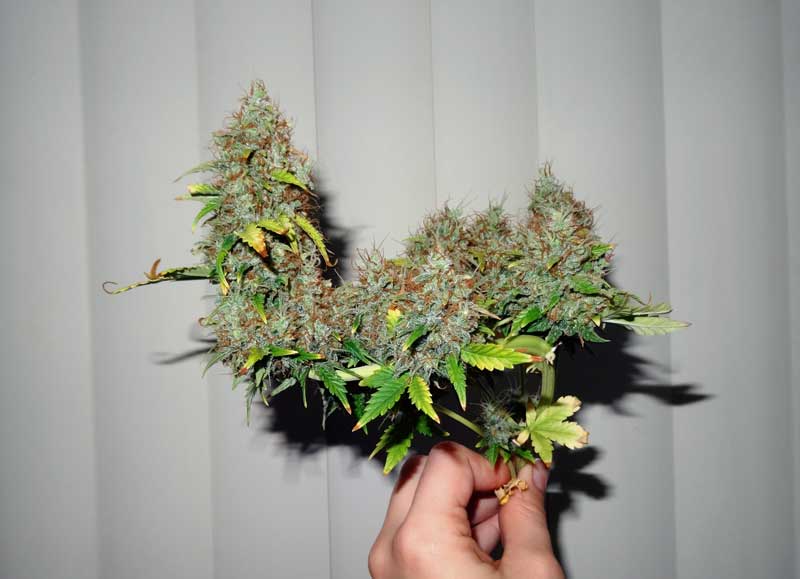
A different one
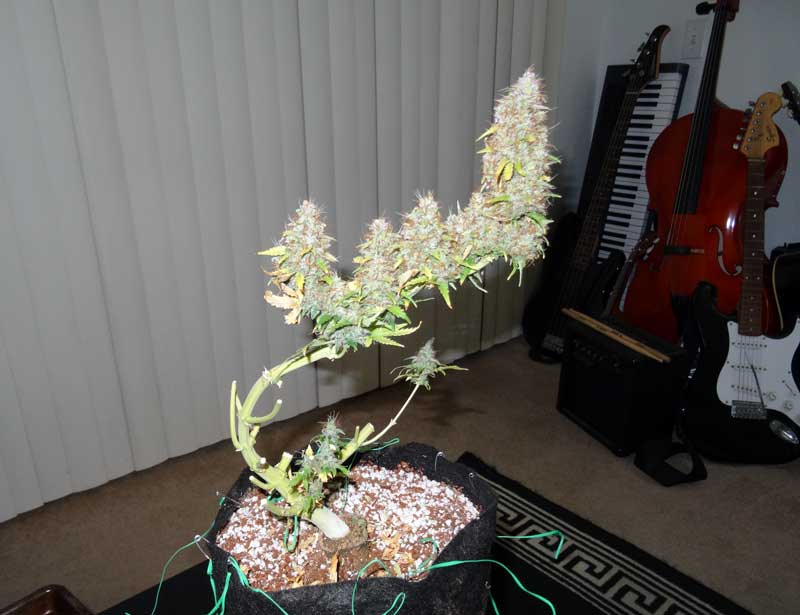
After all the buds were taken off except the main one, this is what the plant looked like
Blue AutoMazar
(harvested December 31, weighed January 5)
Altogether, the Blue AutoMazar plant yielded 66.7 grams, or about 2.3 ounces. These buds appeared to be the largest, but were lighter and more airy than the other buds.
Blue AutoMazar – 2.3 ounces
Blue AutoMazar Strain Review:
- Potency: Body effect, medium potency as far as pure power. These buds were the least “strong” of all the buds harvested. These buds are relaxing and calming. I think this one would be a good one for anti-anxiety. It didn’t make me tired, but I felt relaxed and at peace. For me this strain is great for relaxation and pleasant introspection.
- Taste/Smell: Sweet and soft but not fuity, these buds don’t have a particularly strong scent, and they don’t really smell that much like cannabis. They don’t have a “skunkiness” to them at all and smell like some other unidentified scent. It might be a good strain for a stealth grow.
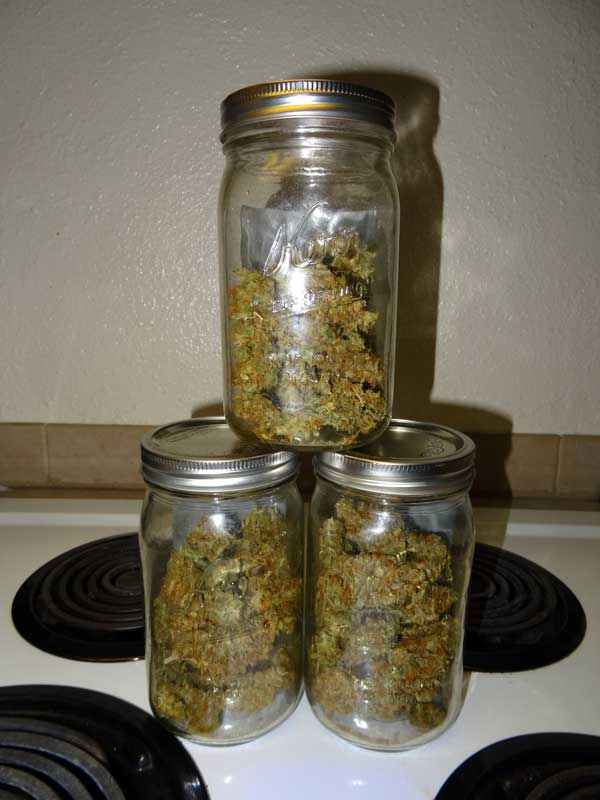
- Bud Structure: This plant looked like it was going to be the rockstar of the grow as far as yields. It had the biggest buds. When we jarred them they nearly filled up 3 quart-sized jars, so I was expecting to get a little under 3 ounces (generally a jar holds about an ounce, give or take). I was surprised and a little disapointed when the final weight came out to 2.3 ounces. But it makes sense after I was exposed to the consistency of the buds; they are lighter and more airy than the other strains.
Critical Jack
(harvested Jan 4, 2015, weighed Jan 8, 2015)
Altogether, the Critical Jack plant yielded 60.1 grams, or about 2.1 ounces.
The Critical Jack buds were the most dense of the three strains. Before they were dried, it was hard to tell what to expect from each plant because of the water weight, but after they dried the denseness of the Critical Jack became a lot more apparent!
Critical Jack – 2.1 ounces
Critical Jack Strain Review:
- Potency: Body/mind effect, high potency. This one is about equal to the Sour Diesel when it comes to pure “strength.” I’d say the buds are comparable to photoperiod strains. These buds have a tingly body effect that eventually moves up to your head, too. This one made me feel really good physically. I think this one could be a good choice for pain, spasms, stress or tensed up muscles.
- Taste/Smell: This plant was the strongest smelling of all of them. It’s probably one of the stinkiest plants I’ve ever grown, actually. It has a sweet and spicy odor that pierces through your nostrils 🙂
- Bud Structure: These buds were the most dense, the most sticky, and the most sparkly of all the plants. They probably have the highest bag appeal.
Sour Diesel
(harvested 1/9/15, weighed 1/15/15)
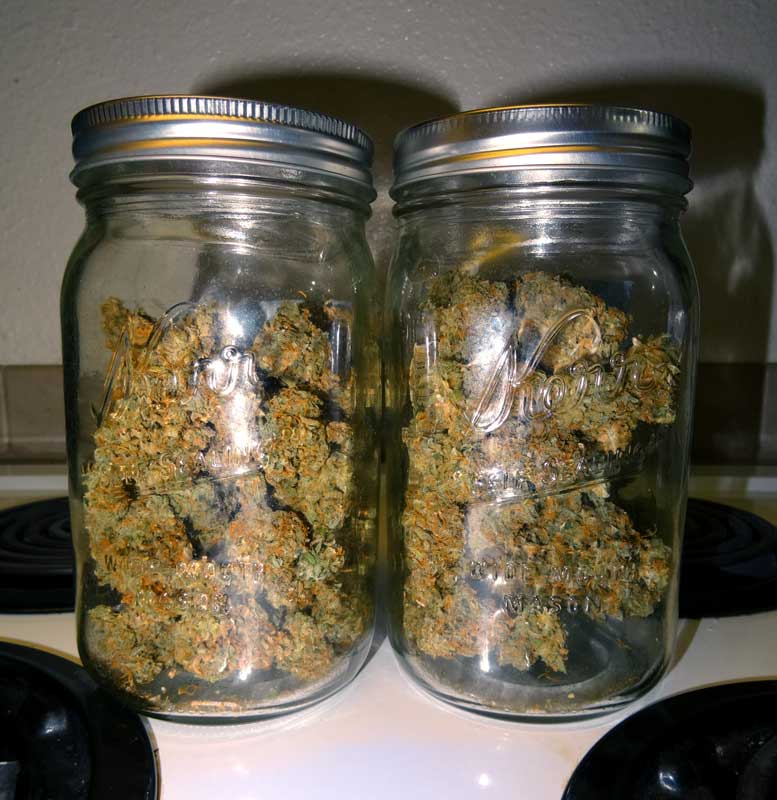
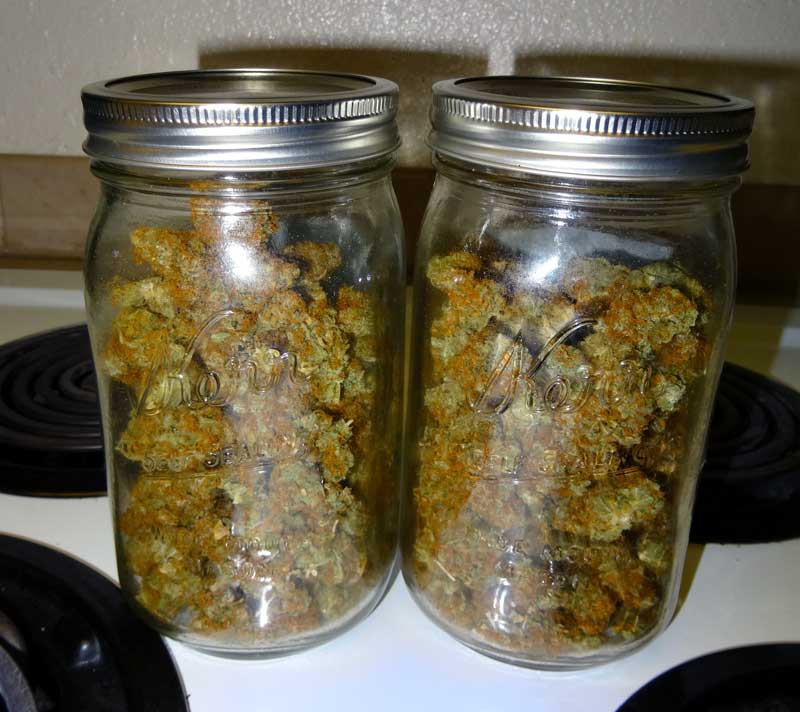
Here are the buds after they’ve been dried. Altogether, the Sour Diesel plant yielded 63.6 grams, or about 2.2 ounces on 1/15/14.
Sour D – 2.2 ounces
Sour Diesel Strain Review:
- Potency: Body/mind effect, high potency. These buds were tied with Critical Jack as far as the potency, and could compete with the photoperiod strains we have in the house as far as pure strength. Very strong initial head/body effect – I found myself putting hand to my head after I tried it (“headband”). This one was good all over and had really strong mental and body effects. I think this one is the most “recreational” of all the plants I grew.
- Taste/Smell: True to its namesake, this plant has a sort of diesel and spicy sour taste/smell.
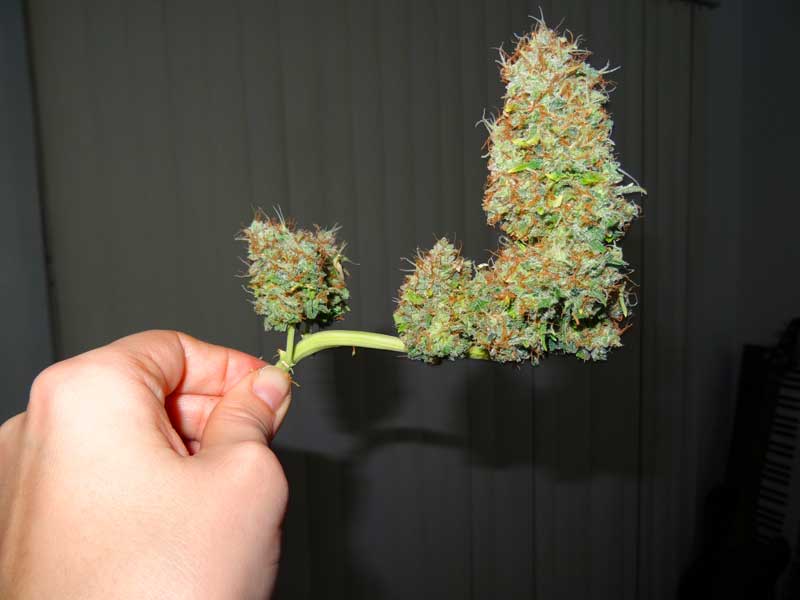
- Bud Structure: Dense, sticky and covered with bright orange hairs, this plant grew long spear-like buds. After a slow start (this plant was way behind the others in the beginning), it really chunked up and ended up being the 2nd as far as yields.
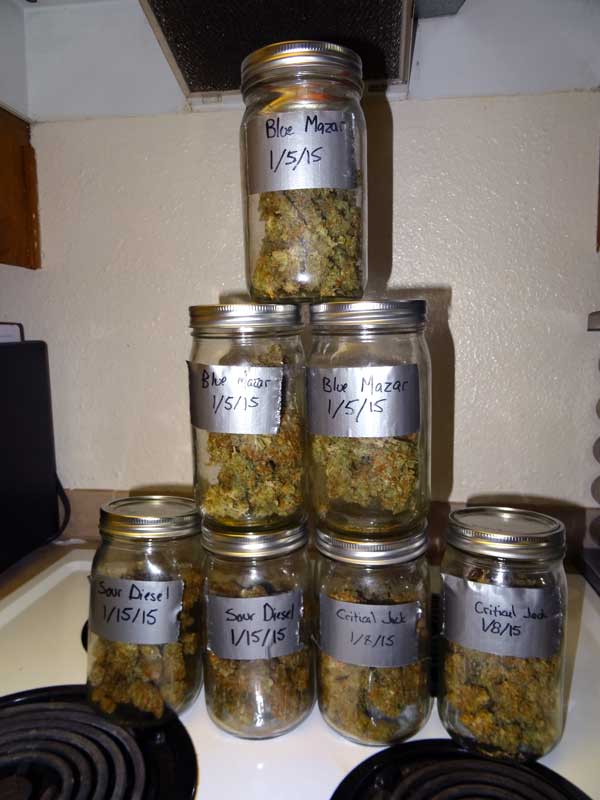
Between the 3 plants I harvested 190.4 grams, or about 6.7 ounces
Post-Grow Thoughts on Auto-Flowering Strains
Before this grow, I’d never grown any auto-flowering strains. I’d seen a few back in 2010 and wasn’t impressed, but the genetics have obviously improved greatly. This was an adventure! I’ve grown photoperiod strains for years, and I always wondered what growing these auto strains would be like. I thought it might be helpful for other growers to learn some of the things I noticed throughout the grow.
Pros
- Short harvest! I planted these on October 13, and harvested the first plant before New Years! With these auto-flowering plants, I was able to harvest 1-2 months earlier compared to growing with photoperiod strains – it felt crazy how fast harvest came. If you need cannabis fast, than growing autos is definitely the way to do it.
- Light Schedules – No need to worry about light schedules or light leaks, though this didn’t really make much difference to me since I was already growing in a tent, and changing the timer to initiate flowering only takes a minute or two.
- Medicinal Qualities – These buds felt more medicinal than the majority of strains I’ve run into. This may be because auto-flowering cannabis strains tend to have much higher levels of CBD than most high-THC photoperiod strains. Learn more about THC vs CBD. Even after enjoying a lot of buds at once, the effects weren’t as “racing” as some of the really high-THC, low CBD strains, and I think some people might actually prefer the effects of the auto-flowering buds. They all made me feel very pleasant and helped melt away stress, without being overwhelming. I like that with these strains I’m able to build up the positive effects as much as I want without running into adverse effects or feeling like it’s “too much.” I think autos might be a good choice for many medical marijuana patients.
- Potency: I was surprised and delighted that the two Dinafem strains seemed to hold their own against photoperiod strains when it comes to pure strength and potency.
Cons
Some Strains Have Lower Potency: I think growers need to be aware that some auto-flowering strains may not be as hard-hitting as many of the photoperiod strains. For example the Blue Mazar produced really nice effects; it’s great for relaxation while allowing me to still be functional, but I’m not sure this particular auto-flowering strain would be a good choice for someone seeking mind-bending buds for recreational use.
Bud Structure: If you’re looking for the most eye-catching buds that will win the next beauty contest, than autos are probably not for you. The buds I grew weren’t as sparkly as the best photoperiod strains, though they were still very pretty. They also seemed to have a slightly different structure than most photo plants; they generally had more and larger sugar leaves (which I assume helps the plant grow vegetatively even while it’s making buds) but that makes them look leafier than photoperiod buds.
No Control Over When Flowering Begins: I didn’t like the lack of control caused by the auto-flowering trait. For example I had to toss one of my plants because it didn’t auto, and I believe that lowered my final yields because there was a “hole” in the canopy I’d created, so that extra light was being wasted. With photoperiod plants, you can get all the plants to flower exactly when you want, even if they’re different ages or sizes, so that particular problem wouldn’t happen in a photoperiod grow.
Training – Any LST Happens in the Flowering Stage: After week 3 the plants had buds growing on them, so when it came time to do a training/bending session, I was worried about bumping into or crushing buds while I was trying to bend the stems. It worked out okay in the end, and I’m very happy with the results, but the whole time I felt like I was actively trying to avoid injuring any of the fledgling buds. It felt stressful. I like how with a photoperiod plant you do your training in the vegetative stage, when the plant is hardy and almost impossible to truly injure. You can drop your light on a photoperiod plant in the vegetative stage and it will recover just fine, but with the autos I felt I had to be a lot more gentle when it came to training. Many growers recommend that you shouldn’t train autos, and should just let them grow naturally, and I do believe that would have made things a lot easier, although it would probably lower the final yields. Next time I grow auto-flowering plants, I plan on topping them.
Reflection: How I Could Have Improved the Grow
Nutrients – Full strength nutrients (based on the schedule by General Hydroponics) was way too much, even with several plain-water waterings in between. I ended up using the GH nutrient trio at half strength, and after the first few weeks I only gave nutrients every 2nd watering, with plain pH’ed water the rest of the time. I didn’t seem to have any problems when I altered to half strength. I do recommend adding an extra plain water watering in hot weather, or if you see signs of tip burn. Here’s the exact nutrient schedule (PDF) I was using at the end. It’s nothing special, just the regular General Hydroponics schedule at half strength, and converted into imperial measurements (tsp instead of ml measurements).
Light – If I could do it again, I’d get a 250W HPS light with a bigger reflector and separate ballast. I originally wanted a 250W HPS with a wing reflector, but I couldn’t find exactly what I was looking for in my price range. I ended up getting this 250W with built-in ballast, and it’s convenient because it’s plug-and-play, but it has a reduced light footprint compared to a dedicated reflector. In other words, a wider reflector would create a bigger area that has usable light. I think the buds on the edges of this grow would have gotten more light if I’d used a wider reflector. I also think it might have been a little cooler in the tent if the ballast could be kept outside the grow area. Still, I am very impressed with this light and I don’t plan to trade it in or buy a new one. The built-in reflector, and the temps were completely adequate for my needs.
Pot Size – I may consider using 5 or 7-gallon smart pots next time. The 2-gallon smart pots were very small for this grow. I ended up having to water the plants every other day and sometimes daily when it got hot or dry. The frequent watering was needed because the pots were too small to hold enough water to last the roots a few days. Part of why I chose such small pots was to fit the 4 plants inside this tent under the grow light. If I could do it again, I probably would have put them in bigger smart pots. Then again, the plants grew fast and well, so maybe I just need to commit to watering every other day and get a better way to water them.
On Training Auto-Flowering Plants
I always train my plants for better yields, but with auto plants everyone warns you not to use any cutting or high stress training techniques like topping or pinching/FIMing because their veg stage is so short they don’t have time to recover.
So without cutting techniques, if I wanted to train the plants I was only left with Low Stress Training (bending stems to the plant grows in the shape you want). LST is a great cannabis training technique, and increases your yields dramatically even when used alone, but it works best when combined with cutting or pinching off the top of the plant when the plant is young. Topping/pinching instantly increases the number of colas/main buds and gives you a symmetrical “platform” to start with, so it annoyed me that I had to work with one main cola that had strong apical dominance.
Despite the warnings I’ve heard from other growers, I wish I’d FIMed (pinched the top off of) or topped these plants when they were young. I’ll never know if it would have turned out better, but from what I saw I believe I would have gotten bigger yields if I had broken their apical dominance from the start. If I had to do this again, I would FIM or top the plants when they have about 3-4 nodes (but only if the plant was growing vigorously, if it was struggling like my Sour D was at the beginning, I would leave it alone until it was healthy). Careful FIMing or topping does not slow down growth much in a healthy plant, and I believe that would have made training much easier (less time needed on the grower’s part doing intricate LST) while making multiple main colas for bud-making. I think it would have been easier to spread out each plant under the light if it had more colas right from node 3 or 4.
But if an auto-flowering plant is struggling or slow growing, I think it’s incredibly important to avoid any type of high stress techniques! It could stunt your plant. Every time you stress an auto-flowering plant, you slow down growth to some extent. That means you’re losing that time forever since these plants have a set number of days to live – it’s a fight against the clock! I believe you have to find a smart balance of finding just the right type of stress to make a better plant structure, but not enough stress to stunt your auto-flowering plant. I definitely can’t recommend anything since I haven’t done it myself!
Conclusion
Overall I’m really glad I did this grow and got a chance to try growing auto-flowering cannabis strains.
They impressed me with their quick time-to-harvest and yields. Their medicinal qualities were better than nearly all the buds I run into, even some of the high-CBD medicinal strains like Harlequin (which never really did anything for me).
I was initially worried the buds wouldn’t be as strong, and I was very pleased to find out the potency of the two Dinafem auto strains were as good as the photoperiod strains we have in the house. Auto-flowering strains have really come a long way from the original “Lowrider” strains when it comes to potency!
I think auto-flowering strains are the perfect choice for a lot of people, especially medical marijuana patients, people who don’t have time to train their plants, or those who need a harvest soon. But for me, the downsides outweighed the upsides, and although I’ll probably visit autos again in the future, I’ll be a growing a photoperiod plant for my next grow!
Jump to…
Auto-Flowering vs Photoperiod Strains
Plant Training for Bigger Yields
1st Grow in My Garage – Auto Northern Lights – 5.35 oz Harvest
5 Ways to Increase Yields When Growing Indoors