by Nebula Haze
One of the most common questions we get at GrowWeedEasy.com is, “What soil should I get?”
There are lots of soil mixes that work great for growing cannabis. To be completely frank, just about any soil mix will work as long as you water plants properly and provide a great growing environment. But some soil mixes are better than others. Today I want to sure a winning combination of soil that provides a series of benefits. When I grow cannabis in soil, this is the combo I use.
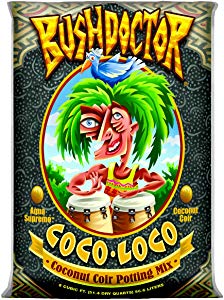
Coco Loco soil amended with Nature’s Living Soil Super Soil Concentrate (full directions below) gives you a “Just Add Water” grow experience
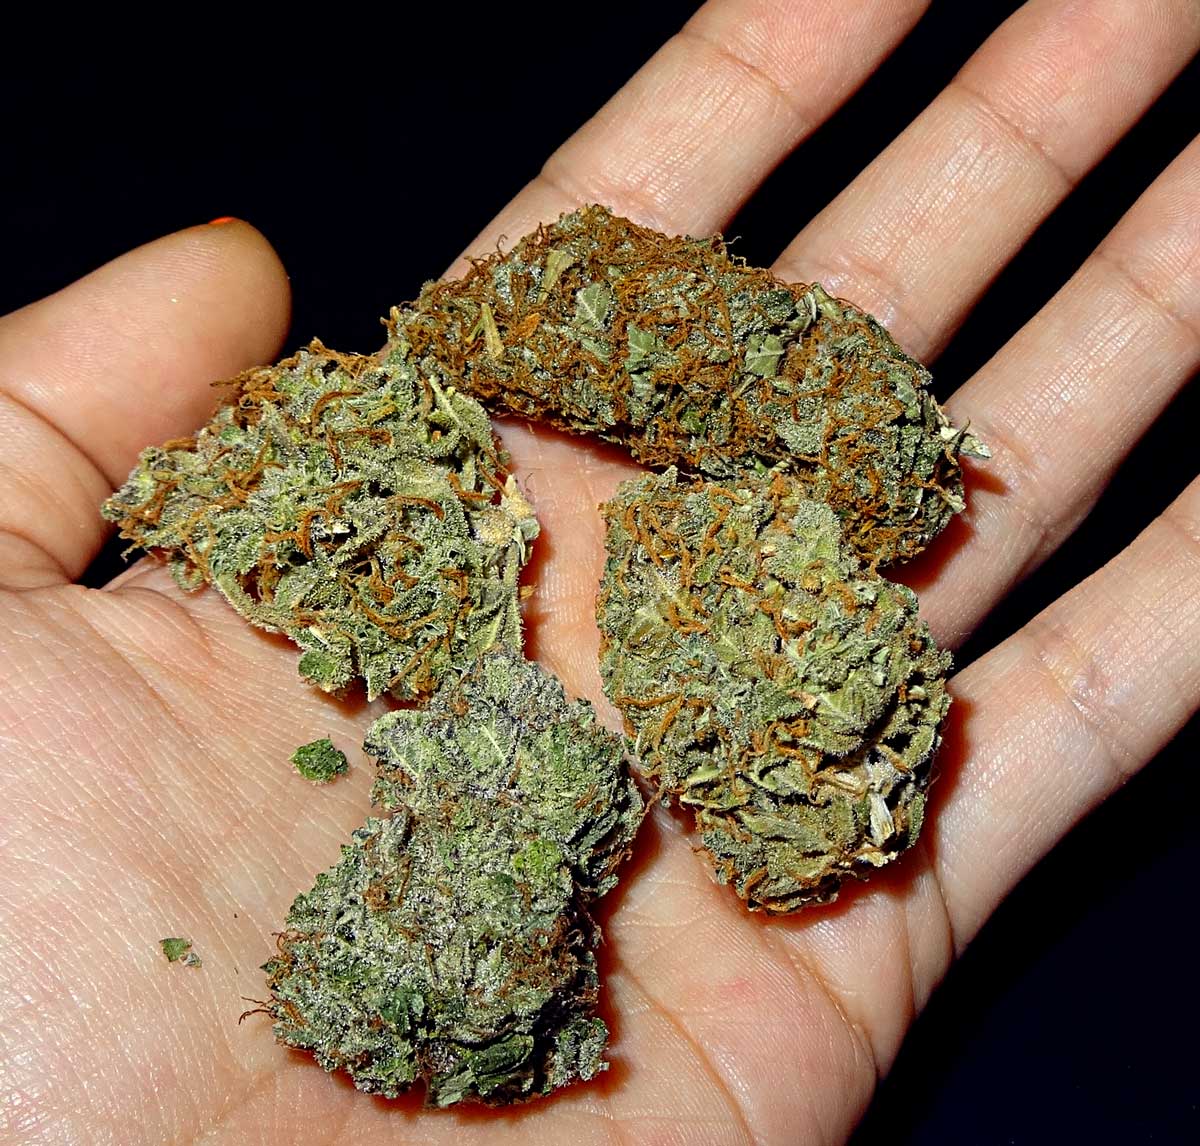
My last harvest with Nature’s Living Soil produced exceptional results. Grown under a 300W LED grow light in 5-gallon fabric pots.
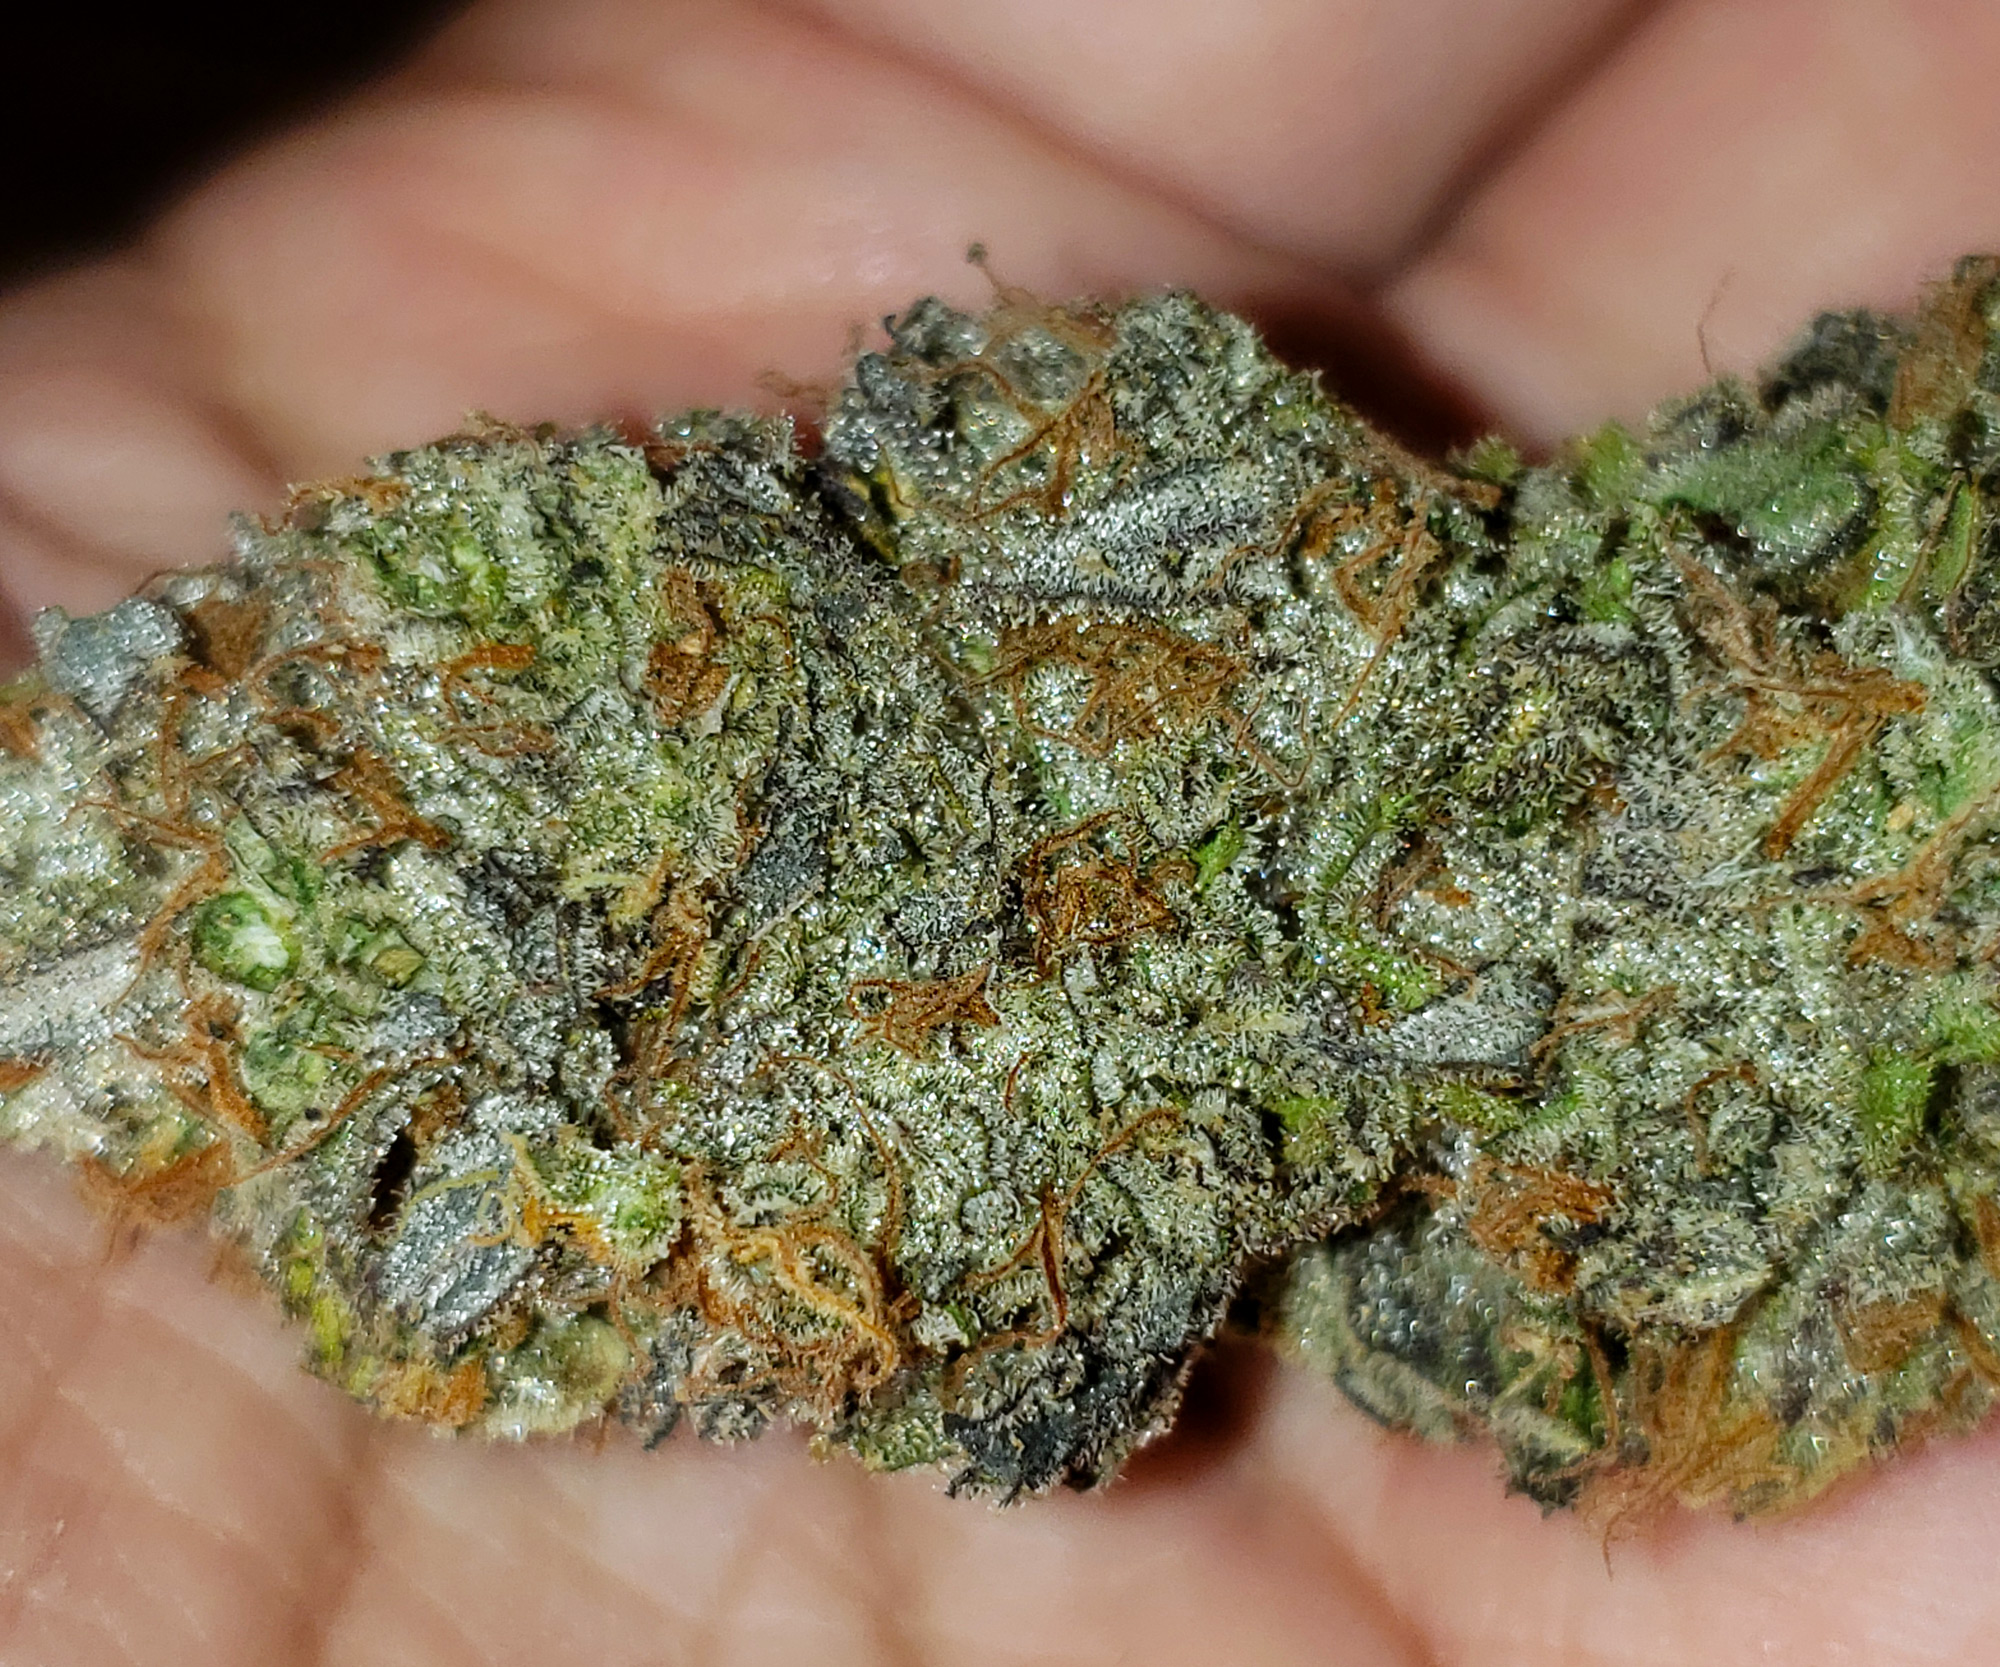
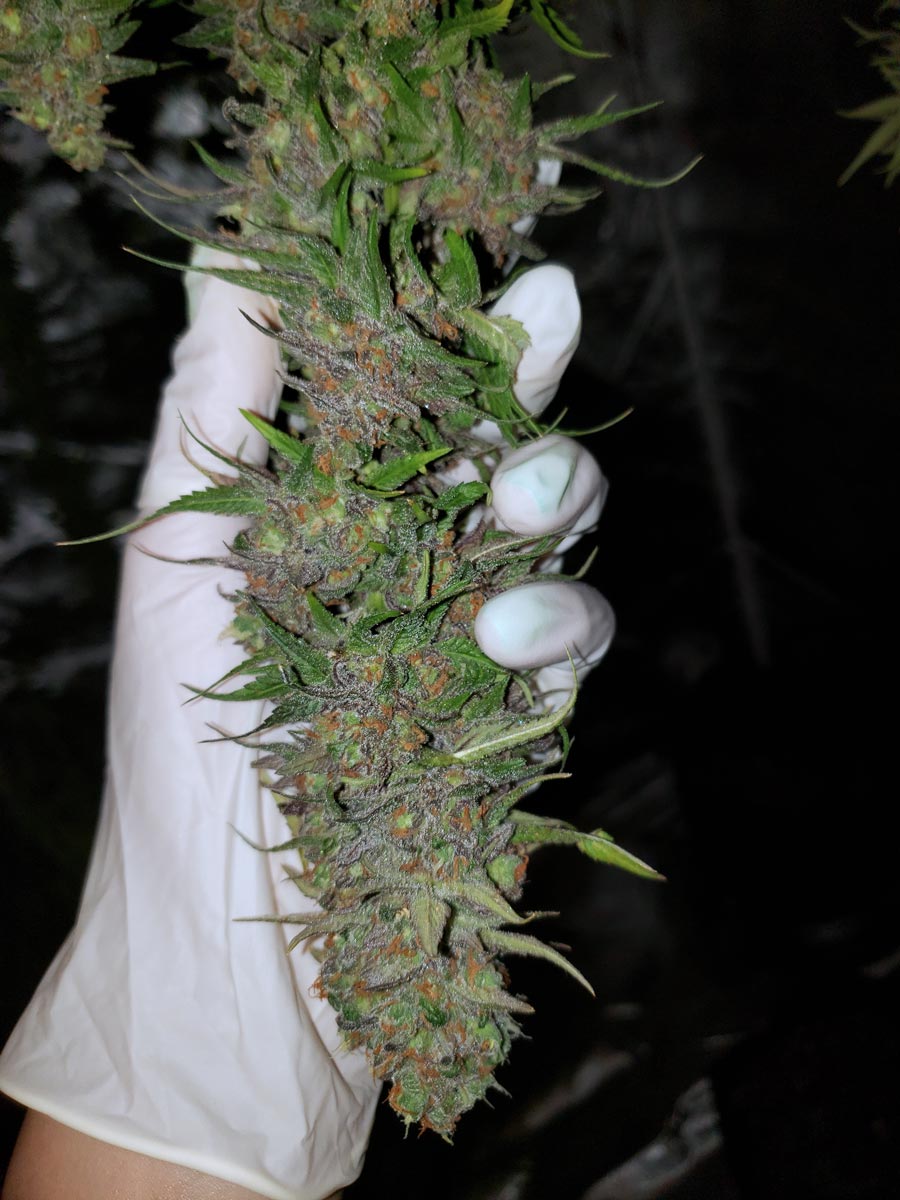
A Critical Purple Kush bud grown with Nature’s Living Soil. No nutrients added, just water + soil!

Click for extreme closeup
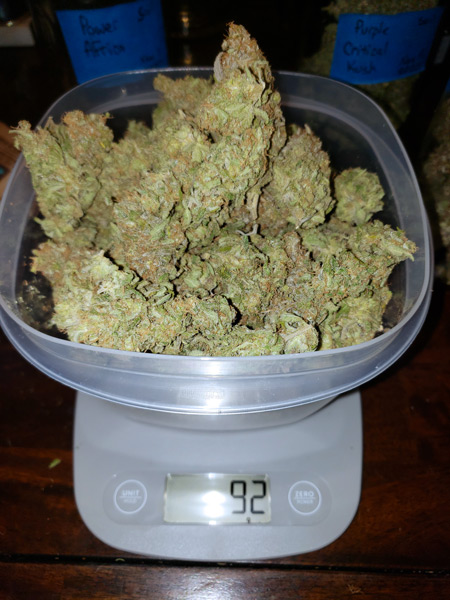
I averaged a little over 3 oz per plant, for a total harvest of 9.4 oz
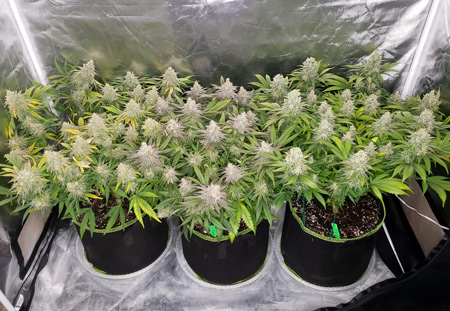
These are the Power Africa buds (left plant)
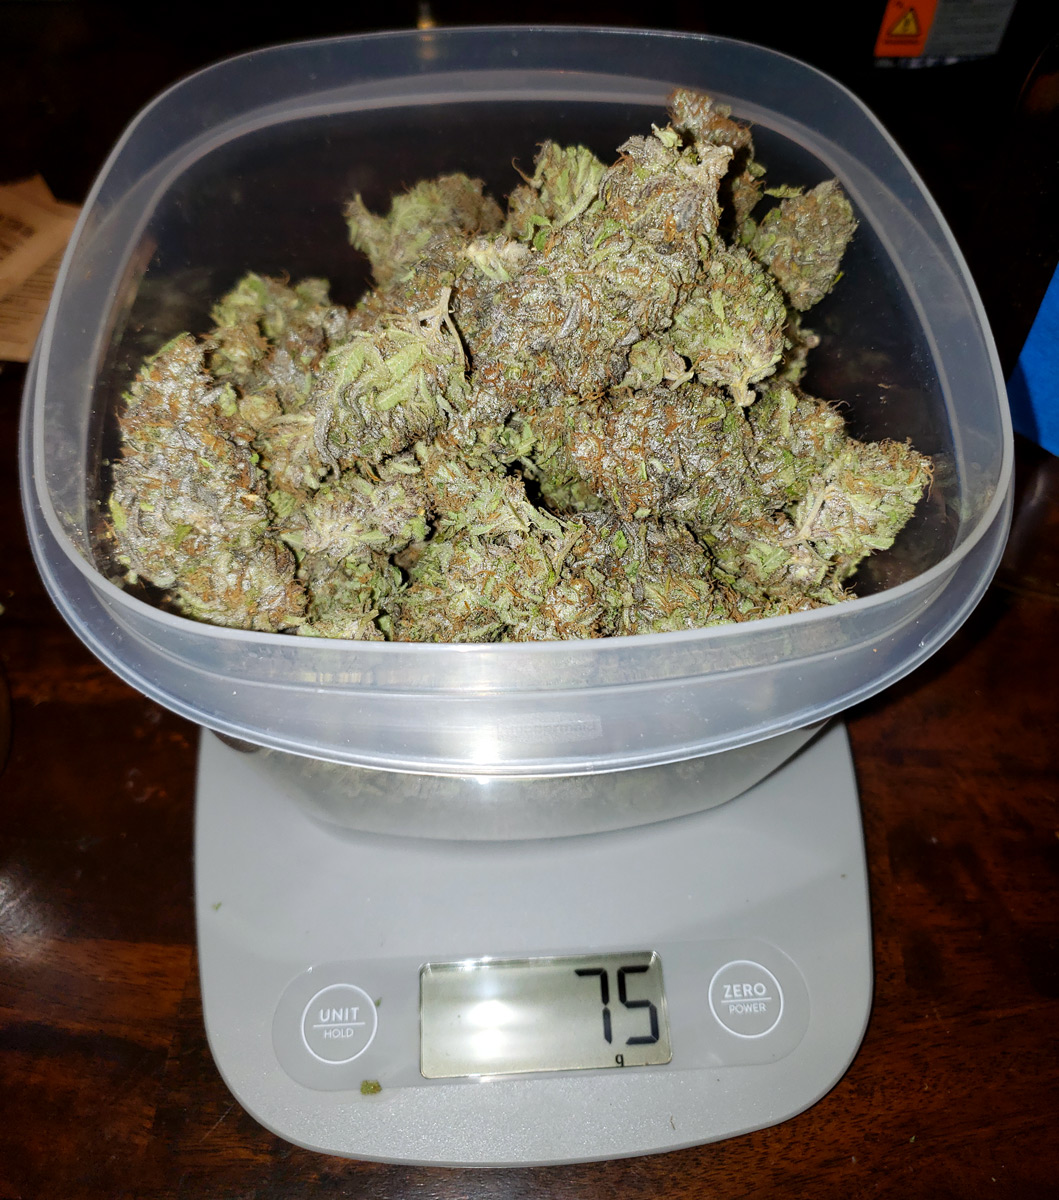
Peyote Critical buds (middle plant) – this plant produced lower yields than the other two, but the buds were still spectacular!
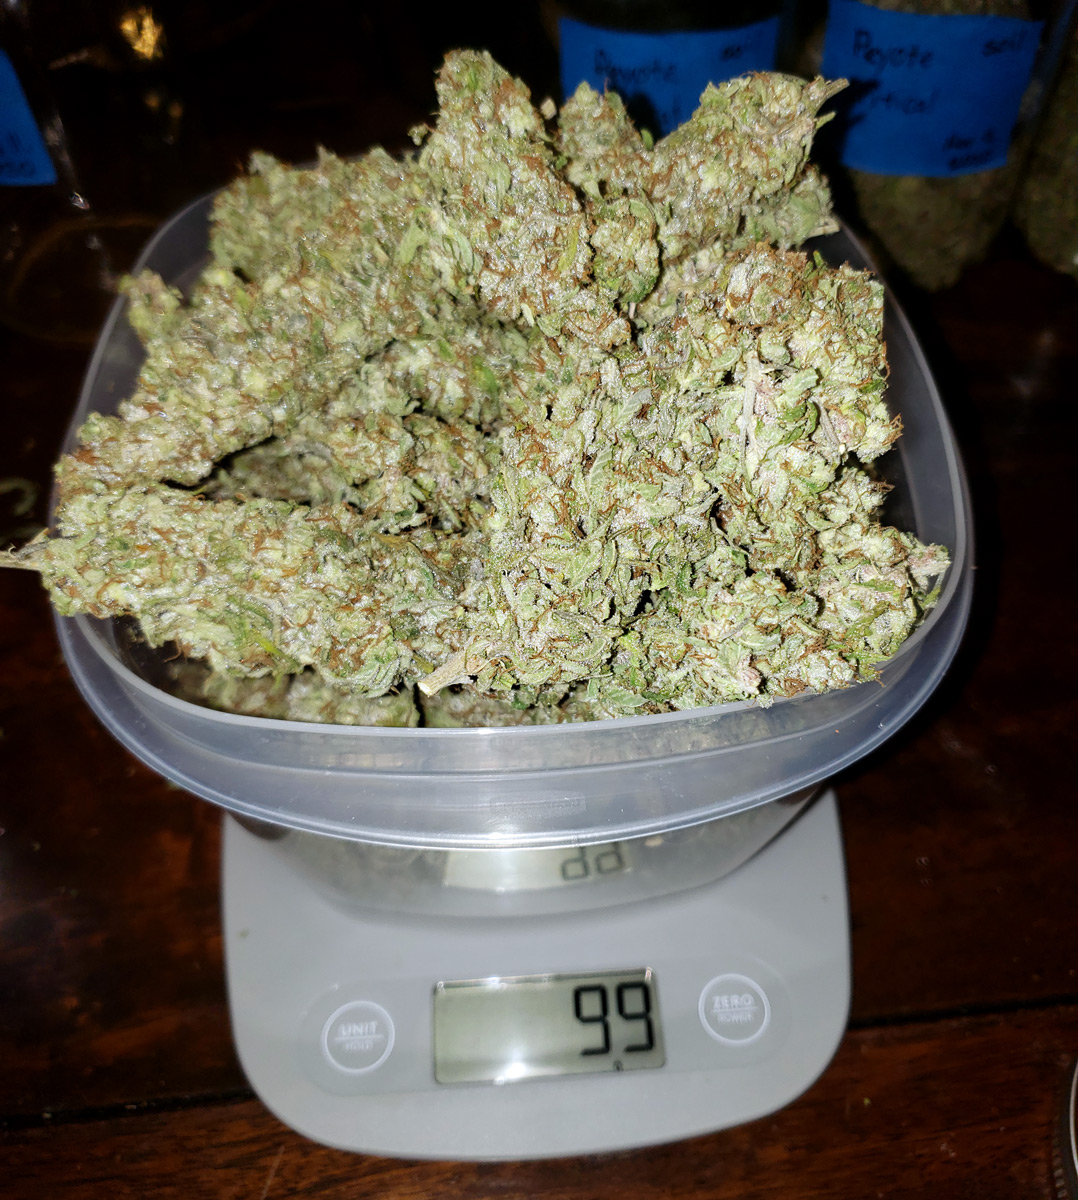
Purple Critical Kush buds (right plant) – Not only did this strain get the best yields, the buds ended up being the fan-favorite when it came to smoke tests!
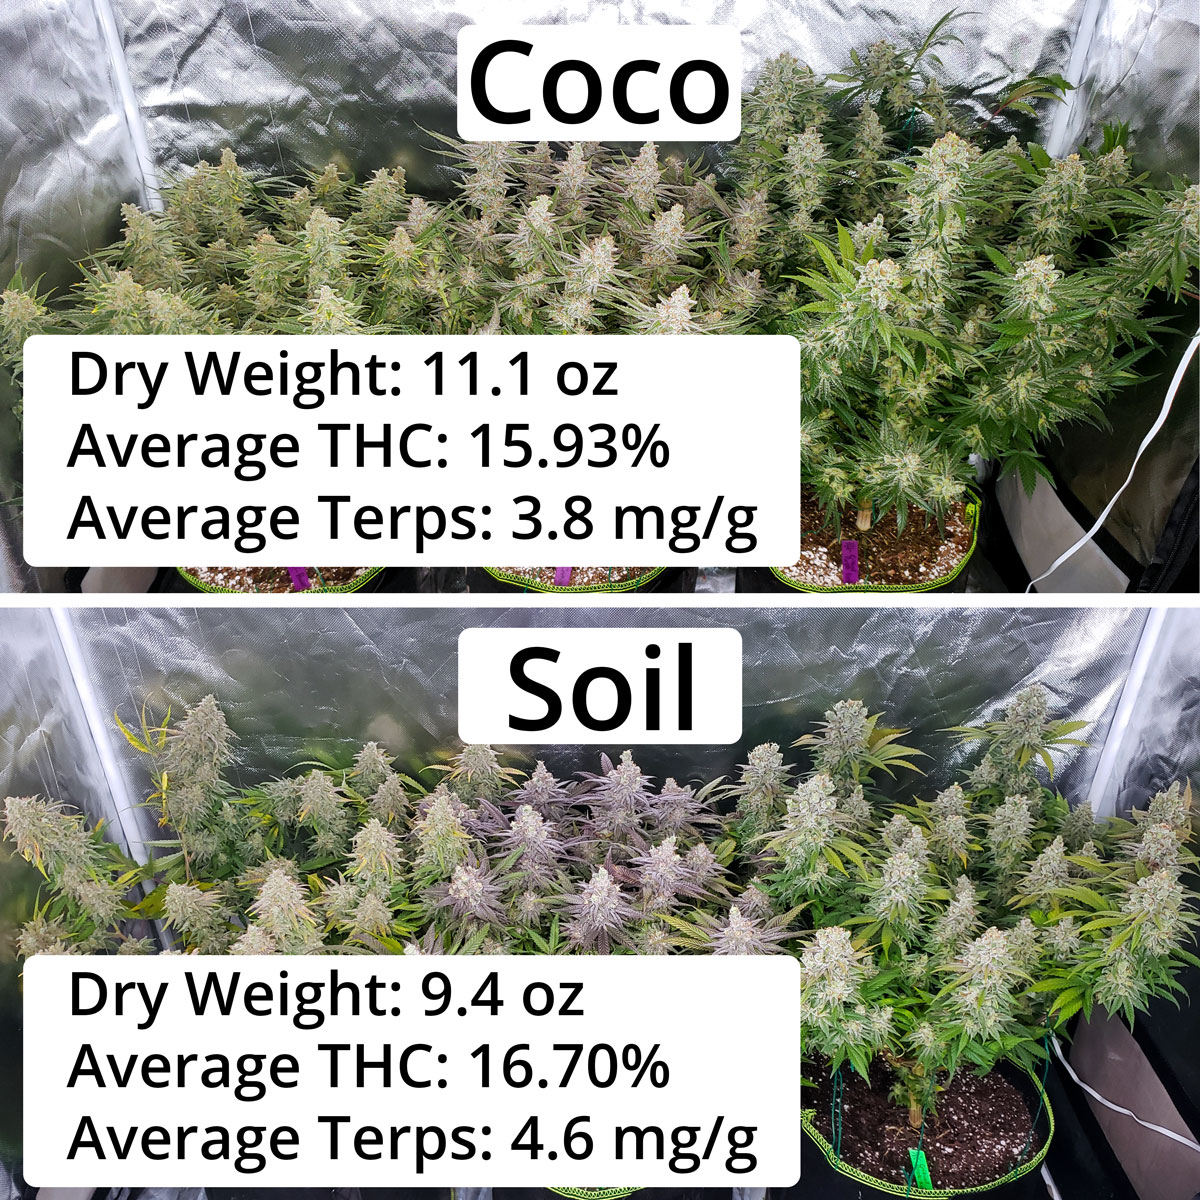
Nature’s Living Soil Produces Epic Potency and Smell!
When I did a side-by-side grow journal of Nature’s Living Soil vs Coco with clones in identical setups, Nature’s Living Soil plants ended up with slightly lower yields but higher THC and terpene production. If you want ease of use, great potency, and complex bud smells, NLS is a great choice.
The Setup
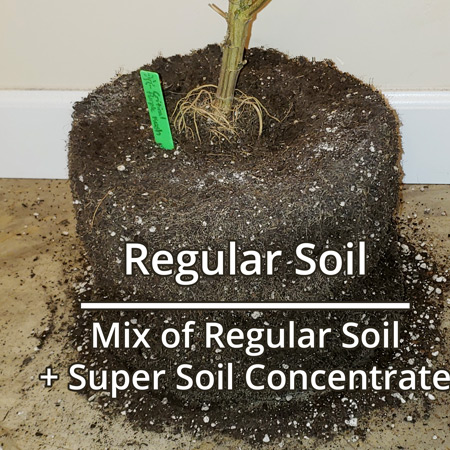
- Bottom 1/3 of each pot is Coco Loco (or any quality soil) mixed with Nature’s Living Soil Concentrate
- Top 2/3 of each pot is filled the rest of the way with just regular soil
The beauty of this soil setup is that you have a “reservoir” of organic nutrients at the very bottom of each pot, filled the rest of the way with regular soil. Your plant roots will naturally grow in the regular soil, but has the ability to “dip into” the nutrient reservoir as needed. Just like in nature. This gives you the ability to skip unnatural chemicals and slowly provide organic nutrients to plants as needed from seed to weed.
Why does this work so well? Plants in soil often run out of nutrients by the time they get to making buds. However, if you make a soil mix too “hot” with nutrients, plants get burned and won’t grow. This setup allows young plants to grow happily in a regular soil mix, but gives the plant access to nutrients if they start running low.
Roots mostly “live” in the regular soil, but extra roots are sent down as needed into the nutrient “reservoir”. After harvest, plant roots are concentrated in the top 2/3, though by harvest many roots are also dipping into the rich super soil mix in the bottom 1/3.
How to Grow Cannabis with Nature’s Living Soil
What You Need
Grow Medium
- Coco Loco soil (or other quality potting soil like Roots Organic or Ocean Forest)
- Nature’s Living Soil Super Soil Concentrate (1 lb concentrate per 5 gallon pot, so 5 lbs of concentrate would be good for 5 x 5-gallon pots).
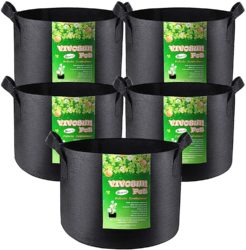
- 5-gallon fabric pots (smaller pots may run out of nutrients by the end unless plants stay very small; to grow bigger plants get 10-gallon fabric pots)
Note: Coco Loco contains coco but it is a soil mix. Don’t use a coco mix that doesn’t contain soil. If you’re unsure which soil to get, I highly recommend sticking with Coco Loco, Roots Organic, or Ocean Forest as I personally know these work great. That being said, any high-quality organic soil potting mix should do the trick.
Nature’s Living Soil Super Soil Concentrate

Home for Plants
- A place to grow (in a closet, in a grow tent, etc.)
- A grow light*
- Air movement (from a fan)
- Temperature 70-85°F / 20-30°C (comfortable for you, comfortable for plants)
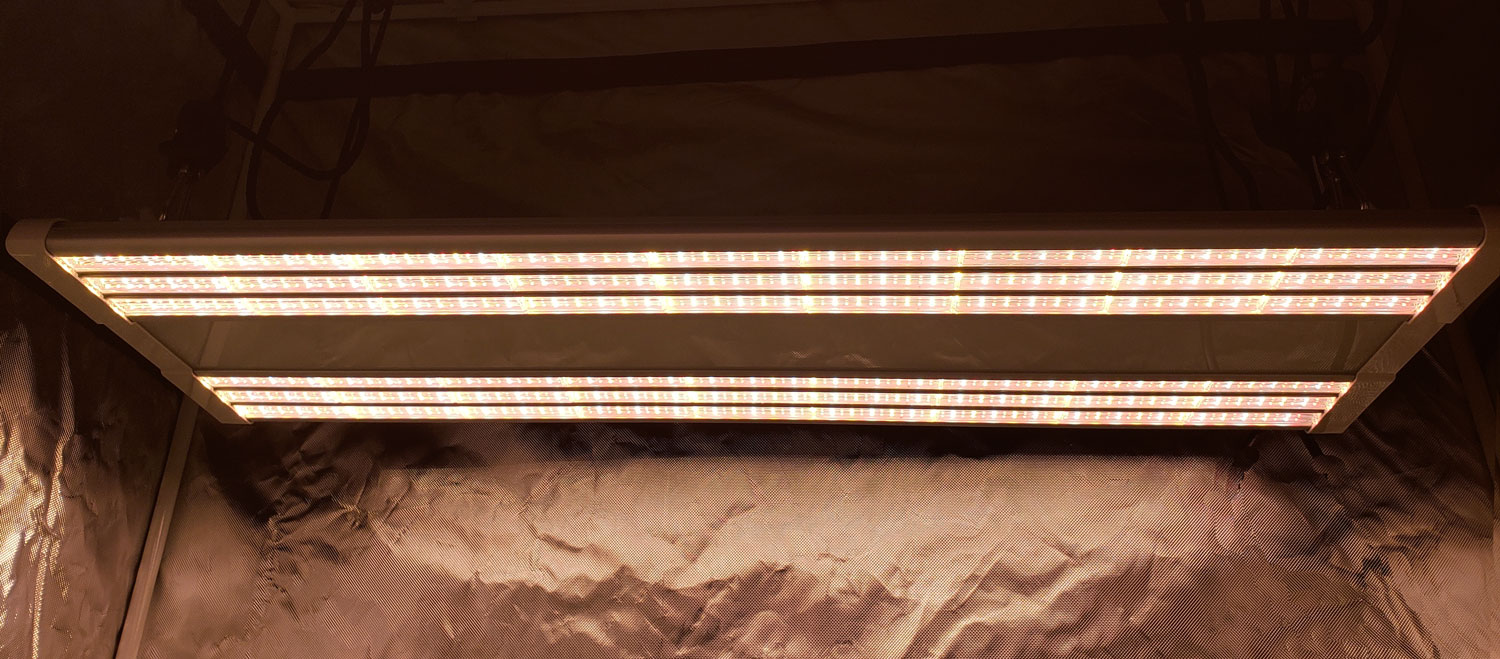
*Recommended grow lights (each can produce 10+ oz per harvest if you follow the instructions below)
- LED grow lights – LEDs are the best choice when heat is a concern. LED fixtures typically stay cooler than other grow lights per watt, and plants under LEDs can withstand higher temperatures without ill effects. A great combo if you’re worried about plants getting too hot. I exclusively use LED grow lights during our hot San Diego summers. Avoid generic or no-name LEDs unless you’re familiar with the brand. In my experience, generic LEDs often use older technology that doesn’t produce big cannabis yields or the best bud quality. I have had the best results with LEDs designed specifically for cannabis plants, including the Mars Hydro TSL2000 (here is a list of the best LED grow lights for growing weed). Both of these fixtures are kept about 24″ (60 cm) away from the tops of plants and produce magnificent bud quality and excellent yields per watt.
- HID grow lights – If you’re dealing with cold and need to add some heat I recommend using HID grow lights such as MH, HPS, and CMH/LEC. All HIDs use one big bulb that gets burning hot and can raise the temperature of the room by several degrees without venting. However, as long as the temperature is under control, HID grow lights get outstanding growth rates, yields, and bud quality. Plants under HIDs tend to be more resistant to nutrient deficiencies than plants grown under LEDs. I exclusively use HIDs when growing in the winter and never need a heater in the grow room. Here is an example of a 400W MH/HPS setup, which regularly produces up to 14 oz. This 315 LEC grow light can produce over a pound when kept about 24″ (60 cm) away from the tops of plants. How to know if it’s too hot for your plants? Put your hand where your plants are. If it’s too hot for you after 30 seconds, it’s too hot for your plants and the light should be moved further away. HID grow lights have a bad reputation for getting hot, but if you’re dealing with cold they’re perfect.
HLG 300 LED grow light on left, 315 LEC grow light on right. Each produces excellent bud quality and 10+ oz per harvest if you follow the instructions below. Choose LEDs when it’s hot in the grow room, and HIDs when it’s getting cold.

How to Grow with Nature’s Living Soil
There are instructions on the bag, but here’s a more detailed explanation with pictures.
1.) Mix up your soil
Add 1 pound of super soil concentrate per gallon of pot (so for example 1 pound of concentrate for a 5-gallon pot). Fill the rest of the bottom 1/3 with regular soil and mix together. Now the bottom 1/3 has a “hot” mix of soil that contains a reservoir of nutrients.
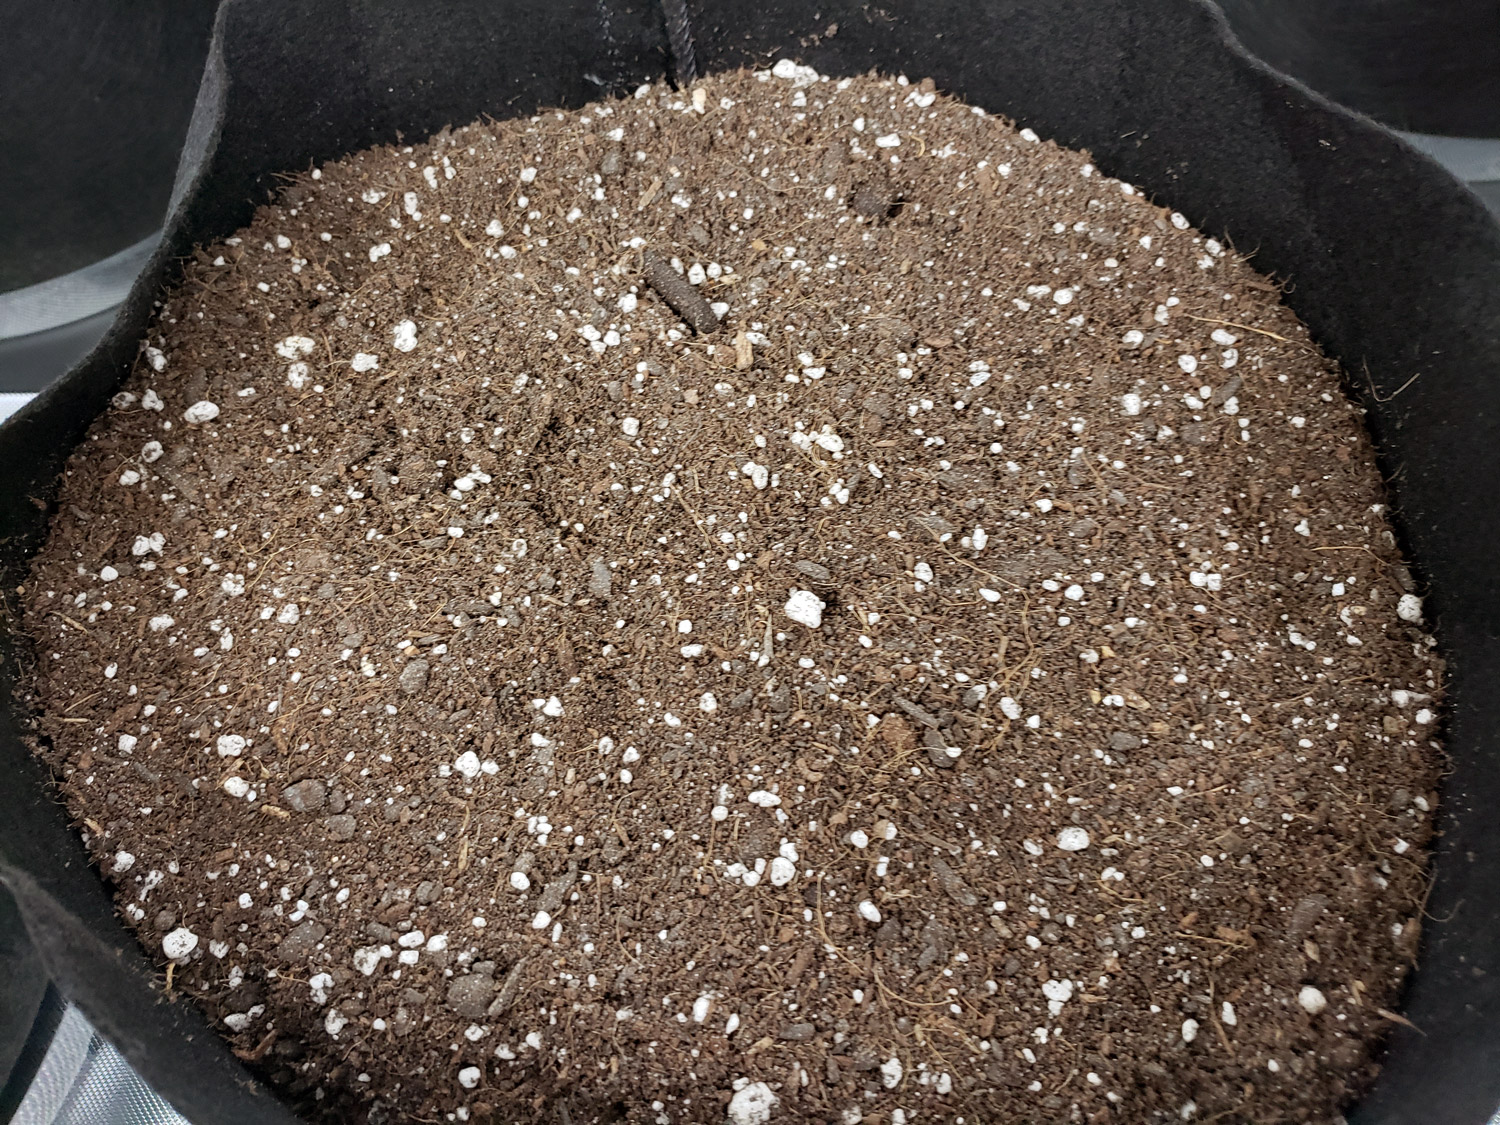
Fill 1/3 of the way with a mix of Super soil concentrate and regular soil (follow instructions on bag)
Fill the remaining 2/3 with pure soil. The layer of regular soil is where your roots are going to “live” for the most part.
Repeat for all your plant containers. You’re ready to start growing!
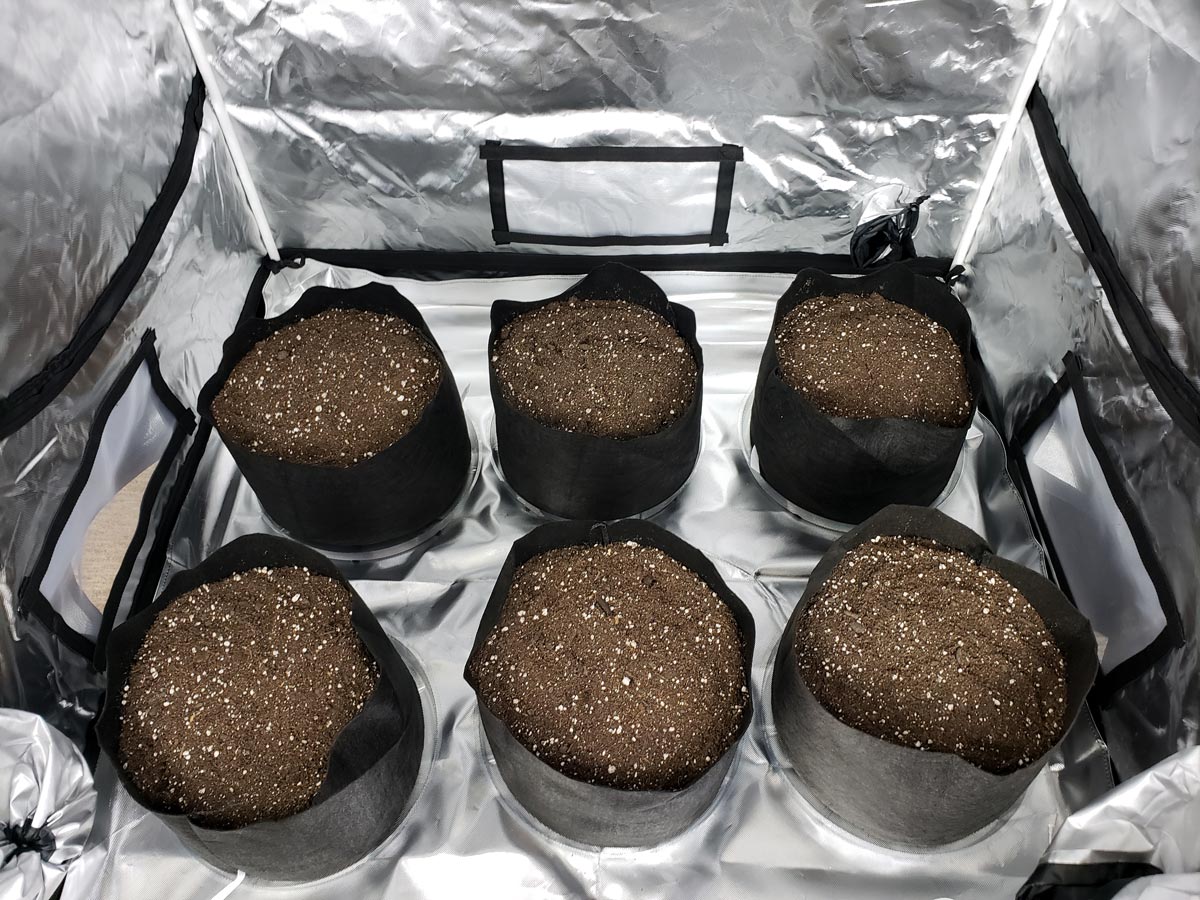
2.) Plants your seeds
Of course, make sure your garden is completely ready first before germination. You’ve set up a place to grow, you’ve got your pots and soil, and your grow light is hanging, right?
Ok! Time to put your seeds (or clones) into their new homes! But where to get seeds safely?
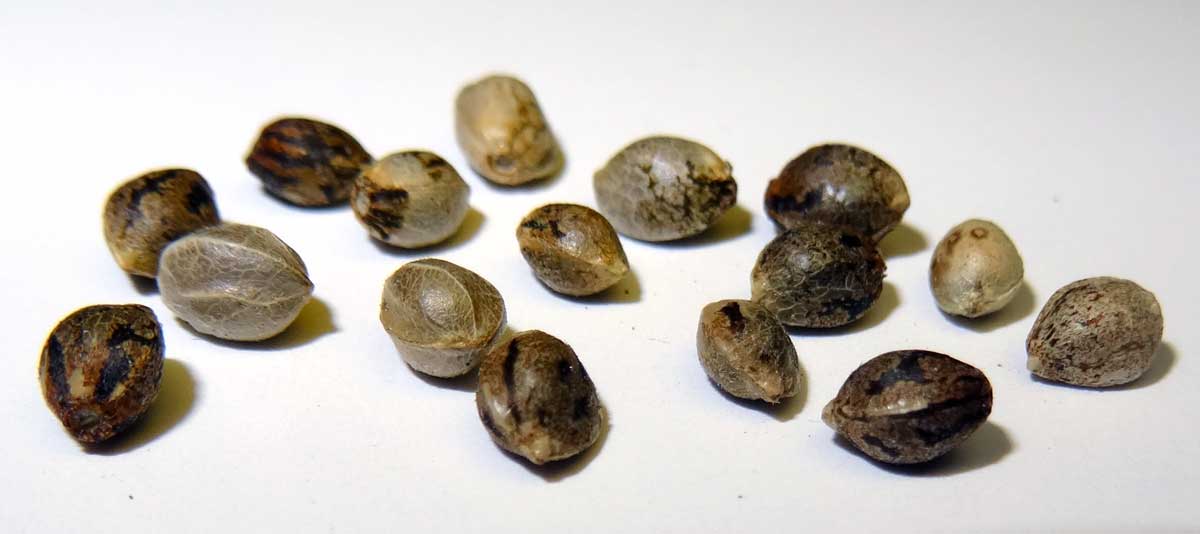
View a list of tested & trusted online seed vendors.
There are lots of ways to germinate seeds, for example seedling plugs or planting seeds into a solo cup of soil and transferring after. But the easiest way is simply to put your seeds in the soil and give 1 cup of water every 3-4 days (basically just keep the soil around the seed moist but not wet) until you see the first set of serrated leaves. Then continue to the watering schedule below.
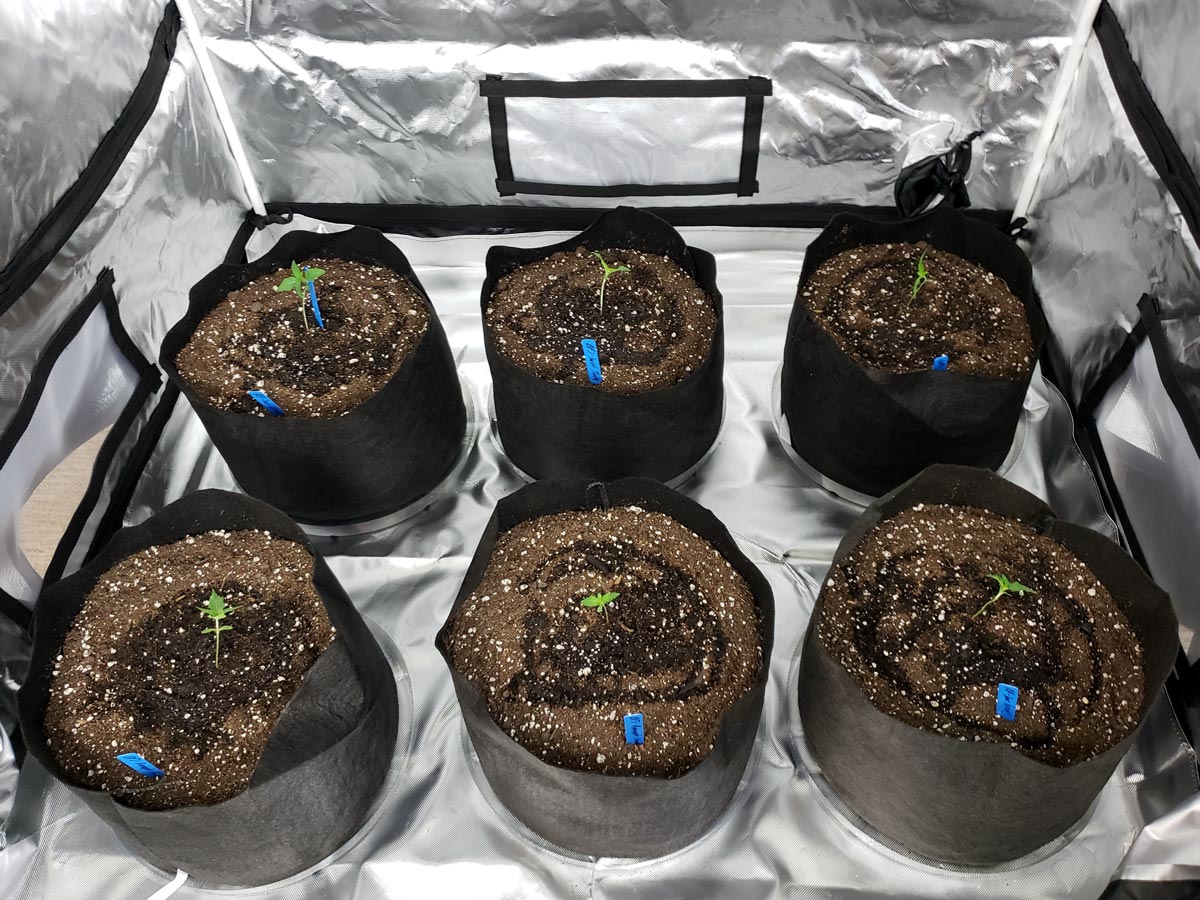
Plant your seed just below the surface and keep soil moist but not soaking. Make sure they stay warm! Your seedling should pop up in a few days.
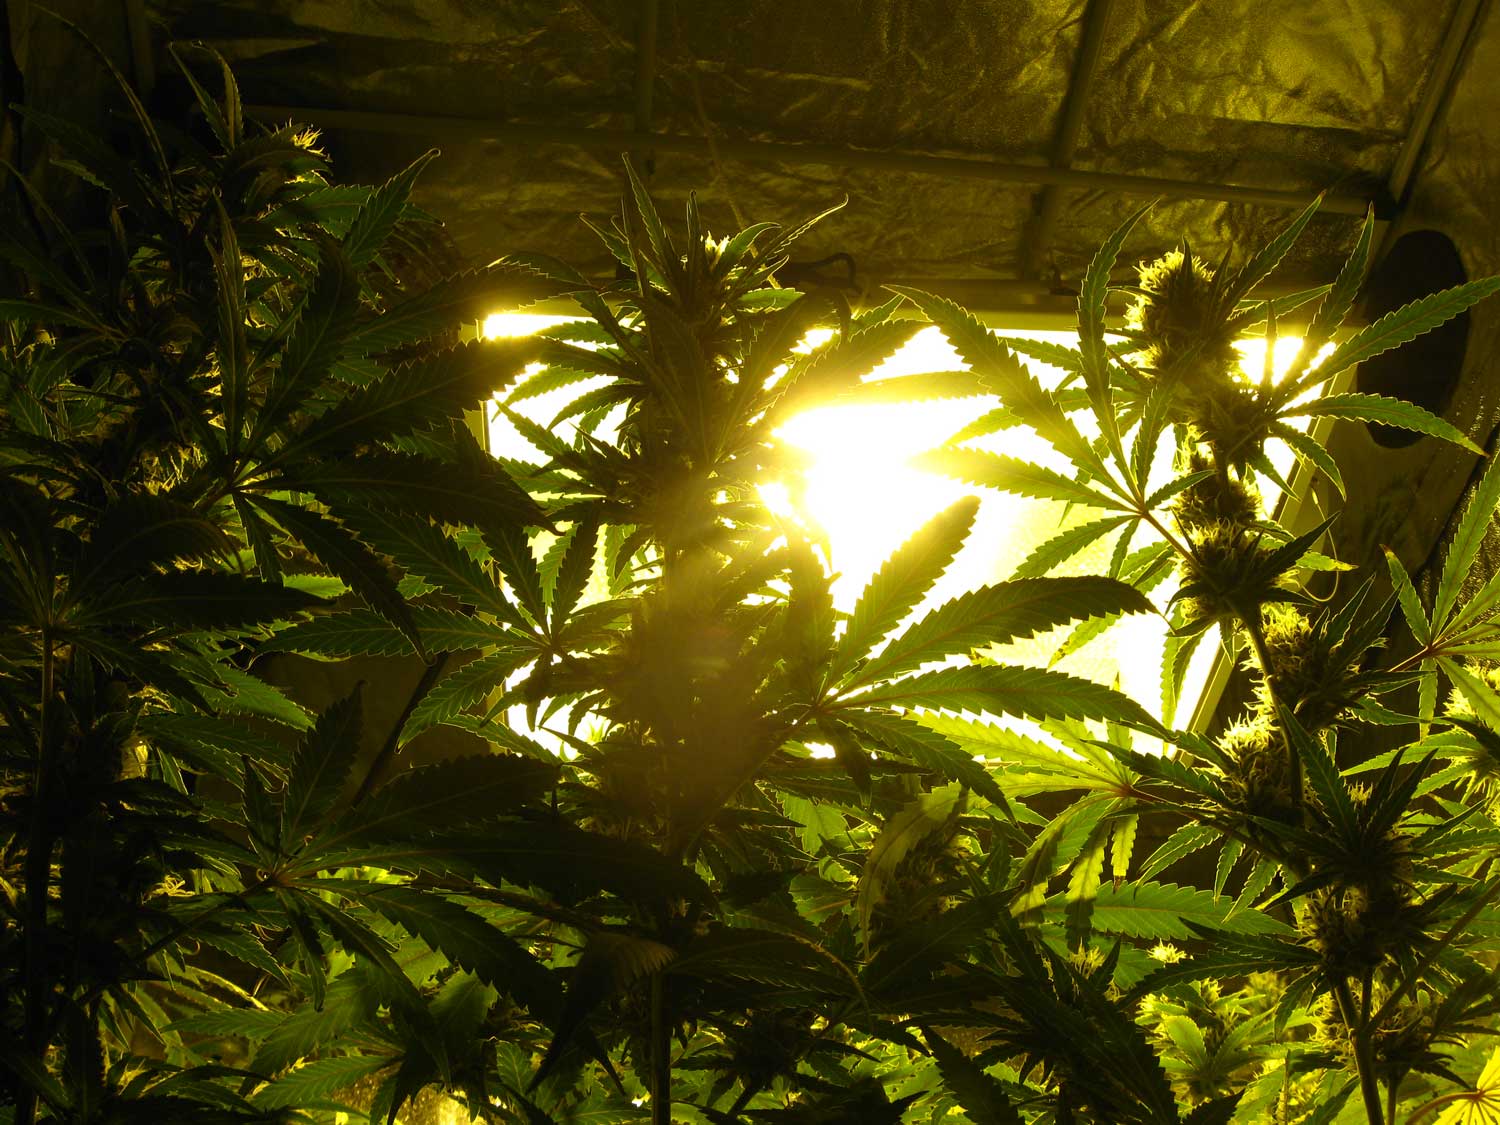
3.) Give plants 18+ hours of light a day
Young cannabis plants do best when given 18+ hours of light a day.
What’s the best light schedule? It depends on your goals.
With 18 hours light/day…
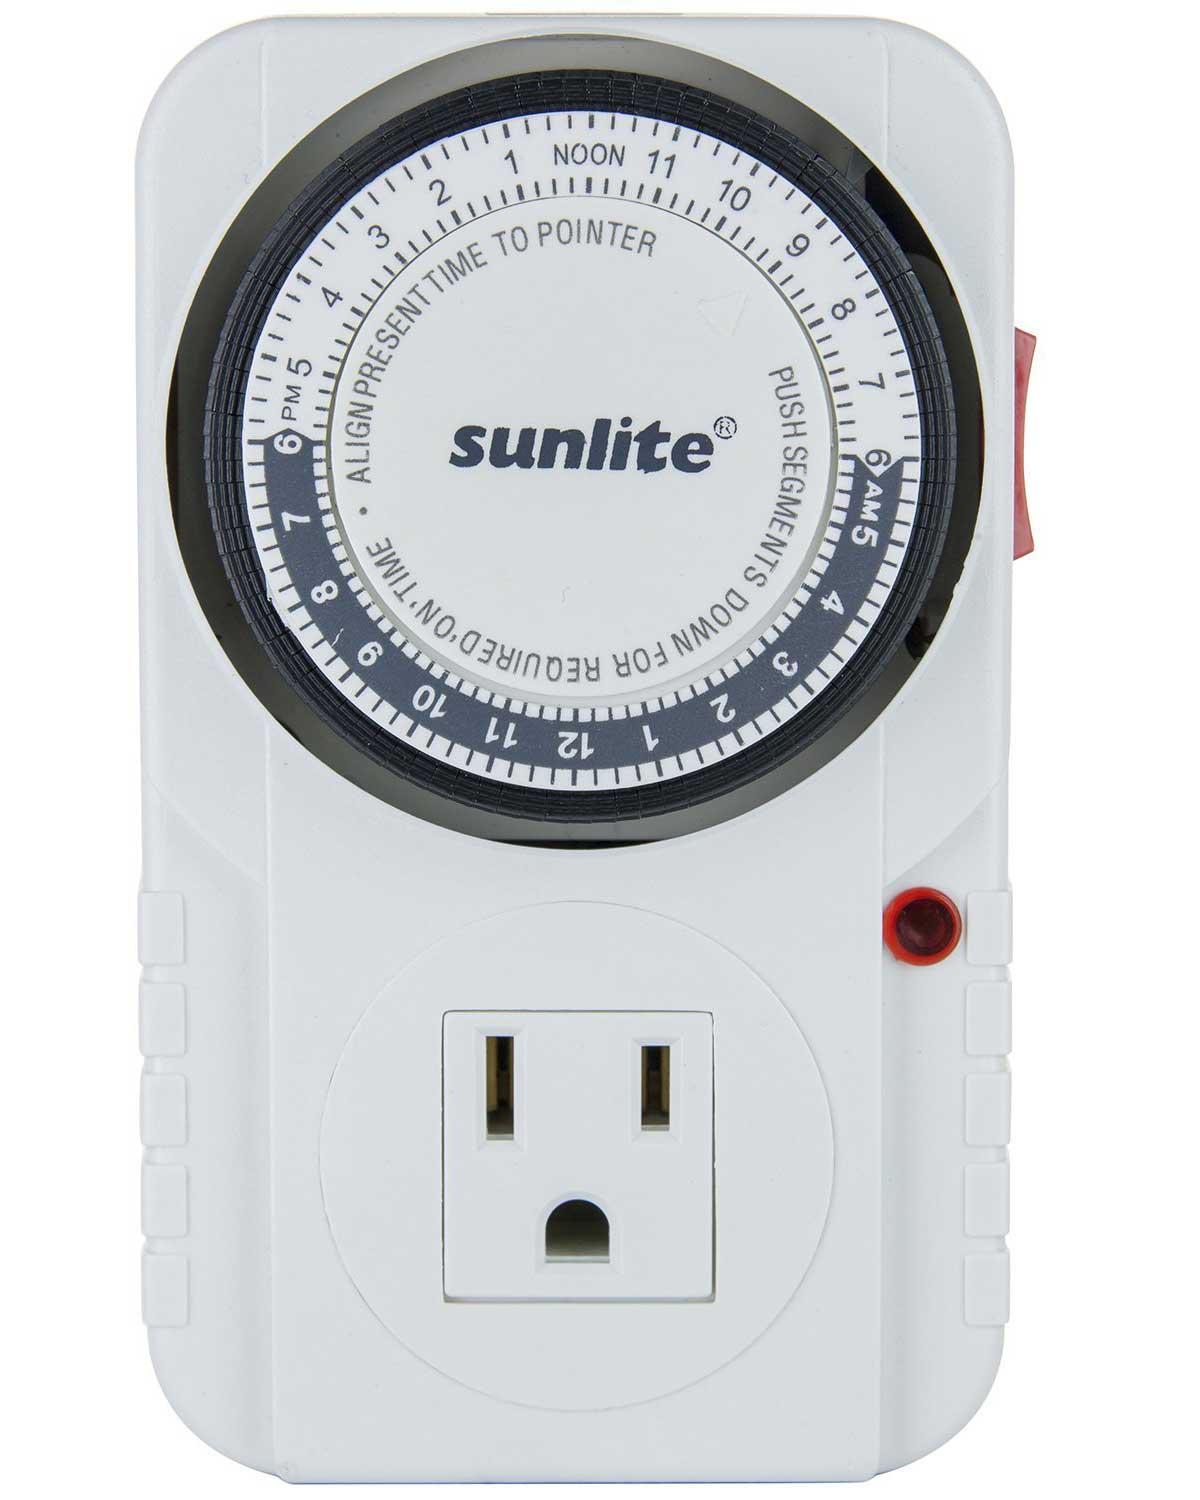
- You must put grow lights on a timer so plants get the same light schedule every day
- Plants tend to be more resistant to problems when they get a dark period
- If you’re struggling with high temperatures in the grow space, set the dark period for the hottest part of the day to help keep plants from overheating.
With 24 hours light/day…
- No need for a timer, just plug lights in
- Plants tend to grow a bit faster
- Plants are less resistant to problems when they don’t get a dark period, but should stay healthy and happy if you give them a great growing environment
- If you’re struggling with cold temperatures, 24 hours of light a day can help keep plants warmer. If you absolutely need to keep lights on 24 hours a day for warmth, consider getting an autoflowering strain because you can keep them on 24 hours of light a day from seed to harvest.
You can also go between 18-24 hours of light a day for a mix of benefits. For example, lots of growers give plants 20 or 22 hours of light a day. Faster growth than 18 hours, but plants still get a little bit of a rest period. Anything between 18-24 works great!
Put grow lights on a timer so they get the same light schedule every day
How far away do I keep grow lights? Here’s a quick guide but the best thing you can do is see what the manufacturer of your light recommends. They’ll know better than anyone what the optimal distance is for your particular model of grow light.
Follow the manufacturer’s recommendation on how far to keep lights from the tops of plants
4.) Water Plants Regularly
I’ve included an example watering schedule for seedlings in 5-gallon fabric pots (bottom 1/3 super soil and top 2/3 regular soil) for the first 30 days. This is designed for seedlings that have already grown their first set of “real” leaves. If you’re planting seeds directly in soil instead of germinating ahead of time as described above, give 1 cup of water every 3-4 days (basically just keep the soil around the seed moist but not wet) until you see the first set of serrated leaves, then start using this schedule…
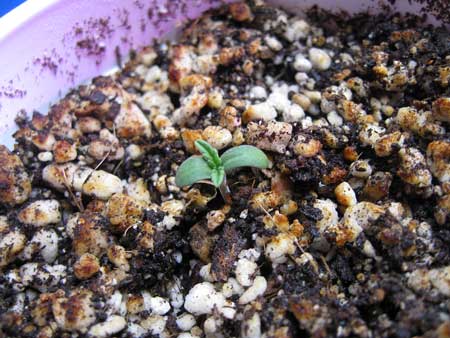
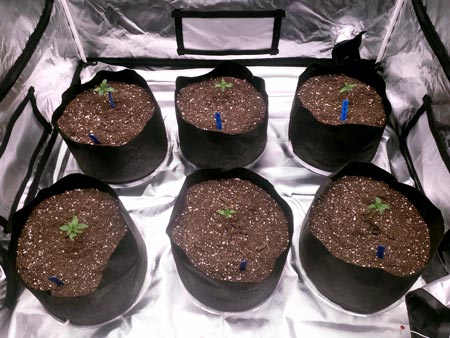
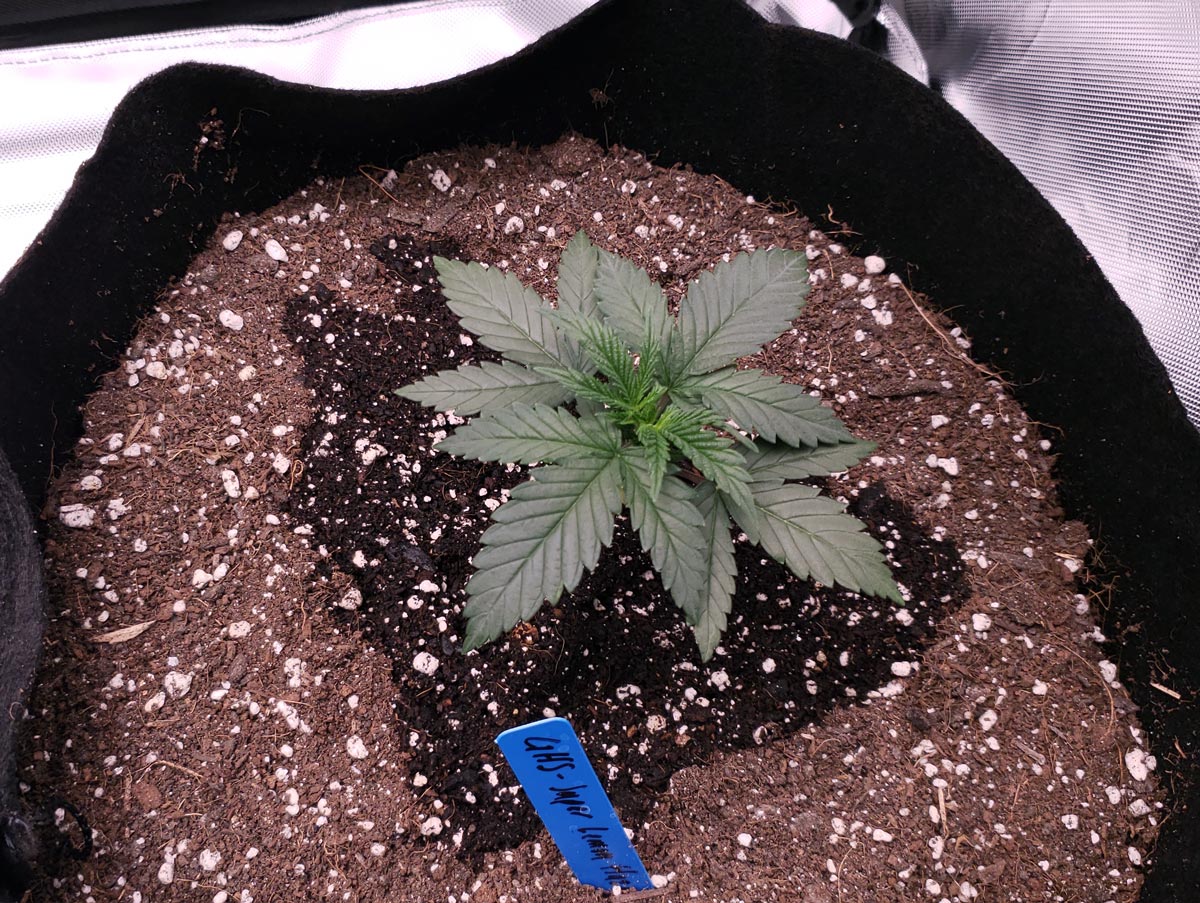
Give 1 cup of water every 3-4 days (basically just keep the soil around the seed moist but not wet) until you see the first set of serrated leaves like this
Then…
- Day 1 – Give 2 cups (500ml) water per plant
- Day 3 – Give 2 cups (500ml) water per plant
- Day 6 – Give 2 cups (500ml) water per plant
- Day 8 – Give 3 cups (750ml) water per plant (every 3 days after this)
- Day 11 – Give 3 cups (750ml) water per plant
- Day 14 – Give 4 cups (1 liter) water per plant
- Day 17 – Give 4 cups (1 liter) water per plant
- Day 20 – Give 5 cups (1.25 liter) water per plant
- Day 23 – Give 6 cups (1.5 liter) water per plant
- Day 26 – Give 6 cups (1.5 liter) water per plant
- Day 29 – Give 8 cups or 1/2 gallon (2 liter) water per plant
- Continue giving 1/2 gallon (2 liters) per plant every 3 days. You may need to give more at a time or more often as plants get bigger. If you ever get any significant runoff out the bottom, it means you should be giving less water at a time. If plants get droopy before being watered, you should give more water at a time, or water more often.
Day 1 (after you see serrated leaves) – Water each seedling with 2 cups (500ml) water
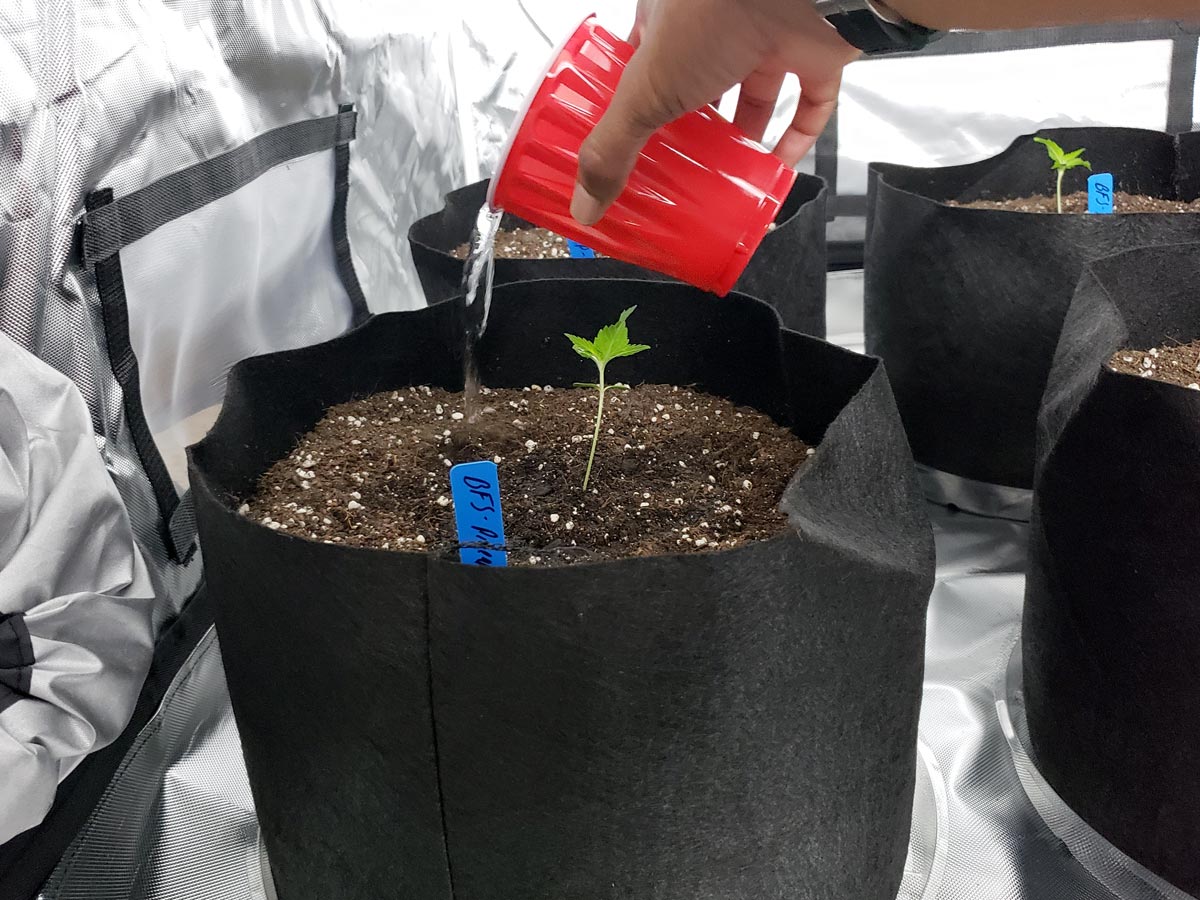
It should look something like this when you’re done
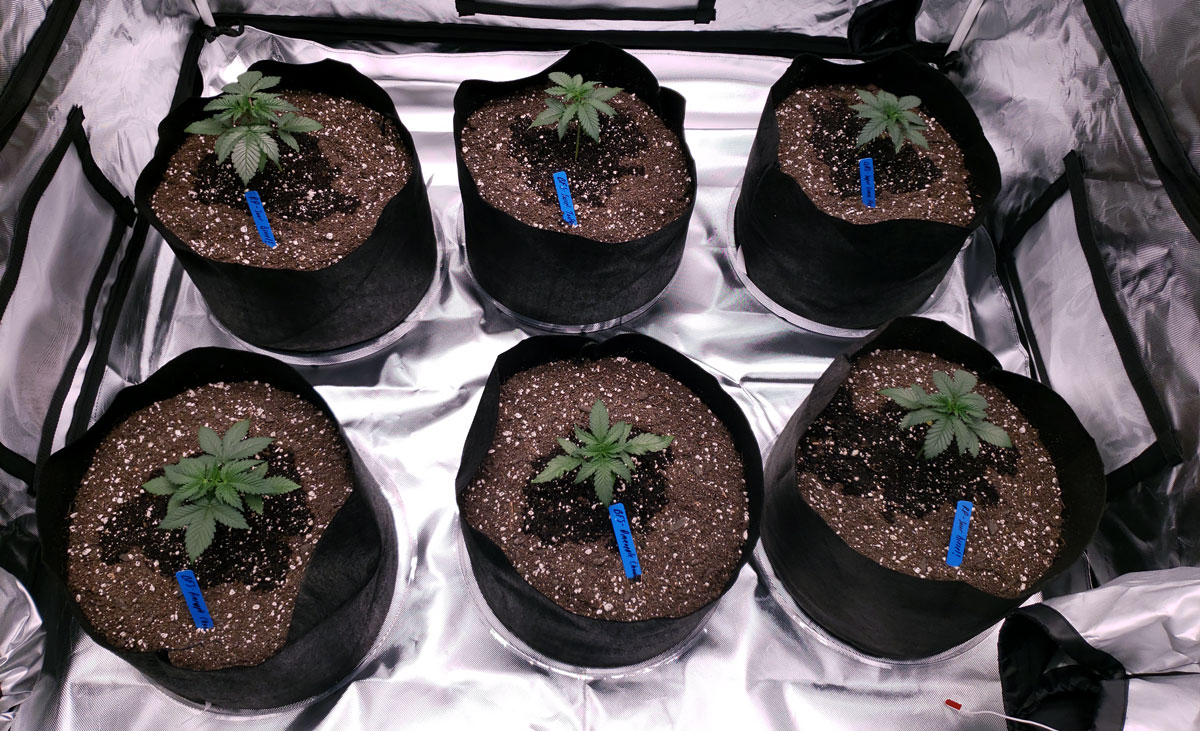
2 days later the seedlings are ready to be watered again. Give another 2 cups (500ml) water. View the schedule for a complete watering timeline.
Typically the top of the soil will look mostly dry before watering again
Note: This is the schedule that I use, but your environment will affect how much plants drink. If plants are in hard-sided pots as opposed to fabric pots, you’ll need to water far less often. If you notice that plants are getting droopy before you water them, give more water at a time or more often. It’s unlikely your plants will be overwatered with this schedule, so you probably won’t need to lower the amount of water. If you would like to water less often than every 3 days, you’ll need to give more water at a time.
How to water plants in super soil after 30 days:
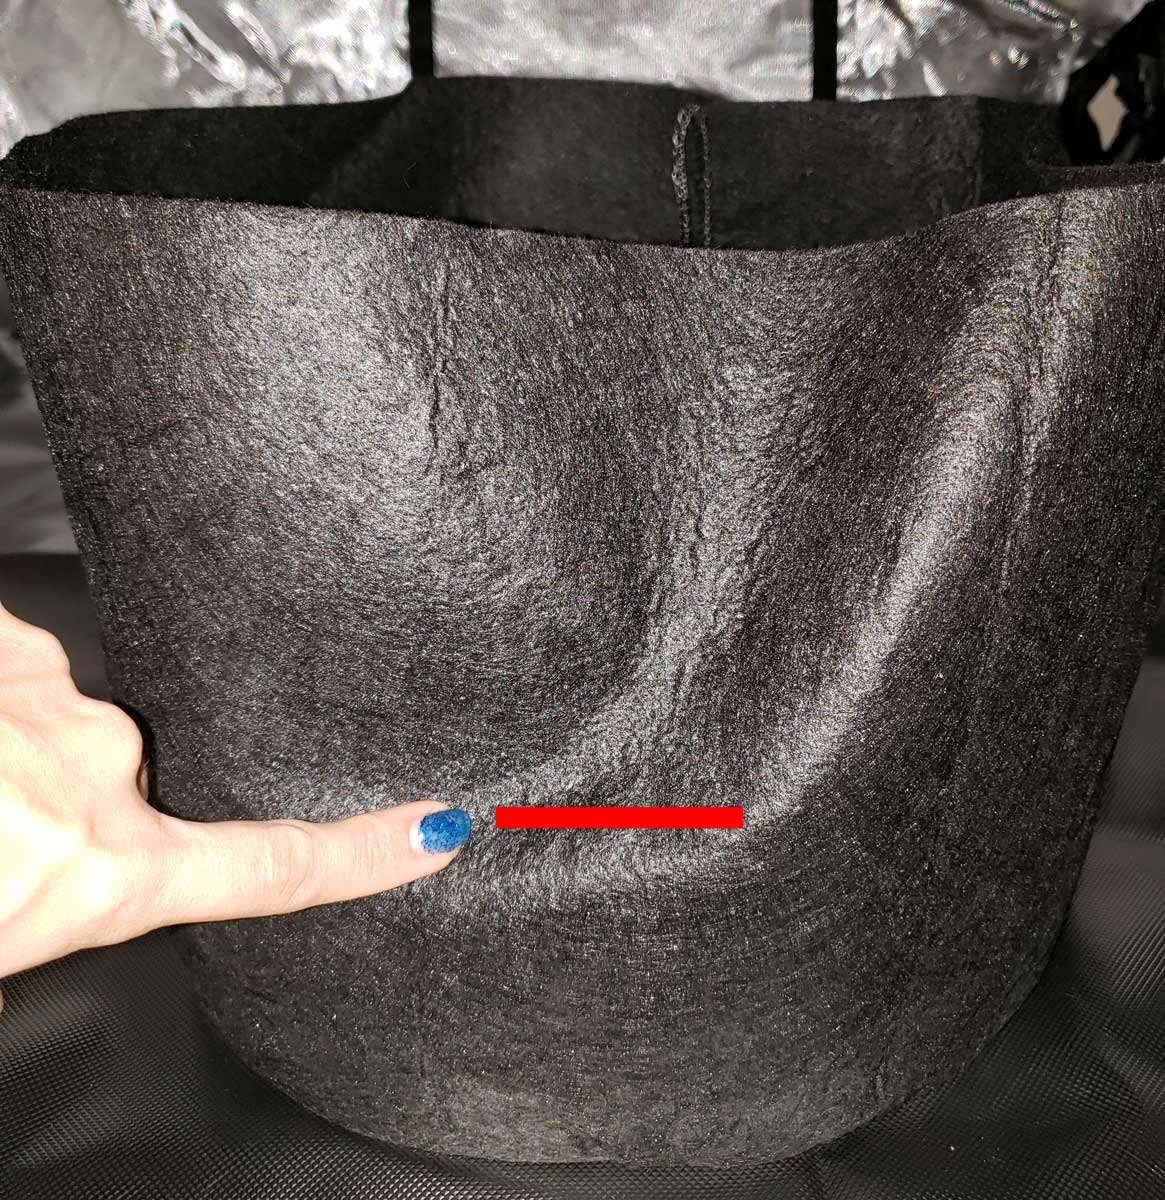
- Give just enough water to wet the medium thoroughly, but don’t give enough water that you get runoff. If you touch the bottom of your fabric pots, you will be able to tell if they’re moist or dry. When the soil is moist the fabric pots will feel cool to the touch.
- Wait until the top layer of soil feels dry before watering again
- When in doubt, water less! It’s super easy to overwater plants in super soil. You can always add more water but you can’t take it back out.
Note: Unlike some other growing mediums, your plants will grow best if you avoid getting runoff water out the bottom. It’s easy for plants to get overwatered in super soil, plus runoff water will carry away nutrients. Since you’re not adding any extra nutrients from seed to harvest, you want to conserve the nutrients you do have.
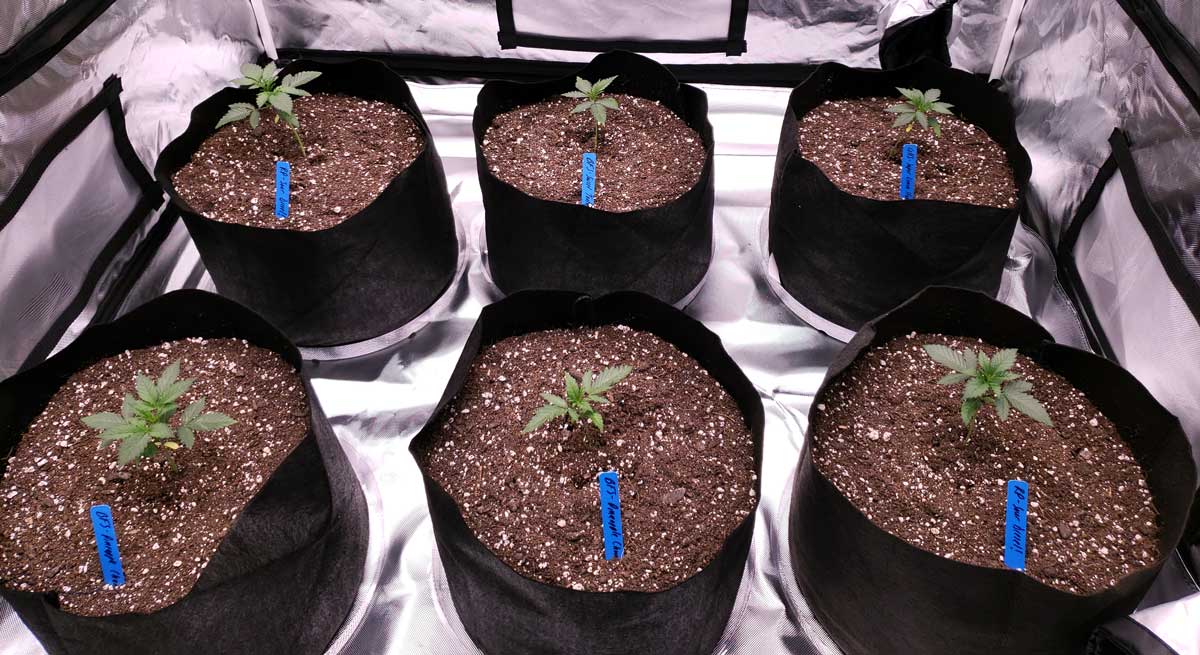
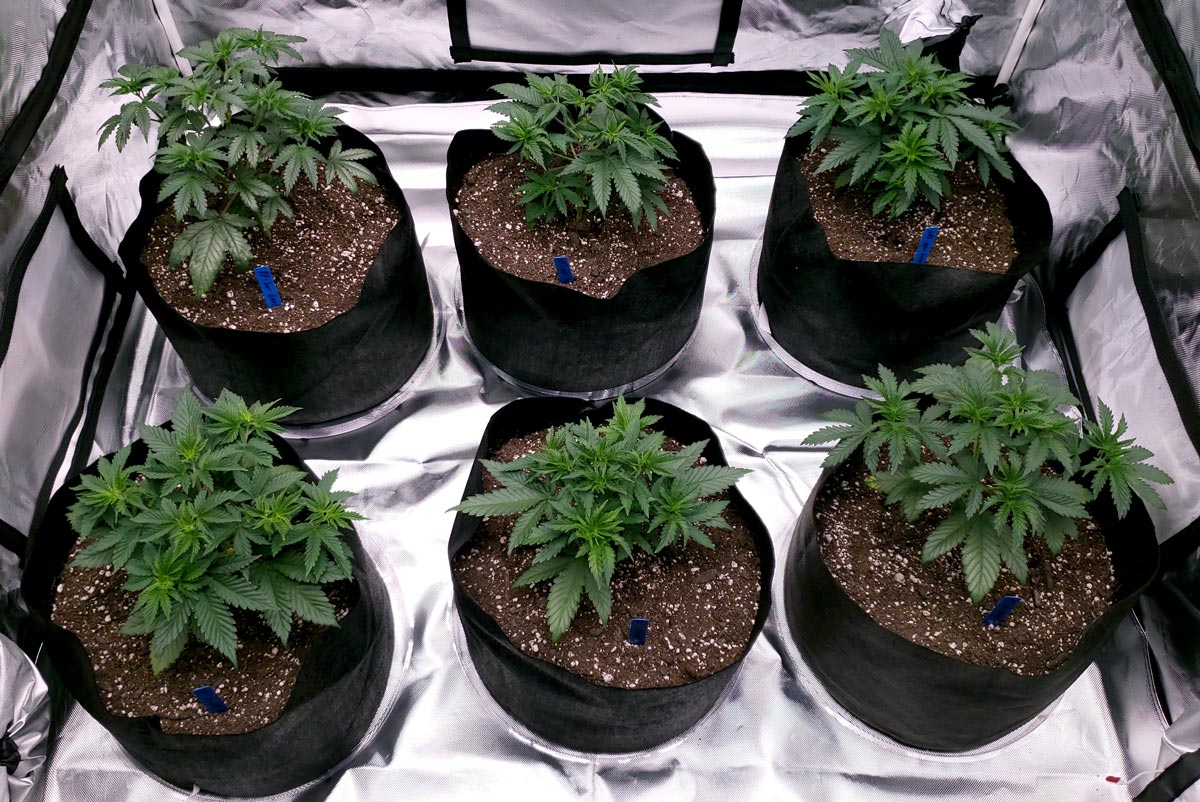
Here are the seedlings on day 8, just after being watered
Give water in a circle around the base of the plant
Important Tips
- Keep roots warm – If the floor of the grow space tends to be cold (for example in a basement or garage), keep plants from sitting directly on the ground. Warmth is important for the colony of organisms at the roots to thrive, and cannabis also tends to grow better with warm (but not hot) roots.
- Use good starting water to prevent problems. I like spring water for this grow style. It usually has a neutral pH and contains some extra minerals and nutrients that aren’t found in filtered or RO water. However, any clean source of water in the right pH range should work.
- Don’t ignore water pH! Ideally, your starting water should be in the 6.5-7 pH range to avoid nutrient deficiencies. A little lower is okay (down to 6.3) but not higher. Pure water naturally has a pH around 7, so if you’re using good water you won’t need to think about this. I know many people say you don’t have to worry about pH in super soil, but that’s only if you’re starting with good water. You WILL get nutrient deficiencies if the pH of your water is too high or low and you don’t adjust it. If your starting water is in the 6.3-7.0 pH range, you don’t need to do anything. However, if it’s outside that range you will have to adjust the pH of your water. Don’t use regular PH Down or PH Up adjusters, as they will kill microbes in the super soil (plus they’re not organic). If you must adjust the pH, use Earth Juice Natural Down (citric crystals) to lower the pH, or Earth Juice Natural Up (potassium bicarbonate) to raise the pH. These are organic and won’t hurt your soil. If you’re adjusting the pH down, try to get it to 7.0 pH. There’s no need to bring it lower because citric crystals can build up in your soil, which tends to drop the pH of the soil slowly over time. Similarly, if adjusting the pH up, try to bring it to 6.5 pH, so potassium bircarbonate doesn’t build up. Basically, use as little pH adjusters as you can to get the water within the right range. Learn how to adjust the pH of water.
4b.) Consider plant training (optional)
You can let plants grow naturally without any additional manipulation, but I highly recommend at least topping your seedlings (cutting off the top tip) above the 5th set of real (serrated) leaves when plants are still young. This will cause your plant to grow multiple main buds instead of one. The super soil method will support almost any plant training technique.
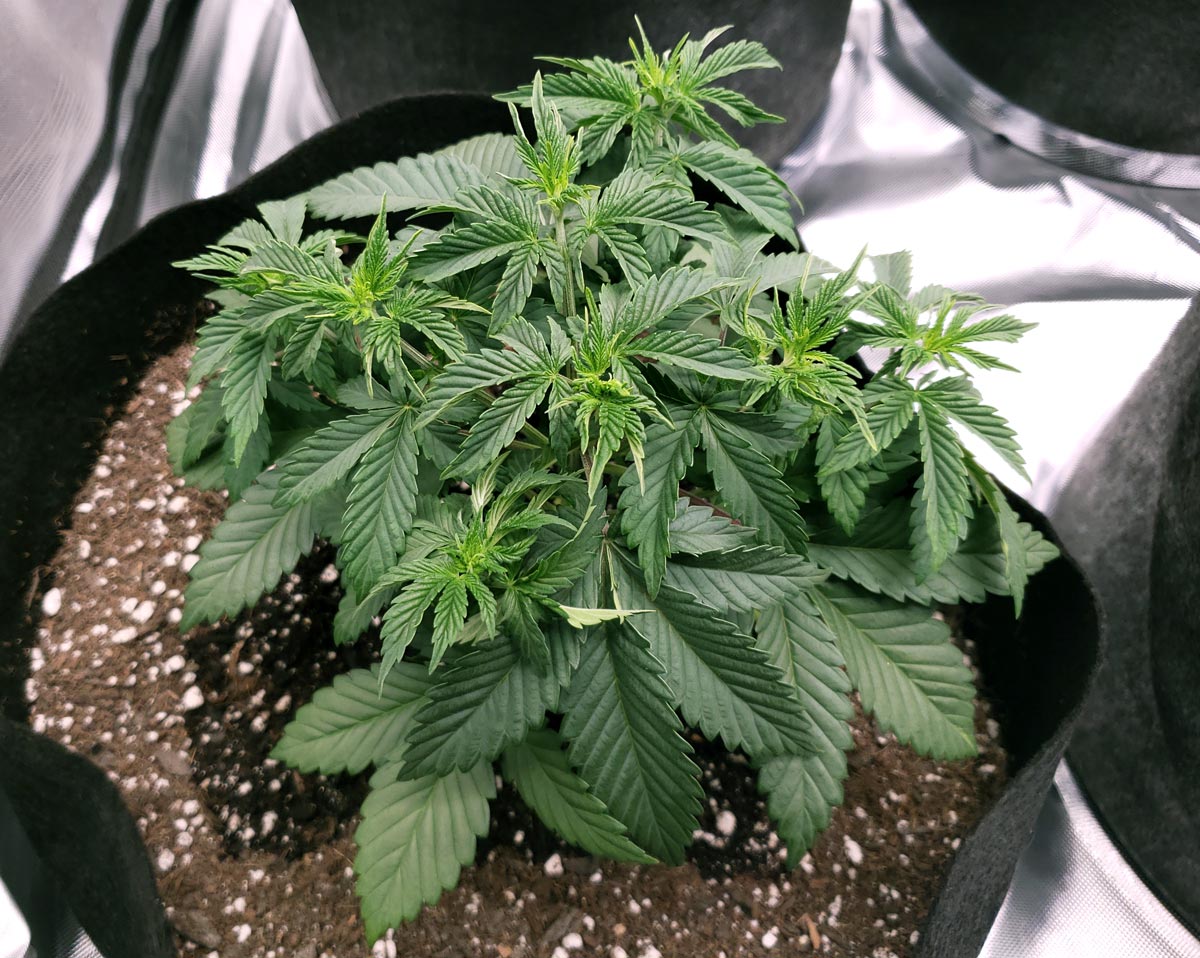
If you want plants to grow multiple buds instead of just one, “top” them (cut off the top tip) above the 5th set of serrated leaves.
 Cut straight through the main stem but avoid damaging other growth
Try to spread out branches as plants grow to help them “bush out”
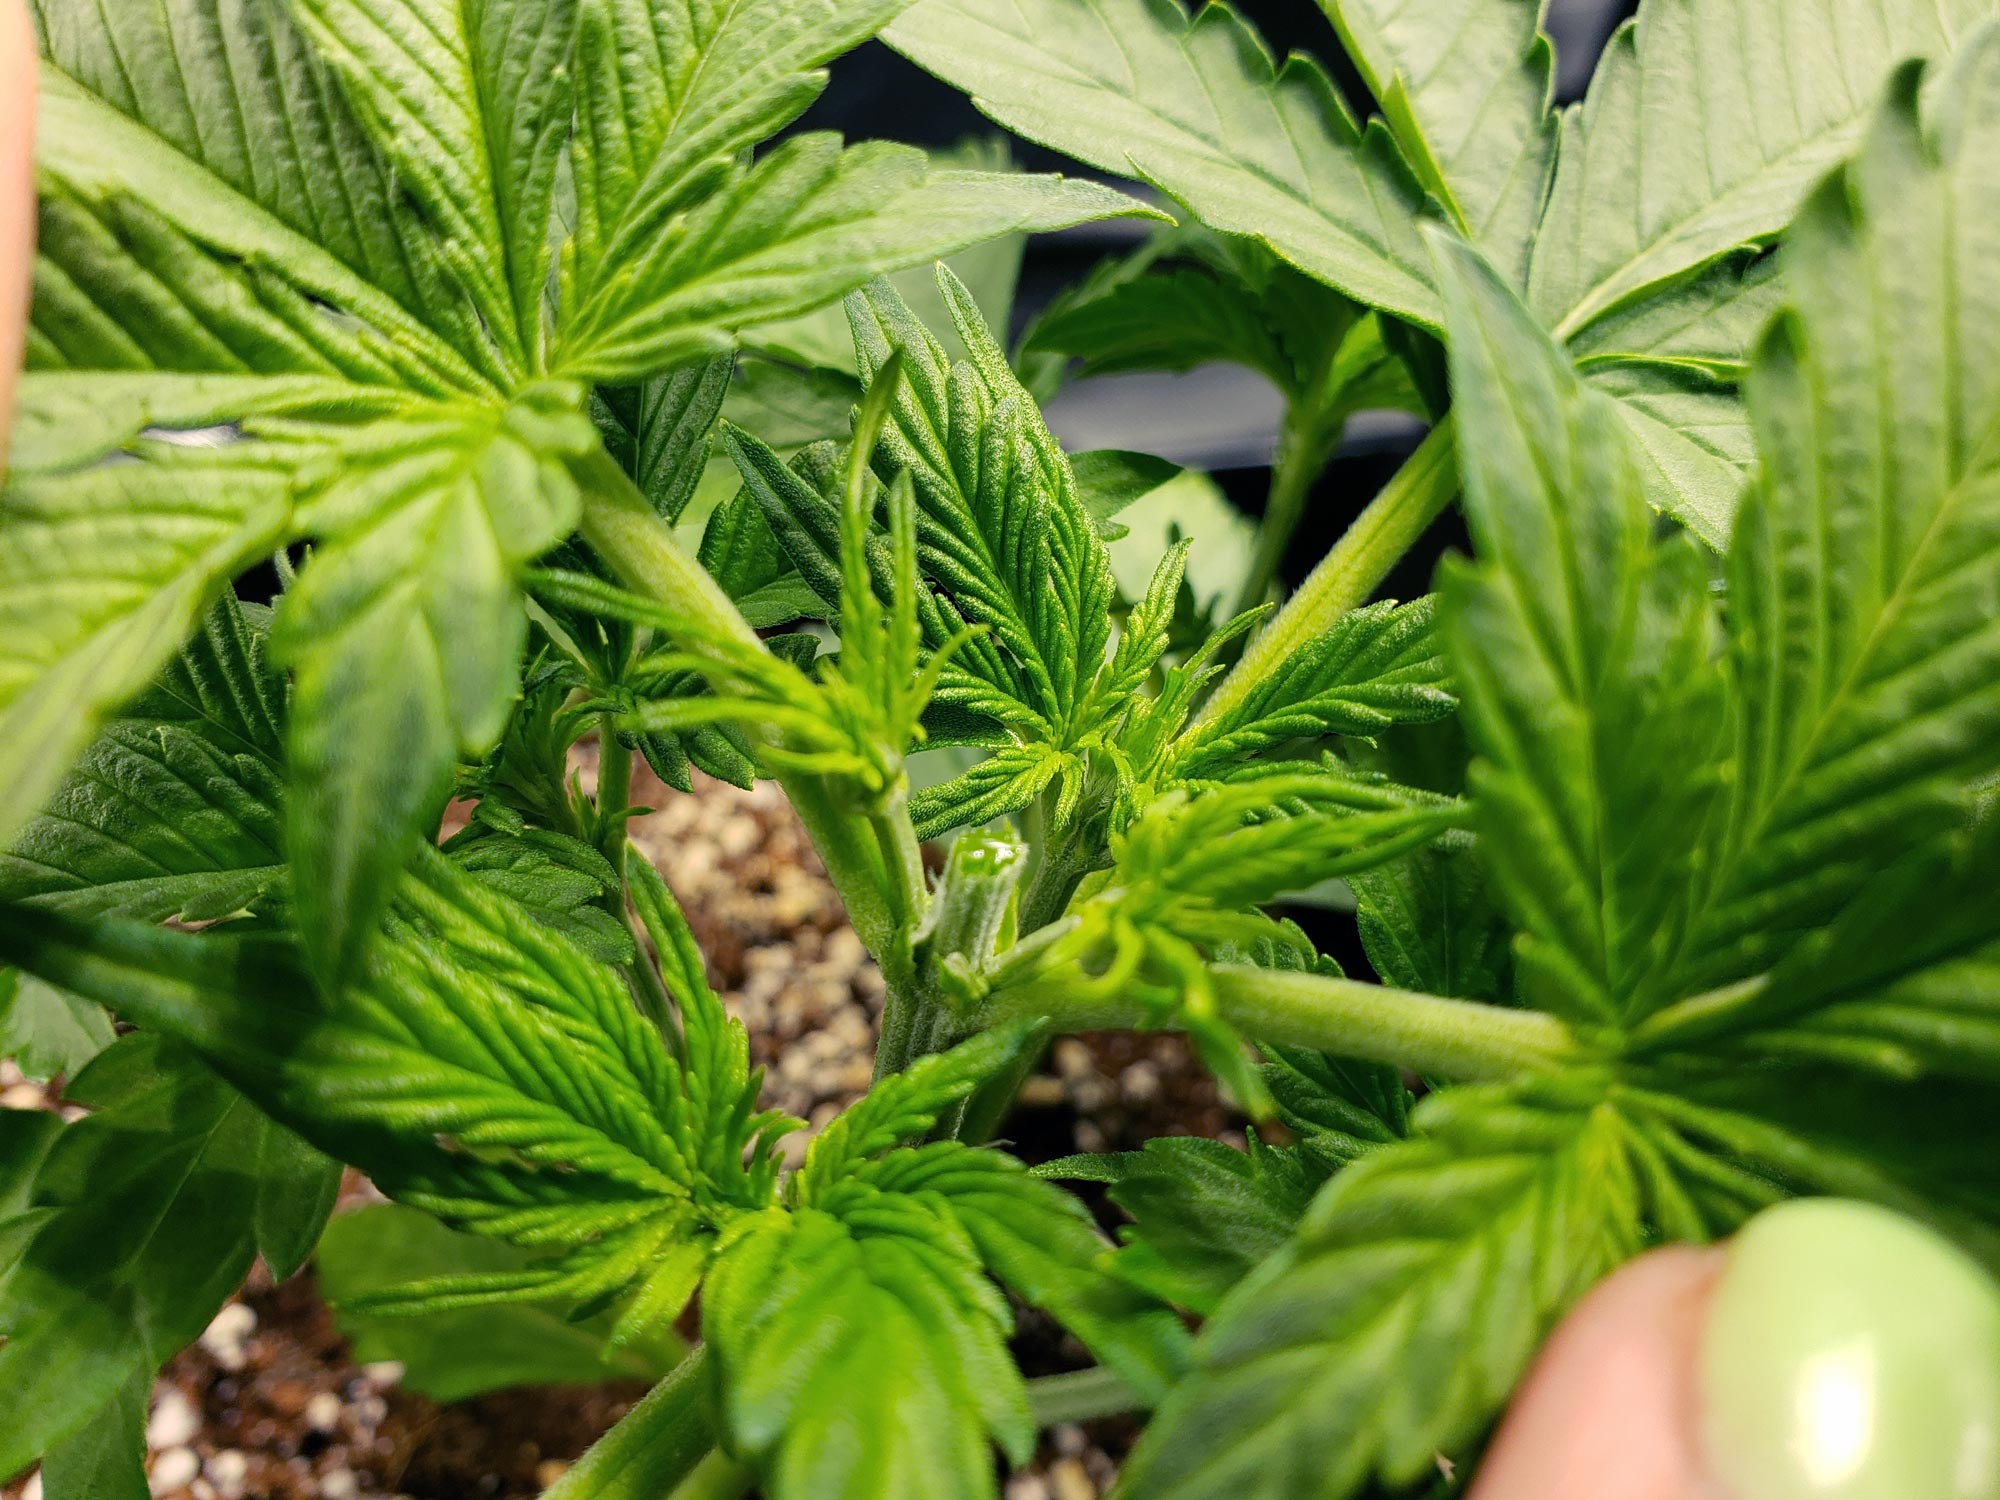
Topping a plant produces more growing tips, which will each turn into its own main bud once the plants start flowering. A growing tip looks sort of star-shaped from above. Make sure each of these “stars” gets access to direct light as plants grow or they won’t keep developing. Ideally, you want 6-10 growing tips to reach the top of the plant before the flowering stage. This helps the plant grow tons of buds instead of just one main bud in a Christmas Tree shape. As a result, you end up with increased yields.
As plants grow, gently bend stems and tuck leaves to expose growing tips to direct light. This creates a bud monster once plants start flowering!
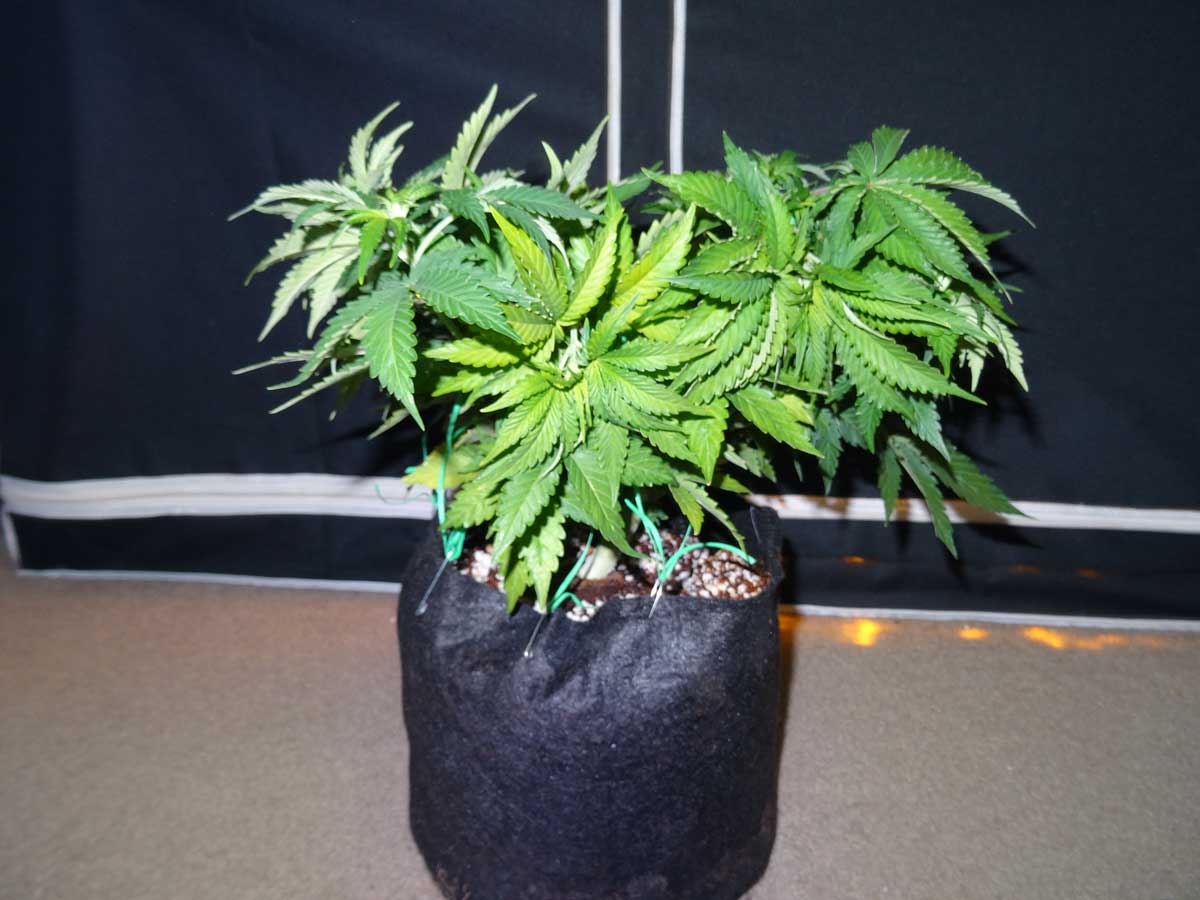
Bending stems down also gives you a chance to control tall plants. If you notice any plants or individual branches getting taller than the others, simply bend it down and away from the center of the plant and tie it down with some plant twist tie. Try to keep your plant canopy flat like a table-top so that all branches are about the same distance from the grow light.
If some of the branches are getting taller than the others…
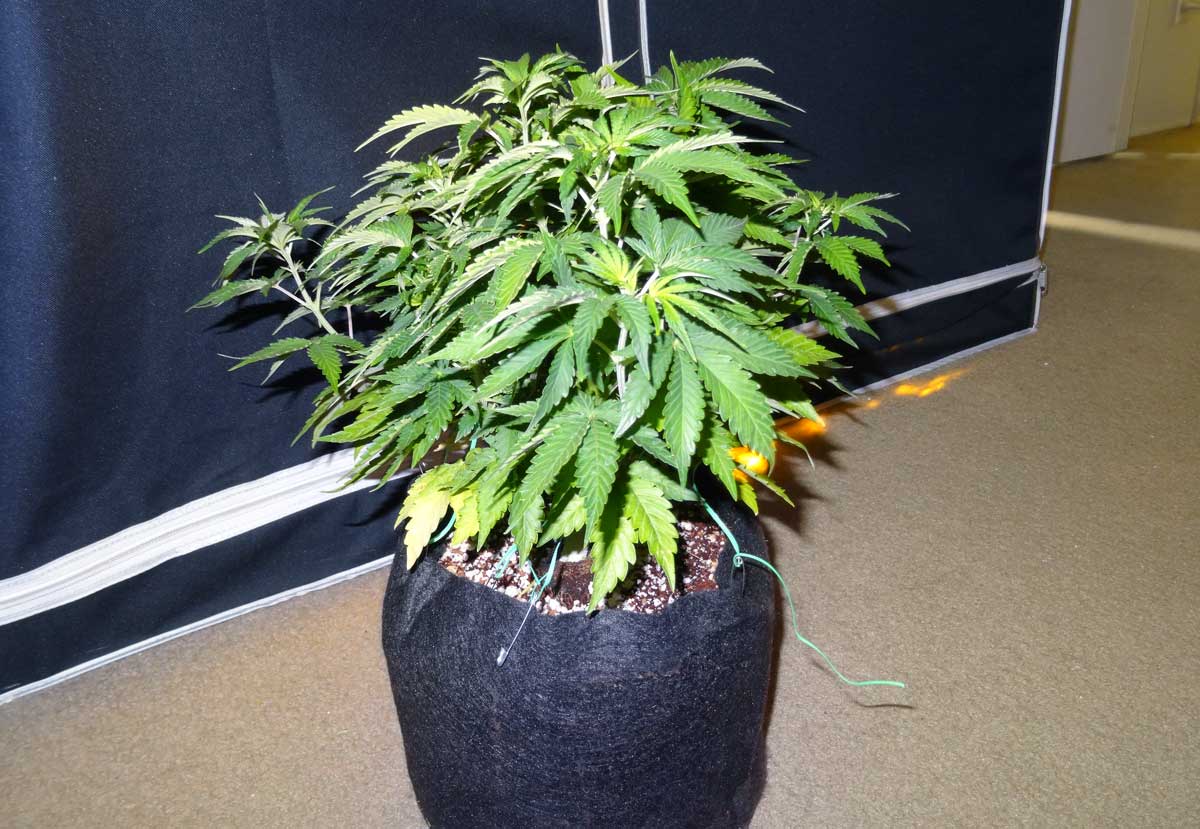
…bend the tallest ones over until they’re all the same height as each other. Plant twist tie and safety pins in the fabric pot give you total control over plant shape.
 Note: the above plant is from a different grow, but it’s a great demonstration of the concept
Plant training is 100% optional. You can let plants grow naturally and still get great results. But topping and bending while plants grow is pretty easy and makes a big difference to your final yields.
Learn more about training plants to grow multiple buds.
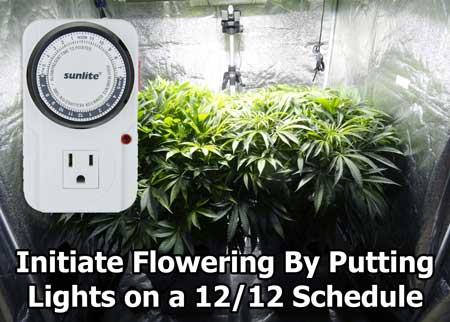
5.) Initiate the Flowering Stage When Plants are 1/2 the Final Desired Size
Outdoor cannabis plants naturally start flowering in the fall and die in the winter. When growing cannabis indoors, you have to give plants long nights to similate the end of summer. This “tells” them to start making buds (unless you have autoflowering plants, which will start flowering on their own after 3-5 weeks).
Switch to a 12/12 light schedule when plants are half the final desired size by putting grow lights on a timer
Why? Giving 12 hours of total darkness each day forces plants to start making buds because they “think” winter is coming. It’s important not to wait too long as plants will about double in height (on average) after initiating the flowering stage. If you know your plant is a “tall” strain, initiate 12/12 when plants are 1/3 the final height.
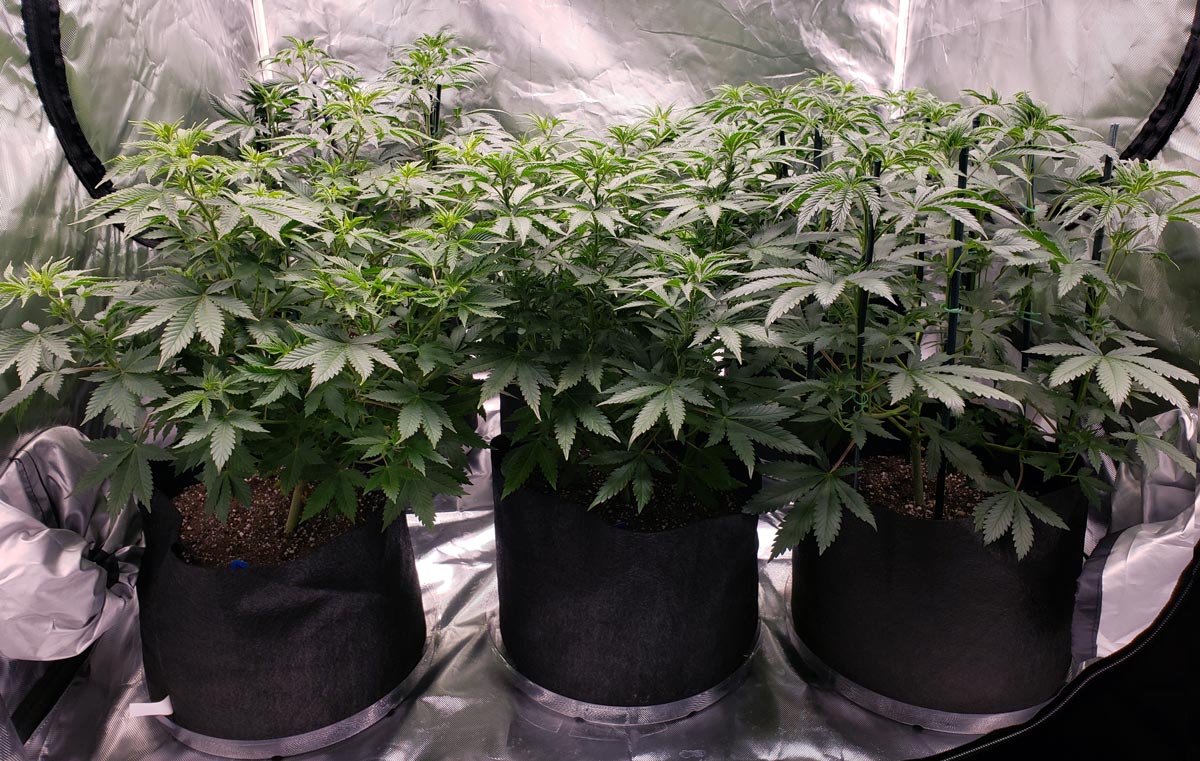
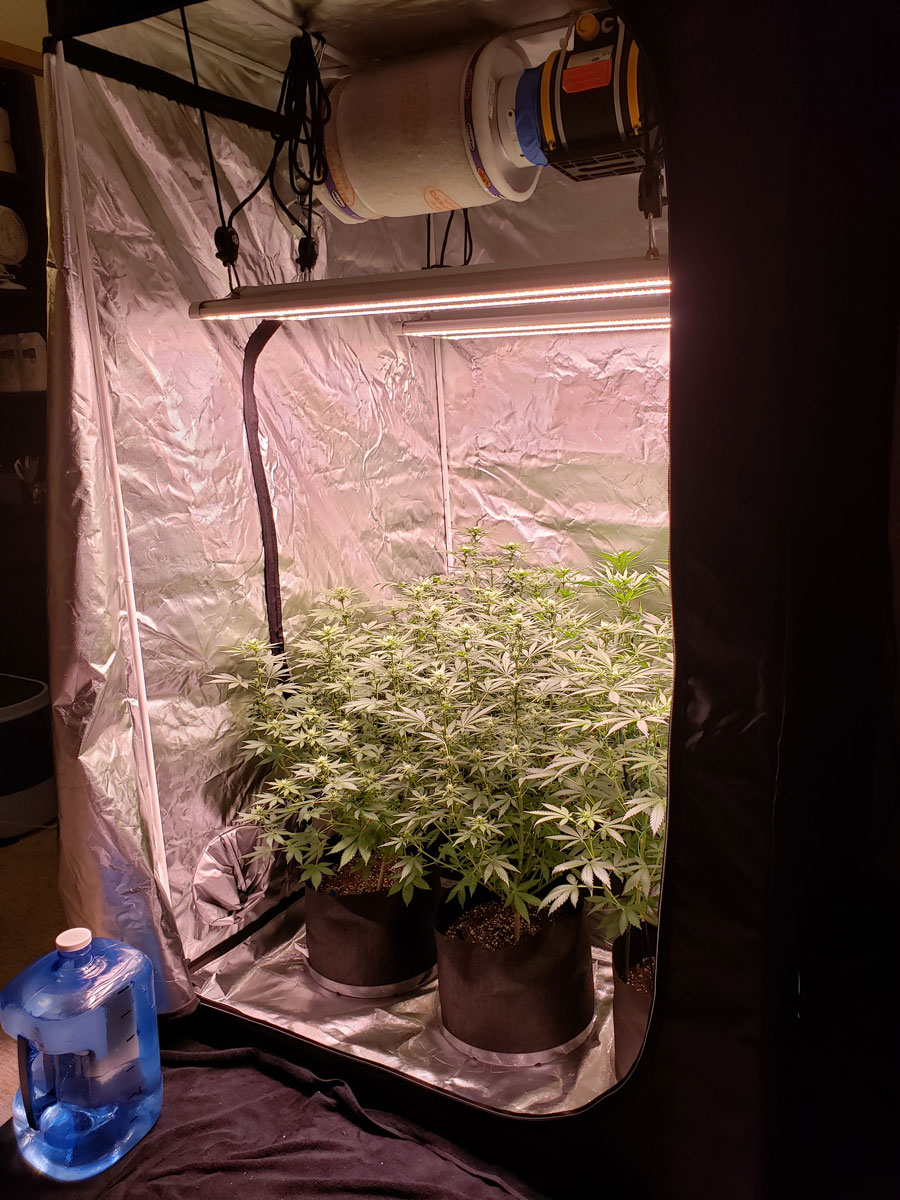
We initiated 12/12 when the plants are half the final desired height. This was about 5 weeks after they were put in the tent.
Make sure plants continue getting 12 hours of total darkness every single day until harvest. No light leaks! No peaking on plants during their dark period! If plants start getting light during their “night” they will actually stop flowering and revert back to the vegetative stage.
Learn more about light schedules and how to get plants to start making buds
Tip: If growing in 5-gallon pots as recommended in this tutorial, don’t wait longer than 2 months to initiate the flowering stage or your plants may run out of nutrients before harvest.
6.) Stay on the Lookout for Common Problems
The beauty of this method is you’ve already done the majority of the work. Just continue watering the plants, watching them for signs of bugs or deficiencies, and wait until buds are ready to harvest.
What if leaves start yellowing early?
This can happen when the plant uses up all available nutrients in the soil. This is most likely to happen when plants were vegetated for longer than 2 months. but it also happens with some strains that are heavy-feeders, especially really high-yielding plants. If you notice a plant is yellowing even though everything else seems right, supplement it with either a top dressing of more Super Soil concentrate (which will get carried down to the roots when you water the plants), or give a quality organic nutrient like Dr Earth Premium Gold (vegetative stage) or Flower Girl (flowering stage).
Notice in this picture how the plant on the left is turning yellow next to the biggest/fattest buds, even though the buds are still white. This means that plant needs extra nutrients. This is especially common on plants with very big buds. Some strains just eat through the nutrients!
Solution: If leaves are yellowing and plants look to be running out of nutrients, top dress with extra Nature’s Living Soil Super Soil concentrate OR supplement with a quality organic nutrient like Dr Earth Premium Gold (vegetative stage) or Flower Girl (flowering stage).
What if I notice brown patches on leaves?
Brown patches are often caused by a Calcium deficiency. This is most likely to appear when if the pH at the roots gets too low, the grow light is too close, or you’re using filtered water (which has filtered out all the calcium).
Brown scorch marks on leaves are usually caused by low root pH, grow light too close, or using filtered water
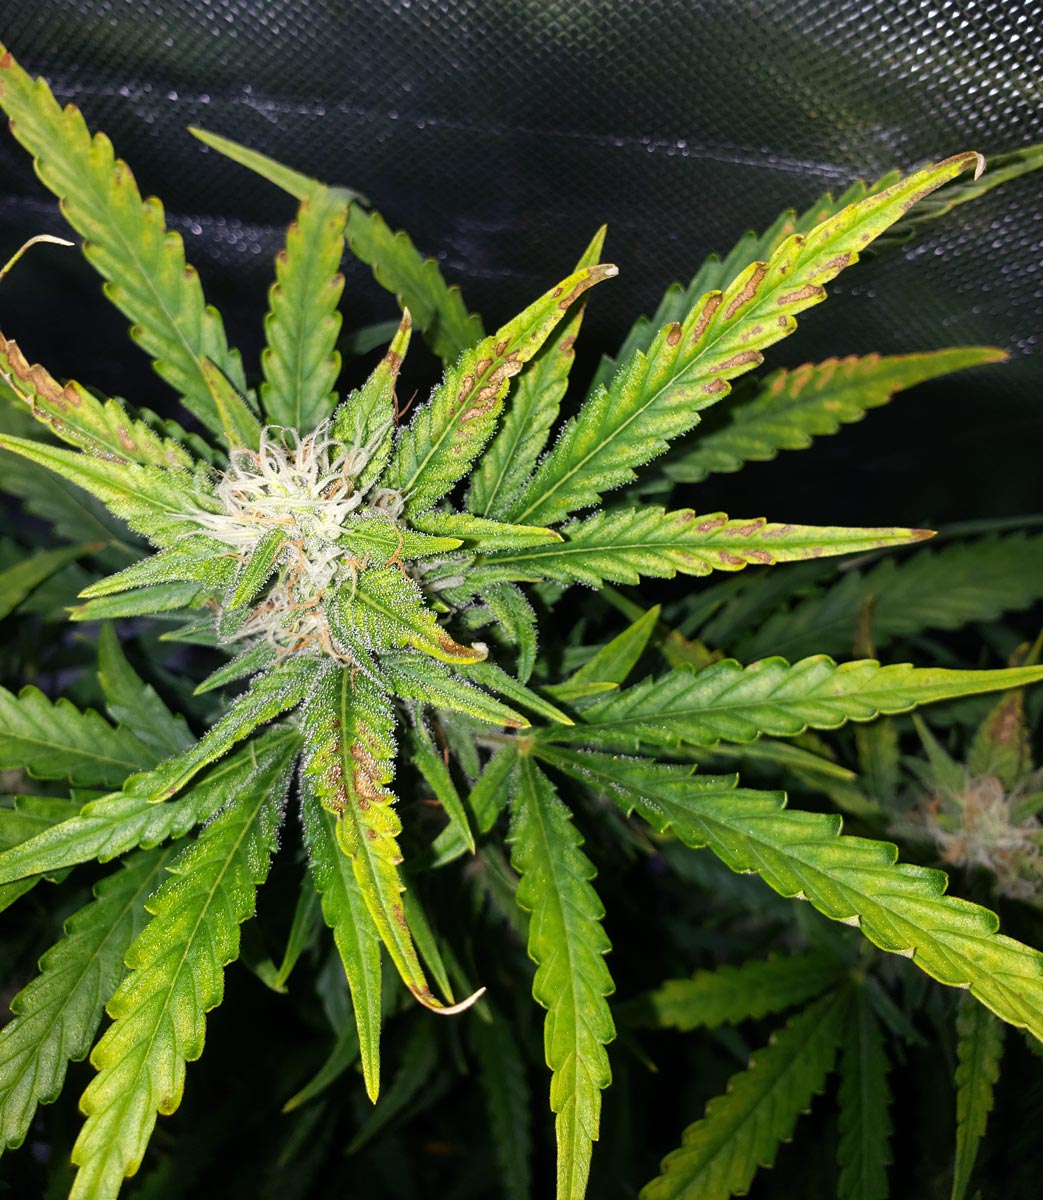
Solution: Check the pH at the roots, move grow light a few inches further away, and start using bottled “spring water” instead of filtered water.
Get help with other common growing problems
7.) Enjoy the View Until Harvest Time
This is the fun part! Also the part that takes the most patience (at least for me).
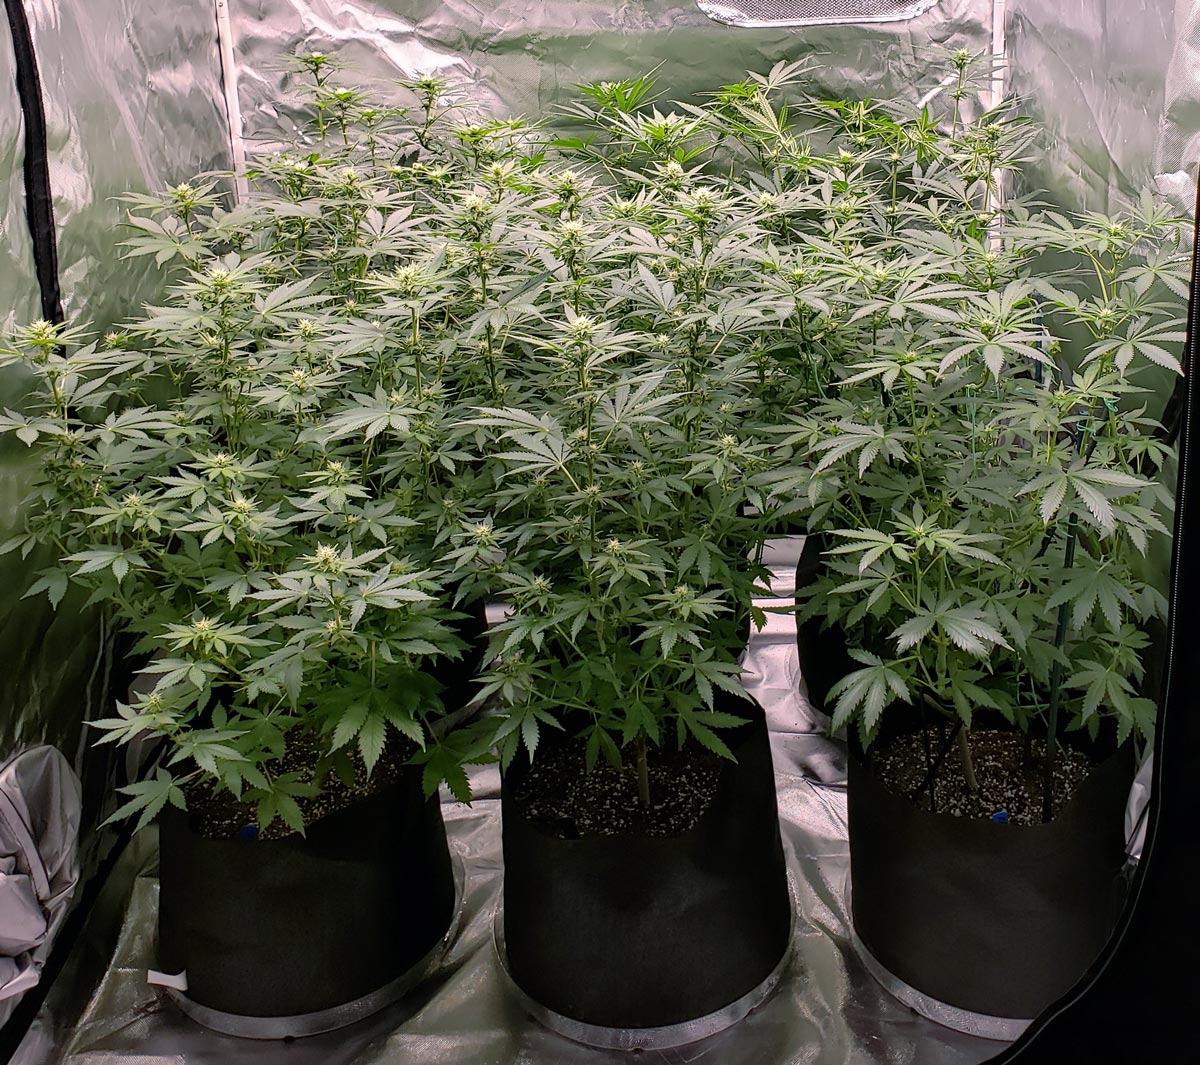
Here are the plants 3 weeks after initiating 12/12
Buds are forming and plants have about doubled in height. Most strains stop getting taller around week 3 of flowering.
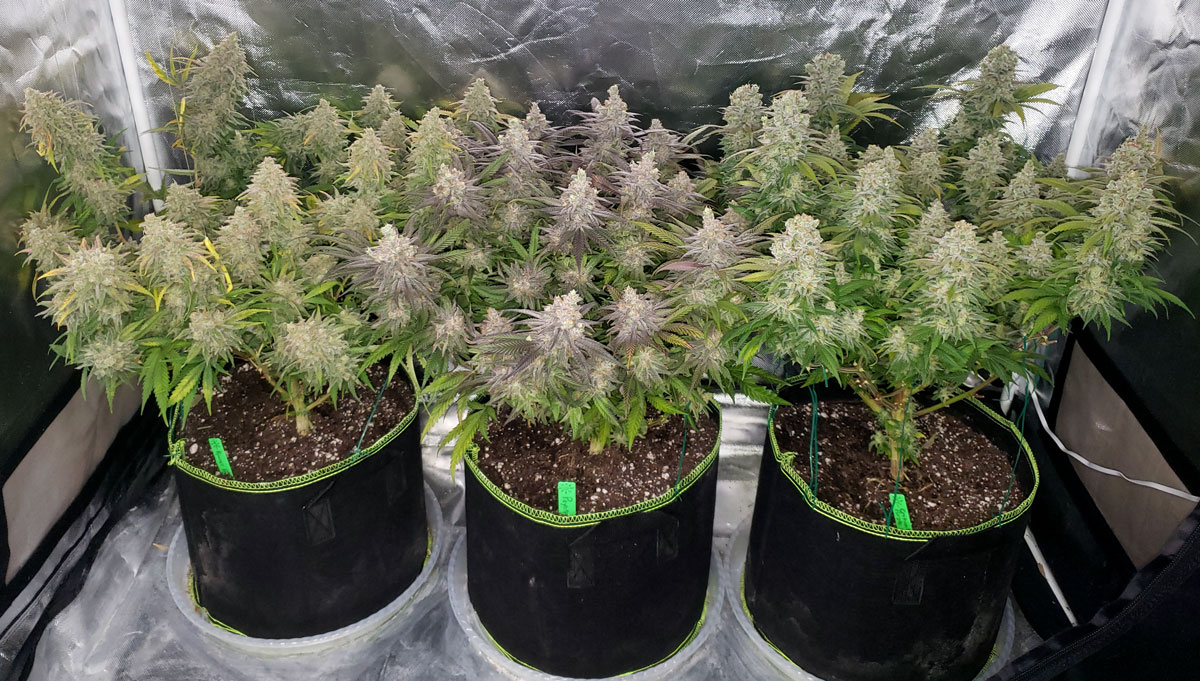
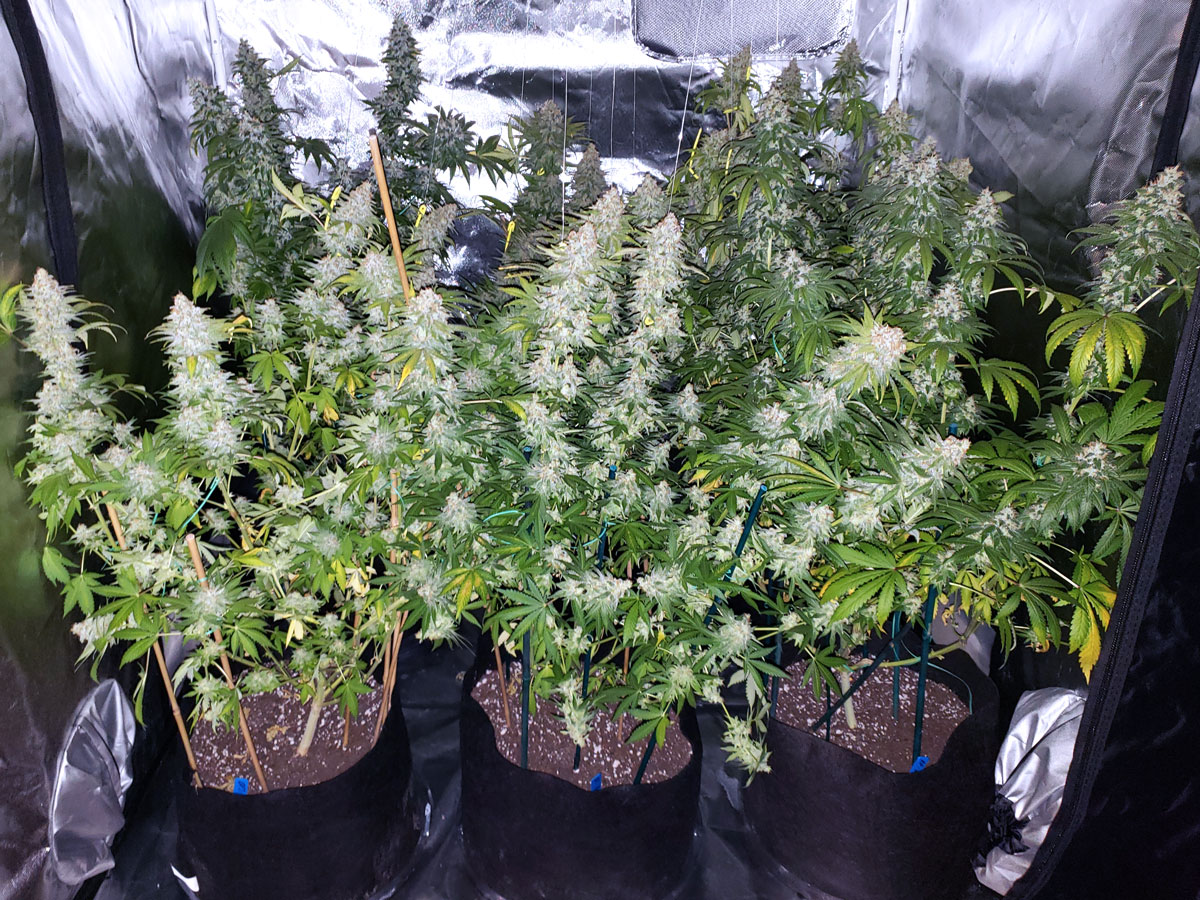
6 weeks after 12/12 – The only care has been watering the plants and letting them do their thing.

Here are the plants just before harvest, about 9 weeks after initiating 12/12. What are those strings? We needed plant yo-yos to help hold the branches up because the buds were falling over.
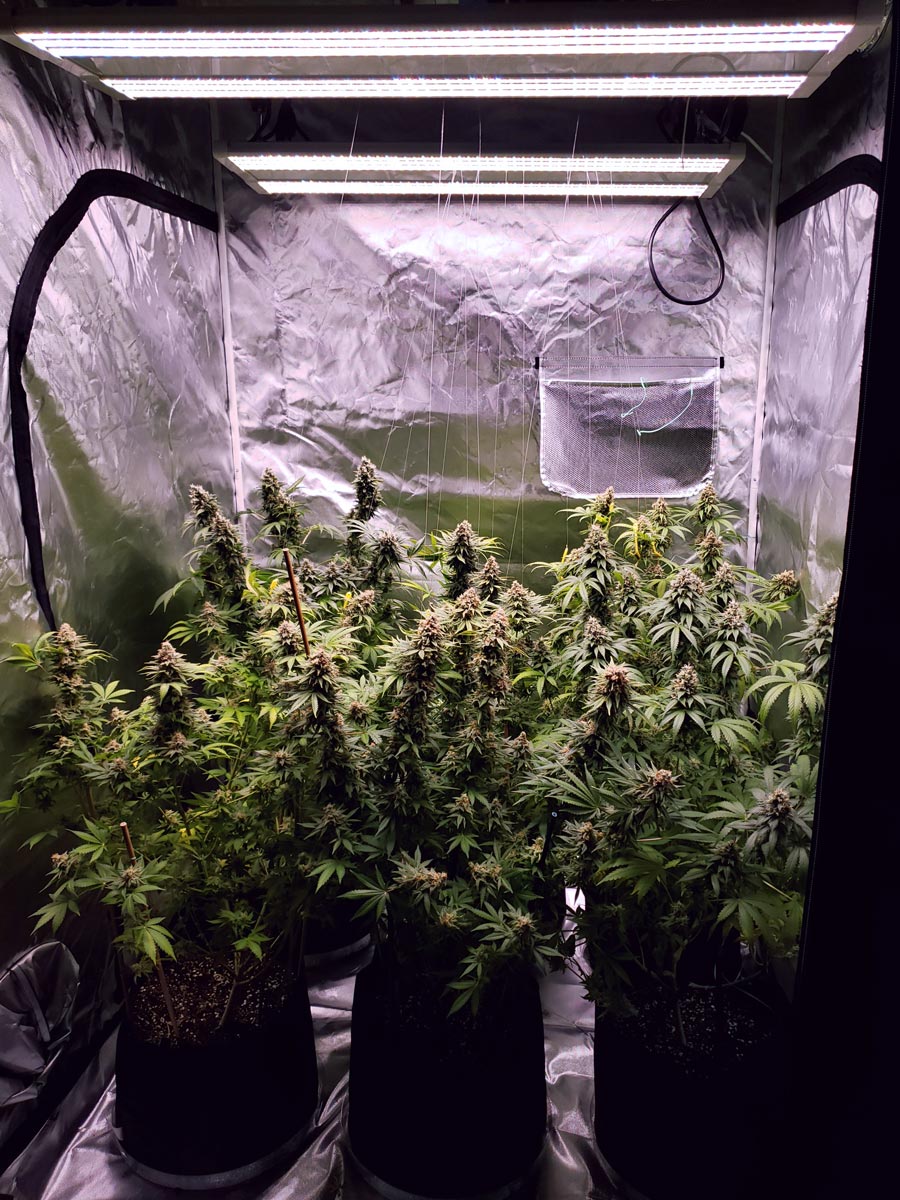
The total time needed in the flowering stage depends on your strain. Some strains need less than 9 weeks while others need more time. When do I harvest my plants?
It’s normal to see some leaves yellowing right as harvest approaches. Your plant is using up the last of the nutrients in the leaves. This is part of the plant’s natural life cycle.
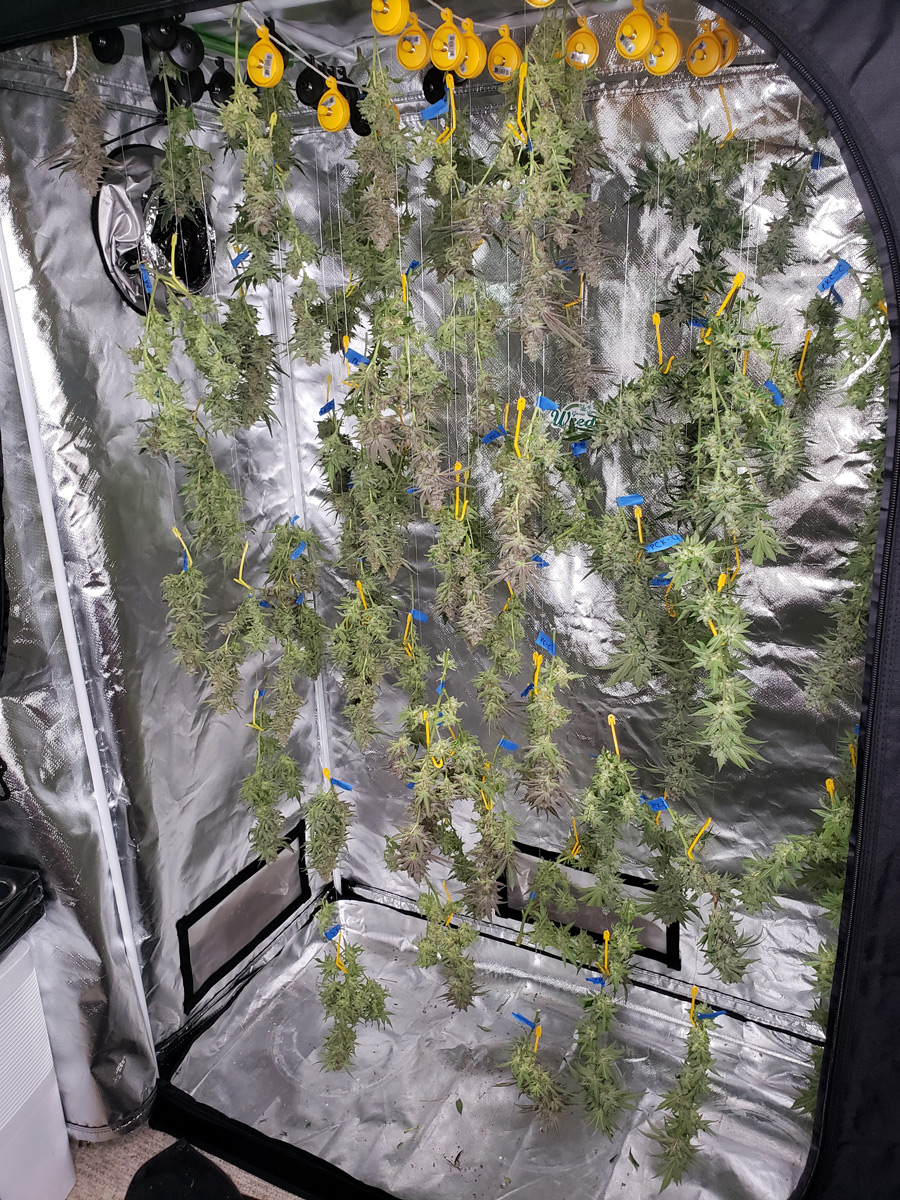
We dried the buds in the grow tent. How do I dry plants?
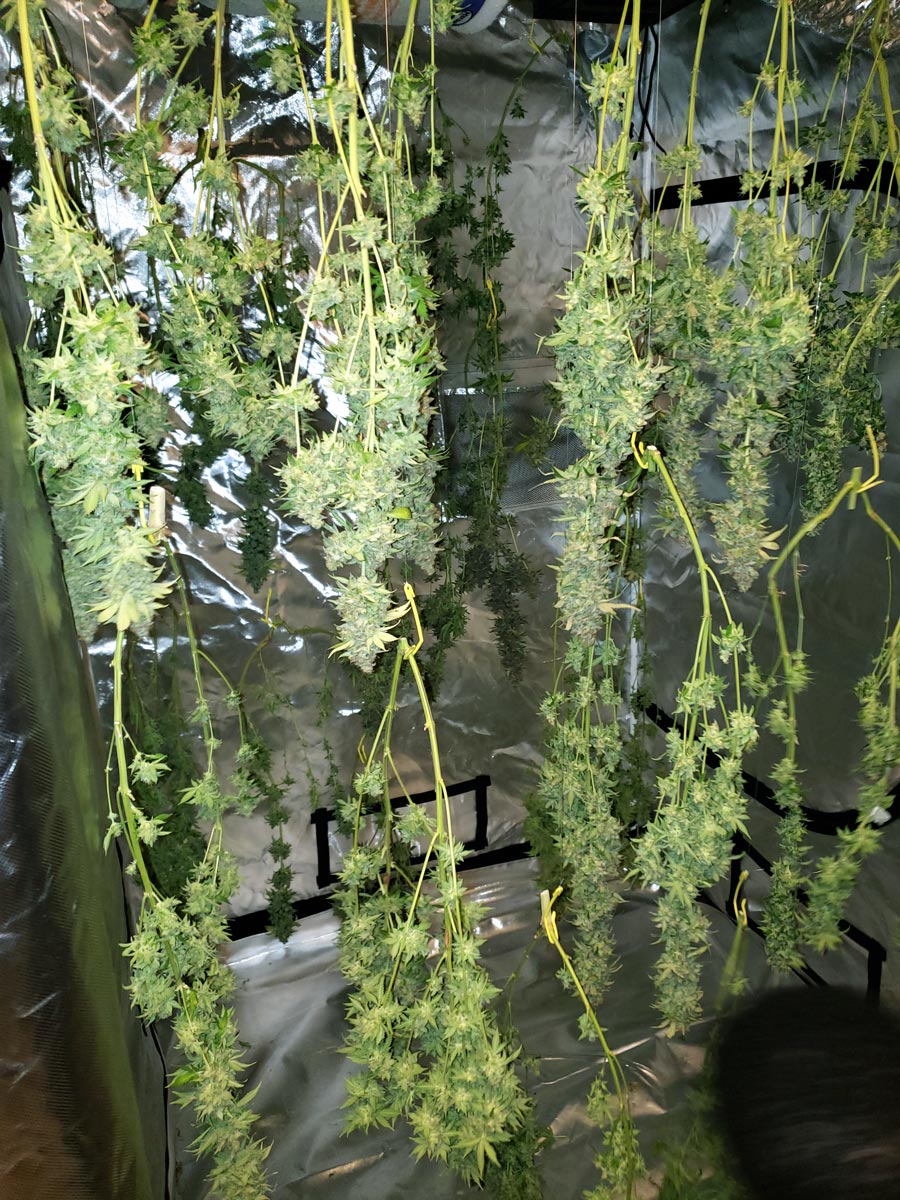
Harvest time is my favorite time!
Now you know how to grow your own organic weed at home!
If you still have questions, don’t worry, we’ve got tons of resources for you. Try using the search bar for specific questions. Or…
More resources for growing cannabis:
- Complete Beginner’s Guide
- How to Grow Weed in 10 Steps
- Diagnose Your Sick Plant
- Bugs, Mold & Other Cannabis Pests
Cannabis Life Stages
Plant Care Tutorials
- Cloning
- Plant Training
- How Often to Water Plants
- Male vs Female Plants
- The Perfect Environment
- How to Control Smell
- How to Set Up Exhaust
How to Improve…

Organic Ways to Deal with Common Pests
- Spinosad – Organic and effective against… WARNING: Commercial growers click here!
- Insecticidal soaps – Fatty acid salts or insecticidal soaps weaken the outer shell of bugs but are safe for humans and don’t leave much of a residue. Many are listed for organic gardening. Effective against…
- Horticultural oils – Lost Coast Plant Therapy is on the expensive side but it’s organic and extremely effective against nearly all cannabis pests. Essentria IC3 and Monterey Horticultural Oil Concentrate are other great options. You will need a mister to apply these treatments. Effective against…
- BT Spray – Labeled as caterpillar “BT” sprays and concentrates. This is a safe biological insecticide containing the bacillus thuringiensis (BT) bacteria. BT kills caterpillar larva by preventing them from eating. This is one of the most effective ways to kill caterpillars, and won’t hurt most beneficial insects. Apply a caterpillar BT spray as soon as you see leaf damage, caterpillars or caterpillar poop (little dark specks on your leaves). BT sprays work best on small caterpillars that are actively eating your leaves. Repeat every week for as long as you’re still seeing caterpillars, though you can give BT more often if there’s a heavy infestation. Make sure to thoroughly mist both the tops and bottoms of leaves, and apply again after a heavy rain (since that will wash the BT away). Since BT is harmless to humans, you can use BT products on flowering plants as long as you don’t get any on buds. One thing to keep in mind is BT spray almost instantly stops caterpillars from being able to eat, but doesn’t kill them directly. So although you may see the caterpillars alive and apparently unharmed after spraying, the BT is still doing its dirty work.
- Diatomaceous Earth is basically fossil dust that you sprinkle on the top of your soil or anywhere else in your grow space(window sills, doorways, etc.). This powder-like substance is harmless to mammals and plants but is incredibly sharp at the microscopic level. Therefore, it will tear and dehydrate bugs on physical contact. Almost every type of bug is at least deterred, but it’s particularly effective against smaller soft-bodies insects and larva (including Fungus Gnats)
- Beneficial organisms – Kill bugs with beneficial insects and organisms like ladybugs, predatory wasps, or nematodes
- Learn about additional safe ways to kill insects
See pictures and get solutions to the most common cannabis pests.
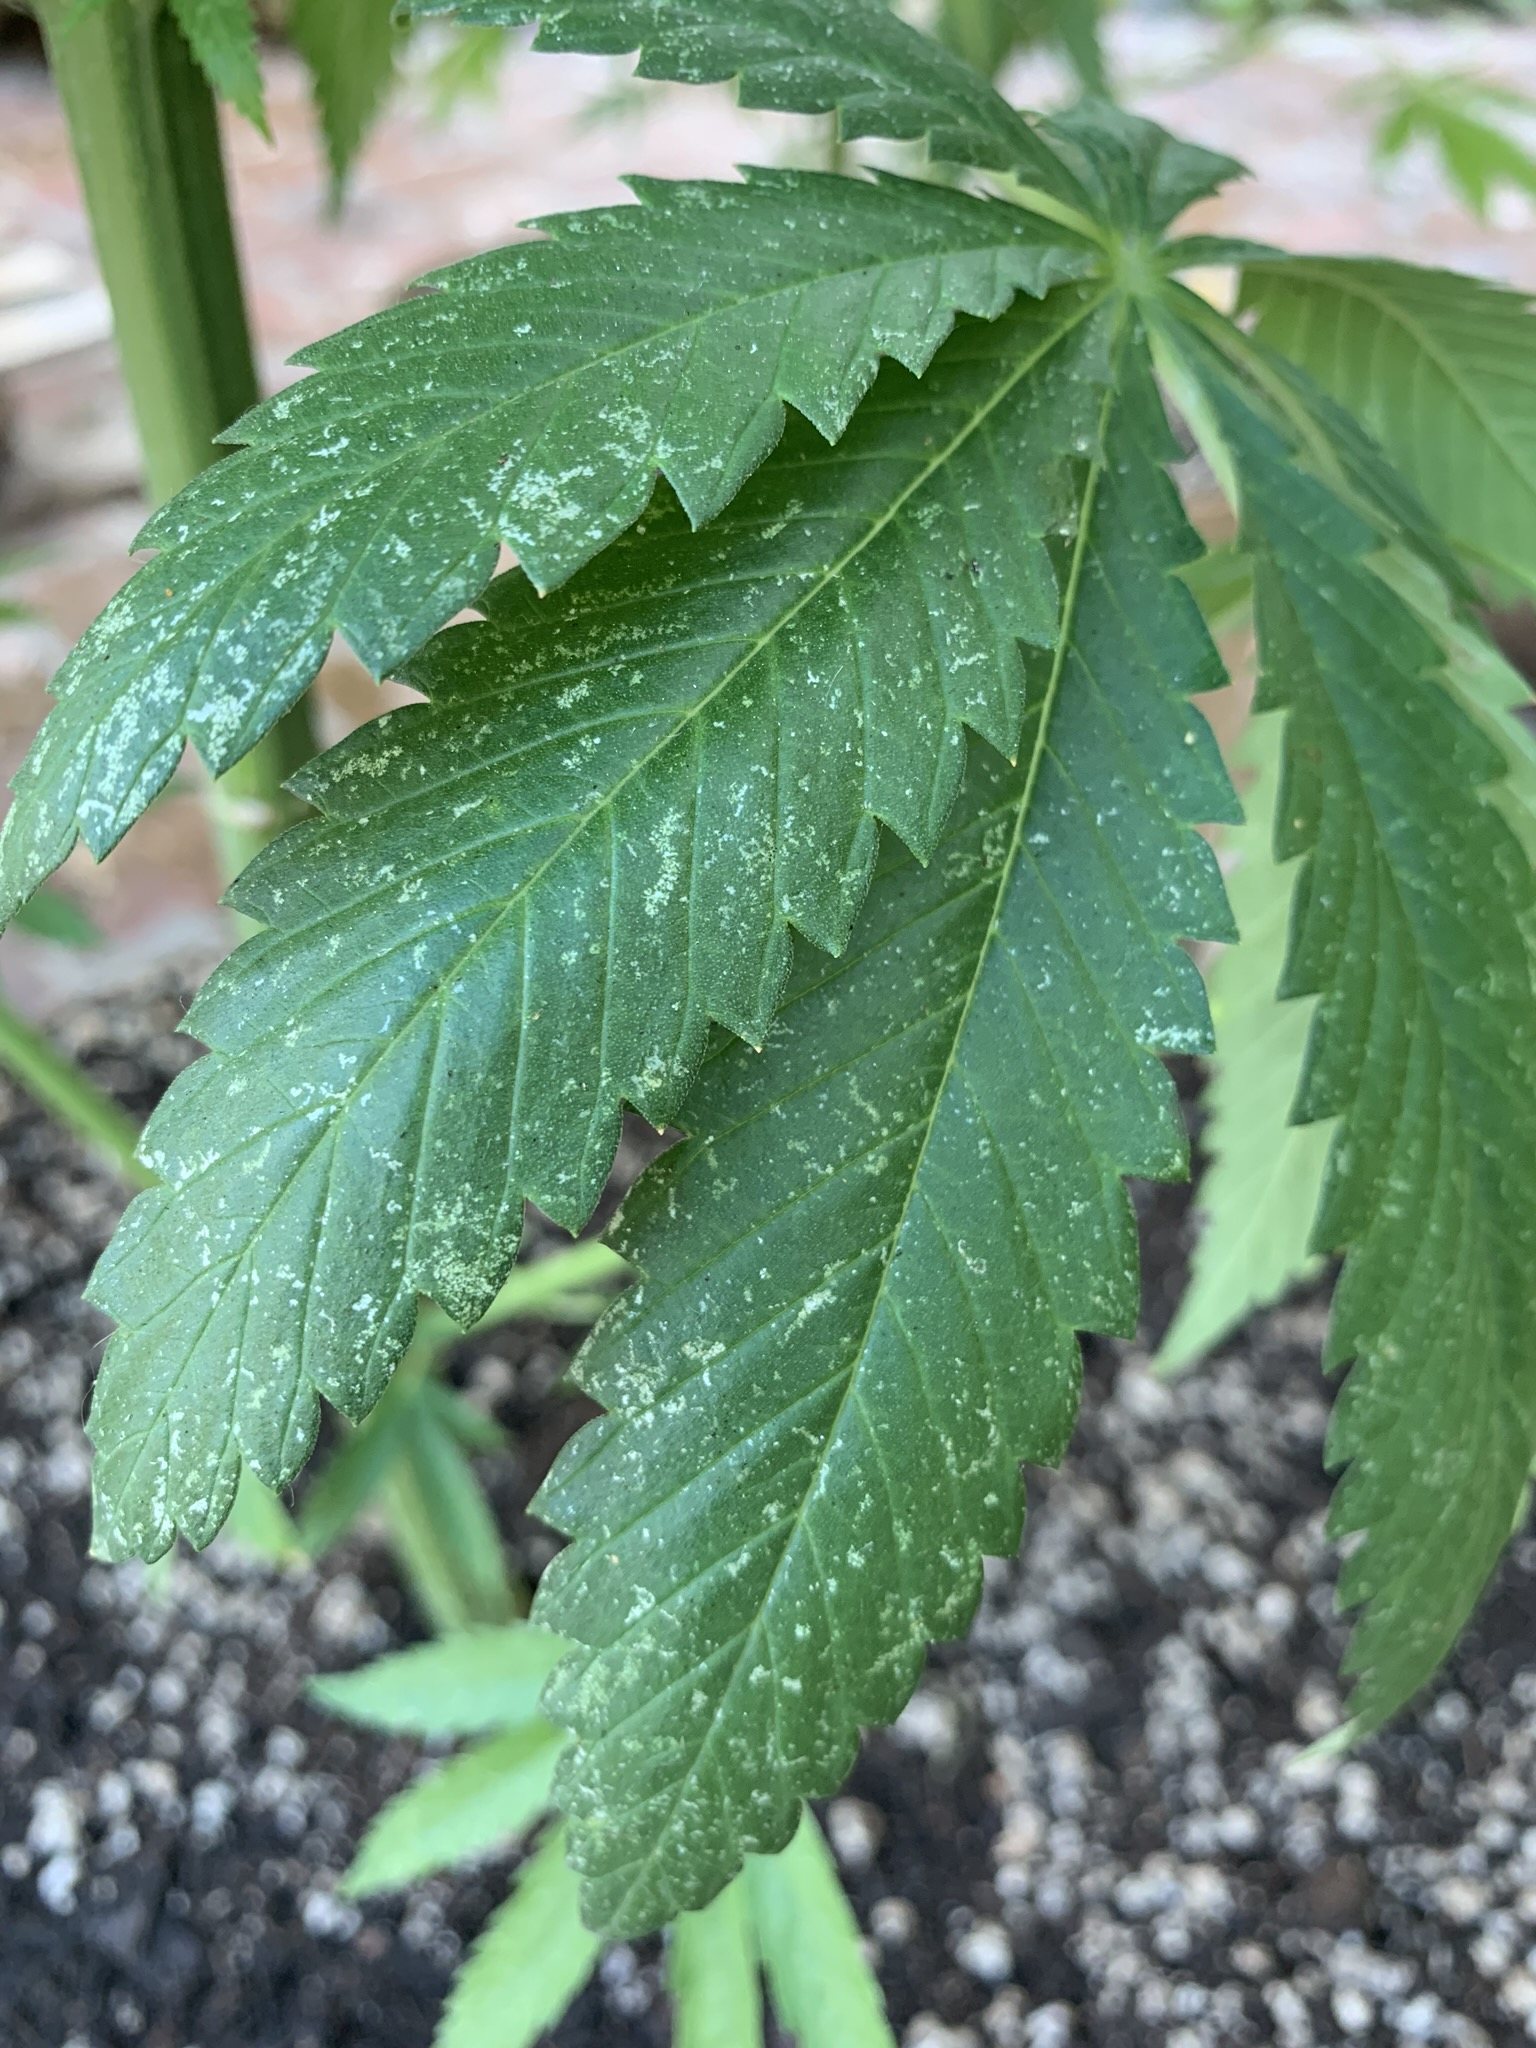
Example of leaf damage from thrips, a common cannabis pest
Common problems to avoid
- Bad starting genetics – Getting sabotaged by seeds is like buying a bad melon. You don’t realize anything is wrong until it’s go-time. Where can I get good seeds?
- Bad starting water, especially if the PPM is high (very “hard” water that’s full of minerals and other stuff) or if the pH is outside the 6.3-7 pH range. You can take steps to correct issues, and correcting the pH goes a long way, but the worse your starting water, the more variables it can introduce that could put you off track.
- Overwatering (and occasionally underwatering) – follow our schedule to make it easy
- Bugs – Bugs can be especially troublesome for people who have a garden or live near a wild outdoor area. Also for people who live close to many other people with balconies, outdoor areas with potted plants, or who have their own gardens (for example in a high rise or residential community). If your home is surrounded by plants that aren’t well cared for, even if they’re not your plants, it can be easy to get bugs. Some common way growers get bugs are:
- your home is surrounded by people with balcony plants or gardens – it takes just one bad rose owner nearby to ensure your outdoors is populated with thrips, aphids, and spider mites.
- going from outdoors directly to the grow area
- visiting another cannabis garden
- getting clones from someone else
- holes in screens or other ways for bugs to enter the home
- any exposure to plants with bugs, including bouquets of roses or someone giving you their homegrown vegetables
- overwatering – attracts fungus gnats
- keeping plants in an open room, basement or garage instead of keeping an enclosed grow space. Grow tents are a great way to help prevent all kinds of bugs getting on your plants, including ones that just happen by like carpenter beetles or spiders (no one wants a spider web on their buds at harvest!)
- Seeing a bug on your plant is like finding a piece of plastic in your food. You may not know what exactly it is, but you hate and want it gone!
- Not thinking about your soil as a reservoir or root environment that you need to care for. With soil, you’re taking care of the soil, and the soil is taking care of the plants. If you follow all the instructions and tips in this tutorial, you will be good!

Don’t ignore water pH!
Ideally, your starting water should be in the 6.5-7 pH range to avoid nutrient deficiencies.

A little lower is okay (down to 6.3) but not higher. Pure water naturally has a pH around 7, so if you’re using good water you won’t need to think about this.
I know many people say you don’t have to worry about pH in super soil, but that’s only if you’re starting with good water. You WILL get nutrient deficiencies if the pH of your water is too high or low and you don’t adjust it. I’ve learned this from experience. If your starting water is clean and in the 6.3-7.0 pH range, you probably don’t need to do anything.
However, if your water is outside the 6.3-7 pH range you will have to adjust the pH of your water.
Don’t use regular PH Down or PH Up adjusters, as they will kill microbes in the super soil (plus they’re not organic). Instead…
Use Earth Juice Natural Down (citric crystals) to lower the pH in super soil. Other options include lemon juice and vinegar, but they’re less consistent.
Use Earth Juice Natural Up (potassium bicarbonate) to raise the pH. Another option is baking soda, but again it’s often less consistent.
These are organic and won’t hurt your soil. If you’re adjusting the pH down, try to get it to 7.0 pH. There’s no need to bring it lower because citric crystals can build up in your soil, which tends to drop the pH of the soil slowly over time. Similarly, if adjusting the pH up, try to bring it to 6.5 pH, so potassium bircarbonate doesn’t build up.
Basically, use as little pH adjusters as you can to get the water within the right range.
Learn how to adjust the pH of water.
Start growing your own beautiful organic cannabis today!