by Nebula Haze
Table of Contents
- Bad Lighting – Grow light is wrong spectrum, too small, or too far from cannabis plants.
- Over Watering – Giving too much water at a time, or watering too often.
- Genetics Wreck You – When bad results aren’t your fault.
- Nutrient Overload – Giving cannabis too much nutrients and/or supplements.
- Excessive Nutrient Deficiencies – When cannabis deficiencies get out of control.
- Privacy Concerns – Being overly carefree about cannabis stealth and privacy.
- Harvest Too Early – Cannabis buds need enough time to fully develop!
Many new cannabis growers learn hard lessons on their own. Too many marijuana growers feel embarrassed to share problem pictures and lessons learned. That’s why I’m here to help by talking about common beginner growing problems openly. I regularly see pictures of struggling cannabis plants whose caretakers don’t know what’s wrong.
Growing amazing weed at home starts by avoiding common problems.
Often, a small but vital piece of plant care knowledge is all the grower needs to quickly solve their problem. This is a problem because growing the best weed (and getting the biggest yields) is partly dependent on preventing major plant problems from affecting your grow.
Happy plants reward you!
With this in mind, I compiled a short list of the most common mistakes I see new marijuana growers make. Read below to find out if you’re making one of these common blunders. Plus get the fixes!
1. Bad Lighting (not enough light, or not the right kind of light)
I’ve come across quite a few pictures sent in where a grower has a plant sitting under a typical household bulb, a tiny LED grow light that’s meant for lettuce, or even on a window sill while it’s clearly snowing outside.
Tall, thin plants? Give more light if your plant is growing tall and stretchy with a lot of space between nodes. Growing tall is a sign the cannabis seedling is “reaching” for the light.
Tall Seedling = Needs More Light
Younger cannabis plants can grow okay without much light. But without strong light levels, plants do not grow big buds in the flowering stage.
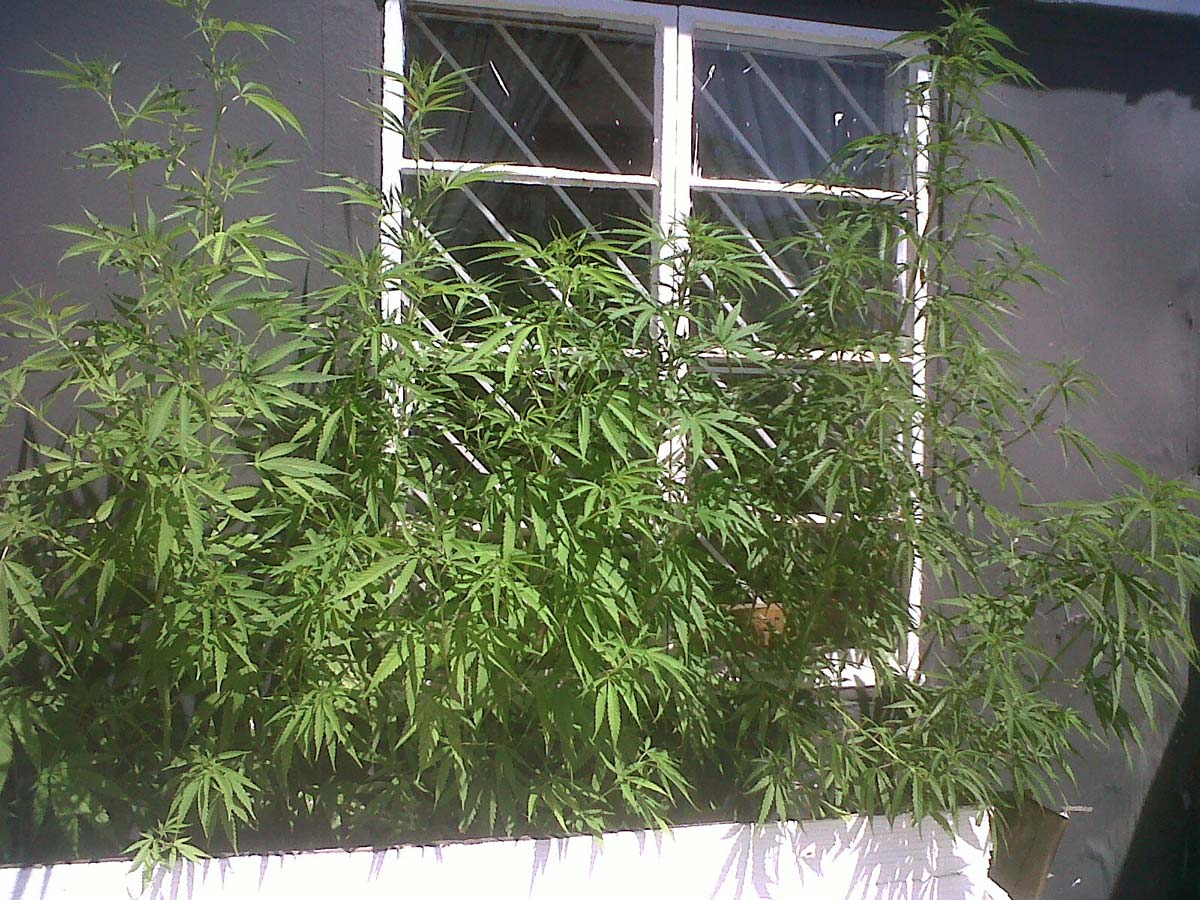
This window plant is tall and thin with small buds. The cause? Not enough light.

The following garden has a great LED grow light for growing weed, but it’s turned down to 50% power and kept too far away from the tops of plants. As a result, the plants grew tall and stretchy. In the flowering stage, all the buds stayed small.
Always keep LEDs the recommended distance away. Cannabis plants need a lot of light to grow properly with big, fat buds!
Grow light too far with power turned down. Low light levels made stretchy plants, small buds.

Without enough light, cannabis buds simply do not fatten up.

Example of a small, airy bud from too little light in the flowering stage. Low smell, little sparkle.
The specific grow light matters. For example, the following picture shows a plain bad LED grow light for growing weed. No matter how you use a grow light like this, cannabis buds won’t fatten up properly. Make sure to always use a grow light made for cannabis plants.
Example of poor spectrum LEDs for growing weed. With a poor spectrum, buds stay tiny no matter what you do!
You should see some green. Cannabis plants need some amount of green in the light spectrum for the best growth. When leaves appear completely purple without any hint of green, that means there is no green in the spectrum. Not good!
You may have noticed that even with “full spectrum” or “wide spectrum” LEDs, the light often appears pink or purple. This is because cannabis plants (especially flowering ones) like a lot of red. But with a good spectrum for growing cannabis, your plants should generally still appear in full color.
In this example, the light from the LED still appears purple (look at the sides of the tent), but the plants are full color. That’s a good sign.
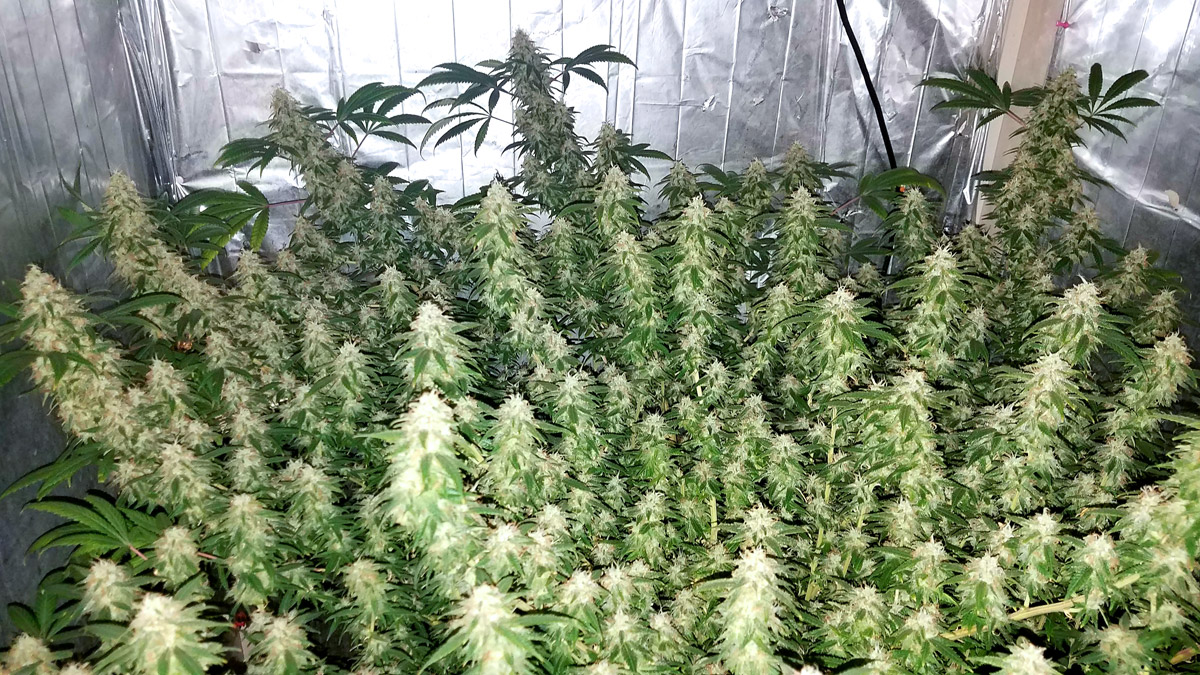
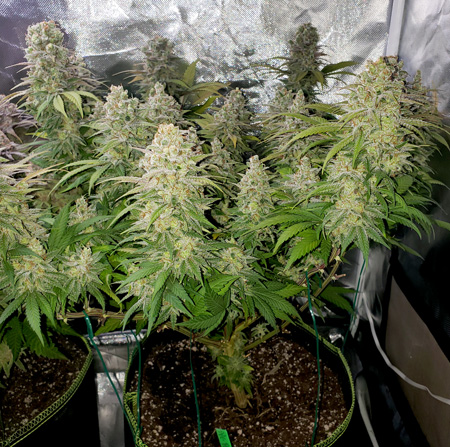
Good LEDs make big buds!

Buds need the right light to thrive. Without enough of the right kind of light, cannabis plants grow tall and stretchy, buds stay small, and bud structure tends to be loose without much smell or sparkle.
But if you give cannabis plants an awesome grow light, they reward you!
Lots of good light grows the best bud quality!
How to Avoid Problems with Cannabis Grow Lights
The amount and spectrum of light given to your plant has an enormous impact on growth rates, bud density, and yields. Plants need light to grow, and plants need intense wide-spectrum light to make big buds. You can expect the amount of bud produced to be somewhat proportional to the light intensity and quality.
- 100+ Watt Grow Light – Small grow light = small harvest. Cannabis growers should usually have at least 100W of grow light ensures the best results (expect 2-4 oz with a 100W LED). Bigger lights are necessary for bigger yields. What’s the best size grow light for you?
- Cannabis-Specific LEDs – LEDs are the best grow light for most home growers (LEDs run cooler, use less electricity, and produce better bud quality that most bulb-style grow lights). You tend to get the best results with LED grow lights that have been designed for and tested on actual cannabis plants. Generic and unknown LED brands produce less consistent results. Some LEDs have an actually bad spectrum or design that keeps buds tiny even if you do everything right.
- Proper Distance Away – Adjust grow light to keep it the recommended distance from the tops of plants. Try to keep grow lights as close as possible to plants without causing signs of light stress on the top leaves (yellowing, deficiencies, etc.) The product details should say how far to keep your particular grow light for the best results.
But that doesn’t mean you need to go out and buy a huge or high-priced grow light for your garden. These days there are affordable small intense 100W LEDs and incredibly efficient mid-size LEDs that deliver high light levels without a ton of heat or electricity.
Learn the best size grow lights for your grow space and cannabis yield goals.
Recommended: 5 best LED grow lights for growing weed.
2. Overwatering (watering too often or too much at a time)
Many of us were brought up thinking that plants need sunshine and water every day. This gets combined with a new grower’s “thirst” to provide for their plants (see what I did there?). As a result, many beginner cannabis growers unintentionally water their plants more than needed.
Overwatering can cause a surprising array of symptoms.
Overwatering prevents plant roots from getting enough oxygen, which causes cannabis plants to adopt a droopy posture. Overwatering can even kill plants in severe cases. Luckily, overwatered plants can usually be restored to full former glory with proper watering practices.
How to Avoid Overwatering:
Overwatering comes from watering too frequently or giving too much water at a time. Here’s how to water properly:
- Soil – Water plants when the soil feels dry up to your first knuckle (or if the pot feels light). Learn how to water plants in soil. Learn how to water plants in soil.
- Coco Coir – Aim to water plants every 1-2 days. If coco is staying wet for 3+ days, try giving less water at a time until plants get bigger and start drinking more. Wait until the topsoil looks partially dry. Don’t water if the top inch feels “wet”. If the container feels light, it’s definitely time to water. Learn how to water plants in coco.
- Seedlings – Learn how to avoid overwatering seedlings (very common!).
For DWC/Water Based Hydro, make sure you have large airstones that make lots of bubbles. Since overwatering is usually triggered by oxygen deprivation in the water, you can actually overwater your hydroponic plant (in a sense) by not providing enough oxygen (not giving enough bubbles).
Learn more about proper cannabis watering practices
3. Genetics wreck you
Oh, how tempting it is to grow a bagseed (a seed you find in your buds). You like the buds it came from, and it’s free. What’s the problem?
Many growers are pulled in by the prospect of growing a free seed found in their marijuana, and many of these growers get disappointed. That’s because seeds you find may be duds, males, runts, or hermaphrodites. What’s worse, even when plants from bag seeds grow well, the buds may not be anything like the ones you found them in. That’s because the bud traits you want have not been stabilized into a strain.
Using random cannabis seeds (even from dank bud) can deliver unpredictable results. It’s true that some bagseed plants end up awesome. But with bagseed, it’s also possible plants grow wild or produce small airy buds with low potency. Yes, even if the original weed was dense and potent!
Don’t grow this by accident! Bad genetics produce bad buds even if you do everything perfectly.
Even if you buy strains from a trustworthy breeder, it’s still important to get the right strain as opposed to buying the cheapest cannabis seeds you can find.
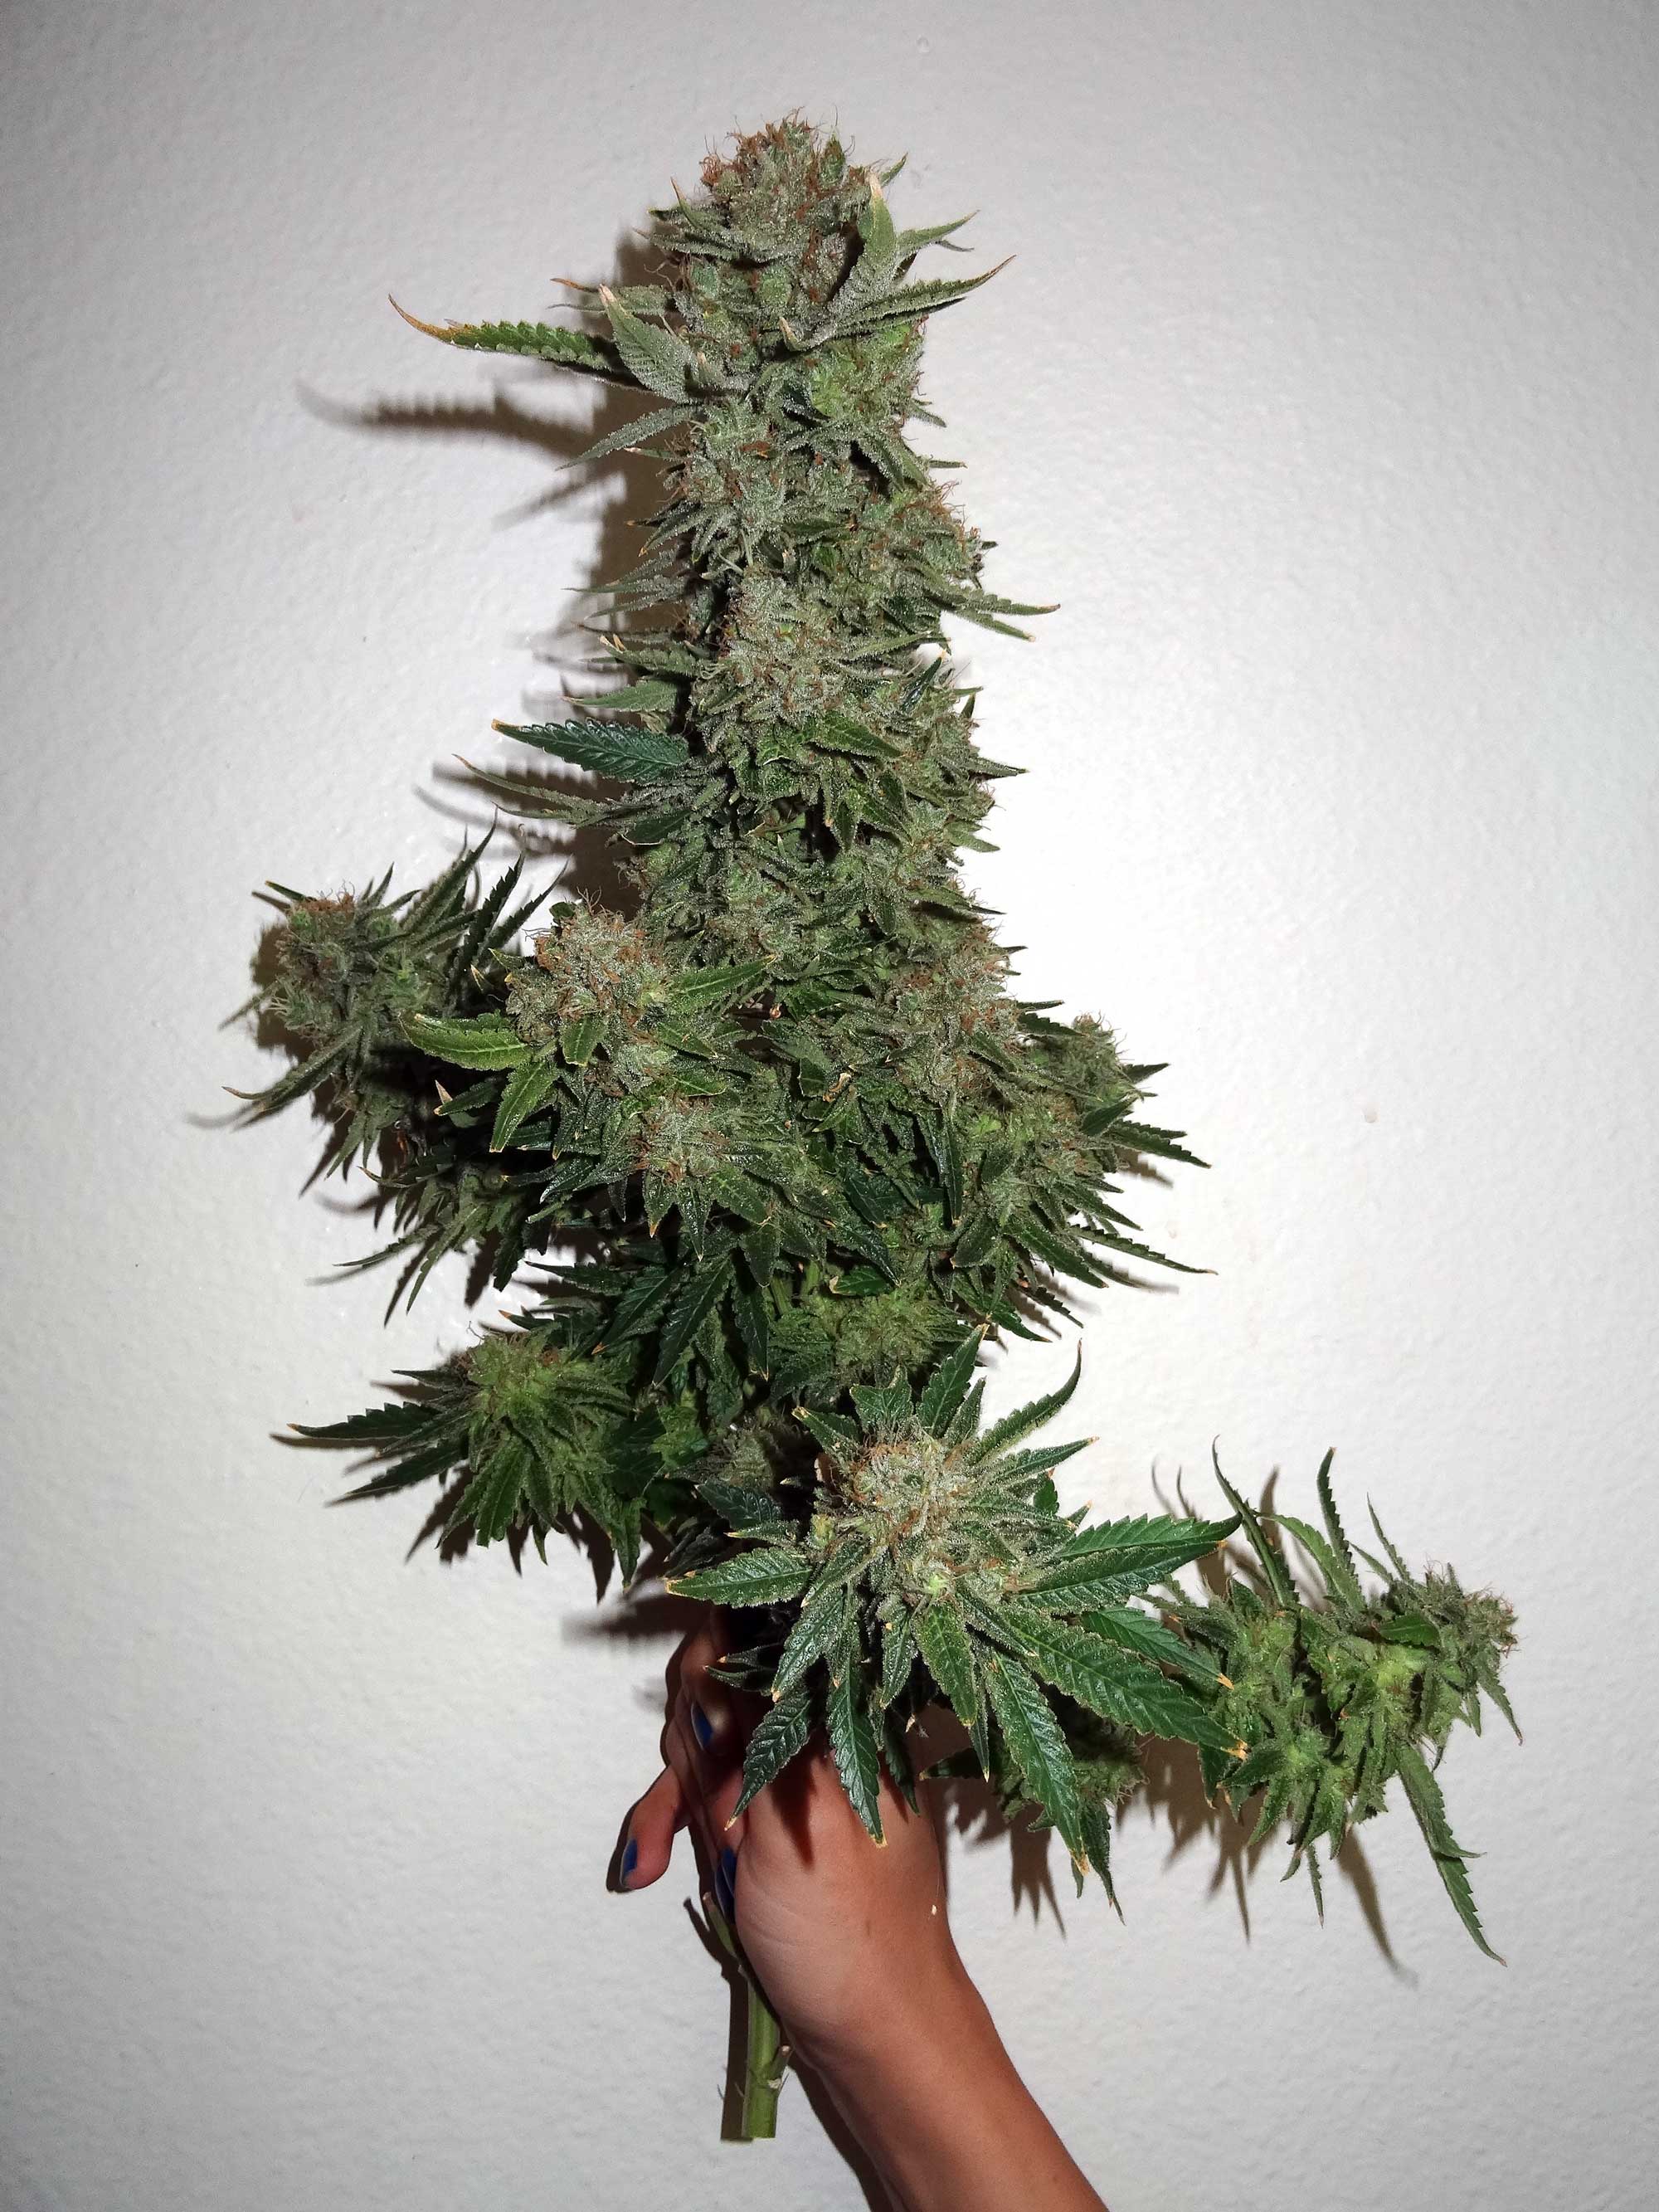
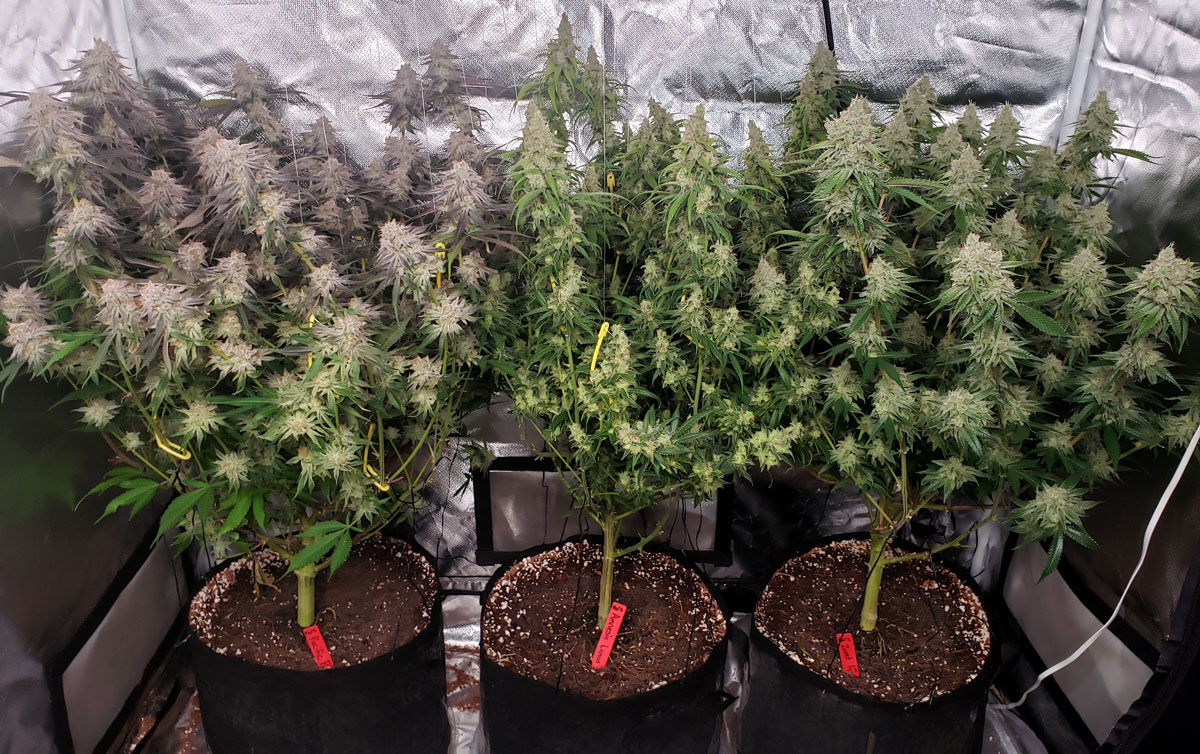
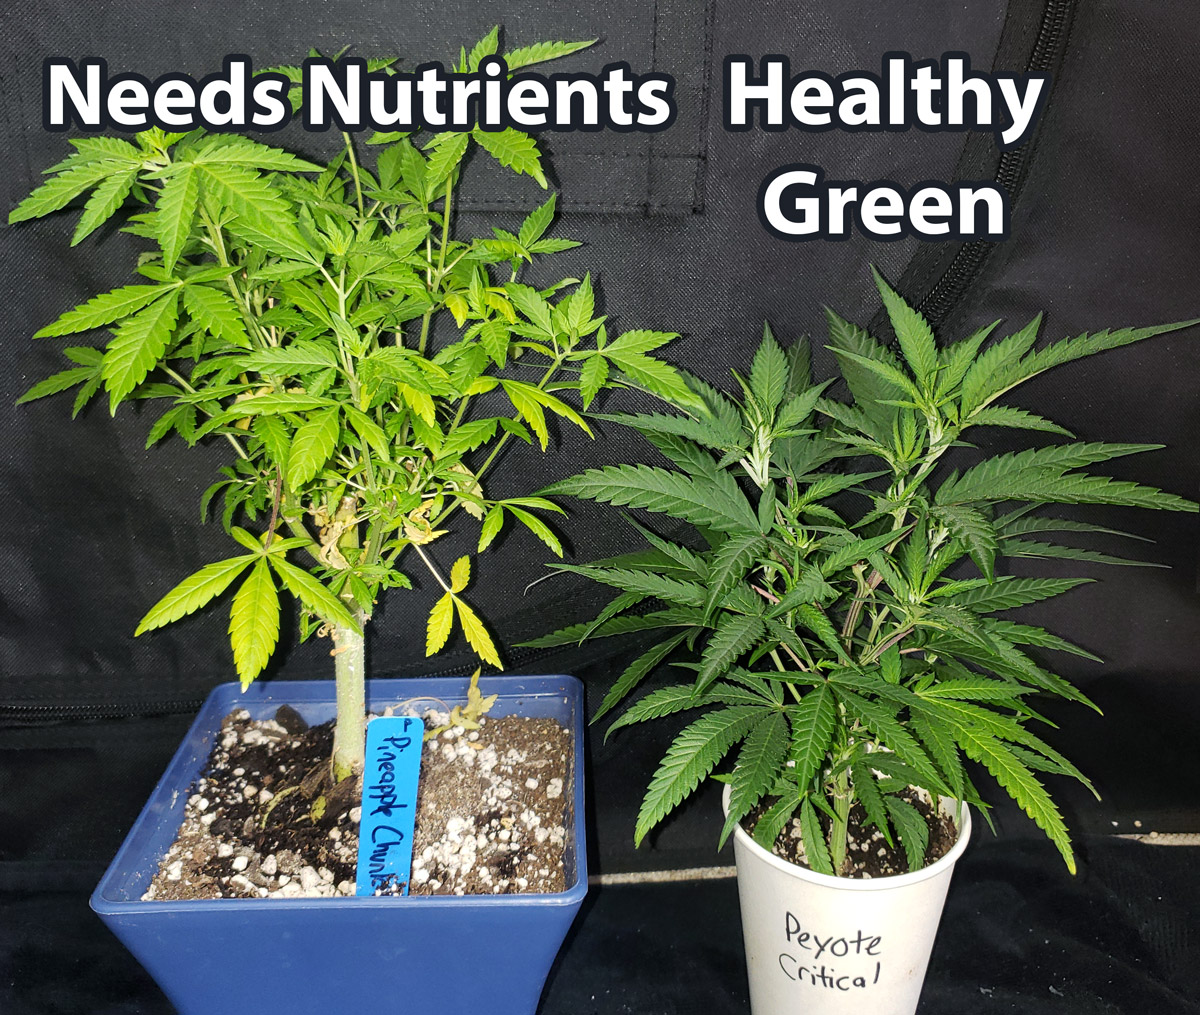
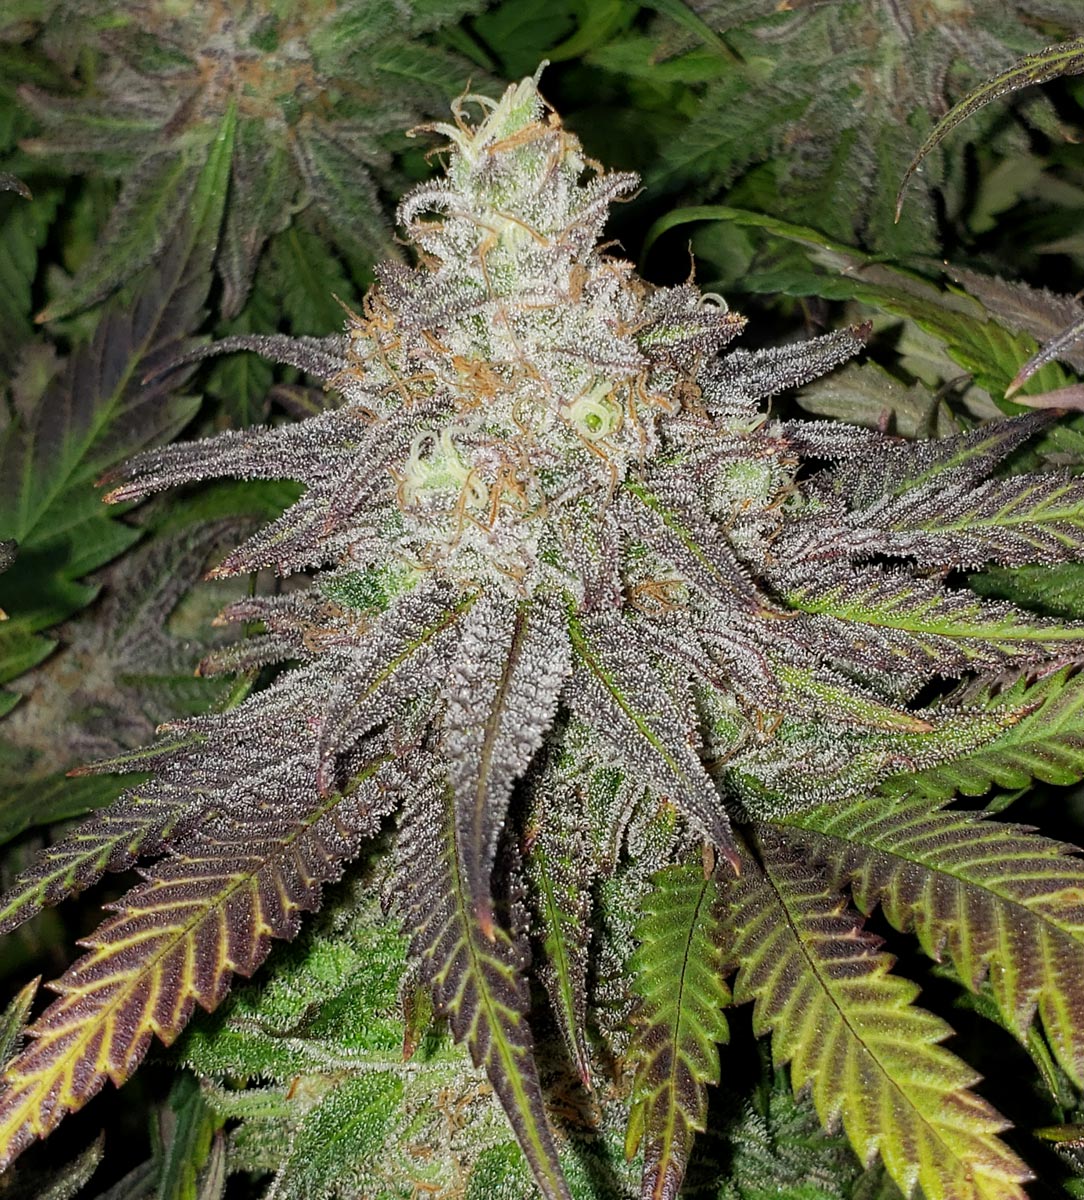
The following picture shows a side-by-side example of how strain can affect bud quality. These 3 strains were grown in identical conditions under a Mars Hydro TSL 2000 LED grow light but the different genetics produced wildly different results.
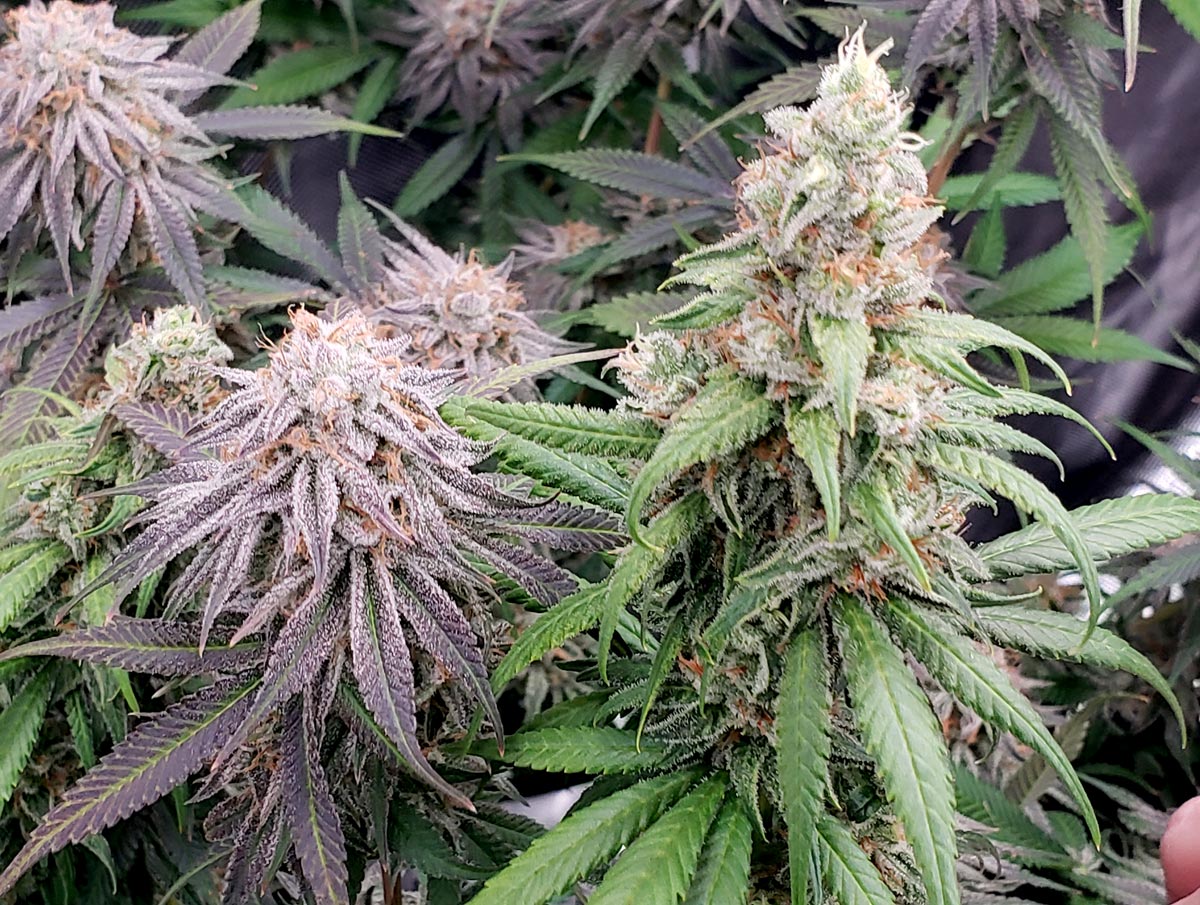
Here’s a closeup of buds from the two cannabis plants on the left. The buds on the green Amnesia Lemon plant looked good but had a loose bud structure, weren’t potent to smoke, and tested at 14% THC in the lab. On the other hand, the purple Pacific Punch plant produced far smaller buds, but they were denser, smoother to smoke, and tested almost twice as potent at 26% THC from the lab. The Pacific Punch buds were just better than the Amnesia Lemon buds in every way despite getting the same nutrients, grow medium, grow light, and overall care. Strain makes a big difference. Here’s the full grow journal.
Choose the right cannabis seeds to get what you’re looking for.
How to Avoid Bad Genetics:
Get good seeds from a reputable source. If you’re going to spend money on good lights and nutrients, you’re wasting that potential on a plant with inferior genes or the wrong sex.
Remember when it comes to genetics…
- Poor genetics always produce poor buds even if you do everything perfectly right.
- Great genetics can grow great buds even if you make a lot of mistakes!
There are many trustworthy sources of seeds. I’ve been using Seed Supreme for the last year or so because they have fast shipping from the US and an excellent selection from many different breeders. Recently, I’ve also been using Seedsman because they have better prices for USD customers due to the current conversion rates. In any case, it’s a good idea to go with a company that will reimburse you in case your seeds don’t arrive or end up being duds.
Growers who start with clones from another grower should exercise caution because clones are a common way to get bugs. My main suggestion is to know the person who is selling/giving you the clones and, if possible, inspect the clones thoroughly. Even better, quarantine the clones away from your other plants for a week or two while watching for signs of pests. Diseases/pests like spider mites or thrips can easily spread from clones to your entire garden and become unwelcome guests that won’t leave.
Get classic 2000s effects with great yields and easy-to-grow: Skunk #1
BlimBurn Seeds is a seed breeder that specializes in capturing legendary genetics and clone-only strains in seed form, like their Blue Dream.
Recommended “chill times” strain: Pineapple Chunk is an easy-to-grow plant with great yields and amazing bud quality even if you make a lot of mistakes.
Recommended “so potent you can’t think” strain: Platinum Cookies is famous for its potency. Don’t enjoy these buds if you’ve got something to do later that day! Read my full review of Platinum Cookies.
For unique appearance, great yields, and excellent bud effects: Zweet Inzanity Rbx. Every time I grow this strain it is a crowd favorite!
Recommended autoflowering strain: Alaskan Purple Auto gives you the convenience of automatic flowering (buds automatically form and are ready to harvest about 3 months from germination) yet produces the bud quality of a photoperiod strain. Learn about auto-flowering strains.

4. Nutrients & Supplements Overload
This is a mistake that’s easy to make, and the majority of growers will do this at some point. I know I have done this from time to time. This is another example of “over-loving” your plants with too much of a good thing.
Here’s another part of the problem: Nutrient companies include a feeding schedule with their nutrient systems, and most of the feeding schedules recommend nutrient dosages that are too high for cannabis plants. If you add supplements on top of high levels of nutrients, you can majorly stress out your plants.
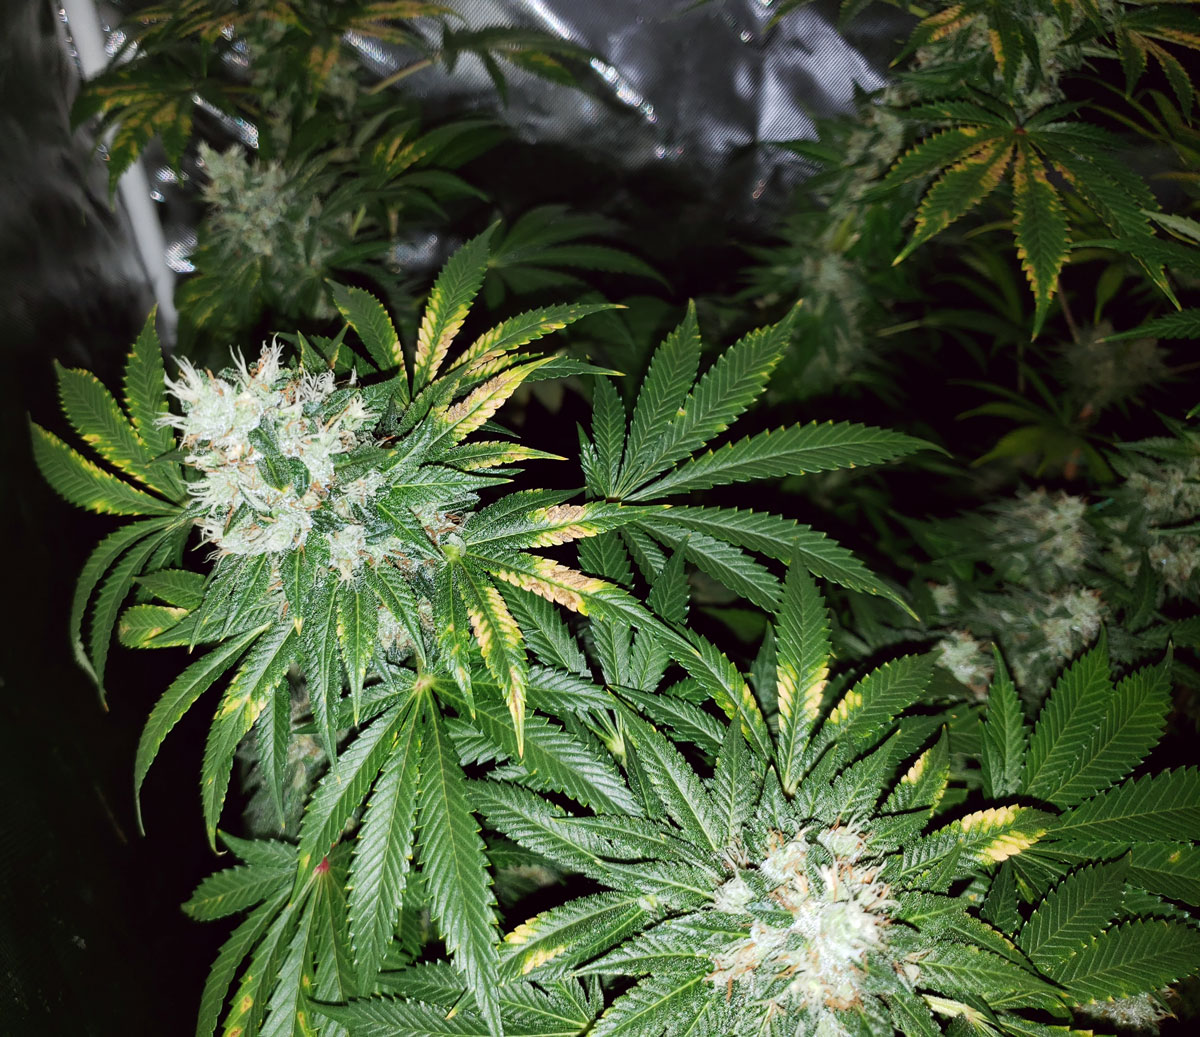
Overfeeding leads to a well-known cannabis affliction called nutrient burn (commonly referred to as “nute burn”). Nutrient burn won’t kill your plants in most cases, but they will leave an eye-catching reminder of their presence for the remainder of the grow.
Brown leaf tips all over the plant are a sign of nutrient burn, which is usually caused by too high levels of nutrients.
Note: If you’re seeing yellow tips on only the top leaves, it may be light stress or a nutrient deficiency caused by incorrect pH. If you’re seeing yellow or brown around the outside of the leaves (not just the tips) you may actually be seeing a copper deficiency or potassium deficiency. I’ve also occasionally seen a plant get discolored tips from overwatering, so that may be something to consider if plants seem droopy and you feel like you’ve been watering a lot.
How to Avoid Giving Too Much Nutrients:
Use the same feeding schedule that comes with your nutrient system, but only use one-half (1/2) of the recommended dosage to start. You can typically only give full-strength nutrients to cannabis plants that are thriving, growing fast, and under strong grow lights.
Example: If the feeding schedule calls for 2 tsp of nutrient solution per gallon of water, use only 1 tsp at first.
You should raise the nutrient levels if your plant starts getting pale or lime green all over, because that’s the main sign it needs more nutrients overall. For example, slowly move up to 3/4 strength or full strength as needed.
Here’s a cannabis plant with the right color vs one that is too pale and needs higher levels of nutrients
If plants are growing slower or under weaker grow lights, they need less nutrients and are more likely to experience nutrient burn because plants have reduced nutrition needs when they’re not doing as much photosynthesis. Cannabis plants that are grown under intense grow lights may need full-strength nutrients or even more in some cases.
Learn more about getting the best results with marijuana nutrients.
5. Out-of-Control Nutrient Deficiencies
When you start cultivating cannabis for the first time, there are a lot of acronyms, formulas, and regimens it seems you need to remember. After hearing PPM, NPK, pH, Lucas Formula, 18/6, 24/0, etc., most people want to ignore the jargon and try just water their plant and see what happens.
(Check out our glossary of common growing terms)
The jargon can definitely be overwhelming, and I would agree that a lot of it can actually be ignored… except pH.
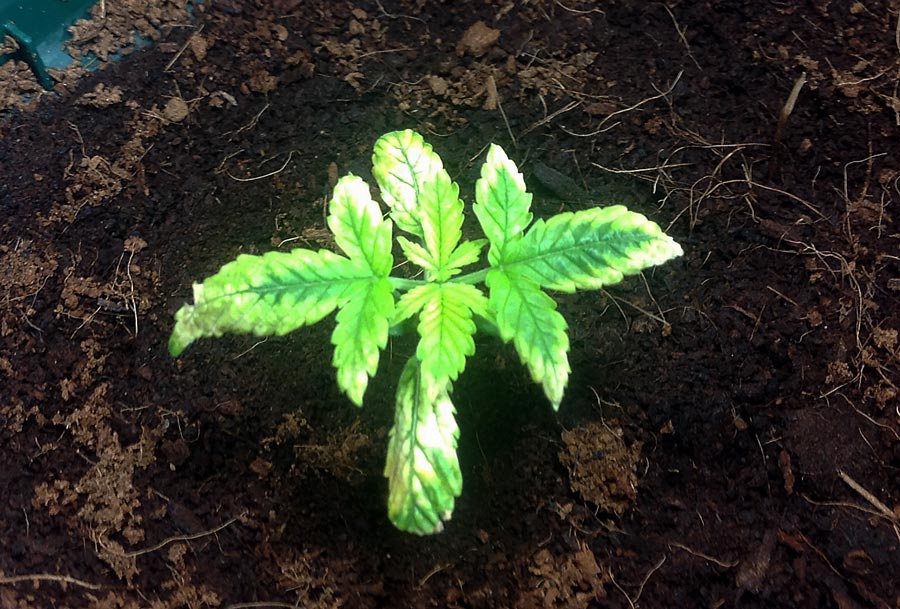
Even though this plant has access to nutrients in the soil, the leaves are showing nutrient deficiencies due to receiving low-pH water. Bad root pH can cause all sorts of leaf discoloration, problems, and deficiencies! The problem cleared up as soon as the plant started getting water with a neutral pH.
This nutrient deficiency (yellow/brown patches on leaves) is caused because the pH was too low in the soil
Managing pH is one of the more technical details that pretty much ALL growers have to deal with unless you’re lucky enough to have perfect water.
Even in an organic super soil setup where pH matters less and many growers say pH doesn’t matter at all, you’ll still get nutrient deficiencies if the pH is totally out of whack. In fact, the picture above shows a super soil plant. Bad pH makes for sickly leaves, plants that struggle to make big buds, and overall poor cannabis growth. Soil growers aim for 6-7 pH for the best nutrient absorption. Growers in hydro, coco, and other soilless media aim for 5.5-6.5 pH.
How to Deal with Nutrient Problems Quickly:
To your plant, root pH determines which nutrients can be absorbed. When the pH is in the wrong range, a cannabis plant can’t uptake nutrients properly.
Why? PH affects the bioavailability of nutrients to the roots because each nutrient molecule takes on a different chemical form depending on the local pH. Some forms are easily absorbed by the roots, while other forms are difficult for your roots to uptake. When your plant can’t absorb nutrients due to pH, you’ll see nutrient deficiencies even if the nutrients are physically there.
Get yourself a pH Testing kit and make sure you’re feeding your plants with water in the correct range:
Hydroponics: 5.5 – 6.5 pH (including coco and other soilless media)
Soil: 6.0 – 7.0 pH
In my experience, most nutrient deficiencies are actually pH problems. Remember this and you’ll keep your plants looking beautiful.
Learn more about checking and adjusting pH to prevent nutrient deficiencies.
6. Privacy Concerns
Even in places where weed is legal to grow, it’s a good idea to keep your garden relatively private. There’s usually no benefit to advertising you are growing cannabis plants and it can sometimes cause problems. Nosy neighbors may give you a hard time, or thieves may learn of your garden and try to steal your plants because they know you’re unlikely to call the police.
Here’s a short list of things I’ve seen in pictures or read in emails.
Don’t do these things!
- Weed in windows sills with a clear view to neighbors and passing traffic
- Uploading pictures of cannabis plants with identifying information (such as mail with name and address visible)
- Growing weed in a low-fenced backyard adjacent to other houses
- Not bothering to filter cannabis odors even though you know the smell bothers people who live near/with you
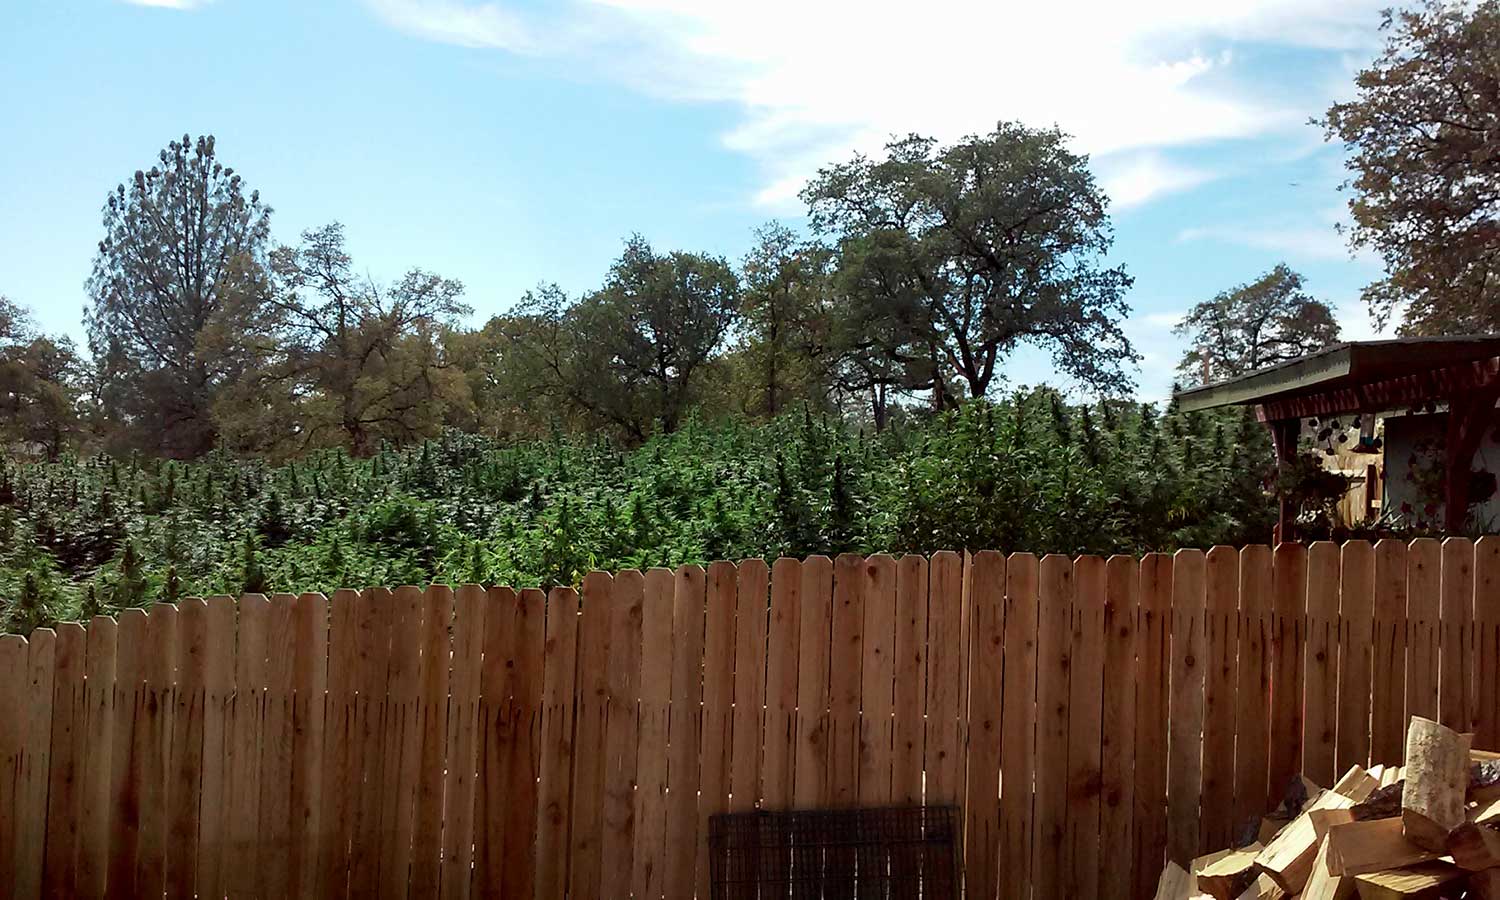
Don’t do this in open view. It’s common for thieves to steal plants right as they approach harvest!
Or this. The smell from these plants overwhelmed the entire neighborhood. Try to be a considerate neighbor and respectful representative of the growing community
How to Ensure Stealth
I realize I may sound like a stickler… but this is an important topic. Legality, nosy neighbors, and thievery aren’t the only issues here. We need to stick together and ensure we’re good representatives of the home growing movement. It’s so disappointing when someone blatantly angers their neighborhood with the smell and overt display of weed plants “because it’s legal” and they don’t care. This hurts us all.
Unfortunately, many huge marijuana companies are fighting to ban home cultivation so they have a monopoly on growing. For example, powerful business entities helped convince the state of Washington to ban home cultivation despite cannabis being legalized for all adults (growing even a single cannabis plant in Washington nets you a felony with up to 5 years of prison time, though you can walk down the street and buy weed from a store). It’s also legal to buy weed but not grow it in Connecticut, Illinois, New Jersey, and New York. There are similar laws for medical marijuana patients in Alabama, Arkansas, Delaware, Florida, Louisiana, Maryland, Minnesota, New Hampshire, New York, North Dakota, Ohio, Pennsylvania, Puerto Rico, West Virginia, and Utah. You can purchase, but not grow at home.
Learn more about where weed is legal to grow in the United States
How can it be legal to buy weed, but not plant a seed?! Don’t be ammo for the anti-growing profiteers.
People are trying to take home growing away from us. Because of this, I encourage every grower to be a good neighbor and thoughtful delegate for weed growers everywhere.
Check out our tutorial on how to grow weed in secret. Even if you don’t read that article, here’s the most important stealth advice: don’t smell, don’t tell, don’t sell.
7. Harvest Too Early
Growing marijuana definitely requires a bit of patience to see it until the end. And no part of the grow will test your patience more than waiting for the right time to harvest your cannabis.
(If you’re in a hurry, most autoflowering strains are ready to harvest less than 90 days from germination)
Harvesting too early will reduce the effects/potency of your medicine in addition to reducing the overall weight. Luckily, it’s straightforward to pick the perfect harvest time.
How to Harvest at the Perfect Time:
Check out the pictures below for an overview on when to harvest for the highest potency and best effects. If you want the full scoop on when to harvest your plants, see our “When do I harvest my marijuana plants?” page.
Not Ready
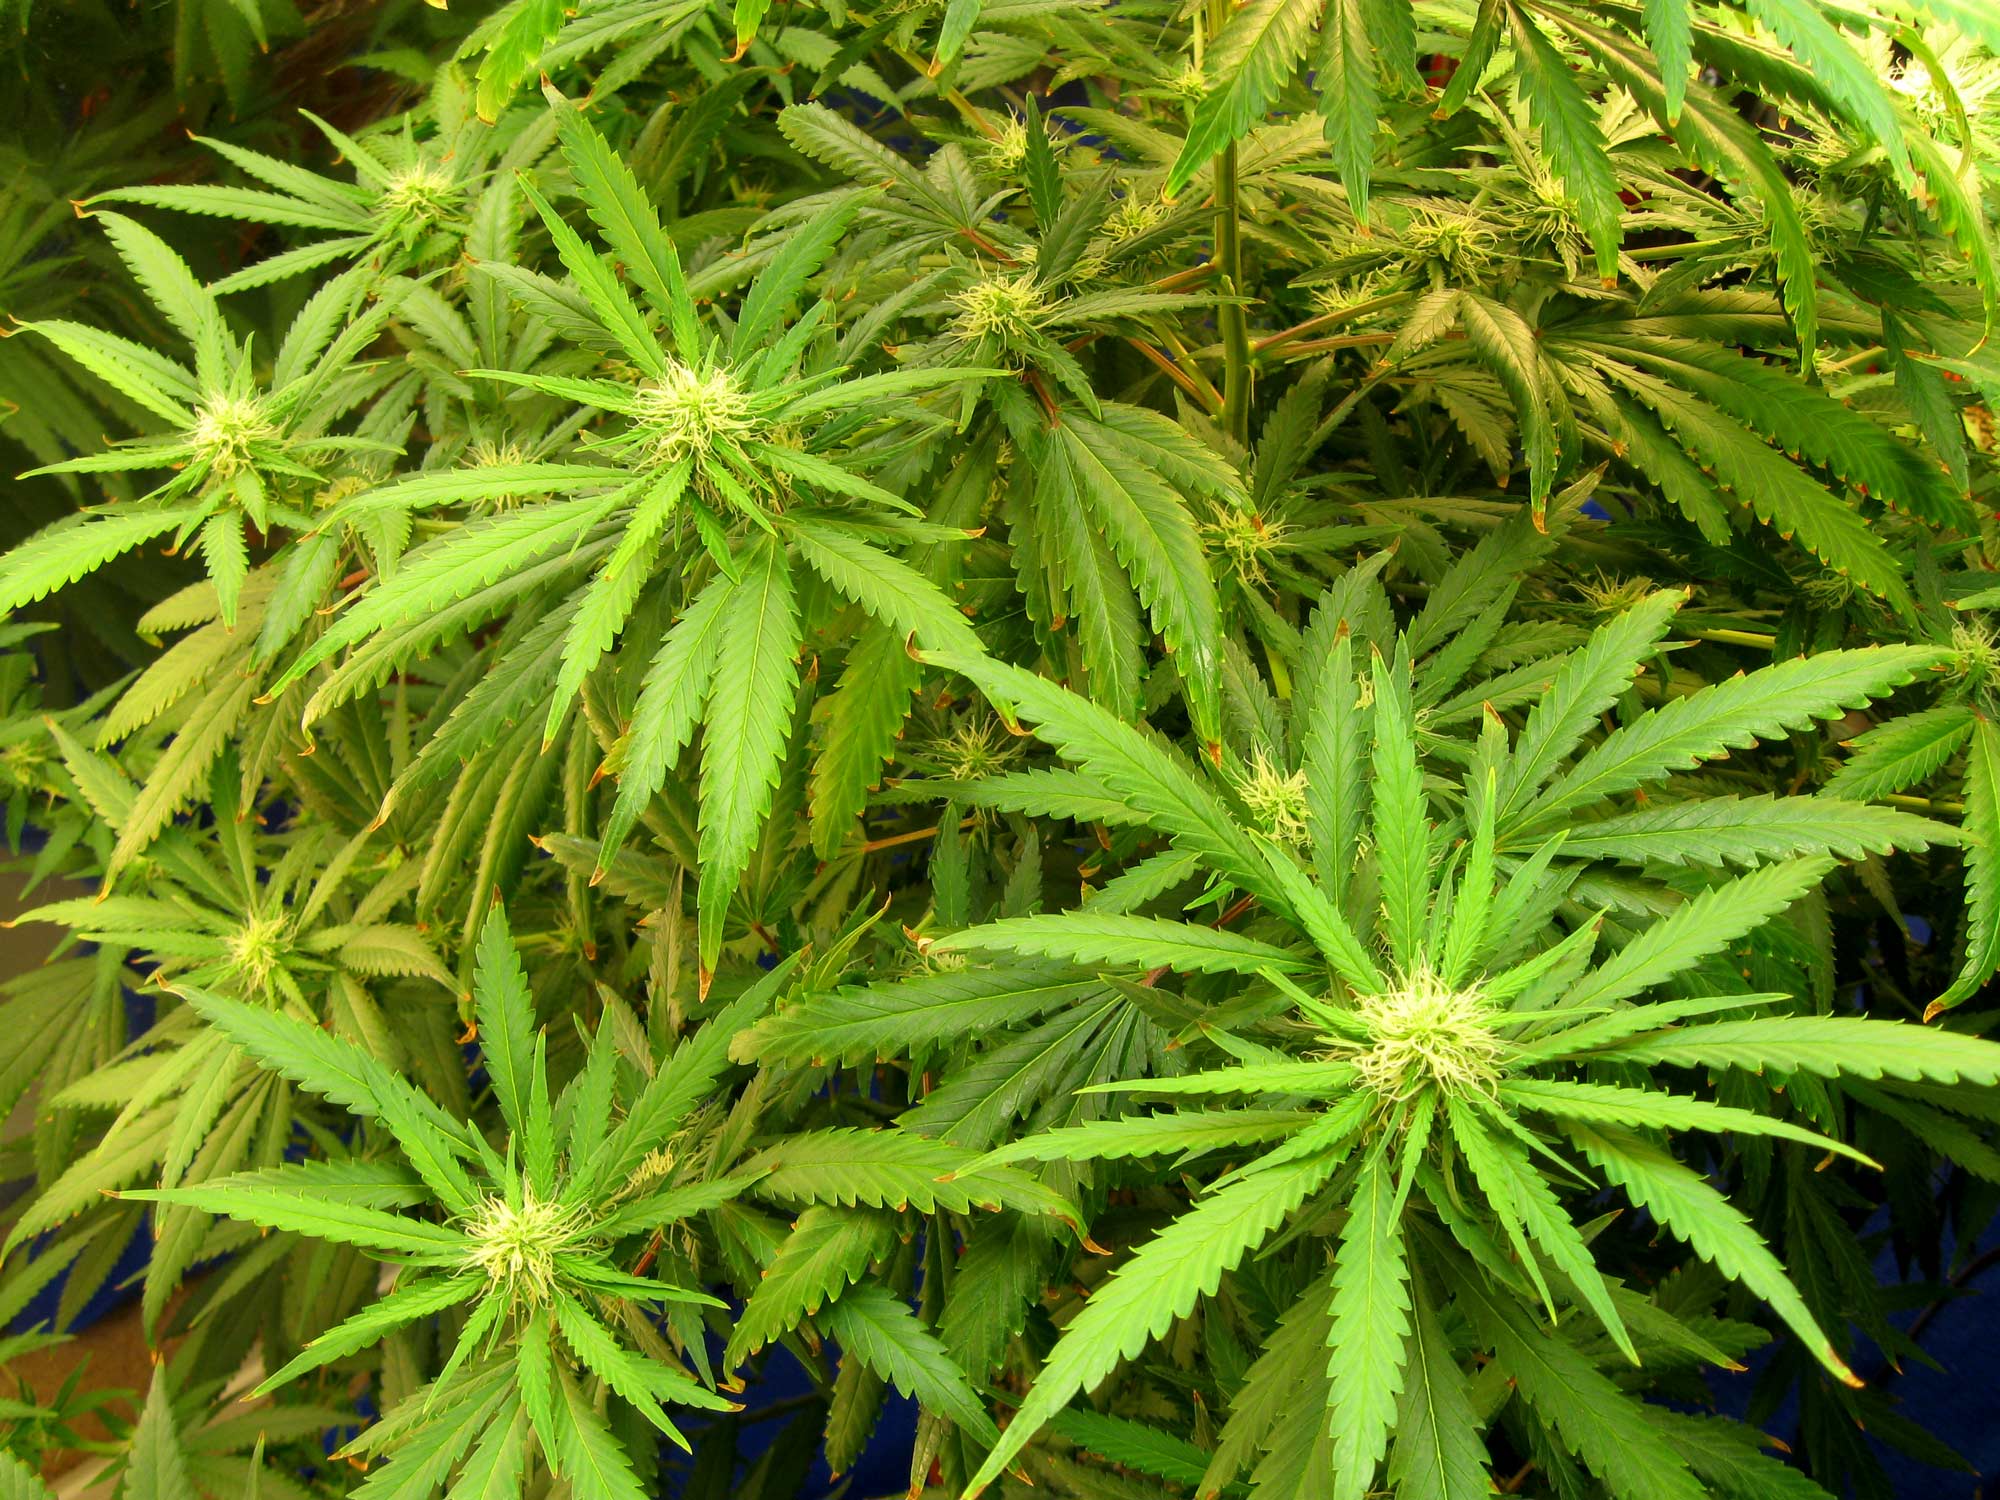
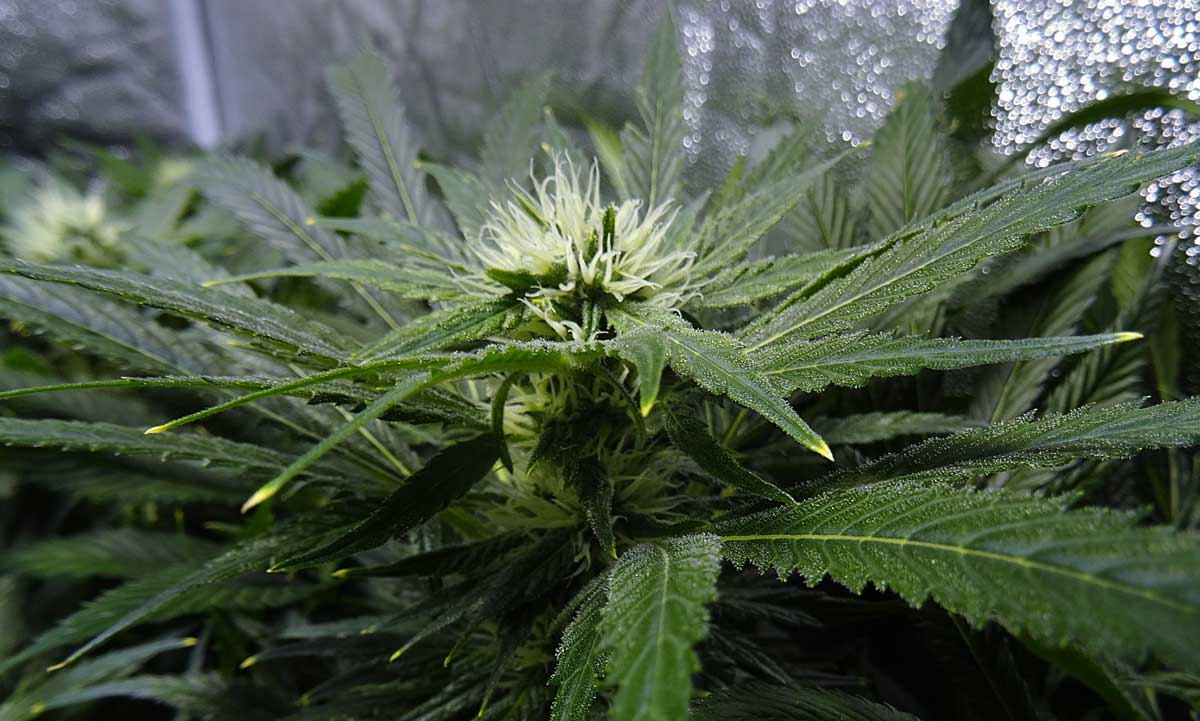
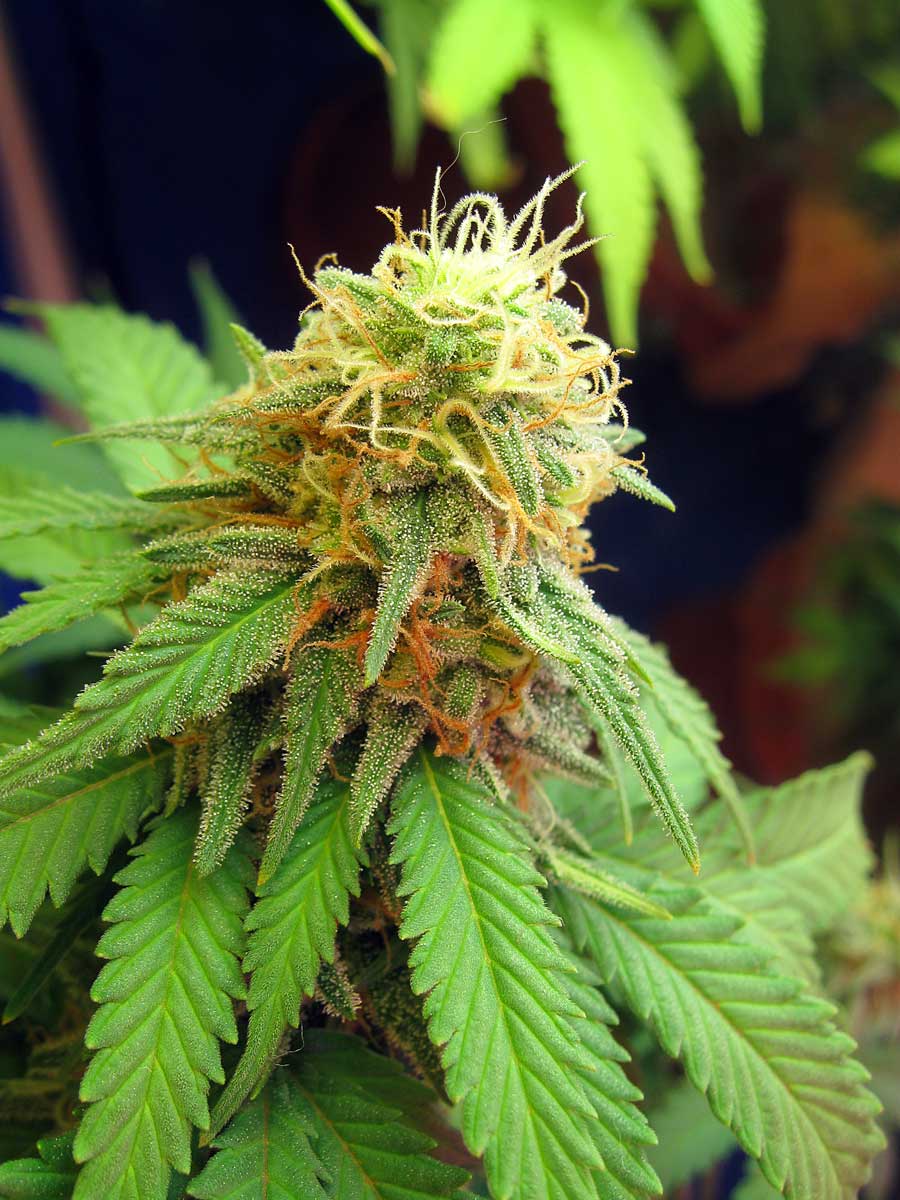
Baby buds (budlets) look like a ball of white hairs. These buds have many weeks to go!
Still Not Ready
As the marijuana plant buds get closer to harvest, they thicken, and those white pistils start to darken and curl up. You’ll notice your buds are slowly getting thicker and denser. However, if you still have a lot of straight white pistils, like this bud, you know you still have a few weeks to go.
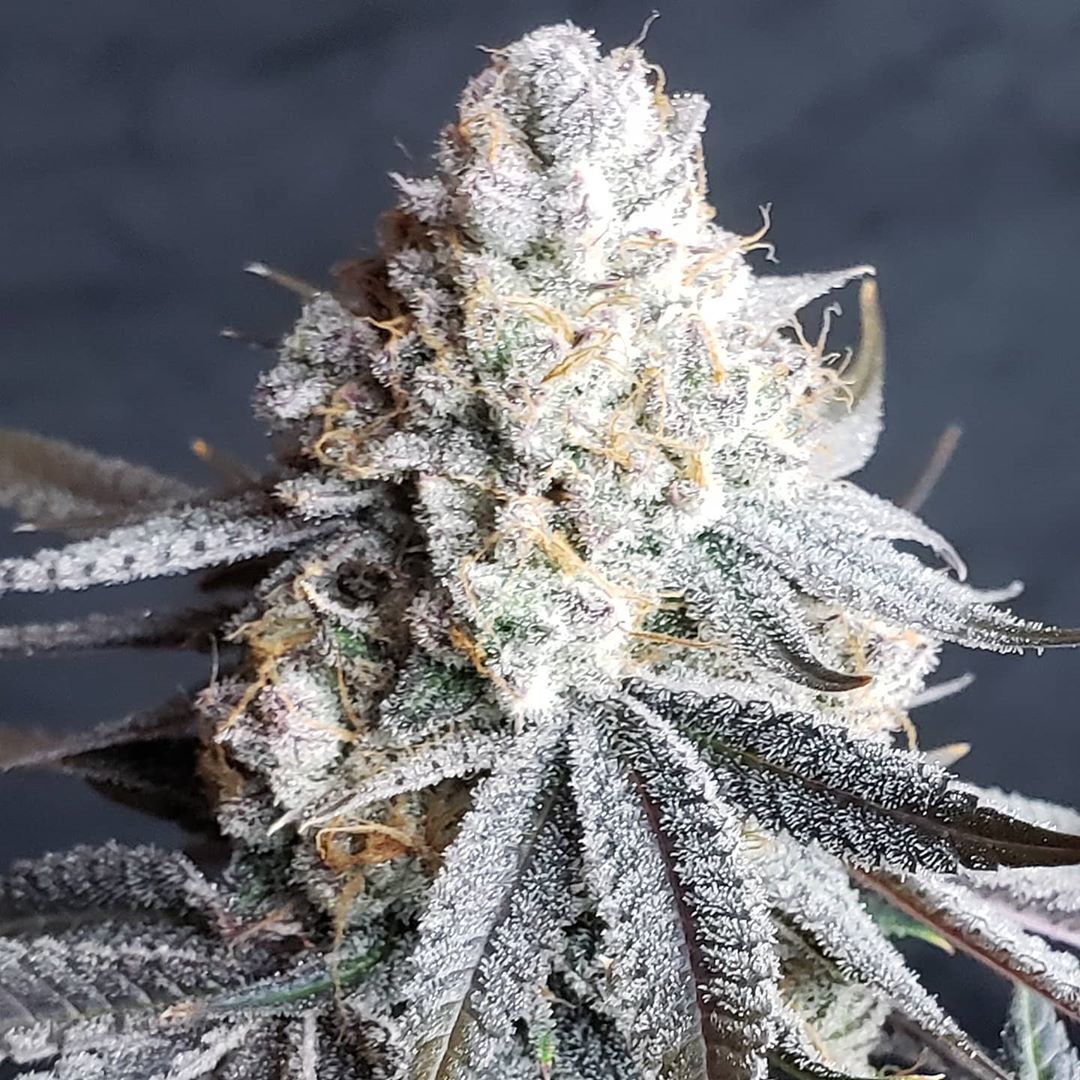
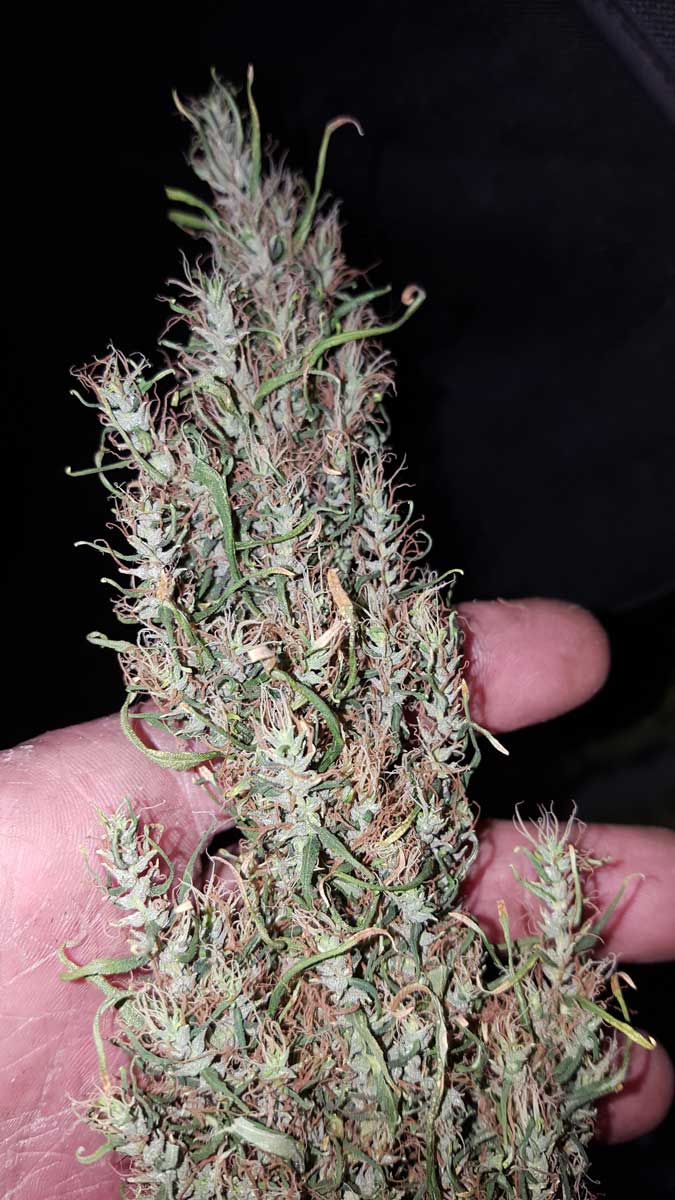
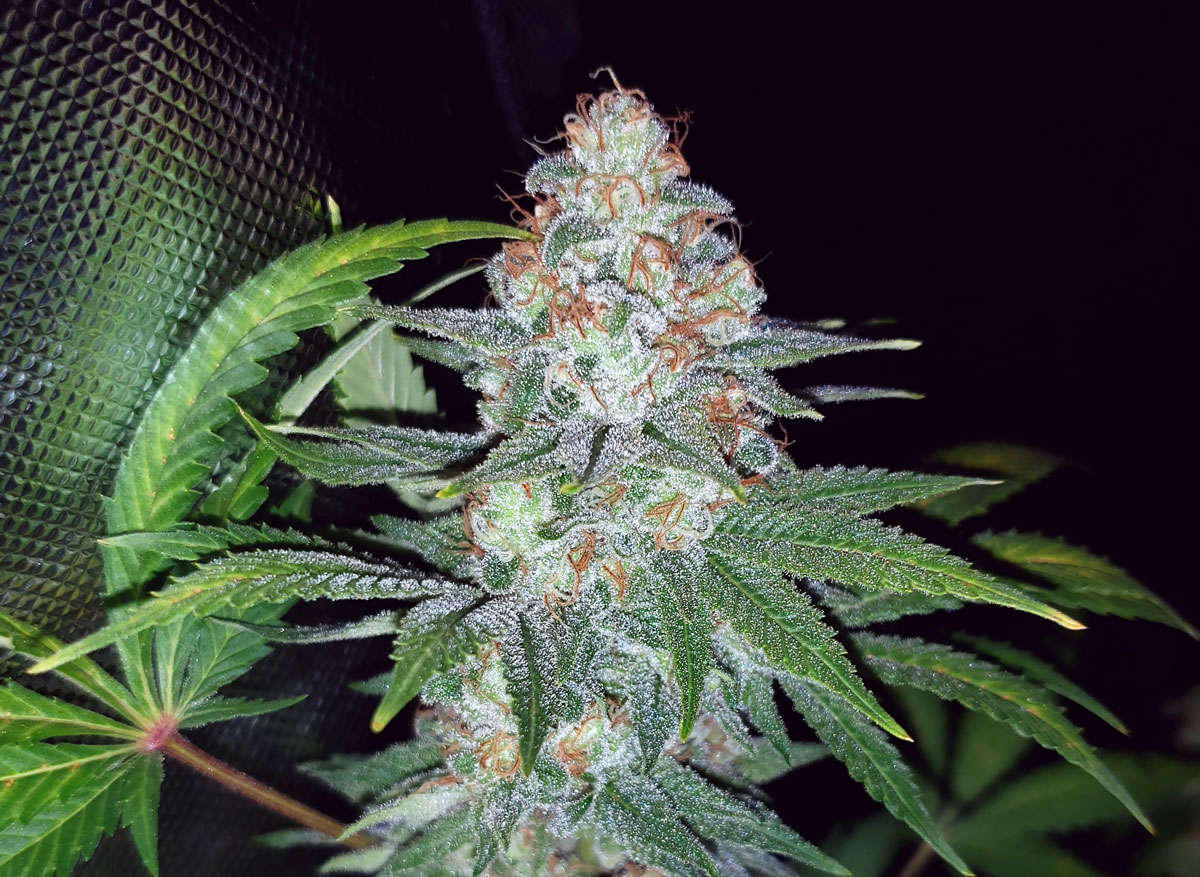
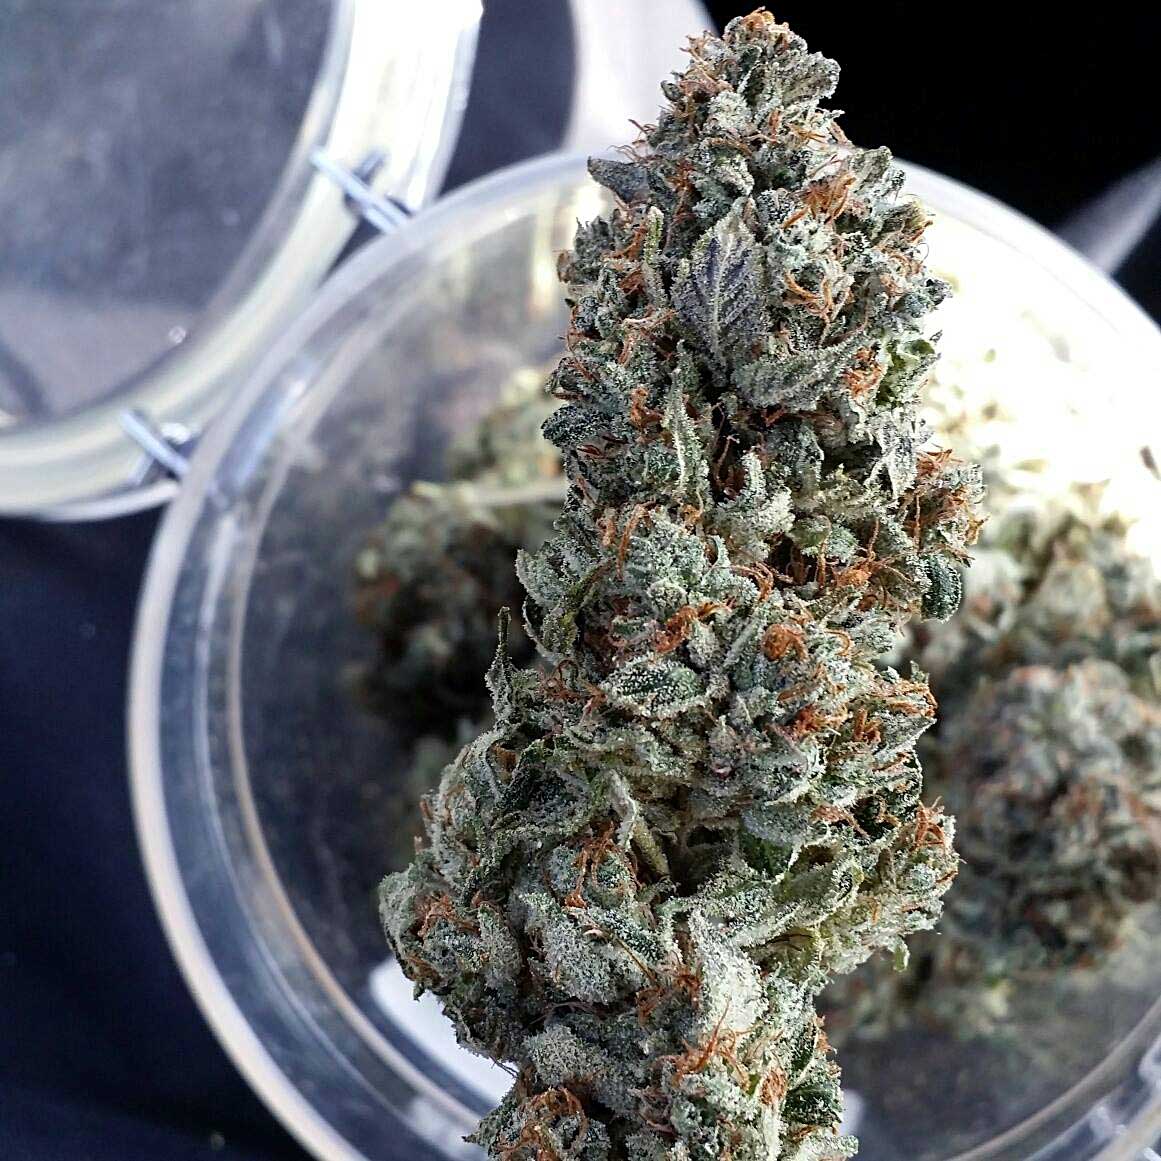
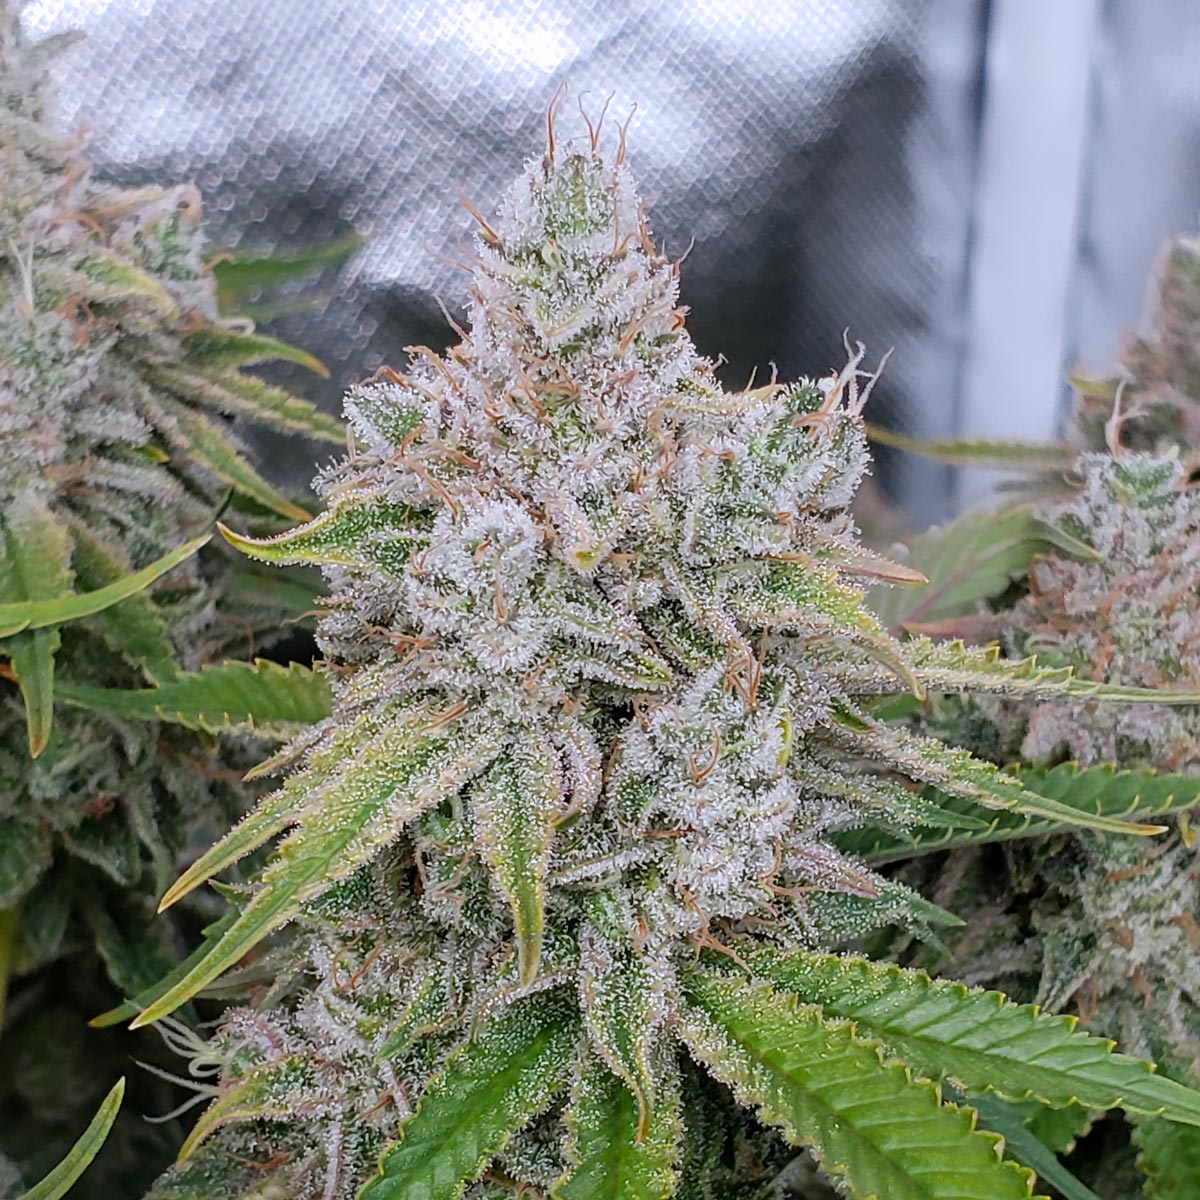
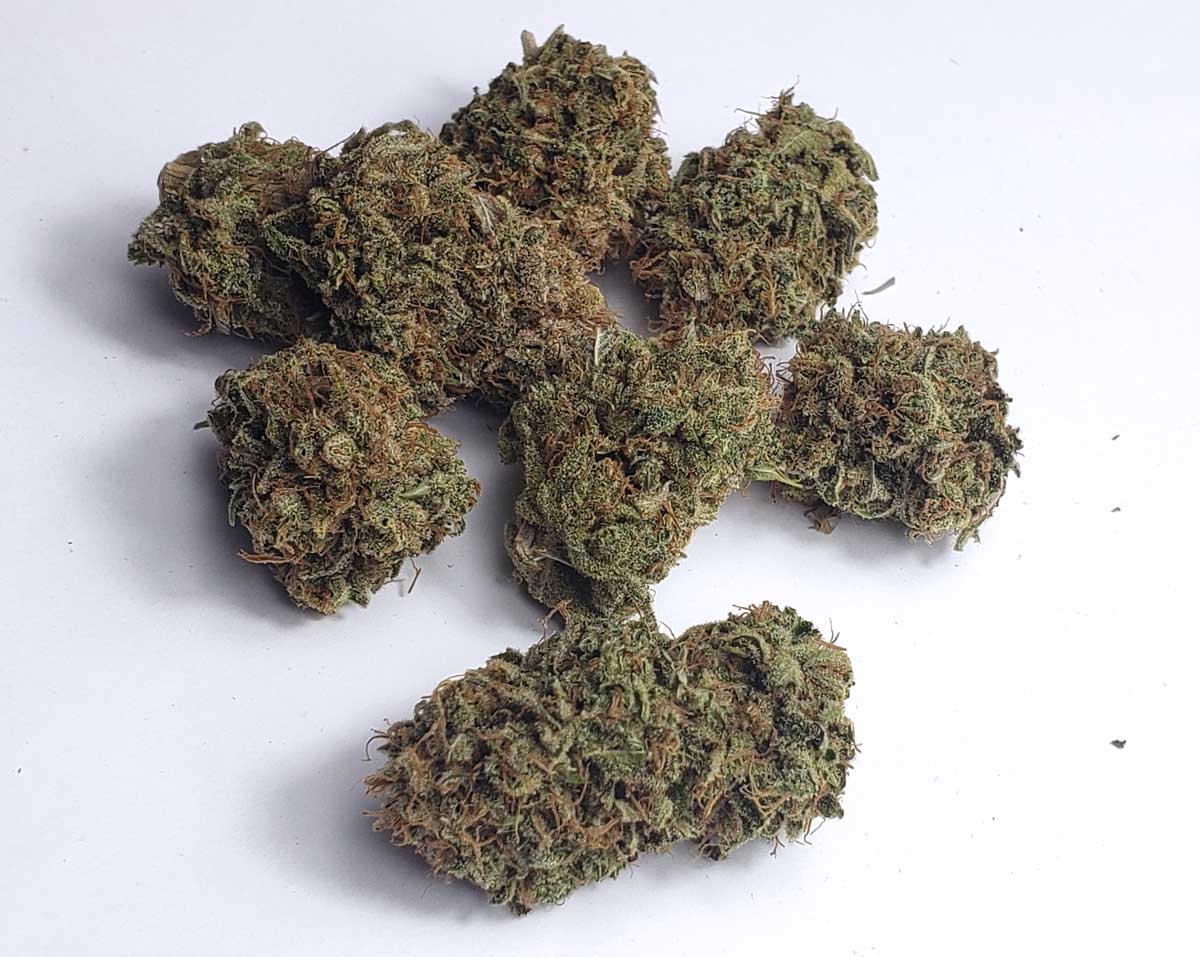
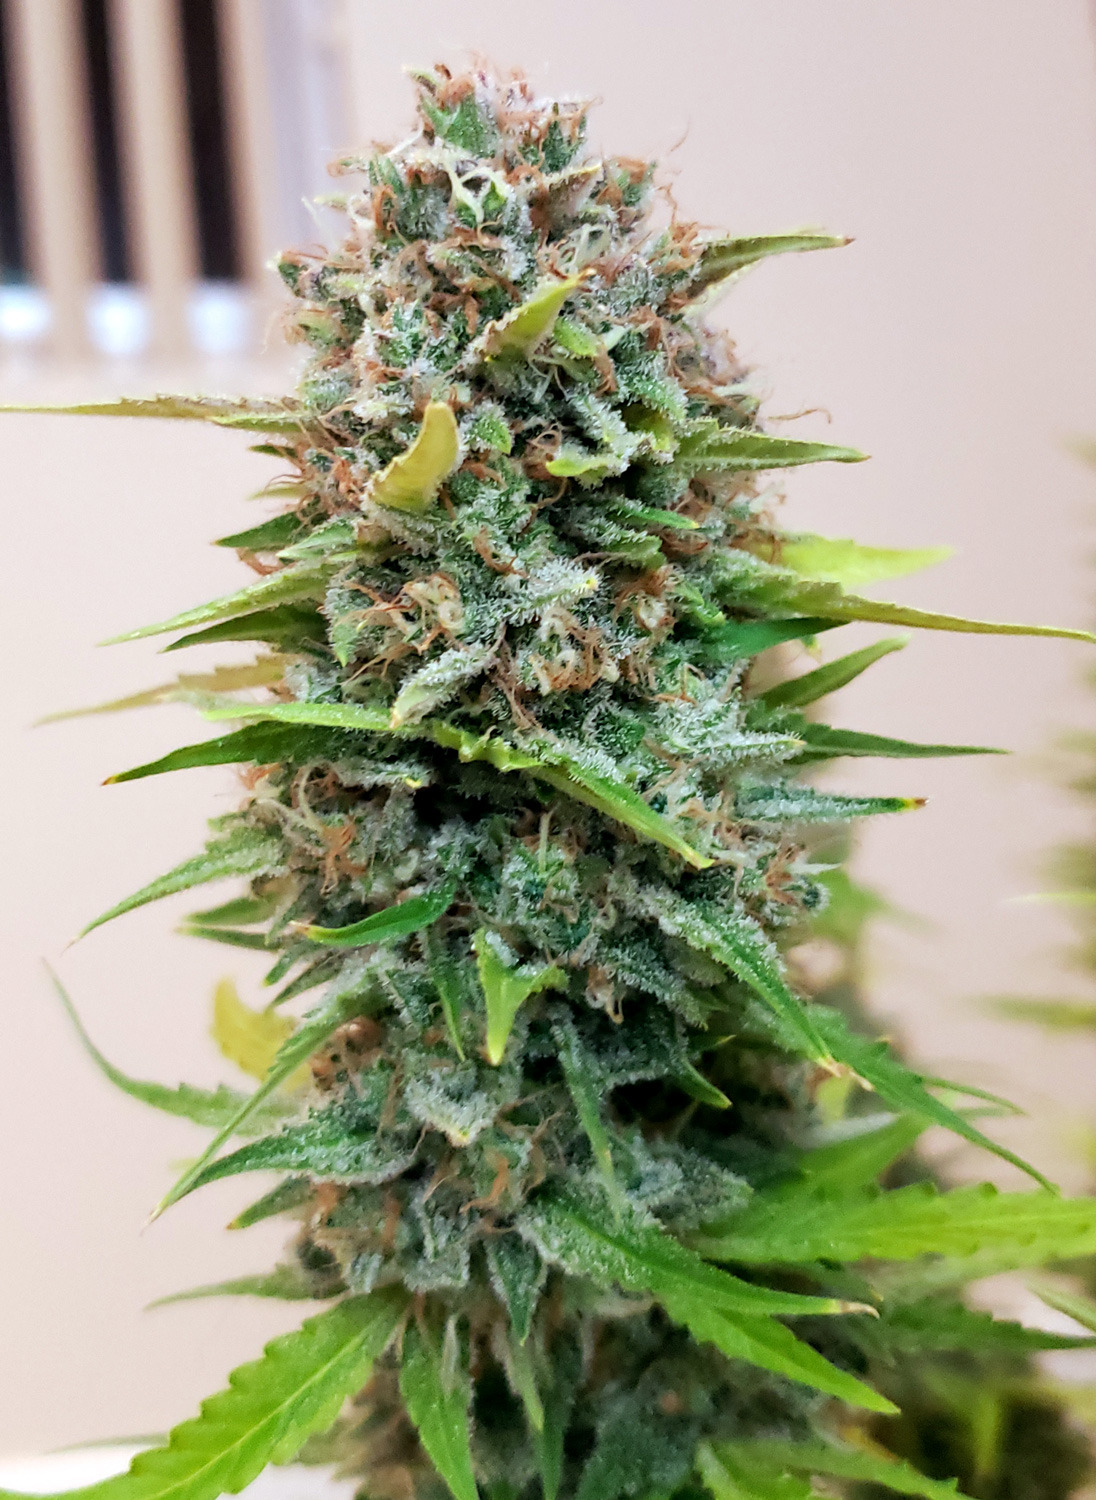
Ready to Harvest!
You’re in the weed harvest window when most of the pistils have darkened and curled in. However, sometimes it’s a little challenging to identify when buds are ready since buds can look different at harvest time depending on the strain and how they were grown. Here are pictures of some different cannabis buds that are ready to harvest!
A bud is ready to harvest when most of the hairs darken and curl in
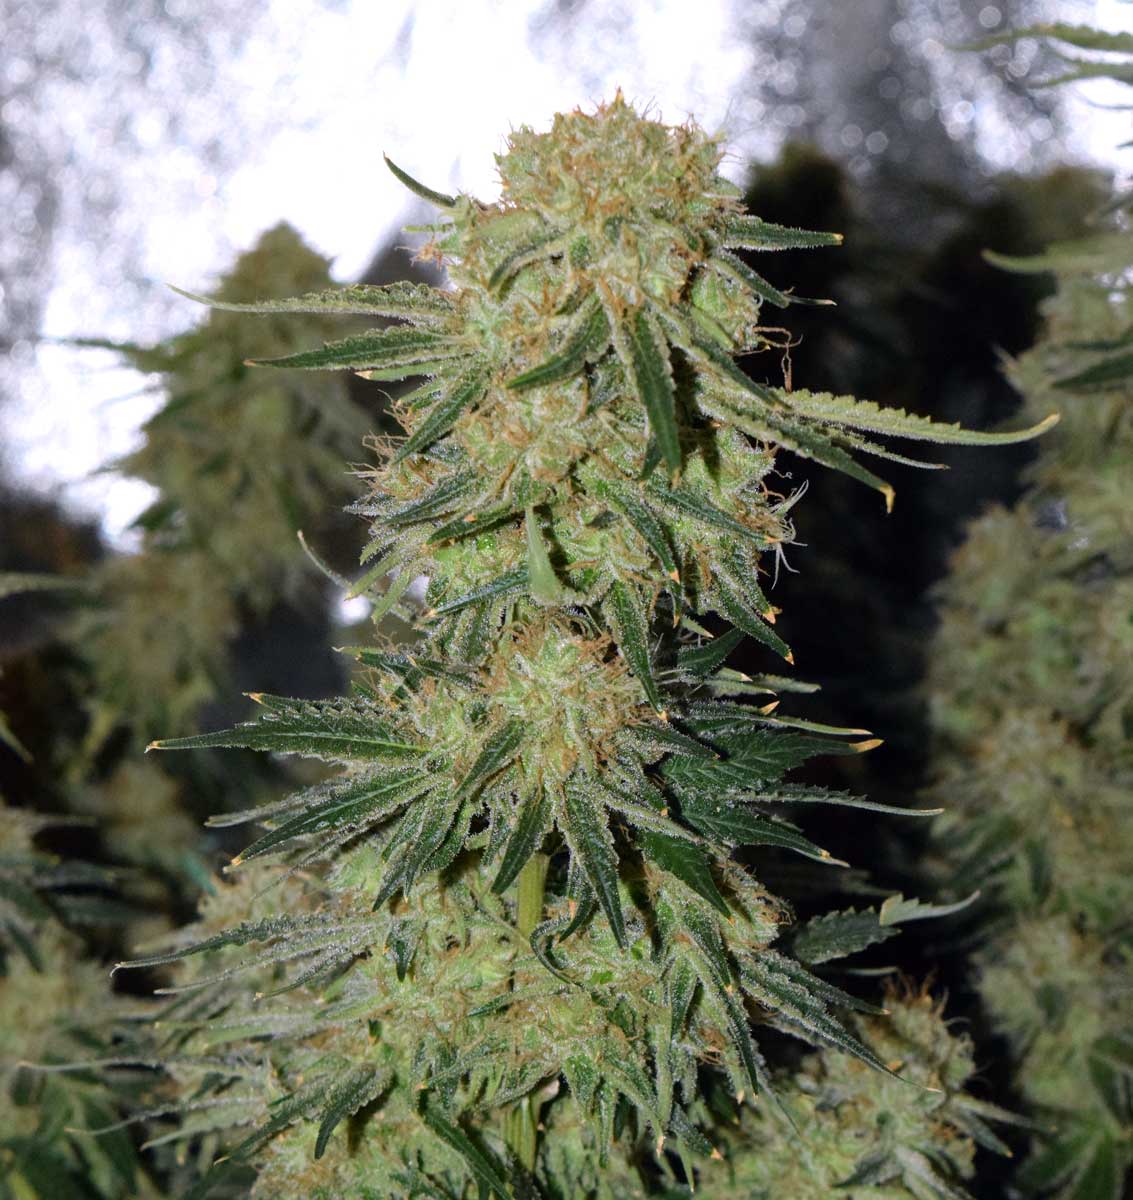

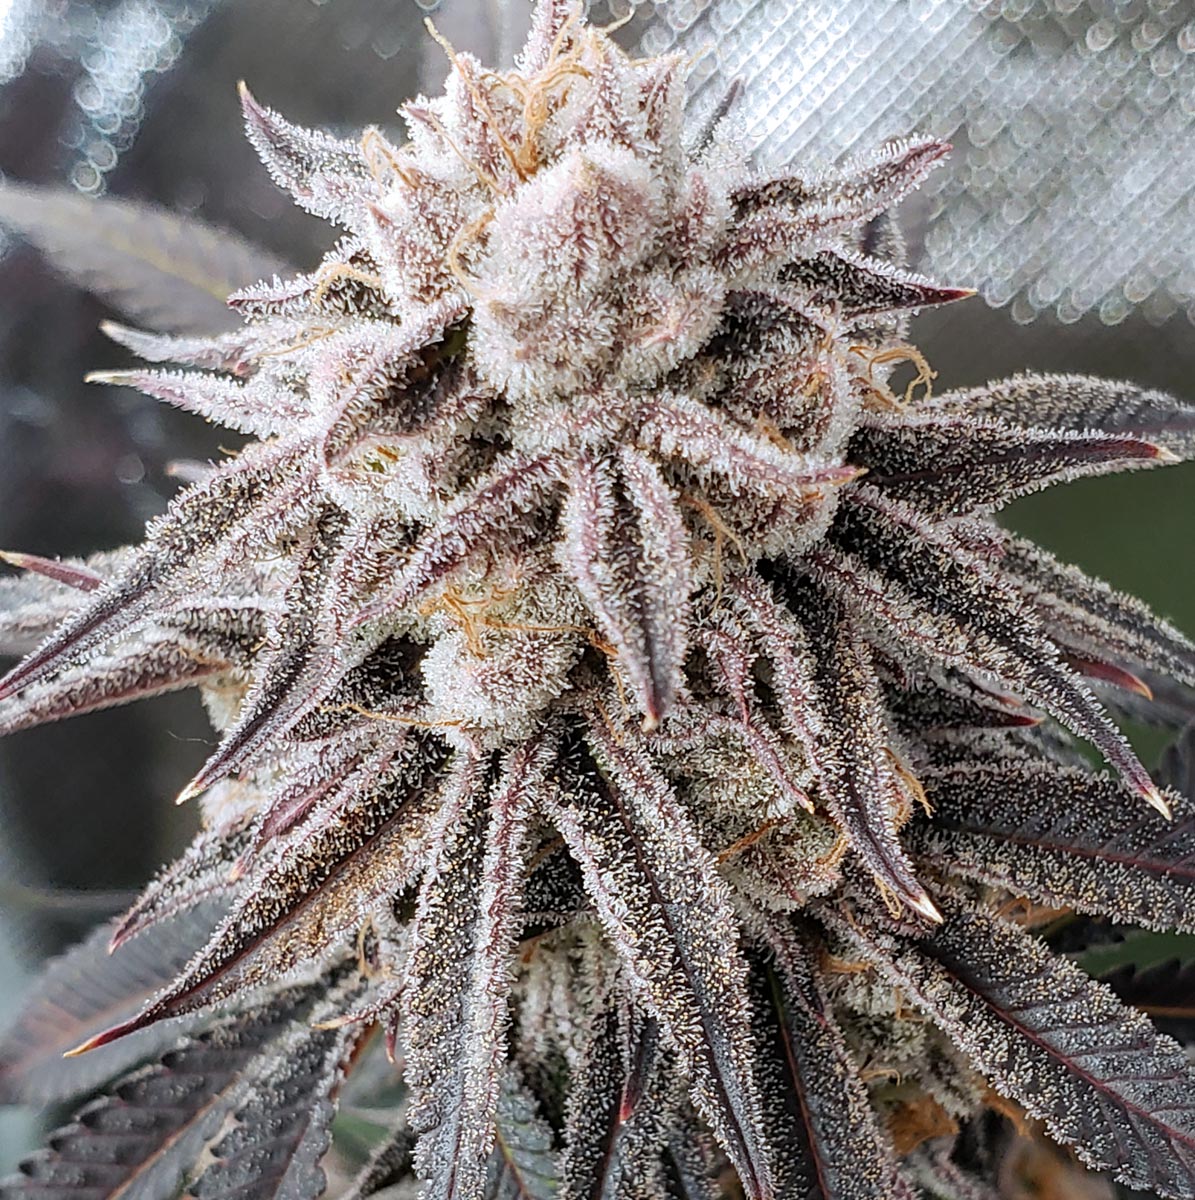
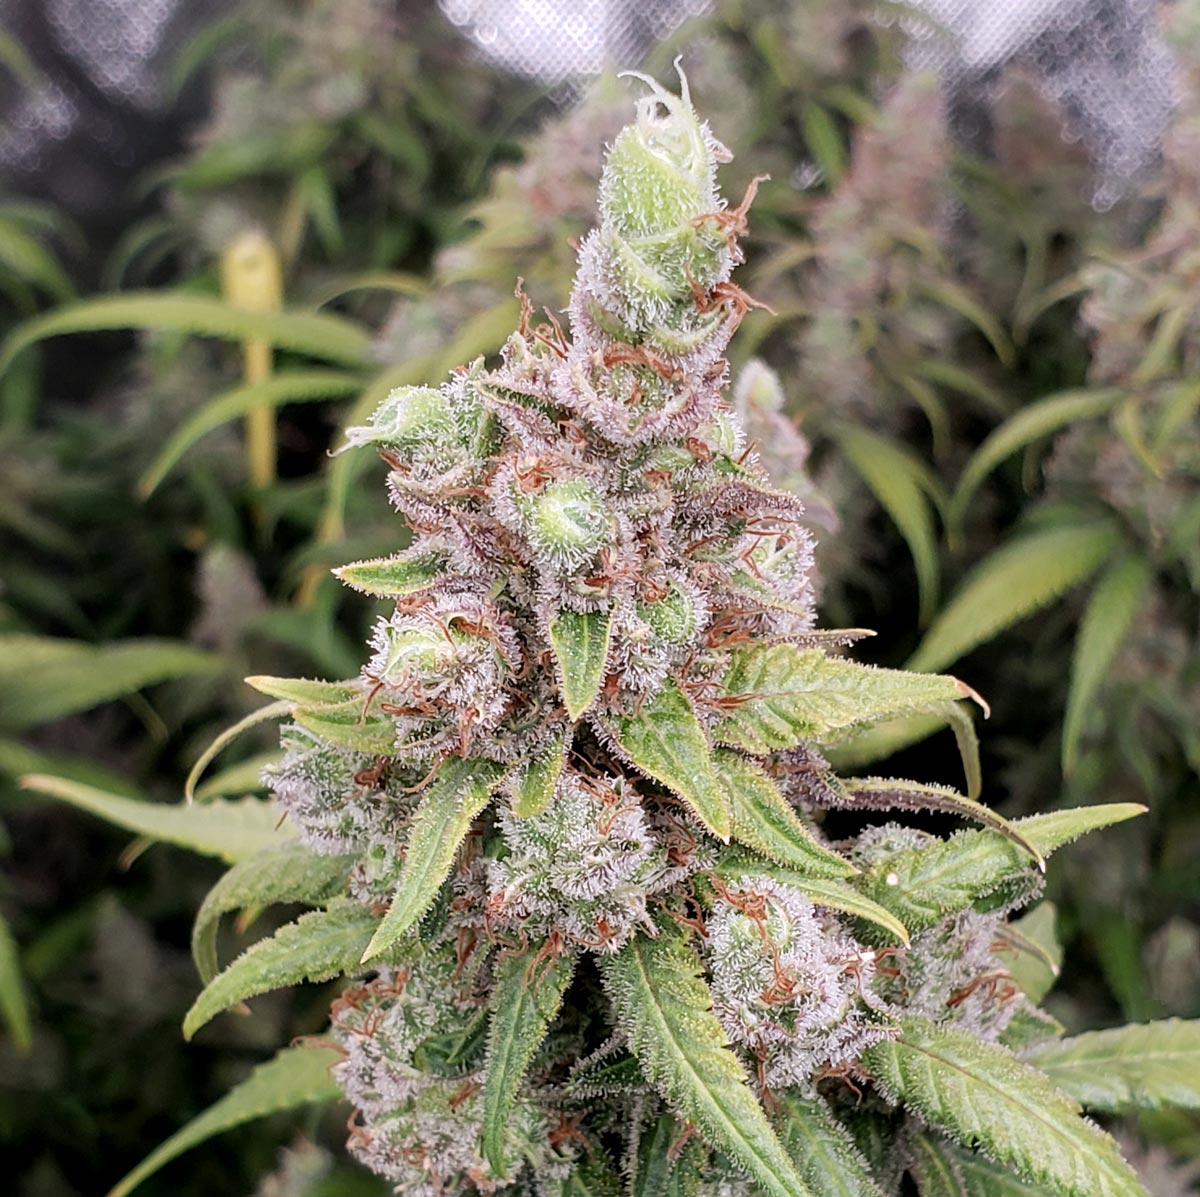

Some marijuana strains have a looser bud structure, but if nearly all the white hairs have curled in you’re in the harvest window.
I hope that this common weed grower mistakes tutorial helps you as much as it would have helped me. Happy growing!
![]()
