by Nebula Haze
Growers often ask me for examples of training a cannabis plant for better indoor yields. A plant that’s trained to grow wide and flat in the vegetative stage produces more buds indoors than a natural-grown plant. Especially with smaller grow lights or a short setup.
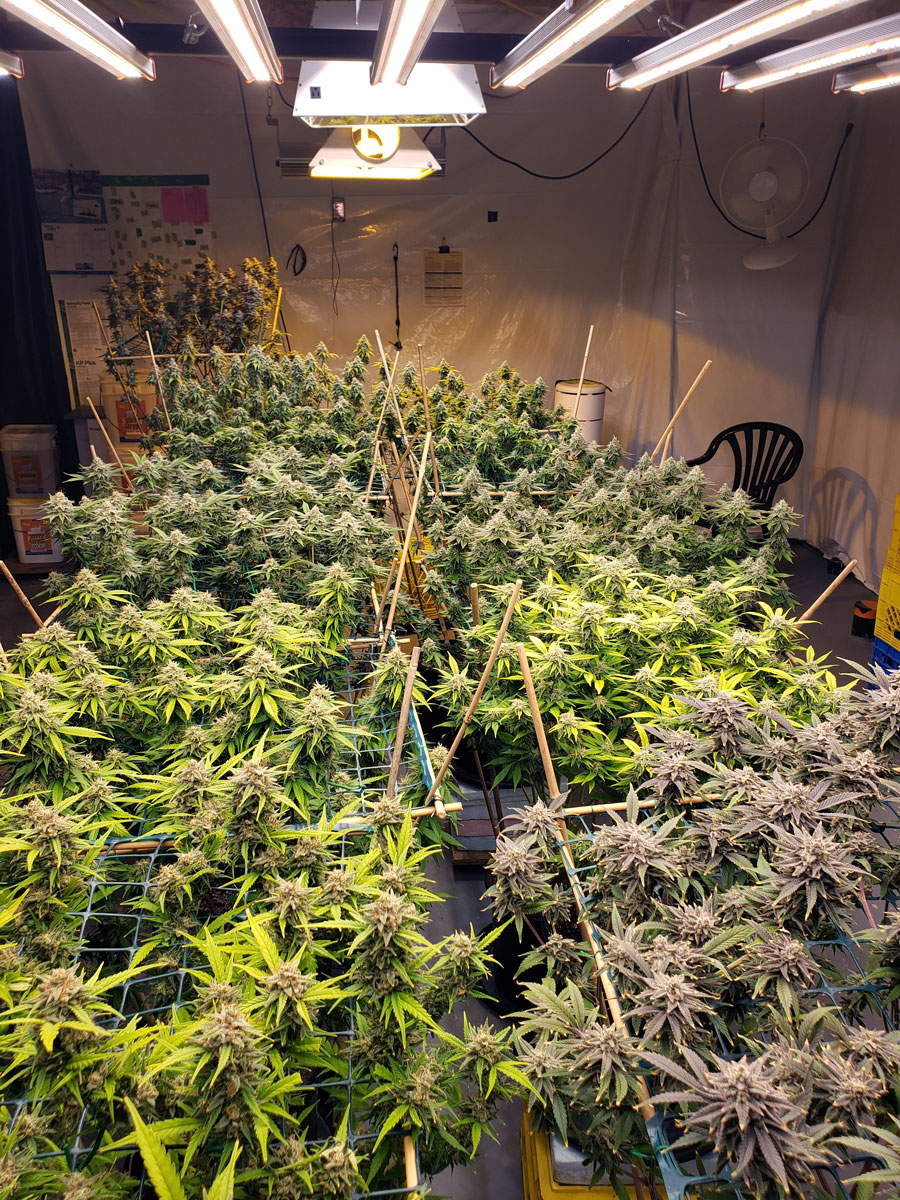
One popular way to create a flat cannabis canopy is a ScrOG which stands for “Screen of Green”. Basically, it means training plants to grow flat along a screen or net. Grow flat cannabis plants like this awesome scrog picture by Graeme.
Traditional Screen of Green (ScrOG) – Plants get trained along a screen or net in the vegetative stage, to make a canopy “table” (this beautiful ScrOG grown by Graeme).

This flat plant shape maximizes yields under indoor grow lights by filling the entire grow space with buds. But is there an easier way to achieve the same result?
Although the result is excellent yields, “scrogging” takes a bit of work.
In addition to having to make (or buy) the screen and set it up in the grow space, the process of threading plants through the net can be time-consuming.
On top of that, once the training process begins, plants can’t be moved independently. With their stems woven through the netting, plants are basically “stuck” on the screen until harvest. This can make it difficult to water plants and/or access the middle.
Nebula’s Faux Scrog: Bigger Yields Without a Net
Today you’ll learn my technique to make a faux “scrog” without a net. Get the same results with less effort.
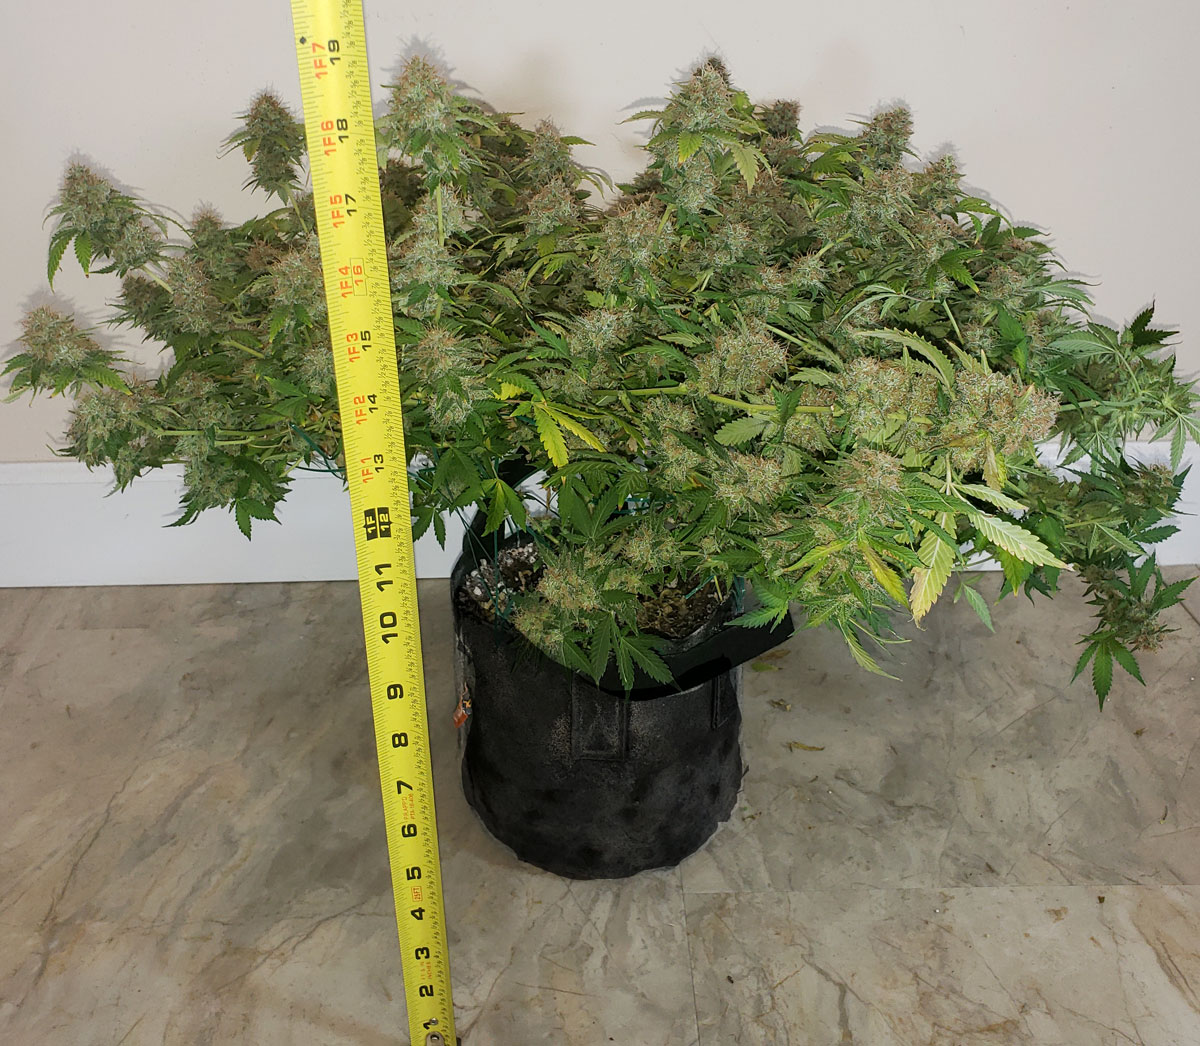
The resulting plant was less than 20″ (50 cm) tall at harvest and look at all those buds!
Today I’ll share an alternative method to achieve similar results. This method of training plants to grow wide and flat gives the same table-like outcome with less work and allows you to still move and access individual cannabis plants as needed. Here goes!
Nebula’s Faux Cannabis “Scrog” Technique
1.) Remove tops as plant grows
I cut off the top of the main stem (also known as “topping” the plant) after about 5 sets of leaves (5th node). This breaks the apical dominance and causes the plant to grow more wide and bushy instead of growing in a Christmas tree shape. There isn’t a perfect or best time to top a plant, though most growers do it above node 3-6. Topping above the 5th works well every time so that’s what I do.
As the plant grows, make sure to cut off the tops of any stems that start getting taller than the others. This simple system (let’s call it the “top any tall stems” training regimen) ensures no stem gets significantly taller than the others while creating multiple branches. This works well with any photoperiod (not auto) cannabis plant, including asymmetrical clones like this one, which aren’t great candidates for more structured techniques like manifolding.
Pay attention as the plant grows. If any stem seems to be getting taller than the others, cut off the top.
Other than that, I didn’t do anything but spread the plant out and let it grow wild.
2.) Bend stems until plant is flat
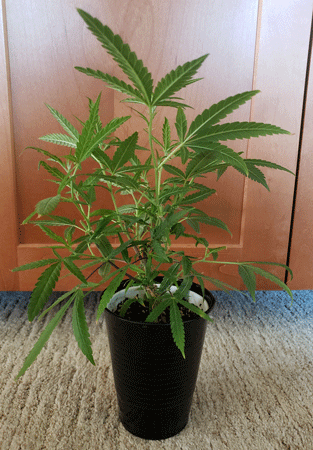
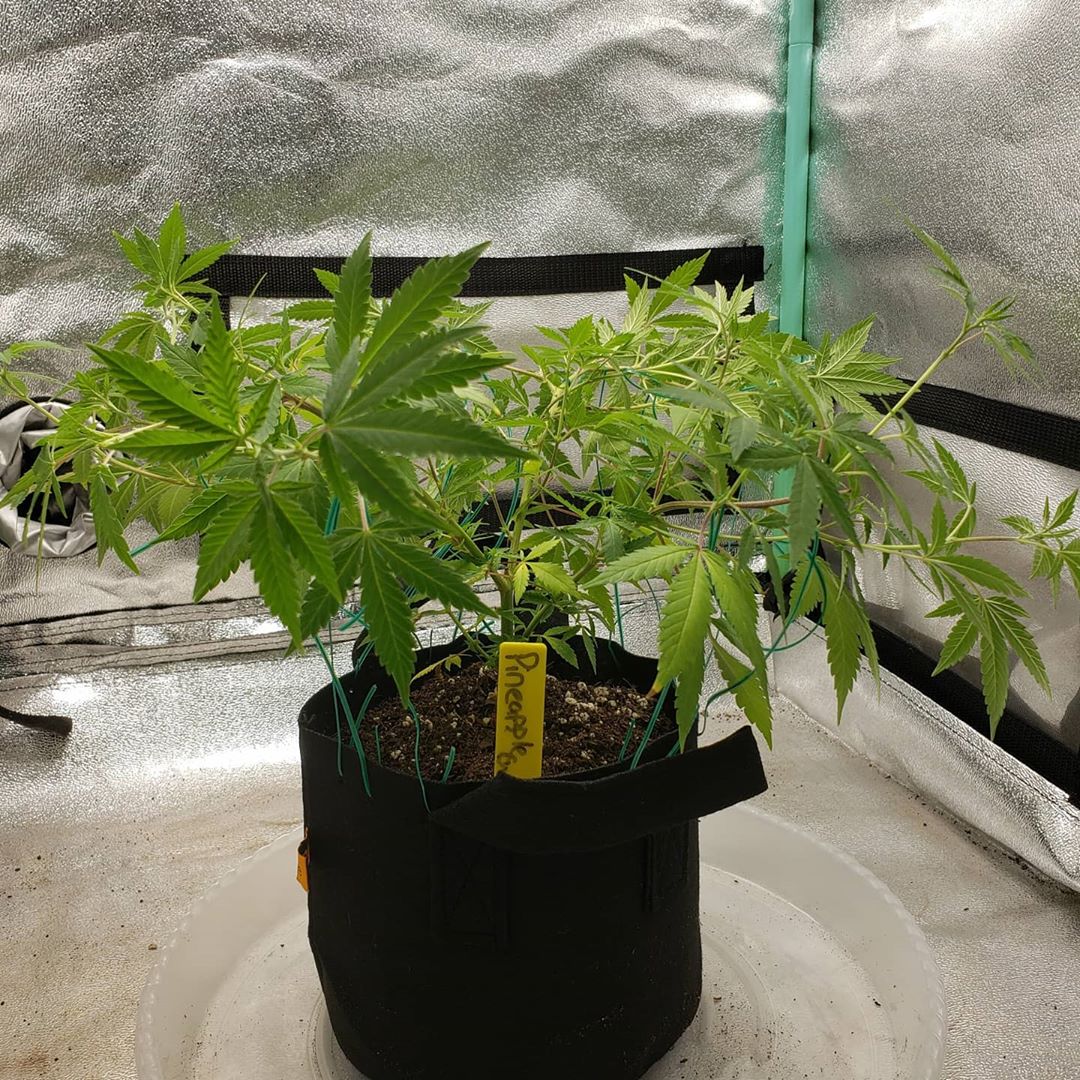
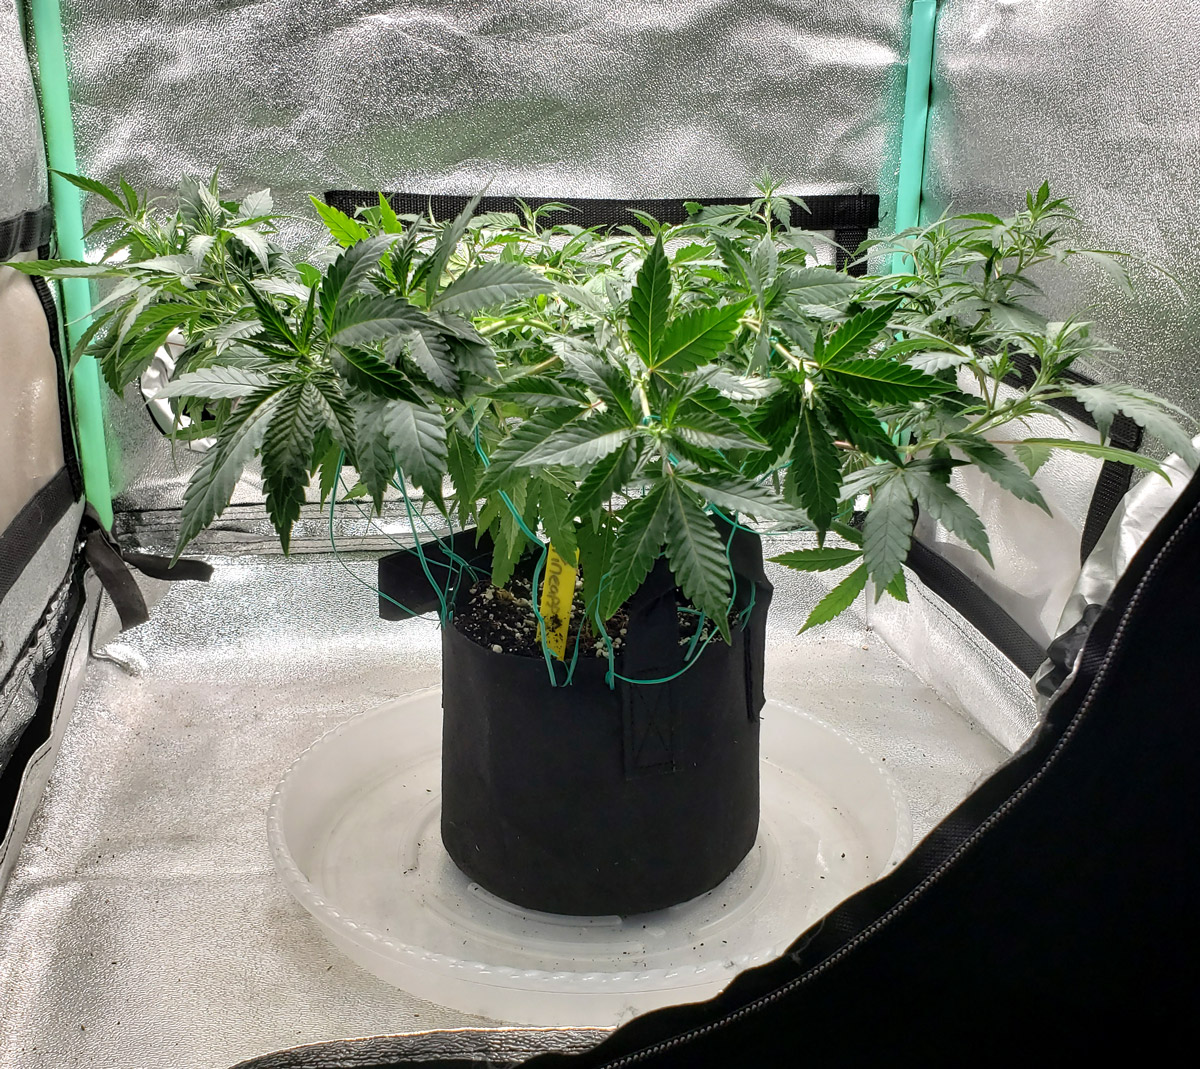
Wait until the plant has grown several branches so you have something to work with.
This Pineapple Chunk clone was topped multiple times and has been growing wild. Ready for training! (I’m using this setup)
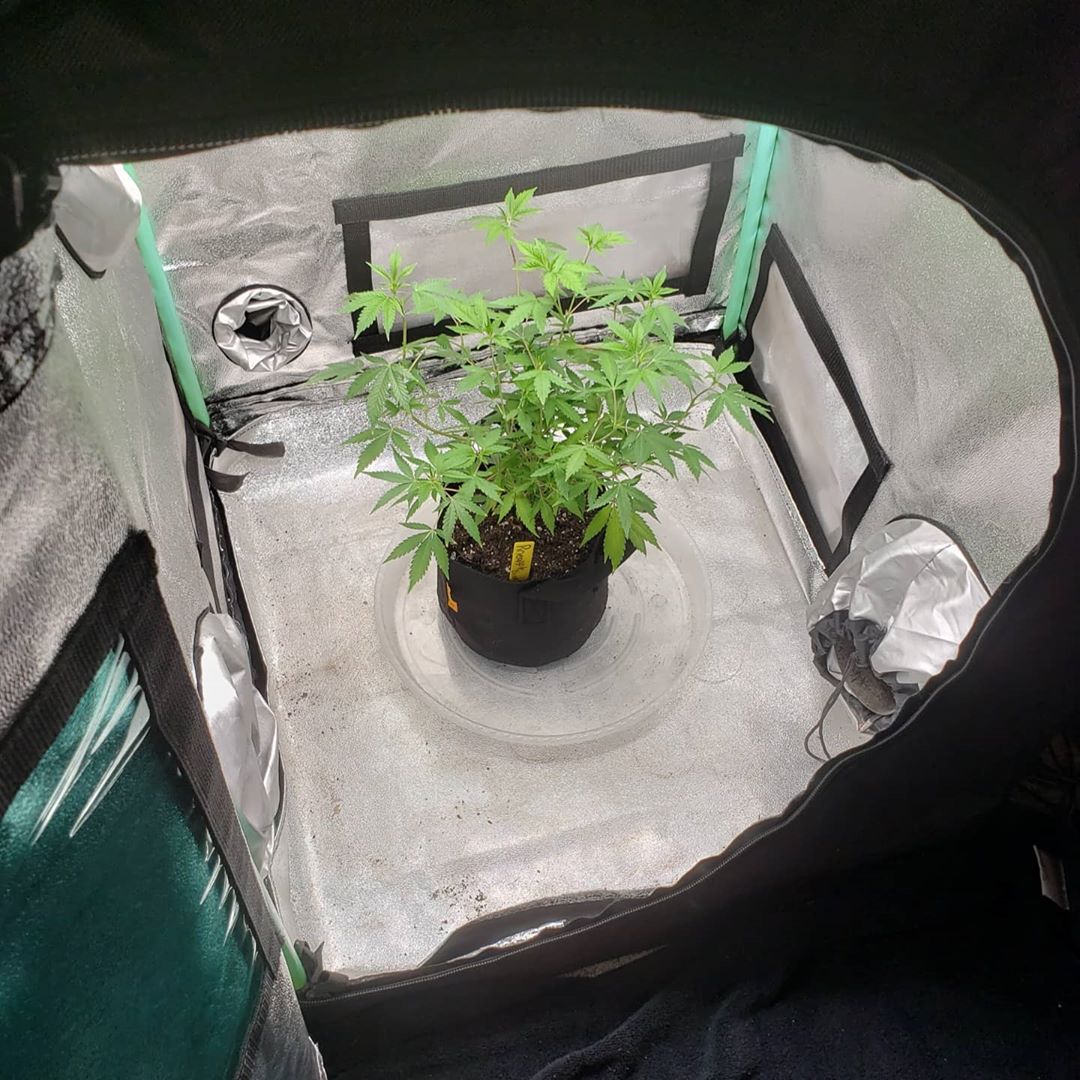
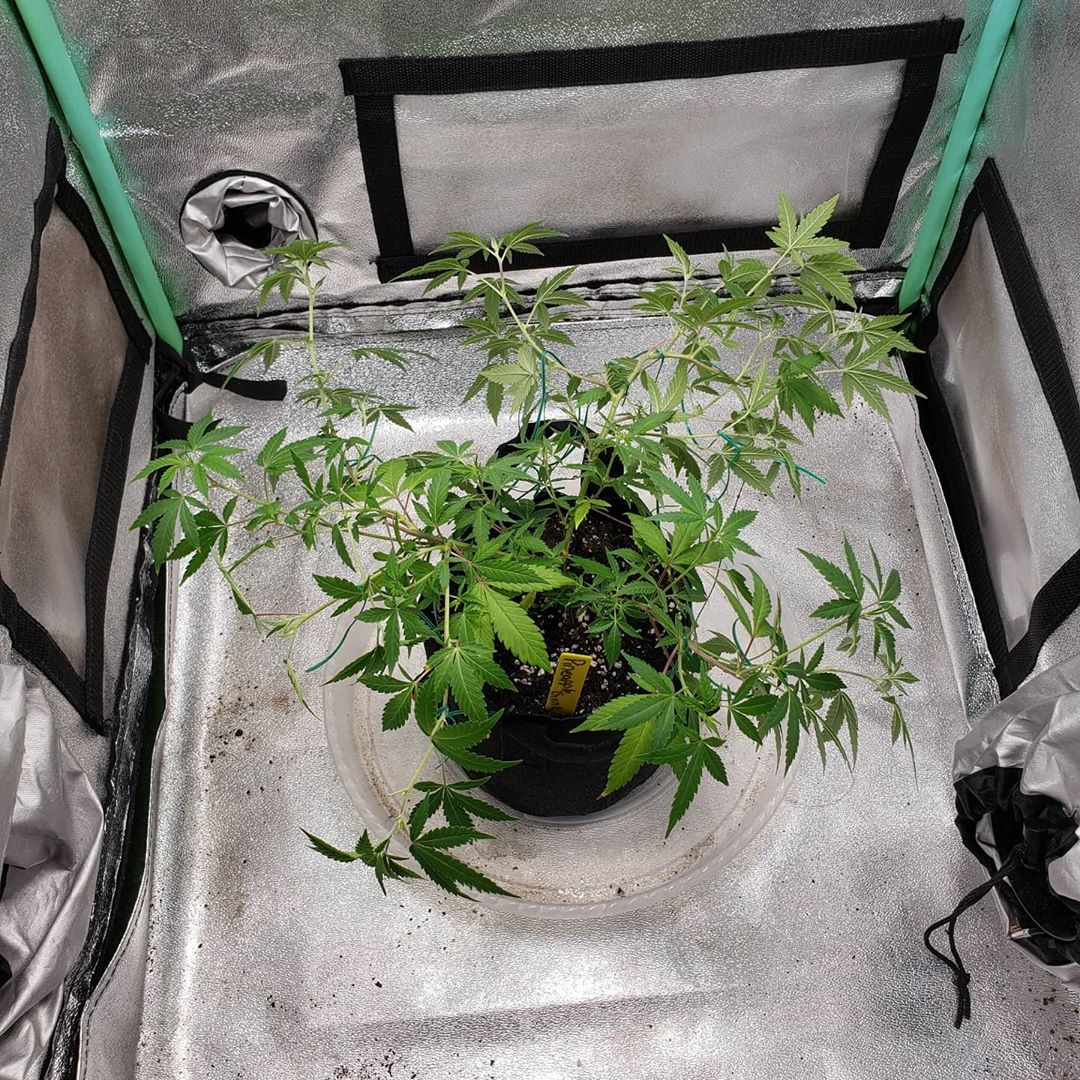
The idea of this step is simply to bend all stems over and away from the middle of the plant. The goal is to eventually fill up the tent with a wide flat canopy before initiating the flowering stage.
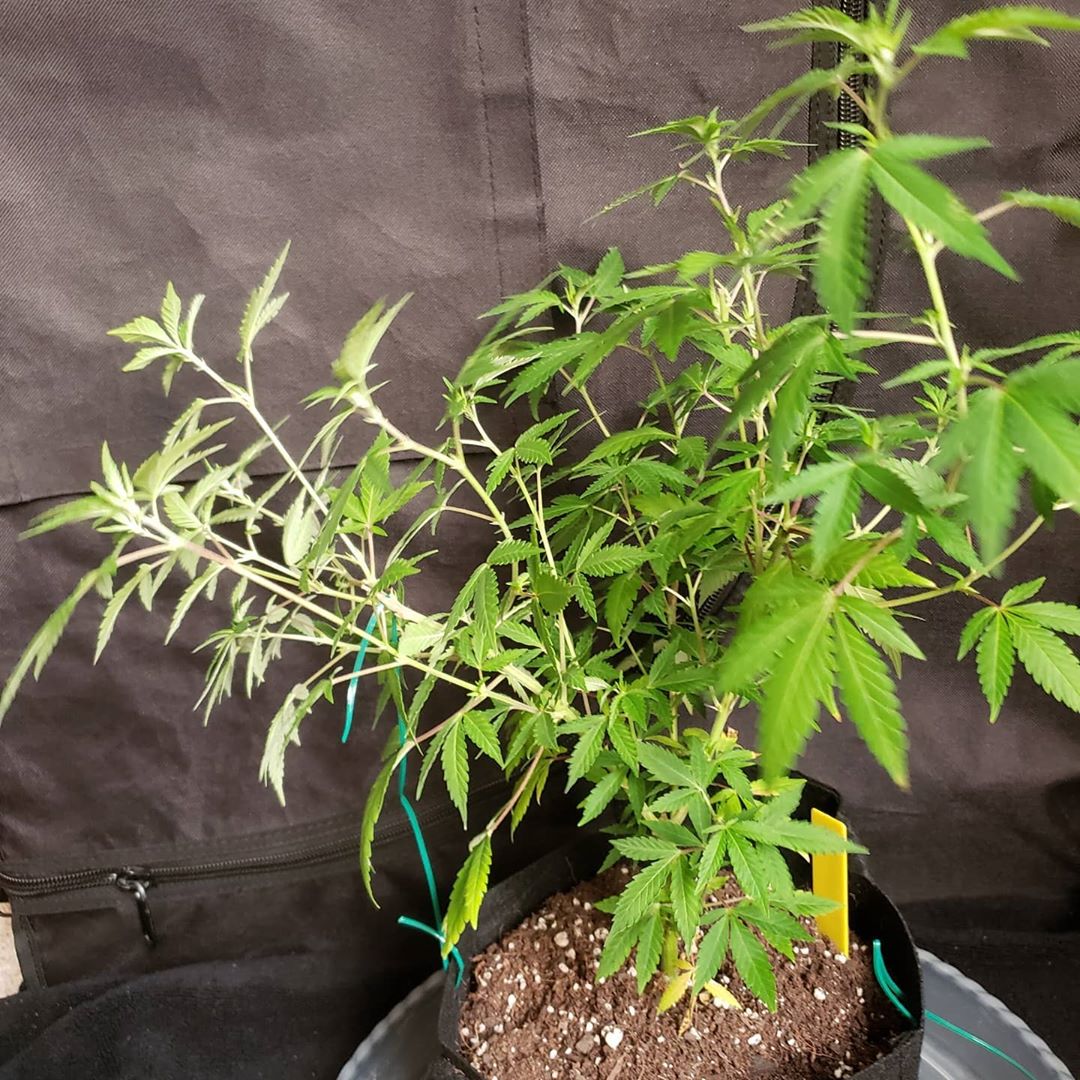
Time to force it flat! Stems were bent over and tied down.
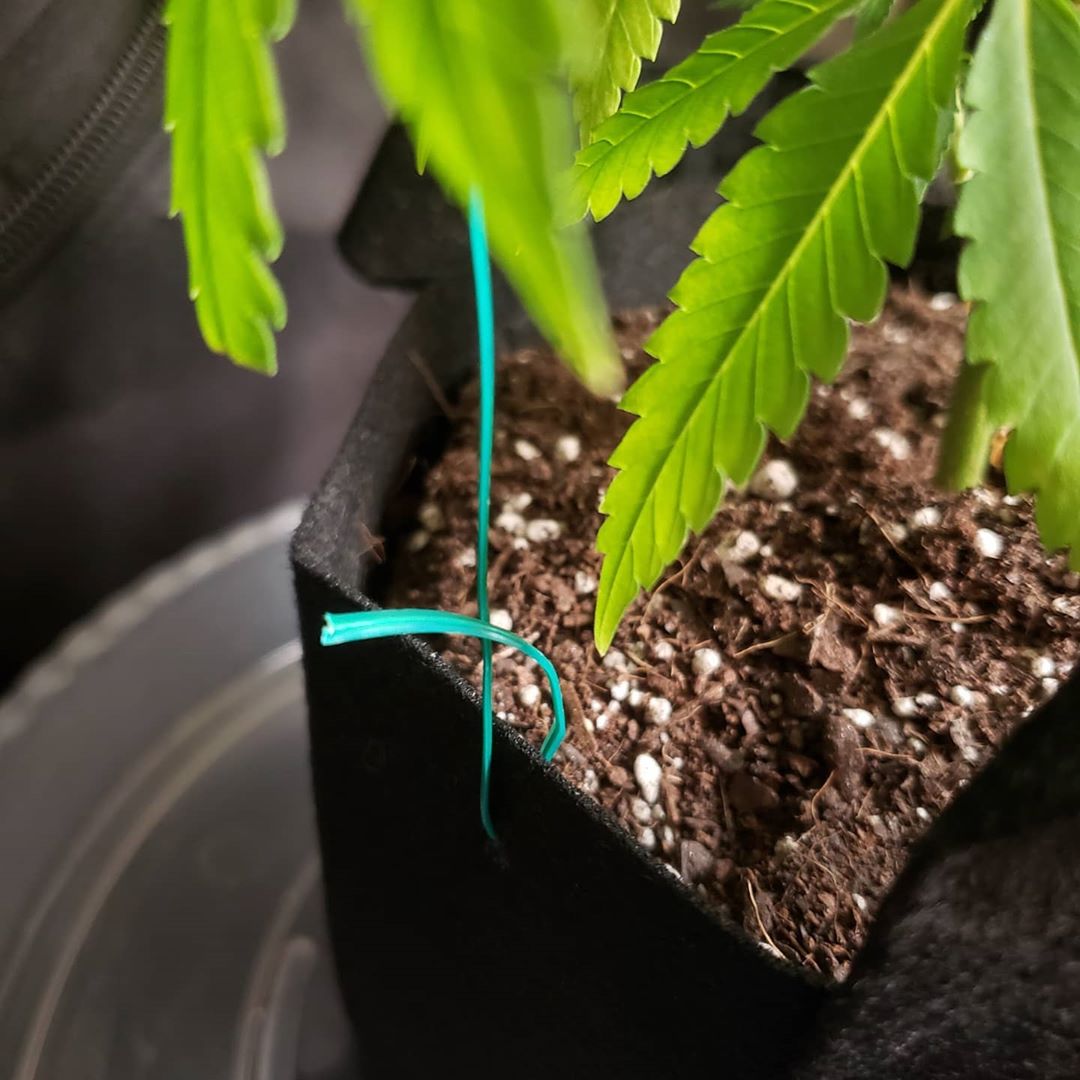
I got a spool of plant twist tie and cut off pieces to hold all the branches down in place
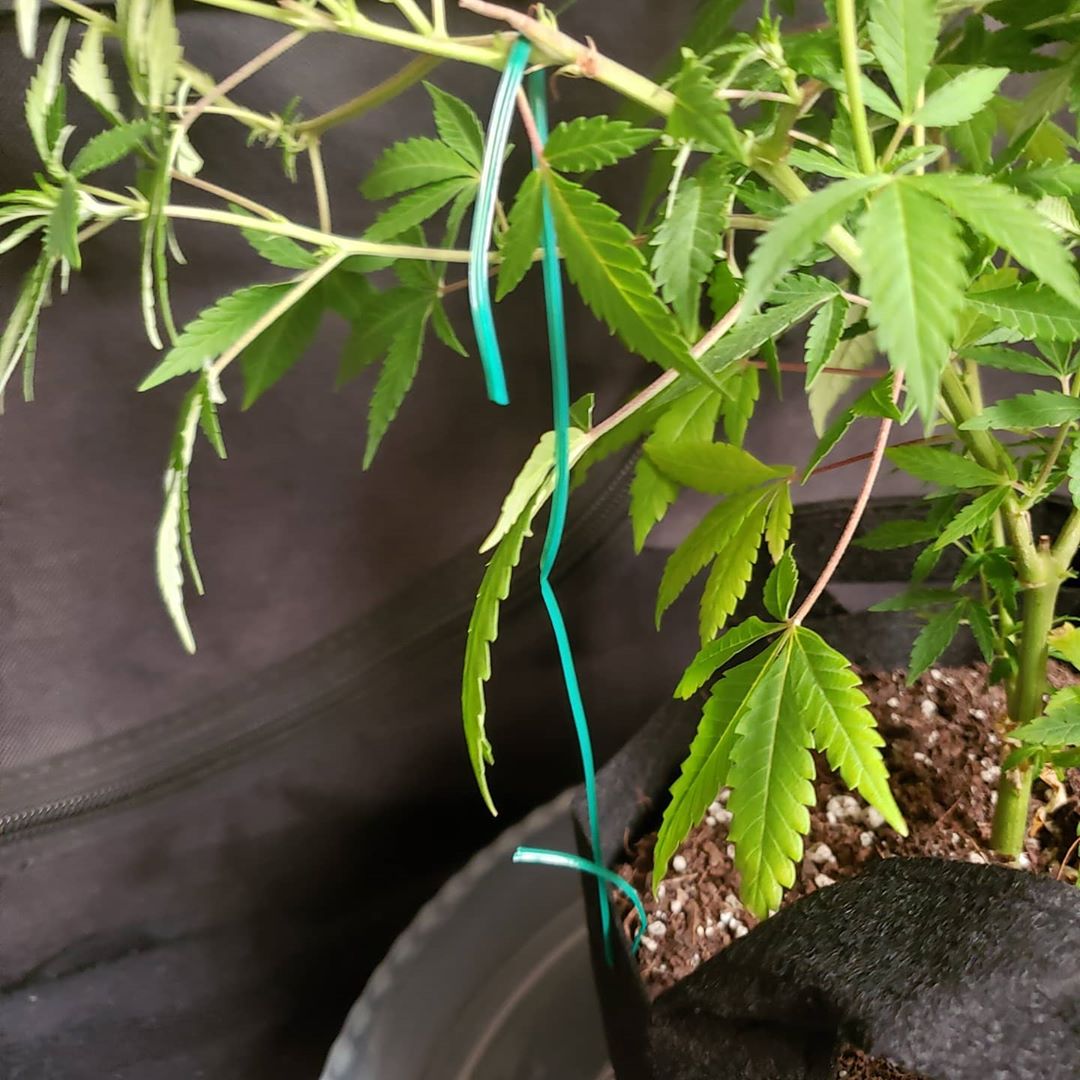
I used Fiskars scissors to poke holes in the fabric pot and threaded through the twist tie. Another option for securing twist tie is a safety pin, but they can rust over time.
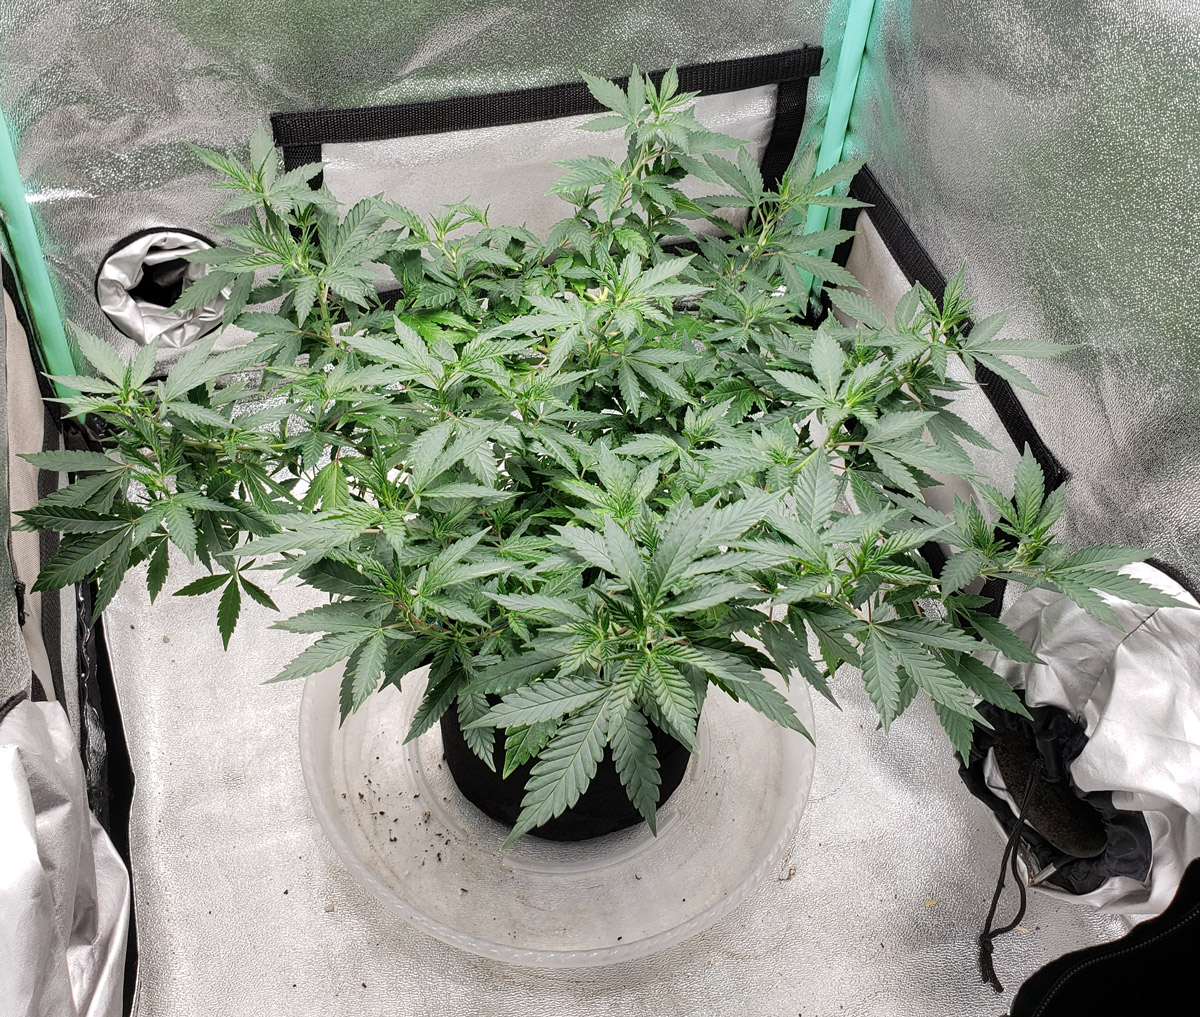
I bent over every branch until the plant was essentially flat and spread out
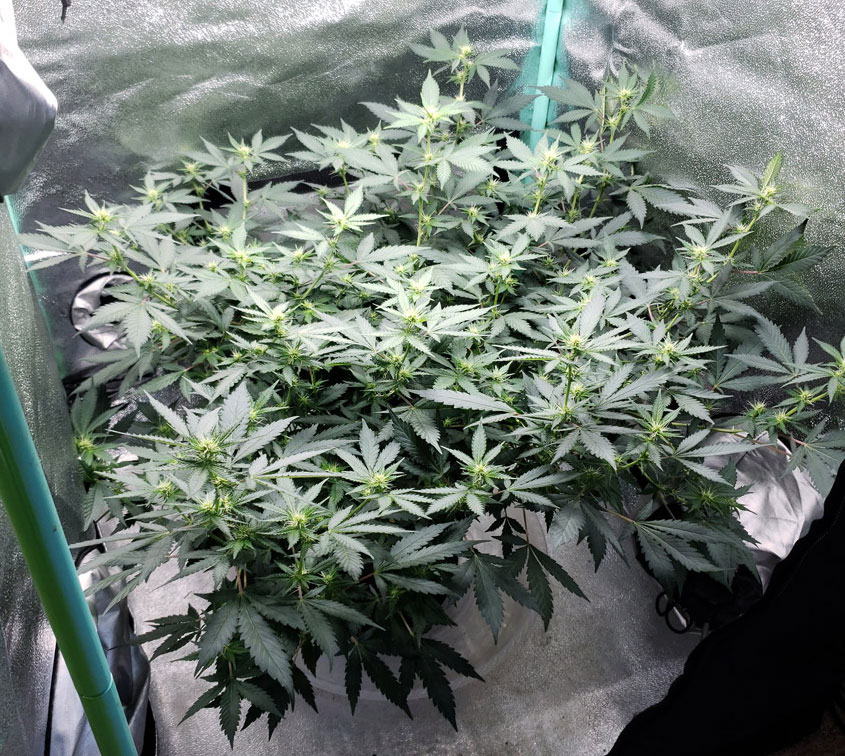
Top view
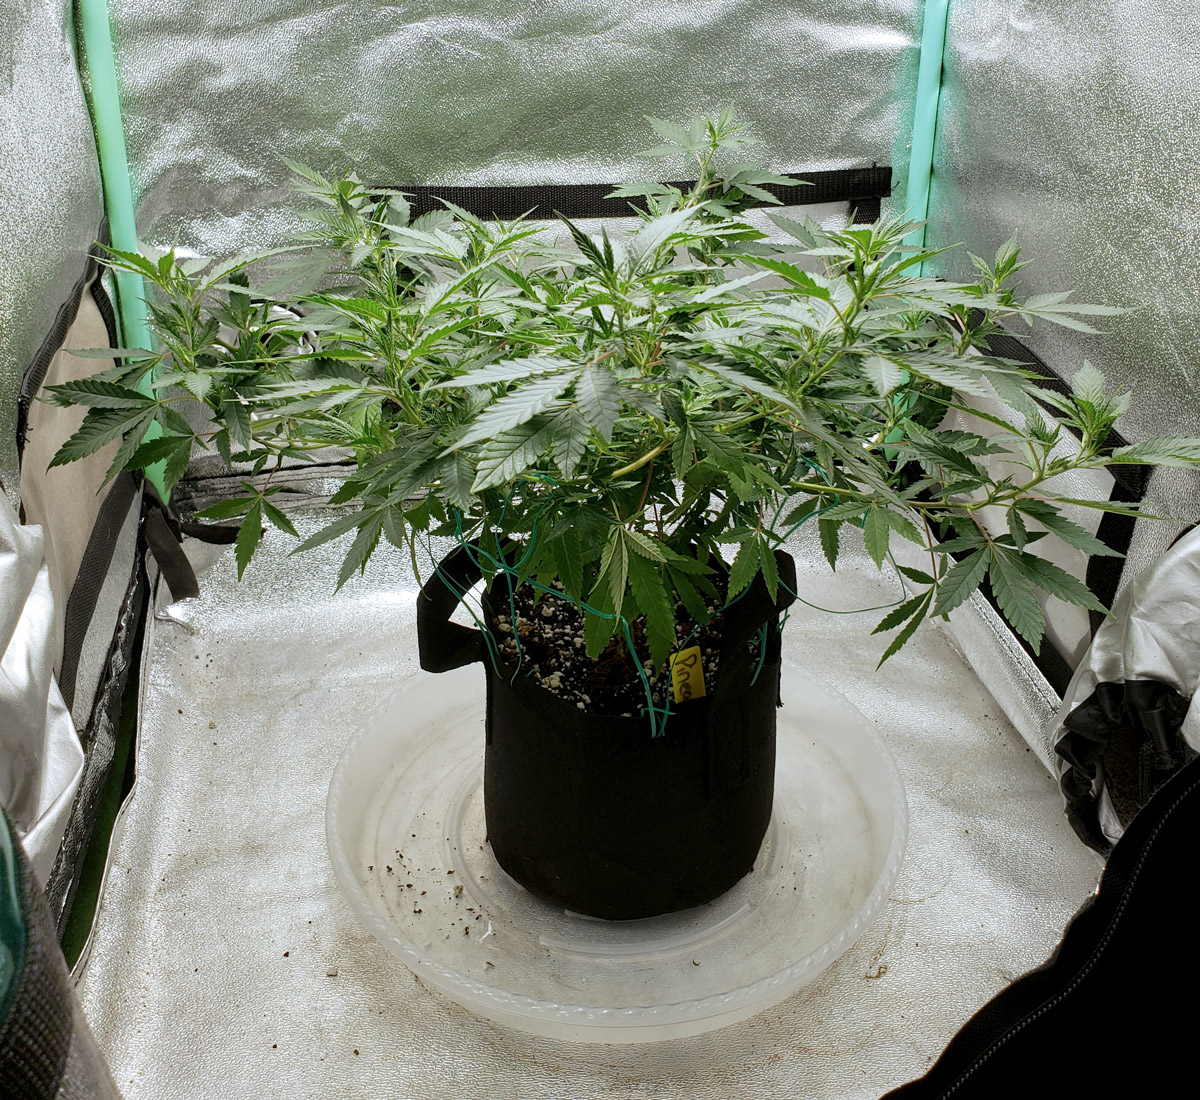
3 days later the plant has grown into its new shape. It almost fills the tent already!
Quick Setup Summary (in case you’re curious, though this technique works in any setup): HLG 65W (4000k version) LED grow light in a 2’x2’x3′ grow tent (0.6m x 0.6m x 0.9m). Using the Flora trio + CaliMagic as nutrients and supplements. Complete setup list here.
Time to let the plant grow a bit bigger and spread out more.
3.) Flatten plant every 1-2 weeks until it’s the desired width
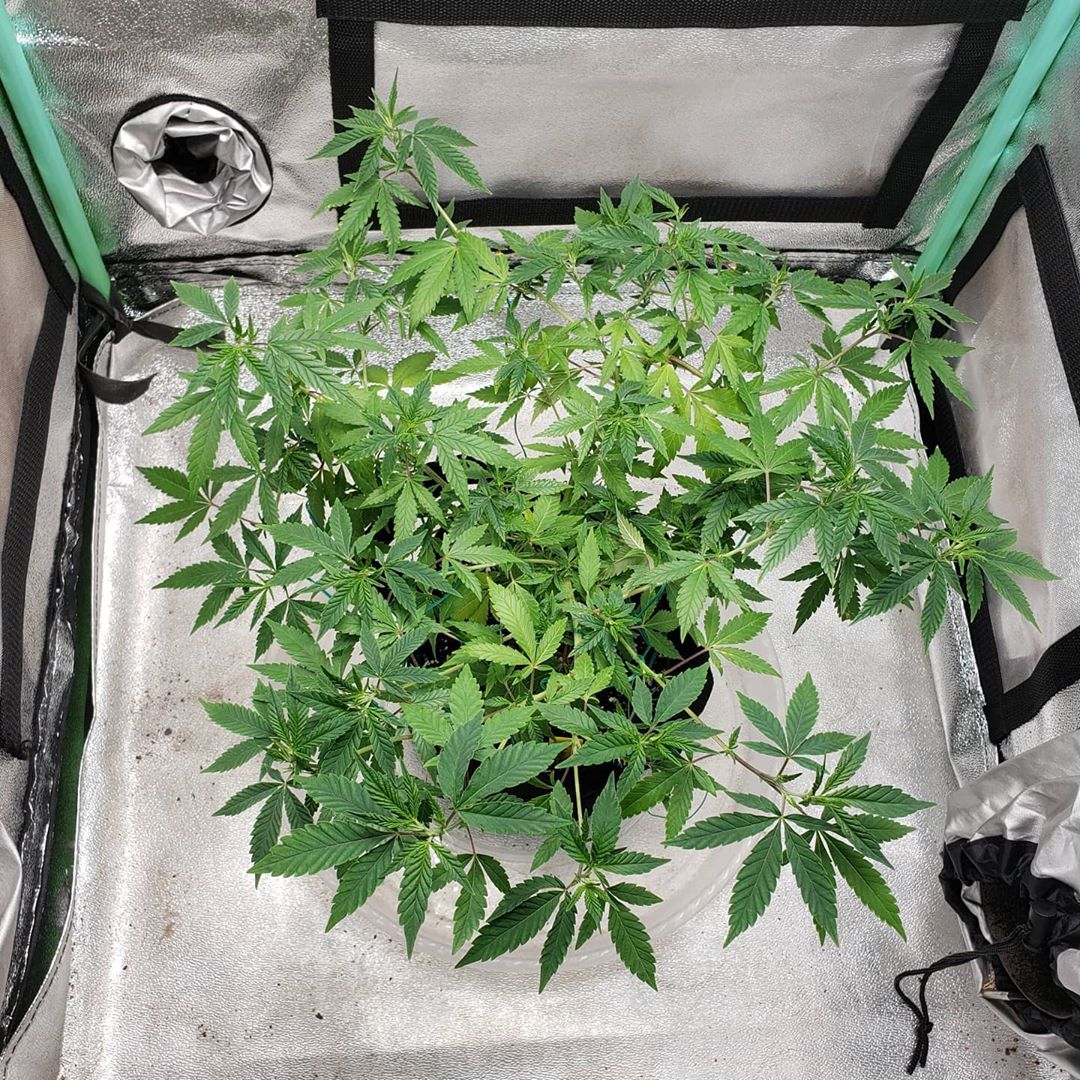
8 days later the plant looks like this
Top view
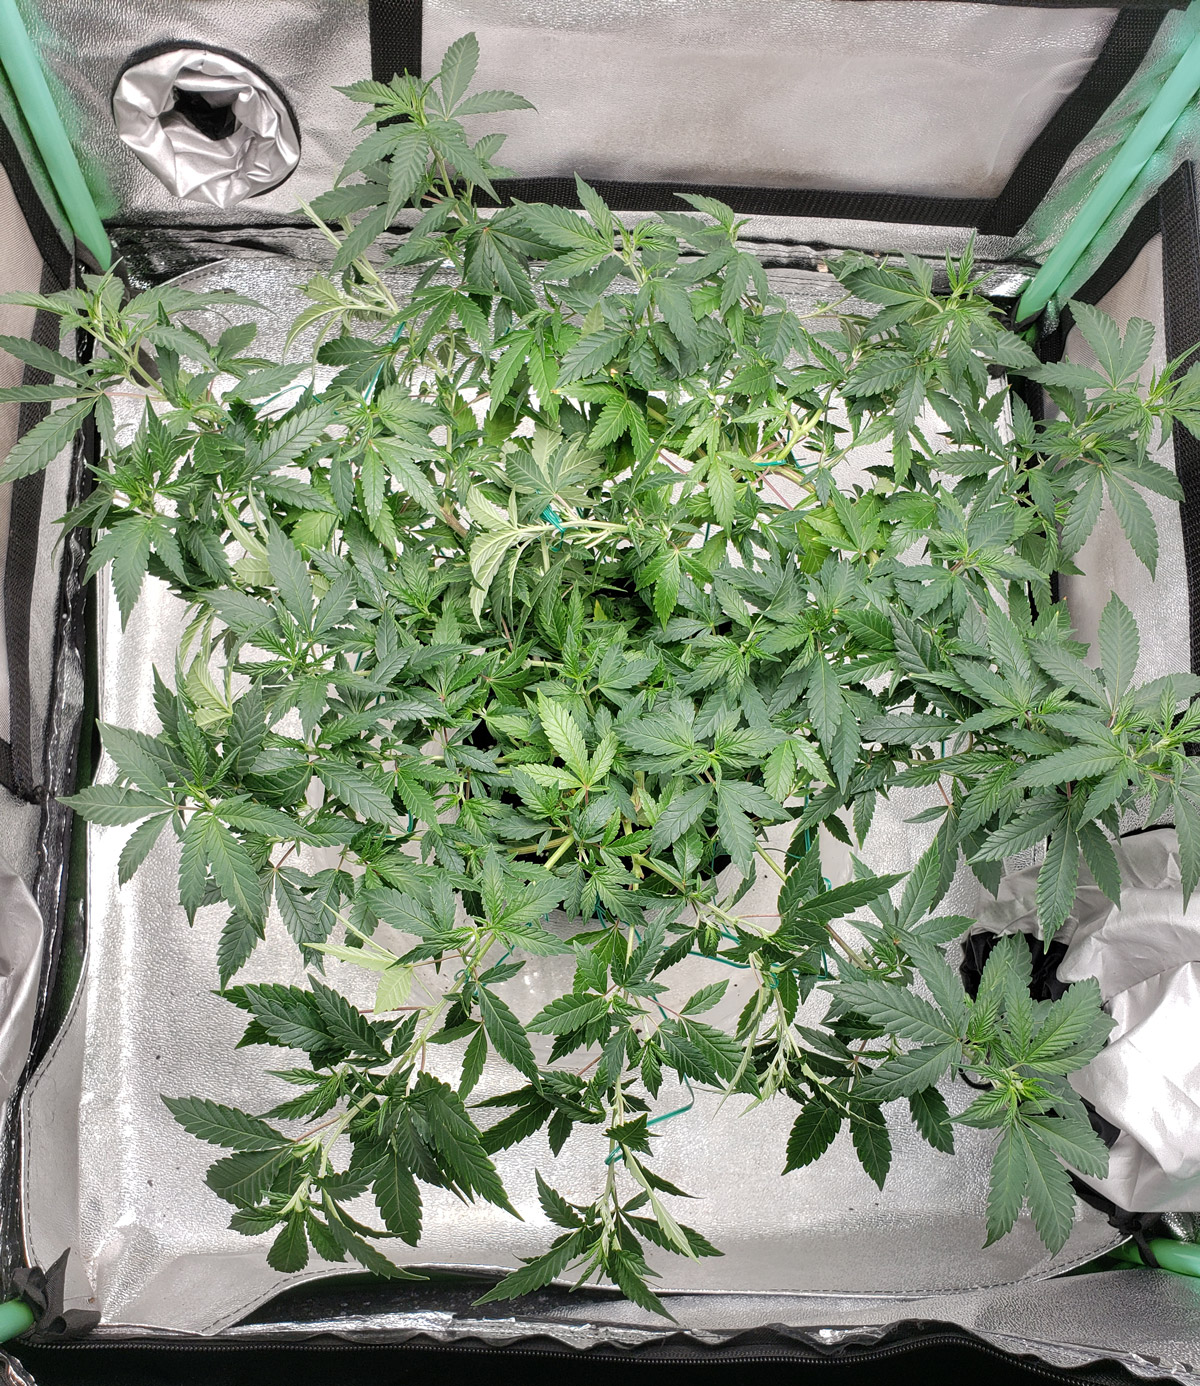
I again bent over and secured the tallest branches to be flat
Here is the top view. Notice how much more plant coverage there is in the tent after the plant has been spread out and flattened. The entire tent is going to be a sea of buds at harvest!
Repeat the step of flattening as many times as it takes to fill the grow space.
4.) Initiate flowering with a 12/12 light schedule
Since I’ve achieved the desired coverage, I initiated the flowering stage by putting the grow lights on a 12/12 light schedule immediately after the last picture.
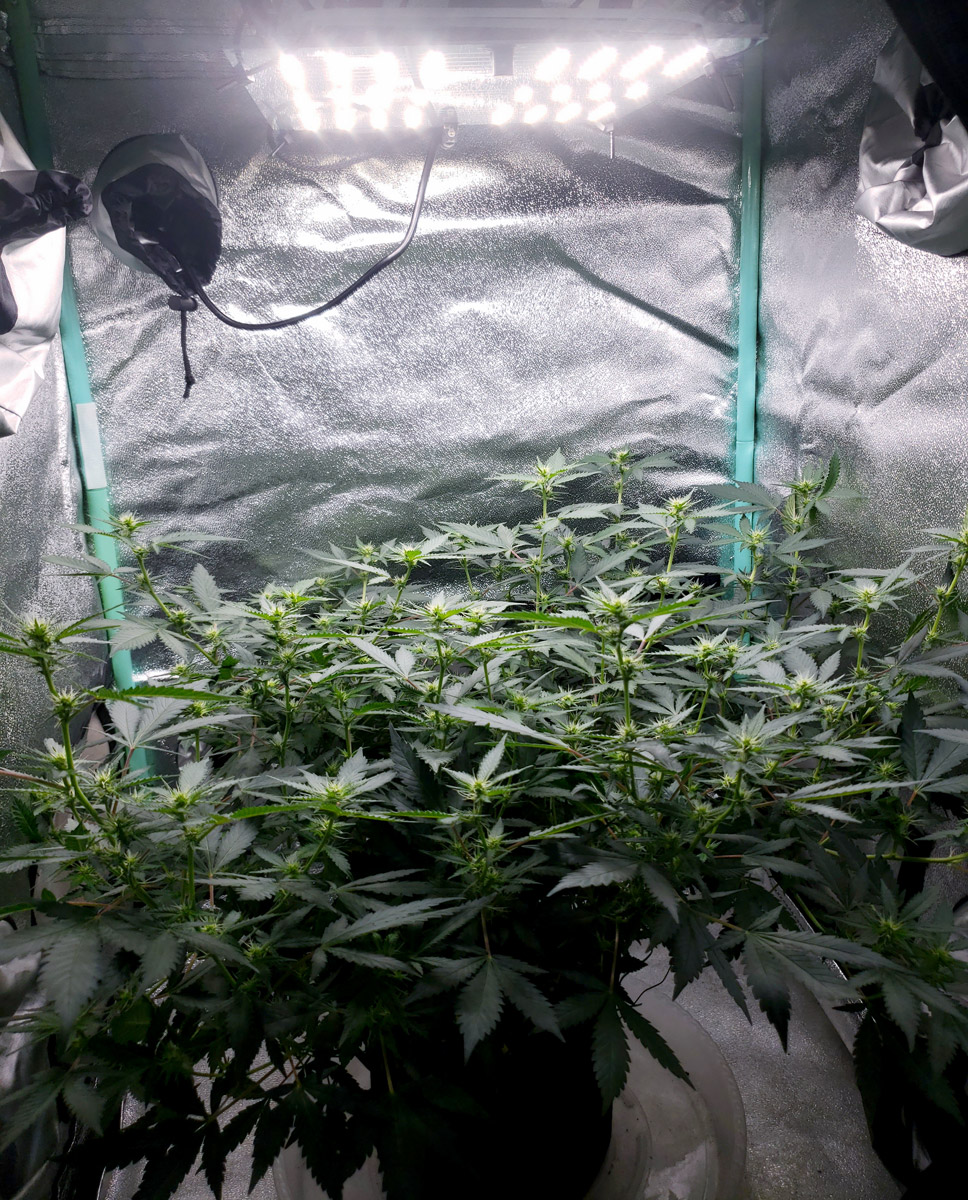
Faux Scrog in action! Here’s what the plant looks like 14 days after it started receiving 12/12.
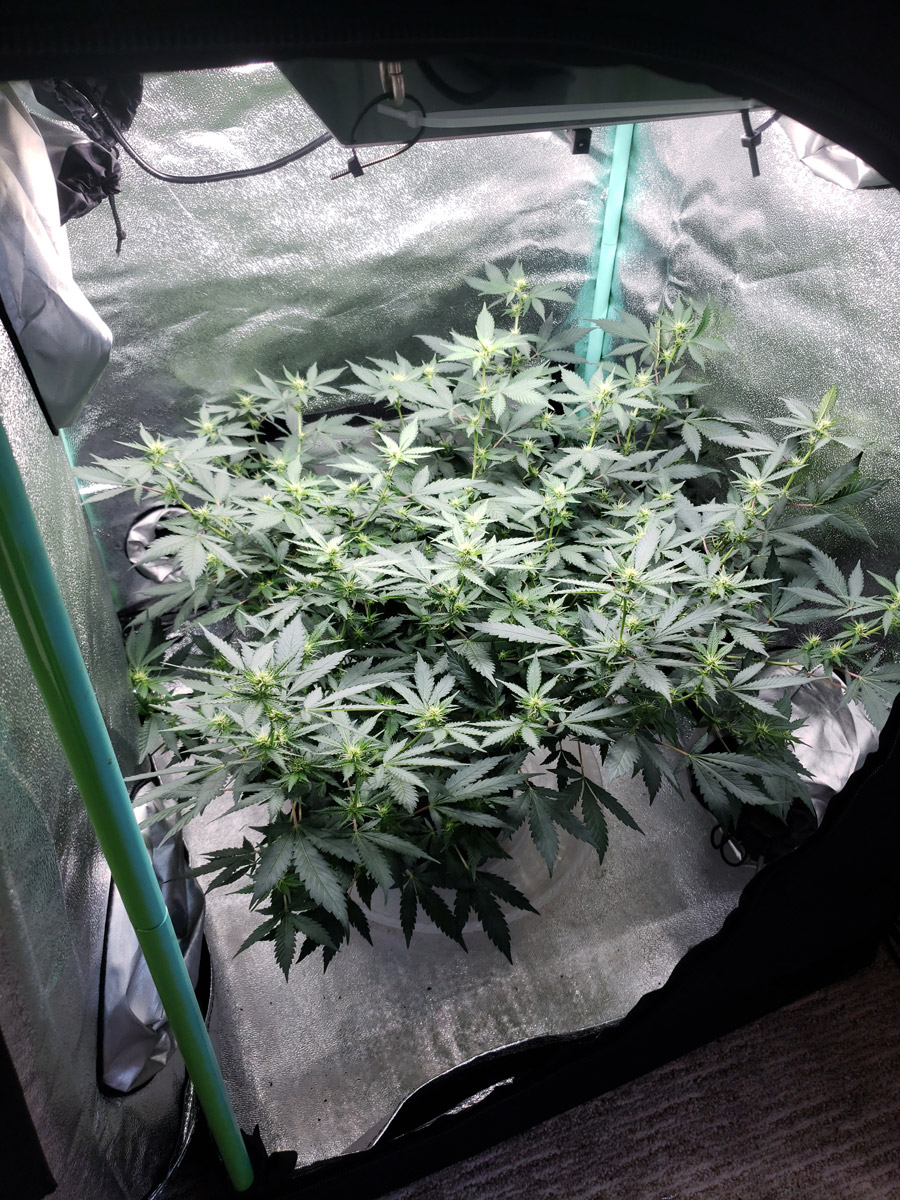
The emerging buds help you see just how many bud sites have been created!
5.) Wait until harvest
At this point, there’s nothing to do but respond to signs of trouble, water the plant as needed, and wait for harvest.
At harvest, the plant is still less than 20″ (50cm) tall and produced over 3 ounces off a small 65W LED grow light. Not bad!