by Nebula Haze
Table of Contents
Introduction: Perfect Setup for Beginners & First-Time Growers
- When to Harvest
- How to Dry & Cure (Make Buds More Potent!)
Introduction for First-Time Growers
Hundreds of cannabis growers have written in over the years and it seems that many, many growers are looking to produce about an ounce a month. There are lots of ways to achieve that yield, but how do you do it using the least amount of time, money and effort? How can you get to harvest as fast as possible?
Today’s step-by-step tutorial uses a 250W HPS, coco coir as a growing medium and auto-flowering cannabis strains. This combination makes it easy and relatively cheap to produce 4 ounces in 4 months…or even more!
You don’t have to know anything about growing cannabis to follow this beginner’s tutorial
This tutorial will give you a green thumb even if you’ve struggled with plants in the past, or just never grown anything! Everything that needs to be done will be explained step-by-step for each stage of your plant’s life. You’ll get a list of supplies with everything you need to grow, from measuring spoons to rope ratchets to seeds to your grow tent!
I have links to every item so you get exactly the same setup and get exactly the same results as you see in this tutorial. Once you’ve completed this grow, the next ones get easier and easier!
Here’s the breakdown:
- $652 Setup – Total setup cost for 1st grow including grow tent, seeds & all supplies (cost breakdown). Your 2nd grow will only cost about $112 for seeds and supplies.
- $30-60/Month Electricity – Average Cost of Electricity (based on $0.12/kWh – $0.25/ kWh). You may pay more or less depending on where you live; 12¢ is the overall US average, 25¢ is the big city average – (electricity breakdown)
- 4-7 Ounces – Average Yield/Harvest – if you follow all the instructions on this page and get the full setup you could possibly get even better yields!
- 3.5 Months – Average Time from Seed to Bud
- 1+ Ounce/Month – Comfortably grow this much (and probably a lot more) without needing advanced knowledge or experience!
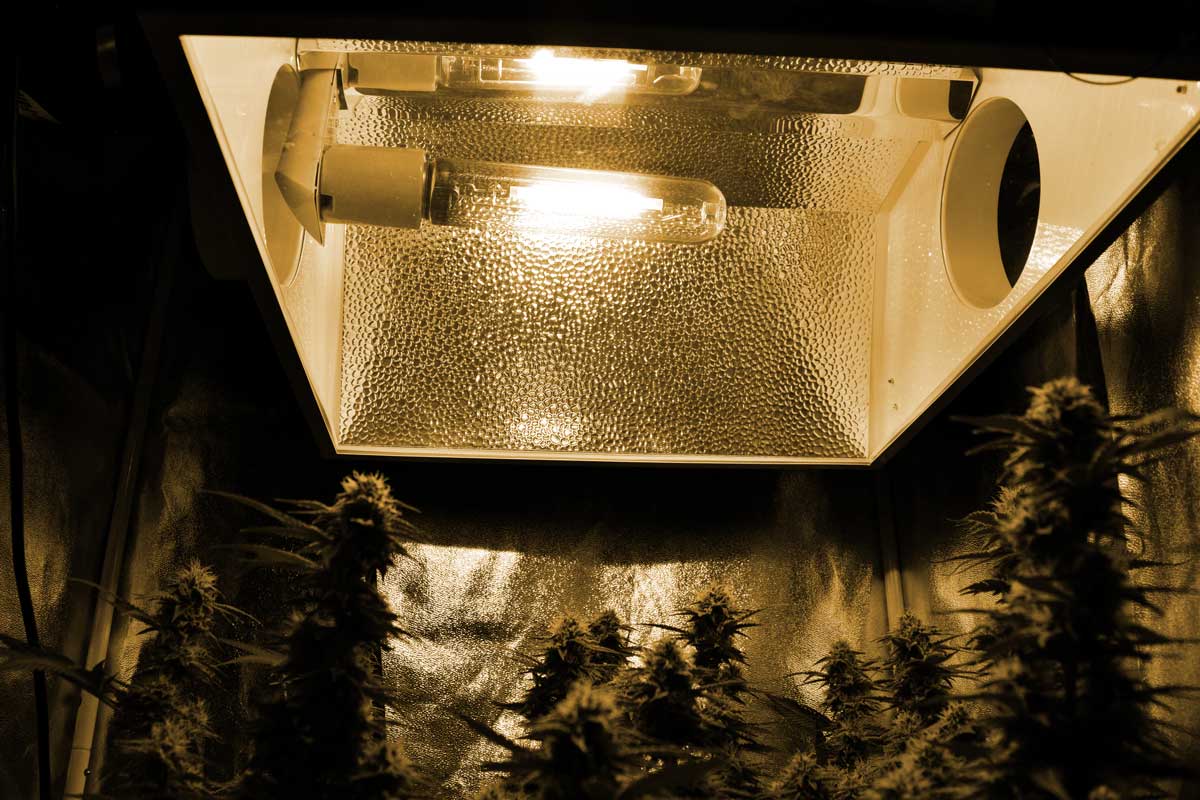
A lot of cannabis growers think they need big grow lights to get the yields they’re looking for, and for some growers that may be true! But for growers looking for about an ounce a month, a 250W HPS may be the best grow light available. A 250W HPS doesn’t get even close to as hot as the bigger HPS grow lights like the 400W and 600W, but it still gets the improved yields, density and appearance of buds grown under an HPS.
A 250W HPS can easily produce 1+ oz/month. If you follow this tutorial you can expect to harvest 4-7 oz every 3-4 months.
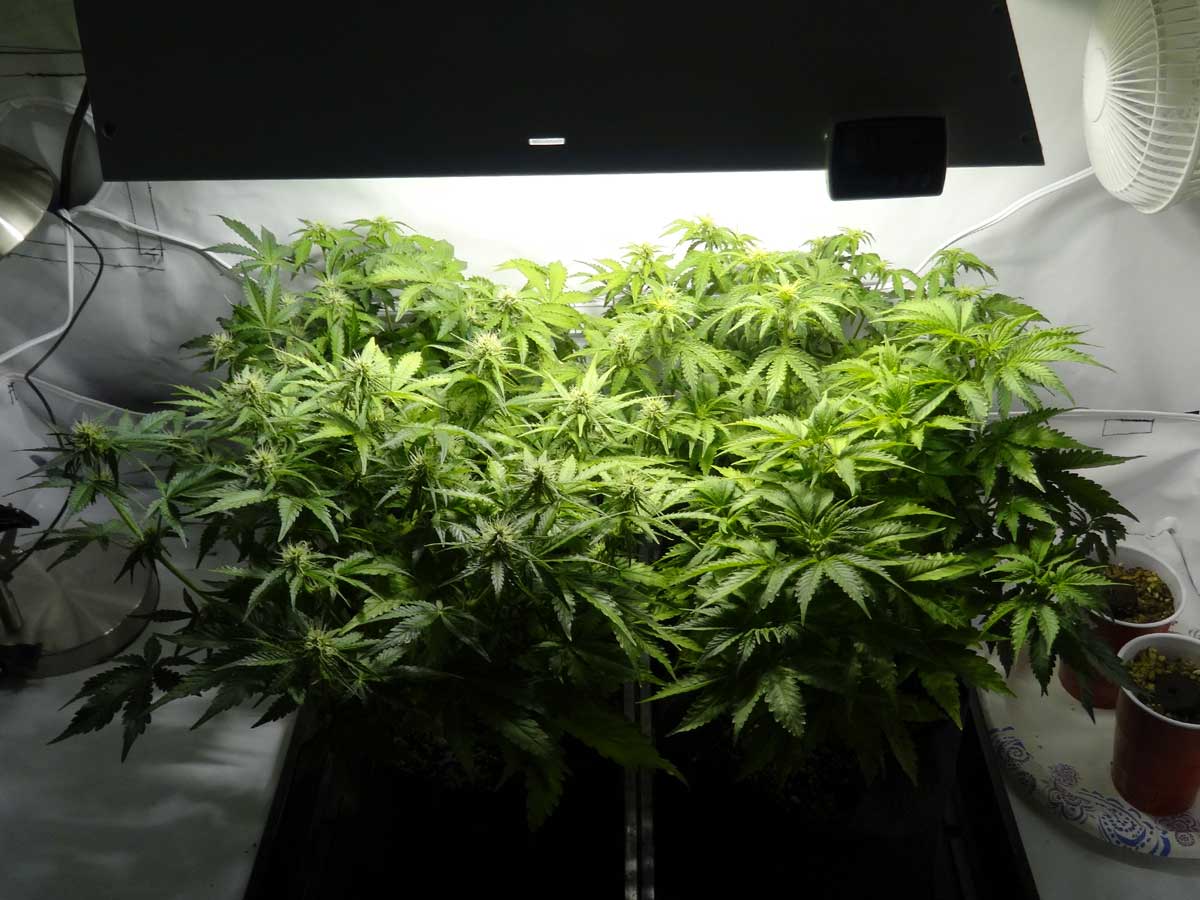
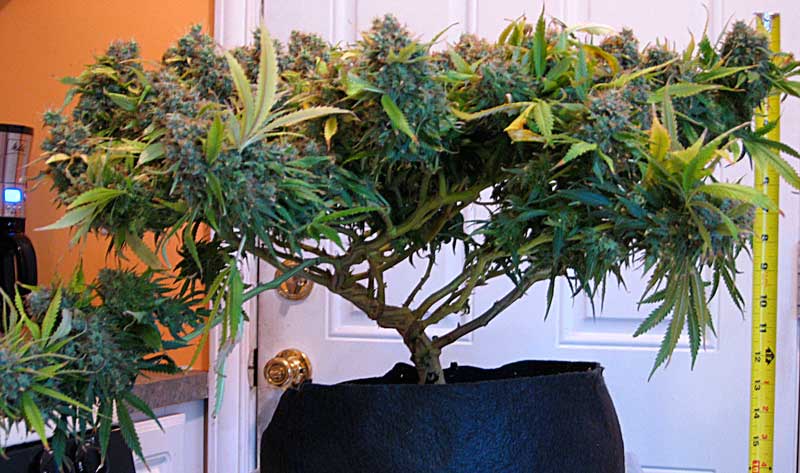
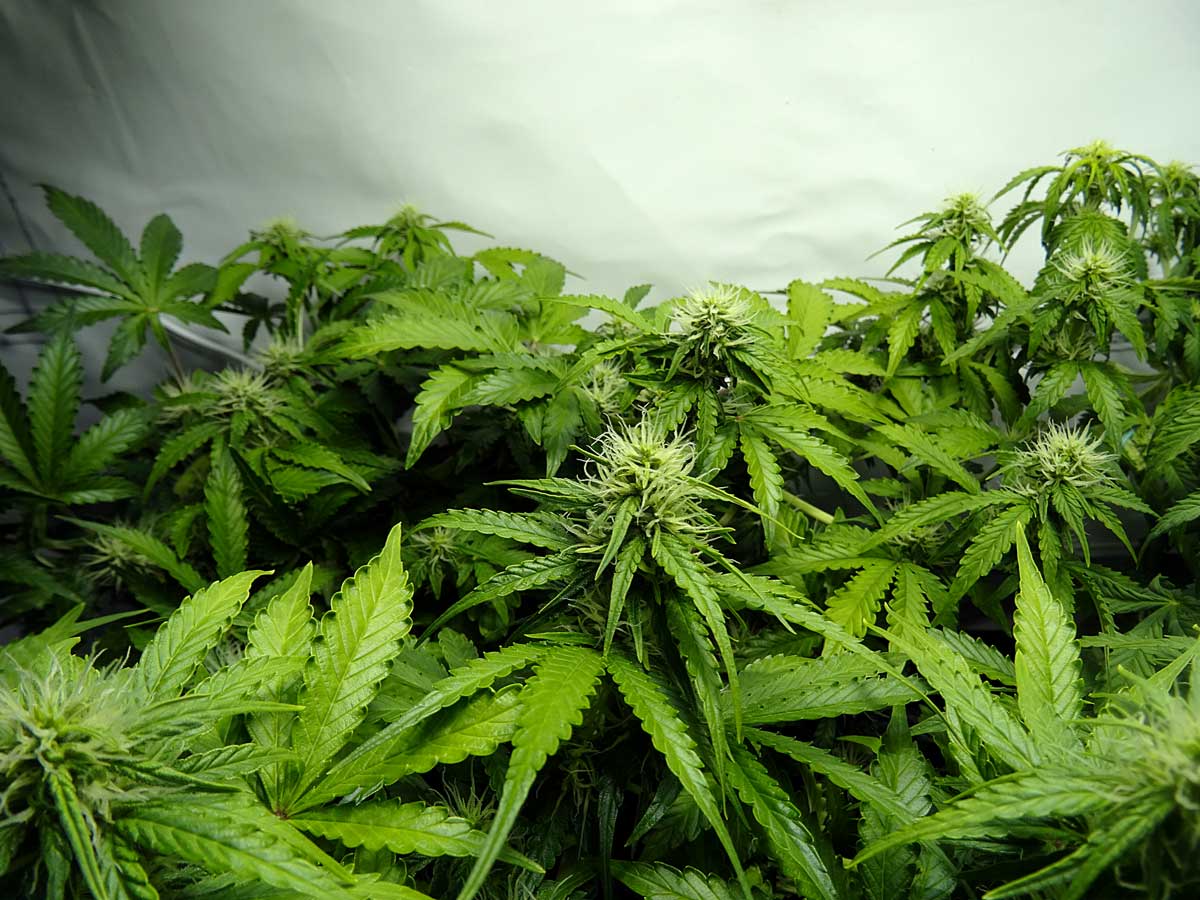
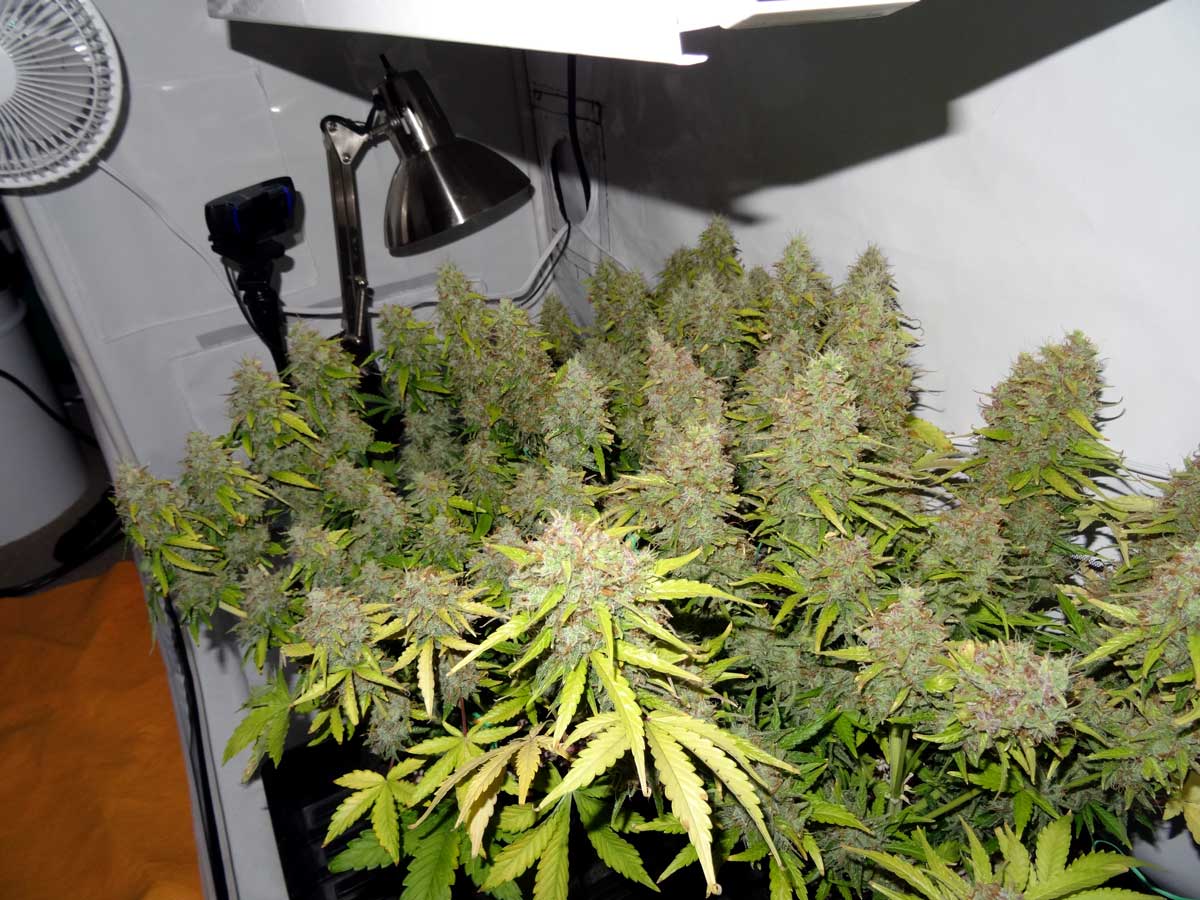
Example Harvest in This Setup – 6.7 ounces
(plants pictured above – view the grow journal)
Why a 250W HPS is a Great Choice for Marijuana Growers:
- Bigger Yields for the Same Electricity – For the same amount of wattage, an HPS grow light gets (on average) 10-20% higher yields than LEDs, and 25-50% higher yields than CFLs or T5s
- Longer & Denser Buds – Buds grown under HPS are usually longer and often more dense than buds from other types of grow lights
- Low Setup Cost – HPS grow lights usually cost quite a bit less to get started with than LEDs, and the cost is similar to starting with CFLs or T5s. The entire grow setup from today’s tutorial including seeds and supplies will cost less than $700, which is cheaper than many similar-wattage LED grow lights are by themselves, and similar to what you’d pay for an equivalent CFL or T5 setup (at least on this scale; small CFL setups can be really cheap!).
- Manageable Electricity Cost – With a 250W HPS and the 3 fans recommended in this tutorial, you can expect to pay around an extra $30-60 in electricity/month (electricity breakdown).
Big HPS grow lights have a reputation for getting very hot, but a small one like the 250W is a lot easier to keep cool. In fact, a 250W HPS doesn’t put out more total heat than an LED that pulls 250W out of the wall!
A strong exhaust fan recirculates and constantly replaces all the air in a sealed environment like a grow tent. This keeps a small 250W HPS grow light cool enough without ducting. This technique works with both air-cooled hoods and “wing” style reflectors
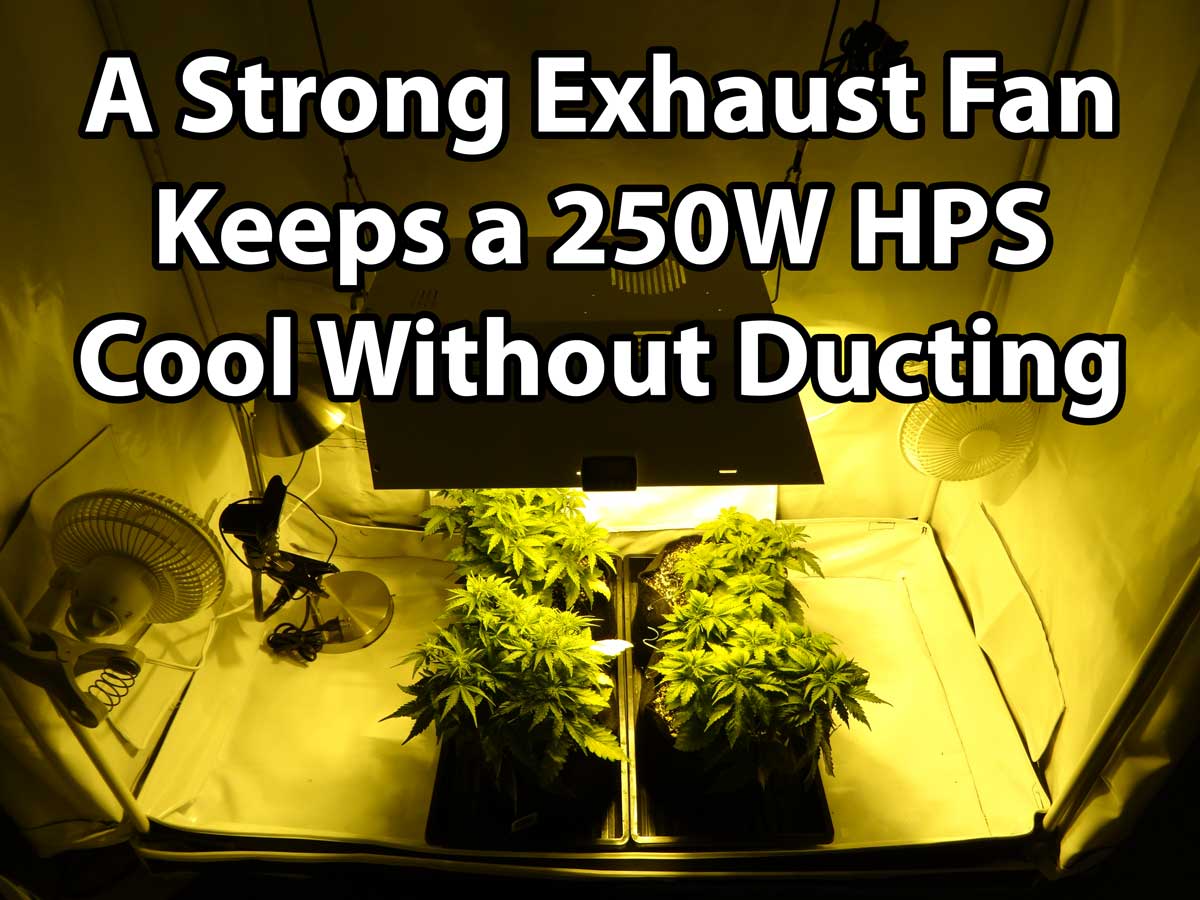
What about outside the grow space? If venting into a closet, a 250W HPS could raise the temperature by 5°F (3°C) degrees or more. In a regular size room it has less of an effect and may only raise the temperature of the room by a few degrees.
I have my grow tent in my bedroom and a window fan keep temps cool enough to almost completely mitigate the heat created by the HPS.
In my experience a 250W light will raise the temperature of a large room by a few degrees. If you use a window fan to blow out hot air, that can help keep the room cooler.
In an ideal world it’s probably a good idea to set up your 250W light with a “real” exhaust system with ducting going from your light to a fan to a window, but in a pinch you can do without and upgrade later (that’s what I did!). Every grow you can make your setup a little bit better, but in the meantime you can harvest lots of beautiful and potent bud!
Why No MH (Metal Halide) bulbs in the Vegetative Stage? Many growers start plants under a metal halide (MH) bulb while the plant is vegetating, then switch over to HPS once their plants start flowering. MH encourages short bushy growth while HPS encourages long/stretchy growth and flowering. I personally use an HPS grow light from seed to harvest because it’s easier and I like how plants grow, but it definitely works either way!
Why Use Coco Coir for Growing Cannabis?
- Feels Like Growing in Soil – Coco coir is a soilless growing medium which gives the feel of growing in soil. Plants are kept in regular containers, and growers simply water their plants with nutrient water. Coco coir can be treated basically the same as (non-amended) soil for growing cannabis.
- Great for Plant Roots – Coco coir is effective at holding onto moisture and nutrients for roots, but also has a lighter texture that lets it hold onto more oxygen. This helps prevent over and under-watering. Coco coir tends to promote healthy and fast root development compared to other potting mixes.
- Does Not Attract Insects – Coco coir does not make a good home for many garden pests that affect soil growers. As such, cannabis growing in coco coir is much less likely to be attacked by pests or bugs.
- Benefits of Hydro – Hydroponics (growing plants directly in water while pumping in air to provide oxygen) is effective at making plants grow faster because it gives oxygen and nutrients to the roots in the most easily accessible form, saving the plant precious energy. However, hydroponics takes extra preparation compared to growing a potted plant and for those looking for a hand-watered experience, coco coir gives many of the benefits of hydro. This results in a quicker harvest and bigger yields compared to growing in soil, without having to manage a water reservoir.
Why grow an auto-flowering strain?
Auto-flowering strains are like regular cannabis plants except an auto-flowering plant will automatically start making buds around week 3-4 of its life (“regular” strains need a special light schedule to make buds). Most auto-flowering plants will be ready to harvest by the time they are 3-4 months old, making them one of the fastest ways to get to harvest.
Learn more about auto-flowering strains!
One nice feature of auto-flowering buds is they tend to be more relaxing and anti-anxiety because they naturally have slightly higher levels of CBD. This is because the ancestor of auto-flowering strains produced a lot of CBD. Although the original auto-flowering strains from years ago were not as potent as regular cannabis plants, the modern strains by trustworthy breeders are as potent as any non-auto (photoperiod) plant!
Auto-flowering strains are also really neat in the way that they act exactly how you’d think a plant should act if you’ve never grown cannabis before.
You plant a seed, water the plant while it grows, and harvest after it finishes making buds on its own. This simplistic approach can help get rid of some of the complication of learning how to grow cannabis. By the time you get to the end of your first grow, you’ll be expert enough to tackle any strain!
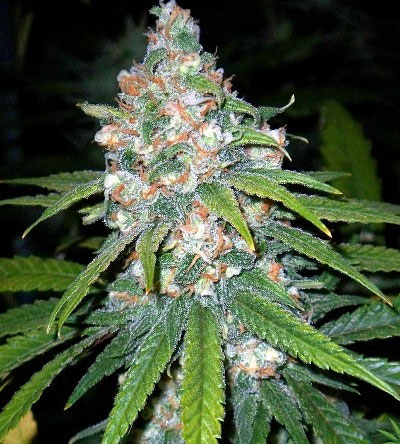
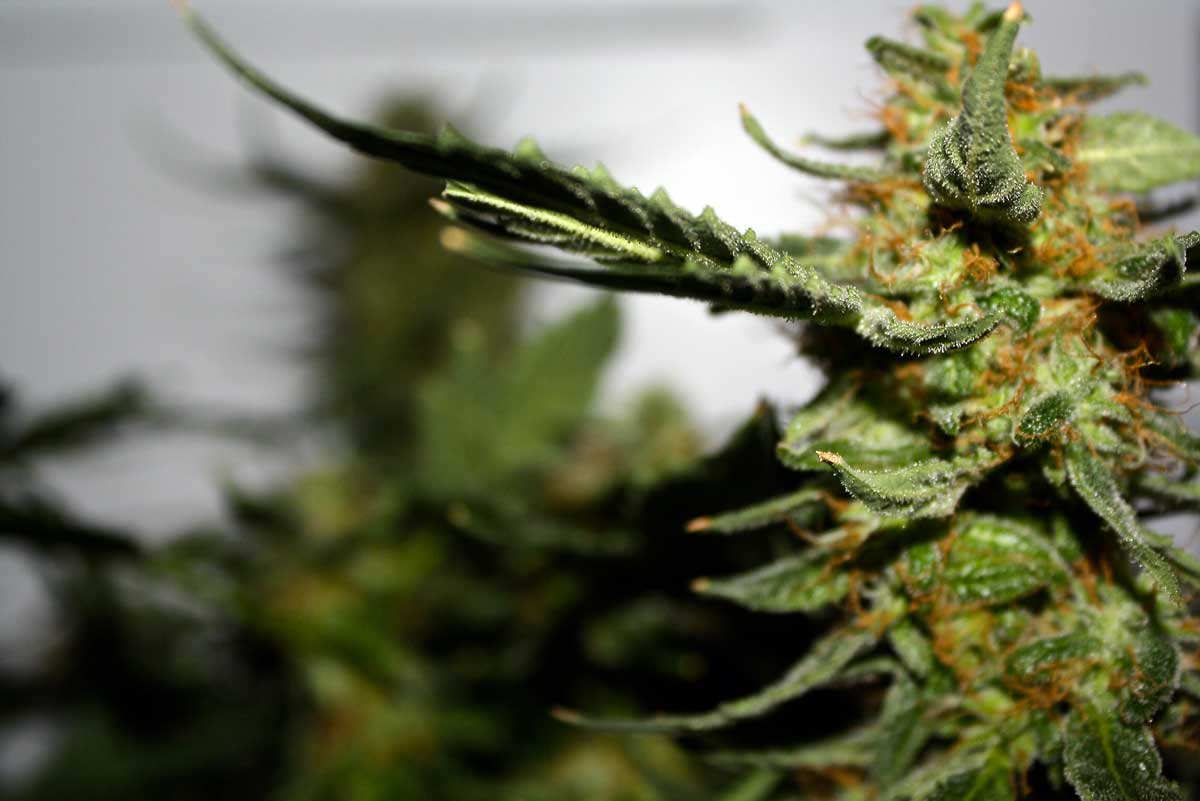
This bud is from an auto-flowering Lemon OG Haze plant
Ready to start growing an ounce of bud a month? If you follow this tutorial step-by-step I can almost guarantee you will have at least 4 ounces in your hands in 4 months, and probably more!
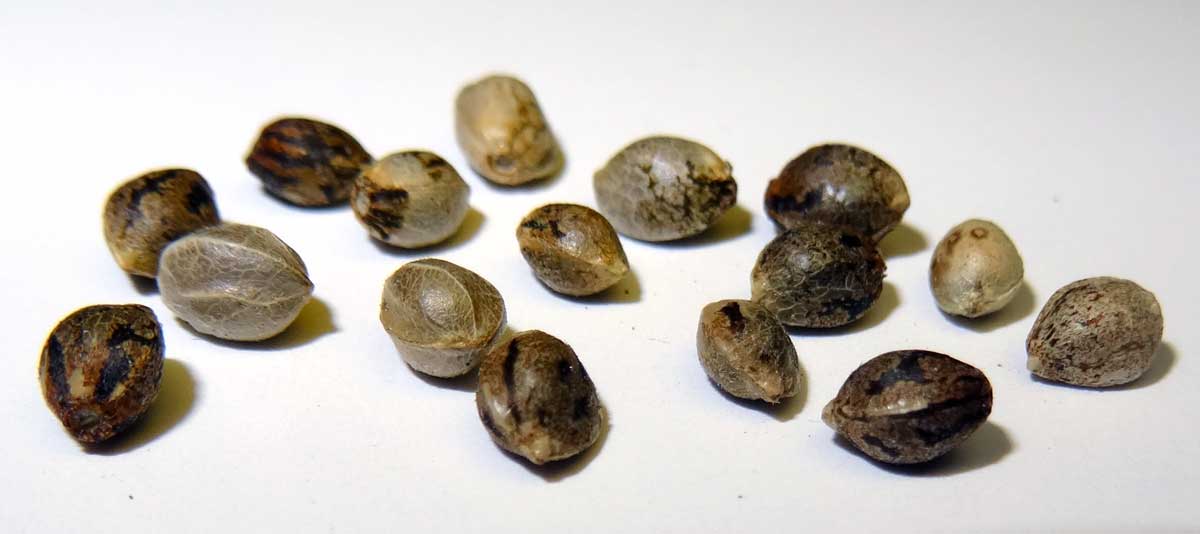
4 Seeds – Get Seeds for 4 Feminized Auto-flowering Plants
The most important thing about choosing strains to grow is they should excite you! Learn more about picking the right strain for your needs. Below I recommend a few breeders and strains because I know these will work for you, but don’t feel stuck if you want something else! Any auto-flowering strain will work in this setup if you follow all the instructions 🙂
Make sure to get “feminized” seeds! That means that all the plants will be female and make buds. Non-feminized seeds have about a 50% chance of being male plants which don’t make buds at all (they’re only good for breeding)! Nearly all auto-flowering seeds are feminized, so they will usually say specifically if they’re “regular”/”non-feminized” seeds. Learn more about ordering cannabis seeds online.
Auto-flowering cannabis plants thrive under an HPS grow light!
You want to get seeds for 4 plants for this setup. If something happens to one or two of them, you’ll still be on track to get a nice harvest! That being said, if you follow this tutorial you shouldn’t lose any plants.
You can grow 4 of the same strain, or 4 different strains, it’s up to you. Generally it’s easier to grow all the same strain because they tend to grow more like each other, but if you’re willing to put in a little extra effort to control any unruly plants you can easily grow 4 different strains at the same time (that’s what I do).
Get seeds for 4 plants so you can grow a forest under your grow light!
Just try make sure that each strain you choose is ready to harvest within 3-4 months. That will help make sure they all stay about the same size. Breeders always list estimates about how long each strain needs to flower before harvest.
A Few Trusted Auto-Flowering Breeders (highly rated by auto-flowering growers)
These aren’t the only great auto-flowering breeders, but I know these ones get great results every time! Each one has strains that have been refined over many generations to lock in good genetics and make sure the plant grows exactly how the breeder tells you.
When you’re growing auto-flowering plants from a trusted breeder, you know what to expect because the plant will grow exactly how the breeder tells you it will. With lesser-known auto-flowering breeders it’s more of a gamble. Sometimes you get great plants, but unfortunately sometimes you get something unexpected that you don’t want.
A Few Suggested Auto-Flowering Strains
These are some of my favorite auto cannabis strains, but there are hundreds of great strains to choose front. Learn more about researching strains!
- Dinafem Auto Critical Jack – This is one of the prettier autos with colorful buds that become covered with trichomes, and it also has very strong mental and body effects!
- Dinafem Auto Sour Diesel – Good yields and although buds are average looking, the effects were out of this world – this is my favorite auto that I’ve grown so far!
- Nirvana Auto Bubbleicious – Buds have a sweet smell that is almost like bubblegum, plus this strain is very easy to grow!
- Dutch Passion AutoBlueberry – Purple or blue tint to buds, amazing blueberry smell and above average potency.
- Pre-Made Coco Coir Potting Mix – You can also mix your own with dehydrated coco coir bricks, which is a bit cheaper since it’s easier to ship
- 4 x 3-gallon Smart Pots – If you need to spend longer than a day or two away from your plants at a time, you may want to get 5 or even 7-gallon pots. Plants grown in 3-gallon containers grow a little quicker for the first few weeks but you’ll have to water them more often than a bigger container.
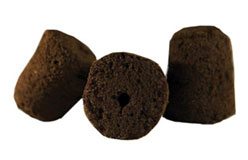
- Rapid Rooters – to start seeds (these can be kept in the fridge between grows)

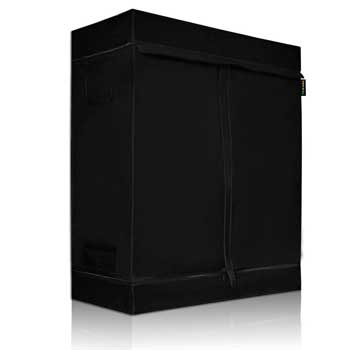
Environment Setup – Get a Grow Tent
Air Circulation: Two small clip-on fans circulating air around and over plants
Exhaust: Can Max 6″ Fan – 334 CFM. (You can use a window fan if the room gets hotter than outside. Temps should stay around 75-85°F (24 – 29°C) in the grow tent. Ideally, the temperature should stay closer to 75°F(24°C), but some areas just don’t allow for this without lots and lots of air conditioning.
250W Grow Light
You need a Reflector, 250W Ballast & 250W Bulb.
Any 250W HPS grow light set will work for this setup, even super cheap ones. However, these days I’ve noticed many grow light companies have stopped carrying 250W HPS lights in favor of 315 LECs (not the same as LEDs, these are a type of HID light). LECs can be a great alternative to HPS, but they initially cost quite a bit more (usually around $500 for a kit) and need to be kept a little further away than a 250W HPS (18″ away vs 12″ away). However they perform extremely well for growing cannabis and have some other neat benefits. Learn more about growing cannabis with LECs.
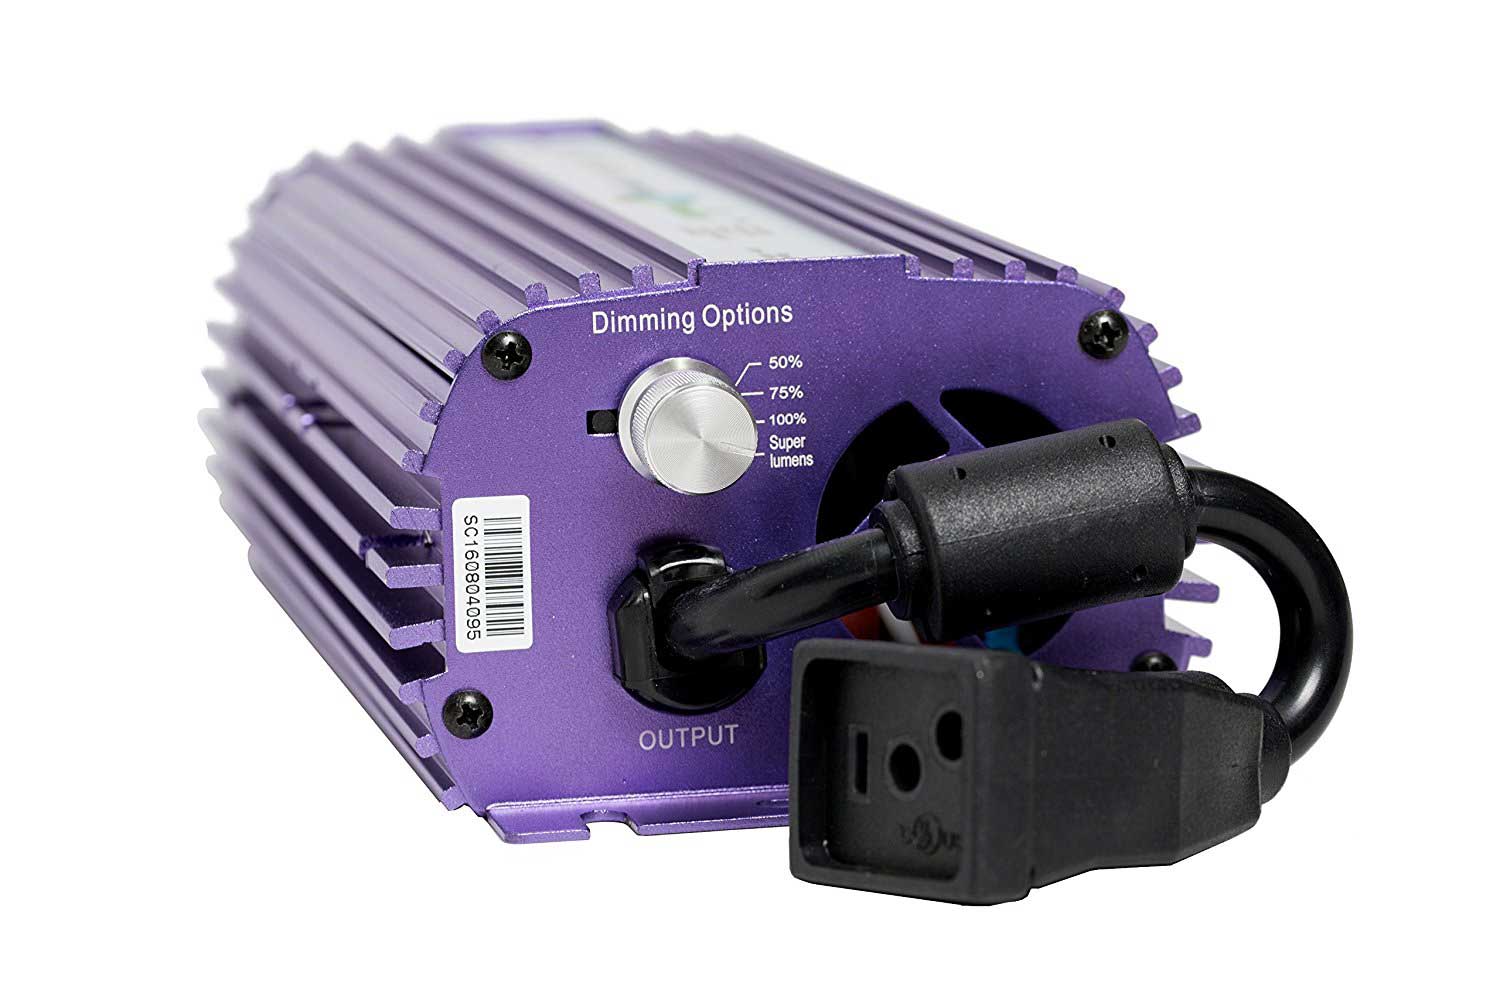
Perhaps the easiest option is to get a dimmable 400W HPS ballast and dimmable 400W HPS bulb with your reflector. Although a 400W HPS light can get pretty hot, you will be able to dim the grow light to 50 or 75% to help keep things cool. This will also allow you to follow through with the tutorial, and you can always turn up the intensity later.
Get this Reflector, 250W Ballast & 250W HPS Bulb (Premium Equipment) – The light from an HPS appears yellow or orange, which happens to be the perfect light spectrum to encourage plants to make bigger buds.
Consider a 315 LEC grow light if you want an alternative to HPS. These newly-popular grow lights are still in testing, but so far they’ve been getting really great results with cannabis!

Get a dimmable 400W HPS ballast, dimmable 400W HPS bulb and a reflector, then turn ths grow light down to 50 or 75% to follow this tutorial. You’ll be able to increase the intensity later. Click pictures for closeup of a ballast with dimming options.
Nutrients
CaliMagic (Cal-Mag supplement, essential when growing in coco coir)
Here’s the exact nutrient schedule I use (PDF) This is basically the regular General Hydroponic coco schedule for the Flora trio, but I cut the dosages in half and converted everything to imperial measurements (tsp, etc), along with a few small tweaks for auto-flowering strains in coco. With these alterations, you can use this schedule exactly as is for growing auto cannabis plants in coco coir.


Watering Your Plants
1-gallon water jug
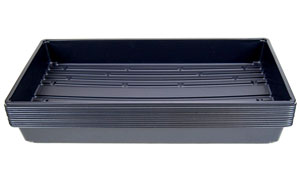
Trays to Catch Runoff Water (put these on a slight incline so all the water pools to the front so you can easily collect it
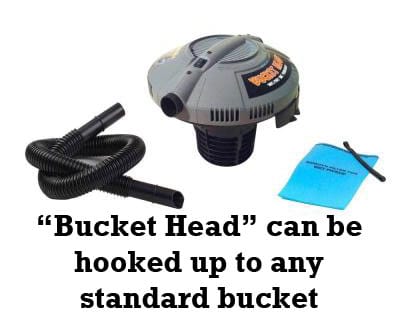
“How do I collect the water from the runoff tray?”
- Wet/Dry vacuum
- Water transfer pump
I use the “Bucket Head” attachment at Home Depot which costs about $25 and can be attached to any standard bucket, turning it into an ultra-cheap wet/dry vacuum.
Other Random Grower Tools
Rope Ratchets to hang light
Measuring spoons (I got this particular set because it goes down to 1/32 tsp)
Dropper/Pipette (for pH testing)
Plant Twist Ties for (optional) plant training
Environment – Setting Up “Exhaust”
For some people this may be a good temporary solution until a real exhaust system can be made. And for some people, this might be a permanent solution to get your grow area temps the way you’d like.
What You Need
Grow tent in a room with access to a window. I actually keep mine right in the bedroom with me, pictured below, because I don’t have a suitable closet.
Exhaust fan – Can Max 6″ Fan – 334 CFM
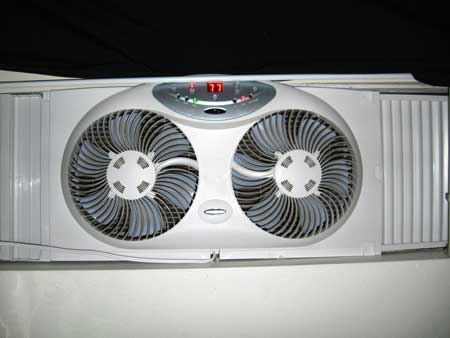
Window Fan – I use the Holmes Dual 8″ Blade Twin Window Fan because it moves a lot of air and actually fits my huge windows, but any strong window fan will work.
The main idea is to vent hot air out of your grow tent, then get the hot air out of your room via a window fan.
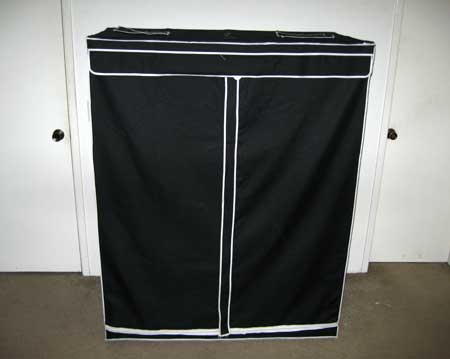
When it’s just a grow tent without any ducting, it doesn’t really look suspicious in your bedroom. Only a few people have seen my grow tent and every one of them thought it’s some sort of storage or way to hold clothes, if they even notice it at all.
Here’s what to do:
Set up your grow tent with grow light inside
Install your exhaust fan at the top of your tent, blowing air out. Make sure there’s an intake hole for new air to get in. The intake hole should be bigger than your exhaust, and should be located on the bottom of the tent on the opposite side of your exhaust fan. This way, the coolest air is being pulled in and the hottest air is being exhausted. This isn’t always possible, but ensures the best results. Most grow tents already have a suitable intake hole, so this is another reason I like grow tents – less work needed on your part to make a good environment for your plants
Install a window fan blowing air out in the same room as the tent. This window fan will be most effective if you have an intake hole, just like your grow space. The best way to accomplish this is to simply open another window in the room, or even a window or door outside the room somewhere else in the house as long as the fan gets access to new air. This causes the fan to blow all the air out, sucking in new fresh air to replace it. The window fan listed above can also be configured so one is moving air out while the other is moving air in, which is an option in a room with just one window. It’s super important to note that the smell of your cannabis will still be an issue! More on that below…
This may not be a permanent solution, but it gets air moving through the tent and keeps the air moving out of the house.
You’re basically building an exhaust system without the ducting. It’s not as efficient as using ducting, but for a lot of growers with just a few plants, it’s all that’s needed to control temps in the grow room and tent. As long as it’s cooler outside than inside, the window fan will cool down the room.
The window fan I use is called a “Bionaire BW2300 Twin Window Fan,” but any strong window fan will work. They’re available in hardware stores, Best Buy, Walmart and on Amazon.com. They have extenders so they’ll fit any window snugly, without gaps on either side.
What about smells? All the normal techniques used to control smells will work for this system. The best option to control odors is to create an exhaust system that gives your tent good suction/negative air pressure. Then have your air pass through a good carbon filter just before going through the fan and leaving the tent. With a good strong exhaust system and a quality carbon filter, this will prevent smells in the bedroom or outside except when you actually open the tent. Learn more about carbon filters and controlling smells
Setting Up Your Coco Coir
Fill your containers about 85% full of coco coir, then water the coco coir thoroughly in their pots before you start your seeds. It can be hard to get the coco wet all the way through if it’s completely dry, and it will get you ready for when you do it for your seedlings the first time!
Place your containers on your trays. If you want, put a block of wood or something sturdy under one side of the trays in the back. This will put them on a slight incline so that when you water them, all the runoff water will pool at the front. This will make it a lot easier to collect water after it runs through your plants.
Watering Your Coco Coir With Nutrient Water Before Using It
- Fill your 1-gallon container with tap water
- Add nutrients to your water following the nutrient schedule (PDF) for seedling strength
- Check the pH of the water with your pH test kit.
- If the pH is higher than 6.5 or lower than 5.5, you’ll want to adjust it. Just add a little bit of PH UP or PH DOWN so it’s between 5.5-6.5. This tiny step takes less than 5 minutes and will make your plants grow much faster and healthier! Learn more about checking the pH.
- For now, pour the water slowly over your containers, trying to wet the entire top of the coco. Keep adding water until you get about 30% runoff out the bottom, just to make sure you got everything.
- You want the coco to be evenly damp when you germinate your seeds; this will “charge it” with some extra nutrients so your new seedlings take off in growth!
Before starting this part, make sure your entire setup is ready for your new plants! You don’t want to start them if your setup isn’t ready yet 🙂
Make sure that you’ve set up your electrical timer so that it’s on for 18 hours a day, and off for 6 hours a day. You will plug your grow lights into this so your plants get a “night” every day. All the fans should be on 24/7. The light should start 3 feet away from the tops of the containers.
Checklist before you start:
- You’ve watered your coco coir thoroughly in their pots and removed all the runoff water
- Lights are on 18/6 timer
- Fans are set to be on 24 hours a day
- 250W HPS is 3 feet away from the tops of your pots
It’s time to get your Rapid Rooters and your seeds! This is one of the most exciting moments in every grow!
Each cube or plug already has a hole specifically for you to place your seed. Just stick your seed into the precut hole. The seed should be about a half inch away from the surface so it doesn’t get too much light before it sprouts. Don’t worry, you really can’t mess this part up 🙂 As long as the seed makes it in there, you should be good!
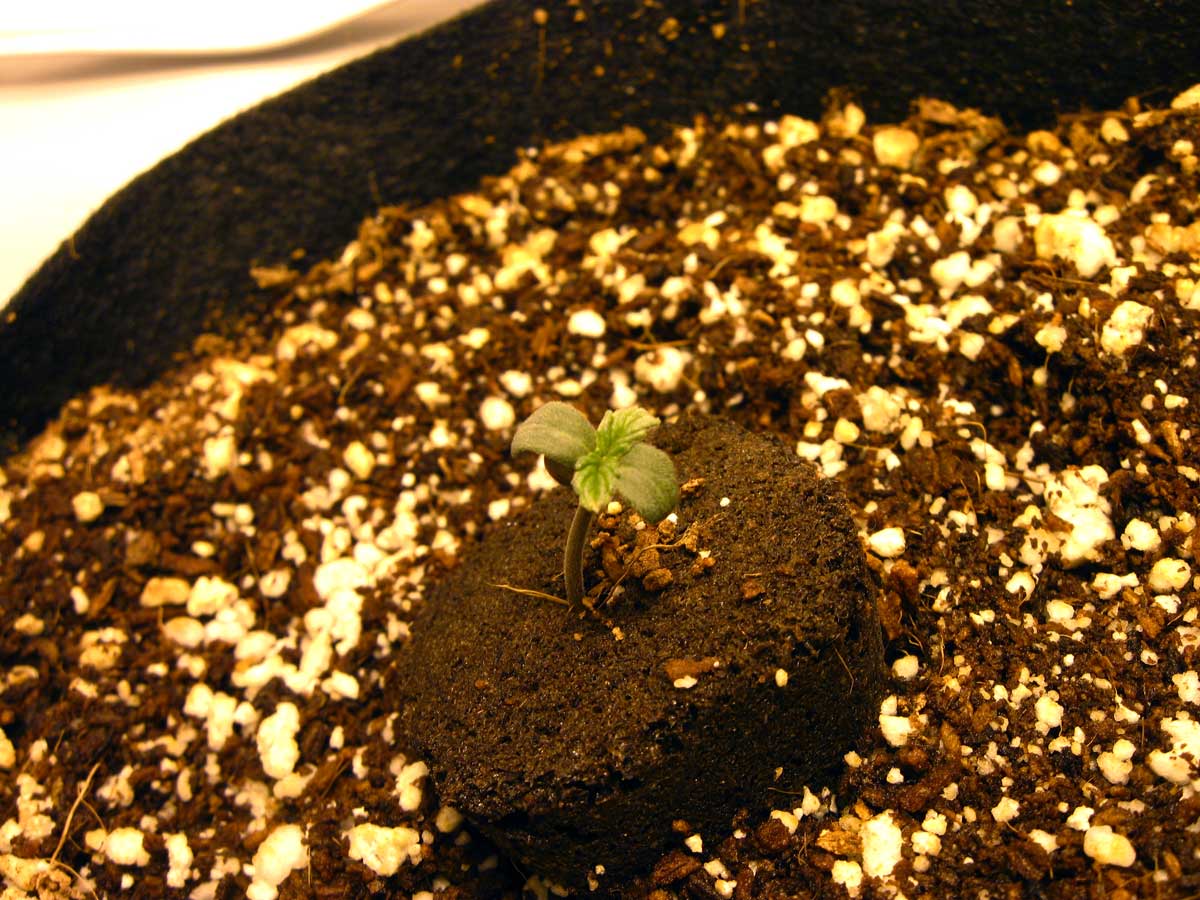
Stick seeds in the hole in the Rapid Rooter, and make sure the seed goes at least 1/2″ down. That’s it! It’s started!

Place your Rapid Rooters on top of your coco coir, or dig a little hole in the coco and put the Rapid Rooters inside.
Now it’s time to turn on your grow light! It should be several feet above the tops of your containers, near the top of the tent. You want your seedlings to have light to grow towards, but if you keep the lights too close it will dry out your Rapid Rooters. You’ll move the light lower after you see the seedlings appear 🙂
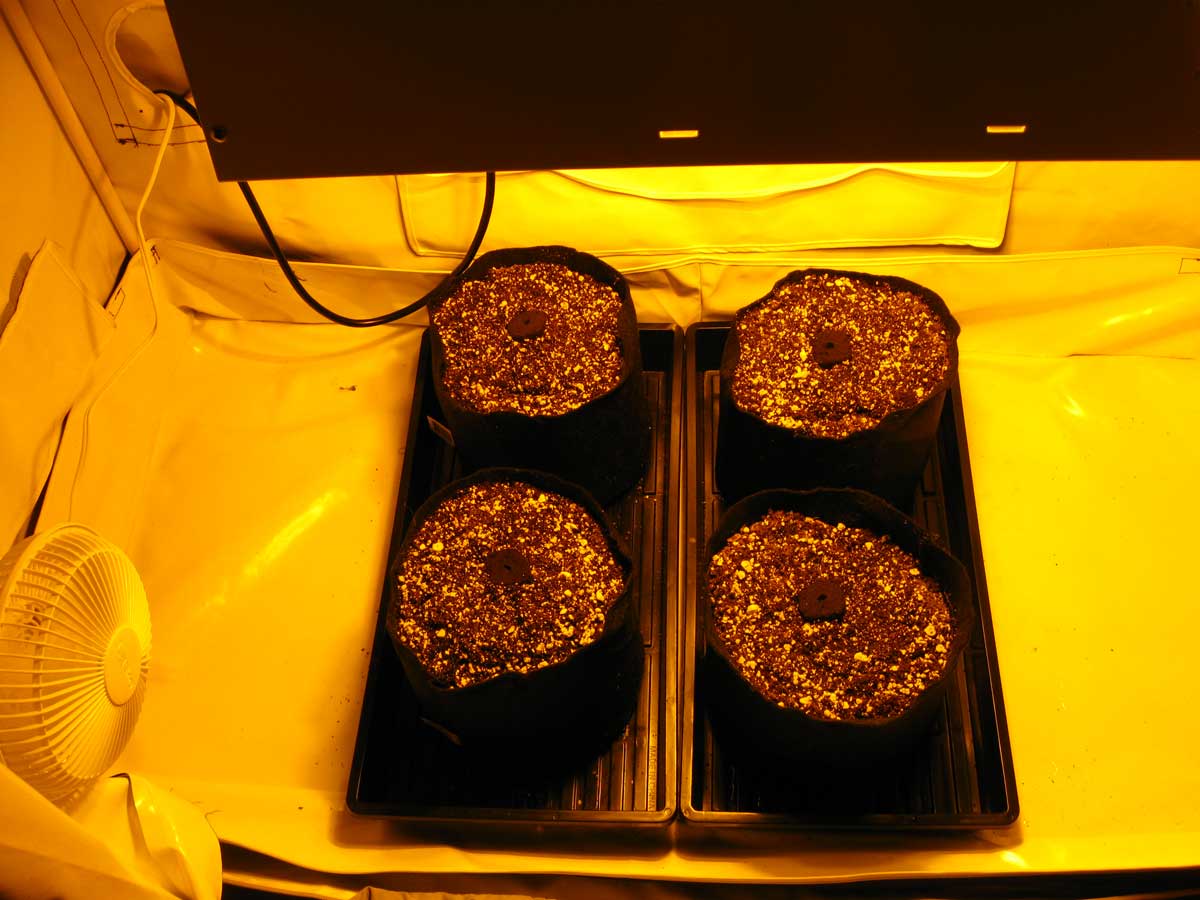
At this point, the inside of your grow tent should look something like this
Make sure your grow light is set so that it’s on for 18 hours and off for 6 hours each day. Choose whatever time is most convenient for you to check on the plants.
Your fans should be on 24/7, even when the grow lights are off, to make sure your plants are getting a constant supply of fresh air. Make sure not to point any fans directly at your seedlings just yet as the Rapid Rooters will dry out too fast. As they get a little bigger they’ll be able to handle a lot more wind.
Check Rapid Rooters twice a day to make sure they stay moist (but not soaking). Water with more pH’ed seedling strength water if you need to re-moisten.
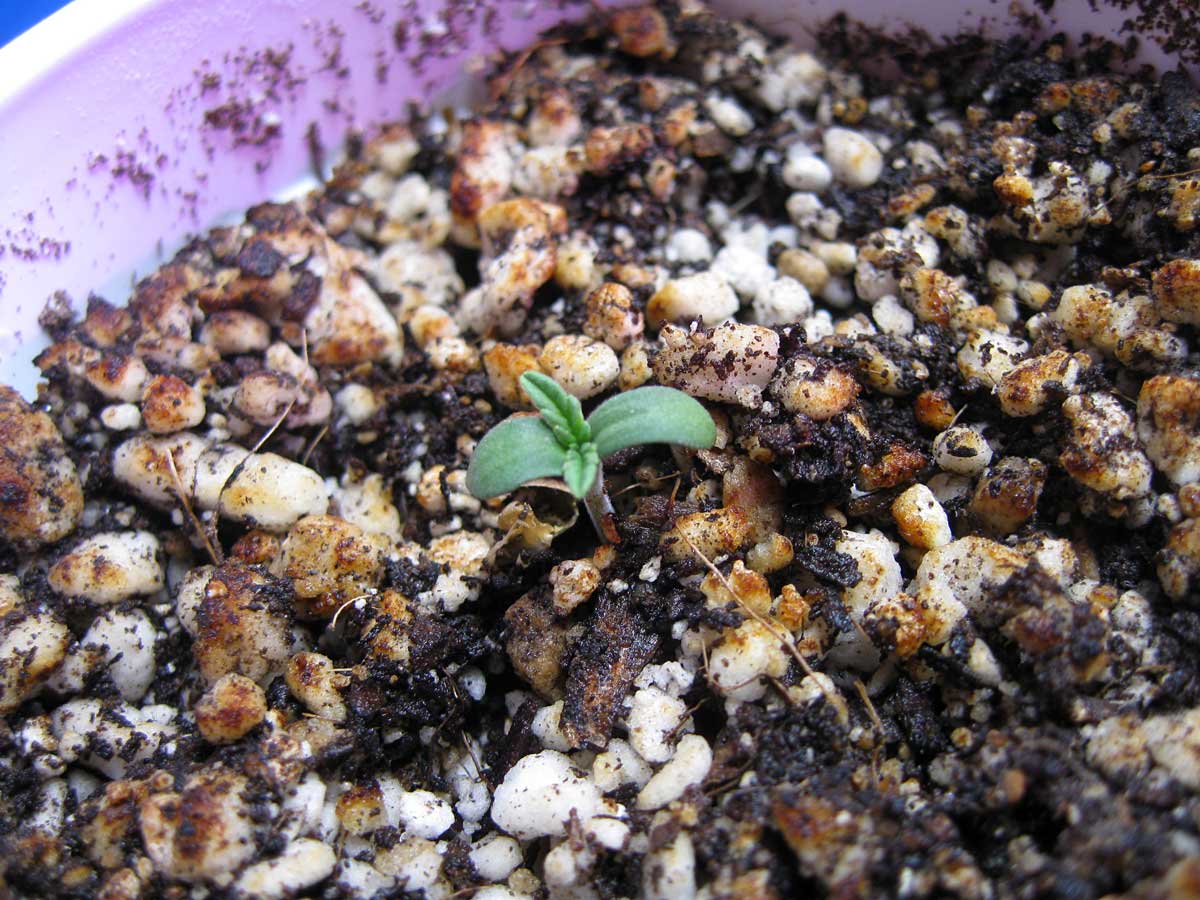
Your new sprouts should show their faces in a few days!
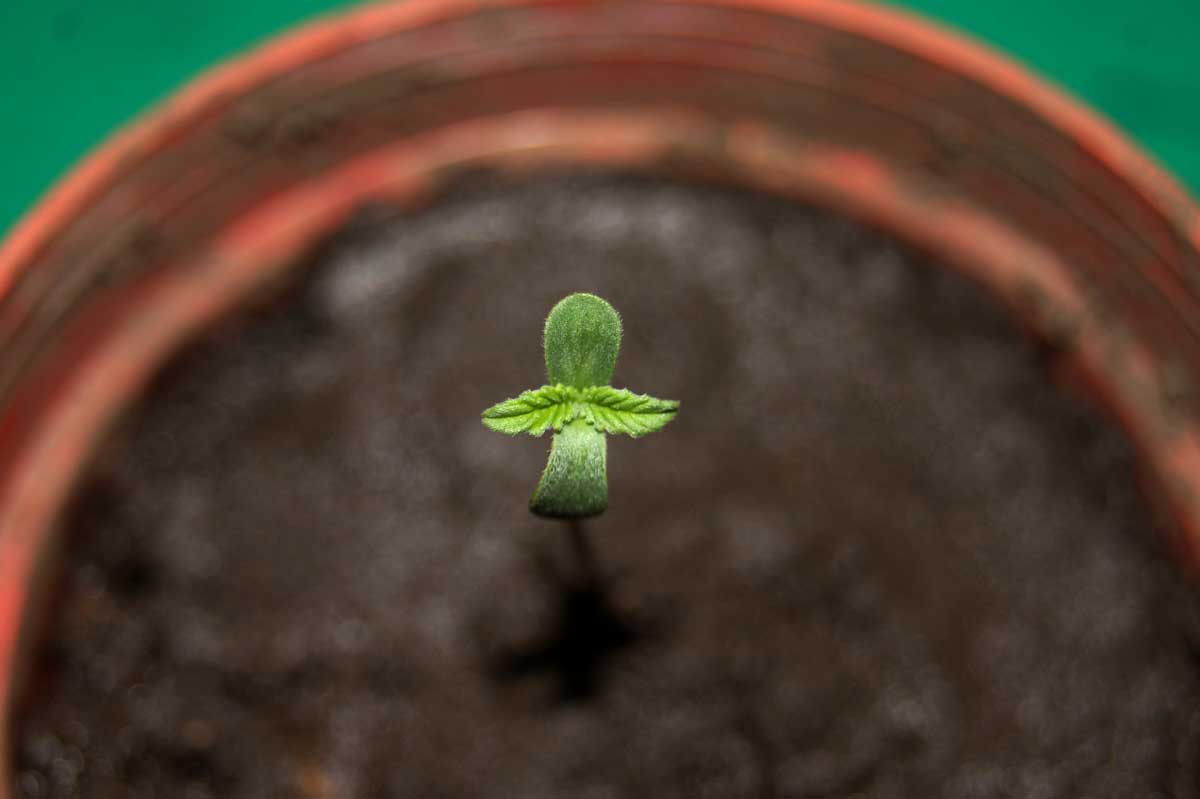
Seeing those first few leaves is exhilarating! The very first two leaves you see will be round (called “cotyledon” leaves) but all the leaves after that will be “real” leaves with serrated edges.
After you see those leaves peak above the surface, it’s time to move your grow light down, so it’s about 2 feet above your plants.
Checklist:
- Move grow light to 2 feet above seedlings after they appear
- Watch for any signs of discoloration or drooping (refer to common seedling problems list below to fix most seedling problems)
- Make sure Rapid Rooter never dries out all the way
During these first few weeks of a young marijuana plant’s life, you want to be careful. Make sure you’re checking on your plants every day! Once you get used to growing, you can check less often, but in the beginning you will get the best results by checking on your plants at least daily. That will let you react quickly if you somehow run into any problems.
Marijuana seedlings, especially seeds from some of the most potent strains, tend to be a bit delicate and you want to make sure you’re taking care of them as best you can.
When the Rapid Rooters feel like they are starting to get dry to the touch (they should be a little moist at all times), it’s time to water your plants for the first time!
Watering Your Plants the First Time
- Fill your 1-gallon container with tap water
- Add nutrients to your water following the nutrient schedule (PDF) for seedling strength
- Check the pH of the water with your pH test kit.
- If the pH is higher than 6.5 or lower than 5.5, you’ll want to adjust it. Just add a little bit of PH UP or PH DOWN so it’s between 5.5-6.5. This tiny step takes less than 5 minutes and will make your plants grow much faster and healthier! Learn more about checking the pH.
- For now, pour the water slowly in just a little circle around the plant. Pouring slowly will help the water absorb into the coco better. You want to make sure the Rapid Rooter gets nice and moist, and wet the coco coir for at least a few inches around the edges of the Rapid Rooter so that seedling roots are getting plenty of water. You want to avoid giving too much water at a time just yet, as your seedlings can’t drink much water until they get a little bigger, and if they keep getting “wet feet” it can stunt their growth. As long as you share the 1 gallon between all four plants, over-watering shouldn’t be a problem!
Fixes to Common Seedling Problems
Here are the 5 most common seedling problems:
1.) Overwatering
2.) Underwatering
- Symptoms: Drooping leaves and/or wilting
4.) Too Much Heat
5.) Light Too Close or Too Far
- Symptoms ( light too close): burned or crinkled leaves
- Symptoms (light too far): seedlings are too tall with too much space between nodes. Looks stretched/leggy and tends fall over
The “vegetative” stage is the stage of life where you cannabis plant is growing only stems and leaves, without any buds. Once your plant has grown 3-4 sets of leaves, you can consider it officially in the vegetative stage!
When plants have a few sets of leaves (nodes) move 250W HPS to about 1 foot above plants. Place the back of your hand over your babies for 30 seconds to make sure it’s not too hot.
For an auto-flowering plant, the vegetative stage only lasts for about 3-4 weeks before the plant starts making buds. However, even after buds start forming the plants will still grow vegetatively and increase in size until they’re 5-6 weeks old.
Now that your plants are a little bigger, you should start watering your plants this way from now on:
- Wait to water plants until the top of the coco is dry up to your first knuckle
- Alternate each time between giving plants nutrient water and plain water
- Water plants thoroughly (always check pH right before watering plants even if using just plain water), until 10-20% extra runoff water comes out the bottom
- Remove all runoff water about 5 minutes later (to give it all a chance to get out)
Learn more about how to water cannabis plants
Daily Care & Tips for the Vegetative Stage
- Follow the nutrient schedule when watering plants, but make sure you’re giving plain pH’ed water every other watering. Always check the pH of water immediately before giving to plants.
- Check on plants daily – look over the plants for problems, discolored leaves, droopiness or any other symptom
- Immediately diagnose any problems and fix them as soon as possible! If you just pay attention to your plants daily and quickly respond to any problems you will get above-average results! The most common reason to see deficiencies is the pH is too high or low.
- Water plants as needed. Never let the coco coir completely dry out or it could kill your plants!
- Make sure 250W HPS is about a foot away from your vegetative plants – put your hand where the seedlings are for 30 seconds; if it’s too hot for you it’s too hot for your plants and the light should be moved up a little bit. If you have a new bulb you may have to keep your light slightly further away than an older bulb.
- The main thing is to avoid any major stress because these first few weeks are important!
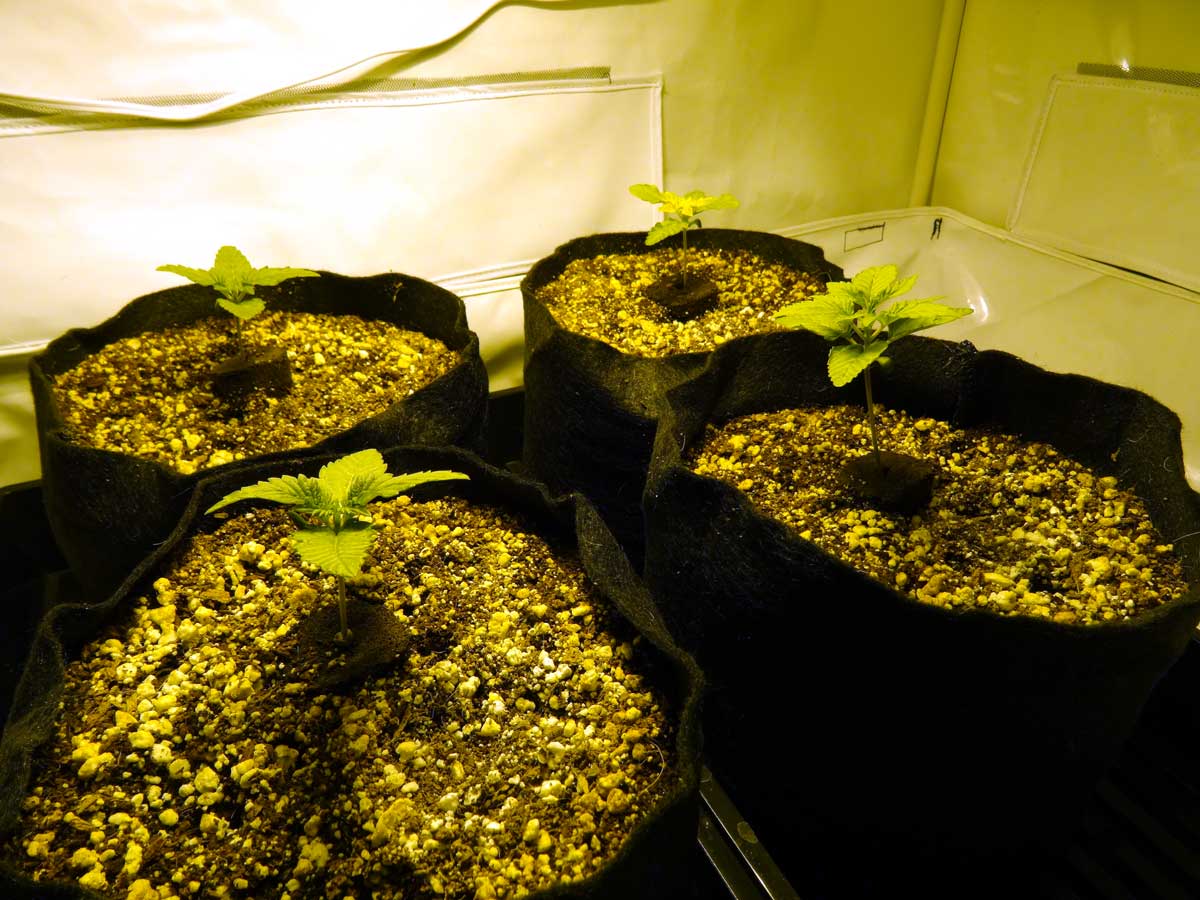
Your seedlings should look something like this during Week 2 from seed
Plant Training for Bigger Yields (Optional)
You don’t need to do this part! You can skip it altogether and your plants will grow just fine. But a little plant training can help increase your yields for free, so why not?
The idea behind plant training is to manipulate your plants while they grow so they tend to grow more short and wide as opposed to tall and thin. You want to “spread out” the plants under the grow light instead of growing tall Christmas Tree shaped plants.
The main way to do that with auto-flowering plants is to watch the plants as they grow and bend any tall stems down and away from the middle of the plant. Then secure the stems in place with something that isn’t sharp, like plant twist ties. By constantly bending over the tallest stems whenever you spot them, you’ll make it so all parts of all the plants are about the same height as each other, in a flat, table-top shape.
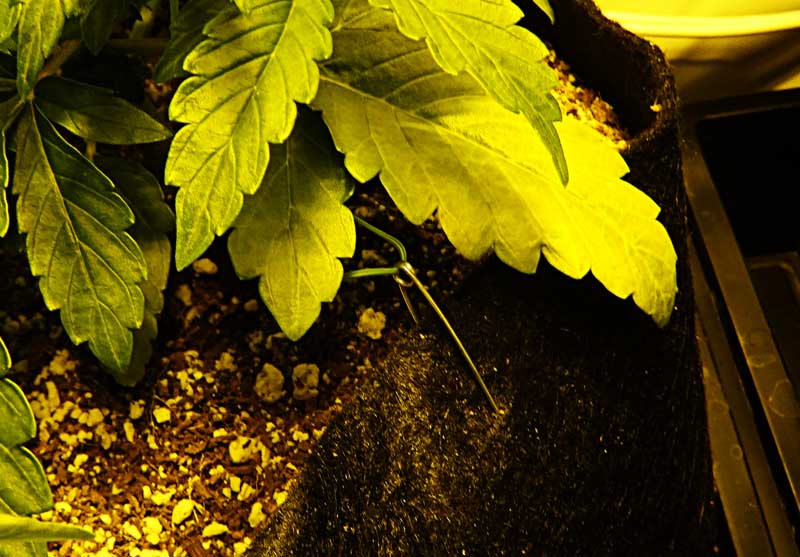
Here’s an example of some light LST (low stress training) on a very young seedling to pull the main stems down and away from the center. This was the tallest seedling of the bunch so the grower is trying to keep it about the same height as the other plants. It’s starting the process of getting the plant to grow wider.
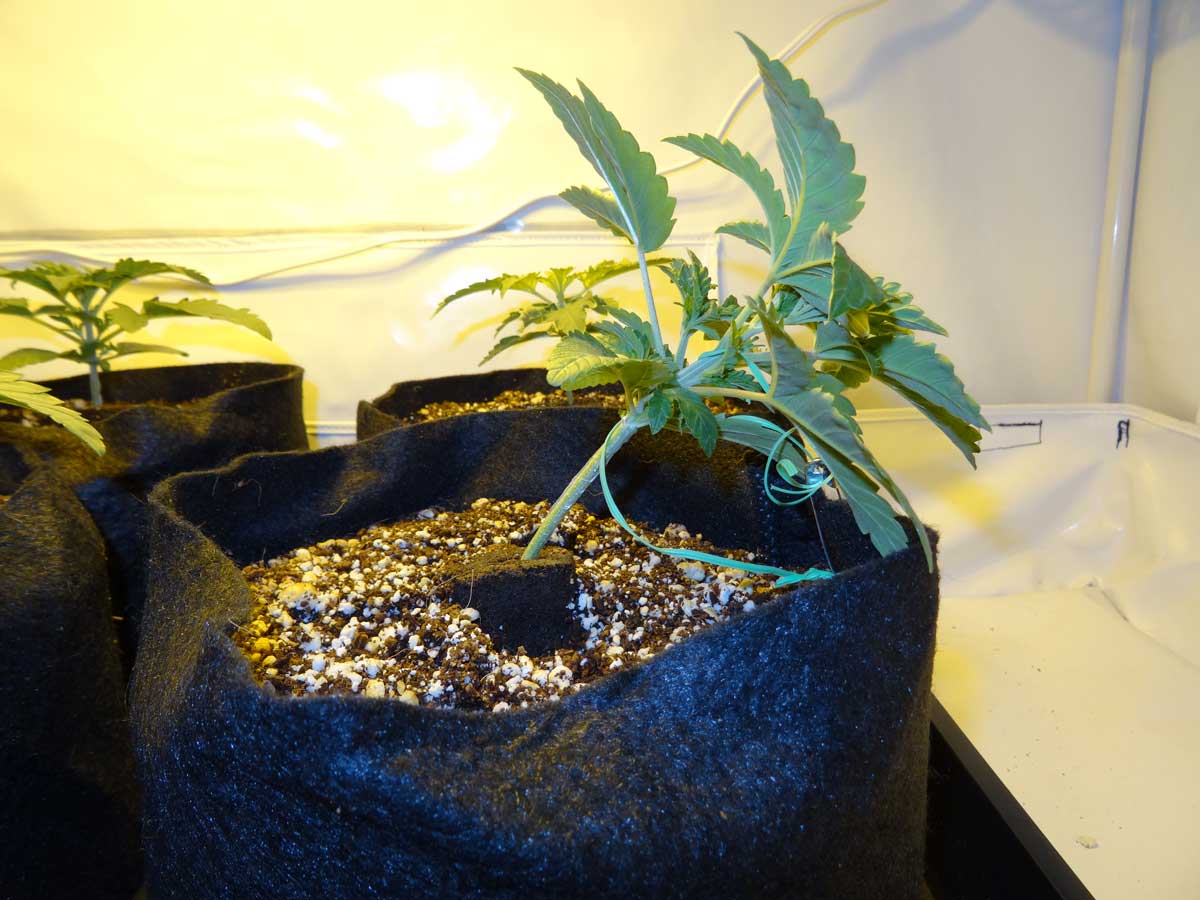
You can secure twisty tie to your smart pots with a safety pin
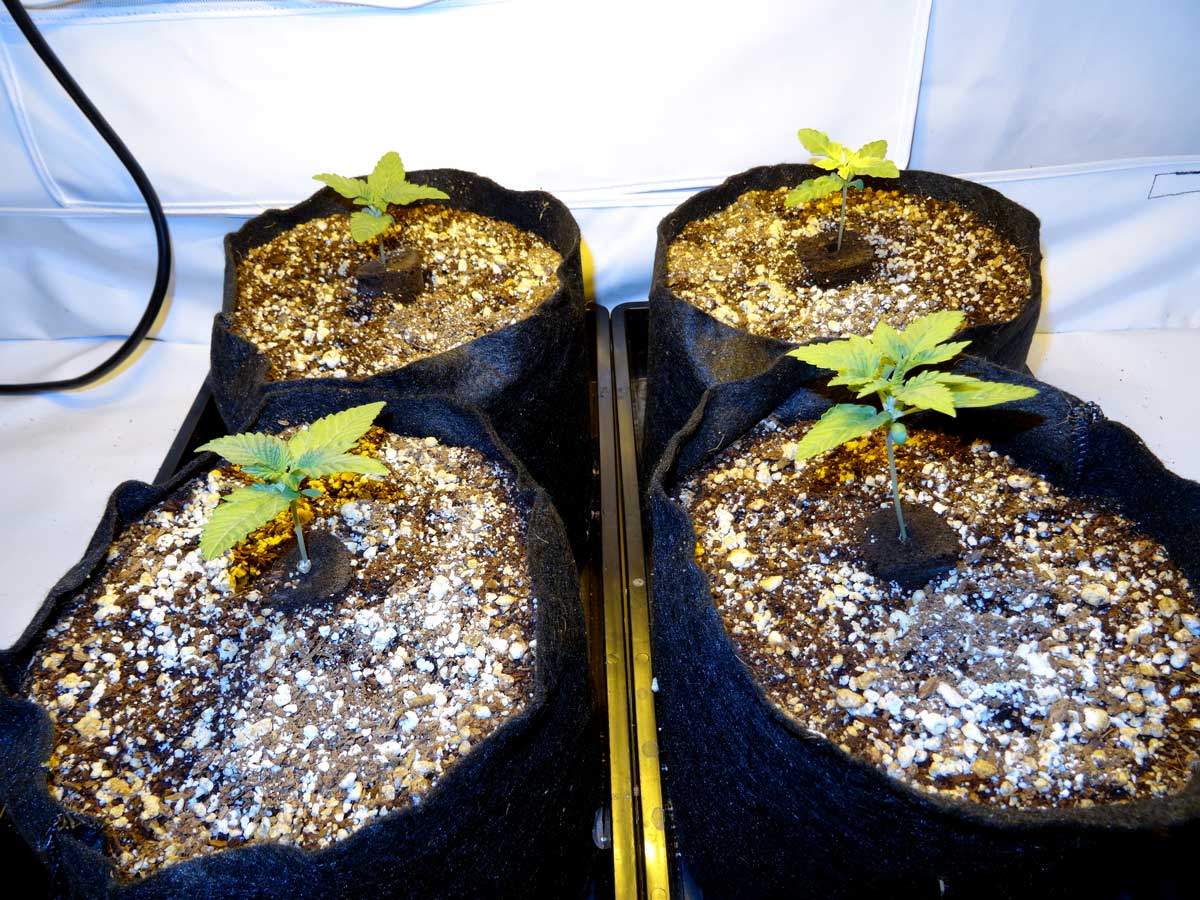
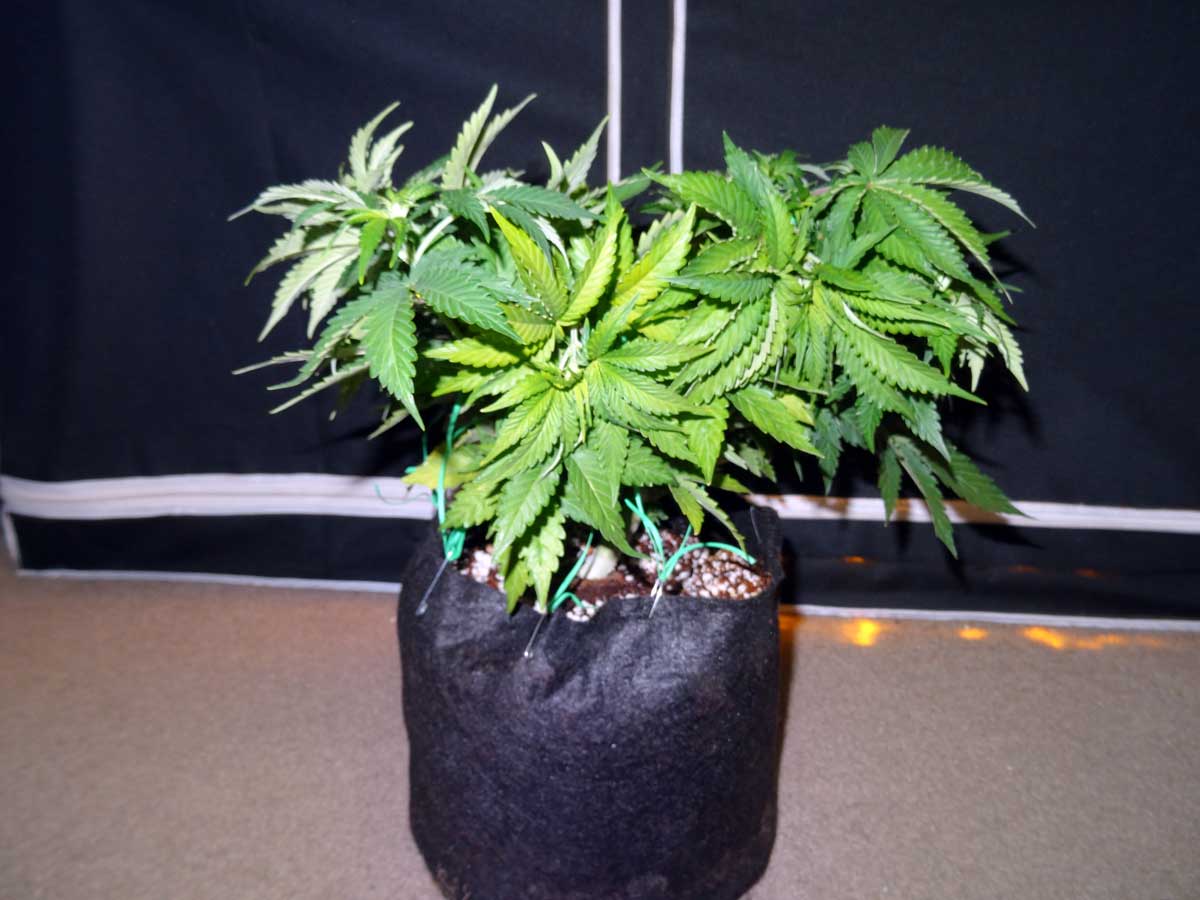
By the end of Week 2 or 3 your plants should look something like this
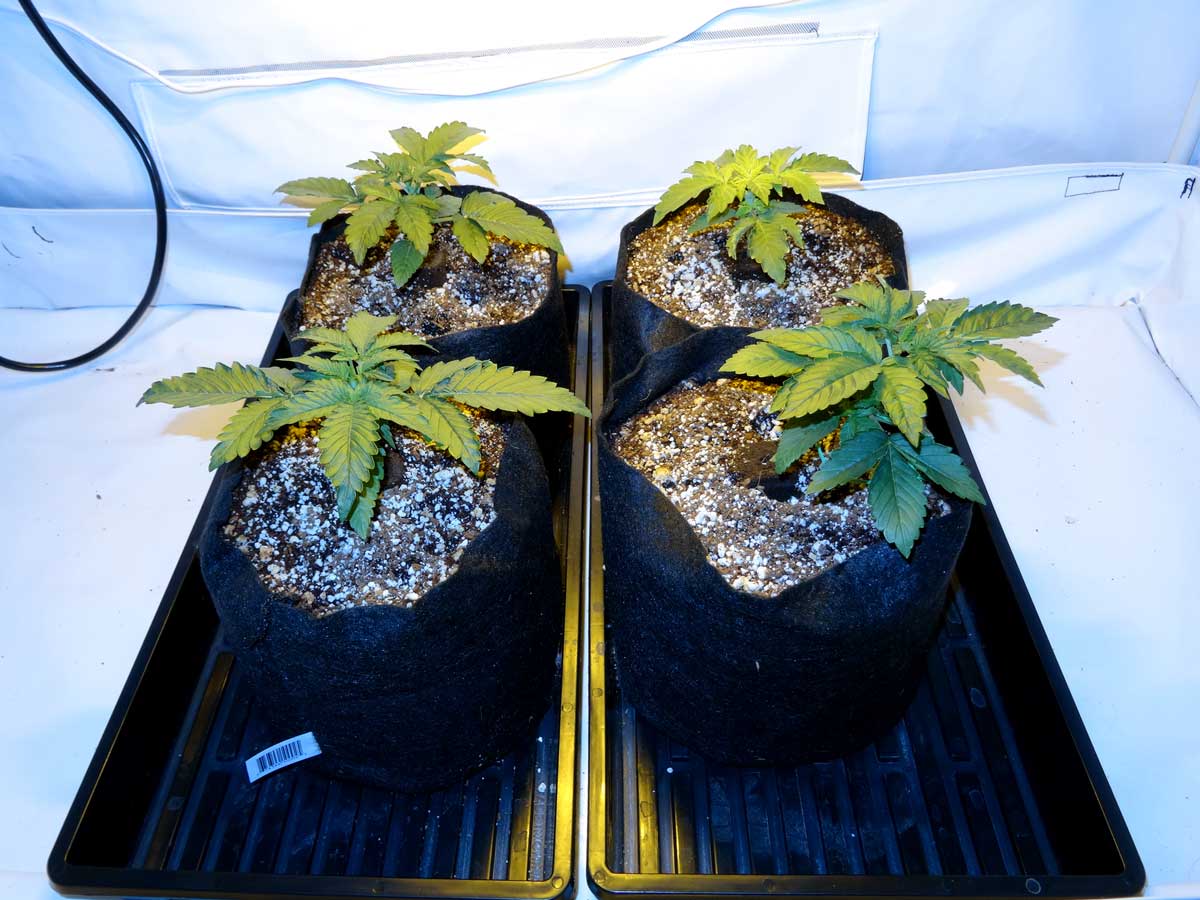
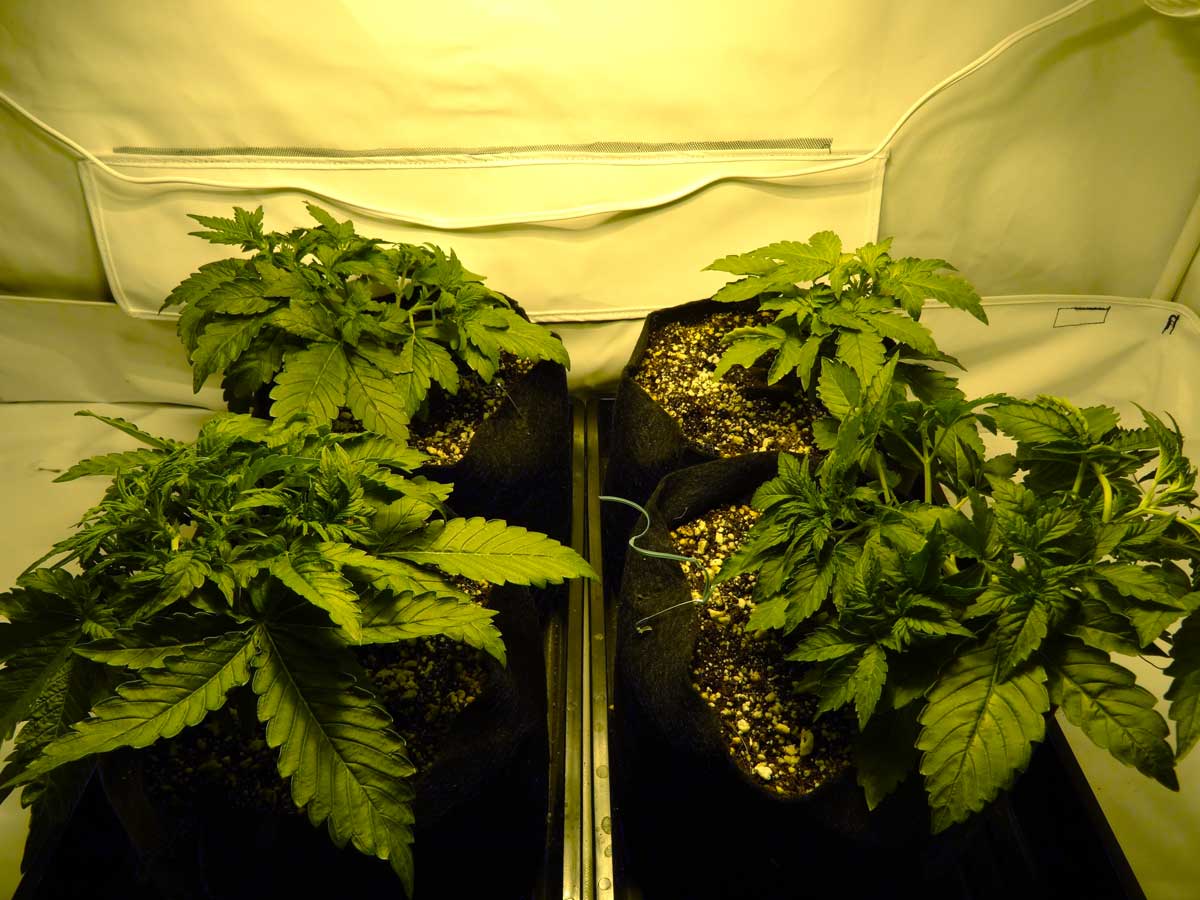
Around Week 3-4, your plants should be nice and flat from the training. Sometimes you’ll have plants that just grow faster than others. You can see the back right plant is much smaller than the others here, but it actually ended up yielding just as much! It just had a little bit of a slow start. As long as your plants are growing and appear green and healthy you know you’re doing good by them!
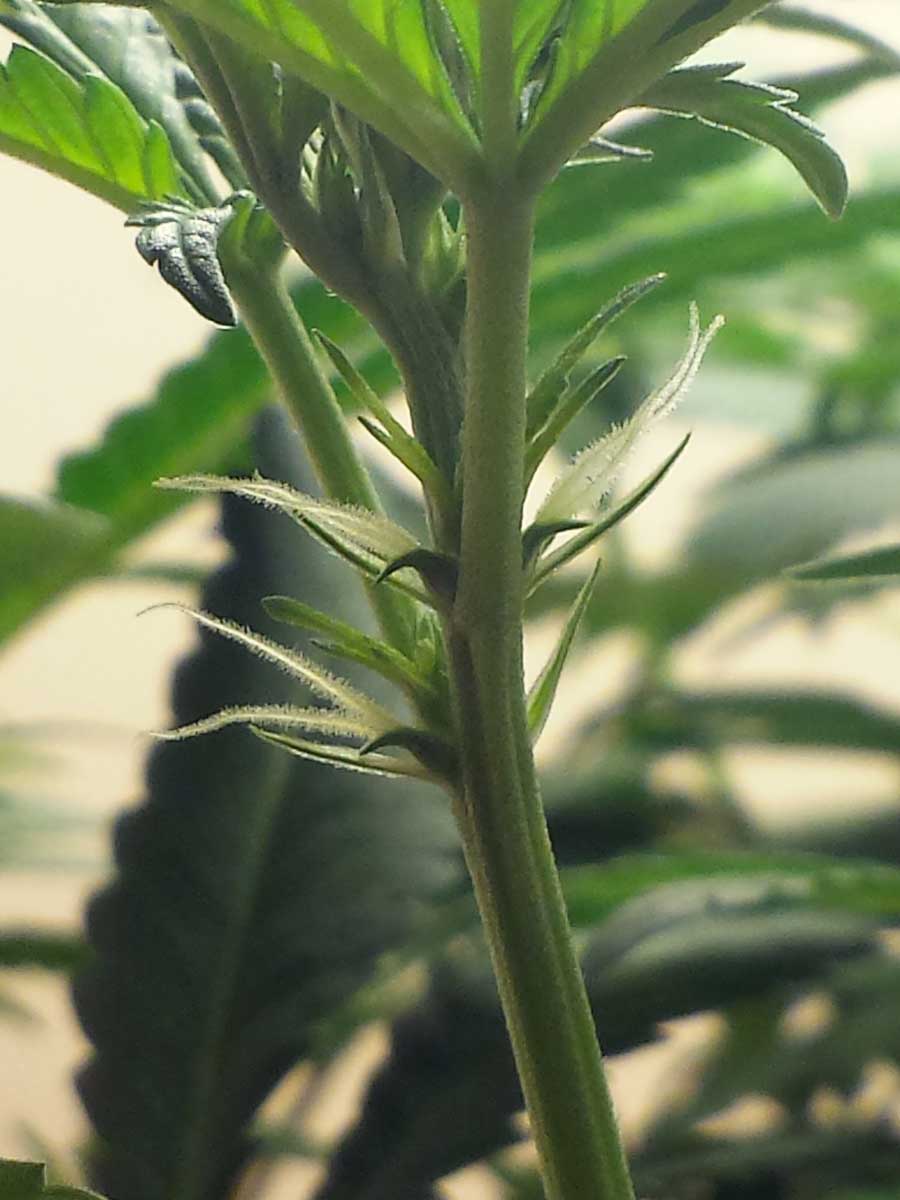
Once your plants are around Week 3-4 from seed, they’ll start showing the first signs of buds growing. The new buds will initially look like wispy white hairs at all the joints of the plant, but these hairs (pistils) will soon start turning into buds with weight to them!
Daily Care & Tips
Around week 3-4 you’ll start seeing wispy white pistils at all the joints where fan leaves meet the stem.
Around week 5 they’re still growing lots of new leaves and stems, and those “buds” are still mostly just a bunch of white hairs at the joints
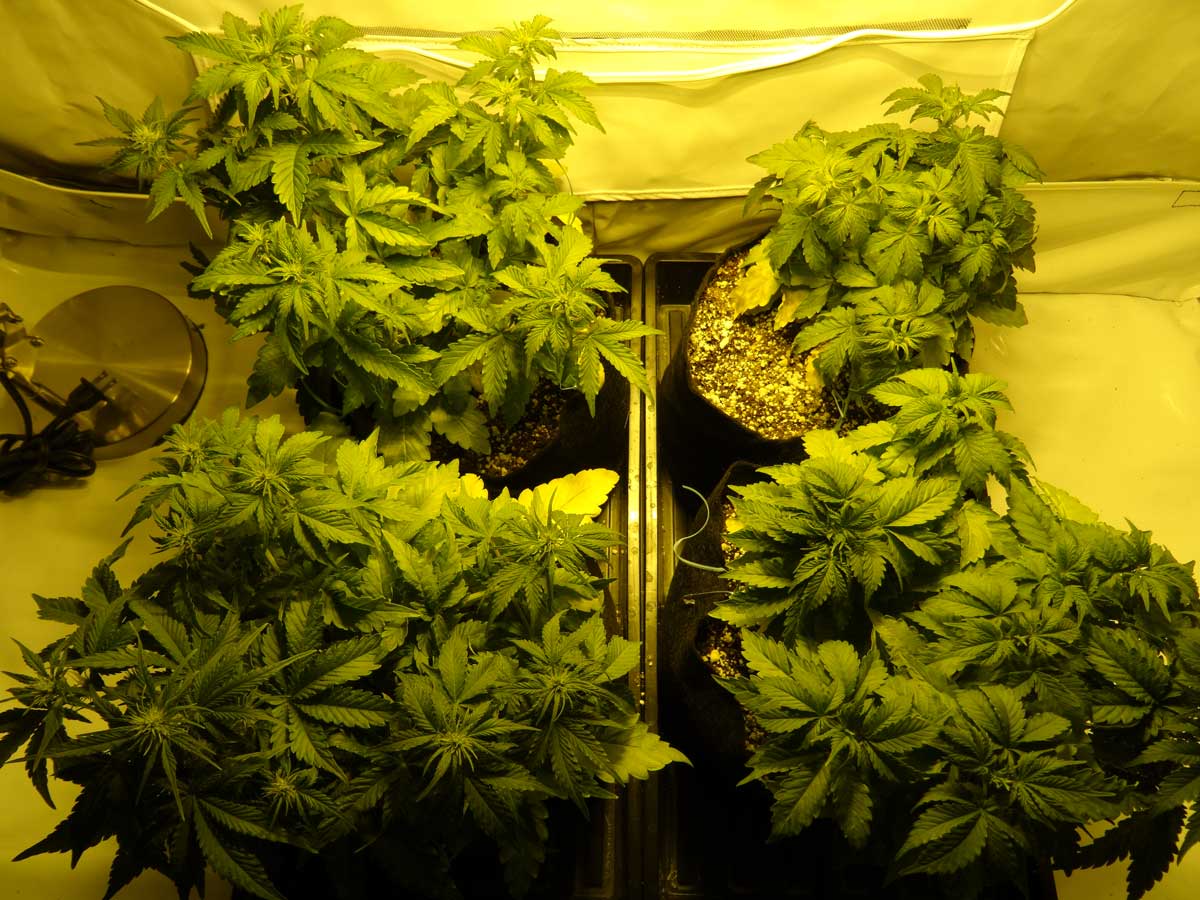
Notice how from the side they have been maintained in a flat, table-top shape. By constantly bending the tallest stems down and away from the center of the plant, your plants will automatically be growing in this shape.
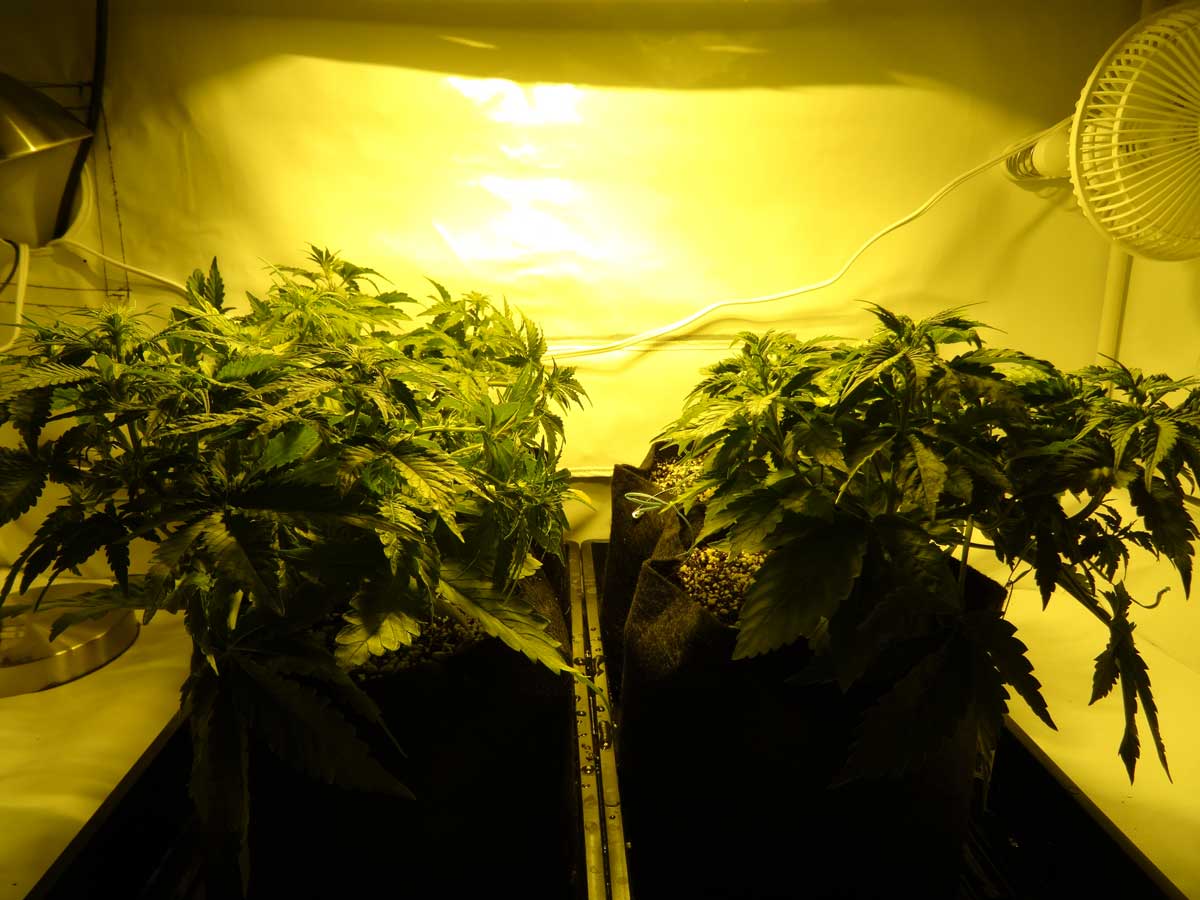
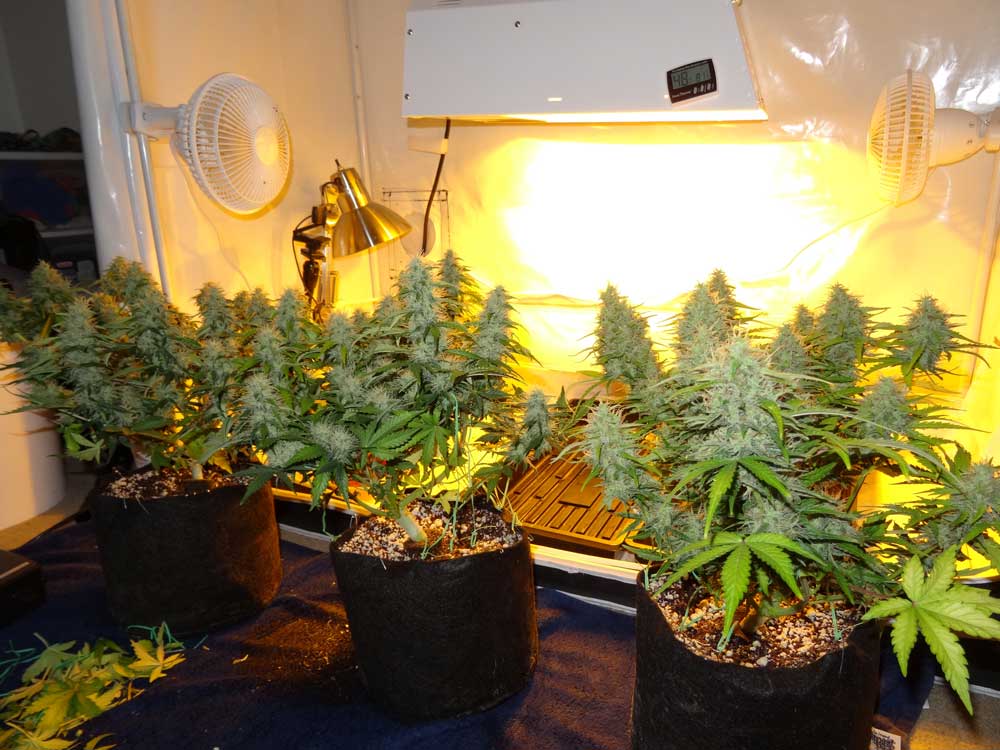
Here are the plants at the beginning of Week 6
A view from the side
During Week 6 you may notice the main stems look sort of “stretchy” as all the bud sites have lengthened. By this point you’re basically just watering your plants and waiting until harvest time, because there’s not much left to do. You can still gently bend tall stems down, but after week 6 your plant is going to focus primarily on buds and stop growing new stems and leaves altogether.
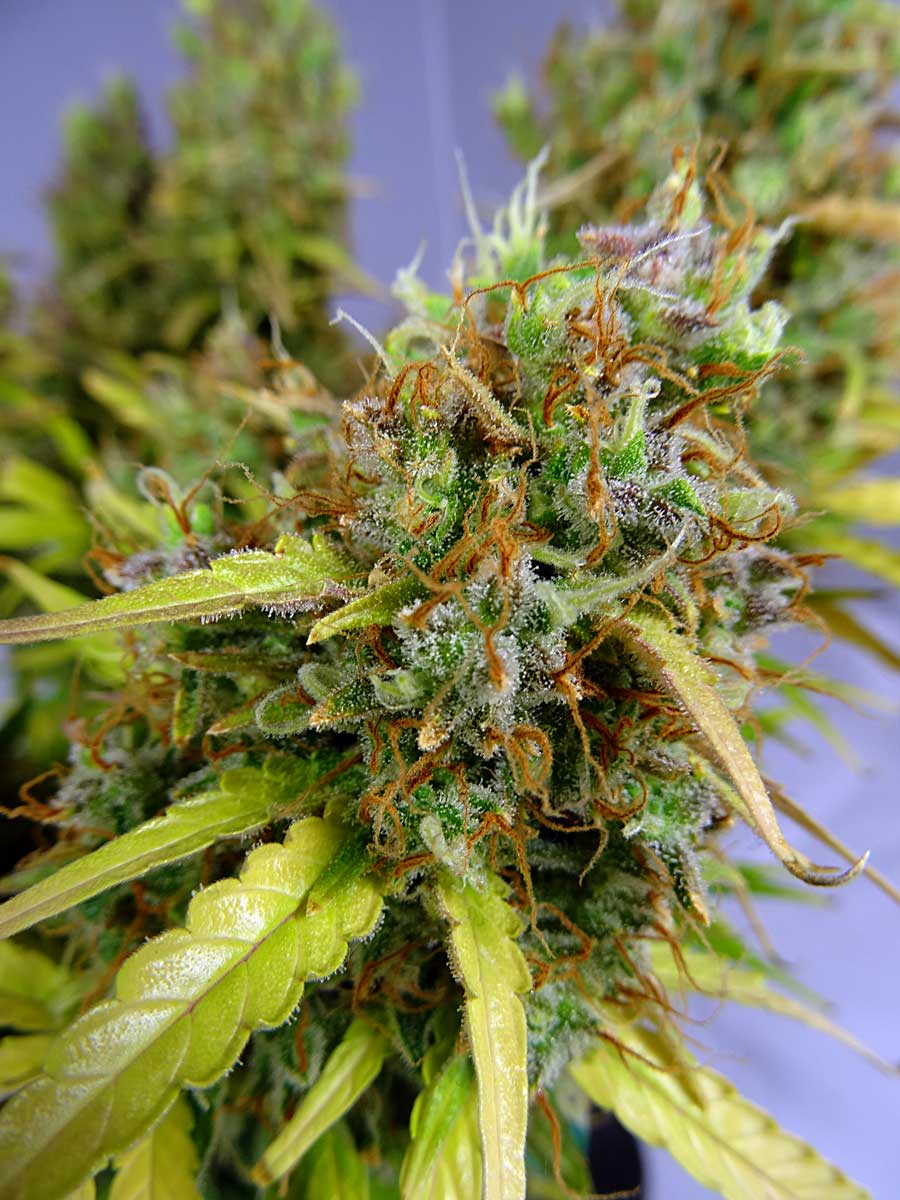
Up close your buds might look something like this around Week 6
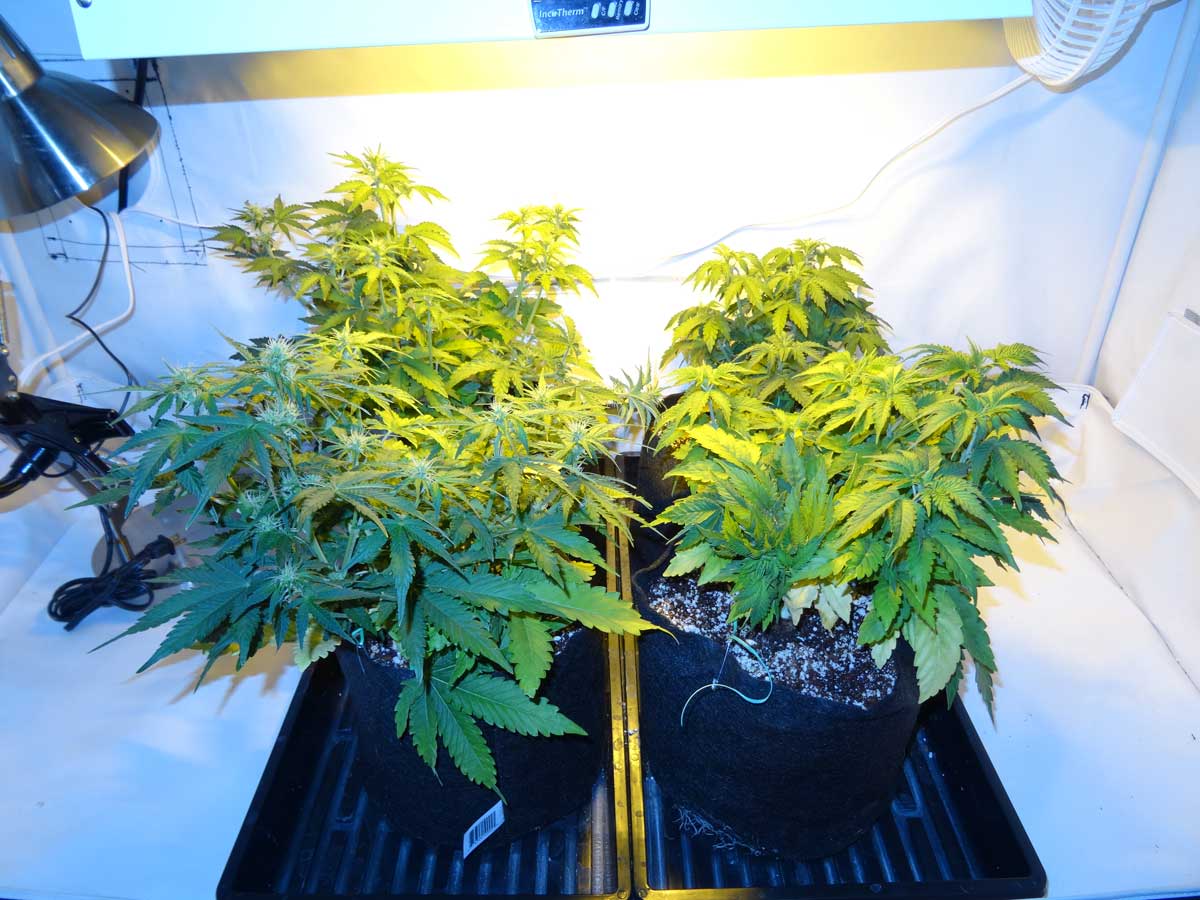
Example of Training at Week 6 – Before Bending/Training

After bending – Notice how all the stems have been bent down so the plant appears flat like a table. Week 6-7 is around the last time you want to train with your plants. After this it’s mostly a matter of letting them fatten up.
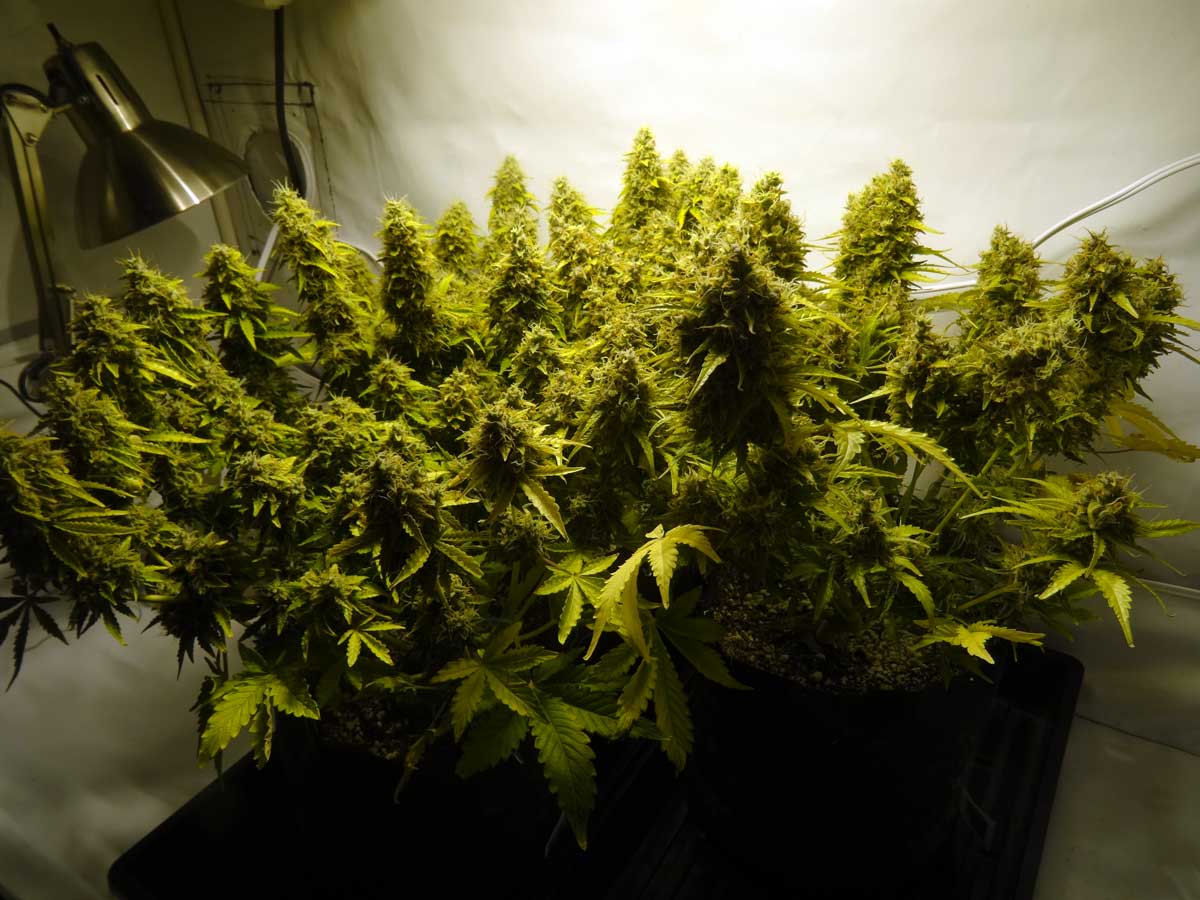
Here are the buds at week 8

The hardest part about growing (at least for me) is waiting for the plants to finish flowering and making buds. It’s exciting while the plant is still growing and changing shape, but there is going to be at least 4-6 weeks where the plant isn’t growing vegetatively anymore and all growth is just buds fattening up and gaining in potency.
It’s hard to be patient while the plant is growing buds, and it’s really easy to take the plant down early. However, if you harvest early your yields and potency will be greatly reduced!
Most autos take about 12-14 weeks from seed before they’re ready to harvest (~3 months), though some strains take a few weeks longer. When choosing strains, you can see from the breeder’s estimations how long they think this strain will take.
Most autos are ready to harvest about 12-14 weeks from seed (~3 months)
If you want to get the best yields and highest potency, it’s been my experience that your auto will usually take 2-3 weeks longer than the breeders recommendation. However, sometimes they’re right on target so it’s important to watch your plant!
You don’t really need to do much else from now on besides water your plants and just check on them for possible problems.
What if a plant doesn’t auto?
One time I grew an “auto-flowering” plant that didn’t automatically start making buds. This happens sometimes, especially with less experienced breeders. This is why it’s so important to purchase auto-flowering strains from a trustworthy breeder! I learned my lesson 🙂
Even though I lost one plant because it didn’t auto (again, make sure you always buy from a trustworthy breeder!) this setup is so effective I still yielded almost 7 ounces with just the remaining 3 plants. You can see the “hole” in the canopy where that 4th plant used to be.

If one of your plants isn’t “auto-ing” you can choose to toss the plant (that’s what I would do if you have limited space and several other plants)
Your other option is to keep it in the same tent until the other plants are ready to harvest, and then put it on a 12/12 light schedule to force it to start making buds after you’ve already harvested the other plants (you can force any cannabis plant to start making buds if you give it 12 hours of uninterrupted darkness every day).
However, if it doesn’t start making buds, that means it’s going to keep getting bigger, making more stems and leaves every day (stay in the “vegetative stage”). It may be difficult to “tame” a plant like that while your other plants have stopped growing vegetatively, but it can be done.
Despite missing a plant, there were still lots of developing buds from the other three!
Don’t want to put any auto-flowering plant that has automatically started making buds on a 12/12 schedule because it will hurt your yields. Your plants can make a lot more bud under 18 hours of light a day than 12 hours of light a day. This is one of the main reasons autos are able to yield so much bud so fast!
As buds mature they fatten and become more dense. The white hairs that used to be sticking straight out start to darken and curl in.
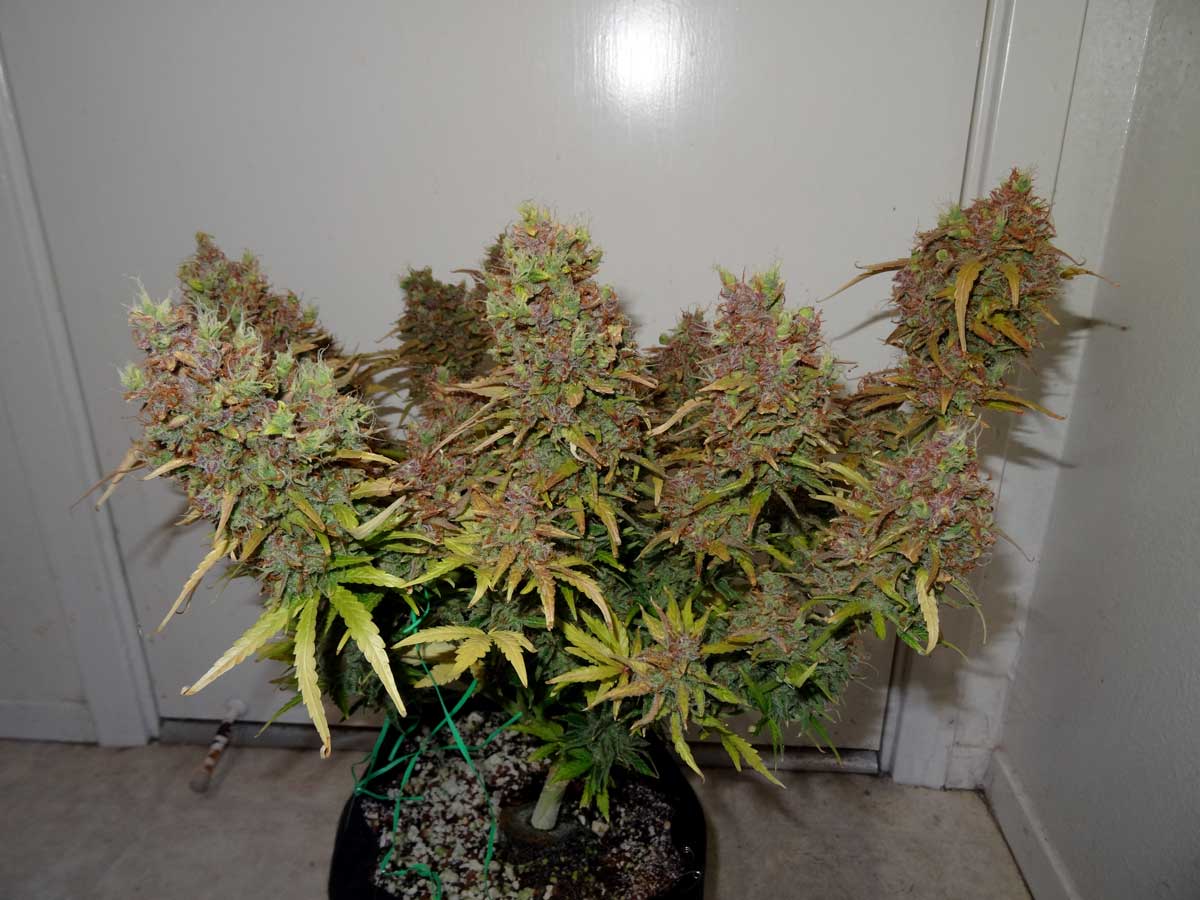
Oh boy! You made it! Time to harvest your plants!
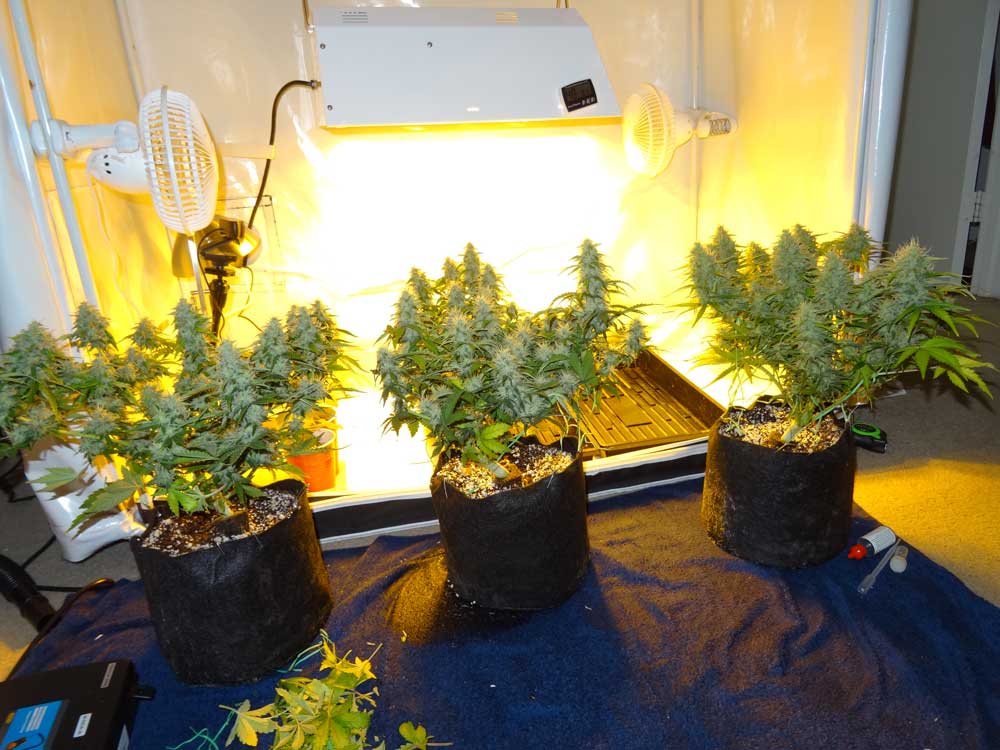
These are the same plants a little over 3 months from seed (13 Weeks)
How to Know Exactly When to Harvest
There are two main ways to determine when to harvest, either by looking at the pistils/hairs, or looking at the trichomes (“glitter”) on the buds under a magnifier.
Your plant is ready to harvest…
- After most of the white pistils (hairs) have darkened and curled in
- After most of the trichomes have turned milky white
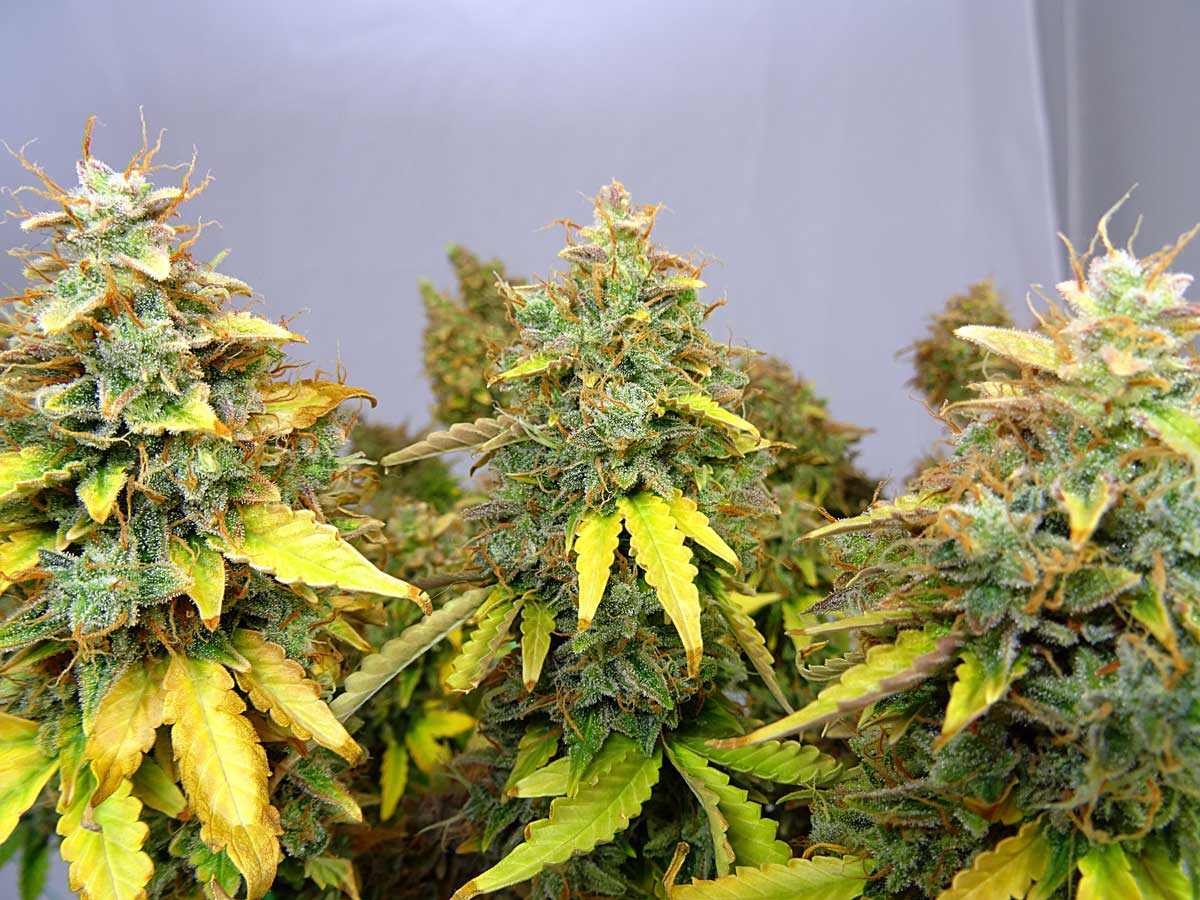
These buds are ready to harvest
(learn more about how to harvest at the right time)
Here’s a video of the trichomes from a plant the day before harvest under a digital magnifier. Most of the trichomes are opaque and white, which means these buds are ready to harvest
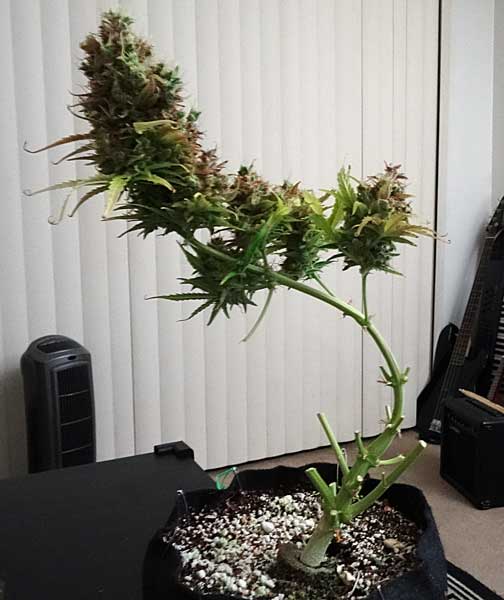
The structure of one of the plants “under the hood” after it’s been harvested
Learn more about when to harvest!
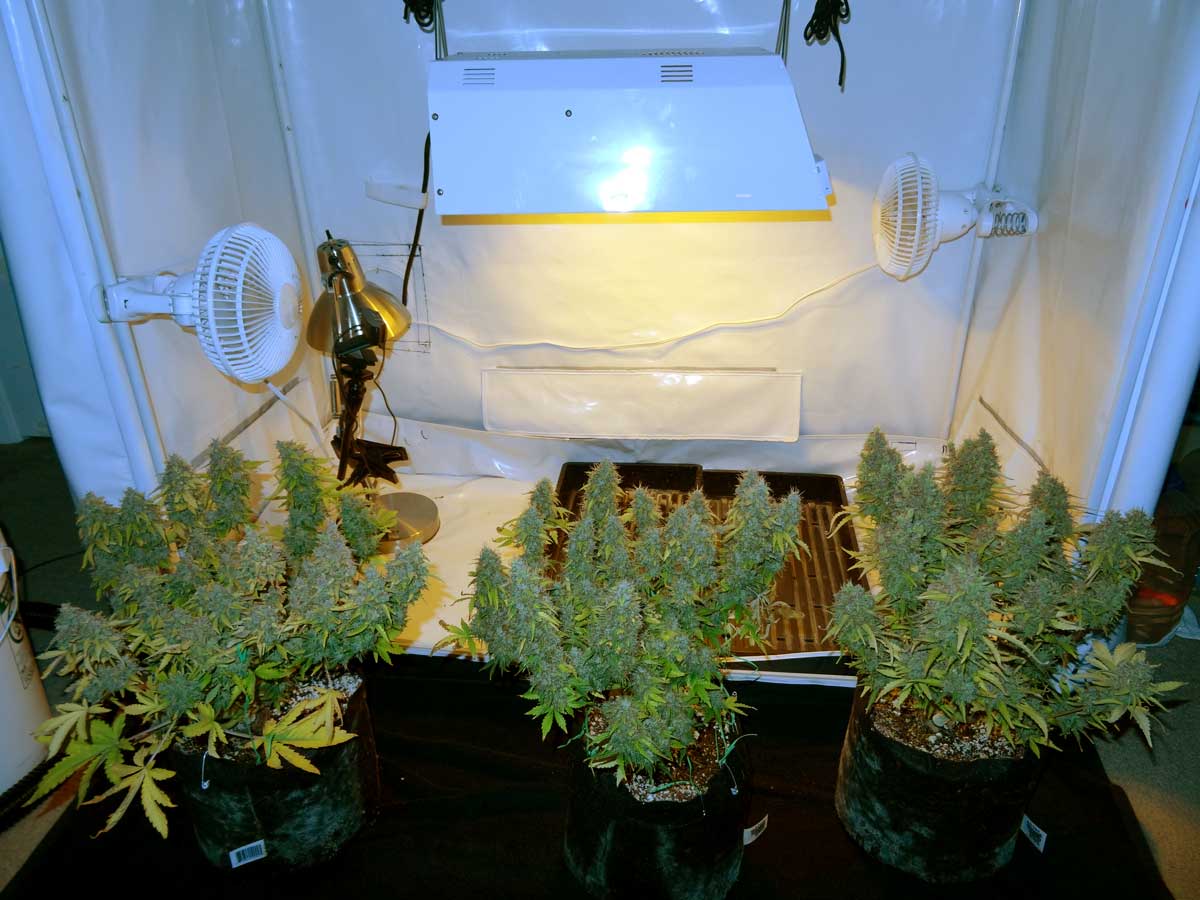
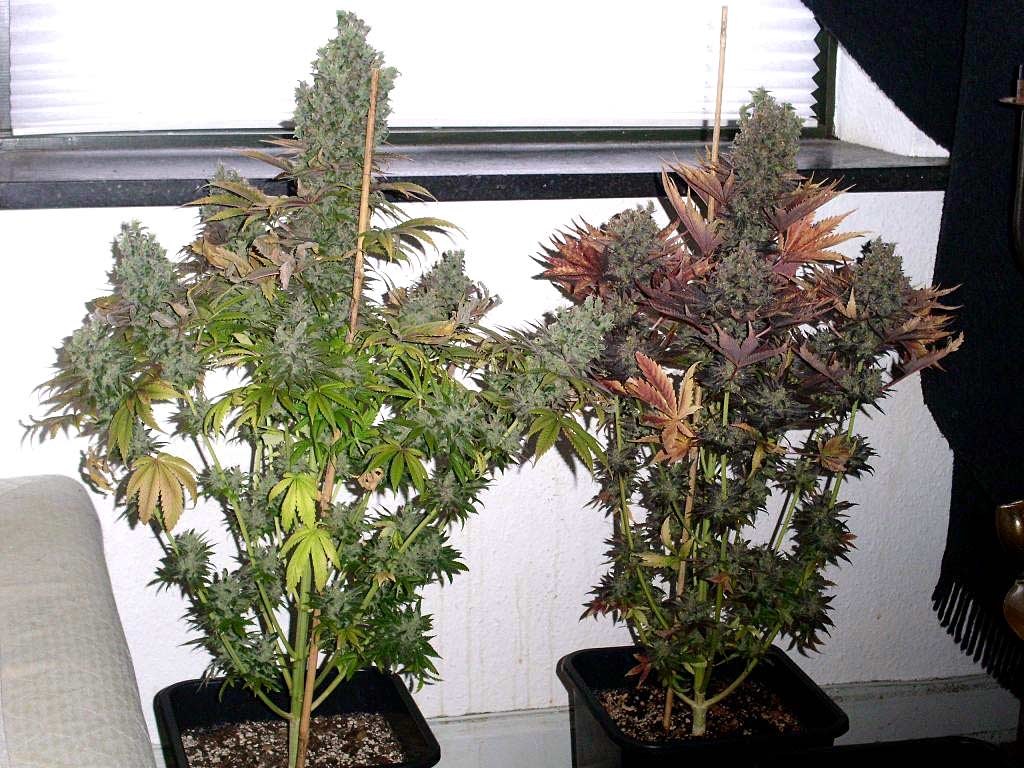
Here are those 3 auto-flowering plants from above at harvest (I pulled them on 3 different days)
(6.7 oz yield in total – check the grow journal!)
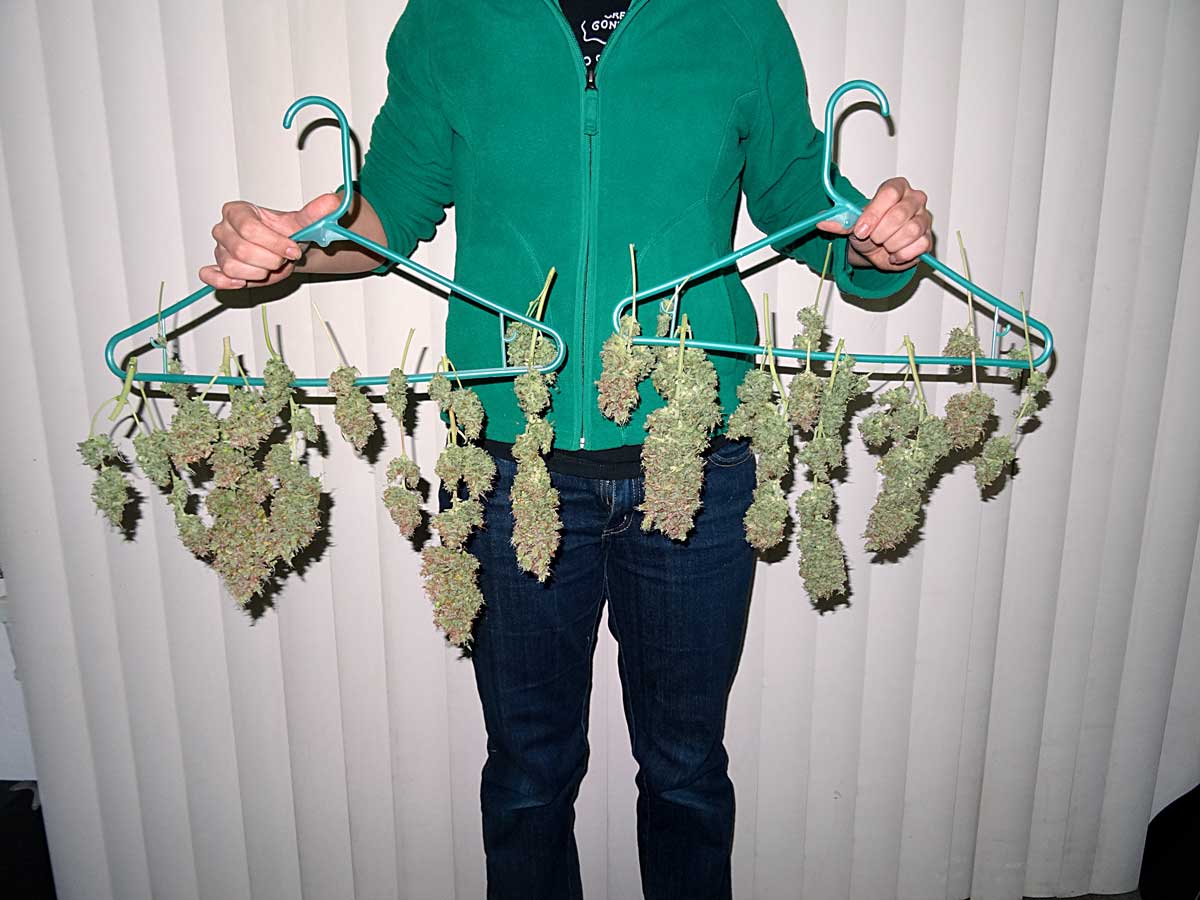
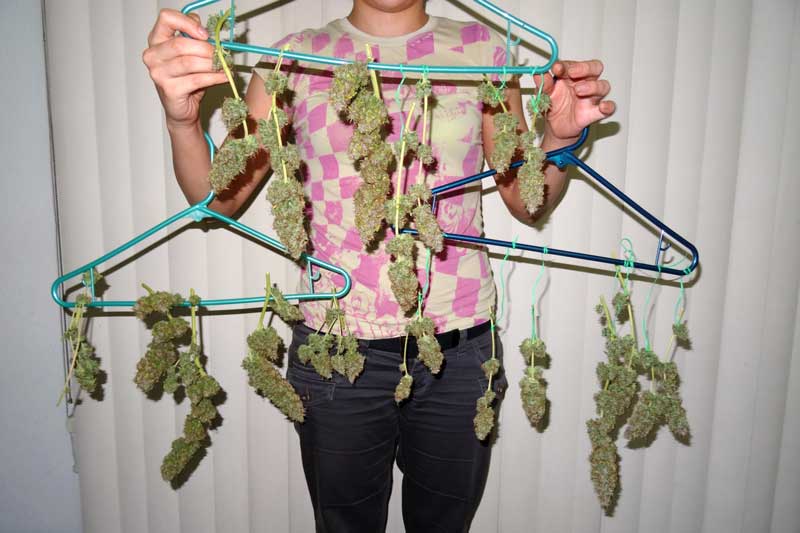

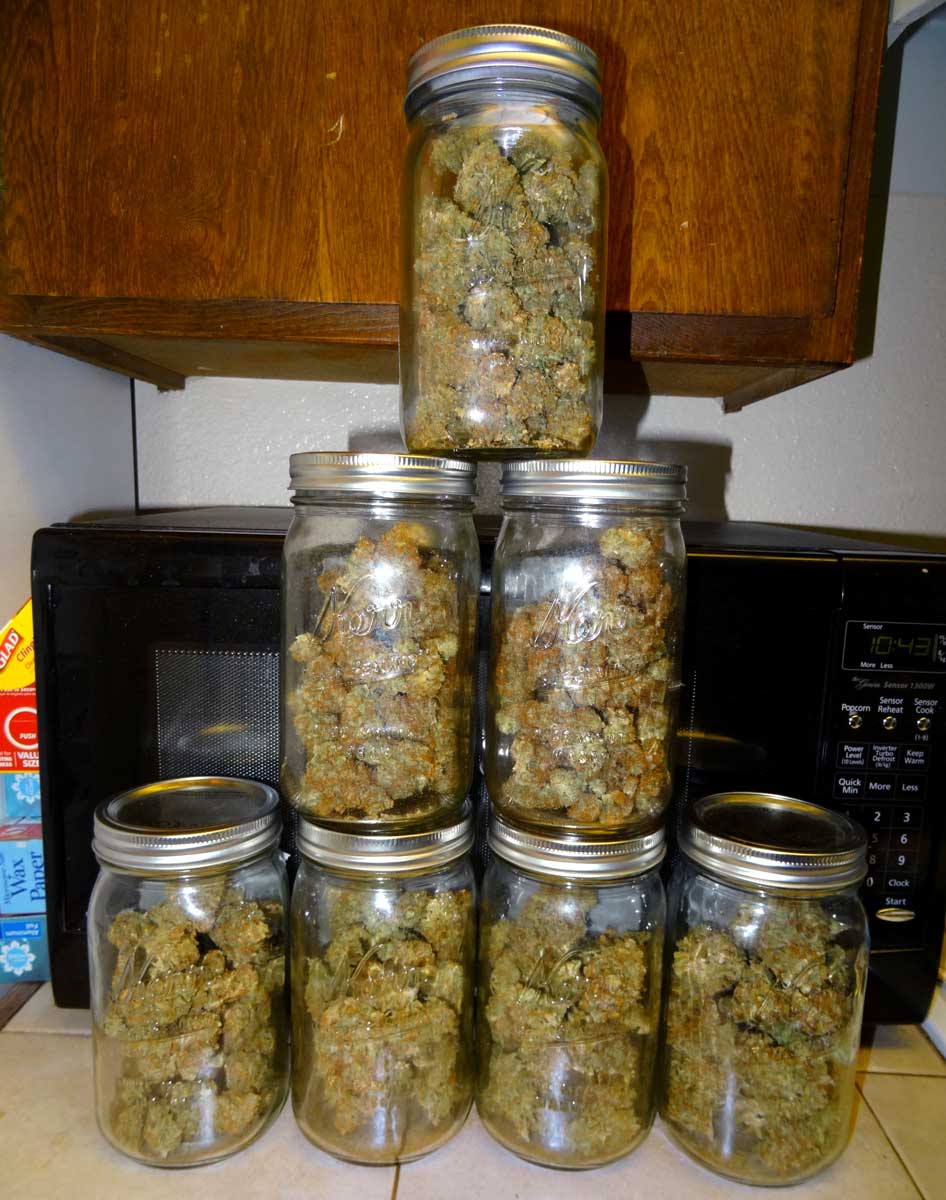
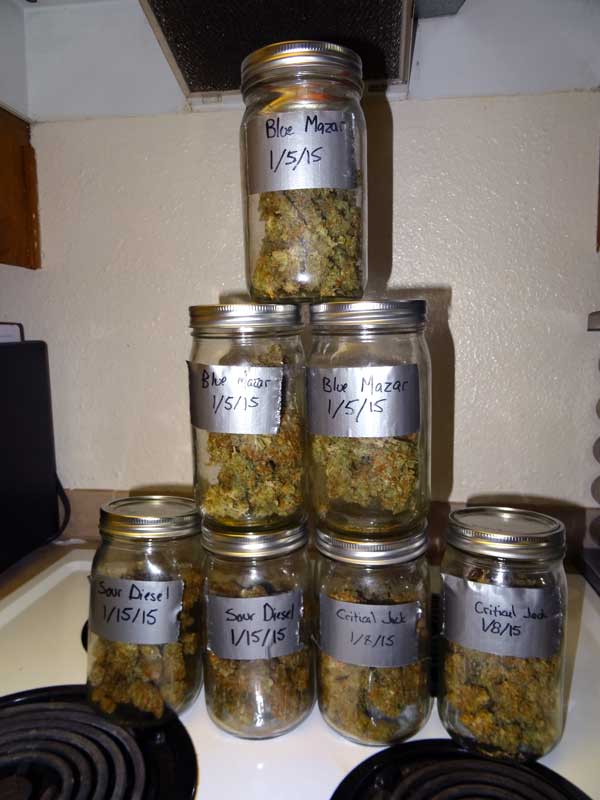
How to Dry & Cure Buds for Better Potency
Now that your plant is harvested, you need to dry and cure your buds for the best results! By drying buds slowly and letting them sit for a few weeks before you smoke them, you will dramatically improve their taste, smoothness and perceived potency! Don’t skip the dry and cure because it can make up a great deal of the final quality of your buds. You’ve come way too far to give up now!
The main idea of drying and curing is to slowly dry your newly harvested buds, then let them sit in a sealed container for a few weeks for the “green” stuff to start to break down and other important chemical processes. This dry/cure process will make buds taste better, smell better, and feel more potent!
Learn how to dry and cure your buds here!
Jump to…
Auto-Flowering vs Photoperiod Strains
Plant Training for Bigger Yields
1st Grow in My Garage – Auto Northern Lights – 5.35 oz Harvest
5 Ways to Increase Yields When Growing Indoors
Cost Breakdown (Including Electricity)
Total Cost for Setup & Supplies: $652
($742 if you get all the optional stuff)
Cost for Complete Setup & Supplies First Grow: $652
Setup Cost for Setting Up 2nd Grow: $122 ($50 for new seeds and $72 for new containers and coco coir)
Most of this stuff can be purchased for cheaper if you shop around online or in person!
Seed Budget: $50
- In general you can expect to pay about $12/seed for feminized auto-flowering seeds, though some cost more or less. Generally most seedbanks will also throw in a few free seeds with every order.
Growing Medium & Containers: $85
- $40 – Pre-Made Coco Coir Potting Mix (or make your own for cheaper)
- $21 – 4 x 3-gallon Smart Pots
- $11 – Rapid Rooters
- $13 Trays to Catch Runoff Water
Nutrients: $52
Grow Tent: $216-276
- $26 2x small clip-on fans
- $60 (Optional) Window fan
250W Grow Light: $154
- $65 – Reflector
- $80 250W Ballast
- $9 250W Bulb
Random Grow Tools: $95-125
- $20 Power strip
- $10 Electrical timer
- $10 Rope Ratchets (best way to hang lights, don’t skip these!)
- $10 Measuring spoons
- $5 Dropper/Pipette (for pH testing)
- $5 (Optional) Plant Twist Ties
- $25 (Optional) Bucket Head Wet/Dry Vacuum
Total Cost of Electricity: $30-60/Month
This includes the cost of running the grow light and fans. The average electricity price in the US is $0.12/kWh, and the average price in a big city is $0.25/kWh. I’ll make estimates for both. If you have cheap electricity where you live, your amounts will be even less!
250W Grow Light: $17-35/month
Total Hours/Month: 31 days x 18 hours on each day = 558 hours (total hours with 250W HPS turned on in a month)
Wattage: 250W
At $0.12/kWh – $16.74/month
At $0.25/kWh – $34.88/month
HOURS x COST/HOUR = Total Amount
558 x (0.12 x 0.250) = $16.74/month
558 x (0.25 x 0.250) = $34.88/month
Exhaust Fan: $7-14/month
Total Hours/Month: 744 hours (31 days x 24 hours/day)
Exhaust Fan: 75 watt
At $0.12/kWh – $6.70/month
At $0.25/kWh – $13.95/month
HOURS x COST/HOUR = Total Amount
744 x (0.12 x 0.075) = $6.70/month
744 x (0.25 x 0.075) = $13.95/month
2 Oscillating Fans: $6-12/month
Total Hours/Month: 744 hours (31 days x 24 hours/day)
Exhaust Fan: 30 watt x 2 = 60W
At $0.12/kWh – $5.36/month
At $0.25/kWh – $11.16/month
HOURS x COST/HOUR = Total Amount
744 x (0.12 x 0.060) = $5.36/month
744 x (0.25 x 0.060) = $11.16/month