by Nebula Haze
This side-by-side grow journal experiment was originally documented on my Instagram profile. I think you’ll find this side-by-side marijuana grow experiment just as intriguing now as I did then. I copied over all the posts so you can enjoy this grow journal as if you were watching in real-time (that’s why each post is worded as if it’s happening now).
What effect does it have on cannabis clones to grow them in coco coir vs super soil? This grow journal’s results were not at all what I expected. From yields to THC levels to terpenes, there were stark differences between the coco and soil grow tents.
Here’s a sneak peek of the two tents just before harvest. Jump straight to harvest day if you want to skip to the end, but I think it was one of my most riveting grows and you’ll enjoy reading each update as it happens.
Read on to see the Coco Coir vs “Just Add Water” Super Soil side-by-side marijuana grow journal…
Coco vs Soil Setup & Supplies (one set for each tent)
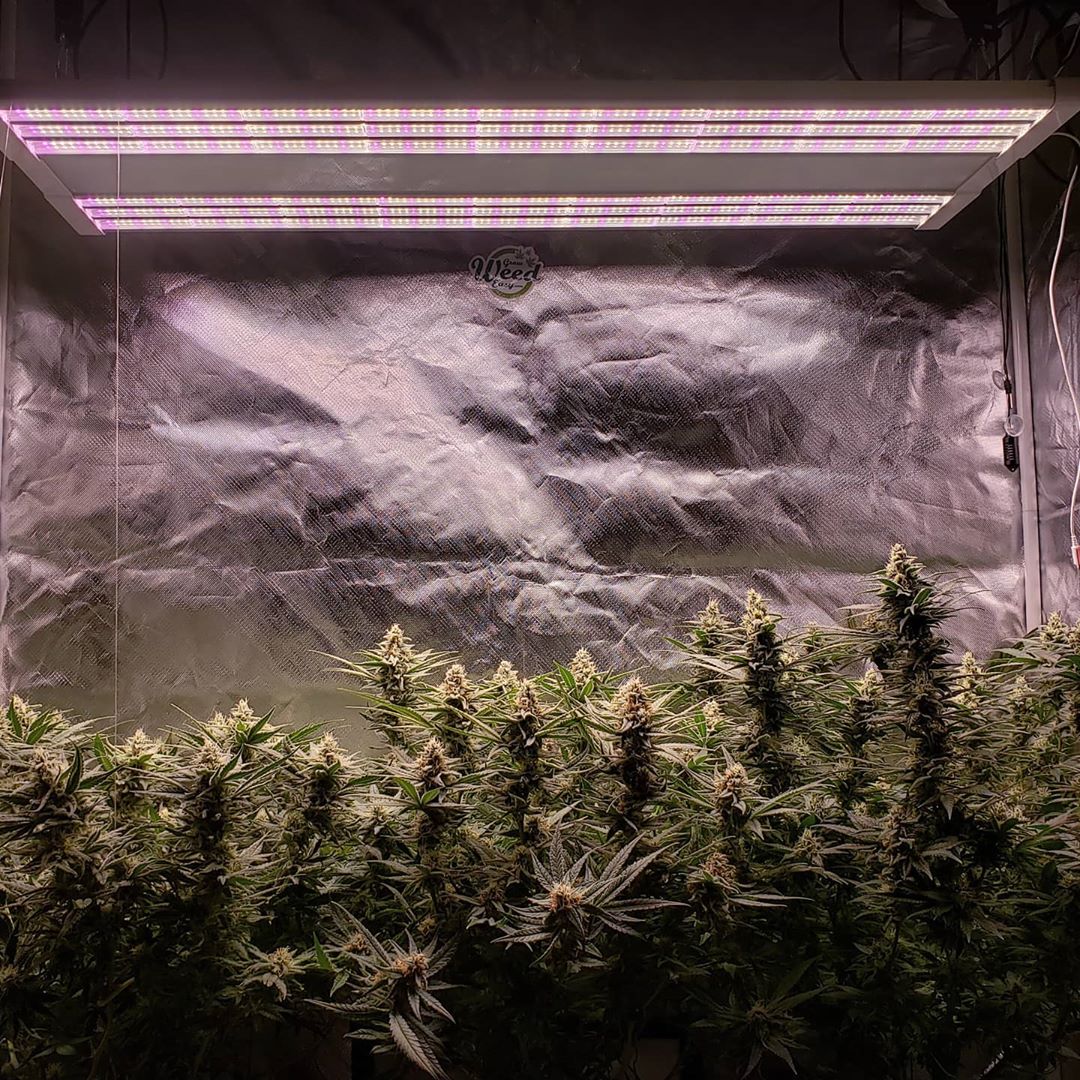
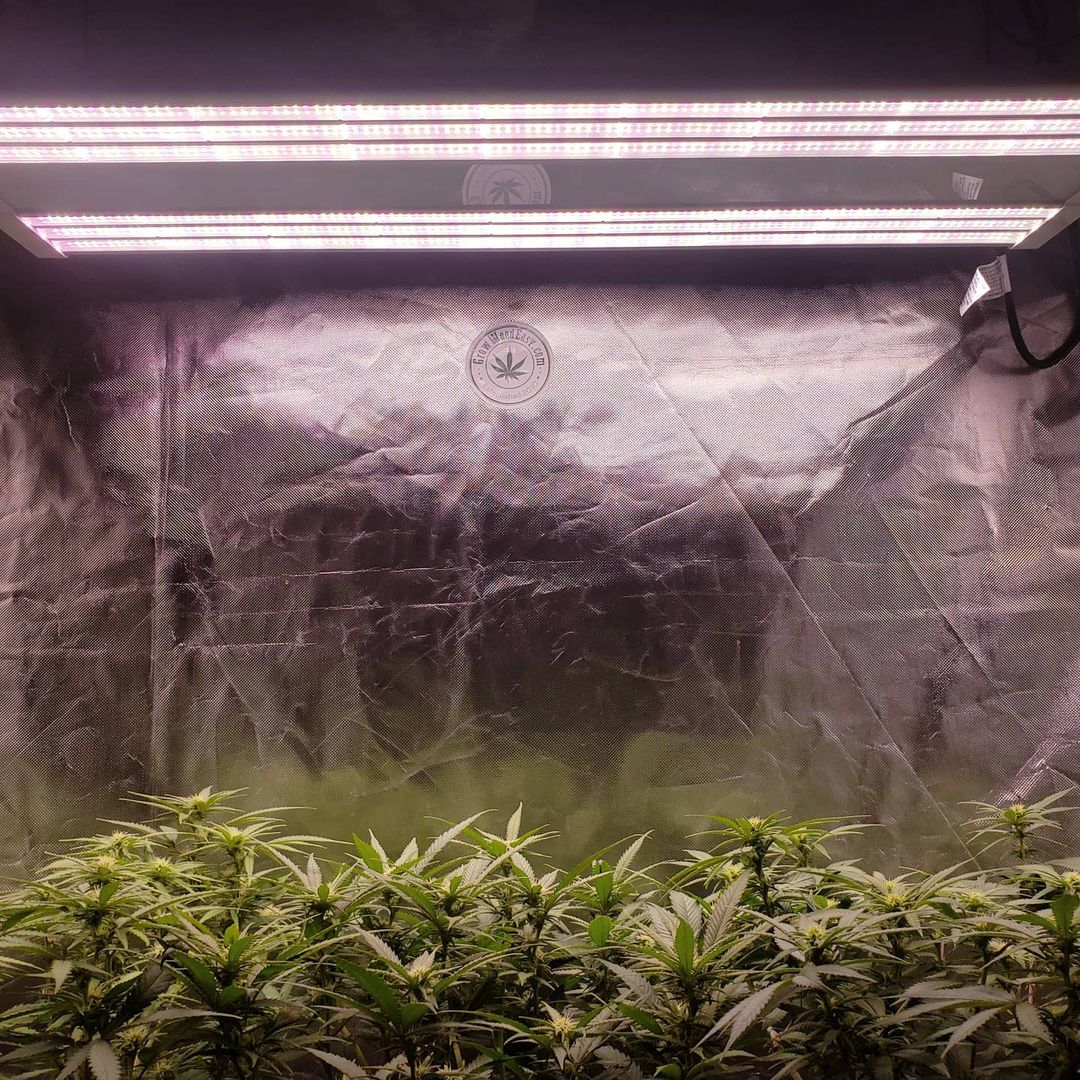
Grow Light
- ES300 LED grow light (discontinued) – I would strongly recommend the Mars Hydro TSL2000 300W LED grow light as a replacement. In our tests, it gets similar or better results and actually costs much less.
Grow Space (tent with exhaust fan)
- Grow tent – 2’x4’x6′ grow tent (also listed as 48”x24”x72”)
- 6″ exhaust fan – AC Infinity Cloudline T6 – Exhaust fans are used to remove heat from the grow space and bring in fresh air for the plants. Any 300W LED makes some heat and it’s good to have an exhaust fan so plants get plenty of CO2 in the air. You also need an exhaust fan if you want to stop smells because a carbon filter doesn’t work without a strong exhaust fan. The AC Infinity is quiet but expensive; the Vivosun 6″ 390 CFM exhaust fan is a cheaper alternative that’s both stronger and louder). Learn how to vent heat with an exhaust fan.
- (optional) 6″ carbon filter connected to the exhaust fan with 6″ ducting – Carbon filters are used to stop smells from leaving the grow space. Learn about carbon filters.
Here’s a picture of a grow in this setup. I’m using the same tent, LED panel, grow medium, pots, nutrients, etc. (the carbon filter is above the light.)
Plant Containers
- 5-gallon fabric pots
- 14″ plant saucers (the circumference of the bottom of the fabric pots is 12″ so this is a little bigger to catch any runoff water ).
Grow medium
- Coco coir tent
- Mother Earth Coco + Perlite Mix
- Nutrients: General Hydroponics Flora trio + Calimagic
- I followed the mixing instructions on the sides of the bottles except cut in half
- “Just Add Water” Super Soil Tent
- Nature’s Living Soil concentrate mixed with soil for the bottom 1/3 of each pot (this holds the majority of nutrients that will be slowly released through the grow)
- Coco Loco soil – Topped the remaining 2/3 of each pot with Coco Loco soil (a high-quality soil that has a bit of coco, ideal for “Just Add Water” mixes).
- Read my full review of Nature’s Living Soil with step-by-step instructions on how to use it
Strains
- Power Africa
- Peyote Critical
- Critical Purple Kush
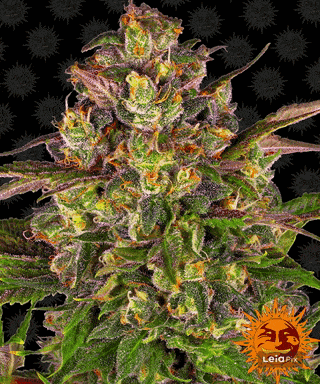
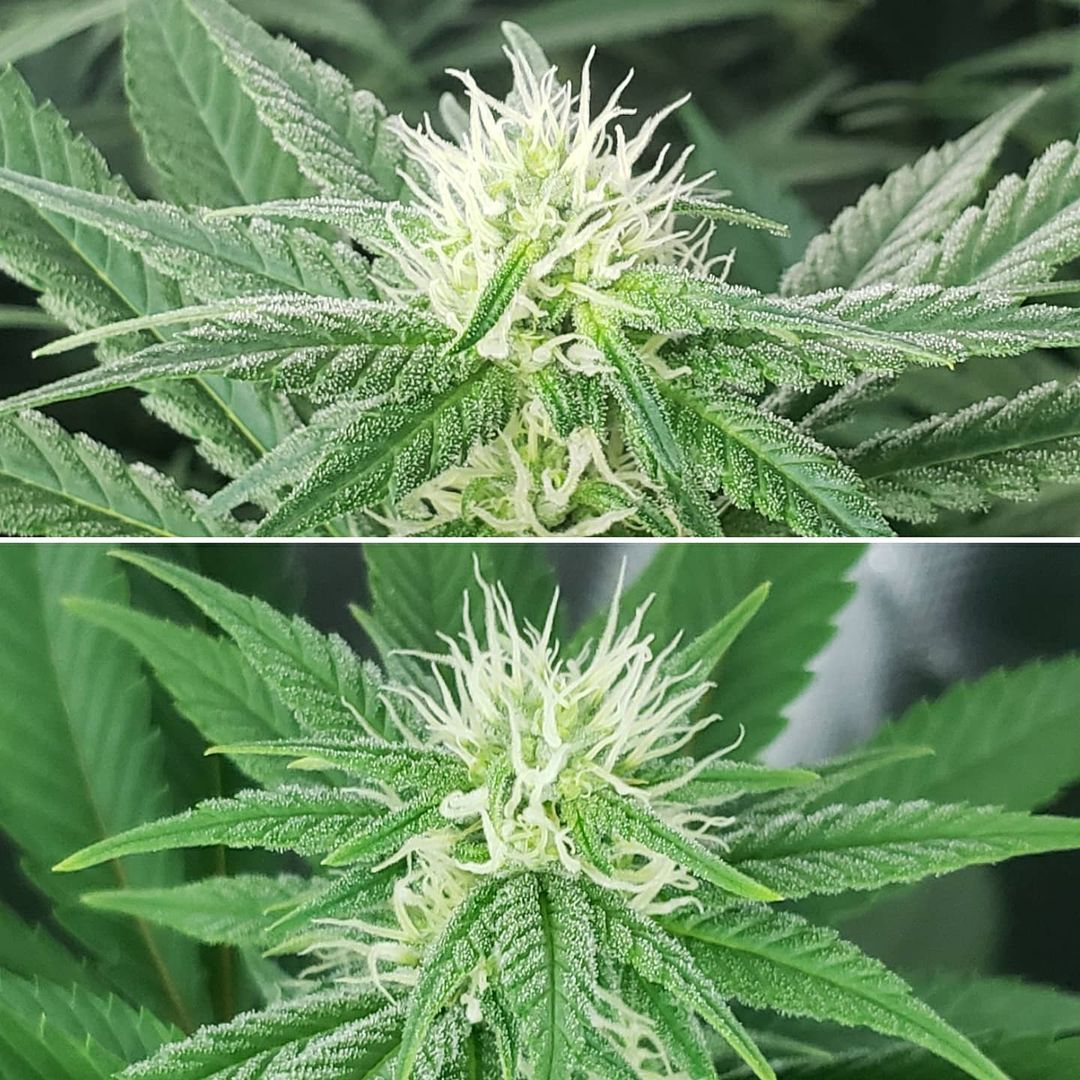
Peyote Critical is the strain that turned purple in this grow journal!
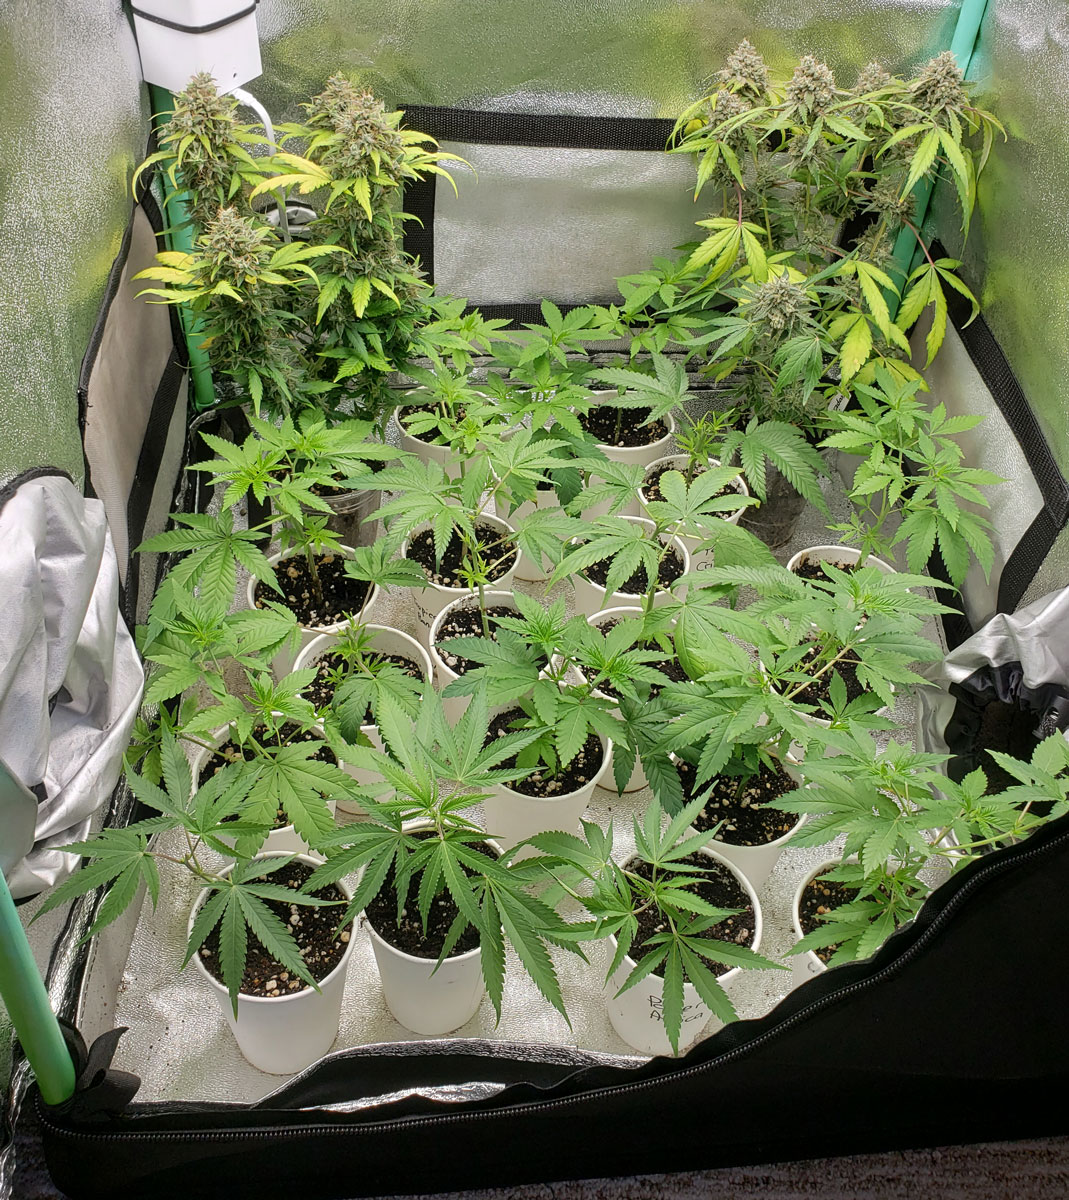
This is a clone tent with two little autoflowering solo cup plants finishing up in the back. I’m amazed what this HLG 65 LED grow light can support with only 65 watts of light!
These clones are rooted and recently put in solo cups. I’m going to grow them out a little then they get put into their final homes.
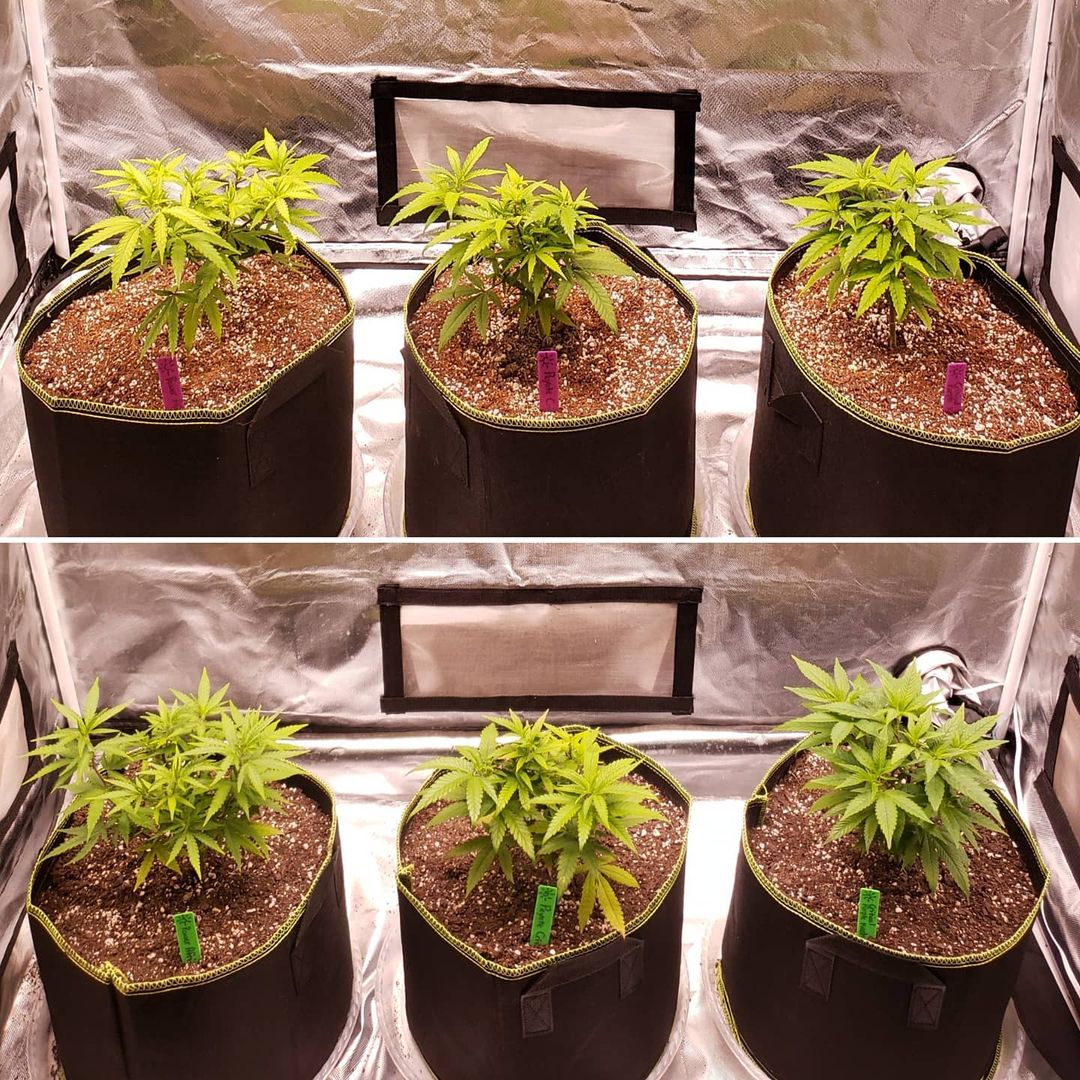
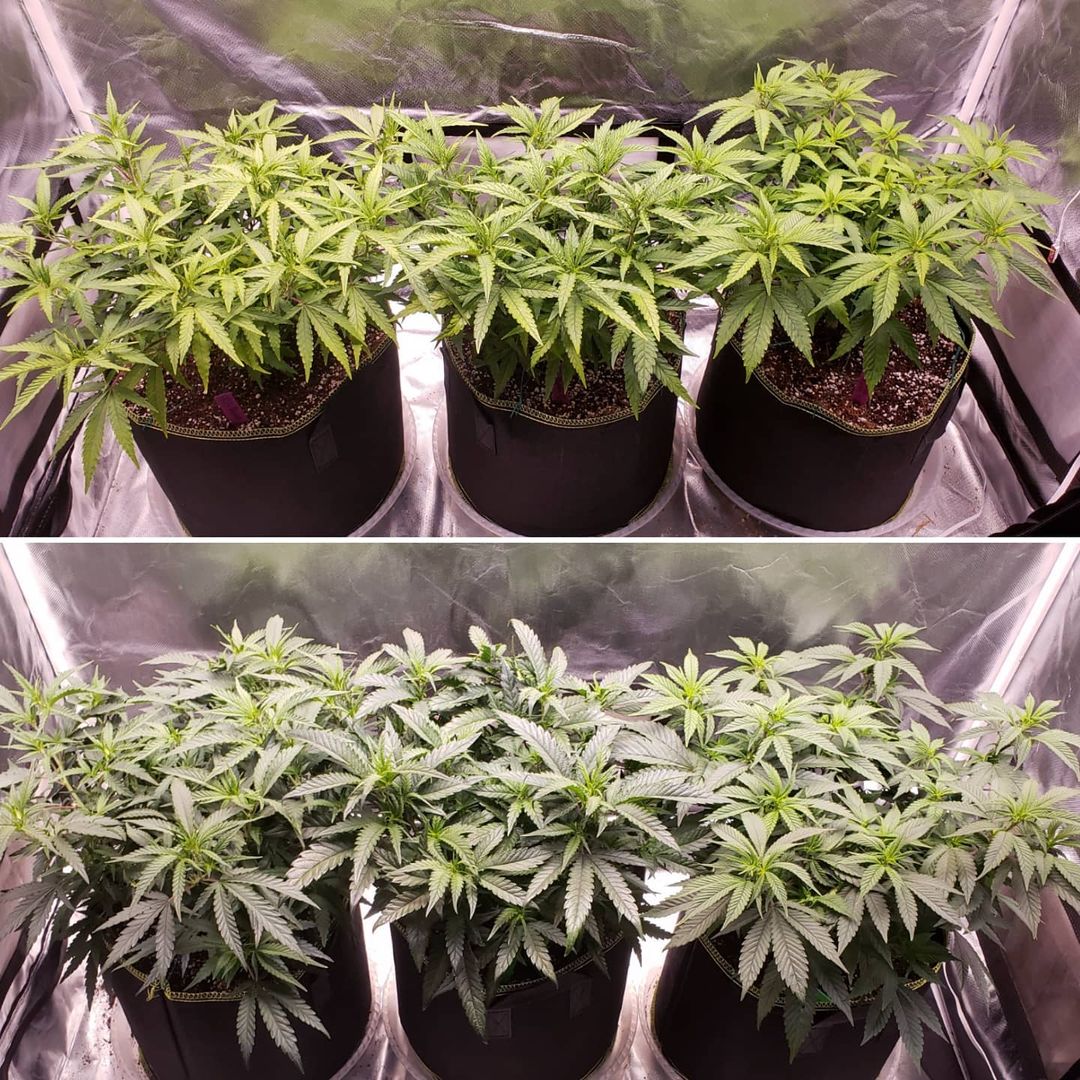
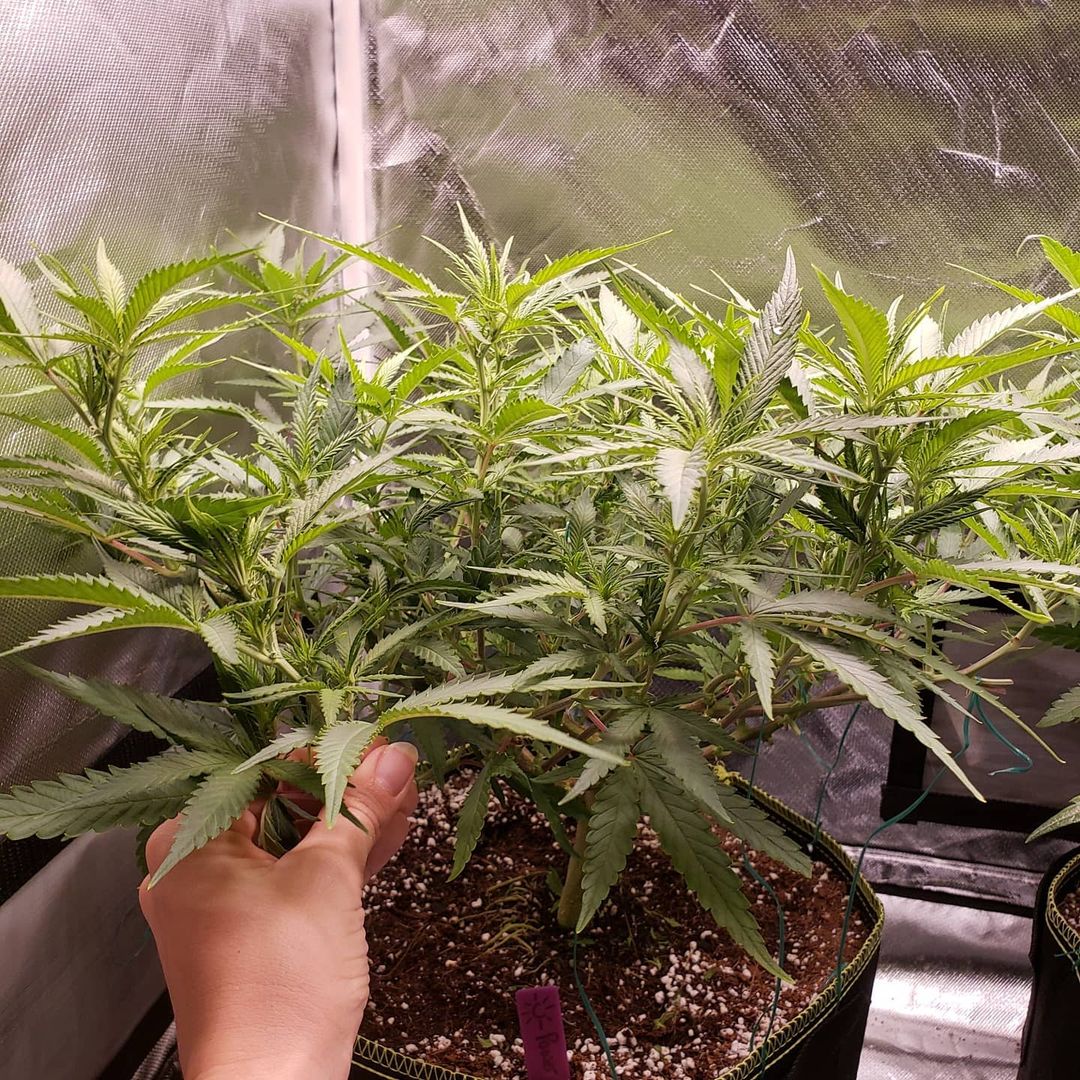
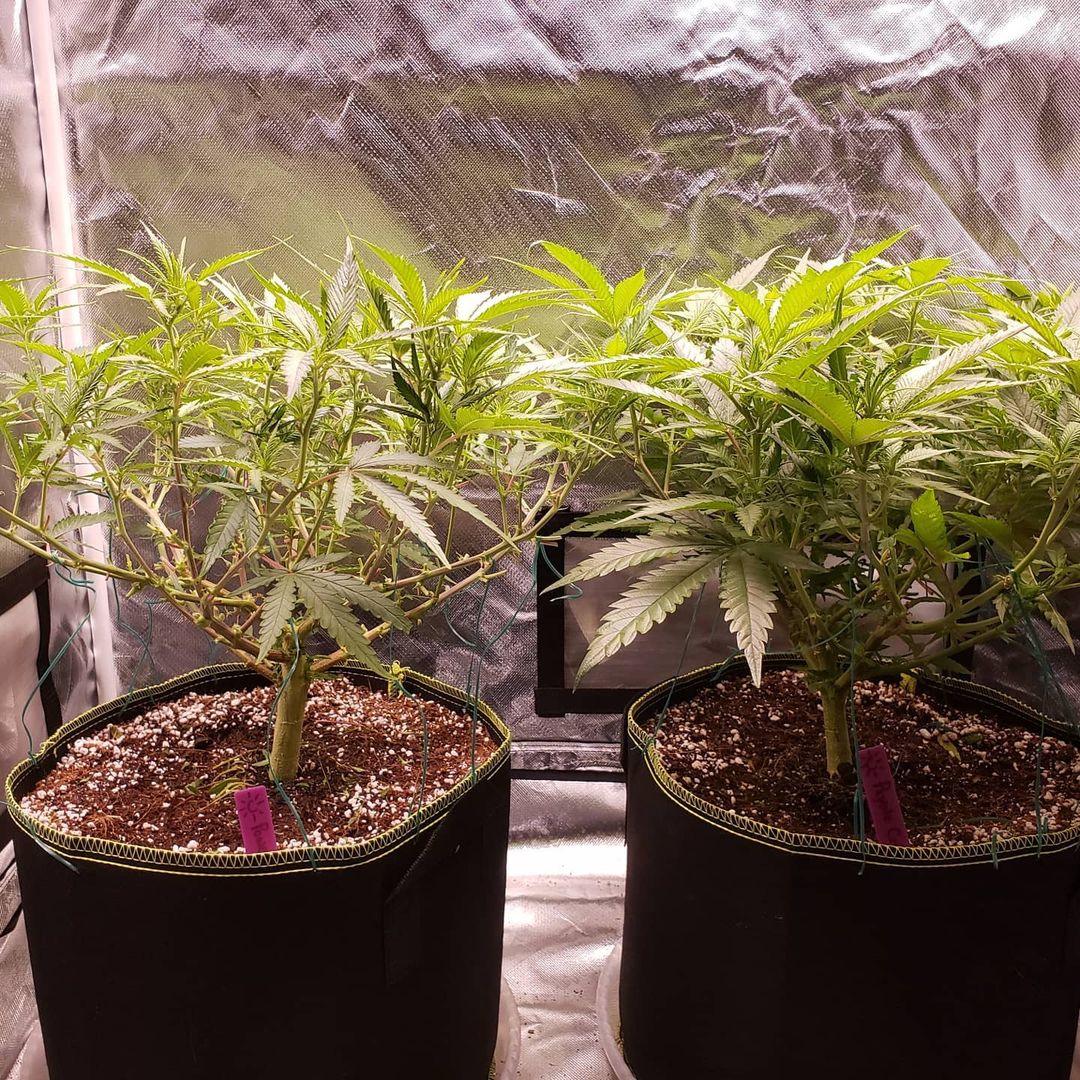
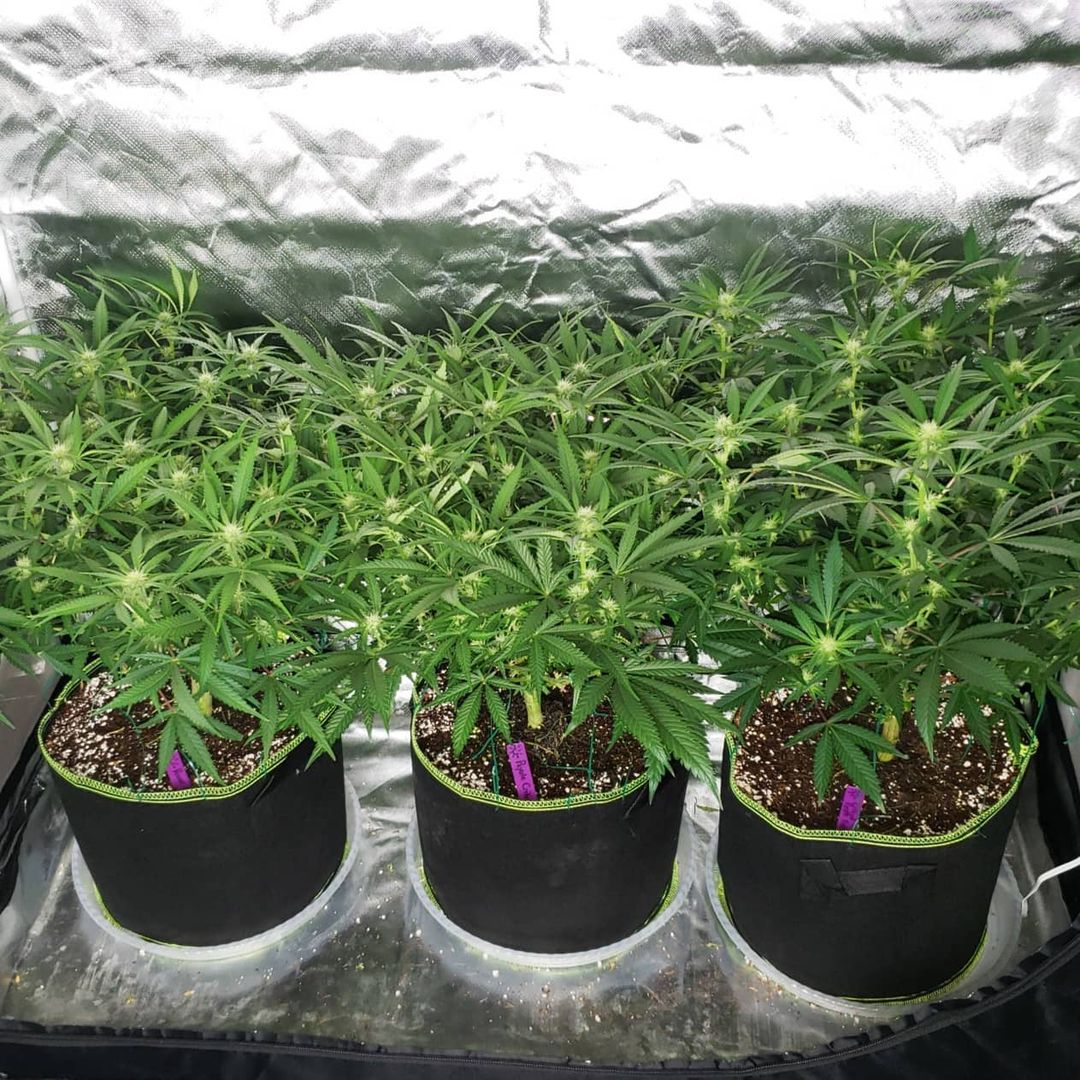
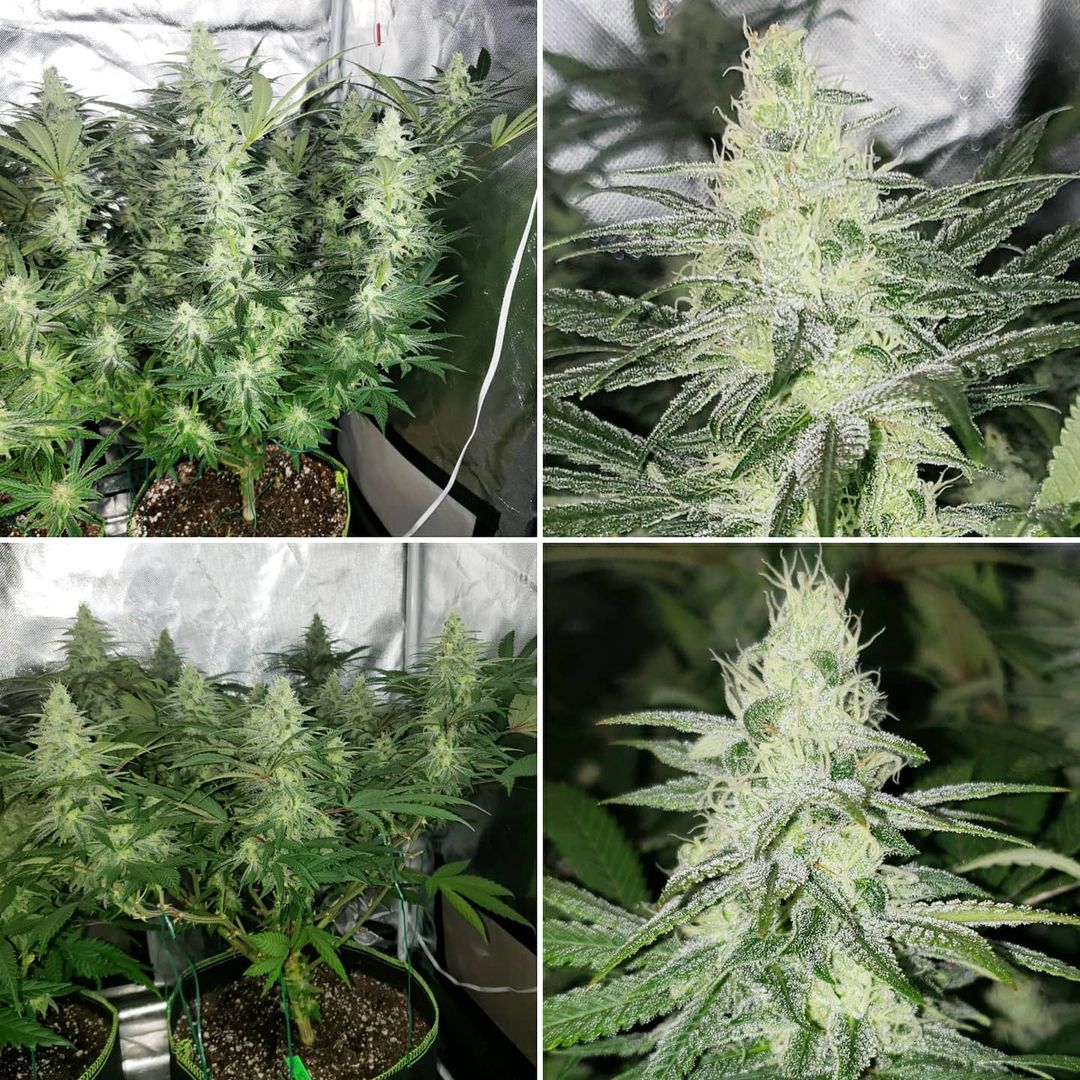
August 20
The top plants are in coco coir (Mother Earth Coco Plus Perlite Mix) and bottom plants are clones in Super Soil (Nature’s Living compost as base and filled the rest of the way with Coco Loco soil).
Here are the clones about 3 weeks from being put into the tents (they were already rooted so they’re bigger than seedlings of similar age).
Top is coco coir (purple stakes). Bottom is Super soil (green stakes). I’ll keep them in this order for the whole grow journal to make it easier to follow along.
Second picture was after some training. Plants were spread out and tied down.
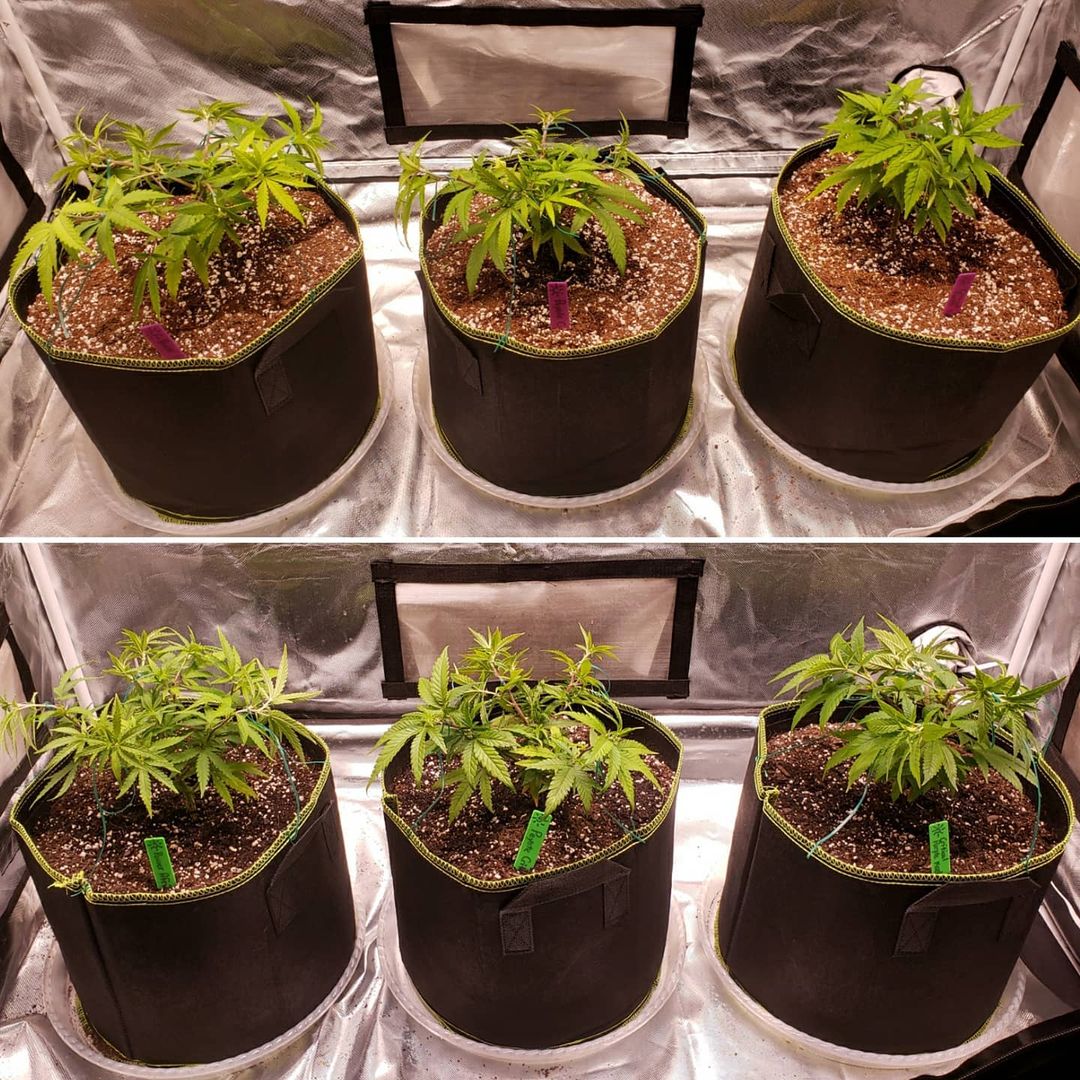
So far the plants in the super soil tent are ahead. It took a little longer for plants to adjust to the coco. However, they’re both starting to grow fast and the differences in growth patterns will soon be more obvious.
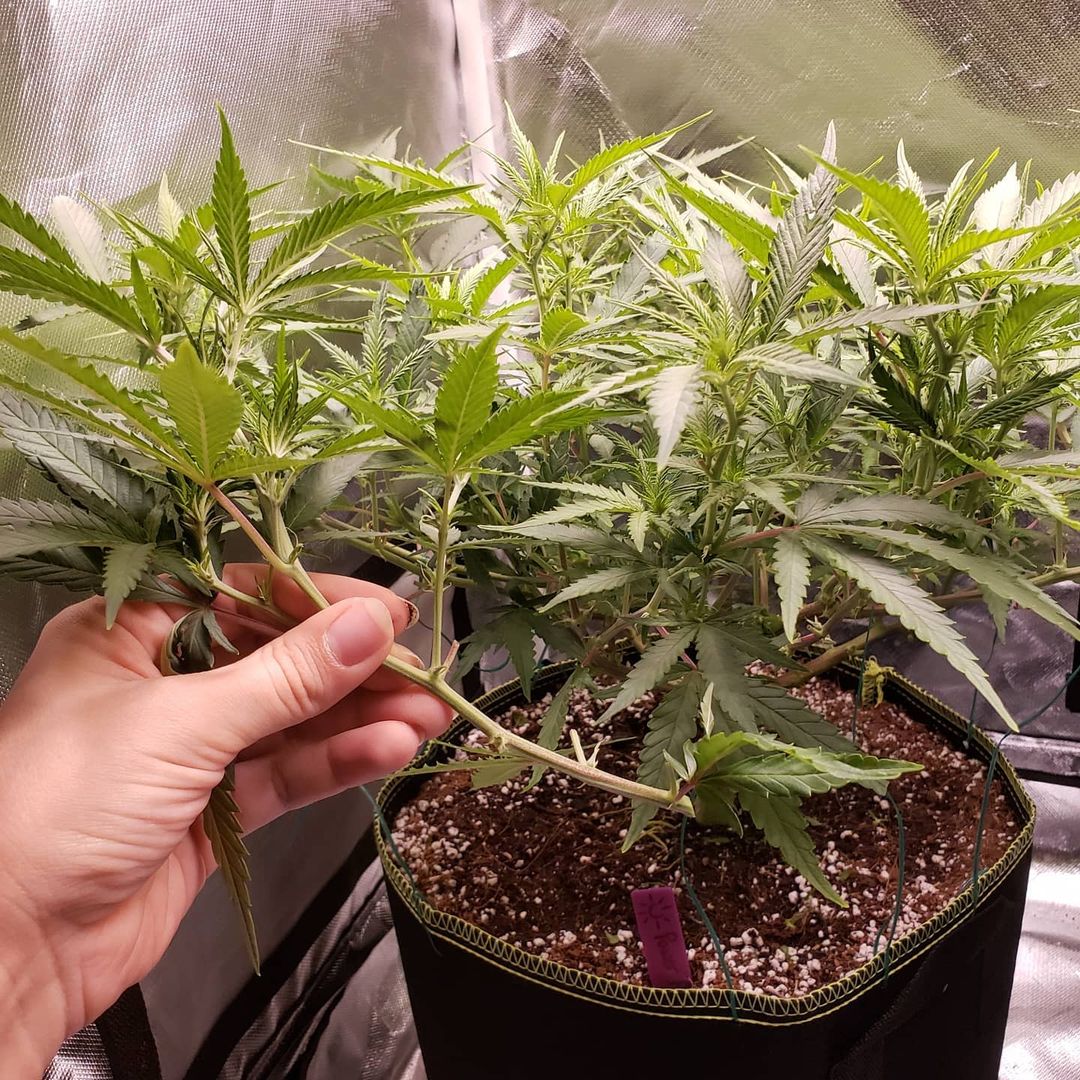
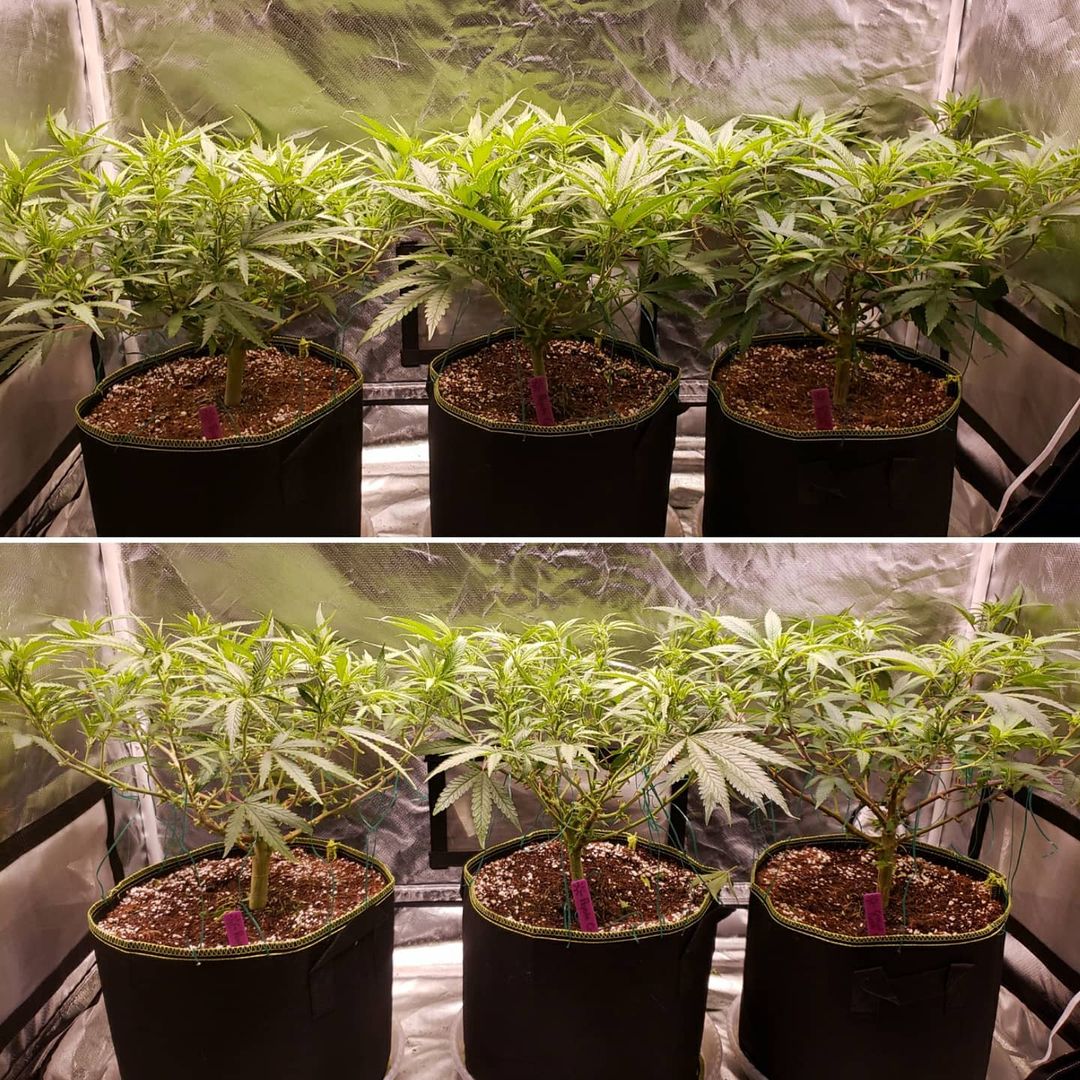
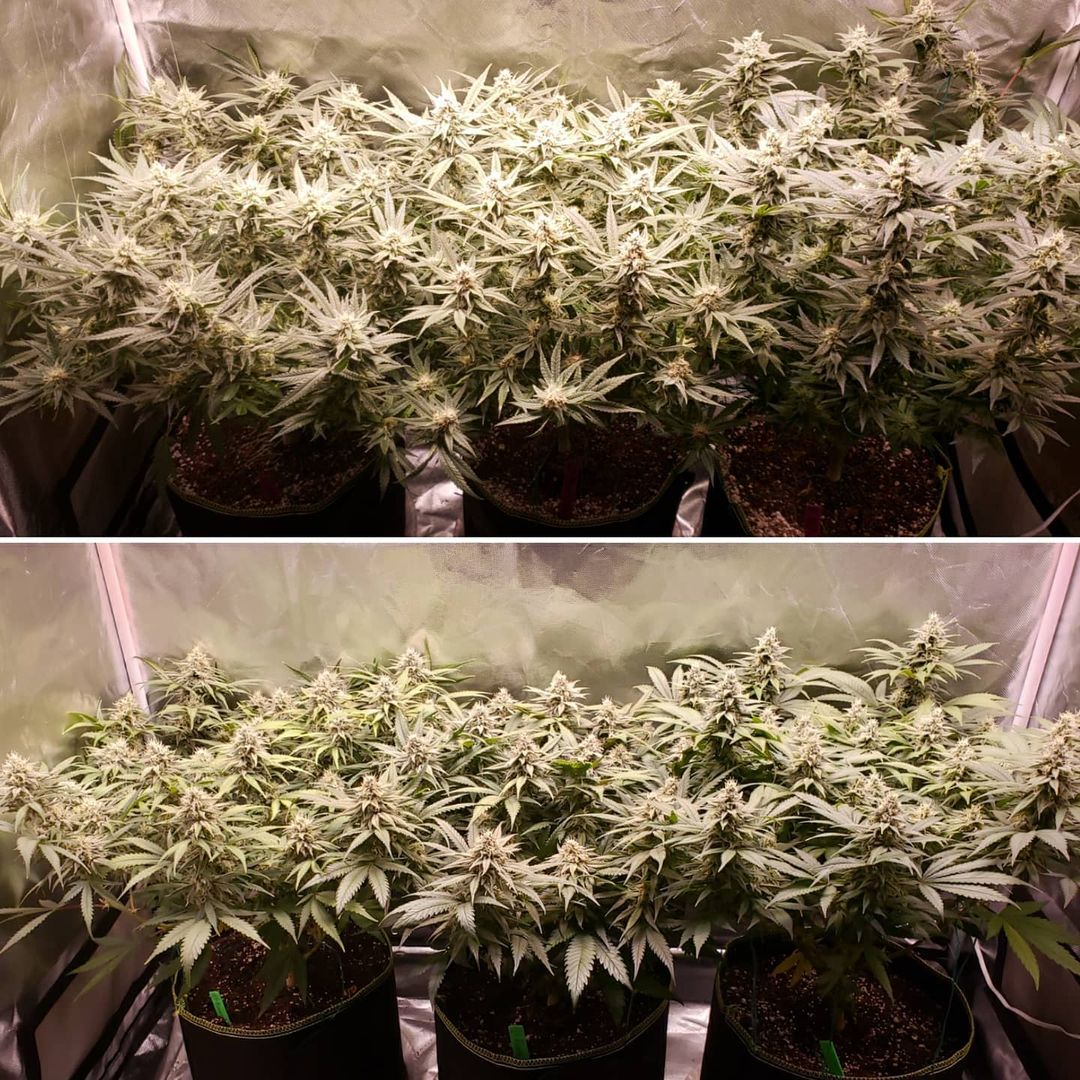
September 5
The coco tent is on top, super soil tent on bottom. The clones are in 5-gallon fabric pots with the LED grow lights. They went into the tents on August 1 so they’re a little over a month old. So far the super soil plants are bigger!
Coco on top, super soil on bottom
The super soil plants are also darker green, with signs of Nitrogen toxicity (“the claw”) from getting high levels of Nitrogen from the super “hot” soil. N is stored in dark green leaves and can be accessed by the plant later. That is why lower leaves and then the whole plant turns yellow when Nitrogen gets low.
Top view
Lots of Nitrogen is fine in the vegetative stage (maybe even good), but high amounts of Nitrogen can suppress bud growth in the second half of the flowering stage. All of these plants will get defoliated at the start of flowering, which removes a lot of Nitrogen from the “system”. Since I’m only giving water to the plants in super soil, those plants are also continually using up nutrients in their soil.
It’s a delicate balance because I also want the nutrients in the soil to last until harvest. That’s why I am not washing any nutrients away with runoff water.
Luckily, in a super soil setup, the plant has a greater ability to “pick and choose” nutrients (just like nature) compared to giving mineral nutrients in the water.
The coco plants are about 11 inches tall and the super soil plants are 12 inches tall. I will probably initiate the flowering stage soon because they’ll about double in size and I’d like them to be 2 feet tall at harvest.
I love how easy it is to care for the super soil plants. Plain water every 3 days and they’re good to go! Whenever I mix up coco nutrient water it makes me appreciate the simplicity of a “just add water” grow!
So far the Nature’s Living Soil tent has been great to use and I feel like the plants growing in it are doing better so far.
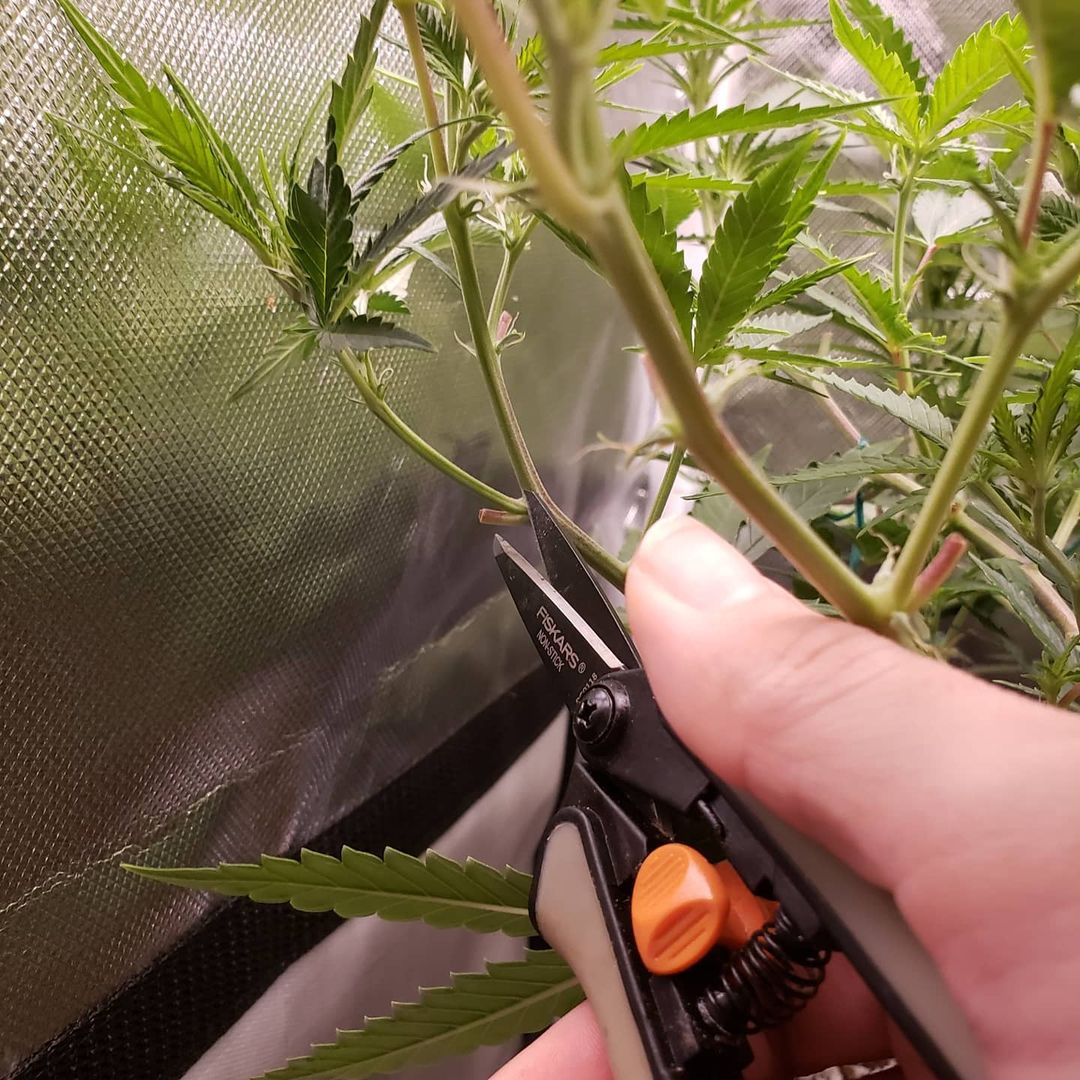
Today I defoliate the cannabis plants as they enter the flowering stage.
These 3 plants were changed to a 12/12 schedule a few days ago to initiate flowering. I can already see the first white hairs/pistils appearing on the future bud sites.
I typically defoliate right at the beginning of the flowering stage and again about 3 weeks later.
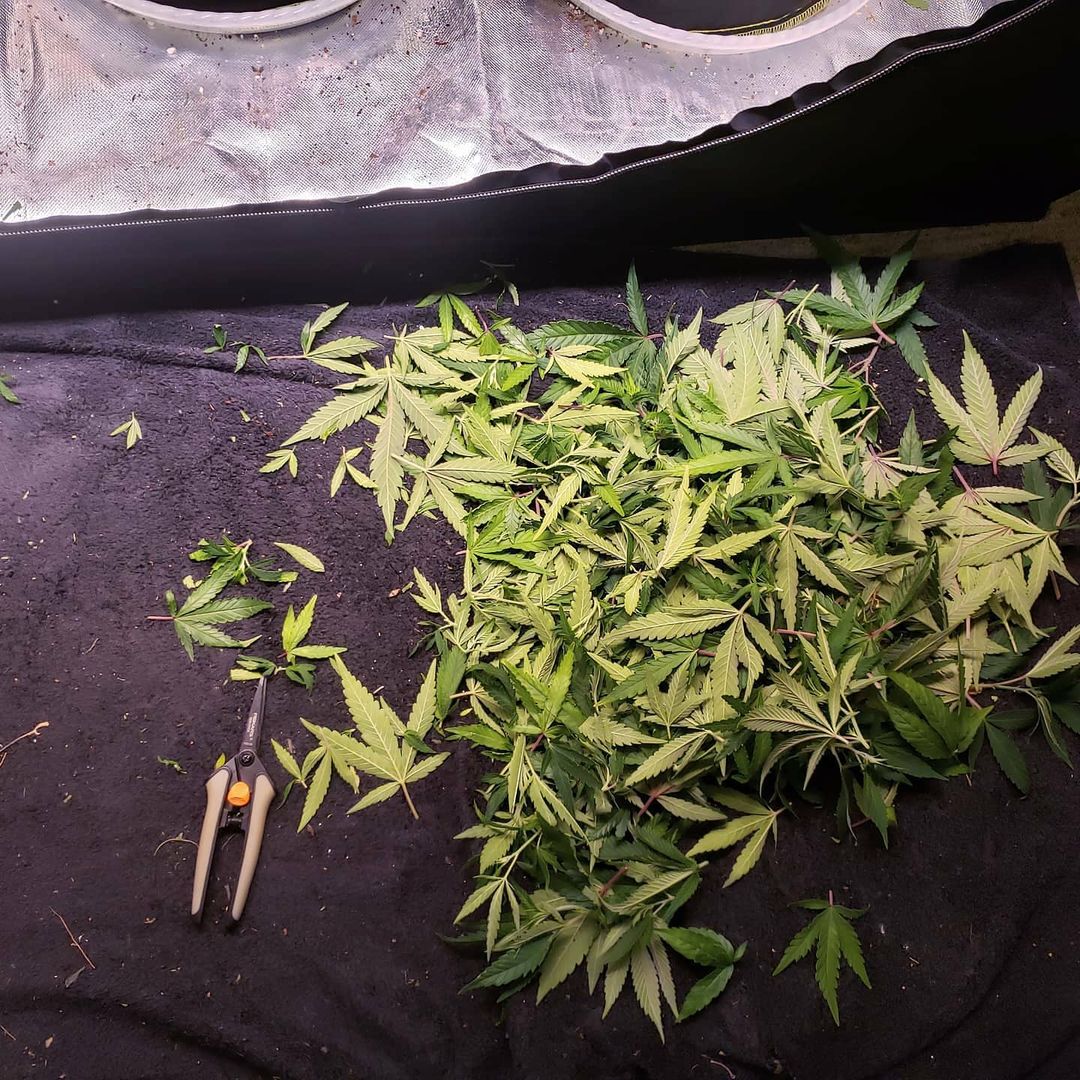

Given what I’m going for, this is a pretty light defoliation. I lollipopped the plants, which means I removed lower growth and small branches that will never make it to the top canopy. I also removed all big fan leaves on long stems, and focused on removing leaves blocking light from reaching future bud sites.
I’ll remove more tomorrow (focusing on removing small lower stems and big leaves) but I’m done for today. I don’t want to stress the plants and defoliating over 2-3 days helps prevent that.
This 2-step defoliation process “hacks” the natural plant processes and forces it to spend more energy on developing buds, and less on vegetative growth. Buds never seem to truly get fat if they’re hidden among a bunch of leaves or located at the bottom of the plant. Buds need to be near the top with direct exposure to light and air to fatten up properly.
Some plants (especially certain sativa strains) don’t really get leafy and defoliation is unnecessary, while other plants get so bushy the leaves are covered in wet spots and you have to defoliate them to prevent the chance of mold! Most plants are somewhere in the middle of this spectrum.
Another bonus to defoliation is it helps keep down the humidity during the crucial flowering stage. High humidity in flowering causes loose buds and can trigger bud rot.
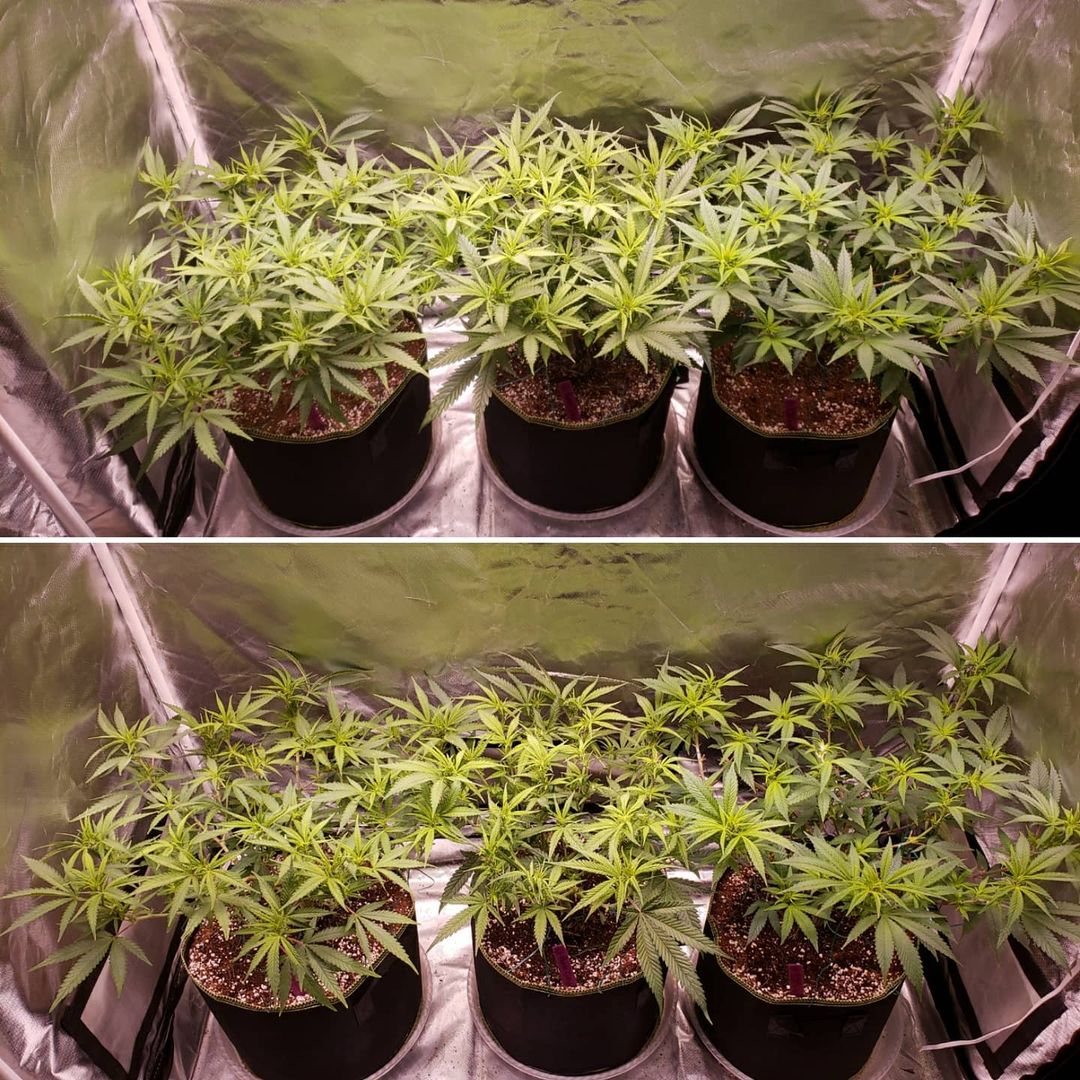
September 15
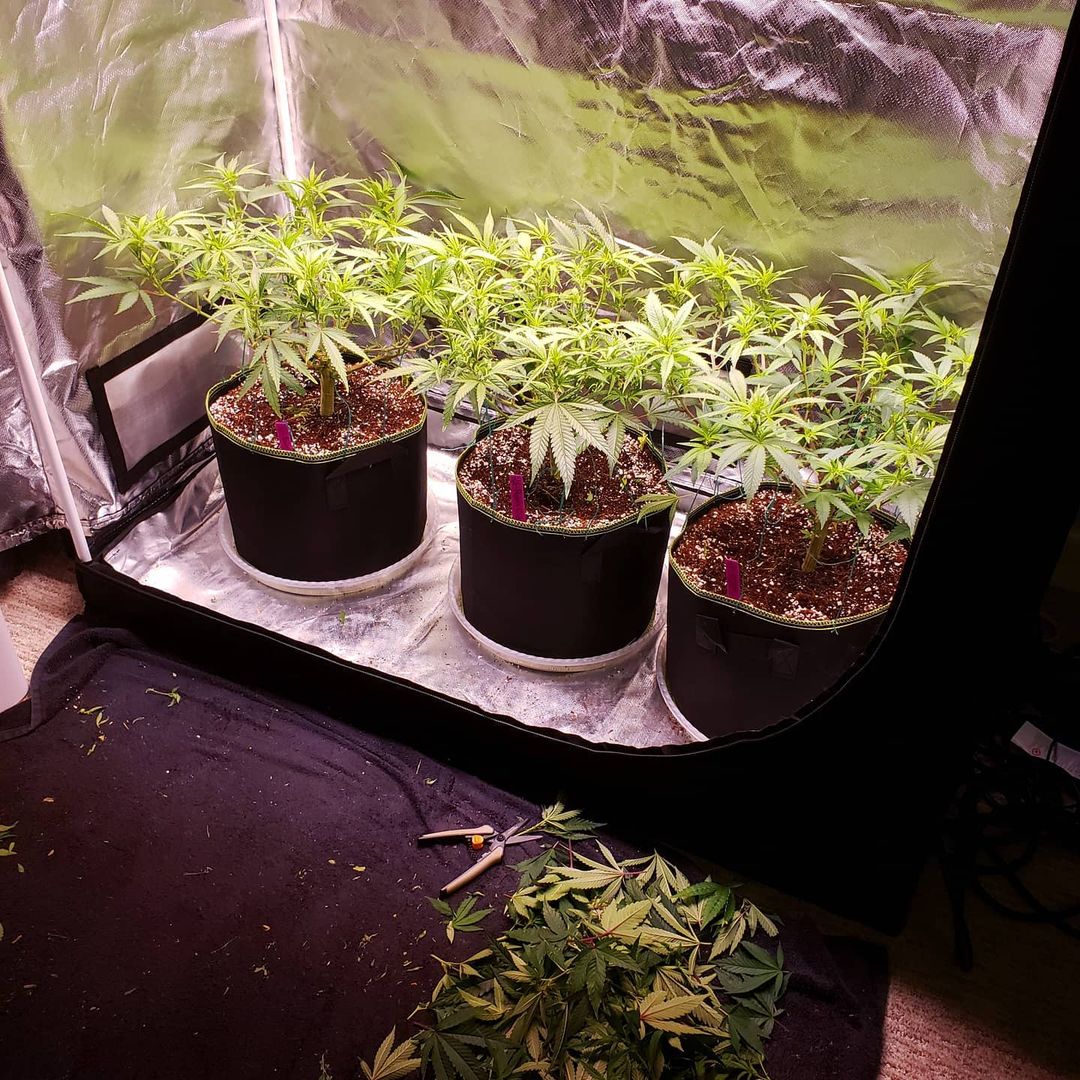
Defoliation in action!
Several growers asked for more tips on how I defoliate my plants after my last post. These plants started a 12/12 light schedule a week ago and are beginning to make flowers/white hairs (sometimes called pistils).
I typically defoliate right after plants start flowering and again about 3 weeks later. I did these lightly a few days ago and finished up today. I’ll go again in 3 weeks.
Today, I focused on removing small stems that will never reach the top canopy. I removed big fan leaves on long stems and “lollipopped” the plants.
Removed big fan leaves on long stems
“Lollipopped” plant by removing growth on the bottom of the plant that would otherwise be in permanent shadow.
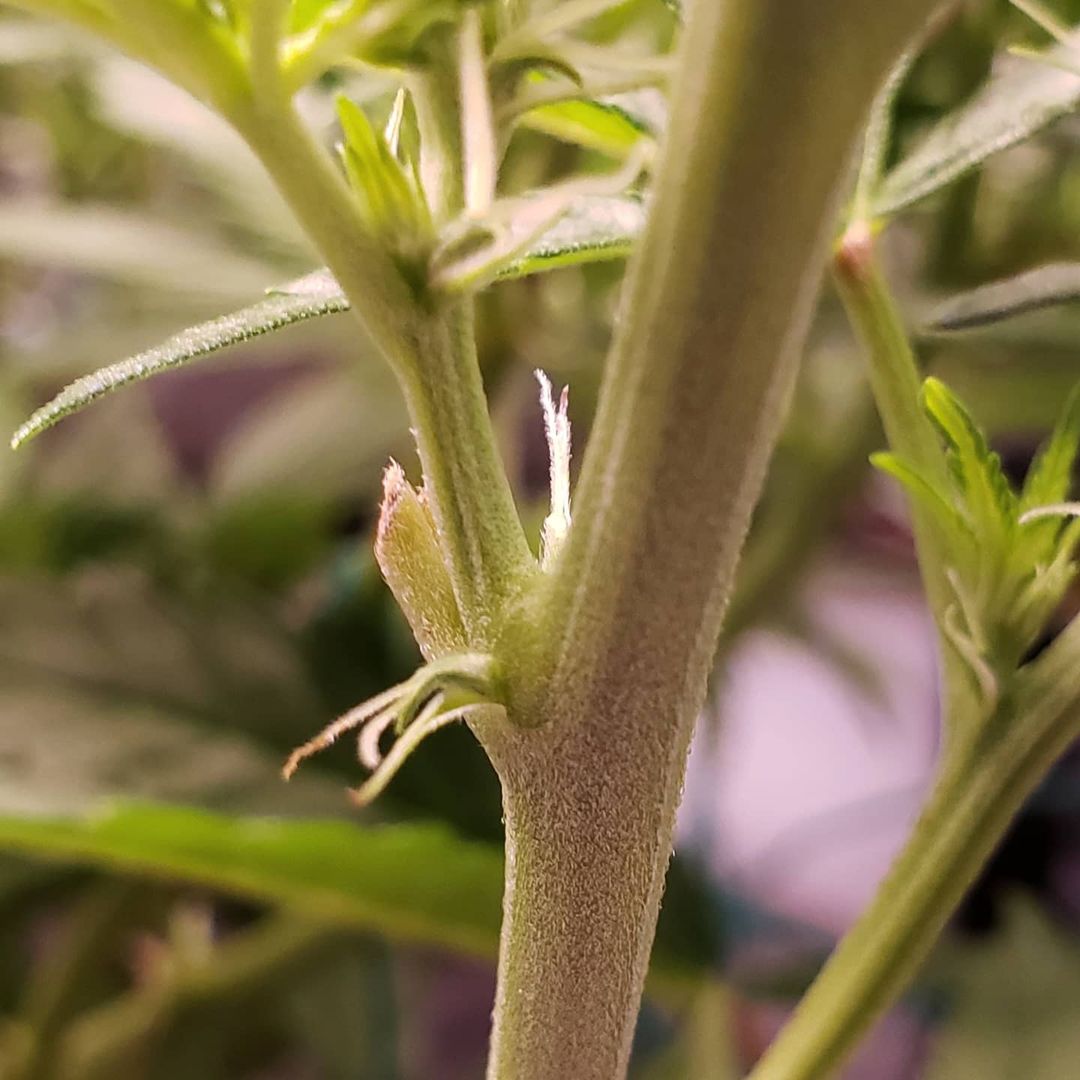
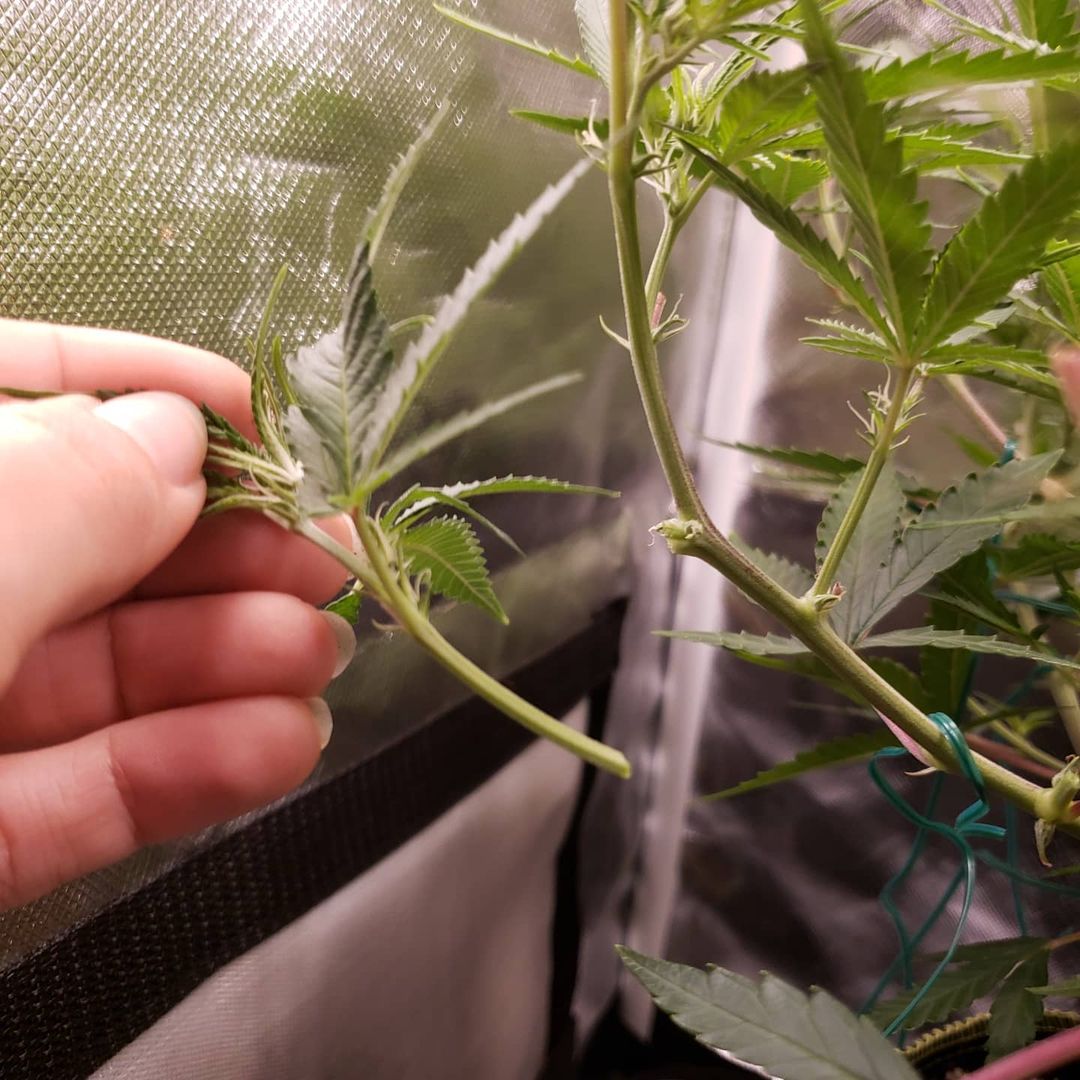
This branch is several inches shorter than all the others, plus is on the front outside edge where it’s touching the tent when I close the door. I don’t think it’ll ever make it to the top of the plant. I decided to remove it.
Here’s that branch after I cut it off
For example, this growing tip on the outside edge will never reach the top canopy so I removed it.
 Sorry little buddy
Here’s an example of one plant that’s been defoliated and lollipopped (left) and one that hasn’t been touched yet (right). I hope that helps you see how it looks before and after.
And here’s all three plants in the coco tent before (top) and after defoliation and lollipop (bottom)
Top view
Why do I defoliate? A few reasons.
1.) I’ve found that buds only fatten up when they get access to plenty of light and air. Buds lower on the plant or hidden in shadow never get big or dense. By removing bud sites that will never get light or air, I’m helping the plant focus on the best quality buds. As a result, buds at harvest tend to be bigger, tighter, and more dense. When plants are defoliated properly, they produce fewer but higher quality buds.
2.) Some plants get so leafy that their leaves lay all over each other and cause wet spots. That was happening here. Left unchecked, too-leafy plants are more likely to get powdery mildew.
3.) Leaves constantly release water vapor into the air which raises the humidity. High humidity in the second half of the flowering stage causes buds to grow more loose and can trigger bud rot. It gets humid where I live (over 70% RH outside on some days). I already use a powerful dehumidifier when necessary, but defoliating plants also helps keep the humidity down.
4.) Defoliated plants are way easier to trim after harvest.
Does defoliation increase yields? It’s possible to defoliate too much and stunt your plant, so, to maximize yields, only defoliate plants that are bushy. Some strains don’t need to be defoliated. But with bushy plants, this type of defoliation consistently produces bigger buds of higher bud quality compared to cannabis grown like wild bushes. An upcoming side-by-side grow will test defoliation vs wild. Also check out my grow journal featuring autoflowering plants with some being topped, trained, and defoliated while the others were left alone.
September 17
They have been on 12/12 for 10 days so far. I didn’t notice a major difference between the tents in the vegetative stage. The super soil plants look darker and are a little bigger, but the tents have been mostly comparable.
Top is coco, bottom is super soil.
Today I noticed the first notable difference… The super soil buds are more developed so far. I included pictures of each plant’s buds matched with their clones in the other tent. I can’t tell yet whether the super soil plants are flowering faster or the buds are just getting bigger.
Power Africa (coco on top, super soil on bottom)
Peyote Critical (coco on top, super soil on bottom)
Purple Critical Kush (coco on top, super soil on bottom)
I have to admit I’m really surprised!
This last picture shows the leaves under regular light (coco top, super soil bottom)

For some reason, the coco leaves look much lighter under the LEDs, but as you can see they’re similar in natural lighting. In fact, all the leaves look a bit dark. I can’t do anything about the super soil plants since they’re getting their nutrients from the soil but I will slightly pull back the nutrients on the coco.
September 23 – Day 16 of flowering
Here are the plants when I opened the tent this morning (coco on top, super soil on bottom)
Coco plants (purple labels) – With the coco I’m still using the General Hydroponics Flora trio plus CaliMagic as nutrients, given at 6.2 pH.
Super soil plants (green labels) – Super soil is receiving plain tap water at 6.8 pH. I have high-pH tap water so I’ve been adjusting the pH down using Earth Juice PH Down citric crystals (make sure to shop around because usually it’s way too expensive on Amazon).

I have been surprised every step of this grow.
Initially, the super soil plants were growing faster. Nature’s Living Soil seems to produce faster growth than Kind super soil.
I started 12/12 when the coco plants were 11″ tall and super soil plants were 13″ tall.
The super soil buds developed faster. I couldn’t tell whether they were ahead or the buds were simply bigger. Now the super soil plants have mostly stopped getting taller and are fully in flowering mode. They only grew about an inch over the last week. Buds are developing beautifully.
The coco plants are acting completely different. They are obviously in the midst of a major flowering stretch and are growing almost an inch taller every day. They’ve caught up to the super soil plants in size and don’t seem to be slowing down. Their buds are developing, too, but it’s hard to even see how far the buds go down into the plants because they’re getting wild and bushy.
Here’s the view directly from the side so you can better see the difference in height (coco on top, super soil on bottom)
Since these plants are clones in otherwise identical conditions, it seems like the only factor causing these differences is the grow medium and how they’re getting nutrients (from the soil vs nutrients in the water itself).
The super soil plants are growing in a more orderly way and the buds are ahead developmentally, but will the soon-to-be-larger coco plants overtake them for yields once they’ve stopped stretching?
Here they are (with flash on) to help you see the buds and how they’re forming. This also helps you see how bushy/leafy the coco plants have gotten.
What other differences besides yields and plant growth will we discover after harvest? I’m getting the buds lab-tested for terpenes and cannabinoids so we’ll have as many data points as possible at the end to compare.
Just as a side note, this is my first grow with the V2 version of this LED (V1 was great) and so far the grow is going as smooth as silk.
All the cannabis plants are super happy under the LED grow light.
You can never truly rate a grow light until after harvest but at least in the vegetative stage, I noticed that these plants seem a bit less sensitive to problems compared to other LED grow lights I’ve tried.
LED grow lights like the HLG models (@horticulturelightinggroup) get excellent yields per watt with great bud quality. I highly recommend them. But like nearly all LEDs, I’ve noticed that plants tend to be more sensitive to environmental issues, watering, and pH/nutrient problems in the vegetative stage compared to fluorescent lights or HIDs like MH/LEC/HPS.
Not so with the plants under these LEDs. The plants in both tents are spotlessly green from top to bottom. No sign of stress anywhere.
Now that plants are flowering, I’m excited to see how buds continue to develop. So far the buds look great. I can’t wait to see the results after harvest!
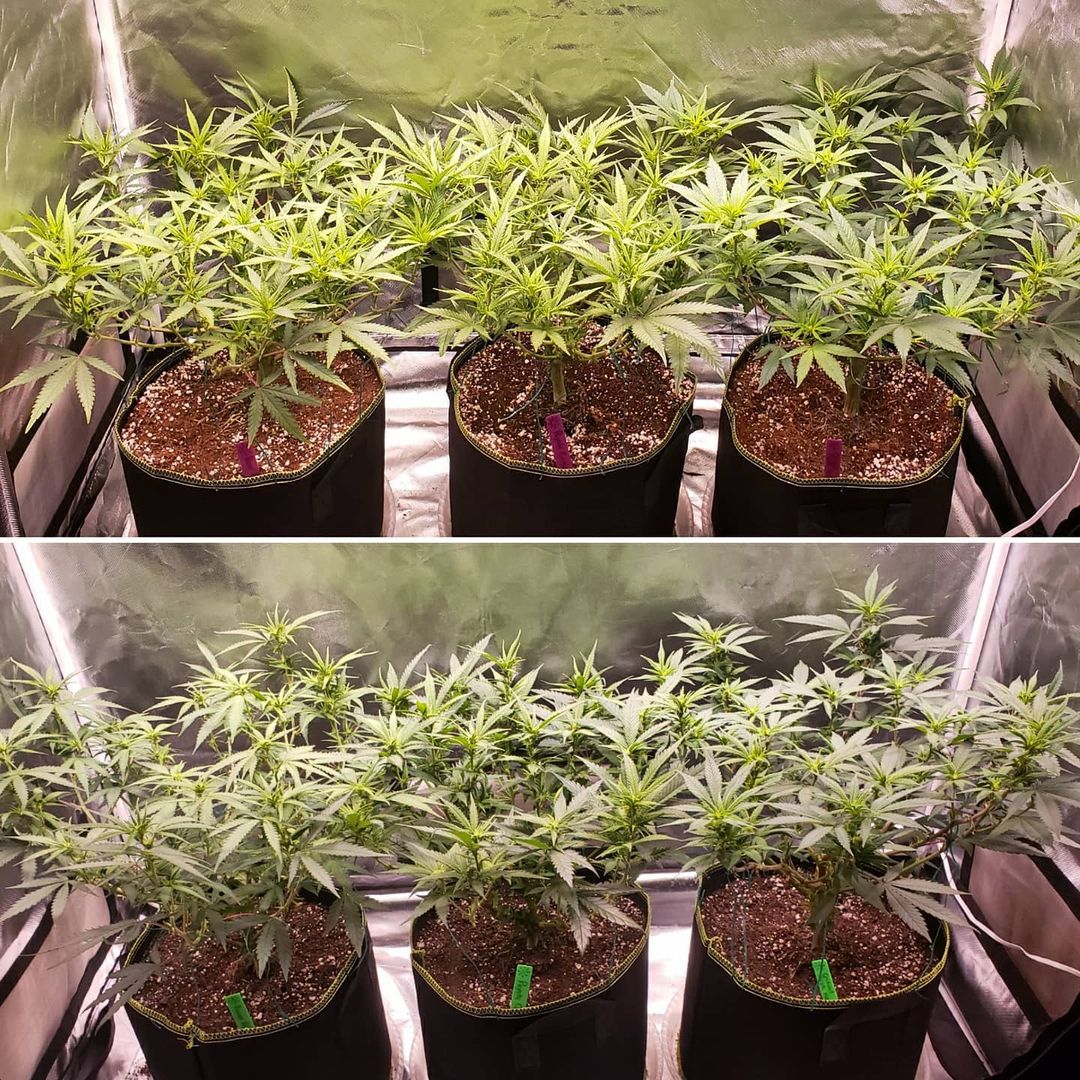
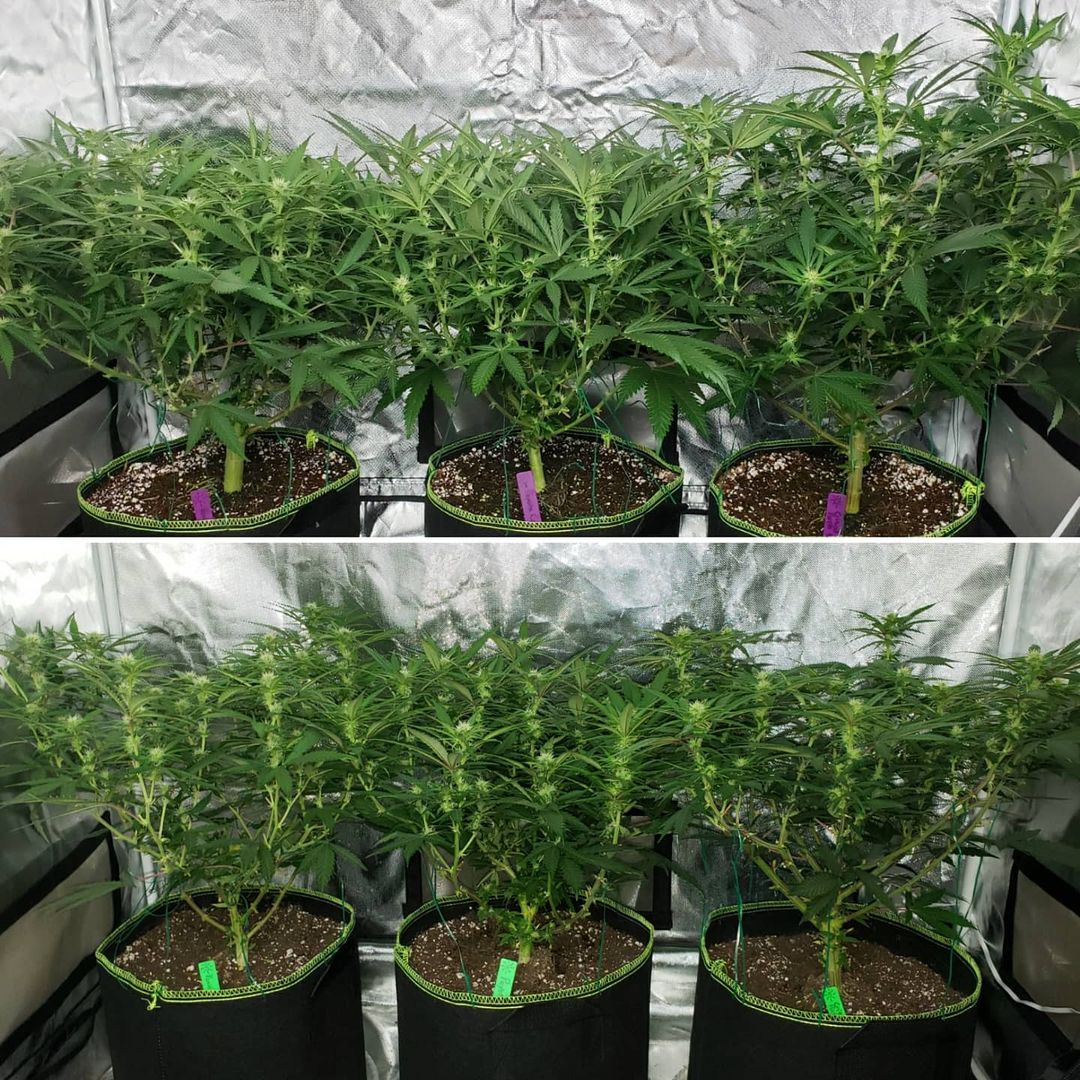
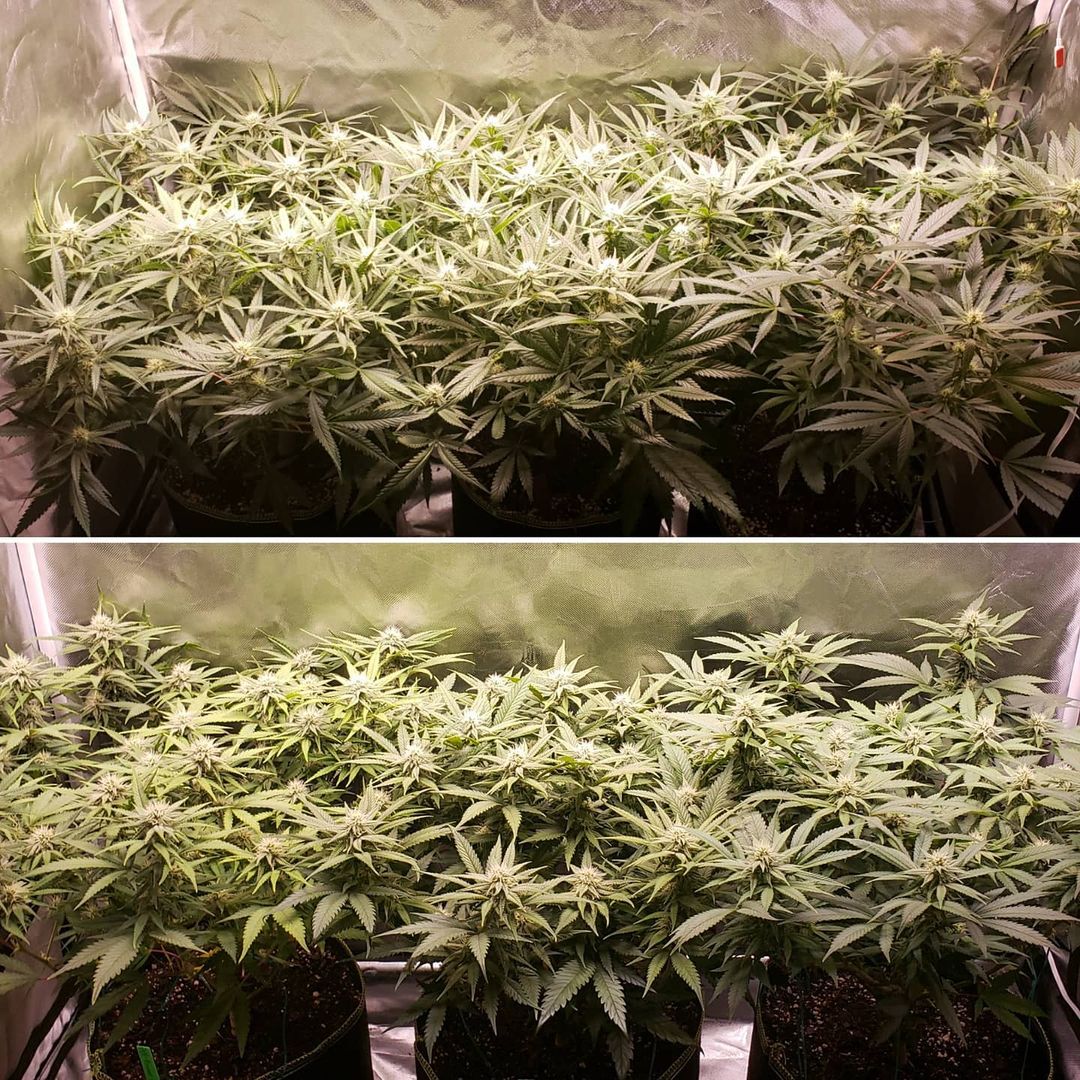
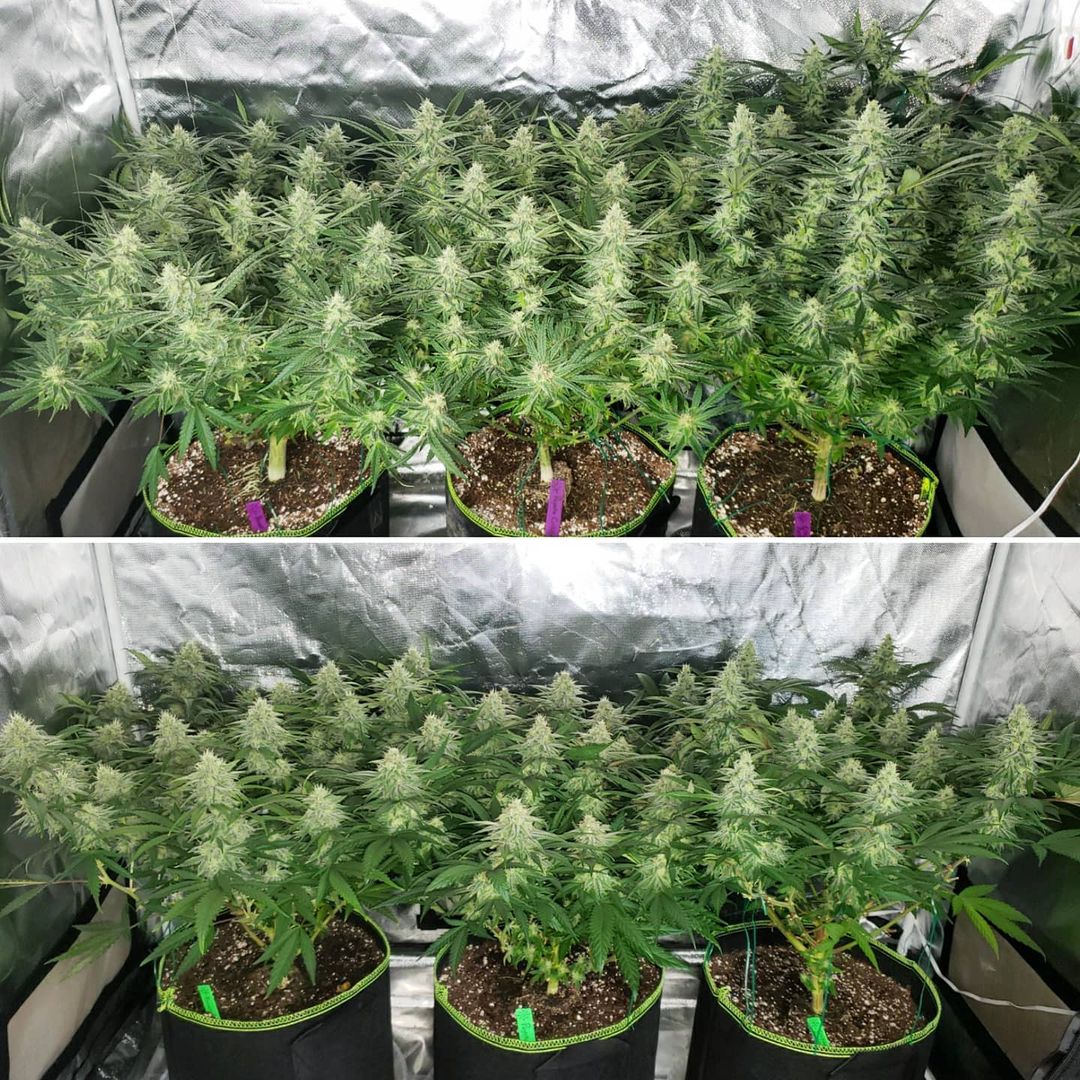
September 28
Just hit 3 weeks of 12/12 today and starting to notice some major differences between each grow medium.
Coco plants appear on top in pictures. Super soil on bottom in pics.
This is what they look like in natural light
Differences in plants: Super soil plants didn’t stretch as much as coco after 12/12 so Super Soil plants are smaller overall. Coco plants still stretching. I noticed the Super Soil plant with the biggest buds (Peyote Critical, left plant in tent pics) appears lighter in color around the biggest buds and is starting to lose a few lower yellow leaves like a Nitrogen deficiency. It’s obviously using more nutrients than the others. I want all the Super Soil plants to have plenty of nutrients so they all got top dressed with a sprinkling of Super Soil concentrate to hopefully bring more nutrients down to the roots when watering.
Differences in bud size: Super Soil plants have bigger/more developed buds. I don’t know whether the buds are ahead in development or just bigger. I’ll be able to tell better once the pistils/hairs start darkening and curling in. If Super Soil buds start turning dark sooner I’ll know it’s just ahead. If they start turning at the same time I’ll know that the buds are just bigger.
Here are pictures of all the buds for comparison (from left to right in each tent).
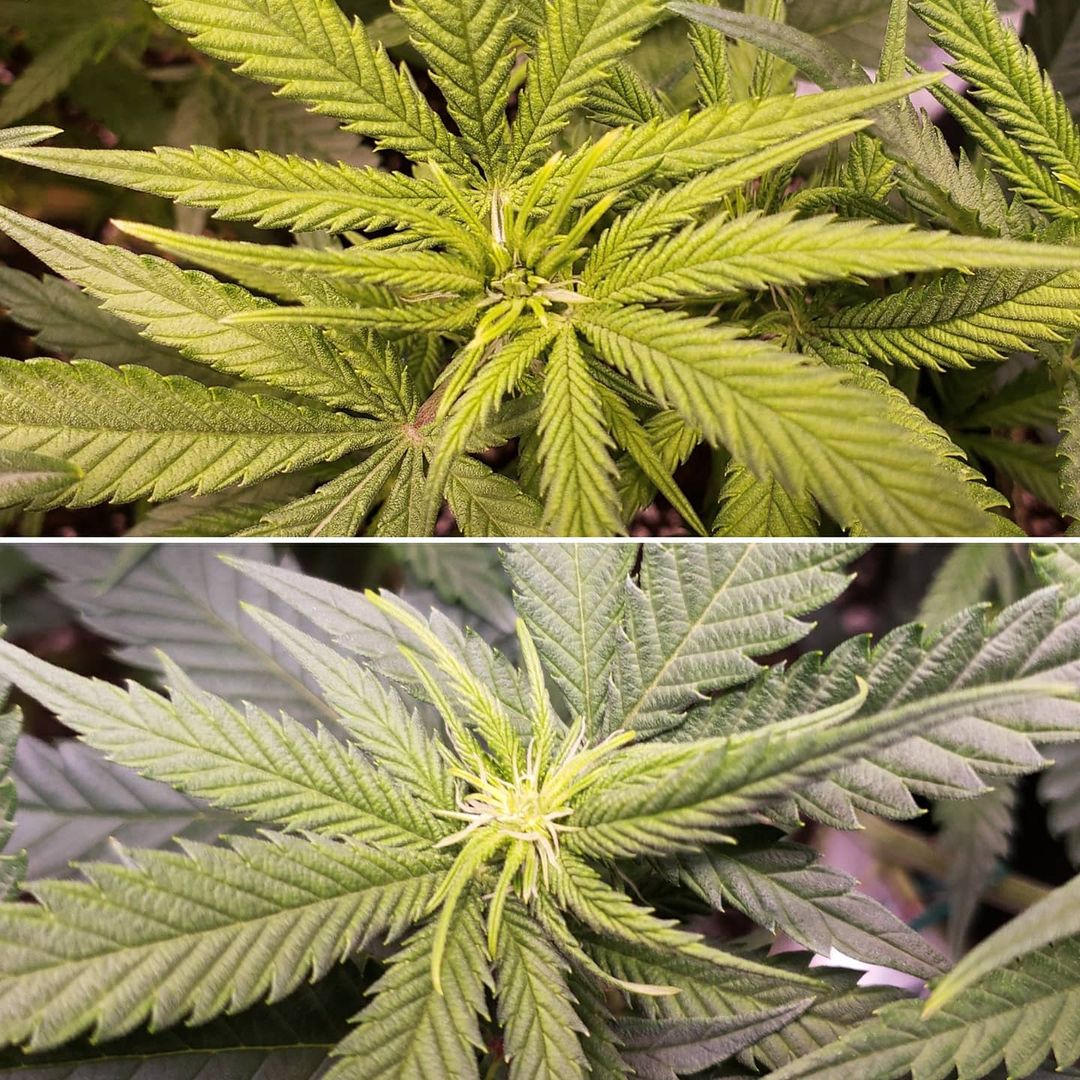
Power Africa (coco top, super soil bottom)
Peyote Critical (coco top, super soil bottom)
Purple Critical Kush (coco top, super soil bottom)
Differences in bud appearance: Two of the clones (Power Africa and Peyote Critical, picture 1 & 2) have significantly more trichomes on the Super Soil plants. One clone (Critical Purple Kush, picture 3) has a a bit more sparkle in the coco tent.
I wasn’t expecting to see noticeable differences so early. I can’t wait to see what happens next!
October 2
Have you ever seen such long stacked buds under a mid-size LED grow light? This bud structure is more typical of big-bulb HID grow lights like LEC and HPS.
The strain is Critical Purple Kush. No sign of purple yet but the buds are dusted in frost already.
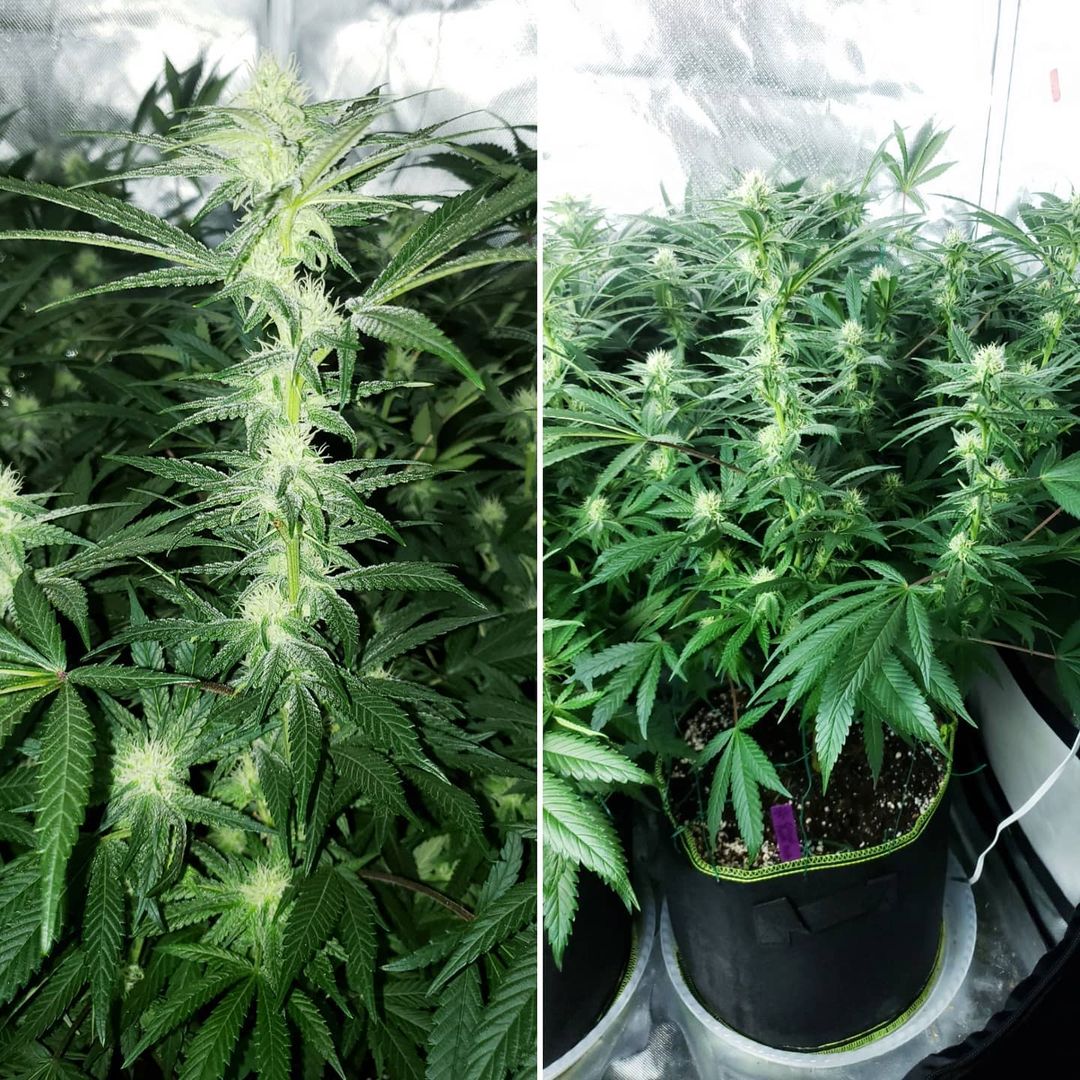
I’m beyond pleased with these LEDs so far. The plants weren’t at all sensitive in the vegetative stage, unlike some other LEDs. They grew green and healthy from head to toe.
I supercropped one branch on this plant, but more for visual symmetry than necessity. It was getting tall in a back corner where it would have been fine except that it marred my beautiful flat canopy.
I’ve noticed plants often seem to produce excellent plant structure under LEDs, with nice thick buds, but usually, buds don’t go as deep into the plant as this one.
My coco plant buds seemed to have stretched significantly more than their clones being grown in “just add water” soil under the same LEDs. I continue to be surprised by how differently the clones are growing when the only difference is grow medium.
October 4
These plants are 4 weeks into the flowering stage (day 28 of 12/12).
Coco tent on top, soil tent on bottom.
In natural light
The differences between the tents is easy to see at this point. The coco plants stretched more and have longer buds, while the soil plants didn’t stretch as much but buds are significantly fatter. Given the different plants structures its hard to guess anything about yields.
The soil plants were looking a bit pale (it’s a lot of hard work making all those fat buds!) with a few lower leaves turning yellow from lack of Nitrogen. They were hungry for more nutrients and must have used up what was in the soil. I top-dressed them with 1 tablespoon each of super soil compost (I had extra Nature’s Living Soil concentrate from when I originally made the soil). The idea was for nutrients would trickle down to the roots with each watering.
After a few days the color is better and no more yellow leaves so it seemed to have done the trick. I’ll probably top dress again before the next watering for another nutrient boost.
It’s adding nutrients to top dress, but still technically “just add water”. What do you think? I think most growers wouldn’t mind sprinkling some compost on the soil in the flowering stage. They’re in 5-gallon pots, and it obviously wasn’t enough soil to last them until harvest. Perhaps next time I’ll put them in 10-gallon pots and see if that has enough nutrients to last until harvest without needing a top dressing.
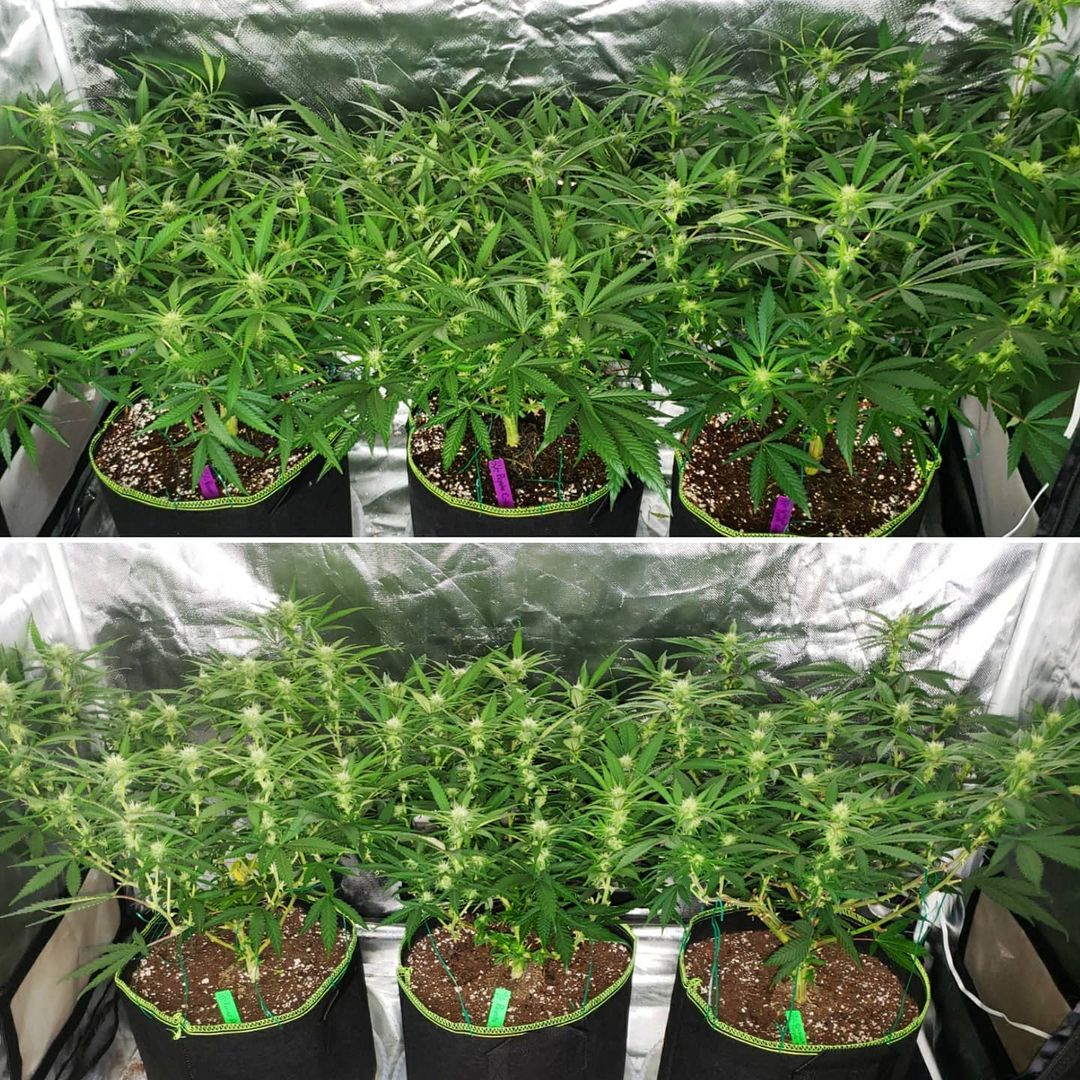
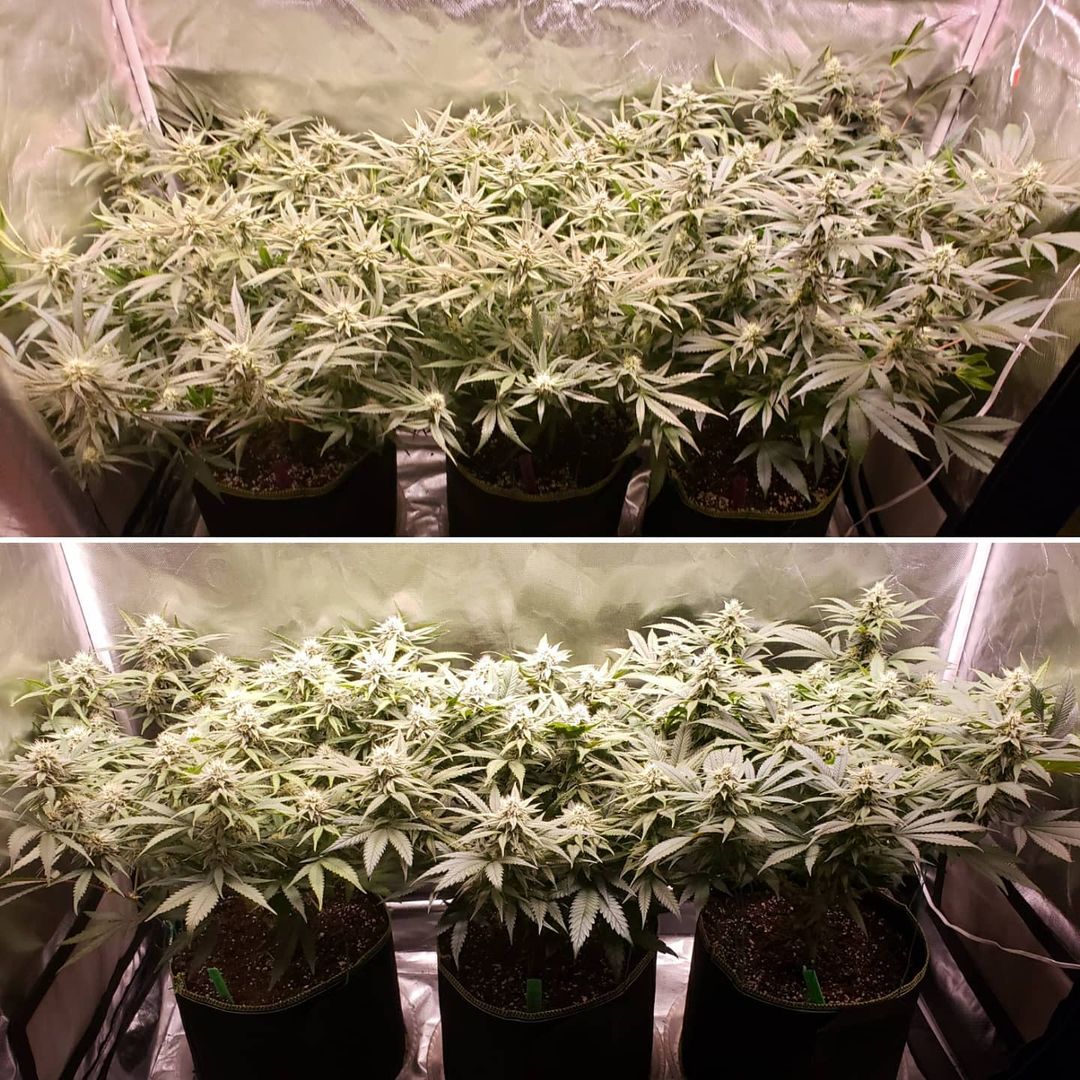
October 11
Top of each picture is the coco plants, bottom are the soil plants. Week 5 after initiating 12/12.
Here they are in natural light
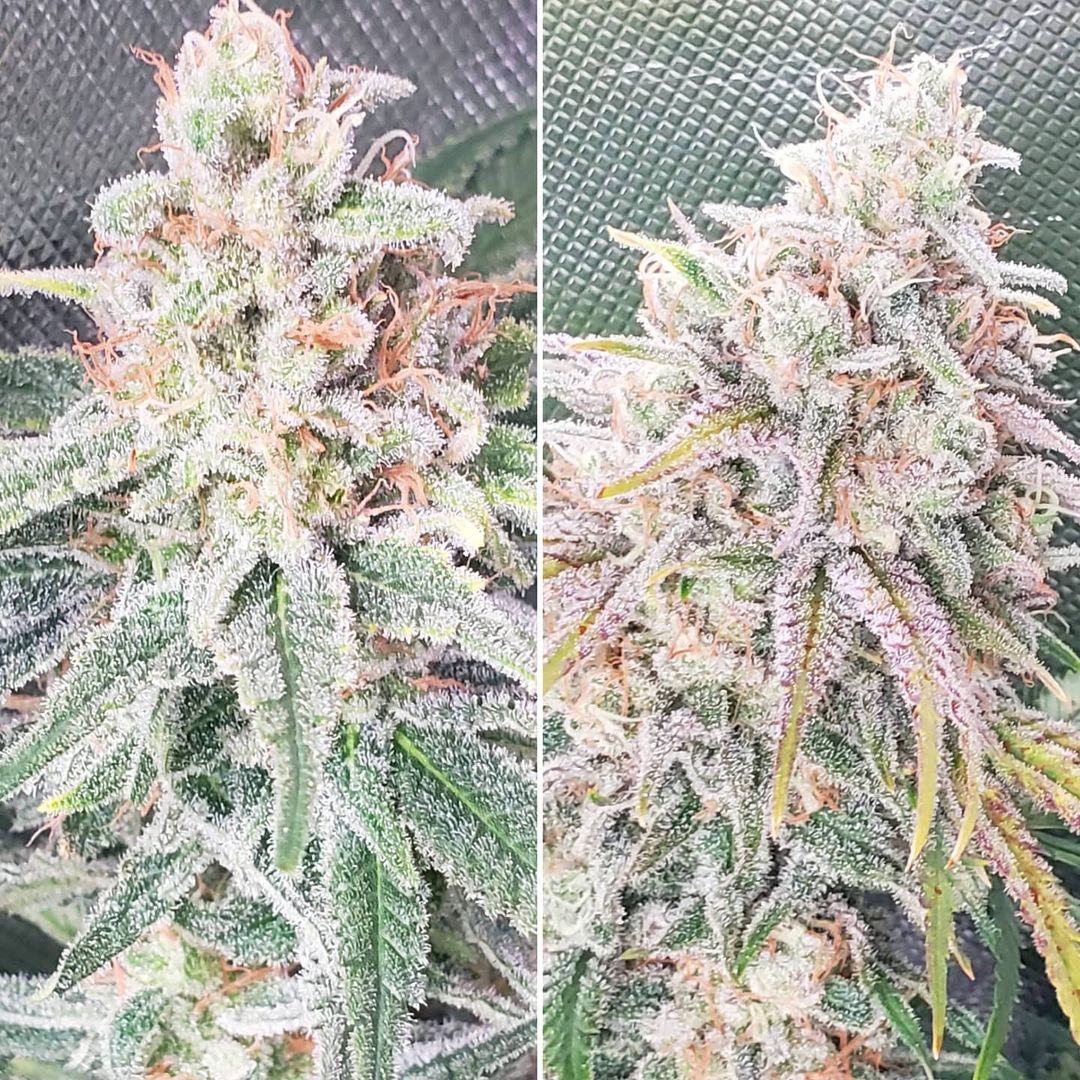
Next I show each plant with a closeup bud picture from each tent (plants listed in order from left to right in each tent). Since the beginning of flowering, the coco buds have been longer while the soil buds are fatter. That makes it hard to compare them to estimate yields.
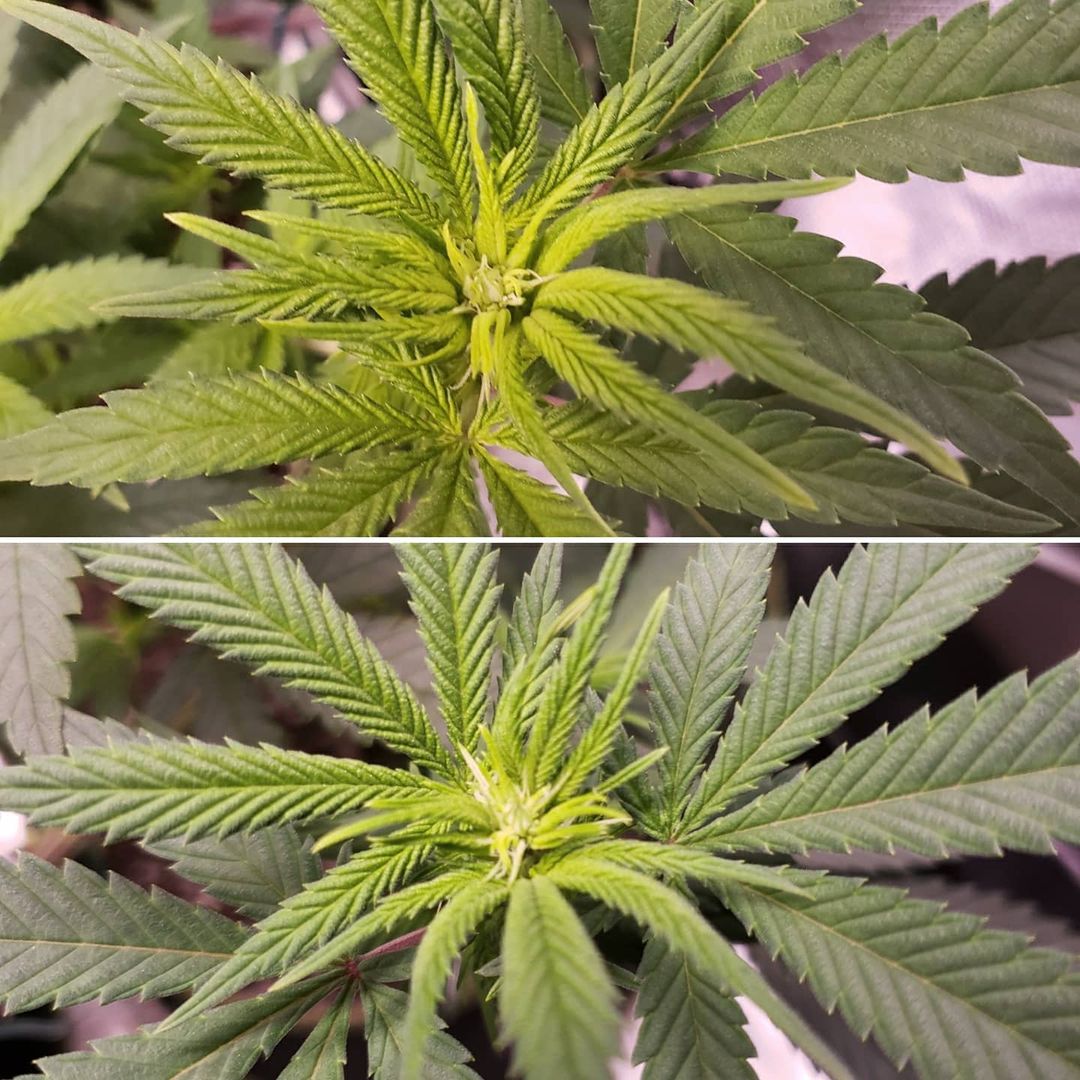
Power Africa (coco top, super soil bottom)
Peyote Critical (coco top, super soil bottom)
Critical Purple Kush (coco top, super soil bottom)
A big difference I’ve noticed is the trichome production stays closer to the buds in the soil grow, while the trichomes on the coco plants are spilling everywhere on the plant. The soil buds are trichome-covered but their fan leaves barely have any trichomes at all. With the coco plants, the fan leaves are so sticky it’s kind of annoying.
Based on what I’ve seen so far, I think the coco may be a better choice for a grower looking to do extractions because there are just so many trichomes on the leaves. However, I’m here for the buds! Can’t wait to get results for cannabinoids, terpenes, and yields after harvest.
They’ve been on 12/12 for 5 weeks today, so there’s 5-7 weeks left before harvest. Who knows what will happen next!
October 14
So far, I love these LEDs. They’re easy to use and my plants look great. They’ve been on 12/12 for just over 5 weeks and starting to look chunky!
Here are the coco plants

I’ve also had excellent results with multiple different HLG LED fixtures. Consistently produce potent, high quality buds with great yields per watt. What LEDs should I test next?
I’ve tried just about every other type of grow light over the years. They all have pluses and minuses.
Fluorescents like T5s are perfect for young plants and produce good quality buds, but the plants need to be well trained to get the best density and yields. Even in the best case, I’ve found them to yield about half as much per watt compared to other lights like LEDs, HPS, and LEC/CMH.
MH/HPS are awesome budget lights. MH makes short bushy growth in the vegetative stage, and HPS produces huge yields and dense buds in flowering. MH/HPS fixtures are cheap and produce comparable yields to LEDs per watt. The downside is burning hot bulbs. But with the temperature under control they produce vigorous happy plants. Great in a grow tent with a strong exhaust fan venting hot air out a window. I sometimes still use HPS during winter because I don’t want to add a heater for LEDs. I’ve gotten better yields, density, and bud quality with 150W or 250W HPS than small cheap Chinese blurple LEDs in side-by-side tests. But new LEDs like HLGs, Mars’ and SpiderFarmer perform better in flowering.
LECs/CMH are another HID, and the technology is basically halfway between MH and HPS. They have similar issues with heat and results are heavily dependent on the bulb used. Their blue/4k bulbs get some of the fastest vegetative growth ever, though plants can be a bit stretchy. Used in the flowering stage the 4k bulbs produce more trichomes and terpenes than other lights I’ve tested due to high UV production, with decent yields. The red/3k bulbs in flowering don’t produce quite as much sparkle and terpenes, but get yields as good as HPS or better.
October 17
If you had to pick, would you be Team Coco or Team Soil?
Top picture is coco, bottom is soil
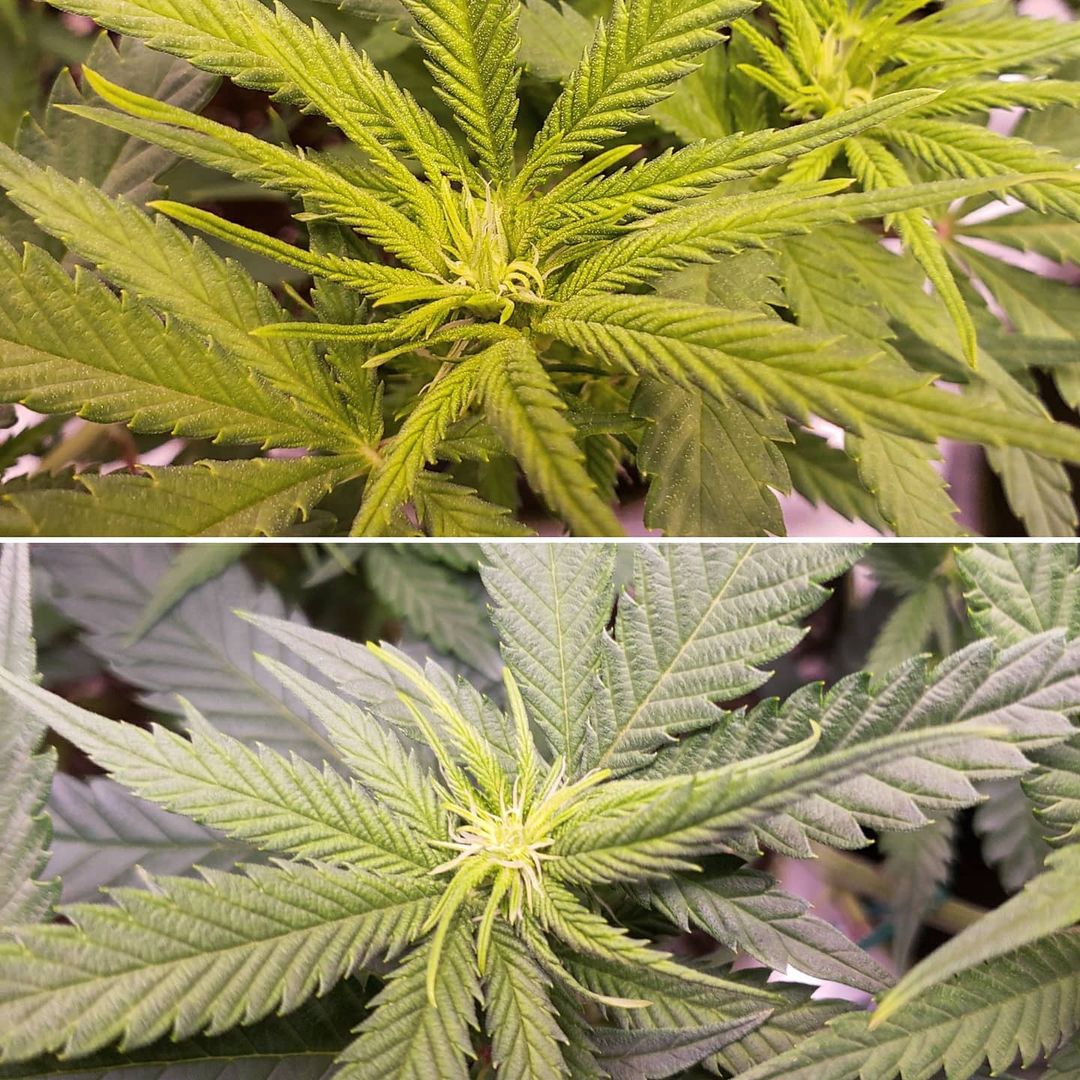
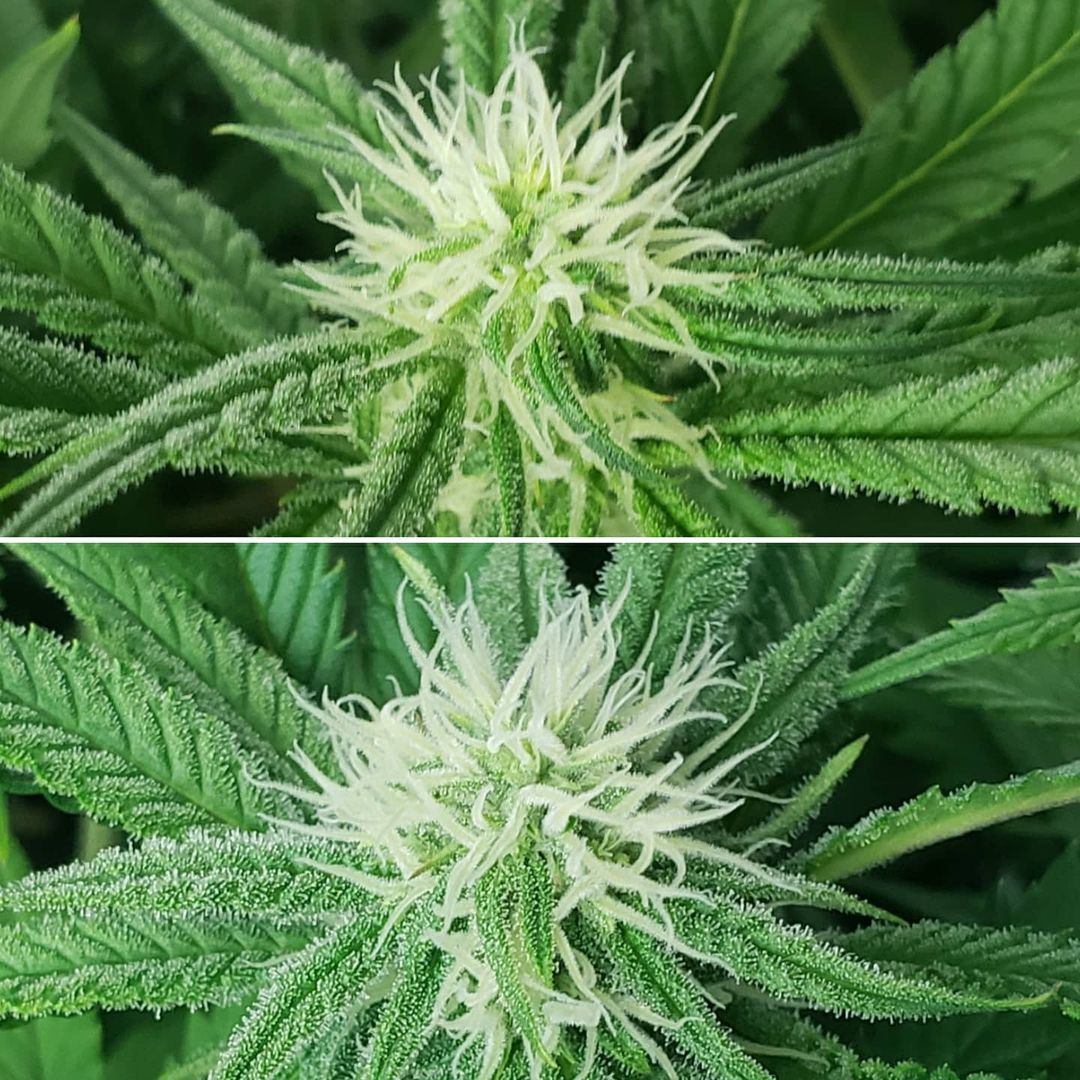
Power Africa. These buds show the greatest difference, especially when it comes to trichome production. The coco buds are absolutely dusted in trichomes (left side is coco, right side is soil)
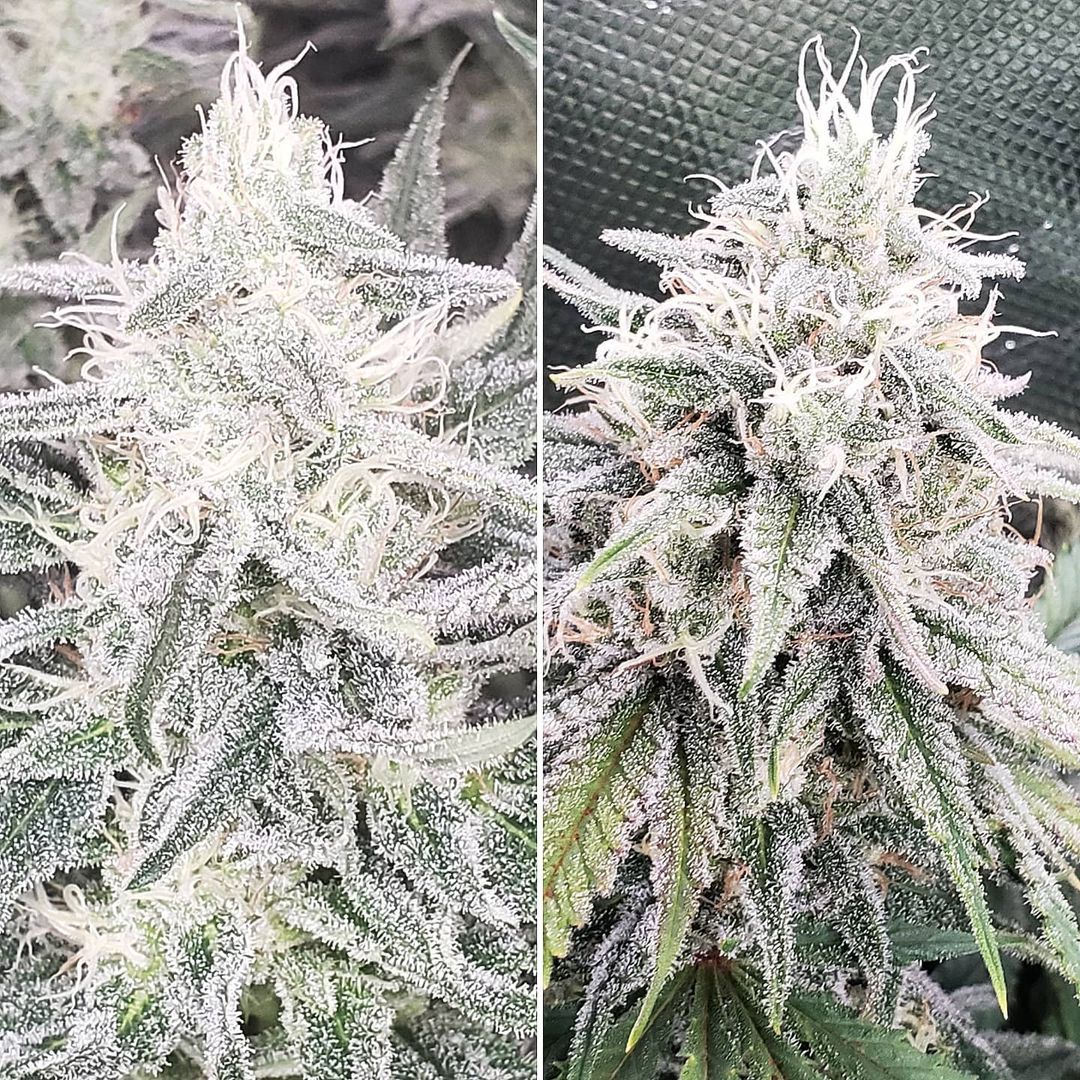
Peyote Critical. These buds look somewhat different. The sugar leaves next to the coco buds are still totally green while the sugar leaves on the soil buds are starting to look a little purple at the tips. (left side is coco, right side is soil)
Purple Critical Kush. The buds from these clones look almost exactly the same. (left side is coco, right side is soil)
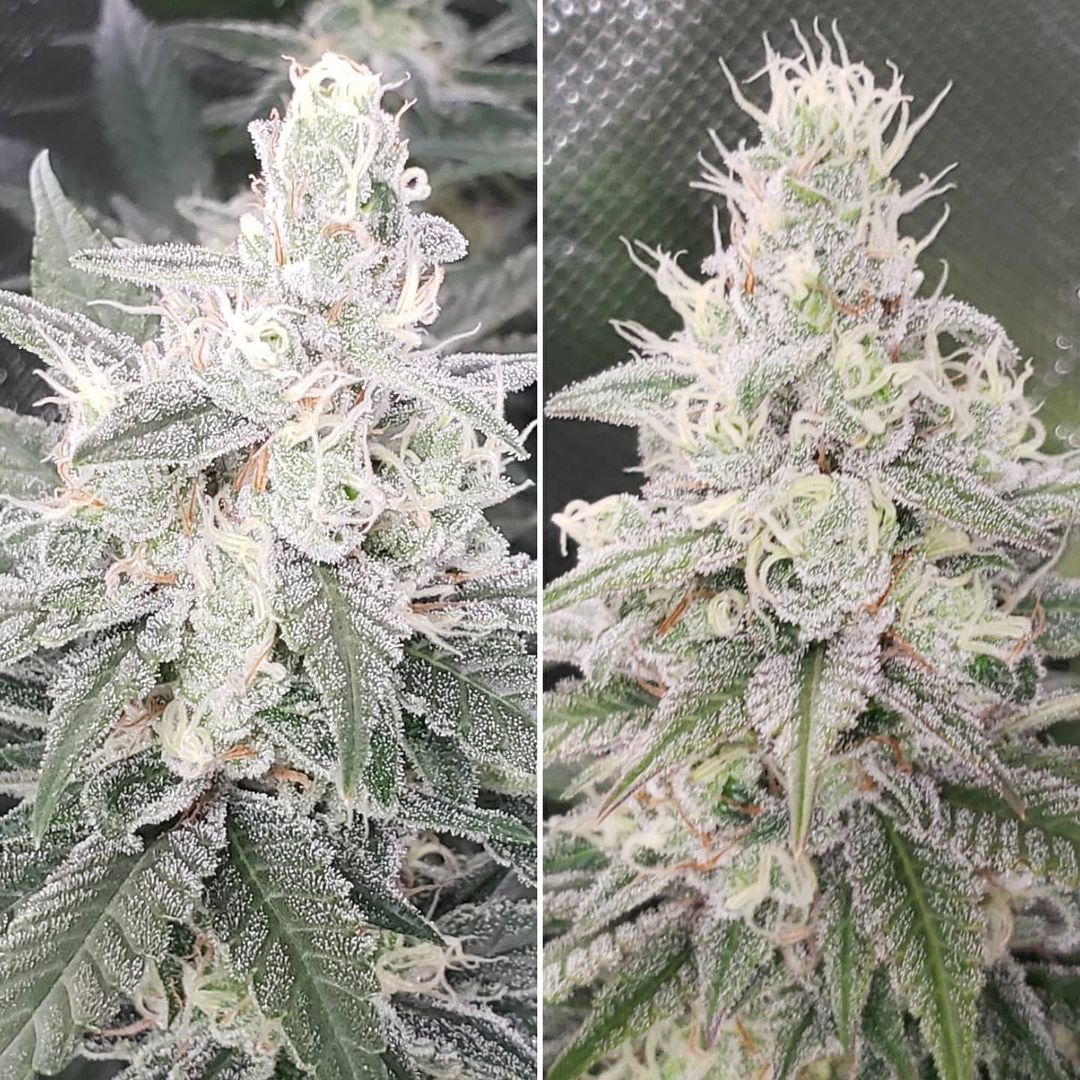
What do you think? In general, the soil buds are fatter but the coco buds are longer (the coco plants stretched more after 12/12 and the stems are all longer overall).
I have to admit I’ve been surprised that the grow medium affects bud development so much on some strains but not others. Even when I’ve grown clones under different grow lights there wasn’t as much of a visual difference between buds as with the Power Africa, especially at only about 6 weeks since 12/12. The plants have only just begun to show their bud “personalities”.
Do you feel like each plant has their own personality when it comes to growth patterns and buds? I know I think of plants that way. When I first started growing I used to actually name each plant.
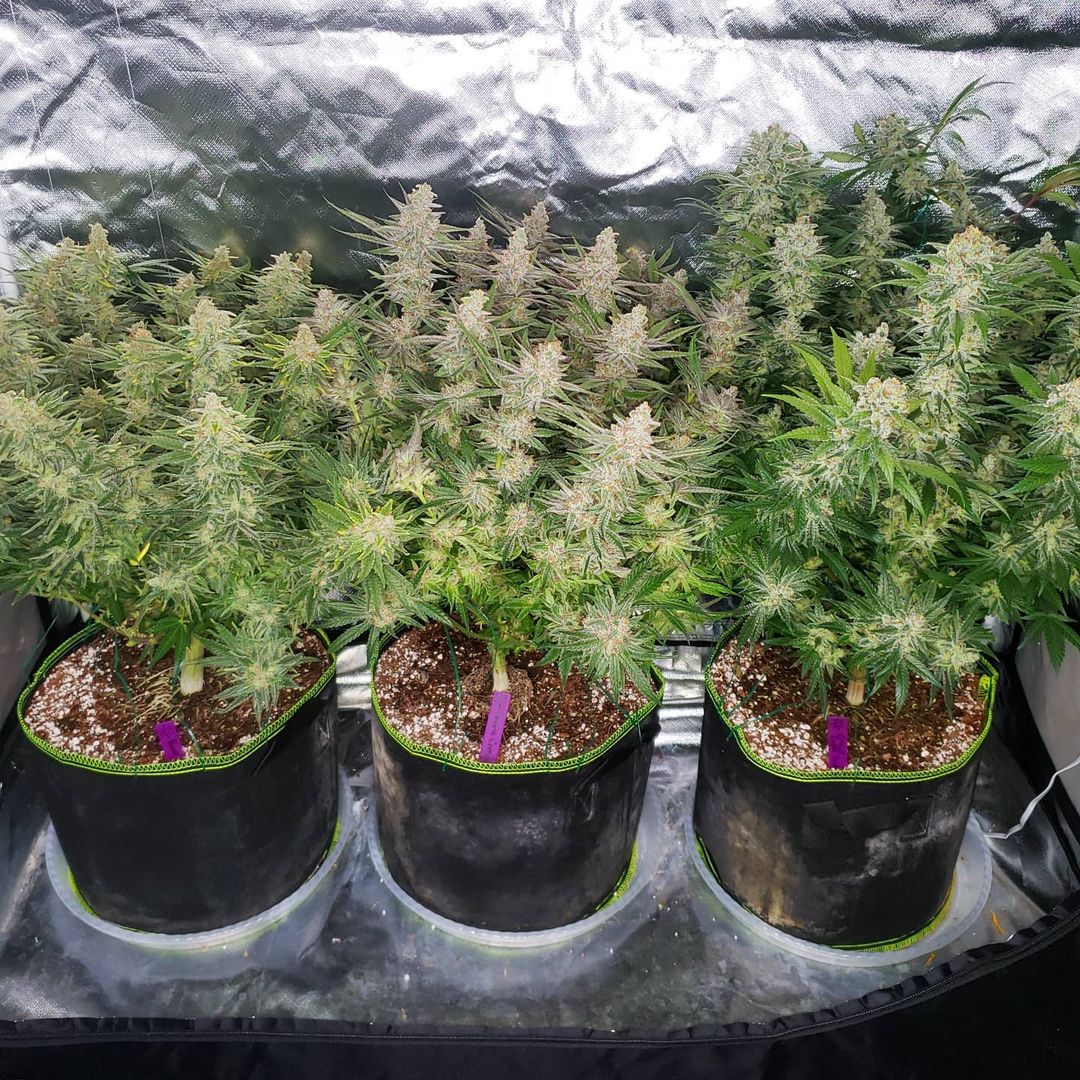
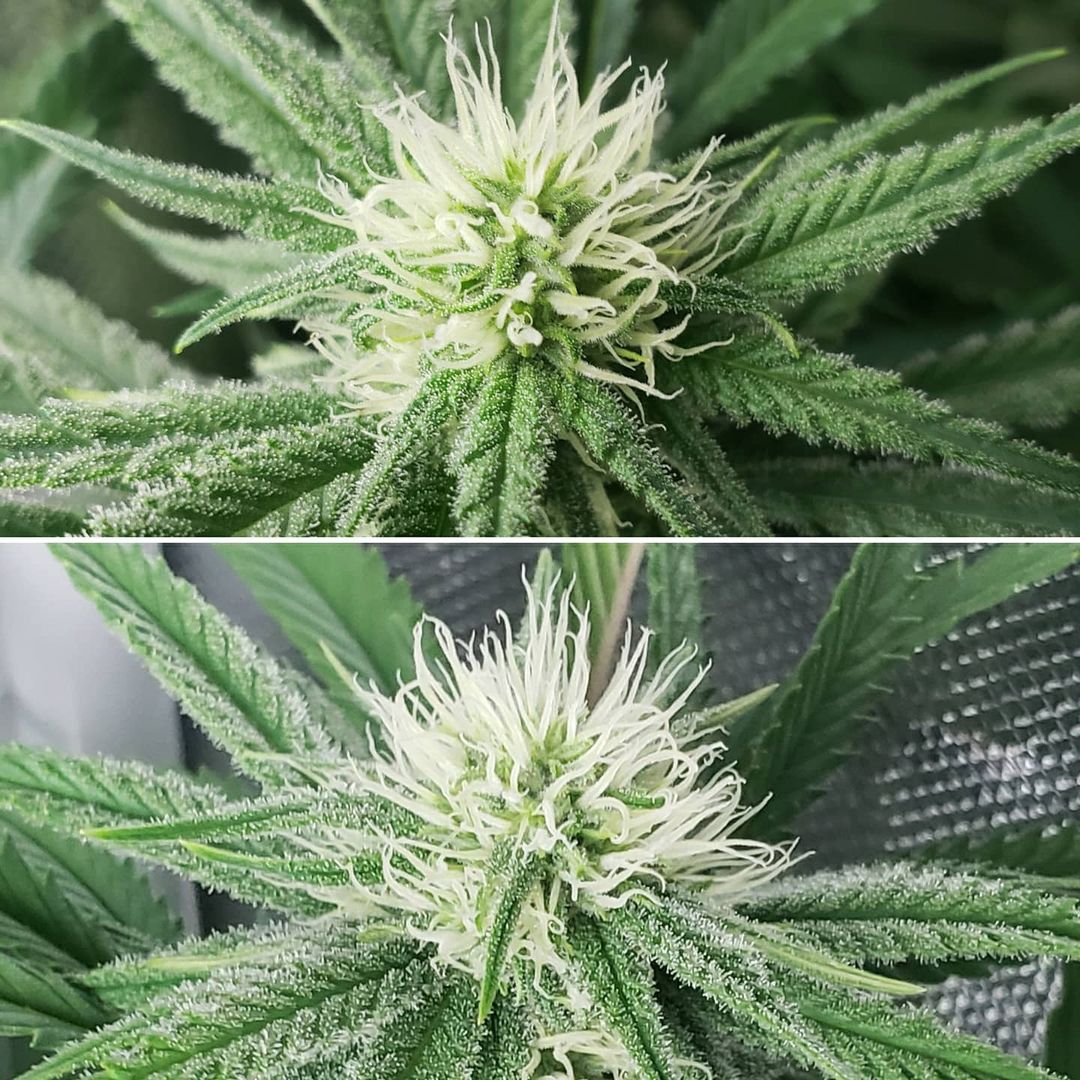
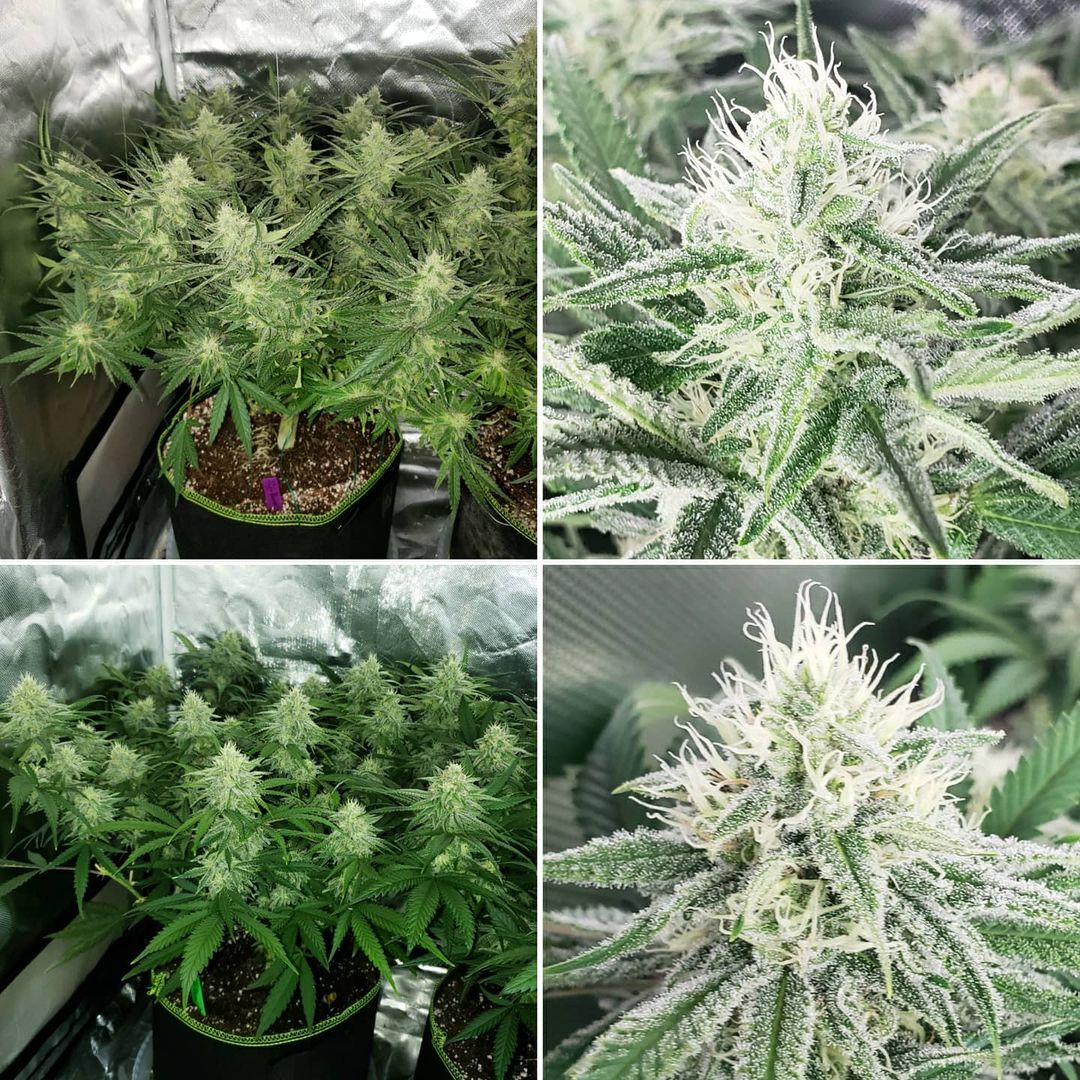
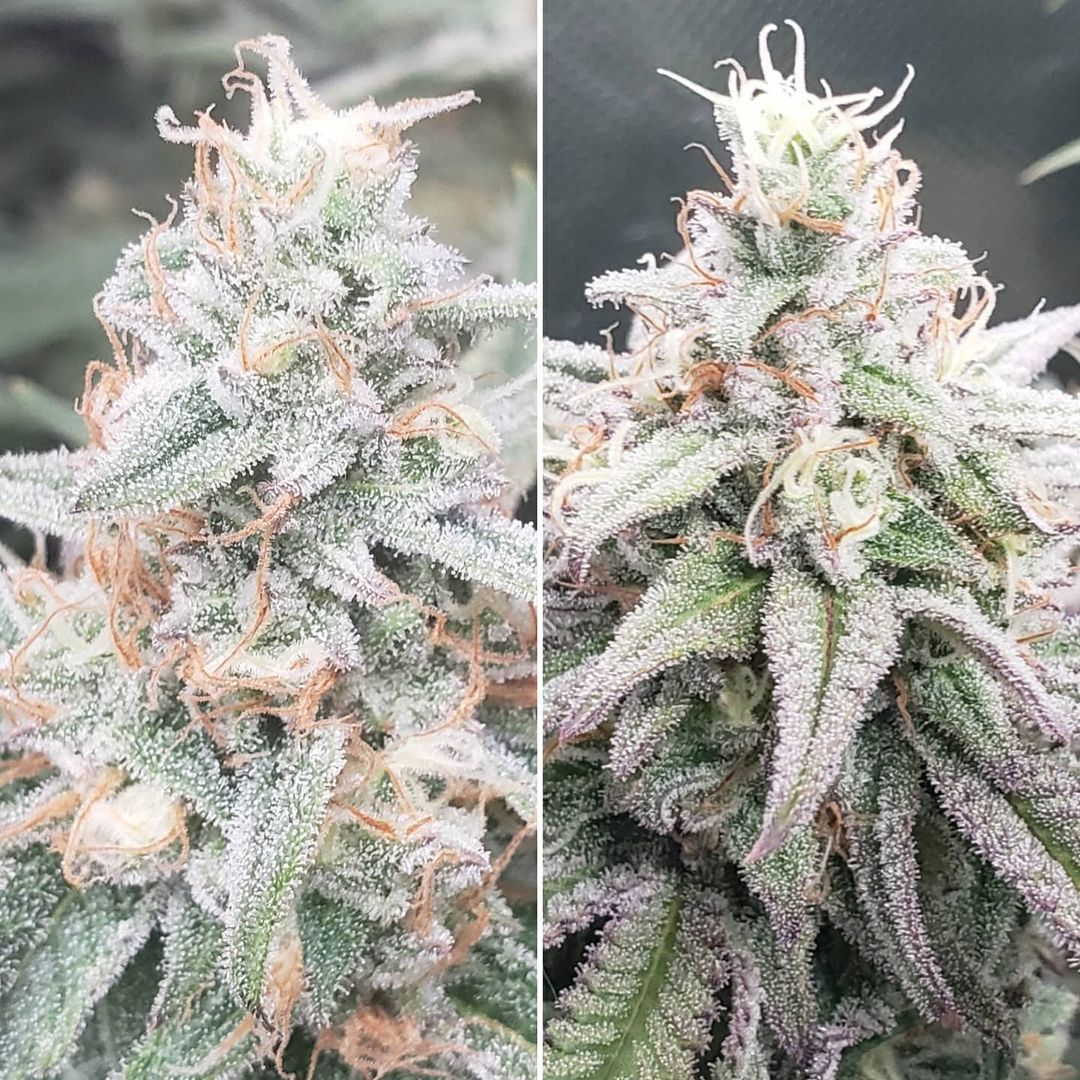
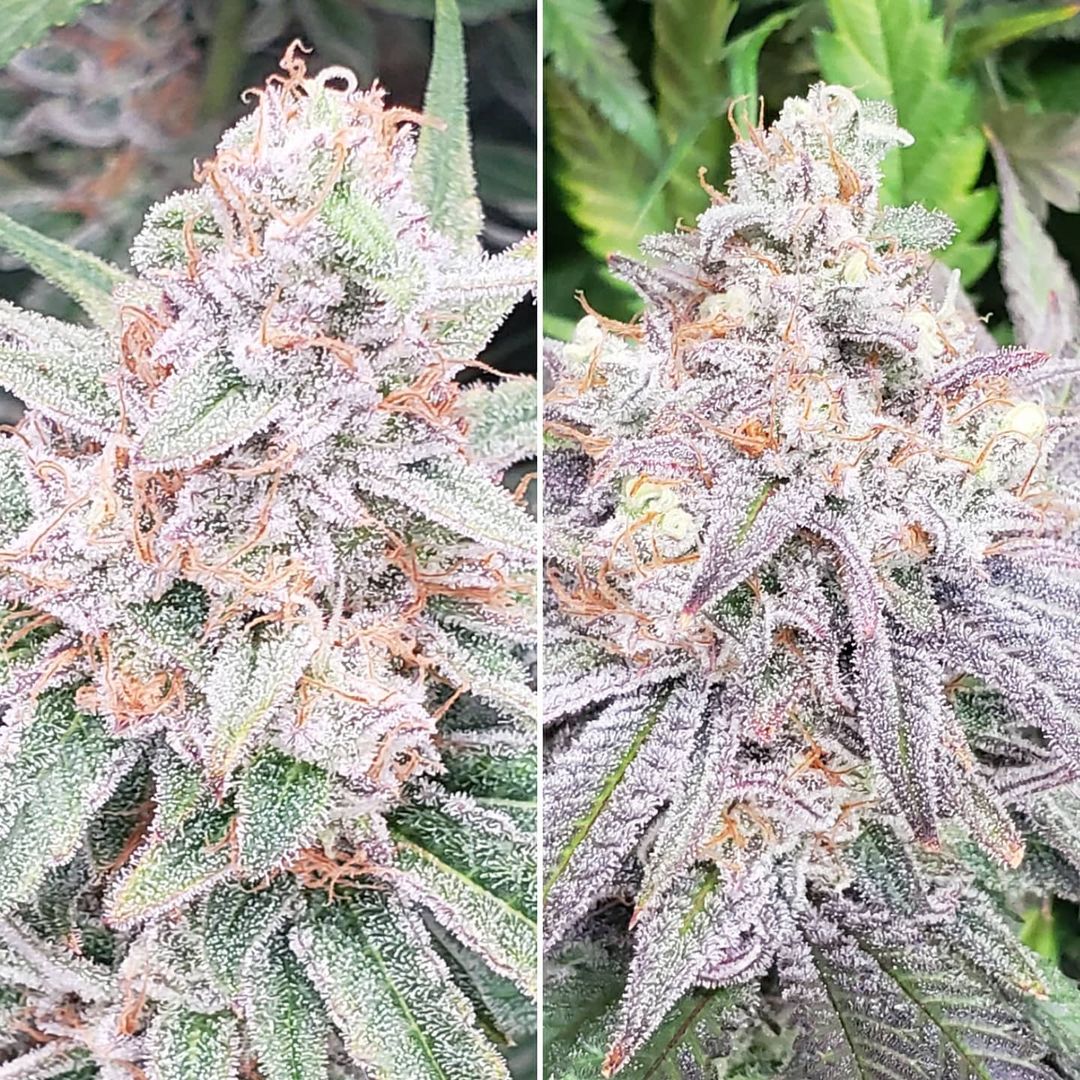
October 23
Nearly all the leaves on the Peyote Critical plant in the super soil are green on top but purple underneath. Pretty! The sugar leaves around the buds and even the buds themselves are turning purple, too.
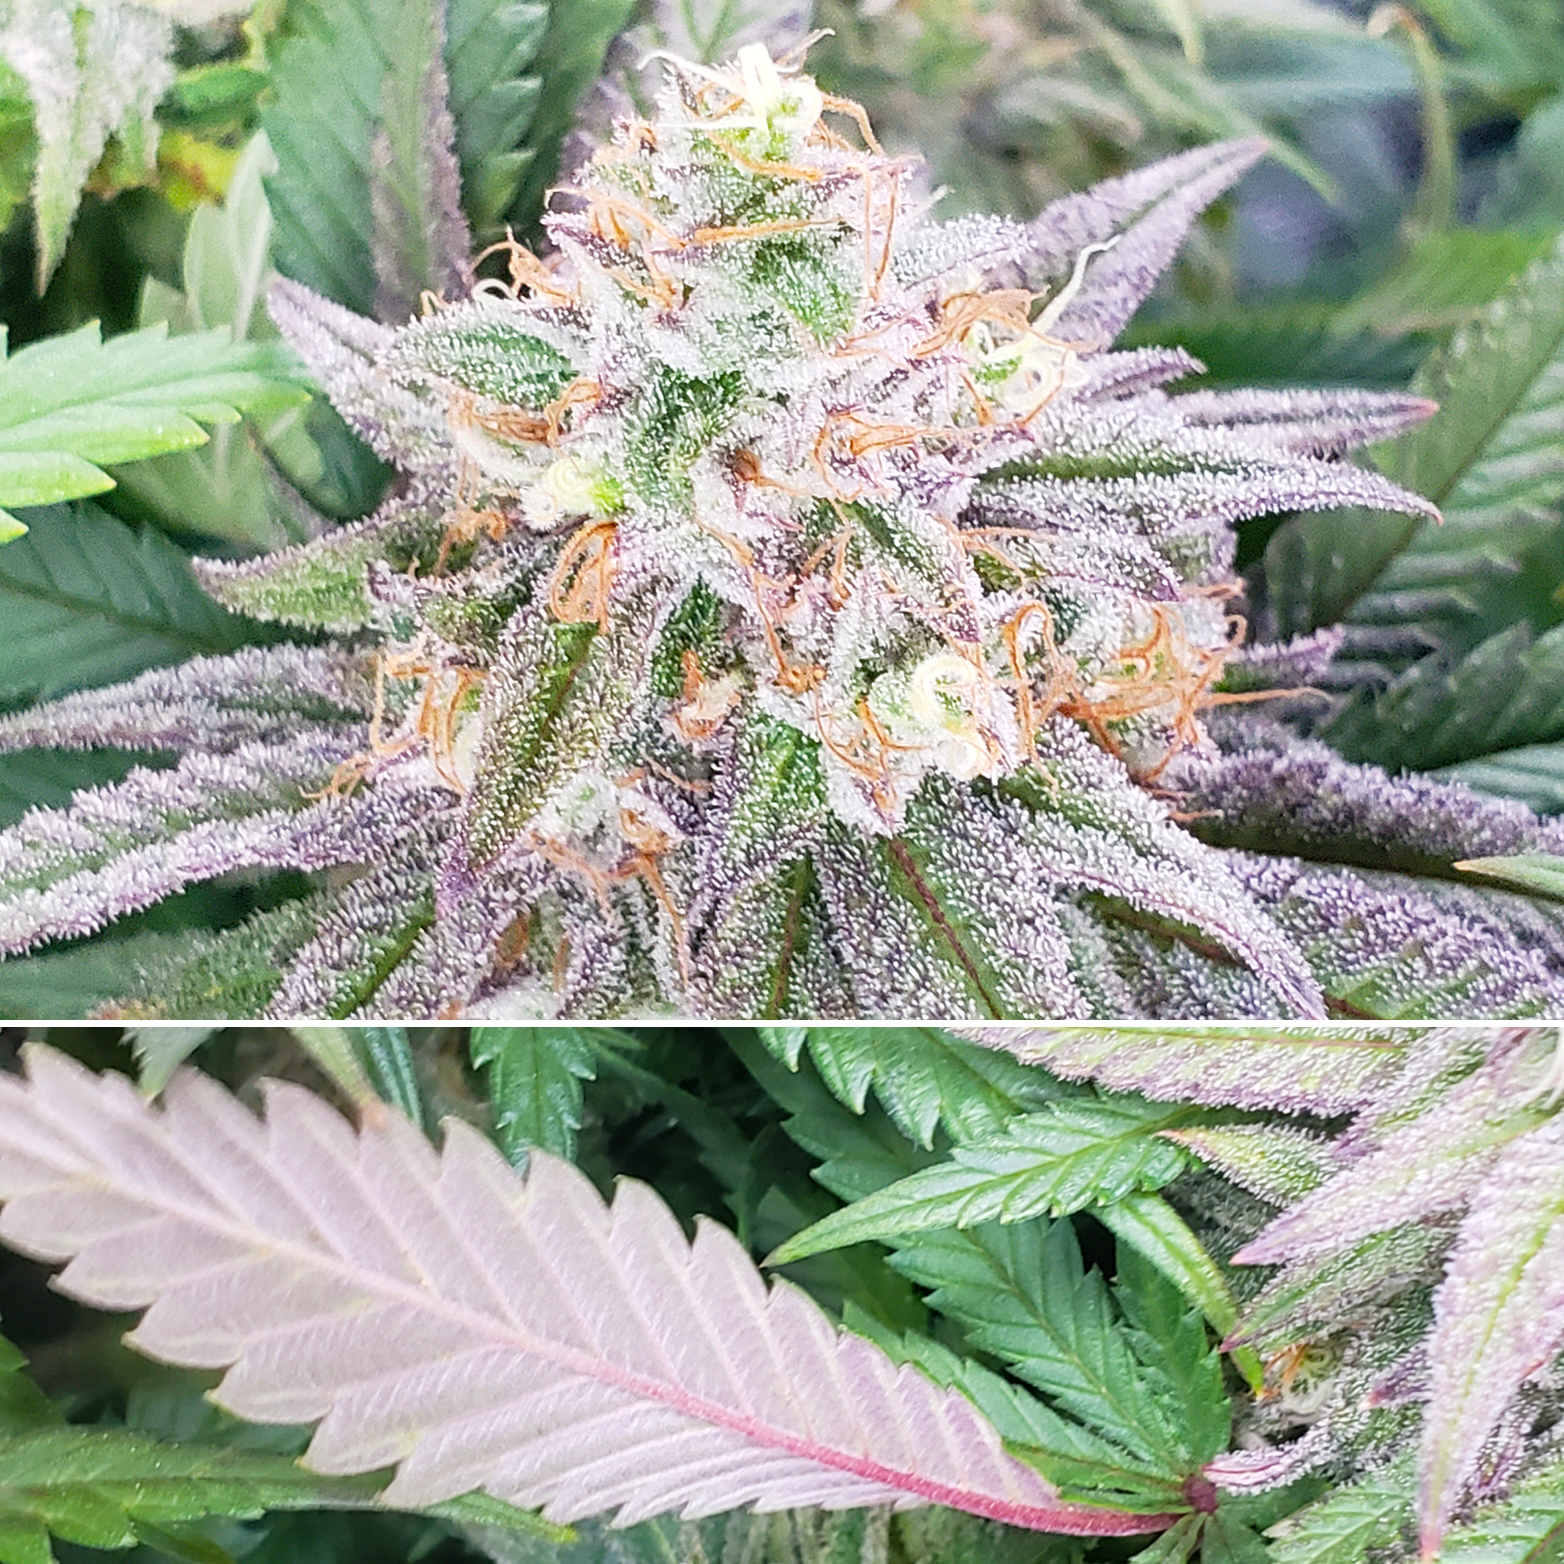
What’s interesting is its clone in coco coir isn’t showing any signs of purple yet. The buds on the coco coir clone are a typical green/orange.
Perhaps the properties of the grow medium have an effect on color. It could also be the nutrients (from the soil vs bottled nutrients) and/or pH (pH is close to 7 in soil, but closer to 6 in coco). In any case, the buds are looking good to me!
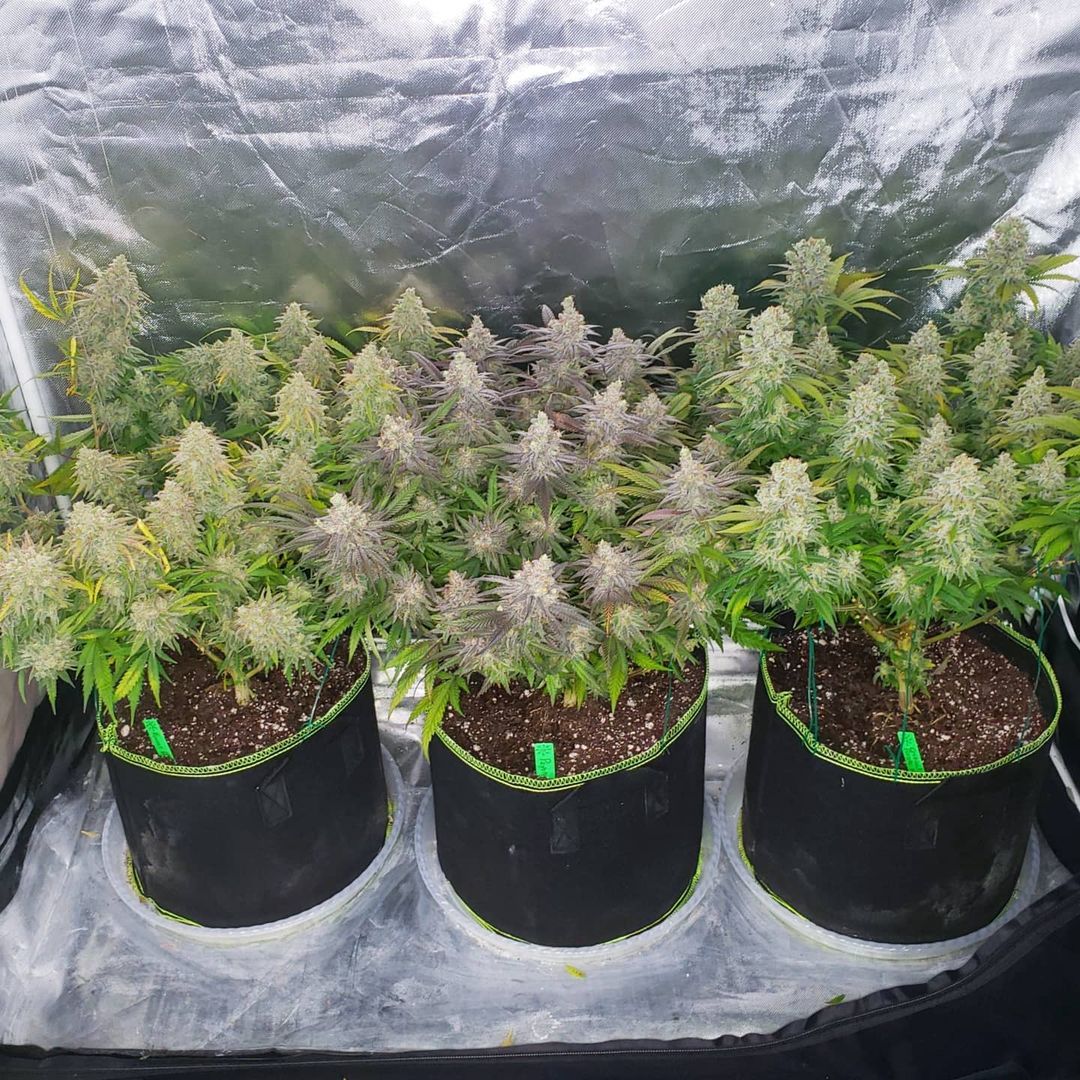
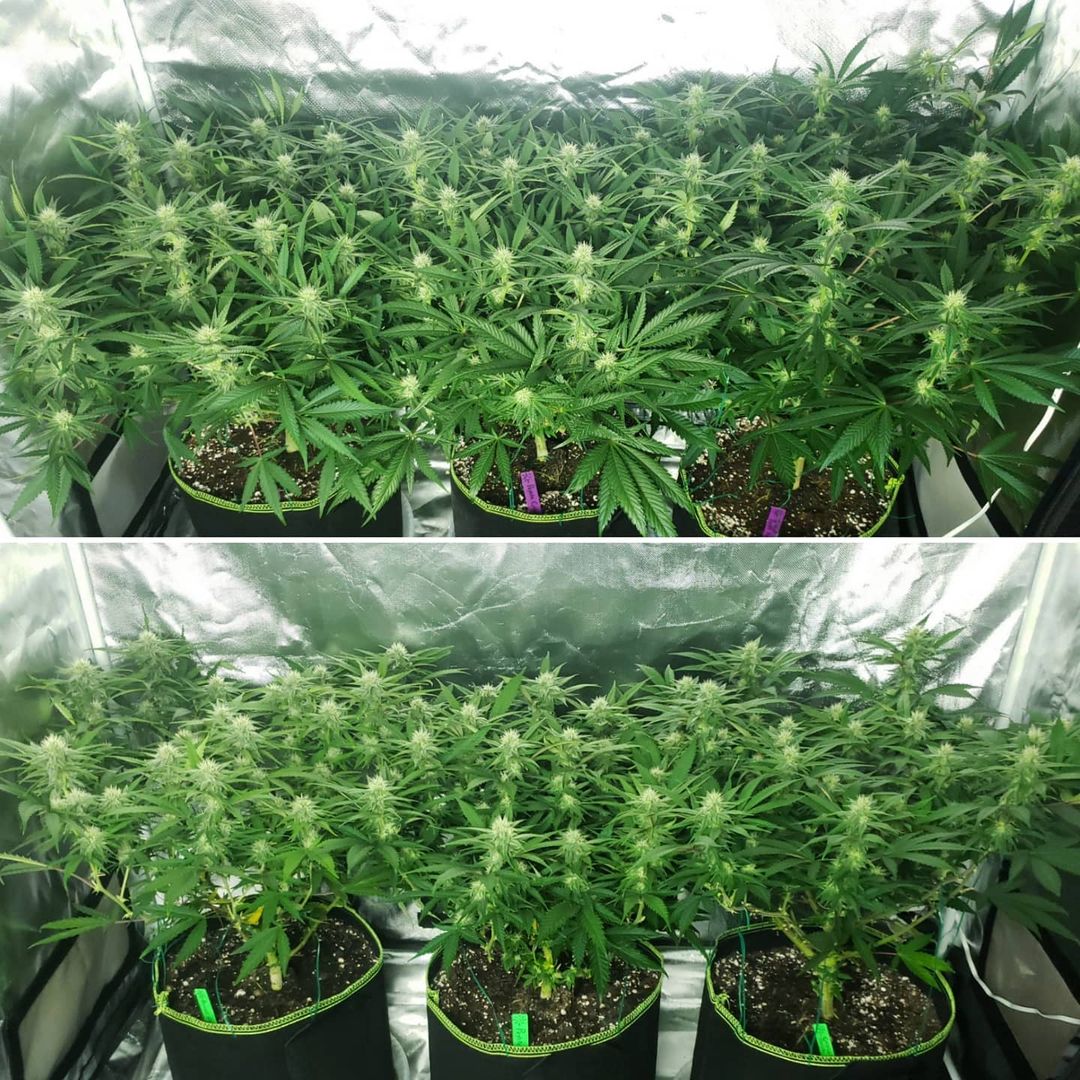
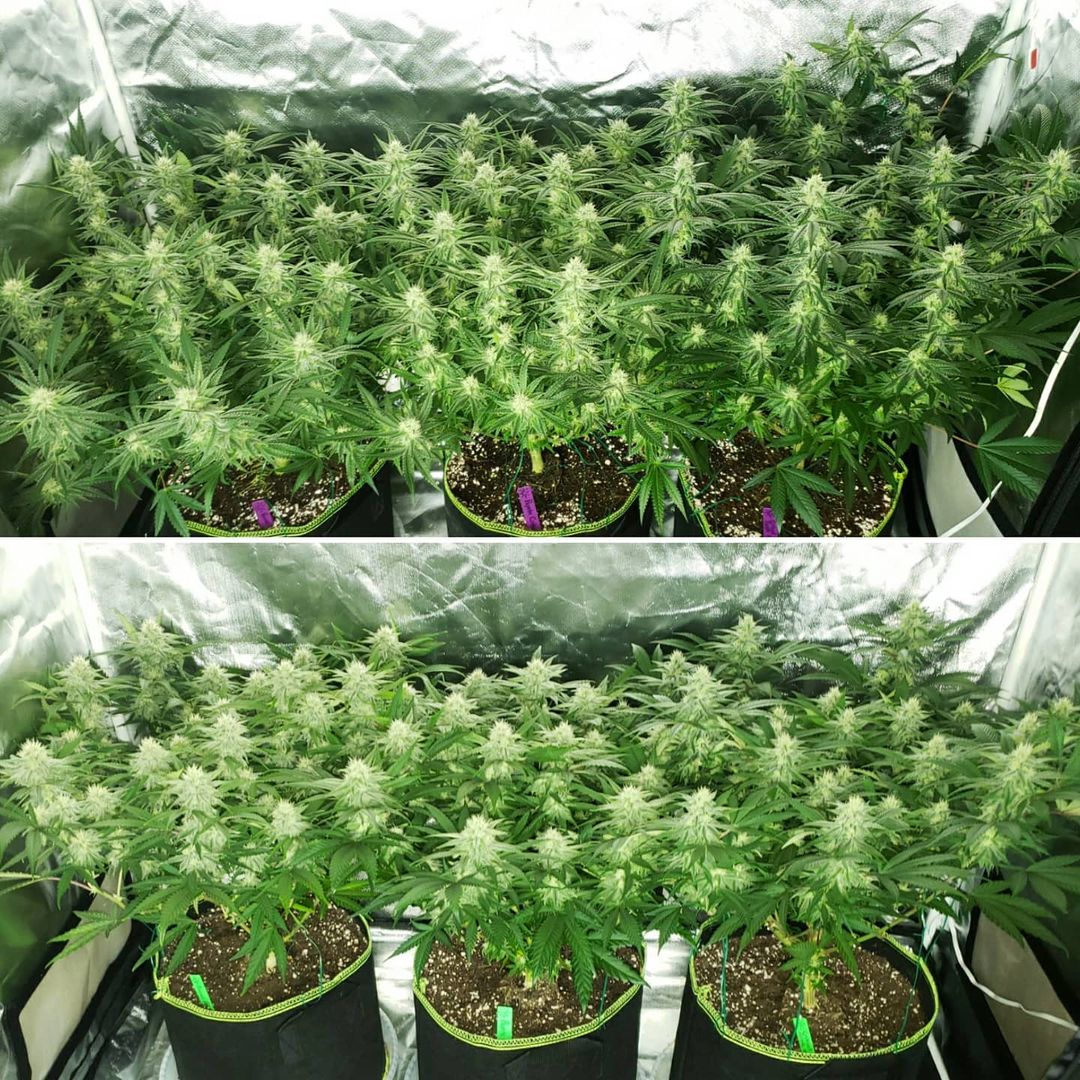
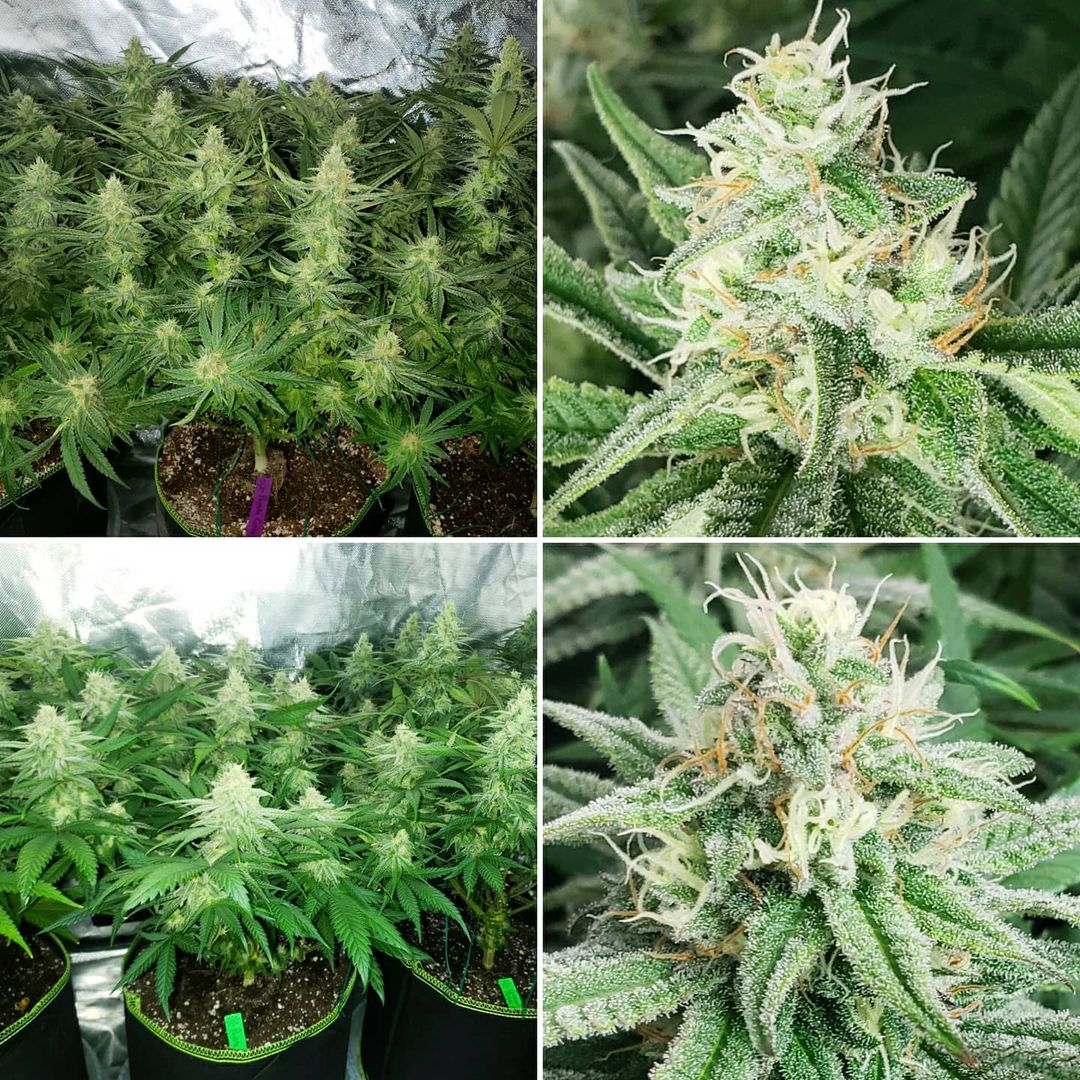
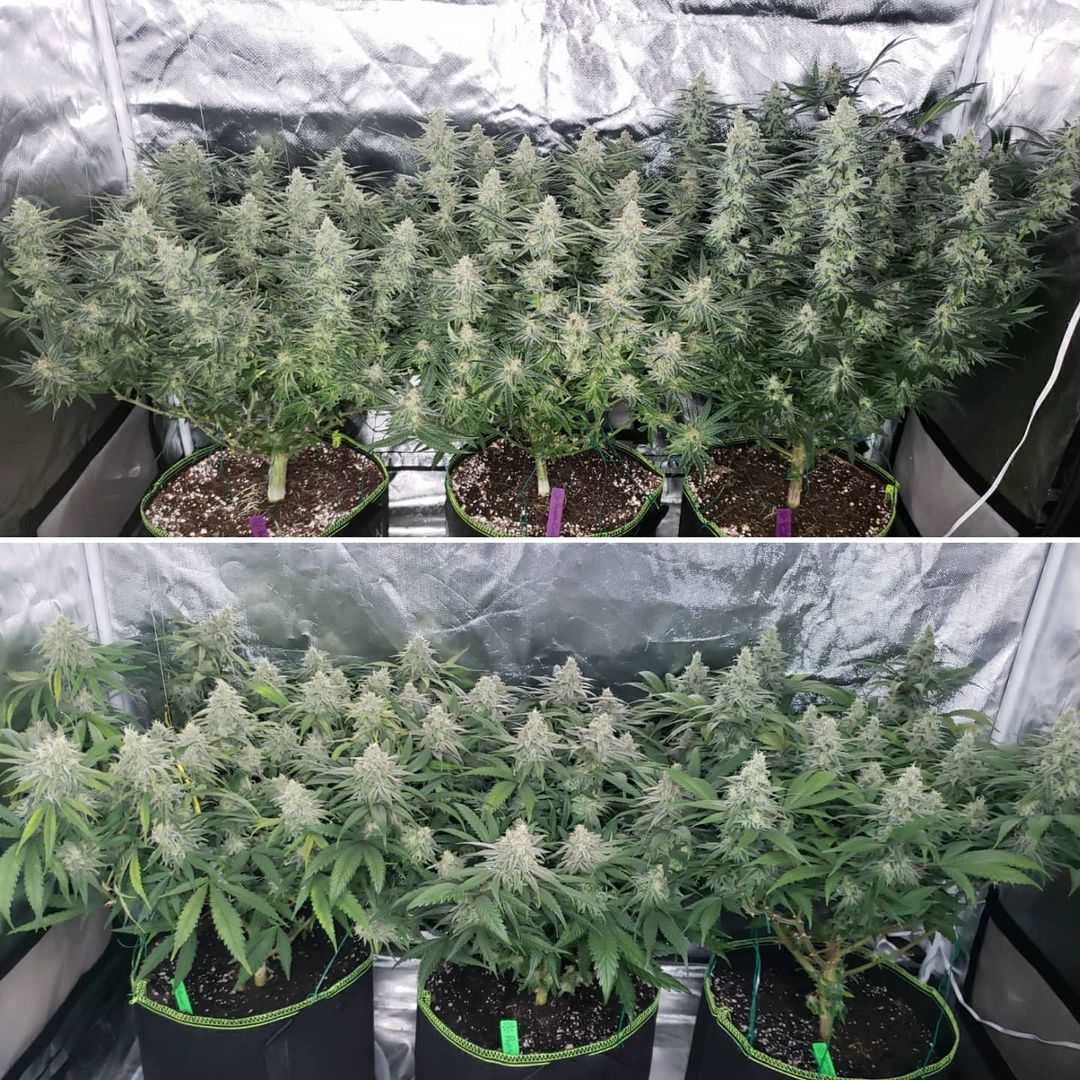
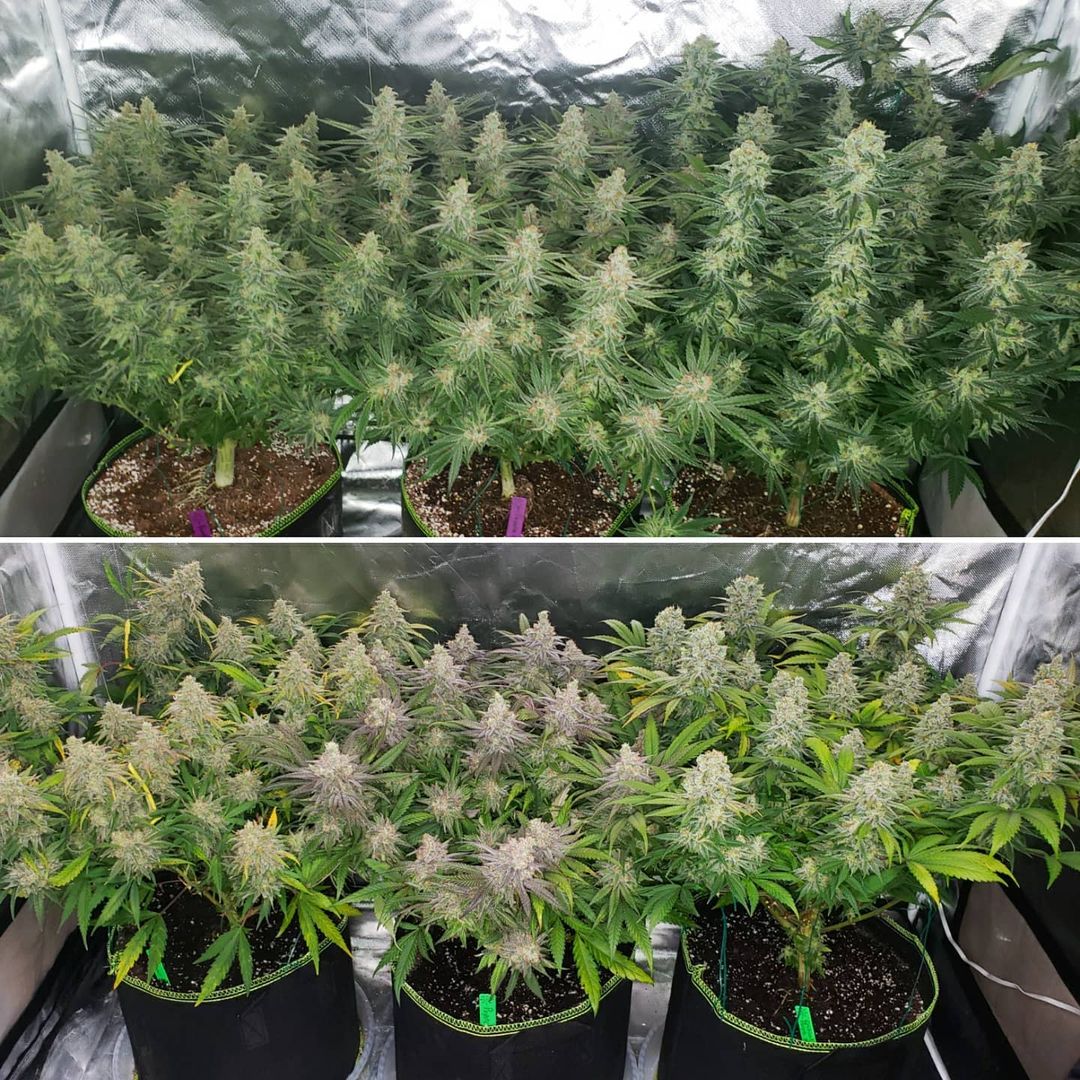
October 30
Top is coco, bottom is super soil
Here are the bud pictures in order of the plants from left to right.
Power Africa (coco left, super soil right)
Peyote Critical (coco left, super soil right)
Purple Critical Kush (coco left, super soil right) – not much sign of of purple yet
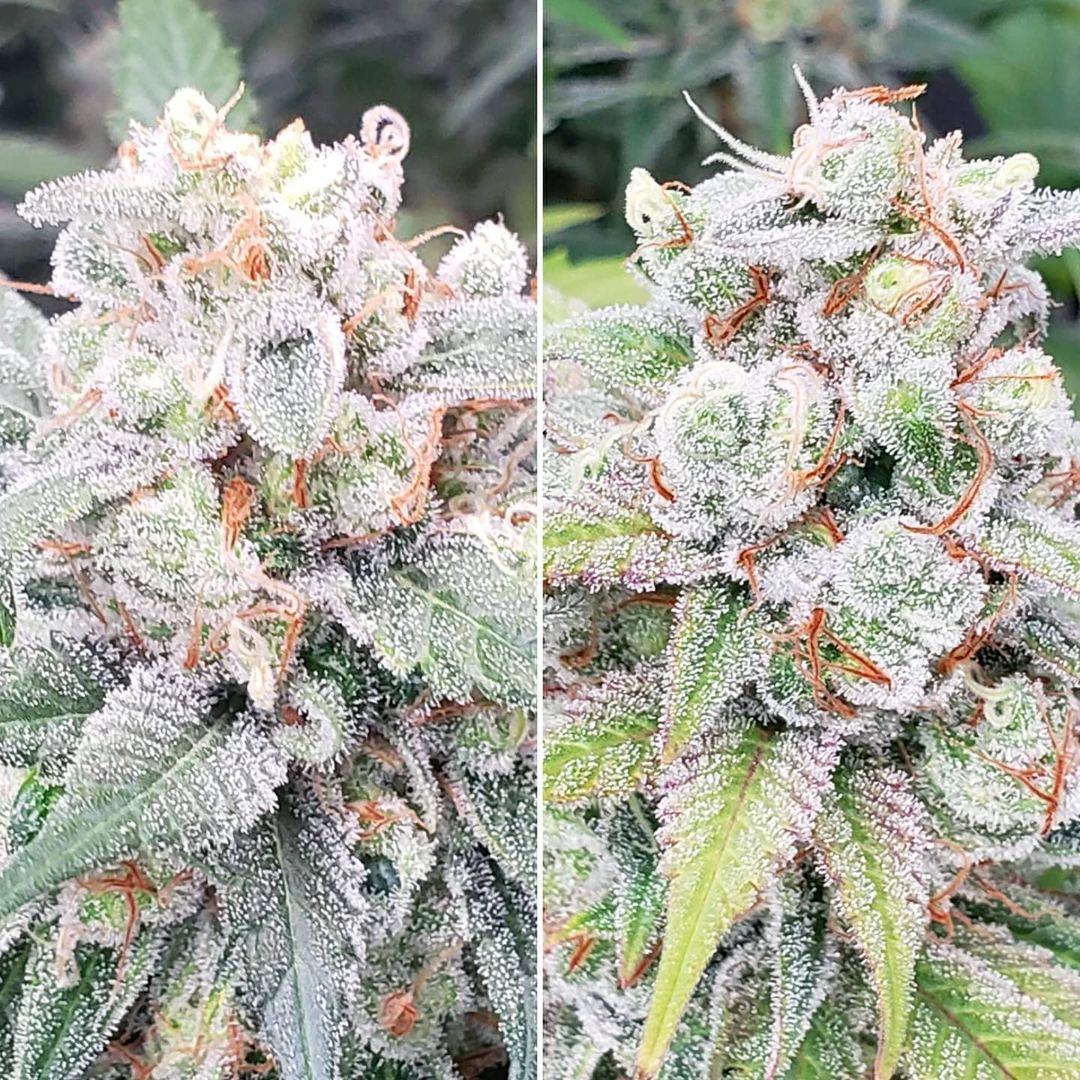
At first the clones looked relatively similar but as we get closer to harvest they look completely different. The grow medium and nutrients are having a huge effect on gene expression in the flowering stage.
Soil buds are more colorful. The coco buds are mostly green with orange hairs while 2 of the 3 soil plants are producing beautiful colors. Bud quality in both tents looks excellent.
The soil plants do look like they’re running out of nutrients in the soil, so some of the color may be the result of nutrient deficiencies. Since this is a “just add water” test I will not add anything. However, if you’re seeing deficiencies like this, I do recommend supplementing soil plants with extra organic nutrients in the flowering stage (low in Nitrogen, high in Phosphorus and Potassium) to ensure nutrients last until harvest. A good example is Roots Organics Uprising Bloom (use this VERY sparingly to avoid burning plants). Or take some of the raw Nature’s Living Soil and make a gentle “tea” and use that to water your plants. If you’re afraid of burning your plants, an excellent ultra-gentle but effective organic bloom booster is Fox Farm Big Bloom. The only downside to Fox Farm Big Bloom is it’s pretty expensive considering you have to use a lot of it at a time.
The coco tent is still winning for trichome coverage while the soil tent is winning for color and smell intensity. It’s hard to estimate yield differences because some clones seem to be doing better in one tent or the other.
I will be reporting yields, smoke reports, and lab results (terpenes and cannabinoids) after harvest. I want you to get as much information as possible on the objective differences between the tents. I’m impatient for harvest time!
Harvest day!
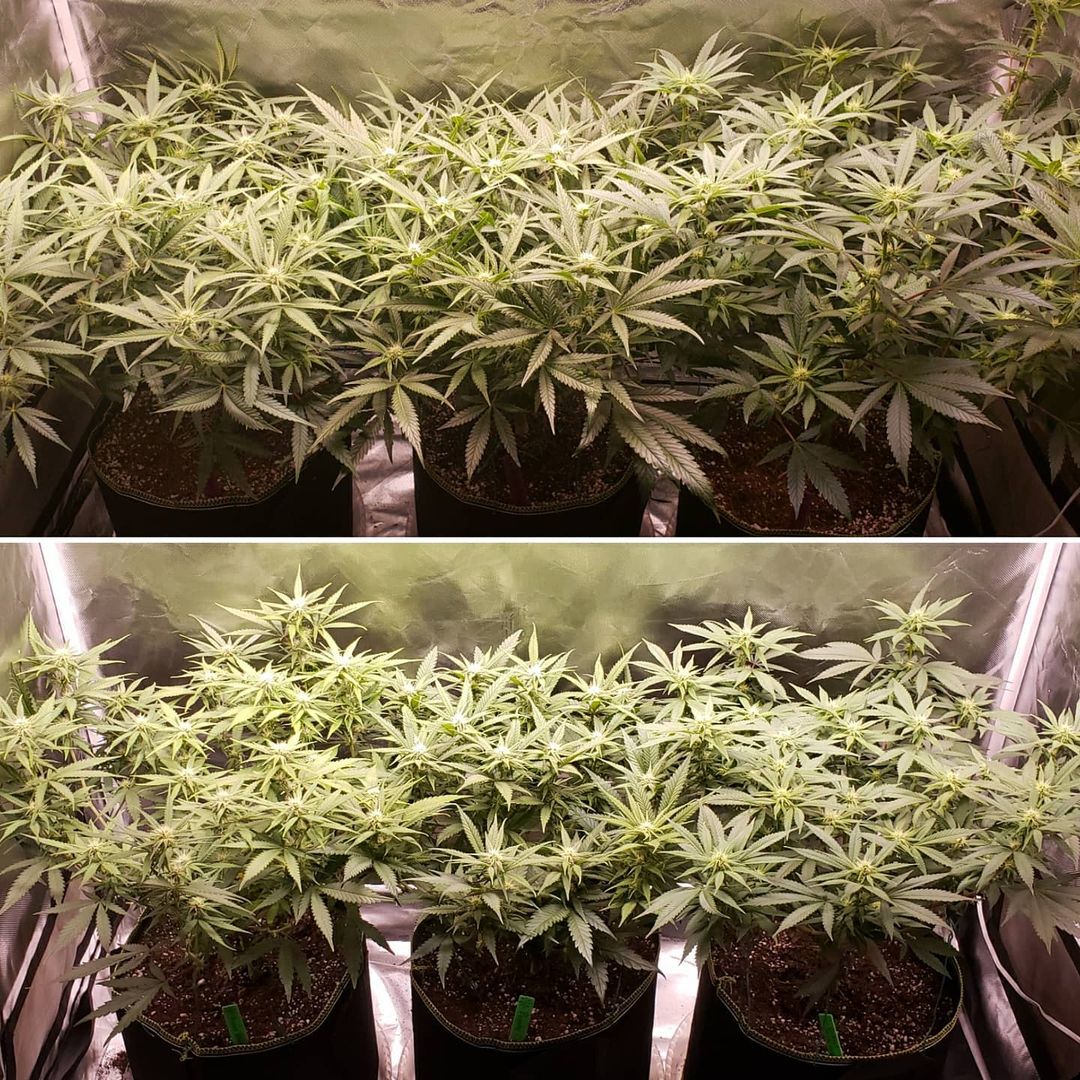
Here are the coco coir plants at harvest
Coco plant drying
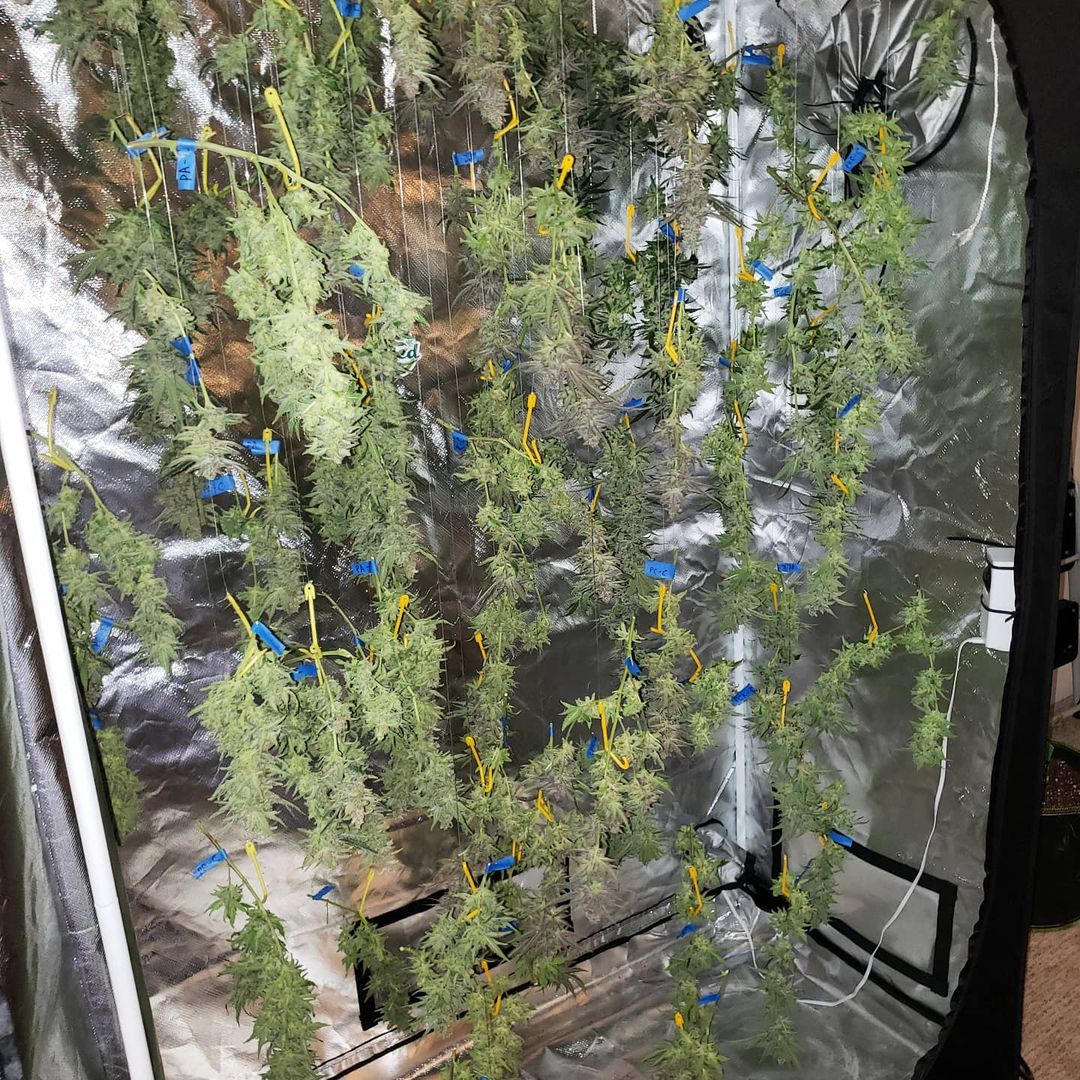
The coco plants were at the beginning of their harvest window (all white trichomes, no clears). I normally would have let them keep growing another week or even two weeks to pack on more weight but the soil plants were done and I harvested them at the same time for the sake of the experiment. It was a tough choice, but in the beginning, I said I would harvest all the plants at the same time and that’s what I’m doing even if it’s not ideal. It’s not a good experiment if you change it as you go along 🙂 If I ever run the experiment again I will harvest the plants when they’re ready instead of at the same time.
Here are the super soil plants at harvest. The Power Africa on the left was really losing color and I was worried the yellowing would start spreading to the buds if I didn’t harvest now.
Super soil plants drying
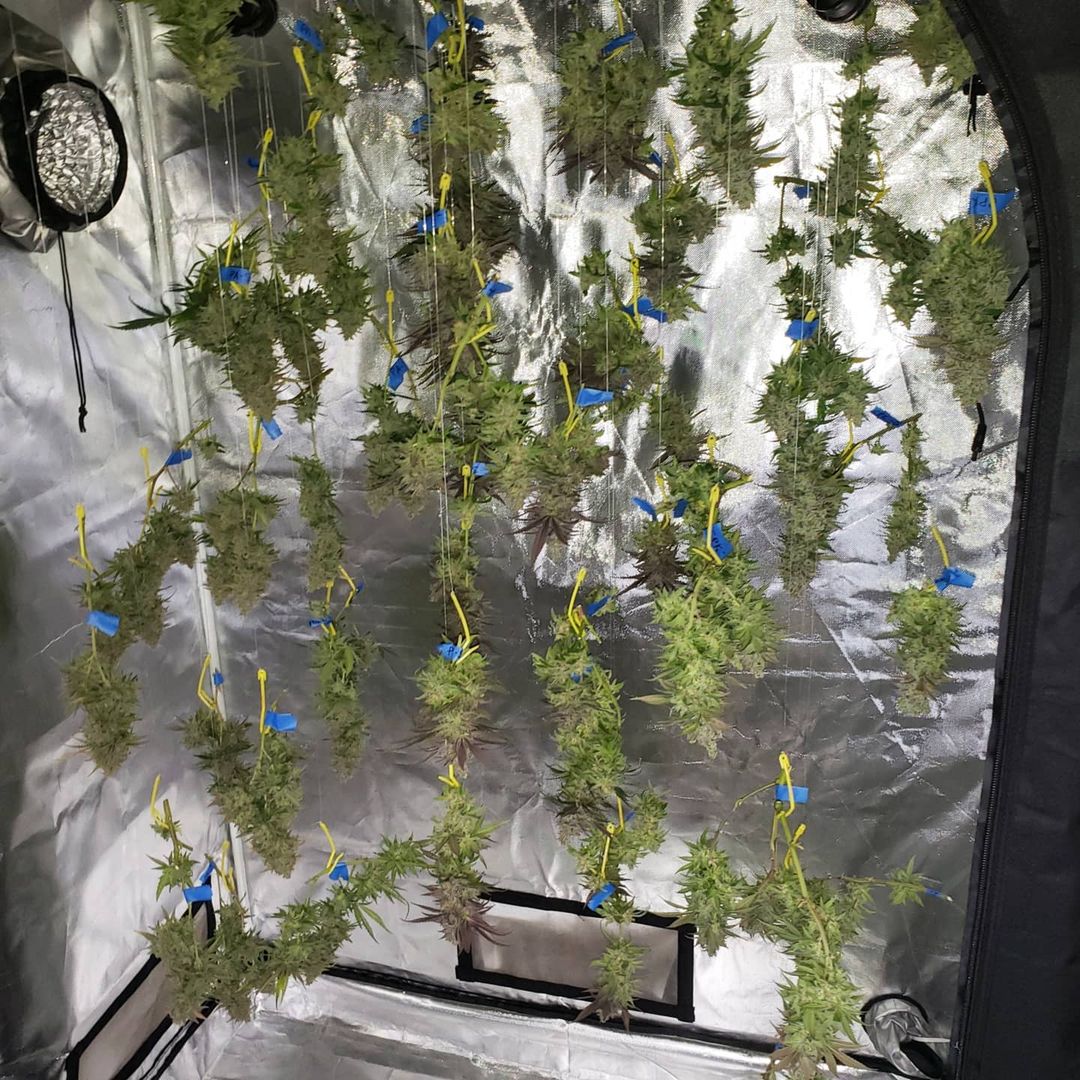
I do think the soil plants would have faired better if I’d boosted them with nutrients, teas, or another source of PK in early flowering. However, this experiment specifically tested “just add water” soil so I stuck to the plan and am sharing the results as-is.
Note from Sirius: Defoliation may have played a part in the soil plants’ nutrient problems, too.
The buds will be drying for about 10 days and then buds get lab-tested for cannabinoids and terpenes. The coco plants received only mineral/chemical nutrients, while the soil plants got all their nutrients directly from the grow medium. Since the plants were clones in identical setups, any differences in the buds are likely the result of the grow medium/nutrients. It’ll be interesting to see how the buds were affected!
I’ll also publish the dry weights and smoke reports after buds have been dried and cured for 2 weeks. The soil buds are fatter but the coco plants stretched more and their buds are longer. Just from looking at the drying tents it seems like the coco plants will win for weight overall, but only the scale will tell.
November 18
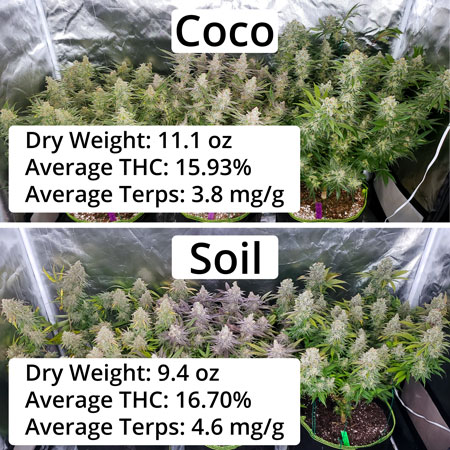
Finally! Here’s the Coco vs Soil grow journal harvest weigh-in. Over 20 oz for the grow!
Left is the coco harvest and right is the soil harvest.
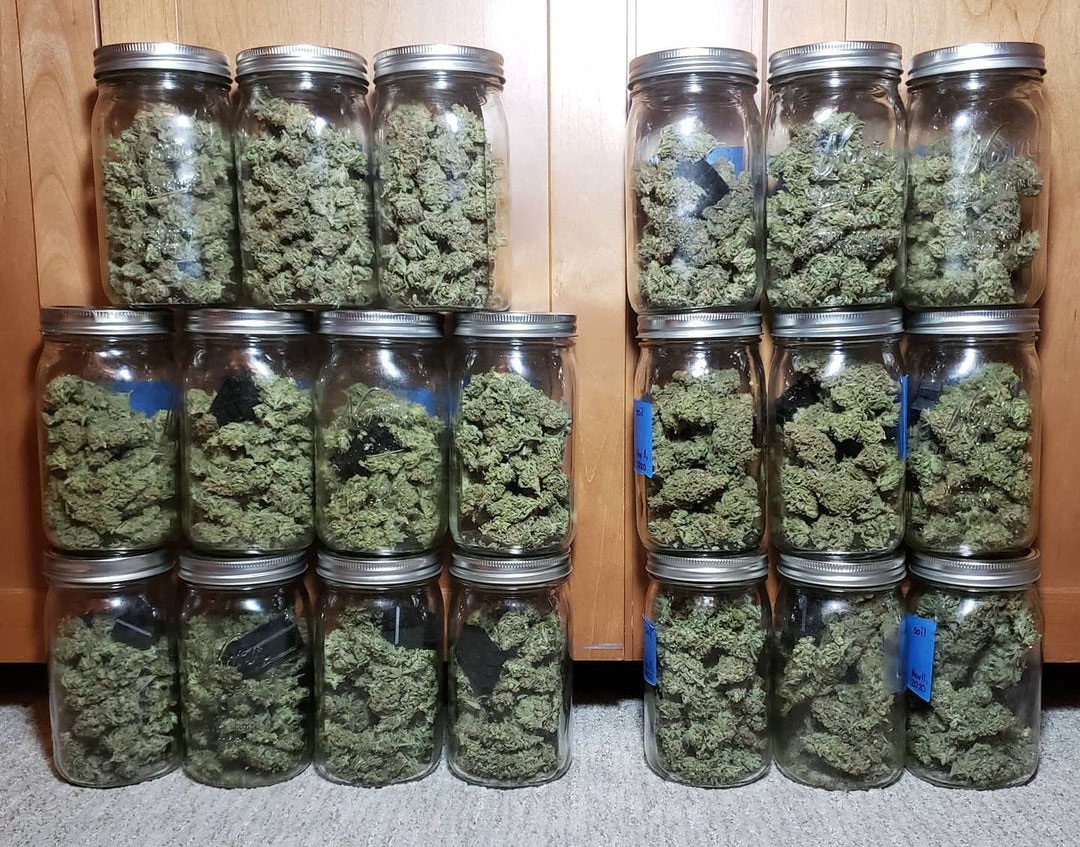
Coco tent yielded 11.1 oz while the soil tent yielded 9.4 oz, so the coco won for yields but not by a whole lot.
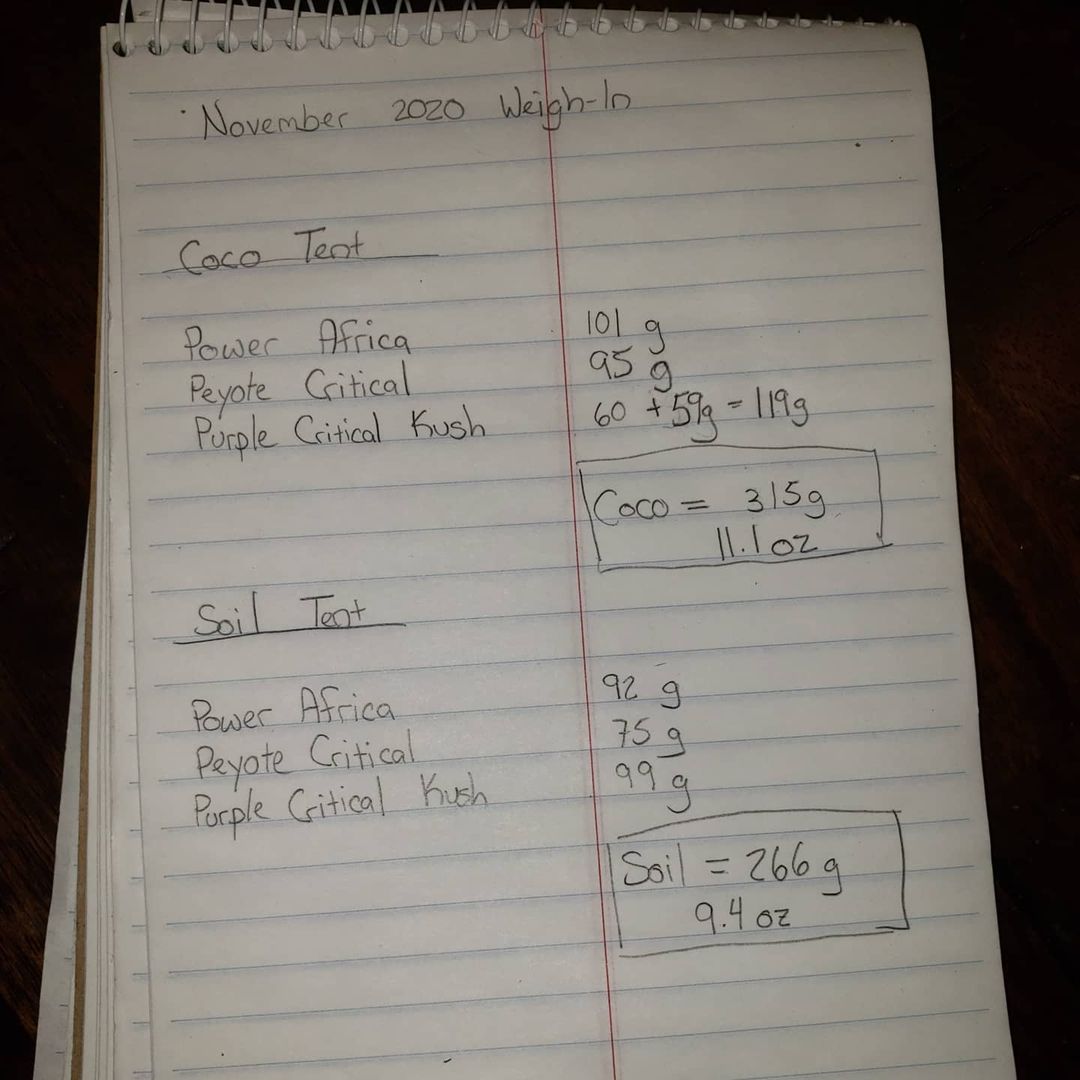
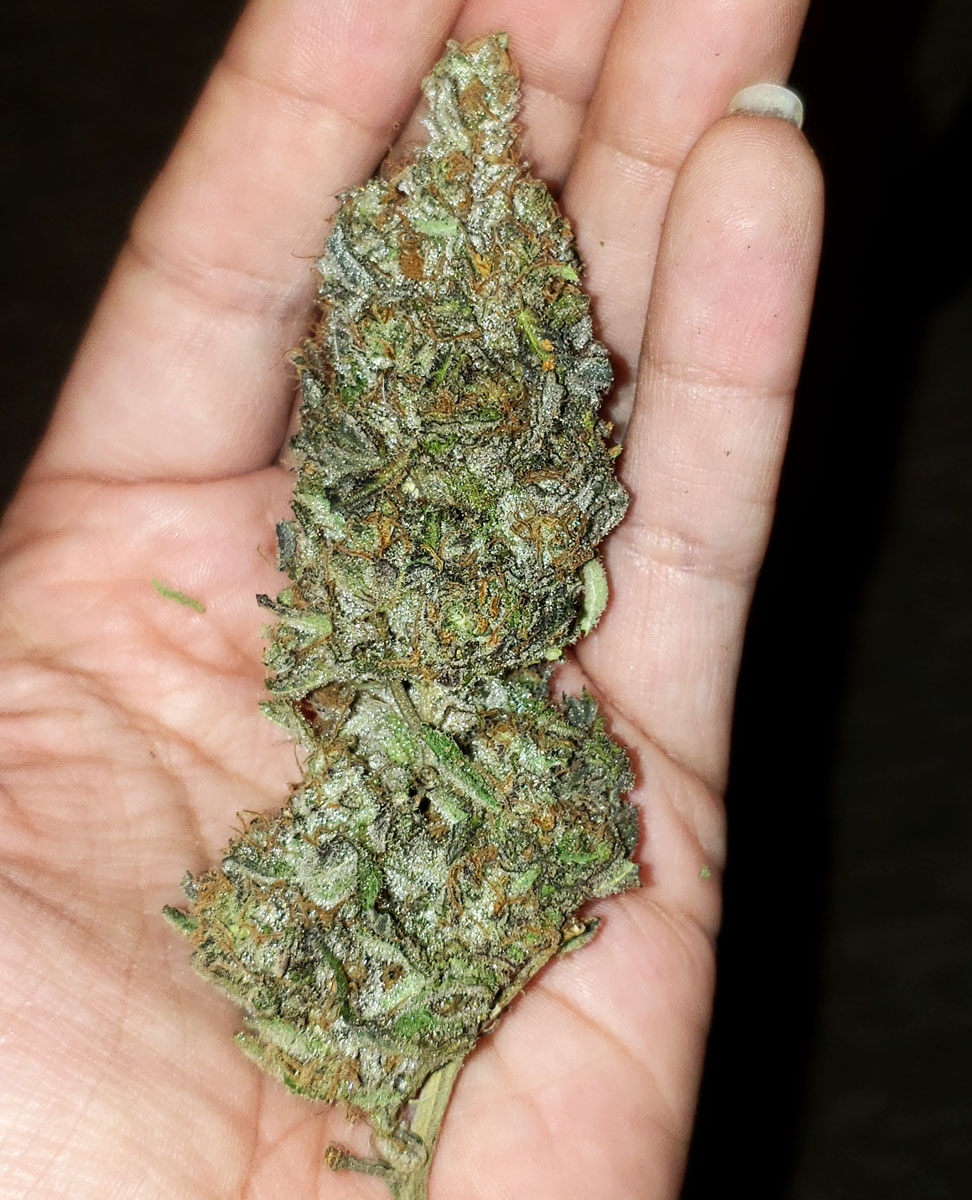
The buds are extremely dense and sticky, with fatter buds in soil but longer buds in coco.
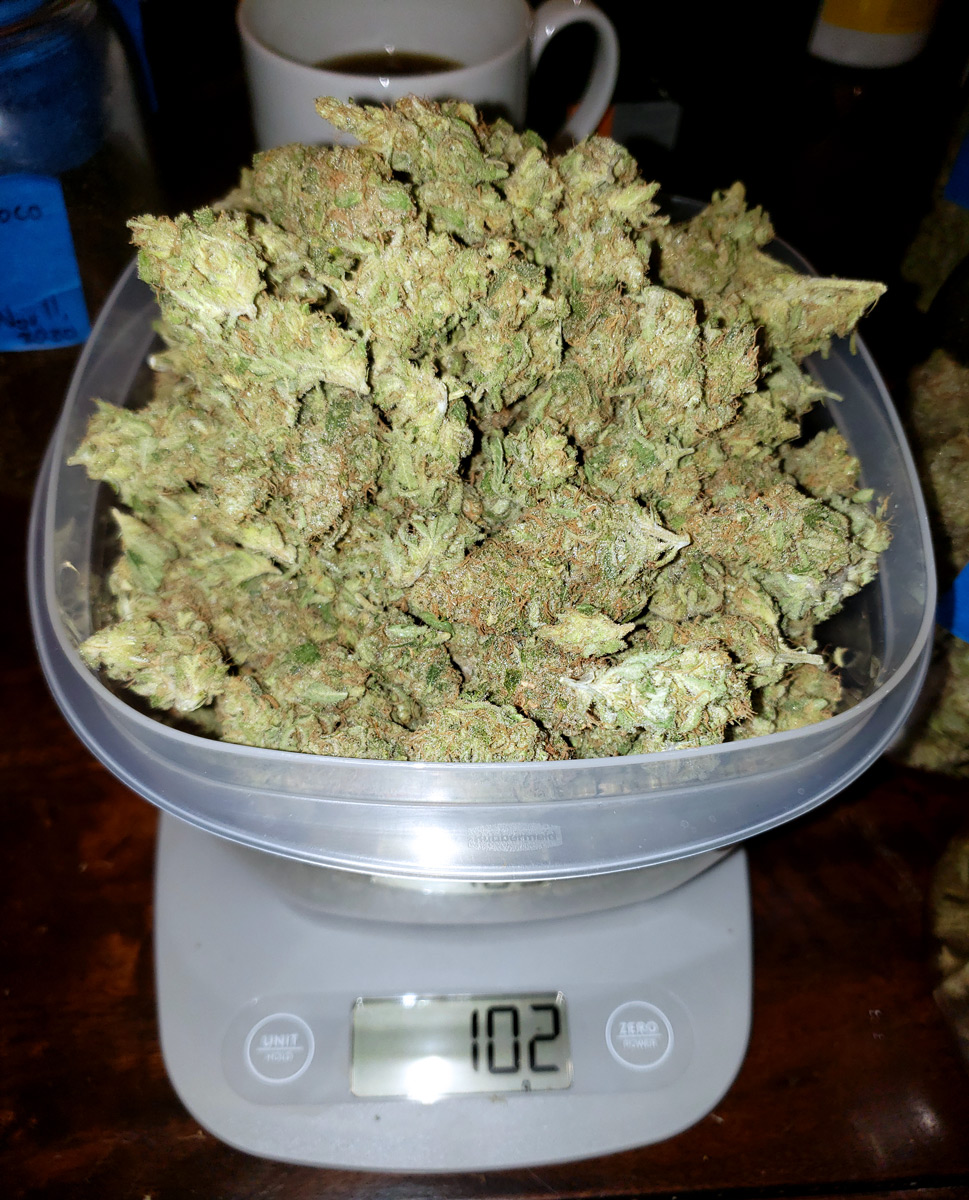
Power Africa in coco weigh-in
Power Africa in super soil weigh-in

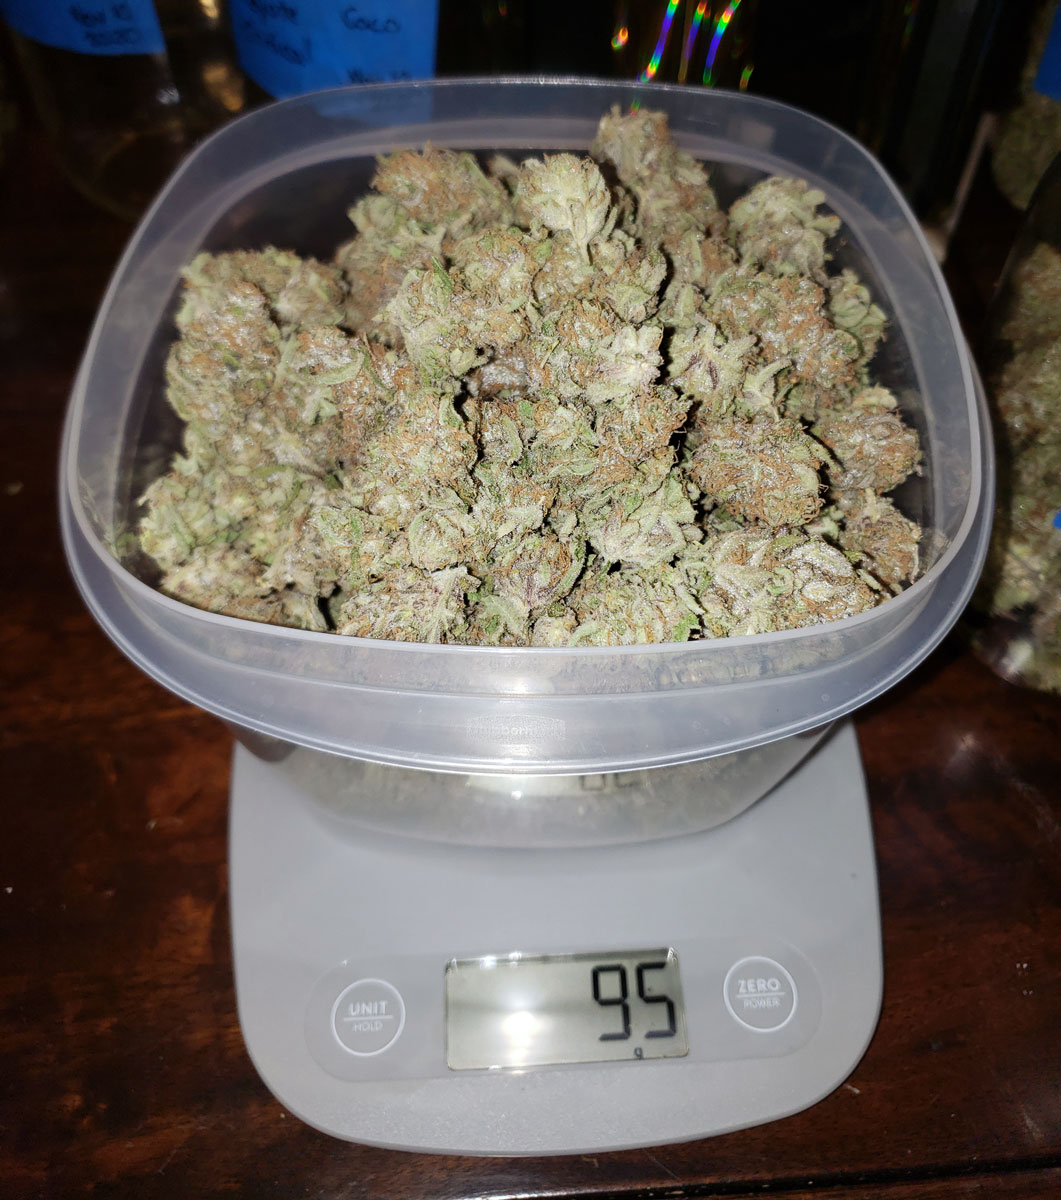
Peyote Critical in coco weigh-in
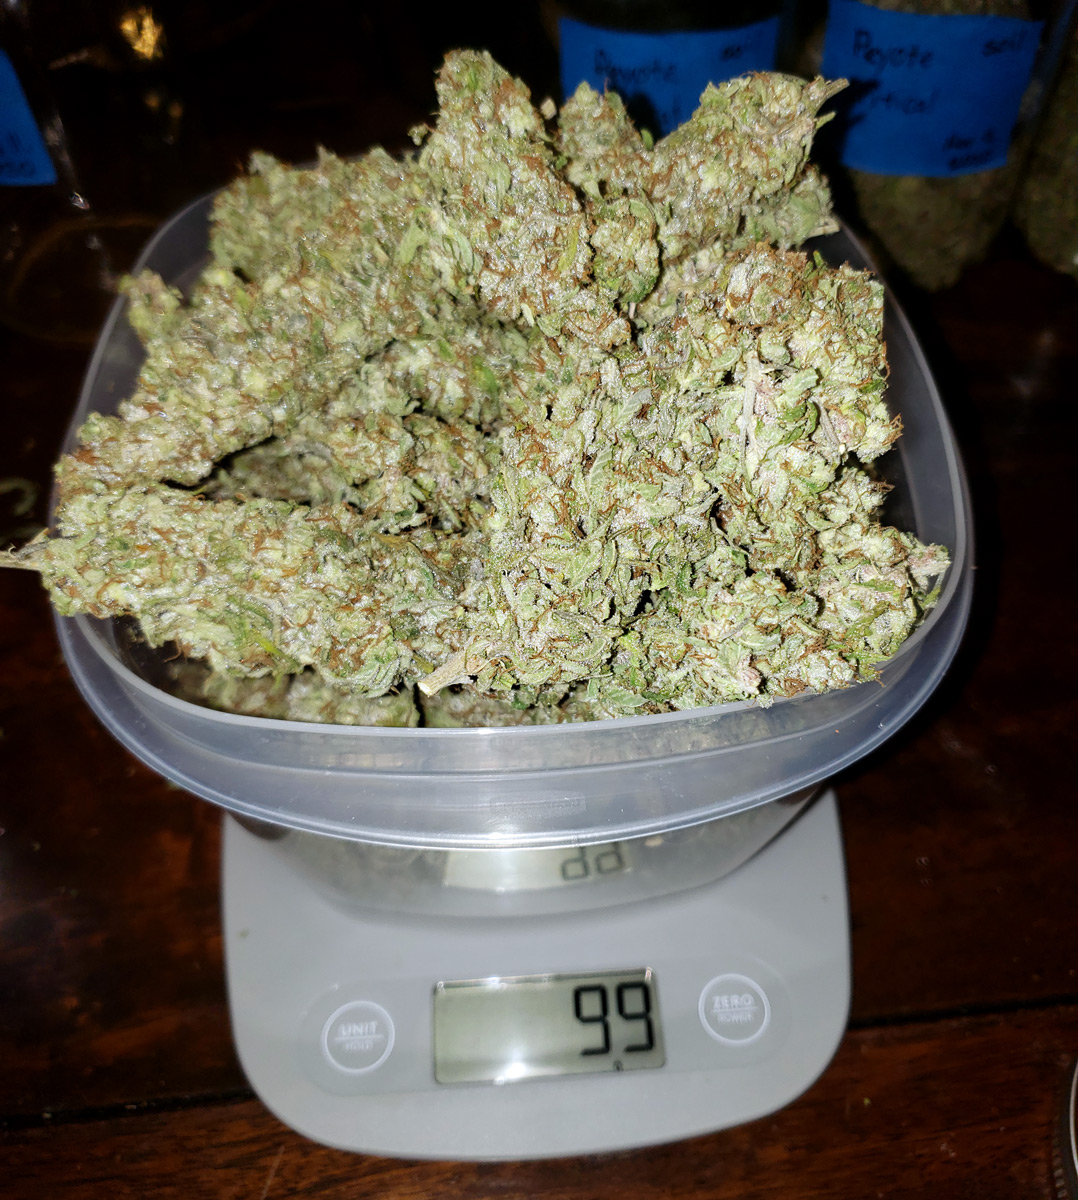
Peyote Critical in super soil weigh-in
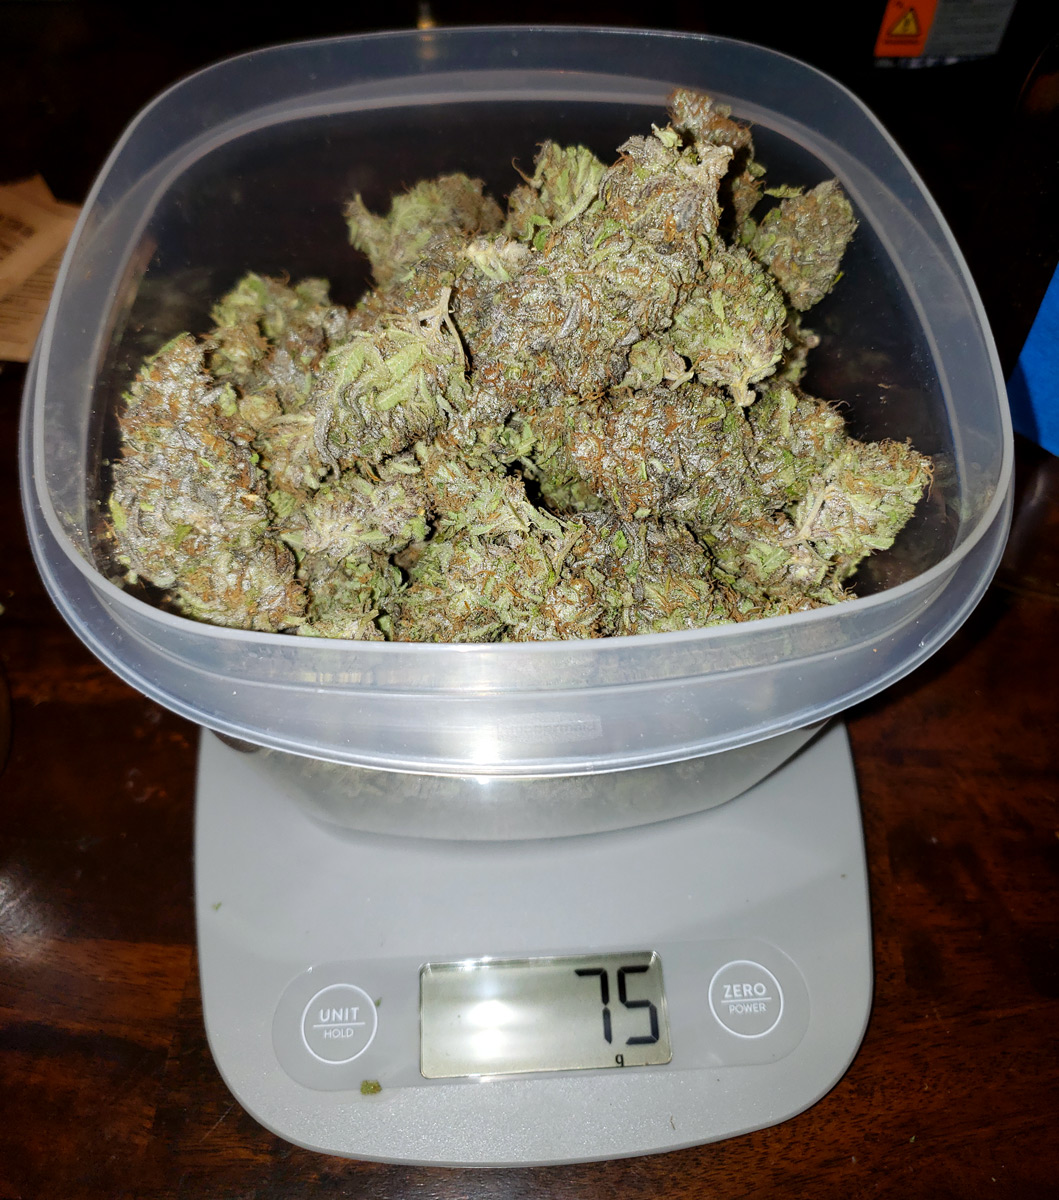
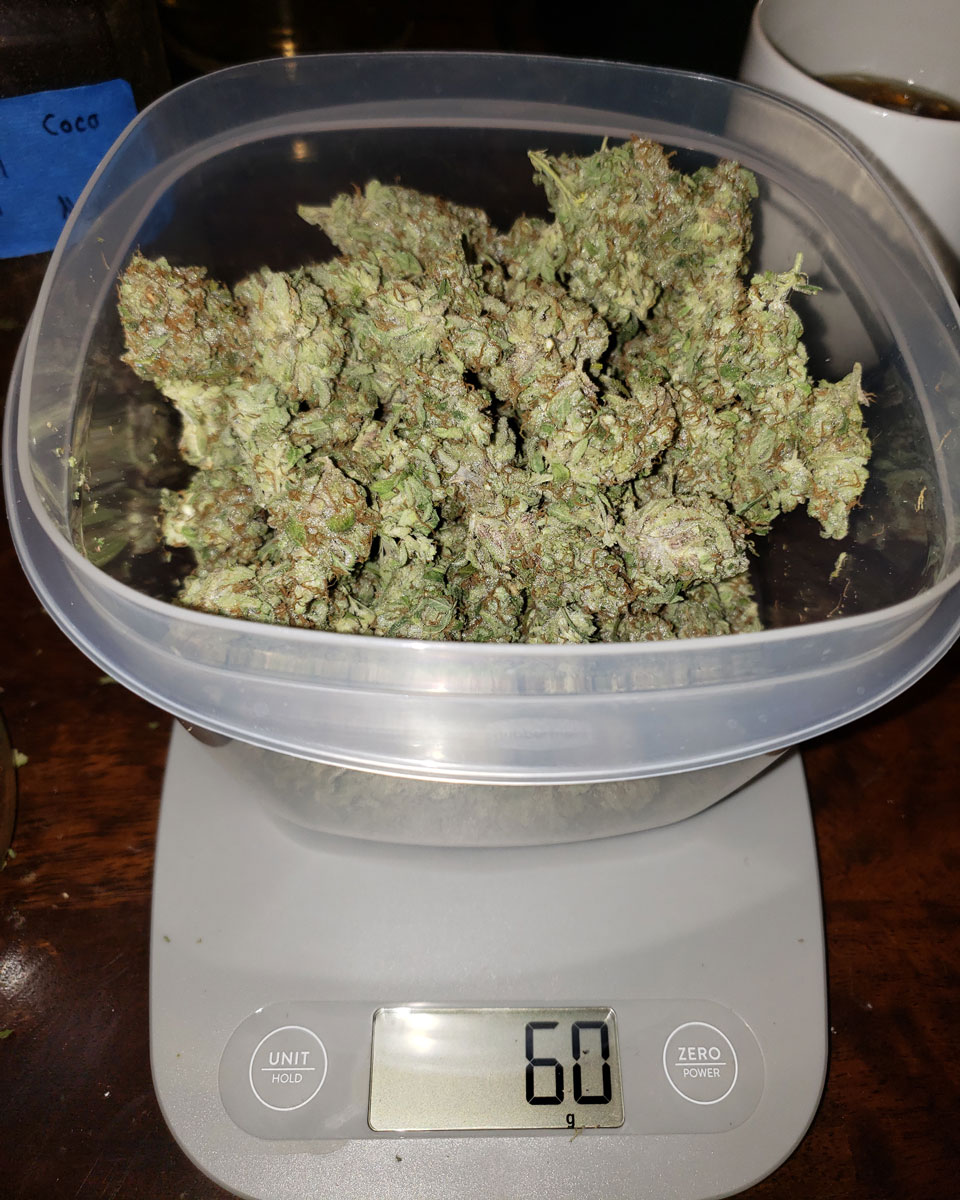
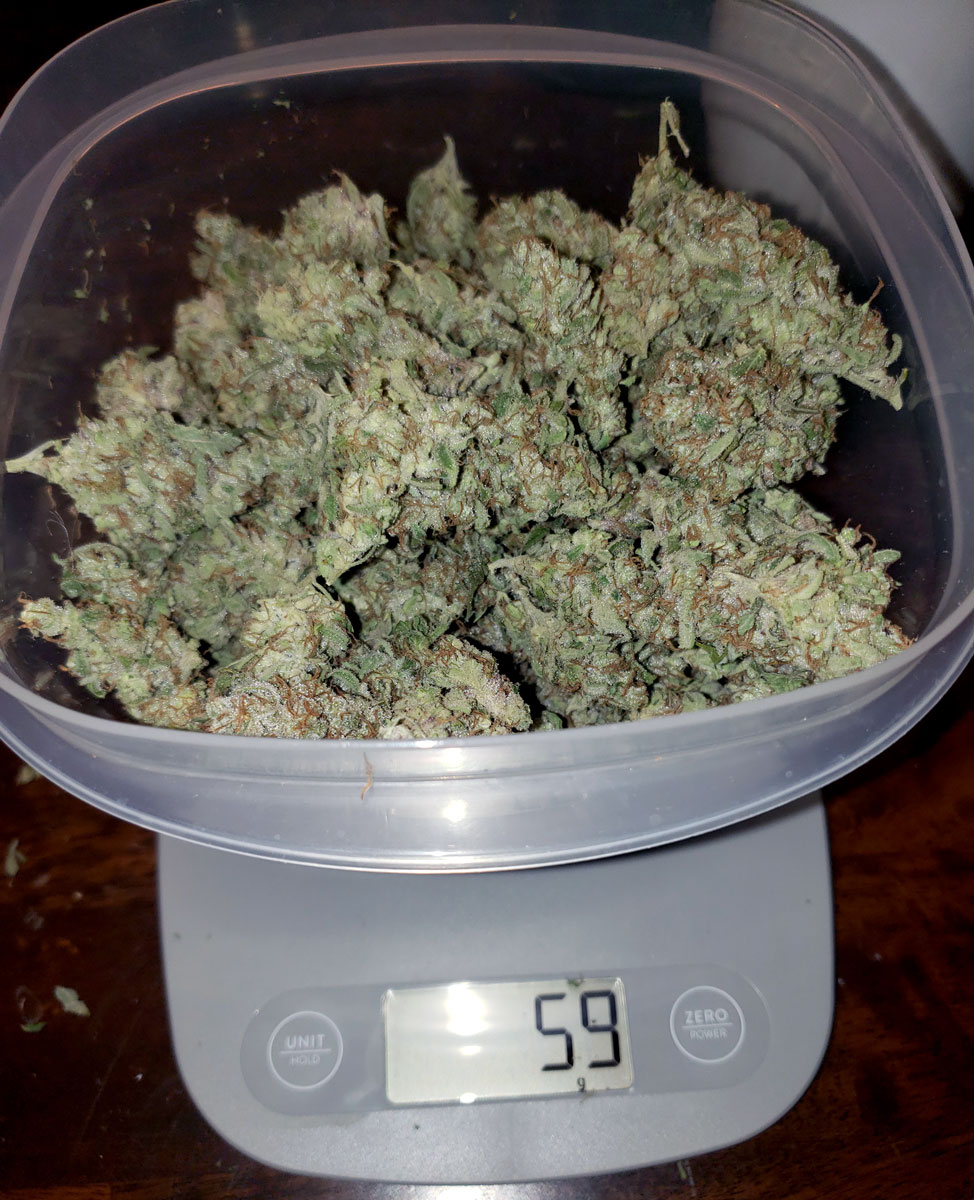
Purple Critical Kush in coco weigh-in (I couldn’t fit it all in one bowl so you’ll see it’s 60 g + 59 g for a total of 119 g)
Purple Critical Kush in super soil weigh-in
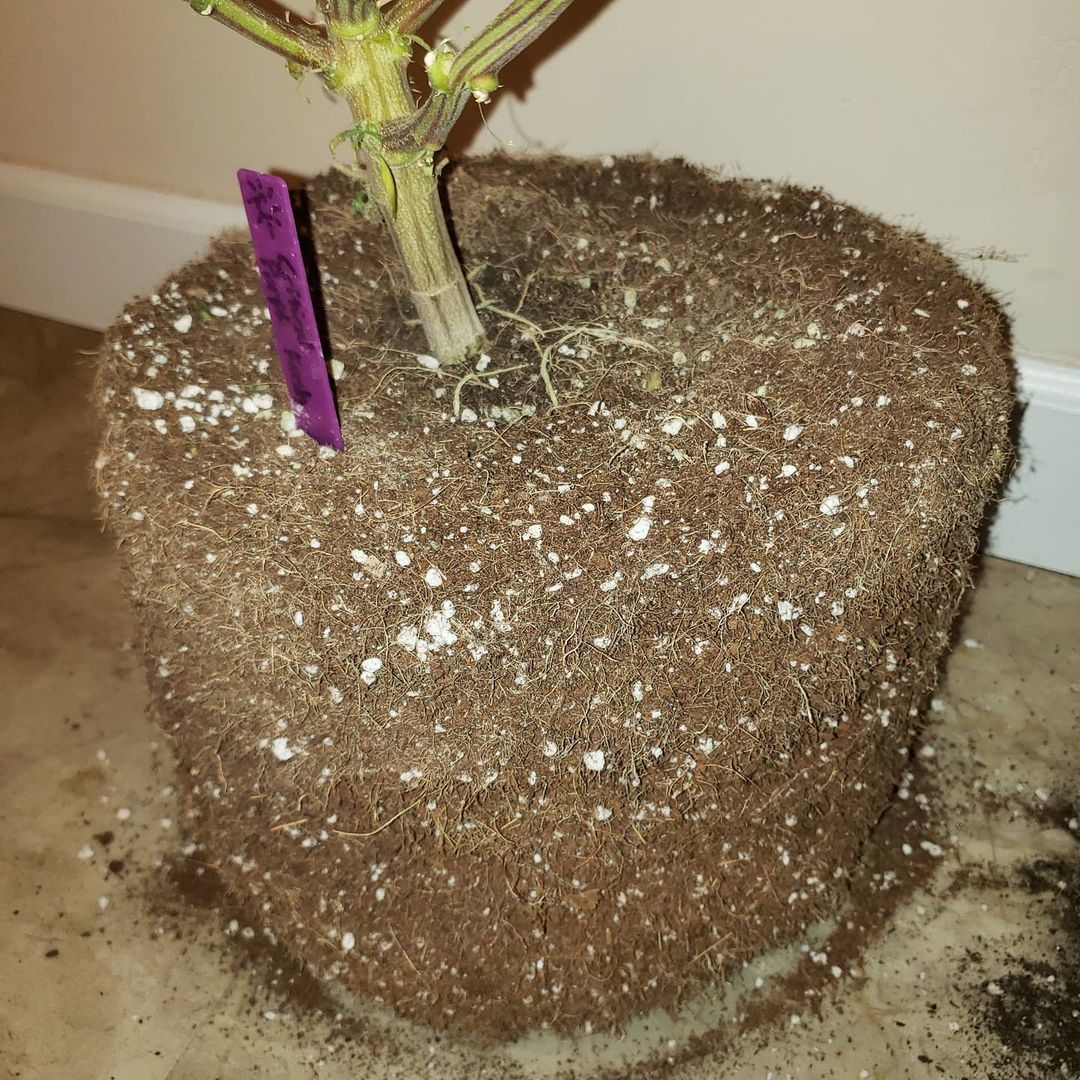
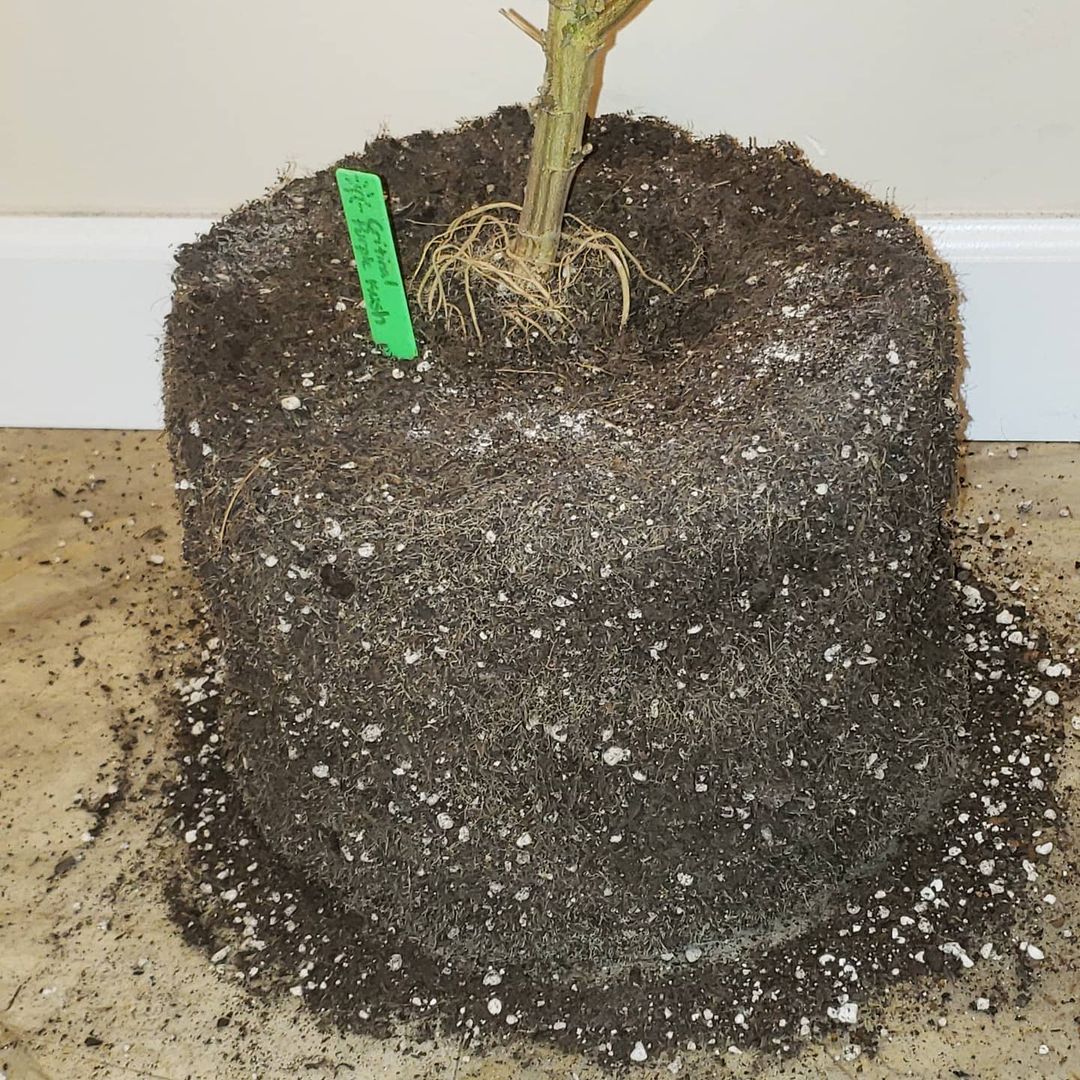
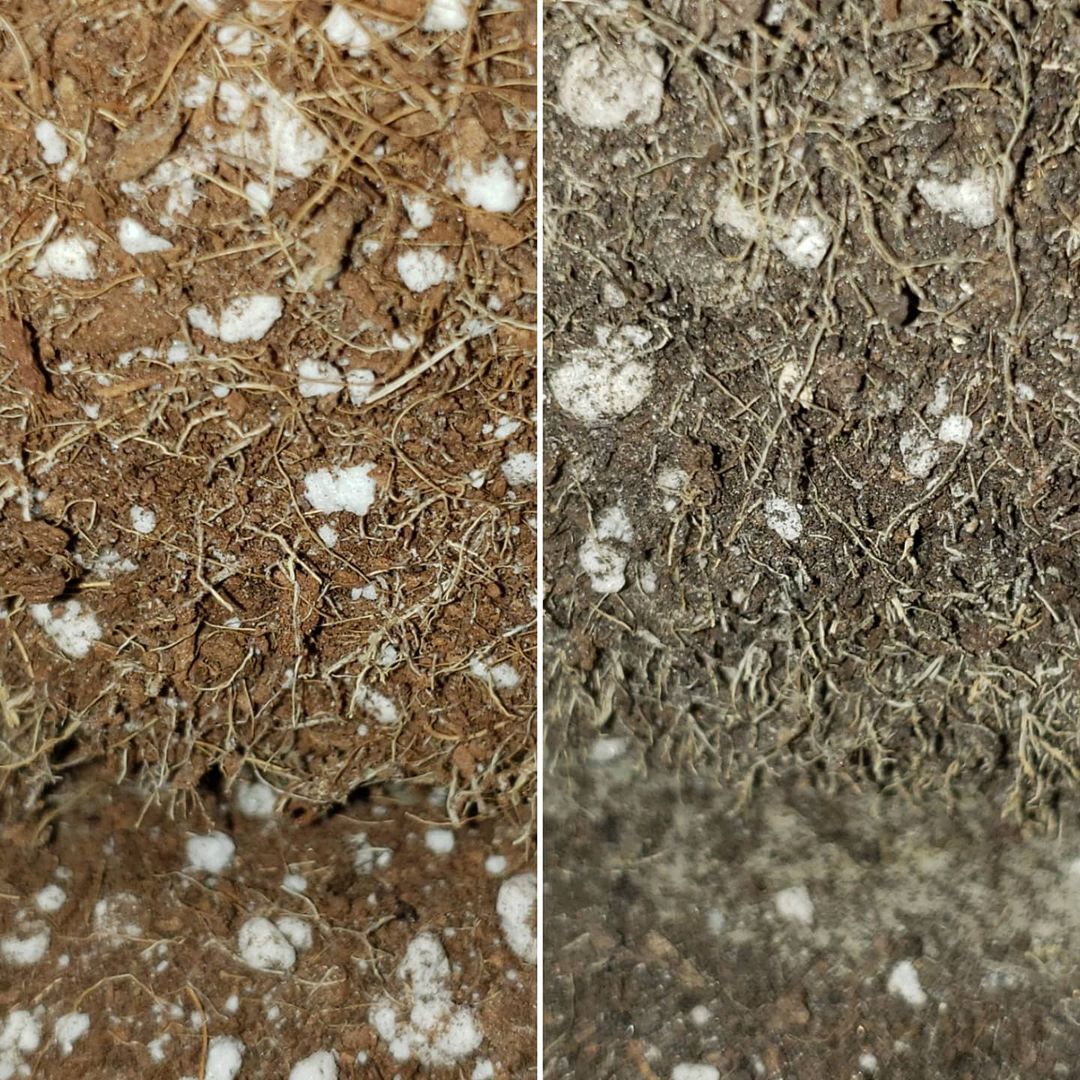
I thought you might also enjoy this coco vs soil root comparison.
Example of coco roots on left, super soil roots on right
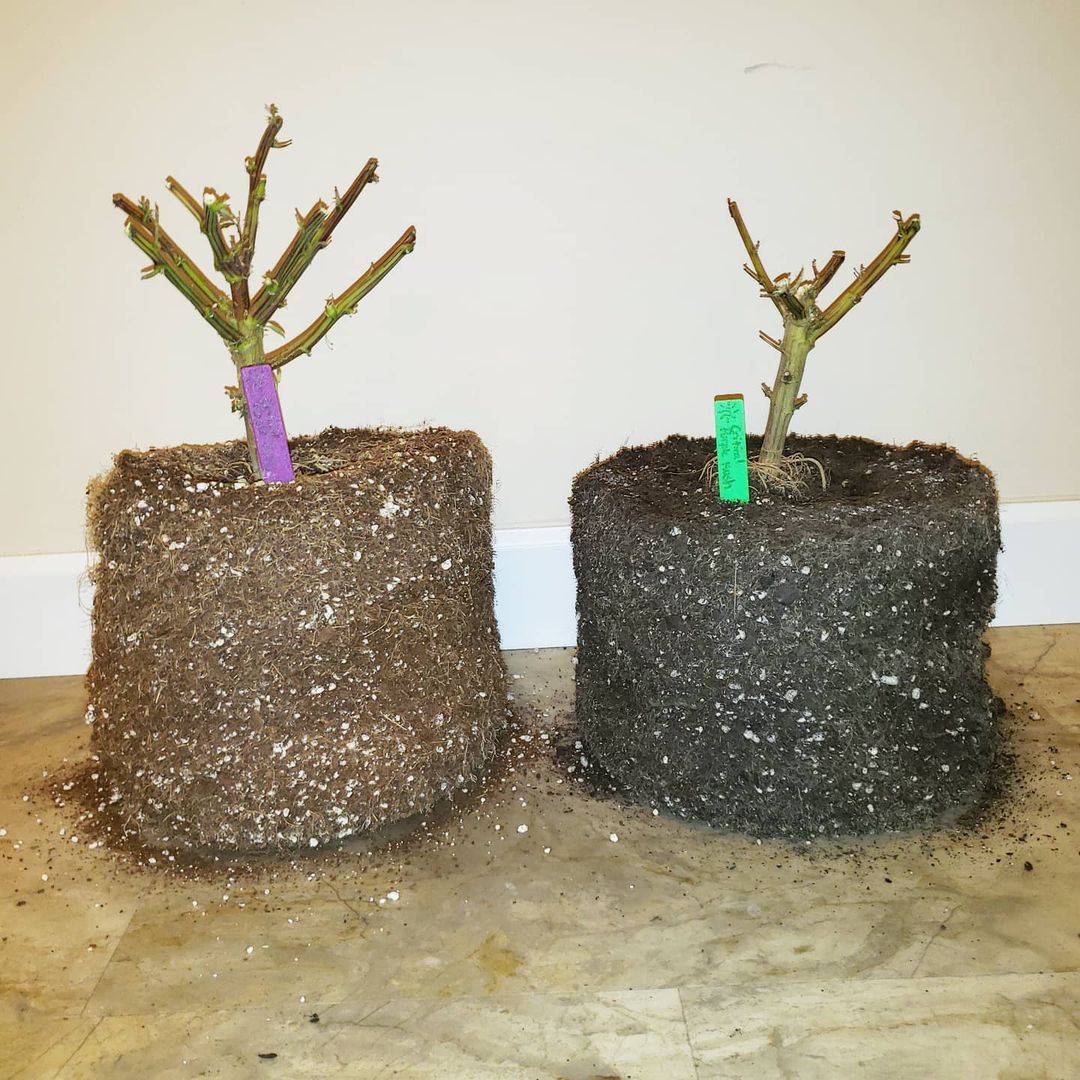
The coco plants were given the Flora trio plus CaliMagic as nutrients. Here’s the coco root ball by itself. The coco root ball weighs less and has a lighter appearance.
The soil plants got all their nutrients directly from the soil. Here’s the soil root ball. The soil root ball is heavier and has a darker richer color.
Here’s a closeup of the roots near the bottom. I expected to see more differences to be honest.
Next step is to get all the buds tested for cannabinoids and terpenes at a local lab in San Diego.
You may have been following my grow journal which pitted clones against each other in coco vs soil. The results are in and I have to admit I’m amazed.
Experiment Details Quick Recap
- Coco: Mother Earth Coco Plus Perlite Mix with Flora trio + CaliMagic as nutrients.
- Soil: Bottom 1/3 of each pot: Nature’s Living Soil Super Soil Concentrate, Top 2/3: Fox Farm Coco Loco soil. All nutrients for these plants came from the soil (no nutrients in the water)
Both sets of plants were in a 2’x4’x6′ grow tent under their own 300W LED grow light.
Results
- Coco won for yields and trichome production
- Soil won for THC percentage and terpenes
Lab report summary
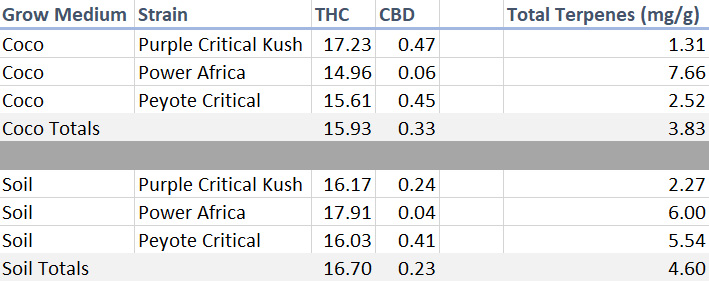
Coco lab reports (PDF)
Super soil lab reports (PDF)
Wow! How cool is that!
Discussion
The soil plants were ready to harvest before the coco plants. As a result, the coco plants were harvested on the early side. The coco tent could have gone on for a few more weeks so chances are their yields and potency would have increased in that time.
However, the super soil plants were at the end of their harvest window, and for the sake of the experiment, I took all the plants down at the same time.
As far as smoke reports, there is no clear winner. Some people prefer the coco buds while others prefer the soil buds. In fact, it seems different for each strain. Honestly, all three of these strains have proven to be really popular regardless of how buds were grown.
I recommend them all (Power Africa, Peyote Critical, and Critical Purple Kush). That being said, Purple Critical Kush has been the fan-favorite so far.
Final Conclusion:
Both grow mediums work great and the real winner is me with all this awesome weed!
Bonus: Check out my full review of Nature’s Living Soil including step-by-step instructions on how to use this soil, a complete watering schedule, and tips I’ve learned over the course of this grow.