by Nebula Haze
Ready to harvest more than 1 pound of top-shelf cannabis right from inside your home? Sounds amazing, doesn’t it? Turning that dream into a reality is fully within your grasp, and I’m going to show you exactly how to produce a pound of top-shelf weed indoors. Harvesting a pound (that’s an eye-popping 16 ounces) of your own top-shelf cannabis is about more than just the weight. It’s also about independence from buying, the delight of sharing your crop with others, and the freedom to have so much weed you never run out, with enough left over to make your own goodies like edibles, extracts, and tinctures.
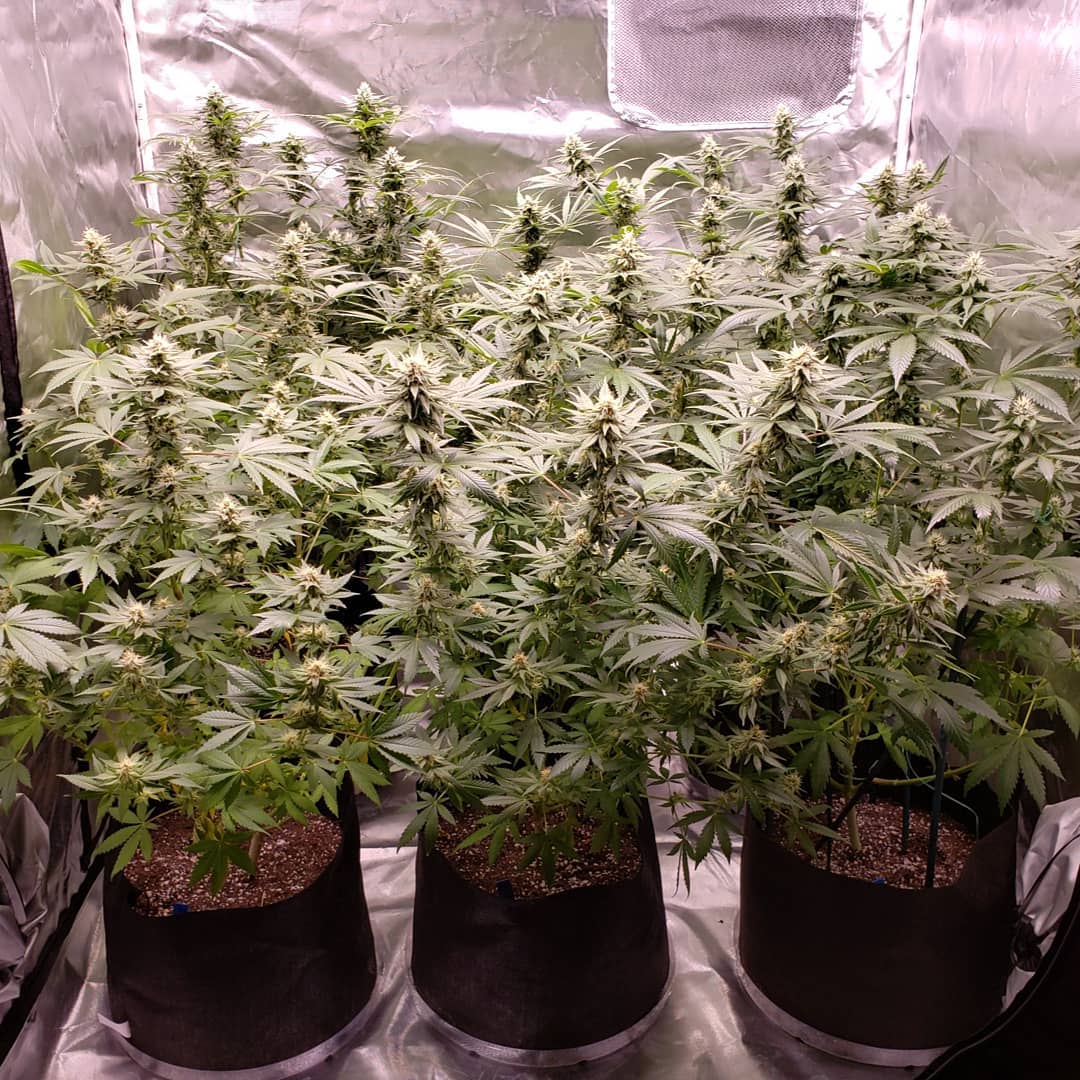
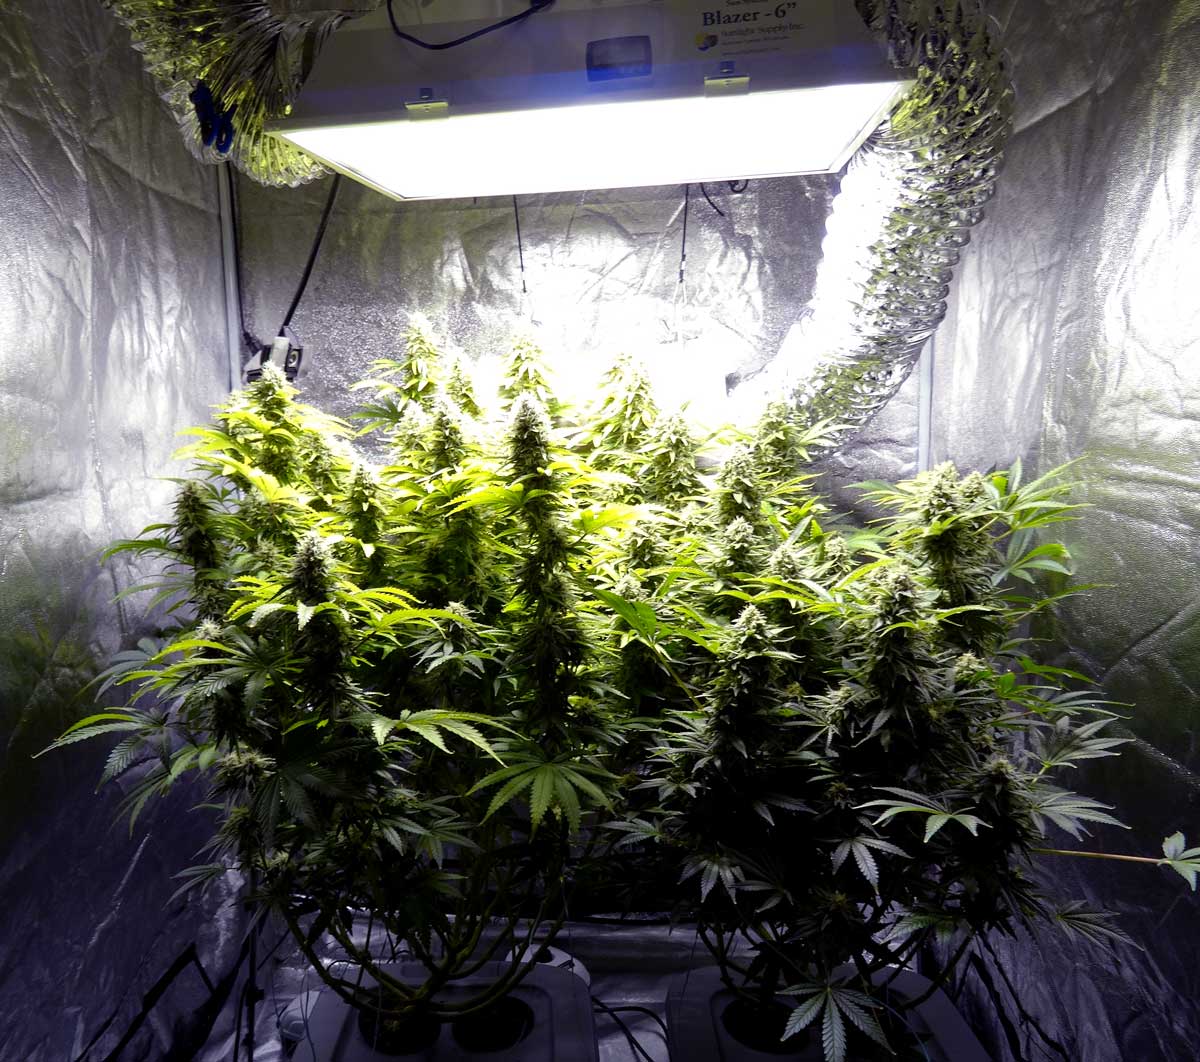
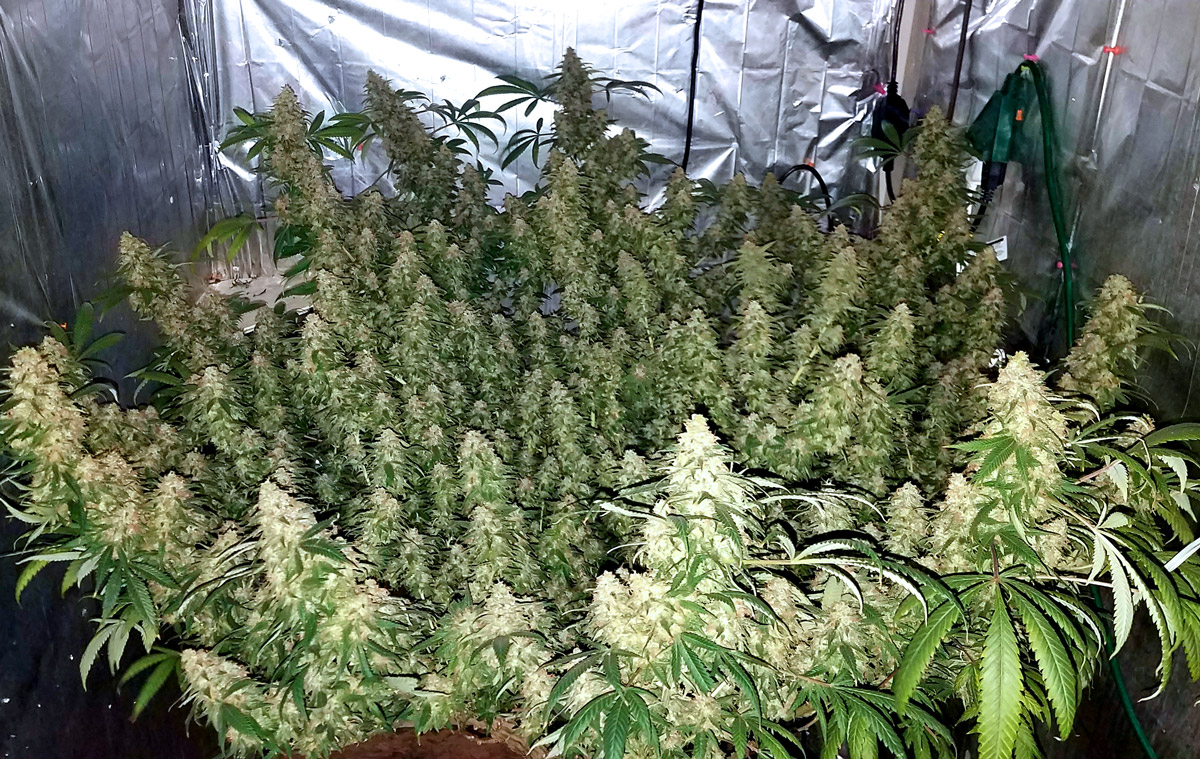
Our first 1-pound indoor cannabis harvest based on this tutorial (600W HPS grow light).
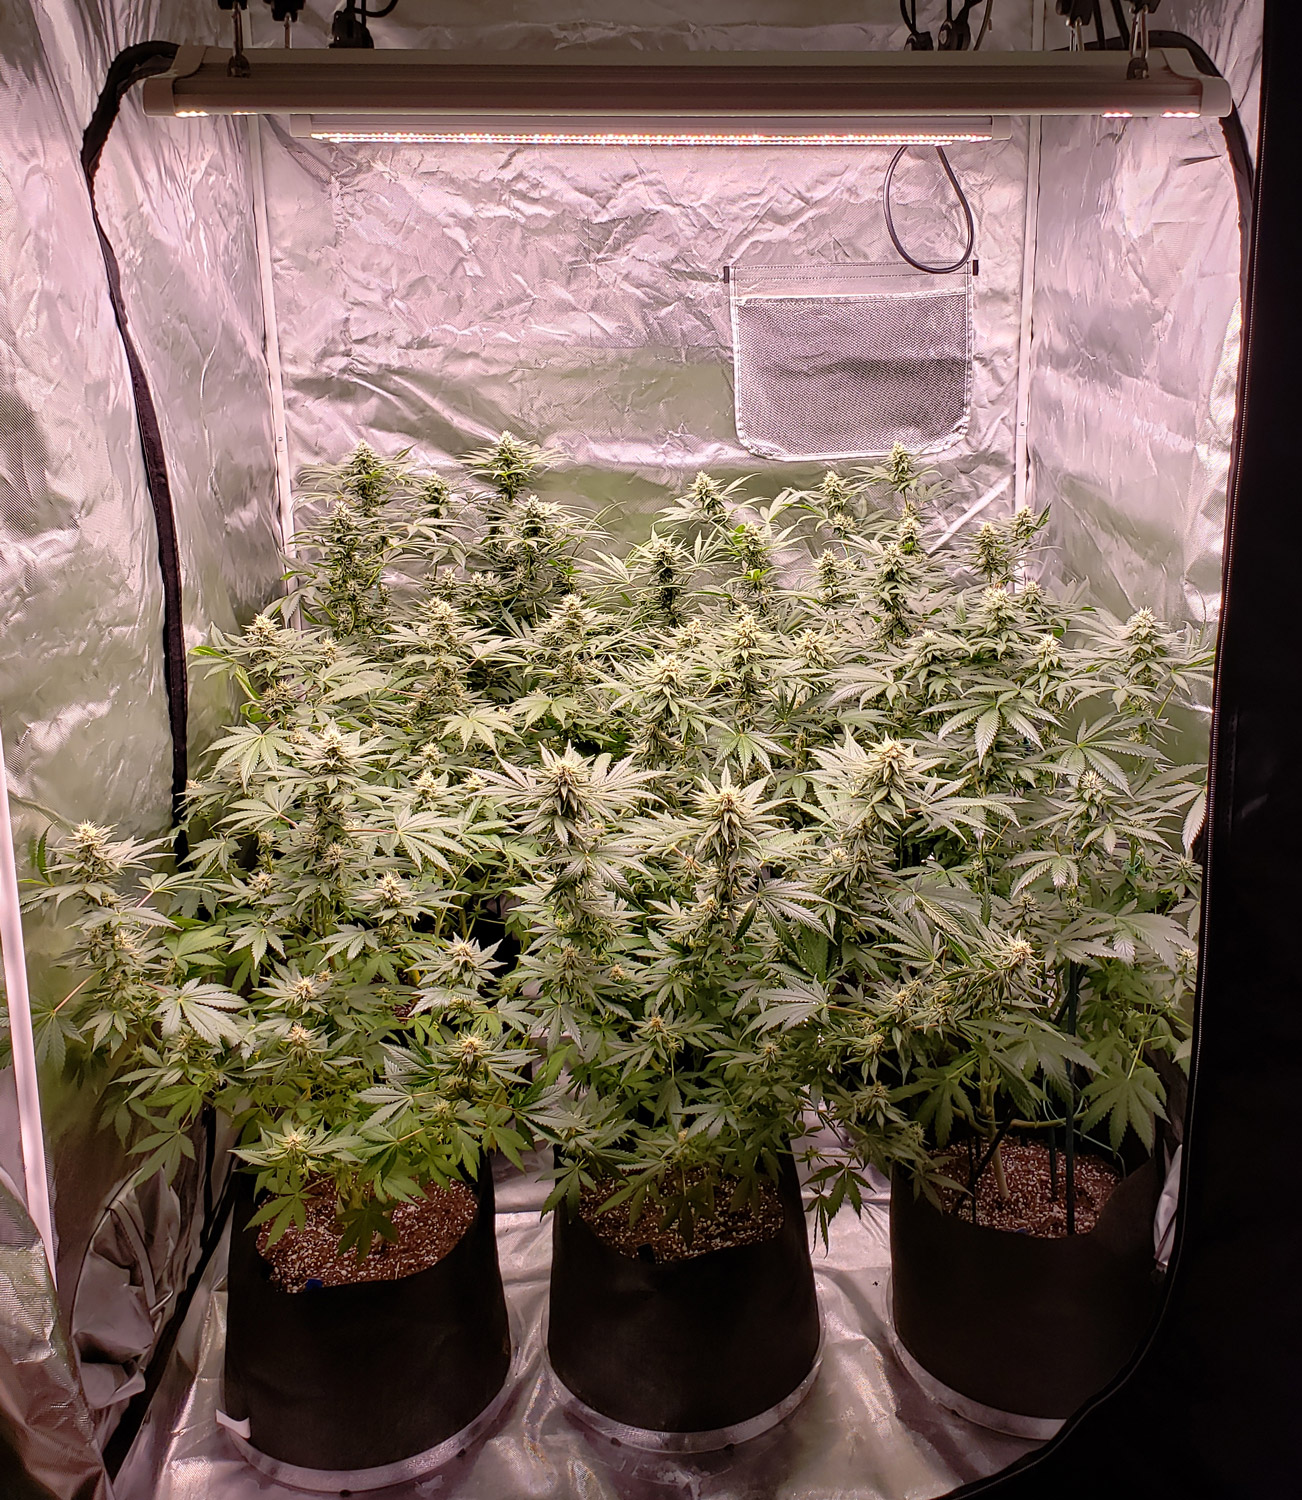
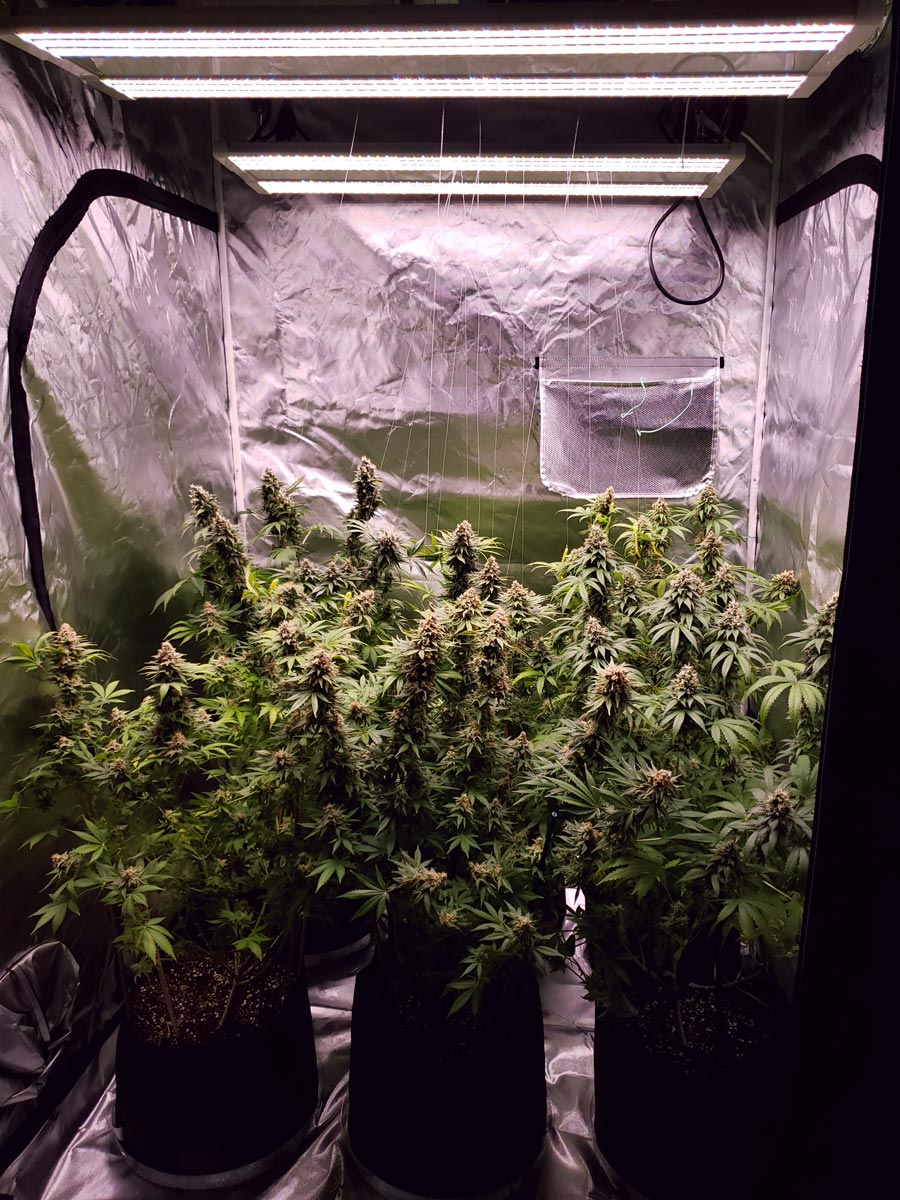
And our first 1-lb harvest after switching to an LED grow light (600W LED grow light).
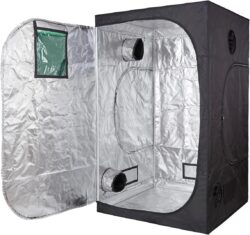
One key to growing a pound of good weed indoors is you have to give your plants the right growing environment. A large tent sized at 4’x4’x6.5′ (1.2mx1.2mx2m) is a manageable size that provides an ideal place to consistently produce your 1-lb cannabis grow.
Here are some examples of grow lights that would be suitable for this size grow tent:
- Spider Farmer SF4000 LED grow light – (uses 450W) – Yields just under 1 pound
- Mars Hydro FC-E4800 LED grow light (uses 480W) – Yields over 1 pound per harvest
- 600W HPS (Uses 600W) – Yields up to 21 ounces or 1.3 lbs
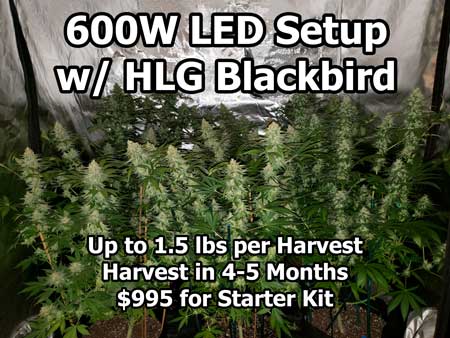
- HLG Blackbird 600W LED (600W, dimmable) – Yields up to 24 oz or 1.5 lbs. Recommended choice – this LED light was designed specifically to achieve high yields in a 4×4 grow tent.
- 1000W DE HPS (Uses 1000W) – Yields up to 35 oz or 2.2 lbs, VERY hot, you will need cooling.
Example Plants Grown in This Size Tent
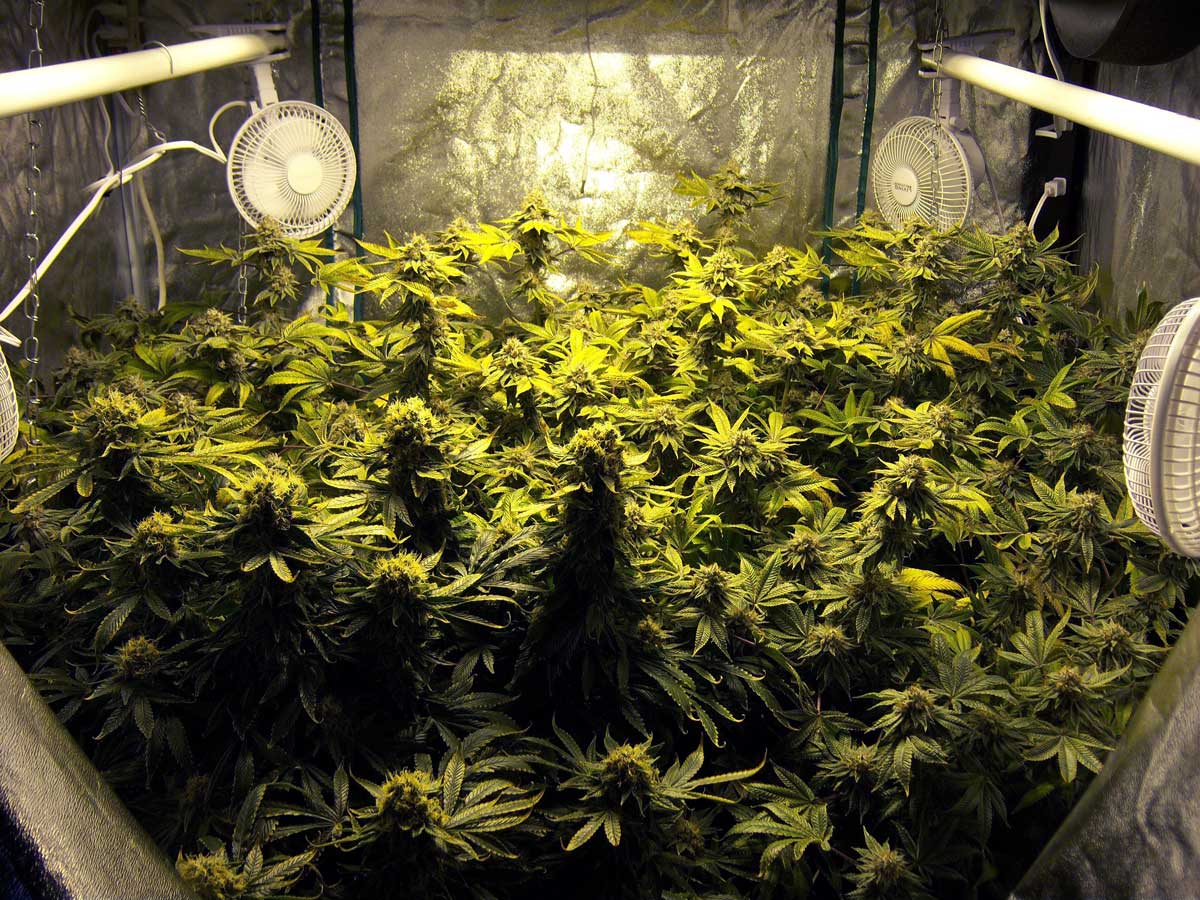
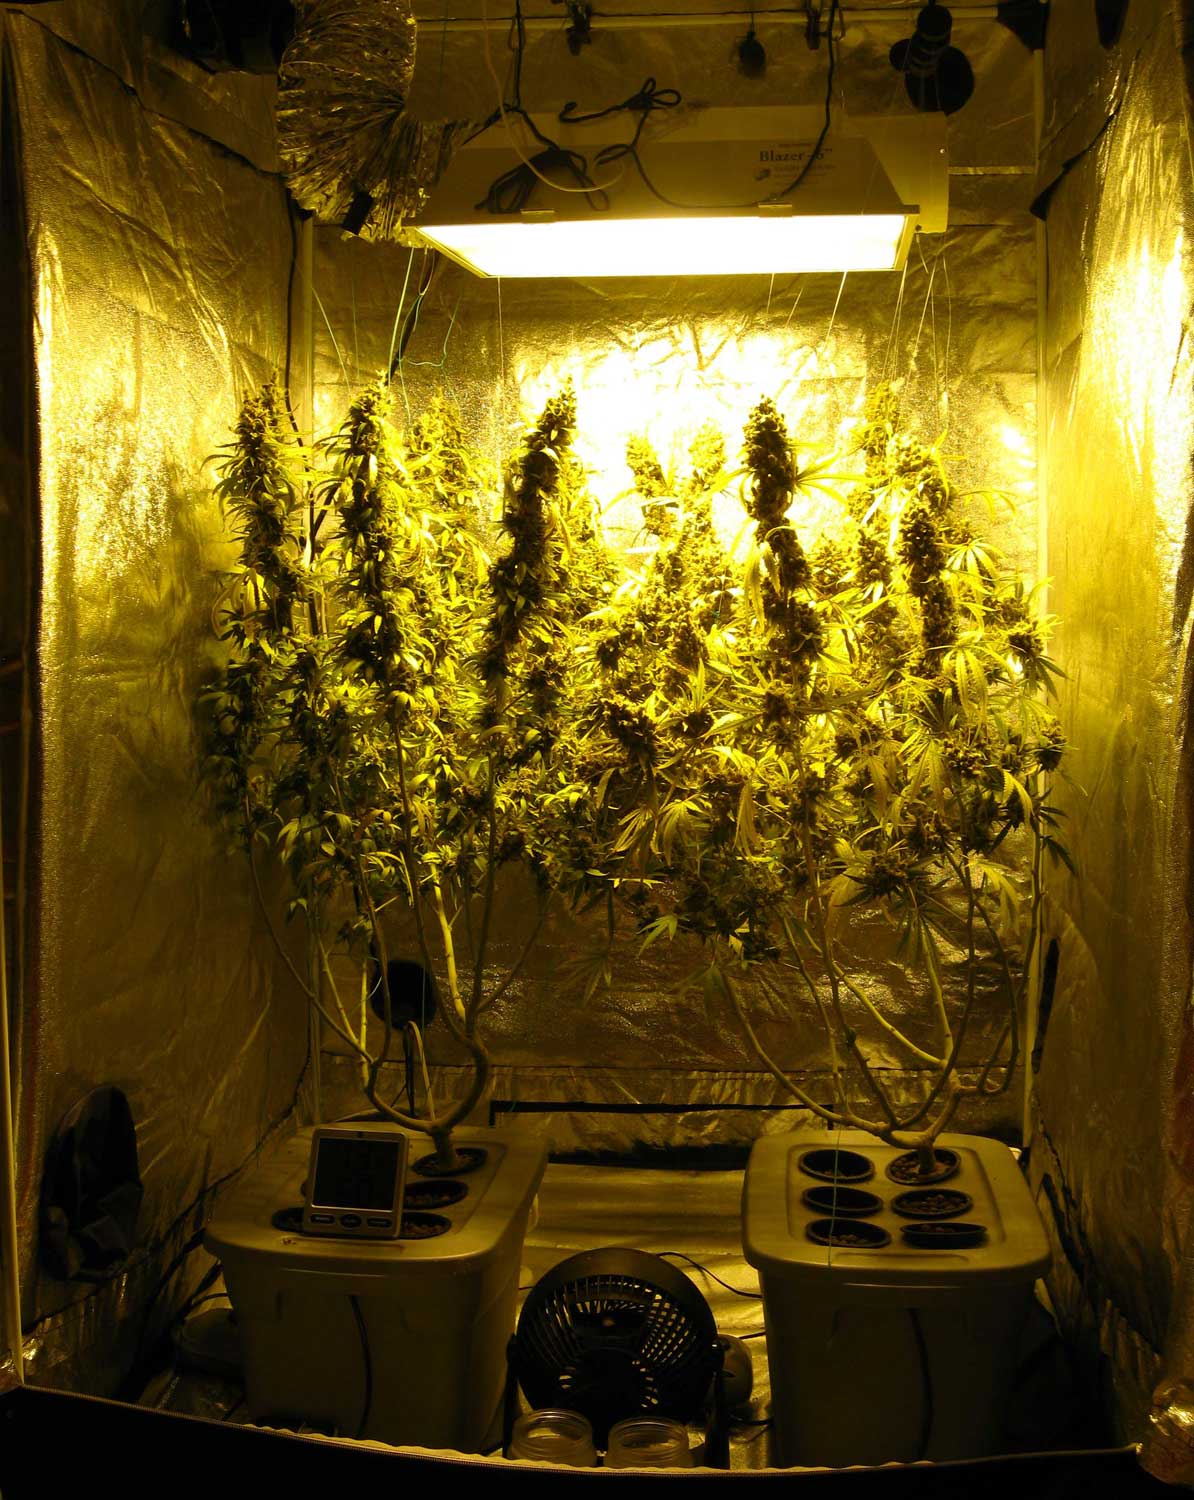
Cannabis plants grown in a 4’x4′ grow tent under a 600W HPS.
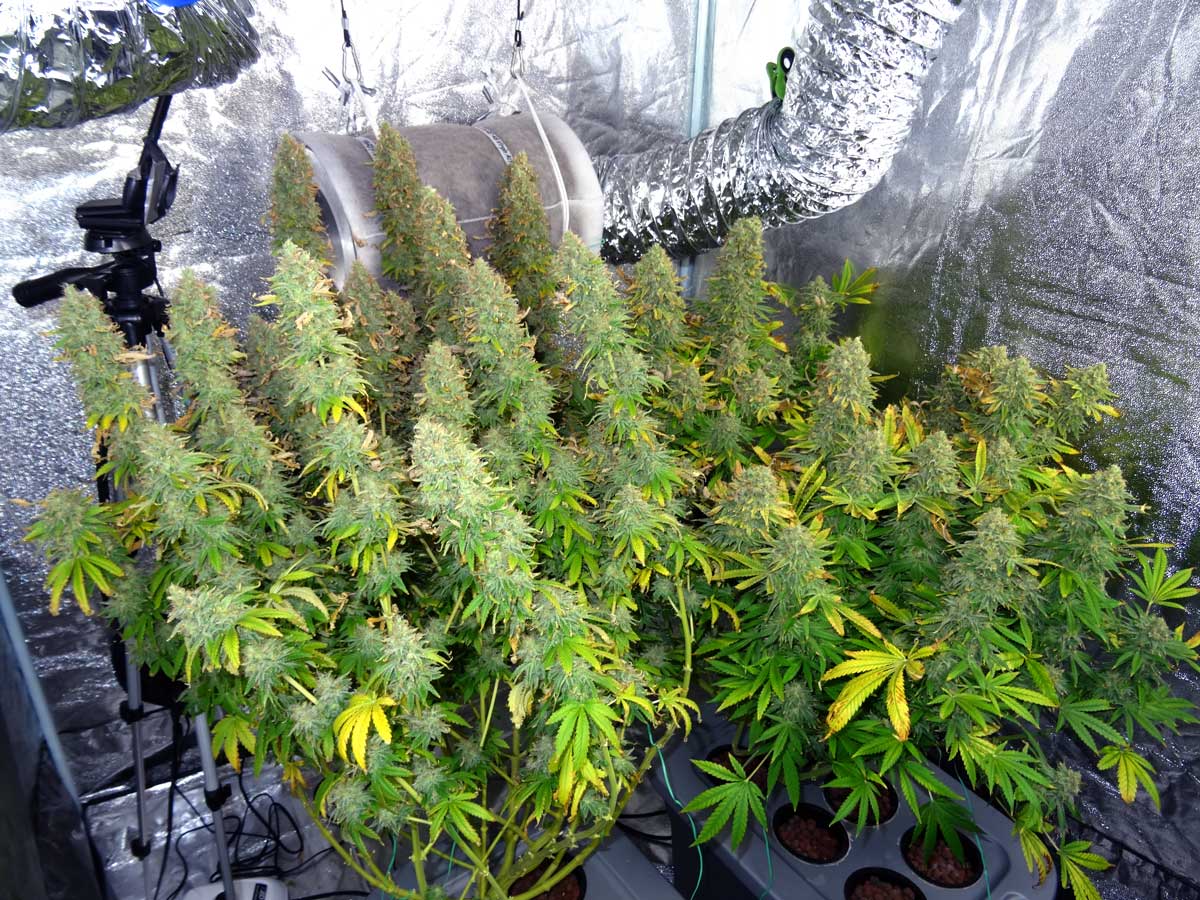
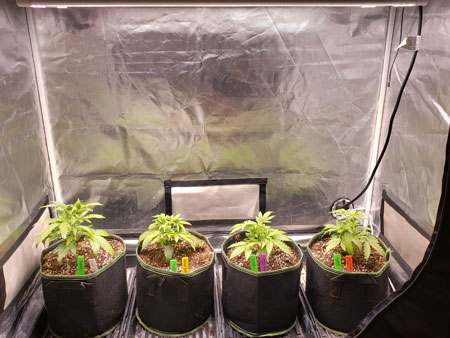
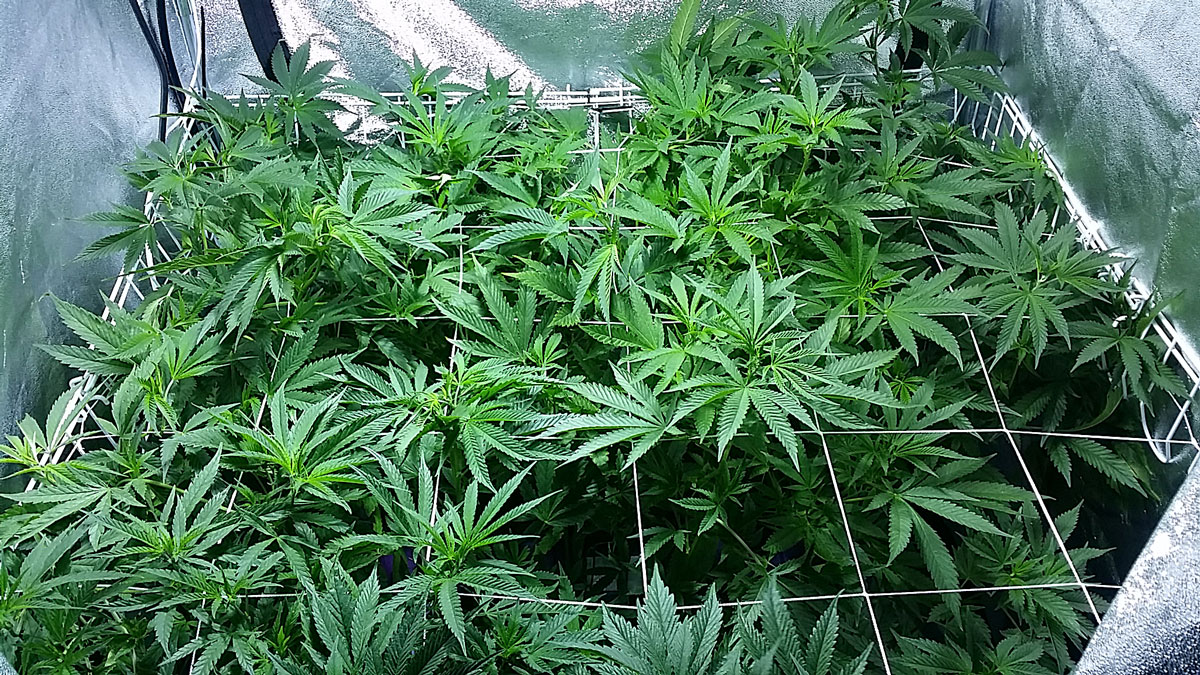
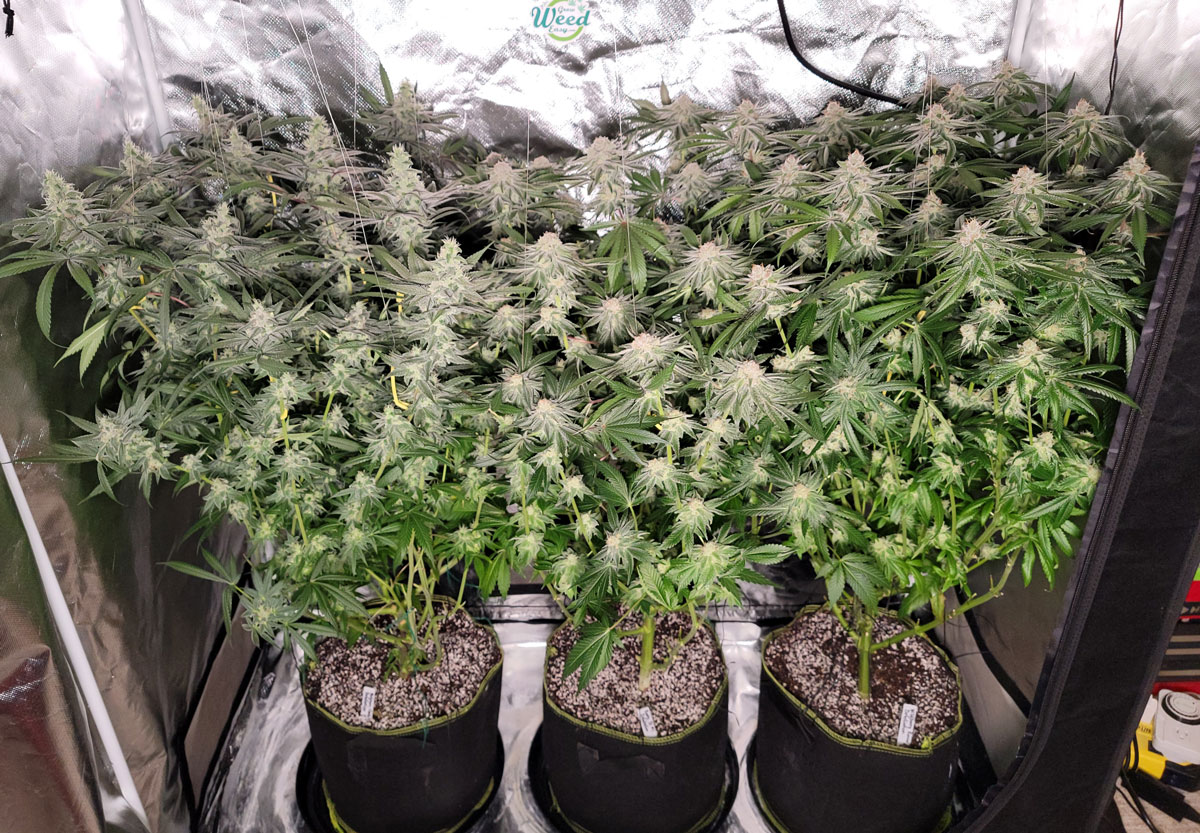
Six plants under a 600W LED grow light in 4’x4’x6.5′ (these are only on day 38 of flowering).
Two Hydroponic Plants under a 600W HPS in 4’x4’x7′ grow tent – Yielded 23.09 oz at harvest!
Those are just a few examples. Many of you have written in asking for more tutorials about growing large amounts of weed in the home environment. We have heard you loud and clear! Here’s the proven strategy we’re covering in today’s cannabis tutorial that will teach you how to yield 1 lb or more of top-shelf cannabis in a single large grow tent:
Overall Strategy
1.) Start with a high-yielding cannabis strain – Learn how to find the right strain.
2.) Get your supplies – Here’s an example of a complete shopping list for a 4’x4′ grow tent that gets great results with cannabis.
3.) “Top” plants at a young age – Cut off the top of the main stem when seedlings are a few weeks old.
4.) Train plants to grow flat and wide (like a table) in the vegetative stage.
- Simple Way: Either use plant twist tie to hold down branches…
- Using a Net: Invest in a Scrog net and install it to be half the final desired height of your plants. Any time a stem grows above the net, tuck it back underneath until you’ve filled the entire net
5.) Initiate the flowering stage, then…
- Defoliate – Follow a strategic defoliation schedule
- Not too hot, not too humid – Maintain a good environment while buds are forming.
- Keep plants healthy – Avoid bugs and nutrient deficiencies.
- If using a net, add a second net and arrange buds to fill the entire net as they grow.
6.) Harvest at the right time.
7.) Dry and jar buds properly.
This is just a super basic outline. Check below for more details and step-by-step instructions!
How to Grow 1 Pound of Weed: Step-by-Step Instructions
1.) Start with a high-yielding cannabis strain
Learn how to find the right strain (regardless of what your goals are).
Some strains naturally yield much more than others. Choose high-yielding strains to maximize your harvest weight.
Autoflowering Strains vs Photoperiod Strains: Which is better for cannabis yields?
Although many auto-flowering strains are high-yielding, and produce fast harvests under 3 months, you don’t have as much control over plant growth patterns and size as you do with photoperiod strains. That’s because autoflowering strains start making buds after about 4 weeks, even if your plants aren’t as big as you need them to be yet. Cannabis plants about double in size after they start flowering, and if your autoflowering plants are too small at that point, they’ll stay small until harvest no matter what you do. Especially for beginners, it can be difficult to consistently harvest 1 lb per harvest with auto-flowering strains because even a small problem at the beginning of the grow can stunt your plant size.
On the other hand, photoperiod cannabis plants are much more forgiving if you make mistakes early on. You have all the time in the world to get your plants to the exact right size and shape before you initiate the flowering stage. As long as you set your plants up right before they start flowering, and keep them healthy, you’re pretty much guaranteed a 1+ lb harvest following all these steps, which is why photoperiod strains are recommended if you’re not sure what to pick.
Pros
- Faster – Ready to harvest in under 3 months. Can’t beat the time to harvest! If speed is most important, then auto-flowering genetics are the way to go.
- No special light schedules – You don’t have to worry about light schedules, light leaks, or anything like that. Just give the plants 18+ hours of direct light a day and that’s all you really need to think about when it comes to light. Check on your plants any time.
Cons
- Early mistakes can dramatically hurt yields – Can’t make mistakes in the seedling stage. Autofloweirng plants start flowering after about a month even if they’ve been sick and are still small. That means early mistakes like overwatering your seedlings will stunt autoflowering plants for life, so only choose autoflowering strains if you’ve got a great handle on taking care of plants for the first 4 weeks of life.
- Less consistent yields – More difficult to always get 1 lb per harvest, due to the shorter life period as well as the fact that it’s easier for plants to end up smaller than you want.
- Fewer strain choices – Autoflowering strains are “boutique” specialty genetics and you typically have fewer options when it comes to autos.
Photoperiod strains <– Recommended for this cannabis high-yield tutorial
Pros
- Early mistakes are forgiven – Even if you make mistakes early on, you have time to let your plants recover and get them the optimum size and shape to guarantee a 1-lb harvest.
- Consistent 1 lb harvests – With photoperiod strains, even a total beginner can produce a pound of weed in their first harvest as long as they just make sure to follow all these instructions.
- Bigger selection – Most strains are photoperiod strains, which means you have a much larger selection to choose from.
- Excellent bud quality – Although you can get some incredible autoflowering strains these days that have bud quality equal to photoperiod strains, on average photoperiod buds not only look and smell nicer, but also have higher THC levels.
Cons
- Takes longer – Average grow time with photoperiod strains is 4-5 months from germination to harvest day. This is about 1-2 months longer than most autoflowering strains.
- Special light schedules – In order to get photoperiod cannabis plants to make buds (start “flowering”), growers give plants 12 hours of complete darkness a day to simulate that winter is coming. This is easy to do in a grow tent by putting your grow lights on a timer. However, the downside is you can’t check on or care for your plants during their 12-hour “lights off” period every day so you don’t accidentally interrupt their beauty sleep.
I recommend growers follow this tutorial with photoperiod strains just to increase the chance you get a full pound or more. However, auto-flowering strains can work if you’re desperate to harvest within 3 months and are willing to make sure to take extra good care of your plants while they’re still young.
Examples of excellent high-yielding photoperiod strains (these are all feminized seeds, which means every plant with be a bud-making female plant)
- Blue Dream by Seed Supreme – Enormous yields every time. A true commercial producer and one of the higher-yielding strains I’ve grown. Buds are sweet-smelling with relaxing yet “social” weed effects that have given in the status of “party favorite”.
- Platinum Cookies by Seed Supreme – Excellent yields and the bud quality is out of this world. The purple-tinted buds tested at 25-27% THC when we grew it and the effects were a crowd favorite. This strain tends to get tall, but responds well to bending and supercropping to keep it short and flat. It has a 12-week flowering stage, which is a few weeks longer than average, but the yield and bud quality are worth 2 extra weeks in my opinion.
- Kushberry Moonrocks by MSNL – Great yields, pretty purple color on buds, averages around 28% THC, only a 10-week flowering stage. Effects are relaxing but POTENT. Definitely a strain meant to be enjoyed at home.
2.) Get your big-yield supplies
Here’s an example of a complete shopping list for a 4’x4′ grow tent that gets great results with cannabis using the HLG Blackbird 600W LED.
Here are other examples of grow lights that would be suitable for this size grow tent, using otherwise the same setup as above:
- Spider Farmer SF4000 LED grow light – (uses 450W) – Yields just under 1 pound
- Mars Hydro FC-E4800 LED grow light (uses 480W) – Yields over 1 pound per harvest
- 600W HPS (Uses 600W) – Yields up to 21 ounces or 1.3 lbs
- HLG Blackbird 600W LED (600W, dimmable) – Yields up to 24 oz or 1.5 lbs. Recommended choice – this LED light was designed specifically to achieve high yields in a 4×4 grow tent.
- 1000W DE HPS (Uses 1000W) – Yields up to 35 oz or 2.2 lbs, VERY hot, you will need cooling.
Any of these grow lights will grow thriving cannabis plants in a 4’x4′ grow tent.
Other hints for getting the highest yields in your setup:
- Grow with coco (or hydro) – Coco and hydro tend to produce better yields than growing in soil on average. The grow medium that tends to produce the lowest yields is super soil (“just add water” soil). However, yields aren’t the only important thing when it comes to growing, and you can achieve 1 pound in this setup even with super soil if you make sure to maximize everything else.
- Use synthetic nutrients – Along the same line, cannabis plants tend to produce the highest yields when using synthetic or mineral-based nutrients. Adding organic nutrients can definitely increase yields vs not using any nutrients, but they are not as easily available to the plant as man-made nutrients. Some great cannabis nutrient systems are mostly organic with just a few key synthetic ingredients to get the best of both worlds, like Fox Farm trio for hydro. But fully synthetic nutrients like General Hydroponics Flora trio get the best yields of any nutrient system we’ve tried in side-by-side grow experiments so far. If yields are your #1 goal, I highly recommend the GH Flora trio – just follow the instructions on the side of the bottle at half strength, maintain a pH of 5.5-6.5 pH at the roots, and you don’t have to worry about nutrients.
- Don’t ignore heat – Young plants don’t mind the heat, but if it’s regularly above 85°F/30°C in the grow space while buds are forming, it will harm your yields by making buds grow more loose and airy. Heat also greatly increases the chance of getting bud rot or mold in your buds. Luckily, a good exhaust fan venting air out of the tent goes a long way, which is why I included in a powerful exhaust fan in the recommended 4×4 setup. However, if the whole room is warming up above that temperature, adding more fans won’t help. At that point, you should vent the hot air directly out a window or install an AC. At that point, you won’t need to worry about heat and can focus on other things.
- React quickly to plant problems – If you notice a nutrient deficiency, see signs of bugs, or catch sight of any other unexpected plant symptoms, pay attention! Check our free plant doctor tool and correct the cause of the problem as soon as possible. Most problems can be dealt with easily at first, but they get harder and harder to fix the longer they go on without intervention.
Once you’ve got your garden set up, start your seeds and lets start growing!
- How to germinate your seeds directly in the grow medium, as pictured below (here’s a germination tutorial for hydro).
- How to water cannabis plants.
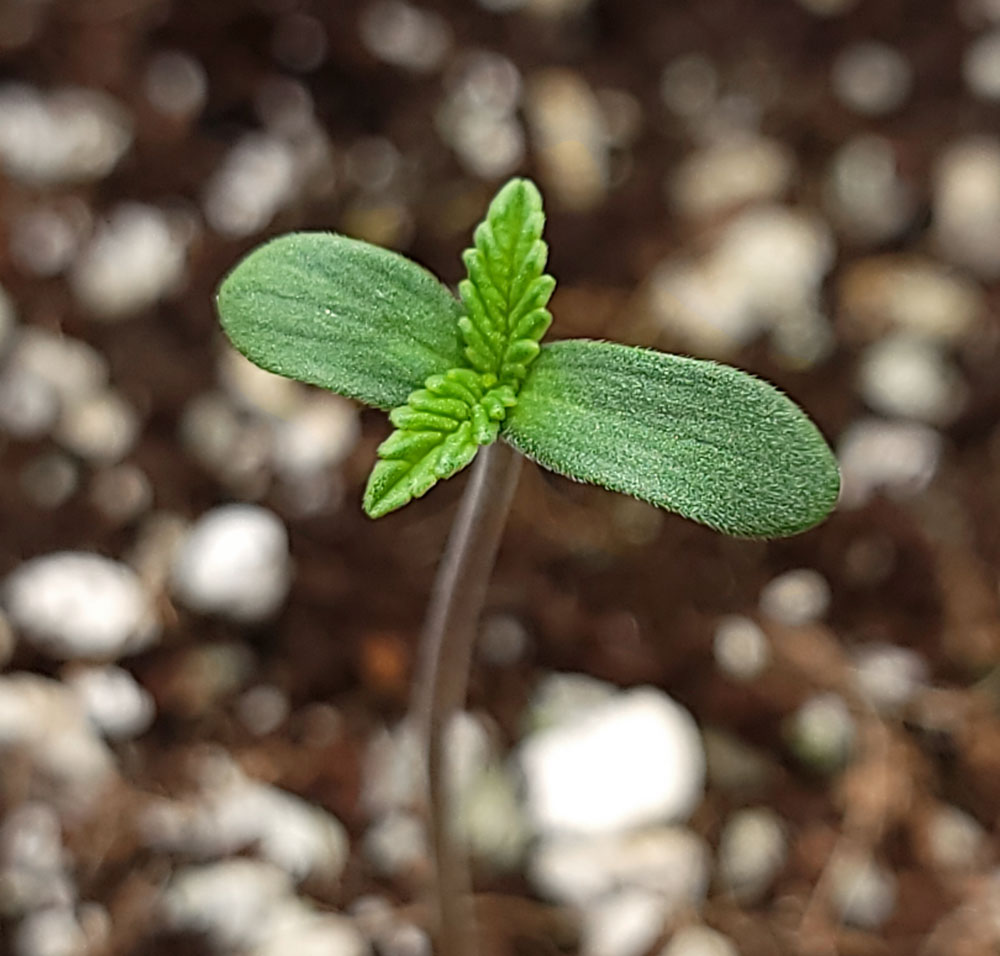
Plant your marijuana seeds and keep them warm during germination.
The result? Cannabis seedlings pop up a few days later.
3.) “Top” plants at a young age
Wait until the seedling has about 6 sets of leaves, then cut off the top of the main stem.
Wait until your plants have grow about 6 sets of leaves (6 “nodes”).
Cut off the top of the plant through the main stem. You want to remove the top node completely.

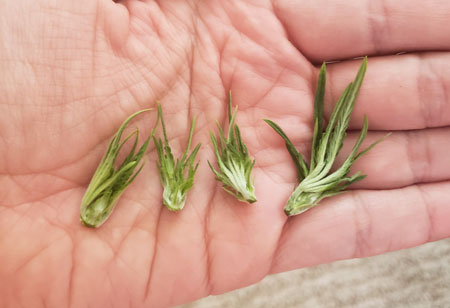
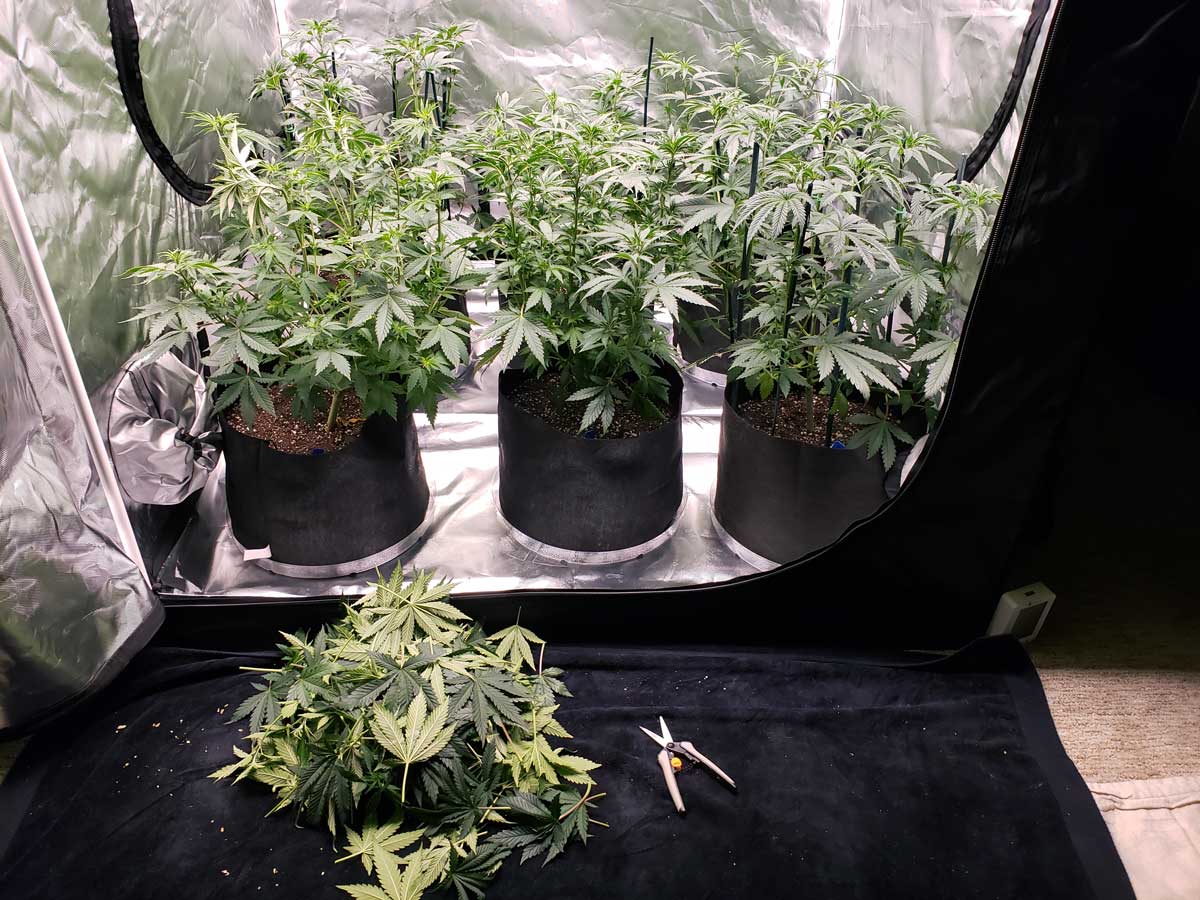
After topping 4 plants, I had 4 little tops. Cutting off such a small amount of plant doesn’t seem like it would make a huge difference to your yields, but this is one of the most important steps to take as a grower indoors to maximize yields. As a result of this simple act, the plant will stop growing with only one main stem, and instead naturally grow more bushy and wide with multiple stems. These bushy cannabis plants will be covered in buds instead of only having one main bud, giving you the “sea of buds” you often see in pictures.
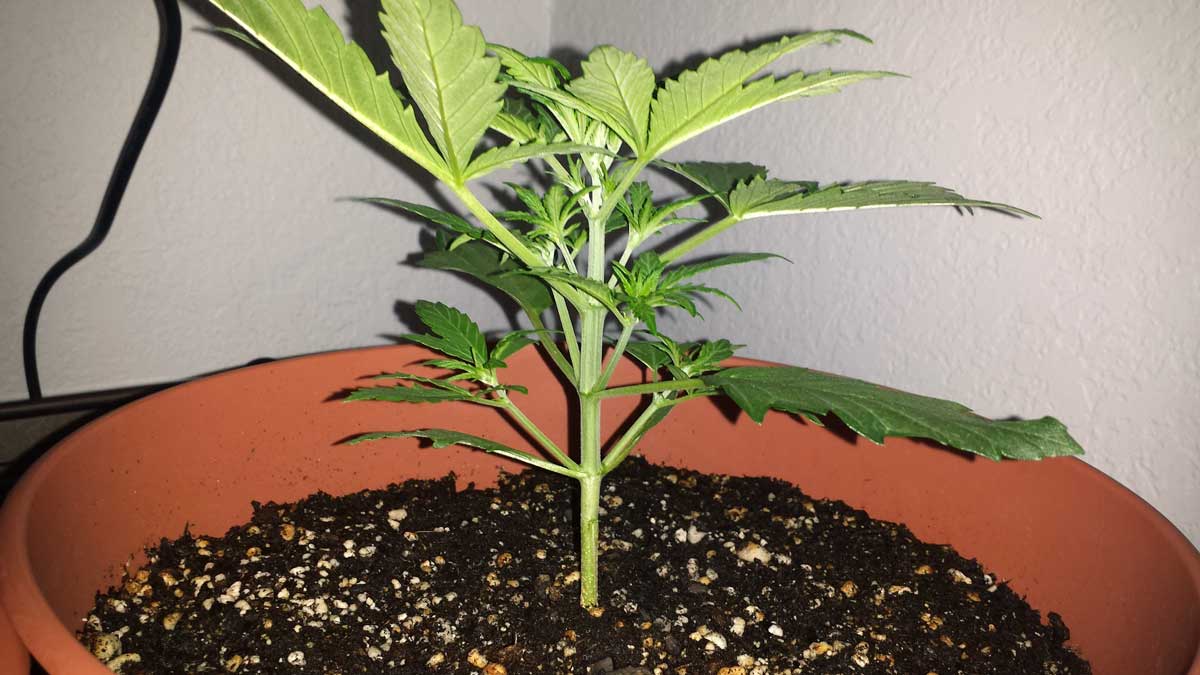
These 4 plants were just topped.
These are the 4 tops from the 4 plants. Such a small amount removed, but it will dramatically change the future growth of your plants.
Now that their tops have been cut off, these plants will never grow the same again. After being topped, they naturally grow bushier with multiple bud sites instead of growing with just one big bud. As a result, you increase the amount of yield you can produce per plant.
Learn more about topping cannabis plants.
4.) Train plants to grow flat and wide (like a table) in the vegetative stage.
Method 1: Bend down branches and use plant twist tie to hold them in place.
- When any branch gets taller than the others, bend it down and away from the center of the plant.
- Tie the stem directly to the plant container using plant twisty tie to hold it in place.
- You’re done when they’re all the same height and about 1.5′ tall from the top of the plant container. At that point, move to the next step.
Full tutorial on how to use plant twist tie plus bending to grow plants wide and flat like a table.
The goal of any training when growing indoors is to force your plants to grow flat and wide like a table. This ensures all the parts of the plant are about the same distance from the grow light. This shape will dramatically increase your yields once buds start forming because it allows your plants to use “every last drop” of light to make buds.

Method 2: Use a “Screen” (get trellis netting and train plants to grow under the net)
Invest in a 4×4′ Scrog trellis net (get two because you may want a second one later) and install it to be half the final desired height of your plants. In a 4’x4′ grow tent, a good final height for your plants is about 3′ tall. So install the scrog net about 1.5′ feet above the tops of your plant containers. Any time a stem grows above the net, tuck it back underneath until you’ve filled the entire net.
Keep tucking branches under the net as plants grow.
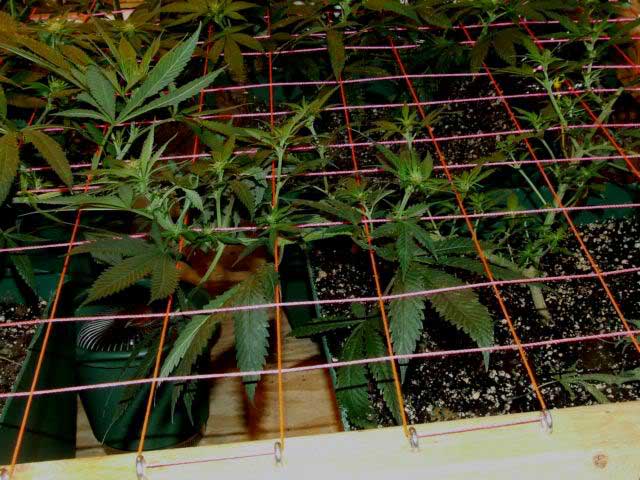
Continue until the whole net is “filled” with a canopy of living plants. This net just has a few spots left before it’s completely filled and ready for the next step.
5.) Initiate the flowering stage, then…
In order to get plants to make buds (start “flowering”) you need to give plants 12 hours of complete darkness a day. This is typically done by putting your grow lights on a timer set on a 12/12 light schedule. Since your plants are in a grow tent, when the grow lights are off, your plants are in complete darkness so they can enjoy their “beauty sleep”.
Note: Don’t check on your plants during their 12-hour “night” period because exposing them to light at night even a few times can disrupt budding and revert plants back to the vegetative stage. Keep plants totally in the dark when the grow lights are off.
Defoliate – Follow a strategic defoliation schedule.
It doesn’t seem like defoliation (removing leaves) should improve cannabis yields, but this is a “hack” that has proven to be remarkably effective. Not only does strategic defoliation increase your yields (when done properly), it also increases the overall bud quality including the THC percentage and density of your buds. We confirmed this at the lab in our defoliation side-by-side experiment with clones. There are many great defoliation schedules, but here’s one that works well to increase yields and is followed by many commercial growers.
Example of a great defoliation schedule (most common defoliation schedule for commercial cannabis growers)
First Defoliation: 3 weeks after 12/12
Remove all the big fan leaves from the plant about 3 weeks after initiating the 12/12 light schedule.
- If a leaf is the size of your hand or bigger, remove it.
- If the stem is at least 1″ long, remove it.
- Make sure to leave at least a few fan leaves on each main stem
Second Defoliation: Do this 4 weeks after the first defoliation
- Repeat the same process
- Focus on making sure all bud sites get direct exposure to the light and aren’t covered by leaves
- After this, don’t remove leaves unless the plant is getting overly leafy, causing leaves to lay on each other and create wet spots
- It’s okay to tuck leaves to expose buds
After defoliation, you should be able to see light from the grow light hitting the floor (if the floor is in shadow then remove more leaves).

Read the full defoliation tutorial.
Other flowering stage tips
- Not too hot, not too humid – Maintain a good environment while buds are forming.
- Keep plants healthy – Avoid bugs and nutrient deficiencies.
Leaves should appear green and healthy for most of the flowering stage. It’s normal for leaves to start turning yellow or looking rough the last 1-2 weeks before harvest, but before that, it’s a sign of a problem. If you notice discolored leaves, don’t ignore it. Do something! Your yields will thank you.
If using a net…
- Once you initiate the flowering stage, stop tucking your stems under the first net.
- Let the stems grow above the net. Each stem is going to develop into a main bud (sometimes called a “cola”).
- Are the colas getting too close ot the light or starting to fall over?
- If the stems are wavy and falling over, or if some stems are growing taller than others, install a second net about 1 foot above the first one.
- This is not 100% necessary, but can be helpful if your stems stretch a lot after initiating 12/12 (a second net helps you arrange buds to make sure they fill the entire grow tent).
- Use the grid to stabilize your colas where you want them.
- If a stem is getting too close to the grow light, tuck it under that second net.
- Try to ensure your buds are all about the same height as each other and the same distance from the light.
Regardless of the exact method of training, the goal is to get all your buds about the same distance from the grow light. This maximizes yields.
6.) Harvest at the right time.
Harvest at the right time. Here’s a quick guide.
Not Ready
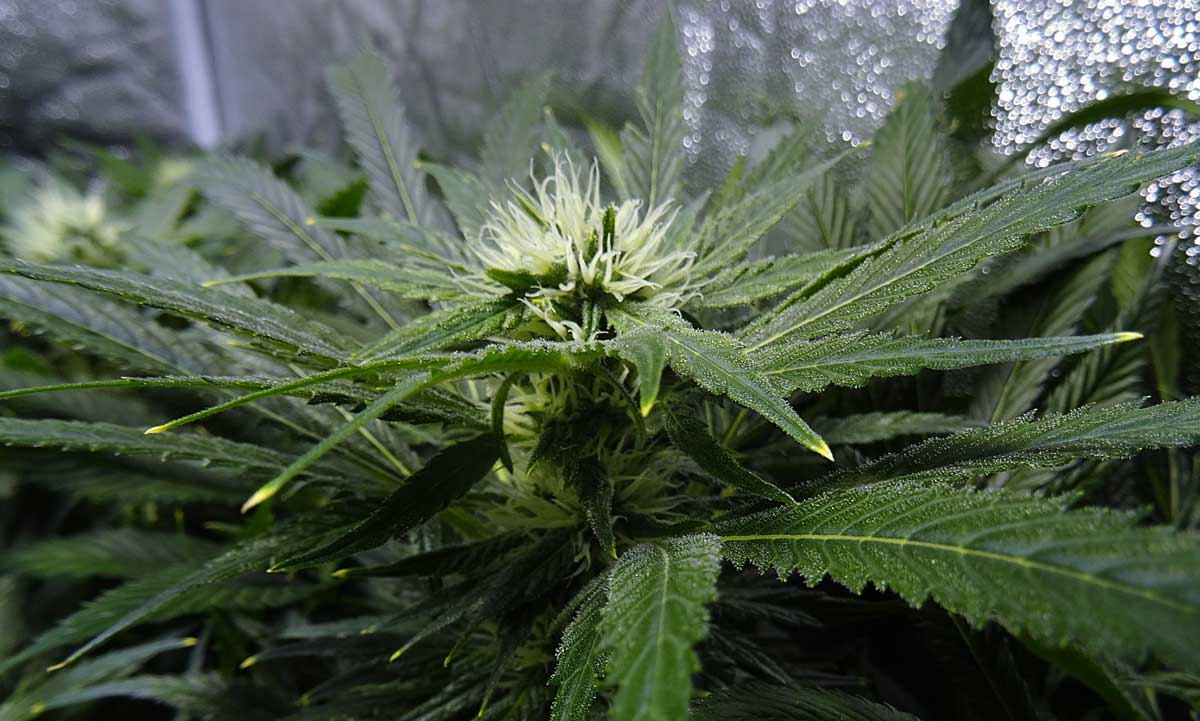
Baby buds (budlets) look like a ball of white hairs. These buds have many weeks to go!
If your buds are all white hairs, they’re just getting started. Expect much more fattening from here.
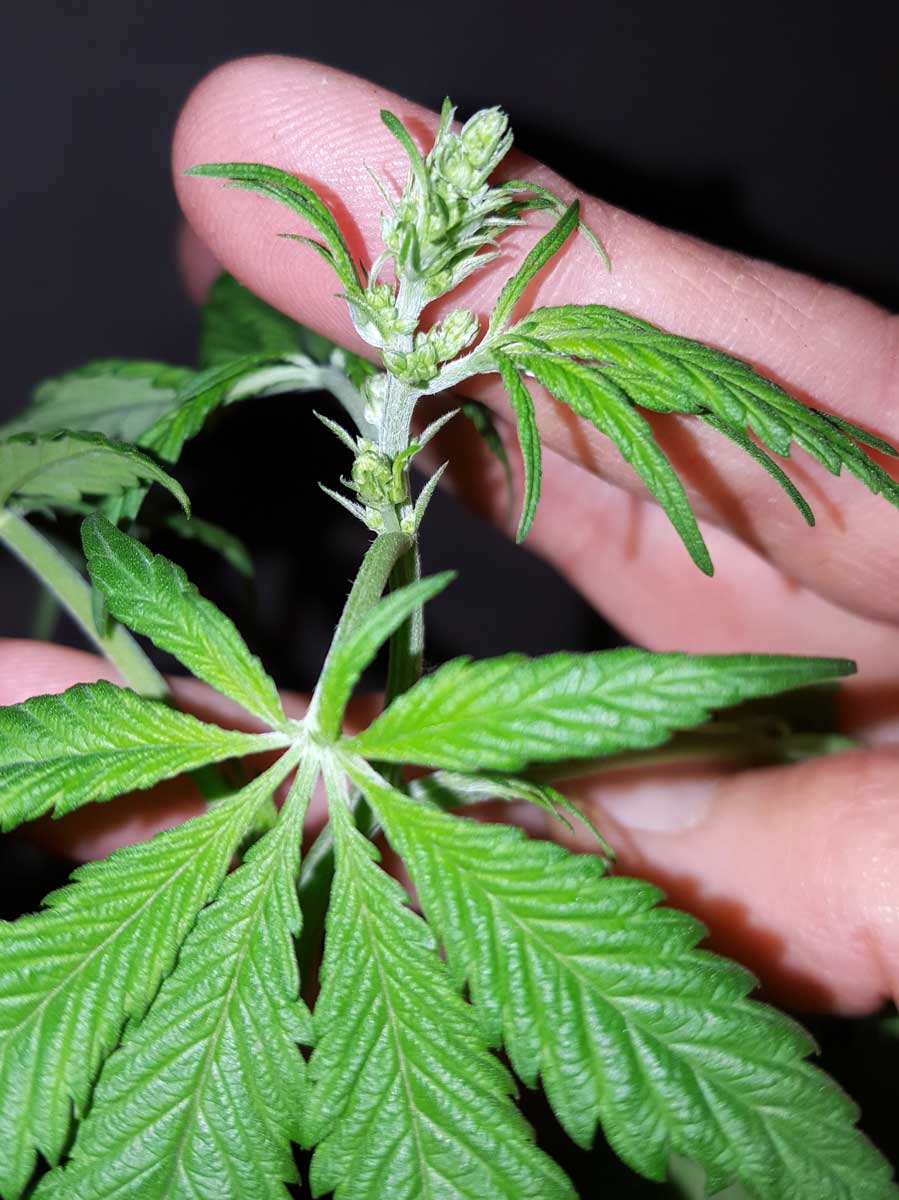
Watch out for pollen sacs!
If you started with feminized seeds from a trustworthy breeder, you should never see pollen sacs. But just in case, if you see pollen sacs instead of white hairs, it means your plant is growing male flowers and should be removed from the grow space immediately. Why toss male plants? Male flowers don’t contain much THC and their pollen causes nearby buds to grow seeds.
Immediately remove any plant that grows pollen sacs instead of white hairs. Learn more about male plants.
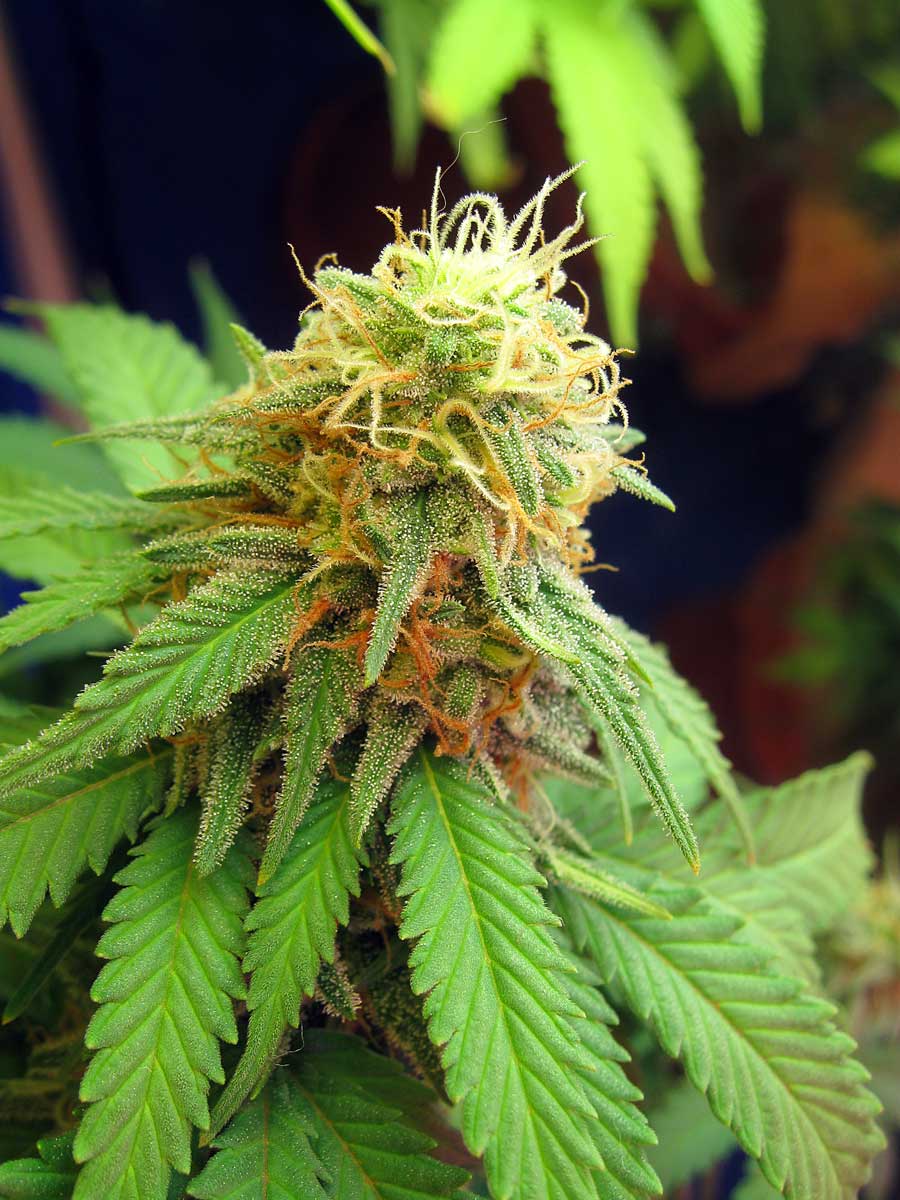
Still Not Ready
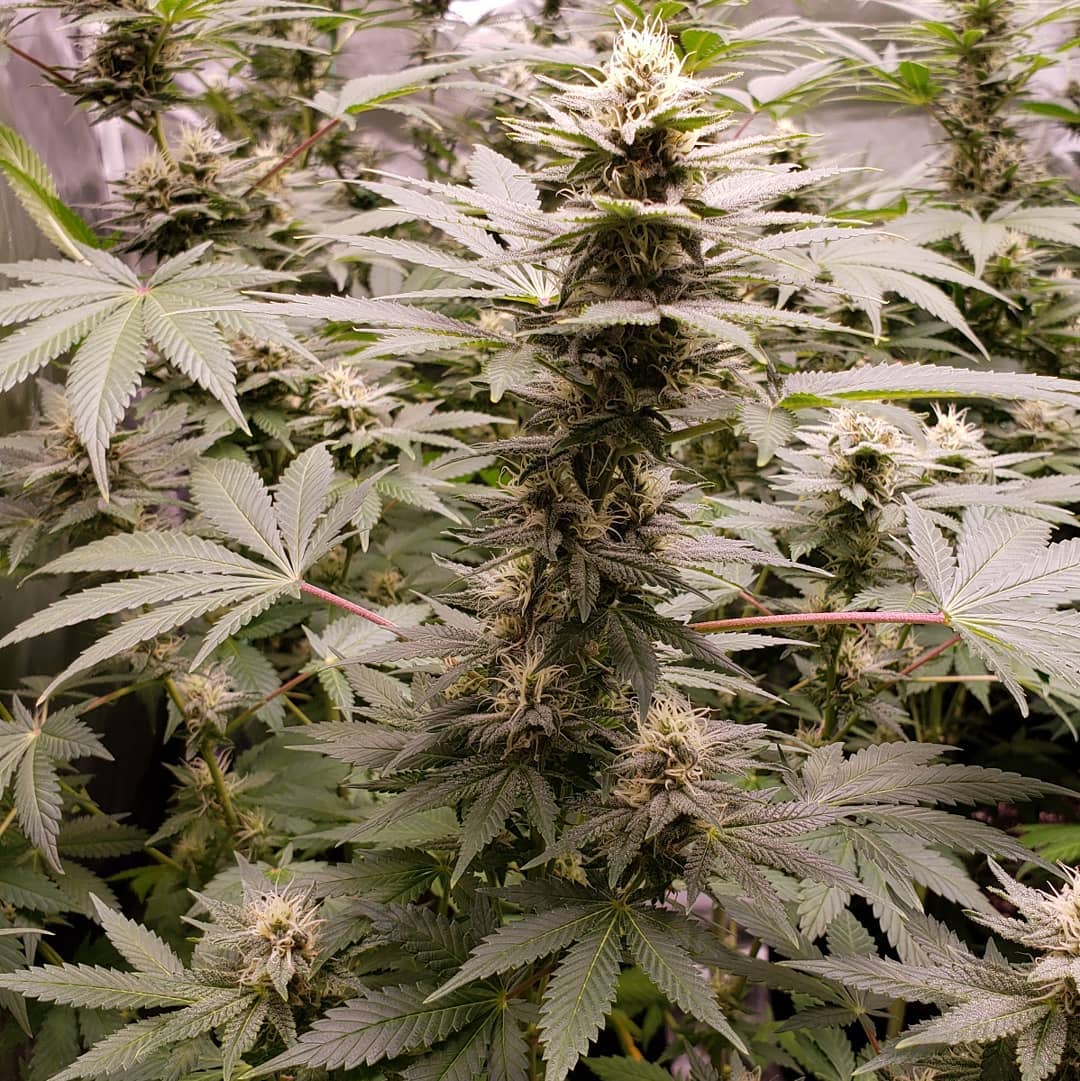
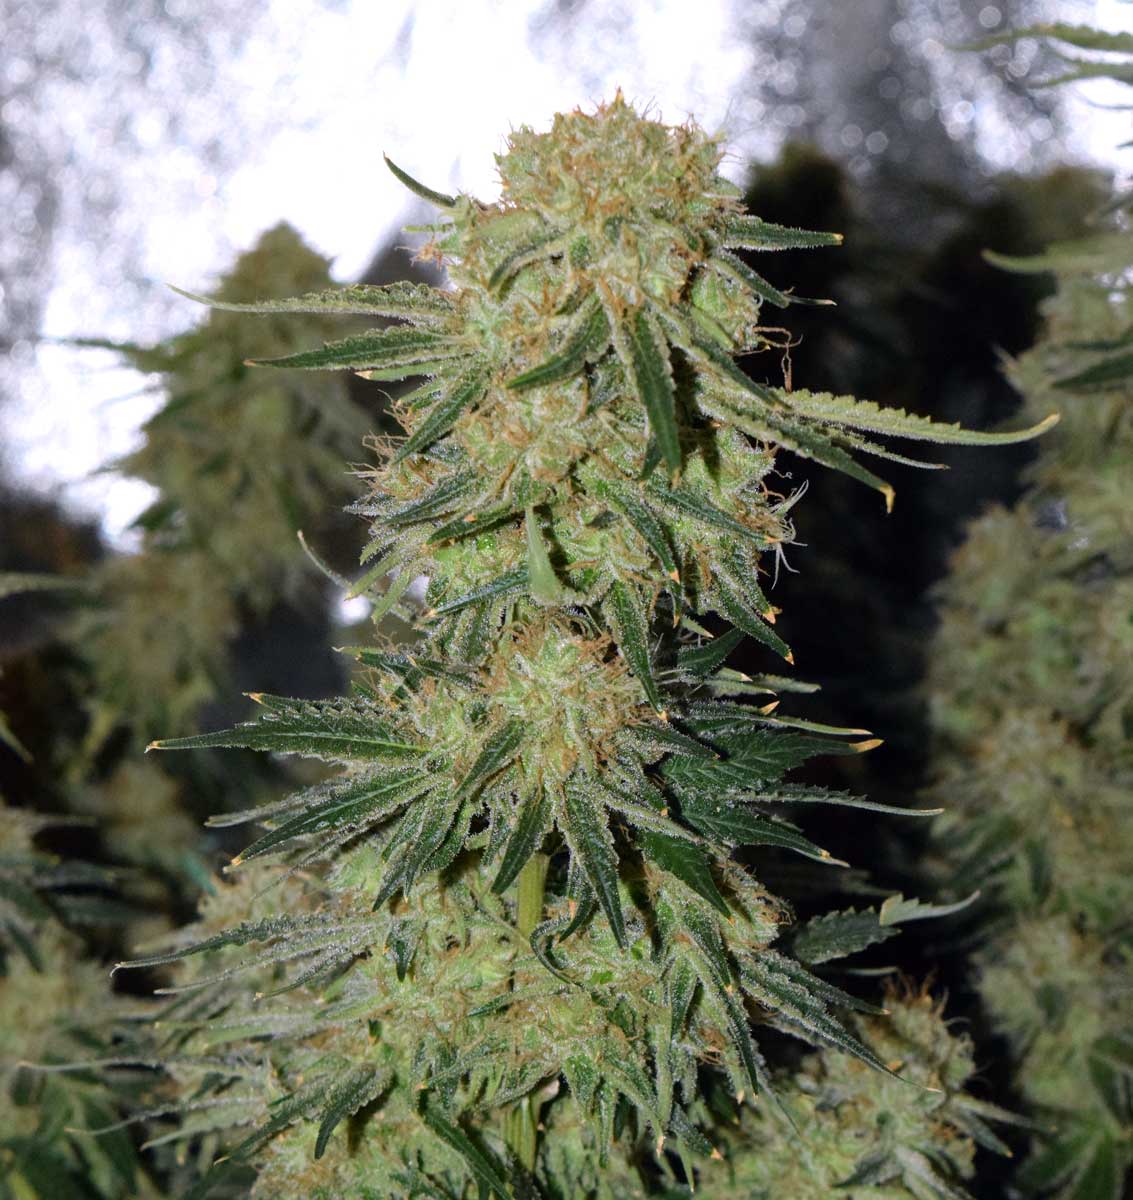
As the marijuana plant buds get closer to harvest, they thicken, and those white pistils start to darken and curl up. You’ll notice your buds are slowly getting thicker and denser. However, if you still have a lot of straight white pistils, like this bud, it means you still have a few weeks to go.
You’re in the ready-to-harvest window for cannabis when most of the hairs have darkened and curled in.
A bud is ready to harvest when most of the hairs darken and curl in.
 Check out tons more pictures of ready-to-harvest buds from different strains!
Learn how to use a magnifier to look at buds for even more precision.
7.) Dry and jar buds properly.
Buds aren’t smokable directly off the plant because they’re mostly full of water. You need to dry and cure buds if you want to get bud quality like what you’re used to buying.
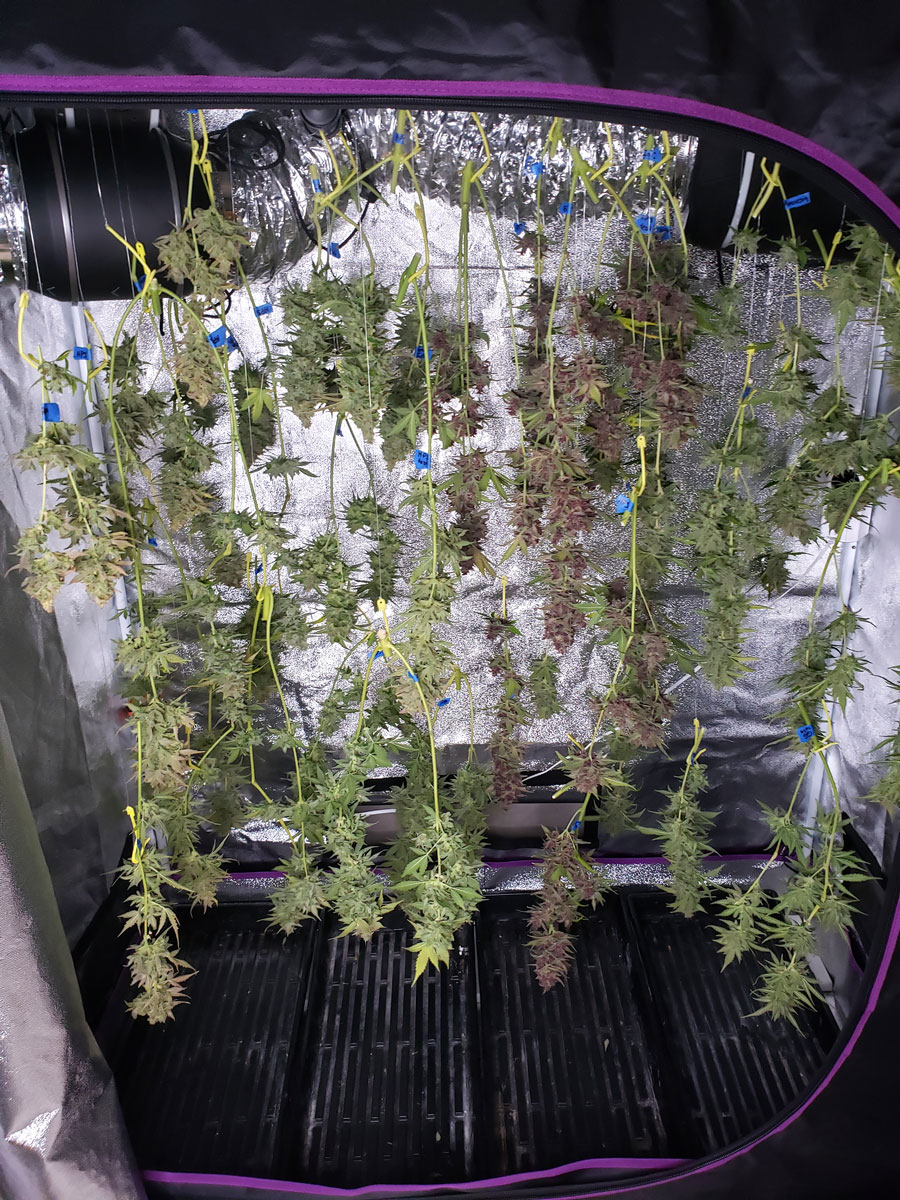
The simplest way to dry buds is to cut off the branches and hang each branch upside down until the buds are dry. Best done in a cool space.
Learn how to dry buds and cure them perfectly.
Time to enjoy the fruits of your labor!

Conclusion: Summary of Key Steps for 1 Pound Yields in a 4×4′ Grow Tent
Growing over a pound of cannabis in a 4’x4’ grow tent is an achievable goal for any home grower (even a beginner) when following my strategic plan.
Here’s a recap of the key steps covered in this guide:
- Start with high-yielding strains – Choose stable, fast-growing strains that are known for their heavy yields.
- Get the right equipment – Invest in a quality grow light, tent, fans, etc. sized for your space. If you get good equipment, especially a good grow light, your equipment will do most of the work for you.
- Top young plants – Cut the main stem early to promote bushy, wide growth.
- Train plants to grow flat like a table – Use bending and tying down (or a trellis / scrog net) to “train” plants and create a wide even canopy that fills the entire grow space. Do this before you initiate the flowering stage.
- Initiate flowering at the right time – Switch to 12/12 when plants are 1/2 the final desired size.
- Strategic defoliation – Remove large leaves to “hack” the plant’s natural plant processes and force it to grow in a way that produces bigger, denser, and more potent buds. Best when done on a specific schedule. For example, a common schedule is to defoliate heavily at the beginning of the flowering stage, and then defoliate again 3 weeks later.
- Control environment – Avoid excessive heat or humidity, and give plants lots of airflow. Luckily, if you started with good equipment and set up your grow space properly, you won’t have to worry about the environment.
- Stay vigilant – Catch issues early and take corrective steps. Don’t ignore problems!
- Harvest at peak maturity – Harvest buds at the right time.
- Dry and cure buds – Dry buds in a good environment, then jar and cure them for a few weeks. This is crucial to achieve professional quality bud!
Follow these steps carefully throughout the grow and you can expect to harvest over a pound of dense, high-quality buds from a 4’x4’ grow tent setup! With some experience under your belt, yields of 1.5 pounds or greater become possible!
You might enjoy the following cannabis growing tutorials…
15 ways to improve cannabis yields
How to increase THC of buds (make buds more potent!)