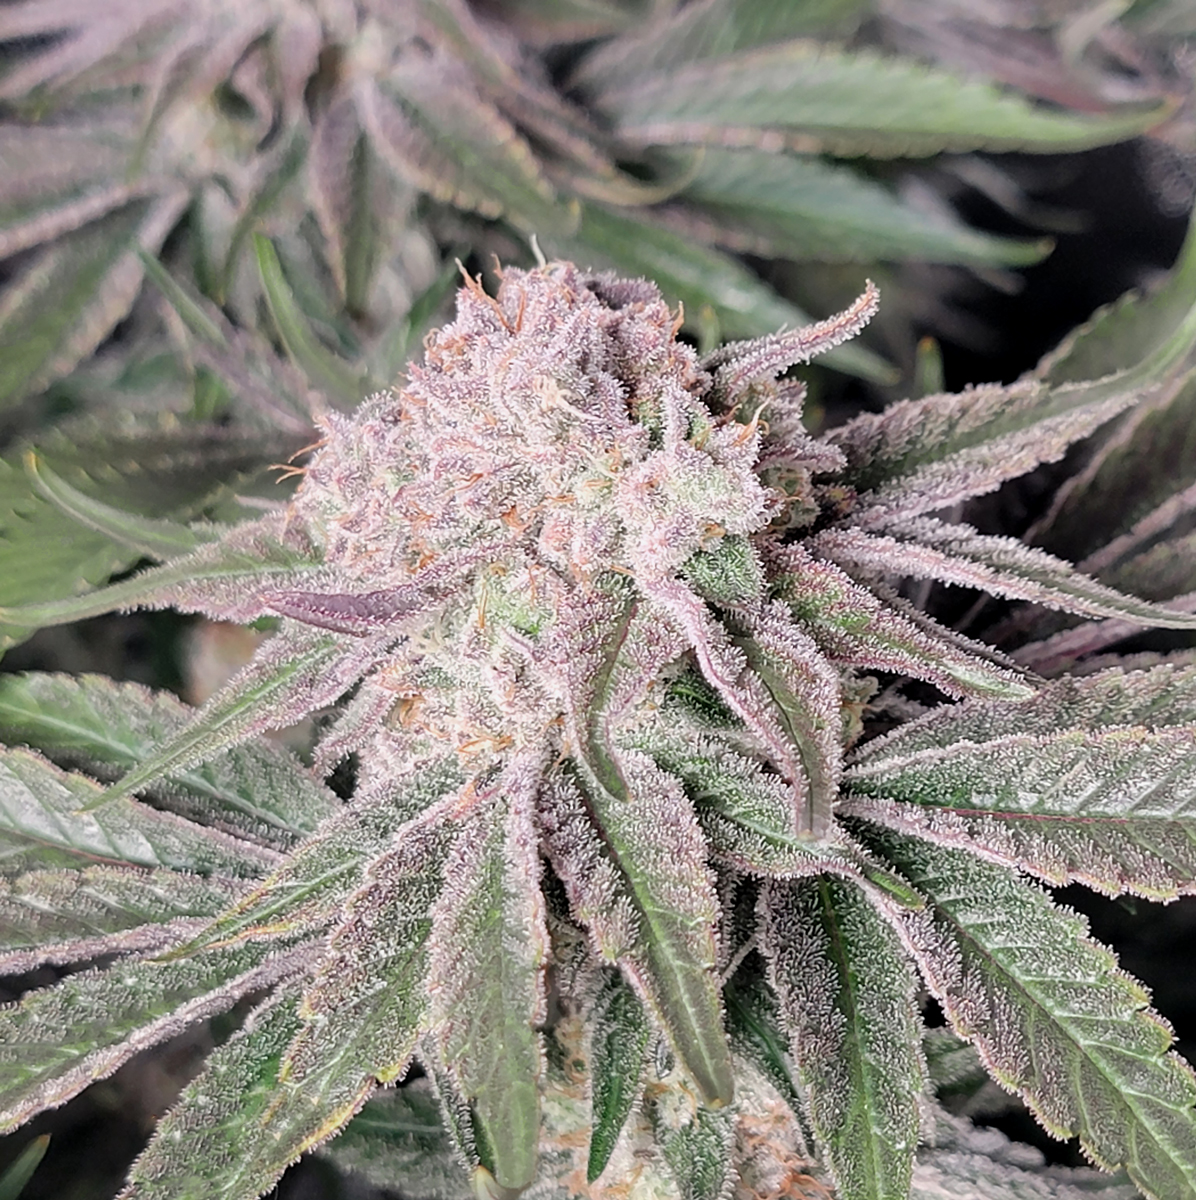
by Nebula Haze
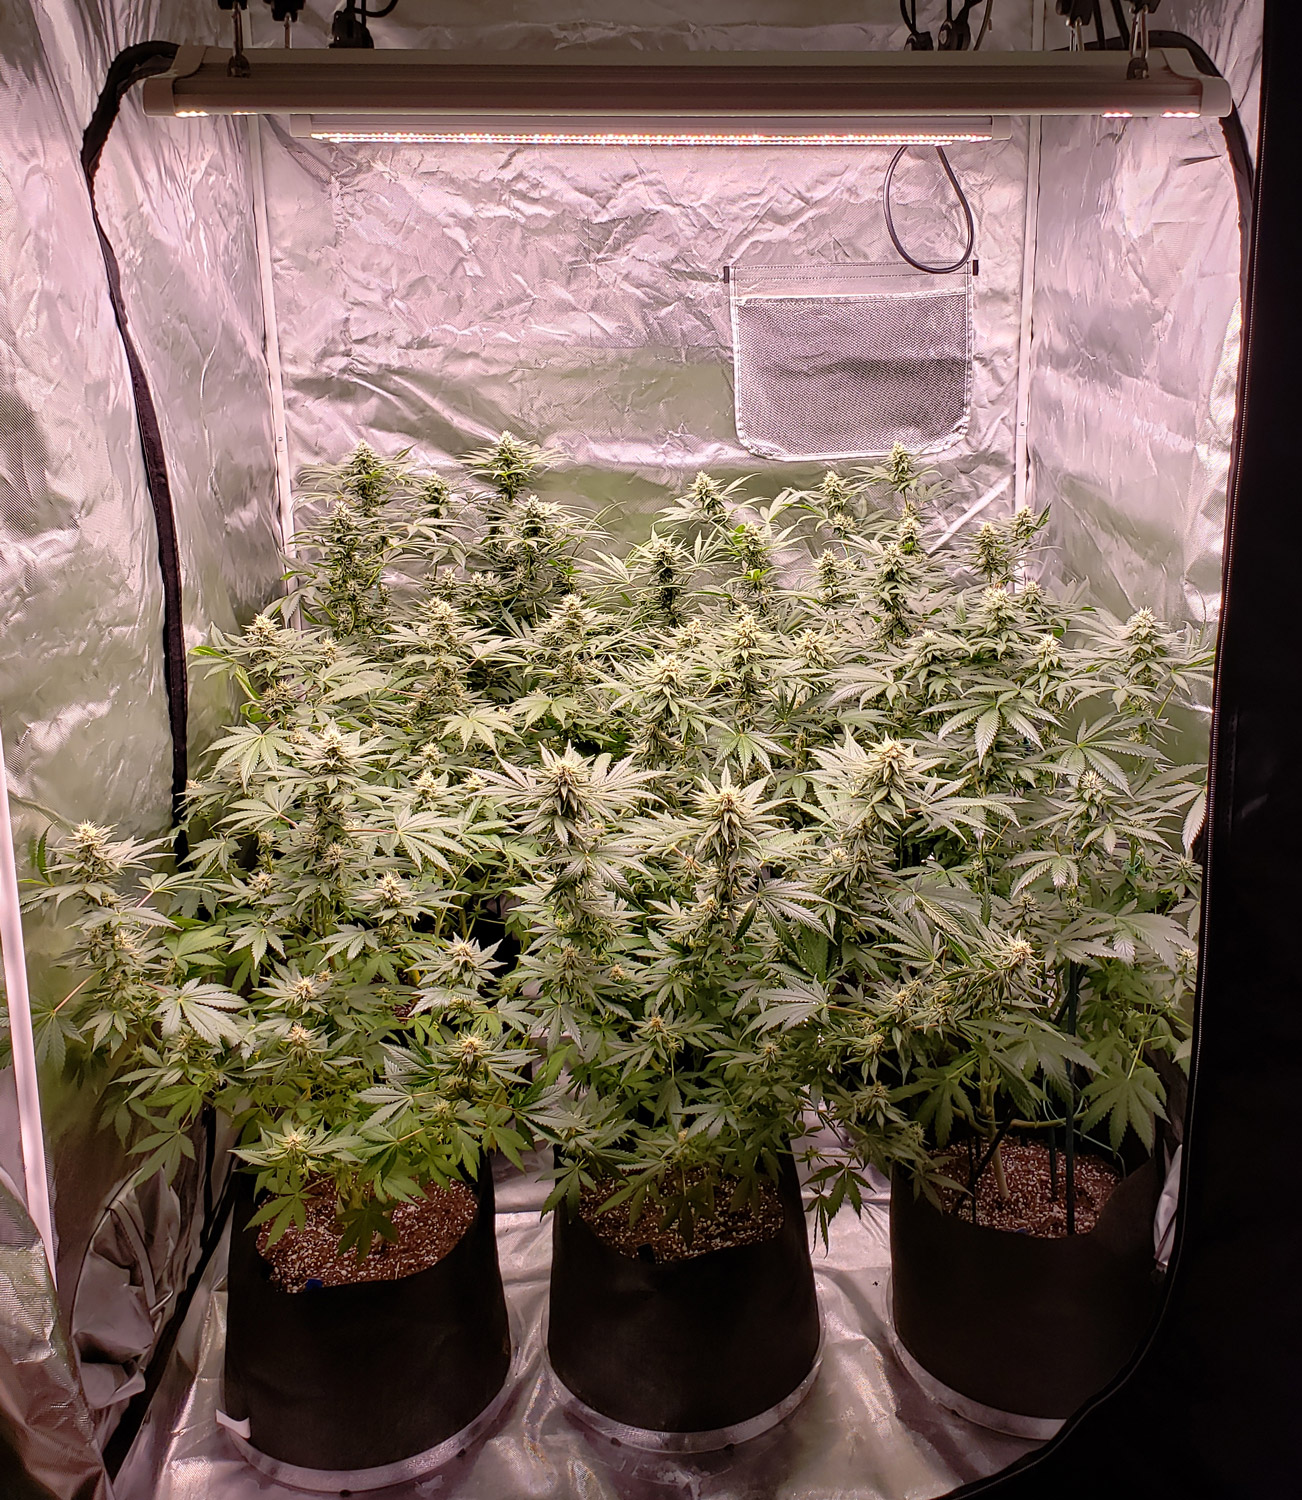
Your cannabis plants are growing buds! But wait… what’s that happening to the leaves?
Yellow leaves, brown spots, and other random deficiencies are common flowering stage problems.
This happened to me several times as a beginner cannabis grower. By the time I was about halfway through the flowering stage, my once-healthy green plants would start getting nutrient deficiencies. What is the cause of this frustrating problem?
Why do so many cannabis plants get nutrient deficiencies in the flowering stage?

Why the flowering stage? Cannabis plants are tougher in the vegetative stage. With new leaves growing every day, no individual leaf ever has to work too hard. The plant is focused on growth and nothing else. Vegetative plants really “grow like a weed”. Yet as the flowering stage goes on, plants stop making new leaves and start focusing on bud development. Each leaf works long, hard hours, and plants stop replacing them. Sick or discolored leaves remain until harvest, and if you don’t fix the issue, those leaves die and the problem spreads to new parts of the plant. What could be a small problem in the vegetative stage can slowly take over your whole plant in the flowering stage.
Unfortunately, cannabis plants are more sensitive when they’re making buds. But never fear! This article explains exactly what’s causing your problem and how to fix it.
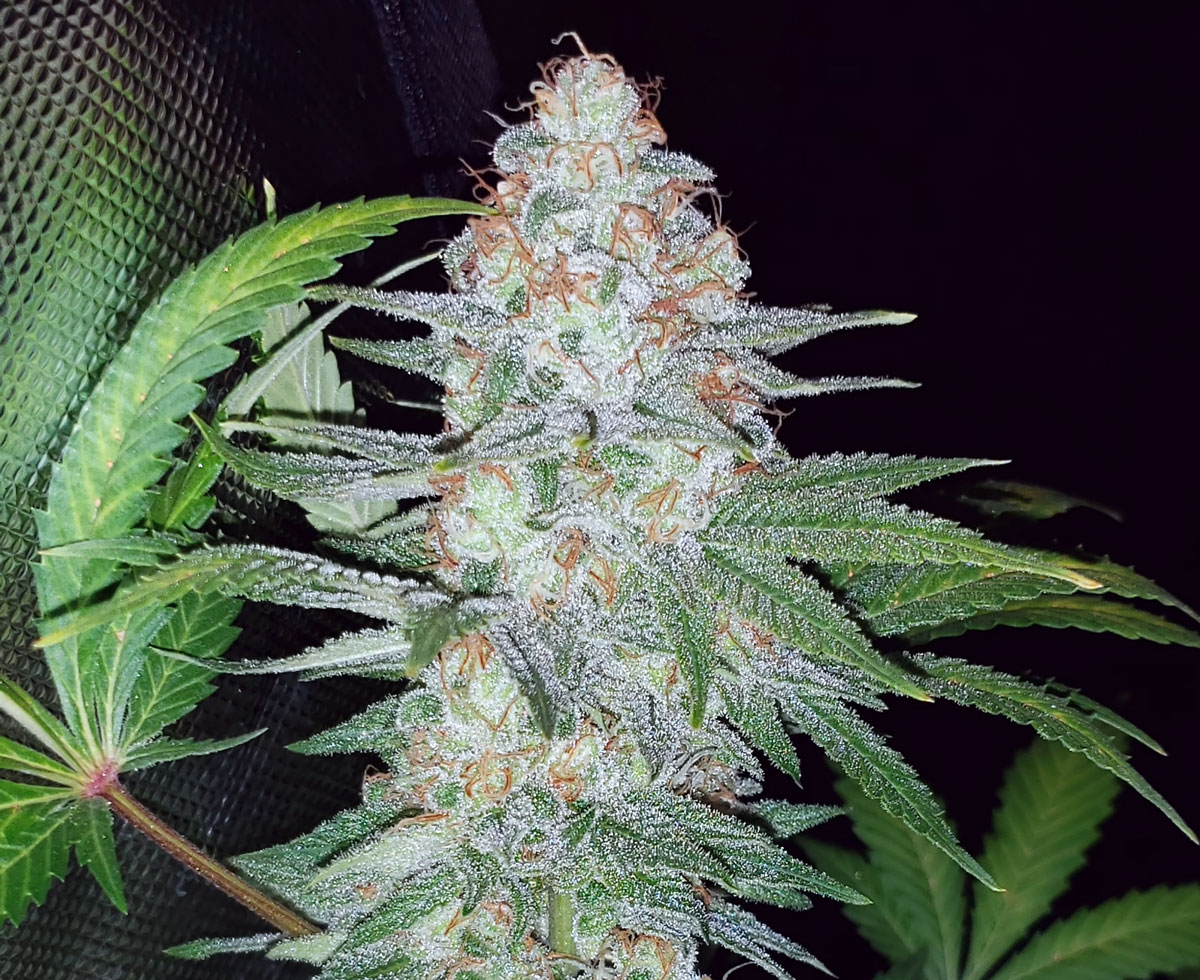
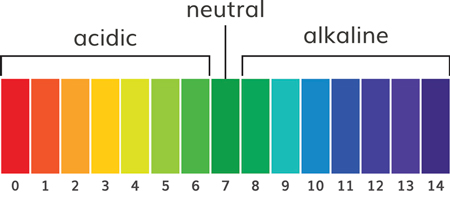
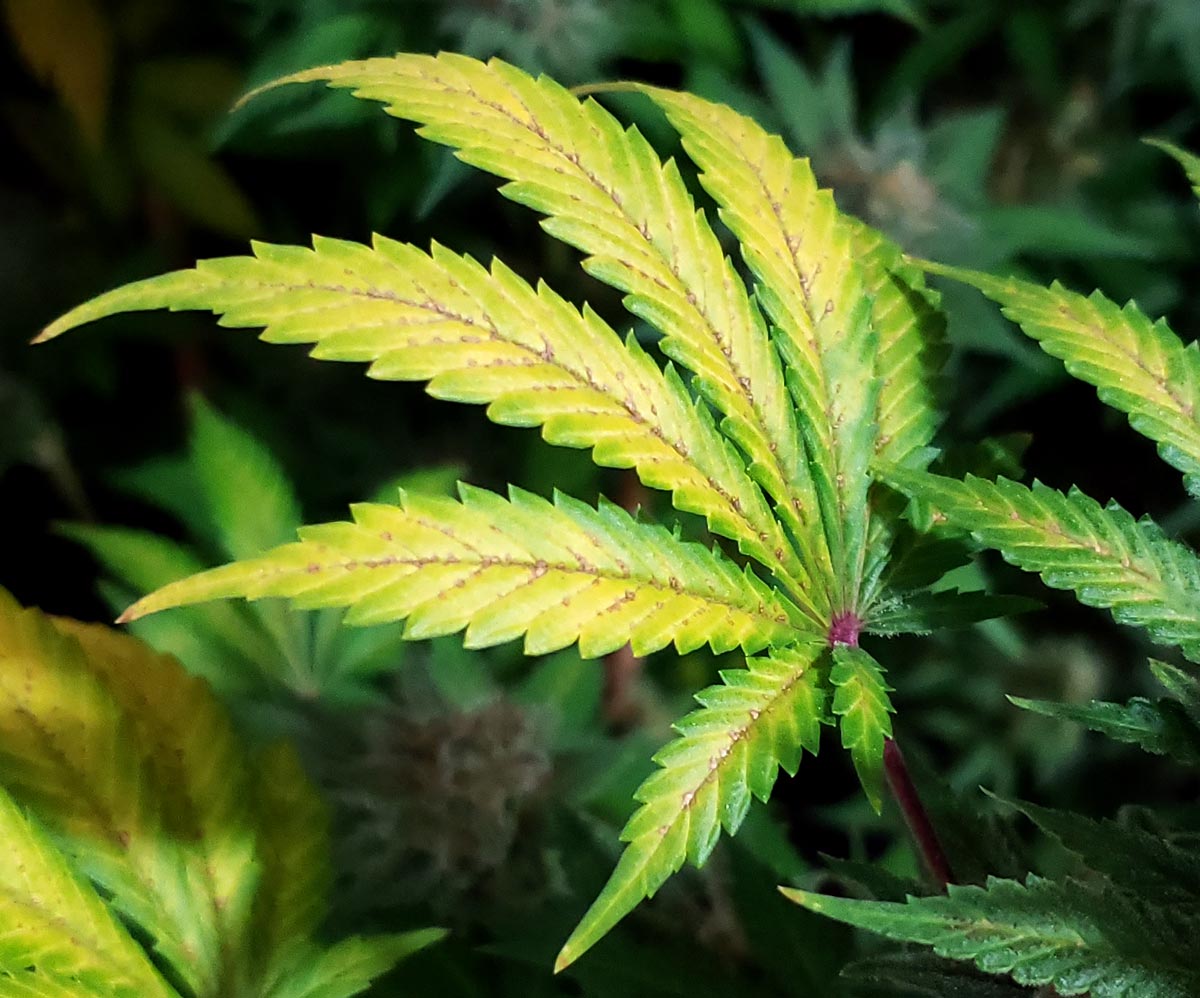
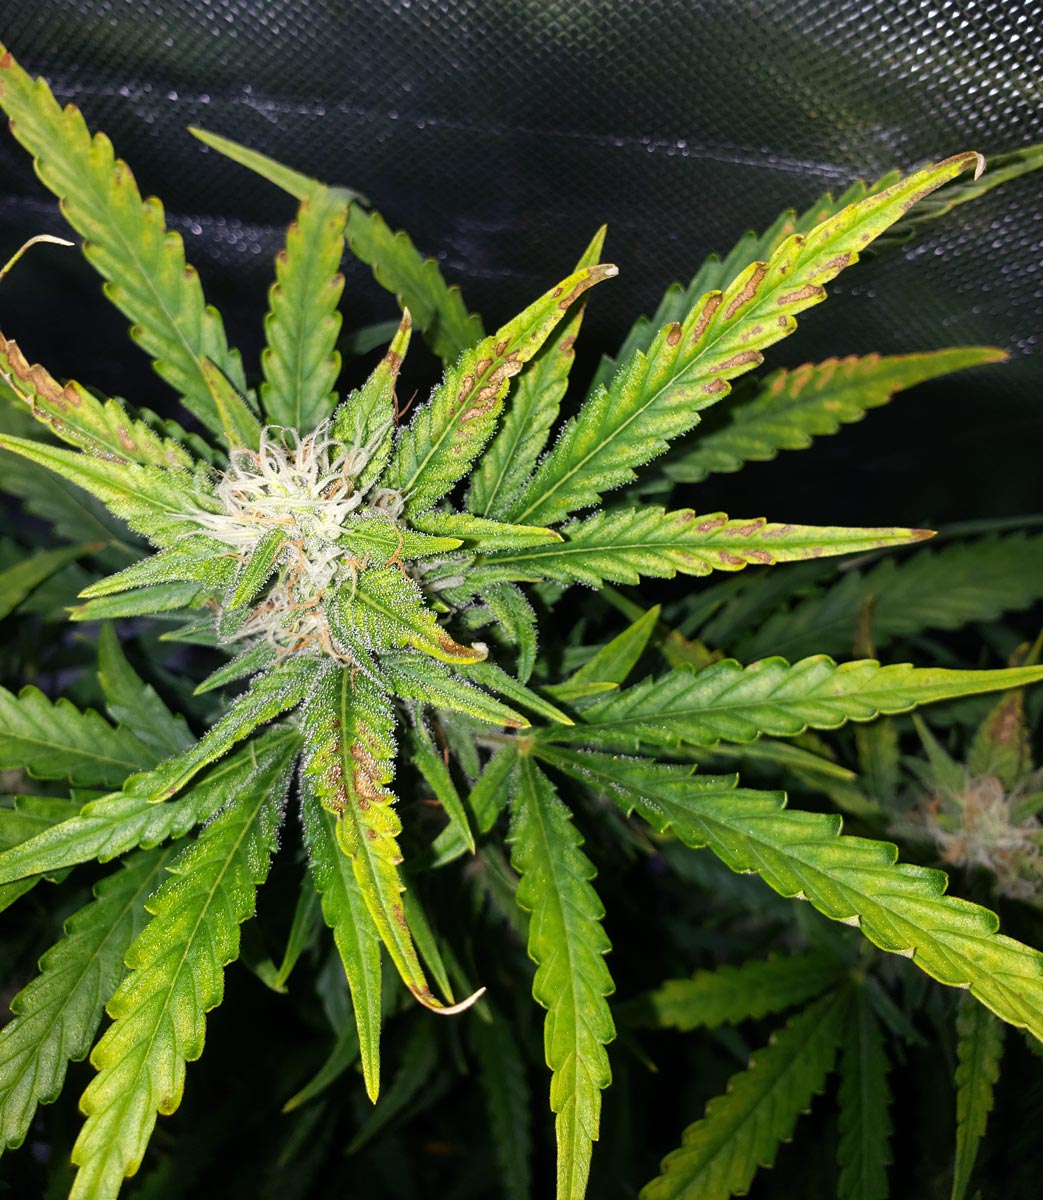
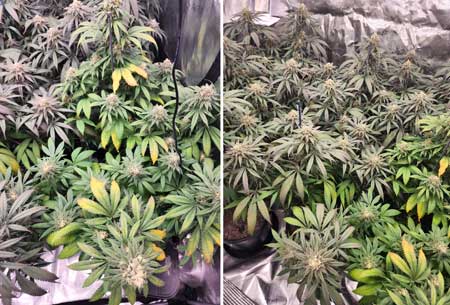
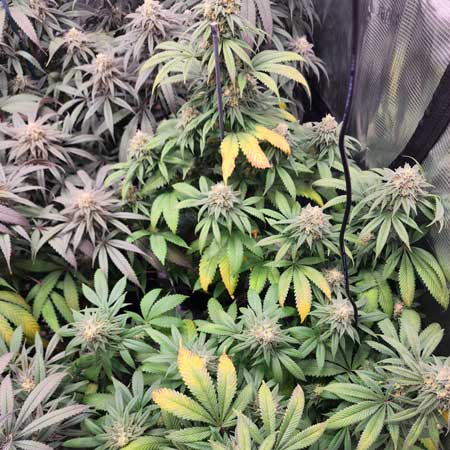
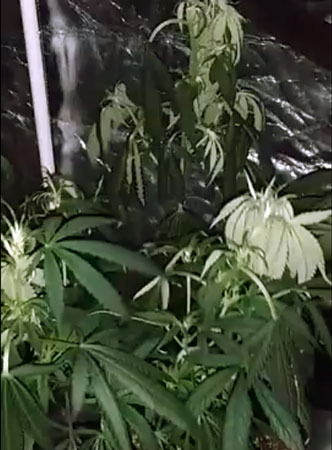
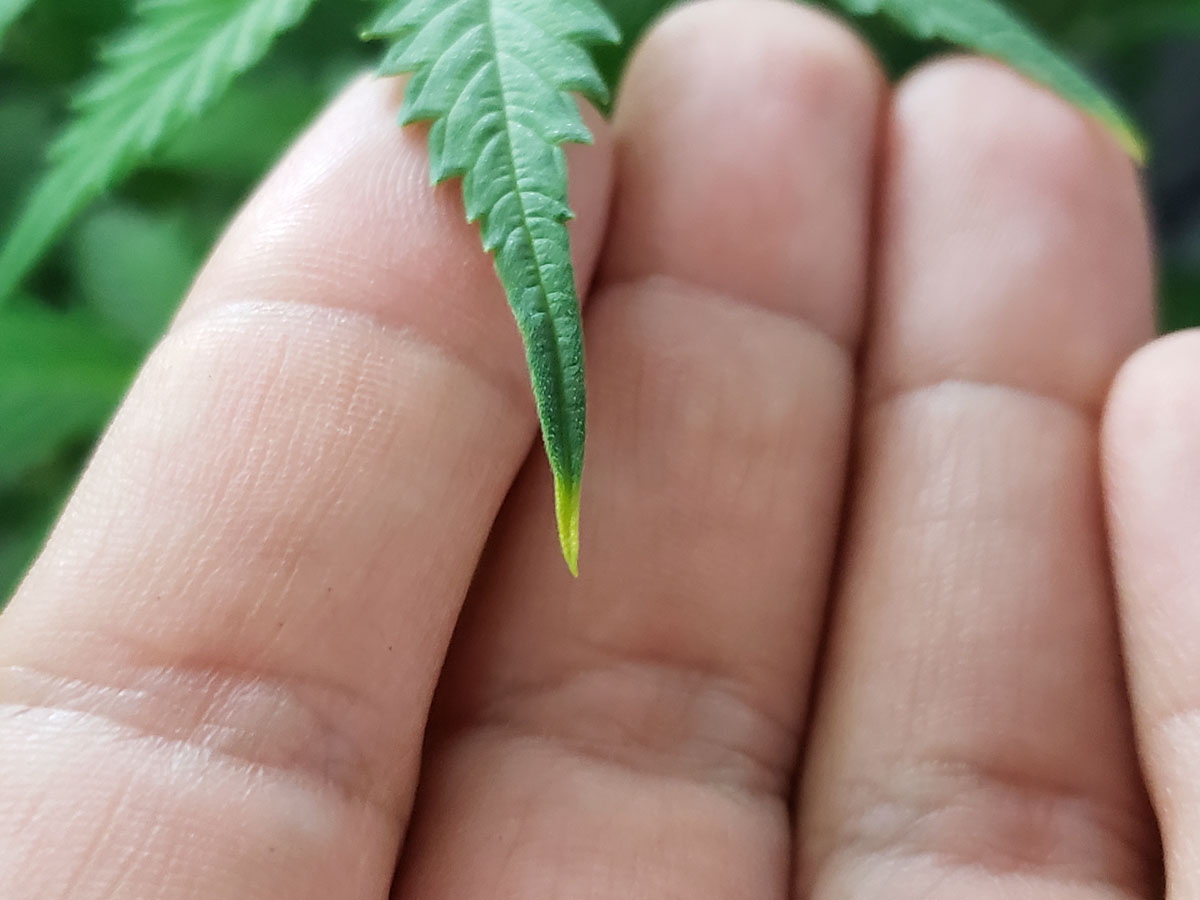
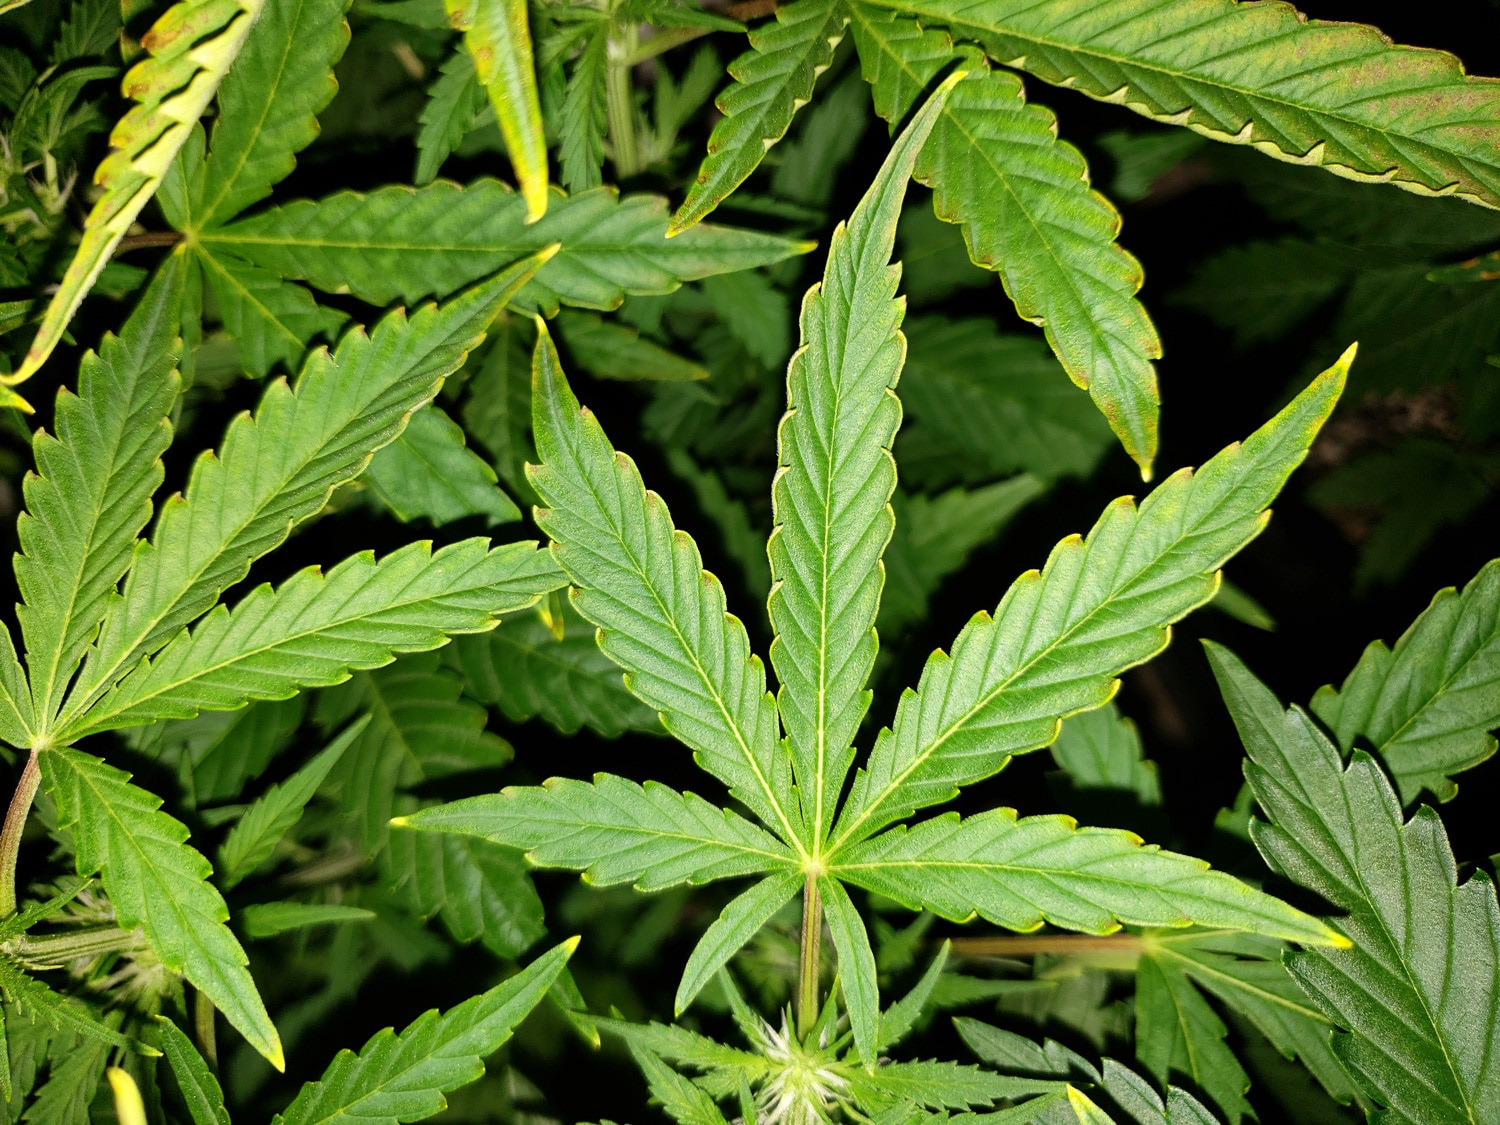
Note: All 3 of the above pictures were caused by too high or too low pH at the roots. Incorrect pH is the most common reason for flowering stage deficiencies, which is why it’s first on the list below. However, there are many other factors that cause or contribute to flowering stage leaf problems such as a poor environment or incorrect plant care.
Today, you learn how to keep leaves green throughout the flowering stage. Your reward? Bigger, better, denser buds at harvest!
Today I’ll explain the most common reasons for cannabis flowering stage deficiencies with pictures, so you can fix your problems and once again start smiling every time you see your garden.
- Plant Care
- Incorrect PH
- Overwatering
- Nutrient Depletion
- Over-Defoliated
- Environment
- Too Hot
- Too Cold
- Extreme Humidity
- Lack of Air Circulation
- Grow Light Issue
1.) Plant Care
Plant care refers to the daily care you give your plants. Let’s cover the most common plant care issues.
Give proper care in the flowering stage, to keep cannabis plants healthy and and maximize bud development.
Incorrect PH
Incorrect pH at the roots is the most common reason growers see nutrient deficiencies. The pH affects how well the roots absorb nutrients because each nutrient takes a different chemical form depending on the pH, and some forms are easier for the roots to absorb than others. Plants often get pickier about pH in the flowering stage. Even if the plants seemed fine without pH adjustment in the vegetative stage, your first step if you see flowering stage nutrient deficiencies is to test the pH.
The wrong pH at the roots will cause nutrient deficiencies even if the nutrients are “there”
- Low pH is the most common pH problem for cannabis growers. Although cannabis plants like slightly acidic root conditions (5.5-6.5 pH in coco/hydro and 6-7 pH in soil), too low pH causes problems. Since neutral water has about 7 pH and tap water often has even higher pH (due to how the water was treated), many growers add PH Down (a strong acid) to adjust their water to a lower pH before watering plants. If the grower never gives enough water to get significant runoff out the bottom, the PH Down can start to build up over time and the root conditions have lower pH than the water going in. On top of that, many nutrients also reduce the pH, so a buildup of nutrients can cause the same issue.
- High pH can also happen. If PH Up needs to be added to the water it can also build up in the grow medium. Another issue is some growers never pH their water even if they have high pH. A plant that doesn’t “mind” in the vegetative stage can get more sensitive to pH in flowering. If you haven’t been checking pH, that’s the first thing to look at when you see nutrient deficiencies. High pH is also relatively common in hydroponic systems where the pH can swing upwards as the plant absorbs the acidic nutrients faster than it drinks the water.
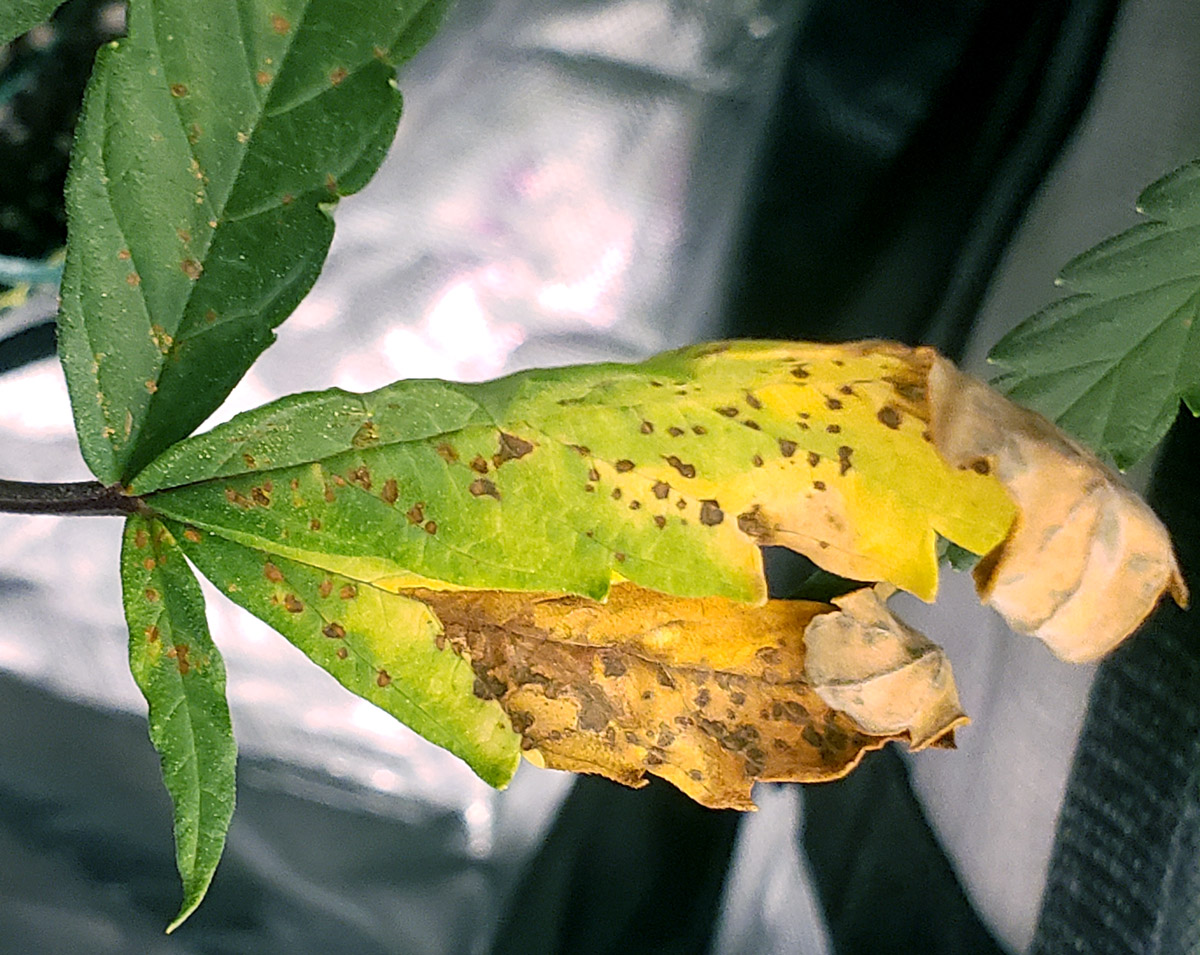
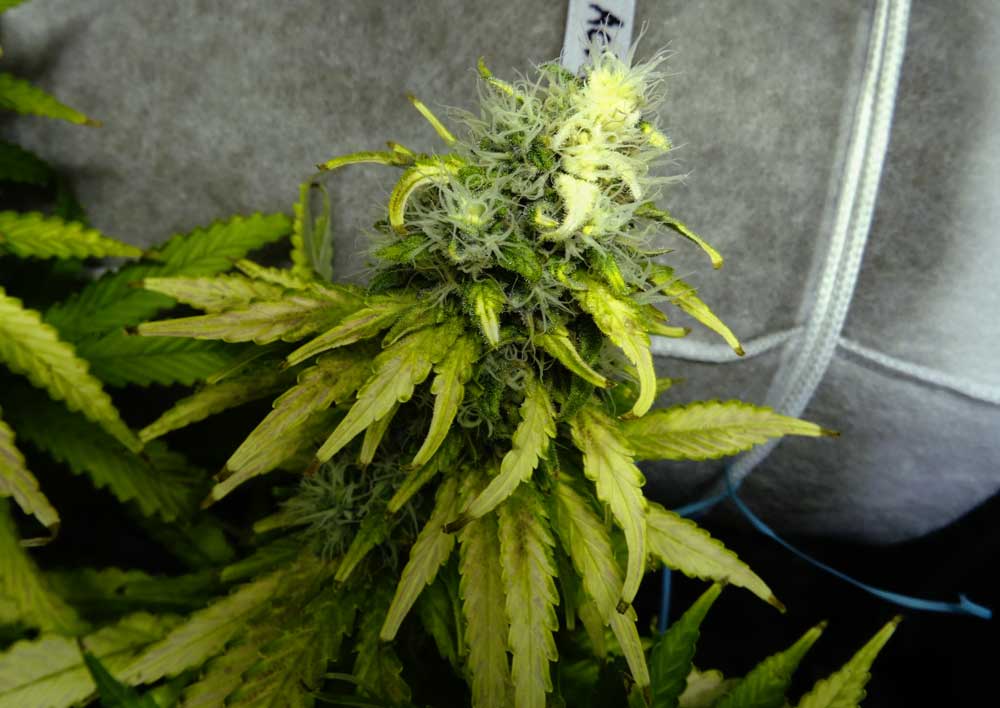
The first 3 pictures on this page were caused by incorrect pH, but here are a few more examples of common flowering stage nutrients deficiencies with more information about how they’re affected by pH.
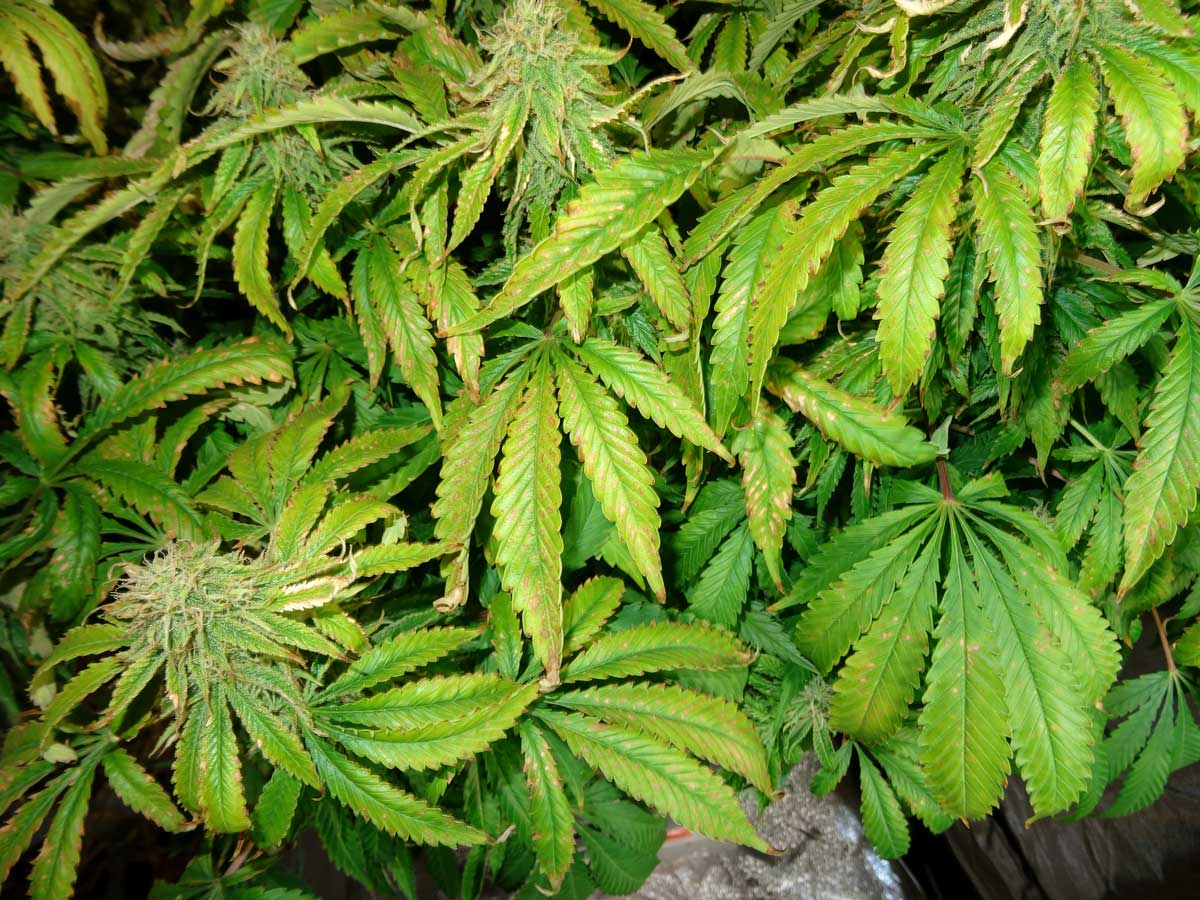
Calcium deficiencies are often caused by low pH and may first appear as brown spots or speckles
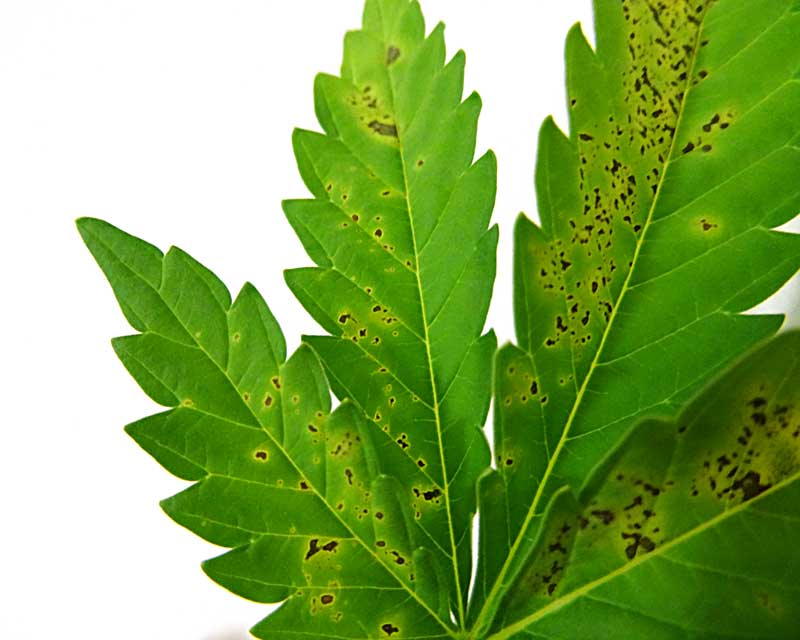
If the pH isn’t fixed, the spots from a calcium deficiency become brown patches that eventually destroy whole leaves. Yellow leaves from this deficiency usually don’t fall off on their own. Unlike some other deficiencies, the leaves are often stuck on (can’t easily be tugged off), even after the leaf looks completely dead.
A Calcium deficiency combined with yellowing, caused by low pH at the roots (soil grow).
Potassium deficiencies are relatively common in the flowering stage and often caused by high pH.
Copper deficiencies are also caused by incorrect pH. The symptoms are dark (almost blue-looking) leaves with yellow edges.
How to Fix: Measure and adjust the pH of your water right before you give it to plants, even if you never needed to in the past.
- Add all nutrients and supplements to water
- Measure the pH of your water with strips, drops, or a pH pen
- Soil water should be between 6-7 pH
- Coco/Hydro water should be between 5.5-6.5 pH
- Adjust the pH to the proper level (if necessary)
- With most setups, use PH Up or PH Down
- If in an organic or living soil setup, use Earth Juice Natural Up or Natural Down (here’s an alternative Natural Down in case the Earth Juice version is sold out) to adjust pH without harming microbes in the soil.
- Test the pH of the runoff water
- If much higher than what you put in, lower the pH to the bottom of the range for the next few waterings
- If much lower, give water at the top of the pH range for the next few waterings
- That’s it! This procedure ensures pH isn’t causing any leaf problems.
Always test the pH before giving water to plants!

“Just Add Water” Super Soil pH Management
If not adding any nutrients (for example with a “just add water” super soil grow), it’s recommended to avoid getting runoff water because it can wash away nutrients that need to be conserved in the soil until harvest. This can make it difficult to know what the pH is at the roots because there’s no way to measure the pH of the runoff.
Here are a few hints for pH management in “just add water” soil.
What is Your Water Source?
If you’re using a high-quality neutral water source like bottled spring water (PPM between 40-100 and pH around 6.8-7 without any adjustment) then you probably don’t need to worry about pH and can go on to the next step to diagnose your issue.
pH Adjusters
However, if you’re using tap water and adjusting the pH (even with natural versions of PH Up or PH Down), then it’s possible the PH adjusters are building up in the soil since there’s no runoff. In this case, you have a couple of options. You could give a little more water than normal one time to get a tiny bit of runoff and test the pH. If the runoff pH is much higher or lower than the water going in, you’ve found your problem. Another (better) option is to switch to a higher-quality source of water that doesn’t need pH adjustment. It’s not uncommon for organic growers to start with tap water when plants are young and switch to bottled spring water before plants get more sensitive in the flowering stage. Giving plants a great source of water will naturally clear up anything built up in the soil over time.
Note: If your tap water isn’t great, bottled spring water is one of the best choices for “just add water” setups. You rarely have to worry about pH with spring water and it contains small amounts of minerals like calcium. Avoid using RO (reverse osmosis) or filtered water in a “just add water” setup because they don’t contain any minerals, which can actually make deficiencies more common.
Overwatering
Photoperiod plants often drink less immediately after the switch to 12/12. This happens because they’re suddenly getting less light a day. As the flowering stage goes on and plants get bigger, they’ll start drinking more again. However, it can be easy to overwater plants if you keep giving the same amount immediately after initiating the flowering stage. Many growers may not realize that overwatering (and in rare cases, underwatering) can actually cause the plant to get what appears to be nutrient deficiencies. The deficiencies happen because water isn’t moving properly in the plant, even if the pH is right and the nutrients are “there” in the grow medium.
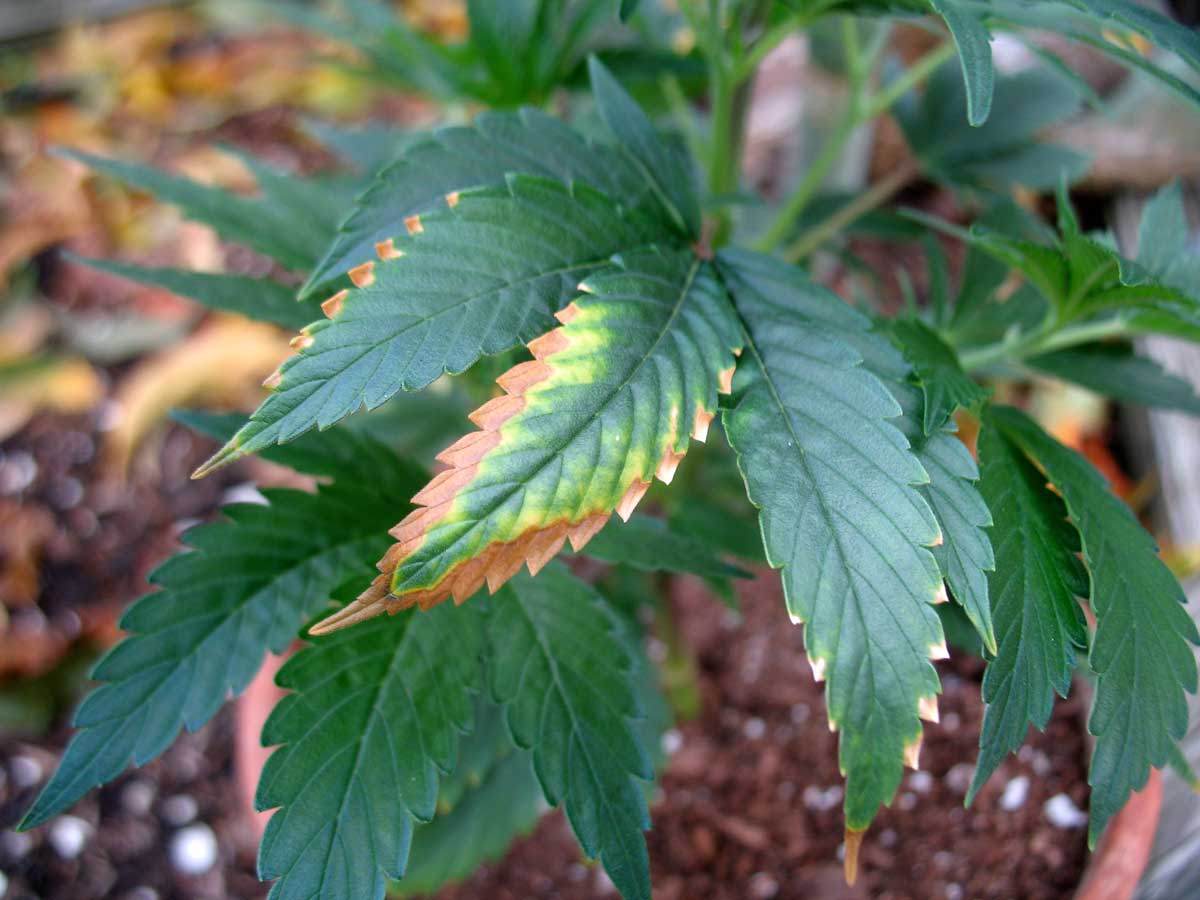
Overwatering can cause symptoms that appear to be nutrient deficiencies. These brown scorch marks look a bit like a calcium deficiency but are actually the result of chronic overwatering.
Brown leaf edges can be a sign of overwatering
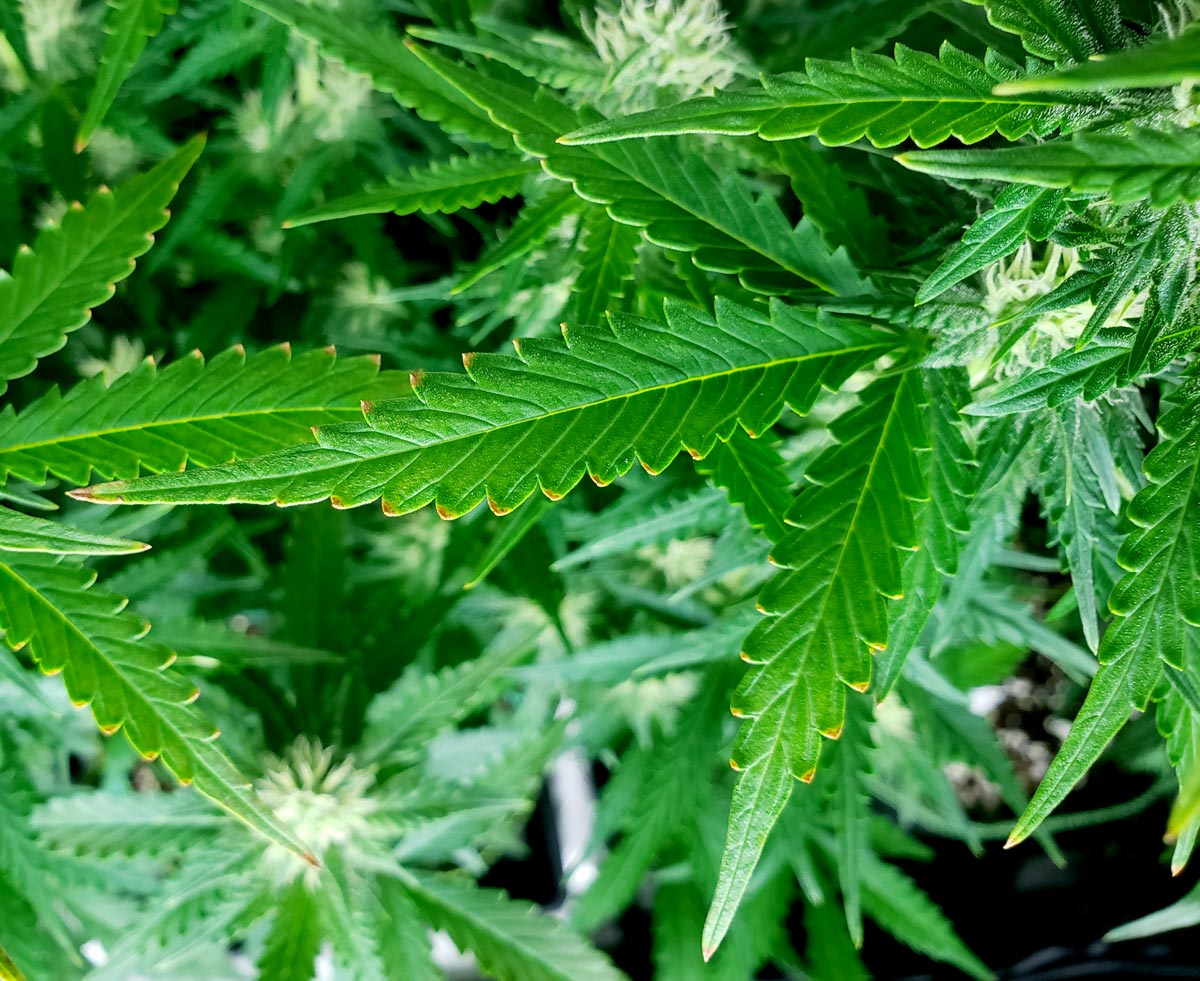
Sometimes brown leaf edges from overwatering can be confused for nutrient burn. Here’s a quick reference to help you know the difference.
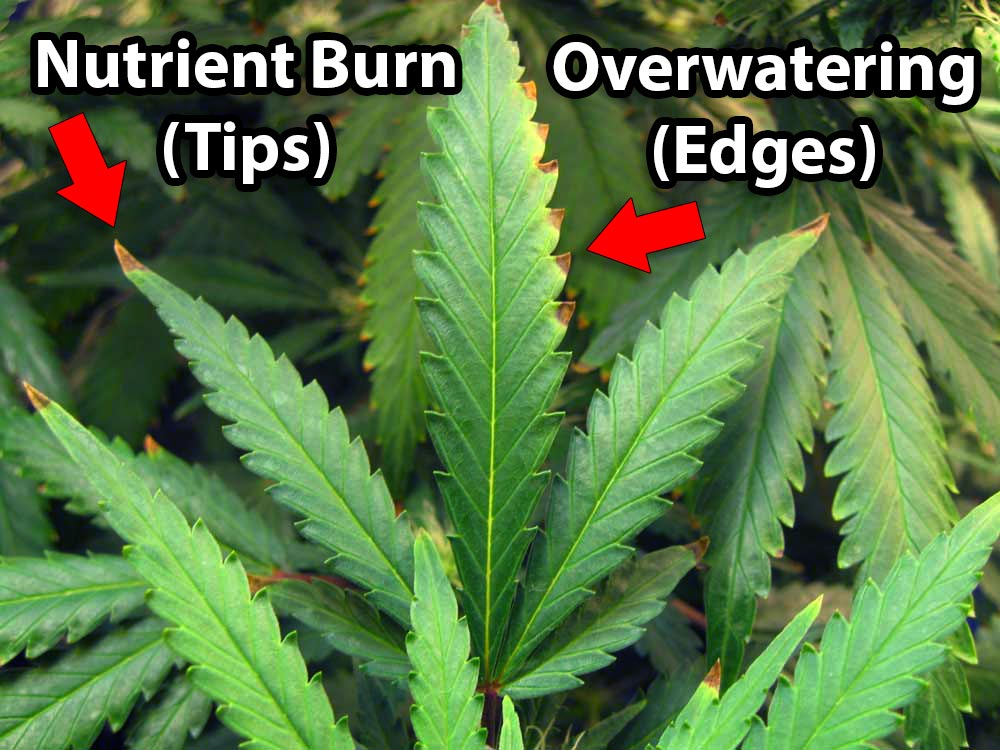
How to Fix: Pay attention to the wetness of your grow medium after initiating 12/12. If it seems wetter than usual, try giving water less frequently or less at a time until plants are drinking normally again. Other signs of overwatering include droopiness and brown leaf edges. Learn how to water plants perfectly.
Too Much Defoliation
Defoliation is the process of removing leaves from the plant. When used strategically in the flowering stage, this technique can increase yields, density, and overall bud quality. However, after a few weeks of bud formation, many plants stop growing new leaves.
Beginners should never defoliate a plant until it looks bare in the flowering stage. This can cause stunting as well as nutrient issues down the road because the plant has less of a “buffer” against problems.
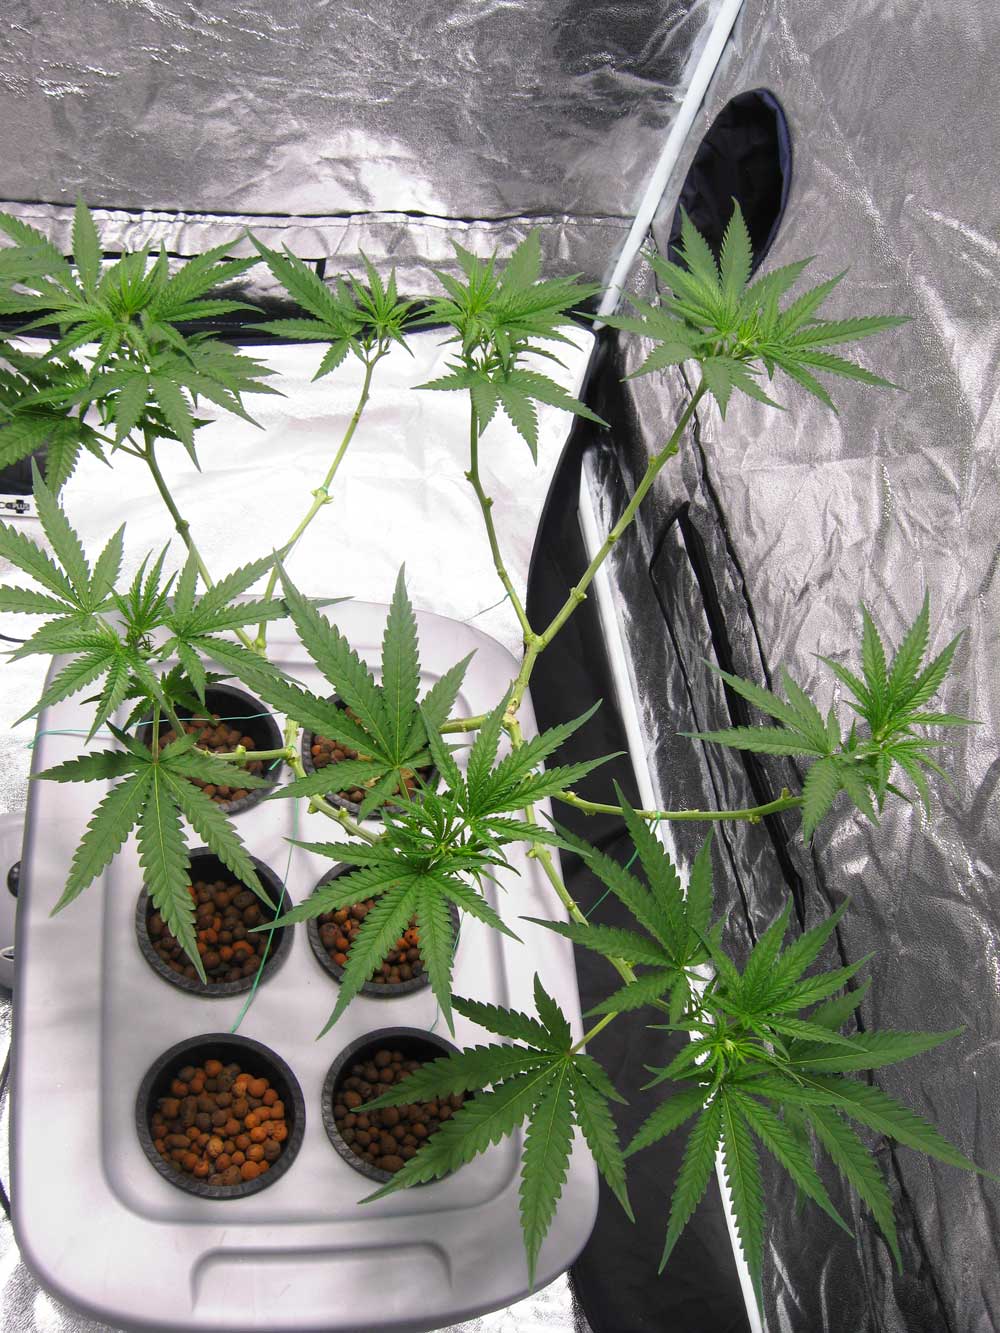
Avoid removing any leaves after plants have stopped getting bigger, especially if leaves seem pale and/or you’re not adding extra nutrients. For example, these plants shouldn’t be defoliated because they aren’t getting extra nutrients (they only have what’s there in the soil) and are well into the flowering stage. Each leaf stores nutrients for the plant to use later, and you don’t want to take away their nutrient stores when not replacing it in the water.
How to Fix: Be careful not to take too many leaves in the flowering stage, especially after week 6. It’s recommended beginners never “strip” their plant, especially if dealing with any kind of problem or nutrient deficiencies. In general, be extra gentle with your plants if they have unhealthy leaves, and the closer they get to harvest.
And for growers that don’t add extra nutrients, go lighter on defoliation (or even skip it altogether) to conserve nutrients in the leaves and soil to ensure plants don’t run out before harvest.
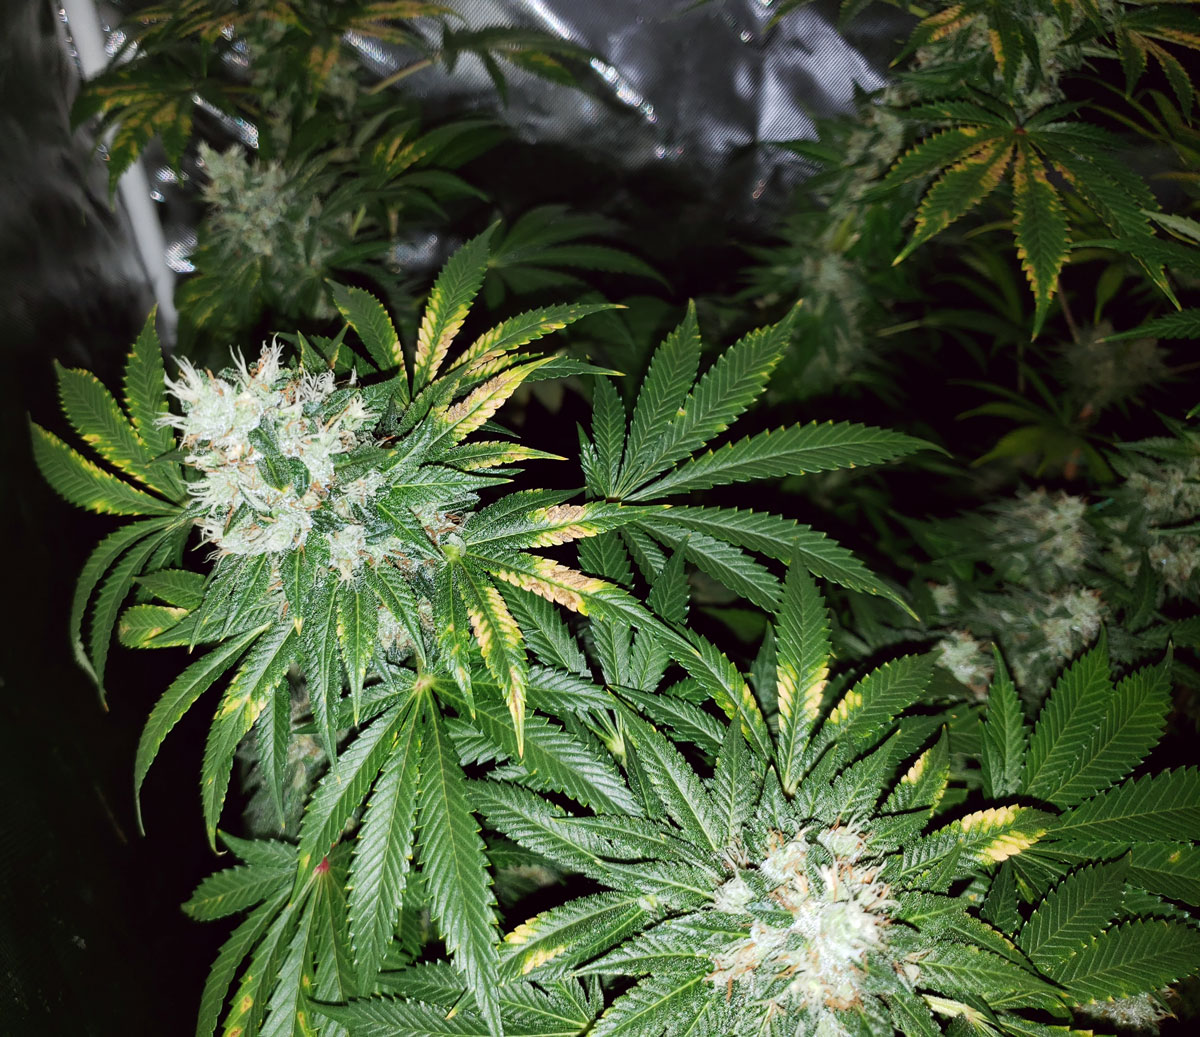
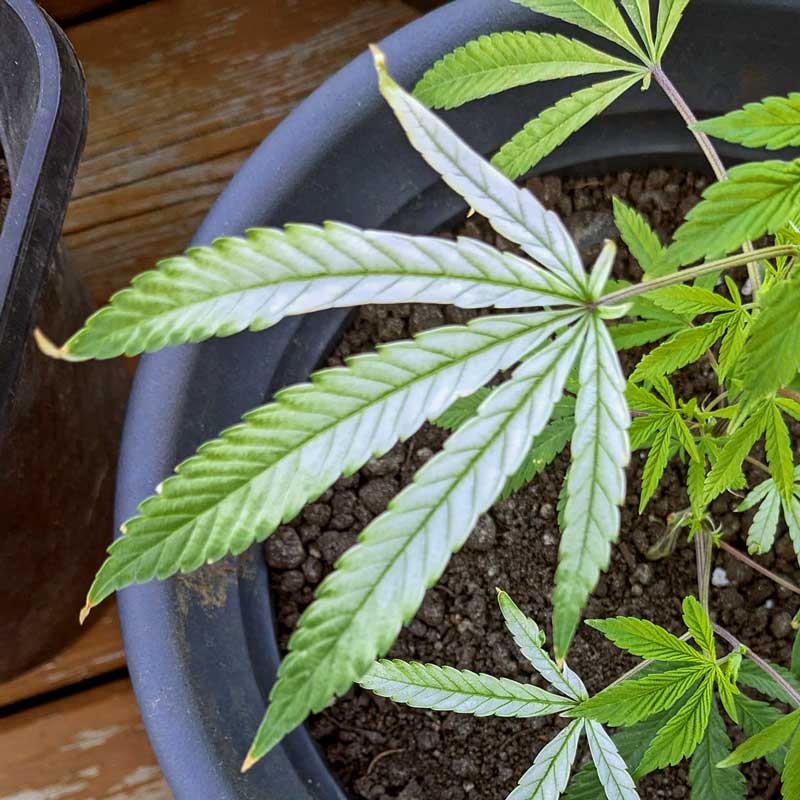
Nutrient Depletion (Plant is Hungry for More Nutrients)
In some cases, you’re getting deficiencies because the base nutrients are depleted. For example if growing in soil, it’s common for plants to use up all the base nutrients by the time they reach the second half of the flowering stage. Even if you’re adding base nutrients in the water, plants may needs higher levels overall. Some plants are heavy feeders, especially if they’re growing big buds!
Here’s a picture to help understand what healthy vs nutrient-hungry leaves look like.
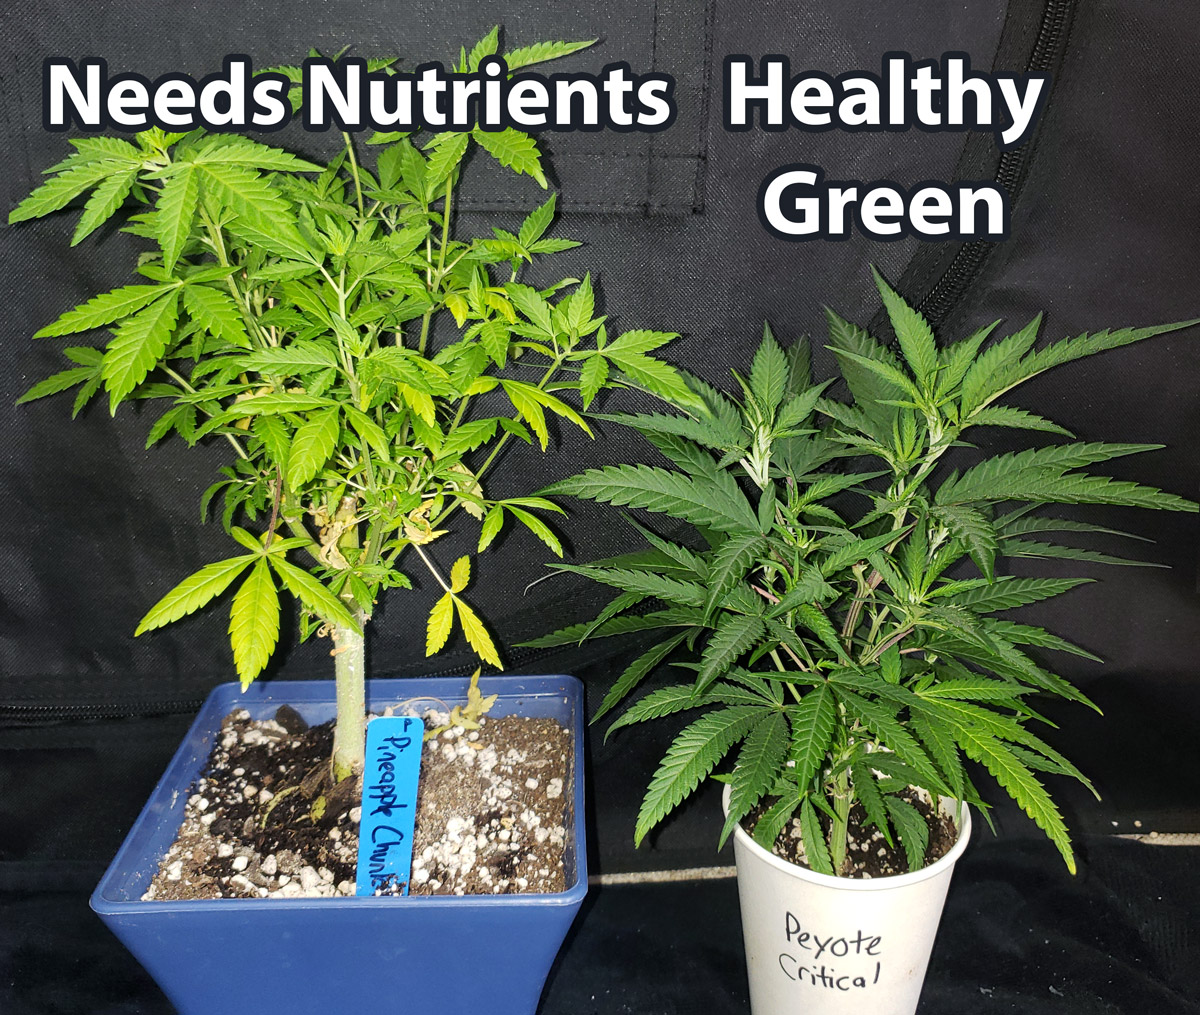
Luckily, it’s easy to tell when plants need higher levels of nutrients overall. This particular problem is most common for growers in a “just add water” setup, especially if you defoliated your plants or have been giving enough water to get runoff. Cannabis plants need relatively high levels of nutrients to produce buds and show specific signs when they’re running out.
Even if you are already adding nutrients via amendments or in the water, these symptoms indicate your plant wants more.
Signs your plant is hungry for more nutrients:
- Pale/lime green leaves all over the plant, especially the leaves directly under the light and close to the biggest buds (these are the hardest working leaves)
- Lower leaves are turning yellow, wilting, then falling off on their own (Nitrogen deficiency)
- Spots, splotches, and necrotic tissue – Nutrient depletion may cause other symptoms that resemble deficiencies, such as spots on the leaves or the ends of leaves dying off.
- Blue-tinted leaves – Some strains always turn purple and that’s healthy for those plants. But with a hungry plant, you may also notice the leaves taking on a blue, silver, or somewhat purple hue even though it’s not typical for that strain.
- Happening even though pH is correct – These symptoms are happening even though you’ve been testing and adjusting the pH.
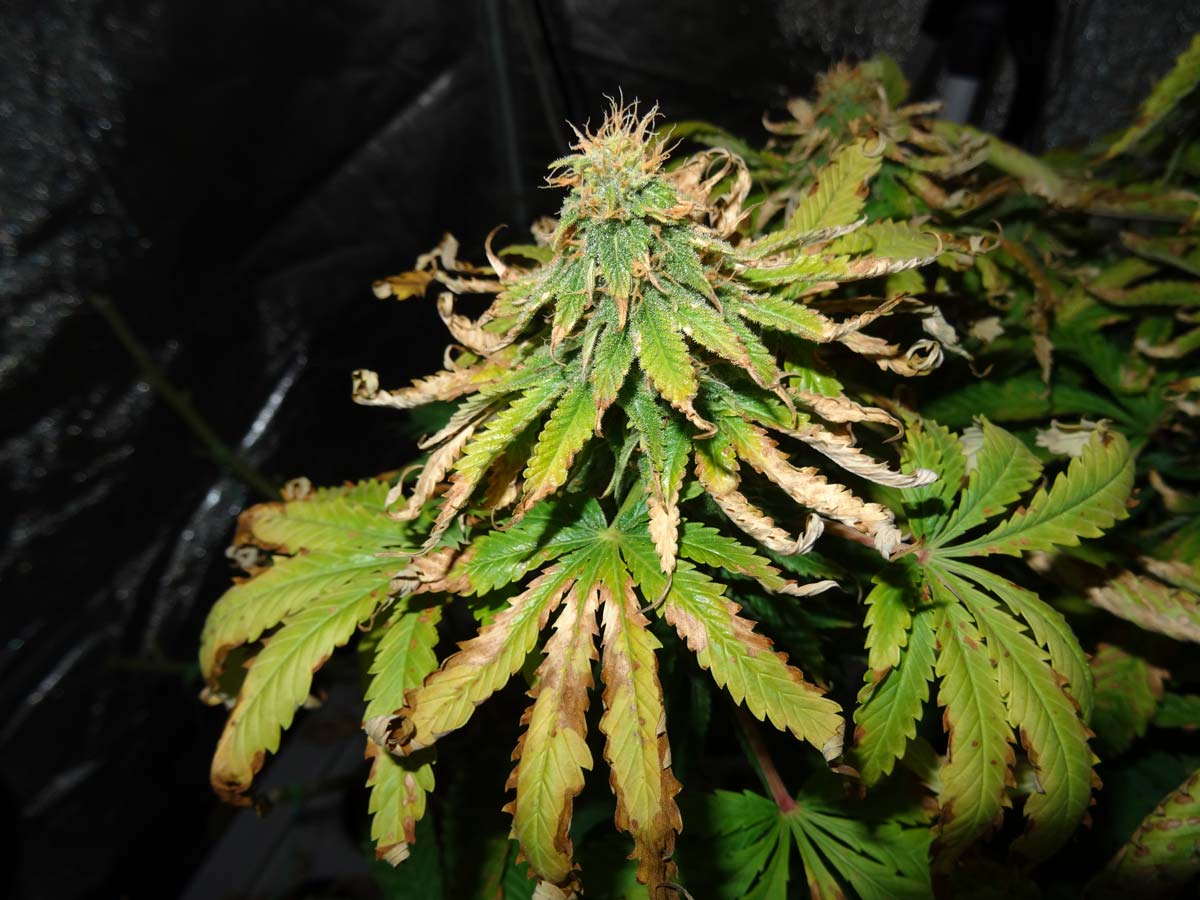
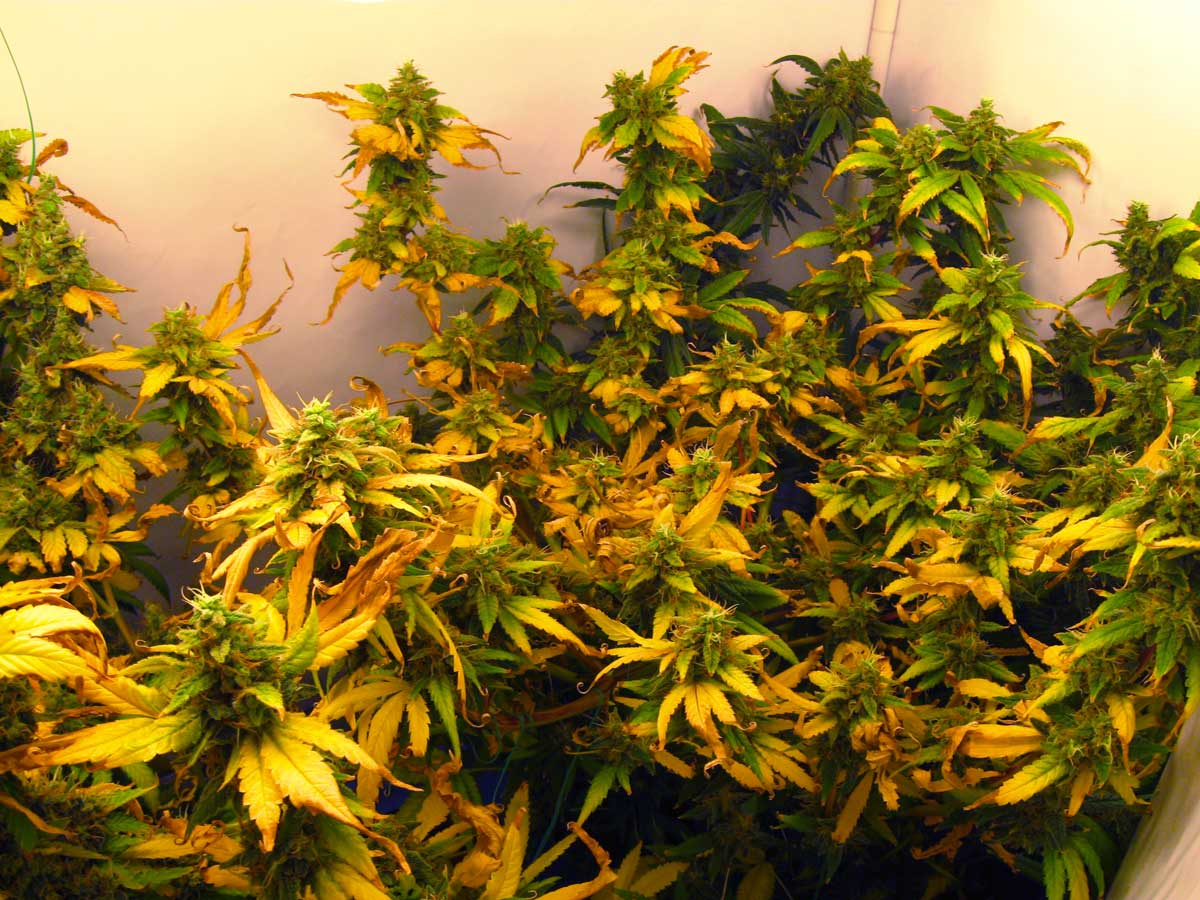
These flowering plants need higher levels of nutrients overall. Notice the pale color on all the hard-working leaves as well as bottom/middle leaves turning yellow and falling off.
 This happens most often on the plants with the biggest buds. If left unchecked, you’ll lose a lot of leaves and your buds won’t get as big as they could have.

Don’t ignore if you see the lower leaves are turning yellow, wilting, and falling off on their own (the leaves aren’t “stuck” on). If you see this, low nutrient levels are definitely a problem.
Here’s another example of hungry flowering plants. In this case, the plants had used up all the nutrients in the soil, and were only receiving a small amount of extra nutrients through a bloom supplement. You may notice that the symptoms are worst on the stems supporting bigger buds. That’s because big buds tend to require the highest amount of nutrients.
Before adding nutrients, some leaves were turning purple with a slightly blue/silver cast, and others were turning yellow.
These symptoms are due to nutrient depletion. The plants were hungry for more nutrients overall.
Immediately after giving an extra dose of bloom nutrients, the plants started turning green again. It’s unlikely all the leaves will fully recover, but many did and the symptoms stopped spreading.
How to Fix: In hydroponics or coco, this is a matter of giving more nutrients in the water. If growing in soil, you have a few options depending on your setup.
Soil options:
- Add nutrients in the water – Start giving extra soil nutrients in the water (easiest and quickest solution). Some good soil nutrients for cannabis are the 3-part Fox Farm Soil trio or the 1-part Botanicare Pure Blend Bloom.
- Top-dress with natural amendments – Example 1-2 tsp/week per plant of Super Soil concentrate.
- Top-dress with dry amendments – for example Pride Lands.
- Give a “tea” (worm tea, compost tea, Terp tea, Heisenburg tea, etc.)
- Replant into fresh soil – This should only be done before buds start forming, to avoid stunting bud formation. If buds are already forming, the other options are better.
Coco and Hydro:
- Increase overall nutrient levels in the water
If growing in coco or hydro, the simple fix is to increase the amount of base nutrients you’re using. You can increase the amount you’re adding to the water with fractions (for example if you’ve been giving 1/2 tsp per gallon you could start giving 3/4 tsp per gallon). If you want to avoid fractions, an easier option is to measure out the same nutrients as before, but use 10-20% less water. This keeps the exact same ratio, but at a higher nutrient strength.
Whenever changing nutrient levels, make sure to check the pH of the water before giving it to plants. A PPM meter can be helpful because it lets you measure the overall “strength” of your nutrient water. This makes it easy to know whether you’re giving more or less overall. There is no exact right PPM for cannabis plants because each water source, nutrient system, and individual plant is different, but PPM meters let you adjust the nutrient strength more precisely.
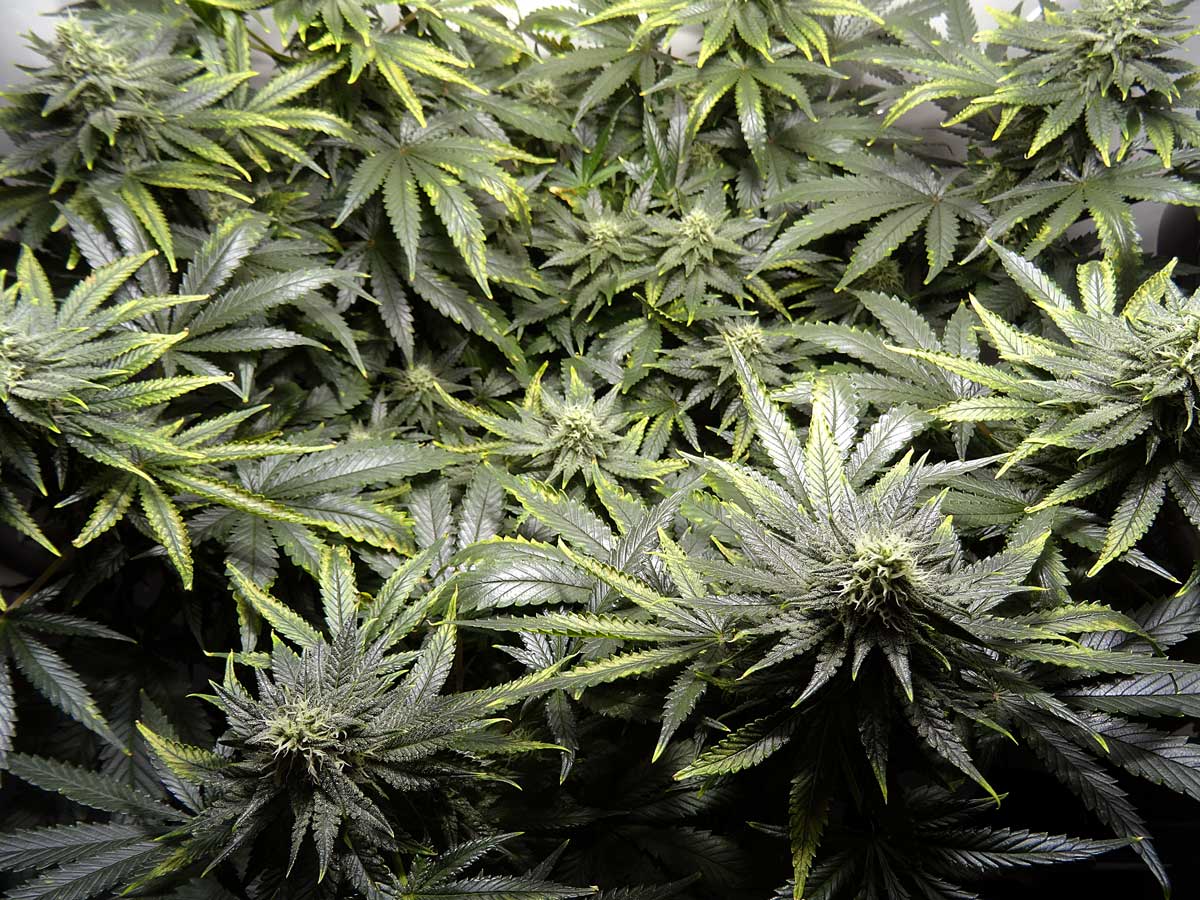
2.) Environment
Your environment in the flowering stage is much more important than in the vegetative stage. Environment does not just affect plant health and leaves, it has a huge effect on your final bud quality/density/smell/yields. It’s important to give great plant care and start with good genetics, but you will never be able to grow outstanding weed if you don’t dial in the environment.
Heat – above 85°F (30°C)
- Leaves and/or buds may get discolored or crispy over time
- Symptoms are worse close to the lights where it’s most hot

Heat can sometimes cause problems that look like nutrient deficiencies
Buds that experience too much heat for too long can become crispy and discolored
How to fix heat:
- Vent out hot air from the grow space
- Increase air circulation
- Reduce the light power if possible
- Consider smaller/different grow lights that put out less heat (better to give plants less light at the right temperature than more light with tons of heat)
- Use an AC or evaporative cooler if the room itself is too hot
- Switch the timer so grow lights are off during the day when it’s hottest
- It can’t hurt to get a heat-resistant strain
Full tutorial on how to manage temperature in the grow room.
Cold – below 65°F (18°C)
- Slow growth
- Discolored or curled leaves
- Unexplained nutrient deficiencies
- Stems or leaves may turn red
- Plants tend to be droopy and may show symptoms similar to overwatering
- Buds don’t fatten up properly
- If it gets very cold, plants can get white leaves, become stunted, or even die
- Cannabis grown under LEDs tends to be more sensitive to cold than under grow lights that use bulbs (pretty much all other grow lights including CFLs, T5, LEC/CMH, MH, HPS, etc).
This cannabis plant showed discoloration and curled tips after experiencing cold nights.

After a night of freezing temperatures, some of the leaves on this plant turned almost white.
Another example of white leaves appearing right after a super cold night.
Buds tend to stay airy and small when the temperature is low. Red stems and leaves are also common in the cold.
How to fix cold:
- Add insulation around grow space/tent
- Use a heater to raise the temperature of the room
- Switch the electrical timer so grow lights are on at night when it’s most cold
- Keep roots off the cold floor, especially in a cellar or garage. Plants can handle cooler temperatures if their roots stay warm. You can raise plants off the floor or put a seedling heat mat under the plants.
- Auto-flowering strains can be a good choice in winter because grow lights can be running up to 24 hours a day, preventing a cold dark period.
- Get a cold-resistant photoperiod strain like Northern Light x Skunk, Purple Queen, K.O. Kush, or Northern Light. Avoid haze or sativa-leaning strains.
Here’s a tutorial on how to manage temperature in the grow room. Here are some additional cold climate and winter tips for indoor growers.
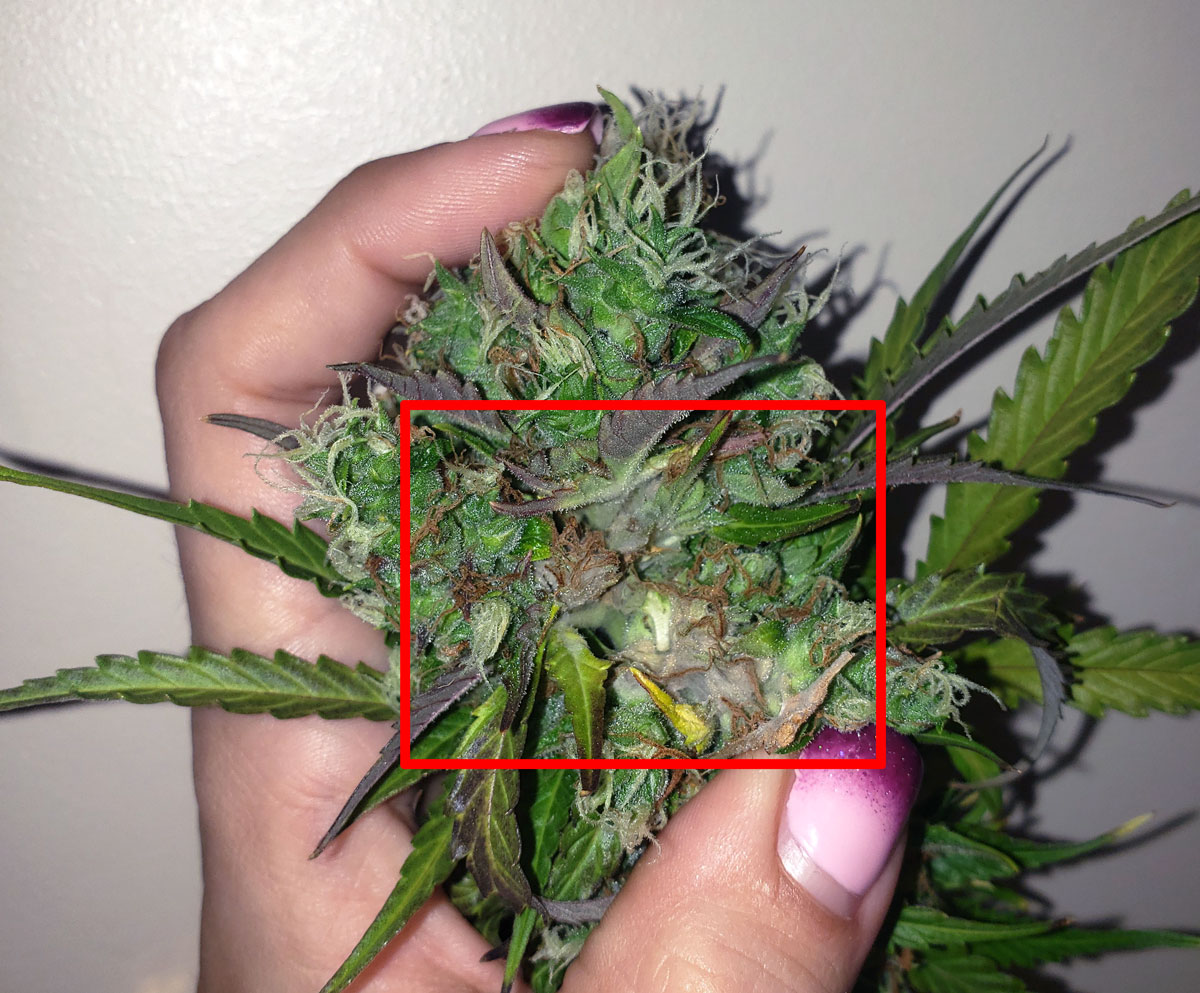
Extreme Humidity and/or Lack of Air Circulation
Optimal humidity is between 40-60% RH in the flowering stage. Outside that range can start causing plant problems. Stagnant, non-moving air around plants (due to lack of fans blowing air around) can cause similar problems as overall high humidity. If you don’t blow the air around, humid pockets tend to form around the buds.
- High humidity (sometimes caused by lack of air movement) causes loose airy buds, slow plant growth, and bud rot.
- Low humidity causes slow growth, nutrient deficiencies, and small buds.
Bud rot is often the result of high humidity or lack of air circulation in the late flowering stage.
Low humidity can cause slow growth and odd symptoms that may resemble over/under-watering or nutrient problems.

How to fix humidity:
- Proper ventilation (vent out hot or humid air)
- Use a humidifier or dehumidifier
- Use fans to gently move air around all the buds and leaves.
- Get detailed instructions with many more tips on how to fix humidity
Grow Light Too Close
- Bleaching of buds or leaves
- Burnt spots and brown markings
- Crispy leaves
- Yellow tips on leaves closest to the light
Light stress may cause yellow tips on leaves closest to the light.

A closeup of yellow tips on cannabis leaves from light stress.
Leaves that are closest to the light may feel crispy and leaf edges may start tipping up.
Too-close grow lights can cause burning or scorch marks, especially when combined with heat.
Bleaching (pale leaves) is another common symptom of too-close lights. The symptoms of light stress always appear worse directly under grow light.
The cannabis buds themselves can even get bleached from light stress.
How to fix too-close lights:
- Move lights further away (zip ties can sometimes be used to attach the grow light to the poles at the top of the tent)
- Some grow lights have the option to reduce the power
- Control heat/cold and have a gentle breeze (plants can withstand more light in a good environment)
- Switch to a less powerful grow light
- Learn more about too-close grow lights.
Bad LEDs
Some LEDs seem to work just fine in the vegetative stage, but suddenly cause problems in the flowering stage. This used to be more common with older technology but can still happen with cheap generic LEDs. If you’re using a cheap LED grow light and plants seem to always start getting sick in the flowering stage, consider upgrading to a better grow light.
Some poor-quality LEDs work okay in the vegetative stage but cause problems in the flowering stage.
How to fix:
- If you’re going to use LEDs, get good ones! Your plants deserve it.
- Learn more about different LED grow lights for growing cannabis.
Recommended flowering LED lights (brands that work well with cannabis plants)
- Spider Farmer (Best All-Around)
- HLG Quantum Board (Best THC Production)
- Mars Hydro (Best Coverage)
- Custom LED Mix (Most Modular)
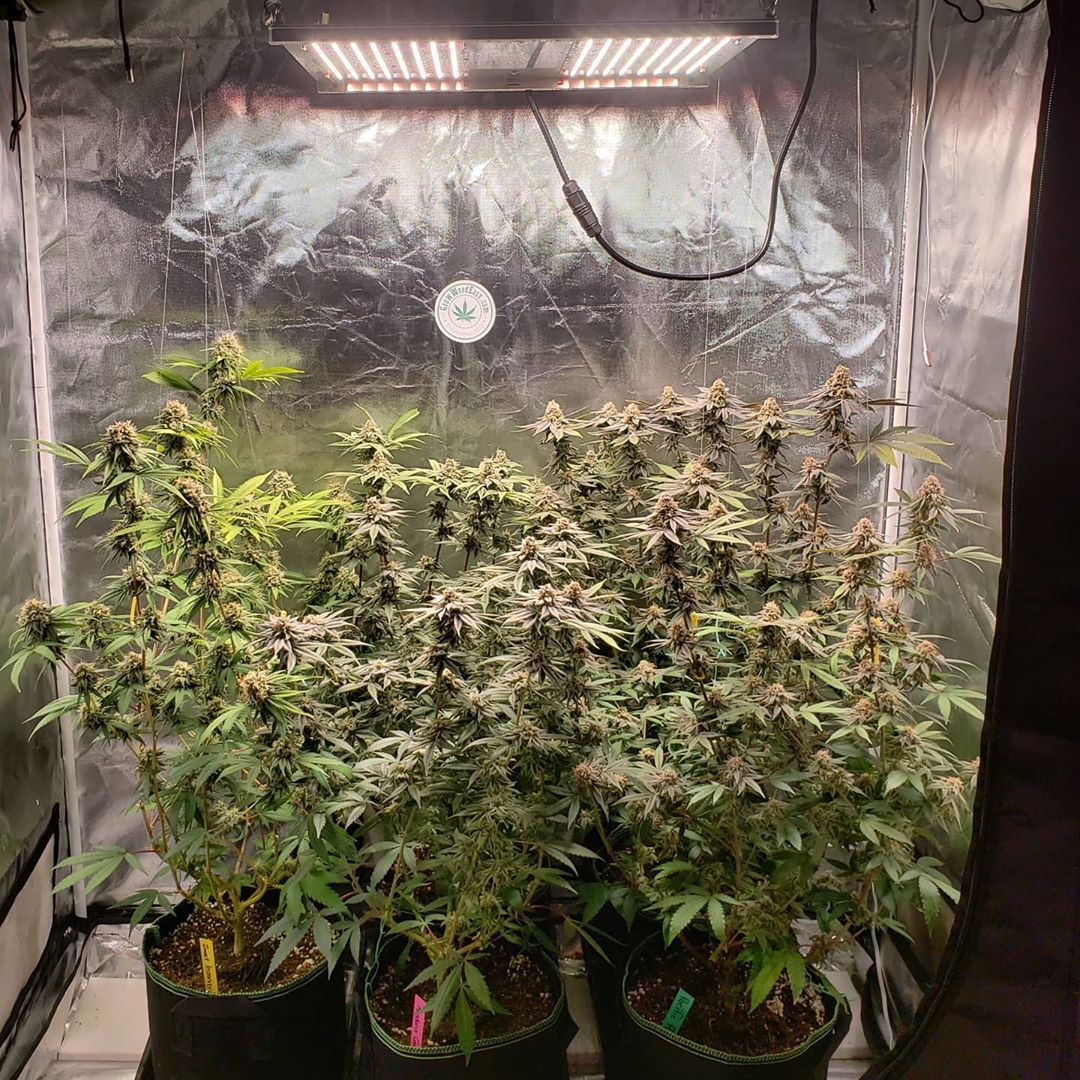
LED grow lights are the best choice for most home growers. They are easy to use and efficient at growing weed!
Closeup of buds grown under HLG Diablo LED.
The smaller HLG lights like the HLG 100 also produce excellent yields and bud quality in small spaces.
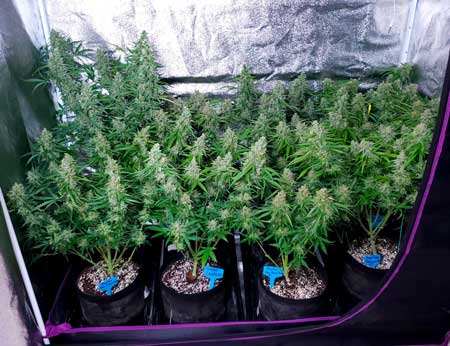
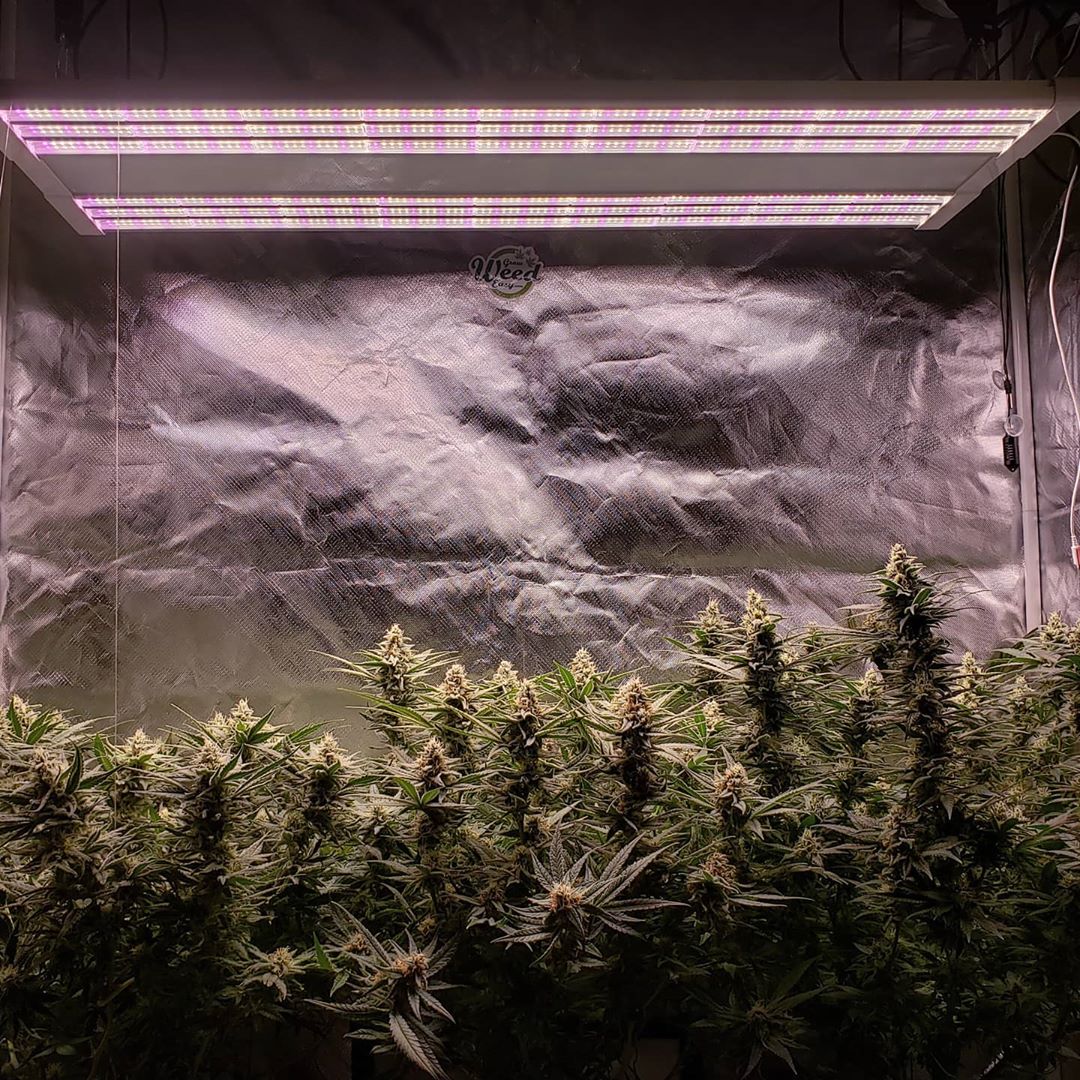
 Plants growing under a 600W Premium LED grow light.
Bonus Cheat Sheet: Environmental factors that affect bud quality
Temperature When Lights are On
- High (above 85°F / 30°C) – Tends to produce discoloration, poor plant growth, and low bud quality. Especially when combined with other stressors like incorrect pH or lack of air circulation.
- Medium-high (78-85°F / 25-30°C) – Tends to get the best yields, but perhaps not maximum bud quality or density
- Medium-low (70-77°F / 21-25°C) – Tends to produce slightly lower yields but the best bud quality (colorful, great bud density, and strong smells)
- Low (under 70°F / 21°C) – causes plants to grow slow with low yields, buds may not develop fully.
Avoid high temperatures for the best bud quality after harvest.
Temperature When Lights Are Off (Dark Period)
- A few degrees cooler – Temperature should ideally be a few degrees cooler during the dark period.
- Avoid letting plants be warmer during dark periods compared to lights on. Warm dark periods can cause stem stretching and loose buds with air gaps inside the nugs.
- Cool dark periods help bring out colors like pink or purple, as well as maximize bud density.
- Stay above 65°F / 18°C even at night to prevent nutrient deficiencies, poor bud development, and slow growth.
Giver slightly cool periods to increase bud density and bring out colors.
Humidity
- High humidity (above 60% RH) contributes to looser buds and an increased chance of mold or bud rot.
- Mid-to-low humidity (40-60% RH) contributes to tighter buds with great trichome production.
- Aim for 45-50% RH in flowering for absolute best results.
- Low humidity (under 40% RH) can cause plants to get stressed, lowering the overall yields. However, if plant has experienced low humidity its whole life, it has likely already adjusted to low humidity.
Keep humidity around 50% for dense, sparkly cannabis buds.
Light distance
- Keep lights as close as possible to maximize yields and density.
- Keep lights a bit further away to increase bud quality/smell/overall appearance (though yields may be slightly reduced).
If you don’t mind slightly smaller yields, keep lights a bit further away to improve the appearance and smell of buds.
Light Type
- LED grow lights (Best) – The best choice for most home growers. Low heat, low electricity, best bud quality, highest bud potency. Learn more about the best LEDs for growing weed.
- Fluorescent lights like T5s can produce excellent bud effects and smell, but result in overall lower bud density and yields per watt compared to other grow lights.
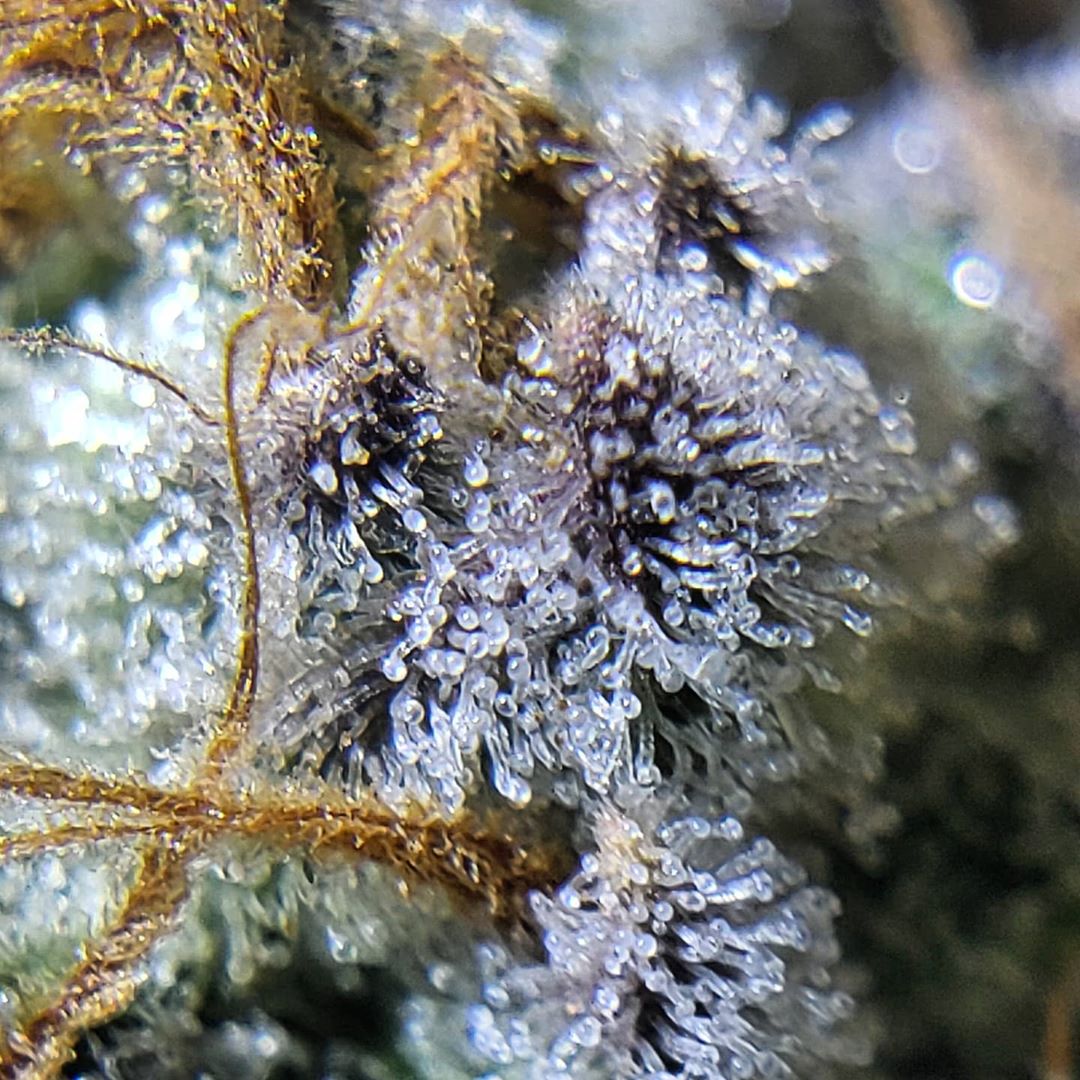
- High-UV lights tend to increase trichome and smell production (for example CMH/LEC grow lights with a 4200k bulb produce extremely smelly, sparkly buds) at the expense of yields.
- Wide-spectrum light that contains a lot of red (such as HPS and powerful red-spectrum LED grow lights like the HLG 350) tend to produce the densest buds, highest cannabinoids, and best yields per watt.
The type of grow light affects how buds develop!
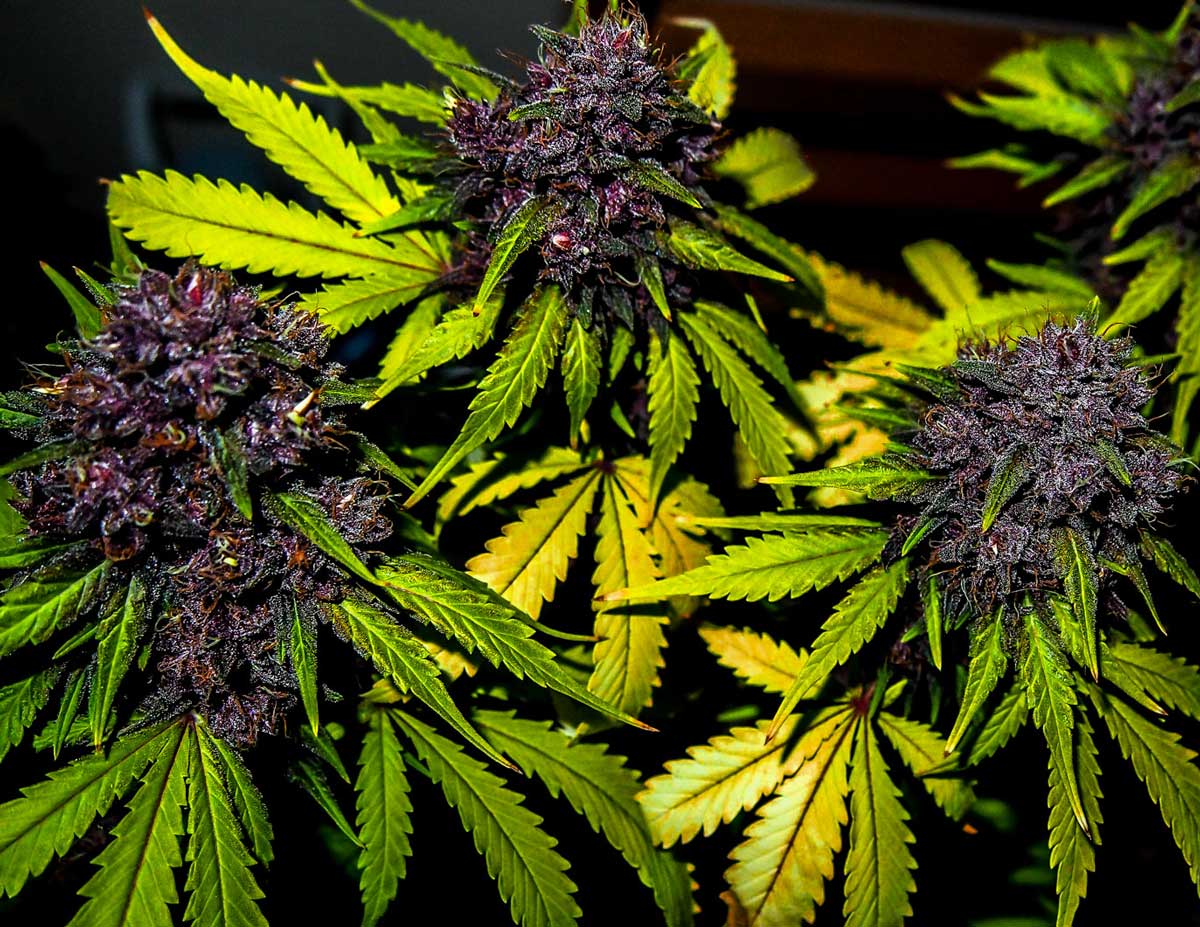
Bonus: Genetics
Any cannabis plant
A Note About Bud Quality
Your bud quality is limited by strain. No matter what you do as a grower, you can’t overcome genetics. If a plant makes buds with 15% THC, there’s literally nothing you could do to get it to produce 25% THC. If a plant doesn’t produce a lot of trichomes, your buds won’t get sparkly regardless of grow tactics. If a strain is low-yielding, the yields will never be great. It’s important to start with the right genetics to get buds exactly the way you want.
- Don’t skimp on buying seeds. Get genetics that make you feel excited. If you’re going to invest in grow equipment and spend 3-5 months growing weed, you deserve great buds at the end. If you start with poor genetics, you’ll get subpar buds even if you do everything perfectly. On the other hand, if you start with a great strain, you’ll harvest good buds even if you make a lot of mistakes.
- Always do a little research to find the perfect strain to grow
- Get seeds from a trustworthy source
- Opt for American strains if you want sparkly buds (American genetics tend to have higher trichome production)
I recommend choosing strains for the effects. Looks aren’t everything. Some of my favorite buds to smoke weren’t necessarily the prettiest!
3 Awesome Strains for Beginners
- Mandarin Cookies by Ethos Genetics – One of my all-time favorite strains. Super potent buds with unique relaxing “chill” effects. Easy to grow and buds produce lots of sparkly trichomes.
- Runtz Muffin by Barney’s Farm – Superlative strain that checks all the boxes: beginner-friendly, great bud quality, and above-average yields.
- Purple Lemonade Auto by Fast Buds – An extremely fast, easy-to-grow, and beautiful auto-flowering strain.
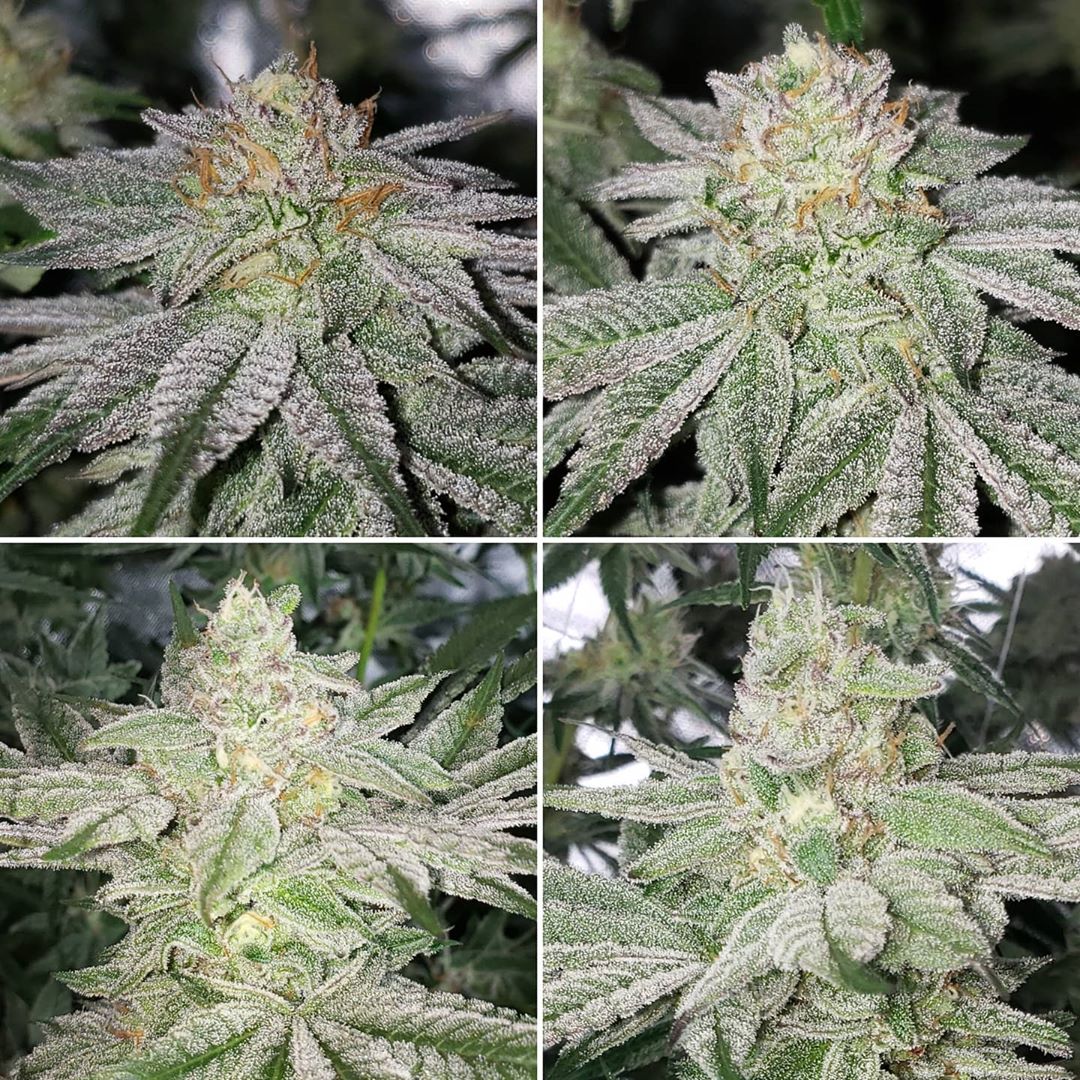
Mandarin Cookies is an awesome strain for beginners or experienced growers. I like to grow it at least once a year. Here are buds from the last 4 plants I’ve grown of this strain. Always a winner!
Runtz Muffin is a popular strain for a reason! Beautiful buds, easy, to grow, and good yields.
Purple Lemonade Auto is a visual stunner that automatically makes buds and is ready to harvest just 2 months from germination.
Now you know how to grow happy cannabis plants with fat, beautiful buds! (This is Pineapple Chunk!)