by Nebula Haze
Table of Contents
Intro: Learn How to Grow Weed Indoors
- How Long Until You’re Smoking Your Buds? 2+ months (3-4 month average)
- Light Needs – Cannabis needs more light than most house plants
- Cannabis Has Two Stages of Life
- Vegetative Stage – Stems & leaves only
- Flowering Stage – Cannabis buds form
- Where to Get Seeds or Clones – Make sure to choose the right strain
- Electricity Use (For Indoor Growers)
- Setup Cost
- Pick Your Grow Space
- Choose Growing Medium
- Choose Grow Lights
- Choose Nutrients (if needed)
- Supplies Checklist – Are You Ready to Start Growing?
Intro to Growing Cannabis: Learn How to Grow Weed!
You’re here because you want to learn how to grow weed indoors and are interested in a free “online class” about growing marijuana. Despite what you may have heard, growing your own cannabis is actually pretty easy once you have the right information. Anyone with the will to grow, a few extra minutes each day, and a grow space already have what it takes to grow their own cannabis.
What Supplies Do I Need to Start Growing Weed Indoors?
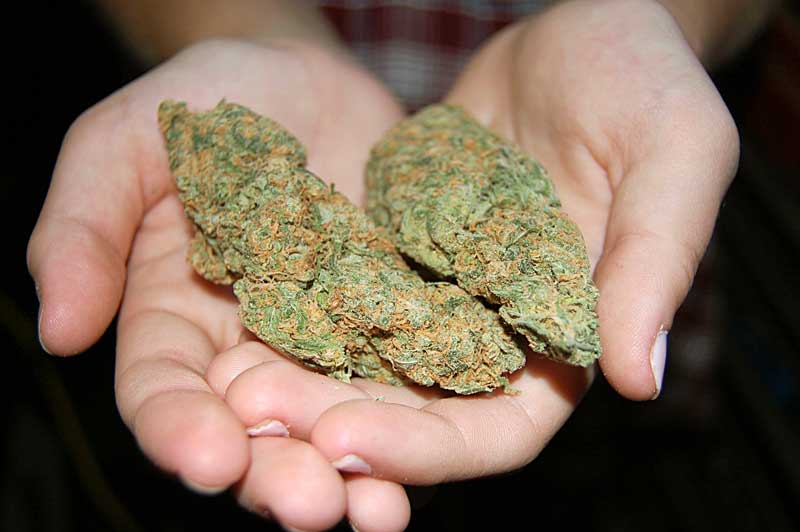
Cannabis goes by many names; weed, pot, marijuana, bud, ganja, and more. These all refer to the dried and cured buds of a female cannabis plant. Cannabis plants can live in many environments, and some form of cannabis naturally grows nearly everywhere in the world. Yet it’s the flowers of specially bred female cannabis plants which most people think of when it comes to the word “cannabis.”
I Want a Shorter and More Simple Guide to Growing Cannabis. (this one is comprehensive)
The flowers of potent strains of cannabis are grown, harvested, dried and cured to become the buds that can be used to vaporize, smoke, eat (via edibles) or otherwise processed for recreational or medical marijuana purposes.
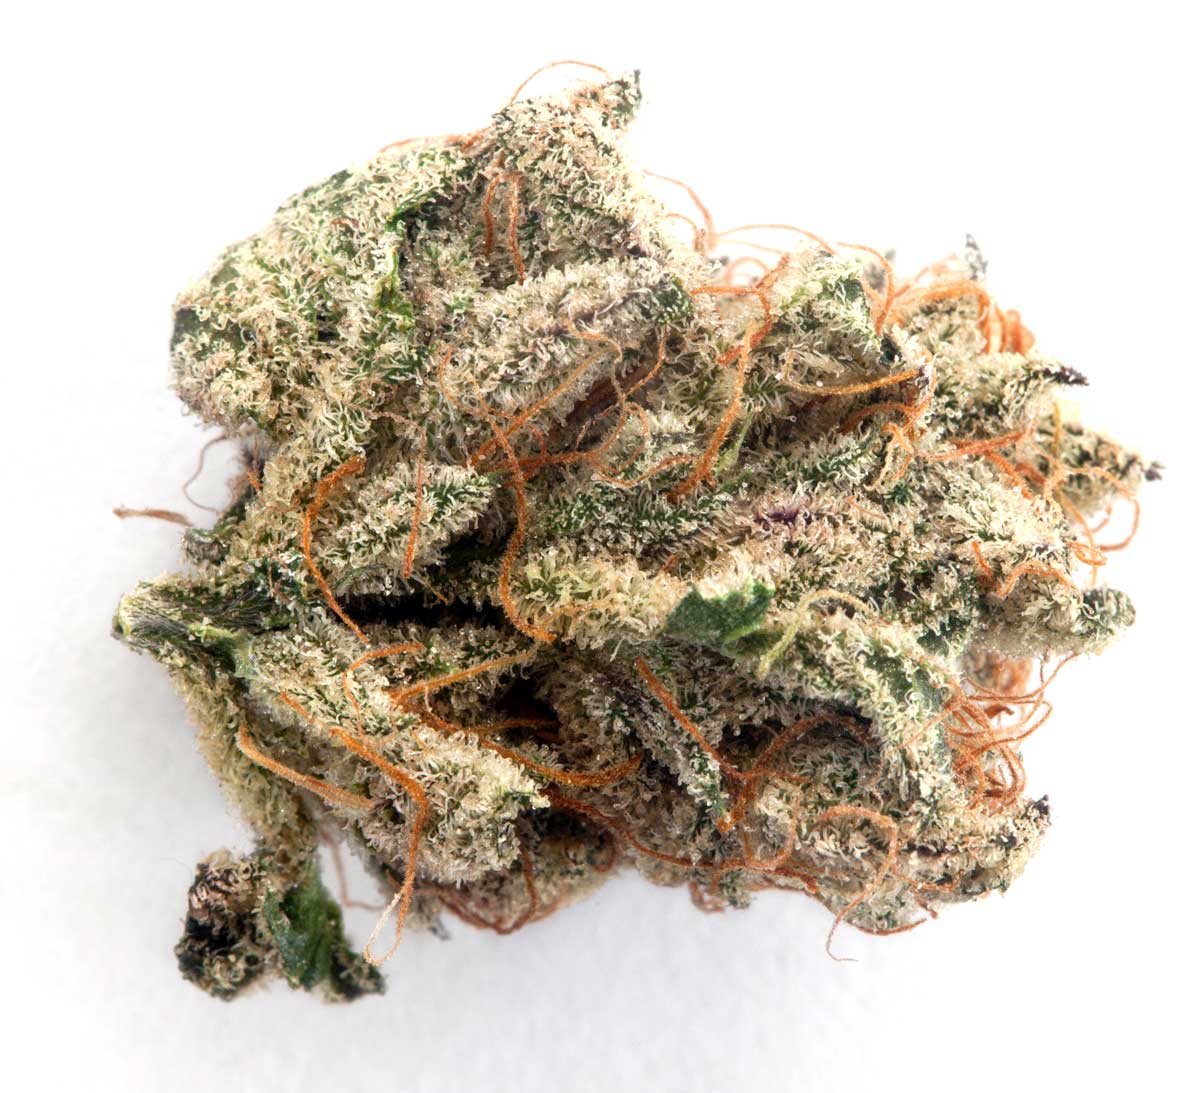
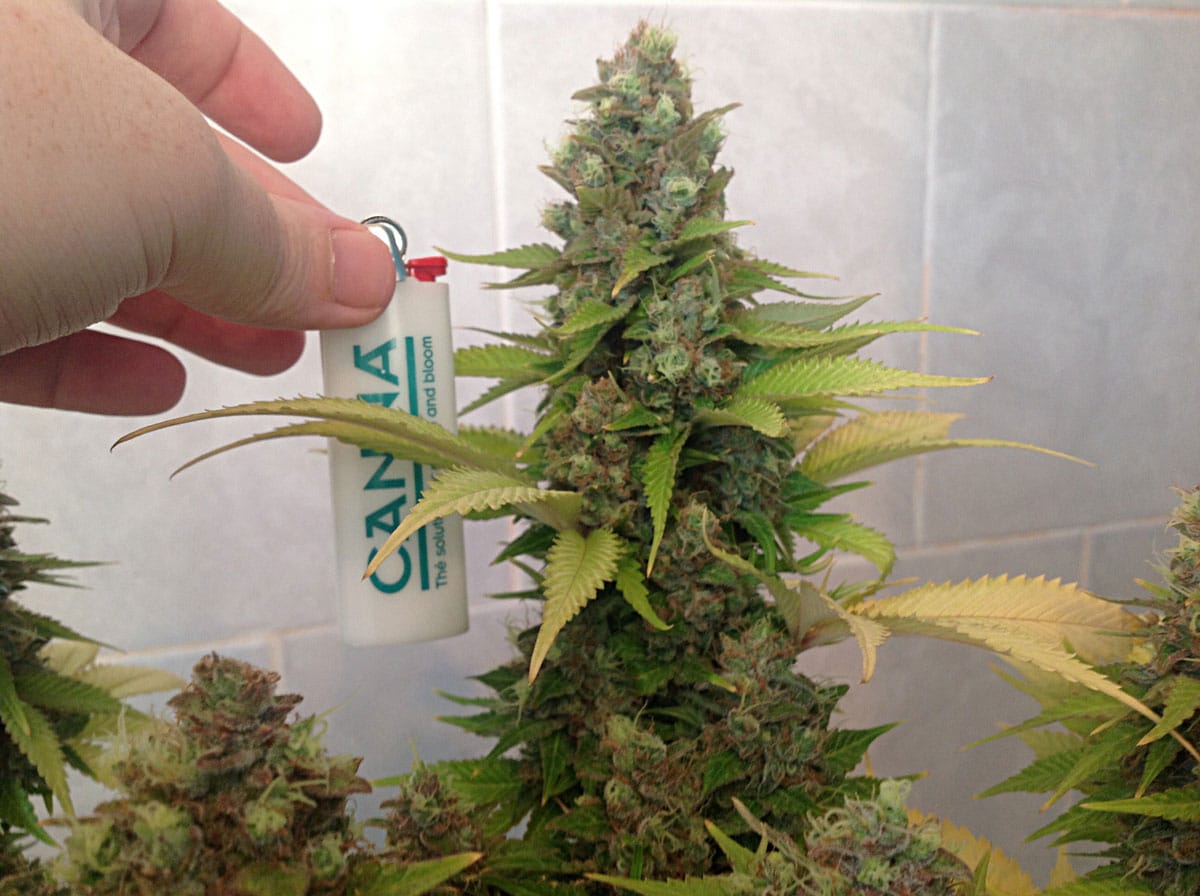
Buds are Dried & Cured Flowers of a Female Cannabis Plant

“Sinsemilla” – potent cannabis buds without seeds (home grown by me!)
Maybe you’re like me a few years ago. You like cannabis, or need it for medical reasons, and you’re tired of paying for it. Or perhaps, like me, you couldn’t even find any cannabis to buy most of the time.
For people like us, growing cannabis can be a relaxing pastime that can save you a lot of money, time and frustration.
Why I started growing cannabis
- save money & time – compared to buying cannabis, growing is much cheaper easier for me
- health reasons – I use medical marijuana for epilepsy
- stealth – never have to bring cannabis in from outside the home
- personal safety – no need to deal with drug dealers or other shady sources to get cannabis
- consistent supply – never run out!
- higher quality cannabis & choice of strains – produce exactly what you want
Before you start growing, it’s important that you understand your local laws. If you live in the USA, this website may help.
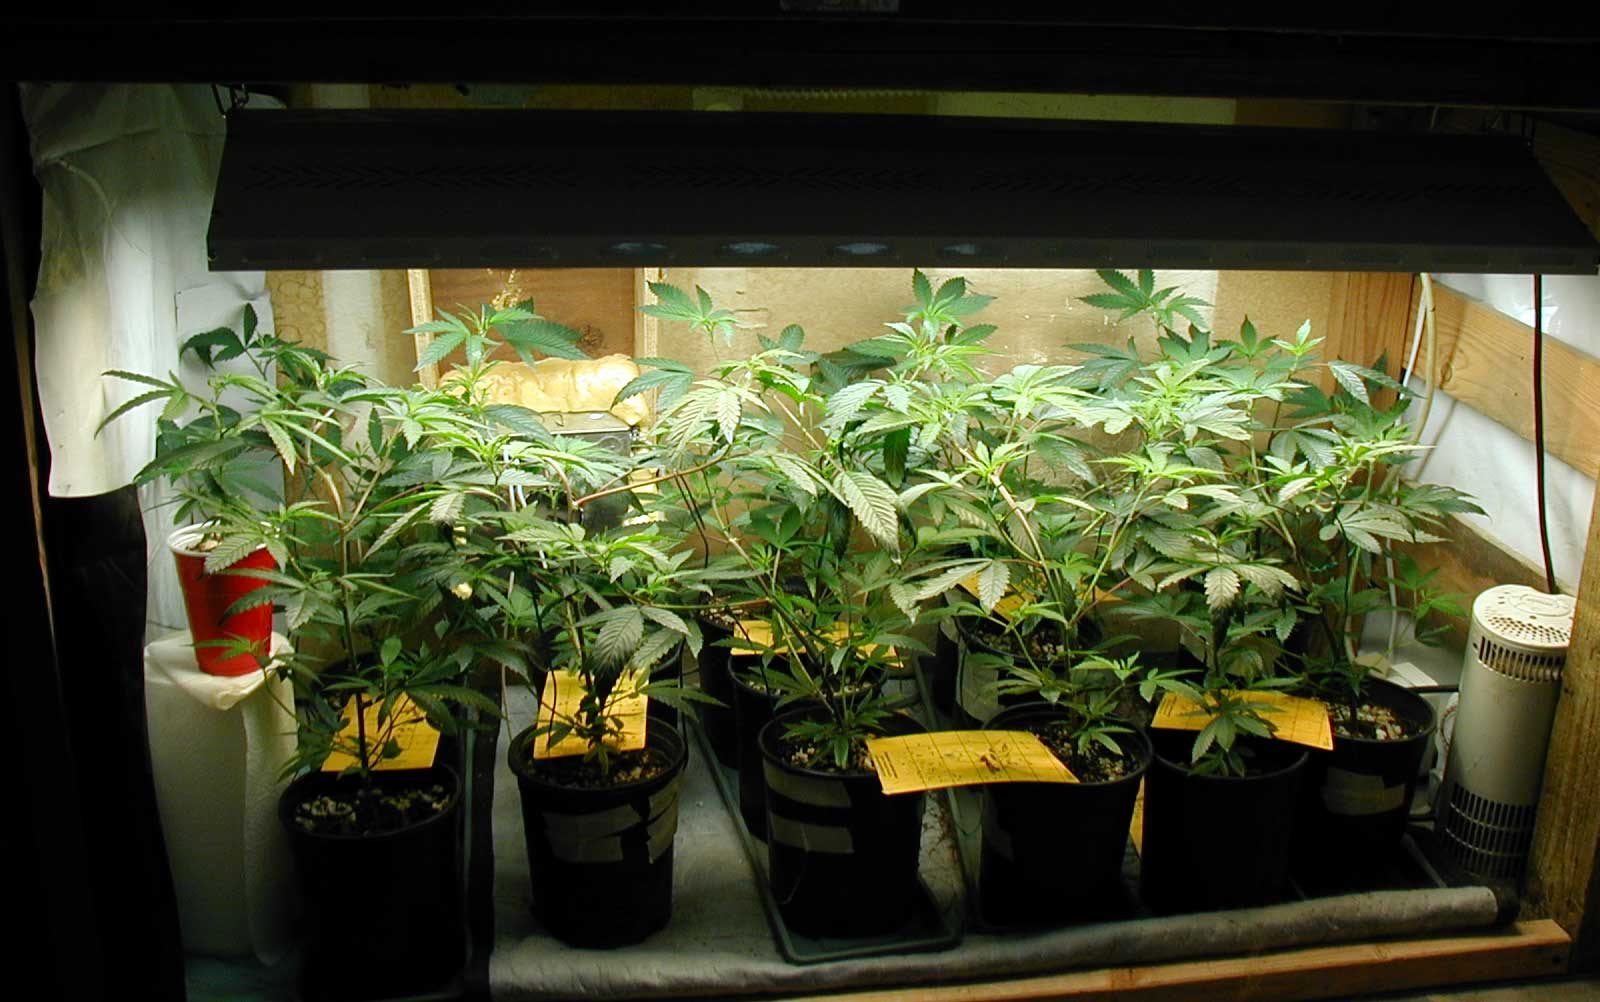
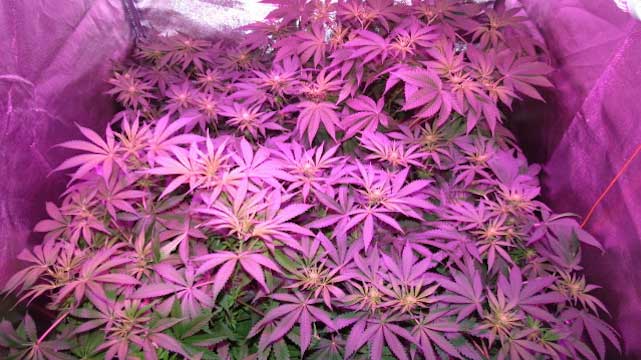
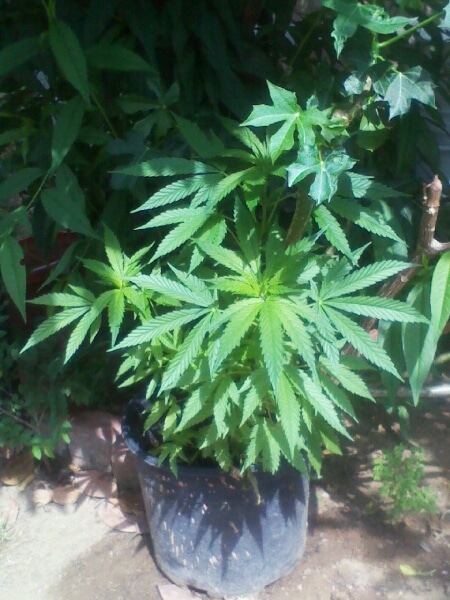
Cannabis is a weed in the wild that adapts to many climates. Cannabis plants can actually be really easy to grow if you have the right information and know what to do. It can seem impossible to get started if it’s your first time growing, but this website will walk you through everything. That way you grow weed like this!
Don’t you want happy plants to greet you each morning?

Soon overflowing with big, beautiful buds!

How Long Until You’re Smoking Your Buds? 2+ months (3-4+ month average)
After you start growing, it usually takes at least 2+ months until harvest for autoflowering strains (the total time needed depends on the particular strain) and 3-5 months for standard photoperiod strains. Some photoperiod grows may need a bit less, some strains take longer, and it also takes on the longer side if you grow big plants. After harvest, your cannabis buds need around a week to dry. Lastly, for the best quality, most growers want to cure their bud for 2+ weeks to get a smoother taste and a higher perceived potency. After being cured for 2-4 weeks, buds feel stronger, are more dense, smell better, and are less likely to cause headaches or anxiety.
In total, you’re looking at a 2.5+ month investment (3-4+ month average) before you’re smoking your homegrown cannabis harvest.
Growing Timeline
2+ Months Seed to Harvest – Autoflowering Strains
3-5 Months Seed to Harvest – Photoperiod Strains
Post Harvest
~1 week – Drying
2+ Weeks – Curing
Total: 2+ months (3-4+ month average)
What it’s like to grow weed: As far as a cannabis grower is concerned….
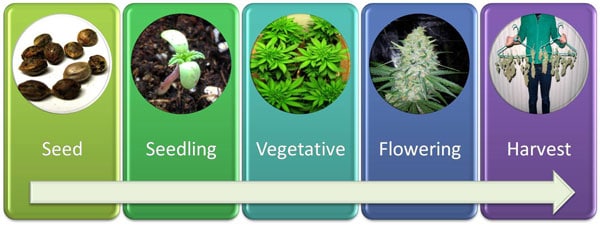
Seed ⇒ Seedling ⇒ Vegetative ⇒ Flowering ⇒ Harvest
Tell Me More: How Long Does It Take To Grow Weed? What’s the growing timeline?
https://www.growweedeasy.com/how-long-does-it-take-to-grow-weed
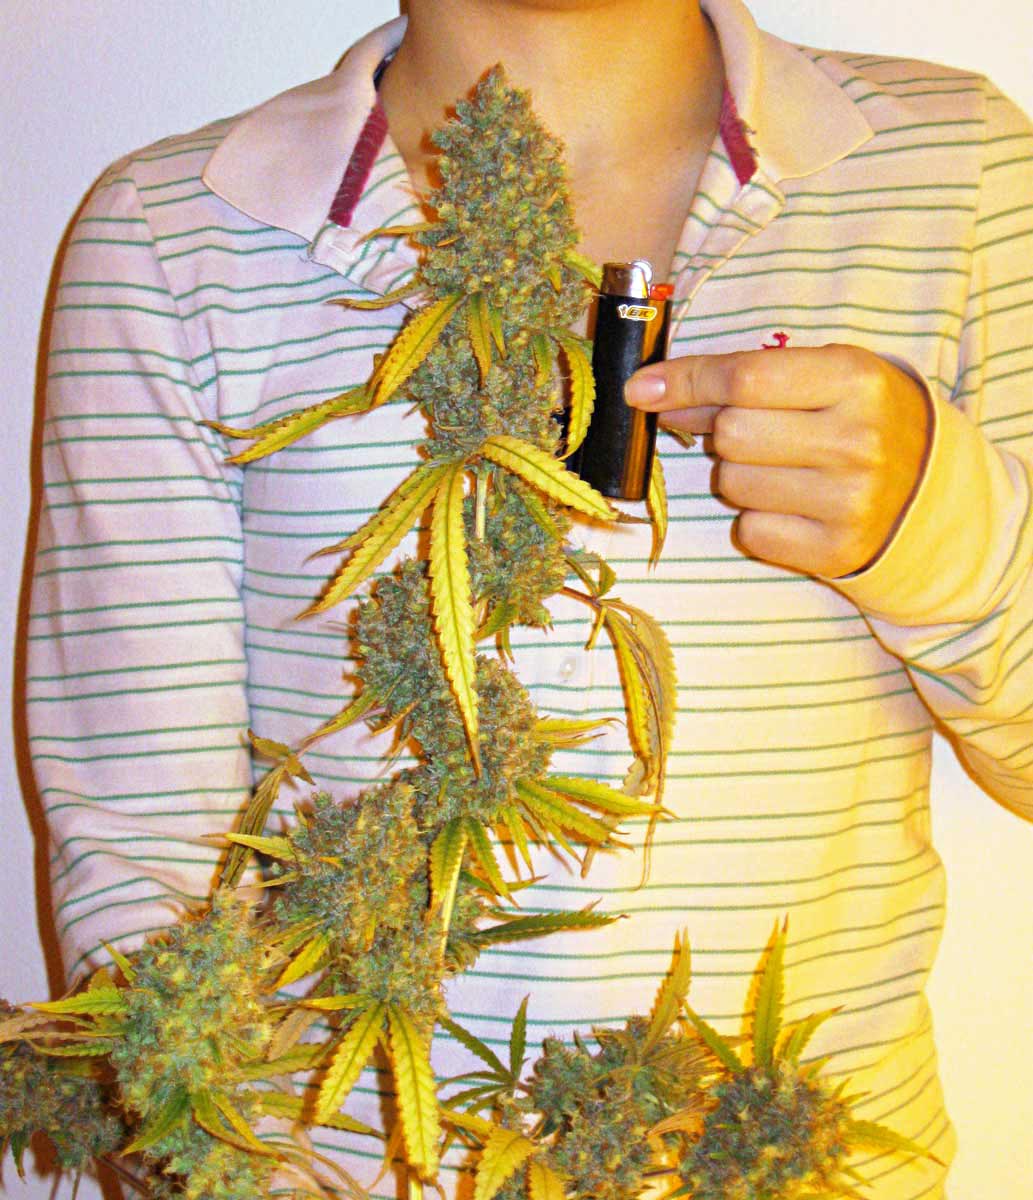
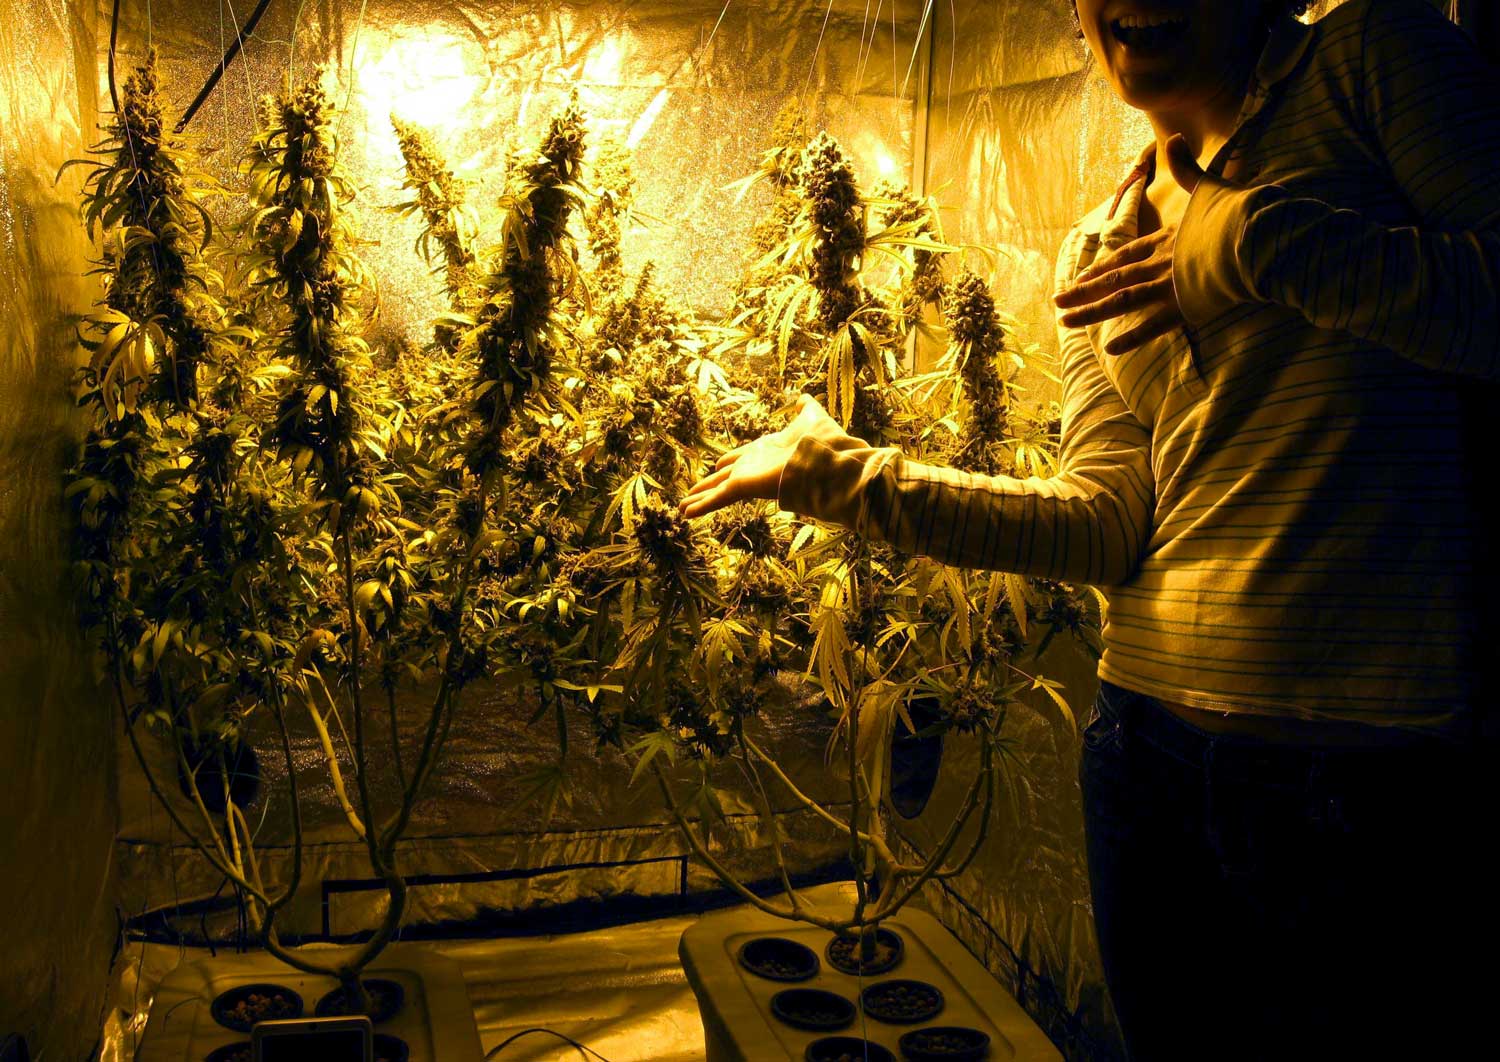
Are you ready for a cannabis harvest in your house, like Larry here?
Cannabis plants are weeds with simple needs. Your cannabis plants will grow as long as you give them the right amount of the following resources..
In order to thrive and grow, your weed needs…
- Light (brightness has a huge effect on yields)
- Air (fresh air with a slight breeze is best)
- Grow Medium (place to grow, soil isn’t your only choice)
- Temperature (room temperature or a little warmer is perfect during the day, cannot stand freezing at night)
- Nutrients (start at half as much as what’s recommended on the package)
- Water (maintain pH for best results, soil likes 6 – 7 pH & hydro likes 5.5 – 6.5 pH)
Whether growing marijuana plants indoors or outdoors, you must ensure that it gets the proper amount of these six resources. Cannabis plants reward you with big “colas” (long, fat buds)!
What’s The Most Common New Grower Mistake? Lack of Research
One of the most common mistakes made by new weed growers is to conduct spur-of-the-moment experiments and hurt or even kill their plants.
You should always at least do a quick google search before you try any new technique.
Why make your plants be the guinea pig of an experiment that someone else has already tried before?
For example, it may seem like a good idea to give your growing cannabis Miracle-Gro nutrients because it’s easily available/cheap, or plant your seeds in the original Miracle-Gro soil you have laying around the house. Unfortunately the standard Miracle-Gro formula does not contain the right ratio of nutrients for cannabis, especially during the budding stage. Using original Miracle-Gro nutrients during flowering can hurt your plants and reduce your yields.
But how could you possibly know that unless you look it up first?
What nutrients can I use for cannabis?
https://www.growweedeasy.com/cannabis-nutrients
Suggestion: Harvest Your First Plant Before Trying Any Experiments
You don’t want to lose your entire crop to something that has already been tried before and proven not to work, so make sure you do a little research and experiment with caution and moderation.
Another common problem new growers have is the tendency to skip crucial steps like maintaining a proper pH or getting the right kind of nutrients. While you can get lucky and succeed at growing weed without taking these steps, you are a lot more likely to end up plants that die or just never produce any buds.
It can actually be really easy to grow marijuana with the right info. It’s like growing any other plant. You follow a proven set of steps, and before you know it, you’ll be harvesting your first buds.
Start by reading this simple cannabis grow guide and you will soon have all the knowledge you need to start producing your own potent buds today!
Light Needs (Cannabis needs more light than most house plants)
Many cannabis growers like to grow outdoors. Outdoor growers need a accessible, private space that gets 8+ hours of direct sunlight a day for the best results.
Outdoor growers need 8+ hours of direct sunlight a day
Plant in Spring, Harvest in Fall.

Cannabis plants grow very fast in a short amount of time, and need a lot of energy from the light to grow and produce buds. In the wild, a cannabis plant can grow to the size of tree in less than a year, and it uses energy from light to power that growth.
Many new growers who want to grow indoors like the idea of growing their cannabis plant in a sunny window, like a house plant. Usually the light from a window won’t be enough. While young cannabis plants seem to be able to grow in bright, sunny windows, cannabis plants usually don’t ever produce more than a few wispy hairs during the flowering stage, and may not produce any bud at all. Without any flowers/bud, you’re out of luck.
Indoor growers almost always need grow lights to get buds
Indoors, nearly all growers will need some type of grow light for successful cannabis growth.
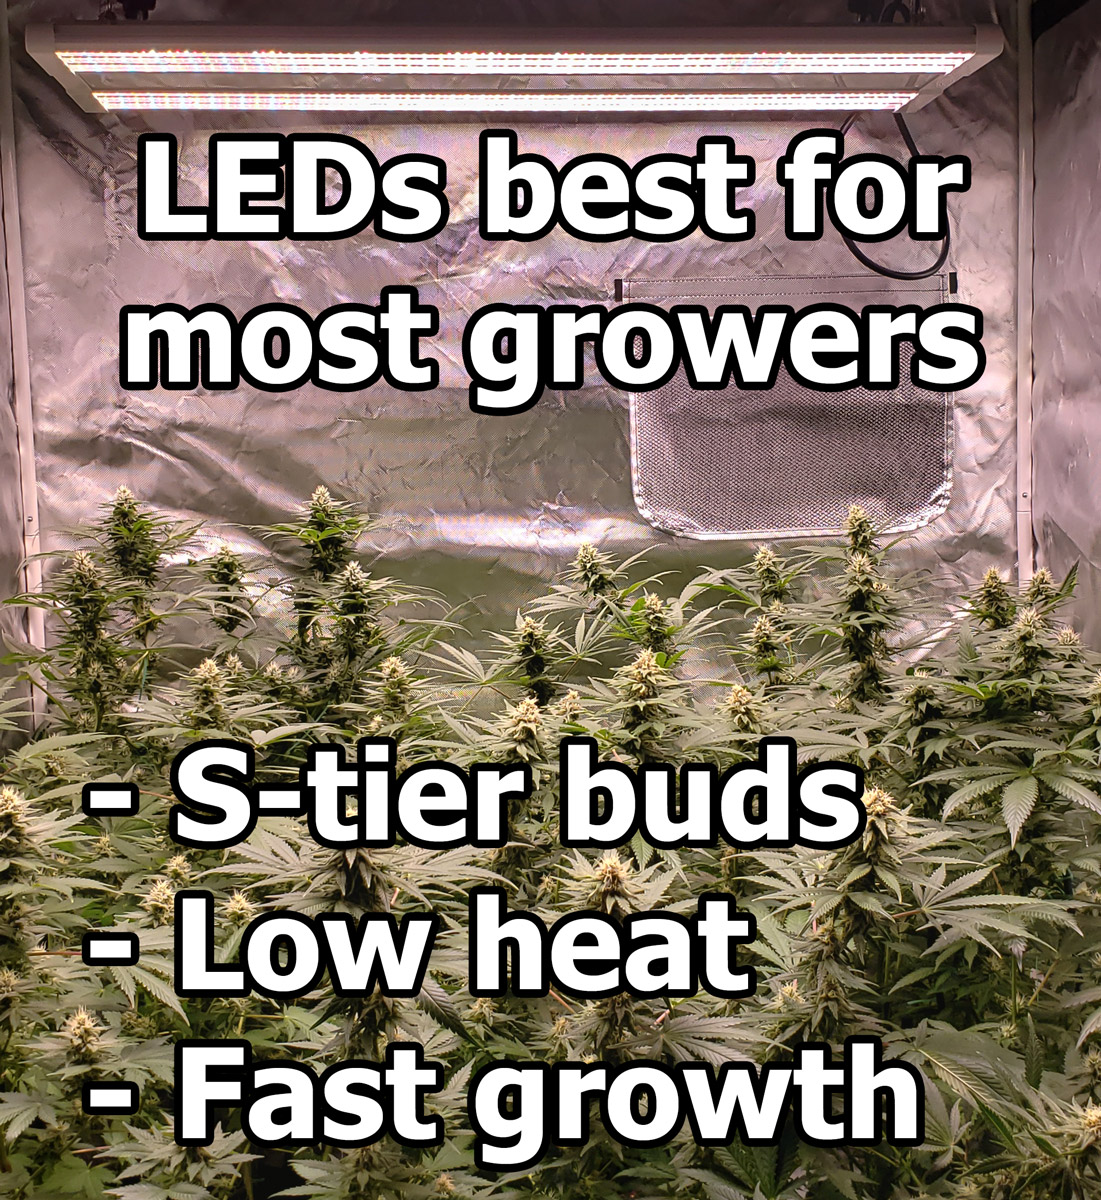
LED grow lights are the best light for (most) indoor growers.
Indoor growers usually put their grow lights with a timer to simulate the sun. This makes it easy to turn on and off the lights for each “day” so grow lights are more automated. There are many different sized grow lights, from the CFL light bulbs you already use in your house to bigger, more specialized grow lights that produce pounds of bud at a time.
There are indoor growing options for nearly everyone, even if you’re on a budget or only have a small space to work with, whether you want to grow in a bucket or a whole room.
Indoor growers need a private space and grow lights
There are limitless setup options
What do you need to grow indoors?
https://www.growweedeasy.com/cannabis-supplies-get-started-growing
Two Stages of Cannabis Life: Vegetative & Flowering
There are two main stages of a cannabis plant’s life…
Cannabis plants keep getting bigger and bigger with long days, and start making buds when they get long nights.
Cannabis life cycle in the wild…
- Germination – Seed sprouts in spring.
- Get Bigger – Cannabis grows for a summer (“vegetative stage”).
- Winter is Coming! – Days start getting shorter in late summer, a signal to start flowering.
- Grow Flowers (Buds) – Cannabis starts making flowers or pollen (“flowering stage”).
- Plant Dies – Cannabis dies for winter. Seeds fall to the ground.
- Repeat – Everything starts over again for the next generation
Why is this important?
Cannabis plants go from seed to death in Spring to Fall, and have a certain order for their life stages. This is very important for you to understand as a grower.
A plant will keep growing vegetatively (just stems and leaves) as long as the plant “believes” it is early spring or summer. Outdoors this happens naturally as the seasons change. Indoors, growers put grow lights on a timer to “tell” the plant when to start flowering.
Cannabis Life Stages
- Vegetative – stems and leaves
- Flowering – making buds / flowers
It seems simple, and it is! Just remember that there are two stages of life for cannabis, first the vegetative stage, and then the flowering stage (which is followed by harvest).
Male & Female Cannabis Plants
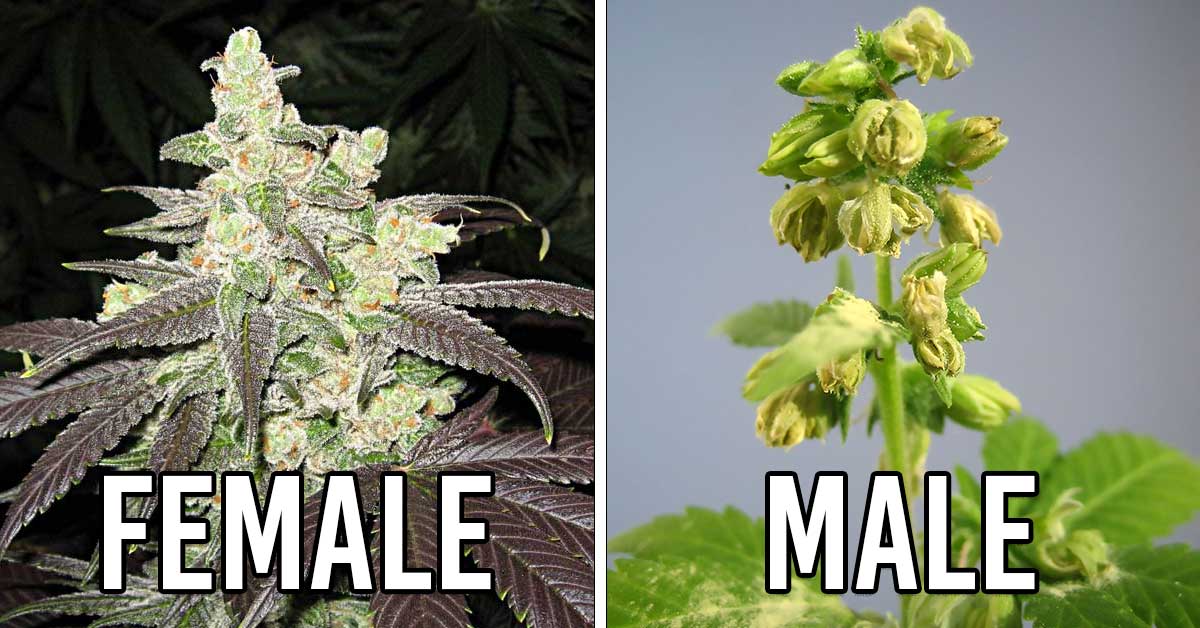
Cannabis plants have a gender. Each plant grows into a “male” or “female” plant. Although about half of plants are male or female, only female cannabis plants produce bud. Getting rid of male cannabis plants also prevents pollination (and seeds).
Did You Know? You can identify gender as young as 3 weeks from seed!
Only Female Plants Grow Buds
Most growers are only interested in growing female plants so they can harvest the bud.
Female Cannabis Plants Produce Buds
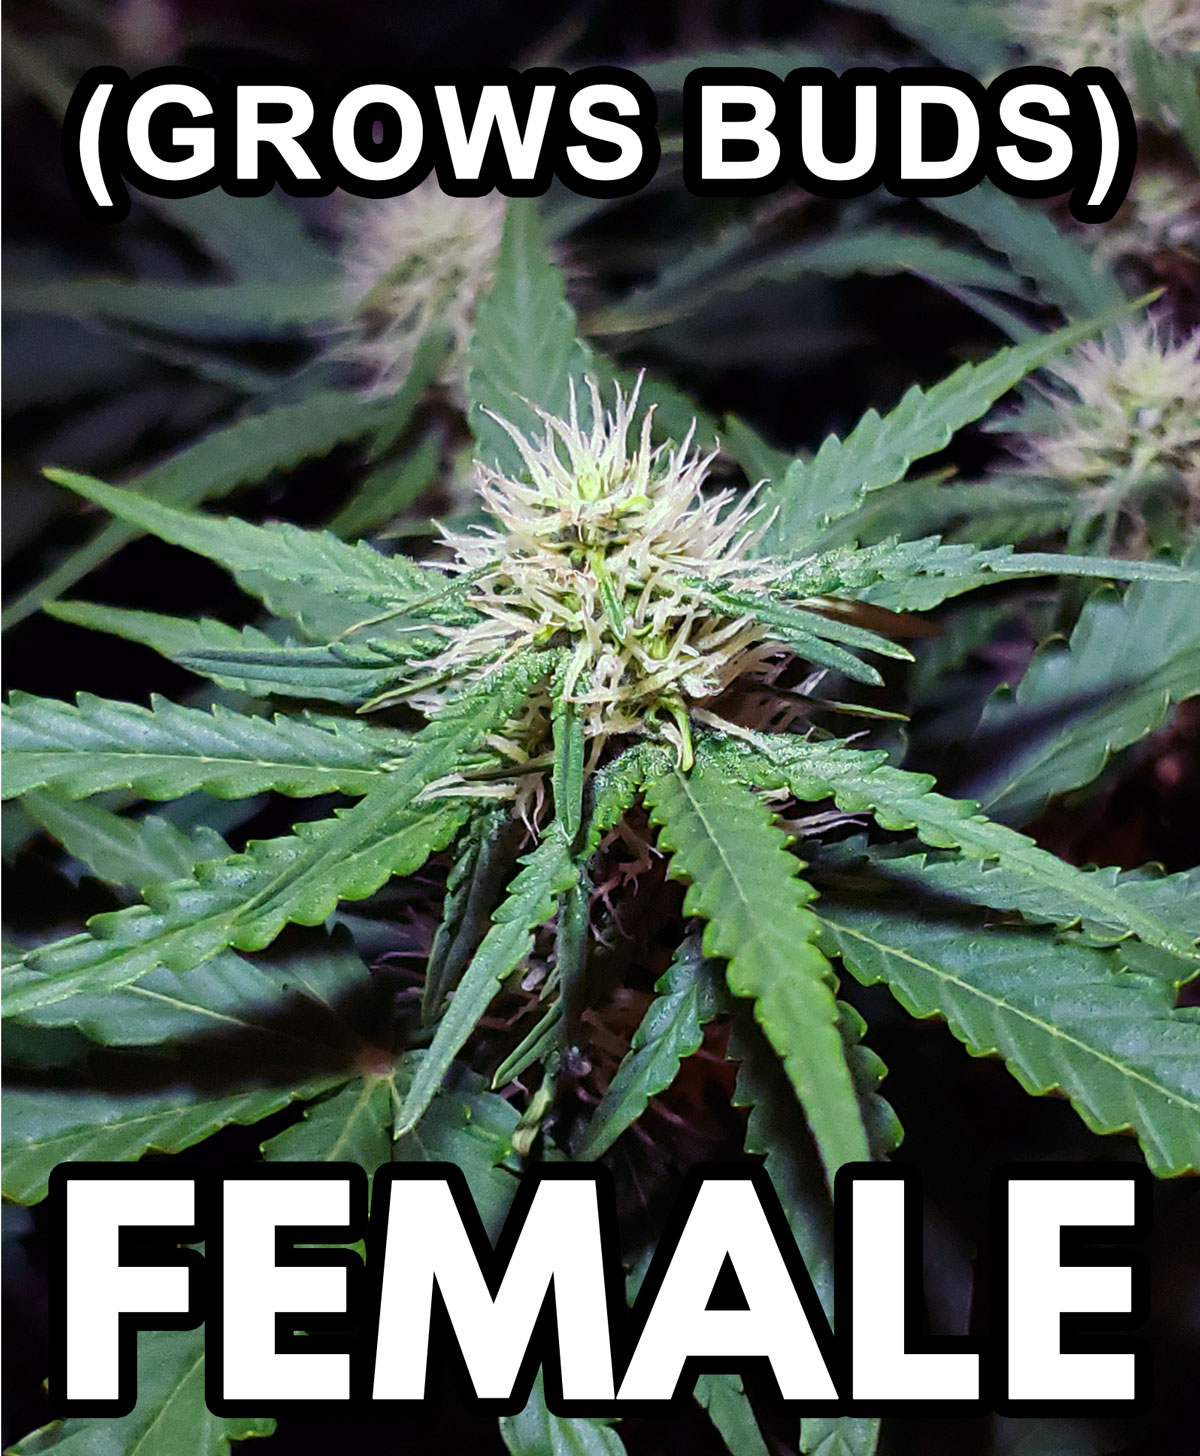
Cannabis plants first show their sex at the end of the vegetative stage or at the beginning of the flowering stage.
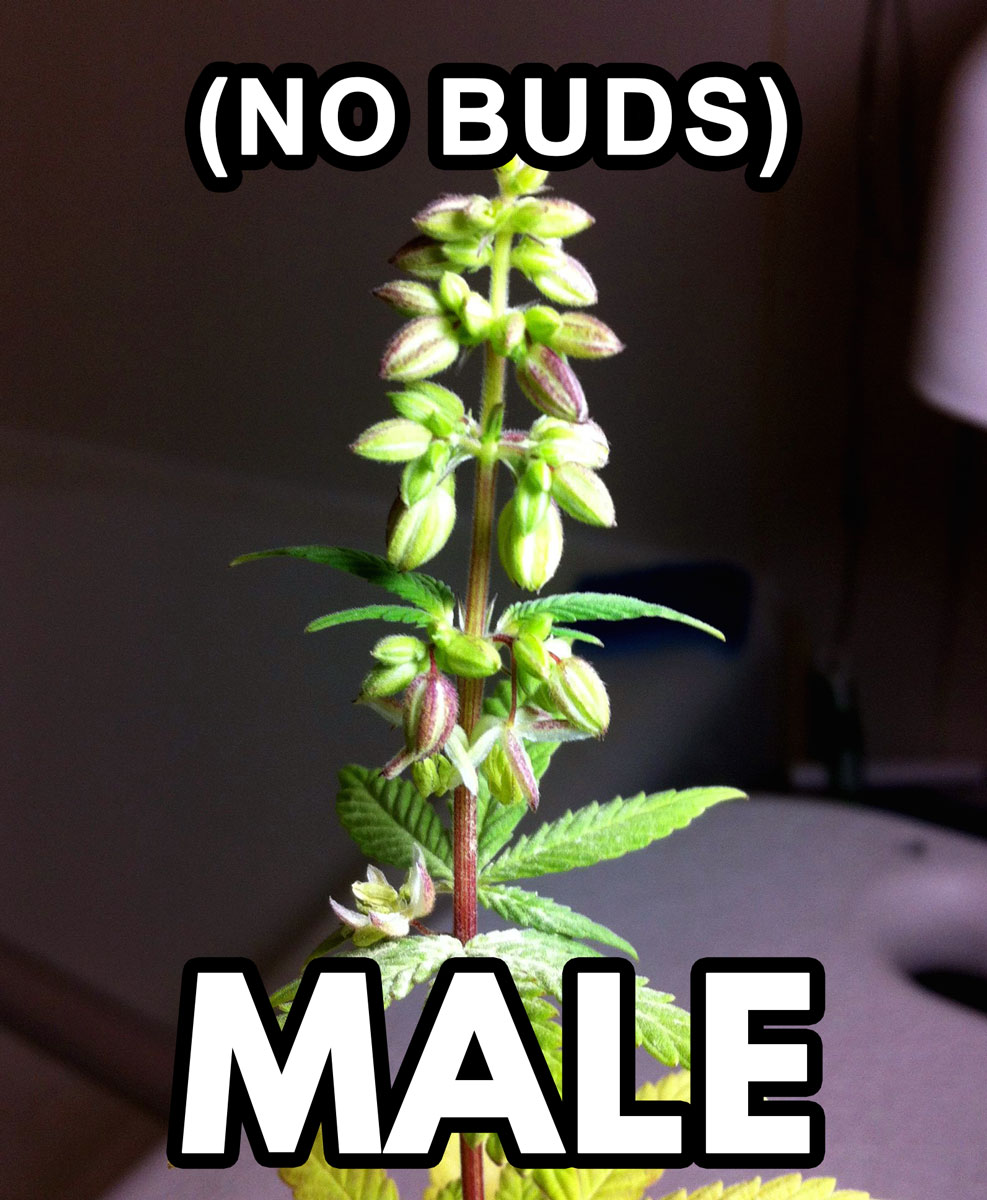
Male cannabis plants only produce pollen sacs, no buds, and few male plants produce a significant amount of THC or other cannabinoids.
That’s worth repeating. Male weed plants do not produce buds with THC. Most growers throw them away on sight.
Male Cannabis Plants Do Not Produce Bud
There is no way to determine the gender of a plant initially, just by looking at the seeds, or even by looking at young plants.
Both male and female cannabis plants look exactly the same until they start flowering. There used to be myths and tricks on how to tell male from female plants from a young age, but none actually works 100% of the time. To this day, even scientists are not exactly sure what causes some plants to become male, and some plants to become female.
For most growers, you will need to identify the gender of your plants as soon as possible and remove any males promptly, before they contaminate your females.
Tell me more about what it means for a cannabis plant to be “male” or “female”
https://www.growweedeasy.com/marijuana-boy-girl
Did You Know? You can identify gender as young as 3 weeks from seed!
How to Get Seeds or Clones – Choosing the Right Strain
The two most popular ways to get cannabis seeds or clones is in person or via online seed banks.
Seeds vs Clones (or read on below)
https://www.growweedeasy.com/seeds-vs-clones
If you want to to reduce the uncertainty and make sure you always grow incredible-quality cannabis, you need to start with great genes.
Just like with animals, the way your cannabis plants turn out will have a lot to do with the genetics they started life with. Each cannabis plant is a mixture of the traits from its two parents.
Tutorial About Choosing the Right Strain
https://www.growweedeasy.com/training#choose-strain
 Because genetics have such a huge impact on your results, it is important to know a little bit about the genetics of the plant you’re working with.
There are three main strains or types of cannabis: indica, sativa, and hybrid strains (hybrid strains are a mix of indica and sativa).
These types are not set in stone. Nearly all cannabis strains you run into with be some sort of hybrid. Some strains lean more indica, others lean more Sativa. Some are a class of their own. I’ve heard some people consider “Haze” to be a strain type, though it’s sometimes considered part of the “Sativa” family.
There is also a very important other type of cannabis; “Ruderalis” or “auto-flowering” strains.
Let me explain…
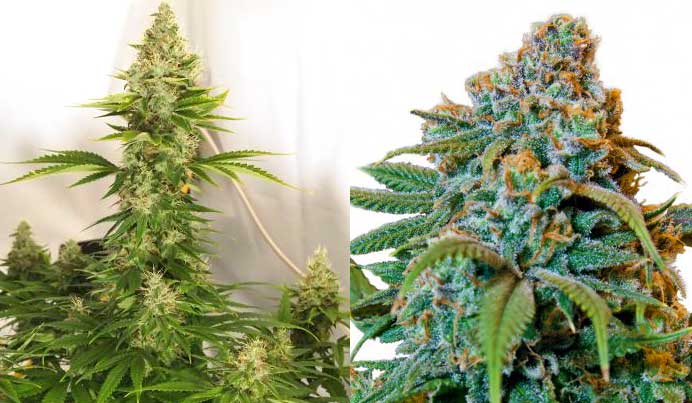
Indica, Sativa & Hybrids (plus Auto-flowering) Strains
Indica
Indica strains tend to cause more of a body high and tend to grow shorter and bushier.
Sativa
Sativa strains tend to cause more of a cerebral or mental high. Sativas grow larger, have higher light requirements, and take longer to mature than indica plants so a sativa strain of cannabis may need special plant training to be suited for growing indoors. Sativas often have thin, finger-like leaves while indicas have fatter, rounder leaves.
Hybrid
It is often simplest to grow marijuana plants that are a hybrid strain because they have been bred to carry the best traits of both sativa and indica.
Auto-flowering or “Ruderalis” strains
Auto-flowering means these strains will start flowering regardless of its light schedule. These strains are usually a famous strain that has been bred to carry the “auto-flowering” characteristic. When growing with Ruderalis-based cannabis strains such as the Lowryder, you can give the plant up to 18 hours of light a day for the whole grow, and your plant will be ready to harvest in about 3 months. Because of their short lifecycle, Ruderalis cannabis stains generally do not grow taller than 1-2 feet.
Auto-Flowering vs Photoperiod (Regular) Cannabis Strains
https://www.growweedeasy.com/autoflowering-vs-photoperiod
If you’re researching what strain of cannabis to grow, pay close attention to the light requirements, grow times, etc. to make sure that it is a good match for your grow area.
Learn more about choosing the right cannabis strain:
https://www.growweedeasy.com/training#choose-strain
Seeds
Seeds are a good way for many people to start growing because they can be easily purchased off the internet and delivered discretely almost anywhere in the world.
Viable cannabis seeds are usually hard and dark colored. If you have cannabis seeds which are small and white, they are often immature and won’t germinate.
Example of Good Cannabis Seeds
(yes, even the lighter colored one)
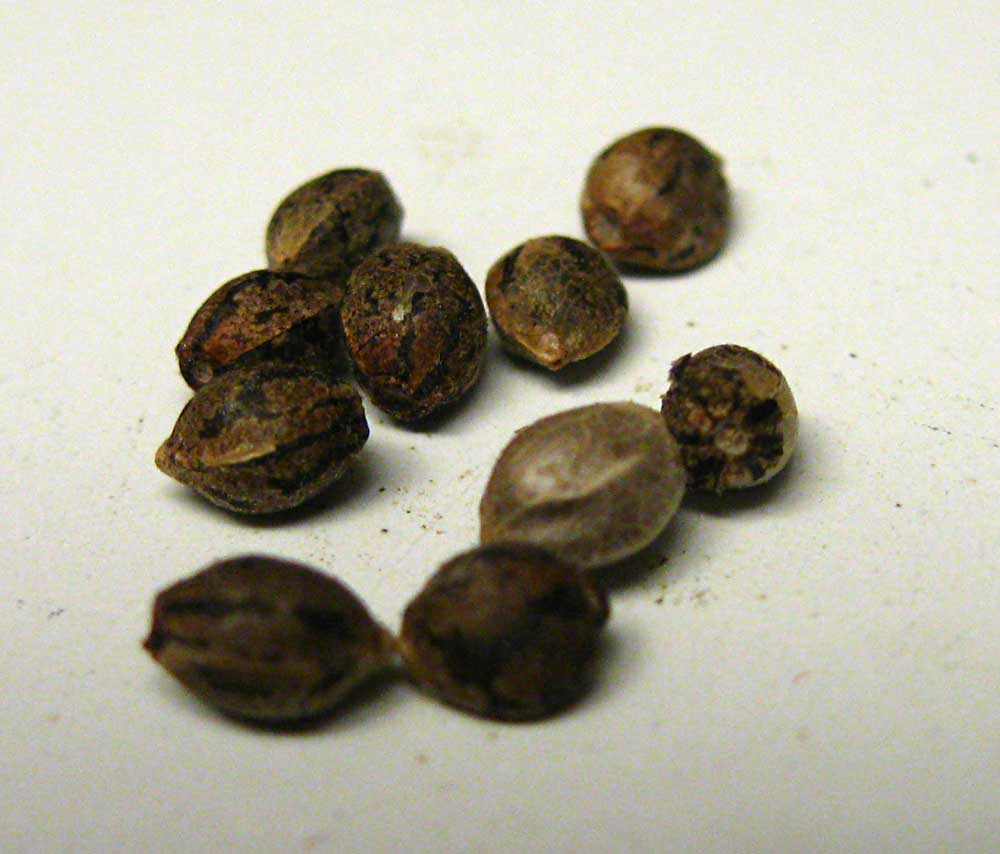
Healthy seeds can be stored in your fridge until you’re ready to use them, but it is not recommended that you freeze your seeds. Seeds which are kept in a cool, dry place away from light will remain viable for five years or even longer!
Sometimes you will find good seeds in marijuana that you have purchased (these seeds are called “bagseed”) which can definitely be used to start growing.
The downside of using seeds that you find in the bud you got from your local weed dealer is that about half of the seeds will end up being male, and only half will end being female. You also don’t know what to expect as far as how the plant will tend to grow.
Still, many growers also start growing cannabis with bagseed that they’ve collected. This is a great way to get started growing, and many growers have happily made it to harvest with bagseed.
Some growers get very lucky with bagseed, and end up with great results. But sometimes growers end up growing buds that are nothing like the ones the seeds were found in.
Already have your seeds? Get started with germinating your cannabis seeds.
Whenever possible, get a trusted strain for best results!
It is actually safe and reliable to buy your marijuana seeds online from a reputable seed source. The biggest problem for USA residents ordering online is the long wait time – nearly all cannabis seed sources are located overseas. I’ve had seeds take a month or longer to make it through customs and arrive to my door. Yet as long as you choose to get guaranteed delivery from your seed source, you know that they will always eventually come, even if it takes twice as long as expected.
Learn more about buying cannabis seeds online with safety
https://www.growweedeasy.com/seeds
Getting seeds online will allow you to purchase feminized (all-female) seeds and will also let you pick the exact strain to match your size and time requirements. This can be helpful when setting up your grow space.
Clones
 Clones are an exact copy of another plant. When starting with a clone, you can expect the plant to grow and produce buds in a very similar way to the mother plant it came from. This can be helpful to growers because they know exactly what to expect.
In order to get cannabis clones, you will need to know someone who already has cannabis plants. As far as I know, there’s no way to consistently order cannabis clones online. The only online way to get cannabis plants is by ordering seeds.
You may be able to buy cannabis clones from your local medical marijuana dispensary if you have a recommendation for marijuana from your doctor in a medical state. Unfortunately this option isn’t available for a lot of new growers. One of the great things about starting with seeds is anyone can do it..
Starting with a cannabis clone can save you a couple of weeks to a month compared to starting with seeds because they have a head start on growth.
Using clones instead of regular seeds guarantees the gender of your weed plant because the clones have the exact same genetics as their parent plant including gender.
If you already have female plants, you can clone them to make more plants (copies) without ever having to worry about sexing your plants or creating seeds.

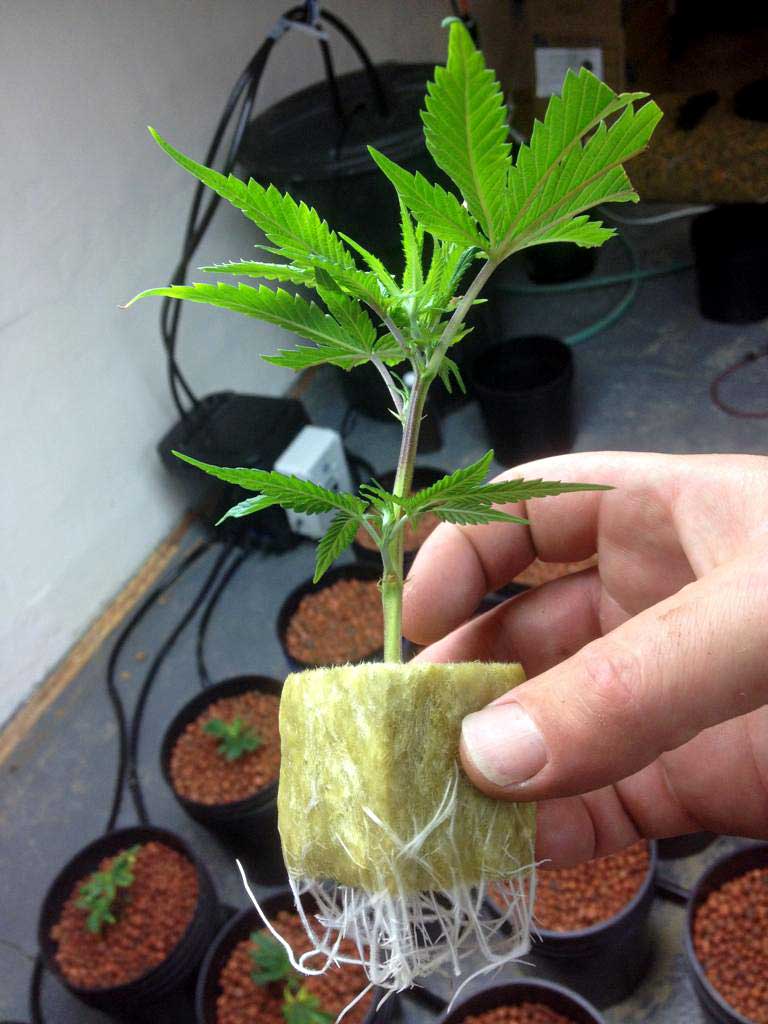
If you’re starting out with a clone, you want to treat it gently for the first day or two that you have it. If your clone hasn’t established roots yet, then you want to make sure that it stays moist and gets gentle light (like from fluorescent tubes) until it develops some roots.
New cannabis clones like warm, wet conditions. Think springtime.
Before your clones have made roots, they to get water through their leaves right until roots have formed. A humid cloner works great for getting clones to root, or you can mist your plants a few times a day until they start forming roots. Some growers will use a heating pad under their clones to help keep things warm. A little warmer than room temperature 72-77 °F (22-25 °C ) is perfect. Many automatic cloners come with a heat setting.
If your clone has already established its roots, then you can put it in its new home with your grow lights a bit further away than normal.
Only give your clone just a little bit of water at first with either no nutrients or a highly diluted nutrient solution. It’s tempting to want to put your lights close to the new baby and give it nutrients because you want to do everything you can to make sure it does okay.
However, in the very beginning, less is more for your clone. Your recently-moved clone is more sensitive to heat and light than an established plant, and putting it in a completely new environment can be stressful. It’s important to check on your clone frequently during its first 24 hours to make sure there isn’t any unforeseen problems such as it tipping over.
Once the clone has started really growing (usually after a couple of days) then you can put your lights closer and start feeding it with full-strength nutrients. At this point you basically treat the clone like a cannabis plant in the vegetative stage (first stage of life).
Get started with creating and caring for your cannabis clones:
https://www.growweedeasy.com/how-to-create-marijuana-clones
Electricity Use (For Indoor Growers)
 For small-scale growers, the difference in your electric bill might not be that noticeable. As an example, I grew a single plant under a small 250W grow light, and only ended up paying $278 in electricity for the whole grow over the course of 4 months. I ended up yielding 6.2 ounces (only $45/ounce or $1.60/gram) and we have some of the most expensive electricity rates in the country ($0.37/kWh)! So for small grows, you’re not going to see a huge bump in your electricity.
But for some of the bigger grow lights, the electric bill can grow quite a bit, especially when using AC units. Yet even with the cost of electricity, it’s usually far cheaper for people to grow their own cannabis indoors than to purchase it.
Just to give you a real example, a 600W grow light (one of the larger types of grow lights) uses about the same electricity as a refrigerator.
Each person has different electricity rates depending on where they live, but let me give you an idea with another one of my grow setups. It’s not just a matter of how much electricity you use for the whole grow, it’s also a matter of how much you pay per month and if you’re saving that compared to buying cannabis. As I mentioned, I live in an expensive city in California and in this grow room I have a 600W light, carbon filter, AC unit and a powerful fan. All that uses about $100/month in electricity, and can produce more than a pound of buds at harvest more than twice/year. That’s more than 3 ounces (85 grams) each month for just $100. And I live in a hot area with expensive electricity.
For me, growing indoors saves handfuls of money compared to buying buds, even with the cost of electricity.
For growers who want smaller amounts of cannabis, it’s easy to scale down your growing operation to suite your needs. A space bucket can cost just $100 to set up, a few bucks of electricity each month, and produce up to an ounce of buds at harvest. For some growers, this is more than enough.
It’s important to understand what you want and get in touch with your growing expectations. This will help you choose the right growing setup.
Outdoors, the starting cost is generally less than indoors – no grow lights or electricity, just soil and sunlight – but the hard part about growing outdoors is finding a good spot that’s private, convenient for you to get to, with easy access to water, and 8+ hours of direct sunlight every day.
Outdoors: Free – $200
Indoors, your cost depends on your setup and what you’re looking for. If you want to harvest an ounce here and then, it may cost very little to get started, even just $100 (check out space buckets).
For a premium indoor setup with a grow tent, grow light, fan, plus growing supplies, you’re looking at spending $800 – $1500 to grow a few plants. A setup like this can yield several ounces or even a pound of bud at harvest.
Indoors: $100 – $1500+
Here’s what you’ll be doing in this section to get set up to start growing cannabis.
- Pick Your Grow Space
- Choose Growing Medium
- Choose Grow Lights (or Sun)
- Nutrients (if needed)
- Supplies Checklist – Are You Ready to Start Growing?
Growing Indoors vs Outdoors
There are many considerations to take into account when deciding whether to grow your plant indoors or outdoors.
As someone who lives in the suburbs of a city, with many close neighbors and far away from any wilderness, I only grow weed indoors.
Most cannabis growers have an idea about whether they want to grow indoors or outside, but check this list of pros and cons to help if you’re still not sure
Pros and Cons – Growing marijuana indoors vs. outdoors
https://www.growweedeasy.com/indoors-vs-outdoors
Indoors
You have more control over everything in an indoor growing environment, which means that indoor growers can consistently produce dank buds, but you also have more responsibility. If you don’t provide everything your plants need, they will die.
What indoor space works best?
You can grow cannabis most anywhere with easy access to water and fresh air…
- a spare room
- a closet
- garage
- grow box
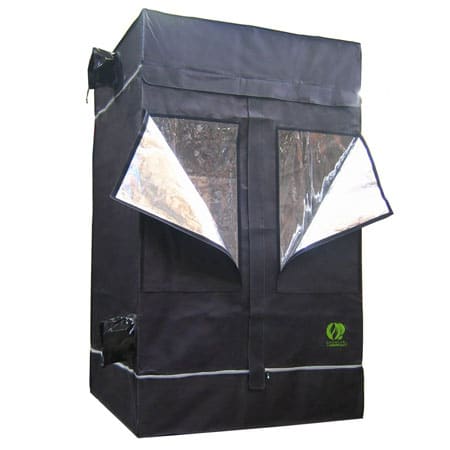
- grow tent ← Best choice*
- extra bathroom
- even the inside of a computer case!
Though I recommend a Space Bucket instead 🙂
* I believe grow tents are the best grow space for new cannabis growers. You simply need to decide how big a grow tent you should get for your space, and you’ve already given your plant so much that will improve their environment for better growth. Grow tents are cheap, effective, and will save you a lot of trouble. A quality grow tent is light proof, has reflective walls, contains built-in options to vent heat, a place to hang your lights, and waterproof floors for spills (so you never end up with water on your floor). A nice grow tent looks doesn’t always look like a grow tent to someone who doesn’t know what one looks like (I’ve had someone ask me if my grow tent was where I hung my clothes), but it contains many features that will help your cannabis plant thrive while reducing your work. It is often less expensive to get a quality grow tent than to try to make an effective grow space or grow box on your own.
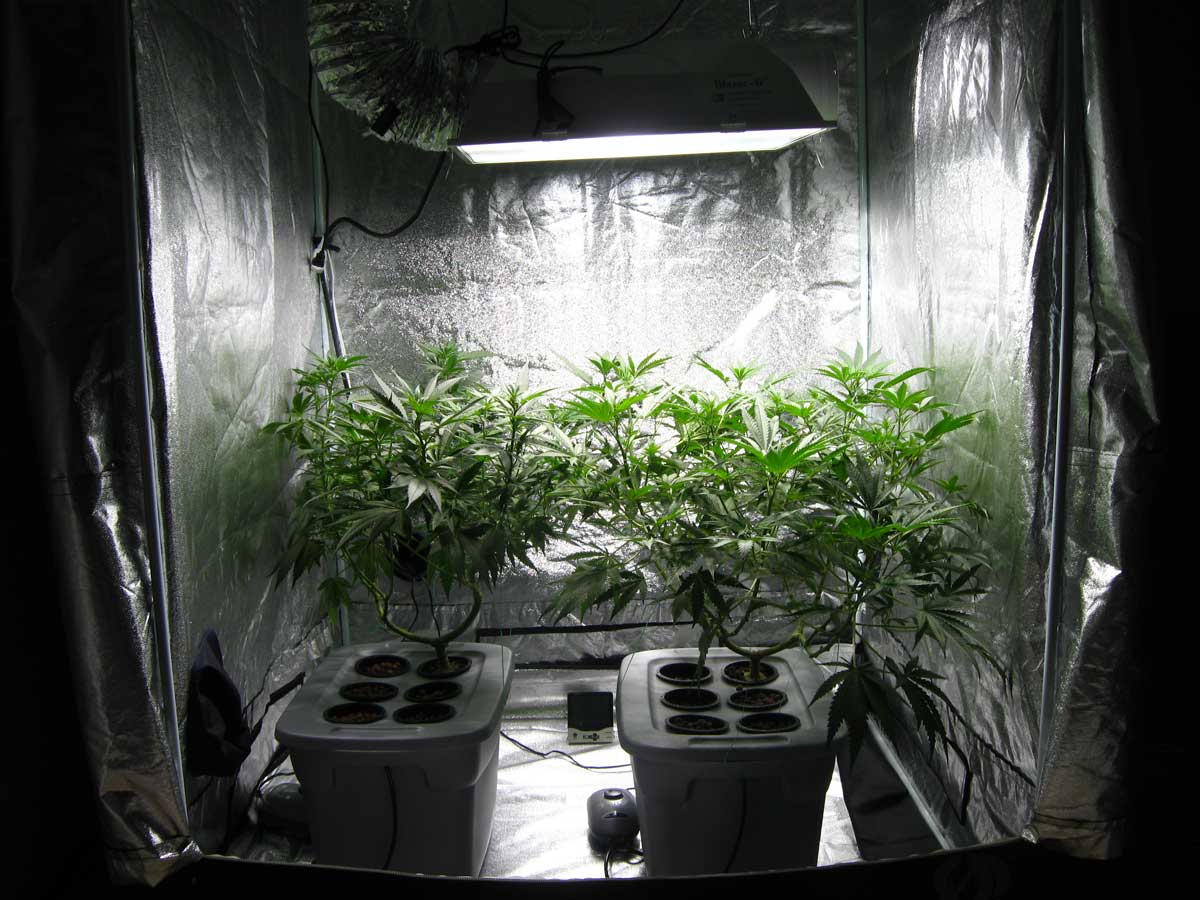
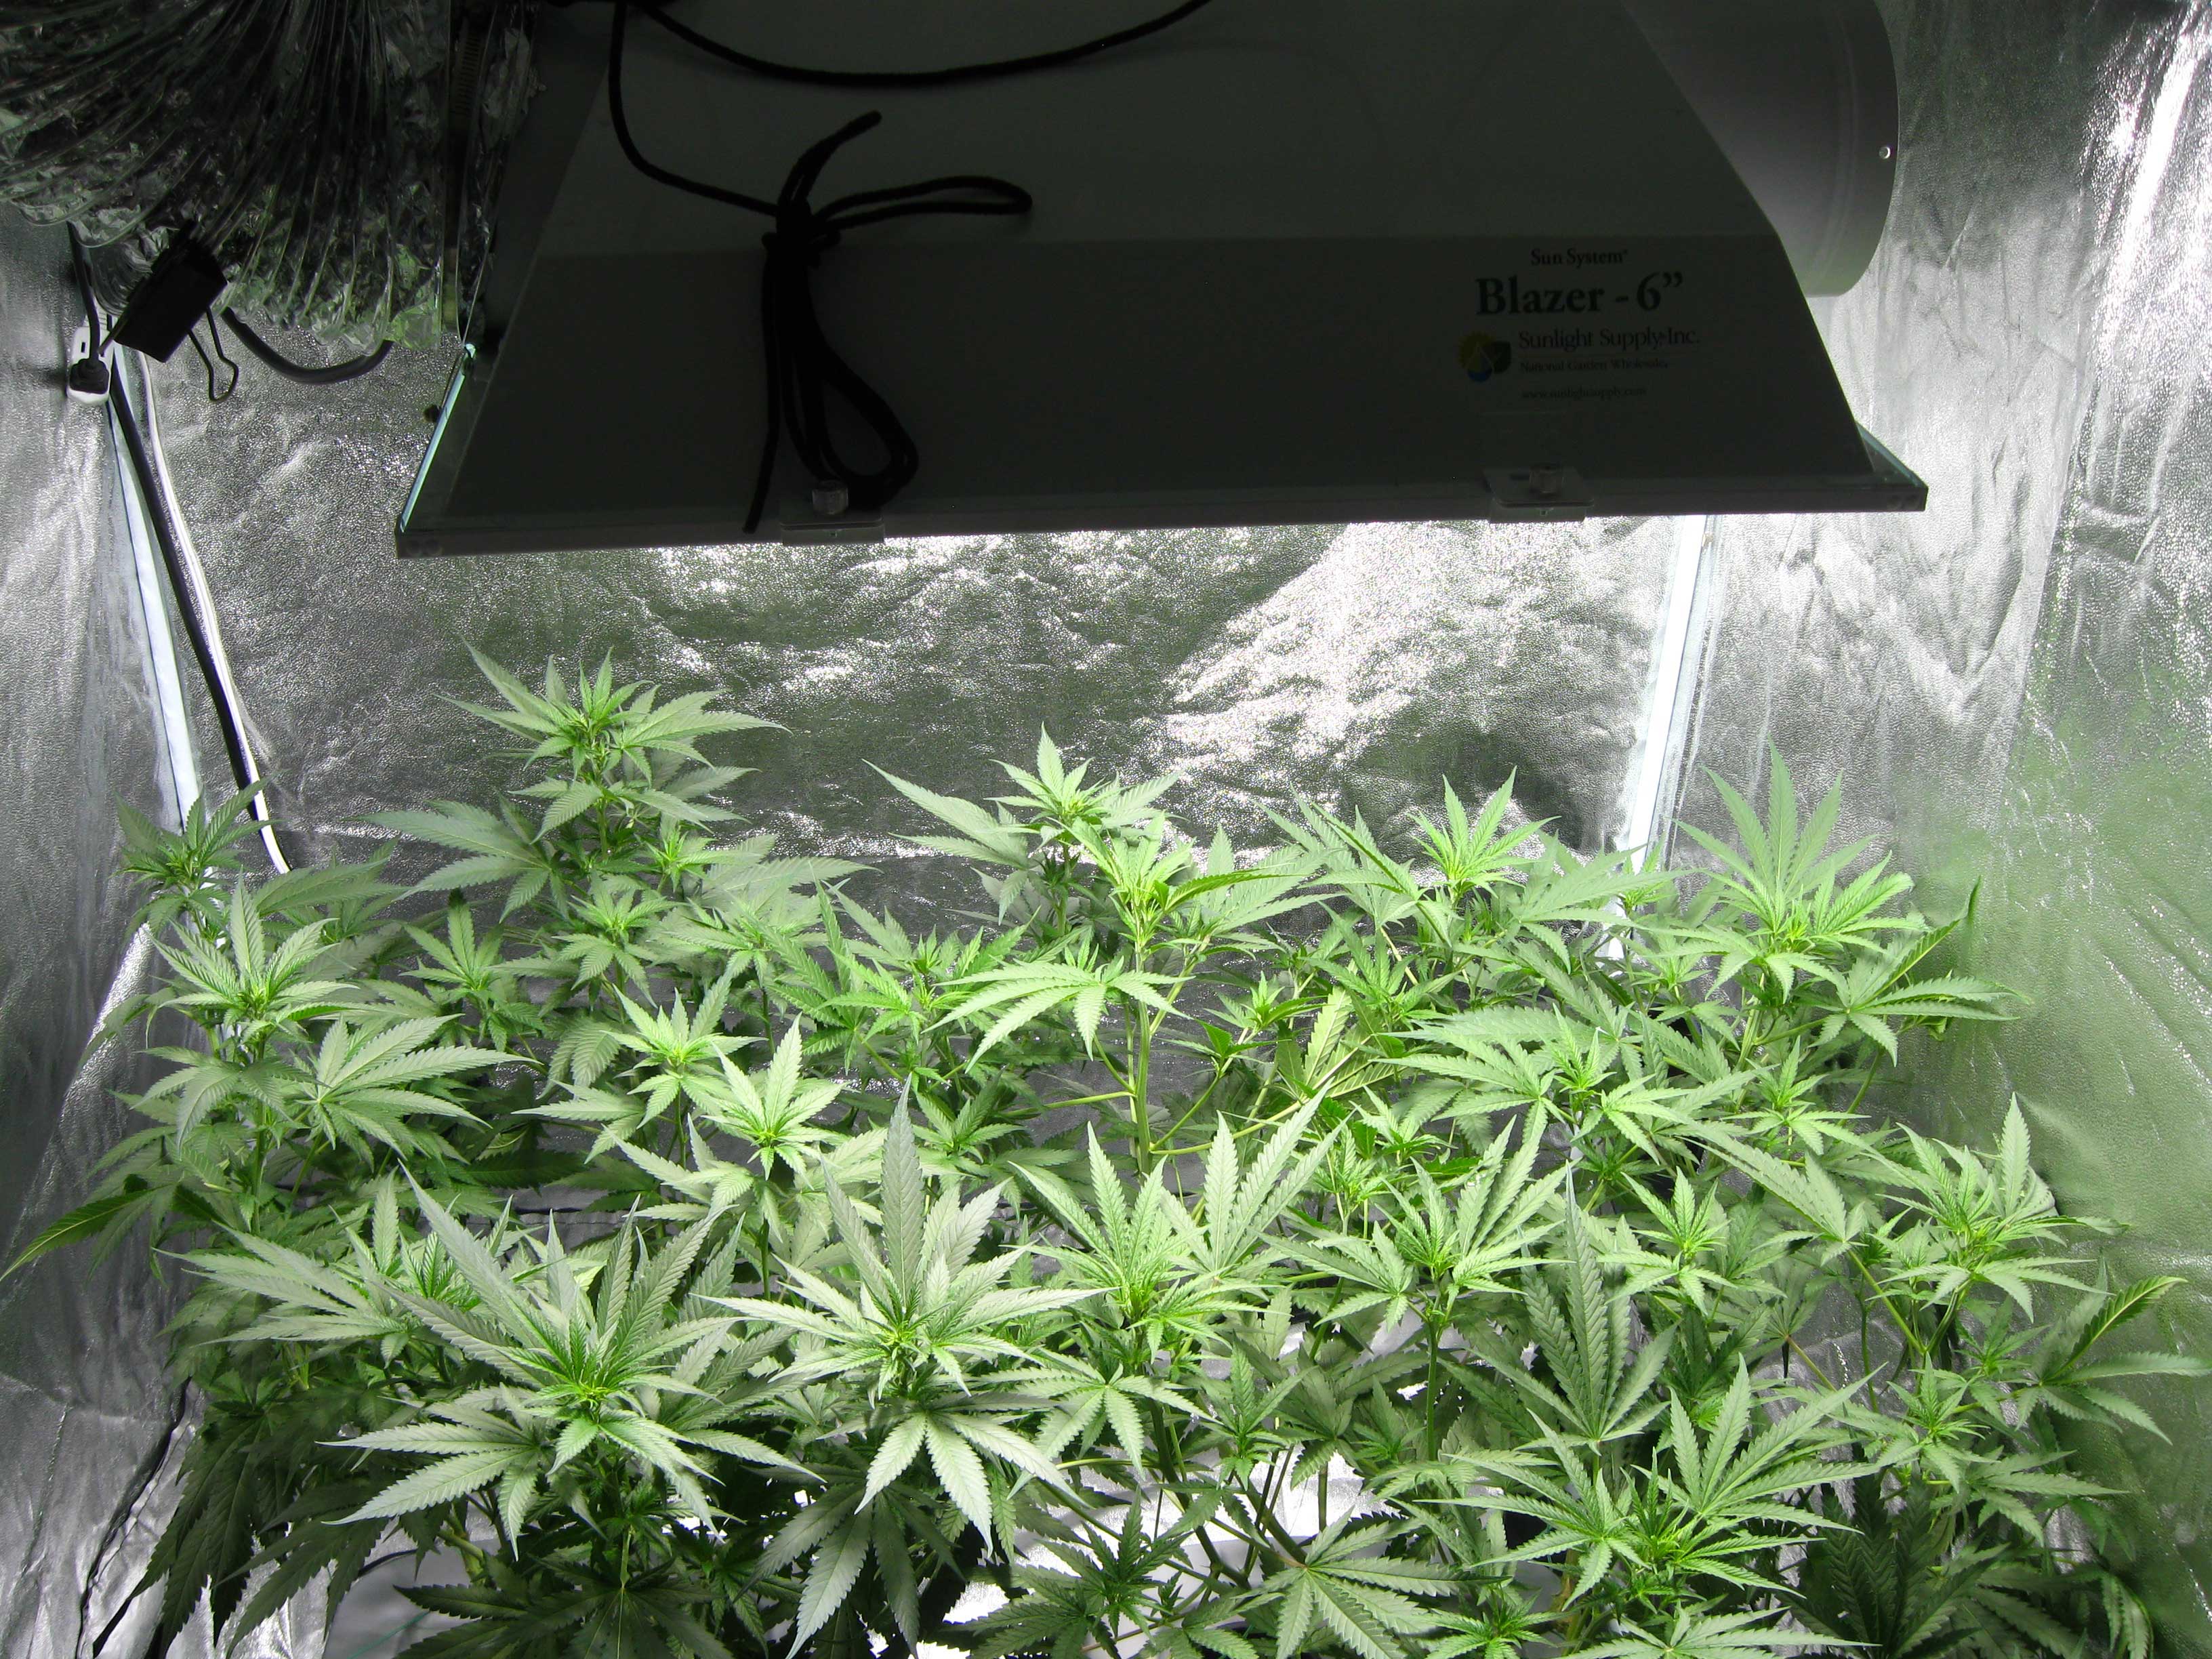
Here’s the same grow tent as above, but with cannabis plants inside:
When thinking about where to grow indoors, you should also consider the temperature of your grow space (and remember your temps will likely rise once you have your grow lights running!).
Young growing cannabis plants grow fastest when temps a bit warmer, in the 70-85°F (20-30°C) range.
 When plants are a bit older, in the budding/flowering stage, it’s best to keep temps slightly cooler, around 65-80°F (18-26°C) to produce buds with the best color, trichome production and smell.
Because temps are so important, it’s best to be able to have some amount of control over the temperature of your grow area. When growing indoors, your grow lights will give off heat. The more powerful your lights, generally the more heat they give off.
If you’re growing just a few plants in a grow tent or box, usually you can install a fan to pull hot air away from the hot lights and out a window to keep things cool enough.
Learn more about grow room temperature
https://www.growweedeasy.com/temperature
Outdoors
Growing cannabis outdoors is cheaper to get started outdoors since you probably don’t have to get grow lights or create an indoor grow area, though you do have to worry about privacy/stealth, possible pollination, people stealing your plants, bugs, deer and other unexpected outdoor visitors.
If you pick the right strain and live in a good environment, it will likely be cheaper to grow outdoors, since you don’t have to provide as much for your plants. The sun and mother nature will do a lot of the work for you.
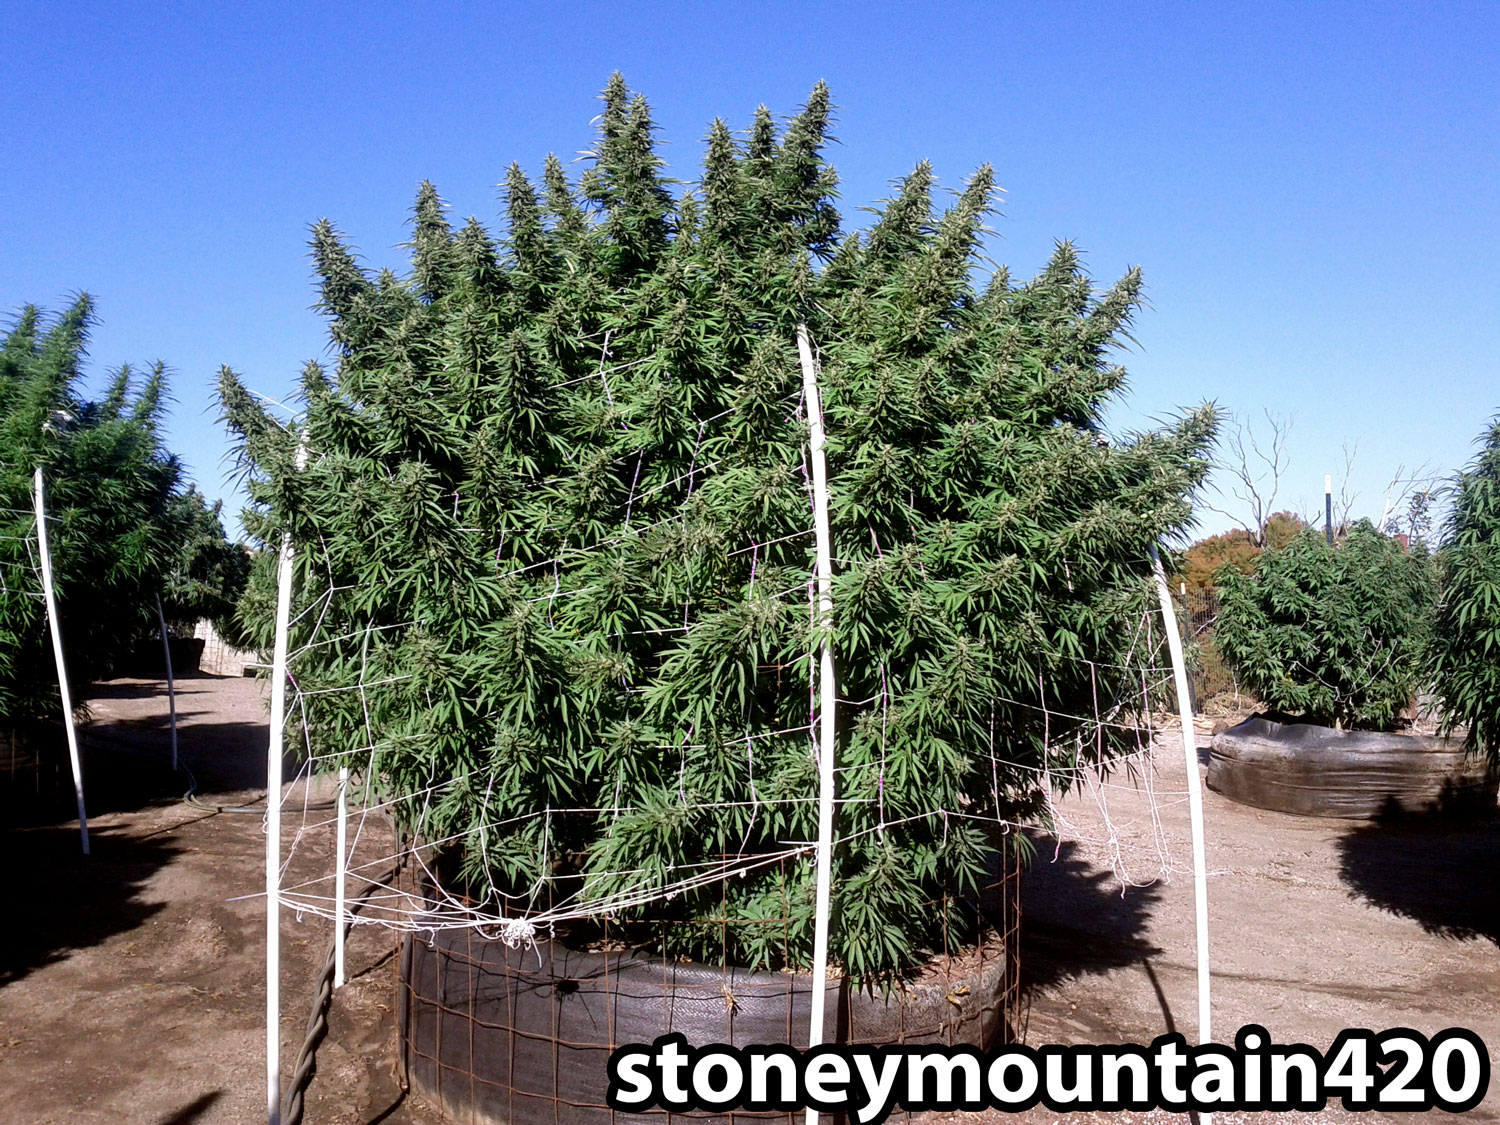
And when you’re growing outdoors, you can produce plants like this…
Of course when you’re growing outside, it’s not always possible to control the environment perfectly. If it’s dry, you will need to water your plants. If it’s too rainy, you need to protect your plants from getting overwatered.
When it comes to temperatures, a good rule of thumb about cannabis plants is if it’s too hot for you, it’s probably too hot for your plants. And just like humans, cannabis plants can die if exposed to freezing temps.
So if you know it’s going to be extremely hot or cold where you live, you may need to take extra steps to protect your plants from the elements, like setting up a small greenhouse.
More About Indoors vs Outdoors
https://www.growweedeasy.com/indoors-vs-outdoors
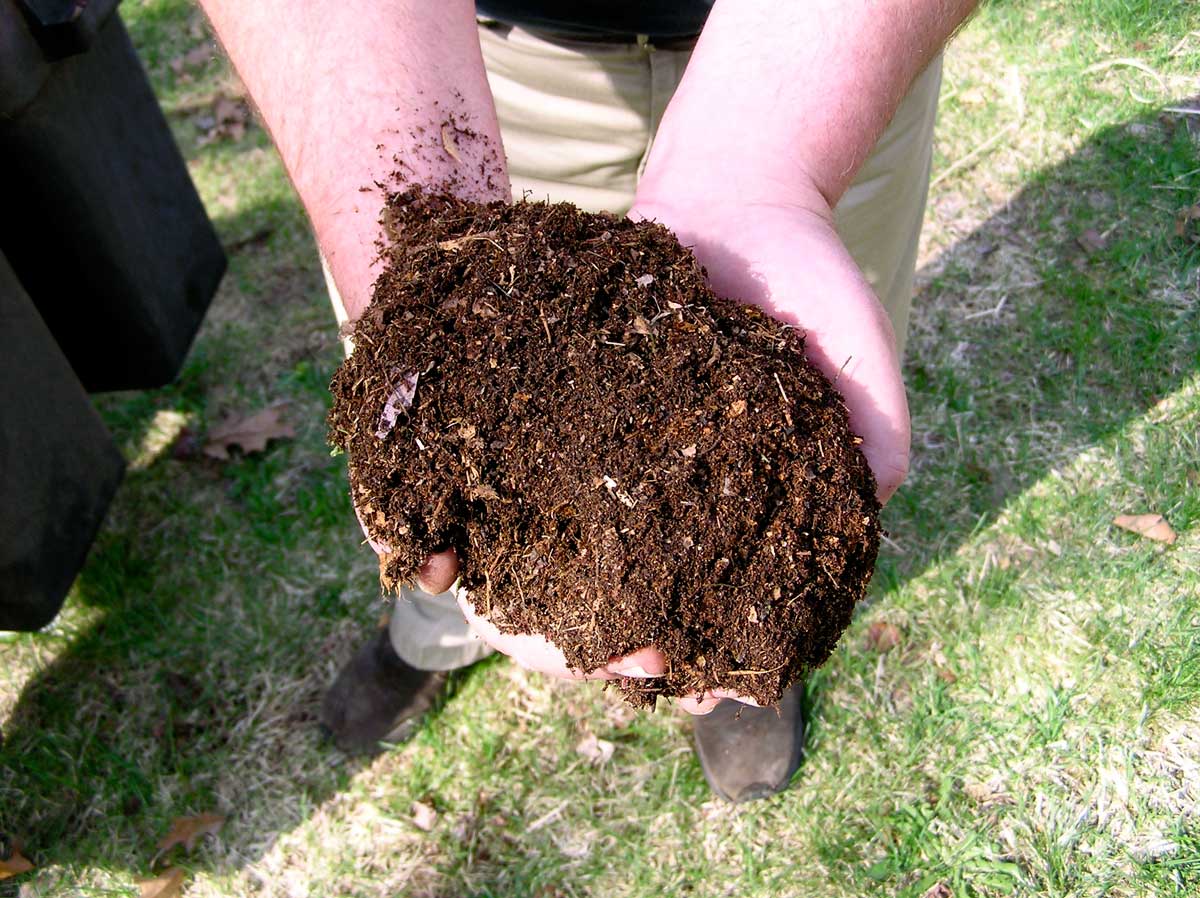
Many new growers instantly think of growing their cannabis in soil.
Soil is the growing medium that most people are familiar with, and one of the most common growing methods, but it’s not the only one.
Common Cannabis Growing Mediums
- Soil ← Most Common, Intuitive, Great Flavor in Buds
- Inert (Soilless) ← Intuitive, Faster Growth than Soil
- Hydroponics ← Fastest Growth, Biggest Yields, Potency
You can successfully grow cannabis plants in soil and other sorts of non-soil (soil-less) mediums, or you could grow your plants directly in water or even in moist air!
Read full tutorial: Soil or Hydro?
https://www.growweedeasy.com/soil-vs-hydro-cannabis
Each growing medium that you use will have different care and watering requirements. I will talk about some of the different options to help you choose the growing medium that’s right for your grow area and experience level.
The most important thing is to choose a growing medium that makes you excited!
Is it your first cannabis grow?
- First Grow, Never Grown a Plant in Your Life
- First Grow, Already Have Soil or Gardening Experience
- I Already Have Grow Experience
First Grow, Never Grown a Plant in Your Life
Recommended growing mediums (go with your instinct!)
- Soil
- Soilless
- Hydroponics
If it’s your first cannabis grow, and you’ve never gardened or grown a plant, it’s okay. Maybe you have a “black thumb” and every plant you’ve ever grown has died.
That’s exactly how I was before I started growing. I managed to kill every plant that ever made it into my possession, even though I was trying my best. I somehow even managed to destroy other people’s plants, with accidental over or under-watering. Sometimes it seemed I just looked at a plant the wrong way and it would dry up and dry.
Even if you’ve never grown any plants before (like I hadn’t) you can still grow cannabis successfully. This website will teach you everything you need to know to breeze through your first harvest.
You already have what it takes to grow cannabis as long as you are willing to the follow step-by-step instructions provided here on how to grow weed, almost like following a cannabis growing “recipe,”.
Cannabis plants are weeds in the wild. All your plants need is the right conditions, and they will grow and make beautiful flowers you can harvest and dry for your own unlimited supply of bud.
As a grower, you can give your plants a better environment than they would ever get in the wild, and your plants will reward you with bountiful flowers.
The most important thing is to choose a growing medium that you feel excited about. Don’t be afraid to try the growing medium you really want, even if it seems like it may be too complicated! All growing mediums have their upsides and downsides, but they are all straightforward once you have the information you need to provide a perfect growing environment. Yes, even hydroponics!
First Grow, Already Have Soil or Gardening Experience
Recommended growing mediums (go with your instinct!)
- Soil
- Soilless
If you’ve grown in soil before, hydroponics may not be something you like unless you’re really interested (in which case, we will guide you). Take a look at a high-yielding hydroponic grow journal from my fellow grower Sirius to see if hydroponics might interest you.
Generally, most growers who have grown in soil tend to go with soil or soilless. When growing in soil, the cannabis will get nutrients from the soil itself. You may also provide extra nutrients in your water. With coco coir, you always provide the nutrients in the water. Other than that, the two methods are similar to each other. Soil is known for better taste, while soilless (particularly coco coir) is known for faster growth, bigger yields, and great potency.
If You’ve Grown Cannabis Before, Consider Trying Something New!
Already know which cannabis growing medium you want?
Just stick the seed in the soil and go. Choose a great soil for growing cannabis and you’re ready to get started.
If you feel certain that you want to grow in soil, do it! Soil is a great way to grow cannabis and there are many different types of soil growing. For those who want something simple and quick to get started, you can use high-quality potting soil and use specially made soil nutrients to give your plants exactly what it needs until harvest. You could also compost your own super soil, which is a relatively advanced way of growing that can be intimidating for new growers who’ve never grown in soil.
Some growers claim growing cannabis in soil produces the best smelling and tasting buds.
General Guidelines for Good Cannabis Soil
- No “extended release” or “slow release” nutrients (especially avoid the original Miracle-Gro soil! It will prevent proper budding in the flowering stage)
- If you use regular high-quality potting soil that isn’t formulated for a plant like cannabis, you can use specially-made soil nutrients during the grow (especially during the flowering stage) to help make sure your plant gets everything it needs to make buds, without having to worry about getting super special soil
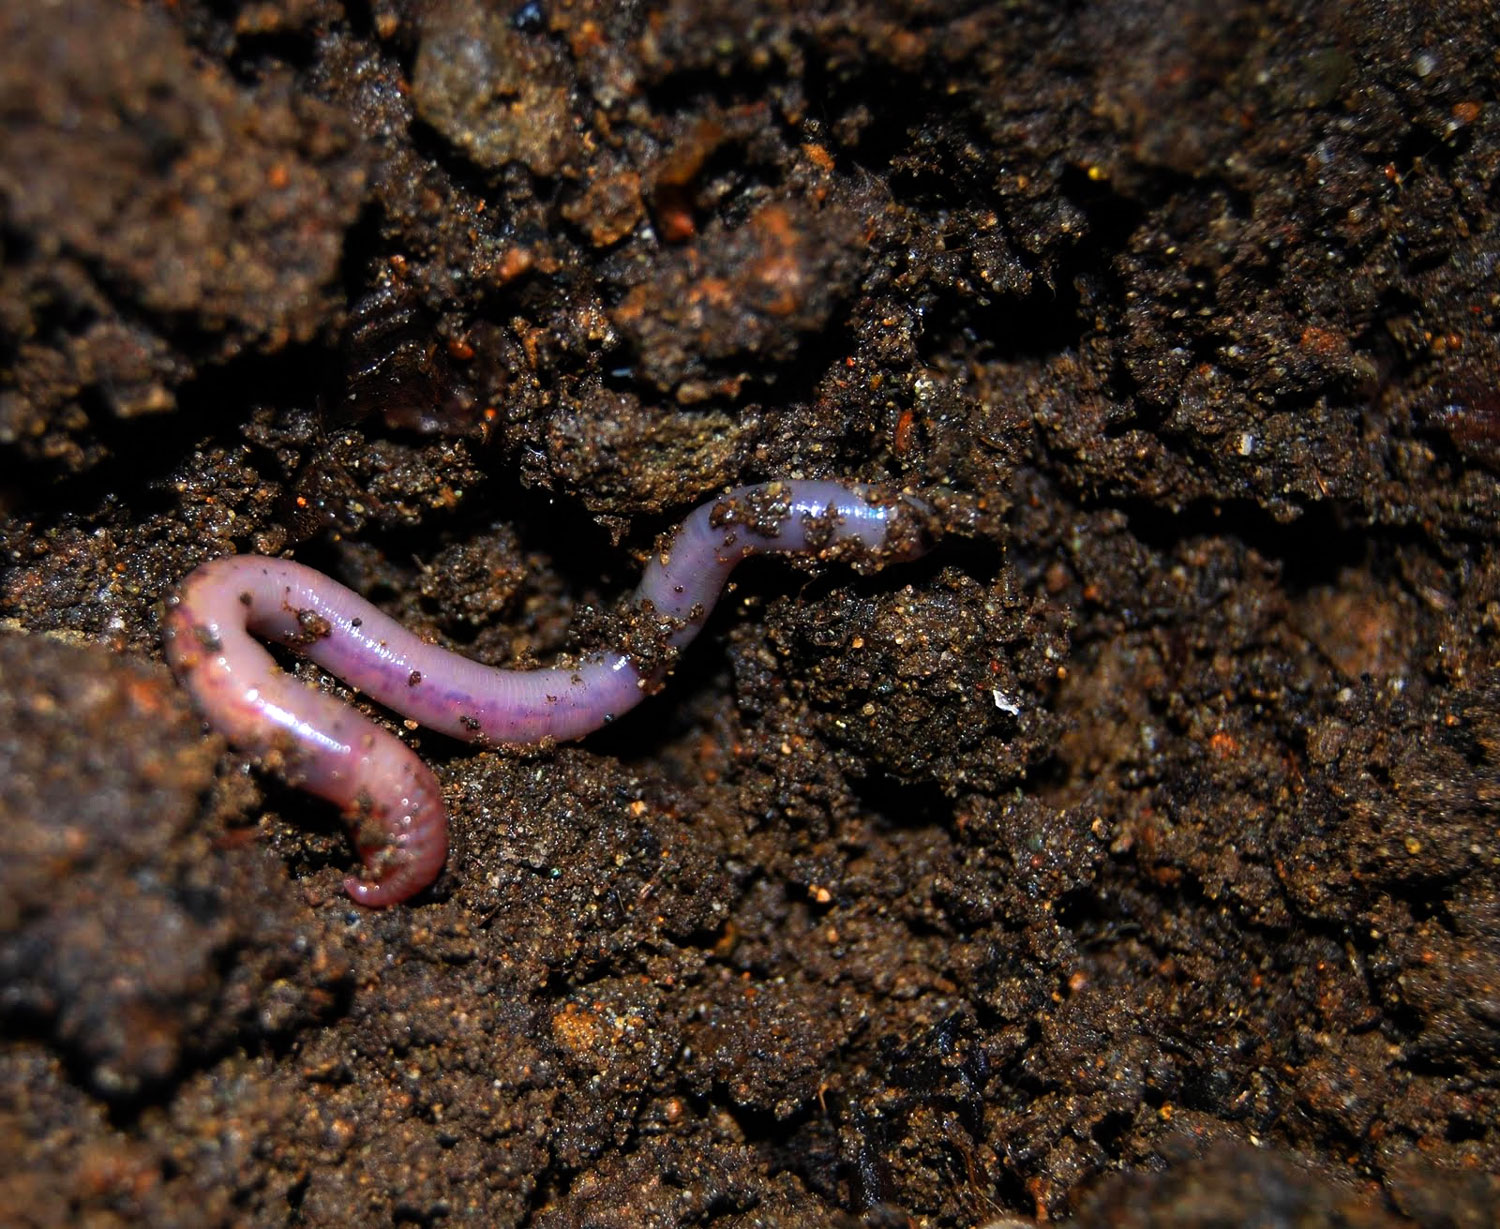
- A great soil mix contains ingredients like… coco fiber (i.e. coco coir, coca fiber), perlite, compost, earthworm castings, bat guano, fish meal, crab meal, bone meal, blood meal, kelp meal, peat moss, pumice, composted forest humus, humic acid, sandy loam, soybean meal, alfalfa meal, rock dust, Mycorrhizae fungi, etc
Recommended Soil Brands
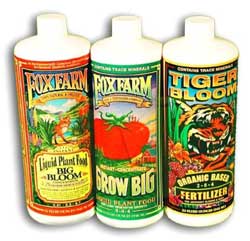
- Fox Farms*
- Roots Organics
- Make Your Own Super Soil (advanced)
*About Fox Farms soil for growing cannabis: The Fox Farms company offers several different types of soil that contain different mixes. “Ocean Forest” soil works well by itself for the whole grow, but it may be a bit too strong for young seedlings and cause some light nutrient burn to young plants until they get a little bigger. After they’ve grown bigger, the plants will no longer experience nutrient burn from Ocean Forest. If this is not acceptable, it’s often recommended to mix Ocean Forest with one of the other, lighter soil mixes offered by Fox Farms. A great mix is their Ocean Forest soil mixed with half “Happy Frog” or “Light Warrior” plus about 30% perlite.
Get your nutrients, plant your seed, and start watering! Get the same experience as growing cannabis in soil with nutrients, except experience faster growth and bigger yields.
 Soilless growing uses an inert medium like coco coir, perlite, vermiculite, etc to grow cannabis plants.
These growing mediums do not have any nutrients, instead you hand-water the plants just like you would in soil, and provide all the nutrients in the water. One of the downsides is there is less of a “buffer” with soilless growing mediums than with soil, which contains nutrients of its own.
Soilless growing is very much like growing in soil with added nutrients. It provides some of the benefits of both soilless and hydroponic growing. Many growers find soilless growing to be as intuitive as soil since both growing methods seem close to what we naturally observe in nature.
With specially made nutrients, the soilless growing experience can be just like growing in soil, but successful soilless growers will be rewarded with faster growth and bigger yields.
Some Possible Soilless Mediums for Cannabis
- Coco Coir (coco, coco fiber) <– Most popular
- Vermiculite
- Promix
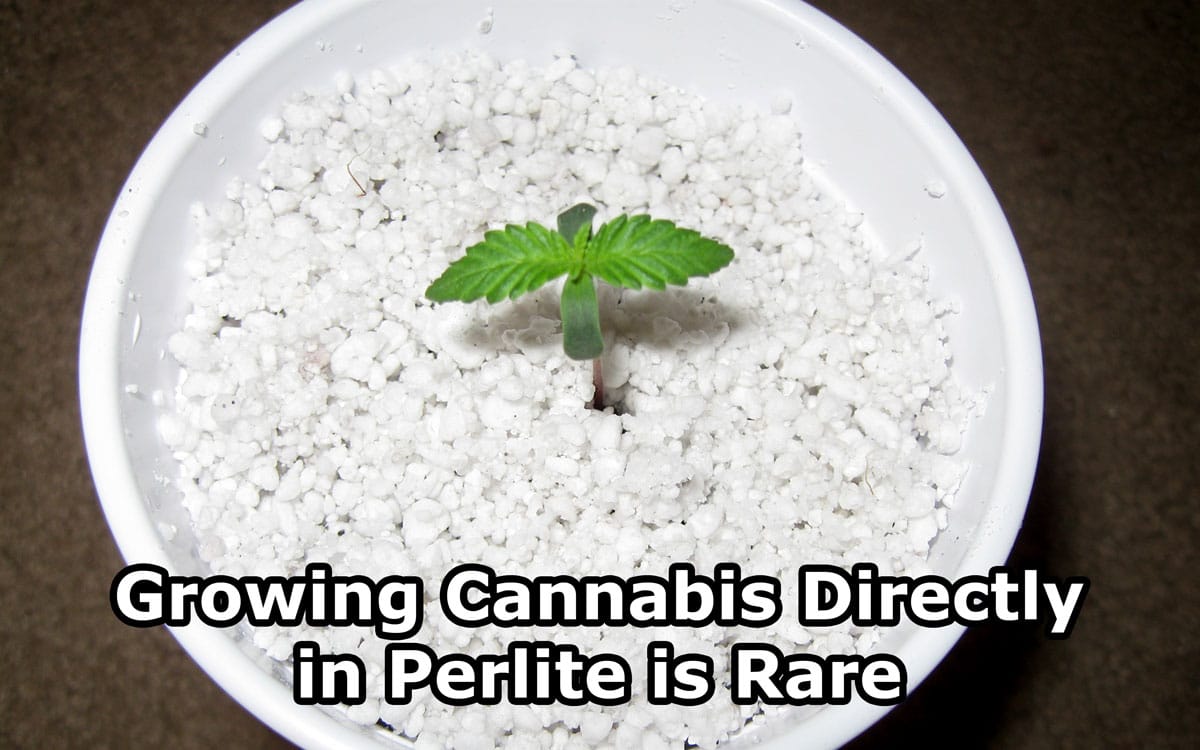
- Perlite*
* Perlite is occasionally used by itself as a growing medium, but is most often mixed with something else for better drainage and increased oxygen to roots. Perlite usually looks like small white pebbles, but each piece weighs very little. It almost reminds me of popcorn. Perlite is made from a “puffed up” type of volcanic glass and cannot hold onto much water. Many growers mix perlite with their soilless mediums or soil to add air and drainage, and some growers use perlite as a wick for wick systems.
While it can be done, growing cannabis in just perlite is rare. It’s difficult to get perlite to hold enough water, and other growing mediums are much easier to use. But perlite
is often mixed with other mediums or soil for growing cannabis.
Make Your Own Soilless Mix for Cannabis
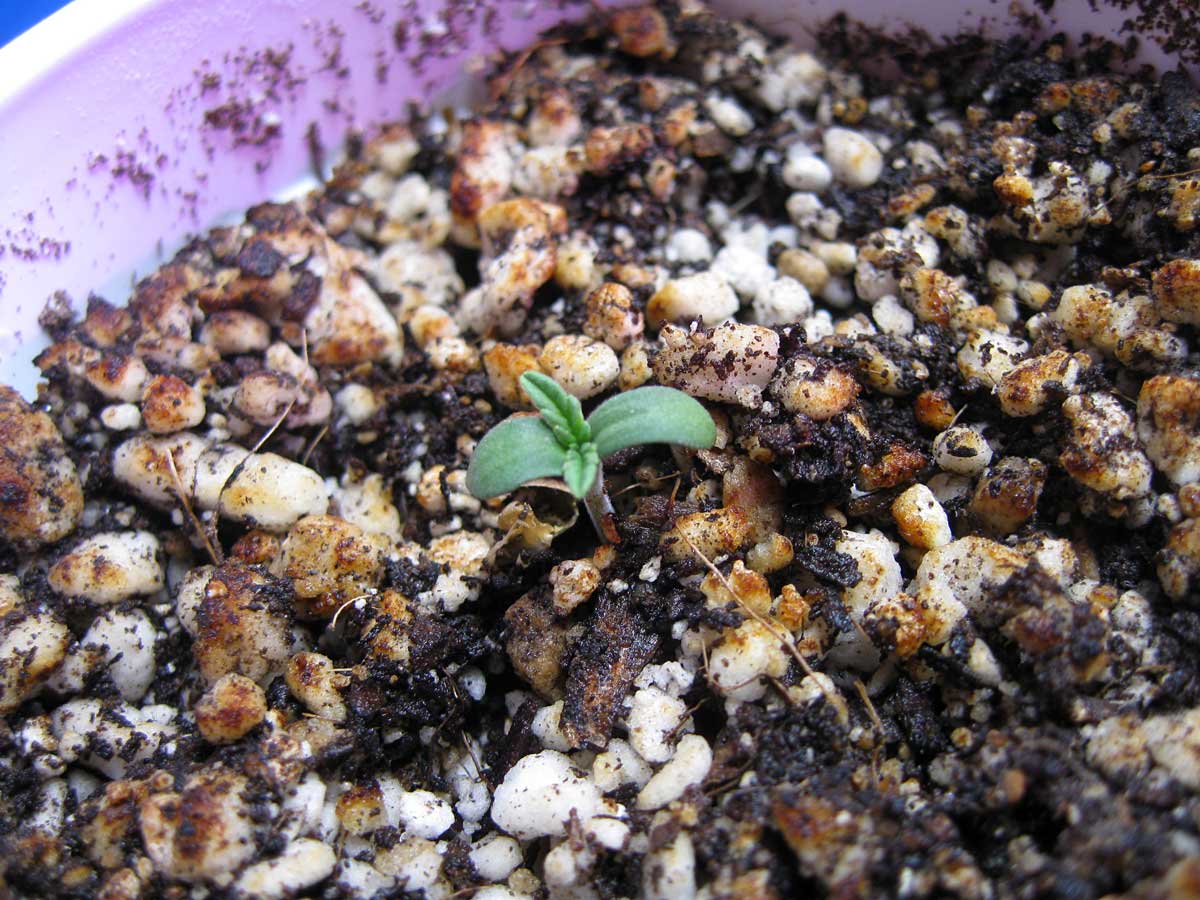
- 50-70% Coco Coir – Coco coir, made from the husks of coconuts, is a proven inert medium for growing cannabis. Like growing hydroponically, coco gets faster growth speed and cannabis yields, but coco can be hand-watered with nutrients, just like soil. Coco coir naturally contains a mix of properties that makes roots grow faster and healthier, and the water-holding properties of coco coir help ensure water is always available to thirsty roots. One of the easiest and most popular soilless growing mediums for cannabis.
- 30-50% Perlite – The perlite adds extra drainage to coco for ease of watering. Perlite creates small spaces of air in the coco coir, which prevents overwatering and gets more oxygen to the roots. Cannabis roots love oxygen, and perlite lets them get it while the coco coir makes sure roots always stay wet.
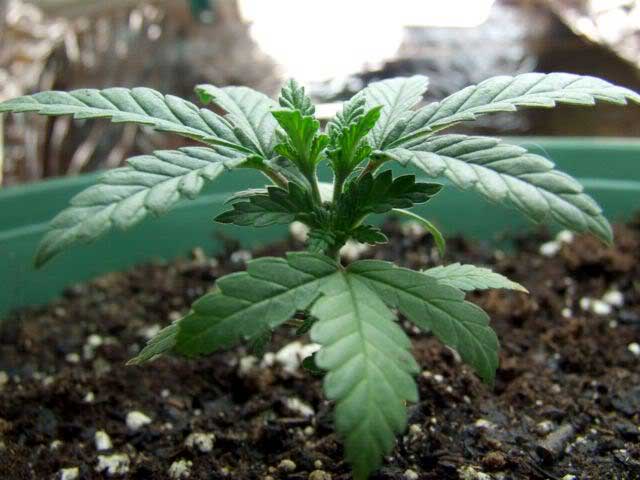
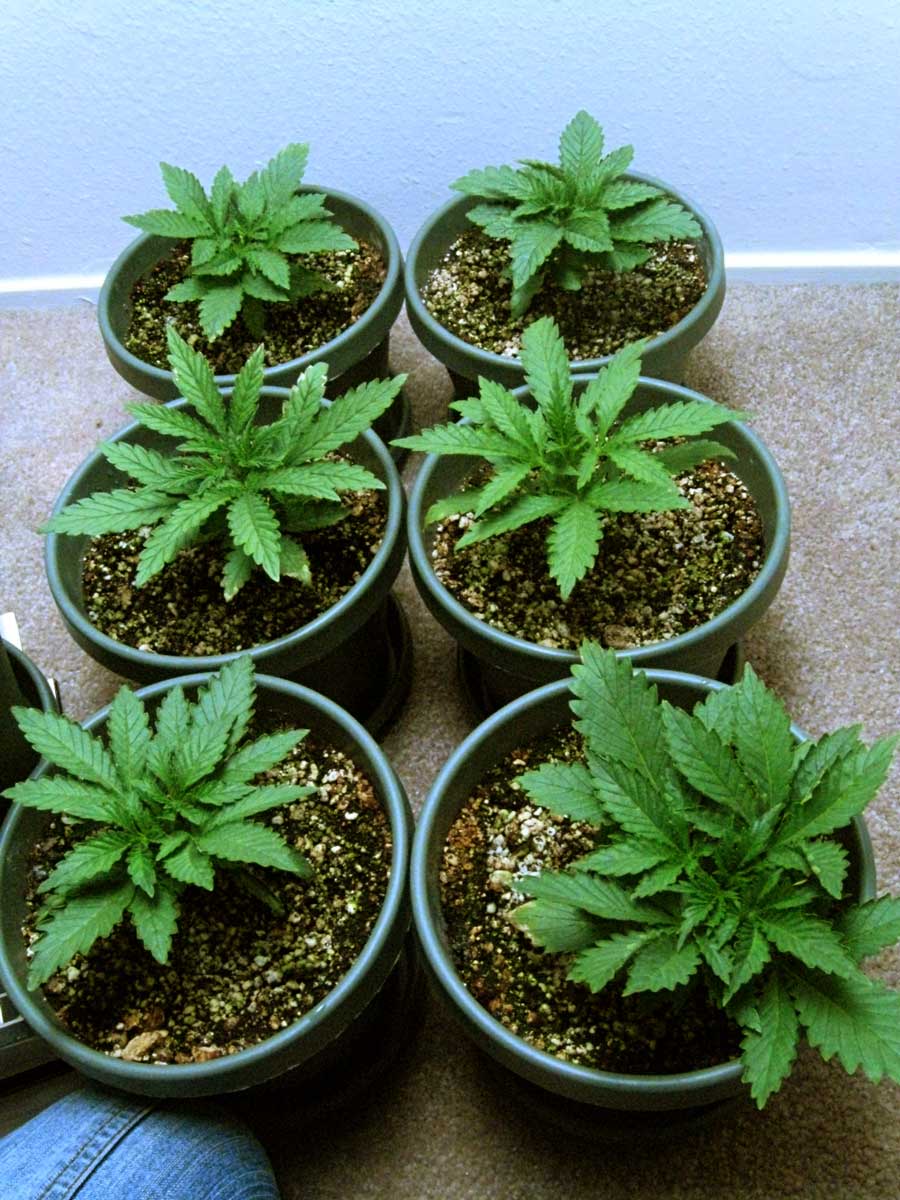
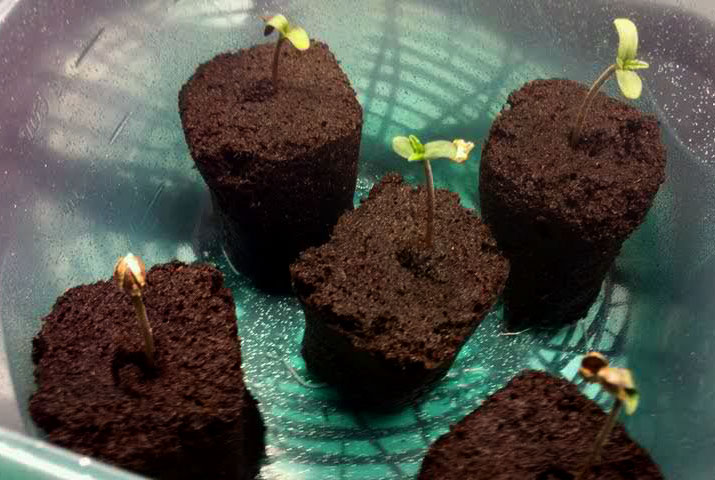
Here’s a Seedling Growing in the Above Coco/Perlite Mix
Sometimes coco coir is already broken up to use ready directly for planting (bagged coco potting mixes include Canna Coco Coir). But most of the time coco coir comes in bricks. All coco coir should be rinsed well before you start your grow (though some packages states the coco has been washed and pH’ed). Brick coco especially needs to be rinsed well to remove extra salt. Bricks are usually much cheaper than the bagged coco coir because each brick is easier and lighter to transport – you add the water at home. Make sure to let a coco coir brick sit in water for at least an hour first – this way you know it’s fully expanded before you start rinsing.
Once you have expanded and thoroughly rinsed your coco coir, it should easily break into a consistency that is a bit like dark rich soil. At this point, mix your coco with perlite; use more perlite in a humid environment, less in a very dry environment. Once your coco and perlite are mixed you’re ready to go!
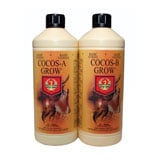
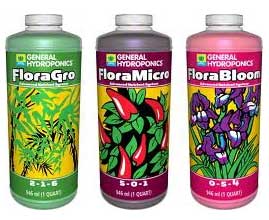
Coco coir has grown so popular as a growing medium for cannabis that now there are many brands of specialized nutrients for that exact combo.
Find Coco Coir Nutrients for Growing Cannabis
https://www.growweedeasy.com/cannabis-nutrients#growing-coco-coir-nutrients
What Container Should I Use to Hold My Growing Medium?
All containers for growing cannabis need to have drainage holes so water can drain out the bottom
Deeper containers are better than shallow ones – roots tend to grow down and can get rootbound in a shallow or too-small container.
Read the Complete Tutorial on Choosing the Right Cannabis Pot (size, type, etc)
Get a container that provides plenty of oxygen to the roots for faster growth!
Recommended Containers for Growing Cannabis
- Standard garden or nursery pot with drainage holes on the bottom
- 5 gallon bucket (drill your own drainage holes out the bottom)
- Fabric Pot (“Smart Pot”) ← One of the best containers for growing marijuana
- Air pot – get more air to your cannabis roots
Fabric Pots are Great Containers for Growing Cannabis
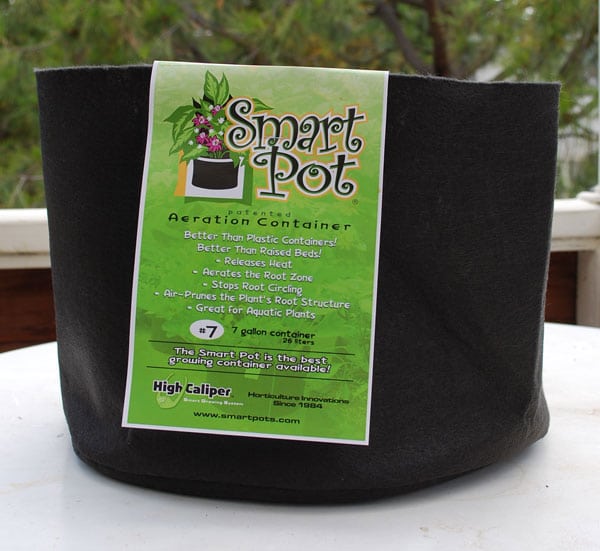
There are popular brands of fabric pots like “Smart Pot,” but you can also make your own fabric pot at home. The great thing about these containers is they get more air and oxygen to the roots, which encourages faster growth.
Which Size Pot Should I Use?
When growing cannabis plants in a container, you have to choose the size of your pot.
A general guide is to have about 2 gallons per 12″ of height. This isn’t perfect, since plants often grow differently, but this is a good rule of thumb.
When in doubt, get a bigger final container size as opposed to a smaller one. Plants that get rootbound from being in a too-small container will grow more slowly and be prone to problems.
It’s not good to transfer plants during the flowering/budding stage, so you want to have your cannabis plants in their final container at least 2 weeks before the beginning of flowering/budding.
How to Transplant Cannabis Without Stress
Final Container for Desired Plant Size – General guide
12″ ~ 2-3 gallon container
24″ ~ 3-5 gallon container
36″ ~ 5-7 gallon container
48″ ~ 6-10 gallon container
60″ ~ 8-10+ gallon container
Choose your setup, get your nutrients, and germinate your seed! Get ready for incredibly fast growth, great yields, and amazing potency.
If you want to grow hydroponically, don’t worry that it’s too complicated – once you set up the right environment, growing hydroponically is just as straightforward as growing in soil. And you will be rewarded with faster growth, bigger yields, and the amazing potency of hydroponically grown buds. Growers who have trouble with hydroponics are usually victims of being given the wrong information. With proper setup and maintenance information, which is usually simple and easy-to-follow, you’ll be able to happily harvest every plant and reap the rewards of hydroponic gardening.
Benefits of Growing Hydroponic Cannabis
- Less Time to Harvest – Shorter vegetative stage gets you to harvest quickly
- Yields – Hydro grows consistently get bigger yields than growing cannabis in soil with the same setup
- Potency – Many growers claim hydro-grown cannabis buds are more potent than soil-grown ones, and this seems to be true from my experience
Intro to Growing Hydroponic Cannabis
https://www.growweedeasy.com/soil-vs-hydro-cannabis#cannabis-hydro
One of the more common hydroponic grow setups for growing cannabis is known as a “DWC” or “deep water culture” system.
Here’s a diagram showing how DWC works for growing hydroponic cannabis.
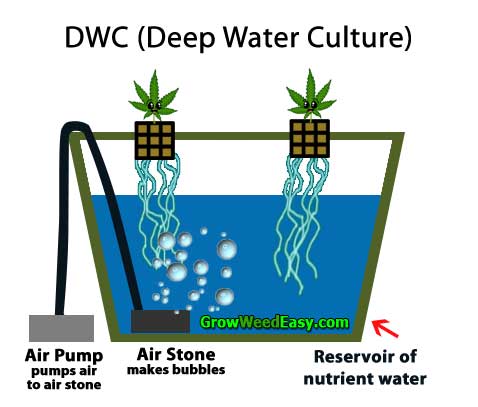
In DWC, the roots are located in a nutrient reservoir full of water. Oxygen is provided to the roots by bubbling air through the water with an air pump. There are lots of different variations of the DWC method, including top-fed DWC.
In all hydroponic methods done right…
- More oxygen to the roots produces much faster growth than soil
- Providing a lot of oxygen at the roots is more important than lots of water – just make sure roots never actually get dry
- Keep nutrient levels on the low side in hydro for fastest cannabis growth
- After setup, tending to your plants in hydro is straightforward
Light For Growing Cannabis: Do I Need Indoor Grow Lights?
 If growing cannabis outdoors, the sun is generally all the light you need. Outdoor growers need to make sure that the plants are in a sunny spot where they get plenty of sunlight throughout the whole day (8+ hours of sunlight a day for best results).
When growing outdoors, you will need to consider that nearly all cannabis plants need to be started (or put outside) in the spring and harvested in the fall.
If growing cannabis indoors, you will need to provide your plant with the light it needs to grow.
Upgrade Guide – Get Help Choosing Your Indoor Marijuana Grow Lights:
https://www.growweedeasy.com/grow-light-upgrade-guide
All Cannabis Grow Lights Need…
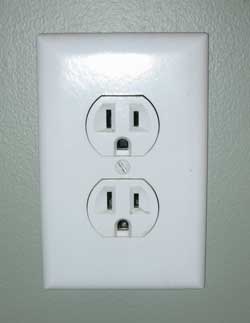
- Surge Protector – No matter which cannabis grow light you choose, make sure you get a surge protector
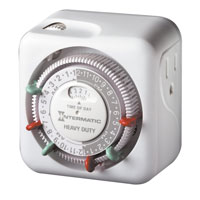
- Lighting Timer – All indoor grow lights should be put on a lighting timer – these timers will automatically turn your grow lights on and off for you. A mechanical one is shown below, and there are digital lighting timers as well. These are commonly found at hardware stores and have a variety of uses for non-growing purposes.
The most common types of indoor grow lights for cannabis are:
- LED Grow Lights
(most home growers)
- HID Grow Lights – MH & HPS
(if you can’t get LEDs, or grow space is cold)
- CFLs & Fluorescent Lighting
(only use if you can’t get LEDs or HIDs)
Complete Guide to All Indoor Cannabis Grow Lights
https://www.growweedeasy.com/grow-lights
High Intensity Discharge (HID) lights
This class of grow lights includes High Pressure Sodium (HPS) and Metal Halide (MH) grow lights. Considered the “gold standard” for growing weed, these lights are powerful and proven to provide great yields. The bigger models use quite a bit of energy and produce heat that may need to be vented from your grow space, but the lower-wattage models of HID lights are much more manageable for the small indoor grower.
Most common HID bulbs:
- MH – Metal Halide Grow Lights – used for the vegetative stage, makes white/blue light
- HPS – High Pressure Sodium Grow Lights – used for the flowering stage, makes yellow light
- (New) Ceramic Metal Halide (Various names for this technology include CMH grow lights, Light Emitting Ceramic, LEC grow lights and LECs) – used from seed to harvest


![]()
Pros of MH/HPS
- Most efficient grow light – MH/HPS/LEC grow lights produce the best yields of any grow light (when yields are compared to electricity used)
- Cheap setup – MH/HPS/LEC are one of the less expensive cannabis grow light options, especially considering the yields; HIDs provide a lot of wattage and light for your money. Many MH/HPS kits comes with everything you need to hang the lights and turn them on immediately
- Easy and intuitive to use – just hang your lights and start growing; cooling options are often built right on the reflector (for example an air-cooled hood)
- Lots of tutorials – HID grow lights have been used by the majority of indoor cannabis growers for decades, and nearly all HID grow lights are used exactly the same way. As long as you choose a size of HID grow light that fits your space, you don’t have to worry about a lot of difference between using different models
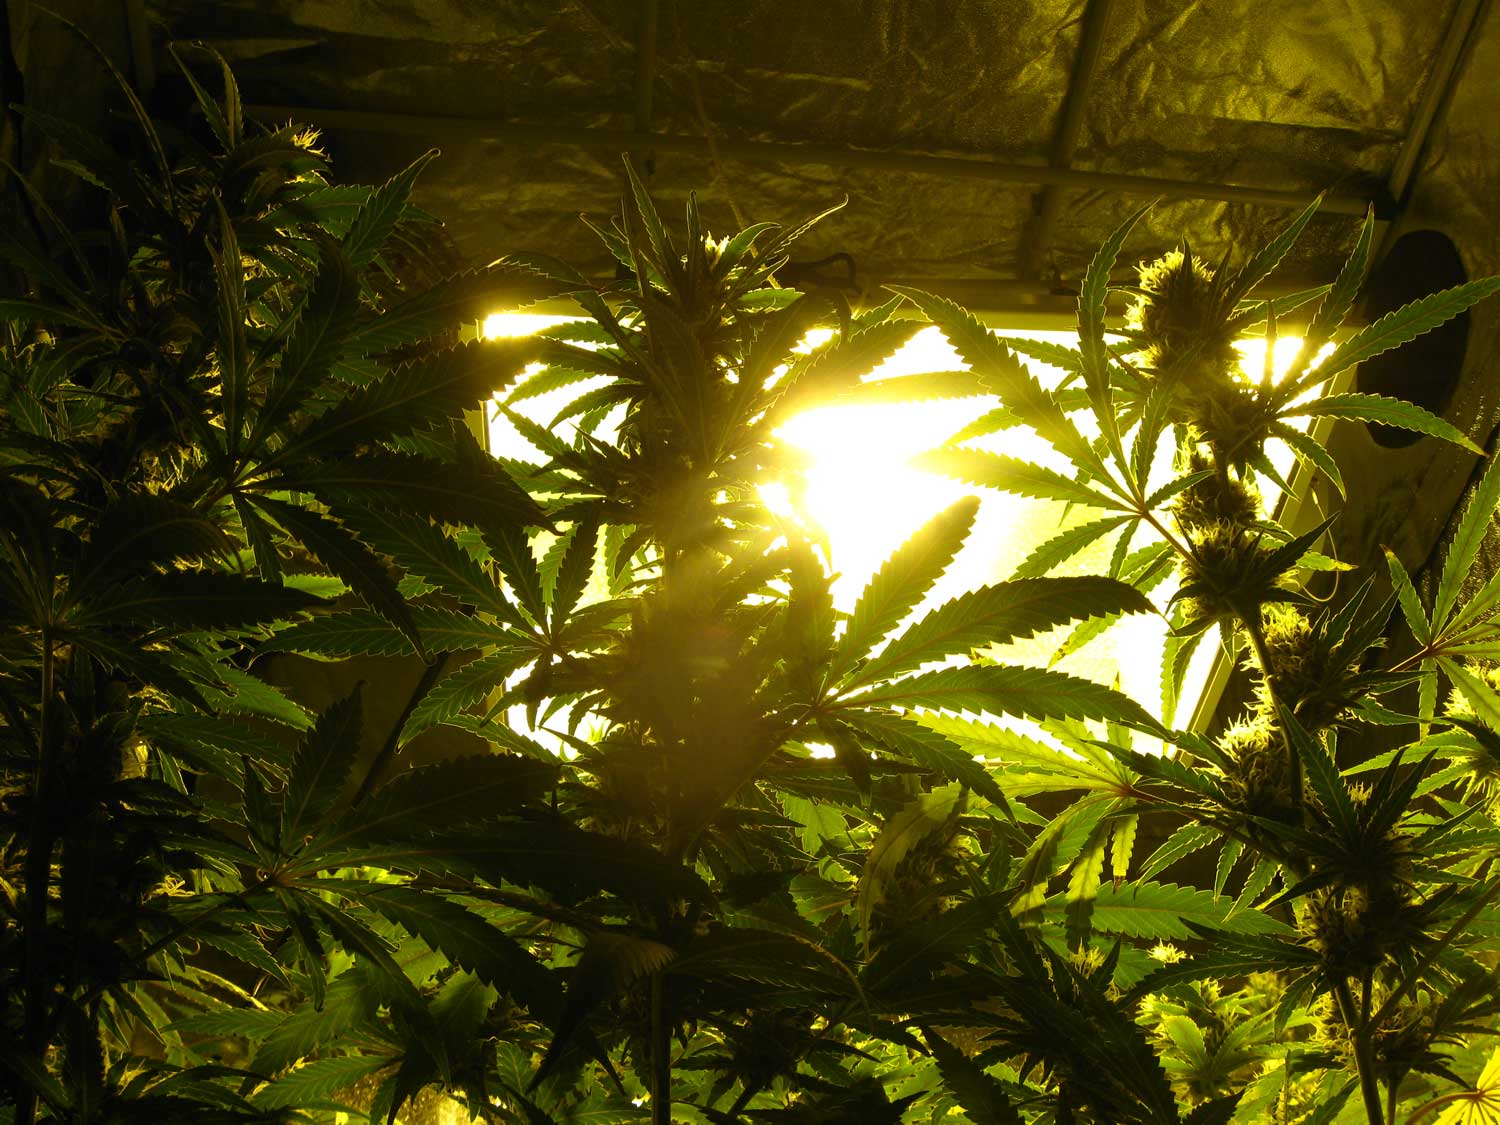
HPS grow lights produce yellow light
Cons of MH/HPS
- Heat – Bigger models need a way to exhaust extra heat (many growers vent heat outside with a fan)
- Height – Need at least 5 feet (1.5 meters) of height for small MH/HPS setups, and 6 or 7 feet (~ 2 meters) of height for a larger setup
Help Me Pick The Right HID Grow Light for My Space
https://www.growweedeasy.com/mh-hps-upgrade-guide
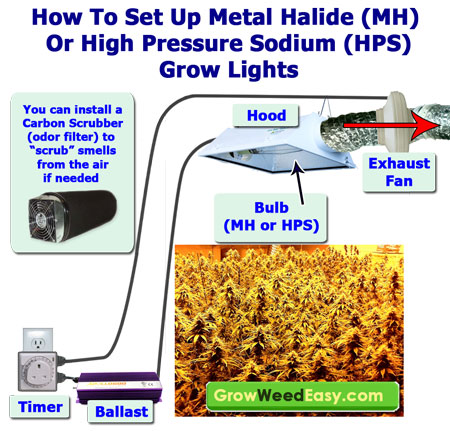
How do I setup my MH/HPS Grow Lights in a Grow Tent?
https://www.growweedeasy.com/hps-grow-lights-setup
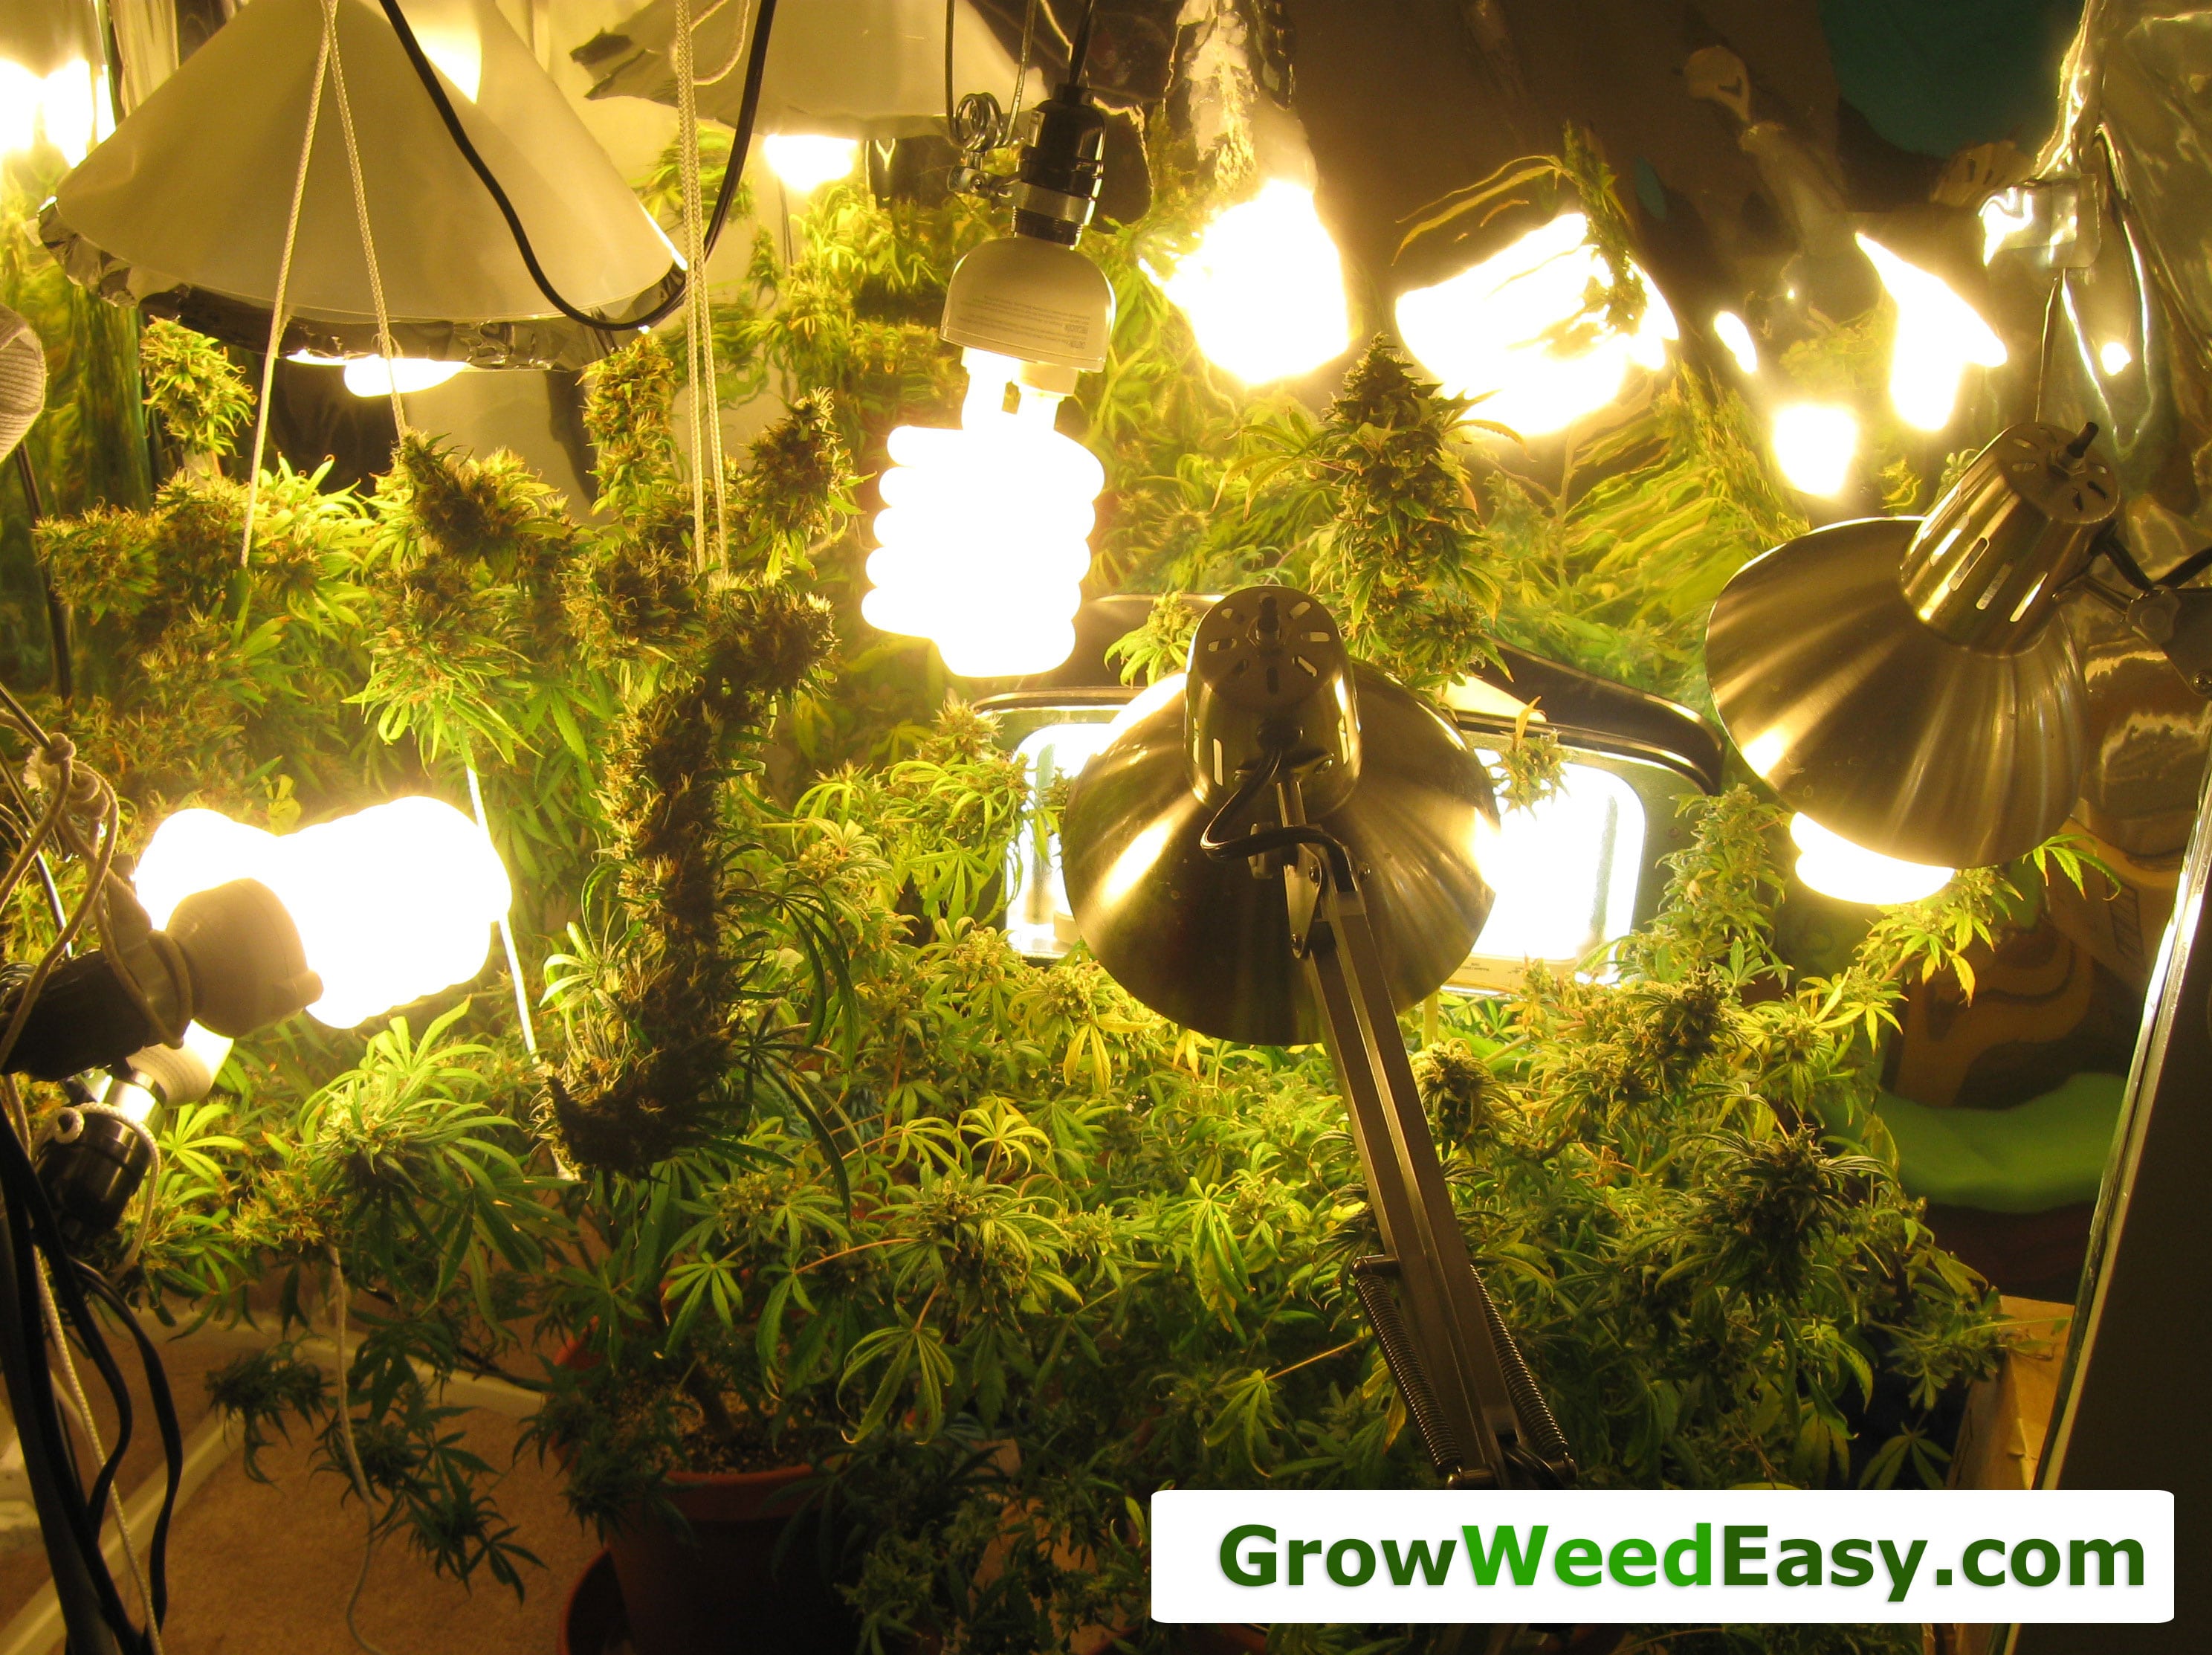
CFLs & Other Fluorescent Grow Lights
CFLs and other fluorescent lighting use a low amount of electricity and can grow young cannabis plants or clones, however, LED grow lights are better in almost every way, so only use fluorescents when LEDs are not available. Fluorescent grow lights can be used during the vegetative stage, which is the first stage of life. Growers must switch to more powerful grow lights in the cannabis flowering stage because because fluorescent lights are usually not bright enough to produce big yields (cannabis needs a lot of light during the flowering stage to make buds).
But in some places, LEDs or grow lights are not available. In that case, CFLs and fluorescent lights like the T5 can grow cannabis plants from seed to harvest if plants are trained to grow short and bushy. When used in the flowering stage, these grow lights usually don’t yield as much as other types of grow lights, but if they are the only choice, you can still harvest a few ounces at a time, even if you don’t have a lot of height or space to work with.
Two most common fluorescent grow lights for cannabis:
Pros of CFLs & Fluorescent Grow Lights
- Cheap setup – CFL and T5 grows can be started on a small budget. Many growers feel they are a great way to “get your feet wet” as far as growing without putting in a big initial investment.
- Low height needed – CFLs are sold as individual light bulbs and T5s are sold as several long tubes in a panel, but each needs only a few feet of height for successful growing
- Stealth – Some of the best high-stealth options because of low height needed for these grow lights. CFLs can be “plugged in” to almost any space and can be bought at the supermarket, which makes CFLs a great choice for a small stealthy setup like growing in a space bucket. A T5 panel is found at most garden stores and doesn’t even need a light socket, it can be plugged directly into a wall.
- Options for low heat, low electricity – Just a few CFLs or a single T5 doesn’t produce much heat or use much electricity
Cons of CFLs & Fluorescent Grow Lights
- Low yields – These grow lights tend to pull in very small yields unless you use a lot of them
- Heat – Each CFL bulb produces a bit of heat (especially the big bulbs), and growers who use many CFLs or fluorescent tubes will need to exhaust extra heat (usually by venting heat outside with a fan).
- Least efficient grow lights – When considering light produced (and yields) for electricity used, CFLs are the least efficient grow lights. T5s are made for gardening and do a bit better, but still not as well as other grow lights.
- Daily Maintenance – It can be difficult to position CFLs near plants, and lights need constant adjustment through the grow
Help Me Pick The Right CFLs for My Grow Space
https://www.growweedeasy.com/cfl-upgrade-guide
I actually started growing indoors with CFLs in coco coir, and they served me well. I believe CFL grow lights are a great choice for a small hobby grower who just wants to harvest a few ounces at a time. They are also a great way to get introduced to growing cannabis without making a big investment or using a lot of space.
Here’s a tutorial I wrote on how to grow cannabis with CFLs
(this is the method I used when I first started growing)
https://www.growweedeasy.com/easiest-grow-method-cfl-coco-coir
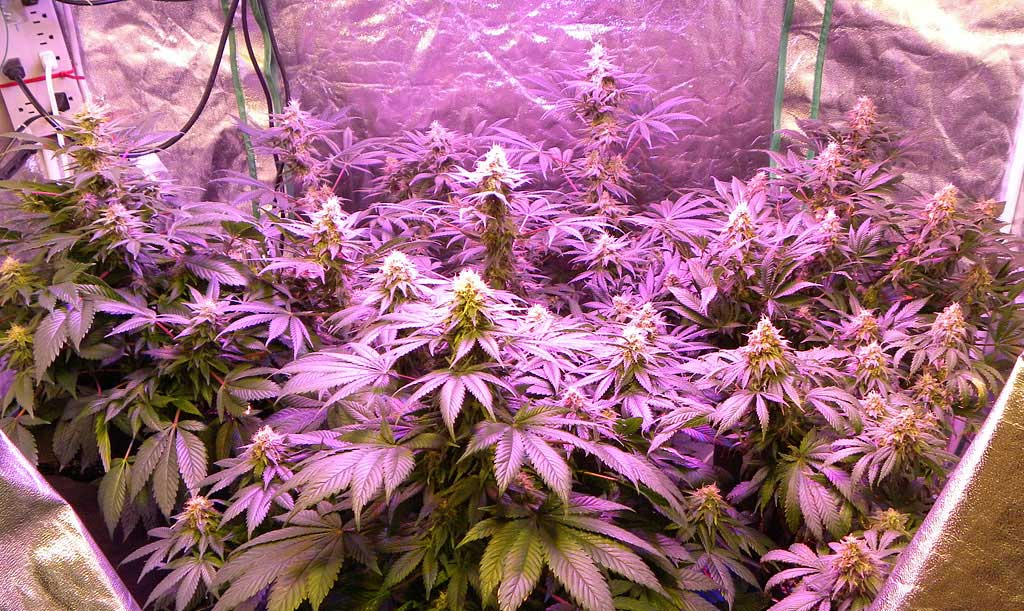
LED Grow Lights
LED grow lights are a relatively new type of grow light which claim to produce better quality buds and bigger yields, while using less electricity and producing less heat than other grow lights.
But are all the claims true? Some are, while other claims are misleading. Protect yourself and learn what you need to know about LED grow lights for growing cannabis.
If you’re not sure what to get, I encourage you to look at LECs, which seem to be consistently getting better yields than LEDs in our grow forum!

Pros of LEDs
- Cutting Edge & Custom Spectrum – One of the newest type of cannabis grow lights, LED grow lights are unlike anything else on the market for growing cannabis. In the last few years, prices have come way down and quality has gone up. LED yields are improving every year and there are now many reliable models of LED that have been proven for growing cannabis
- Stealth – Small LED spotlights or panels can be great for stealth growing since they can fit in many sized spaces, plus they usually have a built-in heatsink to disperse heat into the grow space (instead of letting the heat beam down directly on the plants)
- Options for low heat, low electricity – A small LED panel doesn’t produce much heat or use much electricity
Cons of LEDs
- Expensive setup – LED grow lights are the most expensive cannabis grow lights when considering the price for how much light will be produced
- Heat – Each LED panel produces a bit of heat (especially the high-wattage models), and growers who use a lot of LEDs will need to exhaust extra heat like they would with any other grow light (usually by venting heat outside with a fan)
- Using LEDs Requires Skill – each model of LED grow light needs to be used differently. The size of LED chips, the reflectors for each bulb, and other differences from each model make it difficult to make any generalizations about how to use a particular LED panel. You can’t use your LED panel the same way your friend does unless it’s the exact same model from the same manufacturer. Even if your LED panels look the same, they may need to be used differently so they don’t hurt your plants. It is very important to ask the manufacturer how far a LED panel should be kept from the top of your plants, and how big a space the panel will be able to cover at that height.
- Light Burn and Bleaching – Because some models of LEDs are so powerful, it’s important to avoid using LEDs incorrectly (for example keeping the panel too close to the top of your plants). Keeping LEDs too close to your plants can cause light burn, even when the grow space is completely cool. Basically, LEDs can be so bright that they actually burn your plants. It is common for leaves directly under an LED panel to look stressed, especially when the panel is kept too close, with leaves under the lights sometimes showing browning, spot, crispiness or random deficiencies. There is some speculation that minor stress to the plant is part of what causes the increased bud quality at harvest from LEDs.
- Typically Lower Yields than HIDs – Some LED models do produce really great yields. LEDs usually get far better yields than CFLs or T5s for the amount of electricity used, but they just can’t compete with MH/HPS/LEC grow lights when it comes to yields, at least not yet. Don’t listen to marketing hype – some models of LED panels are very effective at growing cannabis, but just make sure you investigate claims that seem too good to be true. Always get personal testimony from a cannabis grower (especially with pictures or video) to back up claims made by LED manufacturers. From all the actual cannabis LED grow journals I’ve seen, LED grow lights currently just don’t seem to get as high of yields as HIDs (when you consider how much electricity it takes to run the lights). But cannabis yields under LEDs are getting better every year as we make better models and learn more about them, so perhaps that will be changing soon!
I’ve used LED grow lights and been pleased with my results. The bud quality and smell from LED-grown bud is superb, and LEDs are a class of their own. That being said, I generally wouldn’t recommend that new growers get LEDs unless they’re willing to do a bit of research about how to use their lights to get the best results. They are less intuitive and just tend to require more time and effort to “dial them in” to your grow than other types of light.
Always beware of scam LED sellers! You should always conduct research to determine the best LED grow light for your space. There are some crooked LED sellers, which is why it’s recommended you only purchase LED grow lights from a trusted seller who can answer questions and offer a guarantee on their lights. The LED grow lights that come directly from China often have poor light spectrums which cause plants to grow a little funky and not produce as well as a more professional LED panel.
Learn about (a few) LED models which are proven to grow cannabis
https://www.growweedeasy.com/led-upgrade-guide
On Choosing Your Cannabis Grow Lights…
Each type of light system has their pros and cons, but you will need to find the one that fits your budget, grow area, and grow style!
In the end, I highly encourage you to pick the grow light that sticks out to you, or seems more interesting. They all work great, and what’s most important is that you enjoy your grow!
Complete Guide to Indoor Cannabis Grow Lights
https://www.growweedeasy.com/grow-lights
Getting cannabis-friendly nutrients is important if you plan to use nutrients during your grow. Some types of nutrients just don’t contain the right “stuff” for the best plant growth and bud development.
Cannabis nutrients are easy to use – just follow the directions, like a recipe
Unless you have composted your own cannabis super soil, you will most likely want to supplement your cannabis grow with nutrients to make sure plants are getting everything they need.
If you’re growing in soil, you will want to get nutrients made for soil.
If you are growing in any medium besides soil, you will need to get hydroponic nutrients (nutrients specially formulated for hydroponic growing). Some popular soilless mixes for growing cannabis have special nutrients, for example there are many nutrient systems made specifically for growing cannabis in coco coir.
Learn everything you need to know about cannabis nutrients:
https://www.growweedeasy.com/cannabis-nutrients
A marijuana-compatible nutrient system will contain everything your cannabis plant needs throughout the grow, and each of the systems I recommend on my cannabis nutrients page comes with a nutrient feeding chart that explains exactly how much nutrients to add at each stage, like a recipe you follow to water your plants.
 Keep in mind that you should treat the nutrient feeding chart that comes with your nutrients as the maximum amount to provide to your plants. I recommend that cannabis growers who are using a new type of nutrient for the first time to start with a fraction (I usually start with half) of the recommended nutrient levels and work your way up only if you see signs of nutrient deficiencies.
Every nutrient schedule is considered a place to start, and to get the absolute best results, you may have to adjust the intensity (add more or less water) depending on what your plants tell you.
Some cannabis strains love high amounts of nutrients, while others are actually very sensitive and will do best with half the amount of nutrients as other strains. If you start at half strength, I recommend to only move up to a higher dose of nutrients if needed. Use as little nutrients as possible for each plant (without the plant showing nutrient deficiencies) to achieve the best taste in your harvested buds.
Because of this natural variation between plants, there’s no one universal nutrient schedule that works for all strains, but most strains have very similar nutrient needs to each other.
Complete Tutorial: Choose the right cannabis nutrients for your setup
https://www.growweedeasy.com/cannabis-nutrients
Nutrients, continued: The Importance of Root pH
In order for your plants to be able to actually absorb the nutrients through their roots, they need the right pH of the root environment. This is especially important for any growers using liquid nutrients.
The easiest way to maintain proper pH is to test and adjust the pH of your water before you water your plants.
Complete Cannabis pH Tutorial:
https://www.growweedeasy.com/ph
Some people may get lucky and successfully grow cannabis without testing the pH of their water, but many growers using liquid nutrients who don’t test for pH will start seeing signs of nutrient deficiencies and other nutrient problems.
This is because the pH actually affects the form that nutrients take. Some forms are easier for the plant to absorb that others. So that means that even if the right amounts of nutrients are present, your plants just can’t absorb them if the pH is not right.
.
It’s actually really easy, quick, and cheap to learn how to check and adjust the pH of your water, and will take you less than 5 minutes each time you water your plants.
Here’s an Example of a pH Kit
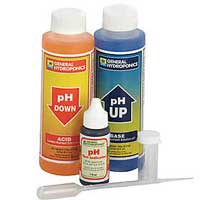
You simply use a specially made pH kit to quickly test and and adjust the pH of your water. The results of paying attention to pH (bigger yields, more dense buds and healthy plants) speak for themselves.
A general rule of thumb is to keep a root pH that ranges from 6.0-7.0 for soil, and a pH between 5.5 – 6.5 for hydroponics. There’s no exact number you need to hit. A little bit of range is actually healthy, since different nutrients are absorbed better at different pHs.
What pH are you looking for when growing cannabis?
Soil: 6.0 – 7.0 pH
Hydroponics: 5.5 – 6.5 pH
Learn everything you need to know about pH and growing cannabis:
https://www.growweedeasy.com/ph
Supplies Checklist – Are You Ready to Start Growing?
The following checklist is a quick summary of everything you’ve gone through so far. Before you start growing, make sure you’ve got everything from this checklist.
Grow Space
Outdoors
- You’ve picked a very sunny and private place to grow
- You have easy access to this space
- You can bring water to your plants when needed
- You’re sure no one else knows about the spot. As far as privacy, try leaving a few $5 bills in the area and come back a few weeks later, if the $5 bills are still around, you have some evidence that no one else has visited this spot since you left.
Indoors
- Grow Space – room, grow tent, grow box, etc. Your cannabis plants need a place to grow! I recommend getting a grow tent in the size that you want if you’re not sure. They create the perfect environment for growing cannabis, and they’re actually pretty inexpensive compared to building a grow box at home.
- Temperature Control – some growers get lucky and happen to have a space that’s just the right temperature. For most indoor growers, they will need a fan to vent out extra hot air from the grow lights. Some growers in cold climates will have to protect plants from cold or freezing temperatures. Discover everything you need to understand about controlling temperature in the grow room: https://www.growweedeasy.com/temperature
Growing Medium
If growing outside you most likely are going to use soil. For indoor growers, by this point you’ve chosen your growing medium of the many options available to you. Learn more about different growing mediums for cannabis here: https://www.growweedeasy.com/soil-vs-hydro-cannabis
Grow Lights
Outdoors
- The sun is all you need. Make sure plants are getting 8+ hours of direct sunlight every day for the best results.
Indoors
- You’ve picked a grow light for your space that excites you. Here’s some more help choosing which grow light if you’re still not sure and here’s a complete list of all the most popular cannabis grow lights: https://www.growweedeasy.com/grow-lights
- You’ve tested your grow light(s), hung your grow light(s) in your grow space, and plugged them in. Learn how to install MH/HPS grow lights with a cheap exhaust system: https://www.growweedeasy.com/hps-grow-lights-setup
- You’ve got your grow lights on an electrical timer. As I mentioned earlier, indoor growers should have an electrical timer to automatically turn grow lights on and off so plants get a “day” and a “night” period without you having to remember to turn the lights on and off yourself.. The simple models of lighting timers are inexpensive and can be easily found at hardware stores or online.
Nutrients
Choose the cannabis nutrients (if any) you plan on using with your cannabis plants. Learn more about nutrients here: https://www.growweedeasy.com/cannabis-nutrients
Cannabis Plants
Get your cannabis clones or order your seeds. Without any plants, growing cannabis is impossible! Learn more about where to find cannabis seeds online here (with seed shipping worldwide, including the USA, UK and Australia!):
https://www.growweedeasy.com/seeds
That’s It! You’re ready to start growing!
You’ve now got everything you need to grow your own cannabis. Let’s get started!
Germinate Seeds or Care for Clones
If you have cannabis seeds, it’s time to get them to sprout.
Basically you want to give your seeds a warm, wet place to start growing. There are many methods and techniques for germination, but I believe the easiest way to start seeds is to place them in a starter cube or seedling plug.
I use Rapid Rooters because they are easy to work with – you just stick your cannabis seed in the Rapid Rooter plug, keep your seed warm and slightly moist, and let the Rapid Rooter do its magic. Sprouts emerge and roots appear in just a few days. Once your seed has sprouted, you just stick the Rapid Rooter directly in your container or hydroponic system.
Another great option for new growers is to germinate their seeds directly in their final growing medium.
Sometimes nature’s way is the easiest way. In nature, cannabis seedlings would sprout in soil, and they would emerge as their taproots start growing down.

One of the biggest benefits of planting your seed directly in the growing medium is you don’t have to worry about moving young seedlings. Because seeds are already in their final resting place, they will immediately start adjusting to the environment. Every time you transplant or move a sprouted seed, it can cause stress as the young plant needs to readjust its new surroundings.
- Soil – Plant seeds a knuckle deep (0.5-1 inch OR 1.3 cm – 2.5 cm) in moist yet not soaking soil. Use a light or a heating pad to keep things warm. This is one of the easiest marijuana germination methods for beginners.
- Coco Coir or other soilless growing medium – Plant in a similar way to soil
- Hydroponics – I highly recommend using Rapid Rooters or other hydroponic-friendly starter cubes for starting seeds in hydro systems. Just place the seed in the Rapid Rooter, and then place the plug in your system.
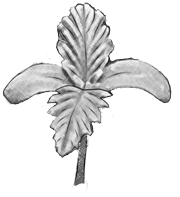
The first two leaves from your cannabis plant will be round (called cotyledons), but after that all the leaves will be serrated like the cannabis leaves you are probably familiar with.
Learn everything you need to know about germinating cannabis seeds here: https://www.growweedeasy.com/germinate
If you’re starting with a cannabis clone, you want to treat it gently for the first day or two. It’s common for new clones to be a bit drooper, and it’s your job to make sure it stays healthy and happy. If your clone hasn’t established roots yet, then you want to make sure that it stays moist and gets gentle light (like from fluorescent tubes) until it develops some roots.

New clones need to get their water through their leaves until their roots haven’t formed, which is why a nice humid cloner works great. If no humidity cloner is available, some growers mist their clones a few times a day until they start forming roots. A little warmer than room temperature 72-77 °F (22-25 °C ) is great for clones. Many automatic cloners come with a heat setting.
Don’t give new clones 24 hours of light, without any dark periods. This can slow down the rooting process. Rooting seems to happen best when there’s some amount of darkness each day.
I recommend starting new clones on a 16/8 or 18/6 (Light/Dark) schedule when you introduce lights.
The most important thing is to keep a close eye on your new clones or seedlings until they’ve become well-established.
Once young plants are growing new leaves and getting taller, they are officially in the vegetative stage.
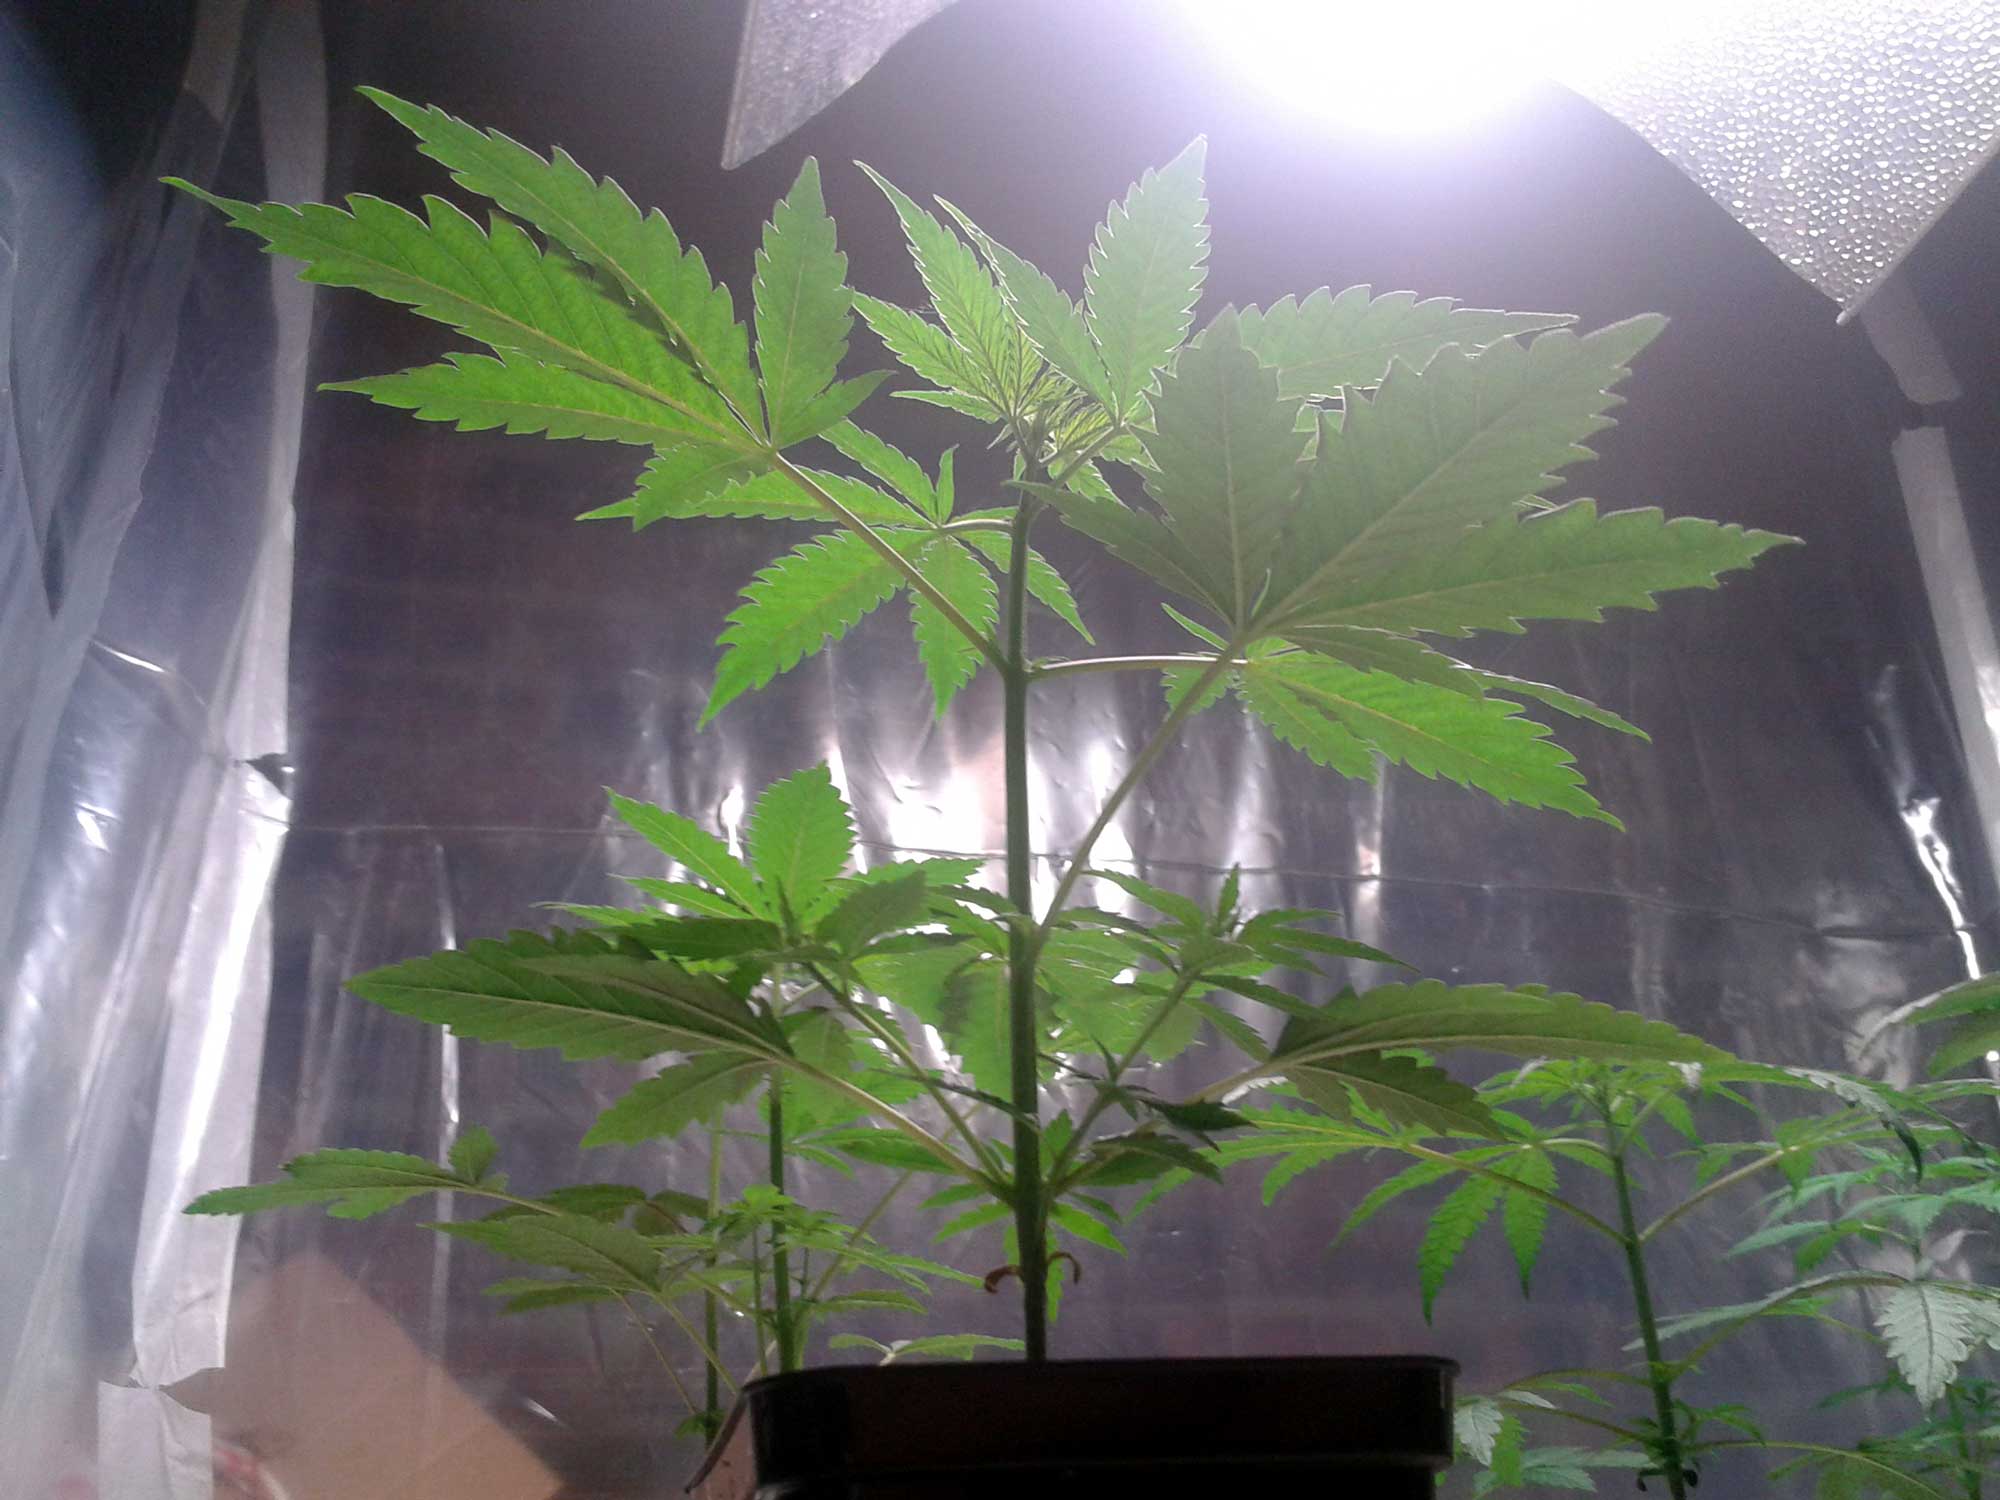
Vegetative Stage
This section will explain how to care for young cannabis plants in the vegetative stage.
When your cannabis plant first starts growing brand new leaves and stems, it marks the beginning of the vegetative stage.
The vegetative stage is a period of growth where your cannabis plant just focuses on getting strong and big. During this stage, cannabis plants will only grow leaves and stems, and will not grow any bud.
Here’s what you’ll find in this section about the cannabis vegetative stage:
Outdoors
 Cannabis plants should be first placed outside in the Spring. The best time differs depending on where you live in the world, but as long as nights are shorter than 12 hours and days are growing longer, it should be a good time to place plants outside. If plants are placed outside too early (while nights are too long) they may start budding right away, instead of staying in the vegetative stage. Therefore make sure your days are long enough to support vegetative growth. Clones should be put out about 2-3 weeks later than seeds because they’re more prone to flowering early.
The vegetative stage is the easiest part of growing outdoors, and as long as you provide the plants with plenty of light, needed nutrients, and water, your plants should thrive.
Keep a close eye on plants for bite marks or other problems, such as bugs, caterpillars, etc.
Outdoors, the amount of time spent by the plant in the vegetative stage is determined by the sun and how long the days are. Plants that get a lot of direct sunlight can grow into trees over the course of one summer.
As the days start growing shorter in the late summer or fall, your cannabis will automatically switch to the flowering stage on its own.
The further away from the equator, the sooner cannabis will start flowering and be ready to harvest. For outdoor grow areas closer to the equator, cannabis will be ready to harvest later in the year.
Indoors
Indoor growers can keep cannabis plants in the vegetative stage for as long or short as they want by providing at least 18 hours of light a day. This is usually accomplished by putting grow lights on a timer.
Unlike outdoor growers, indoor growers have more control over the final size and shape of their plant.
Having a light period that lasts 18+ hours each day will make cannabis think that it’s summer/grow time. As long as cannabis plants get 18+ hours of light a day, they will remain in the vegetative stage, growing only stems and leaves.
Use a timer to automatically turn indoor grow lights on and off

Indoor growers usually provide either a 18-6 or 24-0 light schedule during the vegetative stage of cannabis. 18-6 means 18 hours of light and 6 hours of dark each day. 24-0 means 24 hours of light with no darkness each day.
18-6 vs 24-0 Light Schedule for Indoor Growing
Some people will keep their lights on 24 hours during this stage while others will keep the lights on a schedule where they’re 18 hours on and 6 hours off every day.
Which is better?
The answer depends on which grower you ask, and may even be different from plant to plant. Most weed strains are fine and will flourish when given 24 hours of light a day in the vegetative stage. Yet some strains may do better on 18/6.
If electricity costs are a big concern, you may want to consider a 18/6 light schedule in order to help keep electricity costs down. This also allows growers to use the 6 hours of darkness to help cool the grow area. If your grow area gets too hot at certain times of the day, you could set your 6 hours of darkness to happen during that time, so lights aren’t running when it’s hot.
According to the Marijuana Horticulture Bible (pg 38), research has shown that most strains of marijuana do grow faster when given 24 hours of light during the vegetative stage.
There will always be growers who feel that cannabis plants need some time with the light off (a dark period) in order to have optimal growth, while others believe that the extra hours of light are better since they give your plants slightly faster growth in veg.

However, many growers seem to agree that ruderalis (auto-flowering) strains of marijuana grow fastest when given just 18 hours of light a day. So if you are growing auto strains, you may want to consider an 18-6 light schedule.
I personally keep my lights on and 18-6 schedule (18 hours of light, 6 hours of dark) for all my plants during the vegetative stage. It’s easy and my cannabis plants grow fast and healthy. Some delicate strains and autoflowering strains seem to get stressed by a 24-hour light period, and I believe many strains seem to grow healthier with a cool dark period every day.
However, I used to grow using 24 hours of light a day for my cannabis plants in veg, and they grew just fine. 24 hours of light/day provides somewhat faster growth than an 18/6 schedule because plants are getting more light to make energy. It’s up to you to decide which light schedule is best for you. Both work great.
Daily Care in the Vegetative Stage
In the vegetative stage, your job is simple. Cannabis plants grow fast and are tough in the vegetative stage.
To keep your cannabis happy and healthy, you need to do the following
Provide water – Water plants when top inch of soil feels dry to the touch. In containers, make sure water can drain freely out the bottom. In a hydro setup, there will always be plenty of water.
Nutrients – if providing nutrients, start using the included nutrient schedule at ½ strength, and only raise to higher levels of nutrients if needed. Simply add the directed amount nutrients to your water before giving it to plants or adding to reservoir. Manage pH levels if using liquid nutrients.
Provide light – Keep plants in sun or use your vegetative grow light as directed. Simply turn grow lights on and keep at the recommended distance from the top of your plants. Outdoors plants will continue vegetating until days start growing short. Indoors plants will stay in the vegetative stage as long as they’re getting 18+ hours of light a day
Not too cold, not too hot – Vegetative cannabis plants prefer a comfortable room temperature or slightly warmer. 70-85°F (20-30°C) is great. Avoid low humidity in the vegetative stage if possible. Never allow plants to experience freezing temps
Air circulation – Make sure cannabis gets a constant supply of fresh air so plants get the CO2 they need to grow, and keep air moving so there are no hot spots and leaves are always moving/rustling. Outdoors you may want to put up wind breaks if it gets too windy so plants aren’t being waved around.
Some things to look out for during your first grow:
- Strange coloring or spotting in your leaves. It is normal a few older and lower leaves to turn yellow or brown and die as the plant matures. It is also normal for all the leaves to start turning yellow in the last week or two before harvest time as your plant pulls nitrogen from the leaves into the mature buds. Other than those exceptions, your leaves (optimally) should always look green and healthy during the whole grow.
- Keep an eye out for leaves that are falling off, curling up or dying at a rate of more than a couple of leaves every few days. If your plant is losing more leaves than it’s growing, you know there’s a problem.
- Any sort of rotten or bad smell often indicates bacteria, mold, or rotting. Investigate your system to see if you can find the source of the bad smell. If your plants are starting to smell pretty skunky towards the end of your flowering stage, that’s totally normal.
- Keep an eye out for signs of mold on your buds or leaves. If you see something on your leaves or buds that does not look like trichomes, you may be seeing the first signs of mold. A common mold looks like white powder on your leaves and is known as “Powdery White Mildew.”
- Very slow growth means that something is wrong. Use this 7-step checklist to figure out what it is: https://www.growweedeasy.com/7-step-cure
- Keep an eye out for “stretching” or when your plant grows very tall with a lot of space between nodes, as opposed to getting bushy and growing lots of leaves. This usually indicates that the plant needs more light and is trying to “reach” for the sun.
- Look out for any signs of bugs including mucus trails, eggs, spots, etc.
- Watch out for any other signs your plant isn’t growing vibrant and healthy.
Don’t worry about every little thing, but if you feel like your plant may be having some sort of problem, try to identify what it is and fix it as soon as possible! Many times a problem can be fixed if it’s caught in the early stages, and won’t have an effect on yields.
How often do I water my plants?
 Seedlings may need less water at a time until they are growing vigorously. Especially if young plants are in a big container, avoid giving a lot of water at a time until the plants starts growing faster. Once plant is growing new leaves and stems regularly, start watering using the techniques explained below.
Water plants when soil feels dry up to your first knuckle.
How to water cannabis properly…
- Wait until the top of the growing medium is dry about an inch deep (up to your first knuckle – just use your finger to poke a hole in the soil and see if it feels dry).
- Add water until you see at least 20% extra runoff water drain out the bottom of your pot. Go back to step 1. Note: If water takes a long time to come out the bottom, or if pots take longer than 5 days to dry out before the next watering, you may actually have a problem with drainage
Some growers also use the “lift the pot” method to decide when to water your plants (basically wait until your pot feels “light” since the plants have used up all the water). It’s up to you to decide what’s easier for you.
Learn more about watering plants perfectly every time:
https://www.growweedeasy.com/how-often-water-marijuana
Is My Temperature Okay?
Vegetative cannabis plants prefer a comfortable room temperature or slightly warmer. 70-85°F (20-30°C) is great. Avoid low humidity in the vegetative stage if possible.
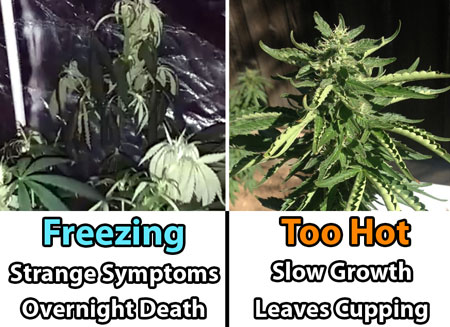
Make sure to always check the temperature as experienced by your plants, not the ambient room temperature. Check the temperature directly under the light where the top of your plants are located. If temperature feels too hot for your hand after 10 seconds, it’s too hot for your cannabis and you need to take steps to bring the temperature lower. If it’s just a hot spot, you can use small fans to disperse the heat and provide good air circulation in the room.
Cannabis plants cannot stand cold temperatures. Freezing temps can kill cannabis. So if plants are kept in a cold area (for example a basement), take steps to prevent the plants or roots from getting too cold. Grow lights will help keep the plant warm, but make sure the bottoms of the plants have a protective barrier from anything that might be too cold.
Vegetative cannabis plants prefer a comfortable room temperature or slightly warmer. 70-85°F (20-30°C) is great. Avoid low humidity in the vegetative stage if possible.
Learn more about temperature for the vegetative stage of cannabis:
https://www.growweedeasy.com/temperature#seedling-and-vegetative-stage
What if I run into problems?
It’s important to keep a close eye on your personal garden during your first couple of grows, and it is inevitable that you will make some sort of mistake or have some sort of problem with your plants.
No grower ever has a “perfect” grow
A good grower always keeps a close eye on their plants, so they can catch and correct any issues before the plant is permanently damaged.
It’s okay to make mistakes. Just keep an eye out and fix them!
Marijuana plants are very resilient, especially in the vegetative stage. As long as you fix any problem that is hurting them, they will usually bounce back quickly and go on to produce fine buds. Problems or nutrient deficiencies that happen to cannabis in the vegetative stage do not have much effect on flowering/budding as long as issues are corrected right away
Here’s a list of marijuana problems, symptoms and cures: https://www.growweedeasy.com/marijuana-symptoms
Plant training is not crucial to success. You can get to harvest without training your plants. But plant training is crucial to getting the best yields from your grow lights. Outdoors, growers may want to train plants to grow short and wide, so they stay out of sight while producing a big yield.
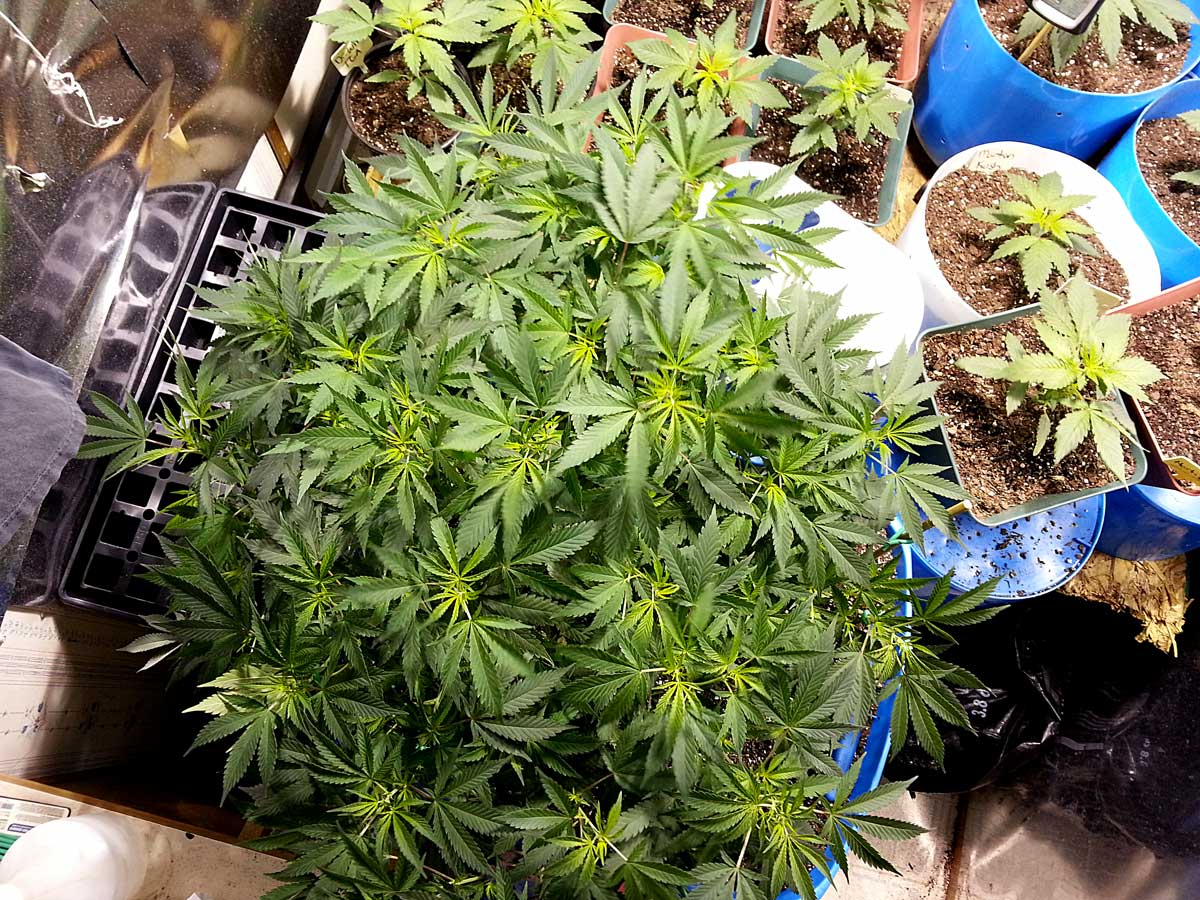
Cannabis growers often want cannabis plants to grow into a certain size and shape to produce the best yields. The best time to train your cannabis plant is in the vegetative stage. There is very little plant training that can be done in the flowering stage.
So if you have special space requirements, make sure you learn about training your plants before they get too big!
As a grower, you have a lot of control over the final size and shape. Plant training techniques allow you to create a cannabis plant that grows the way you want.
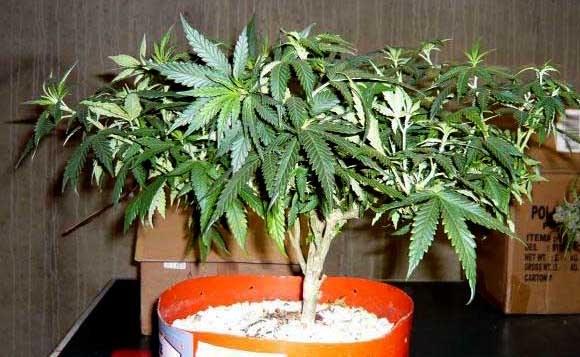
A cannabis plant that is trained to grow short and wide takes full advantage of indoor grow lights.
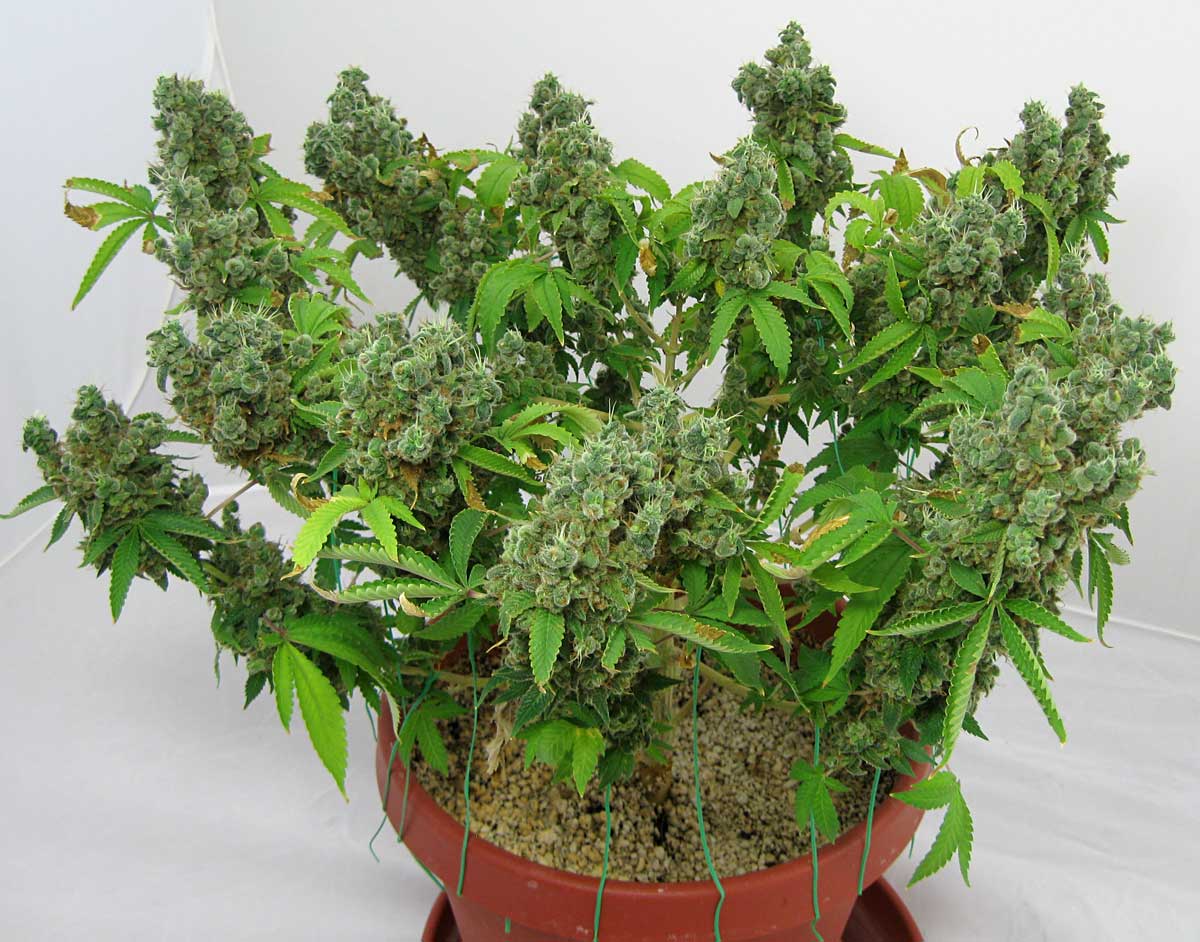
Notice how each of the colas are about the same size, since the plant was trained so that all colas received the same amount of light.
Common cannabis training techniques:
- Low Stress Training (LST)
- Supercropping (Extreme LST)
- Sea of Green (SoG)
- Screen of Green (ScrOG)
- Intro to Cutting Your Plants For Better Growth
- Topping
- FIMing
- Main-Lining (Creating a Manifold)
- Defoliation (Advanced Only)

No matter how well you train your plants, some grow patterns are going to be determined by your plant’s genes, especially in the flowering stage. You can control the genetics by choosing to start with a great strain, and plant training will give you the tools you need to get your cannabis to grow the way you want, so you get the best yields possible.
Learn About All Cannabis Training Techniques Here:
https://www.growweedeasy.com/training
How long should cannabis plants be kept in the vegetative stage?
When growing indoors, the length of time to keep your plant in the vegetative stage will vary with how big you want your final plant to be. The longer your plant stays in the vegetative stage, the bigger it will get.
Some people will turn their cannabis plants over to flowering when they’re barely more than a seedling while others will wait until the plant is much larger, after several months.
A cannabis plant can stay in the vegetative stage for virtually forever, and plants can be kept in the vegetative stage for years if given enough hours of light each day. This is often how growers keep great genetics – they’ll keep a “mother plant” in the vegetative stage, and take clones off the plant when needed.
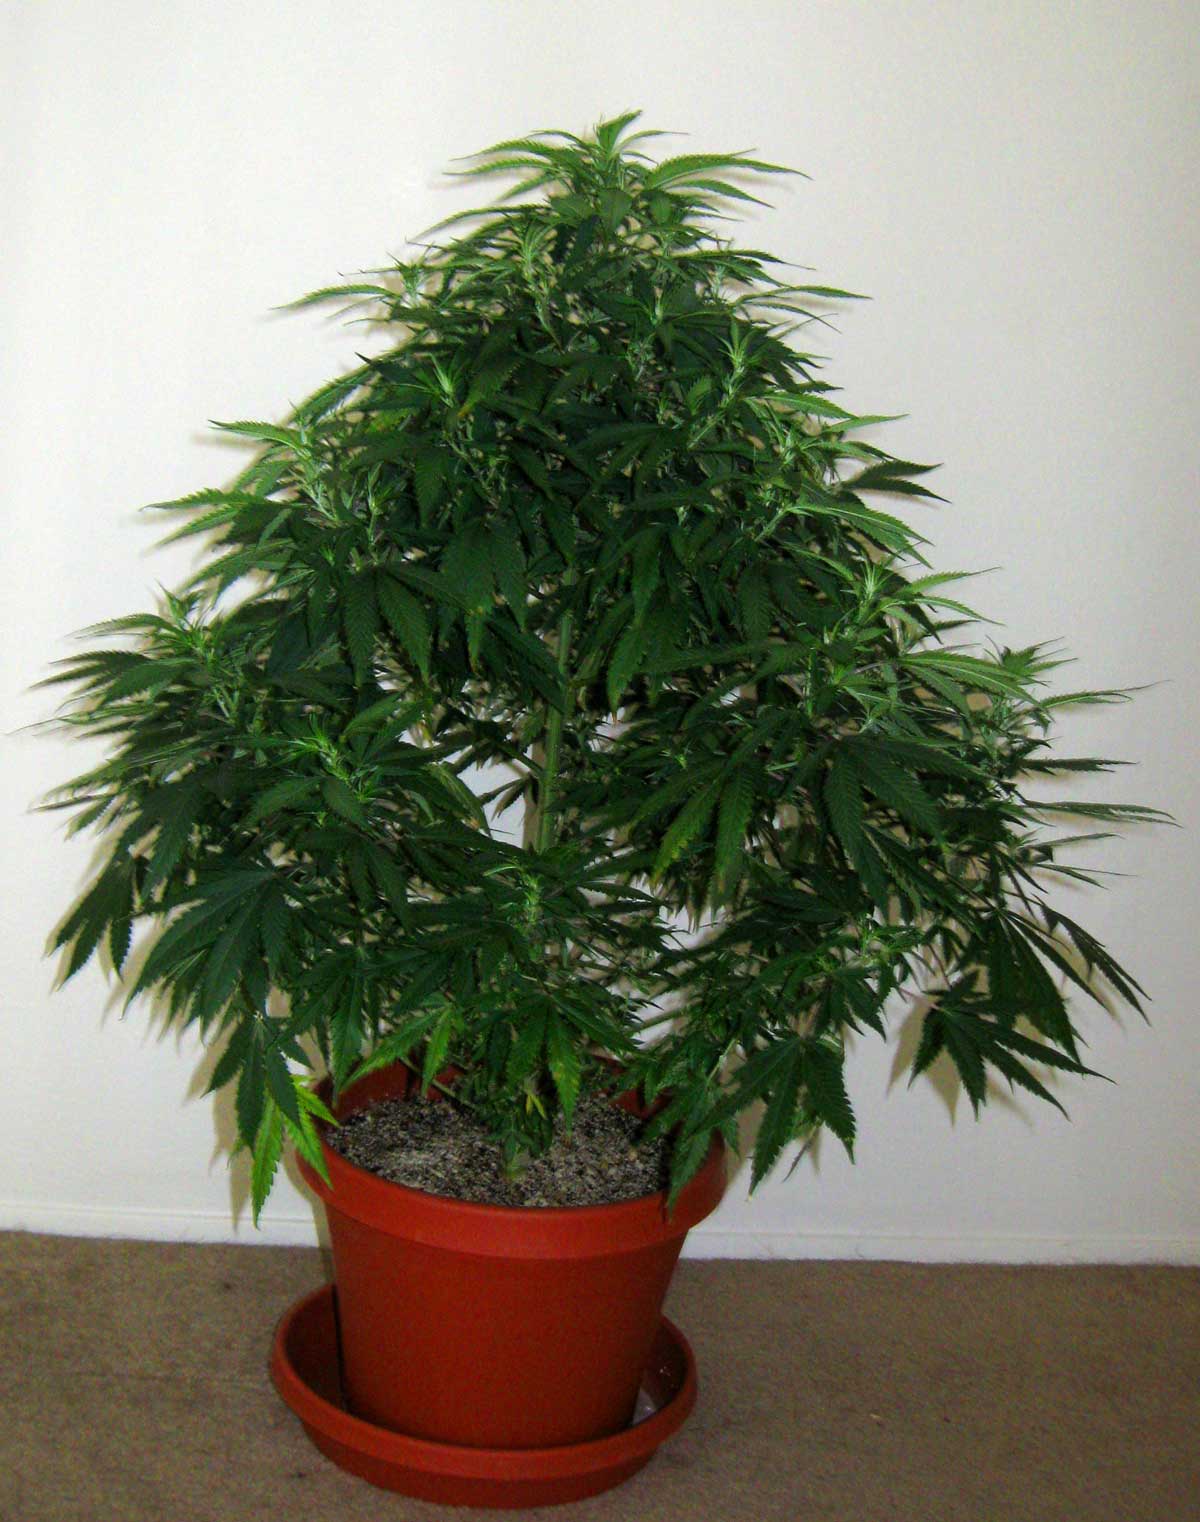
Many indoor growers believe that it’s better to make many smaller plants and harvest often as opposed to having large plants and harvesting infrequently.
If you are trying to keep your plants smaller, you will want to keep them in the vegetative stage for a shorter amount of time. For bigger plants, let them stay in the vegetative stage for longer until they’ve reached the size you want. The time spent in the vegetative stage is a big part of what sets the final height of the plant at harvest.
A good rule of thumb is to let your plants stay in the vegetative stage until it reaches about half its final height. Cannabis plants often double in height after the switch to the flowering stage. The amount of “flowering stretch” is dependent on your strain, which is why it’s important to have picked a strain that suits your needs.
A strain that is labeled…
- Short – usually stretches less than double the height after switch to flowering stage
- Average – may double in height after switch to flowering stage
- Tall – may double or triple in height after switch to the flowering stage
Flowering Stage
The cannabis “flowering stage” is when your female weed plants start to grow flowers (buds) and your male plants reveal themselves by growing pollen sacs that look like little balls.
Your plants will start flowering in response to the amount of light they get each day. As long as your cannabis plants receive a 12+ hour dark period every day, plants will stay in the flowering stage until harvest.
In the flowering stage, your cannabis plants will reveal their gender. Male plants grow “pollen sacs” (looks like bunches of grapes), and female plants grow wispy white hairs (pistils) at the joints of the plant.
Here’s what cannabis pre-flowers look like for male and female plants:
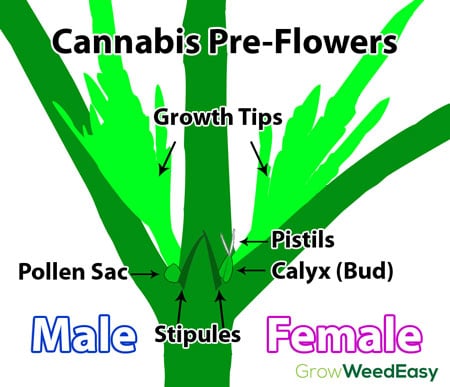
How can I tell if my plant is male or female? (more pics)
https://www.growweedeasy.com/preflowers
Get rid of male plants immediately to prevent pollination and seedy buds!
Here’s what you’ll find in this section about the cannabis flowering stage:
- When Does Flowering Start?
- Initial Growth Spurt – the flowering “stretch”
- Bud Growth (and how to increase yields)
- When to Harvest
- Trimming, Drying & Curing
Outdoors
If you’re growing outdoors, your cannabis will naturally start flowering when the days start getting shorter.

Make sure plants don’t get any light during their nights. If the dark period is interrupted at night (for example, by spotlights, street lights, etc), then they plant may never start flowering, or may revert back to the vegetative stage if it’s already started flowering.
Plants that get light during their dark period may even turn into a hermie, a plant with both male and female parts (which you don’t want).
Learn more about hermies here: https://www.growweedeasy.com/hermie-plant-buds-balls
Indoors
Indoor growers need to change their light schedule to to 12 hours on and 12 hours off to get marijuana plants to start the flowering stage. This is usually accomplished by changing your lighting timer to a 12-12 schedule so lights automatically turn off for 12 hours a day.
You can pretty much pick any time to be their new ‘morning.’ If you’re concerned about your electricity usage, you may be able to get cheaper electricity rates at night so it may be beneficial to have your plant’s ‘day’ time be at night. If you have trouble with heat from your lights, it may also be easier to keep your grow room cool if the lights only turn on at night.
When changing from the vegetative stage to the flowering stage, what’s most important is to make sure your plants get 12 hours of completely uninterrupted darkness each day.
Changing the light schedule indoors makes your plants “think” that winter is approaching, which is why they start making buds. Just like with outdoor plants, make sure that plants don’t get any light during their 12 hours of “off” time. Light leaks can be a big problem during the flowering stage. If you do not maintain consistent night periods, your plants can stop flowering and revert back to the vegetative stage, or even turn into a hermaphrodite.
A hermaphrodite, or “hermie,” is a plant with both male and female parts (which you don’t want). Hermies grow sex organs of both genders, so female plants start growing male pollen sacs which can cause pollination and seedy buds.
Learn more about hermies here: https://www.growweedeasy.com/hermie-plant-buds-balls
If you must visit your plants during their night period, it’s best to get a green light either from a garden or hardware store in order to not disturb your plants during their ‘slumber.’
The reason a green light works at night is because plants reflect back green light instead of absorbing it (hence their green color). Phytochrome, the photoreceptors that cannabis uses to tell whether it’s “day” or “night” is not sensitive to the green spectrum of light. Therefore a green light is pretty much ‘invisible’ to your plants and won’t affect their dark periods.
The flowering stage is one of the most exciting parts of marijuana growing, but it is also the toughest stage life life for cannabis. While budding, plants are more prone to issues, for example during the flowering stage your plant is much more likely to suffer from nutrient problems even if you’re doing everything the same as you were during the vegetative stage.
It’s very important to stay on top of problems in the flowering stage!
If there’s a nutrition problem in the vegetative stage, the plant will just keep growing new leaves to replace any that are lost, but towards the end of the flowering stage, the plant stops making new leaves altogether while it’s focusing on make huge buds.
Therefore, if your leaves get burnt or discolored towards the end of the flowering stage, your plant won’t be able to grow any replacements and you’ll be stuck with your burnt or discolored leaves until the end.
Leaves that are not green and healthy will absorb less light so it’s important to try to maintain plenty of green, healthy leaves in order to produce buds.
However, if you do experience some problems, don’t worry too much. As long as your buds remain intact, and you have enough leaves to get you to harvest, you will still produce amazing quality buds.
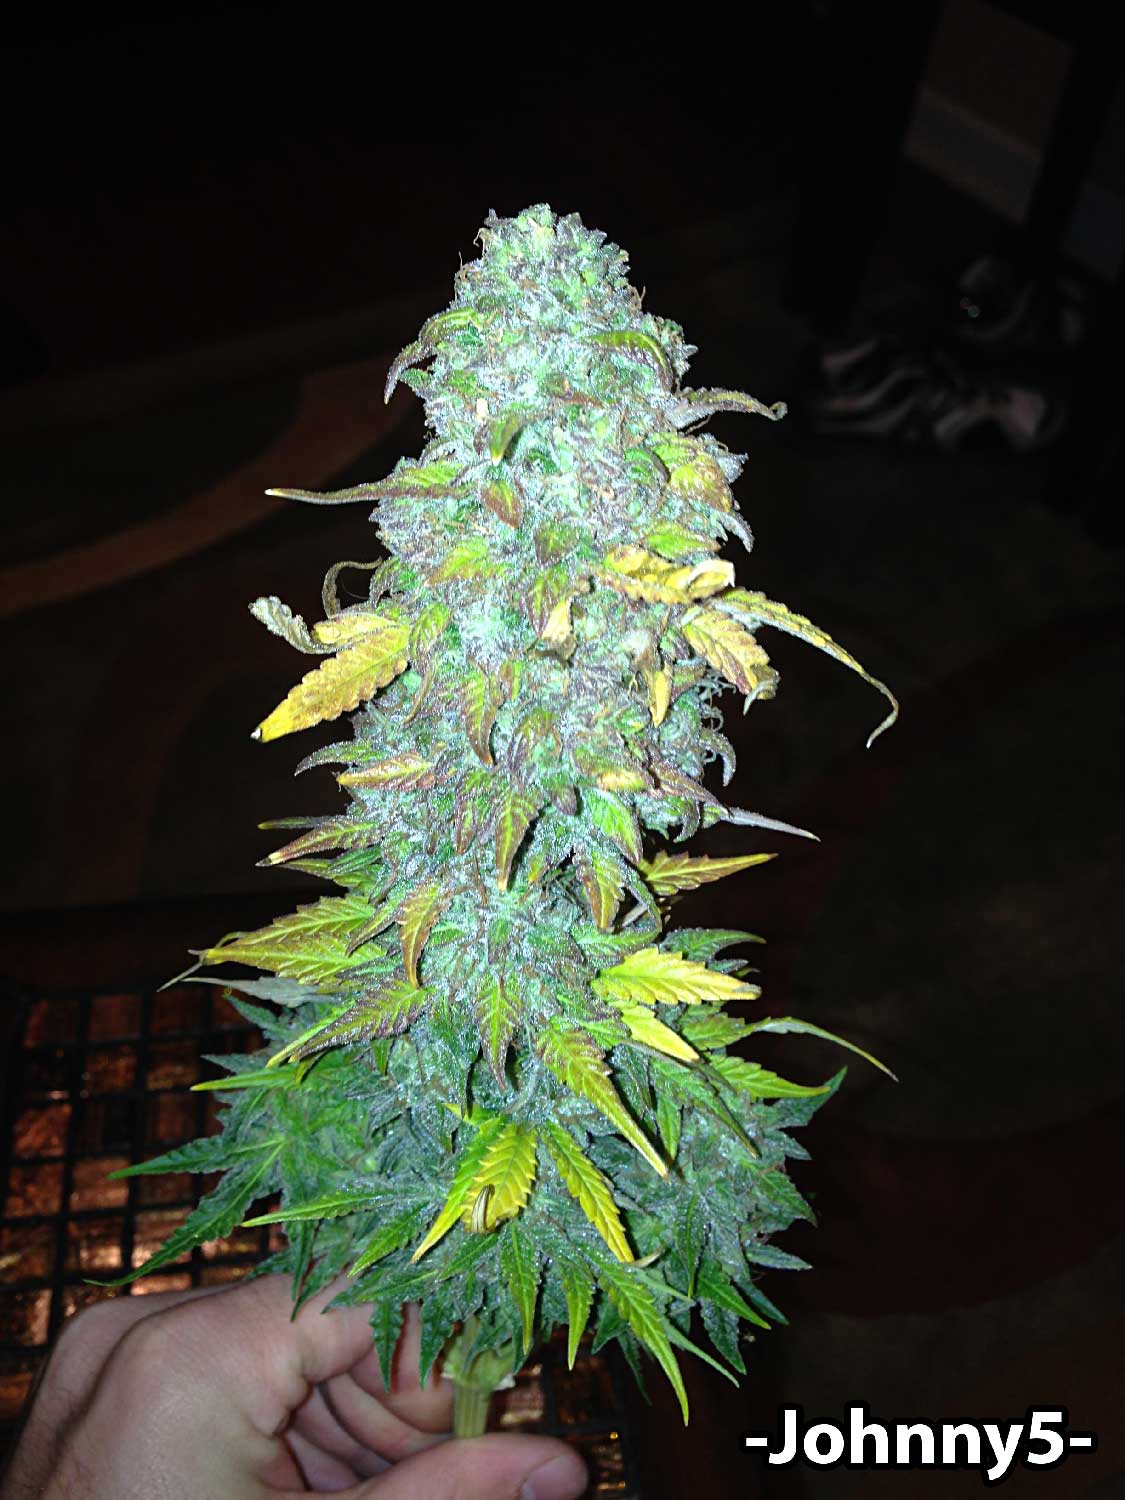 And when you’re growing weed it’s TOTALLY normal to start getting yellow, beat-up looking leaves during the last few weeks of the flowering stage.
Because your plant is at its tallest/biggest during the flowering stage, it can be difficult to provide enough light to the whole plant during this stage, especially when growing indoors. This is a shame because the amount of buds you get in the end is directly proportional to the amount of light the plant receives during the flowering stage. This is why it’s so important you trained plants properly in the vegetative stage.
In the flowering stage, if any part of the plant’s green foliage appears dark or shadowed, then you know that the shadowy areas are not getting enough light. It’s important that leaves and bud sites are exposed to plenty of bright light to make sure buds grow as big as they can.
Buds that don’t get light do not grow much at all. Buds that are lower on the plant, or in the middle of the plant without much access to light and air will tend to stay small.
It is tough for many new growers to be patient and wait until their plant is ready to harvest.
Many new growers cut their cannabis down too early in excitement, which is a huge waste after spending so long caring for the plant. I completely understand though, I’ve been there.
You see your plant is growing buds and it can be tempting to want to harvest your buds as soon as possible. I urge you to be patient during this stage. A few weeks of growing could be the difference between getting a half-strength bud or getting a bud that is at full potency, so it is important to try to wait until just the right time to harvest.
Initial Growth Spurt (flowering “stretch)
When cannabis reaches the flowering (budding) stage, different strains tend to start growing more differently from each other.
When strains are well-matched, they will tend to stretch about the same amount as each other.
Some strains grow very tall after being switched to flowering, doubling or tripling their height (or more). Other strains stay short and squat after being switched to flowering, and may not stretch much at all.
What to expect for the “flowering stretch?”
A strain that is labeled…
- Short – usually stretches less than double the height after switch to flowering stage
- Average – may double in height after switch to flowering stage
- Tall – may double or triple in height after switch to the flowering stage
As you enter flowering, the genetics begin to really show.
Let Me Show You: These plants were grown together. The one of the right starts out a bit taller, and grows just a little lankier than the other one. But generally they’ve stayed about the same height for the vegetative stage. Now look what happens when they get switched over to the flowering stage…
Mismatched Cannabis Strains Are Not Effective
at Using Indoor Grow Lights
Always prepare for the Flowering Stretch!
Bud Growth (and how to increase yields)
You’ve already set things up with the strain you chose and the plant training you did in the vegetative stage.
Now it’s time to focus on what you can do to improve bud growth and yields in the flowering stage.
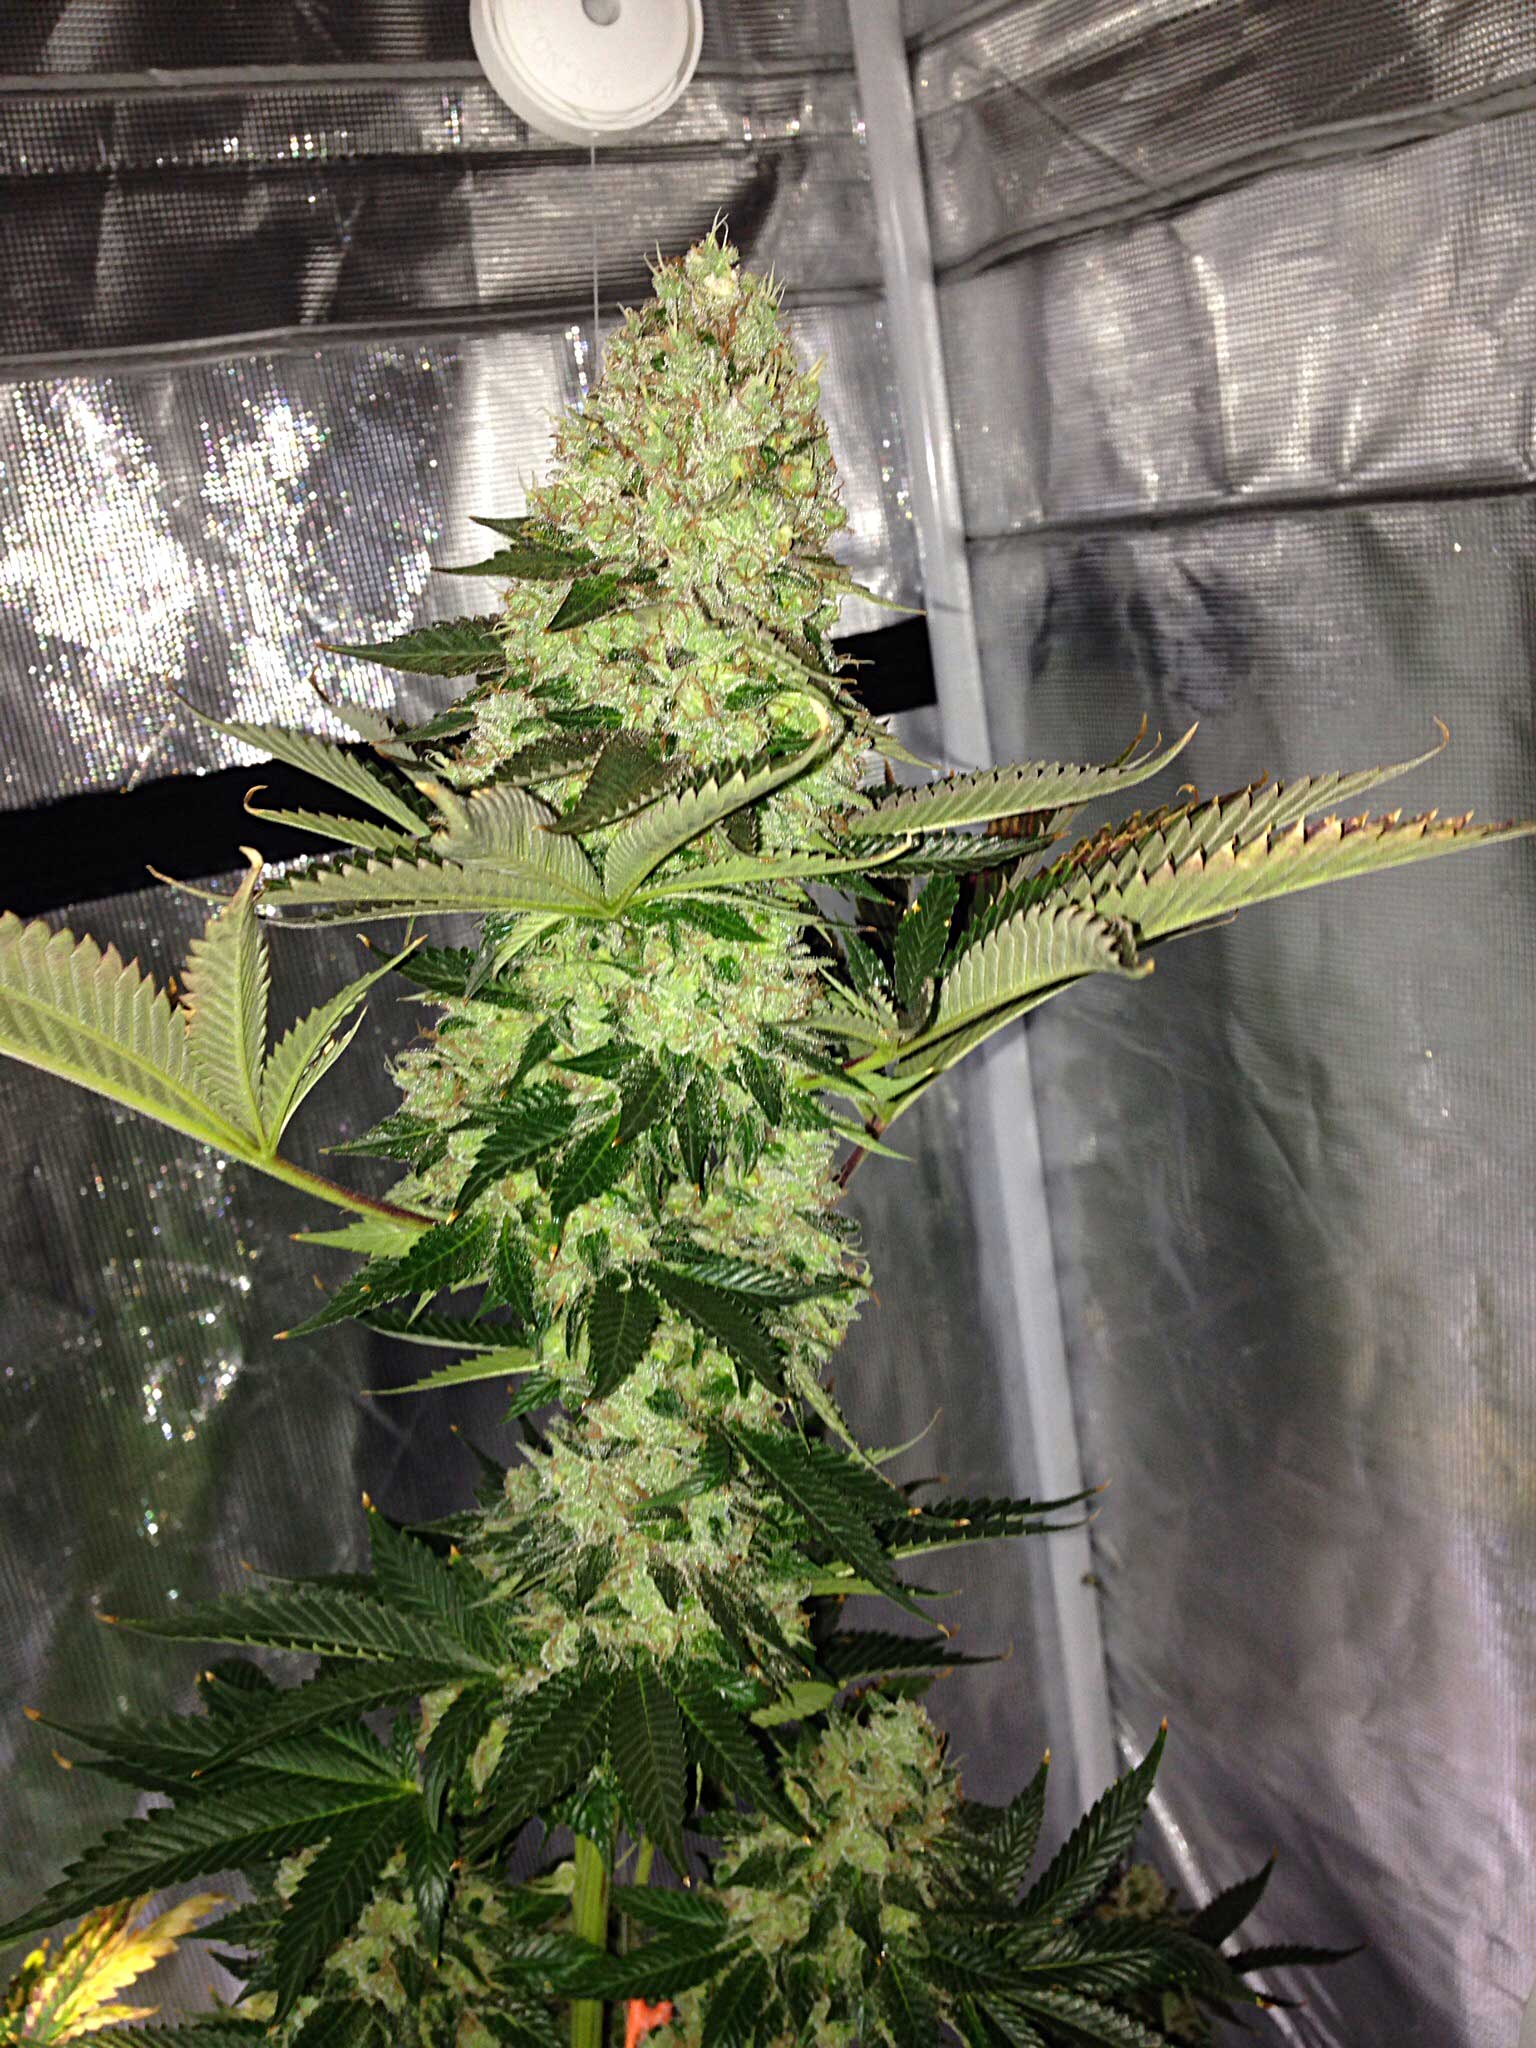 Expose Buds Sites: One thing that can help you get better yields is to expose your bud sites to more air and light. Some growers tuck leaves away, while other remove leaves that are covering buds sites. Try to get the buds as much light and air exposure as possible, but avoid damaging or over-stressing the plant.
Defoliation (removing leaves) is a highly controversial technique for growing cannabis. It’s important the new growers do not defoliate leaves until they’ve made it past their first harvest.
Though defoliation can help open up bud sites, it’s common for new growers to pull too many leaves, which will hurt yields later in the flowering stage. Cannabis uses leaves to make energy, and if it doesn’t have enough leaves it won’t be able to make enough energy to grow and fatten up buds.
Give Plenty of Light: Giving the maximum amount of brightness to your plants will improve your yields by giving your plant more energy to grow. It’s important not to go overboard though, as too much light can actually light-burn your plants.
The highest-yielding cannabis grow lights for the flowering stage are HPS grow lights. Many growers use an HPS grow light in the flowering stage to get bigger yields.
5 Ways to Increase Yields Indoors with Any Strain:
https://www.growweedeasy.com/5-tips-increase-yields-growing-indoors
Avoid Nutrients with Too Much Nitrogen During Budding: It’s important to switch to a flowering or “bloom” formula of nutrients during the cannabis flowering stage, which tend to be lower in nitrogen and higher in phosphorus. Nutrients made for the vegetative stage of growth contain too much nitrogen, which can hinder bud development. So avoid giving your plant a standard nutrient formula in the flowering stage, especially nutrients high in nitrogen (nitrogen is the first number listed on nutrient bottles).
Keep Nutrient Levels Low As You Approach Harvest: Many growers seem to get this idea that more nutrients = more buds. They might start ramping up on nutrients as harvest is coming, in an attempt to get bigger buds. This is not a great strategy.
While cannabis plants use a lot of nutrients in the first month following the switch to flower, your cannabis plants will slowly start needing less and less nutrients as they approach harvest. It can be a good idea to slowly start easing down on the amount of nutrients being provided about halfway through the flowering stage, just a little bit at a time.
Many growers also “flush” their plants by giving them just plain water for the last few weeks before harvest. By keeping nutrient levels relatively low during the second half of the flowering stage, you are preventing nutrient build-up in the plant that could possibly affect the taste of the buds, or prevent proper bud development. As long as your plant is not showing signs of nutrient deficiencies in the first month or two of flowering, you’re providing enough nutrients. Avoid supplements or bud ripening formulas that provide extra nutrients!
In magazines and online, flowering cannabis plants are almost always pictured 2-4 weeks before harvest. This is because leaves start dying and the plants stop looking as picture-perfect as harvest approaches. In the last 2-4 weeks before harvest, it’s normal for the plant leaves to slowly start dying away, just like the leaves of trees in the fall. This isn’t a sign to increase nutrients; it’s a natural part of the plant aging process, and buds will continue to ripen until harvest time.
Control Growing Environment: In the vegetative stage, cannabis plants tend to be able to thrive in many environments. In the flowering stage, plants start being a little more picky about the environment. What helps a lot with bud development is to control the temperature and humidity of the grow area. Most importantly, avoid too-hot temps! Too much heat can burn off terpenes, which reduces the taste/smell of your buds permanently. There’s also some evidence that too-high temps can actually burn off potency too. In the flowering stage, strive for temps that range from 65-80°F (18-26°C). It’s better to have slightly cooler temps at night than during the day, as long as the temperature stays in that range. Keep low humidity if you can because low humidity in the flowering stage reduces the chance of mold and increases trichome development.
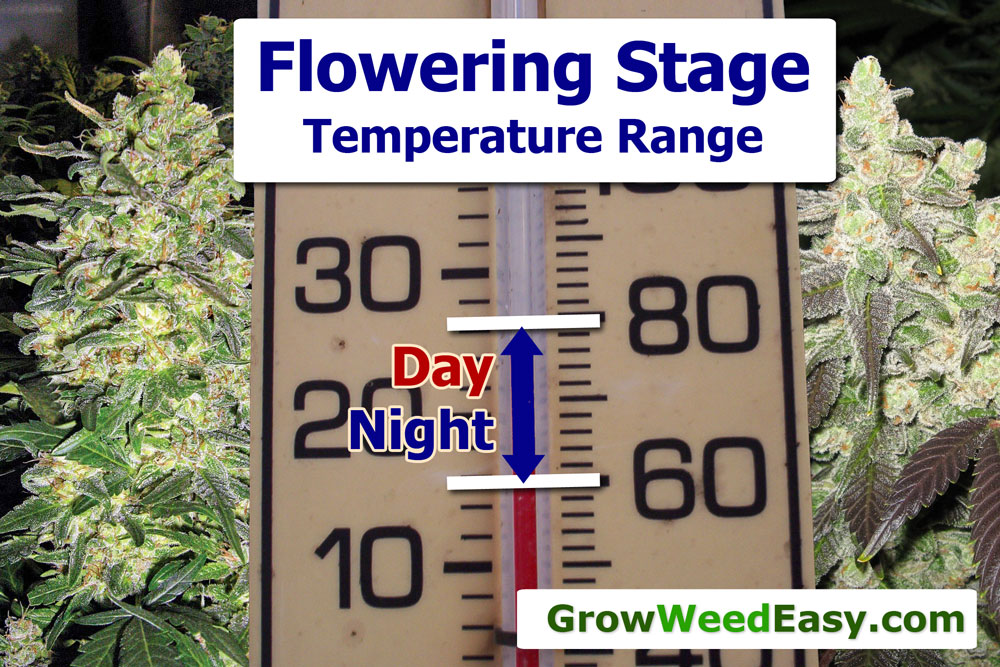
Harvest Buds at the Correct Time: Harvesting too early is one of the best ways to reduce your yields, and is a common mistake for new growers. Cannabis plants fatten their buds up considerably in the last few weeks before harvest, and this last-minute budding adds a lot of extra weight to your final yields.
This section will teach you about harvest time; when are cannabis buds ready for harvest?
This is the Short Version – Read the Complete Tutorial on Choosing the Right Time to Harvest Here:
https://www.growweedeasy.com/harvest
The Science: Why do we harvest cannabis when we do?
If you ask people what the main ingredient in marijuana is, everyone says THC.
However, marijuana actually contains several different substances which produce the desired effects including something known as CBD. There is another well-known cannabinoid known as CBN.
How do THC, CBD & CBN relate to cannabis potency?
https://www.growweedeasy.com/thc-cbd-cbn-when-to-harvest-marijuana
When people talk about different effects from using different types of marijuana, they’re actually talking about variations in the plant chemistry and the ratio of these different substances to each other.
Harvesting a marijuana plant on the early side will tend to produce bud which gives you more of a buzzed, in-your-head experience. However, early-harvested buds give some people anxiety, as well as headaches.
Way too early to harvest – can give some people anxiety or headaches
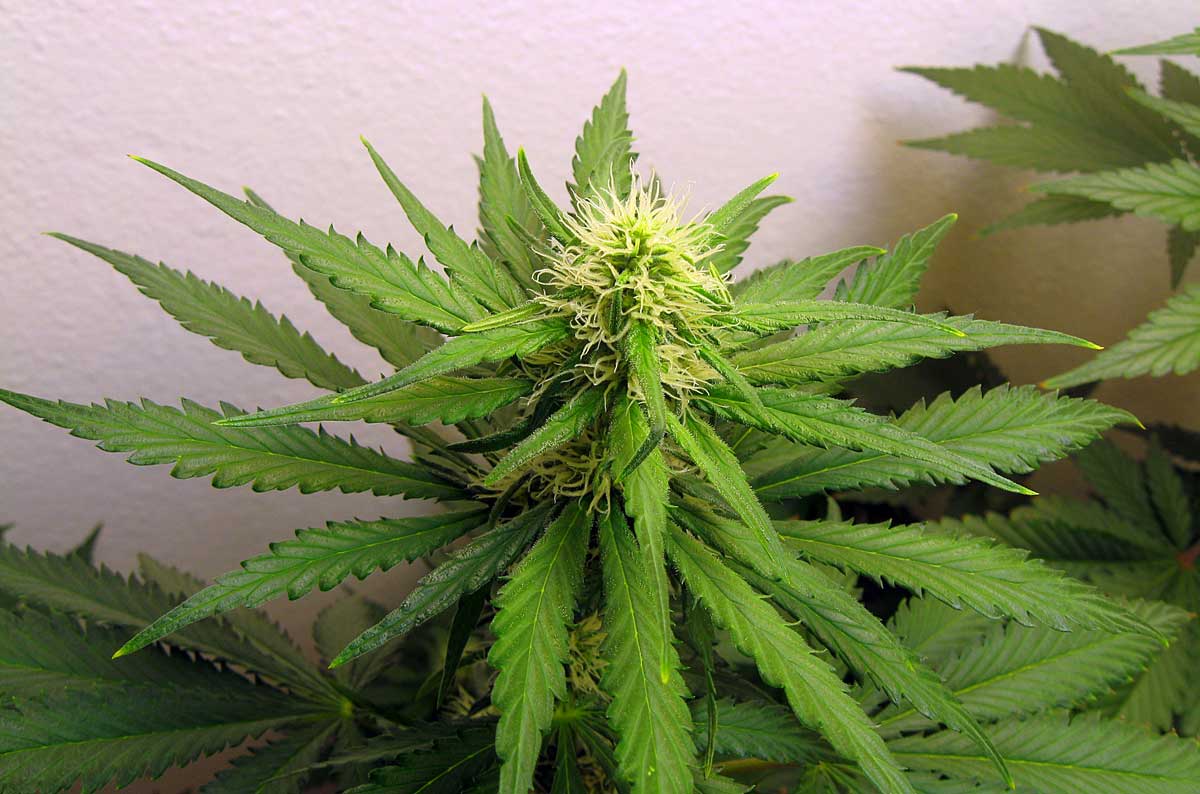
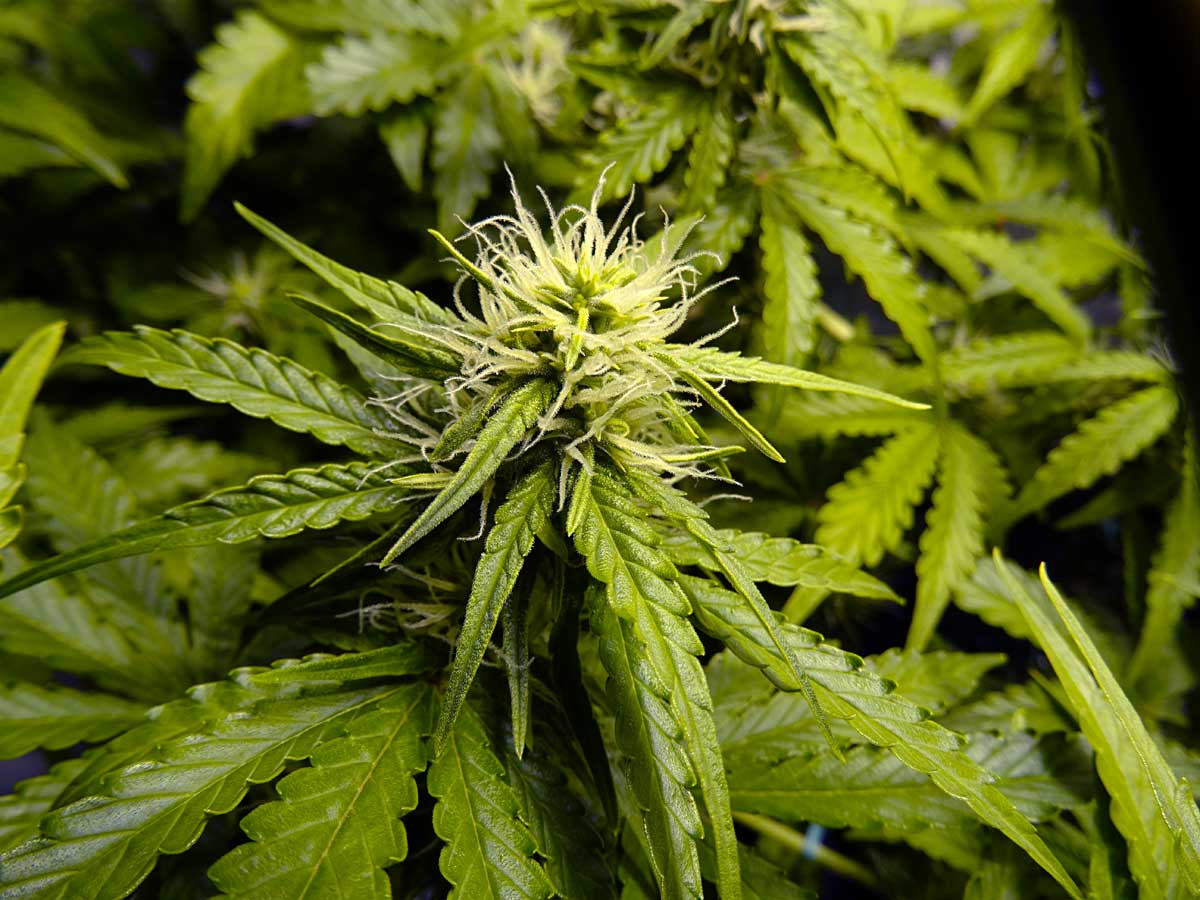
Harvesting a bit later will give your bud more of that stony, relaxed sort of feeling that makes your eyelids feel heavy.
If you harvest your plant after it’s already past the peak point of ripeness, than your bud will not be strong and will cause you to feel extra sleepy.
Thankfully, there is a relatively long window of time where cannabis can be harvested, depending on the strain.
Some growers harvest after only 2 months of flowering, while others wait as long as 4 months or more. The amount of time needed in the flowering stage before harvest is heavily dependent on strain and personal preference.
This cannabis bud is ready for harvest
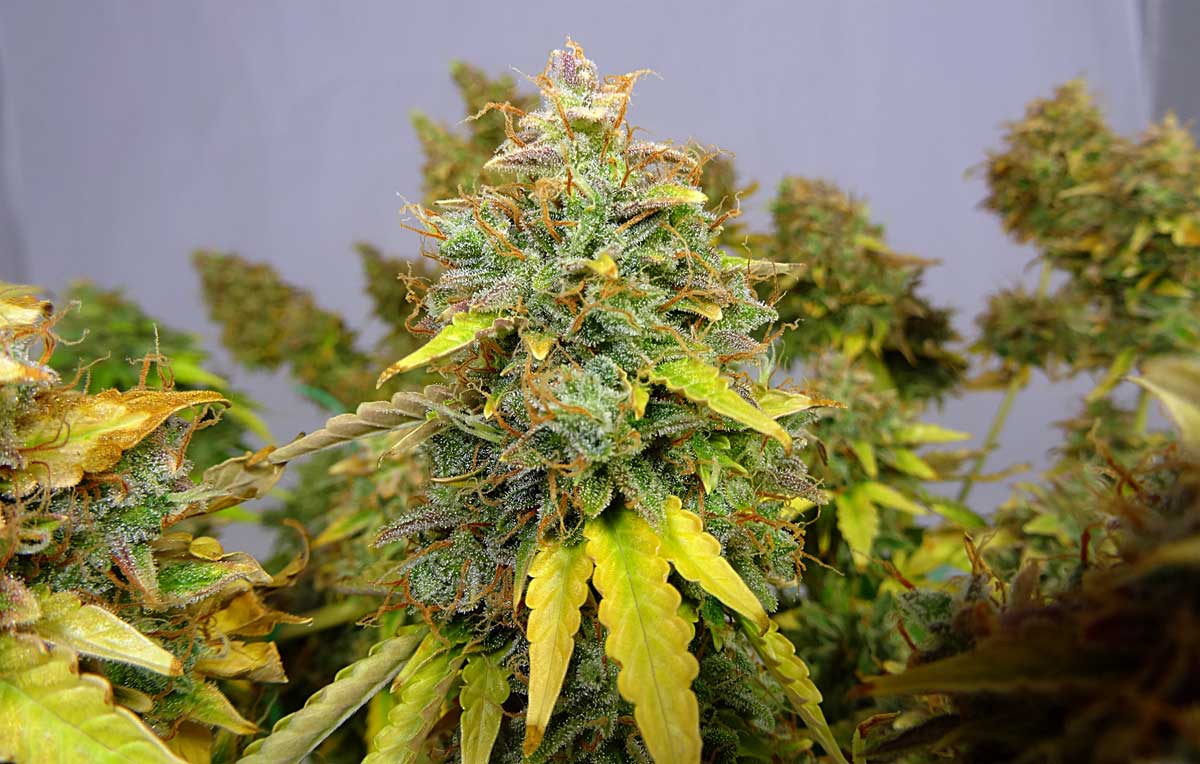
It’s important to pay attention to the cannabis while it’s growing, and also figure out what works for you. However, there are some general rules to follow.
Quick note before you harvest your plants: For better tasting buds, some people recommend changing how you feed your cannabis during the last two weeks before harvest, as follows…
Some people stop providing nutrients to their cannabis for the last two weeks before harvest in order to let the plant flush out any extra nutrient buildup or salts that may lead to a chemical nutrient taste.
Some growers also feed their marijuana plants one teaspoon of blackstrap molasses per gallon of water during the last two weeks to help produce bigger and tastier buds.
The molasses contains sugars to help bulk up your buds. Many of the “bud ripening” supplements on the market today are mostly made of sugar.
Even if you stop adding nutrients to your water for the last two weeks, you still want to pH your water so the plant can access any leftover nutrients that are still available in your growing medium.
Learn how to flush your cannabis before harvest for better quality buds
Flushing is Giving Plants Only Plain Water For Days or Weeks Before Harvest
When to Harvest Your Weed
There are several techniques to be able to look at your plant and tell if it’s ready to harvest.
One method to find out if your cannabis is ready for harvest is to look at the little white hairs (pistils) that have been growing out of your bud.
These little hairs are actually the pistils for the bud flowers (marijuana bud is actually just a bunch of little flowers called calyxes all clustered together).
When the hairs first appear, they are all white. As time goes on, with most cannabis strains the pistils start to curl in and darken.
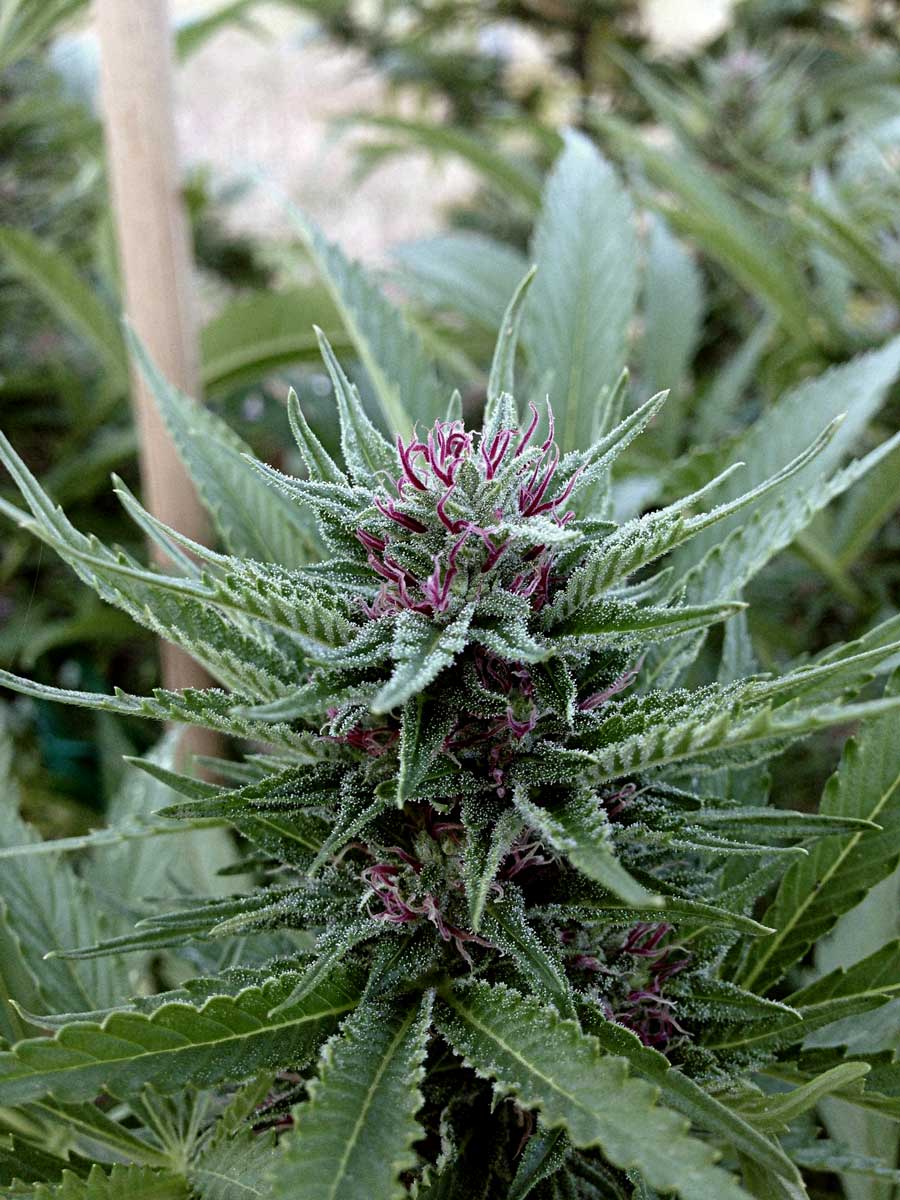 These hairs turn yellow, red, or brown, or even purple or pink, depending partially on the strain, and partially on growing conditions.
A general rule of thumb is to harvest when 50-75% of the hairs have changed color, though each strain is different, and that’s just a rough guideline. Some strains (for example White Widow) tend to stay mostly white even as they approach harvest.
No matter what, if it’s your first grow, you probably want to wait a few weeks longer than you expect. There will be lots of times where it seems like the cannabis buds are getting close to being done, then they will suddenly grow a whole bunch of new white pistils.
It’s hard to be patient and wait for the pistils to turn, but doing so will also result in much bigger yields since the buds have extra time to fatten up. And remember, if you harvest too early, your buds won’t be as potent.
While I like waiting until nearly all the pistils have turned, many others prefer to harvest sooner than that and they get great results too! You need to figure out what is optimal for you and your body.
Just remember that there is a 2-week range where marijuana can be harvested, so you do have a little wiggle room.
Quick and Dirty Method: Look at the Pistils
This method looks at the hairs (“pistils”) on a growing cannabis bud to try to determine harvest time. This method is not as exact as the trichome method explained below, but gives growers a way to start guessing when their buds might be ready, especially if they don’t have a magnifier available.
- Wait until your buds have mostly stopped growing new, white hairs. By this point your buds should be fragrant (the whole grow room will likely smell like marijuana), plump and ‘filled out’
- After new white hairs stop growing, wait until at least 40% of the white hairs have changed color (darkened) and are curling in. This marks the potential beginning of the harvest window. Buds harvested now are not yet at full potency, and will tend to have more of a speedy effect.
- Harvest when 50-75% of the hairs have darkened for highest THC levels
- Harvest when 80-90% of the hairs have darkened for more a couchlock, anti-anxiety effect (some of the THC has turned into the more relaxing CBN)
Much Too Young to Harvest
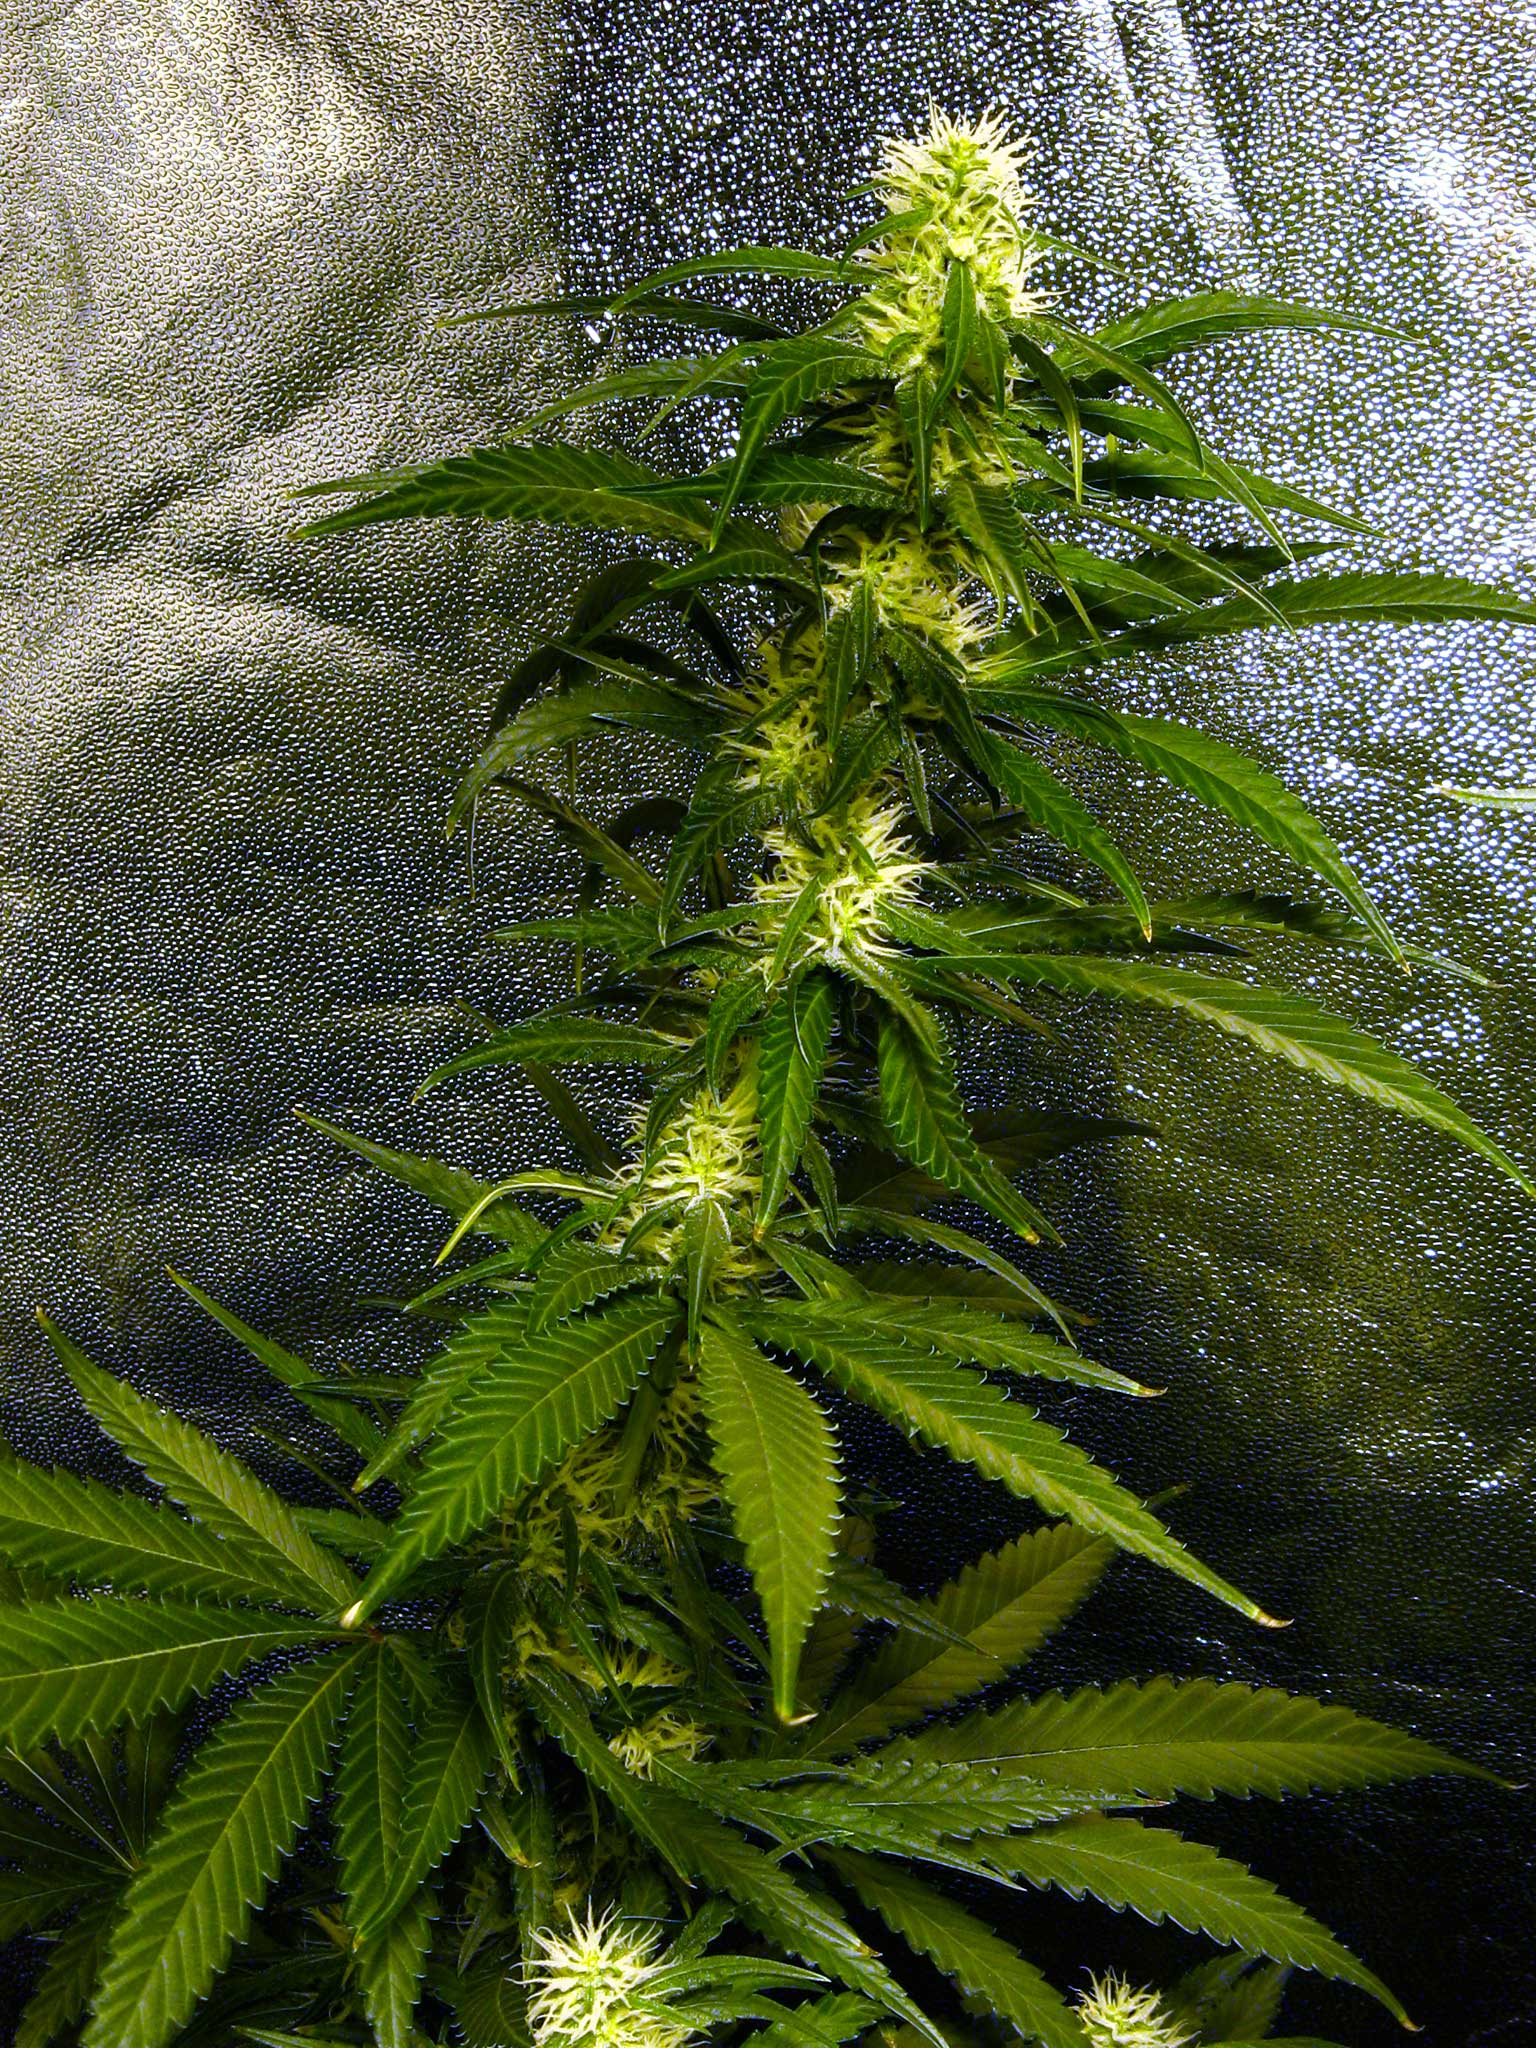
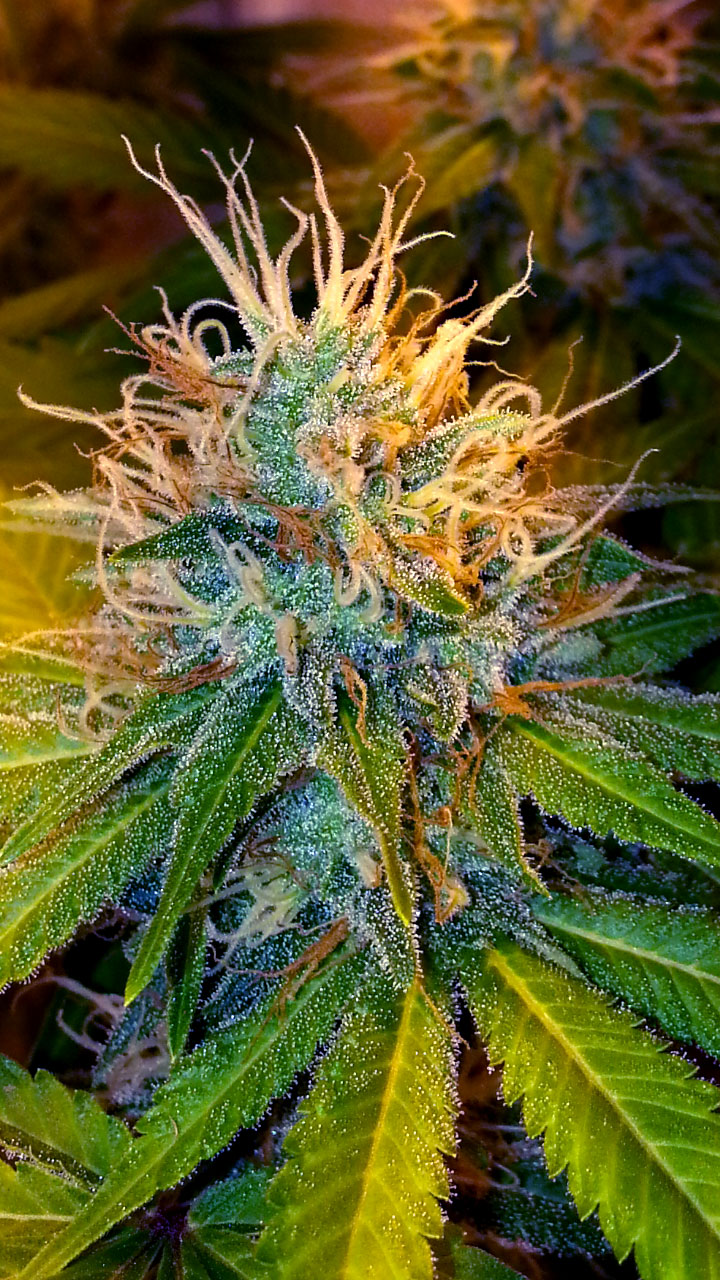
Ready to Harvest
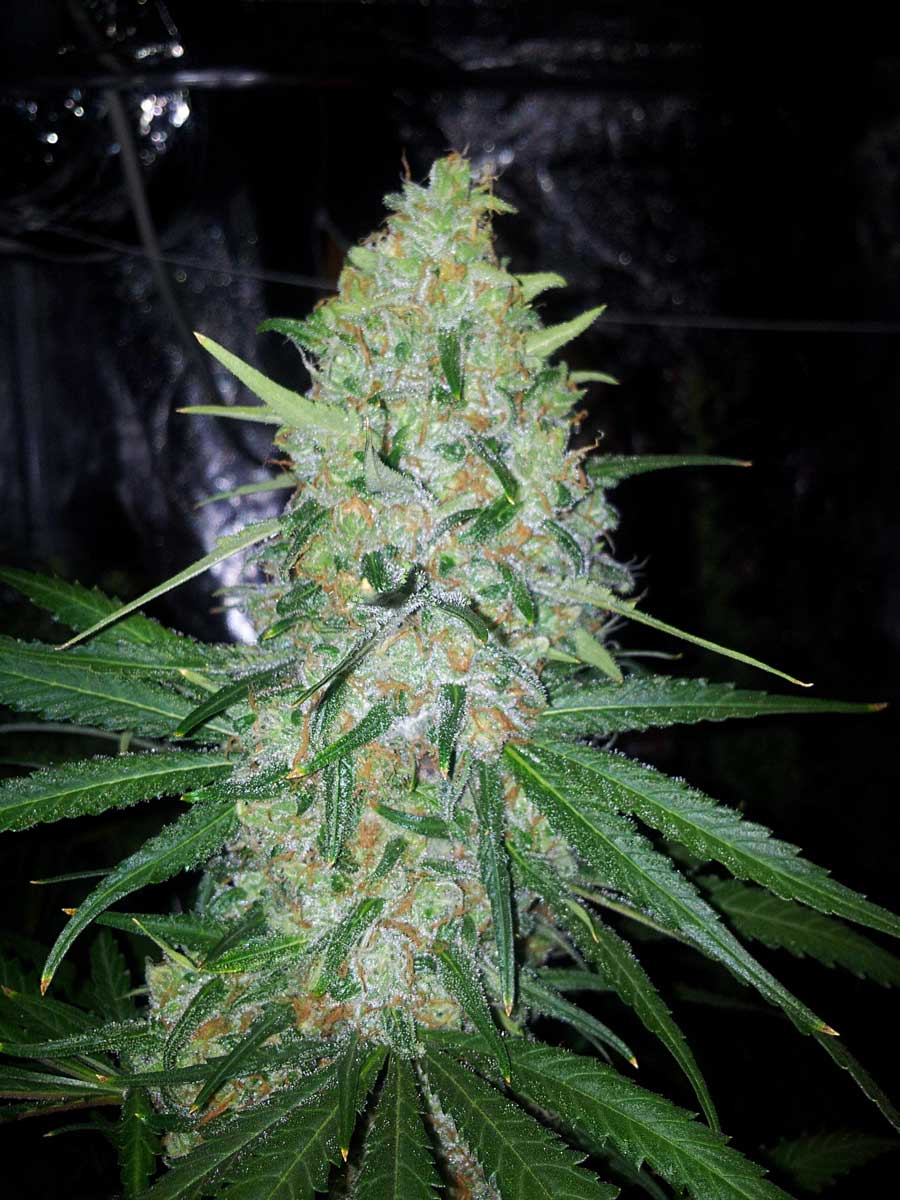
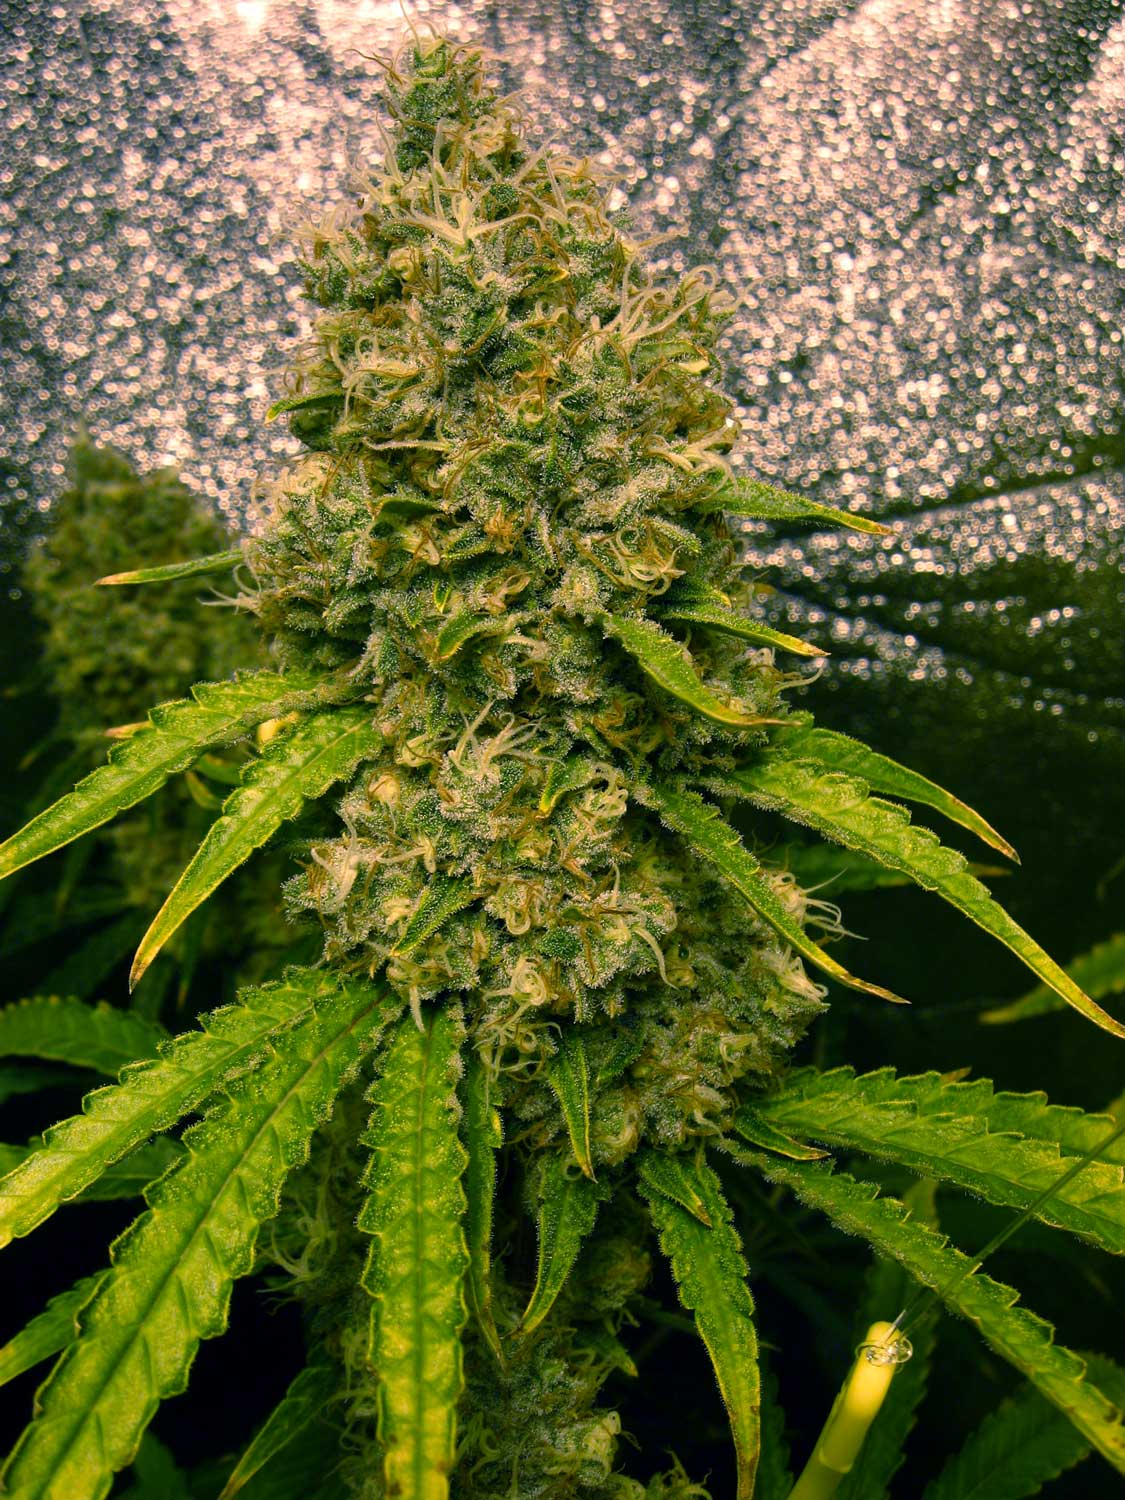


Accurate Method: Look at the Trichomes
Just looking at the plants is not always precise enough especially when a plant is growing in an unexpected ways as you approach harvest time.
When you’re not familiar with your particular strain, or don’t want to risk guessing, you can use a magnifier to look closely at the trichomes to pick the perfect harvest time. In Europe these trichomes are called “resin glands.” Trichomes are the ‘crystals’ or ‘glitter’ you see accumulating on your bud/leaves during the flowering stage. These trichomes are what contain the majority of cannabinoids (the good stuff) in your buds, and they change in appearance as harvest time approaches.
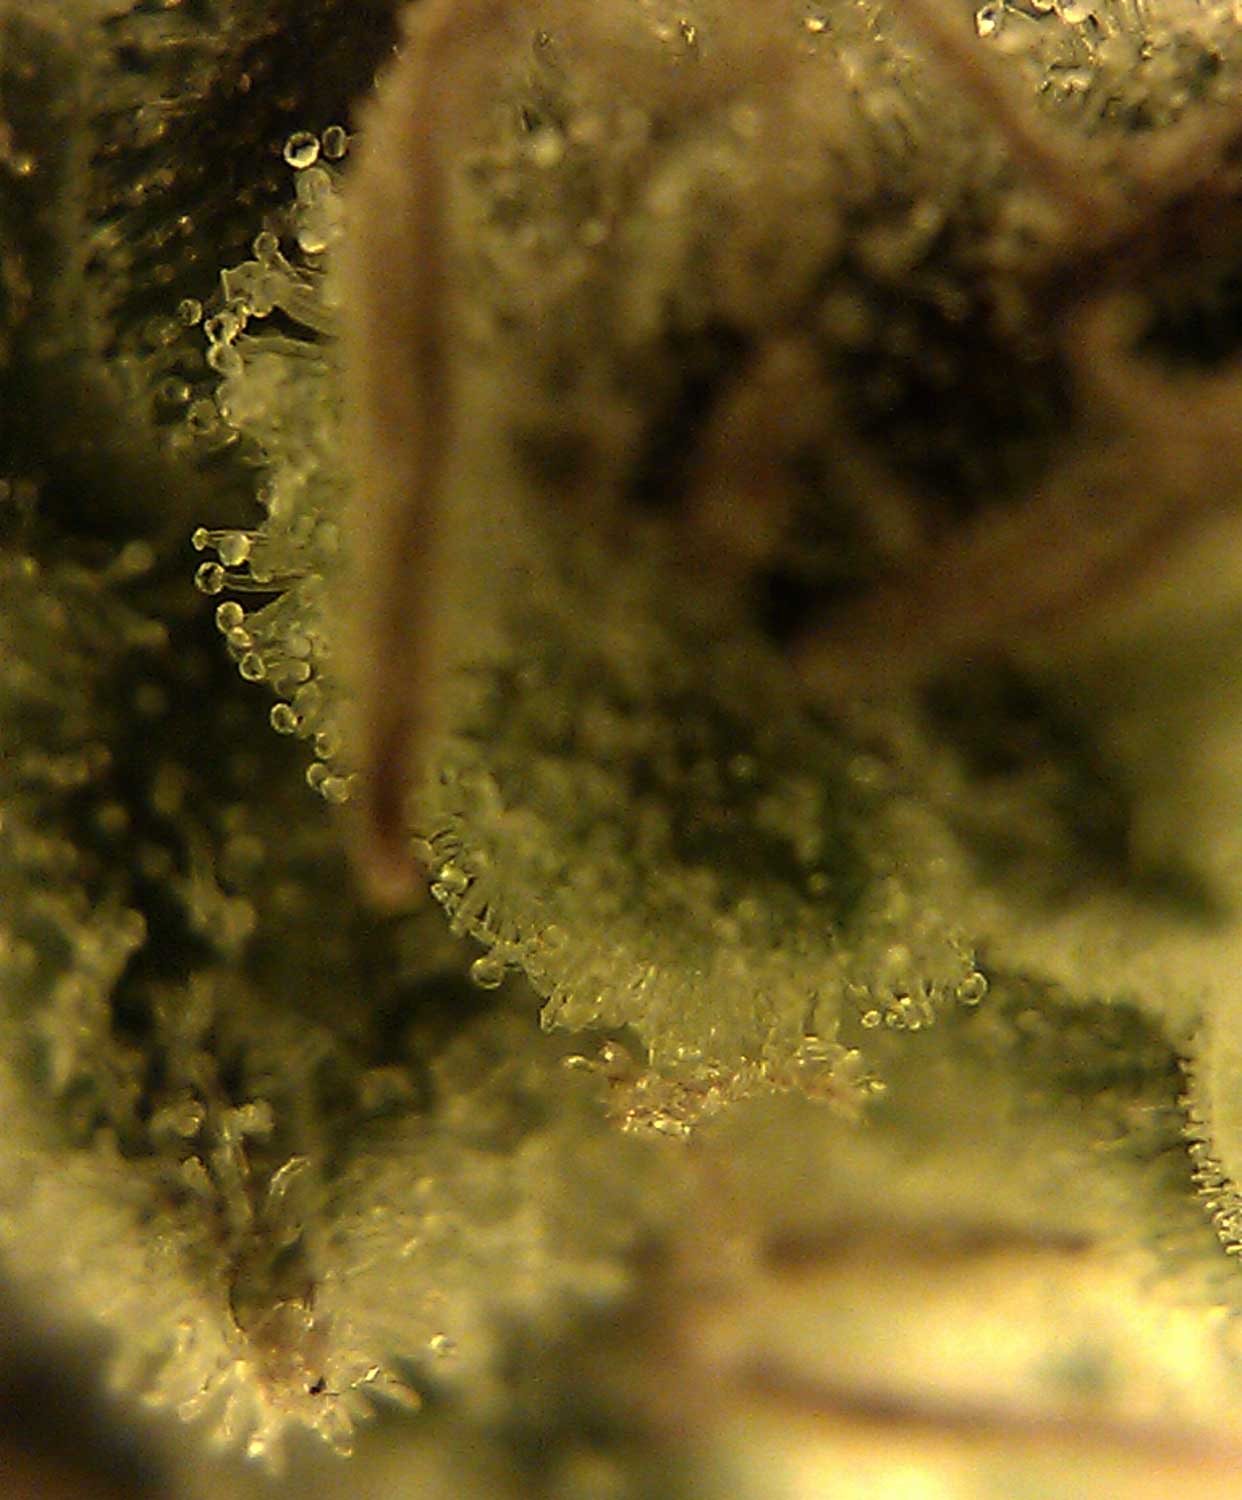
The cannabis trichome method is the most precise way of deciding when to harvest your cannabis plants. Growers can look at the glandular stalked trichomes on the buds under a magnifier, and this gives you the information you need to know the best time to harvest for your needs.
A bit of random trivia for you: These trichomes are supposed to taste bad to animals and deter them from eating the marijuana plant but many cats love the taste of these trichomes! You will notice that some cats will trick to lick or chew the leaves and buds of your flowering marijuana plant after they get a taste. Therefore if you have cats, make sure you keep them far away from your plants after they’ve started flowering!
The trichomes look like little mushrooms under a 30x-60x power, illuminated microscope. For harvest, you want to pay attention to the trichomes that look like the little mushrooms.
You’ll also see tiny, clear hair-like trichomes without the mushroom head, these aren’t important to potency so just ignore these ones.
Here’s a simple picture guide which breaks down when to harvest your weed based on the color of the trichomes.
(some strains trichomes turn purple or pink instead of amber/gold/yellow)
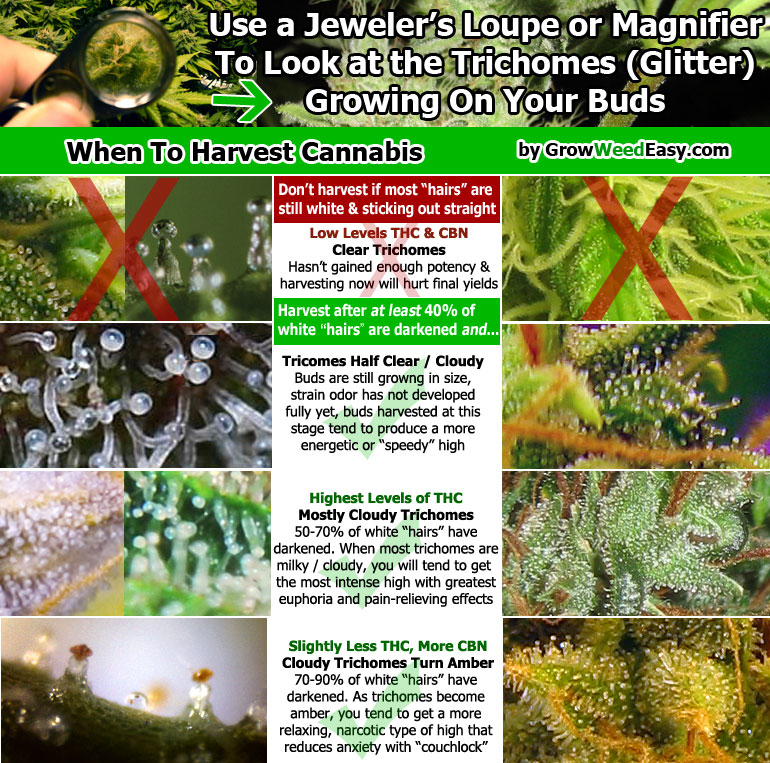
Here’s videos showing trichomes of two of my cannabis plants just before harvest. In this case most of the trichomes are cloudy, with a few ambers here and there.
A digital microscope that takes video works even better than a jeweler’s loupe since you get a much clearer pic of the trichomes. These buds are ready to harvest.
We took these videos using the Carson zOrb hooked up to a laptop. So far this seems to be the most accurate way to look at trichomes (and you can make the picture big so you’re not squinting through a tiny jeweler’s loupe)
I was able to take this video using a digital magnifier that connects to my computer, but many growers use jeweler’s loupes and other types of magnifiers to see the trichomes.
Here’s some general rules about trichomes, hairs, and harvesting.
- If white “hairs” are almost all sticking straight out and trichomes are all still translucent (clear) then your plant is too young and not ready for harvest. Harvesting now will result in low yield and non-potent harvests.
- The beginning of the harvest window opens when your plant has stopped growing new white “hairs” or pistils and at least 40% of the white hairs have darkened and curled in.
- Highest level of THC is when many/most of the trichomes have turned milky white / cloudy (when viewed under a magnifier). Trichomes that are milky have the highest levels of THC and contribute to a more euphoric ‘head high.’
- The end of the harvest window is when the trichomes have become a darker color (usually amber/gold). The amber/yellow trichomes contribute to a ‘body high’ because some of the THC has converted into less psychoactive CBN, which has calming and anti-anxiety effects. With some strains the trichomes will even turn red or purple!
- When trichomes start looking grey or withered, the harvest window has passed.
Due to this general principles, some people who want more of a ‘head high’ tend to harvest their buds earlier, such as when the trichomes are part clear/ part milky or mostly cloudy/milky.
For the “strongest” buds with the most psychoactive effects, harvest when nearly all trichomes are cloudy/milky.
For relaxing, more anti-anxiety buds, wait until some of the cloudy trichomes have darkened to amber.
When growing your own, I recommend sampling buds off your plant at different stages to get an idea what your preference is.
Don’t Harvest Too Early!
The hardest part of growing for many new growers is waiting for the right time to harvest.
There is a strong tendency to harvest the plant early due to excitement.
If you are feeling excited about harvesting your plant, then takes branches off the lower part of the plant that look the most done and dry them and check the potency for yourself.
Harvesting the buds in stages (starting off slowly with small batches) can really help abate the excitement.
Remember, 2 months is the minimum length of the flowering stage while your cannabis is growing buds. Some strains of cannabis need to be flowered for a solid 3-4 months or more before they’re ready for harvest.
Advice on using illuminated hand-held microscope: When using an illuminated microscope for the first time, my advice is to actually cut a piece of bud off the plant. You can try to look at the trichomes on the live plant but it can be a bit difficult.
If possible, put the piece of bud down on something stable such as a table. At that point, you want to take the microscope and push down relatively hard in a place where there are trichomes (on the bud is besst). Once the microscope is firmly pressed on the the plant, you can adjust the microscope focus to be able to see the trichomes.
As long as you keep the plant still and the microscope pressing down hard on the plant, you should be able to just twist the focus until all the trichomes just ‘pop’ into your vision. After a while, you get used to using the microscope and it gets easier.
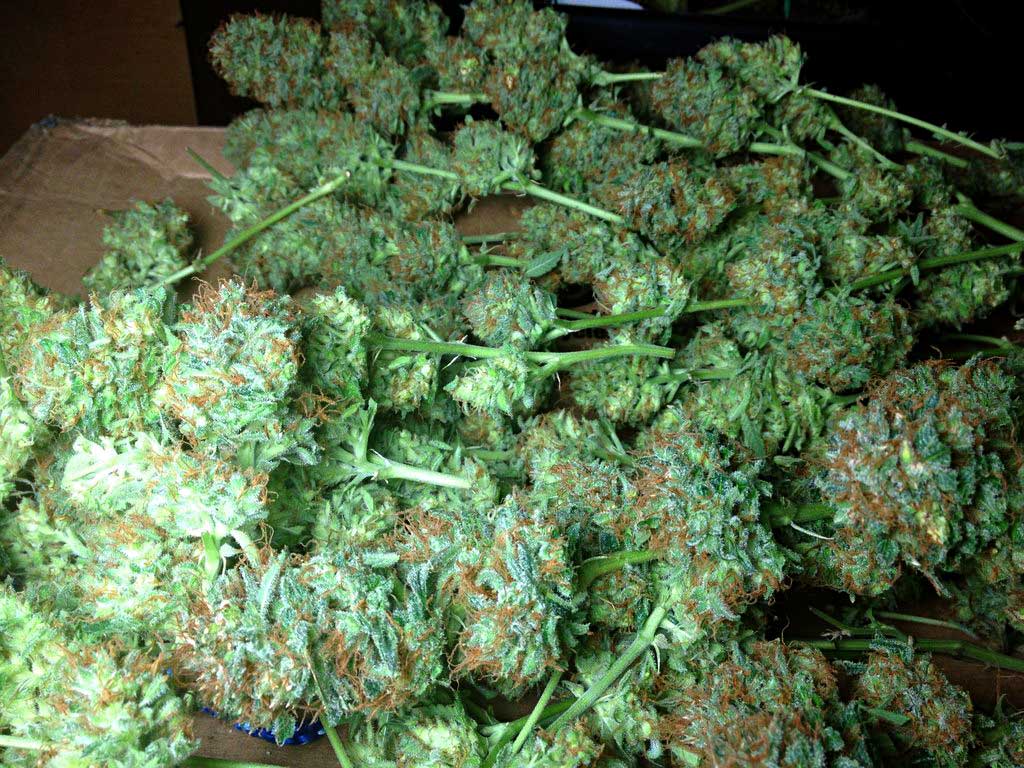
You’ve mastered how to grow weed indoors, and you’re so close to the finish line, but at harvest you’re still not quite done. You still need to trim, dry and cure your buds before they will be ready to use.
You first cut down your plant to prepare it for the drying and curing processes.
“Curing” is the act of drying your buds slowly to preserve and enhance their taste and smell.
Curing technically starts when the plant stops getting water. From that moment on, your plant is drying and beginning the curing process. That means your plant is already beginning to cure while it’s being dried.
A proper dry/cure will get rid of the green/grassy smell of newly harvested buds, which can make them harsh, and allows the marijuana smell and taste to re-emerge.
Read the Complete Tutorial Here:
https://www.growweedeasy.com/curing
Drying: How to Trim & Dry Newly Harvested Cannabis
If you prepare your marijuana buds the proper way, you will ensure the smoothest, best-tasting result. I will describe a simple and easy, yet effective method below.
You can hang the entire plant but the drying process will go much faster if you cut off branches or individual buds from the plant and then hang up your pieces of bud to dry.
You will need to trim the leaves near the bud but remember that you can make edibles, hash oil or canna caps from the small leaves that grow close to the bud. While you should cut off these extra leaves during the trimming process, you don’t necessarily want to throw them away.
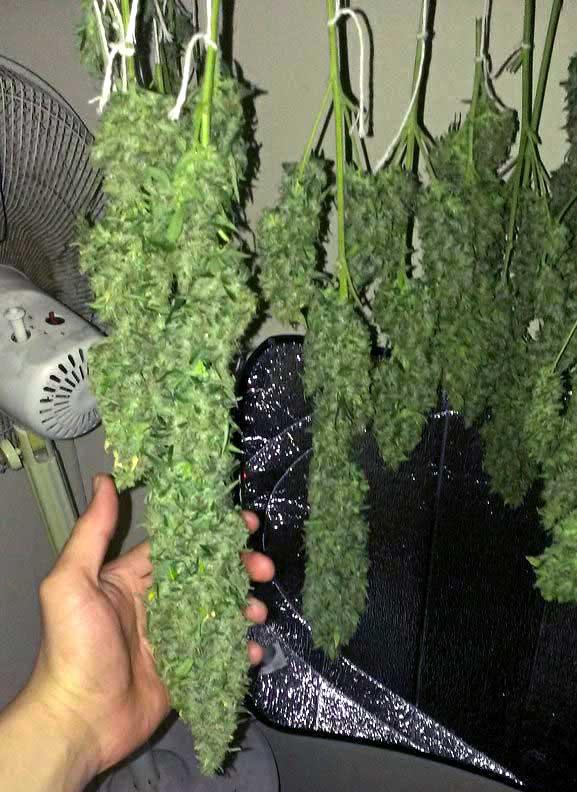 Some growers choose to trim their buds before drying, and some trim their buds after they’ve already been dried. It is less convenient to trim buds after they’re dried, but it will slow down the drying speed if the leaves are left on during the drying process. Optimally want to dry your buds slow, so this may be a good technique if you live in a very dry climate.
I recommend always trimming buds BEFORE drying, unless you have a pressing reason not to. Trimming buds after drying is very difficult.
After you have cut off and trimmed your buds, you hang them upside down in a cool. dark place with plenty of ventilation so that they can dry out.
Make sure to space your buds evenly without touching each other so they can dry out properly without molding. Very humid air or too much moisture during the drying process is your enemy because it can cause mold.
60% humidity is optimal when buds are spread out and not touching each other, though most of us are at the mercy of our drying environments.
If you want to ensure a perfect dry/cure every time, follow this guide: https://www.growweedeasy.com/curing
You can use a humidifier or dehumidifier to adjust the humidity if you’re serious about drying your buds right. With a 60% level of humidity in the air, it will take several (4-10) days for your buds to finish drying all the way. At lower humidities, your drying will go much faster, so you need to watch buds closely and pull them down before they get overdried.
Drying as slowly as possible without mold will give you the highest quality buds, as this enhances the curing process.
Where to Hang Buds?
Basically you can hang buds upside down anywhere you want. This is a time to use your creative skills!
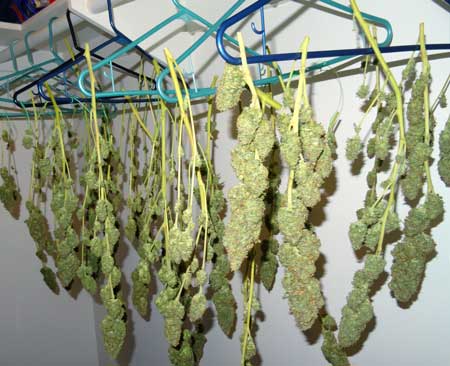
An easy way to hang your buds to dry is pin them to coat hangers using clothes pins and simply hand the coat hangers in a closet.
You can also place them on mesh drying racks. These are a good choice for a humid environment, or if you plan on drying a lot of fresh bud together in a small space. By removing the buds from the stems and putting them on a mesh rack, they will dry a lot more quickly than if they were hung upside down with the buds still on the stems.
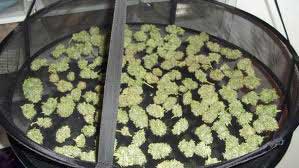
If you’re not sure where to hang your drying cannabis buds, a closet works great. The inside of your grow space or grow tent can also be a really nice choice.
A lot of growers hand their buds in their closets, or even across their living room on string.
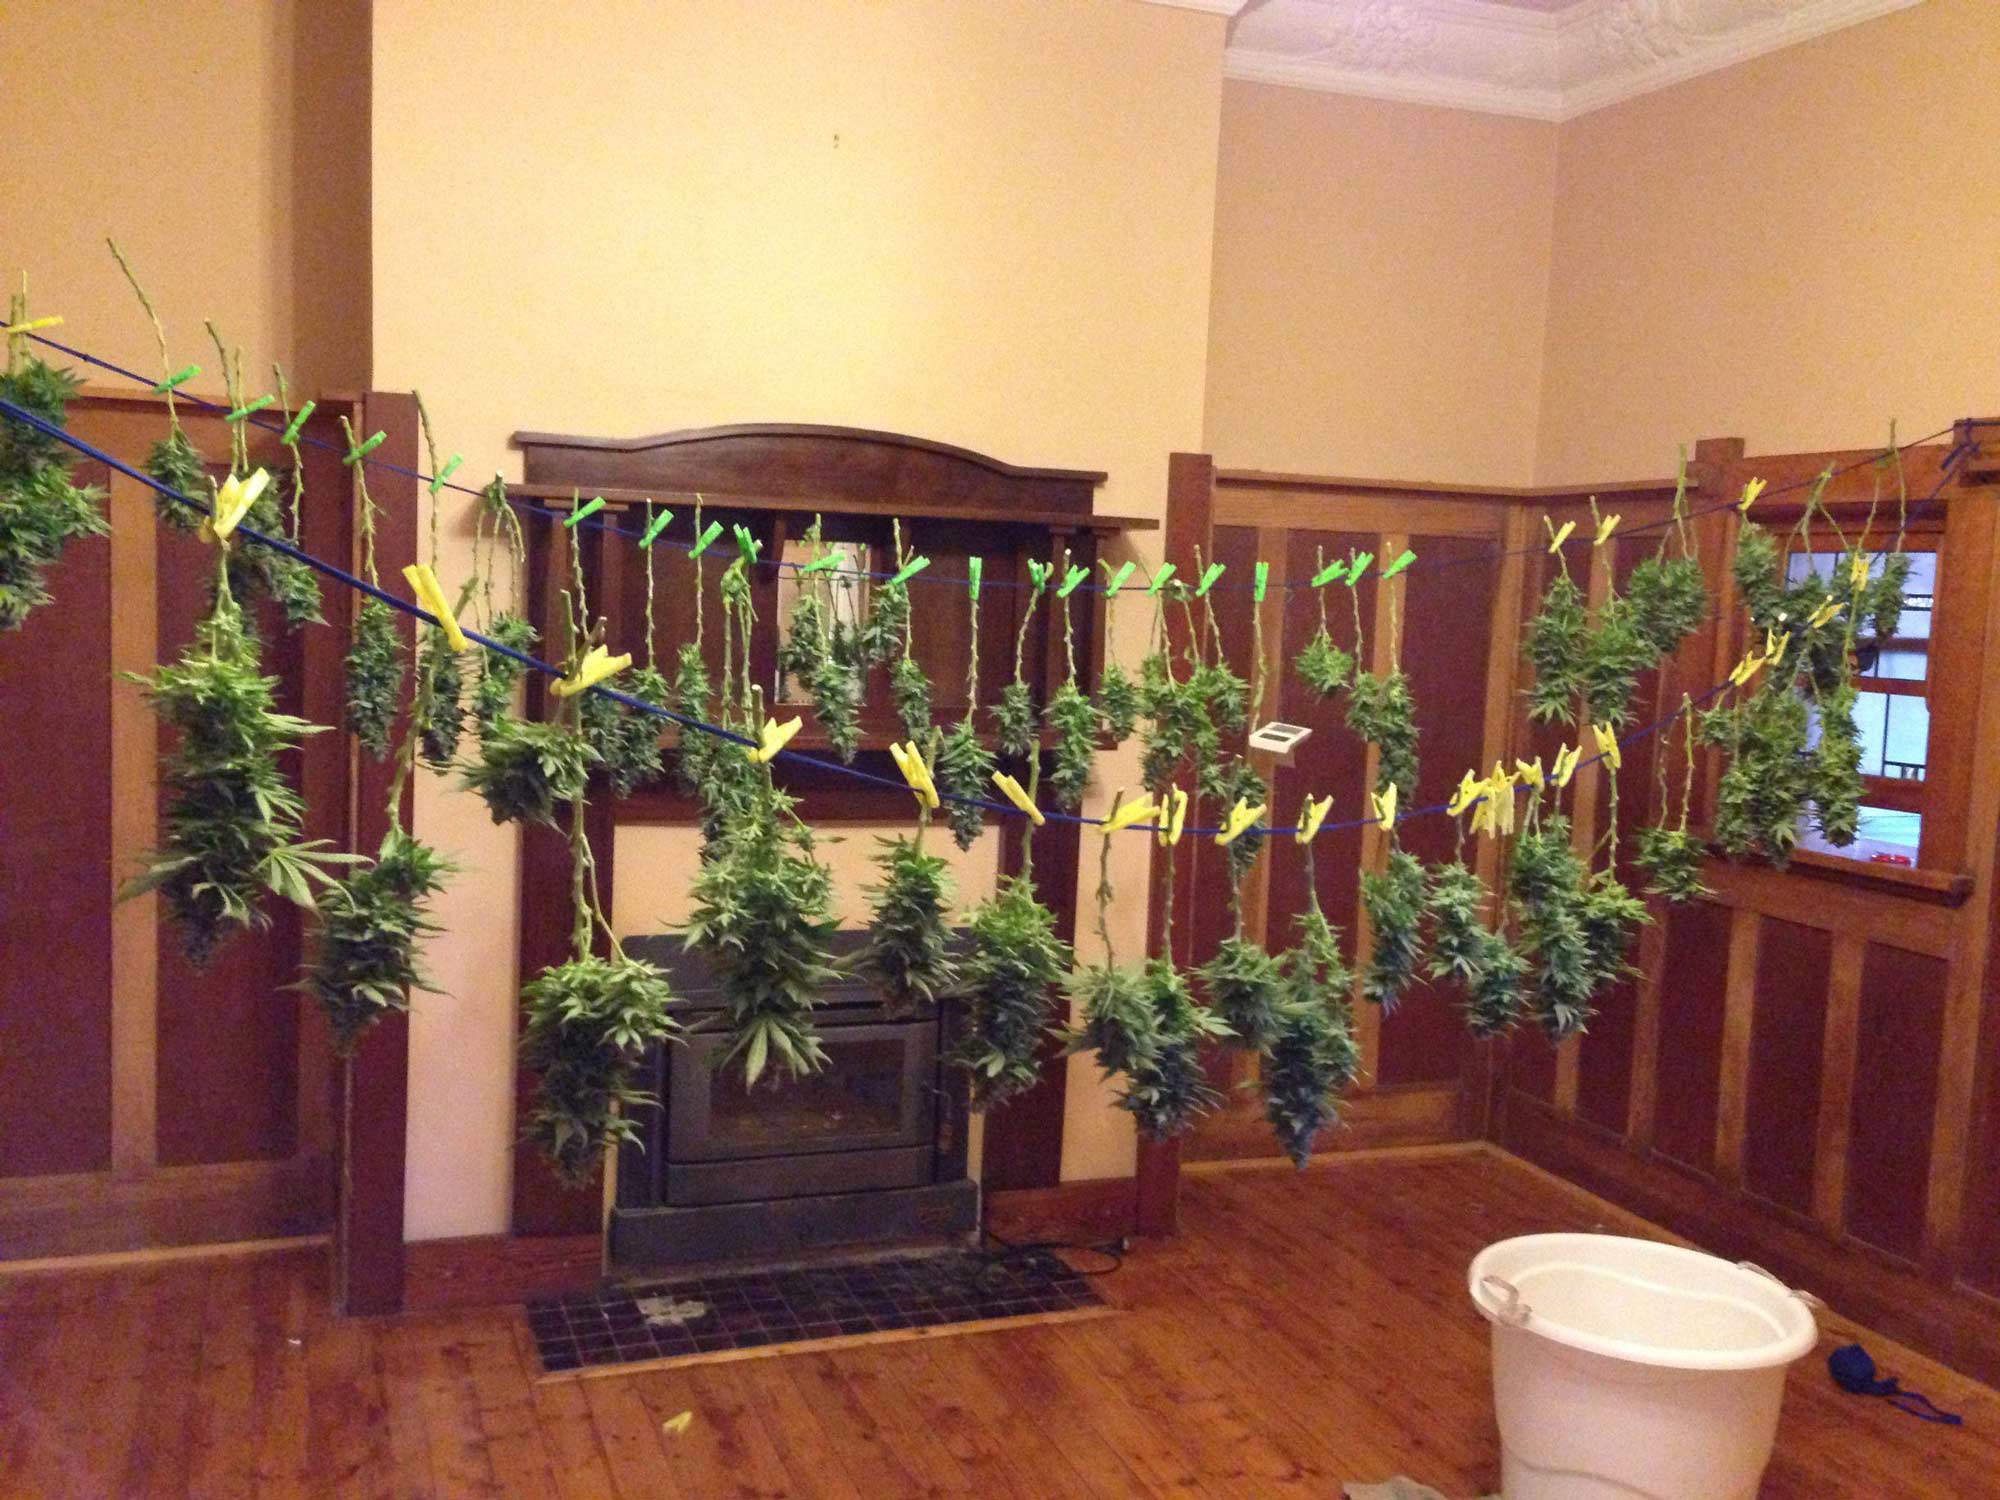
I personally hang my trimmed cannabis buds in my grow tent which was holding my now-harvested plants. A grow tent is a great place to dry cannabis, with a controlled environment and many places to hang bud.
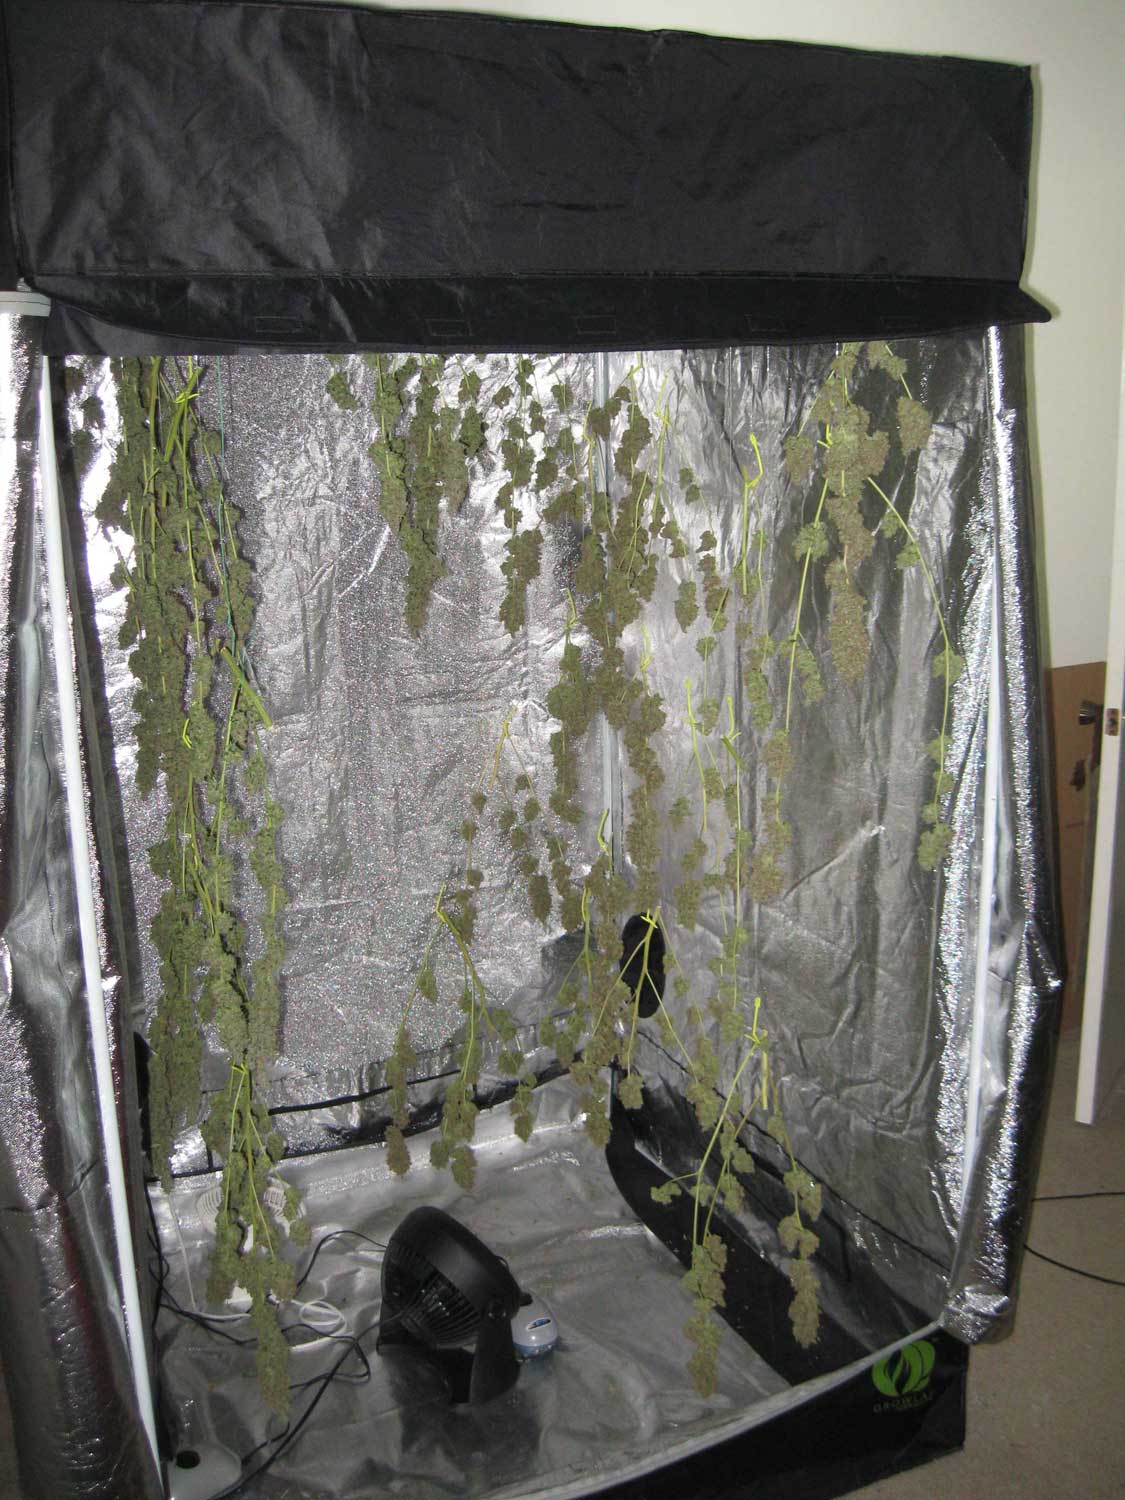
Curing: How to Cure Your Dried Cannabis Buds
Drying is the first part of the pot curing process. It’s important to take drying cannabis down at the right time to get the best results from curing.
When the buds still have moisture in the center, their stems will bend without breaking when you apply pressure to the stem. Once the plants are dried to the middle, the stems will begin to snap instead of bend.
Your marijuana buds are ready for the next stage of the curing process once the small stems snap, but the thicker ones don’t.
- Check your drying buds several times a day – don’t let them get overdried!
- Use your thumb to gently bend a few stems
- Once the smaller stems “snap” when you bend them, it’s time to start the curing process.
- At this point, the thicker stems should still be bendy, and won’t snap if you bend them. The bendiness means the bigger stems still contain moisture, which will be needed in the next part of the curing process.
You want to be careful of over-drying your weed, or buds will crumble when you try to break it up. If this happens, some growers recommend ways to re-moisten the buds with water and hang them to dry again, but this may not help. Cannabis bud seems to cure best if you dry it out slowly one time, and re-misting also means there is a greater opportunity for mold to grow.
Many people growing weed for the first time accidentally hurt their cure by drying their buds too fast. This is why it’s important to keep an eye on your buds closely during the curing process. When the buds are dried past a certain moisture level, they can no longer be “cured” anymore.
Read the Complete Curing Tutorial!
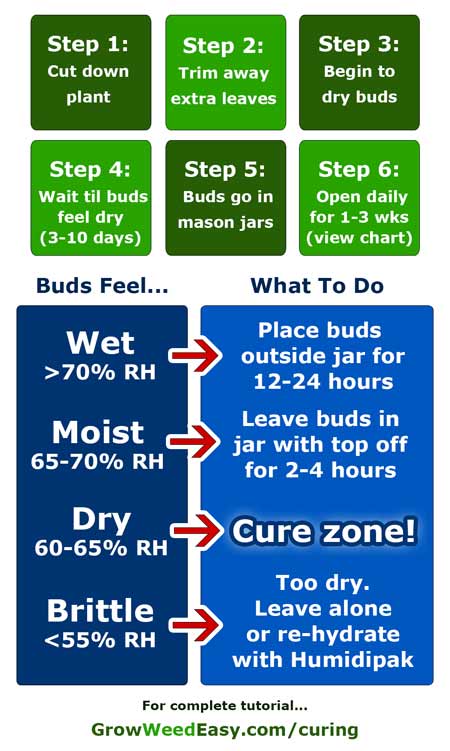
After the marijuana buds have dried, it’s time to cure the bud. This is done by placing the dried buds in quart-sized mason jars.
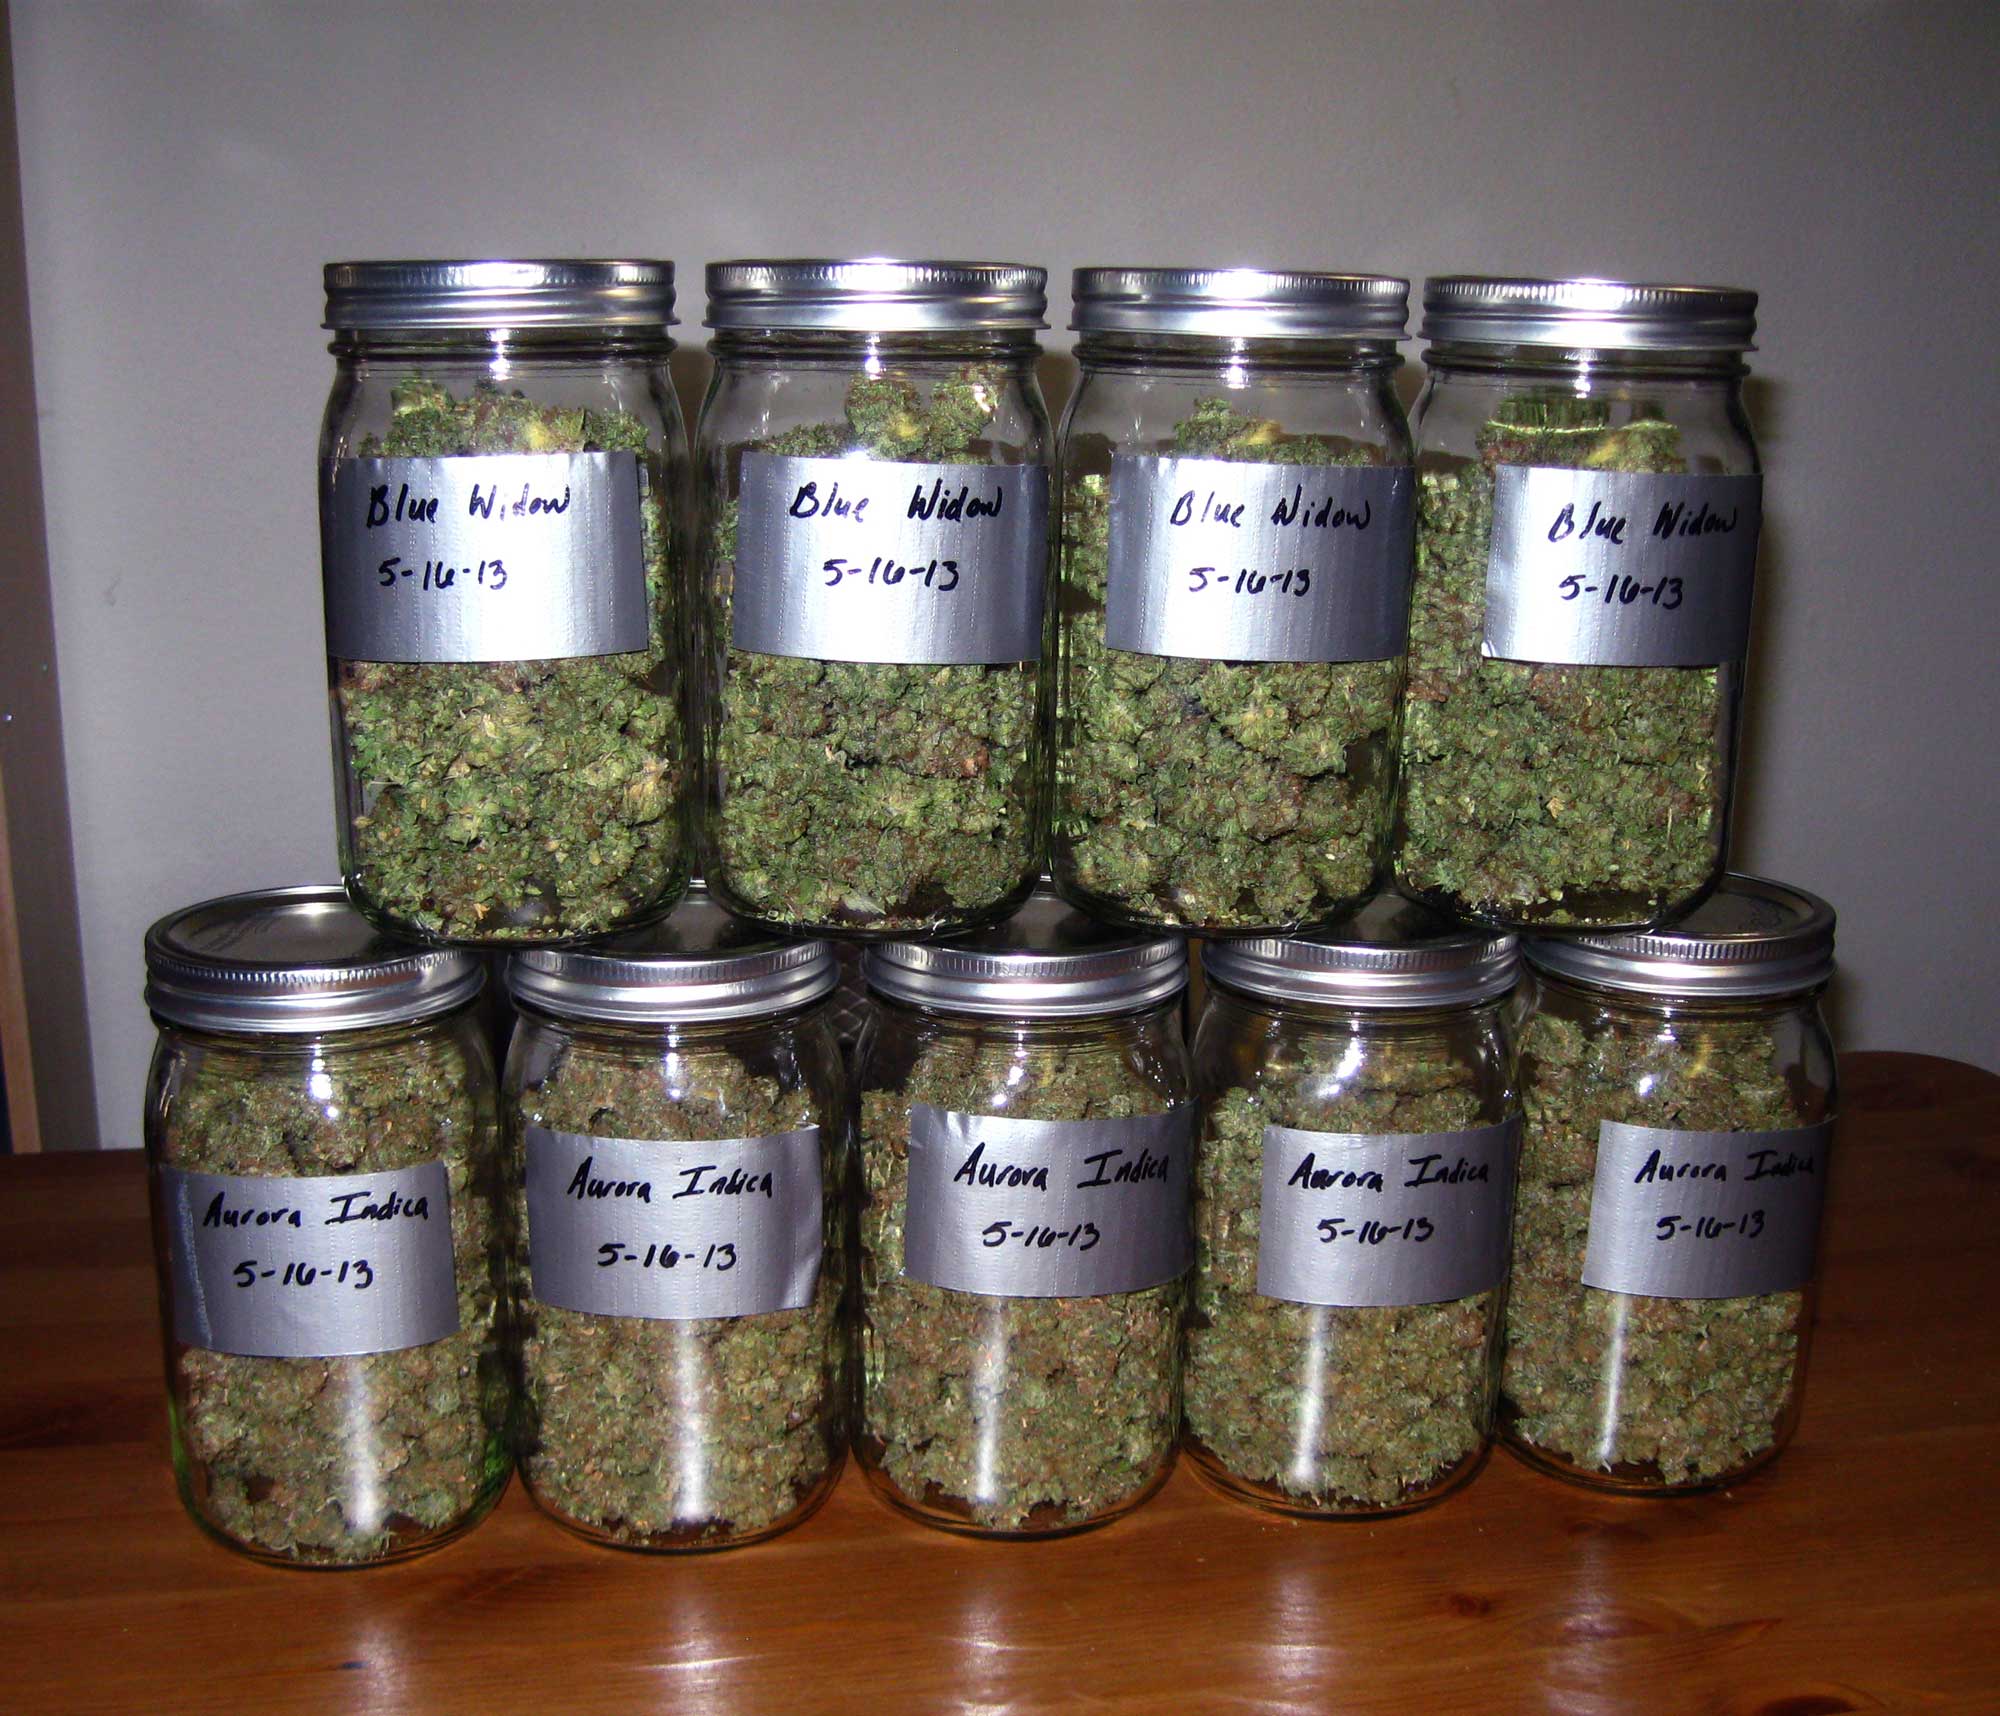
Buds that have not fully dried all the way are placed in mason jars to begin the curing process.
The curing process is a delicate dance of trying to maintain enough moisture to continue curing the buds, but not enough moisture to promote mold. You try to keep things just right.
You’re looking to keep the humidity around 60% in your jars during the curing process. A hygrometer will help.
Why Do We Need to Cure Marijuana Buds?
The purpose of curing is to improve the quality and taste of your buds before you smoke it.
Almost all marijuana enthusiasts agree that the best smell and flavor is obtained after the marijuana has been cured for some length of time.
Curing your buds for at least 2-4 weeks actually improves the apparent or perceived potency.
Yes, that’s right, curing buds in airtight jars for a few weeks actually makes buds feel “stronger” or more potent!
This may have to do with what happens to the cannabis terpenoids during the drying/curing process (terpenoids are produced by cannabis plants and affect the taste/smell of the bud – there’s some evidence they may also change/improve the potency of buds too) or it could be another chemical process entirely! But the important thing is it works.
However, curing for more than 6 months does not seem to continue to add much potency. I personally cure buds for 1-3 months. After that, I’m more concerned with long-term storage of the buds.
How to Cure Your Dried Buds: Step-By-Step
 To cure your freshly dried buds, just put them in a tightly-closed jar in a cool dark place.
A quart-sized mason jar works great.
Each jar should be about 70-80% full after you’ve added the buds. Close the jars. You will be spending the next few weeks monitoring your buds in the jars, and in about 2 weeks, they will be ready for use!
The best cure will happen if you can keep a very close eye on your buds throughout the cure and allow them to finish drying as slowly as possible.
Hint: Use a Hygrometer To Track Moisture! The easiest way to track the relative moisture content and ensure a perfect cure every time is to keep your curing buds in mason jars with a hygrometer inside. Learn more in the curing tutorial: https://www.growweedeasy.com/curing
So you’ve put your buds in jars. If buds ever feel wet during the curing process, it means you need to release extra moisture from the jar. It’s common for buds to feel wet 12-24 hours after being put in jars, but it’s okay.
During the first few weeks of curing, you will want to open the jars once a day for a couple of seconds to get fresh air in your jars and release any moisture that’s built up. Some moisture is still stored in the stems of your buds, even after buds seem mostly dry, and once you start curing the buds, any remaining moisture will spread out evenly through the plant and come to the surface. You know this has happened when you check on curing buds, and they seem like they’re moist again.
Whenever the outsides of buds feel wet, simply open the tops of your jars and allow the buds to be exposed to air until buds feel dry on the outside. It may take 10 minutes, or it may take a few hours depending on how wet the buds are. This will allow your buds to drying slowly, just enough to remove extra moisture trapped in the jar. There needs to be moisture for the curing process to continue, but buds should never be allowed to feel wet on the outside or they are more likely to be attacked by mold.
Many growers who don’t check buds often enough may end up growing mold and ruining their crop just before it’s ready. Yuck.
If you open the jar and it smells really funky (not a good funky), there may be hidden moisture in some of your buds which may not have dried completely and could be in the beginning stages of growing mold due to the moisture.
This especially tends to happen with big fat buds that were cut off the main cola. I generally recommend trashing any buds you suspect may have mold. Your health just isn’t worth it.
For the first 2 weeks of curing: Open your jars for a few seconds regularly. This can be done 1-3 times/day, but open all jars at least once each day.
From 2 weeks and on: Open jars at least once/week after that. If buds are wet or moist when you open the jars, then keep opening them every day until they have felt dry to the touch every day for at least a week.
Buds are usually considered “done” curing after 2-4 weeks, though many growers continue curing for longer. I usually let my buds cure for 3-6 months, as they seem to get more potent as time goes on.
It’s so important to regularly check on your buds as they’re curing and drying, especially if you’re not monitoring the humidity, this process of “burping” the jars regularly actually helps curing happen more effectively..
I encourage you to keep your buds in their curing jars until you use them, but if you have a lot of buds, make sure you take out at least 3 weeks worth of bud at a time so you’re not constantly going in your jars and accidentally drying out your beautiful bud.
Some people only cure their bud for 1-2 weeks total while other cure their bud for 1-2 months or more. Because you need to open the jar regularly, you can always sample some as it’s curing to get a feel for whether it’s done or not.
Buds continue curing for up to 6 months. At that point, they will not gain any more benefits from further curing, and you should start thinking about long-term storage. For long term storage of cannabis buds, add fresh Boveda humidipaks to each quart-sized jar (bigger jars aren’t suitable for long-term storage), and place jars in a cool, dry place. Check on buds at least once/month.
Different people have different preferences, but luckily you can ‘test out’ your buds at any stage of curing, to figure out what works best for you.
Growing Tips & Hints
Here is a list of the cannabis growing hints and tips in this section:
Temperature
In general, cannabis plants enjoy temperatures in the same general range that humans like, perhaps a little warmer.
If a temperature is too hot or cold for a human to comfortable hang out in, it probably is too hot or too cold for your weed.
Depending on the type of grow lights used, the lights will probably raise the temperature of your grow space, which is something you should consider when creating your grow area.
Cannabis likes temperatures from about 70-85 degrees F (20-30 degrees C). Bigger and more powerful lights will raise the temperature more, and smaller grow areas will be more prone to temperature fluctuations due to the lights.
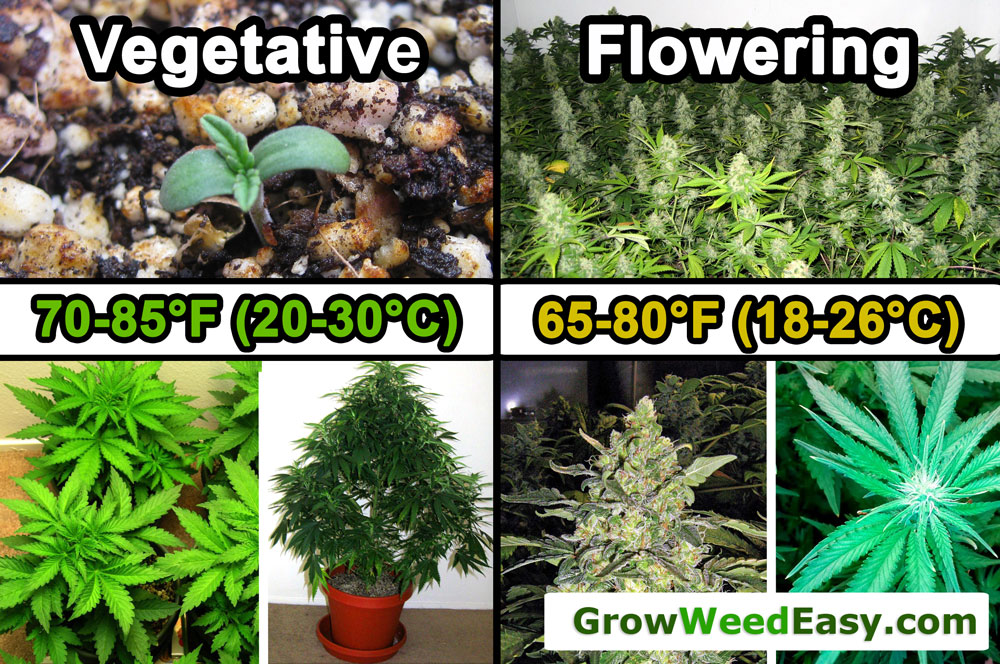
Learn how to control temperature in the grow room: https://www.growweedeasy.com/temperature
Humidity
Regarding humidity, grow areas should not be particularly damp or dry.
Optimum humidity levels are from 40-60% though cannabis can stand a higher or lower humidity.
Cannabis kept in lower humidity conditions will drink more water, while cannabis in high humidity conditions will collect water through the leaves and drink less through the roots.
Cannabis tends to prefer a more humid environment – about 60% relative humidity – in the seedling, vegetative, and early flowering stages. However, towards the end of the florwering stage, cannabis will do better in a drier environment.
Excessive humidity at any stage can cause problems with mildew and mold (like the common, dreaded “white powdery mold.” Too-high humidity is anything above 60-70%. Some strains are especially prone to mold at high humidity.
On the flip side, extra dry air is often associated with finicky plants that get easily stressed for no reason, especially for younger marijuana plants.
Therefore if you have unexplainable problems with your plants, and you know your grow area is very dry or humid, try investing in a humidifier or dehumidifier.
You may be surprised how often fixing the humidity fixes mysterious marijuana plant problems.
Towards the last few weeks before harvest, it becomes essential to keep humidity lower in order to prevent mold, especially when there are huge, dense buds.
Many pro growers dramatically drop humidity with a dehumidifier during the last two weeks before harvest. This increases resin (THC) production and prepares the buds for drying/curing while preventing mold.
During the last two weeks before harvest, you can basically drop the humidity as low as possible.
A thermometer with a humidity sensor can be extremely useful in monitoring a grow area.
Learn everything you need to know about humidity:
https://www.growweedeasy.com/humidity-growing-cannabis
Air Circulation
Your Marijuana Plants Need Air!
Cannabis plants “breathe” CO2 like we breathe oxygen. They need a constant supply of CO2 (usually by giving the plant fresh air) to flourish.
In addition to your exhaust fan, it’s often a good idea to get a few smaller fans to blow air above and below your plant canopy.
This will help prevent hot spots, and gets fresh air and CO2 to all the plants in your grow space. Just make sure your fans aren’t strong enough to actually wave your plants around. Plants that are kept right in front of a fan may get “wind-burned” leaves, which is when leaves that have been waving around too much from the wind start curling and dying.
Read the ventilation & air circulation tutorial for growing cannabis
Smell Control
One of the most recognizable aspects of cannabis is its pungent, unique smell. Unfortunately, that same delightful smell is instantly recognizable, and can cause lots of trouble for growers.
Fortunately, smell control in the grow room is straightforward. There are two ways of stopping smells in the grow room. Either you find a way to “scrub” the smells out of the air, or you find a way to cover up the smell.
Learn about all your options for smell control here:
https://www.growweedeasy.com/how-to-control-smell-when-growing
Stealth
Your new mantra is… “No smell, no sell, no tell.”
There are a lot of ways to keep you and your grow safe, but this is the heart of it all.
No smell – No one should be able to smell your grow or smell cannabis on you. This makes you an easy target for police and marijuana haters!
No sell – Statistically, people who are growing strictly for personal use deal with far less legal troubles than people who sell their cannabis. This even applies in places like Colorado where it’s legal within the state!
No tell – Having fewer people know about your grow reduces the chances of you getting busted by law enforcement or burglarized by thieves. I know it’s hard to not show off your awesome growing skills, but this one secret that needs to stay a secret! Don’t tell ANYONE that you’re growing. It can be amazing how fast information can spread to a group once one person knows.
Don’t be this person!
Read the full stealth tutorial here:
https://www.growweedeasy.com/How-to-NOT-get-Caught-Growing-Weed
Here’s a list of the common cannabis problems that will be covered in this section
Cannabis plants need just the right amount of water to grow and thrive.
When cannabis is given too much water too often, the roots don’t have access to air and will begin to “drown.” But things are just as bad when roots get too dry.
How do you know how often to water your plants?
Basically…
- Water plants when soil feels dry up to your first knuckle
- Make Sure Pots Have Enough Drainage
- Bigger pots = water less often
- Smaller pots = water more often
- 20-30% Extra Runoff Every Time You Water
This tutorial breaks down everything you need to know about watering cannabis: https://www.growweedeasy.com/how-often-water-marijuana
Too tall plants are usually caused by 3 things
- Not enough light
- Genetics
- Improper plant training
I commonly see new growers with tall, stretched seedlings. Too-tall seedlings is almost always caused when the plant is not getting enough light. In that case, move lights closer or get a more powerful grow light.
Genetics can have a powerful effect on plant size and growing habits. This is why it’s important to learn about your strains (if you can) before you grow them. It will help you know what to expect. Learn more about picking the right strain here: https://www.growweedeasy.com/training#choose-strain
However, many growers end up with too-tall plants because they didn’t properly apply plant training techniques like LST, supercropping, ScrOG, topping, FIMing, and more. Learn about plant training techniques here: https://www.growweedeasy.com/training
As long as you’re providing your plant with the right type of nutrients and are managing pH, it’s unlikely that you will run into real deficiencies.
If you’re having problems that you think might be a deficiency, the first step is to look at this 7-step checklist to fixing 99% of cannabis growing problems:
https://www.growweedeasy.com/7-step-cure
If you’re still not sure, take a look at this comprehensive list of cannabis plant problems, bugs and deficiencies.
List of Common Cannabis Growing Problems (with pics)
https://www.growweedeasy.com/marijuana-symptoms
That’s It! You’re Ready to Start Growing Cannabis!
If you enjoyed this article and “online class” for growng cannabis, please share it with your friends! For more growing articles, sign up for our email magazine about growing cannabis (in the right sidebar at the top). We deliver new growing articles to your email address every Sunday morning at 4:20am 🙂
Happy Growing!
Nebula & Sirius
Similar Articles…
How Long Does It Take to Grow Weed? (Marijuana Growth Timeline)
10-Step Quick Start to Growing Cannabis
Check These 7 Things & Cure 99% of Marijuana Growing Problems
Full List of EVERYTHING on GWE ← Over 500 Articles & Growing Tutorials!
Start Here – Beginner Grow Guides
- Complete Beginner’s Guide
- How to Grow Weed in 10 Steps
- Simplest Cannabis Grow Guide Ever!
- How Long Does It Take to Grow Weed? (Marijuana Growth Timeline)
- Complete New Grower’s Shopping List
Cannabis Life Stages
- Germination
- Vegetative Stage (Getting Bigger)
- Flowering Stage (Making Buds)
- Harvest
Choosing…
- Best Type of Nutrients
- Choosing the Best Grow Light
- Soil vs Hydro
- How Many Plants Should I Grow?
- What Part of the House Should I Grow In?
- What Setup Should I Get?
- Best Strains for Beginners
- Where to Get Seeds (including the U.S.)
Common New Grower Topics
- How Much Will Electricity Cost?
- Stealth Growing: How NOT to Get Caught Growing Weed
- What Equipment Do I Need?
- Germinate Your Seeds
- 7 Things I Wish Someone Had Told Me When I First Started Growing Weed
- How to Save Money When Growing Weed
- How to Store Weed Properly (so it never loses smell or potency!)
- Ask Questions & Get Answers From Real Growers! (In Our Free Growing Community)
Problems & Symptoms
- Cannabis Problems Guide
- Diagnose Your Sick Plant
- Bugs & Other Cannabis Pests
- How to Prevent Nutrient Deficiencies
- 7-Step Remedy That Fixes 99% of Grow Problems
Plant Training (Indoor Tricks for Bigger Yields)
- Simplest Plant Training Guide Ever!
- Complete Plant Training Guide
- Breakdown of Techniques
- Low Stress Training (LST) Tutorial
- Topping vs FIMing Tutorial
- LBH’s Famous ScrOG Tutorial
- Supercropping: Simple Secret to Bigger Yields
- Sea of Green (SoG) Tutorial
- 12-12 from Seed – Flowering Plants Early
- Nebula’s Manifold Tutorial
- How to Manifold Clones
- Nebula’s Bud-Based Defoliation Tutorial
- Alternate Defoliation Tutorial
- What is Re-Vegging / Monstercropping?
- How Can I Train an Auto-Flowering Plant?
- 7 Unfortunate Plant Training Mistakes
Grow Mediums
- Soil vs Coco vs Hydro
- Basic Soil Guide
- Organic Soil Compost Guide – Just Add Water!
- Coco Coir Guide
- Hydro/DWC/Bubbleponics Guide
- “True” Organic Growing vs Just Using Organic Nutrients
Nutrients
Grow Lights
- Compare Types of Grow Lights
- How Does The Color Spectrum of Light Affect Marijuana Plants?
- How Far Away Do I Keep My Grow Lights?
- 5 Barriers to LED Grow Light Domination (HPS vs LEDs)
- LEC vs Induction Grow Lights
- You Can Actually Give Plants Too Much Light?!
- Grow Light Upgrade Guide: Yields & Potency Explained
Environment
- Create the Perfect Growing Environment
- Where’s the Best Place in the House to Grow Your Plants?
- How to Control Odors
- How to Set Up an Exhaust
- How to Set Up a Grow Tent for Better Yields (and Stealth)
Plant Care Tutorials
- Cloning
- Intro to Plant Training for Bigger Yields Indoors
- How Often to Water Plants
- How (and When) to Transplant Cannabis
- Male vs Female Plants
- When to Harvest?
- Drying & Curing
How to Improve…
- Yields
- Bud Quality
- THC Levels
- CBD Levels
- Smell/Taste
- Density
- Bud Color (How to Grow Pink or Purple Buds)
- Glitter (Make Buds Sparkle with More Trichomes)
- Bonus: What Determines Yields?
Seeds / Strains
- Where to Get Seeds
- How to Find the Right Strain
- What are “Feminized” Seeds?
- How to Make Feminized Seeds at Home
- Which Breeders to Trust?
- Intro to Auto-Flowering Strains
- THC vs CBD vs CBN
Auto-Flowering Strains
- What are Auto-Flowering Strains? (Photoperiod vs Auto-Flowering)
- Should I “Top” or Train an Auto-Flowering Plant?
- What’s the best light schedule for auto-flowering strains?
- View an auto-flowering grow journal
Edibles & Extracts
And Lots More!
- How Long Does it Take to Grow Weed?
- Vegetative vs Flowering Stage (Long Days vs Long Nights)
- Germination & Seedling Mistakes
- Simple Guide to Plant Training
- What’s the Best Pot / Container?
- Perpetual Harvest
- What Determines Yields?
- 5 Time-Savers for Busy Growers
- Breeding Techniques
- 7 Gift Ideas for Cannabis Growers
- Grow Journals
- See EVERYTHING on the Site!
Just for Fun
- Weird or What? Cannabis Mutations & More!
- Creatures on Cannabis (Cute Photo Gallery)
- 10 Gift Ideas for Cannabis Growers
Submit Pics
Want More?
- Complete List of EVERYTHING on GWE ← Full List (Over 500 articles & growing!)